Getting fit doesn’t have to mean buying expensive gear or creating more waste. This article explores how anyone can create effective fitness essentials from items already sitting around the house. These zero waste gym equipment ideas prove that a great workout is possible without a fancy gym membership or brand-new products. By repurposing everyday materials, you can build a complete home gym that’s kind to both your wallet and the planet.
Introduction: Building a Greener Home Gym
Let’s face it. Gym memberships are pricey. New fitness equipment can cost a small fortune. And then there’s the environmental impact of all that plastic and rubber sitting in landfills when people move on to the next trend.
But here’s some good news. You probably have everything you need for a solid workout right in your home already. Old bottles, worn-out clothes, unused backpacks, and forgotten garden hoses can all become functional gym equipment with a little creativity.
Making your own fitness essentials isn’t just about saving money. It’s about taking a stand against throwaway culture. It’s about proving that effective workouts don’t require expensive gadgets. Most importantly, it’s about getting moving without adding more stuff to an already cluttered world.
This guide walks through ten different pieces of zero waste gym equipment you can build today. Each project uses materials you likely have on hand. No special skills required. No expensive tools needed. Just a willingness to think differently about what fitness equipment can be.
Ready to transform trash into training gear? Let’s get started.
1. Kettlebell From a Detergent Bottle
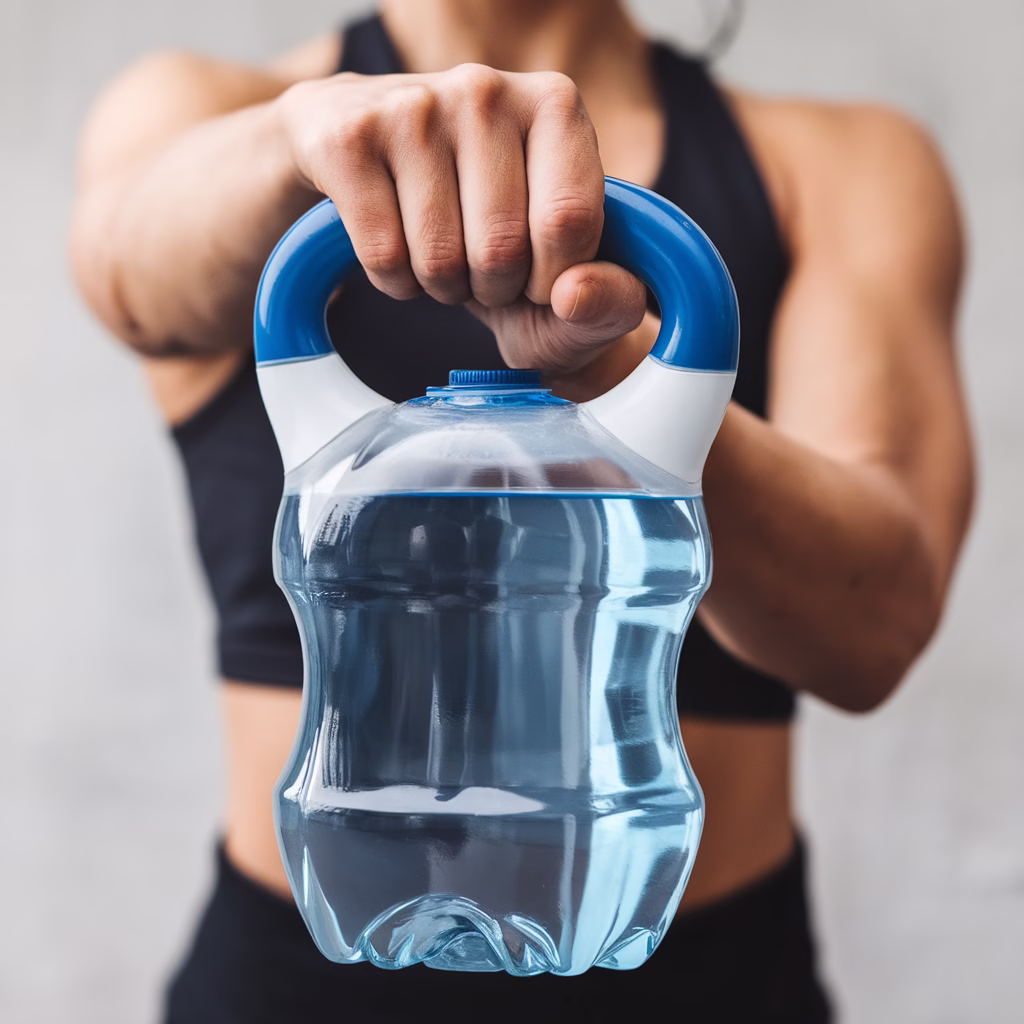
Kettlebells are fantastic for full-body workouts. They build strength, improve coordination, and get the heart pumping. But they’re also heavy, expensive to ship, and often made from materials that aren’t exactly eco-friendly.
Enter the humble laundry detergent bottle. That sturdy container with the built-in handle? It’s basically a kettlebell waiting to happen.
What You’ll Need
- One large laundry detergent or fabric softener bottle with a handle
- Sand, water, or small pebbles for filling
- Strong tape (duct tape works great)
- A funnel
How to Make It
Start by cleaning the bottle thoroughly. Remove any soap residue and let it dry completely. This step matters more if you’re using sand, as moisture can make the filling clump.
Next, decide on your weight. Water weighs about 8 pounds per gallon. Sand weighs roughly 12-13 pounds per gallon. For beginners, start with water. You can always level up to sand later.
Use a funnel to fill the bottle. Leave about an inch of space at the top to prevent pressure buildup. Screw the cap on tightly. Then wrap the cap area with duct tape for extra security.
Test your new kettlebell with some gentle swings before going full intensity. Check for leaks and make sure the handle feels secure.
Exercises to Try
This DIY kettlebell works beautifully for kettlebell swings, goblet squats, carries, rows, and deadlifts. The weight distribution might feel slightly different from a traditional kettlebell, but your muscles won’t know the difference.
2. Weighted Vest Using a Backpack
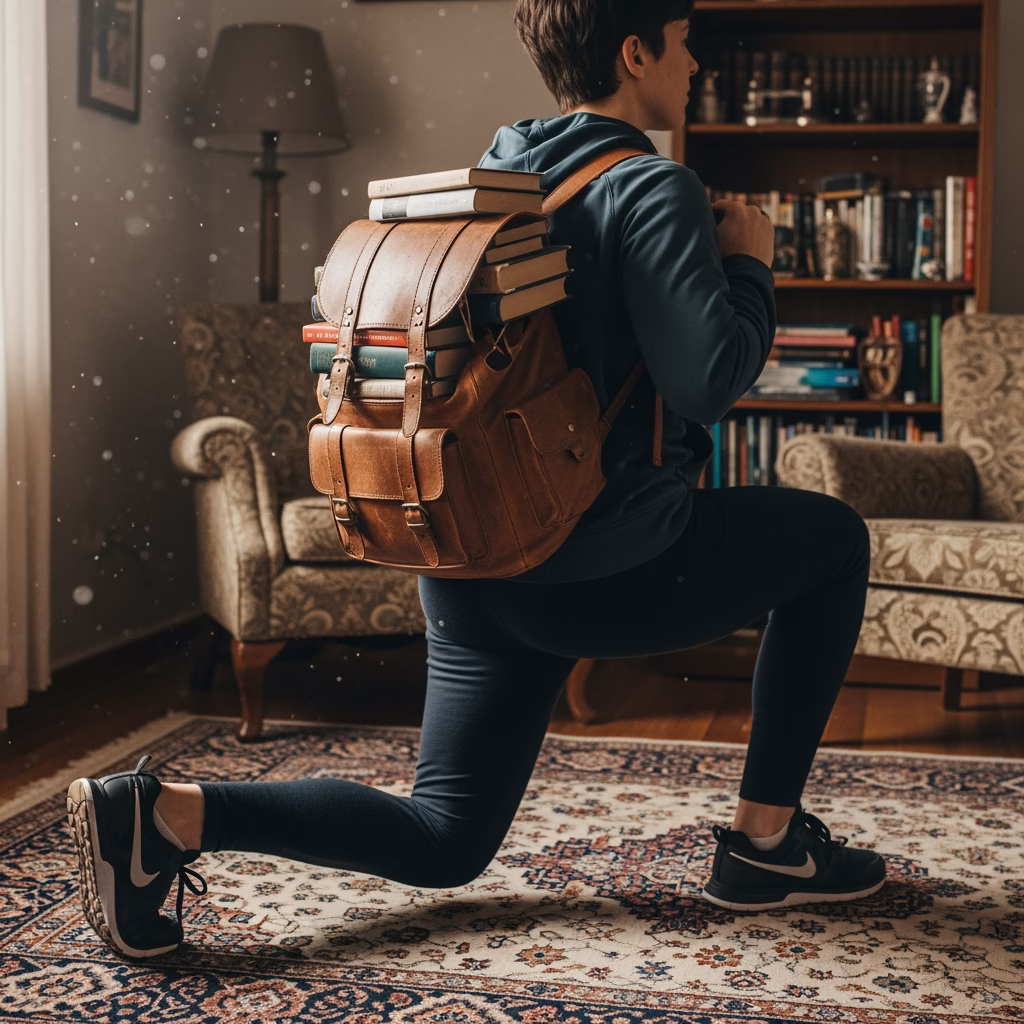
Weighted vests add resistance to bodyweight exercises. They make simple movements more challenging and help build strength faster. Commercial versions can cost anywhere from fifty to several hundred dollars.
An old backpack does the same job for free.
What You’ll Need
- A sturdy backpack with padded straps
- Books, bags of rice, canned goods, or jars filled with sand
- Towels or soft items for padding
How to Make It
Choose a backpack that sits comfortably on your shoulders. Hiking packs with chest and waist straps work especially well because they distribute weight evenly.
Fill the pack with your chosen weights. Books are perfect because they stack flat against your back. Bags of rice or dried beans work too. Canned goods add weight but can shift around, so pack them tightly.
Place heavier items closer to your back. Add towels or soft clothing around the edges to prevent hard objects from poking you.
Weigh your packed backpack on a bathroom scale. Start light—maybe 10-15 pounds. You can always add more as you get stronger.
Exercises to Try
Wear your weighted backpack for squats, lunges, step-ups, push-ups, and neighborhood walks. Even simple activities like climbing stairs become serious workouts. The extra resistance makes your muscles work harder without changing your usual movements.
3. DIY Medicine Ball From Waste Textiles
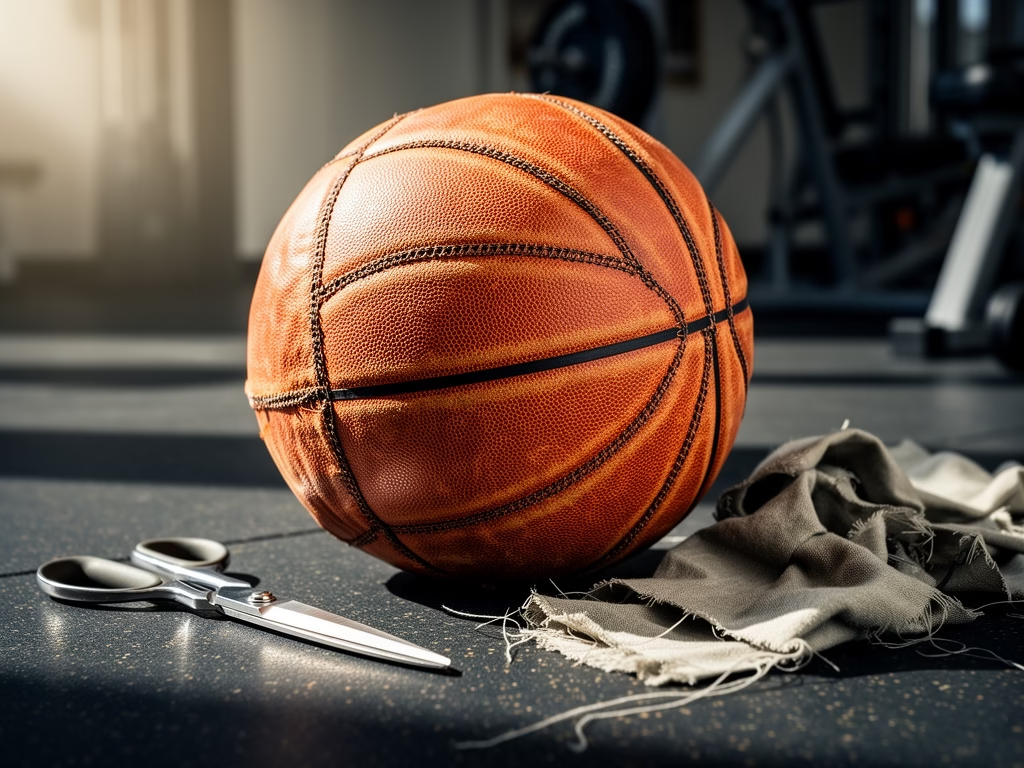
Medicine balls are workout staples. They’re great for building core strength, adding resistance to exercises, and doing explosive movements. Making one at home keeps old fabrics out of the landfill while creating useful gym equipment.
What You’ll Need
- An old basketball, football, or heavy fabric casing
- Fabric scraps, old clothes, or sand in sealed bags
- Needle and strong thread or a sewing machine
- Scissors
How to Make It
If using an old ball, cut a small opening in the surface. Remove any inner bladder. This creates a shell you can fill and reseal.
Stuff the shell with fabric scraps or old clothes. Pack them tightly to create a firm, round shape. For more weight, place sand in ziplock bags and bury them in the center of the fabric filling.
If you don’t have an old ball, sew two circles of heavy fabric together, leaving an opening for stuffing. Think of it like making a round pillow. Canvas, denim, or heavy cotton work well.
Once filled to your desired firmness and weight, sew the opening closed with tight, secure stitches. Reinforce this seam—it will take a beating during workouts.
Exercises to Try
Use your medicine ball for slams, rotational throws, sit-ups, wall balls, and core exercises. The slightly softer texture compared to commercial medicine balls actually makes some exercises more comfortable.
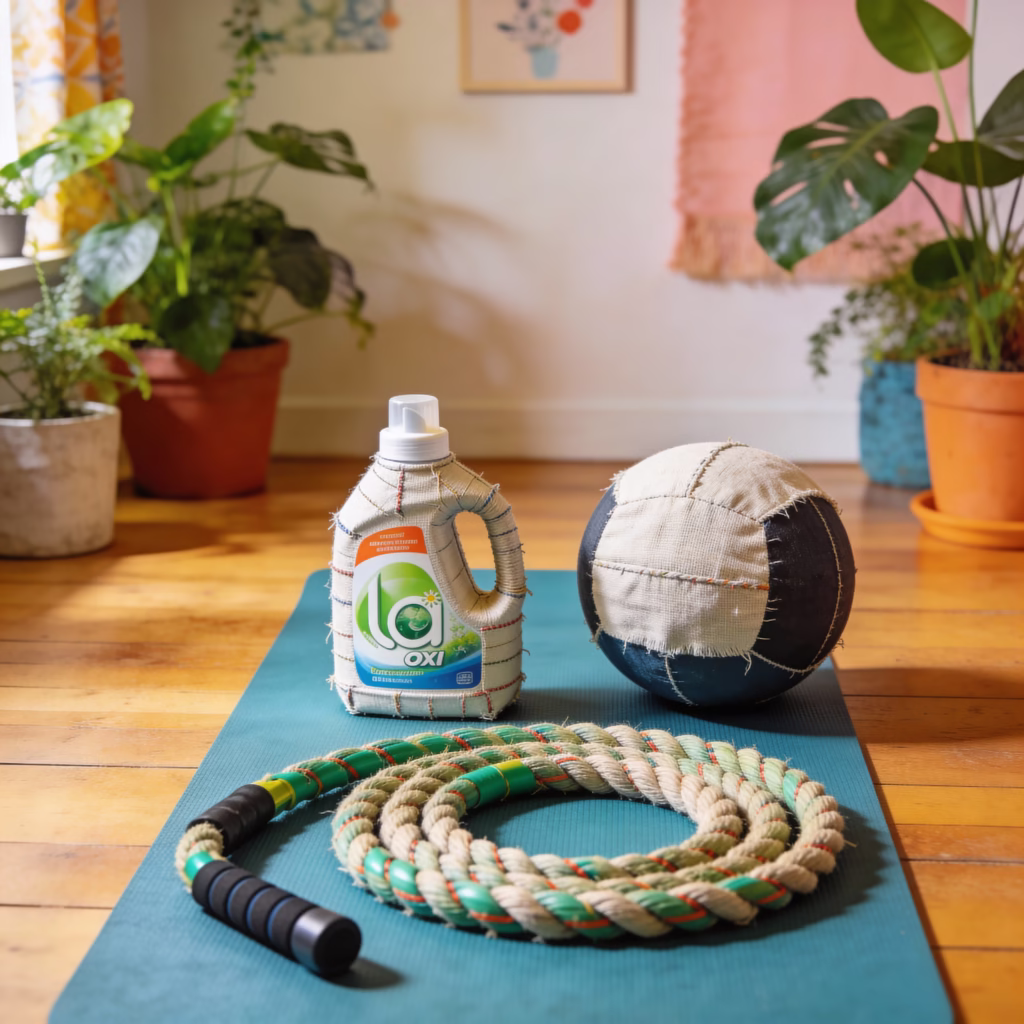
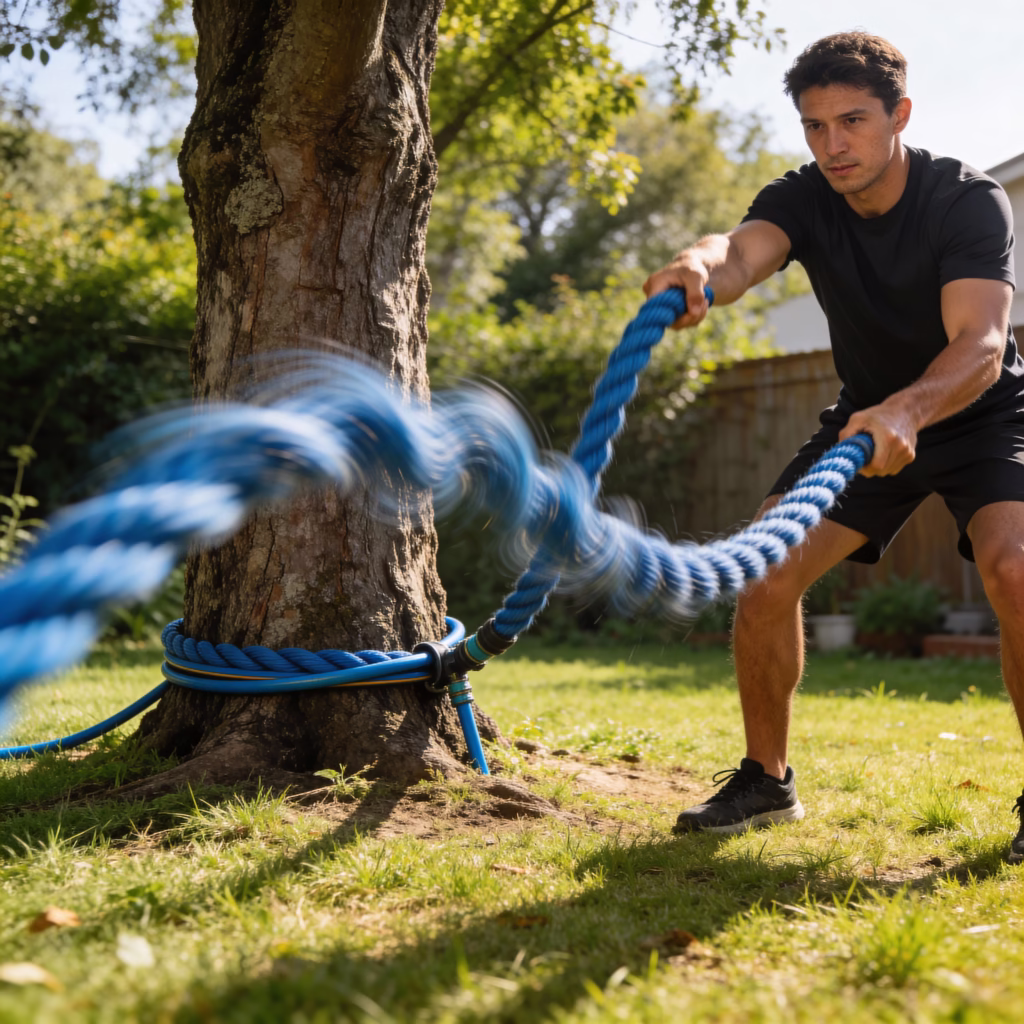
4. Battle Rope From an Old Hose

Battle ropes deliver intense cardio workouts. They build upper body strength and endurance while torching calories. They’re also surprisingly easy to make from materials heading for the trash.
What You’ll Need
- An old garden hose or fire hose (30-50 feet works well)
- A sturdy anchor point (tree, post, or heavy object)
- Tape for the ends
How to Make It
Find a hose that’s no longer useful for watering but still structurally sound. Small cracks are fine since you won’t be running water through it.
Wrap the ends with tape to create comfortable handles. Electrical tape or hockey tape works great. Build up several layers to cushion your grip.
Thread the hose around your anchor point so both ends come back to you. The hose should form a U shape. For outdoor workouts, a sturdy tree works perfectly. Indoors, wrap around a heavy piece of furniture or a stair railing.
Exercises to Try
Create waves by alternating your arms up and down. Try slams by raising both arms and crashing down together. Add circles, snakes, and lateral movements. Even a few minutes of battle rope work will have you breathing hard.
5. Agility Ladder From Scrap Wood or Cardboard
Agility ladders improve footwork, coordination, and quick-twitch muscle response. Athletes use them constantly. They’re also remarkably simple to make from scraps you might otherwise throw away.
What You’ll Need
- Paint stirrers, pallet slats, or thick cardboard strips
- Strong twine, rope, or tape
- Scissors or a saw
How to Make It
Cut your material into strips about 18 inches long. You’ll need 10-12 strips for a standard ladder. Space them about 18 inches apart to create squares.
If using wood, drill small holes near each end and thread rope through. Tie knots to hold each rung in place. The rope becomes the side rails of your ladder.
For cardboard, use strong tape to attach the strips to two long pieces of rope or ribbon. Duct tape holds surprisingly well, though you may need to reinforce it after heavy use.
Roll up your finished ladder for easy storage. It should last through many workouts.
Exercises to Try
Run through with high knees. Try lateral shuffles. Do in-and-out hops. Practice quick feet drills. The ladder forces you to think about foot placement while moving fast, which builds coordination that transfers to any sport or activity.
6. Gliding Discs From Cloths or Paper Plates
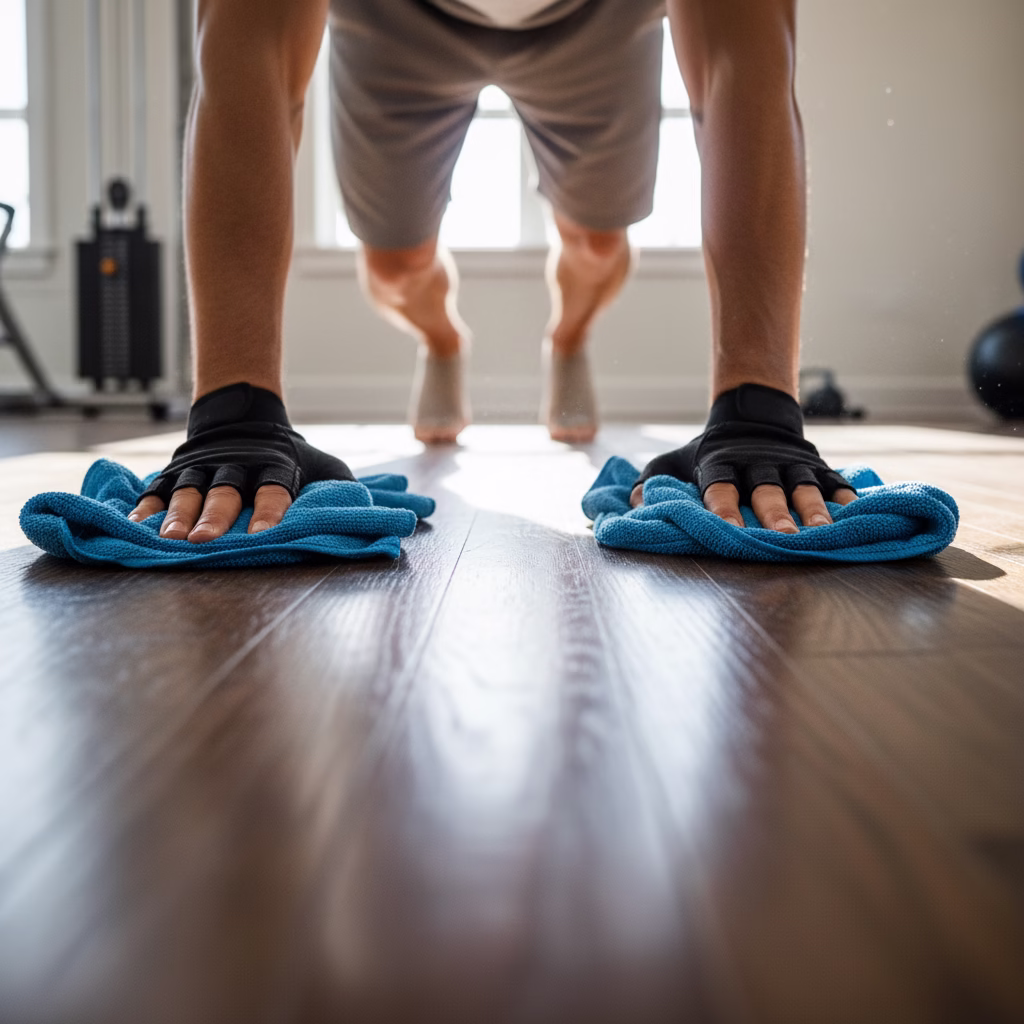
Gliding discs add instability to exercises. This forces your core to work harder. It also allows for smooth, controlled movements that target muscles in new ways. Commercial discs cost money. Household items work just as well.
What You’ll Need
For hard floors: old microfiber cloths, dishcloths, or hand towels
For carpet: paper plates or plastic lids
How to Make It
There’s barely any making involved here. Simply fold your cloths into manageable sizes that fit under your hands or feet. For paper plates, use them as-is or tape two together for extra durability.
The key is choosing materials that slide smoothly on your floor type. Test different options to find what glides best in your space.
Exercises to Try
Sliding lunges work your legs and balance. Mountain climbers become more challenging. Try sliding push-ups where your hands move apart and back together. Core exercises like pikes and knee tucks feel completely different with gliders under your feet.
7. Jump Rope From Retired Cord
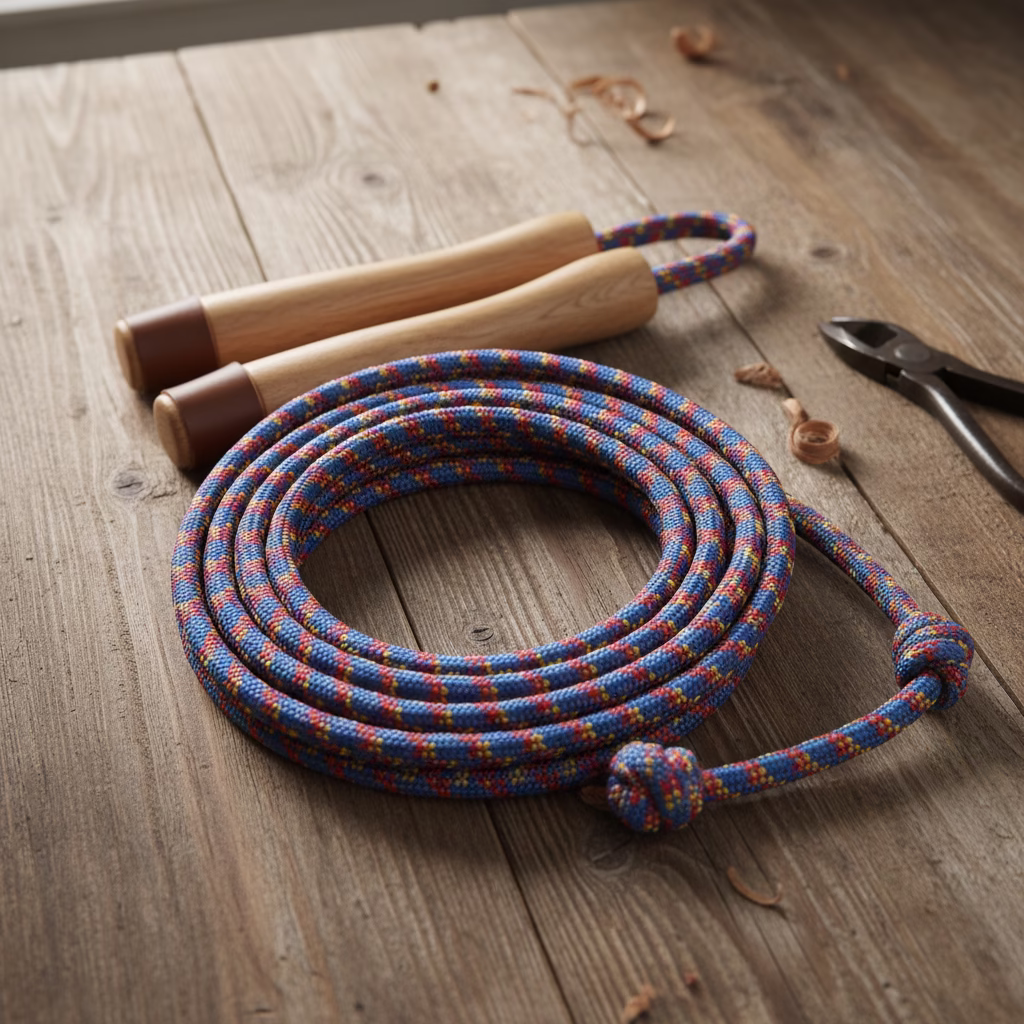
Jumping rope is one of the most efficient cardio exercises around. It burns calories, improves coordination, and can be done almost anywhere. Making a rope from materials you already have takes just minutes.
What You’ll Need
- Old clothesline, climbing rope offcut, or paracord (8-10 feet)
- Wooden dowels, PVC pipe scraps, or heavy tape for handles
- Scissors
How to Make It
Measure your rope length by standing on the center and pulling the ends up. They should reach your armpits. Adjust as needed.
For handles, cut two pieces of wooden dowel or PVC pipe about 6 inches long. Drill a hole through each near one end. Thread your rope through and tie secure knots.
If you don’t have materials for handles, simply wrap the ends of your rope with layers of tape. Build up enough thickness to grip comfortably.
Test the weight and swing of your rope. Heavier ropes move slower, which can actually help beginners learn timing. Lighter ropes allow for faster skipping.
Exercises to Try
Start with basic jumps on both feet. Progress to alternating feet. Try high knees, double-unders, and criss-crosses as you improve. Even five minutes of jumping rope makes an excellent warm-up or cardio burst.
8. Step Platform From Sturdy Scrap Wood
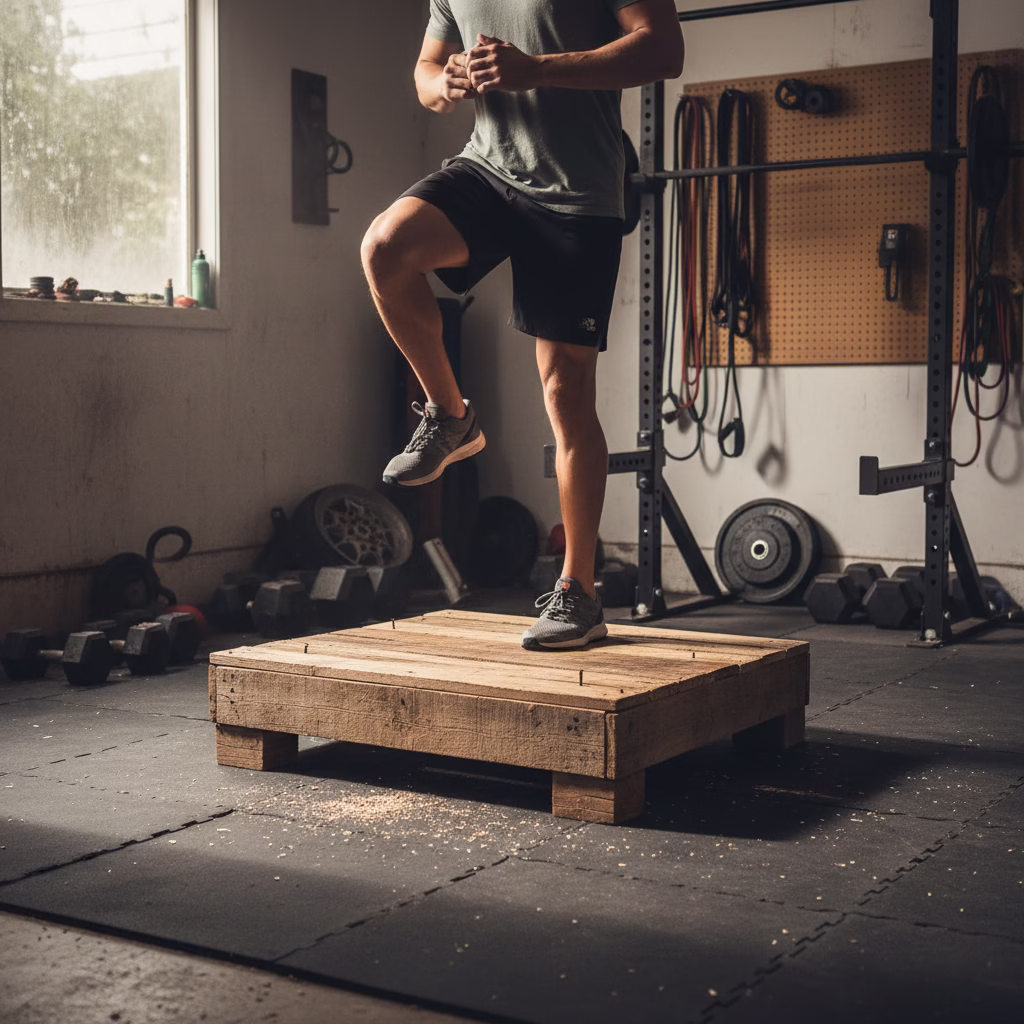
Step platforms open up countless exercise options. They’re useful for cardio, strength training, and stretching. Building one from scrap wood creates a durable piece of gym equipment that lasts for years.
What You’ll Need
- Reclaimed timber planks or a solid wooden crate
- Screws or nails
- A saw
- Sandpaper
- Optional: non-slip material for the top
How to Make It
Decide on your platform dimensions. A standard size is about 4 feet long, 1 foot wide, and 6-8 inches tall. Smaller versions work fine for personal use.
Cut your planks to create a top surface and supporting sides. Assemble using screws rather than nails for extra stability. You’ll be putting your full body weight on this, so over-engineer the construction.
Sand all surfaces to prevent splinters. Pay special attention to edges and corners where hands and feet will make contact.
Add rubber or non-slip material to the top surface. An old yoga mat works perfectly. Cut to size and glue or tape in place.
Test your platform’s stability before using it for exercise. Rock it, stand on it, jump on it. Make adjustments if anything wobbles.
Exercises to Try
Step-ups are the obvious choice. Also try box squats, incline push-ups, decline push-ups, and Bulgarian split squats. Use your platform for low-impact cardio circuits where you step up and down rhythmically.
9. DIY Sandbag for Strength Training

Sandbags are incredible for functional fitness. The shifting weight challenges stabilizer muscles. The awkward shape mimics real-world lifting. Best of all, they’re cheap and easy to make.
What You’ll Need
- An old duffel bag, army surplus bag, or heavy canvas sack
- Contractor bags or heavy-duty garbage bags
- Sand or pea gravel
- Duct tape
How to Make It
Never pour sand directly into your outer bag. It will leak everywhere. Instead, create inner bags first.
Fill contractor bags with sand—maybe 20-40 pounds each depending on your strength level. Squeeze out excess air and seal with duct tape. Then place that bag inside another contractor bag and seal again. This double-bagging prevents leaks.
Put your sealed sand bags inside the outer duffel bag. Having multiple smaller bags lets you adjust the total weight. You can start lighter and add bags as you progress.
Close the outer bag securely. Check for any weak points or potential leak spots.
Exercises to Try
Try sandbag cleans, carries, squats, lunges, throws, and drags. The shifting weight makes every movement more challenging than using a barbell or dumbbell.
10. Foam Roller Alternative From PVC or Pool Noodles
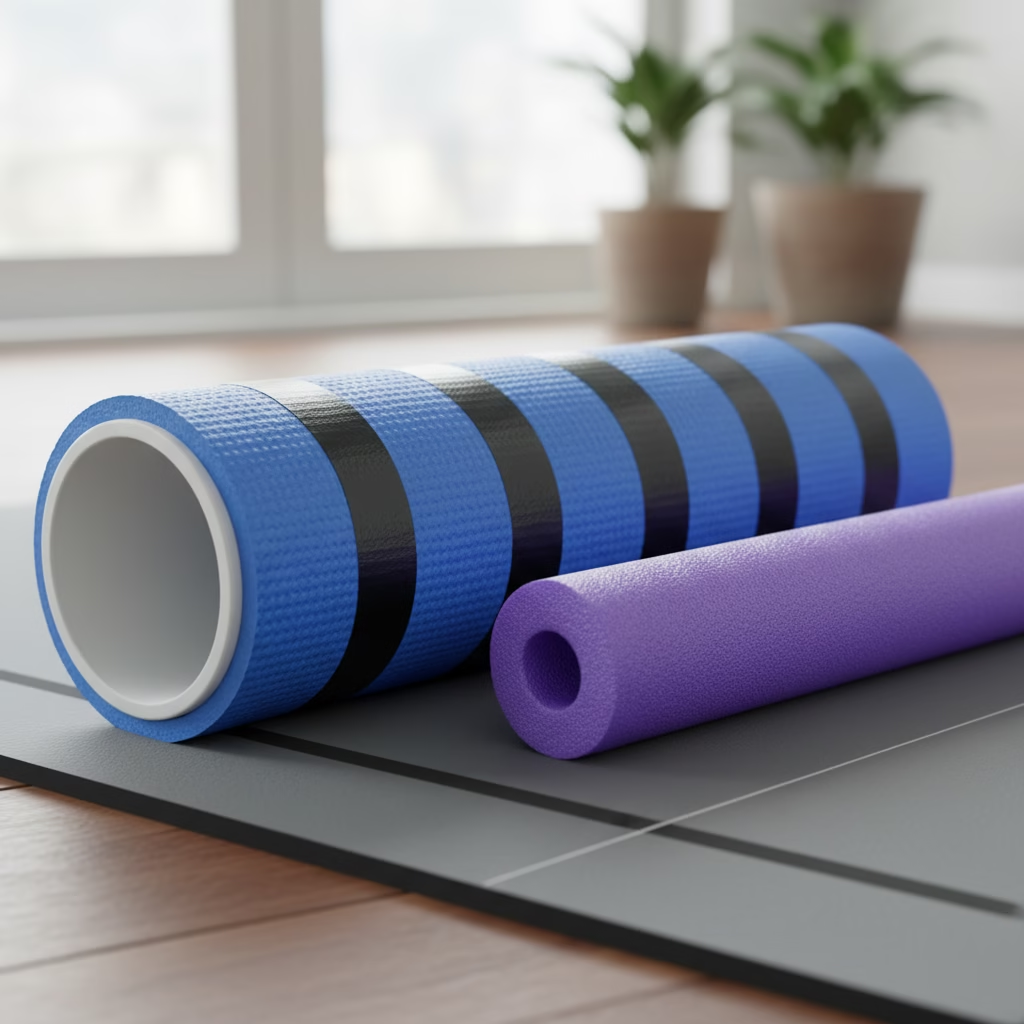
Foam rolling helps with muscle recovery and flexibility. Commercial rollers are often made from petroleum-based foam. You can create effective alternatives from things you might already have.
What You’ll Need
- A section of PVC pipe (4-6 inches diameter, 18-24 inches long) OR pool noodles
- An old yoga mat or towel
- Tape
How to Make It
For a firm roller, wrap a PVC pipe with an old yoga mat. Secure with tape at both ends and around the middle. The mat adds cushion and prevents the pipe from sliding on the floor.
For a softer option, bundle several pool noodles together with tape. This creates a lighter roller that’s gentler on tight muscles.
Both versions work well for different purposes. The PVC roller provides deeper pressure. The pool noodle version offers gentler massage.
Exercises to Try
Roll out your calves, quadriceps, hamstrings, IT band, and upper back. Move slowly over tight areas. Pause on knots and breathe through the discomfort. Regular foam rolling improves recovery and keeps muscles feeling good.
Conclusion: Start Building Your Zero Waste Home Gym Today
Building your own fitness essentials isn’t complicated. It doesn’t require special skills or expensive materials. What it does require is a shift in thinking—seeing potential workout gear in things you might otherwise throw away.
These ten projects prove that effective gym equipment can come from anywhere. A detergent bottle becomes a kettlebell. A garden hose transforms into a battle rope. Old clothes stuff a medicine ball.
Start with one or two projects. See how they feel. Notice how your workouts change when you’re using something you built yourself. There’s a certain satisfaction in training with gear you created from scratch.
Beyond the personal benefits, making your own fitness essentials keeps materials out of landfills. It reduces demand for new products. It challenges the idea that we need to buy our way to better health.
The best workout is one you’ll actually do. If making your own gym equipment gets you excited about fitness, that’s reason enough to start. Your body doesn’t care whether your kettlebell costs two dollars or two hundred. It just knows the work.
So look around your home. What’s been sitting unused? What’s heading for the trash? With a little creativity, those items might become the foundation of your best workouts yet.
External References
For more information on the topics covered in this article, explore these educational resources:
- EPA – Reduce, Reuse, Recycle
- ACE – Exercise Library
- NSCA: strength training principles and safety
- Harvard Health Publishing – Exercise and Fitness
- WHO – Physical Activity
Recent Posts