Cookie Consent by Free Privacy Policy Generator Update cookies preferences

How To Make Healthy breadcrumbs Without Bread


Are you a passionate home cook and a nutrition enthusiasts dedicated to creating accessible, healthy recipes that don’t compromise on flavour? We love exploring innovative ways to make everyday meals extraordinary and share our knowledge with the world, always seeking creative approaches to classic ingredients, especially when it comes to making healthy breadcrumbs without bread.


The image shows a Salmon Fillet coated with breadcrumbs Without Bread
Salmon fillet coated in a nut & seed crust

Elevate Your Cooking with Delicious, Guilt-Free Alternatives with breadcrumbs Without Bread

Are you a passionate home cook and a nutrition enthusiasts dedicated to creating accessible, healthy recipes that don’t compromise on flavour? We love exploring innovative ways to make everyday meals extraordinary and share our knowledge with the world, always seeking creative approaches to classic ingredients, especially when it comes to making healthy breadcrumbs without bread.

Are you looking to add that perfect crunch to your favorite dishes without relying on traditional breadcrumbs? Perhaps you’re following a gluten-free, low-carb, or simply a healthier eating plan. Whatever your motivation, discovering how to make delicious, healthy breadcrumbs without bread is a game-changer for any kitchen. Traditional breadcrumbs, while convenient, often come with unwanted ingredients, hidden sugars, or are simply not suitable for various dietary needs. This guide will open up a world of possibilities, showing you how to create versatile, nutritious, and incredibly tasty alternatives that will elevate your cooking.


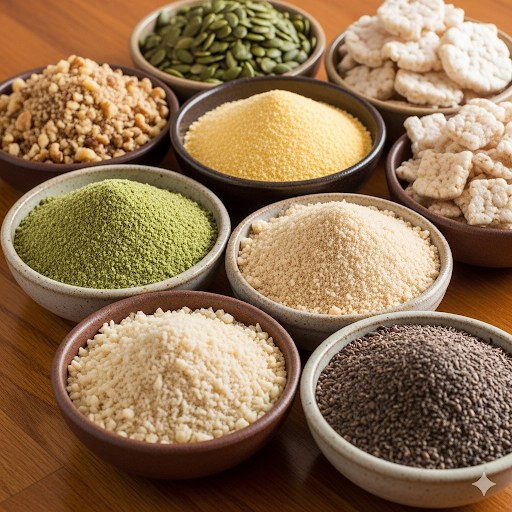
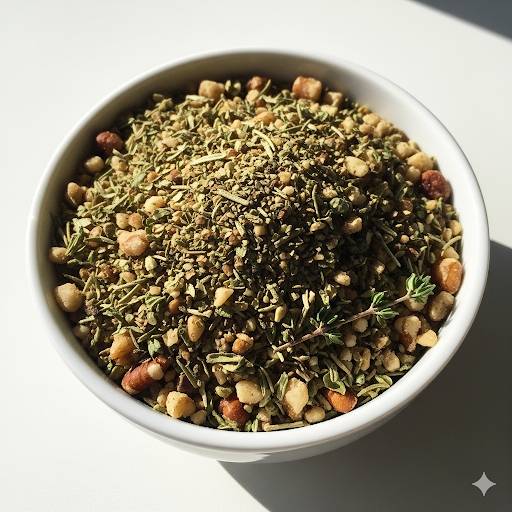
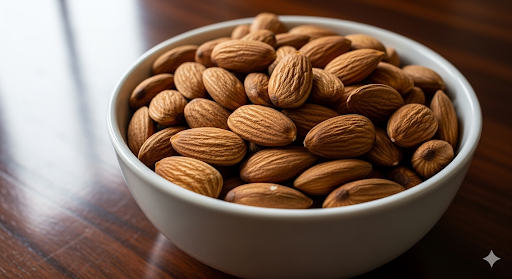
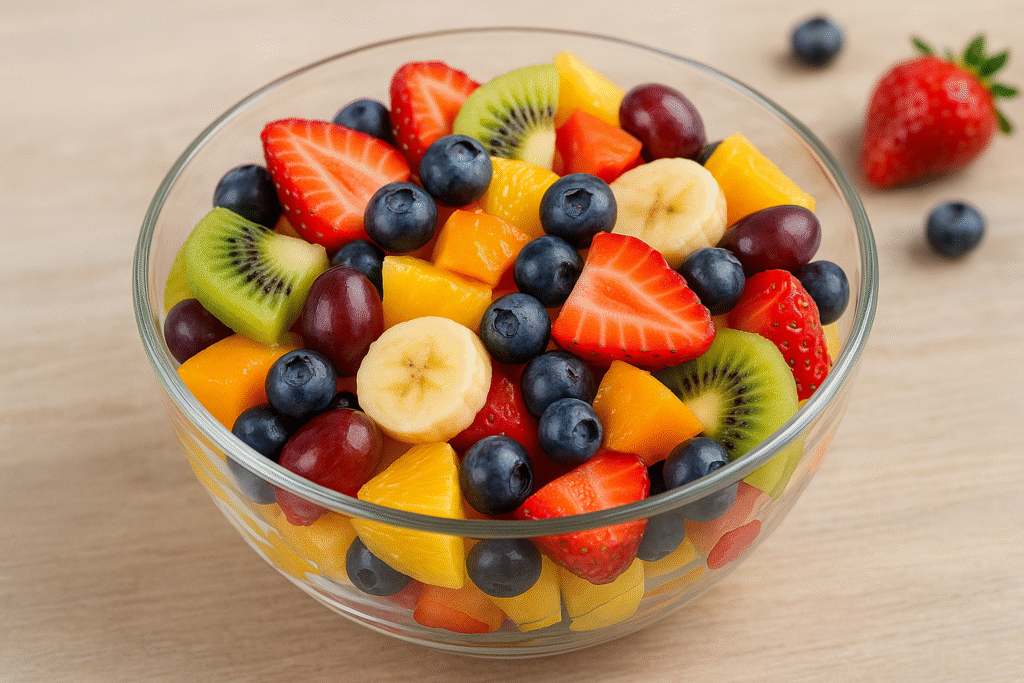
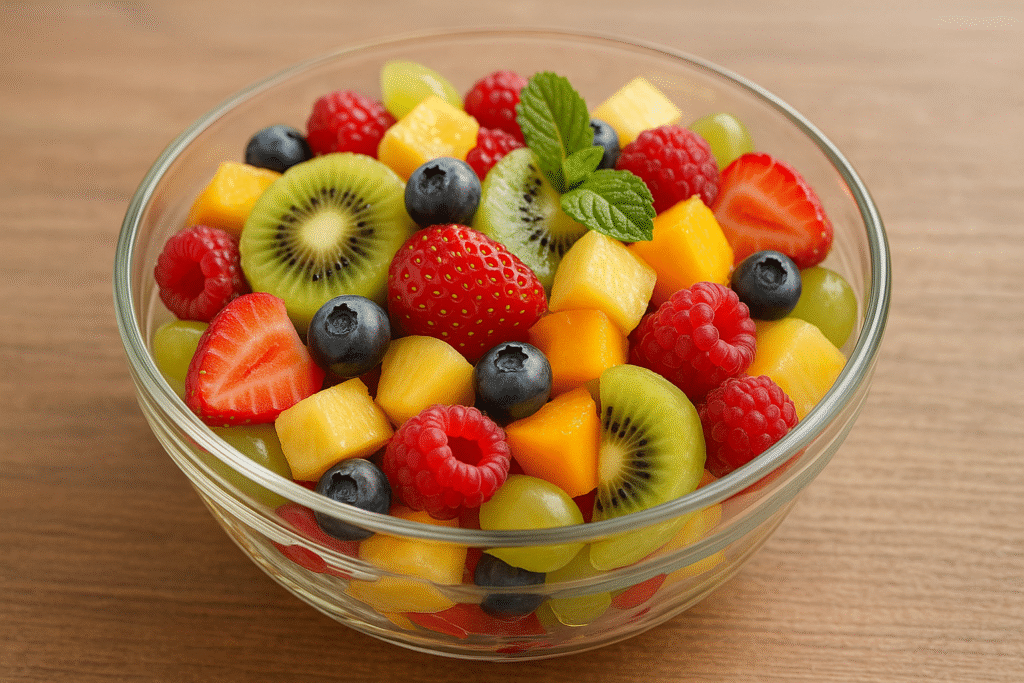
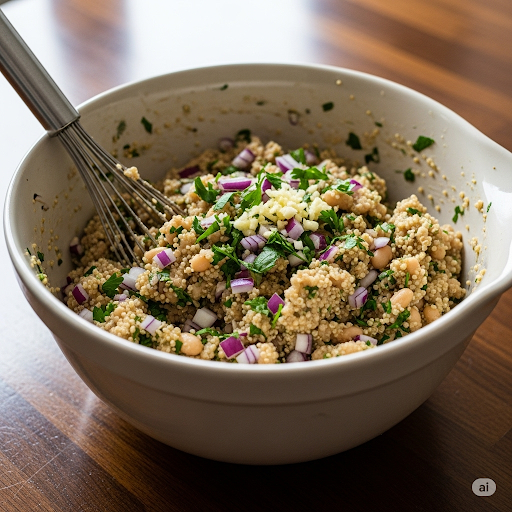
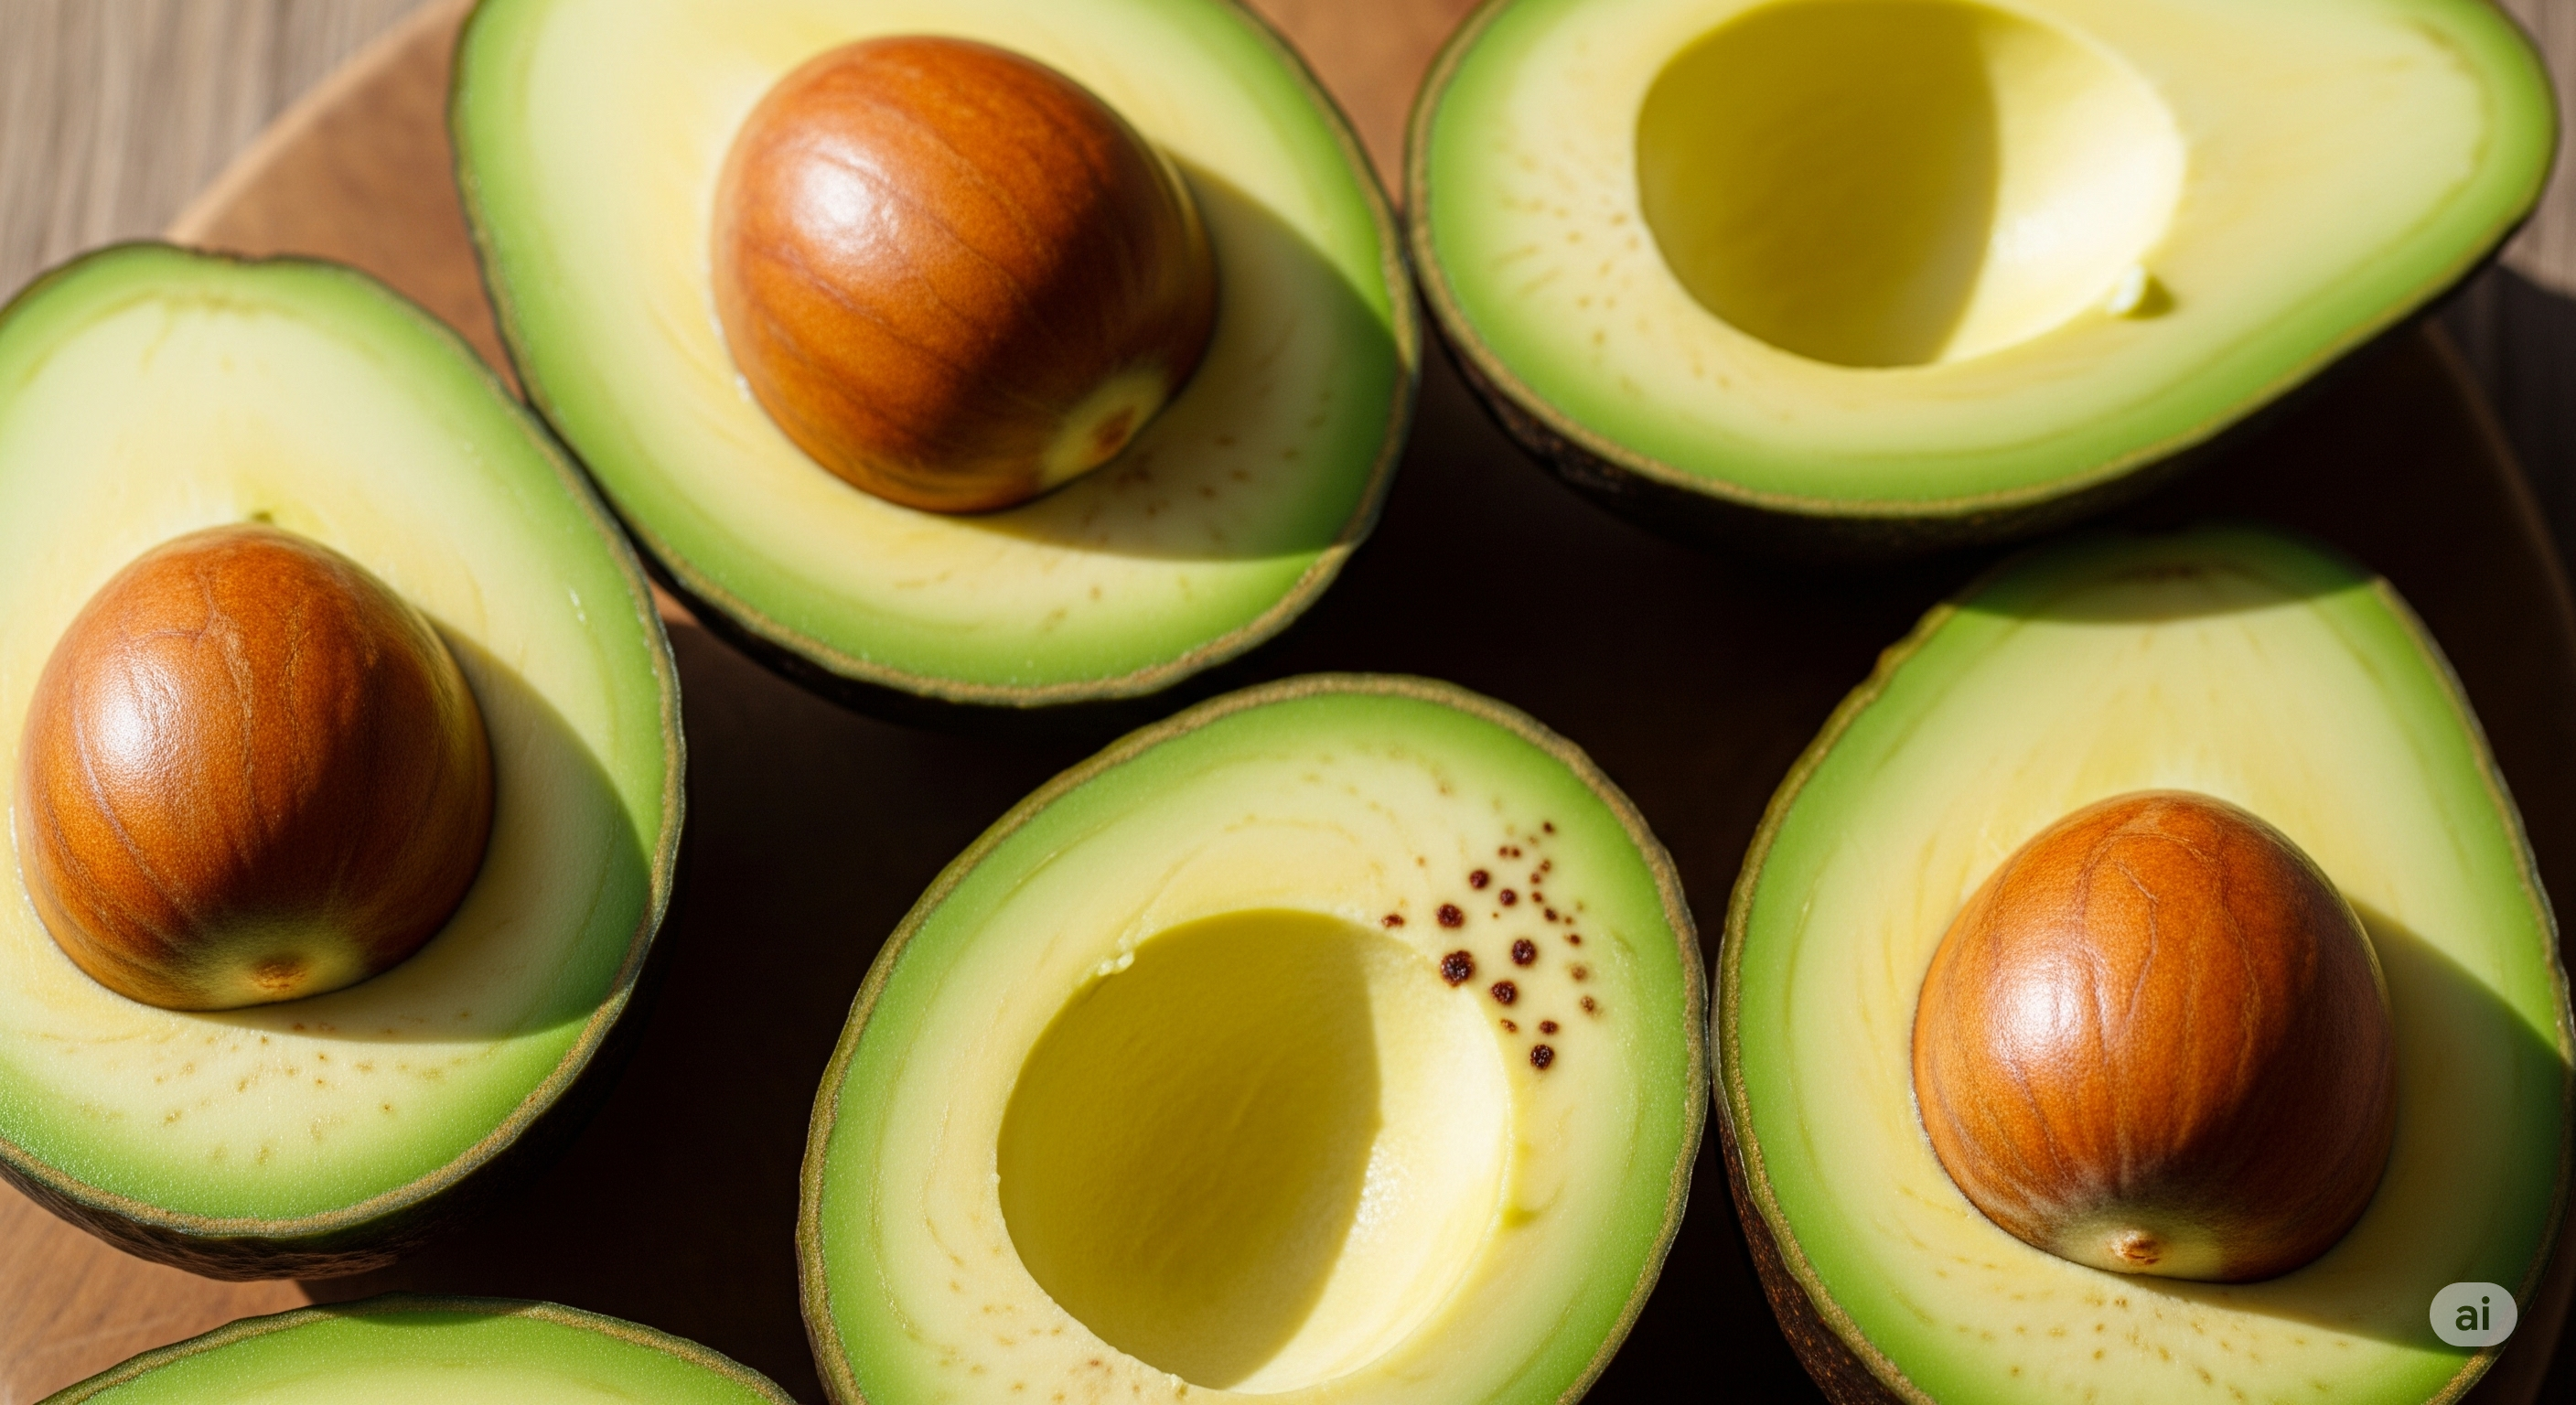
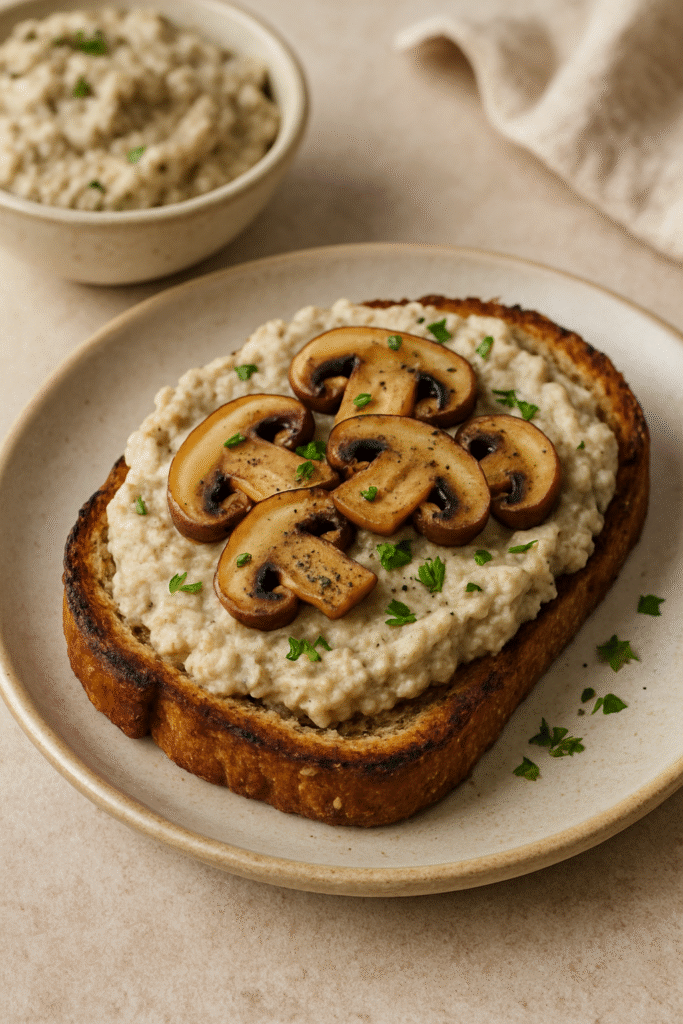
The gallery shows the first bowl with Herb crumbs. The second bowl is a variety of breadcrumbs listed in the article and the third bowl is made up of oat and flax seeds for the breadcrumbs.


Your Kitchen, Your Rules: The Power of Homemade

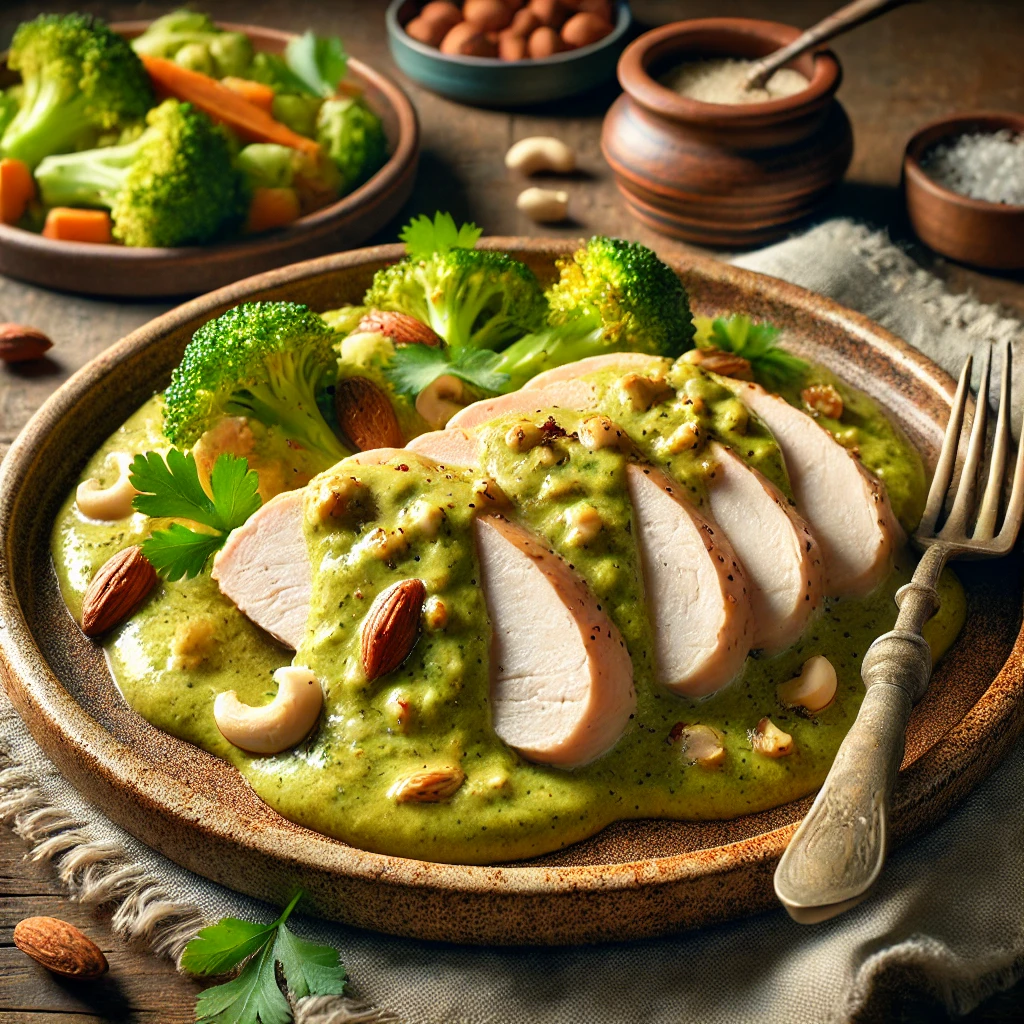
The beauty of breadcrumbs Without Bread lies not just in their health benefits but also in their adaptability. Imagine a crispy coating on your chicken, a delightful topping for your casseroles, or a robust binder in your meatloaf, all crafted from wholesome ingredients you likely already have in your pantry. We’re moving beyond simple substitutions and diving into innovative methods that bring new textures and flavors to your table. From nutty blends to hearty grains and even ingenious vegetable-based options, preparing your own healthy crumbs is simpler than you think.

Ditching the bread doesn’t mean sacrificing flavor or texture. In fact, it often means enhancing both! These homemade versions provide a depth of flavor that store-bought options can’t match, along with a satisfying crunch that makes every bite more enjoyable. Plus, by making them yourself, you have complete control over the ingredients, ensuring they align perfectly with your health goals and taste preferences. Say goodbye to highly processed fillers and hello to pure, unadulterated goodness.

Take Control of Your Ingredients with breadcrumbs Without Bread

This comprehensive guide is designed for everyone, from seasoned chefs to enthusiastic beginners. We’ll walk you through the process step-by-step, ensuring you gain the confidence to experiment and create your own signature blends. We’ll cover everything from equipment and ingredients to storage tips and creative variations, making sure you have all the knowledge you need to master the art of making healthy breadcrumbs without bread. Get ready to transform your meals and impress your taste buds!

So, let’s embark on this culinary adventure and unlock the secrets to crafting healthy, flavourful, and diverse breadcrumb alternatives. You’ll be amazed at how easy it is to upgrade your cooking while staying true to a healthy lifestyle.


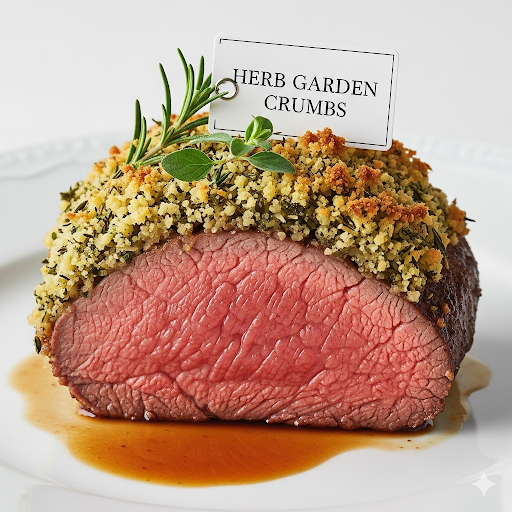
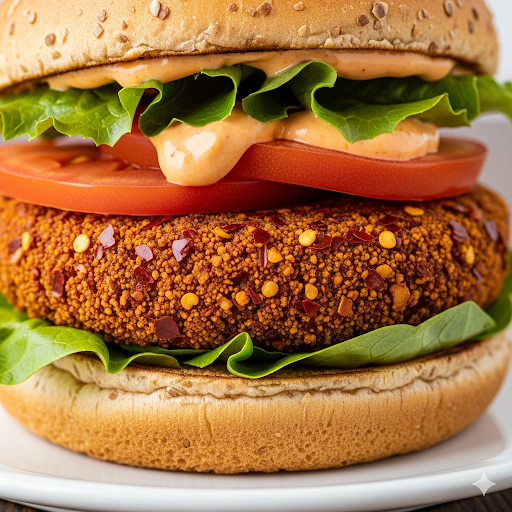
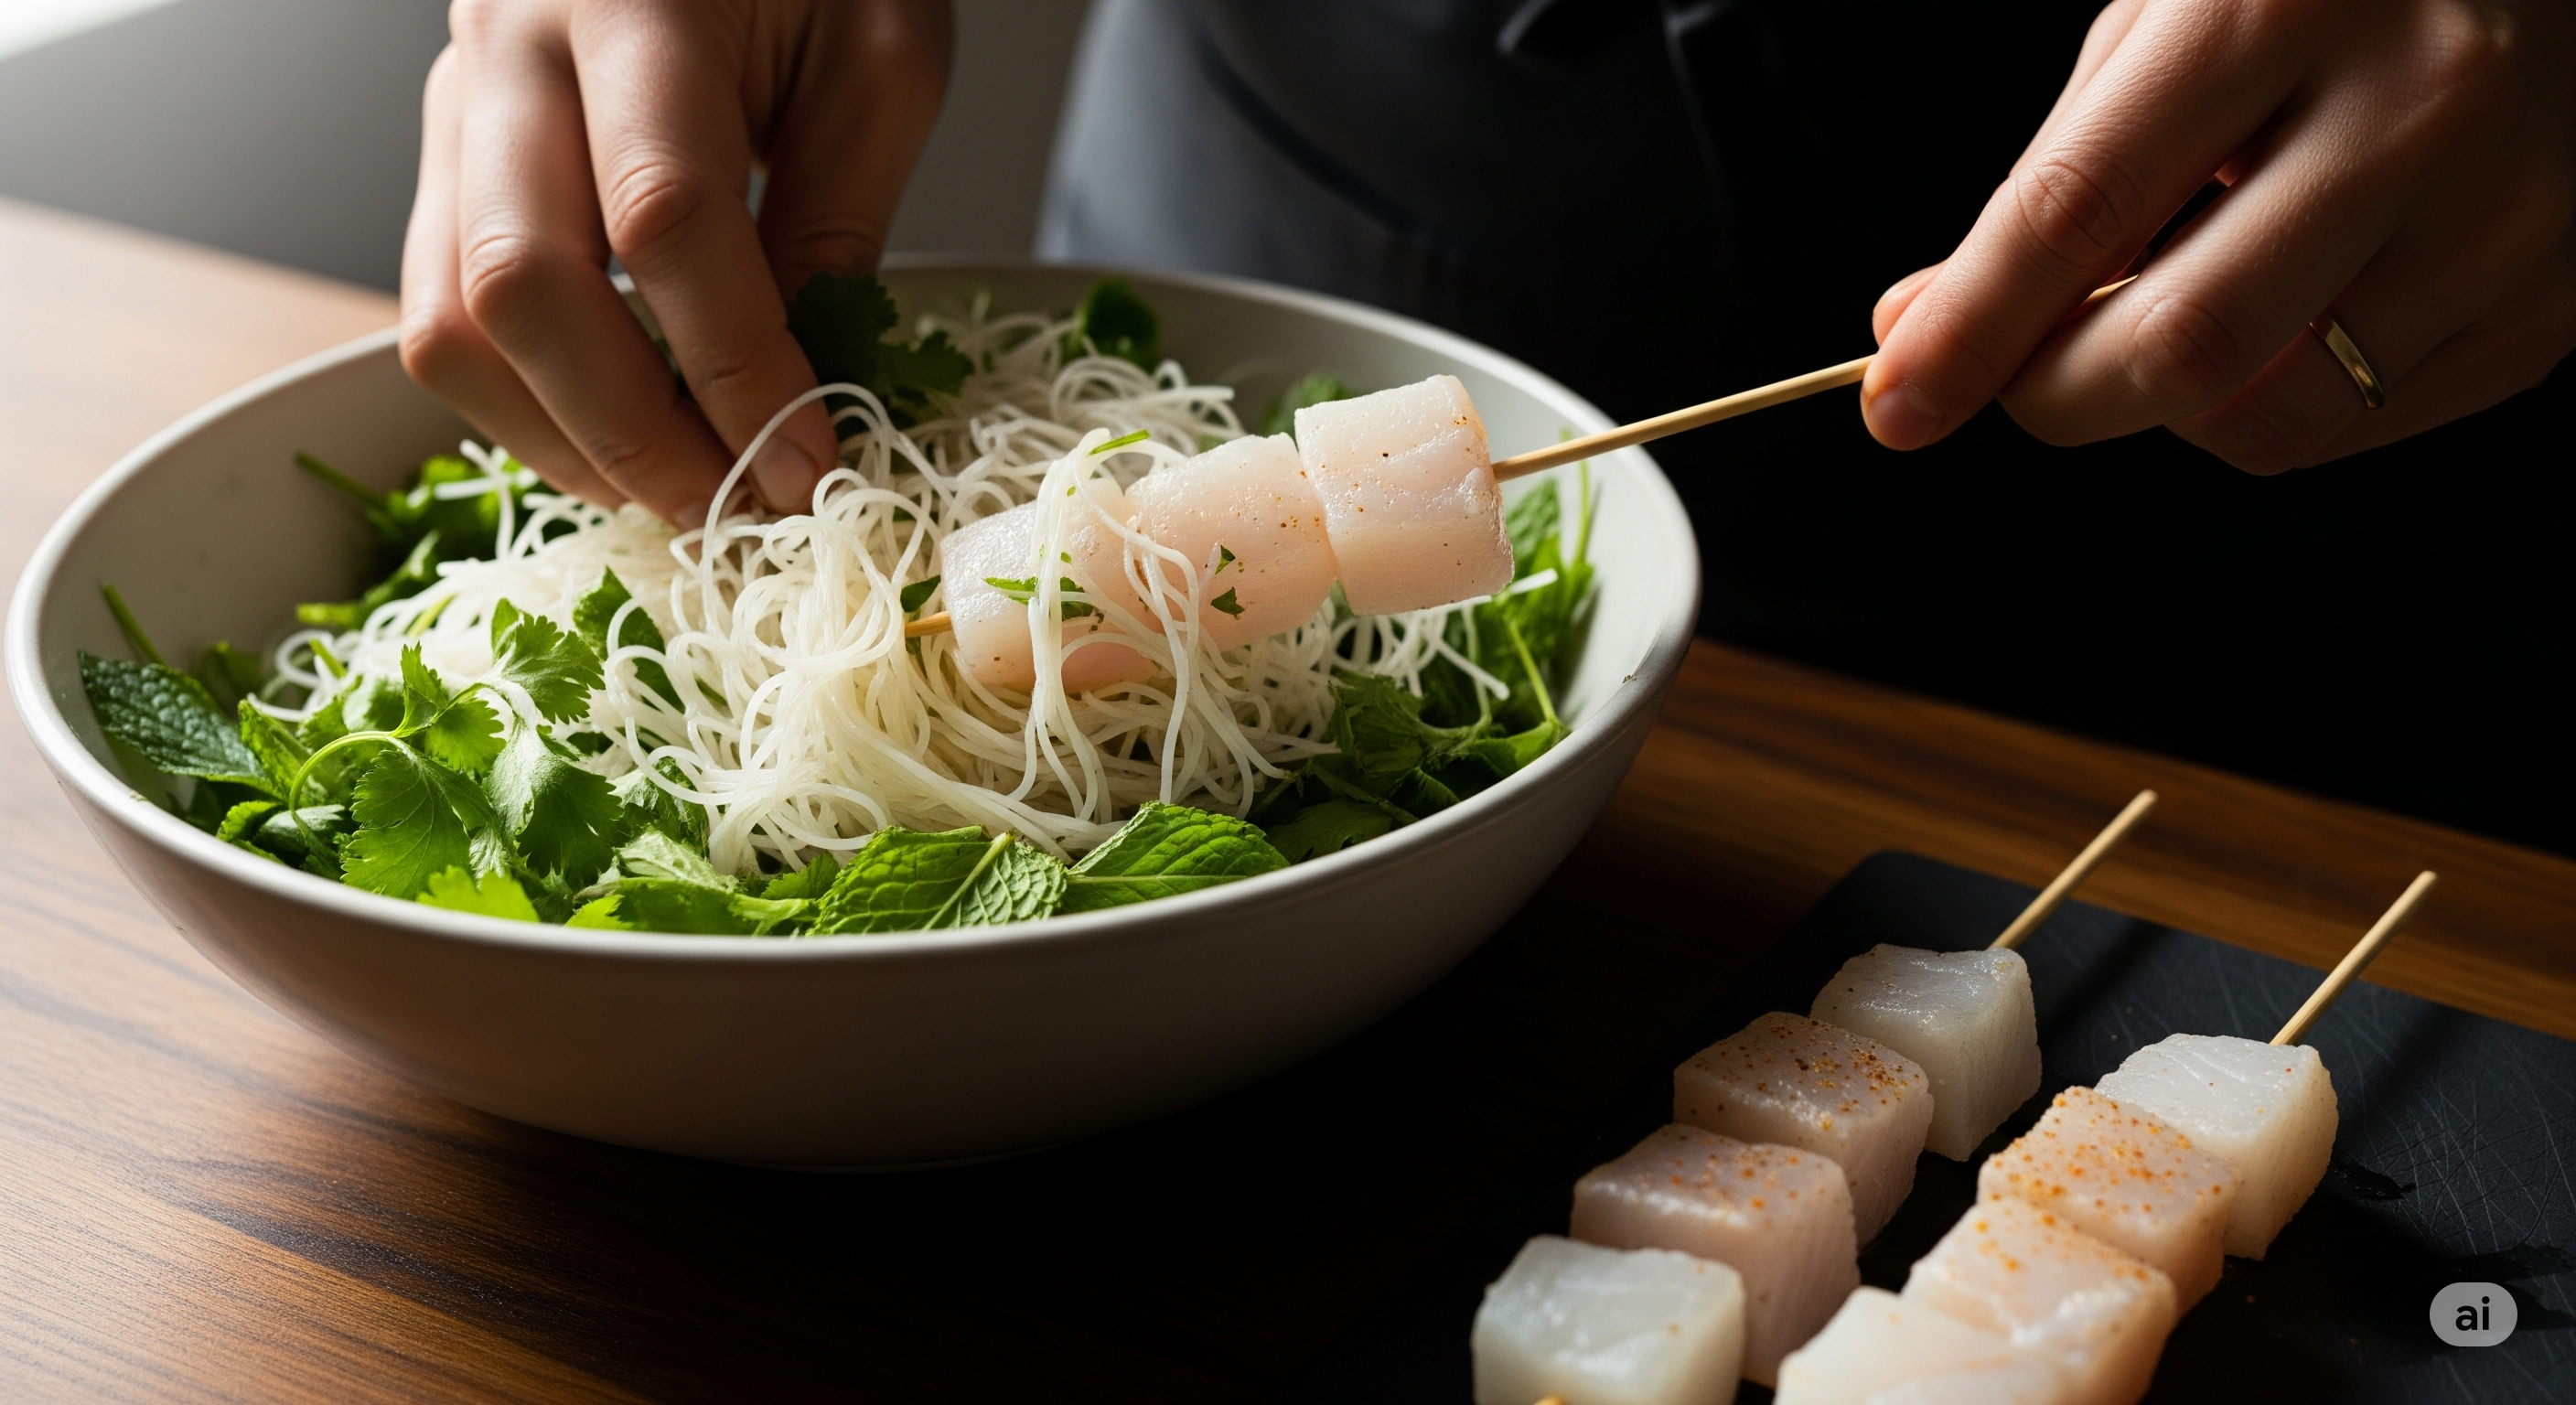
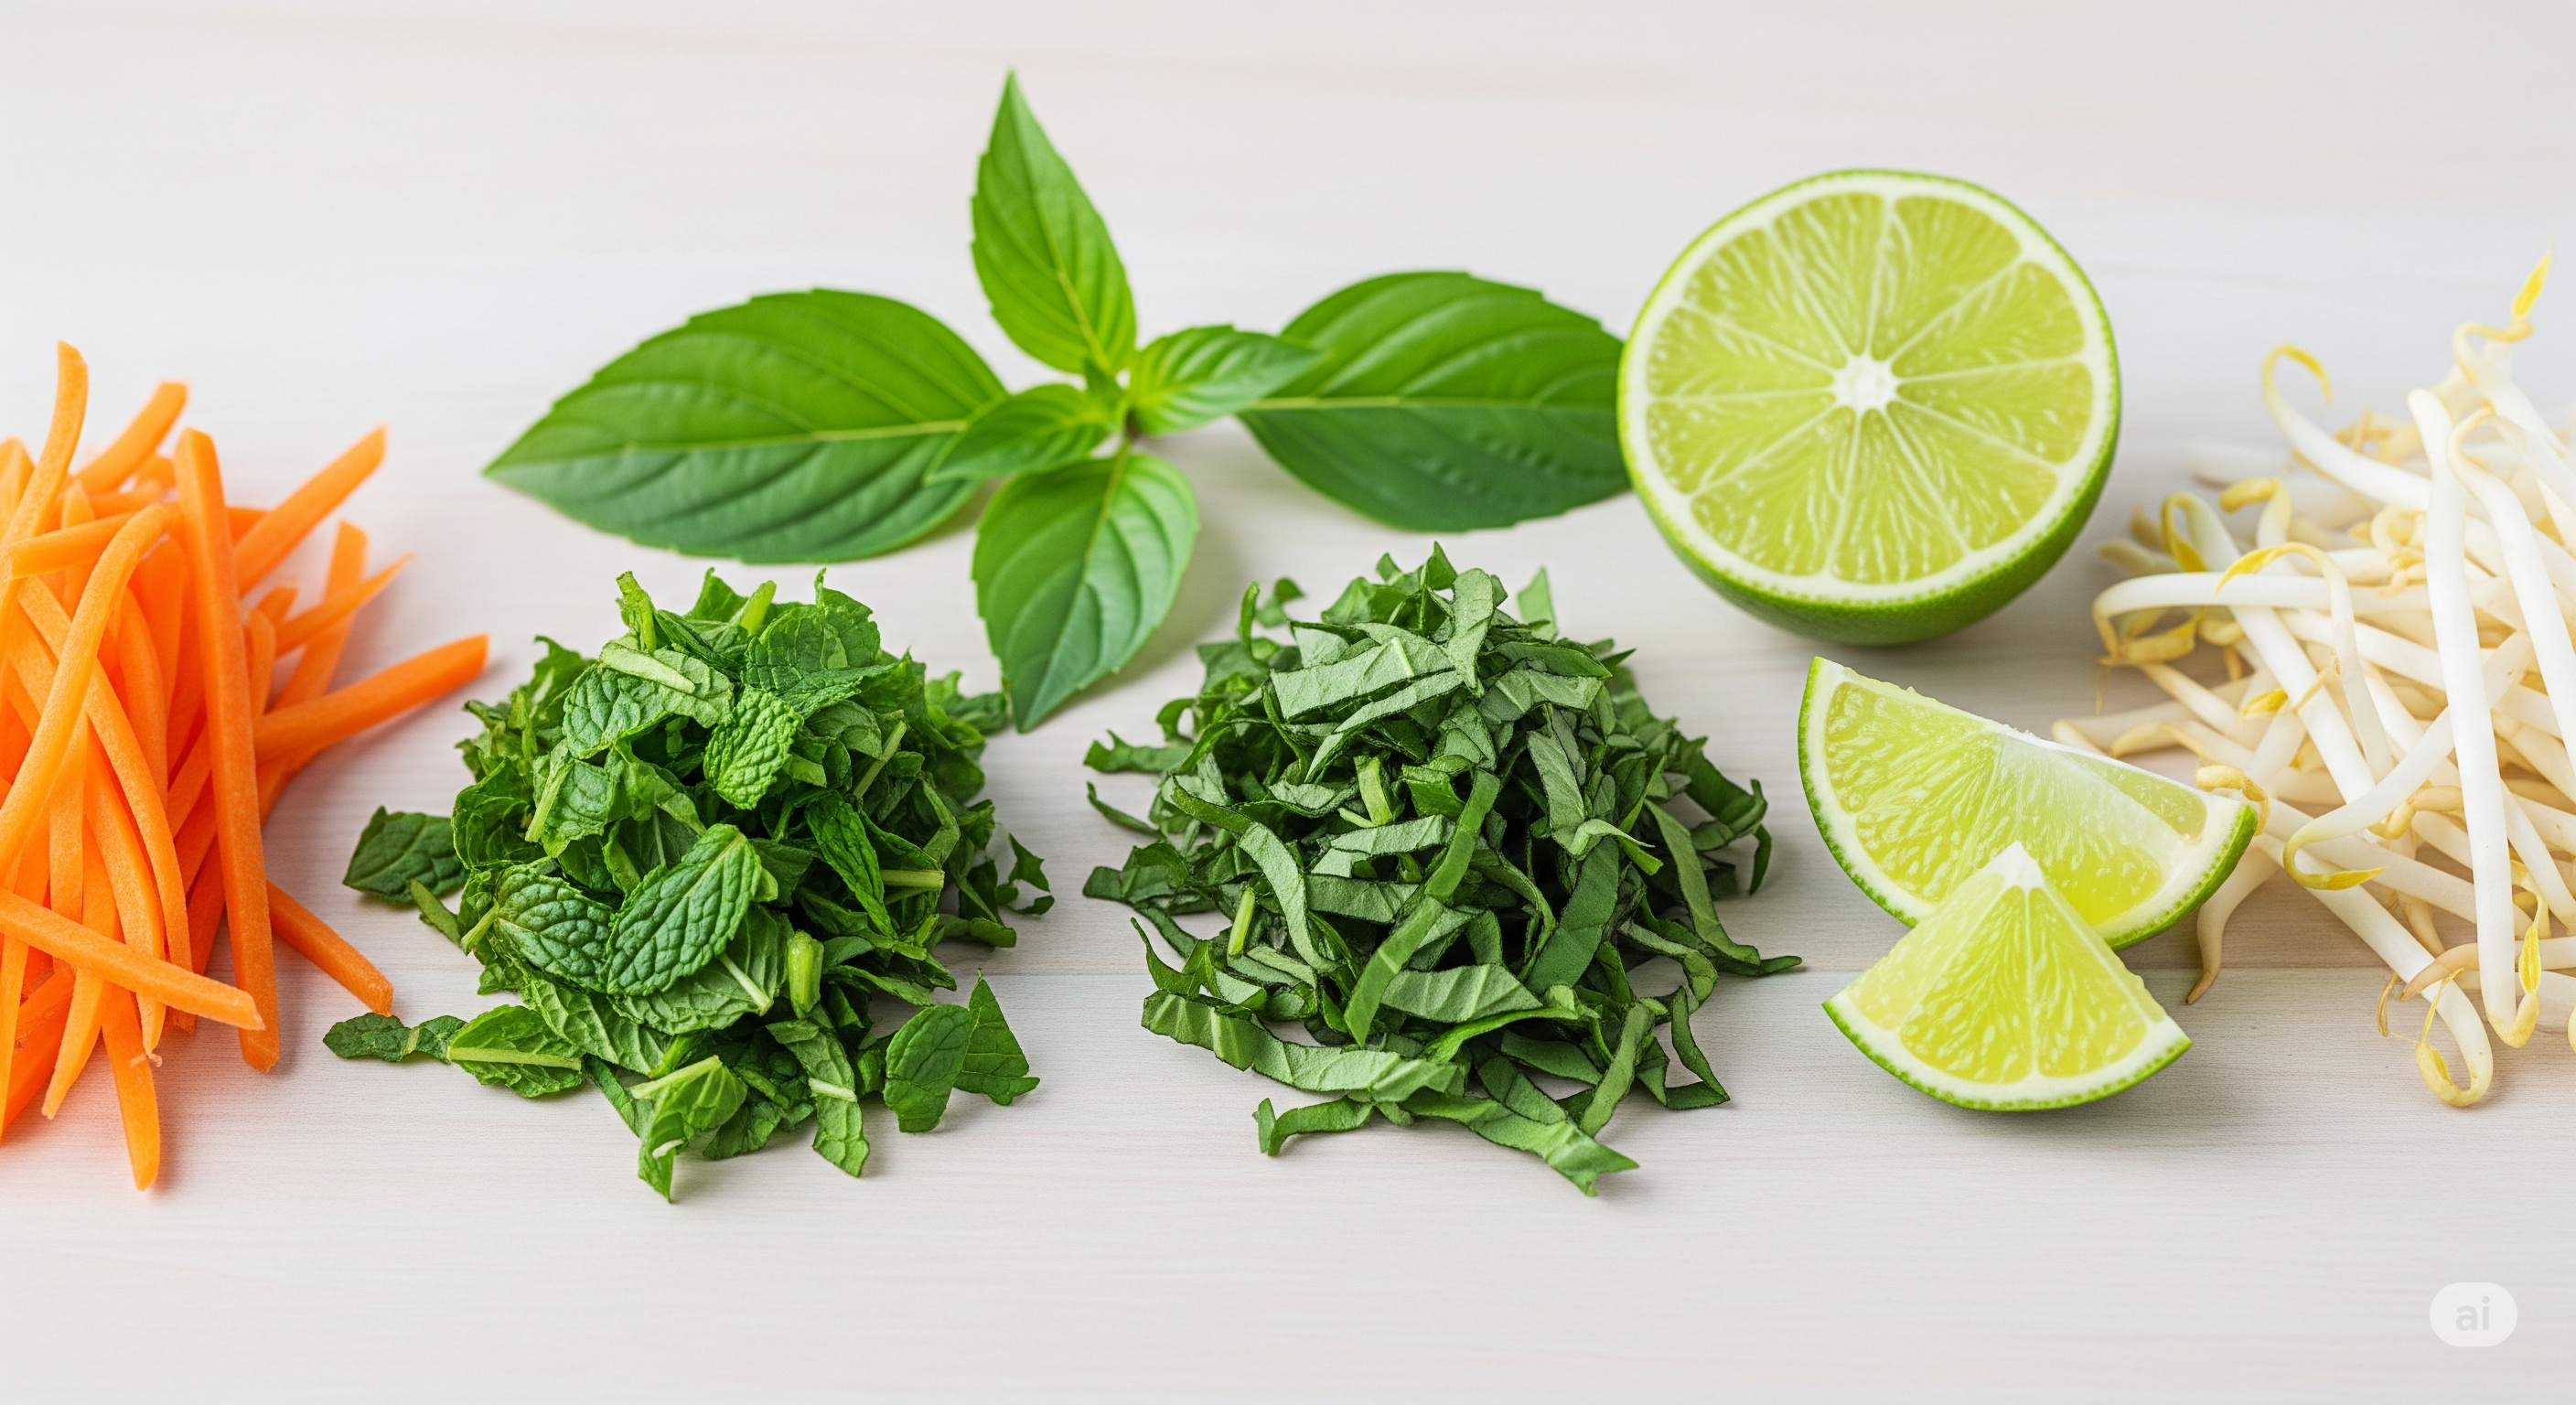
The gallery shows Herb crusted lamb, and the next is veggie chip breadcrumbs on a burger and the last image are Shrimps, with toasted coconut flake coating.


Wholesome Nut & Seed Crumbs: A Versatile Recipe

This recipe focuses on creating a fantastic all-purpose, healthy breadcrumb alternative using a blend of nuts and seeds. It’s naturally gluten-free, low-carb, and packed with nutrients.

Time to Prepare: 5 minutes

Time to Cook/Blend: 10 minutes (for toasting nuts/seeds) + 2 minutes (for blending)

Servings: Approximately 2 cups


Nutritional Highlights (Per 1/4 cup serving, approximate)

  • Calories: 150-180 kcal
  • Protein: 5-7g
  • Fats: 12-15g (primarily healthy unsaturated fats)
  • Carbohydrates: 5-7g
  • Fiber: 3-5g
  • Sodium: 50-70mg (depending on added salt)

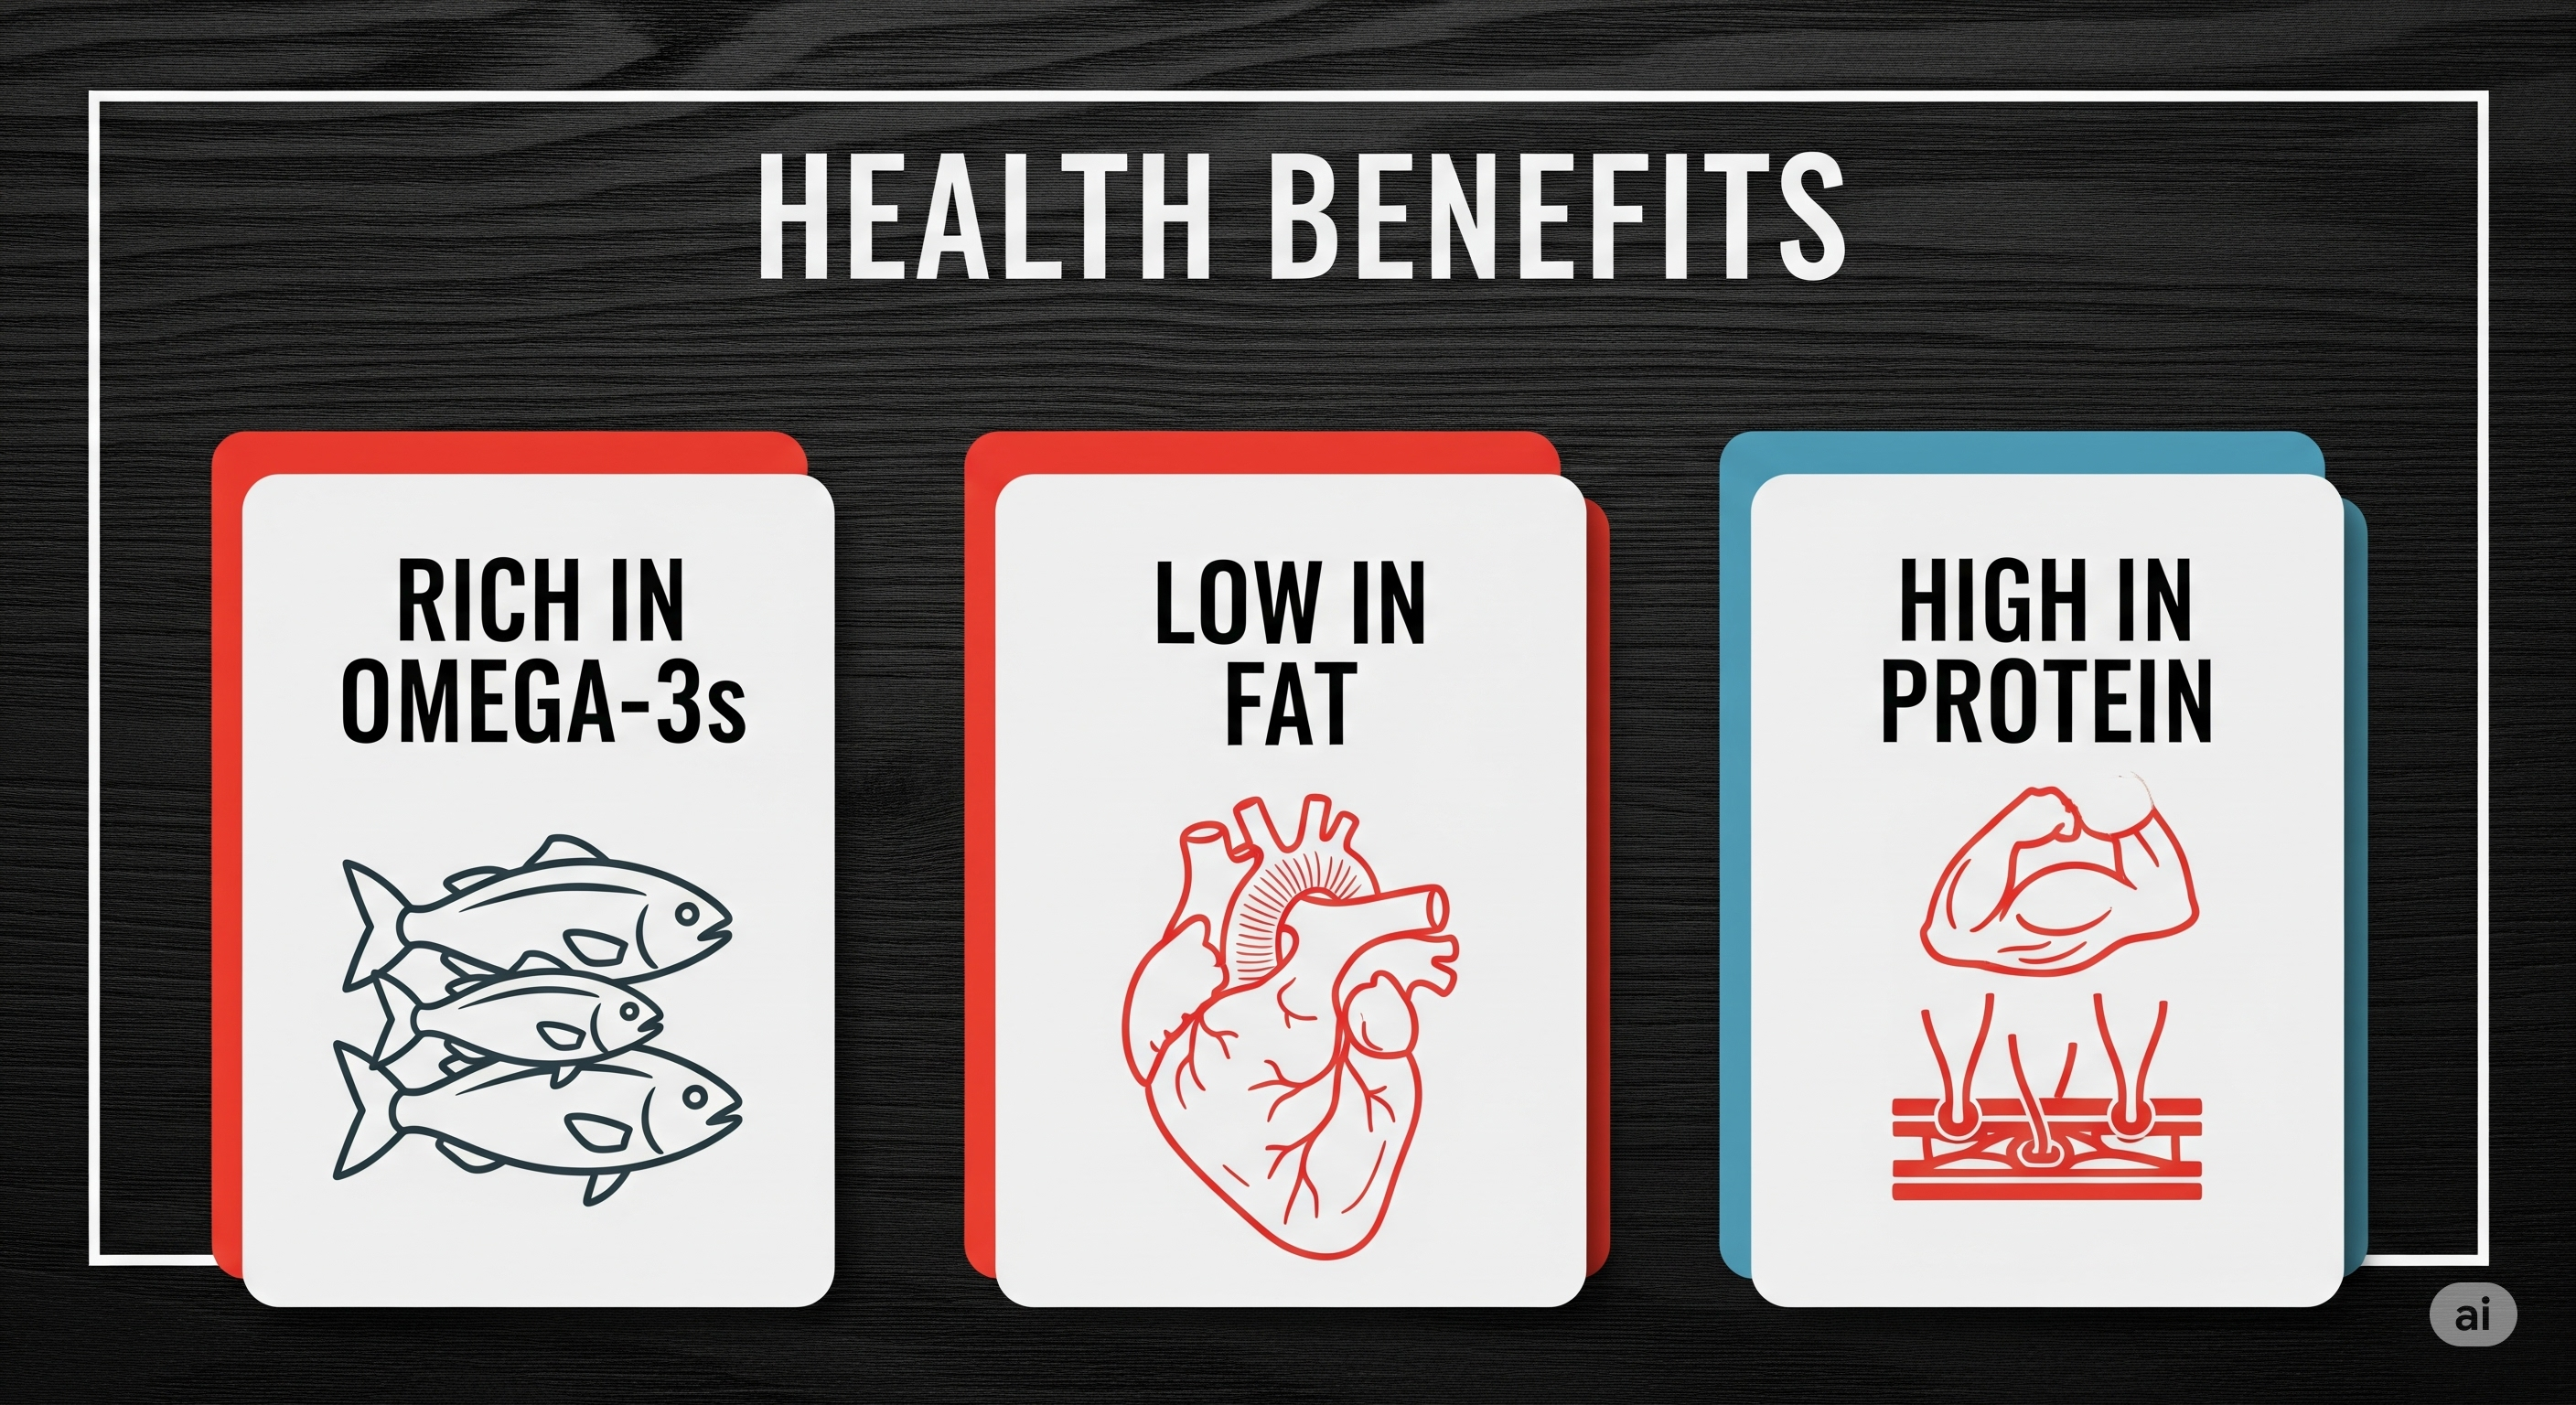
These values will vary slightly based on the specific nuts and seeds used and the exact serving size. They offer a good source of Vitamin E, Magnesium, and Zinc.


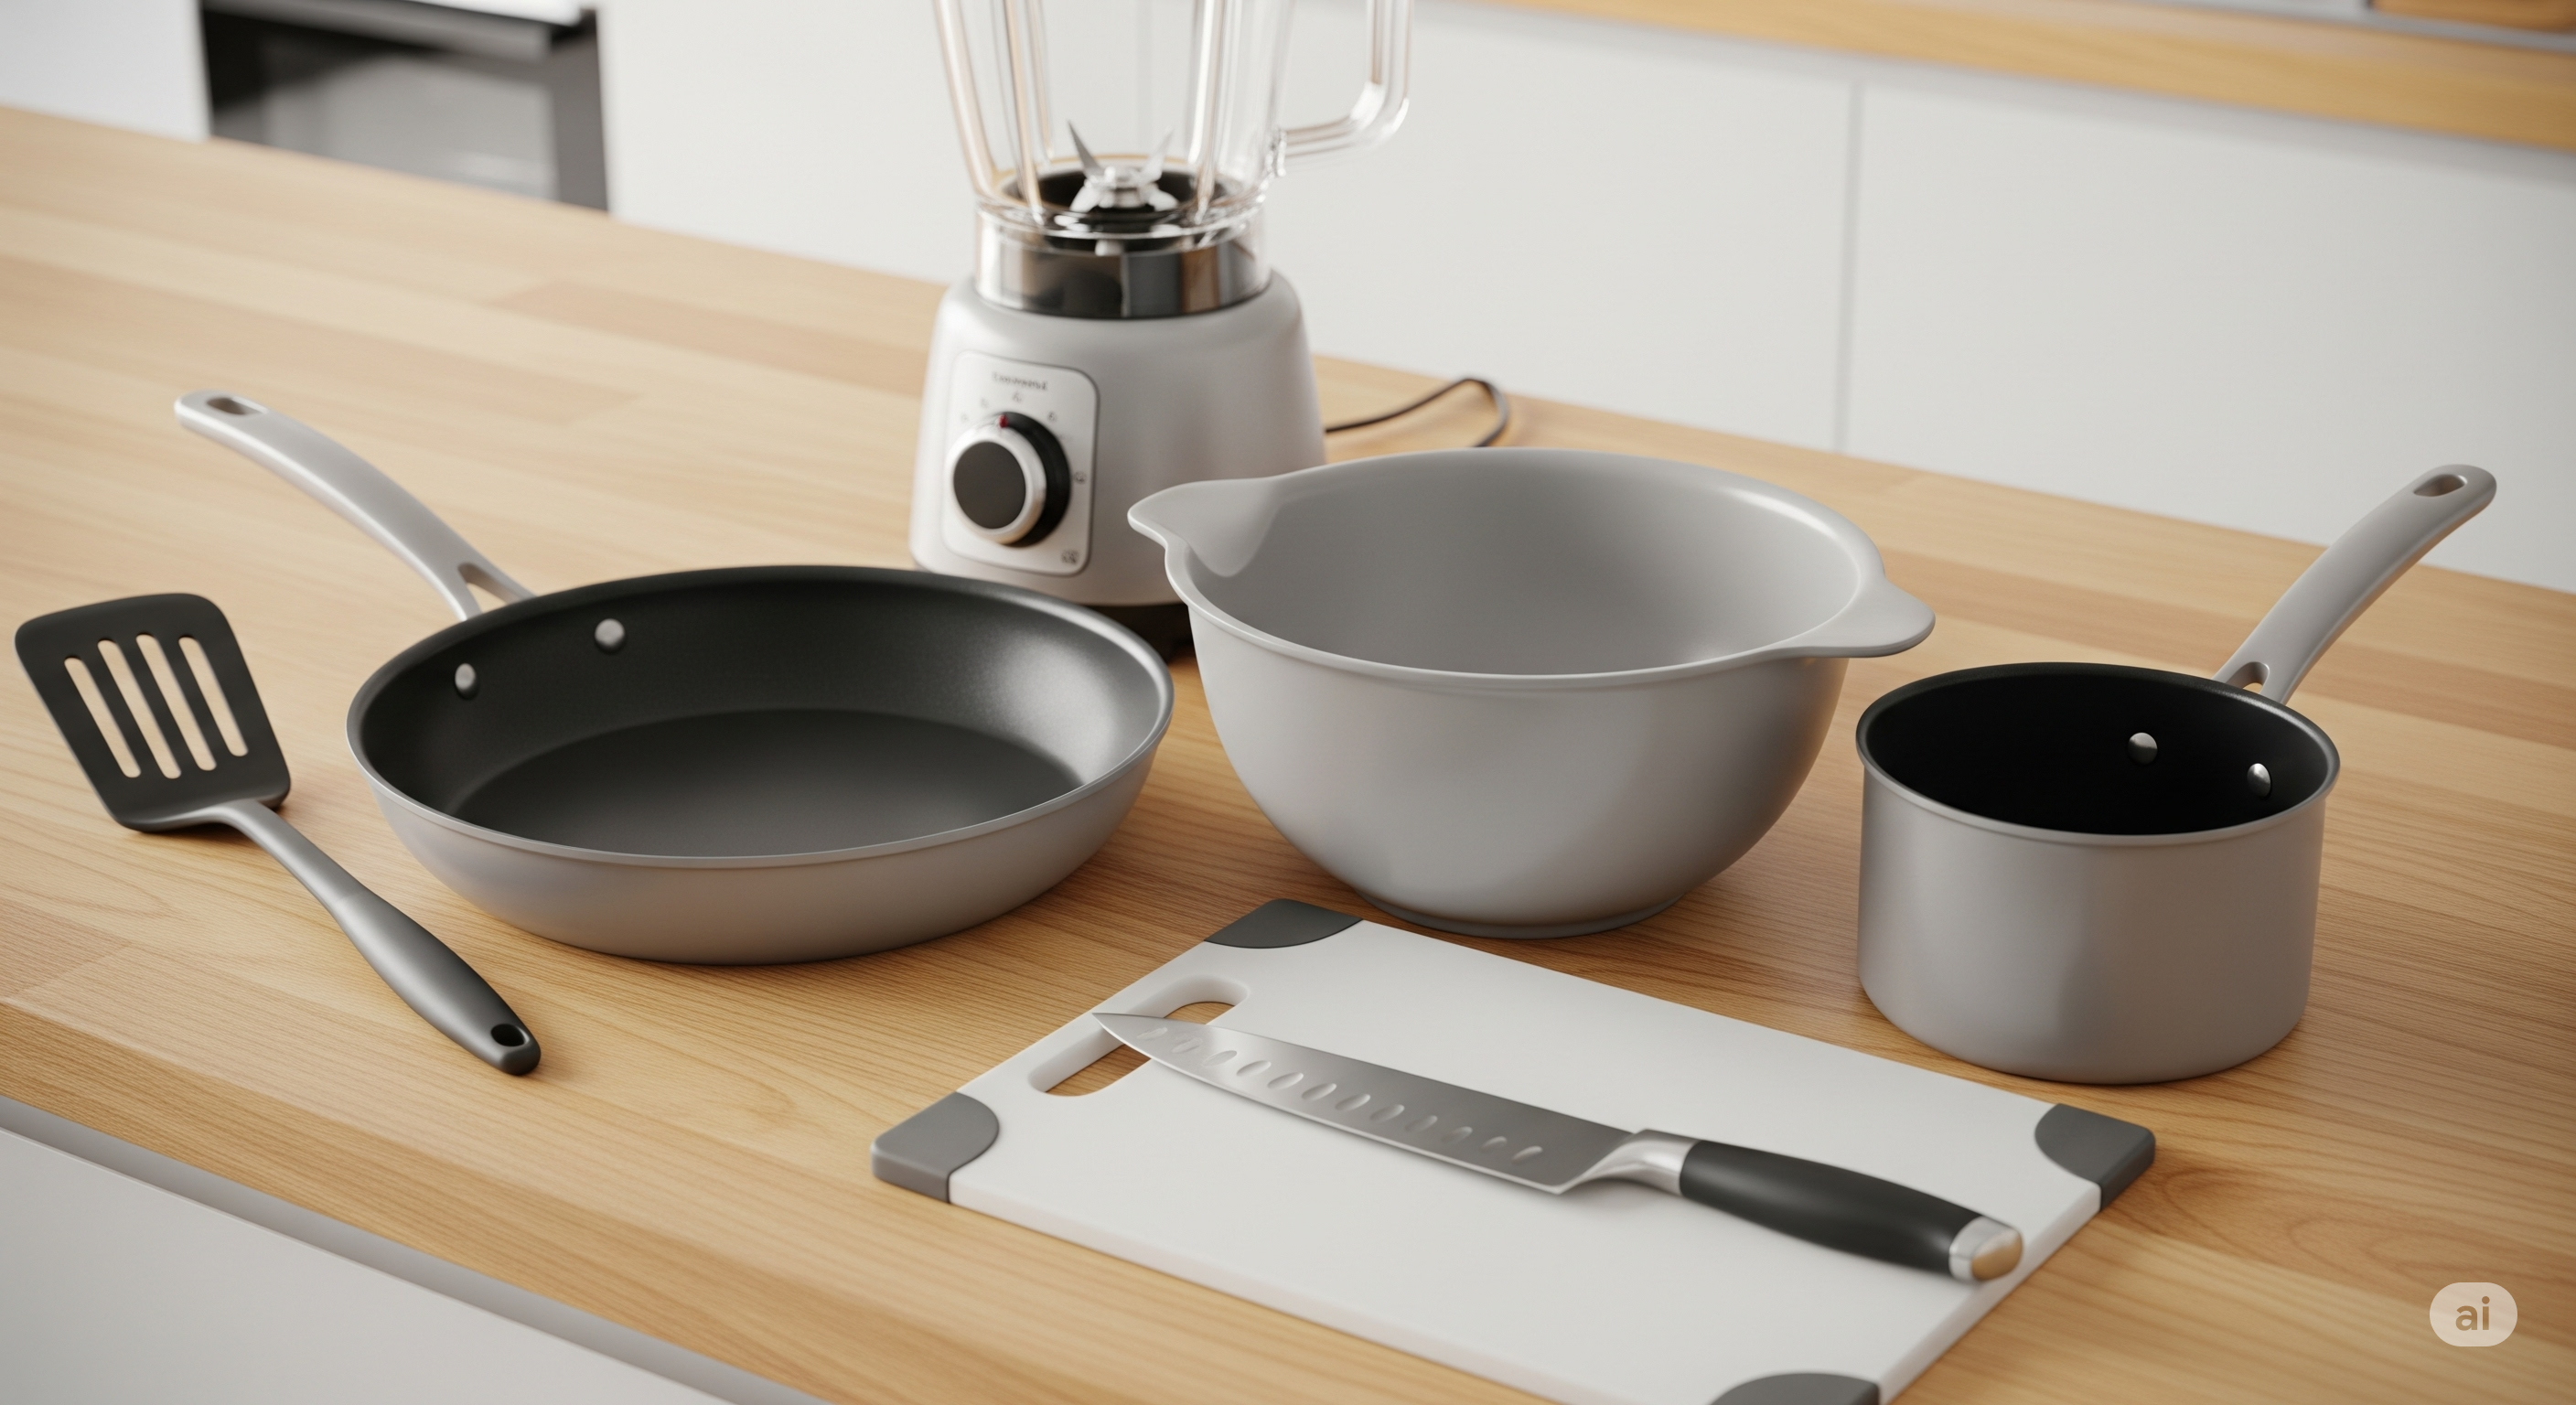
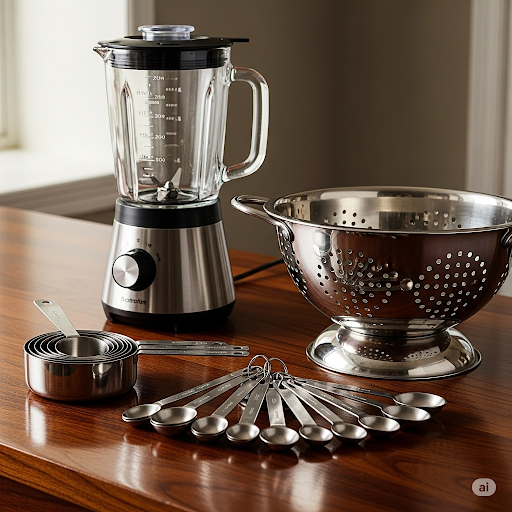
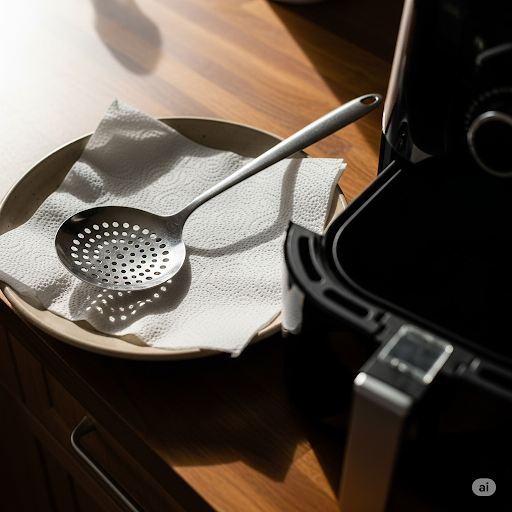
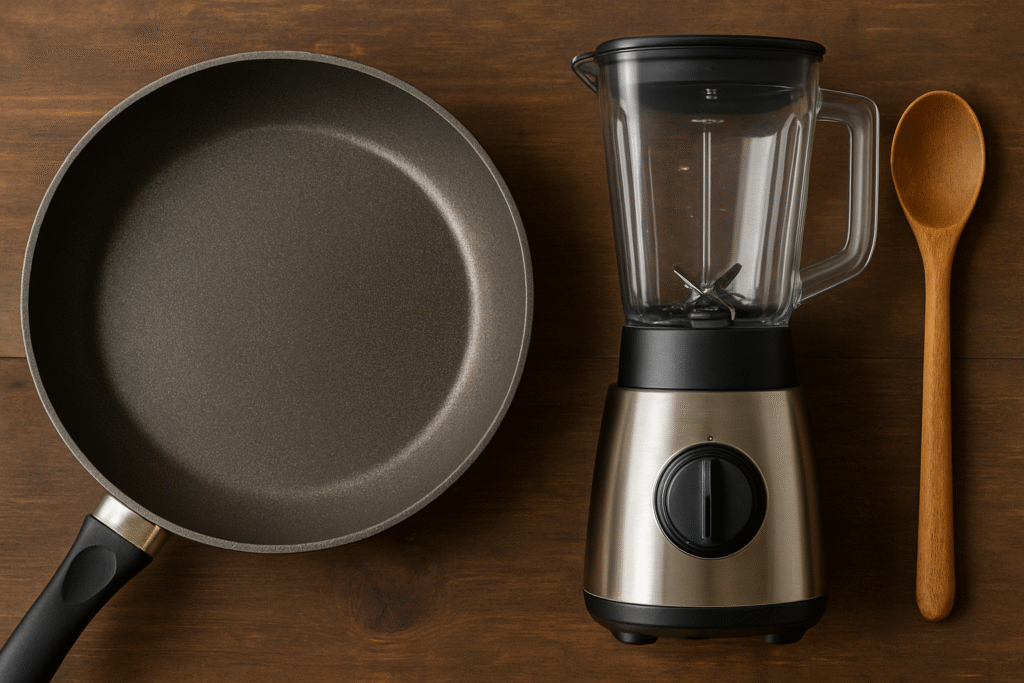
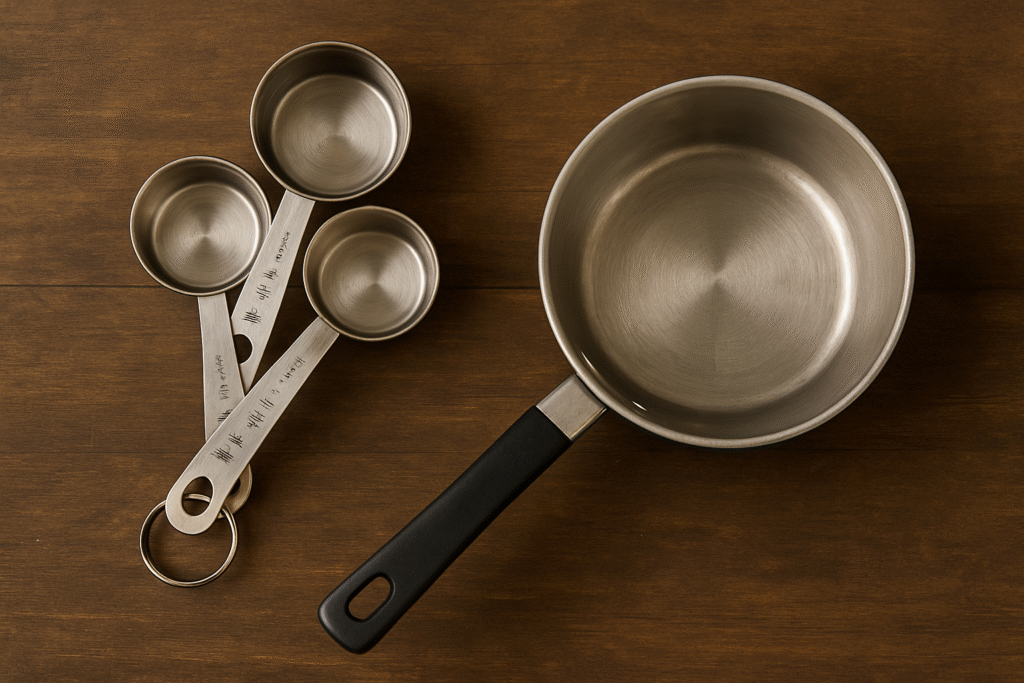
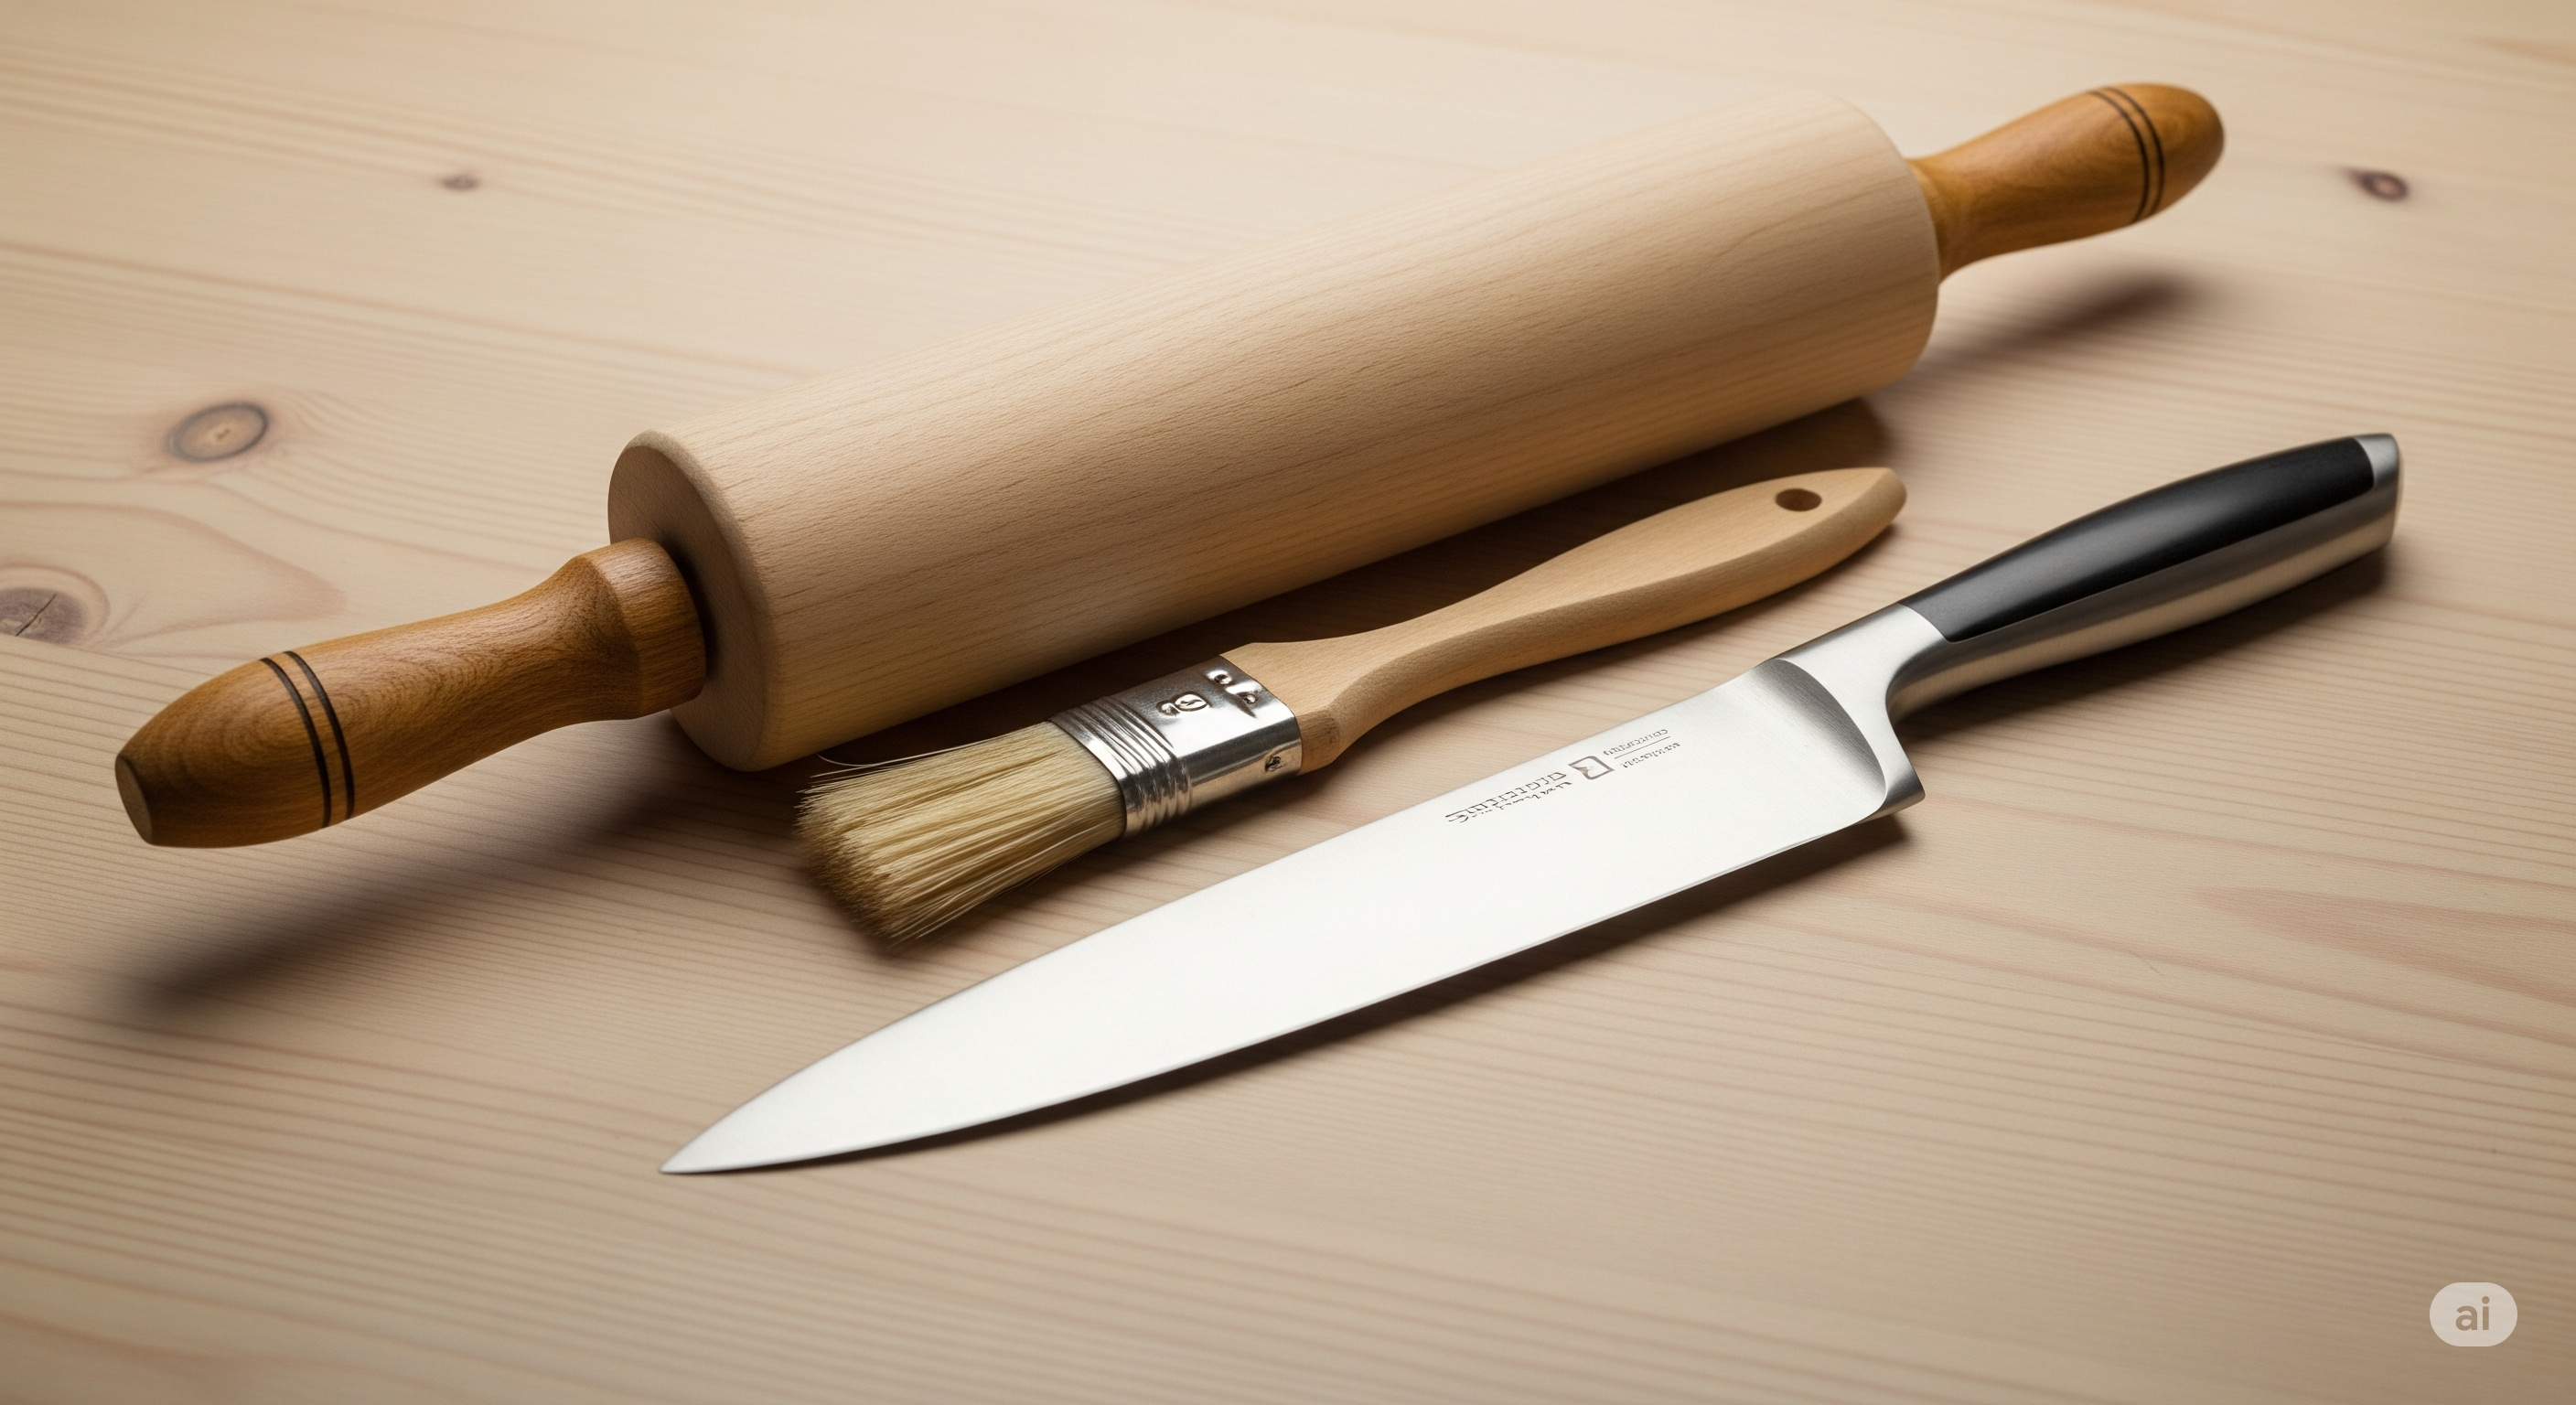
Essential Equipment for Perfect Breadcrumbs

Having the right tools makes all the difference when making your own healthy breadcrumbs without bread.

  • Food Processor (Recommended): This is the most crucial piece of equipment. A good food processor will quickly and efficiently grind your nuts and seeds to the perfect consistency.
  • Alternative Equipment (if no food processor):
    • Blender: A powerful blender can also work, though you may need to pulse in smaller batches and stir more frequently to ensure even consistency.
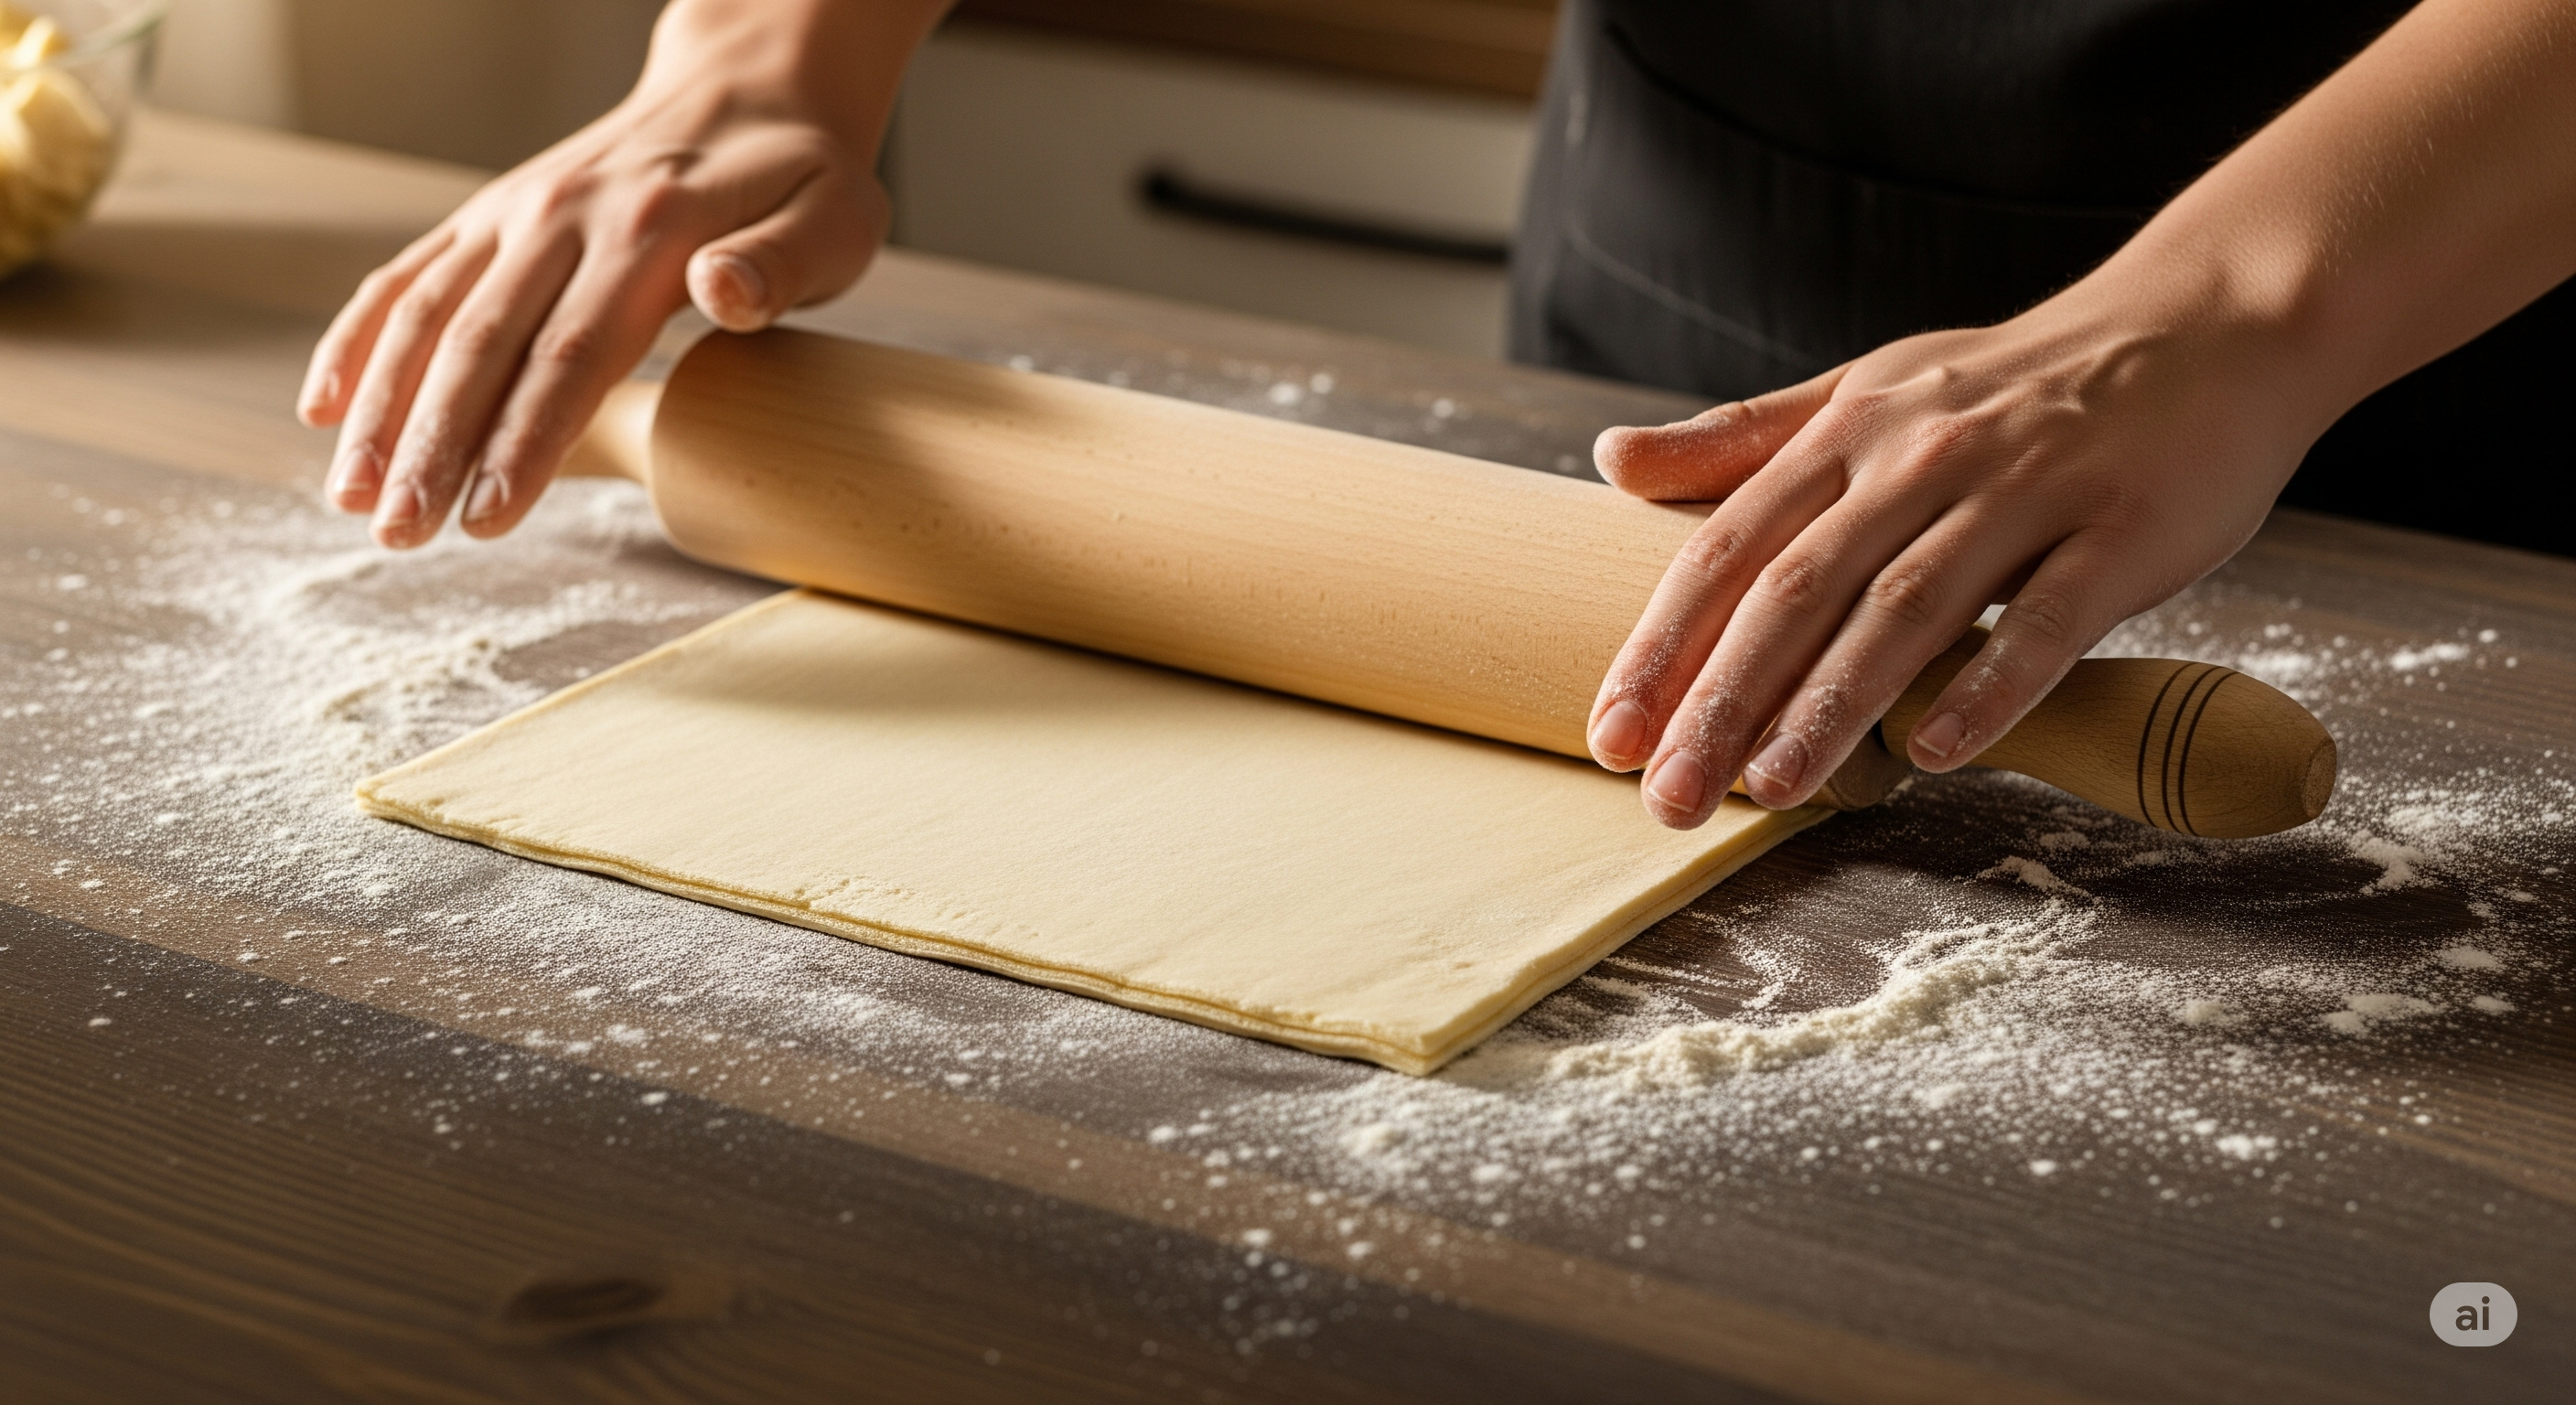
    • Rolling Pin and Sealable Bag: For a more hands-on approach, a heavy rolling pin and a strong, sealable bag (like a freezer bag) are excellent alternatives.
    • Mortar and Pestle: Perfect for small batches, this traditional tool gives you great control over the texture.
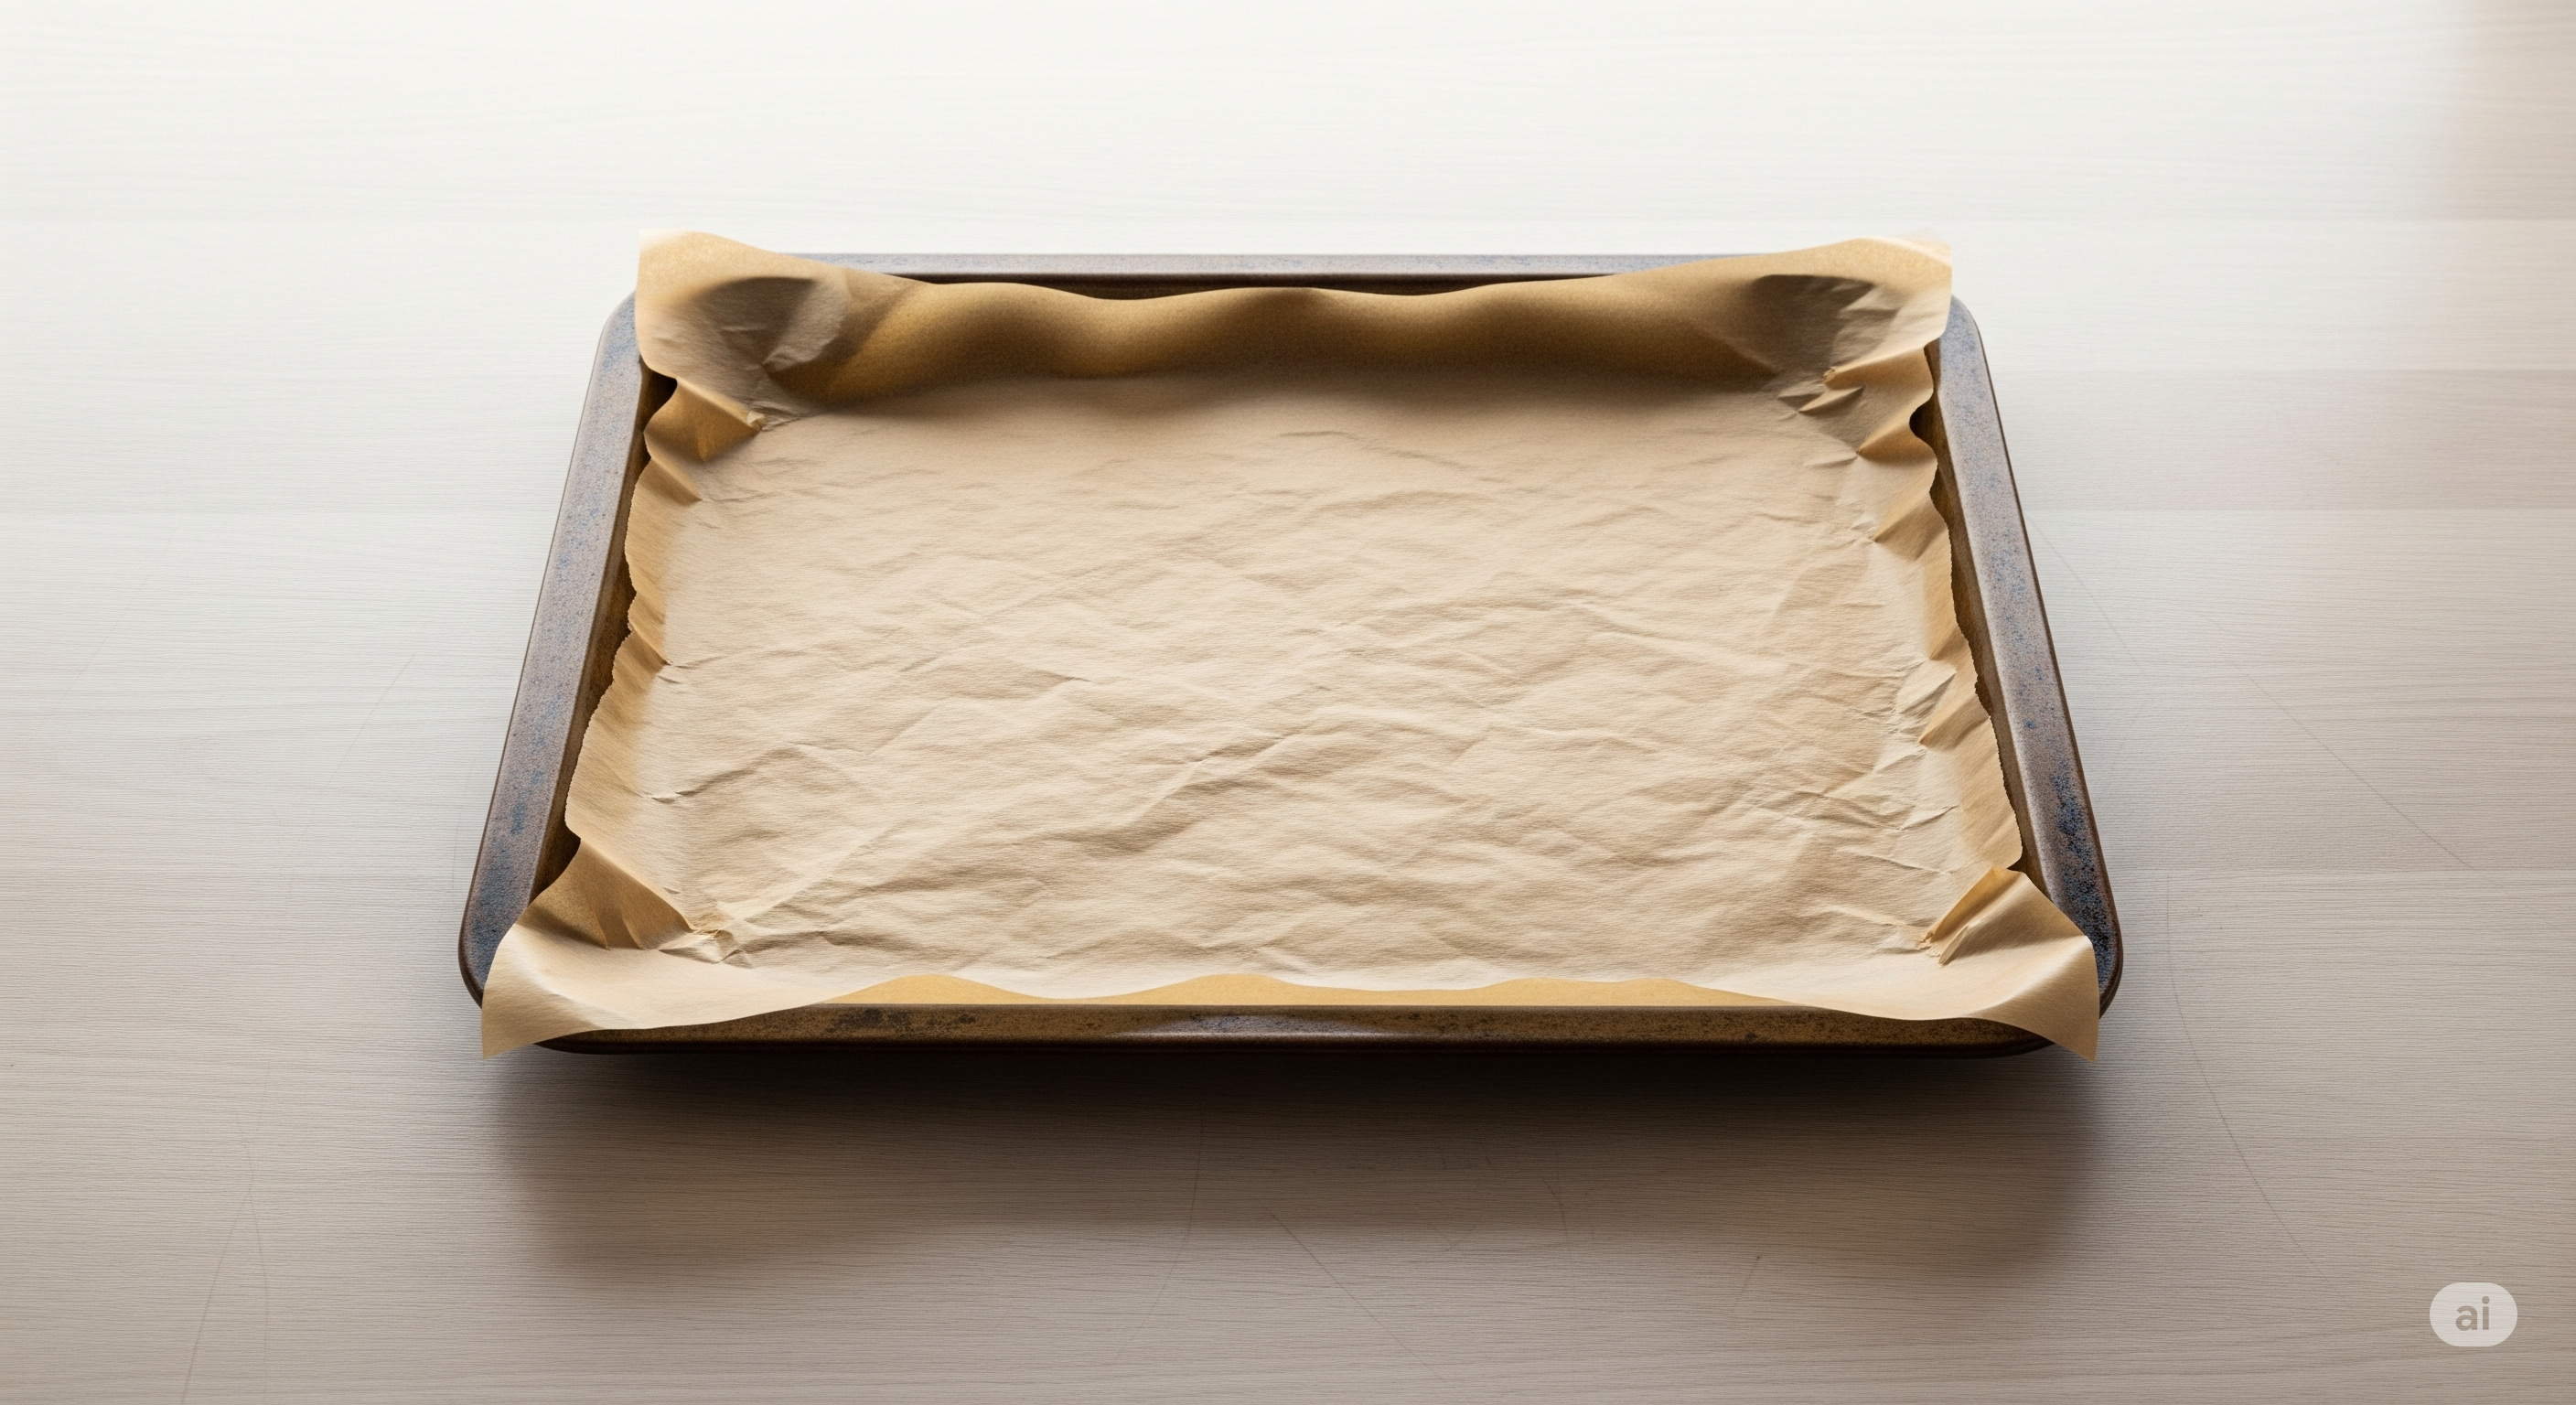
  • Baking Sheet: For toasting your nuts and seeds to enhance their flavour.
  • Parchment Paper or Silicone Mat: To prevent sticking and for easy cleanup on your baking sheet.
  • Airtight Container: For storing your homemade breadcrumbs.
  • Measuring Cups and Spoons: For accurate ingredient measurements.
  • Spatula or Wooden Spoon: For stirring and transferring.

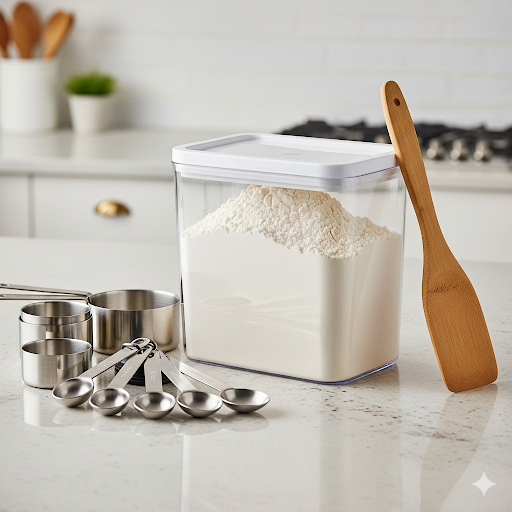
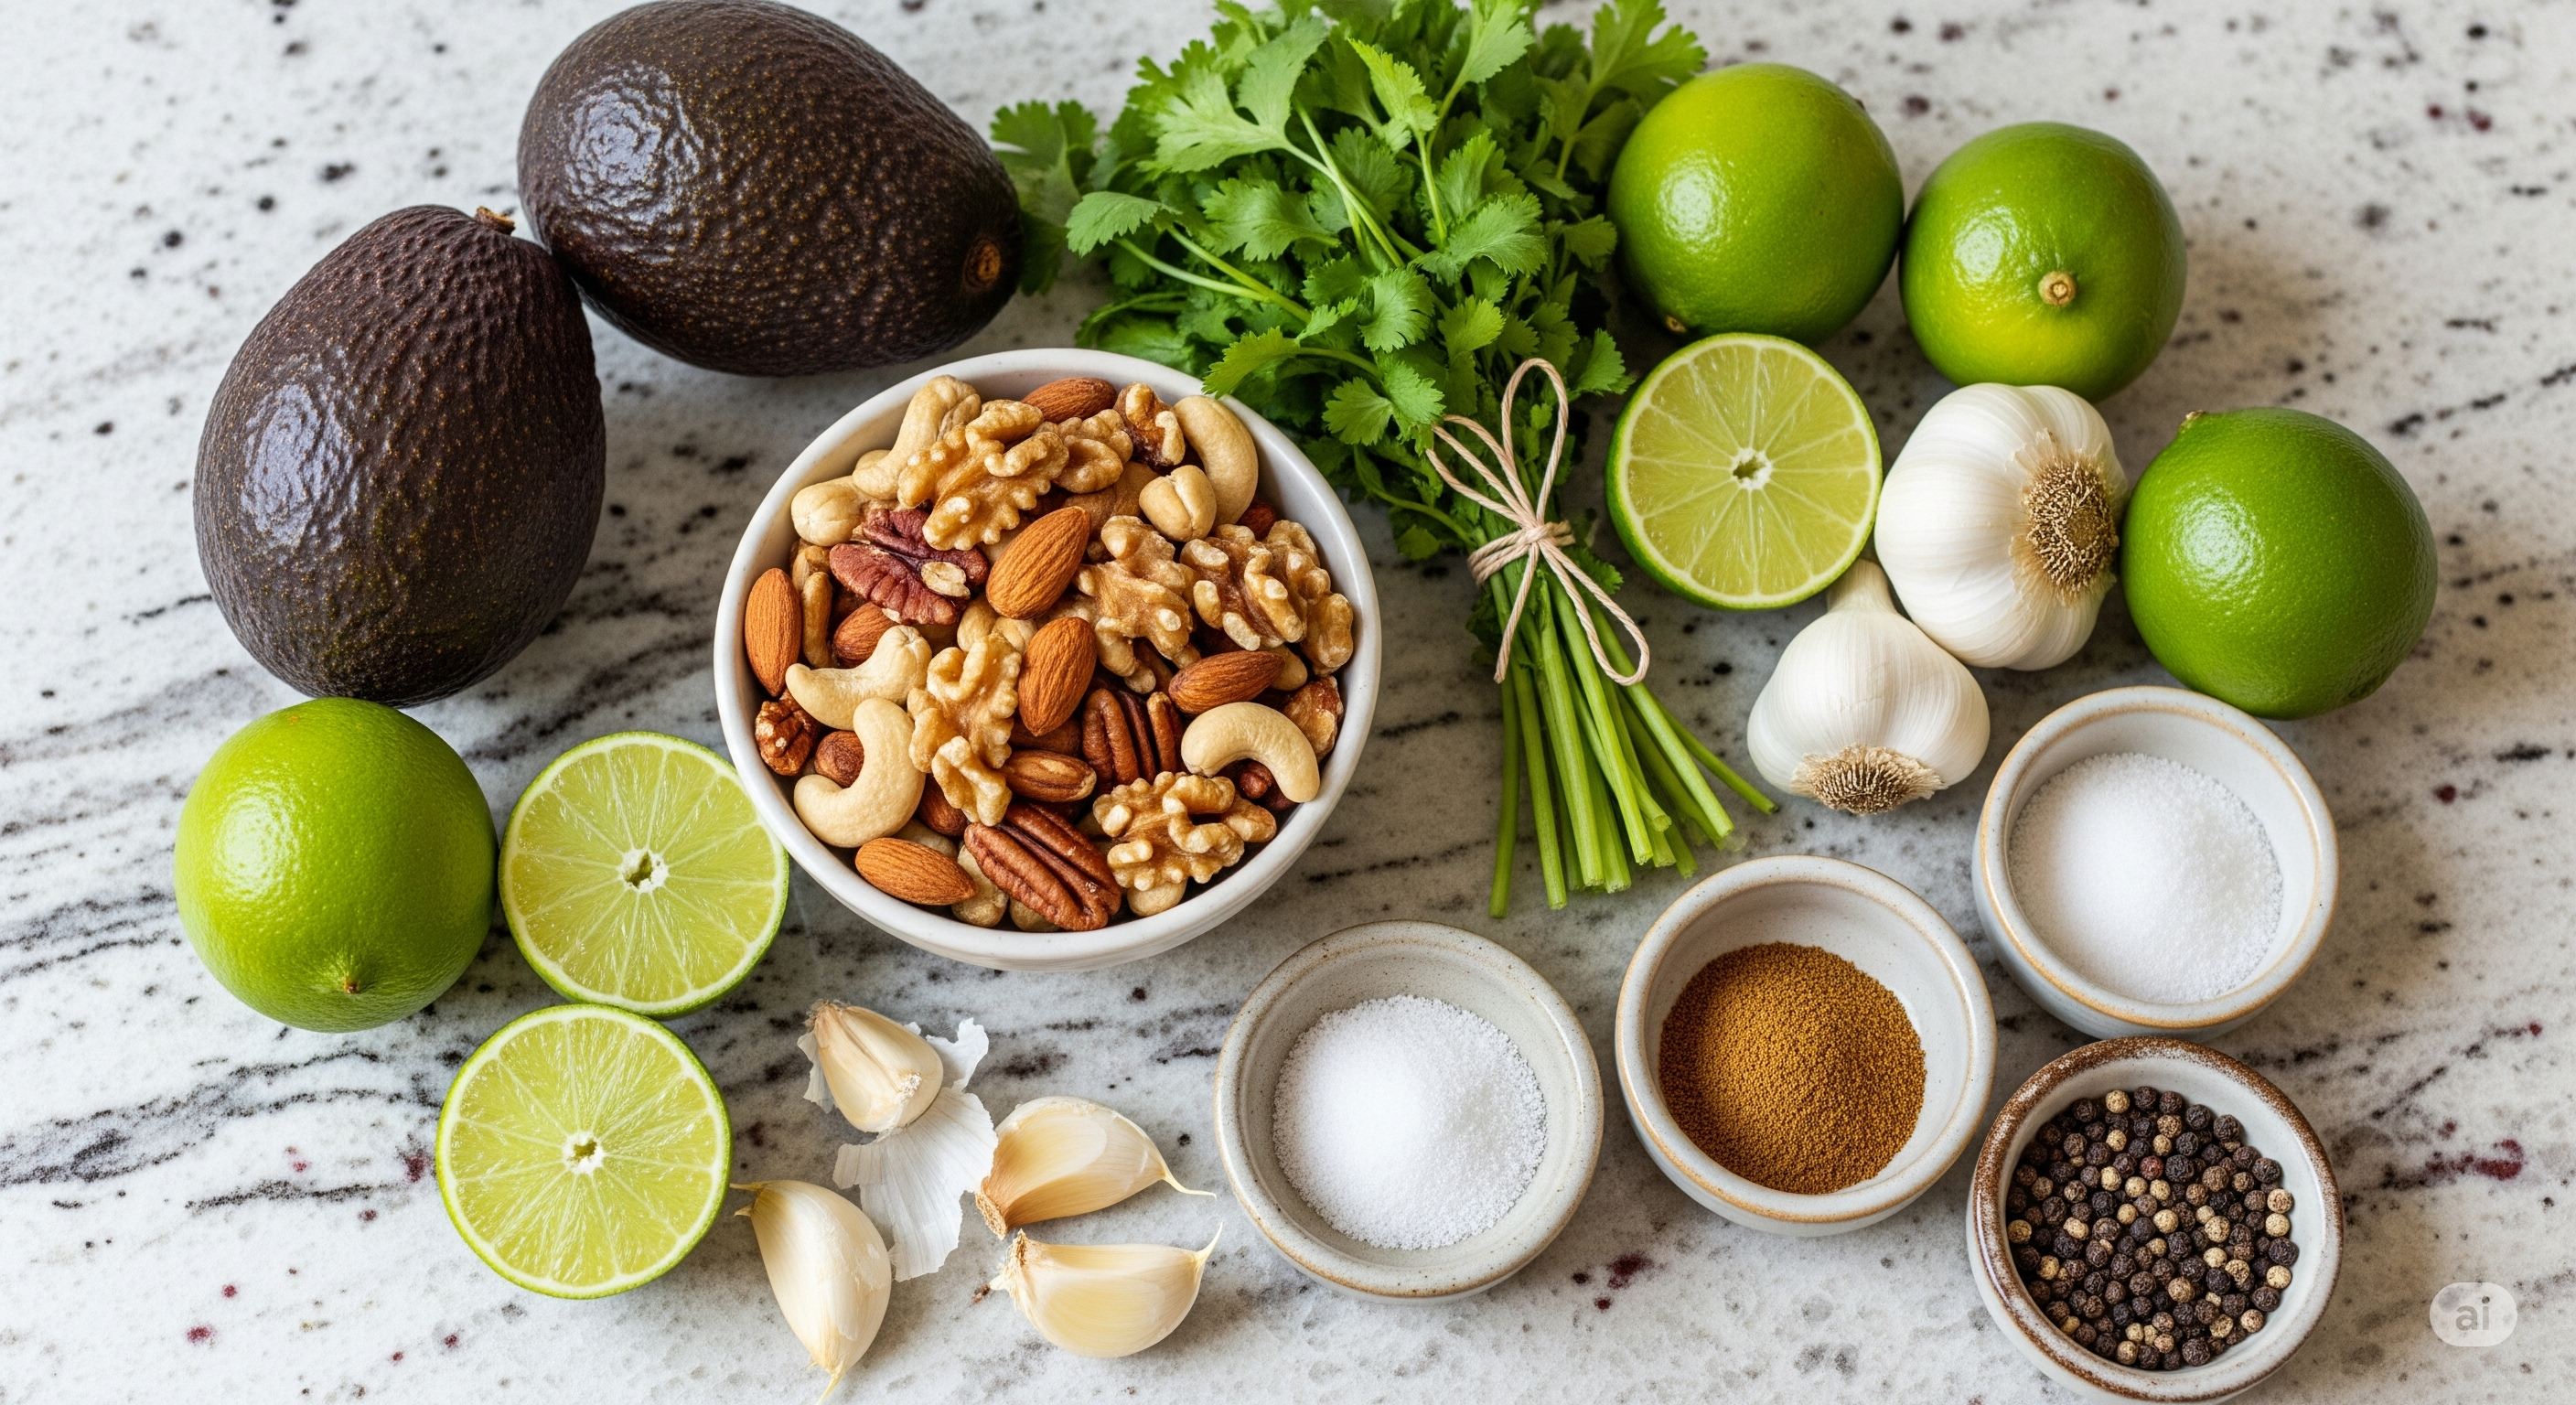
The gallery shows some of the equipment used in this recipe.


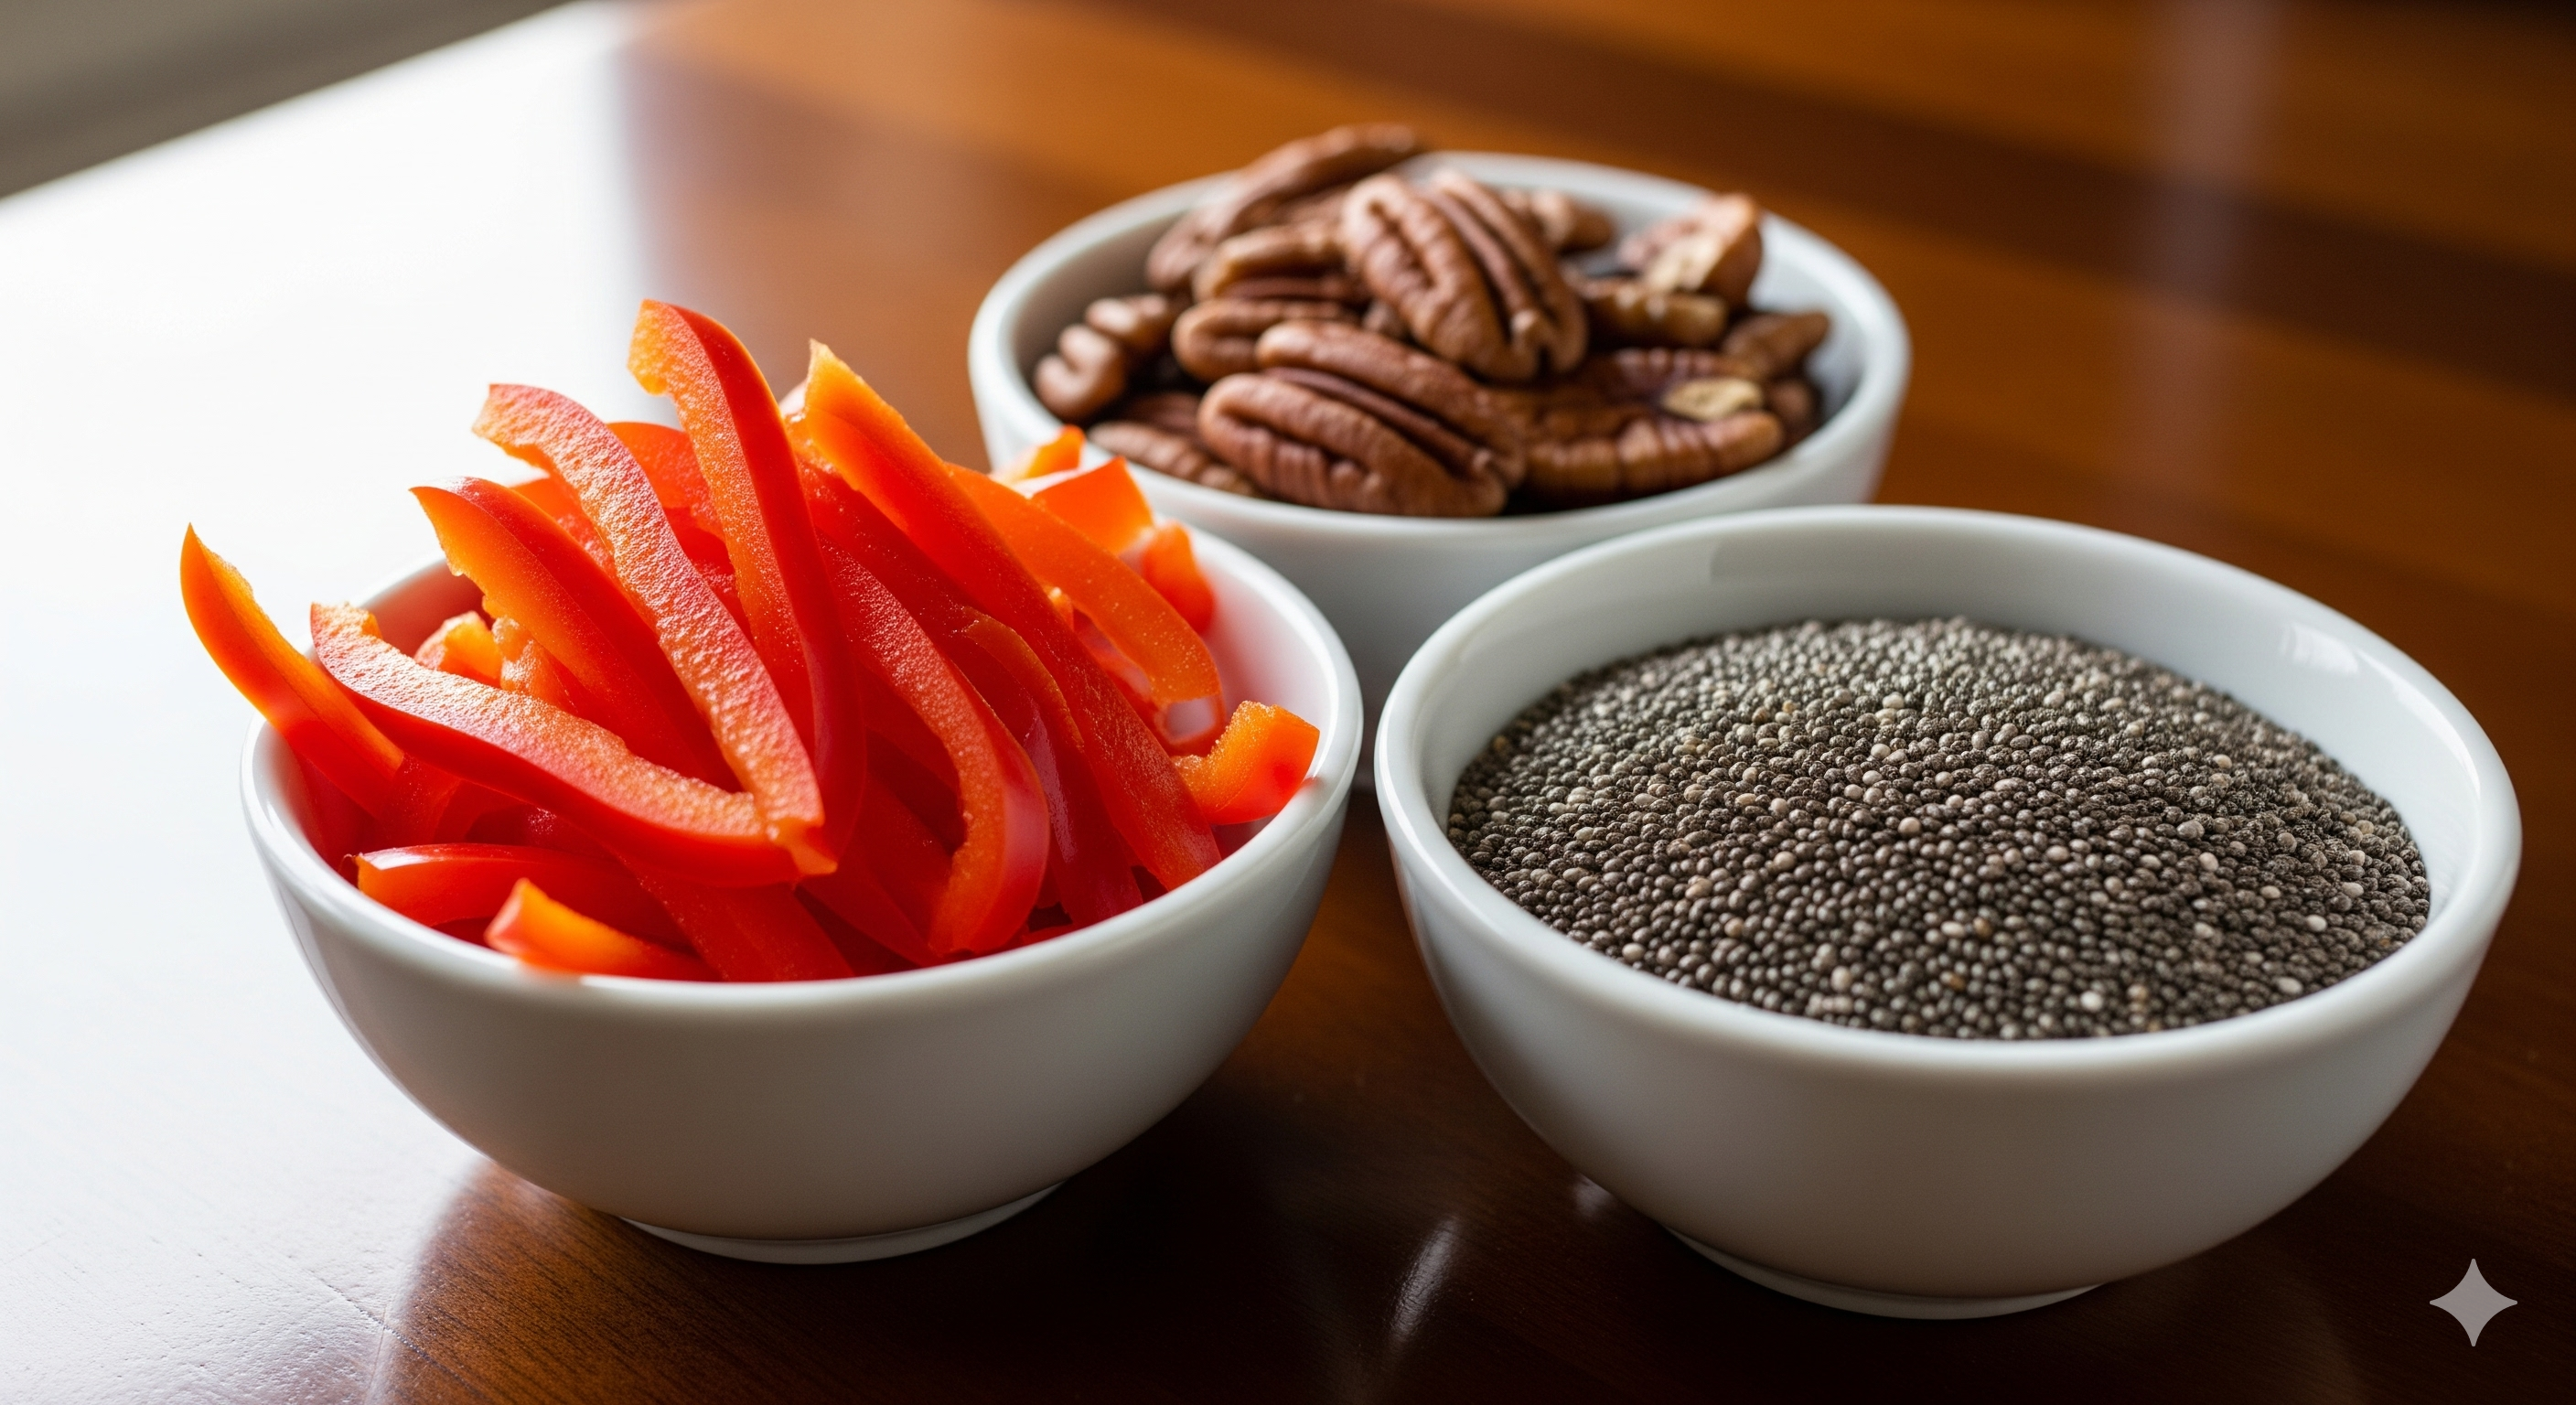
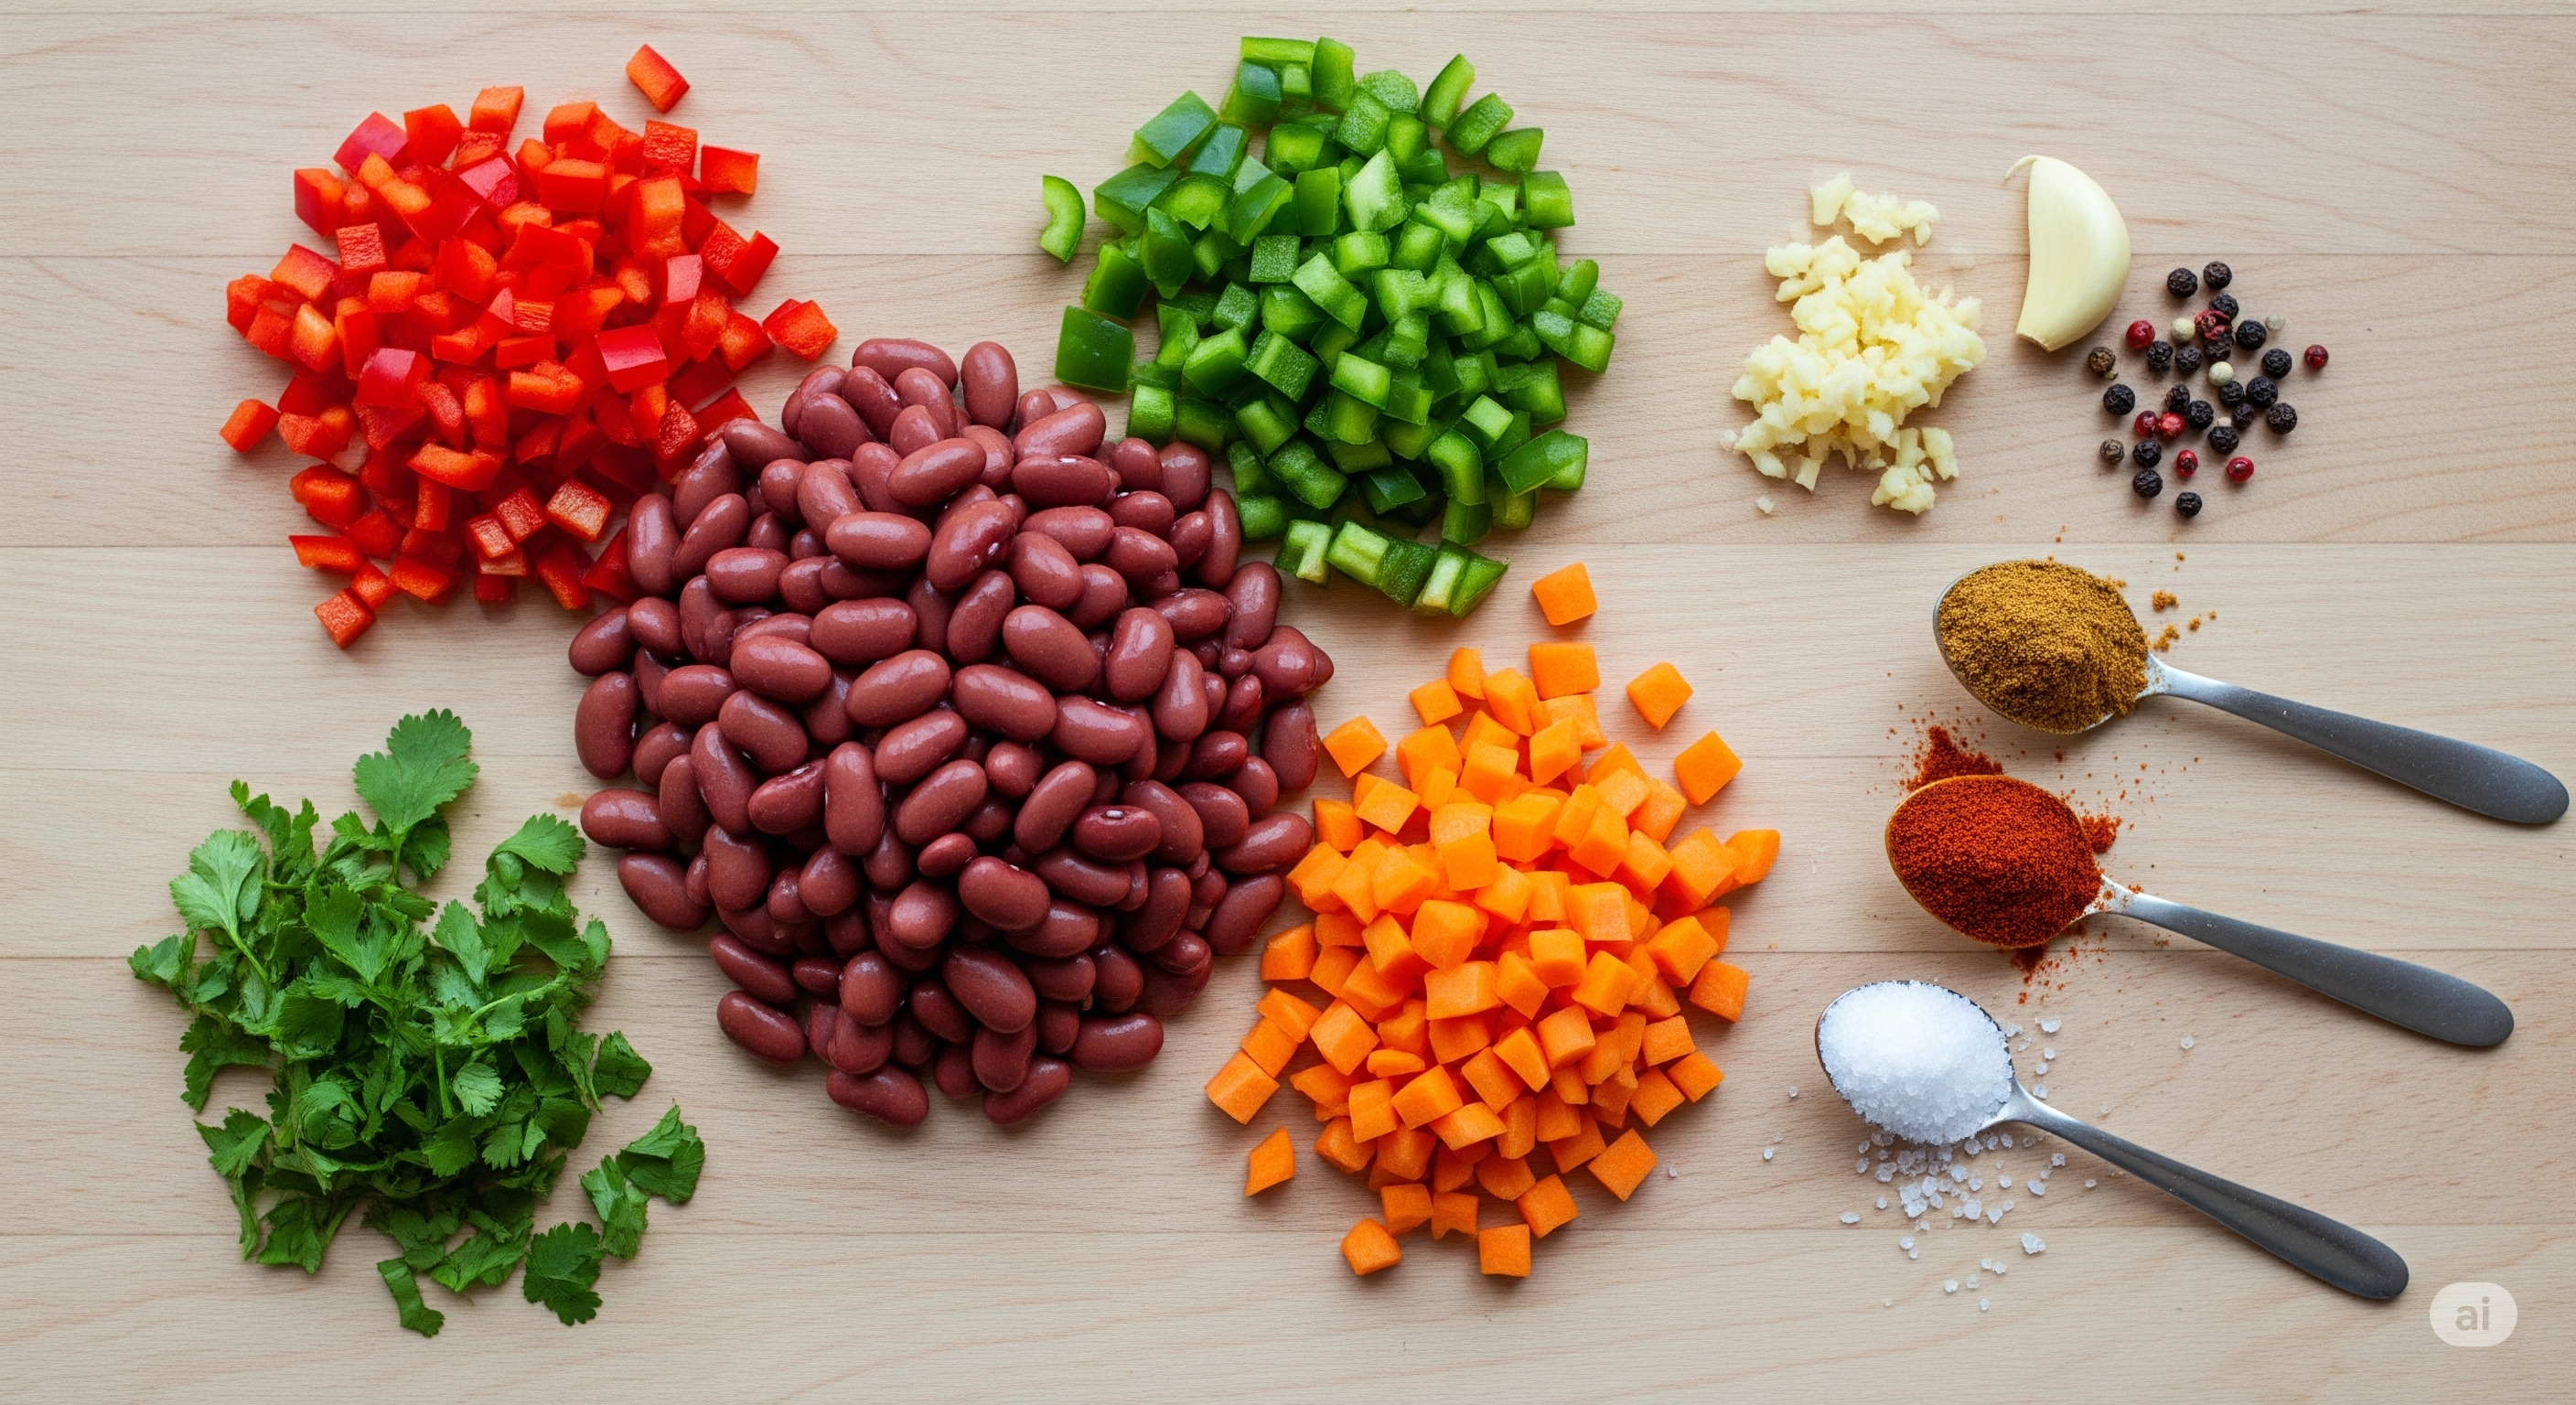
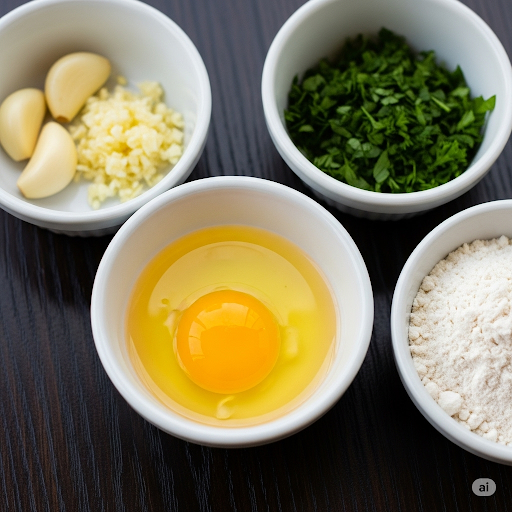
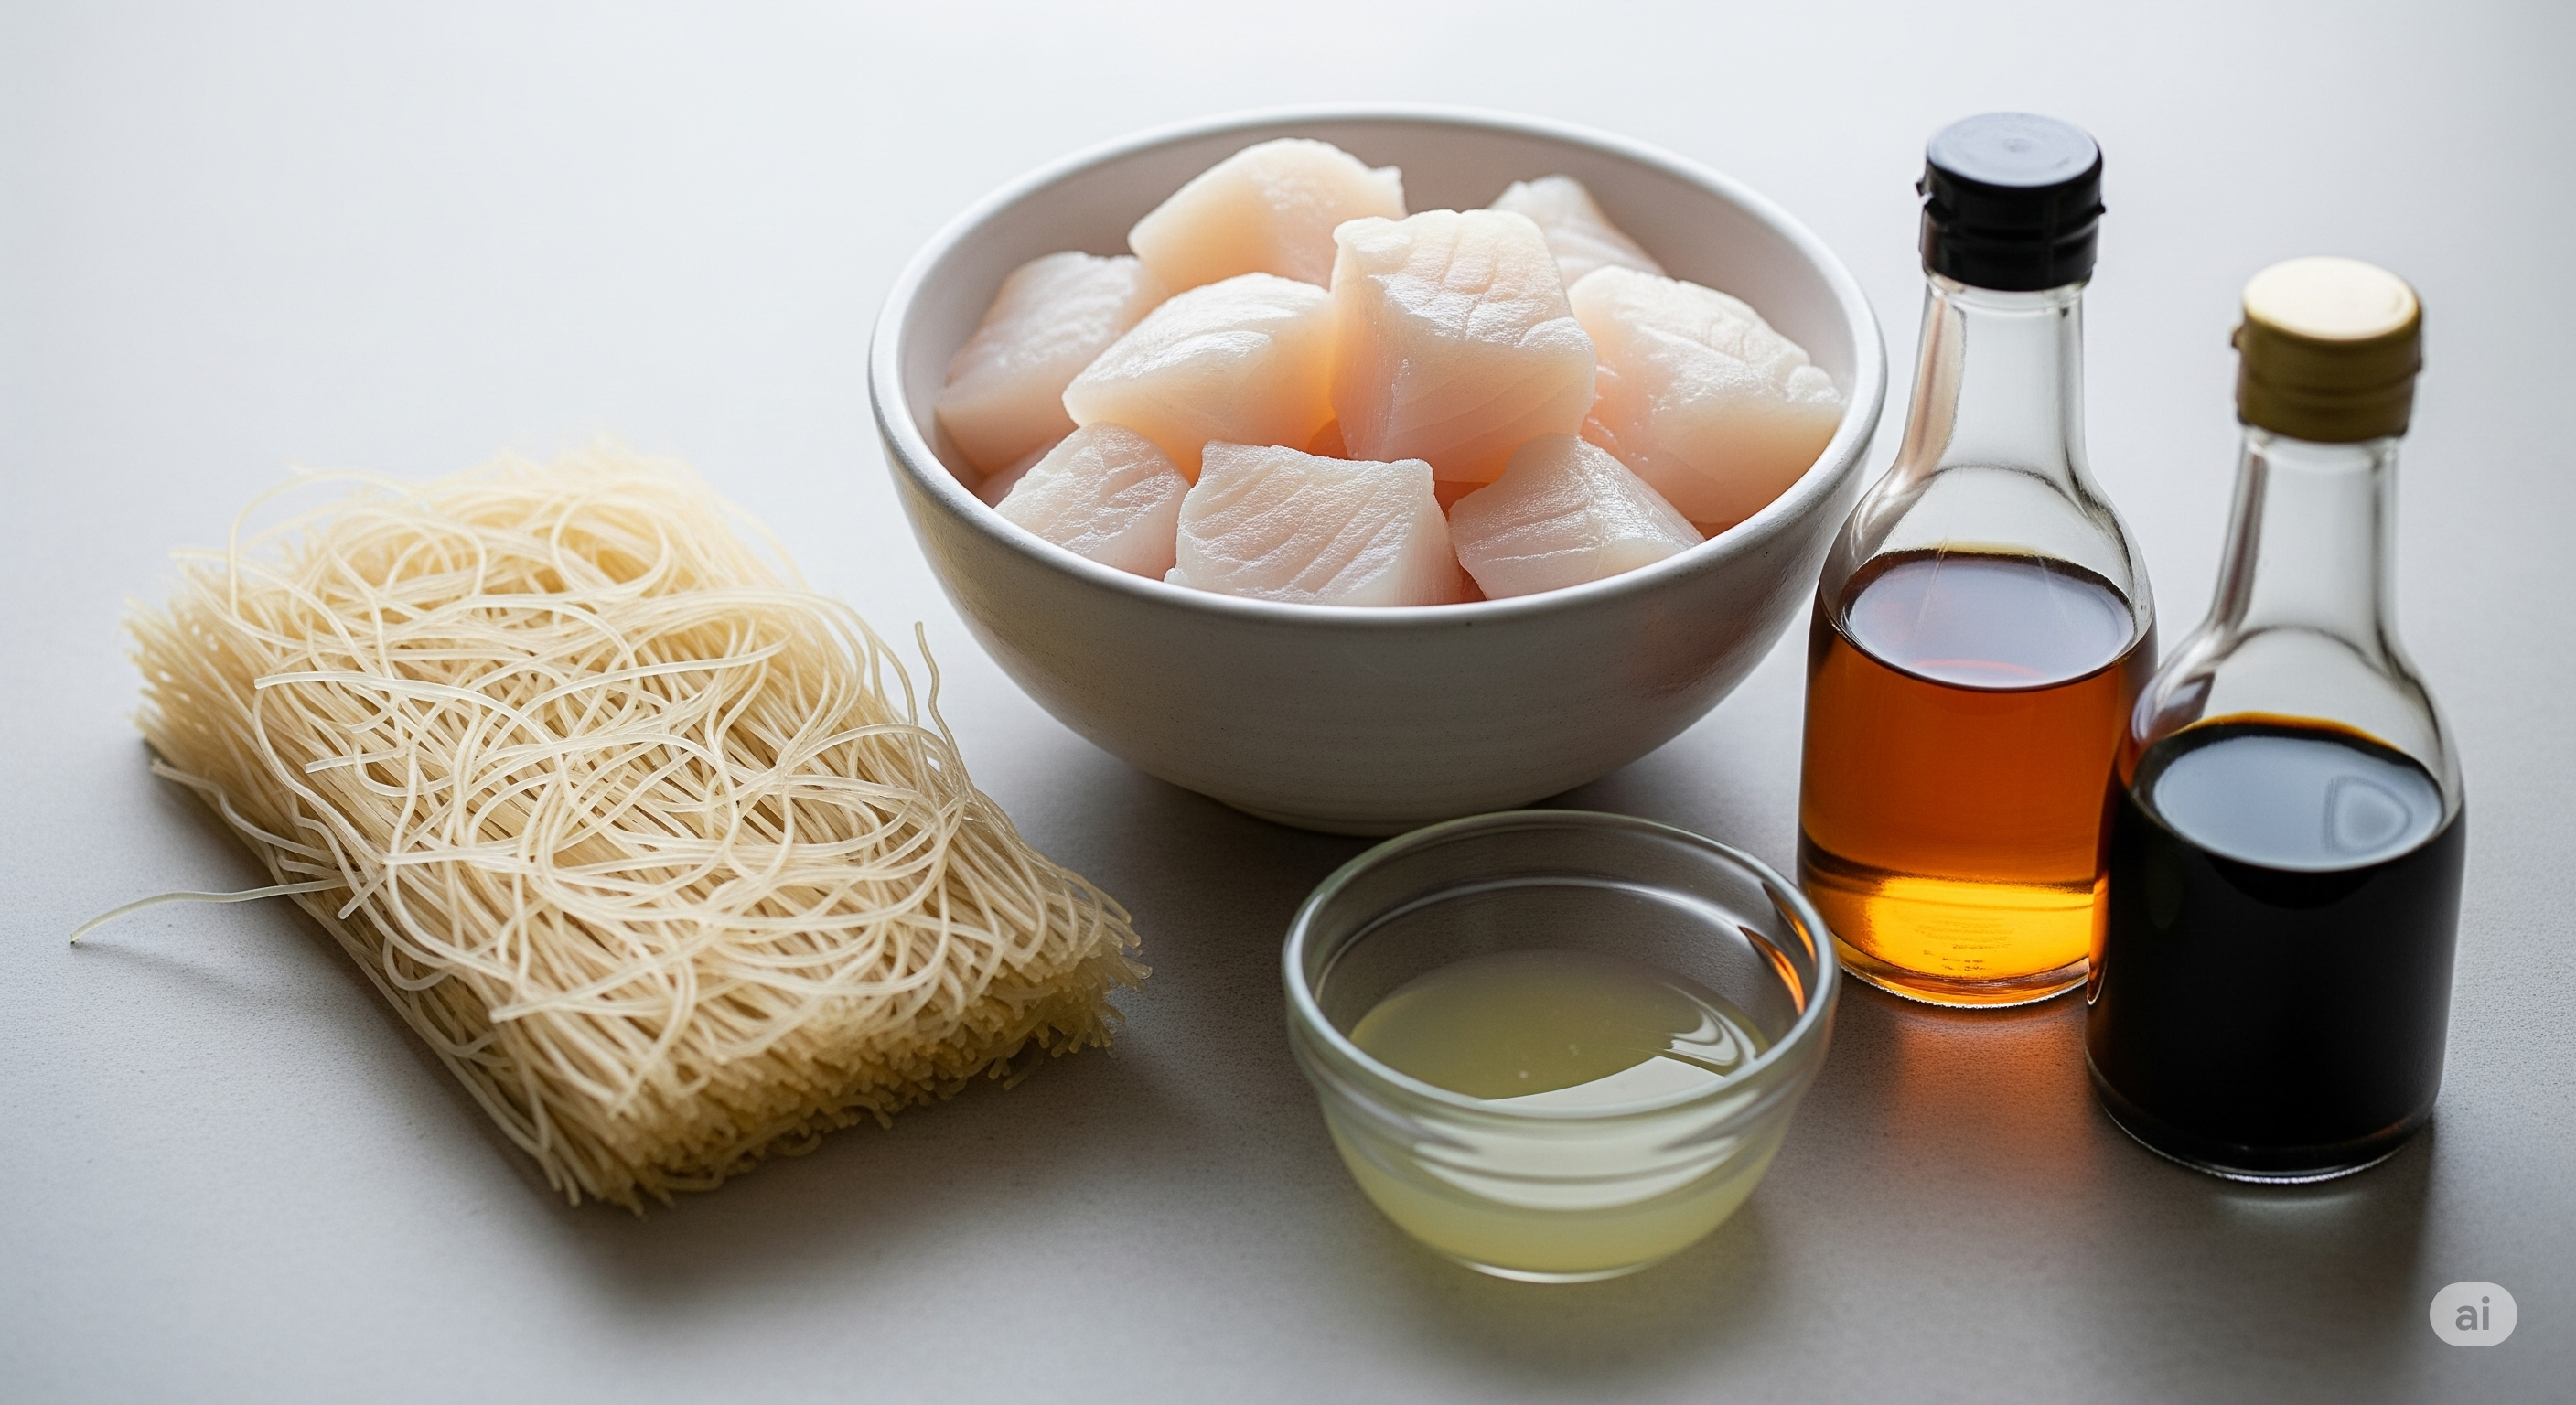
Ingredients for Nut & Seed Breadcrumbs

  • 1 cup (120g) raw almonds (blanched or unblanched)
  • ½ cup (60g) raw sunflower seeds
  • ½ cup (60g) raw pumpkin seeds
  • 2 tablespoons (20g) ground flaxseed meal (optional, for extra binding and nutrition)
  • ½ teaspoon sea salt
  • ¼ teaspoon black pepper
  • 1 teaspoon dried Italian herbs (oregano, basil, thyme blend)
  • ½ teaspoon garlic powder
  • ¼ teaspoon onion powder
  • A pinch of smoked paprika (optional, for a hint of smoky flavor)


Step-by-Step Instructions: Crafting Your Healthy Crumbs

Follow these detailed steps to create your perfectly textured and flavorful healthy breadcrumbs without bread. We’ve included instructions for both with and without a food processor.

Preheat and Prepare Your Nuts & Seeds

Begin by preheating your oven to 160°C (325°F). This gentle heat will help to toast the nuts and seeds, bringing out their deep, nutty flavors without burning them. While the oven preheats, spread the raw almonds, sunflower seeds, and pumpkin seeds evenly in a single layer on a baking sheet lined with parchment paper. This ensures they toast consistently.

Toast for Enhanced Flavor

Once the oven is ready, place the baking sheet with your nuts and seeds into the preheated oven. Toast them for about 8-10 minutes. It’s crucial to keep a close eye on them during this time, as nuts and seeds can go from perfectly toasted to burnt very quickly. You’ll know they’re ready when they smell fragrant and have a lightly golden-brown color. Once toasted, remove the baking sheet from the oven and allow the nuts and seeds to cool completely. This cooling step is important as warm nuts can release too much oil when blended, leading to a pasty texture rather than crumbly.

Combine and Season

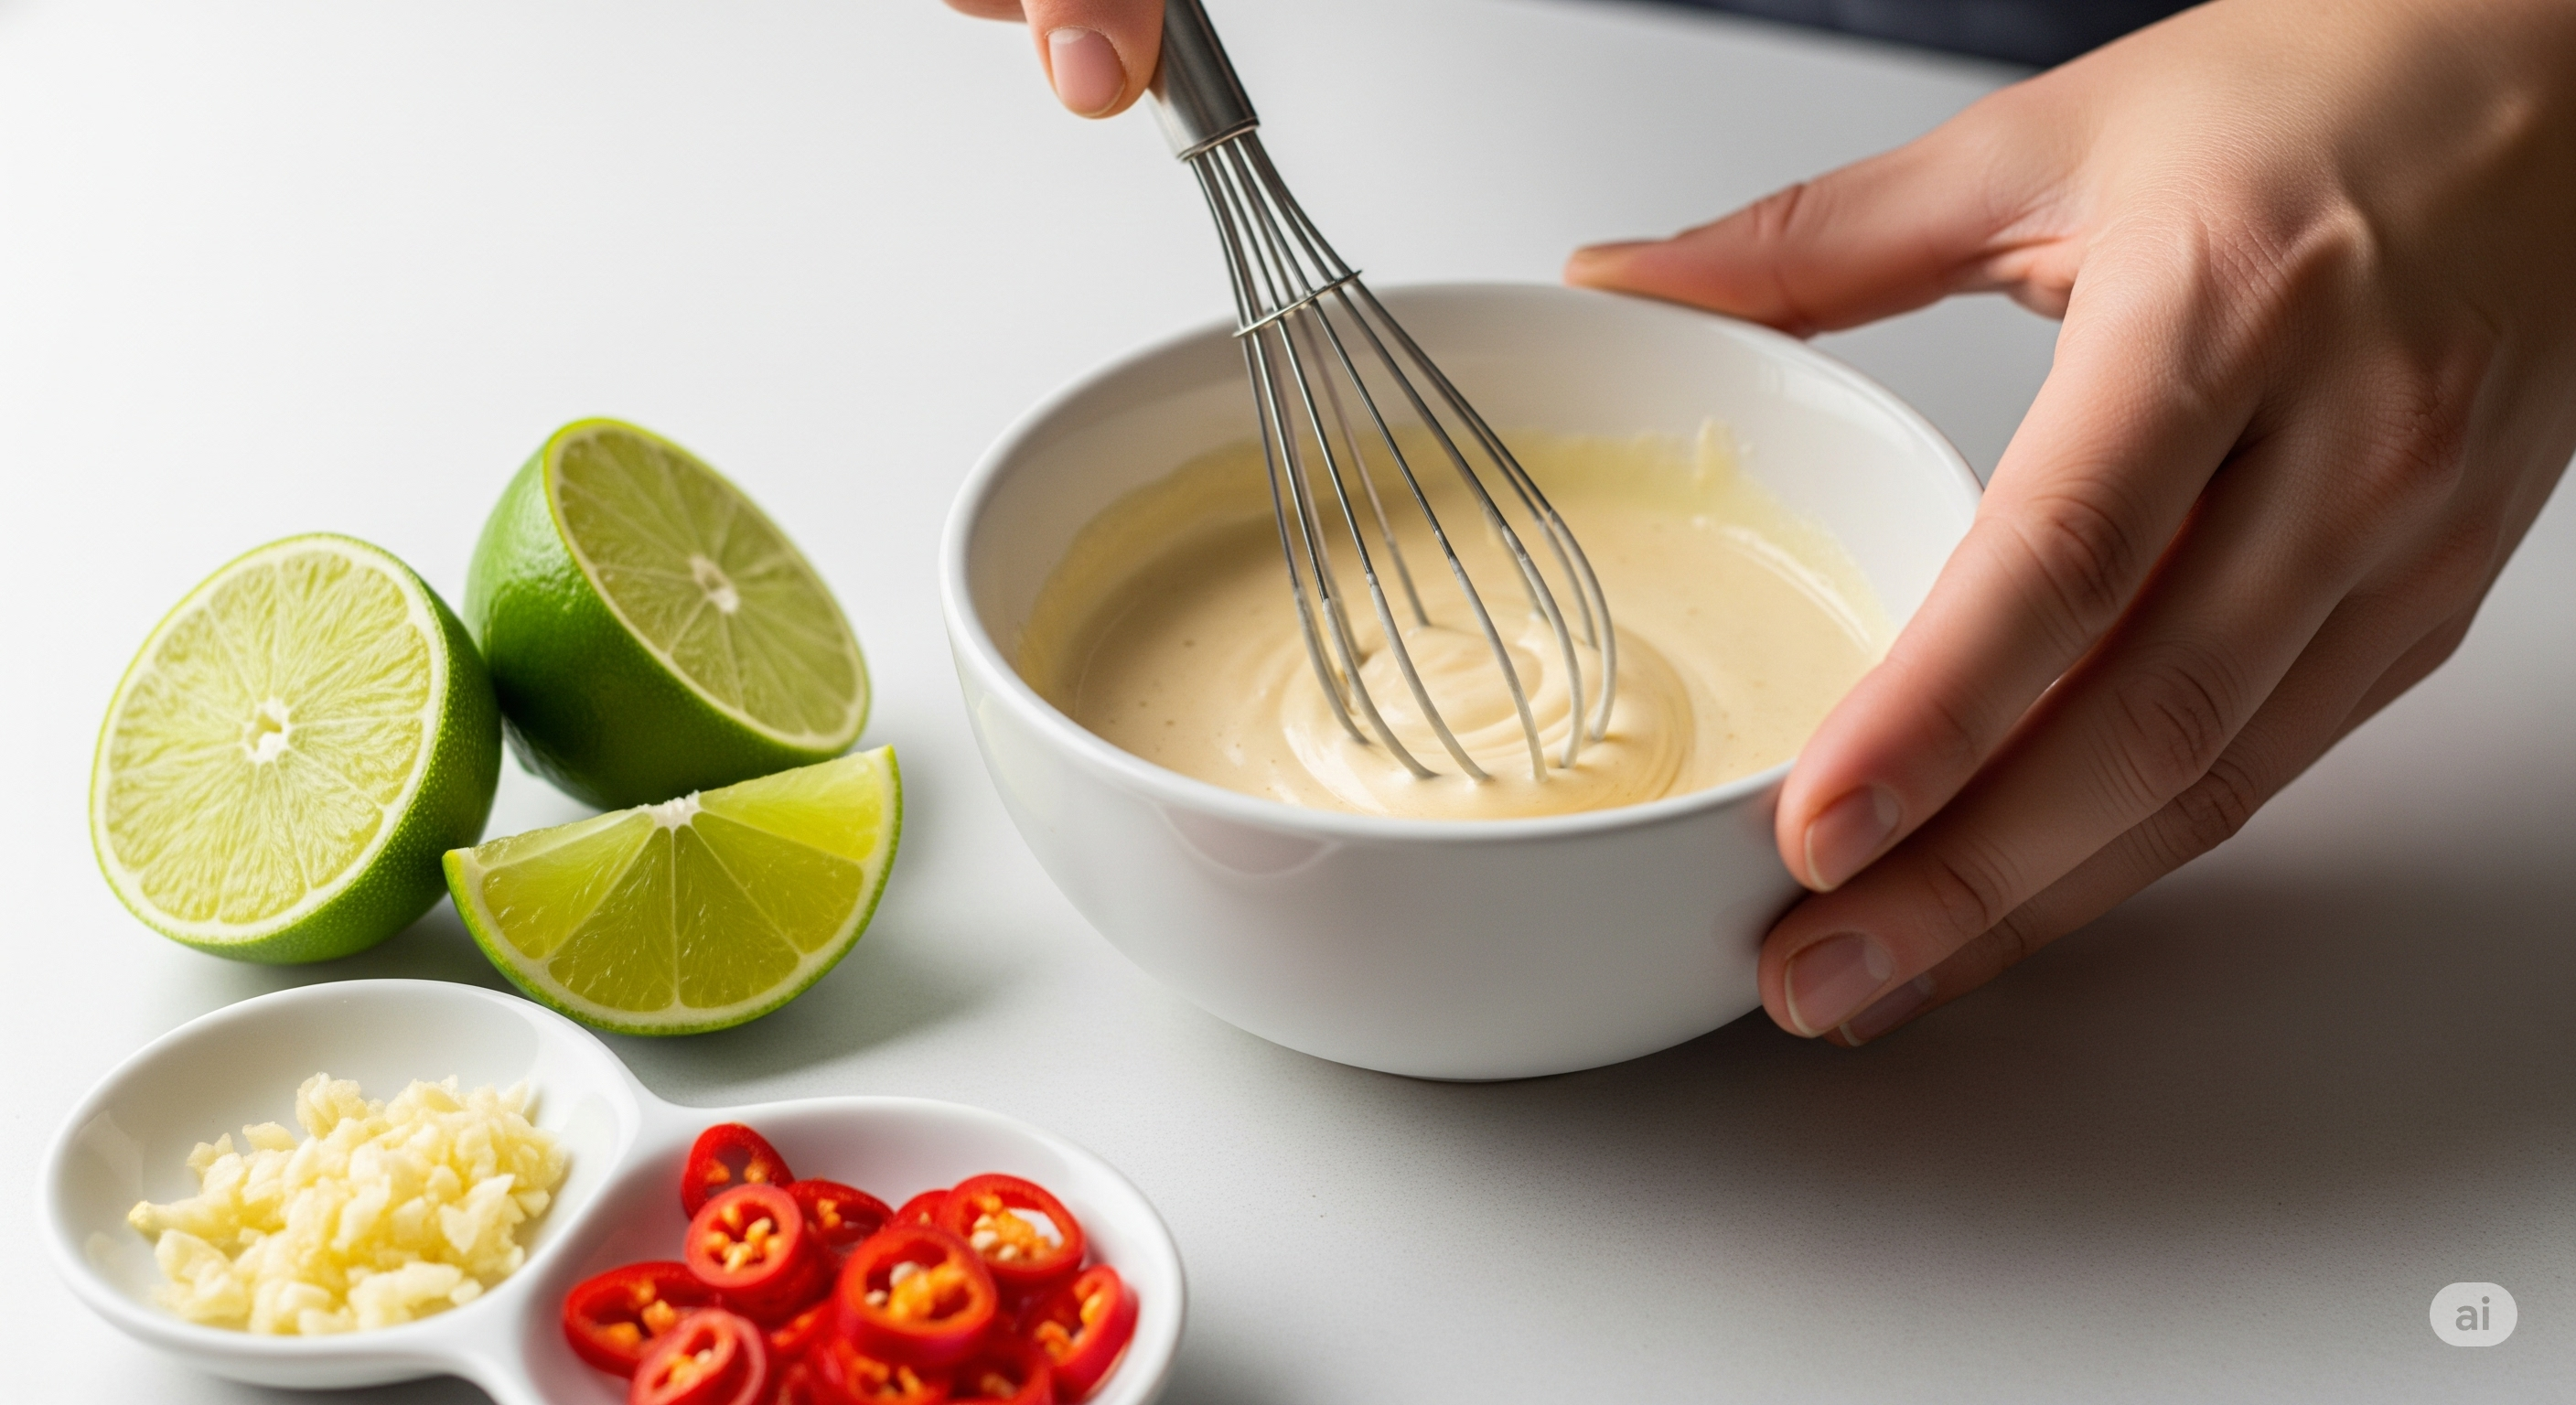
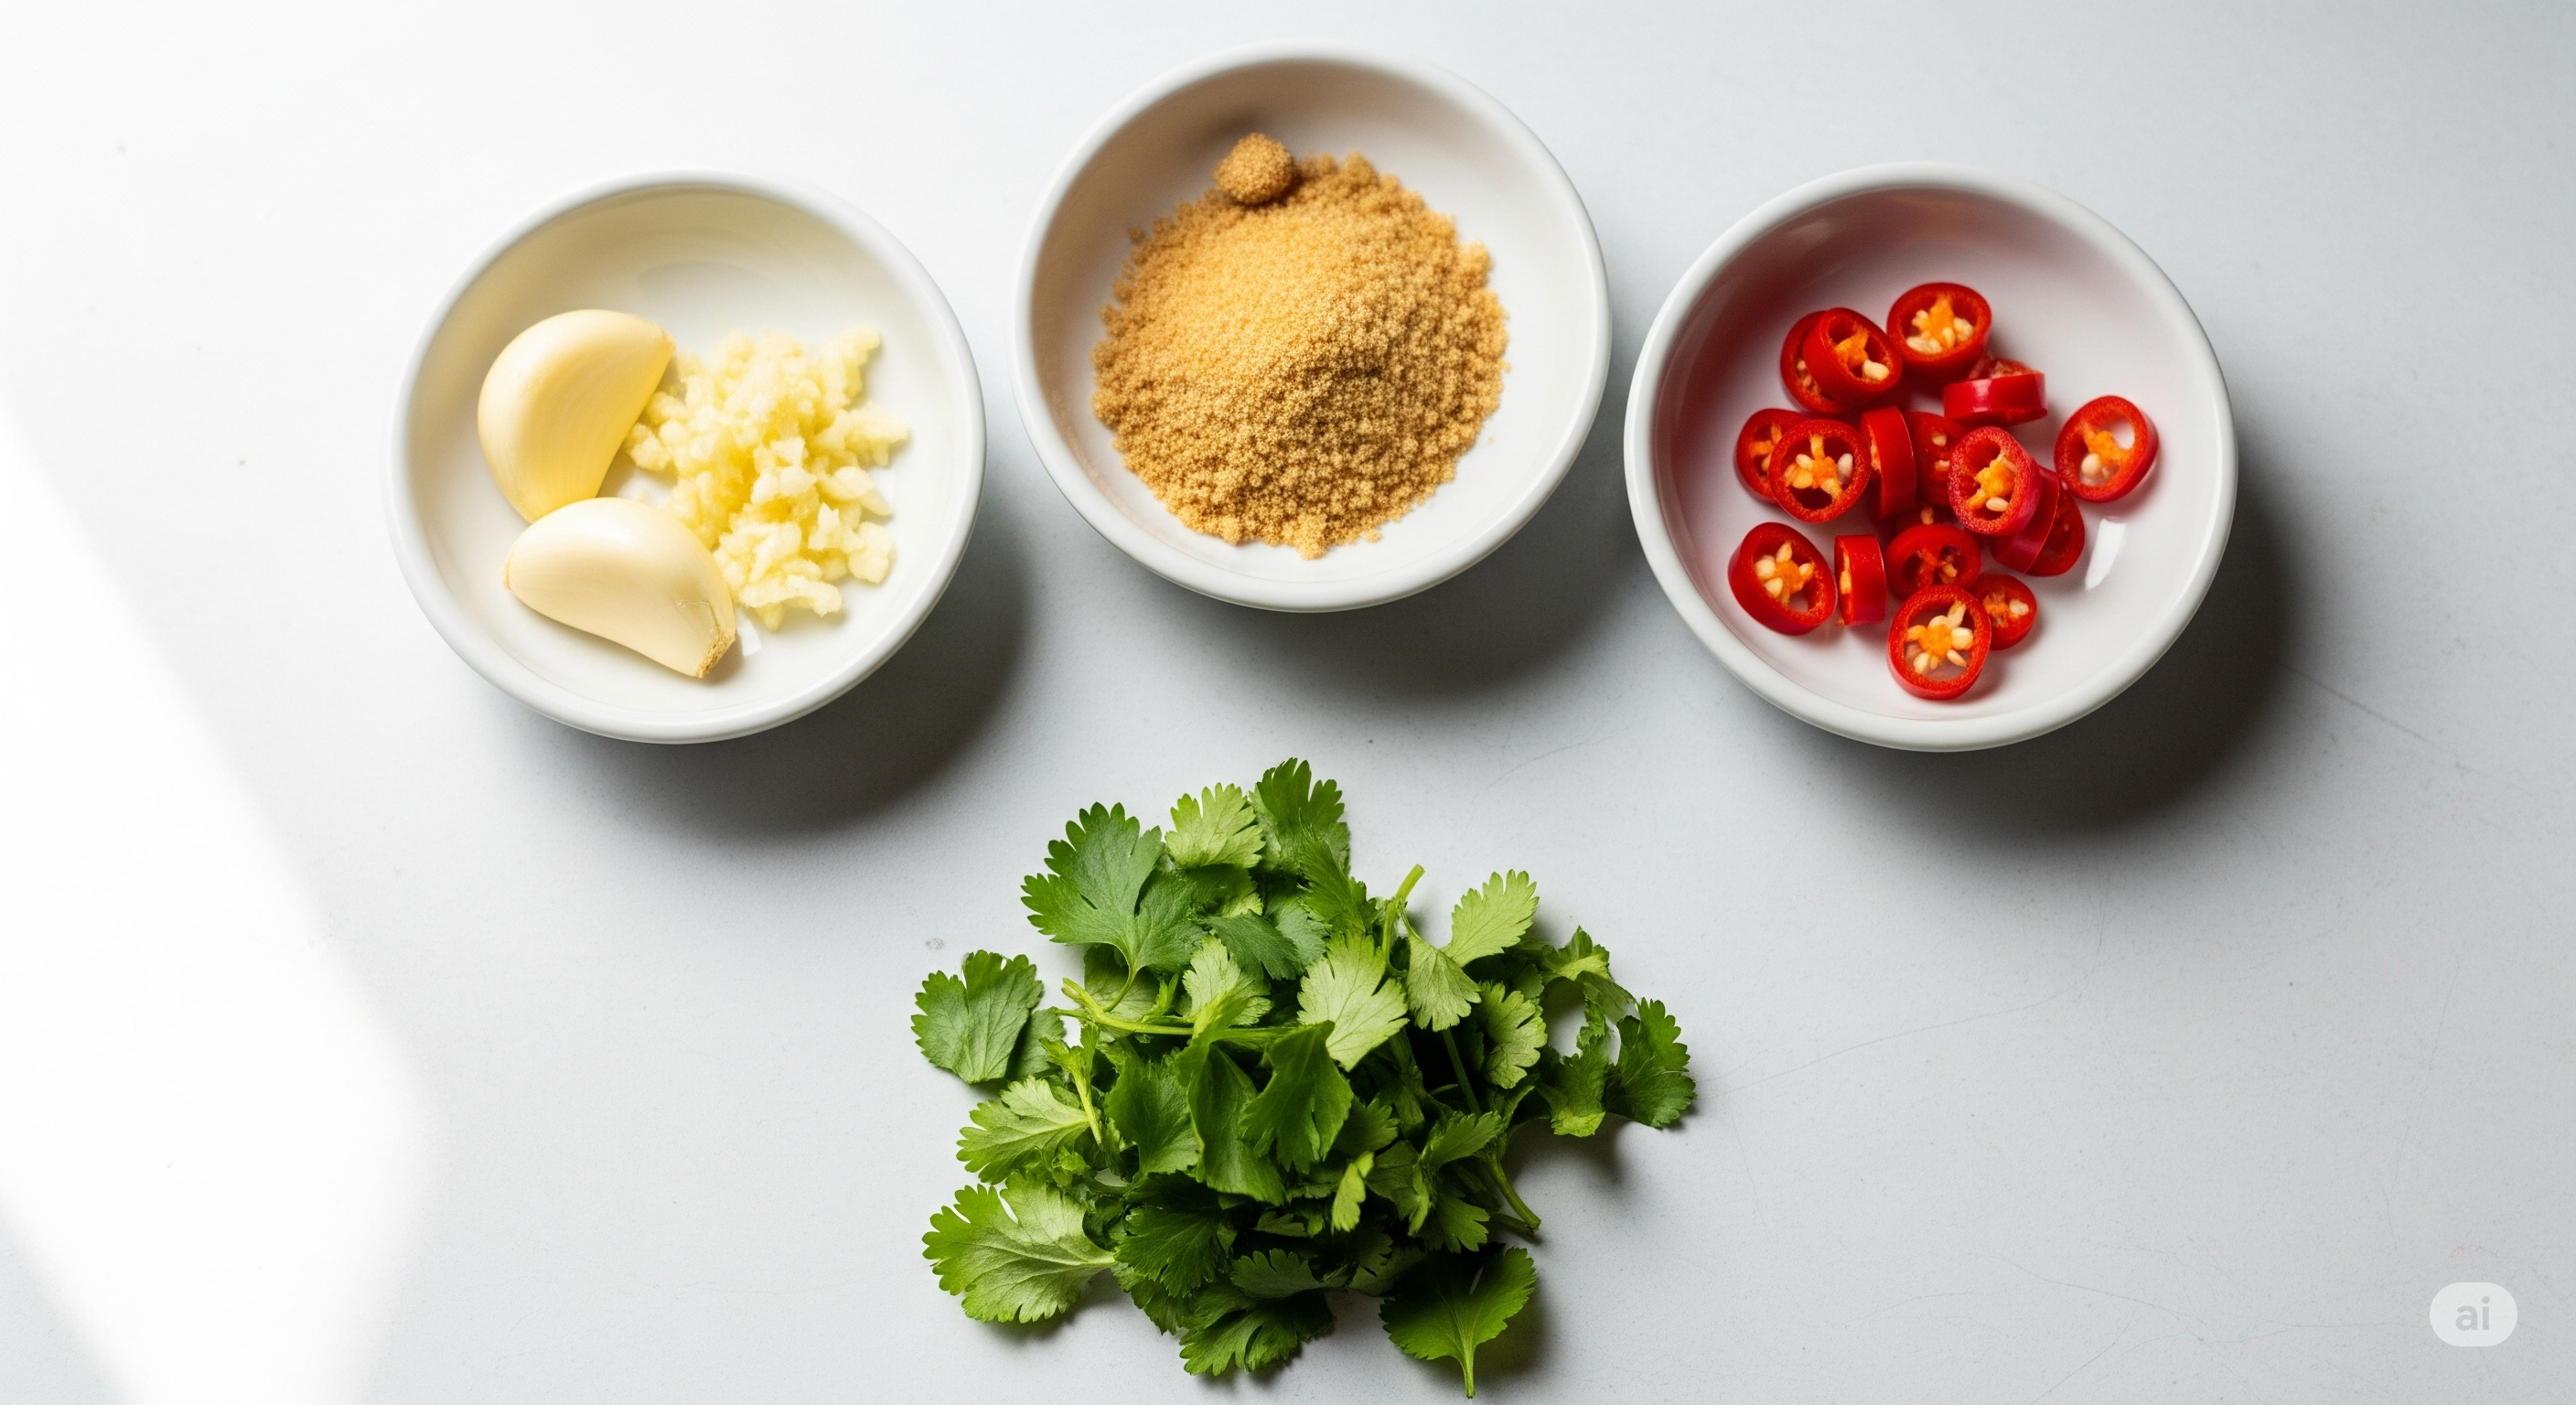
Once the toasted nuts and seeds are fully cooled, carefully transfer them into a food processor, or if you don’t have one, into a large, durable sealable bag. Add the ground flaxseed meal (if using), sea salt, black pepper, dried Italian herbs, garlic powder, onion powder, and smoked paprika (if desired). These seasonings will infuse your breadcrumbs with a delicious, savory flavor profile.

Pulse or Crush to Perfection

Using a Food Processor or Blender

Secure the lid on your food processor. Now, begin to pulse the mixture in short bursts. Don’t simply turn it on and let it run, as this can quickly turn your ingredients into nut butter. Instead, use short, quick pulses. Continue pulsing, checking the consistency every few seconds. You’re aiming for a coarse, crumbly texture that resembles traditional breadcrumbs. Some pieces will be finer, and some will be slightly larger, which adds to the appeal. Be careful not to over-process!

Using a Rolling Pin

If you are using a sealable bag, press the air out and seal it tightly. Lay the bag on a sturdy, flat surface like a cutting board. Use a heavy rolling pin to gently but firmly roll over the nuts and seeds. Roll back and forth, applying pressure to crush them. You can also use a heavy-bottomed pan or bottle to crush them. The process may take a few minutes and will give you a slightly more rustic, varied crumb. Periodically shake the bag to bring larger pieces to the top for crushing.

Check and Adjust

Once you achieve the desired texture, carefully transfer the mixture to a bowl. Give it a good stir with a spoon or spatula to ensure all the seasonings are evenly distributed. Taste a small amount and adjust the seasoning if necessary – perhaps a little more salt, pepper, or herbs to suit your preference.

Store for Freshness

Transfer your freshly made healthy breadcrumbs into a clean, airtight container. Store them in the refrigerator for up to 2-3 weeks, or in the freezer for up to 3 months. Storing them in the fridge or freezer helps to keep the natural oils in the nuts and seeds from going rancid, preserving their freshness and flavor. Label your container with the date so you know when they were made.


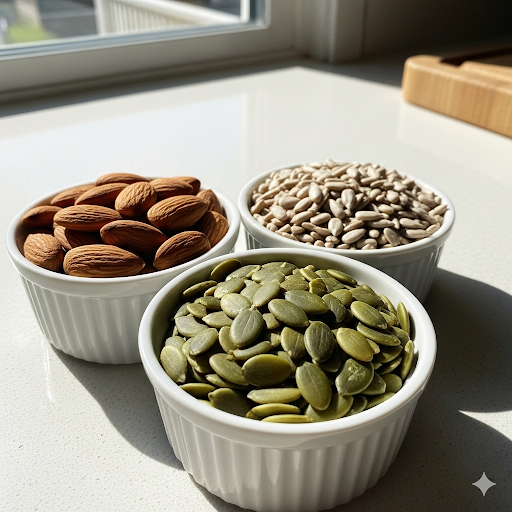
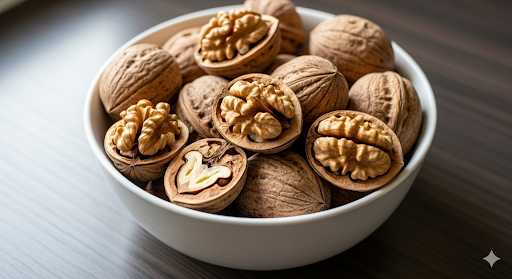
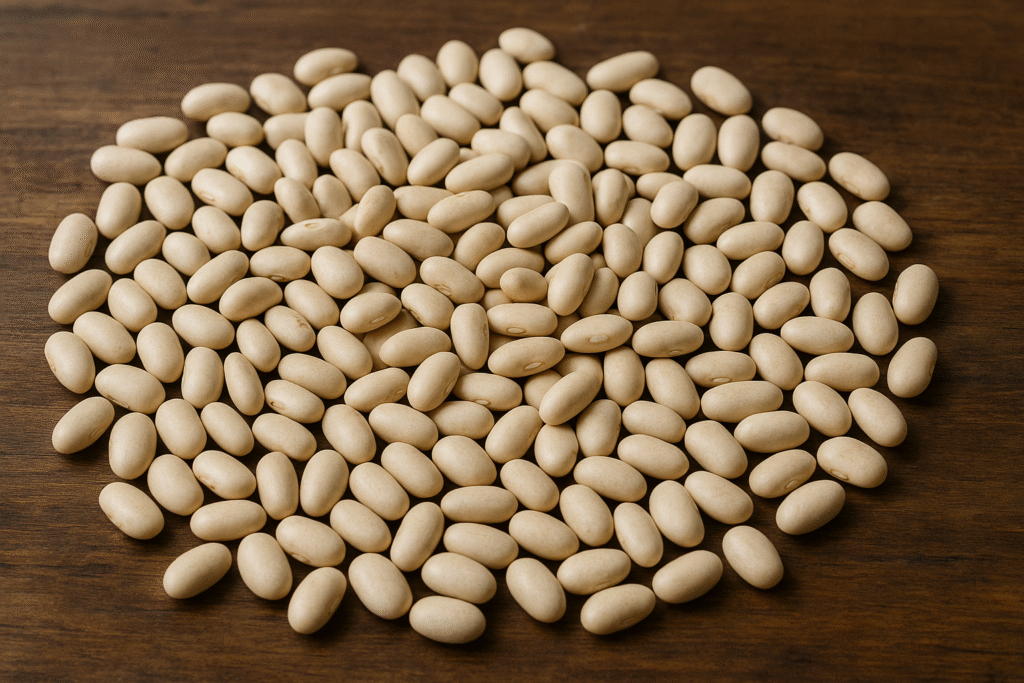
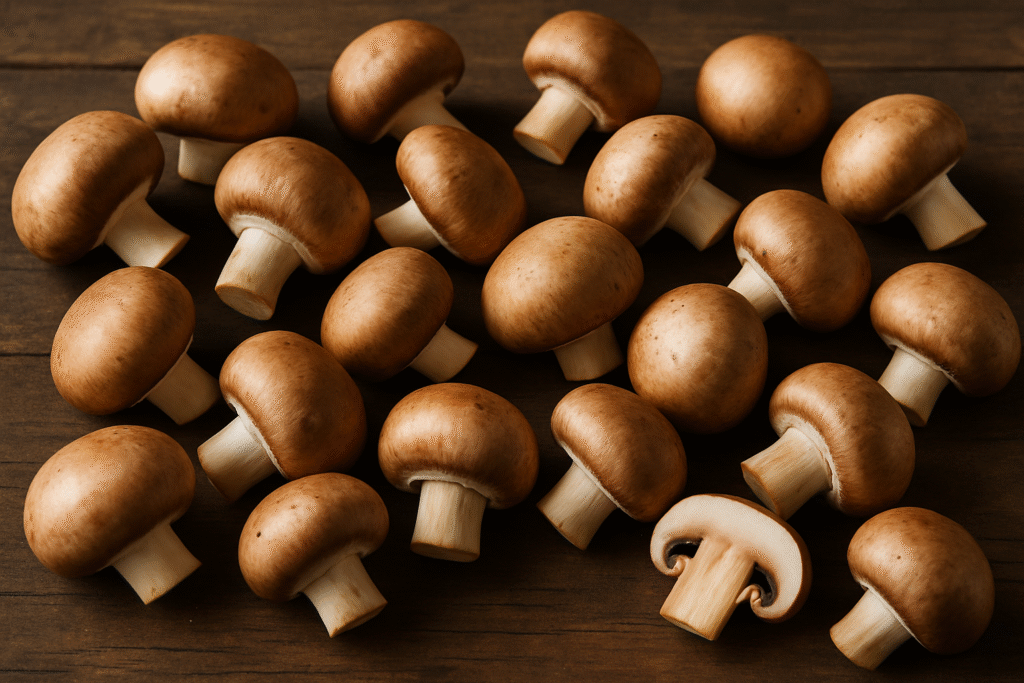
The image shows nuts and seeds being processed and the next image shows some of the seeds and nuts used in the breadcrumb recipes.


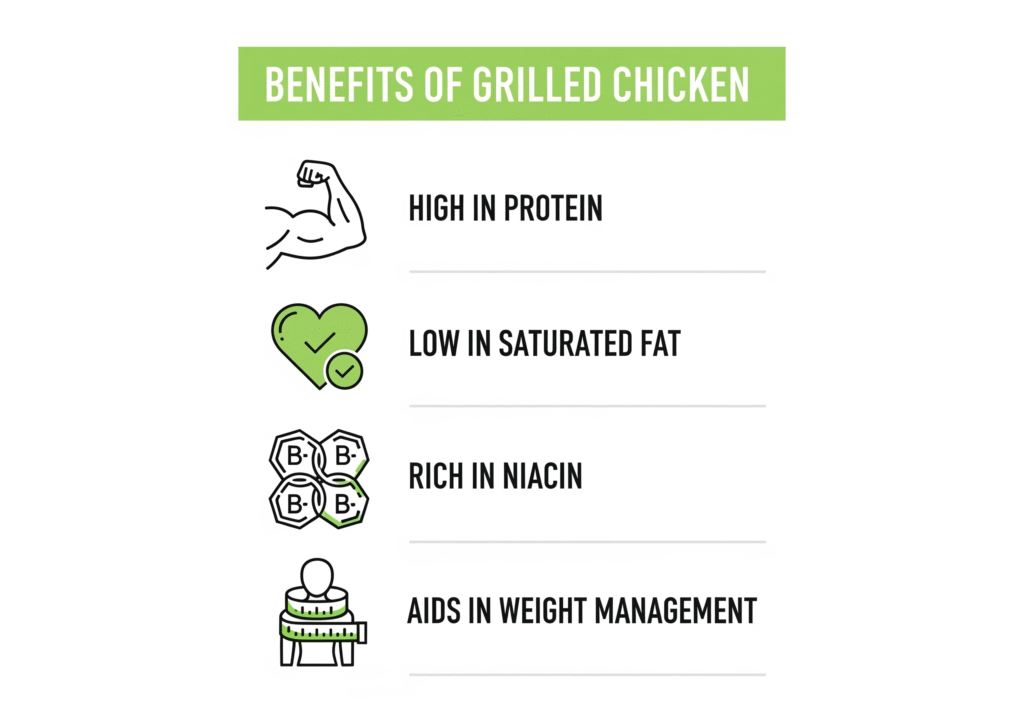
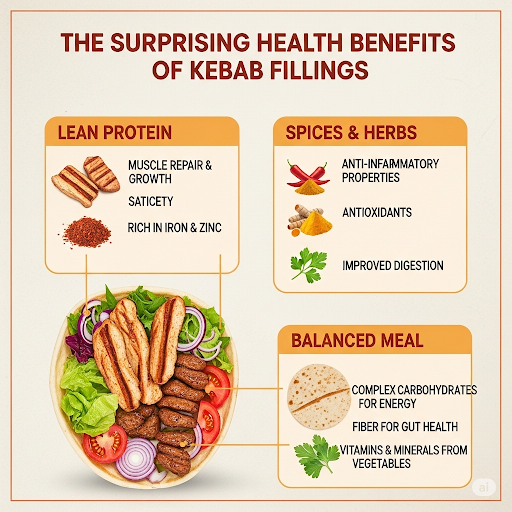
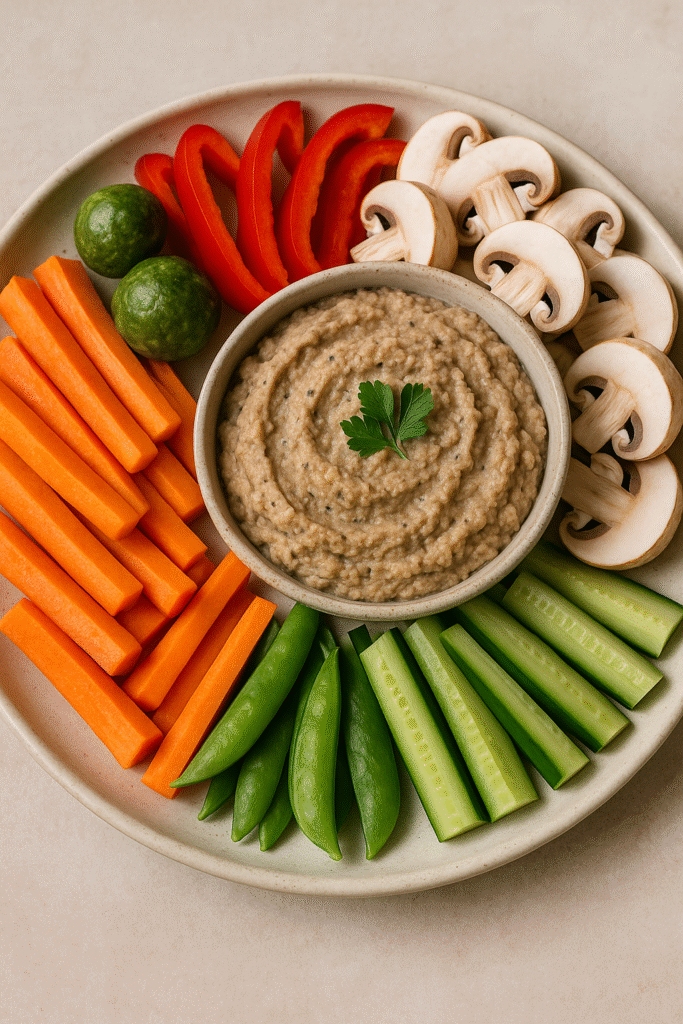
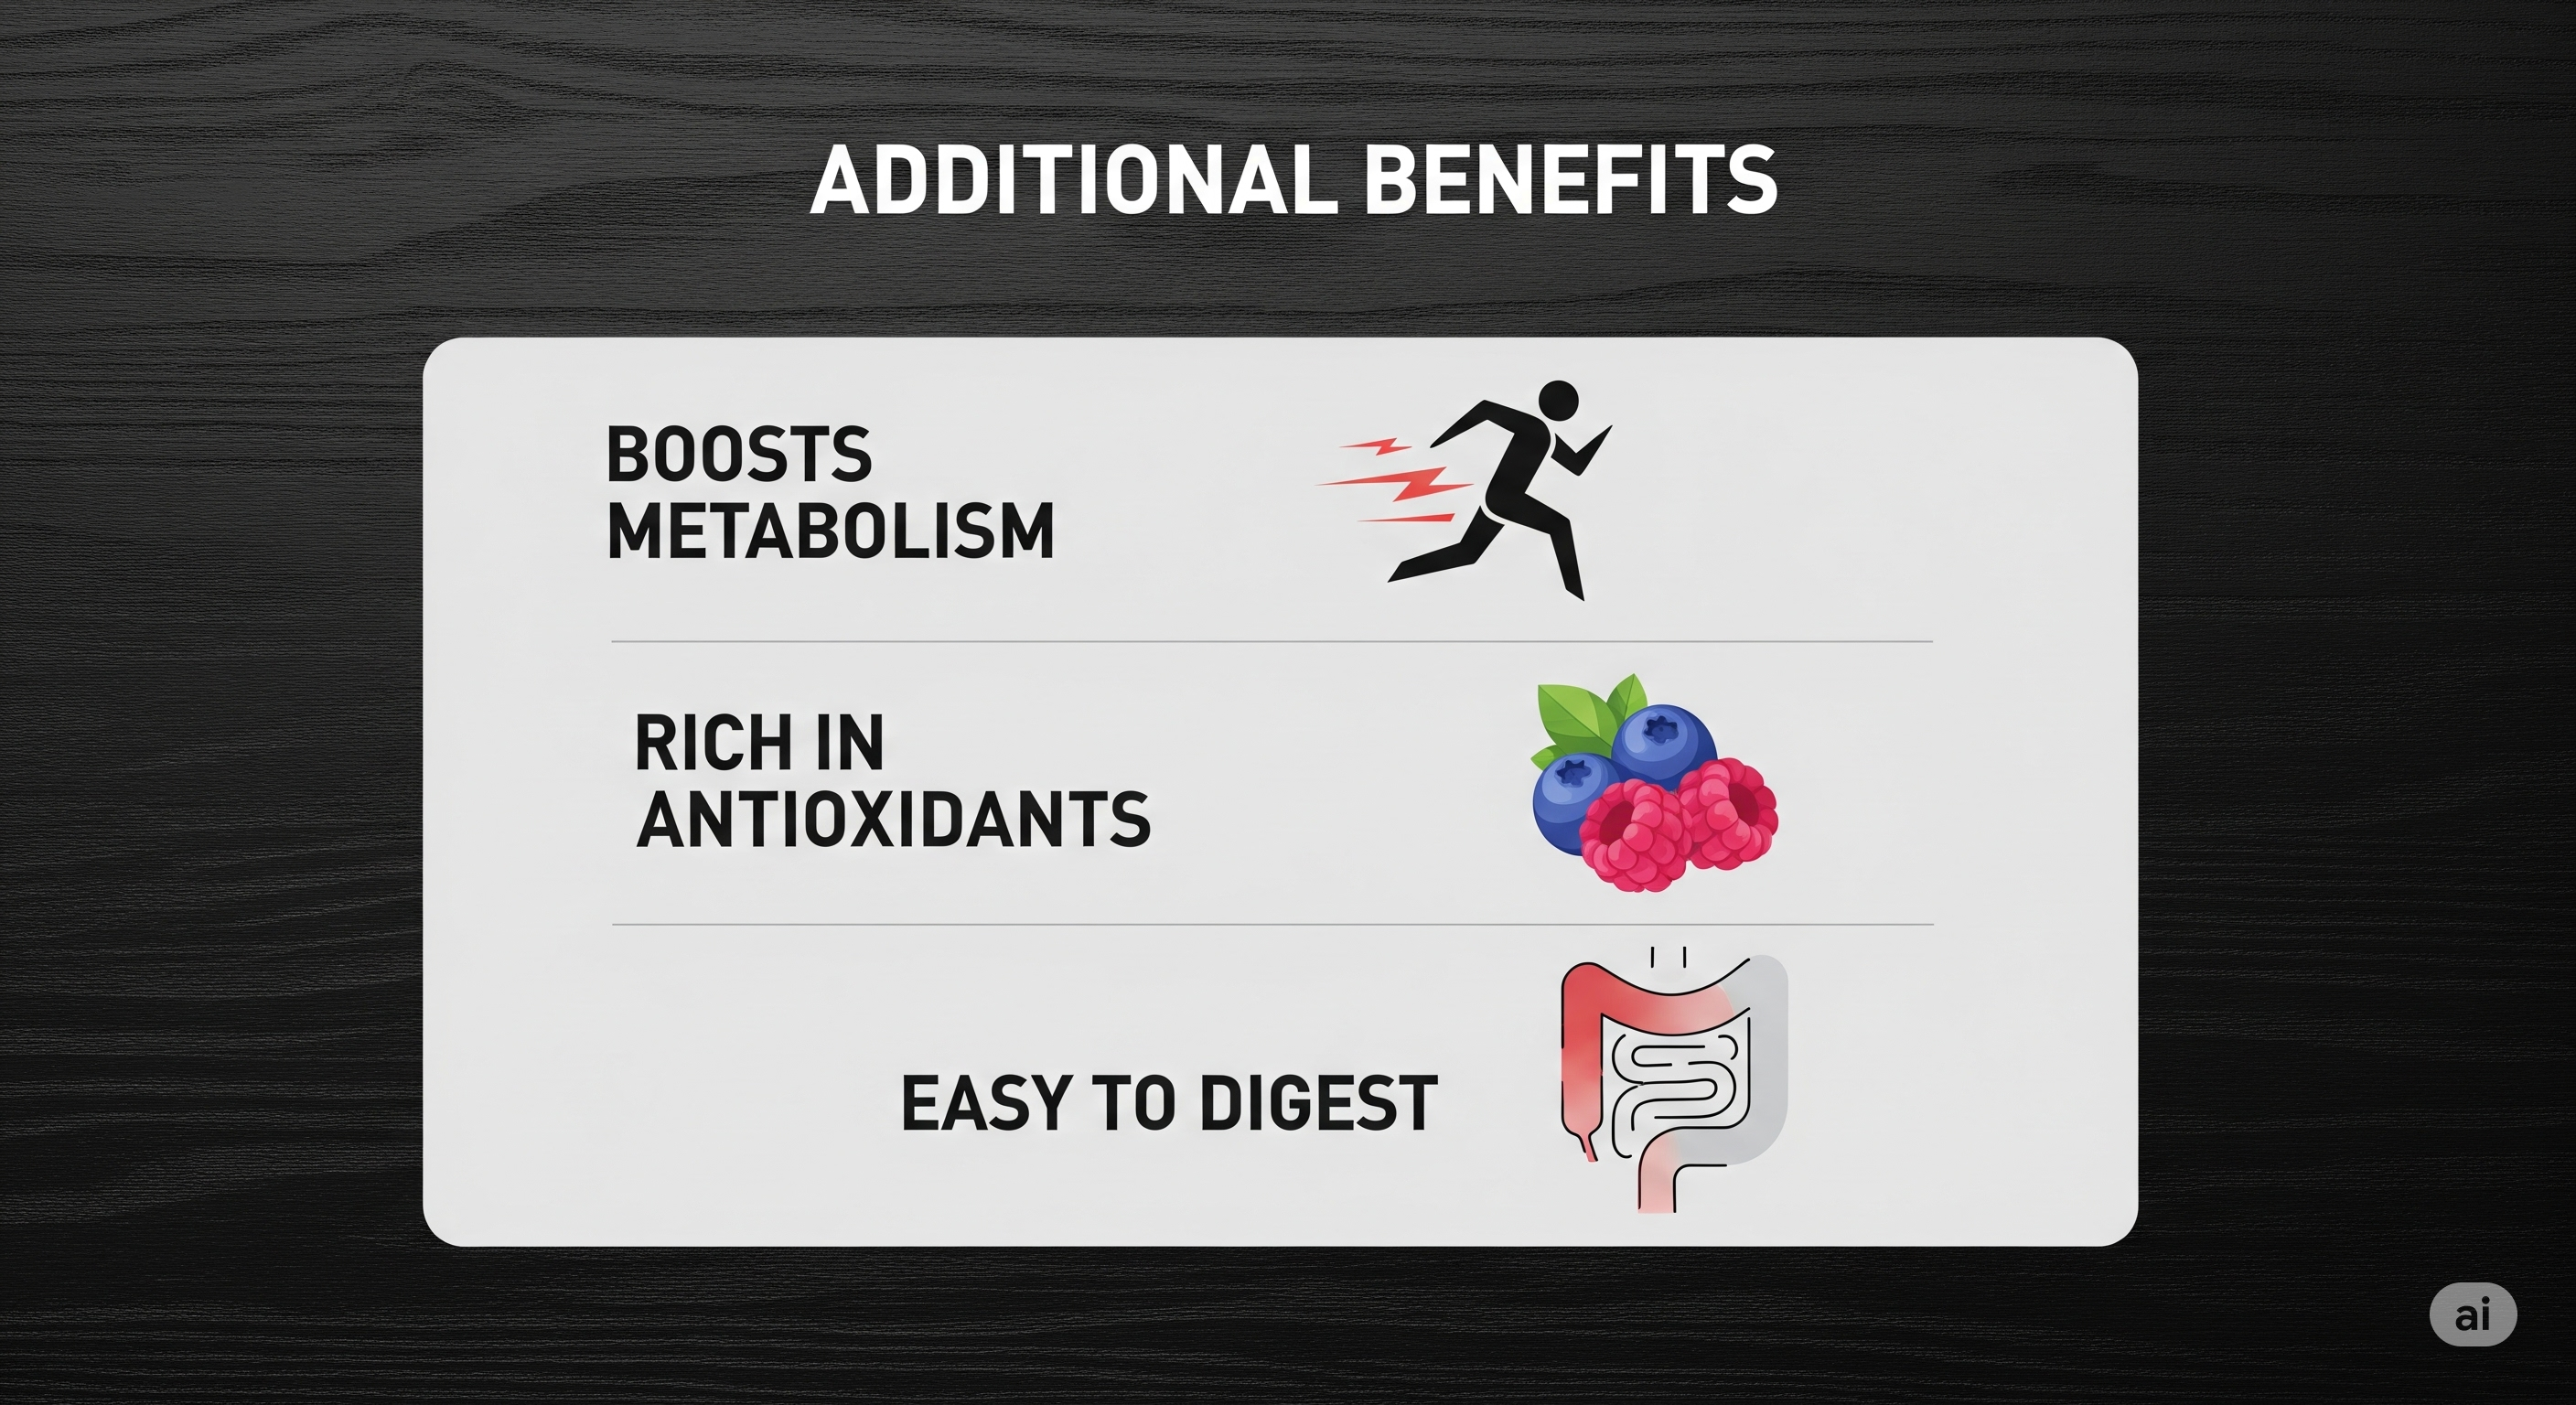
Benefits of Healthy Breadcrumbs Without Bread

Switching to homemade, healthy breadcrumbs without bread offers a myriad of advantages that go beyond just catering to dietary restrictions.

  • Nutrient-Dense: Unlike many traditional breadcrumbs which are often just refined carbohydrates, these alternatives are packed with healthy fats, protein, fiber, vitamins, and minerals from nuts, seeds, and spices. This means you’re adding more nutritional value to your meals.
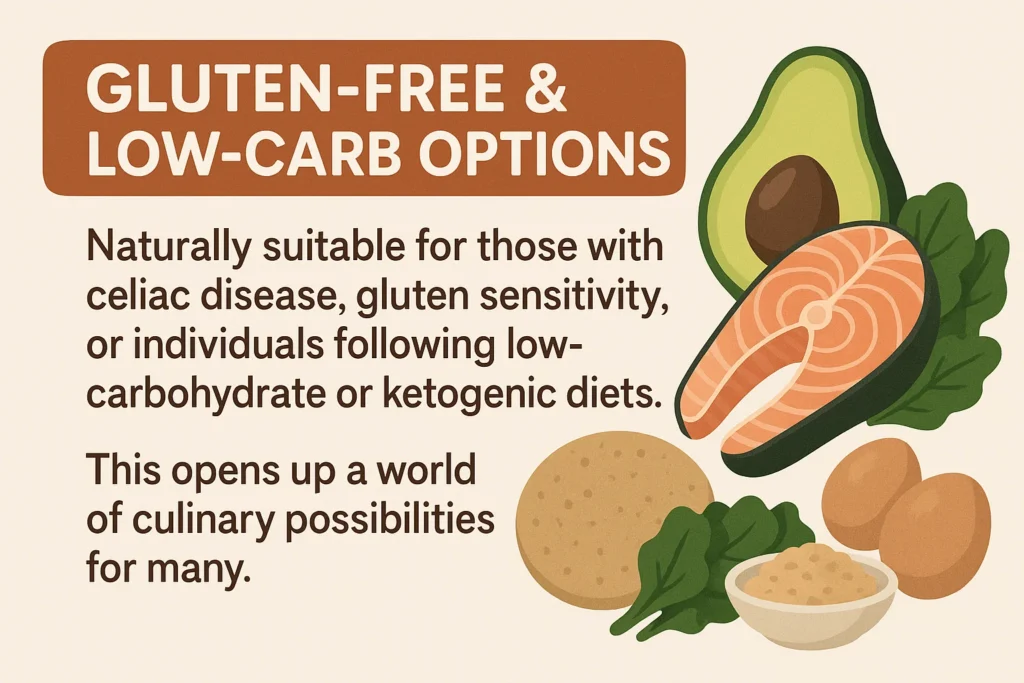
  • Gluten-Free & Low-Carb Options: Naturally suitable for those with celiac disease, gluten sensitivity, or individuals following low-carbohydrate or ketogenic diets. This opens up a world of culinary possibilities for many.
  • Enhanced Flavor & Texture: Nuts and seeds offer a richer, deeper flavor profile than plain bread, alongside a more satisfying, often crispier texture. This can elevate the taste and mouthfeel of your dishes significantly.
  • Control Over Ingredients: When you make your own, you know exactly what goes into them. You can avoid artificial additives, excessive sodium, and unwanted preservatives often found in store-bought versions.
  • Versatility: These crumbs are incredibly versatile, suitable for coatings, toppings, binders, and even as a crunchy element in salads or soups.

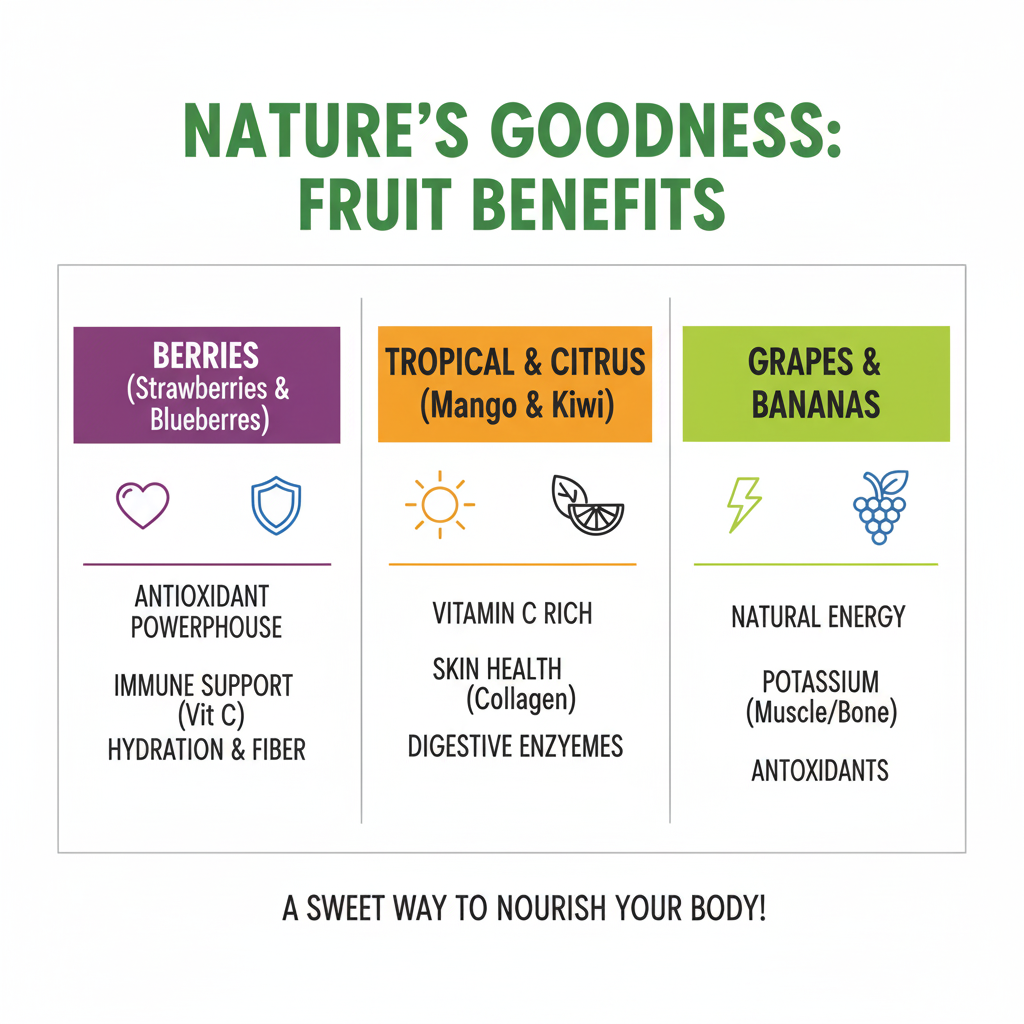
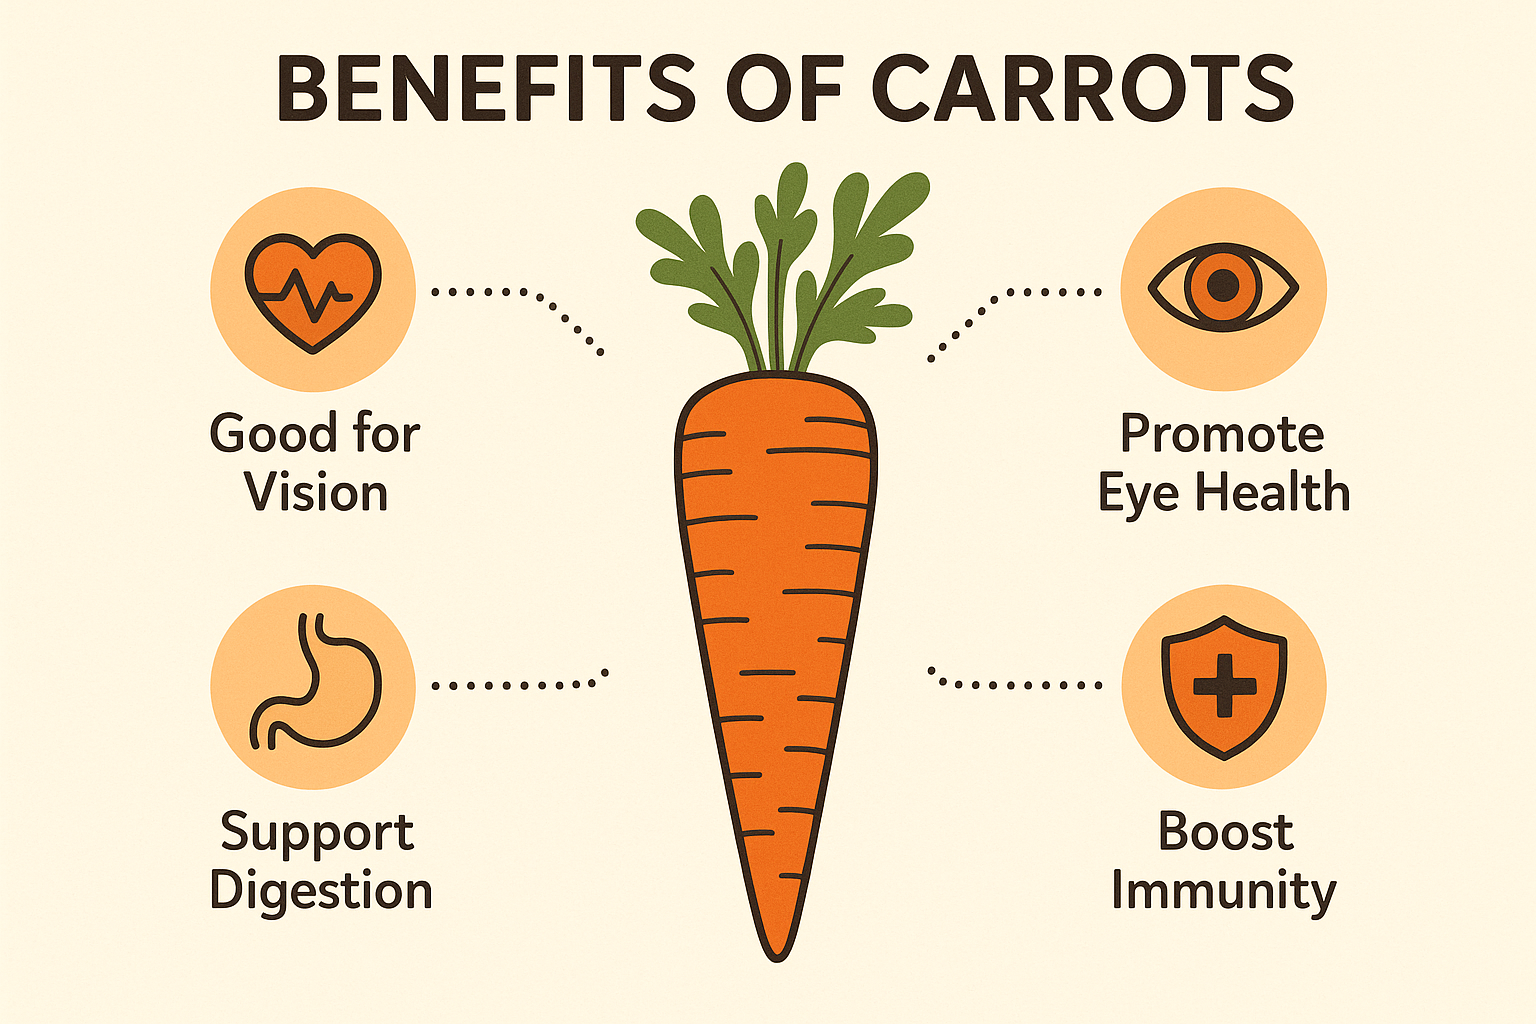
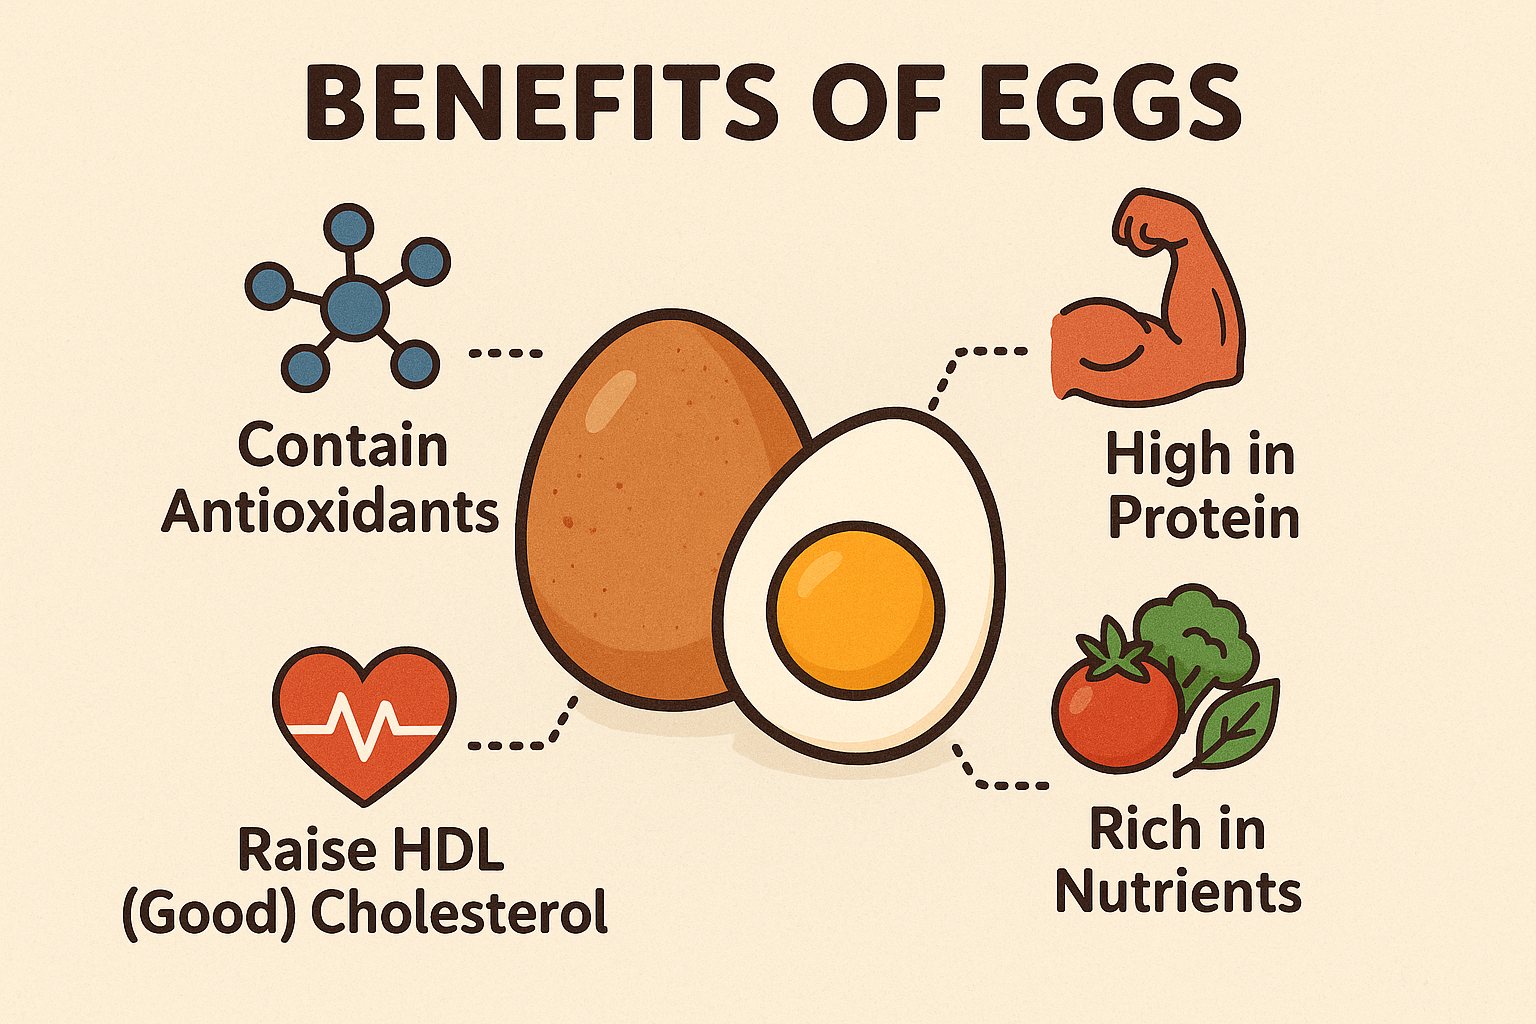
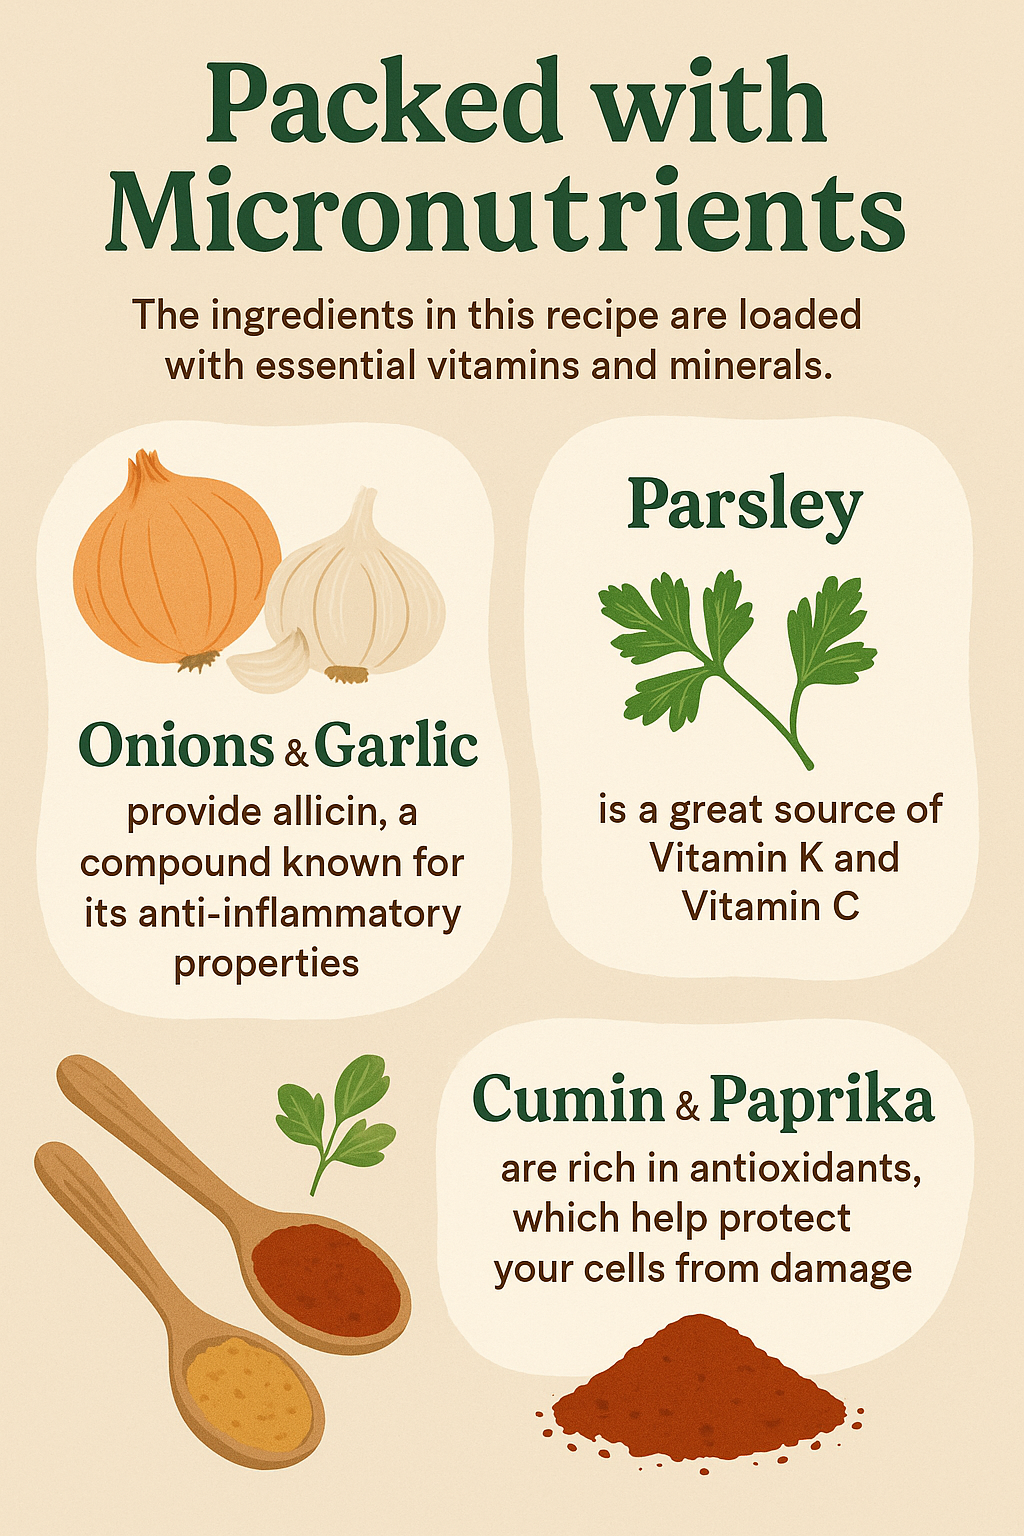
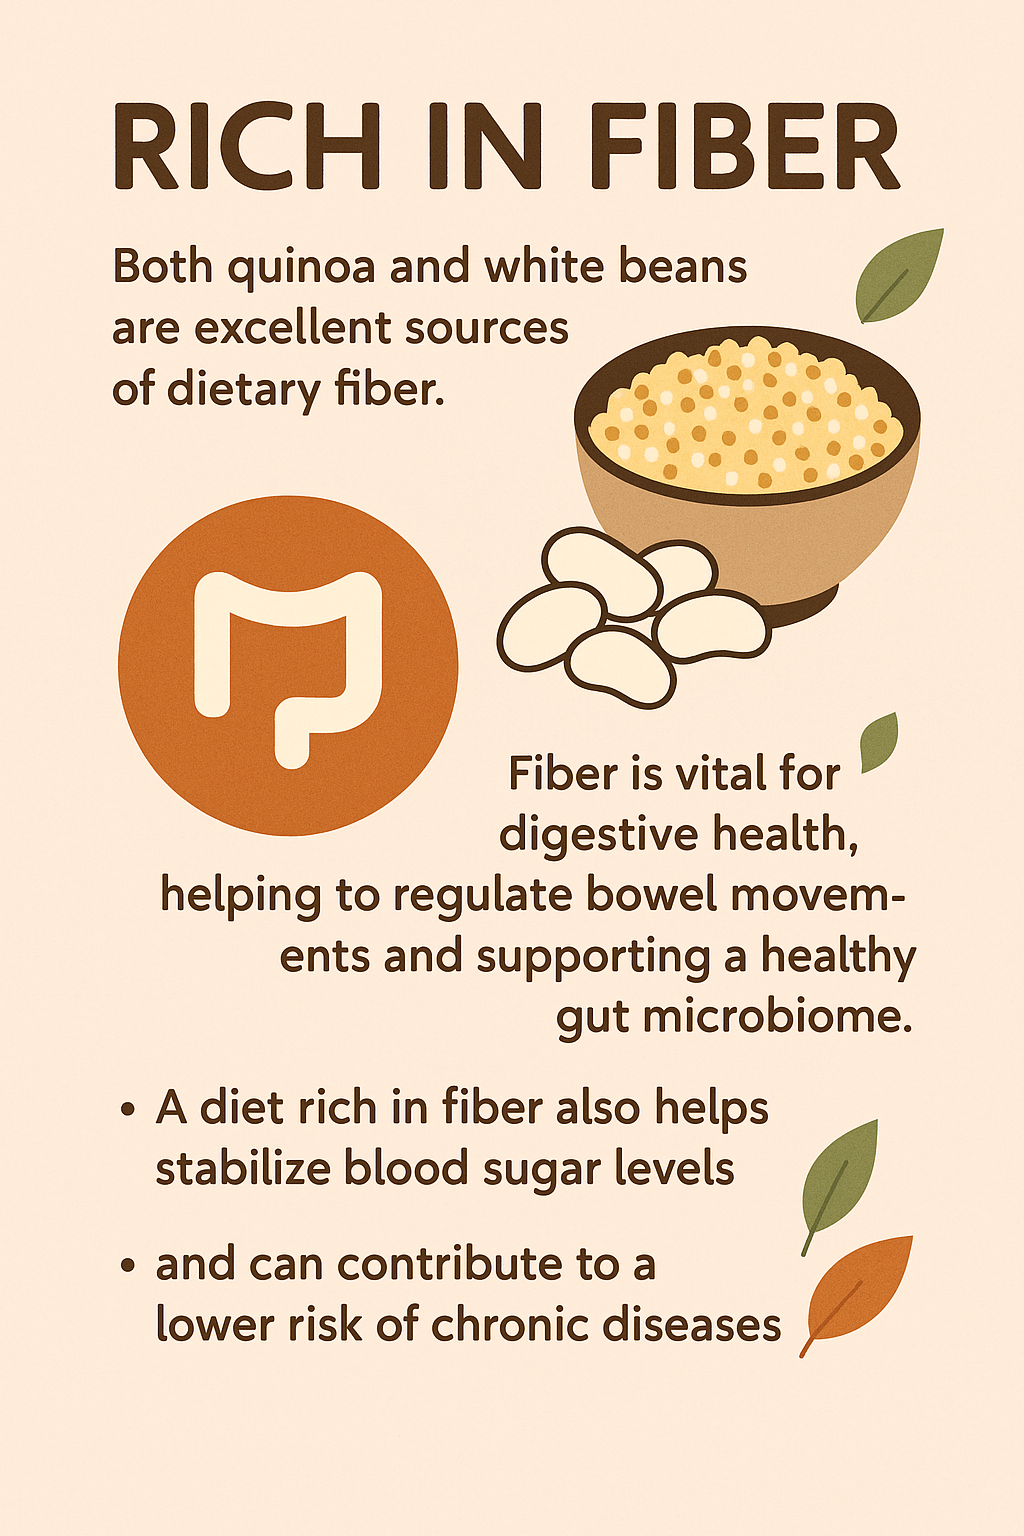
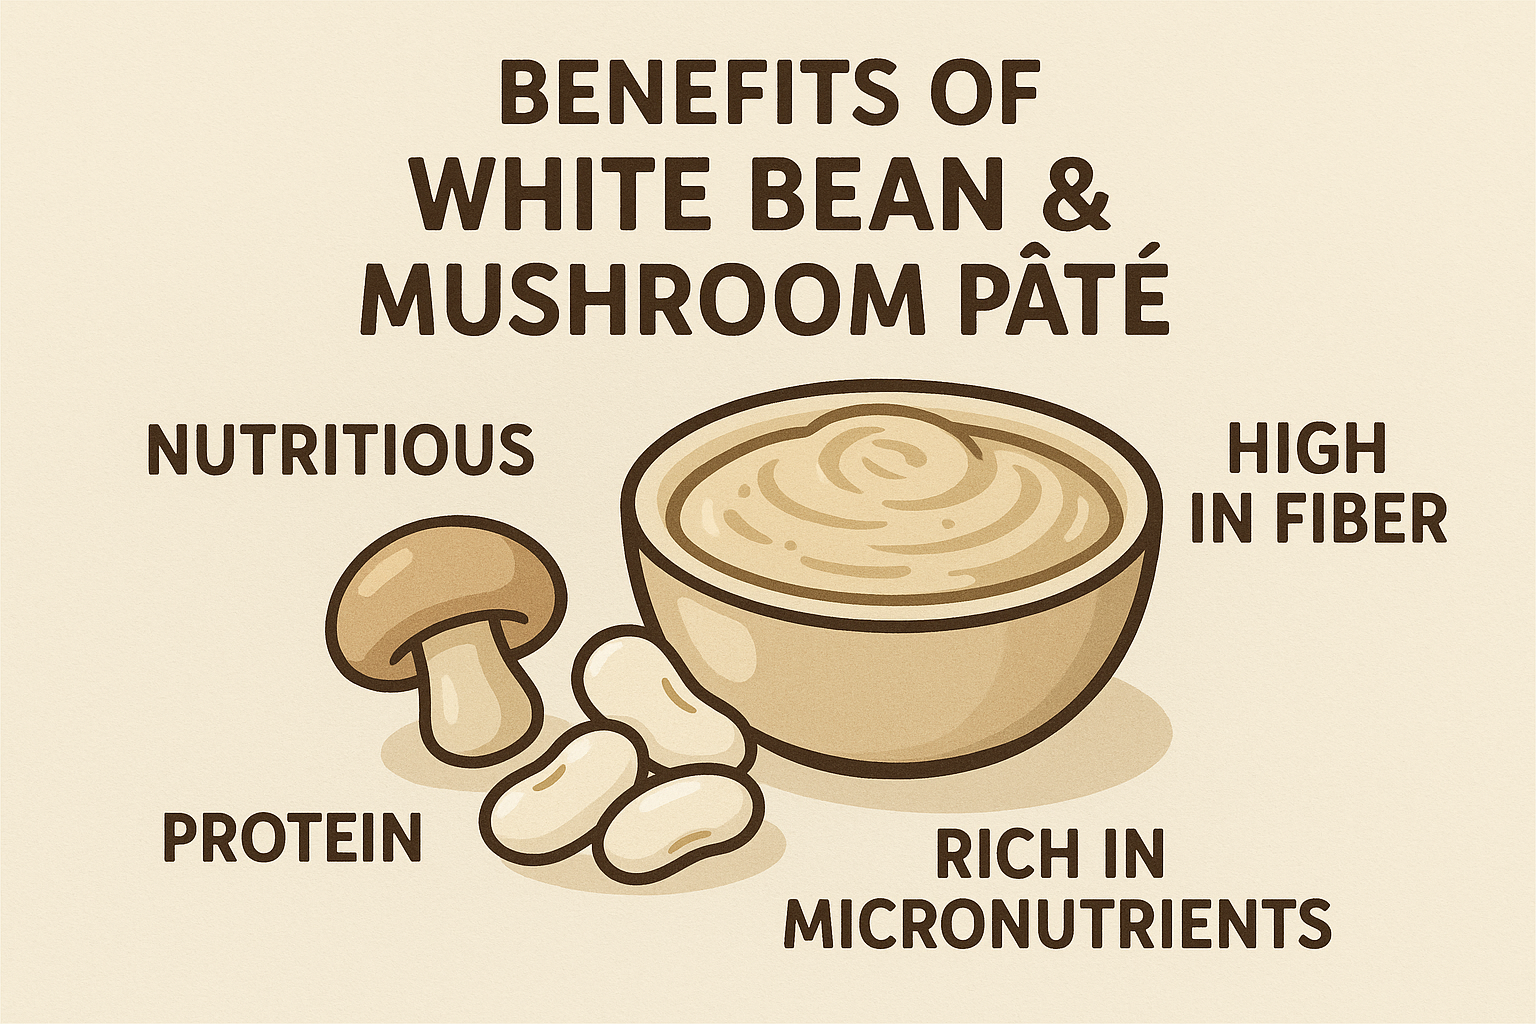
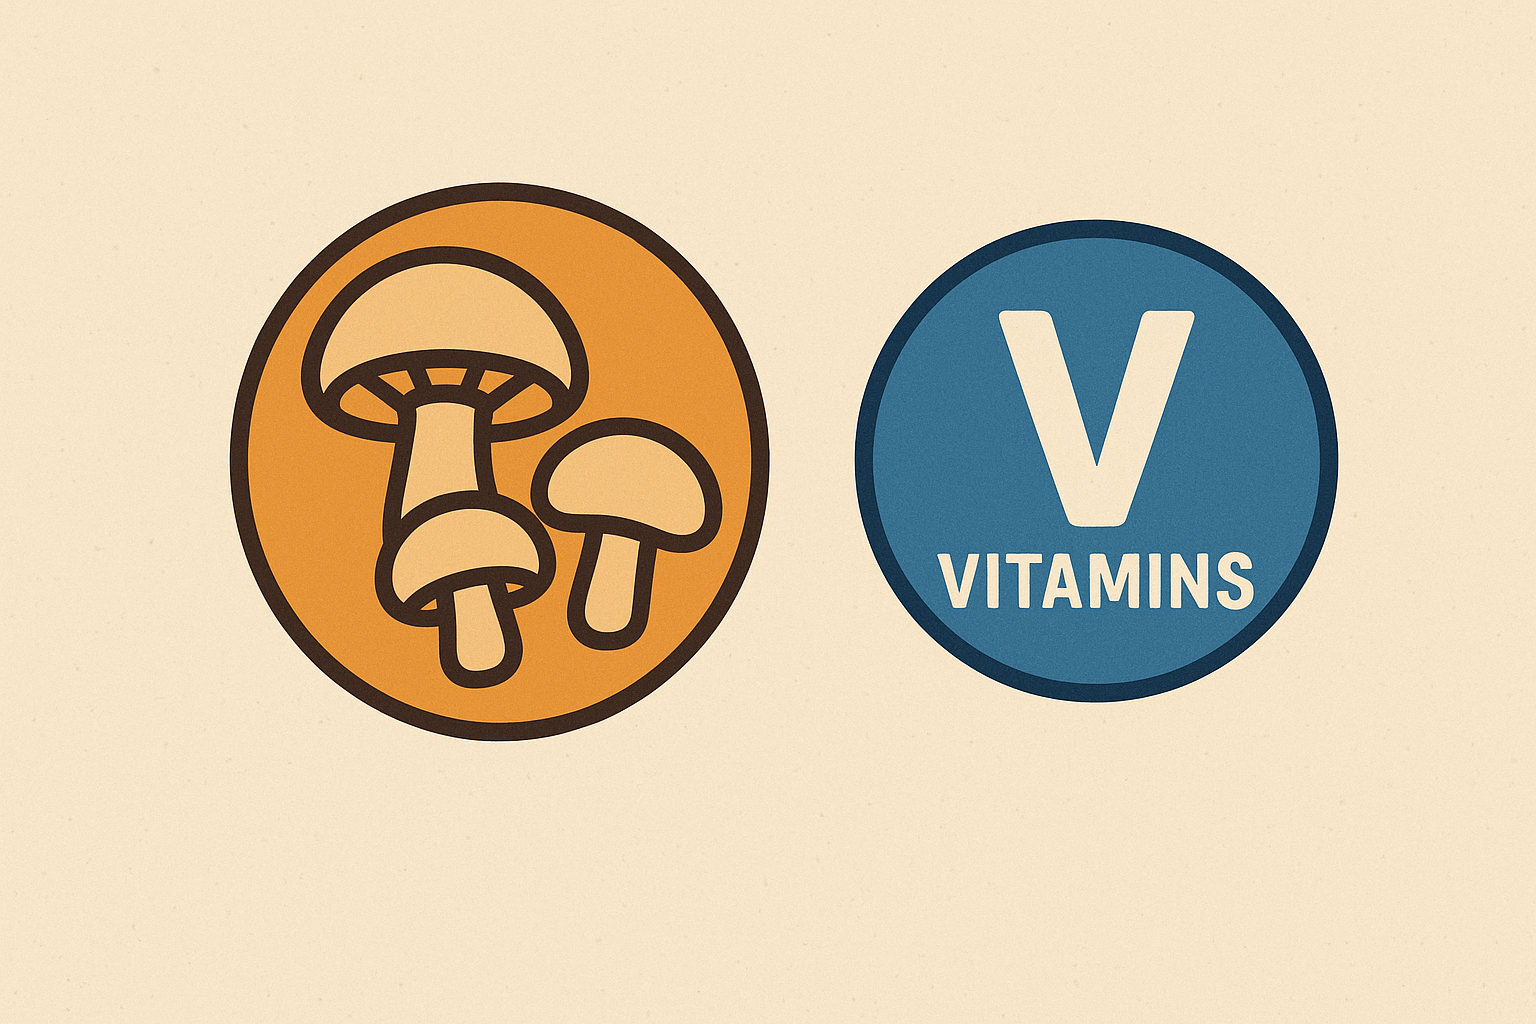
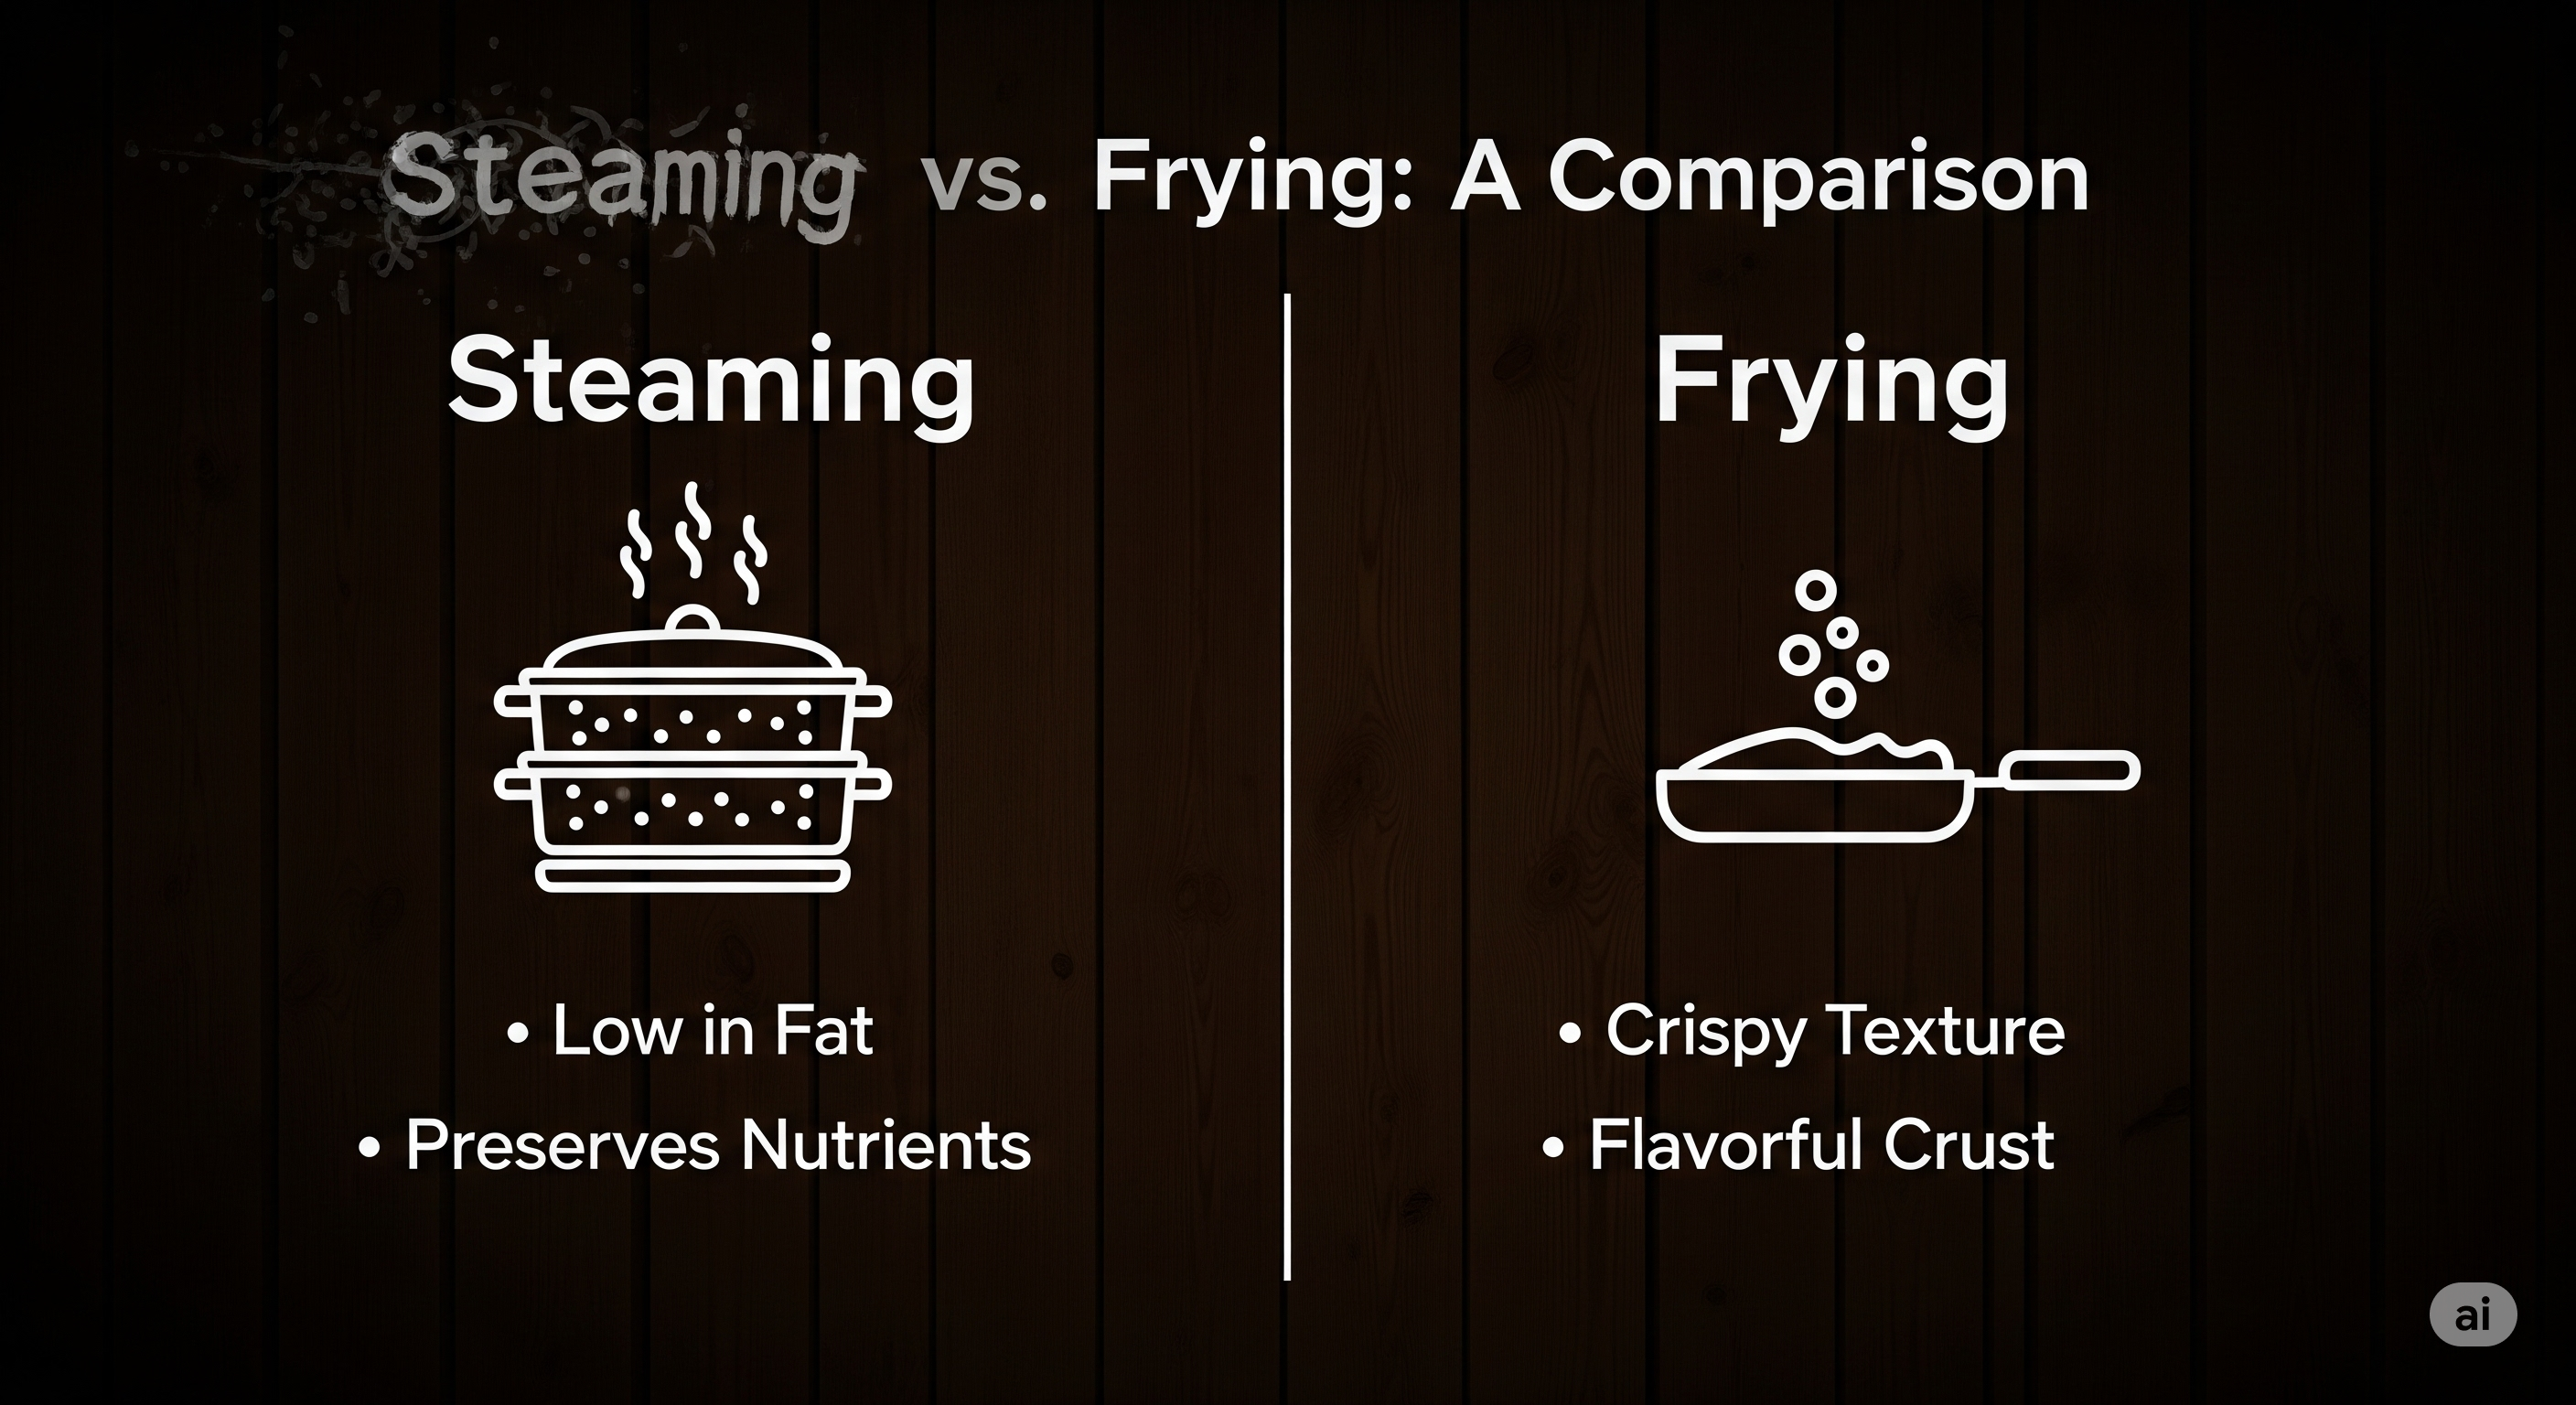
The images show the nutritional benefits gained from using alternatives for breadcrumbs in the first image. Whilst the second image, shows the difference between plain bread and nut & seed.


Creative Variations for breadcrumbs Without Bread

The beauty of making your own healthy breadcrumbs without bread is the endless potential for customization. Here are some ideas to inspire your culinary creativity:

Variation NameKey Ingredients & MethodBest For
Spicy Kick CrumbsAdd ½ – 1 teaspoon of chili powder, smoked paprika, and a pinch of cayenne pepper to the nut/seed blend before pulsing. Adjust to your preferred spice level. You could also include a touch of chipotle powder for a smoky heat.Chicken tenders, fish fillets, spicy veggie burgers
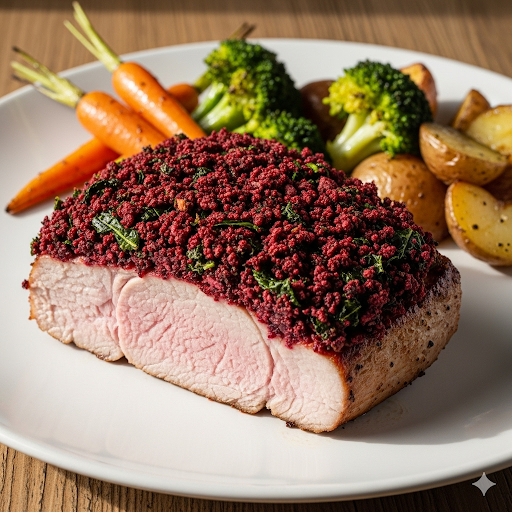
Herb Garden CrumbsIncrease the dried Italian herbs to 2 teaspoons, and consider adding 1 teaspoon of dried parsley and ½ teaspoon of dried rosemary (crushed). For a fresh flavor, incorporate 1 tablespoon of finely chopped fresh parsley after blending.Herb-crusted lamb or chicken, baked vegetables, Mediterranean dishes
Cheesy Garlic CrumbsBlend in ¼ cup of grated Parmesan cheese (or nutritional yeast for a dairy-free option) with the nuts, seeds, and other seasonings. The cheese will melt slightly and create a delicious crust when cooked.Eggplant parmesan, baked chicken, mac and cheese topping
Mediterranean CrumbsInclude 1 teaspoon of dried oregano, ½ teaspoon of dried mint, and the zest of half a lemon. A pinch of sumac can add a lovely tangy note. You can also add 2 tablespoons of finely chopped sun-dried tomatoes (oil-packed, drained) after blending.Fish, roasted vegetables, as a topping for salads or hummus
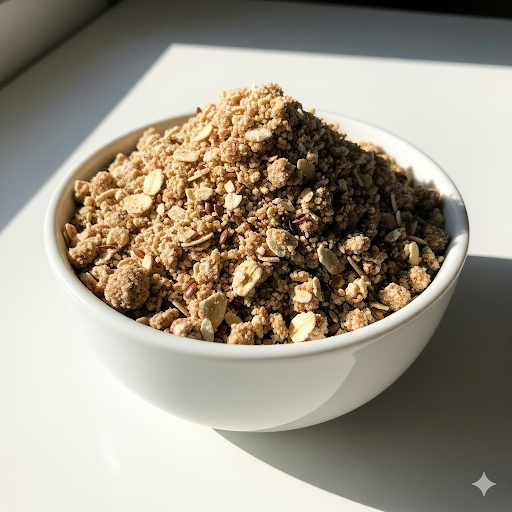
Oat & Flax CrumbsFor a heartier, more budget-friendly option, replace half of the nuts/seeds with rolled oats and 2 tablespoons of ground flaxseed. Toast the oats along with the seeds before processing. This will yield a softer, more traditional breadcrumb-like texture.Meatballs, meatloaf, veggie burgers, as a binding agent
Pork Rind Crumbs (Keto)For a strict keto and incredibly crispy option, pulse plain pork rinds in a food processor or by hand until they reach a breadcrumb-like consistency. Season with salt, pepper, garlic powder, and onion powder. These are very low-carb and absorb less oil than traditional breadcrumbs, making them ideal for frying or air frying.Fried chicken, schnitzel, as a crunchy topping for casseroles
Crispy Cornflake CrumbsCrush unsweetened cornflakes (ensure they are gluten-free if needed) in a bag or food processor. Season with salt, pepper, paprika, and a touch of garlic powder. This offers a light, super crispy texture.Fish sticks, chicken nuggets, fried onion rings
Crushed Nut CrumbsUse cashews, walnuts, or pecans on their own. Toast them lightly, then crush in a food processor or with a rolling pin in a sealable bag.Great for nut-crusted chicken or fish, or as a flavorful binder in a variety of dishes.
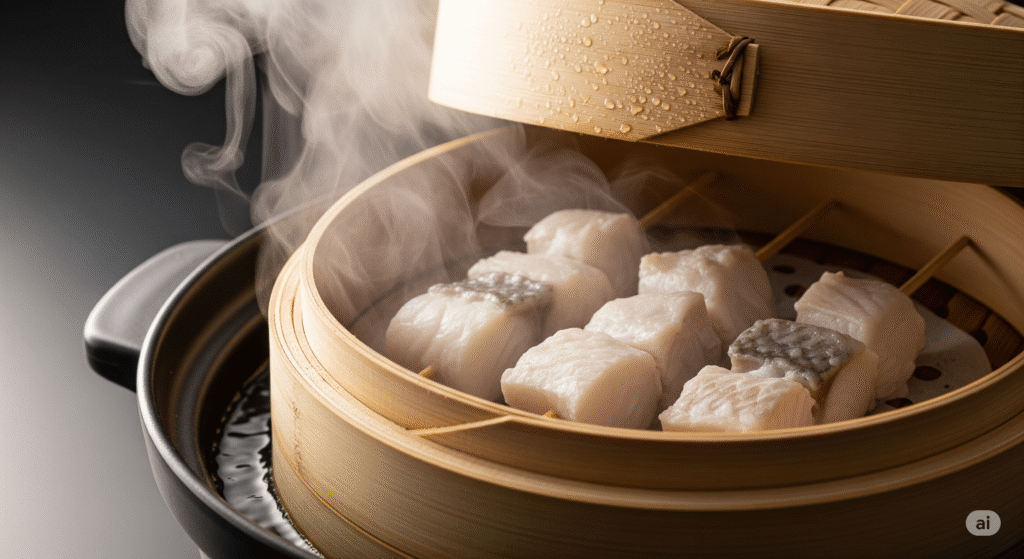
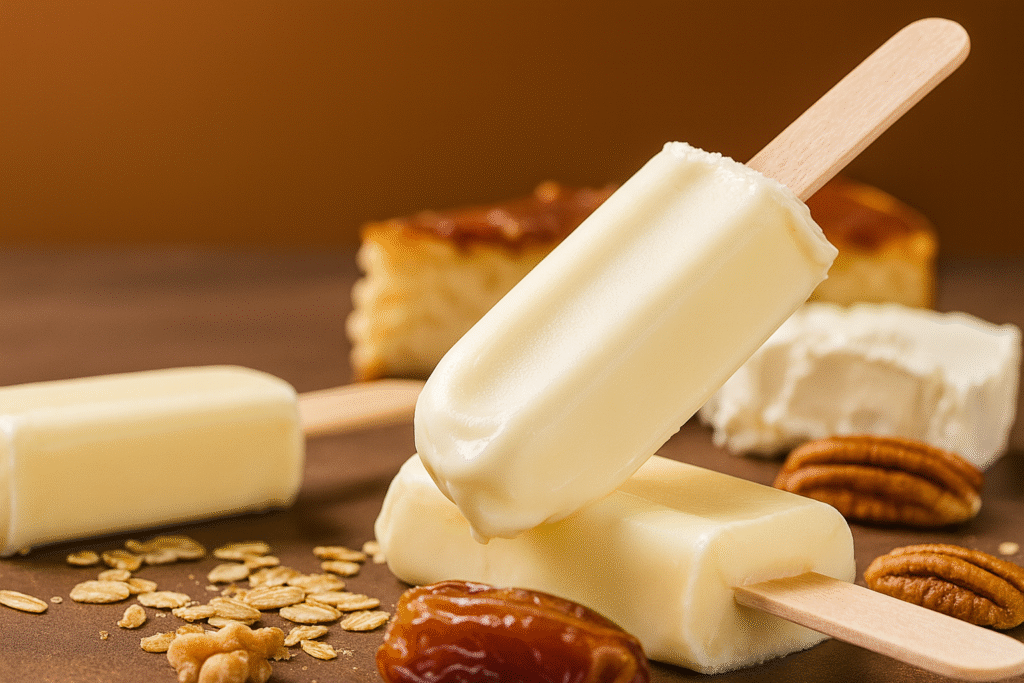
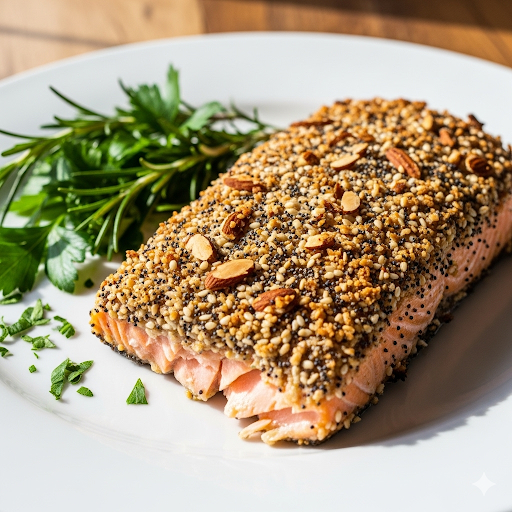
Toasted Coconut FlakesFor a tropical flavor, lightly toast unsweetened coconut flakes in a dry pan or on a baking sheet until golden brown. Once cool, pulse in a food processor for a finer texture.A delicious coating for shrimp or chicken, or a topping for baked sweet potatoes.
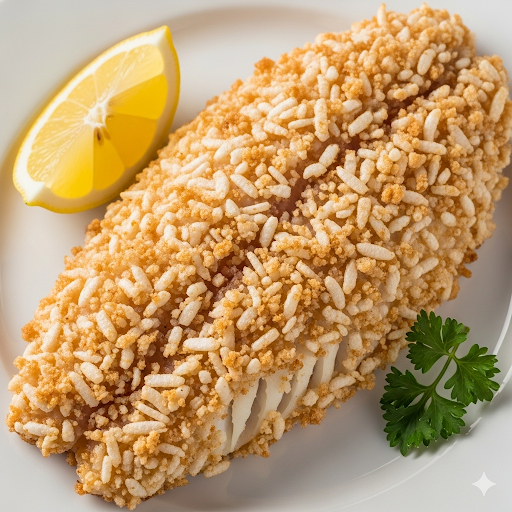
Rice Cake CrumbsCrush plain, unsalted brown rice cakes or brown rice cereal in a sealable bag with a rolling pin. This is an excellent neutral-flavored, gluten-free option.Perfect for light, crispy coatings on fish, or as a binder in veggie burgers.
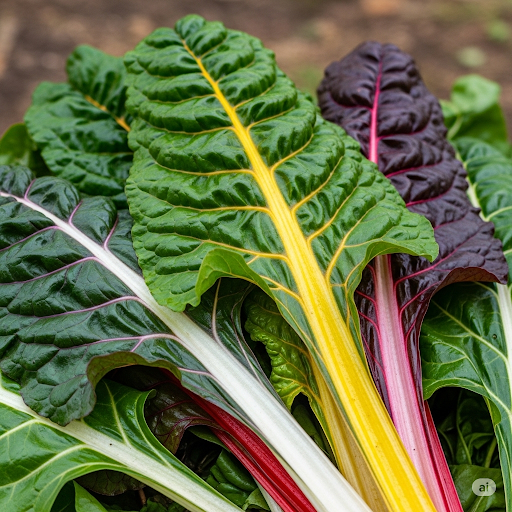
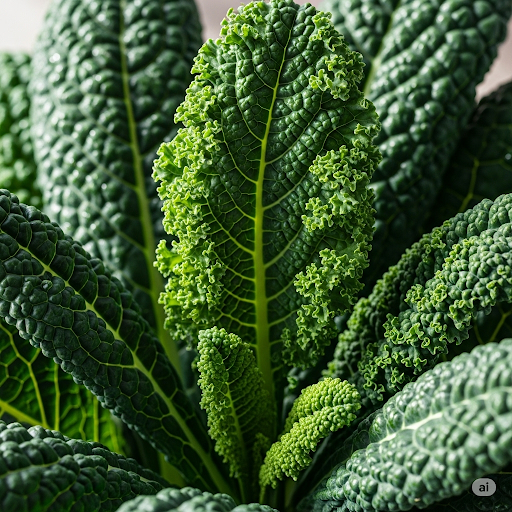
Veggie Chip CrumbsUse baked or dehydrated kale, zucchini, sweet potato, or beet chips. Crush them in a bag or food processor. The natural seasonings on the chips add an extra layer of flavor.A colorful and flavorful coating for chicken or pork, or a crunchy topping for gratins.
Cornmeal or PolentaUse fine-ground cornmeal or polenta directly from the bag. No processing is needed. It provides a hearty, rustic, and naturally gluten-free texture.Ideal for pan-fried fish, or to create a classic southern-style crust on fried green tomatoes.

The gallery shows a fish with a rice cake crumb coating. The second image shows pork with a veggie chip crumb topping. The final images shows pan-fried fish with a cornmeal or polenta crust.


Final Thoughts on Healthy Breadcrumbs Without Bread

Mastering the art of making healthy breadcrumbs without bread is more than just a culinary trick; it’s a step towards more mindful and delicious eating. By embracing these wholesome alternatives, you’re not only enhancing the nutritional profile of your meals but also unlocking a world of new flavors and textures. From the satisfying crunch of toasted nuts and seeds to the hearty appeal of oats or the ingenious use of vegetables, the possibilities are truly endless.

Experiment with different blends, adjust the seasonings to your taste, and discover how these simple changes can transform your everyday cooking. Whether you’re coating chicken, topping a casserole, or binding a veggie burger, these homemade crumbs will add a touch of gourmet goodness that is both healthy and incredibly satisfying. Don’t be afraid to get creative in your kitchen right here in Salford and beyond – your taste buds (and your body) will thank you!


Frequently Asked Questions (FAQs)

Q1: Can I make these breadcrumbs ahead of time? How long do they last?

A1: Absolutely! Making these healthy breadcrumbs without bread ahead of time is a fantastic way to save time during busy weeknights. Store them in an airtight container in the refrigerator for up to 2-3 weeks. For longer storage, you can freeze them for up to 3 months. This prevents the natural oils in the nuts and seeds from going rancid and preserves their fresh flavor. Simply pull them out of the freezer and use them directly from frozen, or let them thaw slightly before using.

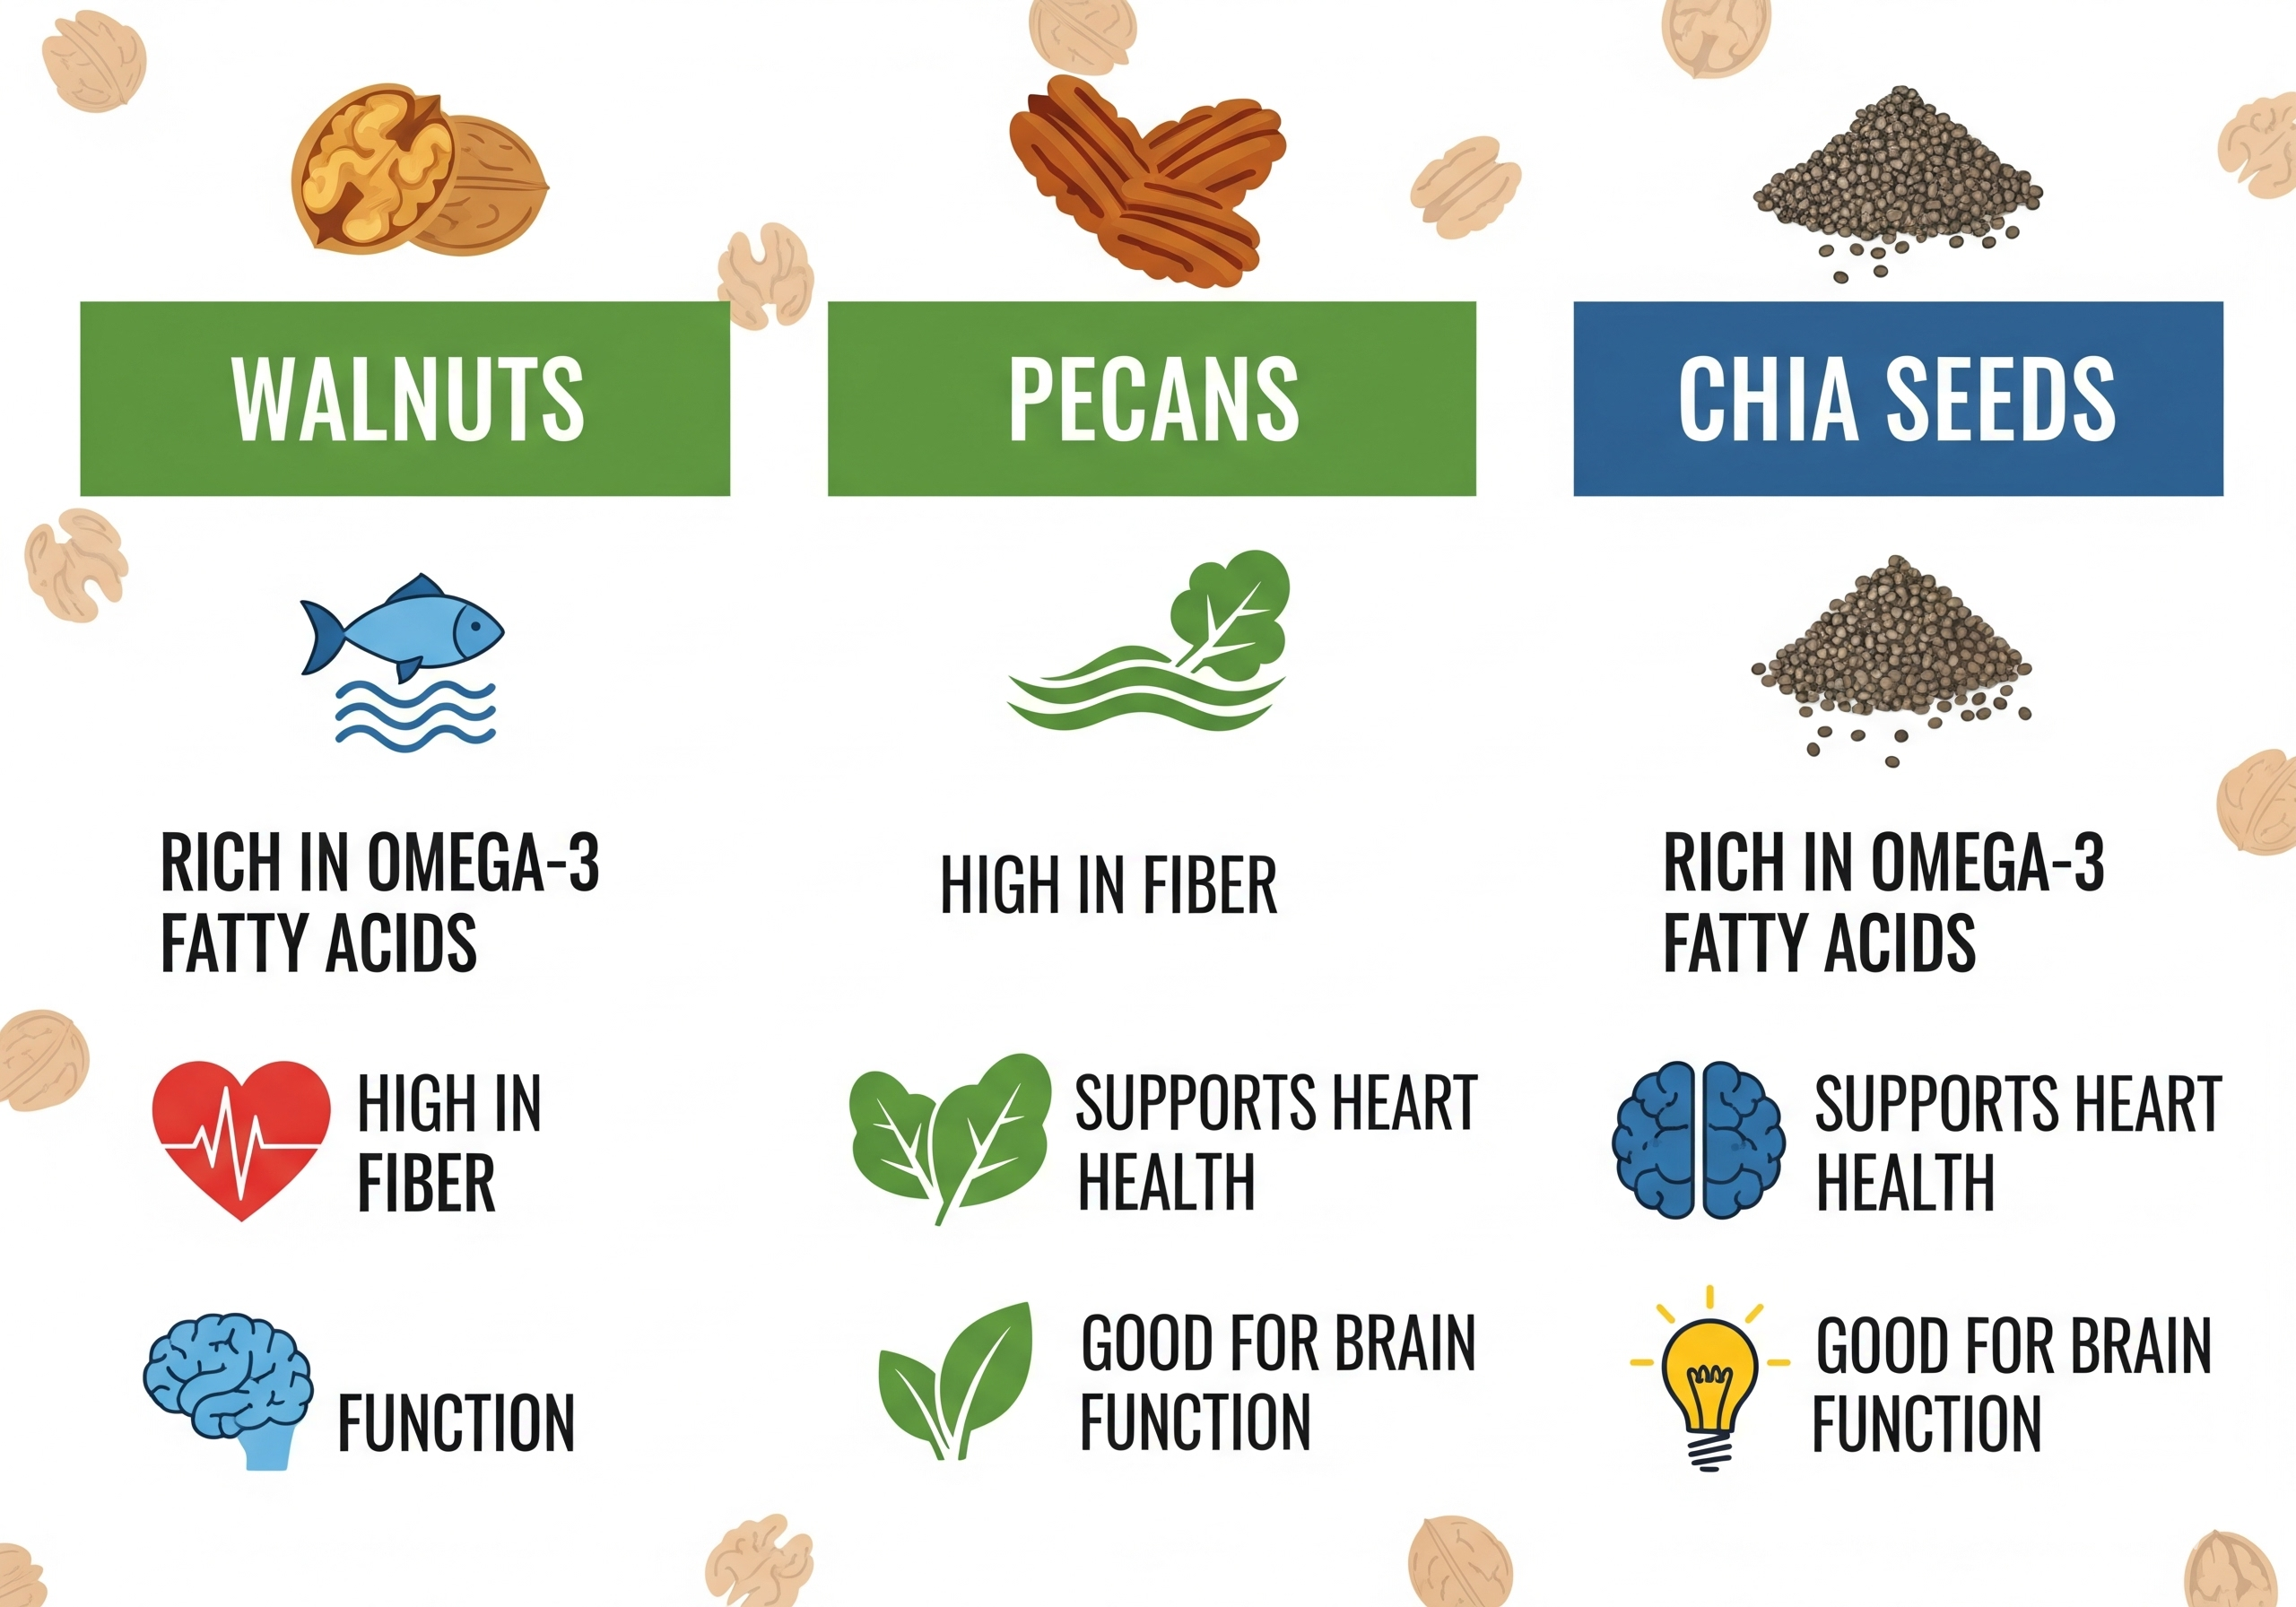
Q2: Can I use different types of nuts or seeds than those listed in the main recipe?

A2: Yes, you can! The beauty of this recipe is its versatility. Feel free to substitute any of the nuts or seeds with your favorites, or whatever you have on hand. Good alternatives include walnuts, pecans, cashews (for a creamier crumb), or even different types of seeds like chia seeds (though they can be very fine). Just ensure they are raw and unsalted for the best control over flavor. Remember that different nuts and seeds have varying oil contents, so you might need to adjust pulsing time slightly to avoid creating a paste. Always aim for that coarse, crumbly texture.


References

  1. Harvard T.H. Chan – Almonds
  2. Mayo Clinic – Nutrition and healthy eating
  3. National Institutes of Health – Omega-3 Fatty Acids

Recent Posts


No Bake – Simple And Delicious Fruit Salad Crumble


This article will guide you in creating a show-stopping Fruit Salad Crumble that requires absolutely no baking. You’ll learn to layer vibrant mango, juicy strawberries, and plump blueberries with a creamy Greek yogurt sauce, topped with a satisfyingly crunchy crumble. This innovative Fruit Salad Crumble is a guilt-free dessert that is as easy to make as it is delightful to eat.


The image shows a Fruit salad crumble with a yoghurt sauce.
Fruit Salad Crumble

A Healthier Twist on a Classic Crumble

Tired of complicated recipes that require a long list of ingredients and hours in the kitchen? This recipe for a no-bake Fruit Salad Crumble is the perfect solution for busy days when you crave something sweet and wholesome. It’s the ideal dish to satisfy your dessert cravings without any of the fuss of a traditional baked crumble. We’re combining the best of a fresh fruit salad with a crunchy, delicious topping for a texture and flavor combination that will surprise and delight you.

What makes this recipe a game-changer is its simplicity. There is no need to preheat the oven or wait for a long baking time. Every single step is quick and straightforward, allowing you to whip up a beautiful and delicious dessert in minutes. It’s perfect for a quick snack, a refreshing dessert after a meal, or even a wholesome breakfast to start your day off right. The best part is that you can have this amazing dessert ready to eat in the time it takes you to chop some fruit.


The gallery shows fresh mangoes, blueberries in a bowl and strawberries.


Layers of Flavor and Texture in Fruit Salad Crumble

This dish is a testament to how simple, fresh ingredients can come together to create something truly extraordinary. The vibrant colors of the fruit aren’t just beautiful; they also signal a wide array of vitamins and nutrients that are fantastic for your body. The creamy yogurt sauce adds a delightful tang and a smooth texture, while the hand-crushed topping provides a satisfying crunch that makes every bite an adventure. It’s a multi-layered experience that feels indulgent but is secretly a powerhouse of health benefits.

One of the great things about this Fruit Salad Crumble is its versatility. You can easily adapt the recipe to use whatever fruits you have on hand, making it a great way to use up ingredients and reduce food waste. Whether you’re a seasoned chef or a complete beginner in the kitchen, the clear, step-by-step instructions will guide you to a perfect result every time. We will show you how to layer these ingredients beautifully, creating a visually stunning dessert that is as delicious as it looks.

Get ready to transform your approach to dessert. This recipe for a no-bake Fruit Salad Crumble is about to become a new favorite in your kitchen. It’s simple, quick, and incredibly tasty. So grab your ingredients, and let’s start creating this refreshing and healthy treat!


The gallery shows a bowl of walnuts, rolled oats and almonds.


No Bake Fruit Salad Crumble: Your Go-To Dessert


Time to Prepare: 15 minutes

Time to Cook/Blend: 0 minutes (no cooking required)

Servings: 4


Nutritional Information

This Fruit Salad Crumble recipe is more than just a sweet treat; it’s a powerhouse of nutrition. The vibrant fruits are a fantastic source of natural sugars, providing a quick energy boost, and are loaded with essential vitamins, minerals, and antioxidants. The Greek yogurt base offers a significant amount of lean protein and beneficial probiotics, which are vital for a healthy gut and digestive system. The crunchy topping provides a mix of healthy fats from the nuts, along with dietary fiber and complex carbohydrates from the oats, which contributes to long-lasting satiety and helps to stabilize blood sugar levels.


Equipment

  • Large mixing bowl
  • Serving bowls or clear glasses for layering
  • Cutting board and sharp knife
  • Small bowl for the topping
  • Fork or rolling pin for crushing
  • Spoon for mixing and serving

Ingredients

For the Fruit Salad

  • 1 ripe mango, peeled and cubed
  • 1 cup strawberries, hulled and sliced
  • 1 cup green grapes, halved
  • 1 cup black grapes, halved
  • 2 ripe bananas, sliced into chunks
  • 1 cup blueberries
  • 1 kiwi, peeled and sliced (for a sour contrast)
  • 1 (15-ounce) can of peaches, drained and diced (optional, for a sweeter fruit option)

For the Greek Yogurt Sauce

  • 2 cups plain Greek yogurt
  • 2 tablespoons honey or maple syrup
  • 1 teaspoon vanilla extract

For the No-Bake Crumble Topping

  • 1/2 cup rolled oats
  • 1/4 cup walnuts
  • 1/4 cup cashews
  • 1/4 cup ground almond
  • 1/2 teaspoon cinnamon
  • 1 tablespoon of melted coconut oil or honey (to bind the topping)


Step-by-Step No-Bake Instructions for Fruit Salad Crumble

Prepare the Fruit Salad

Begin by washing all your fresh fruits thoroughly. Prepare each fruit as described in the ingredients list (cubing the mango, slicing the strawberries and bananas, halving the grapes, and slicing the kiwi). In a large mixing bowl, gently combine all the prepared fruits. If you are using canned fruit, be sure to drain the syrup completely before adding it to the bowl. A quick tip: for the best texture, avoid using frozen fruits. Once thawed, they can become very watery and make the entire dessert soggy, which is not ideal for this recipe.

Make the Greek Yogurt Sauce

In a separate bowl, combine the plain Greek yogurt, honey or maple syrup, and vanilla extract. Use a whisk or a fork to stir the ingredients together until the sauce is smooth and the sweetener is fully dissolved. Taste the sauce and adjust the sweetness if you like. The sauce should have a pleasant creamy and tangy flavor that complements the sweetness of the fruit.

Create the No-Bake Crumble Topping

This is the most fun and creative part of the recipe! In a small bowl, combine the rolled oats, walnuts, cashews, and ground almonds. Using the back of a large spoon or a rolling pin, gently crush the nuts and oats until you have a coarse, crumble-like texture. It should not be a fine powder; you want to leave some larger pieces for a satisfying crunch. Stir in the cinnamon. Now, add the melted coconut oil or honey and mix thoroughly with a fork. This step is crucial for giving the topping the appearance of a baked crumble, making it stick together in clumps rather than just being a powder.

Assemble and Layer

It’s time to put it all together. You can use a large glass bowl for a beautiful centerpiece or individual glasses for single-serving portions. Start by adding a thick layer of your mixed fruit to the bottom of the dish. Next, generously spoon a layer of the prepared Greek yogurt sauce over the fruit, ensuring it covers everything. Finally, sprinkle the no-bake crumble topping evenly and thickly over the yogurt layer, ensuring you get a good, crunchy coating in every spoonful.


The images show fruit salad without the yoghurt sauce or the topping.


Chill and Serve

For the best results, you can serve this dessert immediately to enjoy the freshness of the fruit and the crunchy topping. However, if you want the flavors to meld together even more, you can place the assembled dessert in the refrigerator for about 30 minutes. Serve it chilled, and get ready to enjoy a delicious, no-fuss dessert!


    The Benefits of This Fruit Salad Crumble

    This Fruit Salad Crumble is a prime example of a dish that is both delicious and incredibly good for you. It’s a complete dessert that provides a wide range of health benefits with every bite. The base of the crumble is a celebration of fruits, each bringing its own nutritional gifts. Blueberries and strawberries are packed with antioxidants, which fight free radicals in the body and help reduce inflammation. The mango and kiwi are bursting with Vitamin C, a powerful nutrient essential for a strong immune system and healthy skin. The grapes and bananas provide natural sugars for quick energy, while also offering fiber and potassium.

    Beyond the fruit, the Greek yogurt sauce adds a layer of beneficial nutrients. It is an excellent source of high-quality protein, which helps with muscle repair and keeps you feeling full. Greek yogurt also contains probiotics, which are the “good bacteria” that are vital for maintaining a healthy and balanced gut microbiome. A healthy gut is linked to a stronger immune system, better digestion, and even improved mental clarity.

    Healthy Fats and Fiber for a Better You in This Fruit Salad Crumble

    The no-bake crumble topping further elevates this dessert’s health profile. Walnuts and cashews are a fantastic source of healthy monounsaturated fats, which are known to support heart health by helping to lower bad cholesterol levels. They also contain omega-3 fatty acids, which are essential for brain health and cognitive function. The rolled oats provide a great source of soluble fiber, which aids in digestion and can help stabilize blood sugar levels.

    This dish is a testament to the fact that you can enjoy a sweet treat without compromising your health. By choosing wholesome, nutrient-dense ingredients, you can create a dessert that not only tastes incredible but also actively contributes to your well-being. It is a fantastic alternative to traditional desserts that are often high in refined sugars and unhealthy fats.


    The gallery shows the nutritional benefits of fruit and greek yoghurt.


    Fruit Salad Crumble Variations

    VariationDescription
    Citrus ZingAdd a few tablespoons of orange or grapefruit juice to the yogurt sauce for a sharper, more tangy flavor.
    Tropical ParadiseReplace some of the fruits with pineapple chunks, passion fruit, and shredded coconut for a tropical twist.
    Nut-Free CrunchIf you have nut allergies, you can replace the nuts in the topping with pumpkin seeds and sunflower seeds.
    Spicy KickAdd a pinch of ground ginger or cardamom to the crumble topping for a warm, spicy flavor that complements the fruits.
    Chocolate IndulgenceStir a tablespoon of unsweetened cocoa powder into the yogurt sauce or add some dark chocolate chips to the crumble topping.

    Final Thoughts: A Simple Recipe, Endless Possibilities

    This recipe for a no-bake Fruit Salad Crumble proves that healthy desserts can be both easy and incredibly delicious. It’s a versatile dish that encourages creativity in the kitchen and provides a well-balanced meal in a single bowl. Don’t be afraid to make it your own by experimenting with different fruits or toppings to suit your taste. It’s a fantastic solution for a quick snack or a beautiful dessert for guests. This recipe will inspire you to have fun in the kitchen and enjoy a simple, sweet treat.


    Frequently Asked Questions

    Q: Can I make this a day ahead of time?

    A: You can prepare the fruit salad and the crumble topping separately and store them in airtight containers in the refrigerator. Wait to combine them until just before you plan to serve to ensure the topping remains crunchy and the fruits stay fresh.

    Q: What if I don’t have fresh fruit available?

    A: This recipe is best with fresh fruit, but you can use high-quality canned fruit, such as peaches or pears, as a healthy alternative. Just be sure to drain the syrup completely to avoid an overly sweet or watery dessert. Avoid using frozen fruit, as it can get soggy and watery after thawing, which will not work for this recipe’s texture.


    References

    1. Harvard T.H. Chan – Vegetables & Fruits
    2. Mayo Clinic – Dietary Fiber
    3. American Heart Association – Healthy Eating

    Recent Posts


    Make The Best Pasta salad Ever!


    This article will guide you through creating a unique and flavorful Pasta Salad that is far from ordinary. You’ll learn to combine simple ingredients like pasta, grilled chicken, and fresh vegetables with unexpected additions like sweet mandarin oranges and nutrient-rich chia seeds to create a truly unforgettable meal. The versatility of this Pasta Salad makes it perfect for a busy weeknight dinner or a light, refreshing lunch.


    The image shows a bowl of pasta salad. It contains fruit and nuts plus grilled chicken
    Pasta Salad

    Why This Pasta Salad Is a Game-Changer

    Have you ever found yourself in a food rut, making the same old recipes on repeat? It’s a common challenge for even the most enthusiastic home cooks. This recipe for the best Pasta Salad ever is here to help you break free from that routine. We’re taking a beloved classic and giving it a fresh, modern twist that’s not only delicious but also packed with nutrients and vibrant flavors. This isn’t your grandmother’s creamy macaroni salad; it’s a bright, satisfying, and refreshingly different dish that will become a new favorite in your repertoire.

    What makes this particular Pasta Salad so special is its incredible balance of textures and tastes. Imagine the satisfying chewiness of perfectly cooked pasta, the crispness of fresh green peppers, the sweet pop of cherry tomatoes, and the savory tenderness of grilled chicken. Then, we introduce an unexpected burst of citrus from mandarin oranges, which cuts through the richness of the creamy, herbed dressing. Finally, a sprinkle of nuts and seeds adds a delightful crunch and an extra layer of healthy goodness.

    Low-Effort, High-Reward Cooking

    This dish is also a testament to how simple ingredients can come together to create something truly extraordinary. It’s a low-effort, high-reward meal that’s perfect for meal prepping, packing for a picnic, or serving at your next barbecue. The ingredients are easy to find and the steps are straightforward, making it accessible for cooks of all skill levels. Even if you’ve never made a Pasta Salad before, this recipe will guide you to a perfect result every single time.

    Beyond its amazing flavor, this Pasta Salad is a nutritional powerhouse. It’s a complete meal in a single bowl, offering a fantastic balance of carbohydrates, lean protein, and healthy fats. The vibrant colors in the salad aren’t just beautiful to look at; they’re a sign of the wide array of vitamins and antioxidants you’re getting with every bite. The combination of ingredients supports everything from digestive health to energy levels, making it a smart choice for your body.

    So, get ready to discover a new way to enjoy a classic. This recipe for the best Pasta Salad ever is more than just a meal; it’s an invitation to have fun in the kitchen and nourish your body with every spoonful. Let’s get started on this culinary adventure and prepare a dish that’s sure to impress everyone who tries it.


    The gallery shows cooked pasta, bell peppers and grilled chicken


    Your Best Pasta Salad Recipe


    Time to Prepare: 20 minutes

    Time to Cook/Blend: 15 minutes

    Servings: 6


    Nutritional Information

    This Pasta Salad recipe is more than just tasty; it’s a complete, well-balanced meal. A single serving provides a healthy mix of macronutrients. The pasta serves as a source of complex carbohydrates for sustained energy, while the grilled chicken provides high-quality lean protein, essential for muscle repair and keeping you feeling full.

    The nuts and seeds contribute healthy monounsaturated fats and fiber, which aid in satiety and heart health. The wide variety of fresh vegetables and mandarin oranges are rich in vitamins, minerals, and antioxidants, supporting a robust immune system. The yogurt-based dressing reduces saturated fat compared to traditional mayonnaise-based versions, making it a lighter and healthier choice.


    Equipment

    • Large pot or Dutch oven
    • Large mixing bowl
    • Cutting board and sharp knife
    • Small bowl for dressing
    • Whisk
    • Large colander
    • Spoon or tongs for mixing

    Ingredients

    For the Pasta Salad

    • 1 pound (16 ounces) spiral pasta (rotini or fusilli)
    • 1 large chicken breast (about 8 ounces), grilled and cubed
    • 1 cup cherry tomatoes, halved
    • 1 large green bell pepper, finely diced
    • 1 (11-ounce) can mandarin orange segments, drained
    • 1/2 cup walnuts or pecans, chopped
    • 2 tablespoons chia seeds

    For the Creamy Yogurt Dressing

    • 1 cup plain Greek yogurt
    • 1/2 cup mayonnaise (or a lighter alternative)
    • 2 tablespoons lemon juice
    • 1 tablespoon white wine vinegar
    • 1 tablespoon fresh dill, finely chopped
    • 1 teaspoon onion powder
    • 1 teaspoon garlic powder
    • Salt and black pepper to taste

    The images show the raw ingredients used in this recipe


    Step-by-Step Instructions for the Perfect Pasta Salad

    Cook the Pasta

    Bring a large pot of salted water to a rolling boil over high heat. Add the pasta and stir occasionally to prevent it from sticking together. Cook the pasta according to the package directions, or until it’s al dente (tender but still firm to the bite). Once cooked, drain the pasta thoroughly using a colander. Rinse the pasta under cold water for about 30 seconds to stop the cooking process and cool it down. This is an important step to prevent the salad from becoming gummy. Once rinsed, set it aside to drain completely.

    Prepare the Dressing

    While the pasta is cooking, you can make the delicious creamy dressing. In a medium-sized bowl, whisk together the plain Greek yogurt, mayonnaise, lemon juice, and white wine vinegar until the mixture is smooth and well-combined. Next, stir in the fresh dill, onion powder, and garlic powder. Season generously with salt and black pepper. Whisk everything together one last time to ensure all the spices are fully incorporated. Taste the dressing and adjust the seasonings if needed. Set the dressing aside.

    Combine the Salad Ingredients

    Once the pasta has cooled and drained, transfer it to a large mixing bowl. Add the cubed grilled chicken, halved cherry tomatoes, and finely diced green bell pepper to the bowl with the pasta. Carefully fold the ingredients together using a spoon or tongs to ensure an even mix.


    Add the Dressing and Finishes

    Pour the prepared creamy yogurt dressing over the pasta and vegetable mixture. Gently toss everything together until all the ingredients are evenly coated in the dressing. Next, gently fold in the drained mandarin orange segments, chopped walnuts or pecans, and the two tablespoons of chia seeds. These delicate ingredients should be added last to prevent them from breaking apart.

    Chill and Serve

    For the best flavor, cover the bowl and place it in the refrigerator to chill for at least 30 minutes. This chilling time allows the flavors to meld together and the dressing to absorb into the pasta, making it even more delicious. Give the salad one last toss before serving to redistribute the dressing and ingredients.


      The Benefits of This Pasta Salad

      This Pasta Salad is not just a tasty treat; it’s a foundational dish for a balanced diet. Its strength lies in its perfectly calibrated mix of macronutrients. The complex carbohydrates from the pasta provide a steady release of energy, preventing the sharp peaks and subsequent crashes that come from simple sugars. This is beautifully complemented by the lean protein from the grilled chicken and the healthy fats from the nuts and seeds.

      Together, this trio keeps you feeling full and satisfied for longer, which is a key factor in managing appetite and supporting long-term weight management goals. It’s a satisfying meal that won’t leave you searching for snacks an hour later.

      The health-conscious choices in this recipe elevate it far beyond a typical side dish. The addition of nuts and seeds, like the walnuts, pecans, and chia seeds, provides a significant boost of heart-healthy monounsaturated fats and essential omega-3 fatty acids.

      These healthy fats are crucial for brain function, helping to improve memory and cognitive health. The same ingredients are also packed with fiber, which is a powerful ally for your digestive system. It aids in promoting regular bowel movements and can even help lower LDL (“bad”) cholesterol, actively contributing to your cardiovascular health.

      A Treasure Trove of Vitamins and Antioxidants

      The colorful array of vegetables and citrus is more than just a feast for the eyes; it’s a treasure trove of micronutrients. The bright red cherry tomatoes are a fantastic source of lycopene, a potent antioxidant known for its ability to fight free radicals and support a healthy heart.

      Meanwhile, the green peppers and juicy mandarin oranges are loaded with Vitamin C, a powerhouse nutrient that is vital for a strong immune system and the production of collagen, which keeps your skin looking radiant and youthful. These ingredients work in harmony to reduce inflammation throughout the body and protect your cells from damage.

      Finally, this salad is an excellent food for your gut microbiome. The Greek yogurt used as the base for the dressing contains live and active cultures, which are beneficial probiotics. These good bacteria are essential for maintaining a balanced and healthy gut.

      The fiber from the vegetables, nuts, and seeds acts as a prebiotic, feeding these beneficial bacteria and helping them thrive. A healthy gut is linked to a cascade of positive effects, from improved digestion and immunity to better mood regulation. Eating this Pasta Salad is a simple yet effective way to nourish your body from the inside out, making it a true investment in your holistic well-being.


      The gallery shows the nutritional benefits of chicken, the vegetables and nuts used in this recipe


      Pasta Salad Variations

      VariationDescription
      Spicy KickAdd a pinch of red pepper flakes or a finely diced jalapeño to the dressing for a touch of heat.
      Mediterranean TwistReplace the grilled chicken with chickpeas, add crumbled feta cheese, and use cucumber and red onion instead of bell peppers.
      Herb GardenExperiment with different fresh herbs. Try adding chopped fresh basil, mint, or cilantro for a new flavor profile.
      Seafood SwapSubstitute the chicken with cooked shrimp or flaked canned tuna for a seafood-inspired version.
      Vegetable MedleyUse a different mix of vegetables like steamed broccoli florets, corn, shredded carrots, or black olives to suit your taste.

      Final Thoughts: A Simple Recipe, Endless Possibilities

      This recipe for the best Pasta Salad ever proves that healthy eating can be both easy and incredibly flavorful. It’s a versatile dish that encourages creativity in the kitchen and provides a well-balanced meal in a single bowl. Don’t be afraid to make it your own by experimenting with different vegetables, proteins, or dressings. You can take this basic recipe as a guide and adapt it to your preferences and whatever ingredients you have on hand. It’s a fantastic solution for meal prepping, ensuring you have a delicious and nourishing meal ready to go throughout the week.


      The images shows someone enjoying the cooked pasta salad outside and a close up look at the pasta salad.


      Frequently Asked Questions

      Q: Can I use a different type of pasta?

      A: Yes, absolutely! Short pasta shapes work best for salads as they hold the dressing and other ingredients well. Penne, farfalle (bow tie), or orecchiette are all great substitutes for the rotini pasta.

      Q: How long can I store this pasta salad?

      A: This salad can be stored in an airtight container in the refrigerator for up to 3-4 days. The pasta will absorb some of the dressing over time, so you might want to add a little extra yogurt or lemon juice before serving on subsequent days to freshen it up.


      References

      1. Harvard T.H. Chan – Protein
      2. Mayo Clinic – Healthy Diet
      3. American Heart Association –Diet and Lifestyle

      Recent Posts


      Make This Easy Cabbage Omelette Rolls with Veg


      This article explores the simplicity and health benefits of making delicious Cabbage Omelette Rolls at home. Whether you’re a seasoned cook or a beginner, you’ll discover how easy and rewarding it is to create this nutritious meal for your family. The versatility of these Cabbage Omelette Rolls with a vibrant carrot sauce makes a wholesome meal and perfect addition to any healthy eating plan.


      The image shows Cabbage Omelette Rolls on a plate With a bowl of carrot sauce on the side.
      Cabbage Omelette Rolls

      Easy and Delicious Cabbage Omelette Rolls: A New Twist on Healthy Eating

      Discover a simple, healthy recipe that’s as delicious as it is easy to make. These savory Cabbage Omelette Rolls are a game-changer for anyone looking for a quick and nutritious meal. They’re perfect for breakfast, lunch, or a light dinner.

      Tired of the same old boring meals? This recipe offers a refreshing and innovative way to incorporate more vegetables into your diet. The gentle crunch of the cabbage paired with the soft, fluffy egg creates a delightful texture, while the vibrant filling of kidney beans, bell peppers, and carrots bursts with flavor. It’s a satisfying dish that won’t weigh you down.


      The images show some of the equipment used and the cooking of the Omelette.


      A Nutritional Powerhouse

      One of the best things about these Cabbage Omelette Rolls is their incredible versatility. You can easily adapt the recipe to use whatever vegetables you have on hand, making it a great way to reduce food waste. Whether you’re a seasoned chef or a complete beginner, the clear, step-by-step instructions will guide you to a perfect result every time.

      This dish isn’t just a treat for your taste buds; it’s a feast for your body. Cabbage, a cruciferous vegetable, is packed with vitamins and minerals, while eggs provide high-quality protein. The combination of these ingredients makes for a balanced meal that supports your overall well-being. Plus, it’s a fantastic option for meal prep, so you can have healthy meals ready to go throughout the week.

      Get ready to transform your approach to healthy eating. These Cabbage Omelette Rolls are about to become a new favorite in your kitchen. They’re simple, quick, and incredibly tasty. So grab your ingredients, and let’s get cooking!


      The images show omelette being eaten and meal prepping the omelette.


      Cabbage Omelette Rolls: A Healthy and Quick Meal


      Time to Prepare: 15 minutes

      Time to Cook/Blend: 20 minutes

      Servings: 3 rolls


      Nutritional Information for Cabbage Omelette Rolls

      Each serving of these delicious rolls is a powerhouse of nutrients. A single Cabbage Omelette Roll typically contains about 250-300 calories, depending on the exact ingredients and portion sizes. They are an excellent source of protein from the eggs and kidney beans, which helps with muscle repair and keeps you feeling full. You’ll also get a significant amount of dietary fiber from the cabbage and other vegetables, which aids in digestion. The colorful mix of bell peppers and carrots provides essential vitamins A and C, crucial for immune function and skin health. This recipe is also naturally low in unhealthy fats and is a great way to boost your daily vegetable intake.


      The gallery shows images of the ingredients for the omelette, sauce and the filling.


      Ingredients

      For the Cabbage Omelette Rolls

      • 2 cups finely shredded green cabbage
      • 6 large eggs
      • 1/2 teaspoon salt
      • 1/4 teaspoon black pepper
      • 1 tablespoon olive oil or avocado oil

      For the Filling

      • 1 can (15 ounces) kidney beans, rinsed and drained
      • 1/2 red bell pepper, finely diced
      • 1/2 green bell pepper, finely diced
      • 1 small carrot, finely diced
      • 1/4 cup chopped fresh cilantro or parsley
      • 1 clove garlic, minced
      • 1/2 teaspoon cumin powder
      • 1/4 teaspoon chili powder (optional)
      • Salt and pepper to taste

      For the Carrot Dipping Sauce

      • 1 cup chopped carrots
      • 1/2 cup vegetable broth
      • 1/4 cup plain Greek yogurt (or a non-dairy alternative)
      • 1 tablespoon lemon juice
      • 1/2 teaspoon smoked paprika
      • Pinch of salt

      The images shows some of the equipment used in this recipe including an Air fryer (optional)


      Equipment

      • Large non-stick skillet
      • Medium-sized mixing bowl
      • Small saucepan (for the sauce)
      • Blender or food processor (for the sauce)
      • Cutting board and sharp knife
      • Spatula

      Step-by-Step Cabbage Omelette Roll Instructions

      Prepare the Filling

      Start by preparing the vibrant filling. In a medium bowl, combine the rinsed and drained kidney beans, finely diced red and green bell peppers, and the finely diced carrot. Add the minced garlic, cumin powder, chili powder (if using), and chopped cilantro or parsley. Gently stir everything together until well combined. Season with salt and pepper to your liking. Set this mixture aside while you prepare the omelettes.

      Make the Cabbage Omelette Batter

      In a separate medium bowl, crack the six large eggs. Whisk them vigorously until the yolks and whites are fully combined and the mixture is light and frothy. Stir in the finely shredded cabbage, salt, and black pepper. The cabbage may look like a lot at first, but it will cook down and integrate perfectly with the egg.

      Cook the Omelettes

      Heat the tablespoon of olive oil in a large non-stick skillet over medium-low heat. Once the pan is warm, pour about one-third of the cabbage and egg mixture into the pan. Use the back of a spatula to spread the mixture out evenly into a thin, round layer. Cook for 2-3 minutes, or until the edges begin to set and the top is no longer runny. You can gently lift an edge with your spatula to check for doneness.

      Add the Filling

      Once the omelette is mostly cooked but still slightly soft on top, carefully spoon one-third of the prepared bean and vegetable filling across the center of the omelette, creating a line from one side to the other. Be careful not to overfill it.


      Roll the Omelette

      Using your spatula, carefully lift one edge of the omelette and begin to roll it tightly over the filling. Continue to roll it until you have a neat, tight roll. Gently press down on the roll to seal it. Cook for another minute to ensure it’s cooked through and the roll holds its shape. Transfer the finished roll to a plate. Repeat this process with the remaining batter and filling to create the other two omelette rolls.

      Alternative Cooking Methods

      If you prefer a firmer texture or a crispier finish, you can also bake or air fry the rolls. After preparing the rolls in the skillet as described above, you can finish them in an air fryer at 350°F (175°C) for 3-5 minutes, or on a baking sheet in a preheated oven at 400°F (200°C) for 5-7 minutes. This is a great way to add a nice golden-brown exterior.


      How to Make the Carrot Dipping Sauce

      1. Cook the Carrots: In a small saucepan, combine the chopped carrots and vegetable broth. Bring the mixture to a boil, then reduce the heat and let it simmer for about 10-15 minutes, or until the carrots are very tender when pierced with a fork.
      2. Blend the Sauce: Carefully transfer the cooked carrots and any remaining broth into a blender or food processor. Add the plain Greek yogurt, lemon juice, and smoked paprika. Blend on high until the sauce is completely smooth and creamy. If the sauce is too thick, you can add a little more broth or water, a tablespoon at a time, until it reaches your desired consistency.
      3. Serve: Season the sauce with a pinch of salt to enhance the flavors. Serve the warm Cabbage Omelette Rolls alongside the creamy carrot dipping sauce. The sweet and tangy sauce perfectly complements the savory rolls.

      The Benefits of Cabbage Omelette Rolls

      These Cabbage Omelette Rolls are more than just a tasty meal—they’re a health-conscious choice that offers numerous benefits, making them a fantastic addition to your diet. The star of this dish, cabbage, is a cruciferous powerhouse. It’s an excellent source of Vitamin C, a powerful antioxidant that helps protect your cells from damage, supports a strong immune system, and is crucial for healthy skin. Cabbage also provides a significant amount of Vitamin K, which is essential for proper blood clotting and bone health.

      Beyond its vitamin content, cabbage is rich in dietary fiber. This is a major plus for digestive health, as fiber helps promote regularity and can prevent constipation. A high-fiber diet is also linked to a reduced risk of chronic diseases such as heart disease and type 2 diabetes. The vegetables in the filling, like bell peppers and carrots, contribute a vibrant array of nutrients. Red and green bell peppers are loaded with Vitamin A and C, while carrots are well-known for their high beta-carotene content, which the body converts to Vitamin A. These nutrients are vital for maintaining good vision, supporting immune function, and fighting inflammation.


      The gallery shows the Nutritional benefits of Cabbage, Carotts and Eggs.


      Sustained Energy and Satiety With Cabbage Omelette Rolls

      The eggs in this recipe provide a complete and high-quality source of protein. Protein is a fundamental macronutrient necessary for building and repairing tissues, making enzymes and hormones, and providing sustained energy. The Cabbage Omelette Rolls will keep you feeling full and satisfied for longer, helping to prevent those mid-day hunger pangs and supporting weight management goals. The kidney beans in the filling further boost the protein and fiber content, making this a well-rounded and satiating meal.

      Furthermore, this dish is naturally low in carbohydrates and gluten-free, making it a great option for those following specific dietary plans. The balance of protein, fiber, and healthy fats from the olive oil contributes to stable blood sugar levels, preventing energy crashes. By choosing a wholesome, homemade meal like these Cabbage Omelette Rolls, you can be confident that you are fueling your body with the nutrients it needs to thrive. It’s a simple, delicious, and effective way to prioritize your health without sacrificing flavor.


      Cabbage Omelette Roll Variations

      VariationDescription
      Protein Power-UpAdd cooked, shredded chicken, turkey, or tofu to the filling for an extra boost of protein.
      Spicy KickMix in some chopped jalapeños or a dash of hot sauce to the filling for those who love a bit of heat.
      Cheesy GoodnessSprinkle some shredded cheese (cheddar, mozzarella, or feta) over the filling before rolling the omelette.
      Herb GardenExperiment with different herbs like fresh dill, mint, or basil to create a new flavor profile.
      Vegan AlternativeSubstitute the eggs with a chickpea flour or plant-based egg substitute batter, and use a vegan yogurt for the sauce.
      Morning GloryUse breakfast sausage, crispy bacon bits, or a mix of sautéed mushrooms and spinach for a breakfast-themed roll.

      The images show the different variations of this recipe. The first is made with chicken and the second is breakfast sausage.


      Final Thoughts: A Simple Recipe for Cabbage Omelette Rolls

      Making these Cabbage Omelette Rolls is a simple yet effective way to introduce a nutritious and delicious meal into your routine. They are perfect for a busy weeknight or a lazy Sunday brunch. The combination of easy preparation and fantastic flavor makes this recipe a true winner. Don’t be afraid to experiment with the filling ingredients to make it your own. Start with this recipe and let your creativity take over. You’ll be amazed at how a few simple ingredients can create such a satisfying and healthy dish.


      Frequently Asked Questions

      Q: Can I make these ahead of time for meal prep?

      A: Yes, these rolls are perfect for meal prep! You can cook the rolls ahead of time and store them in an airtight container in the refrigerator for up to 3 days. When you’re ready to eat, you can reheat them in a microwave, a pan, or an air fryer for a few minutes.

      Q: How can I prevent the omelettes from sticking to the pan?

      A: Using a good quality non-stick skillet is key. Make sure the pan is properly preheated and lightly oiled before pouring in the egg mixture. Cooking over a medium-low heat also helps prevent sticking and ensures the omelette cooks evenly without burning.


      References

      1. Harvard T.H. Chan – Cabbage
      2. Mayo Clinic – Dietary Fiber
      3. American Heart Association Protein

      Recent Posts


      Make This Simple Quinoa And White Bean Fritters


      Welcome to a recipe that redefines simple and delicious eating. These quinoa and white bean fritters are not only easy to make but also packed with flavor and nutrition. Whether you’re a seasoned chef or a kitchen novice, this recipe is designed to be a delightful experience from start to finish.


      The image shows Quinoa and White bean fritters with a black bean and date sauce plus a tahini sauce.
      Quinao And White Bean Fritters

      The Secret to Simple, Wholesome Cooking

      Cooking delicious and healthy meals from scratch doesn’t have to be a complicated affair. In today’s fast-paced world, many of us are searching for recipes that are both nourishing and easy to prepare, allowing us to enjoy homemade goodness without spending hours in the kitchen. The key lies in using simple, accessible ingredients and smart cooking techniques that maximize flavor and nutrition with minimal effort.

      This recipe for Simple Quinoa and White Bean Fritters is a perfect example of this philosophy in action. It transforms humble pantry staples—quinoa and white beans—into a truly spectacular and satisfying dish. Quinoa, a complete protein, and white beans, rich in fiber and plant-based protein, form the foundation of these fritters. They are bound together with a few simple seasonings and then pan-fried to a golden-brown crisp, creating a delightful texture that’s crunchy on the outside and tender on the inside.


      The image shows cooked quinoa on a plate and cooked white beans


      Unlocking Flavor with Pantry Staples

      What truly elevates this dish, however, is the accompanying Black Bean and Date Sauce. This sweet and savory sauce is not just a tasty complement; it’s a flavor revelation. The rich, earthy notes of the black beans are perfectly balanced by the natural sweetness of dates, creating a unique condiment that pairs beautifully with the mild flavor of the fritters. This sauce is a testament to the fact that a few simple ingredients can create a profound impact on a dish, turning something simple into something extraordinary.

      This recipe is also incredibly versatile and adaptable to your personal taste and dietary needs. Whether you’re looking for a quick weeknight dinner, a healthy lunch option, or a crowd-pleasing appetizer, these fritters fit the bill. The recipe can be customized with different herbs, spices, or vegetables to suit your palate. It’s a testament to how creative and flexible plant-based cooking can be, proving that wholesome food is anything but boring.

      So, get ready to roll up your sleeves and discover the joy of making these Simple Quinoa and White Bean Fritters. This is more than just a recipe; it’s an invitation to embrace simple, wholesome cooking that nourishes both your body and your soul. Let’s dive in and create something truly delicious together.


      The images show dates with stones and black beans on a plate


      The Quick Quinoa and White Bean Fritters Recipe

      Servings: 4

      Time to Prepare: 15 minutes

      Time to Cook/Blend: 20 minutes


      Nutritional Information

      (Please note: Nutritional values are approximate and may vary based on exact ingredients and portion sizes.)

      • Calories: 350-400 kcal
      • Protein: 15g
      • Carbohydrates: 50g
      • Fiber: 10g
      • Fat: 10g
      • Sodium: 400mg

      The gallery shows some of the equipment used for this recipe: Blender, colander, measuring spoons, large bowl and air fryer.


      Essential Equipment

      • A large mixing bowl
      • A sturdy fork or potato masher
      • A large non-stick skillet or frying pan
      • Measuring cups and spoons
      • A blender or food processor (for the sauce)
      • A large metal colander for rinsing
      • A large slotted spoon or spatula for flipping
      • A large plate lined with paper towels
      • Air fryer

      Ingredients for the Fritters

      • 1 cup cooked quinoa (cooked and cooled)
      • 1 can (15 oz or 425g) cannellini or great northern white beans, rinsed and drained
      • 1/2 small onion, finely diced
      • 2 cloves garlic, minced
      • 1/4 cup finely chopped fresh parsley
      • 1 large egg (or 1 flax egg for a vegan option)
      • 1/4 cup all-purpose flour (or a gluten-free flour blend)
      • 1/2 teaspoon smoked paprika
      • 1/2 teaspoon ground cumin
      • Salt and black pepper to taste
      • 2 tablespoons olive oil for frying

      The gallery shows the dry ingredients used for this recipe.


      Ingredients for the Black Bean and Date Sauce

      • 1 cup cooked black beans (or 1/2 can, 7.5 oz or 215g), rinsed and drained
      • 1/2 cup pitted dates (Medjool or regular)
      • 1/4 cup water
      • 1 tablespoon fresh lemon juice
      • 1 teaspoon olive oil
      • Salt to taste

      Step-by-Step Instructions for Quinoa And White Bean Fritters

      Prepare Your Base

      In a large mixing bowl, start by mashing the rinsed and drained white beans with a fork or a potato masher. Don’t worry about getting them perfectly smooth; a little texture is great for the fritters. You want a chunky, mashed consistency. Once mashed, add the cooled, cooked quinoa to the bowl. Stir them together until they are well combined.

      Add Flavor

      Next, add the finely diced onion, minced garlic, and chopped fresh parsley to the bowl. Mix everything thoroughly. The parsley will add a fresh, vibrant green color and a clean taste to the fritters.

      Bind the Fritters

      In a separate small bowl, lightly whisk the egg. Pour the whisked egg over the quinoa and bean mixture. Sprinkle in the flour, smoked paprika, ground cumin, a good pinch of salt, and a generous crack of black pepper. Gently fold all the ingredients together with a spatula or your hands until everything is evenly combined. The mixture should hold together well when you form it into a patty. If it feels too wet, add another tablespoon of flour.

      Form and Fry

      Heat the olive oil in a large non-stick skillet over medium heat. While the oil is heating, scoop up a portion of the mixture (about 1/4 cup) and use your hands to form it into a patty, about 1/2 inch thick. Carefully place the fritters into the hot skillet, being careful not to overcrowd the pan. Work in batches if necessary.

      Cook to Perfection

      Cook the fritters for 3–5 minutes on the first side, or until they are a deep, golden-brown color and a crispy crust has formed. Flip them gently using a spatula and cook for another 3–4 minutes on the other side, until they are also golden and cooked through. The inside will be tender and soft.

      Make the Sauce

      While the fritters are cooking, prepare the Black Bean and Date Sauce. In a blender or food processor, combine the cooked black beans, pitted dates, water, lemon juice, and olive oil. Blend on high speed until the sauce is completely smooth and creamy. Season with a pinch of salt to taste. If the sauce is too thick, add water one tablespoon at a time until you reach your desired consistency.

      Serve

      Once cooked, transfer the fritters to a plate lined with a paper towel to absorb any excess oil. Serve the hot fritters immediately, topped with a generous dollop of the rich Black Bean and Date Sauce.


      Air Fryer Method (Alternative Cooking Instructions) for White Bean Fritters

      If you prefer a healthier, oil-free cooking method for your white bean fritters, an air fryer is a fantastic option.

      1. Prepare Your Air Fryer: Begin by preheating your air fryer to 375°F (190°C).
      2. Lightly Coat the Fritters: Once you have formed the patties, lightly spray both sides of each fritter with olive oil or a non-stick cooking spray. This will help them crisp up and achieve that perfect golden color.
      3. Arrange and Cook: Carefully place the prepared fritters in the air fryer basket in a single layer. Make sure there is space between each one to allow the hot air to circulate. Do not overcrowd the basket. Cook the fritters for 10-12 minutes, flipping them gently halfway through the cooking time.
      4. Check for Doneness: The fritters are done when they are a deep golden-brown color and feel firm to the touch. They will have a satisfyingly crispy exterior. Serve immediately with the Black Bean and Date Sauce.

      The image shows the quinoa miixture and the fritters frying on a stove.


      Benefits of These White Bean Fritters

      These simple white bean fritters are not just a treat for your taste buds; they are also a powerhouse of nutrition.

      • High in Plant-Based Protein: Quinoa is a complete protein, meaning it contains all nine essential amino acids. Combined with the protein from the white beans, these fritters provide a substantial, meat-free protein source that is crucial for muscle repair, feeling full, and supporting a healthy metabolism.
      • Rich in Fiber: Both quinoa and white beans are excellent sources of dietary fiber. Fiber is vital for digestive health, helping to regulate bowel movements and supporting a healthy gut microbiome. A diet rich in fiber also helps stabilize blood sugar levels and can contribute to a lower risk of chronic diseases.
      • Packed with Micronutrients: The ingredients in this recipe are loaded with essential vitamins and minerals. The onions and garlic provide allicin, a compound known for its anti-inflammatory properties, while the parsley is a great source of Vitamin K and Vitamin C. The spices, cumin and paprika, are rich in antioxidants, which help protect your cells from damage.

      The gallery shows the benefits from plant based foods and the fiber and protein gained from the other ingredients.


      Recipe Variations for White Bean Fritters

      Here’s how you can customize this recipe to suit your preferences or what you have on hand.

      Variation CategorySubstitution or AdditionNotes
      ProteinUse chickpeas, lentils, or other beans.These can be used in place of white beans. Adjust consistency with flour as needed.
      CarbohydratesUse cooked brown rice, bulgur, or mashed sweet potato.These alternatives provide a similar texture and nutritional profile to quinoa.
      Herbs & SpicesAdd fresh cilantro, dill, or basil. Use a pinch of red pepper flakes.These substitutions will give the fritters a different flavor profile. The red pepper flakes will add a kick of heat.
      VegetablesGrate carrots or zucchini, or add corn kernels.These additions will add extra texture and nutrients. Be sure to squeeze out excess moisture from the grated vegetables.
      BindingUse a flax egg (1 tbsp ground flax + 3 tbsp water) for a vegan option.This is an excellent plant-based alternative to a chicken egg.
      SauceServe with a dollop of Greek yogurt mixed with dill, or a simple avocado cream sauce.These offer a creamy alternative to the black bean and date sauce.

      Final Thoughts for Quinoa And White Bean Fritters

      These Simple Quinoa and White Bean Fritters are more than just a recipe; they are a culinary experience that proves healthy eating can be both easy and incredibly delicious. They offer a simple yet profound way to nourish your body with wholesome, plant-based ingredients. With their crispy exterior, tender interior, and the perfect sweet-and-savory balance from the Black Bean and Date Sauce, they are sure to become a staple in your kitchen. So go ahead, give this recipe a try, and discover the joy of creating a truly satisfying and nutritious meal from scratch.


      Frequently Asked Questions (FAQs)

      Can I make the fritters ahead of time?

      Yes, you can! To prepare them in advance, you can form the patties and store them in an airtight container in the refrigerator for up to 24 hours. When you’re ready to cook, simply follow the frying instructions. You can also cook them completely, let them cool, and store them in the fridge for up to 3 days. To reheat, just pop them in a toaster oven or a non-stick pan until heated through and crispy.

      Can I bake the fritters instead of frying them?

      Absolutely! While pan-frying gives them a great crispy crust, baking is a healthier option. To bake, preheat your oven to 400°F (200°C). Place the formed fritters on a baking sheet lined with parchment paper. Lightly brush or spray the tops with olive oil. Bake for 15-20 minutes, flipping once halfway through, until they are golden-brown and firm to the touch.


      References

      1. FoodData Central – White Beans
      2. Harvard T.H. Chan – Fiber
      3. Healthline – 14 Healthy Foods High in Antioxidants

      Recent Posts


      Easy Steamed Cabbage Rolls with A Kebab Filling


      Our team is dedicated to crafting simple, delicious recipes that make healthy eating an achievable and enjoyable part of your daily life. We are passionate about creating vibrant, nourishing dishes like this Steamed Cabbage Rolls recipe to show that wholesome food can be both easy and incredibly satisfying. We are committed to empowering you with the knowledge and inspiration to cook with confidence and joy.


      Image shows Steamed cabbage rolls with a tahini sauce
      Steamed Cabbage Rolls

      A Delicious Twist on Classic Steamed Cabbage Rolls

      Welcome to a culinary adventure that proves comfort food can be both incredibly satisfying and exceptionally healthy. Today, we are taking a classic dish—cabbage rolls—and giving it a modern, healthful twist by using a gentle steaming method and a vibrant, flavorful kebab-inspired filling. Steaming is a fantastic way to prepare vegetables and meats, as it locks in nutrients and moisture without the need for added oils or heavy sauces. This recipe transforms a humble head of cabbage into a tender, delicate wrapper for a rich and aromatic filling, creating a meal that is light yet deeply satisfying. It’s a testament to the power of simple ingredients and clean cooking techniques.

      Our journey begins with the star of the show: a large, beautiful head of cabbage. Often overlooked, cabbage is a true nutritional powerhouse. When steamed, its leaves become soft, pliable, and almost translucent, making them the perfect vessel for a hearty filling. This recipe elevates the traditional cabbage roll by replacing the typical ground meat filling with a savory kebab-style mixture. We’ll combine lean ground meat with a medley of fresh herbs and warm spices like cumin and paprika, creating a flavor profile that is both familiar and excitingly new. The result is a roll that is packed with taste and goodness, offering a fresh take on a beloved classic.

      Simple and Wholesome Steamed Cabbage Rolls

      The beauty of these Steamed Cabbage Rolls lies not only in their taste but also in their simplicity. We’ve streamlined the process to make it approachable for even the most inexperienced home cook. From preparing the cabbage leaves to rolling the final product, our step-by-step instructions will guide you through each stage with clarity and confidence. The end result is a meal that looks impressive but is surprisingly easy to execute. It’s a perfect dish for a cozy family dinner or a special meal with friends, offering a unique and memorable culinary experience.

      What makes this recipe truly stand out is its commitment to health without sacrificing flavor. The steaming process ensures that the nutrients in both the cabbage and the filling are preserved, providing your body with essential vitamins and minerals. The lean filling provides a high-quality protein source, keeping you full and energized, while the spices add depth and complexity without any additional calories. This dish is a perfect example of how you can create wholesome, nourishing meals that don’t taste like “diet” food. It’s a meal that celebrates clean, fresh flavors and feels good to eat.

      So, get ready to roll up your sleeves and discover a new favorite. This article will provide you with a comprehensive guide to crafting these delicious and healthy Steamed Cabbage Rolls. We’ll cover everything from the ingredients and equipment you’ll need to the key benefits of this fantastic dish. By the end, you’ll have a new go-to recipe that you can confidently prepare, share, and enjoy. Let’s get started and bring this healthy, savory sensation to your kitchen!


      The gallery shows images of a head of cabbage, ground beef and a bag of rice


      The Health-Conscious Way to Enjoy Cabbage Rolls

      Time to Prepare: 25 minutes

      Time to Cook/Blend: 30-35 minutes

      Servings: 4


      Nutritional Breakdown (Approximate per serving):

      • Calories: 350-400 kcal
      • Protein: 25-30g
      • Fat: 15-20g
      • Carbohydrates: 25-30g
      • Fiber: 8-10g

      Note: Nutritional values are estimates and can vary based on portion size and specific ingredients.


      The gallery shows a basket steamer in a pot, measuring spoons and a large bowl


      Essential Equipment for Steamed Cabbage Rolls

      • Large pot with a lid
      • Steamer basket or a large metal colander that fits inside the pot
      • Large mixing bowl
      • Cutting board and sharp knife
      • Measuring cups and spoons
      • Tongs or a large slotted spoon

      Steamed Cabbage Rolls Ingredients

      • 1 large head of green cabbage
      • 1 lb (450g) lean ground beef or lamb
      • 1/2 cup long-grain rice, uncooked
      • 1 small onion, finely diced
      • 2 cloves garlic, minced
      • 1/4 cup fresh parsley, finely chopped
      • 1/4 cup fresh mint, finely chopped
      • 1 teaspoon ground cumin
      • 1/2 teaspoon paprika
      • Salt and black pepper to taste
      • 1 (14.5 oz) can crushed tomatoes (for the sauce)
      • 1/2 cup beef or vegetable broth
      • 1 tablespoon olive oil (for the sauce)
      • Optional: a pinch of red pepper flakes for heat

      A Simple Tahini Sauce to Complement Your Steamed Cabbage Rolls

      This light and creamy tahini sauce provides a nutty, savory contrast to the kebab filling. It’s an excellent, healthy alternative to heavier sauces and comes together in just minutes.

      Sauce Ingredients

      • 1/2 cup tahini
      • 1/4 cup fresh lemon juice
      • 1-2 cloves garlic, minced
      • 1/4 teaspoon salt
      • 1/4 to 1/2 cup warm water (or more for desired consistency)

      The gallery shows Tahini sauce and the dry ingredients for the sauce


      Detailed Step-by-Step Instructions

      Prepare the Cabbage Leaves

      Begin by carefully coring the cabbage. Use a sharp knife to cut around the core at the base of the cabbage head. Place the whole cored cabbage into a large pot of boiling water. This will help the leaves soften and detach easily. As the outer leaves become pliable (after about 3-5 minutes), use tongs to gently peel them off, one by one. Place the softened leaves on a platter to cool. Once they are cool enough to handle, use a paring knife to carefully trim the thick, hard part of the central vein from each leaf. This makes them easier to roll without tearing.

      Make the Kebab-Style Filling

      While the cabbage leaves are cooling, prepare your flavorful filling. In a large mixing bowl, combine the uncooked rice, lean ground meat (beef or lamb), finely diced onion, minced garlic, chopped parsley, and chopped mint. Add the ground cumin, paprika, a generous pinch of salt, and black pepper. Use your hands to mix everything together thoroughly until all ingredients are well combined. The mixture should be a uniform consistency.

      Create the Steaming Setup and Sauce

      In the same large pot used for the cabbage, add the crushed tomatoes, beef or vegetable broth, and olive oil. Stir to combine and season with a little salt and pepper. Bring this mixture to a gentle simmer over low heat. This will serve as the steaming liquid and a light sauce for your finished rolls. If you are not using a sauce, simply add enough water for steaming.

      Assemble and Roll the Cabbage Rolls

      Lay one prepared cabbage leaf on your cutting board. Place a generous spoonful of the filling mixture near the base of the leaf. Fold the sides of the leaf inward, over the filling, and then roll it up tightly from the bottom. The goal is to create a compact, secure roll that will hold its shape during cooking. Repeat this process with the remaining leaves and filling until all are used.

      Steam the Cabbage Rolls

      Gently place the finished rolls seam-side down in the steamer basket. Arrange them in a single layer, or stack them if necessary, but try not to crowd them too much. Place the steamer basket over the simmering tomato sauce in the pot, making sure the bottom of the basket doesn’t touch the liquid. Cover the pot with a tight-fitting lid.

      Cook to Perfection

      Steam the cabbage rolls for 30-35 minutes. This steaming process allows the rice to cook fully and the meat to become tender. You’ll know they are ready when the rice is soft and the meat is cooked through. The rolls will be tender to the touch, and the cabbage will be very soft. Once cooked, use tongs to carefully lift the rolls out of the steamer basket and arrange them on a serving platter. Drizzle with the sauce from the bottom of the pot if desired, or serve them plain for a lighter option. Serve immediately while warm.


      Instructions for the Sauce

      1. Combine Ingredients: In a small mixing bowl, whisk together the tahini, fresh lemon juice, minced garlic, and salt. The mixture will initially thicken and seize up—this is normal.
      2. Add Water to Thin: Gradually whisk in the warm water, one tablespoon at a time. Continue to whisk vigorously until the sauce becomes smooth and creamy, with a pourable consistency. You can add more water to achieve your desired thickness.
      3. Taste and Adjust: Taste the sauce and adjust seasoning as needed. You may want more salt for flavor or more lemon juice for a tangier finish.
      4. Serve: Drizzle the sauce generously over the finished Steamed Cabbage Rolls just before serving.


      The Health and Wellness Benefits

      These Steamed Cabbage Rolls are more than just a delicious meal; they are a nutritional powerhouse. Steaming is one of the healthiest cooking methods, as it helps to retain the vitamins and minerals that can often be lost in other cooking processes. Cabbage itself is incredibly rich in Vitamin K and Vitamin C, which are essential for bone health and immune function. It’s also a fantastic source of fiber, which aids in digestion and helps you feel full and satisfied.

      The kebab-style filling provides a lean protein source that is crucial for muscle repair and a strong metabolism. The use of aromatic spices like cumin and paprika not only adds incredible flavor but also offers a range of anti-inflammatory and antioxidant properties. This recipe is a perfect example of how to make a complete, balanced meal with protein, complex carbohydrates from the rice, and a generous amount of vegetables, all while keeping it low in added fats and calories.


      The images show the benefits of steamed cabbage and the health benefits of the kebab filling.


      Delicious Steamed Cabbage Rolls Variations

      VariationDescription
      Vegetarian DelightSubstitute the ground meat with cooked lentils, quinoa, or a combination of mushrooms and walnuts for a savory, plant-based filling.
      Spice It UpAdd a pinch of cayenne pepper or finely chopped fresh chili to the filling mixture for a fiery kick.
      Cheese PleaseFor a richer flavor, add a tablespoon of grated feta cheese or Parmesan to the filling mixture before rolling.
      Sauce on the SideCreate a separate, creamy yogurt-garlic sauce to serve on the side for dipping.
      Different GreensIf cabbage is not available, you can use large Swiss chard or kale leaves after blanching them to make them pliable.

      The images show alternative ingredients for this recipe. The first Swiss chard and Kale leaves.


      Final Thoughts on Steamed Cabbage Rolls

      This recipe for Steamed Cabbage Rolls with a kebab filling is a testament to the idea that wholesome, healthy food can be both easy to make and full of incredible flavor. By embracing the simple power of steaming, we’ve created a dish that is light, nourishing, and deeply satisfying. It’s a wonderful way to enjoy the versatility of cabbage and to incorporate more vegetables into your diet in a delicious way. We encourage you to try this recipe and make it your own by experimenting with different fillings and spices. Get ready to roll up a new favorite!


      Frequently Asked Questions (FAQs)

      Q: Can I prepare these cabbage rolls ahead of time?

      A: Yes, you can. You can assemble the rolls and store them uncooked in an airtight container in the refrigerator for up to 24 hours. When you’re ready to cook, simply follow the steaming instructions as written.

      Q: Why do I need to remove the thick vein from the cabbage leaf?

      A: The thick central vein is tough and doesn’t become soft during the steaming process, which can make the roll difficult to eat. Trimming it off makes the leaf more pliable and ensures the final product is tender and easy to chew.

      Q: How do I know if the rice is cooked inside the roll?

      A: The best way to check is to carefully open one of the rolls. The rice should be soft and tender, not hard or crunchy. If it’s not fully cooked, continue steaming the remaining rolls for a few more minutes and check again.


      References


      Recent Posts


      Make This Simple Steamed Chicken With Avocado & Nut Sauce


      We are dedicated to crafting simple, delicious recipes that make healthy eating an achievable and enjoyable part of your daily life. We are passionate about creating vibrant, nourishing dishes like this Steamed Chicken With Avocado to show that wholesome food can be both easy and incredibly satisfying. We are committed to empowering you with the knowledge and inspiration to cook with confidence and joy.


      The Image Shows Steamed chicken with Avocado and Nut sauce in a plate. This meal is surrounded by various side dishes
      Steamed Chicken with Avocado and Nut sauce

      Unlock Flavor and Nutrition with This Simple Steamed Chicken With Avocado & Nut Sauce

      Welcome to a culinary journey that proves healthy eating can be incredibly delicious and satisfying. We’re about to transform simple ingredients into a gourmet-level dish that not only tantalizes your taste buds but also nourishes your body from the inside out. Forget complex cooking methods and long ingredient lists; this recipe is all about simplicity, purity, and flavor. We will explore the art of creating a perfectly moist steamed chicken breast paired with a velvety, rich sauce made from fresh avocado and crunchy nuts. This dish is designed to become a staple in your weekly meal rotation—whether you’re a busy professional, a dedicated home cook, or someone just starting their health and wellness journey.

      This recipe is a true testament to the power of whole, unprocessed foods. The steamed chicken provides a lean protein foundation, ensuring you feel full and energized without the heaviness of fried or heavily processed meats. Steaming is a gentle cooking method that preserves the chicken’s natural moisture and nutrients, locking in flavor and health benefits. It’s a method embraced by chefs and health experts alike for its ability to produce tender results with minimal effort. The real star of the show, however, is the sauce. It’s not your typical dairy-heavy concoction but a vibrant, earthy, and creamy creation born from the magic of ripe avocados and a medley of your favorite nuts.

      This Steamed Chicken With Avocado is a Symphony of Flavor and Texture

      The unique combination of flavors in this Steamed Chicken With Avocado recipe makes it a standout. The mild, clean taste of the steamed chicken provides the perfect canvas for the luxurious sauce.

      The avocado contributes a rich, buttery texture and a healthy dose of monounsaturated fats, while the nuts add a satisfying crunch and a deeper, nutty dimension. This blend of textures and flavors is what makes the dish so comforting and satisfying. It’s a complete meal in one, offering a perfect balance of protein, healthy fats, and fiber.


      Customizing Your Steamed Chicken with Avocado

      This recipe also offers incredible versatility. While the core components are simple, you can easily adapt it to suit your personal preferences or what you have available in your pantry.

      For instance, you can use different types of nuts, add a touch of spice, or pair it with various vegetables to create a new experience each time. We’ll delve into some of these variations later on, providing you with all the tools you need to make this recipe uniquely yours. The beauty of this meal lies in its adaptability and its ability to be a blank canvas for your creativity.

      So, are you ready to elevate your home cooking with a dish that is as healthy as it is delicious? This article will guide you through every step of the process, from gathering your ingredients to plating the final, beautiful meal. We’ll provide detailed instructions, helpful tips, and insights into the nutritional benefits of each component.

      By the end, you’ll have a new favorite recipe that you can confidently prepare and share with family and friends. Get ready to fall in love with the simple elegance of steamed chicken with avocado and nut sauce.


      The gallery shows the steamed chicken with herbs, a variety of nuts that can be used in this recipe and Avocados cut in half.


      The Easiest Way to Prepare Healthy Meals

      Time to Prepare: 10 minutes

      Time to Cook/Blend: 15-20 minutes

      Servings: 2-3


      Nutritional Breakdown (Approximate per serving):

      • Calories: 450-500 kcal
      • Protein: 40-45g
      • Fat: 25-30g (primarily healthy monounsaturated and polyunsaturated fats)
      • Carbohydrates: 5-10g
      • Fiber: 5-7g

      Note: Nutritional values are estimates and can vary based on portion size and specific ingredients.


      Essential Kitchen Equipment

      • A steamer basket or a large pot with a lid and a metal colander
      • Blender or food processor
      • Cutting board and sharp knife
      • Small saucepan or skillet for toasting nuts (optional)
      • Measuring cups and spoons

      Steamed Chicken with Avocado & Nut Sauce Ingredients

      • 2 boneless, skinless chicken breasts (about 6-8 ounces each)
      • 1 ripe avocado
      • 1/2 cup mixed nuts (almonds, cashews, walnuts are great)
      • 1/4 cup fresh cilantro or parsley, chopped
      • 1 tablespoon lime juice
      • 1-2 cloves garlic, minced
      • 1/2 teaspoon ground cumin
      • 1/4 cup warm water (or more for desired consistency)
      • Salt and black pepper to taste
      • Optional: a pinch of red pepper flakes for a little heat

      This gallery shows some of the equipment and ingredients used in this recipe.


      Simple Step-by-Step Instructions

      Prepare the Chicken for Steaming

      Pat the chicken breasts dry with a paper towel. Season them generously on all sides with salt and black pepper. This simple step is crucial for building flavor from the inside out. Prepare your steamer setup: add an inch or two of water to a large pot, place a steamer basket or colander inside, and bring the water to a boil.

      Steam the Chicken

      Carefully place the seasoned chicken breasts in the steamer basket. Cover the pot with a tight-fitting lid to trap the steam. Reduce the heat to a gentle simmer and let the chicken steam for 10-15 minutes, or until cooked through. A good way to check is to insert a meat thermometer into the thickest part; it should read 165°F (74°C). The chicken should be tender and juicy. Once cooked, remove the chicken from the steamer and let it rest on a cutting board for at least 5 minutes before slicing. Resting is key to keeping the juices inside the meat.

      Toast the Nuts (Optional but Recommended)

      While the chicken is steaming, you can toast the nuts. Place the nuts in a dry skillet over medium heat, stirring frequently for 2-3 minutes until they are lightly golden and fragrant. Be careful not to burn them. This step enhances their natural flavor and adds a deeper richness to the sauce. Let them cool slightly before adding to the blender.

      Make the Creamy Avocado Sauce

      While the chicken rests, prepare the sauce. Scoop the flesh of the ripe avocado into your blender or food processor. Add the toasted nuts (reserve a few for garnish), minced garlic, lime juice, cumin, chopped cilantro or parsley, and a pinch of salt and pepper.

      Blend the Sauce to Perfection

      Begin blending the ingredients. As the mixture starts to combine, slowly add the warm water, one tablespoon at a time, while the blender is running. Continue blending until you achieve a smooth, creamy consistency. You can add a little more water if you prefer a thinner sauce. Taste and adjust seasoning with more salt, pepper, or lime juice as needed. The sauce should be rich, tangy, and flavorful.


      The images shows avocado sauce in a blender and the avocado sauce drizzled on the steamed chicken slices.


      1. Slice and Serve: Slice the rested chicken breasts against the grain into thin, uniform pieces. Arrange the slices on a serving plate.
      2. Spoon on the Sauce: Generously spoon the creamy avocado and nut sauce over the sliced chicken. Garnish with the reserved whole nuts, a sprig of fresh cilantro, and a few slices of fresh avocado if you like. Serve immediately while the chicken is still warm.

      The Benefits of This Healthy Steamed Chicken With Avocado Recipe

      This recipe is more than just a delicious meal; it’s a powerhouse of nutritional benefits. Steaming chicken, as opposed to frying, drastically reduces the need for added oils and fats, keeping the calorie count low while retaining essential nutrients. The star of the show, the avocado, is a superfood packed with monounsaturated fats, which are known to support heart health and help lower bad cholesterol. These healthy fats also aid in the absorption of fat-soluble vitamins like A, D, E, and K, making the meal even more beneficial.

      The nuts in the sauce contribute a significant amount of plant-based protein, healthy fats, and fiber, promoting satiety and aiding in digestive health. They are also a great source of minerals like magnesium and potassium. The garlic and cilantro not only add incredible flavor but also provide antioxidants and anti-inflammatory properties. Finally, lime juice is a fantastic source of Vitamin C. This recipe is a perfect example of how a few simple, whole ingredients can come together to create a meal that is both satisfying and incredibly good for you.


      This gallery shows the benefits of Steaming, using plant ingredients in cooking such asNuts, Cilantro and Garlic.


      Variations for Every Palate

      VariationDescription
      Spicy KickAdd a pinch of red pepper flakes to the sauce before blending. You can also add a finely chopped jalapeño or a dash of your favorite hot sauce.
      Herbaceous TwistSwap cilantro for fresh basil, mint, or a combination of herbs.
      Nutty SwapDon’t have almonds? Use walnuts, pecans, or a combination. Sunflower seeds or pumpkin seeds are also great for a nut-free option.
      Vegetable PowerServe the chicken and sauce over steamed broccoli, roasted carrots, or sautéed spinach. This is an excellent way to add more nutrients.
      Grain BowlPlace the chicken and sauce over a bed of quinoa, brown rice, or couscous for a more filling meal.
      Vegan AlternativeSubstitute the chicken with steamed firm tofu or chickpeas. The sauce will still be just as delicious and nutritious.

      The gallery shows all the cooked ingredients for this rceipe.


      Final Thoughts on Steamed Chicken With Avocado

      This recipe for Steamed Chicken With Avocado and nut sauce is a culinary triumph in its simplicity. It’s a dish that respects the natural flavors of its ingredients while offering a wealth of health benefits. By choosing this recipe, you are making a conscious decision to nourish your body with wholesome, satisfying food. It’s a great way to introduce new flavors and textures into your diet and can be a fantastic starting point for exploring more clean-eating recipes. We encourage you to give this recipe a try tonight and discover just how easy and enjoyable healthy cooking can be. Your taste buds—and your body—will thank you!


      Frequently Asked Questions (FAQs)

      Q: Can I make the avocado sauce ahead of time?

      A: It is best to make the sauce right before serving to prevent the avocado from browning. The lime juice in the recipe helps to slow down oxidation, but for the best flavor and vibrant green color, prepare it fresh.

      Q: What is the best way to store leftovers?

      A: Store any leftover chicken and sauce in separate airtight containers in the refrigerator. The chicken will last for 2-3 days. The sauce may brown slightly, but it will still be safe to eat. You can gently reheat the chicken in a microwave or a skillet with a little water.

      Q: Can I use chicken thighs instead of breast meat?

      A: Yes, you can. Chicken thighs are a great alternative and often result in an even more moist and flavorful dish due to their higher fat content. The cooking time may be slightly longer, so be sure to check that the internal temperature reaches 165°F (74°C) before serving.

      Q: Can I freeze the leftover sauce?

      A: Freezing the sauce is not recommended. The high water content in the avocado can cause it to become watery and grainy when thawed. For the best texture and flavor, it’s best to prepare a fresh batch of sauce each time you make the recipe.


      References


      Recent Posts


      Easy To Make White Bean And Mushroom Pate


      Unlock the secrets to a simple, healthy, and incredibly flavorful spread with our guide to creating a luscious White Bean and Mushroom Pâté. This recipe is a game-changer for anyone looking to incorporate more plant-based goodness into their diet, proving that healthy eating can be both delicious and easy. With the humble white bean as its star, this pâté is set to become your new favorite go-to.


      This is an image of white bean and mushroom pate topped with herbs and mushroom in a plate
      White bean and mushroom Pate

      The Plant-Based Pâté Revolution

      The world of plant-based cuisine is continuously evolving, offering innovative and delicious alternatives to classic dishes. Among the most surprising and satisfying transformations is the plant-based pâté. Gone are the days when pâté was solely associated with meat; today, a new generation of spreads is emerging, and they are bursting with flavor, texture, and nutritional benefits. This movement towards plant-based options isn’t just a trend; it’s a testament to the creativity and versatility of ingredients like humble beans and earthy mushrooms.

      This particular recipe for White Bean and Mushroom Pâté is a shining example of this culinary revolution. It combines the creamy, smooth texture of white beans with the rich, umami depth of sautéed mushrooms, creating a spread that is both luxurious and comforting. The result is a dish that can stand proudly alongside its traditional counterparts, offering a similar level of sophistication without the animal products. It’s a fantastic option for everyone, from seasoned vegans to those simply looking to explore more meat-free meals.


      The images show the raw white bean and mushrooms used to prepare this recipe


      A Deliciously Simple White Bean Spread

      One of the greatest advantages of this recipe is its incredible simplicity. You don’t need a culinary degree or a pantry full of obscure ingredients to create something truly spectacular. The process is straightforward, relying on the natural flavors of the main components, enhanced by a few simple aromatics like garlic and herbs. This accessibility makes it an ideal recipe for weeknight dinners, last-minute gatherings, or as a healthy and satisfying snack to keep on hand. It proves that healthy eating doesn’t have to be complicated or time-consuming.

      Furthermore, this pâté is incredibly versatile. It can be served in a multitude of ways, from a sophisticated appetizer with crackers and crudités to a delicious sandwich spread. Its robust flavor profile makes it a wonderful addition to various meals, adding a boost of protein and fiber. This adaptability ensures that the recipe will become a staple in your kitchen, offering endless possibilities for creative and delicious meals.

      Finally, embracing recipes like this White Bean and Mushroom Pâté is a step towards a more sustainable and compassionate way of eating. By choosing plant-based options, we can reduce our environmental footprint and contribute to a healthier planet. This recipe is more than just food; it’s a statement that delicious, satisfying, and nourishing meals can be made with simple, wholesome ingredients. It’s a delicious win-win for your taste buds, your health, and the planet.


      The first image is the white bean pate on toast. The second image shows the mushroom pate with a selection of vegetables.


      A Delicious White Bean and Mushroom Pâté

      Servings: 8-10 people


      Time to Prepare:

      • Preparation: 15 minutes
      • Cooking: 20 minutes
      • Chilling (Recommended): 1-2 hours

      Time to Cook/Blend:

      • Sautéing: 10-12 minutes
      • Blending: 3-5 minutes

      Nutritional Information (per serving, approx.):

      • Calories: ~120
      • Protein: 6g
      • Fat: 8g
      • Carbohydrates: 9g
      • Fiber: 4g

      Please note: Nutritional values are approximate and may vary based on exact ingredients and serving size.


      These images shows the equipment used in this recipe


      Equipment You Will Need

      • Large skillet or frying pan
      • High-speed blender or food processor
      • Spatula or wooden spoon
      • Measuring cups and spoons
      • Small saucepan (optional, for garnishing)

      Ingredients for a White Bean and Mushroom Pate

      • 2 tablespoons olive oil
      • 1 large onion, finely chopped
      • 2 cloves garlic, minced
      • 2 pounds cremini or button mushrooms, cleaned and sliced
      • 1 tablespoon fresh thyme leaves (or 1 teaspoon dried thyme)
      • 1/2 teaspoon smoked paprika
      • 1/4 teaspoon black pepper
      • 2 cans (15 ounces each) cannellini or navy white beans, rinsed and drained
      • 3 tablespoons nutritional yeast (optional, for a cheesy, nutty flavor)
      • 1 tablespoon lemon juice
      • 1/4 cup chopped fresh parsley, plus extra for garnish
      • 1/4 cup chopped walnuts or pecans (optional, for texture)
      • Salt, to taste
      • Optional Garnish: Sautéed mushrooms, fresh parsley, chia seeds, a drizzle of olive oil


      Instructions for a Perfect White Bean and Mushroom Pate

      Preparation is Key

      Start by preparing your vegetables. Finely chop the onion and mince the garlic. Thoroughly clean your mushrooms by gently wiping them with a damp cloth or a mushroom brush to remove any dirt. Avoid soaking them, as they will absorb water like a sponge. Once clean, slice them into uniform pieces to ensure they cook evenly.

      Sauté the Aromatics

      Heat the olive oil in a large skillet or frying pan over medium heat. Add the chopped onion and cook for 5-7 minutes, stirring occasionally, until it becomes soft and translucent. This step is crucial for building the foundational flavor of your pâté. Add the minced garlic and cook for another minute until fragrant, being careful not to let it burn.

      Cook the Mushrooms

      Turn up the heat to medium-high. Add the sliced mushrooms to the skillet. It may seem like a lot of mushrooms, but they will cook down significantly. Cook the mushrooms for 8-10 minutes, stirring occasionally, until they release their liquid and begin to brown. This browning process is what develops the deep, savory, umami flavor that is essential to the pâté. Once they are golden brown, stir in the fresh thyme, smoked paprika, and black pepper. Cook for an additional minute.

      Combine and Blend

      Transfer the cooked mushroom mixture to your high-speed blender or food processor. Add the rinsed and drained white beans, nutritional yeast (if using), and lemon juice. Pulse the mixture a few times to start, then blend until you achieve a smooth and creamy consistency. You may need to stop and scrape down the sides of the blender with a spatula to ensure everything is fully incorporated. If the mixture is too thick, add a tablespoon of water or a little more olive oil to help it blend more easily.

      Season and Chill

      Once you’ve reached your desired texture, taste the pâté and season generously with salt. The amount of salt needed can vary, so it’s important to taste and adjust. Stir in the chopped fresh parsley and any optional nuts. For the best flavor and texture, transfer the pâté to a serving dish, cover it, and refrigerate for at least 1-2 hours. Chilling allows the flavors to meld together and the pâté to firm up, making it easier to serve.


      These images show the nutritional benefits of white beans and mushrooms


      Benefits of This White Bean and Mushroom Pate

      This delightful pâté is more than just a tasty spread; it’s a powerhouse of nutritional benefits. Here are some of the key advantages of making this a staple in your diet:

      • Excellent Source of Plant-Based Protein: White beans are an incredible source of protein, which is essential for muscle repair, immune function, and overall body health. For those following a vegetarian or vegan diet, this recipe offers a delicious way to meet your protein needs.
      • Rich in Fiber: Both white beans and mushrooms are loaded with dietary fiber. Fiber is crucial for digestive health, helping to keep you feeling full and regulating blood sugar levels. A high-fiber diet is also linked to a lower risk of heart disease and type 2 diabetes.
      • Packed with Vitamins and Minerals: Mushrooms are a fantastic source of B vitamins (like riboflavin, niacin, and pantothenic acid), which are vital for energy production. They also provide essential minerals like selenium and potassium. White beans contribute folate and iron.
      • Heart-Healthy Ingredients: This recipe is made with olive oil, which is a monounsaturated fat known for its heart-protective properties. The high fiber content also helps to lower bad cholesterol levels, contributing to a healthier cardiovascular system.
      • Naturally Low in Saturated Fat: Unlike traditional meat-based pâtés, this version is naturally low in saturated fat and completely cholesterol-free, making it a much healthier choice for a balanced diet.

      Variations to Customize Your Pâté

      This recipe is wonderfully adaptable. Feel free to experiment with different flavors and textures to suit your personal preferences.

      Variation CategorySuggestions
      Spice & HeatAdd a pinch of cayenne pepper or a dash of hot sauce to the mixture for a spicy kick. Substitute smoked paprika with sweet paprika for a milder flavor.
      Herbs & AromaticsSwap fresh thyme for rosemary or sage for a different earthy flavor. Add a pinch of onion powder or garlic powder for a more intense savory taste.
      Flavor ProfileIncorporate sun-dried tomatoes (rehydrated and drained) for a tangy, Mediterranean twist. Stir in a teaspoon of truffle oil at the end for an extra touch of luxury.
      TextureFor a chunkier pâté, only blend half of the mushroom and bean mixture, then stir in the other half by hand. Add roasted pumpkin seeds or sunflower seeds instead of walnuts for a nut-free version.
      ServingServe it warm for a comforting dip, or chilled for a more classic pâté experience. Garnish with a balsamic glaze for a sweet and tangy contrast.

      Final Thoughts: The Versatility of the White Bean

      This easy-to-make White Bean and Mushroom Pâté is more than just a recipe; it’s an invitation to explore the delicious and healthy world of plant-based cuisine. It showcases the incredible versatility of the humble white bean, proving that simple ingredients can be transformed into something truly special and elegant. Whether you’re hosting a dinner party or simply looking for a healthy snack to keep on hand, this pâté is a fantastic choice that is sure to impress. So go ahead, give it a try, and discover your new favorite plant-based staple.


      Frequently Asked Questions (FAQs)

      Q1: How long does this White Bean Pâté last in the refrigerator?

      A: When stored in an airtight container, this pâté will last for up to 5-7 days in the refrigerator. It’s an excellent make-ahead option for meal prep or entertaining.

      Q2: Can I freeze this pâté?

      A: Yes, you can! To freeze, transfer the pâté to a freezer-safe, airtight container, leaving a little room at the top for expansion. It can be stored in the freezer for up to 3 months. When you’re ready to use it, let it thaw overnight in the refrigerator. You may need to give it a quick stir or a little extra blend to restore its original creamy texture.

      Q3: What can I serve with this pâté?

      A: This versatile pâté is delicious with a wide range of accompaniments. Serve it with toasted baguette slices, crusty bread, your favorite crackers, or a platter of fresh vegetables like carrot sticks, cucumber slices, and bell pepper strips. It also makes a wonderful spread for sandwiches and wraps.


      References


      Recent Posts


      Make This Simple Steamed Fish On Herbed Rice Noodles


      Are you a lover of seafood, but find yourself running out of ideas? This steamed fish recipe is a game-changer! It’s a healthy, simple, and incredibly flavorful meal that you’ll want to make again and again.


      The image shows Steamed fish skewers on herbed rice noodles on a plate
      Steamed fish on skewers

      A Culinary Journey of Flavor and Steamed Fish

      Embarking on a journey to eat healthier doesn’t have to mean sacrificing flavor. In fact, it often opens up a world of simple, vibrant dishes that nourish both the body and the soul. This recipe for simple steamed fish on a bed of herbed rice noodles is a perfect example. It proves that some of the most delicious meals are those with minimal preparation, allowing the natural goodness of the ingredients to shine through. This dish is a culinary tradition in many Asian cultures, celebrated for its delicate flavors and incredible health benefits. It’s a testament to the idea that cooking with fresh, whole ingredients is the best way to achieve a truly satisfying result.

      The beauty of this dish lies in its simplicity. We’re not using heavy oils or complicated cooking techniques. Instead, we are relying on the gentle process of steaming, which locks in moisture and preserves the fish’s natural nutrients and tender texture. Steaming is a fantastic method for preparing fish because it allows the delicate flesh to cook through evenly without drying out. This results in a fish that is incredibly moist, tender, and flaky, a texture that is simply unmatched by other cooking methods.


      The gallery of images show: Savoury sauce in a bowl, herbed rice noodles and steamed fish on a plate


      The Perfect Balance of Flavors

      At the heart of this dish is a vibrant array of fresh herbs. Herbs like cilantro, mint, and basil are not just for garnish; they are an essential part of the flavor profile. When tossed with the delicate rice noodles, they create a fragrant, refreshing foundation for the fish. The contrast of the warm, delicate fish with the cool, fresh noodles and herbs is a delightful experience for the palate. This recipe is also highly versatile, allowing you to easily adapt it to your preferences and what you have available in your kitchen.

      This dish is a celebration of clean, fresh flavors. The herbed rice noodles provide a light and refreshing base, while a simple, savory sauce brings everything together. The fish, gently steamed to perfection, soaks up the flavors from the sauce, creating a harmonious and balanced dish. The result is a meal that feels both comforting and incredibly healthy, leaving you feeling light and energized.

      Whether you’re a seasoned chef or just starting your culinary journey, this recipe is designed to be approachable and rewarding. The steps are straightforward, the ingredients are easy to find, and the result is a dish that is sure to impress. It’s perfect for a weeknight dinner when you want something healthy and quick, but also elegant enough to serve to guests. So, get ready to discover the simple joy of cooking with fresh ingredients and create a meal that is as good for you as it is delicious.


      The gallery of images show: Noodles being prepared, the dressing being made and skewered fish on a plate.


      Time to Prepare

      15 minutes

      Time to Cook

      10 minutes


      Nutritional Breakdown of Steamed Fish

      This recipe is a powerhouse of nutrition. The fish provides a lean source of protein and essential omega-3 fatty acids, which are crucial for brain and heart health. The rice noodles are a good source of carbohydrates for energy, while the fresh herbs add a boost of vitamins and antioxidants. This is a low-fat, high-protein meal that is excellent for anyone focused on a balanced diet.


      Equipment

      • Medium-sized pot
      • Large bowl
      • Steamer basket or insert
      • Skewers (bamboo or metal)
      • Serving platter or individual bowls

      Servings: 4

      Steamed Fish on Herbed Rice Noodles: Ingredients List

      • 1 lb firm white fish fillets (such as cod, halibut, or snapper), cut into 1-inch cubes
      • 12 ounces dried vermicelli rice noodles
      • 2 tablespoons fresh lime juice
      • 1 tablespoon fish sauce
      • 1 tablespoon soy sauce or tamari
      • 1 teaspoon brown sugar
      • 2 cloves garlic, minced
      • 1 small red chili, finely sliced (optional, for a bit of heat)
      • 1 cup fresh cilantro, chopped
      • ½ cup fresh mint leaves, chopped
      • ½ cup fresh Thai basil leaves, chopped
      • 1 medium carrot, julienned (cut into thin strips)
      • ½ cup bean sprouts
      • Lime wedges and extra fresh herbs for garnish

      The gallery shows the full range of the raw ingredients that has been included in this recipe.


      Step-by-Step Instructions

      Prepare the Noodles and Skewers

      Begin by cooking the rice noodles according to the package directions. Typically, this involves soaking them in hot water for a few minutes until they become tender. Once they are cooked, drain the noodles and rinse them under cold water. This stops the cooking process and prevents them from sticking together. Set them aside in a large bowl. If you are using bamboo skewers, soak them in water for at least 15 minutes before you begin cooking to prevent them from burning during the steaming process.

      Make the Dressing

      In a small bowl, whisk together the lime juice, fish sauce, soy sauce (or tamari), brown sugar, minced garlic, and sliced red chili (if using). Stir until the sugar has completely dissolved. This simple dressing will be tossed with the noodles and also drizzled over the fish.

      Assemble the Noodles

      Add the chopped fresh cilantro, mint, and Thai basil, along with the julienned carrots and bean sprouts, to the bowl with the rice noodles. Pour half of the prepared dressing over the noodle mixture. Gently toss everything together until the noodles are evenly coated and the herbs are well distributed.

      Skewer and Prepare the Fish

      Gently thread the 1-inch fish cubes onto the prepared skewers. Arrange the pieces so they are not too tightly packed, allowing the steam to circulate and cook the fish evenly. You should have 2-3 pieces of fish per skewer, depending on their size.

      Steam the Fish

      Place the fish skewers in a single layer on a steamer basket. Place the steamer basket in a pot with about 1-2 inches of simmering water. The water should not touch the bottom of the steamer basket. Cover the pot with a tight-fitting lid and steam for 5-7 minutes, or until the fish is flaky and cooked through. Be careful not to overcook the fish, as it can become tough.


      This image shows the fish being steamed on skewers and the cooked skewered fish on a plate.


      Serve and Garnish

      To serve, create a bed of the herbed rice noodles on a large serving platter or in individual bowls. Carefully arrange the steamed fish skewers on top of the noodles. Drizzle the remaining dressing over the fish and noodles. Garnish with fresh lime wedges and extra herbs for a pop of color and freshness.

      The first image shows rice noodles with herbs and the second image shows steamed fish on skewers.


      The Health Benefits of Steamed Fish

      Opting for steaming as a cooking method is one of the healthiest ways to prepare food. Unlike frying or grilling, steaming does not require added oils or fats, significantly reducing the calorie content of your meal. This gentle cooking process also helps to preserve the natural nutrients, vitamins, and minerals in the fish, as they are not lost to the cooking liquid or high heat. This ensures you are getting the maximum nutritional benefit from every bite.


      The images shows a comparison of the benefits of steaming fish over frying and roasting.


      Beyond the cooking method, the ingredients themselves are packed with goodness. Fish, especially fatty fish like salmon, are rich in omega-3 fatty acids, which are vital for reducing inflammation and supporting brain function. Even lean white fish, as used in this recipe, is an excellent source of high-quality protein, which is essential for muscle repair and a feeling of fullness. The fresh herbs provide a wealth of antioxidants and anti-inflammatory compounds, contributing to overall well-being. This dish is not just delicious; it’s a smart choice for a healthy lifestyle.


      The 2 images show the benefits that you get from fish.


      Flavor Variations and Serving Suggestions

      This recipe is a wonderful canvas for creativity. Here are some simple variations to suit your taste:

      VariationDescription
      Spicy KickAdd more sliced red chili or a teaspoon of sriracha to the dressing for a fiery punch.
      Peanut CrunchSprinkle a handful of roasted, chopped peanuts over the finished dish for added texture and a nutty flavor.
      Ginger InfusionAdd a teaspoon of finely grated ginger to the dressing for a warm, spicy note.
      Vegetable BoostAdd blanched snap peas, thinly sliced bell peppers, or thinly sliced mushrooms to the noodle mixture.
      Citrus ZestUse a mix of lime and orange juice in the dressing to create a more complex, citrusy flavor.

      Final Thoughts on Steamed Fish

      This simple steamed fish recipe is more than just a meal—it’s an invitation to savor fresh flavors and embrace a healthier way of cooking. It’s a testament to the idea that the best food is often the simplest. By using gentle techniques and high-quality ingredients, you can create a dish that is not only good for you but also incredibly satisfying. The next time you are looking for a light, delicious, and easy-to-make meal, give this recipe a try. You’ll be amazed at how quickly you can create something so flavorful and elegant.


      Frequently Asked Questions

      Q: Can I use frozen fish for this recipe?

      A: Yes, you can. Just be sure to thaw the fish completely before cutting it into cubes and threading it onto the skewers. Pat the fish dry with a paper towel to remove any excess moisture.

      Q: Can I make the dressing in advance?

      A: Absolutely. You can prepare the dressing a day or two ahead of time and store it in an airtight container in the refrigerator. This can help save time on a busy weeknight.


      References


      Recent Posts


      Make These Easy Moroccan Sausage Pinwheels


      Get ready to impress your friends and family with these delectable Moroccan Sausage Pinwheels, a simple and savory appetizer that’s packed with flavor. This recipe is a delightful twist on a classic, combining the beloved sausage roll with the warm, aromatic spices of Moroccan cuisine.


      Image is of Moroccan Sausage Pinwheels laid out on a plate.
      Moroccan Sausage Pinwheel

      The Ultimate Crowd-Pleasing Appetizer

      Are you looking for a show-stopping appetizer that’s both simple to make and bursting with unique flavors? Look no further than these Moroccan Sausage Pinwheels. Forget the bland, store-bought versions; this recipe elevates the classic party snack with a sophisticated, aromatic twist. By using a blend of traditional Moroccan spices like cumin, coriander, and cinnamon, we transform ordinary sausage meat into a rich, complex filling that will transport your taste buds to the vibrant markets of Marrakesh. The beautiful pinwheel shape not only makes them visually appealing but also ensures every bite is a perfect balance of flaky pastry and savory filling.

      This recipe is designed to be accessible for cooks of all skill levels, from beginners to seasoned home chefs. We’ll walk you through each step with clear, detailed instructions to ensure your pinwheels turn out perfectly every time. The process is straightforward: create a flavorful sausage filling, spread it on puff pastry, roll it up, and slice it into elegant pinwheels before baking. The result is a golden, crispy, and incredibly delicious treat that’s perfect for any occasion, whether it’s a casual get-together, a holiday party, or a cozy family dinner.


      These Images shows a pinwheel stored in a freezer and a pinwheel cooked in an Air fryer.


      Why You’ll Love These Sausage Pinwheels

      The beauty of this recipe lies in its versatility. While we’ll provide a core set of spices for an authentic Moroccan flavor, you can easily adjust them to your personal preference. Want more heat? Add a touch more cayenne or a spoonful of harissa paste. Prefer a milder flavor profile? Scale back on the spices. These pinwheels are a canvas for your culinary creativity. They can be made ahead of time and frozen, making them an excellent option for meal prepping or for those busy days when you need a quick, no-fuss appetizer.

      Beyond their incredible taste, these sausage pinwheels are a great way to introduce new and exciting flavors to your repertoire. Moroccan cuisine is known for its warm spices and use of fresh herbs, which create a comforting yet exotic profile. This recipe is an ideal introduction to these flavors without being intimidating. You’ll be amazed at how a few simple ingredients can create such a memorable and impressive dish. It’s a testament to the power of spices in transforming everyday ingredients into something truly special.

      So, gather your ingredients, preheat your oven, and get ready to embark on a delicious culinary journey. These Moroccan Sausage Pinwheels are more than just a snack; they’re an experience that will delight your senses and leave your guests asking for the recipe. Let’s get started on creating a batch of these savory, flaky, and utterly irresistible treats that will become a new favorite in your home.


      Time to Prepare: 20 minutes

      Preparation Time: 20 minutes

      Time to Cook:

      • Cooking Time: 25 minutes
      • Total Time: 45 minutes

      Servings: 12 pinwheels


      Nutritional Information (per serving):

      • Calories: 150 kcal
      • Total Fat: 10g
      • Saturated Fat: 4g
      • Cholesterol: 20mg
      • Sodium: 250mg
      • Total Carbohydrates: 10g
      • Dietary Fiber: 1g
      • Protein: 5g
      • Vitamin A: 2% DV
      • Iron: 6% DV

      The images show the equipment used for this recipe. Mixing bowl and frying pan, baking tray and rolling pin, pastry brush and knife.


      Ingredients for Sausage Pinwheels

      • 1 lb ground lamb or beef
      • 1 tablespoon olive oil
      • 1 small onion, finely minced
      • 2 cloves garlic, minced
      • 1 teaspoon ground cumin
      • 1 teaspoon ground coriander
      • ½ teaspoon ground ginger
      • ½ teaspoon paprika
      • ¼ teaspoon ground cinnamon
      • Pinch of cayenne pepper (optional, for heat)
      • ½ cup fresh parsley, chopped
      • ¼ cup fresh cilantro, chopped
      • 1 sheet frozen puff pastry (thawed)
      • 1 egg, beaten (for egg wash)
      • 1 tablespoon sesame seeds

      Equipment:

      • Large mixing bowl
      • Large non-stick skillet
      • Baking sheet
      • Parchment paper
      • Rolling pin
      • Pastry brush
      • Sharp knife
      • Air fryer


      Step-by-Step Instructions for Sausage Pinwheels

      Prepare the Filling

      In a large skillet over medium heat, add the olive oil. Add the finely minced onion and cook for 3-5 minutes, or until it becomes soft and translucent. Add the minced garlic and cook for another minute until fragrant. Add the ground lamb or beef, breaking it up with a spoon as you cook. Brown the meat thoroughly, ensuring no pink remains. Drain any excess fat from the pan.

      Season and Combine

      Return the cooked meat to the skillet. Reduce the heat to low and stir in the ground cumin, coriander, ginger, paprika, cinnamon, and cayenne pepper (if using). Cook for 1-2 minutes, stirring constantly, to toast the spices and release their aromas. Remove the skillet from the heat and stir in the chopped parsley and cilantro until well combined. Allow the mixture to cool completely before proceeding to the next step. A cool filling is essential to prevent the puff pastry from becoming greasy and difficult to work with.

      Roll Out the Pastry

      On a lightly floured surface, carefully unfold the thawed puff pastry sheet. Gently roll it out into a large rectangle, about 10×15 inches, using a rolling pin. The goal is to make a smooth, even surface for the filling.

      Assemble the Pinwheels

      Once the filling is completely cooled, spread it evenly over the entire surface of the puff pastry, leaving a small 1-inch border on one of the long edges. This border will help seal the roll. Make sure the filling is spread in a thin, even layer so the pinwheels will roll up nicely.

      Air Fryer Instructions

      For a quicker cook time and an even crispier pastry, you can use an air fryer.

      1. Preheat the Air Fryer: Preheat your air fryer to 360°F (180°C) for 3-5 minutes. This is a crucial step to ensure the pastry puffs up properly.
      2. Arrange the Pinwheels: Place the sliced pinwheels in the air fryer basket in a single layer. Do not overcrowd the basket, as this will prevent the air from circulating and result in uneven cooking. Work in batches if necessary.
      3. Apply Egg Wash: Brush the tops of the pinwheels with the beaten egg wash and sprinkle with sesame seeds.
      4. Air Fry: Cook for 12-15 minutes, or until the pastry is golden brown and the filling is cooked through. Check on them halfway through to ensure they are browning evenly.
      5. Cool and Serve: Carefully remove the pinwheels from the air fryer and let them cool for a few minutes before serving.

      The images show pastry being prepared and the next image shows the mince getting spread over the prepared pastry.


      Roll and Slice

      Tightly roll the puff pastry from the long edge with the filling towards the clean border. This is the most crucial step to get the classic pinwheel shape. Once rolled, press the seam to seal it. Place the log in the freezer for 10-15 minutes to firm up. This will make it much easier to slice without squishing the shape. Use a very sharp knife to slice the log into ¾-inch thick rounds.

      Bake to Golden Perfection

      Preheat your oven to 400°F (200°C). Line a baking sheet with parchment paper. Arrange the sliced pinwheels on the prepared baking sheet, leaving about an inch of space between each one to allow them to puff up while baking. Whisk the egg in a small bowl and brush the tops and sides of each pinwheel with the egg wash. This will give them a beautiful, golden sheen. Sprinkle with sesame seeds for a final touch of flavor and texture.


      The image shows mince in a frying pan and a plate with cooked Sausage pinwheels.


      Serve and Enjoy

      Bake for 25-30 minutes, or until the pastry is golden brown and the filling is cooked through. The exact time may vary depending on your oven. Once baked, remove from the oven and let them cool for a few minutes on the baking sheet before transferring them to a wire rack. Serve warm.


      The Benefits of This Sausage Pinwheels

      These Moroccan Sausage Pinwheels are more than just a delicious snack. The inclusion of spices like cumin, coriander, and ginger not only adds incredible flavor but also provides a host of health benefits.

      These spices are known for their anti-inflammatory and antioxidant properties, which can contribute to overall well-being. Using lean ground meat, such as lamb or beef, provides a good source of protein, essential for muscle repair and a feeling of fullness.

      The addition of fresh herbs like parsley and cilantro introduces vitamins and minerals into the dish, making it a more wholesome option than many other party foods. This recipe allows you to serve a tasty and satisfying appetizer that you can feel good about.


      The gallery shows the benefits of protein from meat, cumin and ginger

      Variations on the Sausage Pinwheel Theme

      VariationDescription
      Spicy Sausage PinwheelsFor a fiery kick, add a tablespoon of harissa paste to the meat filling. You can also use a spicy sausage instead of ground meat and spices.
      Vegetarian DelightSubstitute the ground meat with a plant-based alternative or a mixture of finely chopped mushrooms and lentils. Increase the spices and add a bit of smoked paprika for a deeper flavor.
      Cheese-Lovers’ PinwheelsSprinkle a layer of crumbled feta or goat cheese over the meat filling before rolling for a tangy, creamy addition.
      Gluten-Free VersionUse a gluten-free puff pastry sheet, which is now widely available in many grocery stores. Follow the same steps as the original recipe.
      Herbacious TwistFor an even fresher flavor, increase the amount of fresh herbs and consider adding a little bit of fresh mint or dill to the filling.

      Final Thoughts for Sausage Pinwheels

      These Moroccan Sausage Pinwheels are more than just a recipe; they are an invitation to explore new and exciting flavors in your own kitchen. With a little effort, you can create a truly impressive appetizer that’s both comforting and exotic. The combination of warm spices, savory meat, and flaky pastry is simply irresistible. This is the kind of dish that will have your guests asking for seconds and requesting the recipe before they’ve even finished the first one. So go ahead, give it a try, and let these delectable sausage pinwheels transport you and your loved ones to a new world of taste.

      Frequently Asked Questions (FAQs)

      Q: Can I make these Moroccan Sausage Pinwheels ahead of time?

      A: Yes, absolutely! This is one of the best things about this recipe. You can assemble the entire log, wrap it tightly in plastic wrap, and store it in the refrigerator for up to 24 hours. When you’re ready to bake, simply slice and proceed with the baking instructions. Alternatively, you can slice the raw pinwheels, place them on a baking sheet, and freeze them until solid. Once frozen, transfer them to a freezer-safe bag for up to 2 months. When you’re ready to cook, just bake them directly from frozen, adding an extra 5-10 minutes to the baking time.

      Q: What is the best way to serve these?

      A: These pinwheels are delicious on their own, but they also pair wonderfully with a dipping sauce. A simple yogurt-based dip with a little lemon and garlic, or a spicy harissa-yogurt sauce, would complement the flavors beautifully. They are best served warm, straight from the oven, for that perfect flaky, melt-in-your-mouth texture.


      References:


      Recent Posts