Cookie Consent by Free Privacy Policy Generator Update cookies preferences

5 Bento Box Meals Kids Love

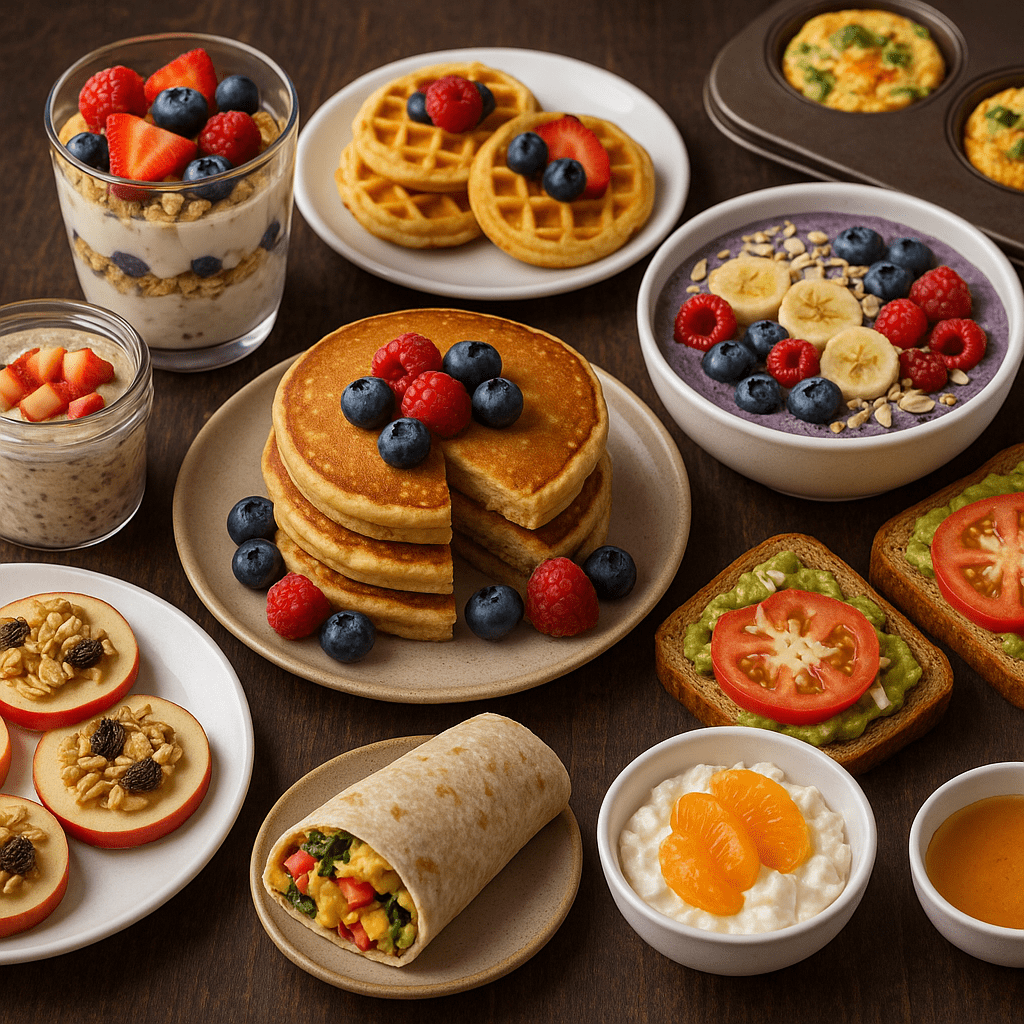
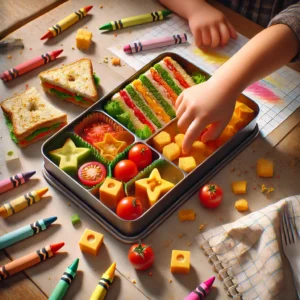
Packed with variety, nutrition, and fun presentation, these 5 bento box meals make lunchtime exciting. Each box is themed, full of fresh ingredients, and designed with kids in mind — the perfect introduction to healthy, balanced eating.


Image of bento box meals with colorful food (star-shaped sandwiches, cherry tomatoes, and cheese cubes) spilling out.
Bento Box Meals

Introduction To Bento Box Meals

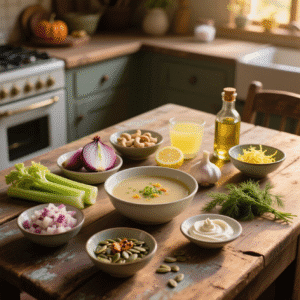
If you’ve ever packed a school lunch, you know the challenge — finding meals that are healthy, easy to prepare, and most importantly, that your kids will actually eat. Bento box meals are a perfect solution. They bring together variety, visual appeal, and balanced nutrition in one compact container. Plus, the compartmental design helps you offer multiple food groups without them mixing or turning soggy.

The beauty of bento box meals is their versatility. Whether your child prefers classic comfort foods, bright bursts of color, or adventurous flavors, a bento can be tailored to suit them. You can pack everything from sandwiches and wraps to fruit, veggies, dips, and sweet treats, all in one box.

In this article, we’ll share five creative bento box themes your kids will love. Each comes with a unique combination of flavors, textures, and colors — and every meal includes a nutritional breakdown so you can see exactly what your child is getting. We’ve also included tips on equipment, preparation, and variations to help you customize each meal to your child’s taste.

Let’s dive in and explore five exciting bento box ideas that will make lunchtime the highlight of their school day.


Equipment You’ll Need For Bento Box Meals

  • Bento Box or Lunchbox with Compartments – Keeps foods separated and fresh.
  • Silicone Cups or Dividers – For holding dips, nuts, or small snacks.
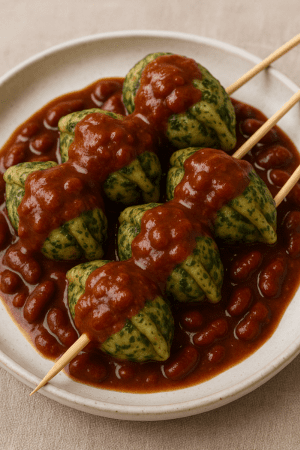
  • Mini Food Picks or Skewers – Adds fun and makes small foods easy to grab.
  • Small Sauce Containers with Lids – Ideal for dressings, dips, or yogurt.
  • Reusable Cutlery – Forks, spoons, or mini sporks.
  • Ice Pack – To keep perishable items fresh until lunchtime.

5 Bento Boxes

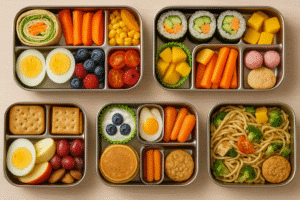
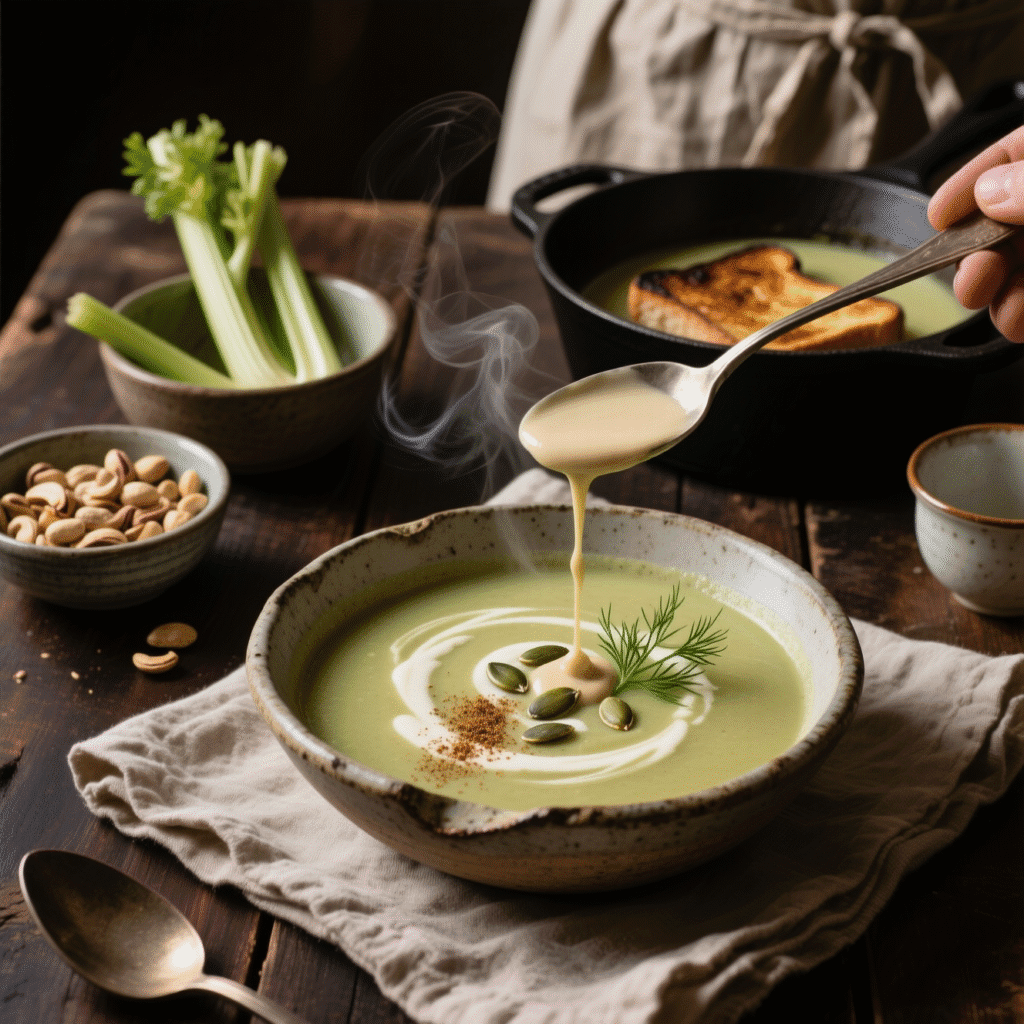
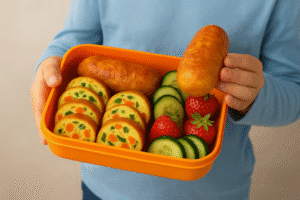
Bento Box Meal 1: Rainbow Garden Box 🌈

Theme: Bright, colorful, and plant-powered for kids who love variety.

Servings: 1 bento box meal
Prep Time: 15 minutes
Cook Time: 0 minutes

Ingredients:

  • 1 wholegrain wrap, sliced into pinwheels
  • ¼ cup hummus
  • 1 small carrot, julienned
  • ½ small cucumber, julienned
  • 4 cherry tomatoes, halved
  • ¼ cup red bell pepper strips
  • ¼ cup sweetcorn
  • ¼ cup mixed berries (blueberries, raspberries)
  • 1 small square of dark chocolate (optional treat)

Nutritional Info (approx. per serving):
Calories: 310 | Protein: 9g | Carbs: 48g | Fat: 9g


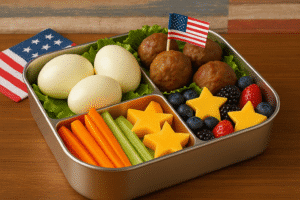
Bento Box Meal 2: Protein Power Pack 💪

Theme: For active kids who need extra energy and muscle support.

Servings: 1 bento box meal
Prep Time: 15 minutes
Cook Time: 10 minutes (boiling eggs and cooking meatballs)

Ingredients:

  • 2 boiled eggs, halved
  • 4 wholegrain crackers
  • ¼ cup cottage cheese
  • ½ cup apple slices (tossed in lemon to prevent browning)
  • ¼ cup grapes
  • 10 almonds or cashews
  • 2 mini turkey meatballs

Nutritional Info (approx. per serving):
Calories: 340 | Protein: 20g | Carbs: 22g | Fat: 17g


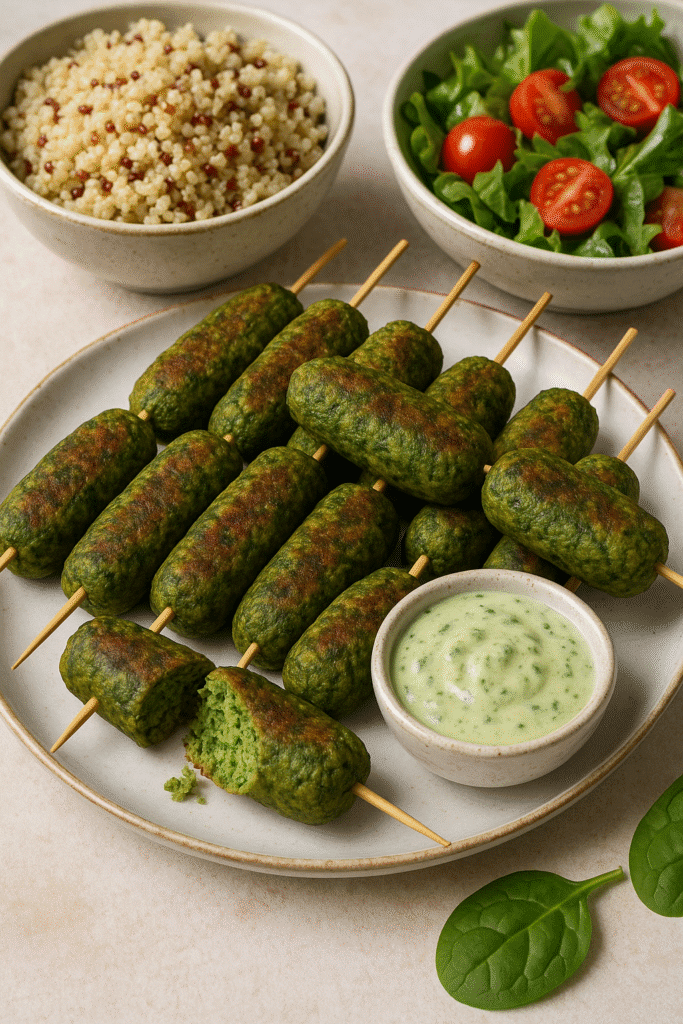
Bento Box Meal 3: Mini Sushi Fun 🍣

Theme: Kid-friendly sushi with mild flavors and no raw fish.

Servings: 1 bento box meal
Prep Time: 20 minutes
Cook Time: 5 minutes (for chicken or rice prep)

Ingredients:

  • 4 sushi rolls made with cooked chicken, avocado, and cucumber (use nori or soy paper)
  • ¼ cup edamame (shelled)
  • ¼ cup mango chunks
  • 1 mini container of soy sauce (low sodium)
  • 1 rice cracker
  • 2 mini strawberry mochi (optional)

Nutritional Info (approx. per serving):
Calories: 295 | Protein: 12g | Carbs: 46g | Fat: 7g


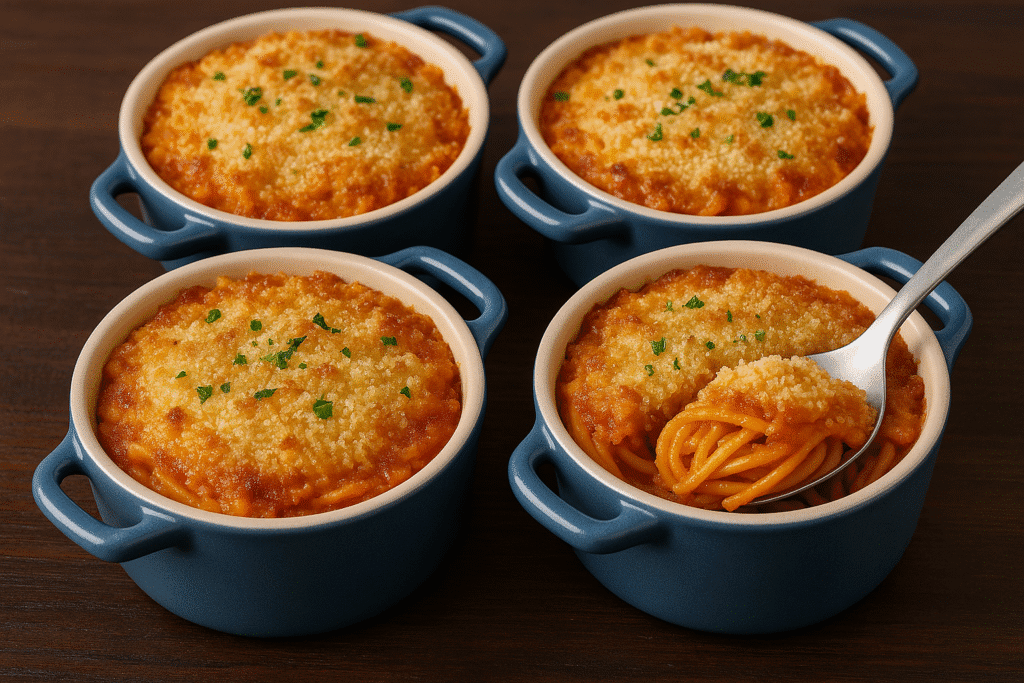
Bento Box Meal 4: Pasta & Veggie Delight 🍝

Theme: A cold pasta salad paired with fresh fruit and snacks.

Servings: 1 bento box meal
Prep Time: 15 minutes
Cook Time: 10 minutes (for pasta and chicken)

Ingredients:

  • ½ cup wholegrain pasta
  • ¼ cup diced chicken breast
  • ¼ cup chopped broccoli (lightly steamed)
  • ¼ cup cherry tomato halves
  • 1 tbsp olive oil + lemon dressing
  • ¼ cup pineapple chunks
  • 1 mini oat cookie

Nutritional Info (approx. per serving):
Calories: 330 | Protein: 15g | Carbs: 44g | Fat: 11g


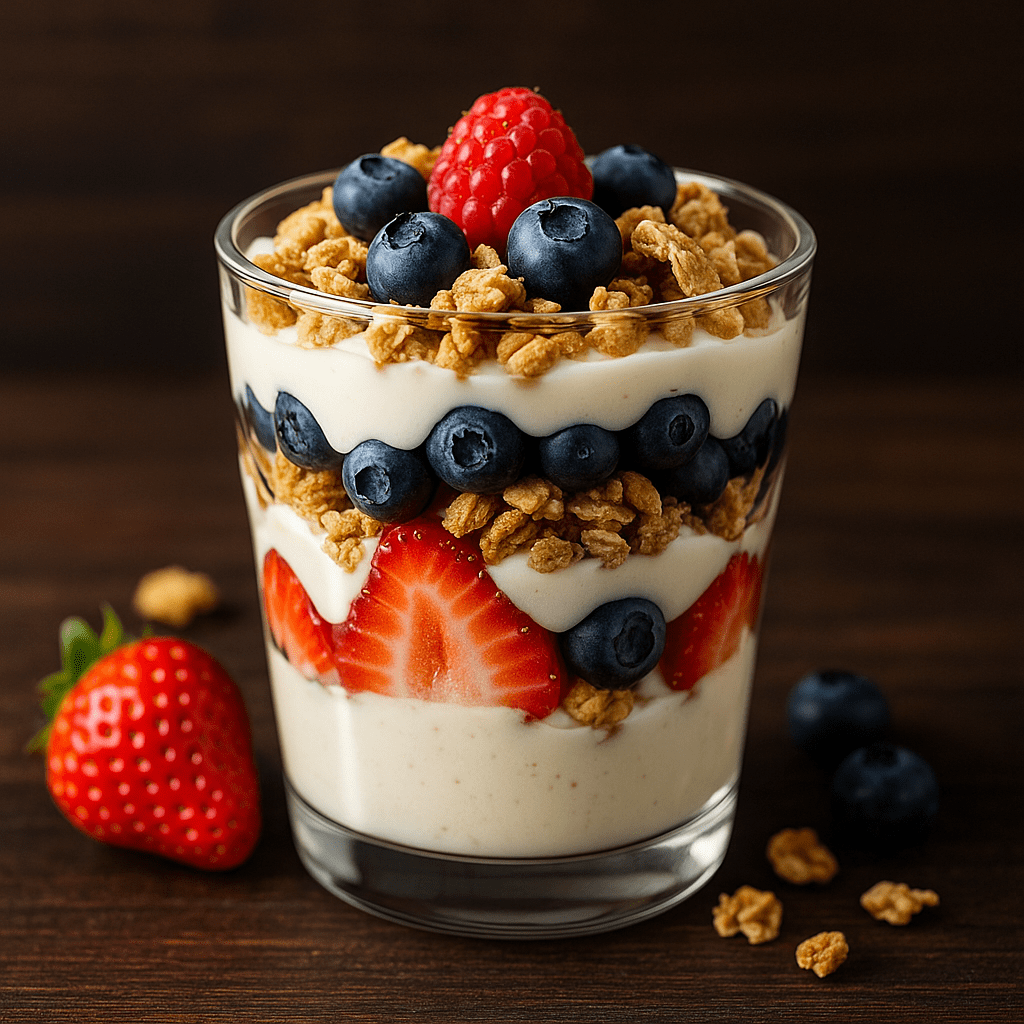
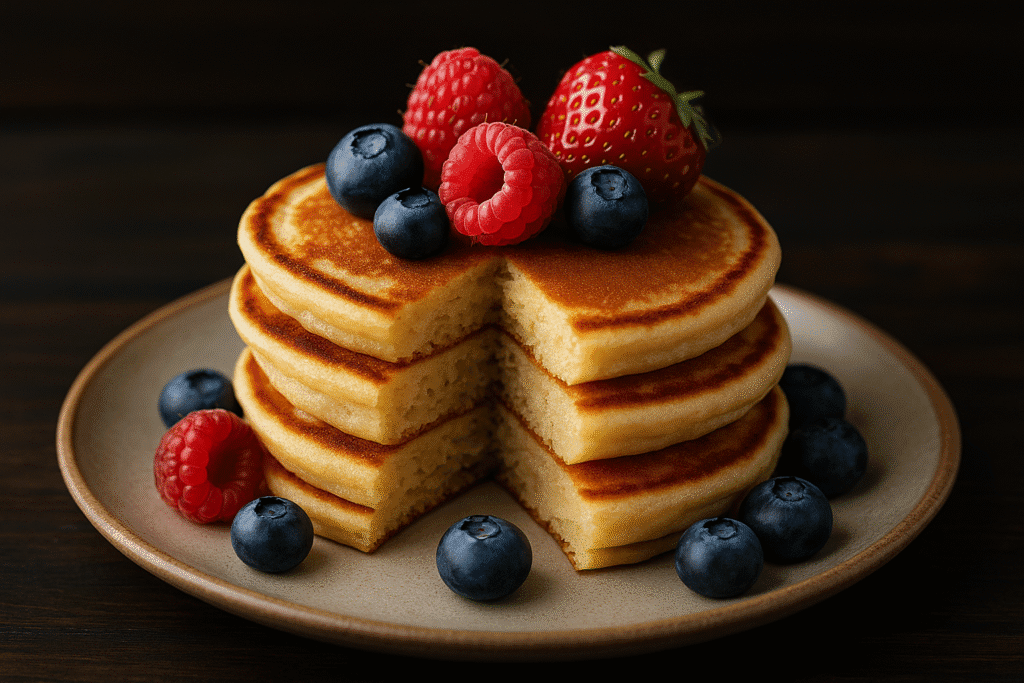
Bento Box Meal 5: Breakfast-for-Lunch Box 🥞

Theme: Turns breakfast favorites into a fun midday meal.

Servings: 1 bento box meal
Prep Time: 15 minutes
Cook Time: 5 minutes (for pancakes and boiled egg)

Ingredients:

  • 3 mini wholegrain pancakes
  • 2 tbsp Greek yogurt
  • ¼ cup blueberries
  • 1 boiled egg
  • ¼ cup baby carrots
  • 1 tsp maple syrup (in a small container)

Nutritional Info (approx. per serving):
Calories: 310 | Protein: 12g | Carbs: 44g | Fat: 9g


Time to Prepare & Cook The Bento Box Meals

  • Prep Time: 15–25 minutes (varies by meal)
  • Cook Time: 5–15 minutes for cooked elements like pasta, eggs, or meatballs

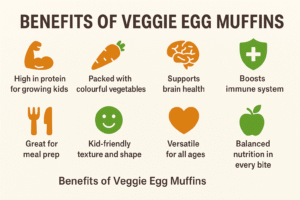
Benefits of Bento Box Meals

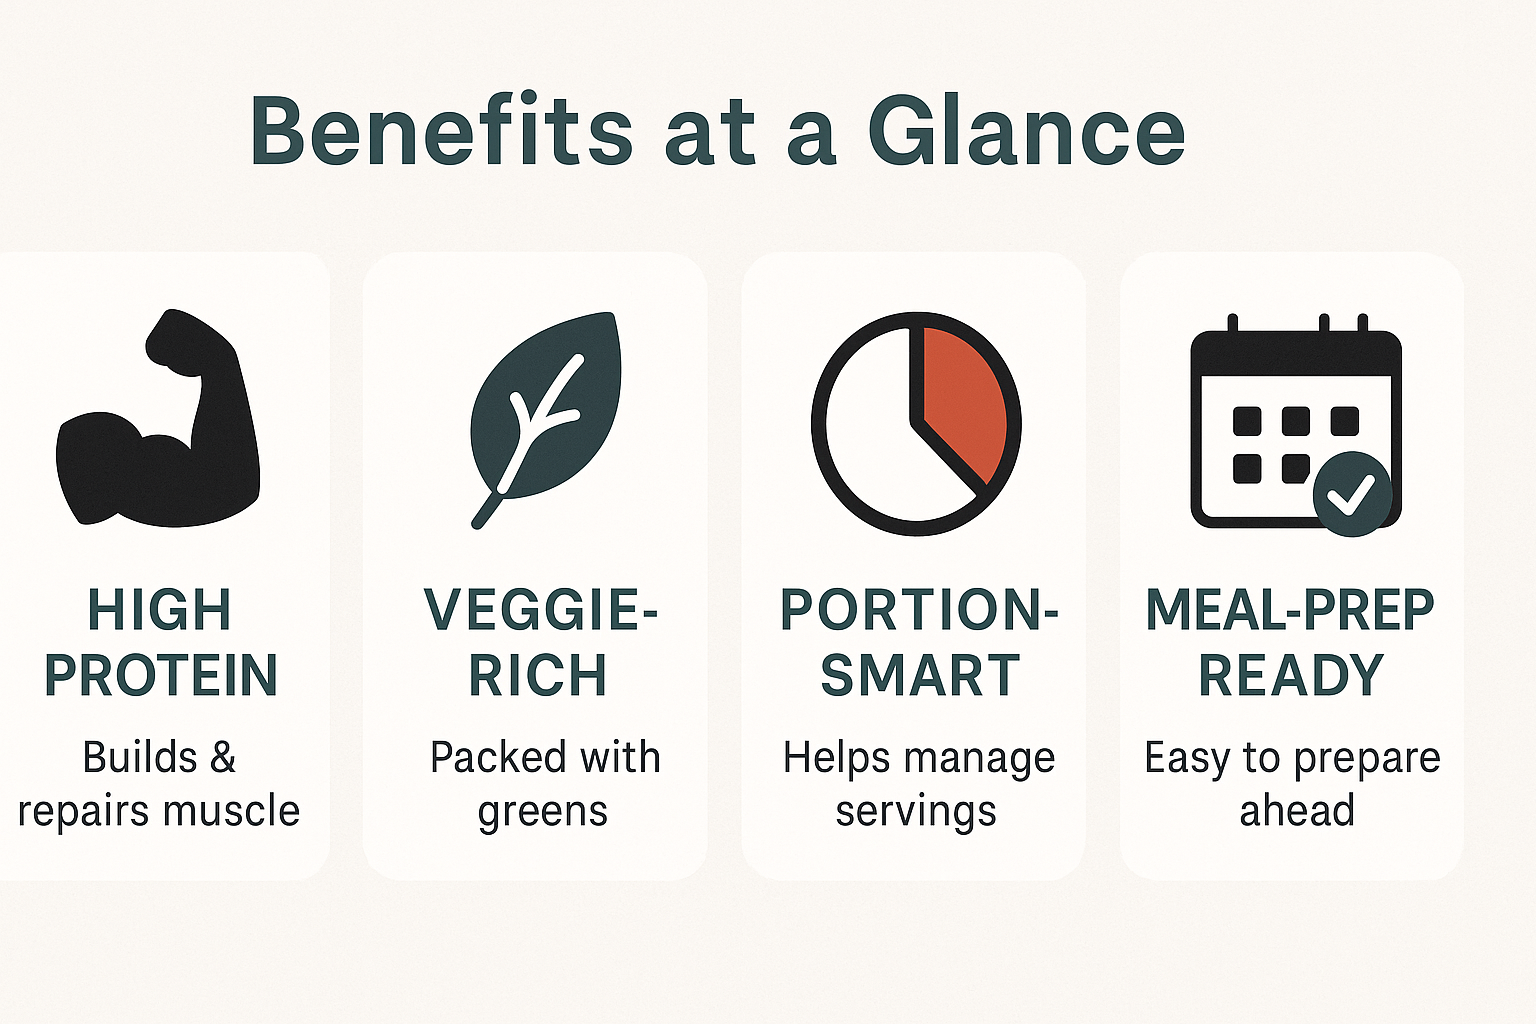
Bento box meals offer more than just visual appeal — they help you provide a balanced diet in a way that’s exciting for kids. By using different compartments, you can pack multiple food groups without mixing textures or flavors, which is ideal for picky eaters. The variety helps kids get a wide range of vitamins and minerals while keeping portion sizes in check.

These boxes encourage better eating habits by normalizing colorful, balanced plates that include proteins, complex carbohydrates, healthy fats, and fiber-rich produce. They’re also cost-effective, as you can make use of leftovers and seasonal produce. Preparing bento boxes ahead of time saves you from morning lunch-packing stress.

And the best part? Kids often eat more when food is bite-sized, easy to pick up, and visually interesting — making bento boxes a fun yet practical win for parents.


Variations To Bento Box Meals

ThemeVariation Idea
Rainbow GardenSwap hummus for guacamole
Protein Power PackReplace meatballs with baked tofu bites
Mini Sushi FunUse scrambled eggs and cucumber for tamago-style rolls
Pasta & VeggieTry pesto pasta instead of lemon dressing
Breakfast-for-LunchAdd a mini smoothie in a sealed container

Protein power packed

Final Thoughts For Bento Box Meals

Bento box meals are a creative, healthy, and fun way to keep your kids excited about lunchtime. By rotating themes and incorporating their favorite foods, you can make balanced eating a natural part of their daily routine. Whether your child is into bright, colorful veggies, protein-rich snacks, or breakfast-for-lunch treats, there’s a bento box idea here to keep them happy and nourished.


Frequently Asked Questions (FAQs)

Q1: Can I make bento box meals ahead of time?
Yes! Prepare most elements the night before, storing them in airtight containers in the fridge. Add crackers or dry snacks in the morning.

Q2: How do I keep fruit from browning?
Toss sliced apples, pears, or bananas in lemon or lime juice to slow oxidation.

Q3: Can these meals be frozen?
Some elements like cooked pasta, meatballs, and pancakes can be frozen, but fresh fruits and vegetables should be prepared fresh.

Q4: How long can bento boxes stay fresh?
With an ice pack, they can last up to 5 hours at a safe temperature.

Q5: Are bento boxes suitable for picky eaters?
Yes! You can customize the compartments with familiar foods while gradually introducing new ones.


References

  1. Academy of Nutrition and Dietetics – Kids’
  2. KidsHealth– Balanced Eating Guidelines
  3. Harvard School of Public Health – Kid’s Healthy Eating Plate

Recent Posts


Rich, Creamy & So Good for You

This creamy & so good soup is your go-to bowl of calm—vegan, gluten-free, and made with love from real ingredients like roasted celery and infused cashew cream.


A bowl of This Creamy & So Good Vegan Soup sits on a table with a towel underneath the bowl.
Creamy & So Good Soup

A Soup That Started in Stillness

Some of the best meals begin in the quiet moments—the ones when you’re feeling a little worn down, in need of something that doesn’t just fill your belly but fills your soul. I remember standing barefoot in the kitchen one late afternoon, craving something gentle, warm, and real. That’s how this soup came to life.

A Bowl You Can Trust

It’s not about trends or detox plans. It’s about a bowl of creamy comfort that you can trust. You know the kind: smooth, velvety, a little savory, and full of subtle depth. This recipe isn’t trying to sell you on miracles—just the beauty of well-cooked vegetables, thoughtfully chosen ingredients, and flavors that hug you from the inside out.

What Sets This Creamy & So Good Soup Apart

The twist that makes this soup sing? Roasting the celery first. It caramelizes slightly, mellowing its sharpness and deepening the flavor. Then there’s the cashew cream—infused with lemon zest and a touch of garlic. It’s not just creamy; it’s layered, nuanced, and so incredibly satisfying. You won’t miss dairy for a second.

Why It Became a Favorite

For me, this soup became a go-to during the weeks when everything felt like too much. It’s simple but intentional. Easy, but rich in flavor. The kind of recipe you’ll return to over and over again—not just for the taste, but for the way it makes you feel. And isn’t that what the best food does?

A Ritual in a Bowl

There’s something about gently simmered ingredients in a warm pot that resets everything. The steam rising, the soft stir of a wooden spoon, the smell of garlic and lemon in the air—it turns your kitchen into a place of care. This creamy & so good soup is more than food. It’s ritual. It’s pause. It’s a little moment of calm in a loud world.

Whether you’re prepping for the week, cooking for one, or setting the table for someone you love, this creamy & so good soup belongs in your rotation.


Soup Cooking

Time to Prepare This Creamy & So Good Soup

Prep Time: 10 minutes
Cook Time: 25 minutes
Total Time: 35 minutes
Servings: 4
Dietary Info: Vegan, Gluten-Free


Equipment You’ll Need for Easy Vegan Celery Soup with Cashews

  • Baking sheet (for roasting the celery)
  • Blender (high-speed for smooth texture)
  • Medium saucepan or soup pot
  • Fine mesh strainer (optional, for extra smoothness)
  • Ladle and serving bowls
  • Small mixing bowl for cashew cream

Soup Ingredients

Ingredients for Creamy Celery Soup Without Cream

  • 1 tablespoon olive oil
  • 1 small onion, chopped
  • 6–7 celery stalks, trimmed and chopped
  • 2 garlic cloves, minced
  • 3 cups vegetable broth
  • 1/2 cup raw cashews (soaked for 4 hours or boiled for 10 minutes)
  • 1 teaspoon lemon zest
  • Juice of 1/2 lemon
  • Salt and pepper to taste
  • Optional garnish: toasted pumpkin seeds, dill, or a swirl of infused cashew cream


How to Make This Creamy & So Good Vegan Celery Soup

  1. Roast the Celery: Preheat oven to 400°F (200°C). Place chopped celery on a baking sheet, drizzle with olive oil, and roast for 15–20 minutes until slightly golden and softened.
  2. Sauté the Base: In a soup pot, heat a little olive oil over medium heat. Add onion and garlic, cooking until soft and fragrant, about 5 minutes.
  3. Add the Roasted Celery: Stir the roasted celery into the pot with the onions and garlic. Pour in the vegetable broth.
  4. Simmer: Bring to a gentle boil, then reduce heat and let simmer for 10 minutes to meld flavors.
  5. Make the Cashew Cream: In a blender, combine soaked cashews, lemon zest, lemon juice, and 1/4 cup water. Blend until smooth and creamy.
  6. Blend the Soup: Carefully transfer soup to a blender (or use an immersion blender). Blend until smooth and creamy.
  7. Stir in Cashew Cream: Add most of the cashew cream into the blended soup, reserving a tablespoon or two for drizzling on top.
  8. Season & Serve: Taste and adjust salt and pepper. Serve hot, garnished with pumpkin seeds, dill, and a swirl of reserved cashew cream.

Nutritional Information (Per Serving)

  • Calories: 210 kcal
  • Protein: 6g
  • Carbohydrates: 18g
  • Fat: 14g
  • Fiber: 4g
  • Sugar: 4g
  • Sodium: 480mg

Note: Based on standard ingredients. Nutritional values may vary depending on brands and toppings.


Health Benefits of This Creamy & So Good Vegan Soup

  • This easy vegan celery soup with cashews isn’t just a cozy hug in a bowl—it also offers a nourishing boost with every spoonful:
  • Hydration Support: Celery is made up of over 90% water, making this soup a hydrating choice, especially on dry days or when you’re feeling sluggish.
  • Rich in Antioxidants: Lemon zest, garlic, and olive oil contain compounds known to reduce inflammation and fight oxidative stress.
  • Heart-Healthy Fats: The cashews add healthy monounsaturated fats, which support heart health and help keep you feeling fuller longer.
  • Naturally Alkalizing: Celery and lemon help maintain a balanced pH, which supports digestion and may reduce bloating.
  • Low in Calories, Big on Flavor: This creamy & so good celery soup is filling and comforting without being heavy.
  • Great for Gut Health: Blended soups like this one are gentle on digestion, and the fiber from celery and cashews supports gut regularity.
  • Immune-Supporting: Garlic is known for its antimicrobial properties and immune-boosting effects, making this soup perfect for cold season.
  • Tip: Add a teaspoon of grated fresh ginger during the sauté step for an added immunity kick and subtle warmth.

Someone eating soup

Make It Yours: Customizing Your Creamy & So Good Soup

  • Add Heat: Stir in red pepper flakes or cayenne for a little kick.
  • Make It Herby: Blend in fresh parsley, tarragon, or thyme.
  • Add Protein: Top with crispy chickpeas or hemp seeds.
  • Switch the Base: Try roasted parsnips or fennel alongside celery.
  • Top It Off: Use toasted breadcrumbs, herbed oil, or caramelized onions as a finishing touch.
  • Go Citrus: Add extra lemon juice or a hint of orange zest for brightness.
  • Add Greens: Stir in baby spinach or kale at the end for a leafy boost..

Final Thoughts on This Creamy Celery Soup Without Cream

This creamy & so good celery soup isn’t flashy—it’s thoughtful. Nourishing in the quiet way a handwritten letter is, or a phone call from an old friend. It asks little of you, but offers plenty in return. A bowl that’s as soothing as it is satisfying. May it become part of your own quiet kitchen rituals.


References

  1. Healthline – 5 Healthy Benefits of Adding Celery to Your Diet
  2. Cleveland Clinic – 4 Health Benefits of Cashews
  3. Harvard T.H. Chan – The Role of Plant-Based Fats

Recent Posts


Easy Smoothies Kids Love — Full of Hidden Veggies


This easy smoothies recipe is a fun, healthy way to sneak more vegetables into your child’s diet. Packed with flavor, color, and nutrients, it’s a kid-approved breakfast or snack. Whether blended fresh or made ahead, these veggie-loaded smoothies are sure to please.


Image shows 3 different flavoured Easy Smoothies for kids on a counter top.
Easy Smoothies

A Smooth Start to the Day

When mornings get busy, a smoothie is one of the easiest ways to make sure your kids start the day nourished and energized. The beauty of smoothies is that they’re quick, customizable, and can hide a surprising amount of vegetables without affecting taste.

Kids love the sweet, fruity flavors, while parents appreciate the boost of vitamins and minerals. By blending fruits with mild-tasting veggies, you create a drink that’s both fun and functional.

The key is to balance flavors so the vegetables blend seamlessly into the background, leaving the fruit to shine. The result is a colorful, creamy drink that looks like a treat but packs serious nutrition.

Plus, smoothies are versatile. They can be enjoyed for breakfast, as a post-school snack, or even as a lunchbox side (frozen into pops for warmer days).

With this recipe, you’ll be making smoothies your kids will request again and again — all while giving them a healthy head start.


Time to Prepare

5 minutes

Time to Blend

1–2 minutes


Equipment

  • Blender – A high-speed blender works best for a smooth, creamy texture.
  • Measuring cups & spoons – For accurate proportions.
  • Knife & chopping board – To prep fresh fruit and veggies.
  • Reusable straws or cups with lids – Great for kids on the go.

Alternative:
If you don’t have a high-speed blender, use a standard blender but blend in smaller batches, adding a little extra liquid. A hand blender can also work, though you may need to chop ingredients into very small pieces beforehand.


Ingredients (Serves 2)

  • 1 cup frozen mango chunks
  • 1 banana (fresh or frozen)
  • 1 cup baby spinach (fresh or frozen)
  • ½ cup cooked and cooled carrot or sweet potato (for a mild sweetness)
  • 1 cup milk of choice (dairy or non-dairy)
  • ½ cup Greek yogurt (plain or vanilla)
  • 1 tbsp honey or maple syrup (optional)
  • 1 tbsp chia seeds or ground flaxseed (optional, for extra fiber)


Instructions For Easy Smoothies

  1. Prepare the vegetables. If using fresh carrot or sweet potato, peel, chop, and steam until tender, then cool completely before blending. This prevents the smoothie from being too warm.
  2. Add ingredients to the blender. Start with liquid (milk) at the bottom, then add yogurt, banana, mango, spinach, cooked veg, and any optional seeds or sweetener.
  3. Blend until smooth. Use the highest setting for 1–2 minutes. If using a standard blender, blend in stages to avoid lumps. For hand blenders, use a tall container and blend until fully combined.
  4. Adjust thickness. If too thick, add more milk; if too thin, add extra frozen fruit.
  5. Serve immediately. Pour into cups, add straws, and watch them disappear!
  6. For later use: Refrigerate in a sealed container for up to 24 hours or freeze into popsicle molds for a refreshing snack.

Smoothie Ingredients

Benefits of Easy Smoothies

  • Vegetable boost without the fuss – The spinach and cooked carrot or sweet potato are virtually undetectable in flavor.
  • Supports daily nutrition goals – Packed with vitamins A, C, and K, plus fiber and antioxidants.
  • Kid-friendly flavor & texture – Naturally sweet from fruit, creamy from yogurt, and smooth thanks to blending.
  • Adaptable for dietary needs – Works with dairy-free, nut-free, and gluten-free options.
  • Great for picky eaters – A fun way to add vegetables without resistance.
  • Make-ahead convenience – Perfect for batch prepping school snacks or quick breakfasts.

Variations On Easy Smoothies

VariationIngredients SwapNotes
Berry BlastSwap mango for mixed berriesAdds antioxidants and a tangy flavor
TropicalAdd pineapple + coconut milkBoosts vitamin C and gives island vibes
Protein PowerAdd protein powderIdeal for active kids needing extra energy
Chocolate TreatAdd cocoa powder + more bananaTastes like dessert while staying healthy
Green GlowIncrease spinach to 2 cupsPerfect for kids who already like greens

Smoothie Benefits

Nutritional Information (Per Serving)

  • Calories: ~210
  • Protein: 8g
  • Carbohydrates: 38g
  • Fiber: 6g
  • Sugars: 23g (natural from fruit & dairy)
  • Fat: 4g
  • Vitamin A: 90% DV
  • Vitamin C: 70% DV

Frequently Asked Questions (FAQs)

Q1: Can I use frozen spinach?
Yes! Frozen spinach works perfectly and can save prep time. Just add it directly to the blender — no thawing needed.

Q2: How can I make the smoothie thicker?
Add more frozen fruit or reduce the milk slightly. Frozen banana is especially good for creaminess.

Q3: Can I hide other vegetables in this smoothie?
Absolutely! Try steamed zucchini, cauliflower, or pumpkin for extra nutrients without changing the flavor much.

Q4: Will my kids taste the vegetables?
Not likely, especially if you use sweeter fruit like mango, pineapple, or banana to balance flavors.


Final Thoughts On Easy Smoothies

These easy smoothies are a busy parent’s dream — quick to make, loaded with hidden veggies, and enjoyed by kids without complaint. They’re endlessly adaptable, work for different dietary needs, and make mornings less stressful.

Whether you’re serving them fresh, packing them for lunch, or freezing into pops, this recipe is one you’ll keep coming back to.

Give them a try tomorrow morning and see how quickly your kids ask for seconds!


Kid holding a Smoothie

References

  1. USDA FoodData Central – Nutritional data for Bananas
  2. HealthyChildren – Are blended smoothies good for my child?
  3. National Nutrition Council– Tips for Healthful Snacking of Young Children

Recent Posts


Mini Veggie Spaghetti Casseroles you Will Love

Discover the ultimate veggie spaghetti casseroles —individual portions of cheesy, veggie-packed spaghetti bakes topped with golden breadcrumbs. Pair with a fresh side salad or garlic green beans for a complete, satisfying meal.


Image shows 4 mini Veggie Spaghetti Casseroles on a table top.
Veggie Sphagetti casseroles

A Comforting Twist on a Classic – Mini Veggie Spaghetti Casseroles

Sometimes, the best meals are the ones that bring together familiar flavors and a few clever upgrades. That’s exactly what these veggie spaghetti casseroles deliver—a comforting pasta bake made with a smooth, thick vegetable sauce, baked in charming mini casserole dishes, and topped with golden cheese and breadcrumbs.

Instead of using a standard jarred pasta sauce, this recipe blends fresh or frozen vegetables into a velvety, flavorful sauce. It’s a sneaky yet effective way to add more vitamins and minerals to your meals—ideal for kids or anyone who needs a little help reaching their daily veggie goals.

These casseroles are portioned into individual servings, making them just right for family dinners, packed lunches, or even dinner parties where presentation matters. They look impressive on the table, but they’re incredibly easy to make.

The topping—made from a mix of cheese and breadcrumbs—turns irresistibly crisp and golden in the oven or air fryer. Beneath it lies perfectly cooked spaghetti coated in a thick, savory vegetable sauce. And the best part? You can prepare everything in advance, making this recipe a weeknight lifesaver.

Whether you enjoy them straight from the oven, save leftovers for the next day, or transform them into popcorn pasta snacks, these casseroles are the definition of flexible, family-friendly cooking.


Time to Prepare

15 minutes

Time to Cook/Blend

25 minutes


Ingredients

Ingredients (Serves 4)

  • 200g (7oz) spaghetti
  • 1 tablespoon olive oil
  • 1 medium onion, chopped
  • 2 cloves garlic, minced
  • 1 medium carrot, diced
  • 1 red bell pepper, chopped
  • 1 small zucchini, chopped
  • 100g (3.5oz) spinach, fresh or frozen
  • 400g (14oz) canned chopped tomatoes
  • 1 teaspoon dried oregano
  • 1 teaspoon dried basil
  • Salt and pepper, to taste
  • 100g (3.5oz) grated mozzarella cheese
  • 4 tablespoons breadcrumbs (panko or regular)
  • Extra olive oil, for drizzling

Equipment For Veggie Spaghetti Casseroles

To make these delicious Veggie Spaghetti Casseroles, you’ll need:

  • 4 mini oven-safe casserole dishes (ceramic or glass, approx. 10–12 cm diameter) — ideal for individual portions.
  • Medium saucepan — for cooking the pasta and vegetables.
  • High-speed blender or food processor — to blend the cooked vegetables into a smooth, thick sauce.
    Alternative: Use a hand blender directly in the saucepan if you don’t have a countertop blender.
  • Mixing bowl — to combine the pasta and sauce before assembling the casseroles.
  • Spoon or ladle — for portioning into dishes.
  • Cheese grater — for grating fresh cheese topping.
  • Measuring cups & spoons — to ensure ingredient accuracy.
  • Air fryer-safe ramekins (optional) — if baking in an air fryer instead of a traditional oven.

Alternative if you don’t have mini casserole dishes:
Use one medium-sized ovenproof dish instead. You may need to increase the baking time by 5–8 minutes. Once baked, you can scoop or cut into individual portions, or even slice into squares for easy lunchbox packing.


Instructions

  1. Cook the spaghetti
    • Bring a large pot of salted water to a boil. Add the spaghetti and cook according to package instructions until al dente. Drain and set aside.
  2. Prepare the vegetable sauce
    • Heat olive oil in a large skillet over medium heat. Add onion and garlic, sauté for 2–3 minutes until softened.
    • Add carrot, bell pepper, zucchini, and spinach. Cook for 5–6 minutes until the vegetables soften.
    • Stir in chopped tomatoes, oregano, and basil. Season with salt and pepper. Simmer for 10 minutes.
  3. Blend the sauce
    • Use an immersion blender to blend the vegetables into a thick, smooth sauce. If you don’t have one, transfer the mixture to a blender in batches and blend carefully. Return to the skillet and keep warm.
  4. Assemble the casseroles
    • Preheat the oven to 180°C (350°F).
    • Divide the cooked spaghetti among four mini oven-safe casserole dishes. Pour the vegetable sauce evenly over each dish and stir gently to coat.
  5. Add the topping
    • Sprinkle each casserole with mozzarella cheese and breadcrumbs. Drizzle lightly with olive oil for extra crispiness.
  6. Bake or air fry
    • Oven: Bake for 12–15 minutes, until the topping is golden brown.
    • Air fryer: Place mini casseroles in the basket and cook at 180°C (350°F) for 8–10 minutes.
  7. Serve and enjoy
    • Serve hot with a side salad or garlic bread.

Benefits

Benefits of Veggie Spaghetti Casseroles

These veggie spaghetti casseroles aren’t just delicious—they’re practical, versatile, and packed with nutrition.

  • Packed with hidden vegetables – The blended vegetable sauce is an easy way to increase your daily veggie intake without even realizing it. Great for sneaking in nutrients for picky eaters.
  • Serves four – This recipe is designed for four individual servings, making it perfect for a small family meal or for prepping lunches ahead of time.
  • Creative leftovers – Any leftover casserole can be turned into popcorn pasta. Simply roll cold leftovers into bite-sized balls, coat lightly with breadcrumbs if desired, and pan-fry or air fry until crisp for a fun snack.
  • Works with fresh or frozen vegetables – Whether you have fresh seasonal produce or a freezer stash, both work perfectly in this recipe.
  • Air fryer friendly – You can bake these in an air fryer instead of the oven. Just place the mini casseroles in the basket and cook at 180°C (350°F) for about 8–10 minutes, or until golden and heated through.
  • Meal prep made easy – The mini format makes storage simple. Just cover, refrigerate, or freeze for quick future meals.
  • Customizable – Switch up the pasta, vegetables, or toppings to suit your taste or dietary needs.

Nutritional Information (Per Serving)

  • Calories: ~350 kcal
  • Protein: 15g
  • Carbohydrates: 42g
  • Fiber: 6g
  • Fat: 14g
  • Saturated Fat: 6g
  • Sodium: 480mg
  • Vitamin A: 80% of daily value
  • Vitamin C: 60% of daily value
  • Calcium: 25% of daily value
  • Iron: 15% of daily value

Values are approximate and will vary depending on the exact ingredients used.


Variations

Variation TypeAdjustment
Gluten-FreeUse gluten-free spaghetti and breadcrumbs.
Extra ProteinAdd cooked chicken or lentils to the sauce.
Low-FatUse reduced-fat cheese and limit the olive oil drizzle.
SpicyAdd a pinch of chili flakes to the vegetable sauce.
VeganSwap mozzarella for plant-based cheese and use vegan breadcrumbs.

Variations

Final Thoughts On Veggie Spaghetti Casseroles

These veggie spaghetti casseroles combine all the comforting elements of a baked pasta dish with the added bonus of extra vegetables and portion control. They’re easy enough for weeknights yet special enough for serving to guests.

With their creamy, veggie-rich sauce, golden breadcrumb topping, and endless customization options, they’re sure to become a family favorite. And don’t forget—leftovers can turn into a completely new snack the next day, giving you two meals in one.

If you’re looking for a cozy, healthy, and adaptable dinner, these mini casseroles are your new go-to recipe.


Frequently Asked Questions (FAQs)

Q: Can I make this ahead of time?
Yes! Assemble the casseroles up to a day in advance, cover tightly, and refrigerate. Bake or air fry just before serving.

Q: Can I freeze these casseroles?
Absolutely. Let them cool completely, wrap each dish in foil, and freeze for up to 3 months. Reheat from frozen at 160°C (320°F) until hot in the center.

References

  1. Harvard T.H. Chan – Vegetables and Fruits
  2. USDA –Nutritive Value of Foods
  3. British Nutrition Foundation – A healthy, balanced diet

Recent Posts


Quick Veggie Egg Muffin Rolls Your Kids Will Love

These veggie egg muffin rolls are a delicious and healthy option the whole family can enjoy. Packed with fresh vegetables and protein, they’re quick to prepare and easy to customize. Whether for breakfast, lunch, or a snack, these veggie egg muffin rolls will be a hit in your kitchen.


White Plate full of Veggie Egg Muffin Rolls
Veggie Egg Muffin Rolls

A Fun and Healthy Twist on Egg Muffin for Kids

Egg muffins are a parent’s dream — they’re protein-packed, easy to make ahead, and endlessly customisable. But if you want to add a little extra fun factor to your kids’ meals, veggie egg muffin rolls are the way to go. They’re shaped like mini baguettes, making them easy for little hands to hold, and their bright vegetable filling looks as good as it tastes.

In this recipe, we’ll use fresh eggs and colourful vegetables to make something that’s healthy enough for breakfast, lunch, or snacks, but exciting enough that your kids will actually want to eat it.

You can prepare them in silicone baguette tins for a smooth, roll-shaped finish, or bake them in a loaf tin and slice them into kid-friendly portions. They’re freezer-friendly, quick to reheat, and travel well in lunchboxes.

Not only are they simple to make, but you can also get your children involved in the process. From whisking eggs to choosing their favourite veggie add-ins, this recipe is a great way to get kids excited about cooking.

Let’s dive in and make these colourful, healthy, and delicious veggie egg muffin rolls that will become a go-to in your home.


Kid holding lunchbox

Time to Prepare: 10 minutes

Time to Cook: 18–22 minutes (mini rolls) / 30–35 minutes (loaf tin)


Equipment You’ll Need

Silicone baguette mold – creates the smooth, rounded rolls and helps achieve an even golden coating.

Alternative: Standard loaf tin. If using a loaf tin, bake as one loaf, then slice into mini rolls after cooling. Adjust cooking time to 30–35 minutes total.

Large mixing bowl

Whisk or fork

Non-stick baking brush

Measuring cups and spoons

Sharp knife for slicing rolls if using loaf tin


Ingredients (Makes 6 rolls or 1 loaf)

  • 6 large eggs
  • 1 cup (120g) finely chopped mixed vegetables (e.g., spinach, bell pepper, zucchini, carrot)
  • ½ cup (60g) grated cheese (cheddar, gouda, or parmesan for a golden crust)
  • ¼ cup (30g) cooked quinoa or cooked brown rice (optional, for extra texture)
  • 2 tbsp milk or dairy-free milk alternative
  • 1 tsp potato starch or cornstarch (optional – improves coating)
  • 1 tsp garlic powder (optional)
  • ½ tsp salt
  • ¼ tsp black pepper
  • 1–2 tsp light olive oil or melted butter (for brushing molds and tops

Ingredients

Instructions For Veggie Egg Muffin Rolls

  1. Preheat the oven to 170°C (340°F). Lightly grease your silicone baguette mold or loaf tin with a small amount of olive oil or butter.
  2. Prepare the vegetables: Chop finely so they cook evenly. If using watery veggies like zucchini, pat them dry with a paper towel to avoid sogginess.
  3. Mix the batter: In a large mixing bowl, whisk together eggs, milk, potato starch, garlic powder, salt, and pepper until well combined. Stir in the chopped vegetables, quinoa or rice (if using), and grated cheese.
  4. Fill the molds: Spoon the mixture evenly into each cavity of the baguette mold, filling about ¾ full to allow for rising.
  5. Brush for a golden coating: Lightly brush the tops of the batter with olive oil or melted butter. This step is key for the golden, crisp look.
  6. Bake in two stages:
  7. First stage: Bake at 170°C (340°F) for 14–16 minutes, or until mostly set.
  8. Second stage: Increase heat to 200°C (400°F) for an extra 4–6 minutes to achieve that golden, crisp top.
  9. (If using loaf tin – bake 25 minutes at 170°C, then 5–8 minutes at 200°C.)
  10. Cool slightly before removing: Let the rolls rest for 3–5 minutes before removing from the mold. If using loaf tin, allow to cool fully before slicing into mini rolls.
  11. Serve: Enjoy warm, or pack into lunchboxes. They also taste great at room temperature.

Egg Muffin Mixture

Storage and Reheating Tips

  • Refrigeration: Store cooled muffins in an airtight container in the fridge for up to 4 days.
  • Freezing: Wrap individually and freeze for up to 2 months. Thaw overnight in the fridge before reheating.
  • Reheating: Warm in the microwave for 30–40 seconds, or reheat in an oven at 160°C (320°F) for 5–7 minutes.

Benefits of Veggie Egg Muffin

  • 1. A Healthy, Kid-Friendly Breakfast or Snack
  • Veggie egg muffin rolls are packed with high-quality protein from eggs, fiber from vegetables, and healthy fats from olive oil or cheese. This balance helps keep kids fuller for longer, reducing the temptation for sugary snacks.
  • 2. Fun to Eat and Perfectly Portable
  • Shaped like mini baguettes, these rolls are fun for kids to hold and easy to pack into lunchboxes. The sealed roll shape means less mess, making them a stress-free option for busy mornings or school snacks.
  • 3. That Irresistible Golden Crisp Coating
  • The light brushing of olive oil or butter before baking creates a golden, crisp finish — not only making the rolls more visually appealing but also adding a delicious texture that kids love. This small step turns a simple egg muffin into a bakery-style treat without deep frying.
  • 4. Customizable for Every Taste
  • You can easily swap vegetables depending on what your kids like or what’s in season — from spinach and sweetcorn to grated carrot or peas. Cheese can be changed for milder or stronger flavors, and the recipe works with dairy-free alternatives.
  • 5. Balanced Nutrition in Every Bite
  • Each roll contains protein, vitamins, minerals, and slow-digesting carbs (if adding quinoa or brown rice). This combination helps maintain steady energy levels and supports growing bodies.
  • 6. Great for Batch Cooking and Meal Prep
  • These rolls freeze well and reheat beautifully, making them ideal for busy parents who want quick, healthy options on hand. The golden coating stays appealing even after reheating.

Benefits of Veggie Egg Muffin Rolls
Benefits

Variations For Veggie Egg Muffin

Variation TypeSwap or Add-In IdeasNotes
Cheese LoversExtra cheddar, mozzarella, or fetaAdjust salt if using salty cheese
Veggie BoostAdd mushrooms, zucchini, or sweetcornSqueeze excess liquid from watery vegetables
Protein PackedAdd diced cooked chicken, turkey, or hamReduce cheese slightly to balance texture
Dairy-FreeUse plant-based milk and dairy-free cheeseBaking time remains the same
Spice It UpAdd paprika, cumin, or mild chilli flakesKeep mild for kids unless they enjoy a bit of spice

Frequently Asked Questions (FAQs)

Q: Can I make these without cheese?
A: Yes! The muffins will still be delicious and hold together well without cheese, although cheese adds extra flavour and richness.

Q: Can I use frozen vegetables?
A: Absolutely. Just thaw and drain them well before adding to the egg mixture to avoid excess moisture.


Final Thoughts On Veggie Egg Muffin

These quick veggie egg muffin rolls are more than just a healthy snack — they’re a fun way to help your kids eat more vegetables without fuss. Whether you bake them as rolls or slice them from a loaf, they’re colourful, flavourful, and perfect for busy mornings or school lunches. Once you try them, they’ll likely become a weekly staple in your kitchen.


References

  1. Harvard T.H. Chan – Nutrition Source: Eggs
  2. British Nutrition Foundation – Benefits of Vegetables

Recent Posts


Healthy Spinach Falafel Kebabs You’ll Love

These Spinach Falafel Kebabs are a wholesome twist on a Middle Eastern classic, perfect for anyone who loves vibrant, plant-based flavors. With fresh herbs, nutrient-rich spinach, and hearty chickpeas, they’re a delicious way to fuel your body. Whether air-fried, oven-baked, or pan-seared, these kebabs are healthy, satisfying, and full of flavor.


The image os Skewered Spinach Falafel Kebabs on a plate. with side dishes
Spinach Falafels on Skewers

Introduction – Why You’ll Love These Spinach Falafel Kebabs

Falafel is a much-loved street food, known for its crispy outside and soft, herb-packed inside. In this recipe, we’re giving the traditional version a nutritious upgrade by blending in spinach and fresh herbs to create Spinach Falafel Kebabs that are not only flavorful but also loaded with vitamins and minerals.

These kebabs aren’t deep-fried — instead, we’ll explore healthier cooking methods, including baking in the oven and using an air fryer. Both methods keep them crispy on the outside while locking in moisture on the inside. They’re perfect for a light lunch, a hearty dinner, or even as part of a party platter.

Spinach adds a vibrant green color, subtle earthiness, and plenty of nutritional benefits, including iron, vitamin K, and antioxidants. Combined with chickpeas for protein and fiber, these kebabs are satisfying without being heavy.

What’s more, they’re incredibly versatile. Serve them in pita bread with hummus and salad, alongside quinoa and roasted vegetables, or simply as a high-protein snack with a refreshing dip.

If you’re looking for a healthy, easy-to-make plant-based recipe that’s both visually stunning and full of flavor, these Spinach Falafel Kebabs are about to become a favorite in your kitchen.


Ingredients

Time to Prepare

15 minutes

Time to Cook

Air fryer: 10 minutes
Oven: 20 minutes
Pan-fry: 8–10 minutes


Ingredients (Makes 4 servings – 2 kebabs per serving)

  • 2 cups fresh spinach leaves, washed and dried
  • 1 cup fresh parsley leaves (no thick stems)
  • ½ cup fresh coriander (cilantro) leaves
  • 3 cloves garlic, peeled
  • 1 small onion, roughly chopped
  • 1½ cups cooked chickpeas (either home-cooked or canned, drained and rinsed)
  • 1 tsp ground cumin
  • 1 tsp ground coriander
  • 1 tsp baking powder
  • ½ tsp sea salt (or to taste)
  • ¼ tsp black pepper
  • 2 tbsp whole wheat flour or chickpea flour
  • Juice of 1 lemon
  • Olive oil spray (for baking or air frying)


Instructions For Spinach Falafel Kebabs

1. Prepare the Chickpeas

If using dried chickpeas, soak them overnight in plenty of water. Drain, then boil until tender (about 40 minutes). If using canned chickpeas, simply drain and rinse them well under cold water. Pat dry with a clean towel to remove excess moisture — this helps keep the kebabs from becoming soggy.


2. Blend the Greens

  • If using a food processor: Add spinach, parsley, coriander, garlic, and onion to the bowl. Pulse until finely chopped, scraping the sides as needed. Avoid over-blending — you want fine pieces, not a paste.
  • If using a hand blender: Place the greens and aromatics in a large bowl and blend in short bursts, stirring between blends for even chopping.
  • If no electric tools: Finely chop spinach, parsley, coriander, garlic, and onion with a sharp knife until uniform in size.

3. Add Chickpeas and Spices

  • Add the prepared chickpeas, cumin, ground coriander, baking powder, salt, and pepper to the greens.
  • If using a food processor or hand blender: Pulse or blend until the mixture is coarse and crumbly but holds together when pressed.
  • If mixing by hand: Mash the chickpeas with a potato masher or fork into the greens until you get a chunky paste.

4. Bind the Dough

  • Add flour and lemon juice to the mixture.
  • If using a processor or blender: Pulse once or twice (meaning brief 1–2 second bursts) just to mix — don’t over-blend.
  • If mixing by hand: Stir in flour and lemon juice with a wooden spoon, then knead lightly until it forms a soft dough.

5. Shape the Kebabs

Divide the dough into 8 equal portions. Roll each portion into a sausage shape and thread onto skewers. If you prefer round falafel balls, you can make them about the size of a golf ball instead.


 process of blending the falafel mixture in a food processor (or alternative method like a hand blender)
Falafel Mixture

6. Cook the Spinach Falafel Kebabs

Air Fryer (Healthiest Option)

  • Preheat the air fryer to 190°C (375°F).
  • Lightly spray the kebabs with olive oil.
  • Cook for 10 minutes, flipping halfway, until golden brown and crispy.

Oven-Baked

  • Preheat oven to 200°C (400°F).
  • Place kebabs on a baking tray lined with parchment paper.
  • Spray lightly with olive oil and bake for 20 minutes, turning halfway.

Pan-Fried

  • Heat a non-stick skillet over medium heat with a thin layer of olive oil.
  • Cook kebabs for 8–10 minutes, turning to brown all sides evenly.

Air Fryer kebabs
Falafel cooked in Air Fryer

Storage & Reheating Tips

One of the best things about spinach falafel kebabs is that they store and reheat beautifully, making them perfect for meal prep or quick weekday lunches.

  • Refrigeration: Once cooled, place the falafel kebabs in an airtight container. Store in the fridge for up to 4 days.
  • Freezing: For longer storage, arrange the cooled kebabs in a single layer on a baking sheet and freeze until firm. Transfer to a freezer-safe bag or container and store for up to 3 months.
  • Reheating in the Oven: Preheat the oven to 180°C (350°F). Place the kebabs on a lined baking tray and warm for 8–10 minutes until heated through.
  • Reheating in the Air Fryer: Set to 175°C (350°F) and heat for 4–5 minutes. This method keeps them crisp without extra oil.
  • Microwave Option: While not as crisp, you can microwave on medium heat for 1–2 minutes for a quick fix.

💡 Tip: If you’ve frozen the kebabs, reheat them straight from frozen in the oven or air fryer—no need to thaw first.


Benefits of Spinach Falafel

Benefits of Spinach Falafel Kebabs

Spinach Falafel Kebabs aren’t just a delicious plant-based treat — they pack a powerful nutritional punch. The spinach adds a generous serving of vitamins A, C, and K, plus iron and folate, which support healthy blood and boost immunity. Chickpeas bring a hefty dose of plant-based protein and fiber, helping you stay full longer and supporting healthy digestion.

These kebabs are also a healthier twist on the traditional deep-fried falafel because they can be baked or air-fried with minimal oil. This reduces the saturated fat content while still giving you that satisfying crisp on the outside. Pairing them with a yogurt-based dip, tahini sauce, or a vibrant salad turns them into a balanced, nutrient-rich meal.

By choosing Spinach Falafel Kebabs, you’re opting for a dish that is rich in antioxidants, supports heart health, and provides slow-release energy — perfect for a healthy lunch, a light dinner, or even a protein-packed snack between meals.


Nutritional Information (Per Serving – 2 Kebabs)

  • Calories: 210
  • Protein: 9g
  • Carbohydrates: 28g
  • Dietary Fiber: 8g
  • Fat: 7g
  • Saturated Fat: 1g
  • Sodium: 310mg

infograph - variations
Falafel Variations

Variations Of Spinach Falafel Kebabs

VersionHow to Make ItBest For
SpicyAdd 1 chopped green chili or ½ tsp chili powderHeat lovers
Gluten-FreeUse chickpea or oat flourGluten-sensitive diets
Low-SodiumReduce salt to ¼ tsp and use no-salt canned chickpeasLow-salt diets
Fresh Herb BoostAdd mint leaves with parsley and corianderFresh, cooling flavor

FAQs

Q: Can I freeze these kebabs?
Yes — shape them, place on a tray to freeze, then store in a freezer bag for up to 3 months. Cook from frozen, adding a few extra minutes.

Q: Can I make these without skewers?
Absolutely — just shape them into patties or balls and cook using your preferred method.


Final Thoughts For Spinach Falafel Kebabs

These Spinach Falafel Kebabs are proof that healthy food doesn’t have to be boring. With their vibrant color, crisp texture, and fresh flavor, they’re a perfect choice for anyone looking to add more plant-based meals to their diet. Try them in wraps, on salads, or as part of a mezze platter — and don’t forget to make extra for quick lunches during the week.


References

  1. Harvard T.H. Chan – Chickpeas
  2. Healthline – Spinach 101
  3. American Heart Association – Benefits of Plant-Based Eating

Recent Posts


The Ultimate Guilt-Free Chocolate Cake Made With Avocado

This guilt-free chocolate cake is more than just a treat — it’s a nutrient-packed dessert designed for those who want indulgence without compromise. Every bite offers a balance of flavor, texture, and goodness, proving that healthy eating can be just as decadent as it is nourishing.


Chocolate cake showing the avocado sections of this cake
Chocolate & Avocado Cake

A Chocolate Cake That Looks Decadent but Loves You Back

Who says indulgence and health can’t live on the same plate? This chocolate cake is here to prove them wrong. With its deep, rich outer layer of raw chocolate and the surprise of vibrant green avocado within, it’s a showstopper in both taste and presentation. Even better, every ingredient is chosen to be as nourishing as it is decadent.

When you first slice into this cake, you’re greeted by the striking contrast of dark chocolate and a bright, velvety green avocado layer. It’s the kind of visual that makes guests pause before they take a bite — and then immediately go back for seconds. But despite its bakery-worthy appearance, this recipe is surprisingly easy to make at home.

The real beauty of this cake lies in its balance. You’ll still enjoy the rich satisfaction that comes with a slice of chocolate cake, but without the heavy, processed fats and refined sugars often found in store-bought versions. Instead, wholesome fats from avocado and the antioxidant power of raw cacao create a dessert you can feel good about eating.

And while it’s healthy, it’s not too healthy — meaning it still tastes like cake, not like something you “should” eat for the sake of your diet. Think of it as the sweet spot where indulgence meets nourishment.

Of course, like all treats, this should be enjoyed in moderation — but when you do indulge, make sure it’s with something as worthwhile as this.


Time to Prepare

15 minutes

Time to Time to Prepare: 20 minutes

Time to Cook: 35–40 minutes

Servings: (Serves 10–12)


Ingredients for Guilt-Free Chocolate Cake

For the Cake:

  • 1 ½ cups wholegrain flour (or almond flour for gluten-free)
  • ½ cup pure cocoa powder
  • 1 tsp baking powder
  • Pinch of salt
  • ½ cup raw honey or maple syrup
  • ½ cup coconut oil, melted
  • 1 cup unsweetened plant-based milk
  • 1 tsp vanilla extract
  • 2 large ripe avocados (flesh scooped just before blending)
  • ¼ tsp baking soda (for avocado layer only)
  • ½ tsp matcha powder (optional, for extra green color stability)

For the Raw Chocolate Coating:

  • ½ cup raw cacao butter
  • ½ cup raw cacao powder
  • 3–4 tbsp maple syrup (to taste)


Instructions for Making the Chocolate Cake

1. Preheat the Oven

  • Set your oven to 160°C / 320°F (fan 150°C / 300°F).
  • Line a loaf tin or square glass oven-proof dish with baking paper.

2. Prepare the Dry Ingredients

  • In a large bowl, sift together flour, cocoa powder, baking powder, and salt.
  • Mix well and set aside.

3. Make the Chocolate Batter

  • In a separate bowl, whisk together half of the dry mixture with honey/maple syrup, melted coconut oil, plant-based milk, and vanilla extract until smooth.
  • This is your chocolate layer batter.

4. Prepare the Avocado Batter (Just Before Baking)

  • In a clean blender, add avocado flesh (scooped at the last moment), baking soda, matcha powder (optional), maple syrup/honey, coconut oil, the remaining half of the dry mixture, and plant-based milk.
  • Blend until fully smooth and a vibrant green. Avoid over-blending to prevent heat from dulling the color.


5. Layer the Batter

  • Pour half of the chocolate batter into your prepared tin.
  • Add the avocado batter on top, spreading gently to avoid mixing.
  • Finish with the remaining chocolate batter and smooth the top.

6. Bake

  • Place in the oven and bake for 35–40 minutes (loaf tin) or 30–35 minutes (square tin).
  • A skewer inserted should come out with only a few moist crumbs. Avoid overbaking.

7. Cool and Coat with Raw Chocolate

  • Cool the cake completely before icing.
  • Melt cacao butter gently, stir in cacao powder and maple syrup until glossy, then pour over the cake. Let it set before slicing

Benefits of This Chocolate Cake

One of the best things about this chocolate cake is that it’s proof you can indulge without sacrificing your health goals. Every ingredient plays a role in making this a more nourishing dessert option.

  • Avocado for Creaminess and Nutrition – Avocados are a source of heart-healthy monounsaturated fats, which can help reduce bad cholesterol levels. They also contain potassium, which supports healthy blood pressure, and fiber, which aids digestion. In baking, avocado creates a moist, rich texture without the need for butter or margarine.
  • Raw Chocolate for Antioxidant Power – Unlike conventional chocolate, raw cacao is minimally processed, which helps preserve its antioxidants — particularly flavonoids. These compounds have been linked to improved brain function, reduced inflammation, and better heart health.
  • Cocoa Powder for Rich Flavor and Minerals – Pure cocoa powder not only delivers a deep chocolate taste but also provides magnesium, iron, and a natural mood boost by promoting serotonin production.
  • Natural Sweeteners for Balanced Energy – Using maple syrup or raw honey instead of refined sugar means you’re getting a slower release of energy, avoiding the rapid spikes and crashes that come with white sugar.
  • Lower Refined Fat Content – Swapping butter for avocado and coconut oil reduces saturated fat while adding beneficial plant-based fats that help keep you satisfied.
  • Nutrient-Dense and Satisfying – Because the cake contains real, whole ingredients, a small slice is often enough to satisfy your sweet craving, making portion control easier.


Variations for Different Tastes and Needs In This Chocolate Cake

Variation TypeAdjustment
Gluten-FreeSwap spelt flour for almond or coconut flour.
VeganReplace eggs with flax eggs (1 tbsp ground flax + 3 tbsp water per egg).
Extra ChocolateyAdd ½ cup dark chocolate chips (70% cocoa) to the batter.
Citrus TwistAdd 1 tbsp orange zest to the cake batter for a bright flavor.
Protein BoostReplace ¼ cup flour with protein powder of choice.

Final Thoughts on This Chocolate Cake

This chocolate cake proves that indulgence doesn’t have to come with guilt. By using avocado for creaminess and raw chocolate for the topping, you create a cake that satisfies your sweet tooth while giving your body nutrients it can actually use.

The green layers inside add a fun surprise for guests, while the rich cocoa flavor makes it a treat everyone will love. Just remember, even the healthiest desserts should be enjoyed in sensible portions.

So the next time you’re craving a rich, decadent cake, skip the processed versions and bake this wholesome masterpiece instead — your taste buds and your body will thank you.


Frequently Asked Questions (FAQs)

Q: Can I taste the avocado in this chocolate cake?
A: Not at all. The cocoa powder and raw chocolate completely mask the avocado flavor, leaving only a rich, moist texture.

Q: How should I store the cake?
A: Keep in an airtight container at room temperature for up to 2 days or refrigerate for up to 5 days. It also freezes well for up to 2 months.


References

  1. Harvard T.H. Chan – Nutrition Source: Avocados
  2. Healthline – Benefits of Raw Cacao Powder
  3. Mayo Clinic – ingredient substitutions

Recent Posts


10 Healthy Breakfasts Kids Will Jump Out of Bed For!

Discover healthy breakfasts kids will love. These easy, delicious recipes are packed with nutrients and made to start your child’s day right.


An assortment of healthy breakfasts kids will love, including banana pancakes with berries, yogurt parfaits, smoothie bowls, avocado toast, mini waffles, egg muffins, overnight oats, apple slices with peanut butter, a breakfast wrap, and cottage cheese with fruit, arranged on a dark wooden table.
10 Healthy Breakfast For Kids

Morning Magic: Why Healthy Breakfasts Kids Love Matter Most

We’ve all heard it before—breakfast is the most important meal of the day. But for kids, it’s more than just a saying; it’s a cornerstone of their growth, focus, and mood. The right breakfast sets them up for a day of learning, playing, and thriving. When mornings are busy, it’s tempting to grab a quick snack or skip breakfast altogether. However, healthy breakfasts don’t have to be time-consuming or complicated.

In this guide, we’re diving into 10 healthy breakfasts kids will jump out of bed for, blending nutrition with taste in ways that will have even the pickiest eaters asking for seconds. These meals are designed to be fun, colorful, and loaded with the vitamins and minerals kids need—without sacrificing flavor.

If you’ve ever battled over breakfast time, you know the struggle is real. The key? Make meals that not only look appealing but also give kids the energy to fuel their bodies and brains. You’ll find ideas here that range from quick grab-and-go options to sit-down family favorites.

Many of these recipes can be prepared ahead of time, which means less stress for you and more excitement for your kids in the morning. Plus, each recipe includes variations so you can adapt them to your child’s preferences, dietary needs, or available ingredients.

Ready to make mornings something your kids actually look forward to? Let’s get started.


Time to Prepare

Varies by recipe: 5–15 minutes

Time to Cook/Blend

Varies by recipe: 0–15 minutes


Ingredients for Healthy Breakfasts Kids Will Enjoy

Here’s a base list of common ingredients you’ll need for these 10 breakfast ideas:

  • Fresh fruits (bananas, berries, apples, oranges, grapes)
  • Whole grains (oats, whole wheat bread, whole grain tortillas)
  • Eggs
  • Low-fat yogurt or dairy-free alternatives
  • Nut butters (peanut, almond, sunflower seed)
  • Milk or plant-based milk
  • Honey or pure maple syrup
  • Vegetables (spinach, peppers, zucchini – for sneaky nutrition)
  • Cheese
  • Lean proteins (chicken, turkey, ham – optional for wraps)


Instructions for Making Healthy Breakfasts Kids Can’t Resist

1. Fruit & Yogurt Parfait

  1. Layer yogurt, fruit, and granola in a cup.
  2. Repeat layers until the cup is full.
  3. Drizzle with honey if desired.

2. Banana Pancakes

  1. Mash 1 banana and mix with 2 eggs.
  2. Pour batter into a hot, lightly greased pan.
  3. Cook 1–2 minutes per side until golden.

3. Overnight Oats

  1. In a jar, combine oats, milk, chia seeds, and fruit.
  2. Stir, cover, and refrigerate overnight.
  3. Top with nuts or a drizzle of syrup in the morning.

4. Egg Muffins

  1. Whisk eggs with chopped veggies and cheese.
  2. Pour into muffin tin and bake at 350°F for 15 minutes.

5. Smoothie Bowls

  1. Blend frozen fruit, yogurt, and milk until thick.
  2. Pour into a bowl and add fun toppings like sliced fruit or seeds.

6. Breakfast Wraps

  1. Fill a whole wheat tortilla with scrambled eggs, veggies, and cheese.
  2. Roll tightly and serve warm.

7. Peanut Butter Apple Slices

  1. Slice apples and spread peanut butter on each slice.
  2. Top with granola or raisins for crunch.

8. Veggie Toast

  1. Toast whole grain bread.
  2. Top with mashed avocado, sliced tomato, and cheese.

9. Mini Waffles with Fruit

  1. Toast mini waffles and top with berries and yogurt.

10. Cottage Cheese Bowls

  1. Add fresh fruit and honey to cottage cheese for a sweet protein boost.


Benefits of Healthy Breakfasts Kids Will Love

  • Nutrient-Dense: These breakfasts provide essential vitamins, minerals, and proteins for growing bodies.
  • Balanced Energy: Combines complex carbs, healthy fats, and protein to keep kids fuller longer.
  • Supports Learning: A well-fed brain improves focus, memory, and problem-solving skills.
  • Boosts Mood: Healthy foods help regulate blood sugar, reducing morning crankiness.
  • Encourages Healthy Habits: Fun and tasty meals build positive associations with nutritious foods.

Infographic showing the nutritional benefits of each breakfast
Nutritional Benefits

Variations

Breakfast IdeaVariation for AllergiesExtra ProteinExtra Veggies
Fruit & Yogurt ParfaitUse dairy-free yogurtAdd hemp seedsAdd spinach puree to yogurt
Banana PancakesUse gluten-free oatsAdd protein powderAdd grated zucchini
Overnight OatsUse almond milkAdd Greek yogurtAdd shredded carrots
Egg MuffinsUse egg substituteAdd diced turkeyAdd spinach and peppers
Smoothie BowlsUse coconut milkAdd nut butterAdd kale

Final Thoughts on Healthy Breakfasts Kids Will Jump Out of Bed For

Mornings don’t have to be a battle. With these 10 healthy breakfasts kids will jump out of bed for, you’ll give them the energy and nutrients they need—while making your mornings smoother and happier. Start small, add variety, and involve your kids in the process. You might just find breakfast becoming your family’s favorite part of the day.


Frequently Asked Questions (FAQs)

Q1: Can I make these breakfasts the night before?
Yes! Options like overnight oats, egg muffins, and parfaits are perfect for prepping ahead to save time in the morning.

Q2: How can I get my picky eater to try new breakfast foods?
Start by adding small amounts of new ingredients to familiar favorites. Presentation helps too—colorful plates and fun shapes can make a big difference.


References

  1. Harvard T.H. Chan – What’s a healthy breakfast?
  2. HealthyChildren –Why the Morning Meal Matters
  3. Mayo Clinic – Nutrition for Kids: Guidelines for a Healthy Diet

Recent Posts


The Best Lasagna Zucchini Rolls with Ground Beef

Lasagna Zucchini Rolls with Ground Beef are a modern, lighter take on the classic. Rolled zucchini, savory beef ragu, and a melted cheese crown create a satisfying, weeknight-friendly dish.


**Alt text:**
Close-up of **Lasagna Zucchini Rolls** stuffed with ground beef, baked in a tomato meat sauce with bubbly golden cheese, with a spoon lifting one roll from the dish.
Zucchini Lasagna Rolls

Low-Carb Comfort, Big Lasagna Flavor

If you crave the cozy taste of lasagna but want something lighter, these Lasagna Zucchini Rolls are the sweet spot. Thin ribbons of zucchini stand in for noodles. They’re rolled around a savory lean-beef filling and baked in a bright tomato sauce. A sprinkle of part-skim cheese melts on top for that classic, bubbly finish.

This recipe looks impressive yet feels simple. You’ll make one skillet meat sauce, slice the zucchini, roll, and bake. The result is tidy, single-serve rolls that portion themselves. They’re perfect for weeknights, dinner parties, or meal prep.

These rolls are also smart healthy cooking. We use extra-lean beef, olive oil, and lots of vegetables. Salted zucchini sheds water so the bake stays saucy, not soggy. And a modest layer of cheese gives you that lasagna pull without weighing things down.

Serve the pan with a simple green salad or a slice of whole-grain bread for anyone who wants it. Either way, dinner is balanced, colorful, and satisfying.


All the measured ingredients in small bowls on a dark wood board.
Ingredients

Time to Prepare

20 minutes

Time to Cook/Bake

35–40 minutes

Servings: 6 (about 3–4 rolls per person)


Ingredients For Lasagna Zucchini Rolls

For the zucchini “noodles”

  • 3–4 medium zucchini (straight and wide are best)
  • ½ tsp fine sea salt (for drawing out moisture)

For the lean beef sauce + filling

  • 1 tbsp extra-virgin olive oil
  • 1 medium onion, finely diced
  • 2 garlic cloves, minced
  • 1 small carrot, very finely diced (optional sweetness and fiber)
  • 1 cup finely chopped mushrooms or baby spinach (optional volume/veg)
  • 1 lb (450 g) extra-lean ground beef (90–95% lean)
  • 1 tsp Italian seasoning or a mix of dried basil + oregano
  • ¼ tsp crushed red pepper flakes (optional)
  • ½ tsp kosher salt, plus more to taste
  • Freshly ground black pepper
  • 2 tbsp tomato paste
  • 2 cups no-salt-added crushed tomatoes or passata
  • ¼ cup low-sodium beef or vegetable broth (as needed)
  • 1 tsp balsamic vinegar (or a pinch of sugar) to balance acidity

For topping

  • 1 cup part-skim shredded mozzarella (or reduced-fat Italian blend)
  • ¼ cup finely grated Parmesan
  • Fresh parsley or basil, chopped, for garnish


Instructions For Lasagna Zucchini Rolls

  1. Prep the zucchini.
    Trim ends. Using a mandoline or vegetable peeler, slice long, even ribbons about ⅛-inch thick. Lay ribbons on a lined tray. Sprinkle with the ½ tsp salt. Let rest 10 minutes to release moisture.
  2. Start the sauce.
    Warm olive oil in a large skillet over medium heat. Sauté onion and carrot with a pinch of salt for 3–4 minutes until soft. Add garlic for 30 seconds.
  3. Cook the beef.
    Add ground beef. Break it up with a spoon. Cook until no pink remains, 5–6 minutes. Blot any excess fat with a paper towel if needed.
  4. Season and boost veg.
    Stir in mushrooms or spinach (if using). Add Italian seasoning, pepper flakes, salt, and pepper. Cook 2 minutes.
  5. Build the sauce.
    Stir in tomato paste. Cook 1 minute. Add crushed tomatoes and splash in broth if the sauce looks very thick. Simmer 8–10 minutes on low. Stir in balsamic. Taste and adjust seasoning.
  6. Pat zucchini dry.
    While the sauce simmers, gently pat the zucchini ribbons dry with a clean towel to remove extra water. This keeps the rolls firm.
  7. Assemble rolls.
    Spread a thin layer (about 1½ cups) of the beef sauce across the bottom of a 9×13-inch baking dish. Place two zucchini ribbons slightly overlapping to make a wider strip. Spoon 1–2 tablespoons of beef mixture along one end. Roll up snugly. Set the roll seam-side down in the sauce. Repeat, packing the rolls closely.
  8. Top and bake.
    Spoon a little extra sauce over each roll. Sprinkle with mozzarella and Parmesan. Bake at 400°F (200°C) for 18–20 minutes, until the cheese melts and browns in spots and the sauce bubbles around the edges.
  9. Rest and serve.
    Let the dish rest 5 minutes to set. Garnish with parsley or basil. Serve hot.

Benefits Of Lasagna Zucchini Rolls

High in protein, lighter in carbs.
Lean beef plus cheese gives staying power without pasta.

Veggie-forward comfort.
Zucchini, tomato, onion, and optional mushrooms or spinach add fiber, water, and color.

Portion-friendly.
Rolls make it easy to count servings and pack lunches.

Balanced fats.
Olive oil and modest cheese deliver flavor with control.

Family-friendly.
Classic lasagna taste in a neater, faster format.

The benefits of Lasagna Zucchini Rolls: high protein, veggie-rich, portion-smart, meal-prep-ready
Benefits

Variations

Goal/PreferenceHow to Adjust
KetoUse full-fat cheese and skip carrot. Keep sauce thick.
Lower FatUse 96% lean beef or swap half the beef for finely chopped mushrooms (“blenditarian” style).
Turkey SwapUse lean ground turkey; add 1 tsp Worcestershire for depth.
Spicy ArrabbiataAdd ½–1 tsp red pepper flakes and a pinch of chili powder.
Cheesy RicottaSpread 1–2 tsp part-skim ricotta on the zucchini before the beef for extra creaminess.
Dairy-FreeSkip cheese or use a dairy-free melt; add nutritional yeast to the sauce.
Vegetable BoostAdd diced zucchini cores, bell pepper, or extra spinach to the sauce.
Herb LoversFinish with fresh basil and a lemon zest sprinkle.

Serving & Presentation Tips

  • Roll the zucchini snugly and nest the spirals close together in the dish.
  • Spoon extra meat sauce around the rolls for a glossy, saucy finish.
  • Broil 1–2 minutes at the end for golden, bubbly cheese (watch closely).
  • Rest 5 minutes before serving for clean edges and easier plating.
  • Garnish with chopped parsley or basil and a light drizzle of olive oil.
  • Plate 3–4 rolls per person with a crisp green salad (or whole-grain bread on the side).
  • For meal prep, pack rolls with a spoonful of extra sauce to keep them moist.

Serving & Storage

Serve with a crisp green salad or roasted vegetables. If someone wants bread, offer whole-grain slices to mop up the sauce. Store leftovers in lidded containers for quick lunches. Reheat in the oven or microwave until steamy.


Final Thoughts For Lasagna Zucchini Rolls

These Lasagna Zucchini Rolls bring everything you love about lasagna—sauce, cheese, and comfort—without the heaviness. They’re easier to portion, simpler to prep, and friendly to a balanced lifestyle. Grab a few zucchini and a pound of lean beef, and you can have a bubbling pan on the table in under an hour. Save this recipe and make it part of your weeknight rotation.


Frequently Asked Questions (FAQs)

How do I slice zucchini thin enough for rolling?
Use a mandoline on the thinnest setting that still gives you intact ribbons. A wide vegetable peeler also works. If a strip tears, overlap two pieces to make one roll.

How do I keep the rolls from getting watery?
Salt, rest, and pat the zucchini dry before rolling. Bake uncovered so steam can escape. Keep the sauce thick; you can always thin it with a spoon of broth after baking if needed.

Can I make these ahead?
Yes. Assemble up to one day in advance, cover, and refrigerate. Bake uncovered, adding 5 minutes. Leftovers keep well for 3–4 days and reheat nicely.

Can I freeze the rolls?
Freeze after baking and cooling. Wrap tightly for up to 2 months. Thaw in the fridge and reheat at 350°F (175°C) until hot.


References


Recent Posts


Make This Simple Red Cabbage and Beetroot Soup

A step-by-step guide to Red Cabbage and Beetroot soup with a Greek yogurt swirl—serve with warm crusty bread for a satisfying, plant-forward meal.


2 Handle soup bowl contains Red Cabbage and Beetroot soup with a splash of Greek Yogurt
Red Cabbage and Beetroot

Cozy, Creamy, and Weeknight-Easy

If you love bright color and big flavor in a simple bowl, this Red Cabbage and Beetroot soup is for you. It’s silky, tangy, and gently sweet from roasted roots. A spoon of Greek yogurt adds creaminess without heavy cream.

This recipe is built for busy nights. The prep is quick. The cooking is mostly hands-off. A blender turns veggies into a velvety soup in minutes.

You can personalize it. Keep it classic with a yogurt swirl. Or add spice, fresh herbs, or citrus for a twist. Serve with crusty bread to make it a complete meal.


Time to Prepare

10 minutes

Time to Cook/Blend

30–35 minutes

Servings: 4 bowls


Ingredients For Red Cabbage and Beetroot

  • 2 tbsp olive oil (or avocado oil)
  • 1 medium onion, chopped
  • 2 garlic cloves, minced
  • 2 cups shredded red cabbage (about ¼ small head)
  • 2 medium beetroots, peeled and diced (about 2 cups)
  • 1 medium carrot, diced
  • 1 medium potato, peeled and diced (for creaminess)
  • 4 cups low-sodium vegetable broth
  • 1 tbsp apple cider vinegar or lemon juice (to brighten color)
  • ½ tsp ground cumin (optional, for warmth)
  • ½ tsp smoked paprika (optional)
  • ½ tsp sea salt, plus more to taste
  • Black pepper to taste

To finish and serve

  • ½–¾ cup Greek yogurt (2% or 5%), for swirling and topping
  • 1–2 tbsp extra-virgin olive oil, for drizzling
  • Fresh dill or parsley, finely chopped
  • Crusty bread, warmed, for serving


Instructions To Red Cabbage and Beetroot

  1. Sauté aromatics
    Heat olive oil in a large pot over medium heat. Add onion and a pinch of salt. Cook 3–4 minutes until softened. Stir in garlic for 30 seconds.
  2. Add vegetables
    Tip in red cabbage, beetroot, carrot, and potato. Stir to coat with oil and aromatics for 2 minutes.
  3. Season
    Add cumin, smoked paprika, black pepper, and another small pinch of salt. Toast the spices for 30 seconds to bloom their flavor.
  4. Simmer
    Pour in the vegetable broth. Bring to a boil, then reduce to a gentle simmer. Cover and cook 18–20 minutes, until beets and potatoes are very tender.
  5. Brighten the color
    Stir in apple cider vinegar or lemon juice. This helps lock in that vivid magenta hue.
  6. Blend
    Use an immersion blender to puree the soup until silky smooth. (Or transfer in batches to a standing blender. Vent the lid and cover with a towel to release steam safely.)
  7. Adjust
    If the soup is too thick, add a splash of hot water or broth. Taste and adjust salt, pepper, and acidity.
  8. Finish with yogurt
    Ladle soup into bowls. Spoon Greek yogurt on top and swirl with the tip of a spoon. Drizzle with a touch of olive oil.
  9. Garnish and serve
    Sprinkle with dill or parsley. Serve hot with crusty bread for dipping.

Benefits For Red Cabbage and Beetroot

  • Fiber-rich: Red cabbage and beetroot provide gut-friendly fiber that helps you feel full and supports digestion.
  • Antioxidant power: Beets offer betalains; red cabbage is rich in anthocyanins and vitamin C. These compounds help fight oxidative stress.
  • Heart-smart: Vegetables, olive oil, and low-sodium broth make this a heart-conscious choice.
  • Protein boost from yogurt: Greek yogurt adds creaminess plus extra protein and calcium.
  • Meal-prep friendly: The soup keeps its color and texture well and reheats beautifully.

Variations

Goal/PreferenceWhat to Do
VeganSwap Greek yogurt for a thick coconut or almond yogurt; add 1 tbsp tahini while blending for creaminess.
Extra ProteinStir in ½ cup Greek yogurt directly after blending off heat, or add white beans before blending.
SpicyAdd ¼–½ tsp chili flakes or a diced jalapeño with the aromatics.
Citrus-BrightFinish with more lemon juice and zest for a fresher finish.
Herb-LoversBlend in a handful of dill or parsley right at the end.
Roasted DepthRoast beets and onion at 400°F/200°C for 25–30 minutes, then simmer and blend for a sweeter, deeper flavor.
No BlenderSimmer longer and mash with a potato masher for a rustic texture.
Low-SodiumUse no-salt broth and season with vinegar and herbs instead of extra salt.

Frequently Asked Questions (FAQs)

Can I make this soup ahead?
Yes. Cool completely, then store in an airtight container for up to 4 days. Reheat gently on the stove. Add a splash of broth if it thickens.

Does the yogurt curdle in hot soup?
If you’re swirling yogurt on top, it won’t curdle. If you want to stir yogurt into the pot, remove the soup from heat first and whisk it in slowly.

Can I freeze it?
Absolutely. Freeze without the yogurt topping for up to 3 months. Thaw in the fridge overnight and reheat on low until steamy.

How do I keep the color bright?
Acid helps. Add vinegar or lemon juice near the end of cooking, and avoid overcooking after blending.


Nutrition (Per Serving)

  • Calories: ~220
  • Protein: ~9 g (with yogurt topping)
  • Carbohydrates: ~33 g
  • Fat: ~7 g
  • Fiber: ~7 g
  • Sodium: varies by broth

(Values are estimates and will vary based on exact ingredients.)


Serving Suggestions

  • Ladle into warm bowls and swirl in Greek yogurt.
  • Finish with dill, cracked pepper, and a drizzle of olive oil.
  • Serve with thick slices of crusty bread for dipping, plus a simple green salad if you like.

Final Thoughts Of Red Cabbage and Beetroot

This Red Cabbage and Beetroot soup is simple, striking, and satisfying. It comes together fast, uses budget-friendly ingredients, and tastes even better the next day. Grab a loaf of crusty bread, swirl in that Greek yogurt, and enjoy a vibrant bowl tonight. Save this recipe so you can cook it again when you need something colorful and comforting.


References


Recent Posts