Cookie Consent by Free Privacy Policy Generator Update cookies preferences

This Kefir Smoothie Will Love Your Gut Back

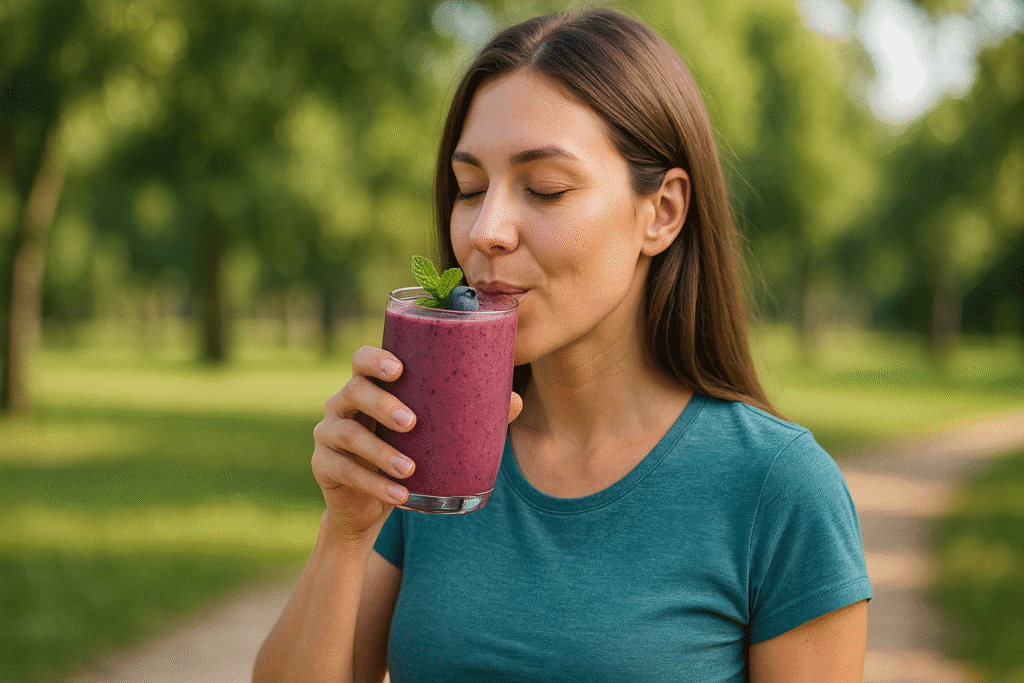
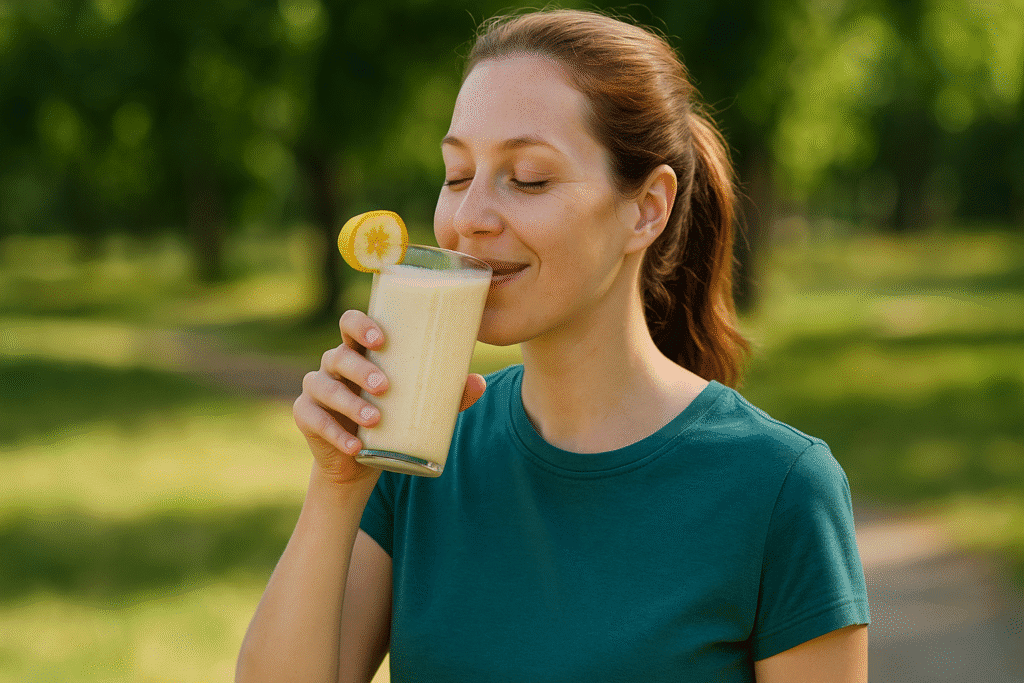
This kefir smoothie is more than just delicious—it’s a daily ritual for better digestion, natural energy, and a balanced gut microbiome. Discover how a simple kefir smoothie can help transform your health from the inside out.


A creamy Kefir Smoothie in a jar with mint.
Creamy Kefir Smoothie

Kefir Smoothie Your Gut Will Thank You For

Gut health is more than just a trend—it’s at the core of how we feel, function, and even think. From immunity to digestion to mental clarity, your gut plays a key role in daily wellness. And one of the simplest (and tastiest) ways to support it is by sipping on a kefir smoothie packed with probiotics, fiber, and natural goodness.

Unlike sugary store-bought blends or overly complicated recipes, this smoothie is refreshingly simple. It uses kefir—a fermented milk rich in live cultures—blended with banana, seeds, and a few easy additions to make it both healing and satisfying. Whether you’re looking to reset your digestion or just start your day with something lighter and smarter, this smoothie is a smart, delicious move.

Best of all, it only takes minutes to make and can be endlessly customized. Let’s dive into how to make this gut-friendly treat and all the benefits it delivers.


Time to Prepare

5 minutes

Time to Blend

1–2 minutes


Ingredients For kefir smoothie

  • 1 cup plain unsweetened kefir (dairy or coconut-based)
  • 1 ripe banana (fresh or frozen)
  • 1 tablespoon ground flaxseeds or chia seeds
  • ½ teaspoon cinnamon (optional)
  • 1 teaspoon raw honey or maple syrup (optional)
  • 1 scoop collagen powder (optional for extra protein)
  • ½ cup ice (optional, for thicker texture)
  • Optional toppings: hemp seeds, sliced banana, or shredded coconut

Instructions For kefir smoothie

  1. Add kefir to the blender as your base.
  2. Slice and add the banana, then sprinkle in flaxseeds or chia.
  3. Add cinnamon, sweetener, and any optional extras.
  4. Toss in a handful of ice for a cold, thick texture.
  5. Blend on high for 45–60 seconds or until smooth.
  6. Pour into a tall glass and top with your favorite garnish.

Benefits of This Kefir Smoothie

🧠 Supports Gut Health

This recipe may be simple, but it’s packed with powerful benefits that make it ideal for daily sipping.

🧠 Supports Gut Health

Kefir is a natural source of probiotics—live bacteria that help balance your gut microbiome. A balanced gut supports digestion, regularity, and reduced bloating. Unlike yogurt, kefir contains a broader range of beneficial bacteria and yeasts, giving it an edge when it comes to repopulating your gut with friendly microbes.

💪 Boosts Immunity

A healthy gut is closely linked to a strong immune system. The live cultures in kefir help defend against harmful pathogens and support immune response. When your gut lining is healthy, it’s better able to act as a protective barrier, reducing inflammation and preventing harmful substances from entering the bloodstream.

🍌 Natural Energy & Satiety

Banana provides natural sweetness and carbs for energy, while seeds deliver fiber and omega-3s to help you feel full longer. The protein from kefir and added collagen also supports muscle repair and sustained energy throughout your day, making it a great pre- or post-workout option.

🌿 Gentle Detox & Digestion

Flaxseeds or chia help support digestion by adding bulk and feeding healthy gut bacteria. These seeds are rich in soluble fiber, which slows digestion and encourages nutrient absorption. Their mild laxative effect can also aid in keeping your digestive system regular.

🌞 Skin & Mood Benefits Of A kefir smoothie

Did you know your gut health affects your skin and mood? A balanced gut microbiome supports nutrient absorption, which is crucial for glowing skin and balanced hormones. The probiotics in kefir can also influence the gut-brain axis, helping to regulate mood and stress levels.


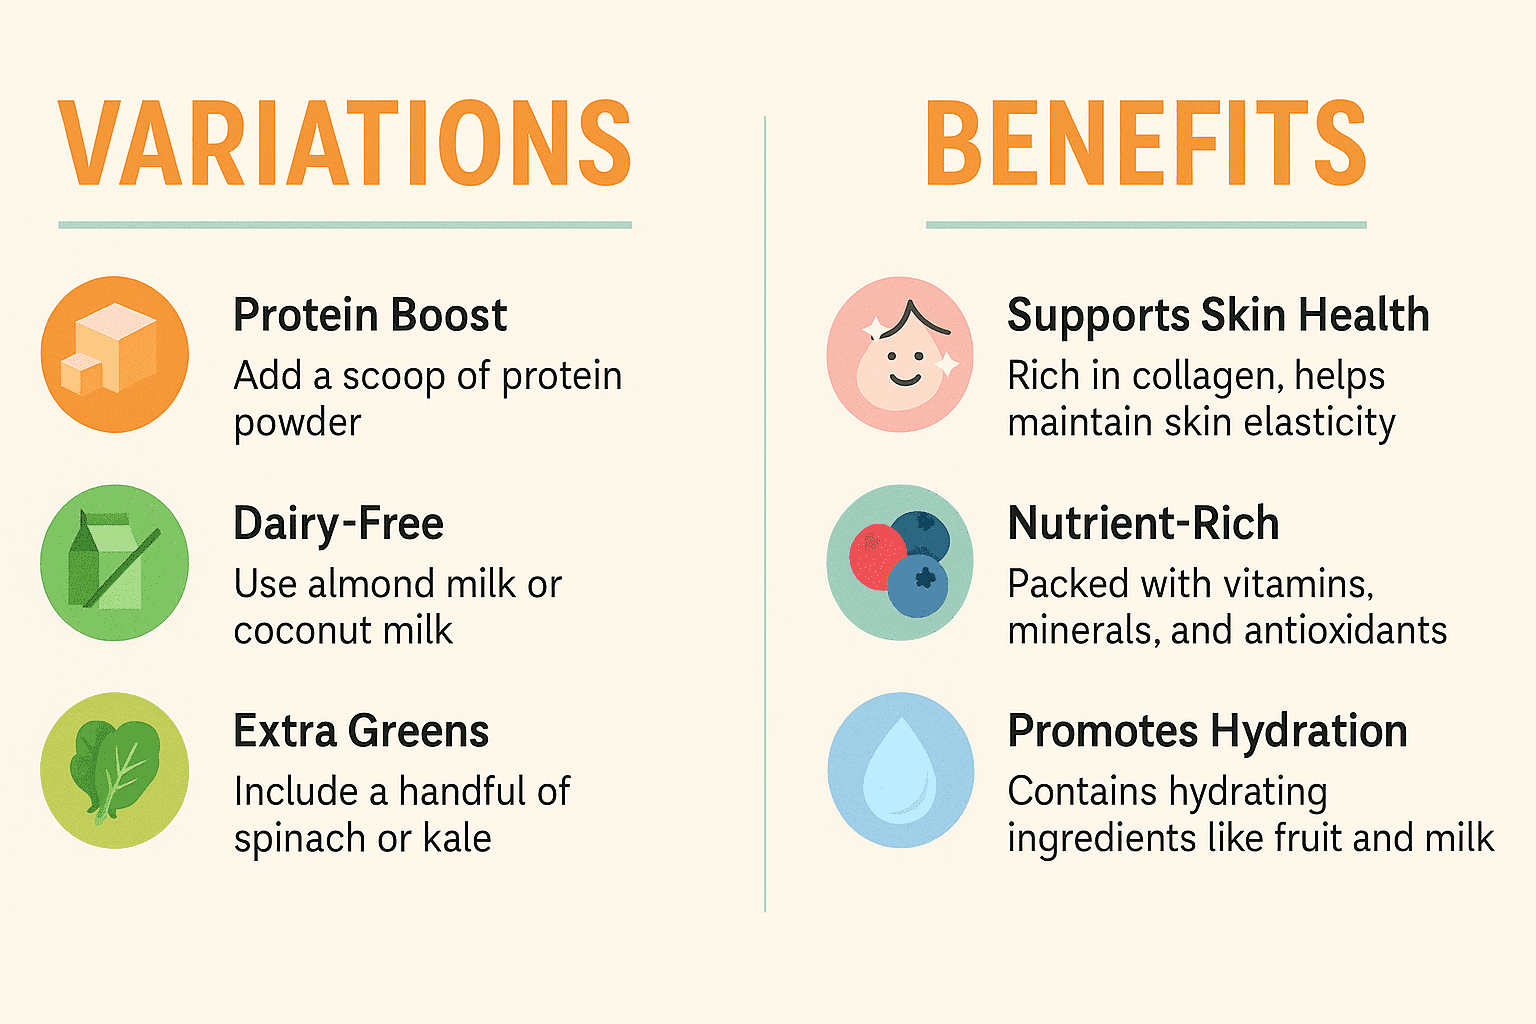
Variations To A kefir smoothie

GoalIngredient Swap or Addition
Vegan-FriendlyUse coconut kefir and maple syrup
Low-SugarSkip sweetener and use green banana
Protein BoostAdd collagen or plant-based protein powder
Anti-InflammatoryAdd turmeric and ginger with black pepper
Berry FlavorAdd ½ cup blueberries or strawberries
Tropical TwistAdd pineapple or mango chunks
Green DetoxBlend in a handful of spinach or kale


Variations

GoalIngredient Swap or Addition
Vegan-FriendlyUse coconut kefir and maple syrup
Low-SugarSkip sweetener and use green banana
Protein BoostAdd collagen or plant-based protein powder
Anti-InflammatoryAdd turmeric and ginger with black pepper
Berry FlavorAdd ½ cup blueberries or strawberries

Frequently Asked Questions (FAQs)

Q: Can I drink kefir smoothies every day?

Q: Can I drink kefir smoothies every day?

A: Yes! Kefir is generally safe for daily consumption and can actually help improve digestion over time. Start slow if you’re new to fermented foods to let your gut adjust.

Q: Can I use flavored kefir instead of plain?

A: You can, but check the label. Many flavored kefirs contain added sugars and flavorings. Plain kefir gives you full control over taste and nutrition.

Q: What’s the best time to drink a kefir smoothie?

A: Many people enjoy it in the morning to kickstart digestion and energy, but it’s also great as a mid-afternoon snack or a light dinner if you’re looking to reduce bloat.

Q: How long does the smoothie last in the fridge?

A: Ideally, drink it fresh. But if you need to store it, keep it in a sealed jar for up to 24 hours. Just shake or stir before drinking, as separation may occur.


Final Thoughts

Your gut does a lot for you—so why not show it some love back? This kefir smoothie is one of the easiest ways to support digestion, boost your microbiome, and feel your best, all without sacrificing taste. With only a few ingredients and endless customization options, it’s the perfect daily ritual for glowing from the inside out.

Incorporating fermented foods like kefir into your lifestyle doesn’t have to be complicated. This smoothie is fast, flexible, and full of functional ingredients that work in harmony with your body. Whether you’re chasing gut health, clearer skin, better energy—or all three—this smoothie has your back.

Try this recipe once and you may never go back to store-bought blends again. Your gut (and taste buds) will thank you.


References

Recent Posts


Collagen Smoothie with Berries: Benefits + How to Make It

Discover the power of a collagen smoothie packed with berries, antioxidants, and skin-loving nutrients. This easy recipe supports healthy skin, joints, and overall wellness—perfect for your daily glow-up routine.


A glass of berry collagen smoothie garnished with fresh mint, blueberry, and raspberry, with a bowl of extra berries and a striped napkin in the background.
Berry Smoothie

A Glow-Up in a Glass

Glowing skin, strong hair, and healthy joints—all from a smoothie? If you haven’t jumped on the collagen train yet, this berry-powered blend is a perfect introduction. With the rise of beauty-from-within trends and natural wellness routines, more people are looking for simple ways to support their skin, hair, and overall health from the inside out.

This collagen smoothie isn’t just another health fad. It’s backed by science and built with real ingredients that fuel your body and help you feel vibrant from morning till night. Whether you’re blending it as a post-workout recovery drink or sipping it as a skin-loving breakfast, this recipe fits seamlessly into almost any wellness routine.

Paired with antioxidant-rich berries, healthy fats, and protein-rich yogurt, this smoothie delivers a balance of flavor and function. Plus, it’s ready in just minutes—no fancy equipment or culinary skills required.

Ingredients for a collagen smoothie including mixed berries, banana, chia seeds, collagen powder, almond milk, yogurt, and honey arranged neatly on a kitchen counter.

Why Collagen Is Worth the Hype

Collagen is the most abundant protein in your body, forming the building blocks of your skin, joints, muscles, and even bones. As you age, your natural collagen production slows down—typically starting in your mid-to-late twenties—which can lead to wrinkles, joint stiffness, and thinning hair.

Supplementing with high-quality collagen peptides can help fill in those gaps. Studies show that consistent collagen intake may:

  • Improve skin elasticity and hydration
  • Reduce the appearance of fine lines
  • Support stronger nails and thicker hair
  • Aid in joint comfort and muscle recovery

Pair collagen with vitamin C-rich foods (like berries), and you have a recipe for optimal absorption and glow-from-within benefits.


Time to Prepare For Collagen Smoothie

5 minutes

Time to Blend

1–2 minutes


Ingredients For Collagen Smoothie

  • 1 cup frozen mixed berries (blueberries, raspberries, strawberries)
  • 1 small banana (fresh or frozen)
  • 1 tablespoon chia seeds or ground flaxseeds
  • 1 scoop unflavored or berry-flavored collagen peptides
  • 1 cup unsweetened almond milk (or oat milk)
  • ½ cup plain Greek yogurt (or coconut yogurt for dairy-free)
  • 1 teaspoon honey or maple syrup (optional)
  • Ice cubes (optional, for thicker texture)
  • Optional toppings: hemp seeds, extra berries, or shredded coconut

Instructions For Collagen Smoothie

  1. Add the almond milk to the blender first to help with smooth blending.
  2. Toss in the frozen berries, banana, Greek yogurt, and chia seeds.
  3. Add one scoop of collagen peptides.
  4. Blend on high for 30–60 seconds, or until completely smooth.
  5. Taste and adjust sweetness if needed with a touch of honey or maple syrup.
  6. Pour into a glass and serve immediately. Garnish with fresh berries or chia seeds if desired.
Ingredients for a collagen smoothie including mixed berries, banana, chia seeds, collagen powder, almond milk, yogurt, and honey arranged neatly on a kitchen counter.”

Benefits of This Collagen Smoothie

This isn’t just a tasty drink—it’s a full-body wellness blend. Every ingredient plays a role in supporting your health goals.

✨ Skin, Hair & Nail Support

Collagen peptides are known to increase skin elasticity, reduce wrinkles, and promote a more youthful appearance. Berries are packed with vitamin C, a key nutrient that stimulates your body’s own collagen production. Add in healthy fats from chia or flax, and you’ve got nutrients that support moisture retention in the skin and shine in the hair.

💪 Joint & Muscle Recovery

Collagen’s benefits extend well beyond skin deep. It helps build and maintain cartilage and ligaments, easing joint pain and improving mobility. This makes the smoothie a great option for post-workout recovery, especially when combined with protein-rich yogurt.

🌱 Digestive & Gut Health

The fiber from berries, banana, and chia seeds supports gut health and regular digestion. Greek yogurt adds beneficial probiotics, especially helpful if you choose a variety with active cultures.

🧠 Mental Focus & Energy

The natural sugars from fruit combined with protein and healthy fats provide sustained energy without a crash. That makes this smoothie perfect for breakfast or a mid-day pick-me-up.

A glass of berry collagen smoothie garnished with fresh mint, blueberry, and raspberry, with a bowl of extra berries and a striped napkin in the background.

Variations to Try

Don’t be afraid to experiment! This smoothie can be easily customized to suit different goals, diets, and flavor preferences.

GoalSwap or Add This
Extra ProteinAdd more Greek yogurt or a clean protein powder
Gut Health BoostReplace yogurt with kefir or add a probiotic capsule
Vegan VersionUse plant-based yogurt + vegan collagen booster
Tropical VibesSwap banana for frozen mango and add coconut
Low-Sugar OptionSkip banana and sweeteners; use only tart berries
Anti-InflammatoryAdd turmeric and ginger with a pinch of black pepper
Infographic showing smoothie variations like protein boost, dairy-free, and extra greens on the left, and benefits like skin health, nutrient richness, and hydration on the right, using icons and clear text.

Make It a Habit: Pro Tips For Collagen Smoothie

Blender Tips: A high-speed blender will give you the creamiest result, but any blender will work—just let frozen fruits thaw a bit if needed.

Daily Routine: Collagen benefits are cumulative. Try drinking this smoothie 4–5 days a week for visible improvements in skin and energy.

Best Time to Drink: Morning is ideal so your body can use the nutrients throughout the day. It’s also great as a pre- or post-workout fuel.

Storage: You can make this smoothie ahead and store it in a sealed container for up to 24 hours in the fridge. Shake well before drinking.


Frequently Asked Questions For Collagen Smoothie

Q: Can I use collagen powder in a cold smoothie?

A: Yes, absolutely. Collagen peptides dissolve easily in cold or hot liquids. They’re flavorless, so they blend in perfectly without altering the taste or texture of your smoothie.

Q: How long does it take to see results from collagen?

A: Most people report seeing improvements in their skin, hair, or joints within 4–8 weeks of daily collagen use. Consistency is key, so try to include it regularly in your routine.

Q: Is this smoothie good for weight loss?

A: It can be! This smoothie is naturally filling, high in fiber and protein, and contains no refined sugar. Just be mindful of portion sizes and optional sweeteners if you’re tracking calories.


Final Thoughts

If you’re looking for a simple way to support your skin, hair, and overall vitality, this collagen smoothie with berries is a perfect choice. It’s fast, delicious, and totally customizable for your health goals. Whether you sip it as a morning glow-up or a post-gym treat, you’ll feel good knowing you’re nourishing your body inside and out.

Smiling woman in a teal shirt enjoying a berry collagen smoothie outdoors in a sunlit park setting, holding the glass close to her lips.

References


Recent Posts


Better Carrot Cake with Greek Yogurt Frosting

A lighter, naturally sweetened better carrot cake that delivers flavor, moisture, and nourishment—without the sugar overload.


A serving of a better carrot cake with Greek yogurt frosting, topped with crushed nuts, served on a ceramic plate against a soft beige background.
Carrot Cake

A Classic Dessert, Reinvented the Better Way

There’s something nostalgic and comforting about a slice of carrot cake. Maybe it’s the warm spices, the tender crumb, or that rich frosting on top. Whatever the reason, this dessert has stood the test of time. But let’s be honest: the classic version? It’s usually loaded with oil, sugar, and heavy cream cheese frosting—which can leave you feeling more sluggish than satisfied.

This better carrot cake skips the excess without sacrificing what makes the original so lovable. Made with wholesome ingredients like freshly grated carrots, whole wheat or almond flour, maple syrup, and topped with a Greek yogurt frosting, it’s moist, flavorful, and nutrient-packed. It’s the cake you’ll want to bring to every brunch, birthday, or afternoon tea—and feel good about eating too.

At TapedCircle, we believe that desserts should nourish your body and your soul. This better carrot cake strikes that perfect balance: comfort food, made clean.


Why A Better Carrot Cake

“Better” doesn’t just mean healthier—it means more thoughtful, more balanced, and more satisfying.

  • Lower in added sugar – Naturally sweetened with maple syrup
  • Frosting without cream cheese – Greek yogurt keeps it tangy and light
  • Boosted with fiber and nutrients – Thanks to carrots, nuts, and whole ingredients
  • Moist and flavorful – No dryness or bland bites here
  • Perfect for mindful eaters – A treat you can enjoy with zero regret

Time to Prepare For A Better Carrot Cake

  • Prep Time: 15 minutes
  • Cook Time: 35–40 minutes
  • Total Time: ~55 minutes

Ingredients For A Better Carrot Cake

For the Carrot Cake:

  • 1 ½ cups almond flour or whole wheat flour
  • 1 tsp baking soda
  • ½ tsp baking powder
  • 1 ½ tsp cinnamon
  • ½ tsp nutmeg
  • ¼ tsp ground ginger (optional)
  • ¼ tsp salt
  • 2 eggs
  • ⅓ cup maple syrup or honey
  • ¼ cup unsweetened applesauce
  • ¼ cup melted coconut oil or olive oil
  • 1 tsp vanilla extract
  • 1 ½ cups grated carrots (about 2–3 medium carrots)
  • Optional: ½ cup chopped walnuts or raisins

For the Greek Yogurt Frosting:

  • ¾ cup plain Greek yogurt (full-fat or 2%)
  • 2–3 tbsp maple syrup
  • 1 tsp vanilla extract
  • Pinch of sea salt


Instructions For A Better Carrot Cake

1. Preheat & Prep

Preheat your oven to 350°F (175°C). Line an 8-inch round or square cake pan with parchment paper and lightly grease the sides.

2. Mix Dry Ingredients

In a large bowl, whisk together the flour, baking soda, baking powder, cinnamon, nutmeg, ginger, and salt.

3. Mix Wet Ingredients

In another bowl, beat the eggs. Stir in maple syrup, applesauce, oil, and vanilla extract until well combined.

4. Combine & Fold

Add the wet mixture into the dry ingredients and stir until just combined. Fold in the grated carrots and any optional add-ins like walnuts or raisins.

5. Bake

Pour the batter into your prepared pan and smooth the top. Bake for 35–40 minutes, or until a toothpick comes out clean. Let it cool in the pan for 10 minutes before transferring to a rack.

6. Make the Frosting

While the cake cools, whisk together the Greek yogurt, maple syrup, vanilla, and salt until smooth and creamy. Chill until ready to use.

7. Frost & Serve

Once the cake is fully cooled, spread the Greek yogurt frosting over the top. Slice and serve!


Why Greek Yogurt Makes the Best Light Frosting

Greek yogurt isn’t just a healthier swap—it brings:

  • Tangy flavor that mimics cream cheese
  • Creamy texture with fewer calories
  • Protein boost for better satiety
  • Probiotics for gut-friendly benefits
  • Less sugar than most frosting recipes

You can also flavor the frosting with orange zest, a dash of cinnamon, or a spoonful of almond butter for a unique twist.


Health Benefits of A Better Carrot Cake

  • 🥕 Carrots – Rich in beta-carotene, fiber, and antioxidants
  • 🌰 Almond flour or whole grains – Provide protein, healthy fats, and slow-digesting carbs
  • 🍯 Natural sweeteners – Lower glycemic impact than refined sugar
  • 🥄 Greek yogurt – High in protein and gut-friendly probiotics
  • 🧁 Lower in sugar & fat – No butter, no refined frosting, no guilt

🍰 A Thoughtful Indulgence For A Better Carrot Cake

While this carrot cake is made with better-for-you ingredients, it’s still a sweet treat at heart. Think of it as a mindful indulgence—something to enjoy without guilt, but with intention. A small slice can satisfy, especially when you know it’s made with whole, nourishing ingredients.


Storage & Serving Tips For A Better Carrot Cake

  • Store: Keep cake in the fridge for up to 4 days (frosted or unfrosted).
  • Freeze: Freeze unfrosted cake for up to 2 months; thaw before frosting.
  • Make-Ahead: You can bake the cake a day in advance and frost before serving.

This cake is even better chilled overnight—the spices and flavors deepen beautifully.


FAQs

Can I make this cake vegan?

Yes! Replace the eggs with flax eggs (2 tbsp flax + 6 tbsp water) and use a dairy-free yogurt for the frosting.

Can I use regular yogurt?

Yes, but make sure it’s thick or strain it in cheesecloth to avoid runny frosting.

Is this cake gluten-free?

It is if you use almond flour. Whole wheat flour makes it nutrient-dense but not gluten-free.

Can I turn this into muffins?

Absolutely. Pour the batter into a muffin tin and bake for 18–22 minutes.


Reader Reviews

⭐⭐⭐⭐⭐ “This is my new favorite carrot cake recipe. The Greek yogurt frosting is genius!” – Ellie M.

⭐⭐⭐⭐ “So moist and flavorful without the sugar overload. A keeper!” – James L.

⭐⭐⭐⭐⭐ “I made this for Easter brunch and it disappeared in minutes!” – Priya D.


Final Thoughts For A Better Carrot Cake

This better carrot cake hits the sweet spot—literally and nutritionally. It gives you that nostalgic spice and tender crumb, but with whole ingredients that make your body feel as good as your tastebuds do.

Perfect for birthdays, potlucks, or just a weekend treat, it proves that healthy baking doesn’t have to be boring. And with the Greek yogurt frosting, you’ll never miss the cream cheese.


References


    Recent Posts


    The Best Almond Flour Chocolate Cake Ever

    A deliciously wholesome almond flour chocolate cake that proves healthy desserts can still feel indulgent.


    Moist almond flour chocolate cake on a white plate, topped with a glossy chocolate glaze and sliced for serving
    Almond Flour Chocolate Cake

    A Healthier Way to Satisfy Your Almond Flour Chocolate Cake Cravings

    If you’ve ever tried to eat healthier and still found yourself daydreaming about a rich, moist chocolate cake—you’re not alone. Chocolate is more than just a sweet treat. It’s comfort, nostalgia, and celebration all rolled into one. The challenge? Most traditional chocolate cake recipes are loaded with refined sugar, white flour, and unhealthy fats that leave you feeling heavy, bloated, or worse—guilty.

    Enter the almond flour chocolate cake. This isn’t some “diet” version that tastes like cardboard or leaves you wishing you’d eaten the real thing. This cake delivers on all the texture and flavor you crave: it’s soft, deeply chocolatey, and delightfully moist. But here’s the game-changer—it’s made with nutrient-rich almond flour, natural sweeteners, and healthy fats that work with your body, not against it.

    At TapedCircle, we believe you shouldn’t have to choose between enjoying dessert and living well. That’s why we’re excited to share this almond flour chocolate cake recipe: it’s wholesome enough to serve at a family gathering, simple enough to whip up on a weeknight, and healthy enough to become a regular part of your smart indulgence routine. It also aligns beautifully with anti-inflammatory and gluten-free lifestyles, making it a perfect fit for your wellness-focused kitchen.

    Just don’t forget—it’s still cake. Even with cleaner ingredients, this is a treat meant to be savored in moderation. So light a candle, slice a piece, and enjoy every bite.


    Why Choose Almond Flour?

    Almond flour isn’t just a substitute for wheat flour—it’s a nutritional upgrade. Here’s why it shines in this cake:

    • Naturally Gluten-Free – Ideal for gluten-sensitive eaters or those reducing processed grains.
    • Rich in Healthy Fats – Helps keep the cake moist and satisfying.
    • Low in Carbs – Makes it a better option for low-glycemic or keto-style eating.
    • Packed with Vitamin E – Supports skin and heart health.

    Time to Prepare For Almond Flour Chocolate Cake

    • Prep Time: 10 minutes
    • Cook Time: 30–35 minutes
    • Total Time: ~45 minutes

    Ingredients For Almond Flour Chocolate Cake

    All ingredients are easy to find and pantry-friendly.

    • 2 cups fine almond flour
    • ½ cup unsweetened cocoa powder
    • ½ tsp baking soda
    • ¼ tsp salt
    • 3 eggs (room temperature)
    • ½ cup maple syrup (or honey)
    • ¼ cup melted coconut oil (or olive oil)
    • 1 tsp vanilla extract
    • ¼ cup almond milk (or any plant-based milk)
    • Optional: ½ cup dark chocolate chips or chopped nuts


    Instructions For Almond Flour Chocolate Cake

    1. Preheat & Prep

    Preheat your oven to 350°F (175°C). Line an 8-inch round cake pan with parchment paper and lightly grease the sides.

    2. Mix Dry Ingredients

    In a large bowl, whisk together the almond flour, cocoa powder, baking soda, and salt until evenly combined.

    3. Combine Wet Ingredients

    In a separate bowl, beat the eggs. Add the maple syrup, melted coconut oil, vanilla extract, and almond milk. Stir until smooth.

    4. Combine & Mix

    Pour the wet ingredients into the dry mixture. Stir just until combined—don’t overmix. If adding chocolate chips or nuts, fold them in now.

    5. Bake

    Pour the batter into your prepared pan and smooth the top. Bake for 30–35 minutes, or until a toothpick comes out mostly clean with a few moist crumbs.

    6. Cool & Serve

    Let the cake cool in the pan for 10 minutes, then transfer to a wire rack. Serve warm, chilled, or at room temperature.


    Healthy Swaps & Tips For Almond Flour Chocolate Cake

    • For Extra Fudginess: Add 1 tablespoon of brewed coffee to enhance the chocolate flavor.
    • For Vegan Option: Swap eggs for flax eggs (3 tbsp ground flax + 9 tbsp water, rest for 10 min).
    • For Sugar-Free: Use stevia or monk fruit instead of maple syrup, adjusting moisture as needed.
    • Frosting Idea: Try a dollop of Greek yogurt mixed with cocoa powder and honey for a light, tangy frosting.

    Why This Cake Works for Healthy Eating

    This isn’t a “diet cake” that tastes like cardboard. It’s cake—just made smarter.

    • Lower glycemic impact thanks to almond flour and natural sweeteners.
    • Healthy fats from almonds and coconut oil help keep blood sugar stable.
    • No refined sugar or flour, which supports more sustained energy.
    • Gluten-free & grain-free, making it easier on digestion.
    Almond Flour vs. White Flour Infographic

    Infographic: Almond flour offers more protein, fiber, and vitamin E—with fewer carbs—compared to white flour.


    But Let’s Be Real—It’s Still Cake

    While this cake is definitely healthier than your average slice, it’s still dessert. That means:

    • Portion matters—one small slice can satisfy without overdoing it.
    • It’s a treat, not a staple. Even healthy desserts should be enjoyed in balance with other nourishing foods.
    • Listen to your body. If you’re craving something sweet, this is a better way to indulge without feeling deprived.

    Storage & Make-Ahead Tips For Almond Flour Chocolate Cake

    • Store: Keep covered in the fridge for up to 5 days.
    • Freeze: Wrap individual slices and freeze for up to 2 months.
    • Reheat: Microwave for 15–20 seconds for a warm, gooey bite.

    Frequently Asked Questions

    Can I use almond meal instead of almond flour?

    You can, but the texture will be denser and slightly gritty. Blanched almond flour yields a lighter crumb.

    Can I make it nut-free?

    Unfortunately, not this version. But you could try oat flour or sunflower seed flour as an alternative in a separate recipe.

    Is this keto-friendly?

    If you swap the maple syrup for a low-carb sweetener like monk fruit, then yes—it’s keto adaptable.


    Reader Reviews

    ⭐⭐⭐⭐⭐ “I didn’t tell my kids it was healthy, and they LOVED it!” – Megan C.

    ⭐⭐⭐⭐⭐ “So moist and rich! Hard to believe it’s gluten-free.” – Josh P.

    ⭐⭐⭐⭐ “Great flavor. I added some orange zest—amazing!” – Lila D.


    Final Thoughts For Almond Flour Chocolate Cake

    This almond flour chocolate cake proves you don’t have to give up flavor to eat well. It’s rich, decadent, and surprisingly wholesome—all without the sugar crash.

    Whether you’re celebrating, meal-prepping desserts for the week, or just craving something sweet, this recipe delivers the goods. Just slice, savor, and smile—mindfully, of course.


    References


      Recent Posts


      Easy to Make Sweet Potato Noodles

      These easy sweet potato noodles pair perfectly with garlic sautéed greens, sesame seeds, or grilled tofu for a nourishing, naturally gluten-free meal.


A colorful plate of spiralized sweet potato noodles, sautéed with garlic and herbs, topped with sesame seeds and fresh herbs in a white ceramic dish.
      sweet potato noodles

      Introduction

      Tired of traditional pasta and ready for something fresh, colorful, and nourishing? Sweet potato noodles bring a delicious twist to your plate—whether you’re looking to lighten things up or simply try something new. These vibrant noodles are naturally gluten-free, lower in carbs, and packed with vitamins that support energy and gut health.

      If you’re looking for a way to mix up your mealtime routine, sweet potato noodles might just be your new favorite go-to. They’re vibrant, naturally sweet, and packed with nutrients—making them a fantastic swap for traditional wheat-based noodles.

      Sweet potato noodles, also known as “swoodles,” can be spiralized fresh at home or bought pre-packaged. They cook quickly and absorb sauces beautifully, giving you the texture of a noodle with the benefits of a whole food vegetable. Whether you sauté them lightly with olive oil and garlic or toss them into stir-fries and bowls, these noodles are as flexible as they are flavorful.

      Ideal for gluten-free, paleo, Whole30, and plant-based diets, these noodles are more than just pretty—they’re functional. Whether you’re preparing a quick lunch, a creative side dish, or the base of a nourishing bowl, sweet potato noodles can handle it.


      Equipment You’ll Need For Sweet Potato Noodles

      • Spiralizer (or julienne peeler)
      • Large skillet or sauté pan
      • Tongs or spatula
      • Sharp knife and cutting board
      • Optional: steamer basket or microwave-safe bowl for softening noodles

      Prep & Cook Time For Sweet Potato Noodles

      • Prep Time: 10–15 minutes
      • Cook Time: 5–7 minutes
      • Total Time: ~20 minutes
      • Servings: 2–3

      Ingredients For Sweet Potato Noodles

      • 1–2 medium sweet potatoes, peeled
      • 1 tablespoon olive oil or avocado oil
      • 1 clove garlic, minced
      • 1/4 teaspoon sea salt
      • Pinch of black pepper or red chili flakes (optional)
      • Optional toppings: sesame seeds, chopped herbs, sliced scallions, tahini drizzle


      Recipe For Sweet Potato Noodles

      1. Spiralize the sweet potatoes using a spiralizer. If using a julienne peeler, slice carefully into noodle-like strips.
      2. Heat oil in a large skillet over medium heat. Add garlic and cook until fragrant, about 30 seconds.
      3. Add sweet potato noodles to the pan. Sauté for 5–7 minutes, tossing gently until just tender but still holding their shape.
      4. Season with salt, pepper, or chili flakes to taste.
      5. Serve warm with your choice of toppings or as a base for bowls, stir-fries, or salads.

      What to Serve With Sweet Potato Noodles

      • Grilled chicken, salmon, or tofu for added protein
      • Crisp veggie slaw or a citrus-dressed salad
      • A fried egg or poached egg on top for a savory breakfast bowl
      • Roasted chickpeas or lentils for a plant-based pairing


      Tips for Perfect Sweet Potato Noodles Every Time

      • Choose firm sweet potatoes for best spiralizing results
      • Don’t overcook—5–7 minutes is just right for tender-crisp texture
      • If storing raw spiralized noodles, wrap them in paper towel to absorb moisture
      • Add a splash of water while cooking if they start to dry out or stick

      Flavor Boosters & Sauce Ideas

      • Lemon-garlic tahini drizzle
      • Creamy avocado pesto
      • Coconut milk + lime sauce
      • Peanut sauce or almond butter with a dash of sriracha


      Sweet Potato Noodles vs. Other Spiralized Veggies:

      While zucchini noodles are lower in calories and cook faster, sweet potato noodles hold up better in hot dishes and add natural sweetness and fiber. Compared to carrots or beets, sweet potatoes have a softer texture and neutral base that pairs well with savory or spicy sauces.


      Make It a Bowl!

      • Asian-Inspired Bowl: Sweet potato noodles, sautéed bok choy, tofu, sesame seeds, and tamari glaze
      • Southwest Bowl: Sweet potato noodles, black beans, corn, avocado, and lime crema
      • Mediterranean Bowl: Sweet potato noodles, hummus, cucumbers, cherry tomatoes, olives, and a drizzle of olive oil

      Health Benefits

      • Sweet potatoes offer beta-carotene, vitamin C, potassium, and dietary fiber.
      • Olive oil contributes heart-healthy fats and anti-inflammatory compounds.
      • Garlic supports immune health and digestion.

      This dish is naturally gluten-free and lower in calories than most pasta dishes, while still providing a satisfying, comforting bite.


      Nutrition Info (per serving, approx.):

      • Calories: 150–180 kcal
      • Carbohydrates: 22–26g
      • Protein: 2–3g
      • Fat: 6–8g
      • Fiber: 4g

      Storage & Meal Prep:

      Store cooled sweet potato noodles in an airtight container in the refrigerator for up to 3 days. Reheat gently in a pan or microwave with a splash of water or oil.

      Meal prep tip: Spiralize raw noodles in advance and store in the fridge (uncooked) for up to 3 days to cut down on prep time.


      Recipe Variations

      • Toss with a spoonful of almond butter and coconut aminos for an Asian-inspired twist.
      • Add sautéed mushrooms, tofu, or tempeh for a heartier meal.
      • Try a lemon-garlic tahini dressing for a creamy finish.
      • Mix in baby spinach or kale while cooking for extra greens.
      • Top with toasted pumpkin seeds or hemp hearts for added crunch.

      FAQs

      Can I roast sweet potato noodles instead of sautéing? Yes! Lightly coat in oil and roast at 400°F (200°C) for 10–12 minutes.

      Do sweet potato noodles get soggy? Only if overcooked. Keep them slightly firm for best results.

      Can I use white sweet potatoes? Absolutely. They work just as well and have a slightly different flavor.

      Are these freezer-friendly? It’s best to enjoy them fresh, but you can freeze spiralized raw sweet potato and sauté directly from frozen.


      References

      1. USDA FoodData Central – Sweet Potato
      2. Healthline – Sweet Potato Nutrition Facts
      3. Harvard T.H. Chan School of Public Health – Vegetables and Fruits

      Recent Posts


      Easy To Make, Sweet Potato Breakfast Muffins

      These healthy sweet potato breakfast muffins pair perfectly with Greek yogurt, nut butter, or a warm herbal tea for a satisfying, fiber-rich start to your day.


      A batch of healthy sweet potato breakfast muffins resting on a cooling rack, golden and moist, topped with optional chopped nuts and oats.
      Sweet Potato Muffins

      Introduction For Sweet Potatoes Breakfast Muffins

      Sweet potato breakfast muffins are a game-changer for anyone looking to start their morning with something delicious and wholesome. They’re the kind of food that bridges the gap between indulgent and nourishing—soft, satisfying, and bursting with flavor, without relying on processed ingredients or loads of sugar.

      Not only are these muffins a breeze to whip up, but they also sneak in nutrient-rich ingredients that boost energy and support digestion. Whether you’re managing blood sugar, fueling a workout, or packing school lunches, these muffins deliver.

      What sets these muffins apart is their clean ingredient list. Instead of refined sugars and processed oils, they rely on the natural sweetness of roasted sweet potatoes, a touch of maple syrup, and healthy fats like olive oil or nut butter. They’re gluten-free, dairy-free (if you choose), and totally customizable with add-ins like nuts, seeds, or dried fruit.

      These muffins work well for all ages and dietary preferences and are especially loved by those following whole-food, plant-based, or anti-inflammatory diets. Plus, they freeze beautifully—so make a double batch and thank yourself later!


      Why You Need Sweet Potatoes Breakfast Muffins

      Sweet potatoes are more than just a dinner side dish—they’re one of the most versatile, nutrient-dense ingredients you can keep on hand. In baked goods like muffins, they bring a naturally sweet flavor, a moist texture, and loads of nutrition to the table. Packed with fiber, beta-carotene, and slow-digesting carbohydrates, sweet potatoes help keep your energy stable throughout the morning.

      They also make a great base for gluten-free and dairy-free recipes because of their natural binding qualities and mild taste. Whether you’re blending them into batter or stirring into oatmeal, sweet potatoes prove that healthy eating doesn’t have to be boring—or bland.


      Equipment You’ll Need For Sweet Potatoes Breakfast Muffins

      • Muffin tin (12-cup)
      • Mixing bowls
      • Whisk or fork
      • Spatula
      • Measuring cups and spoons
      • Oven

      Prep & Cook Time For Sweet Potatoes Breakfast Muffins

      • Prep Time: 15 minutes
      • Cook Time: 25–28 minutes
      • Total Time: ~40–45 minutes
      • Yields: 12 muffins

      Ingredients For Sweet Potatoes Breakfast Muffins

      • 1 cup mashed roasted sweet potato (about 1 medium)
      • 2 large eggs (or flax eggs for vegan)
      • 1/4 cup olive oil or melted coconut oil
      • 1/4 cup maple syrup or honey
      • 1/4 cup unsweetened almond milk
      • 1 teaspoon vanilla extract
      • 1 cup oat flour (or finely ground rolled oats)
      • 1/2 cup almond flour
      • 1 teaspoon cinnamon
      • 1/2 teaspoon baking soda
      • 1/2 teaspoon baking powder
      • 1/4 teaspoon salt
      • Optional: 1/4 cup chopped walnuts, pecans, or dried cranberries


      Recipe For Sweet Potatoes Breakfast Muffins

      1. Preheat oven to 350°F (175°C). Line muffin tin with paper liners or lightly grease.
      2. In a large bowl, whisk together mashed sweet potato, eggs, oil, maple syrup, almond milk, and vanilla until smooth.
      3. In a separate bowl, combine dry ingredients: oat flour, almond flour, cinnamon, baking soda, baking powder, and salt.
      4. Mix wet and dry ingredients until just combined. Fold in any optional add-ins.
      5. Divide batter evenly into muffin cups, filling about 3/4 full.
      6. Bake for 25–28 minutes, or until a toothpick comes out clean.
      7. Cool in pan for 5–10 minutes, then transfer to a wire rack.

      Health Benefits For Sweet Potatoes Breakfast Muffins

      • Sweet potatoes provide fiber, vitamin A, and antioxidants that support gut and eye health.
      • Oat and almond flour add plant-based protein and healthy fats.
      • Maple syrup offers a natural alternative to refined sugar.
      • Olive oil or coconut oil contribute anti-inflammatory fats.

      These muffins are lower in sugar than store-bought options and free of additives, making them an excellent option for kids, adults, and anyone trying to reduce processed food.


      Nutrition Info (per muffin, approx.)

      • Calories: 160–180 kcal
      • Protein: 4–5g
      • Carbs: 18–22g
      • Fat: 7–9g
      • Fiber: 3g

      Storage & Meal Prep For Sweet Potatoes Breakfast Muffins

      Let muffins cool completely before storing. Place in an airtight container at room temperature for up to 2 days, or refrigerate for up to 5 days. To freeze, wrap individually and store in a sealed bag for up to 2 months.

      Meal prep tip: Make a double batch and freeze half for a ready-to-go breakfast or snack.


      Recipe Variations For Sweet Potatoes Breakfast Muffins

      • Add dark chocolate chips for a sweet treat.
      • Mix in shredded coconut or grated apple for extra moisture.
      • Spice it up with nutmeg, ginger, or pumpkin spice.
      • Use chia seeds or flaxseed meal for added fiber.
      • Top with crushed nuts or oats before baking for a crunchy topping.

      FAQs

      Can I make these vegan? Yes, substitute eggs with flax eggs and use maple syrup and dairy-free milk.

      Can I use canned sweet potato puree? Yes, just make sure it’s unsweetened and not too watery.

      Are these muffins good for kids? Absolutely! They’re naturally sweet, soft, and full of nourishing ingredients.

      Can I make mini muffins? Yes, reduce bake time to 12–15 minutes.


      References For

      1. USDA FoodData Central – Nutrition
      2. Harvard Health Publishing – Carbs
      3. Cleveland Clinic – Eat Healthy Food

      Recent Posts


      Baked Sweet Potatoes with Savory Toppings You’ll Love

      These baked sweet potatoes are perfect with a fresh salad, steamed broccoli, or a simple tahini drizzle for a healthy, hearty meal.


Three baked sweet potatoes sliced open and topped with chickpea salad, spinach and feta, and lentils with yogurt—arranged on a rustic ceramic plate.
      Baked Sweet Potatoes

      Introduction

      Baked sweet potatoes are more than just a side dish. They’re a delicious blank canvas for creating nutritious, comforting meals.

      Their naturally sweet flavor pairs beautifully with savory toppings, making them a staple for clean eaters, meal preppers, and anyone craving whole-food goodness. Whether you’re eating plant-based, gluten-free, or just want to feel good after your meal, this recipe has your back.

      They’re one of the most underrated powerhouses of the produce aisle—low on the glycemic index, rich in antioxidants, and naturally satisfying.

      When baked just right, their flesh becomes soft and creamy, and their caramelized skin adds depth and texture. This combination makes them ideal for stuffing with nutrient-dense, flavorful ingredients.


      Why Sweet Potatoes Deserve a Spot in Your Weekly Rotation

      Another reason baked sweet potatoes are such a go-to in healthy kitchens? They’re incredibly flexible. You can prep a whole tray in one go, eat them fresh or reheat later, and top them with whatever you have on hand.

      The three toppings below—Mediterranean Chickpea Salad, Creamy Spinach & Feta, and Spiced Lentils with Garlic Yogurt—each offer a different flavor profile and nutrient boost, so there’s something to satisfy every craving.

      This recipe is also excellent for meal prep, lunchboxes, or even a simple weeknight dinner when you’re short on time. The combination of complex carbohydrates, plant-based protein, and healthy fats means you’ll feel full and nourished without the heaviness that often comes with comfort food.

      Whether you’re cooking for one or feeding a family, baked sweet potatoes deliver maximum nutrition with minimal effort. And the best part? You don’t need fancy tools or ingredients to make them. Just a few pantry staples and some creativity can turn these vibrant tubers into an exciting part of your weekly rotation.

      You can also serve them in a variety of ways—from a grab-and-go lunch to a plated, Instagram-worthy dinner. If you’re entertaining, try making a baked sweet potato bar with all the toppings laid out for guests to choose from. It’s fun, interactive, and helps everyone eat in a way that feels good.


      Equipment You’ll Need For Baked Sweet Potatoes

      • Baking tray
      • Parchment paper or foil
      • Sharp knife or fork (for piercing potatoes)
      • Mixing bowls
      • Spoon or tongs for serving

      Prep & Cook Time For Baked Sweet Potatoes

      • Prep Time: 10 minutes
      • Cook Time: 45 minutes
      • Total Time: 55 minutes
      • Servings: 3 baked sweet potatoes (1 per topping)

      Ingredients: Base For Baked Sweet Potatoes

      • 3 medium sweet potatoes
      • 1 tablespoon olive oil
      • Pinch of sea salt

      Mediterranean Chickpea Salad:

      • 1/3 cup canned chickpeas (drained and rinsed)
      • 2 tablespoons chopped cucumber
      • 2 tablespoons diced tomato
      • 1 tablespoon chopped red onion
      • 1 tablespoon crumbled feta
      • Squeeze of lemon juice

      Creamy Spinach & Feta:

      • 1/2 cup fresh spinach, chopped
      • 1 tablespoon Greek yogurt
      • 2 tablespoons crumbled feta
      • 1 teaspoon olive oil
      • Pinch of black pepper

      Spiced Lentils with Garlic Yogurt:

      • 1/3 cup cooked green or brown lentils
      • 1/4 teaspoon cumin
      • 1/4 teaspoon paprika
      • Pinch of sea salt
      • 1 tablespoon plain yogurt + 1/2 clove garlic, minced

      Recipe For Baked Sweet Potatoes

      1. Preheat oven to 400°F (200°C). Line a baking tray with parchment paper.
      2. Pierce each sweet potato with a fork and rub with olive oil and salt.
      3. Bake for 40–50 minutes, or until tender when pierced.
      4. Remove and cool slightly. Slice open each sweet potato lengthwise.
      5. Fluff the inside gently with a fork to create a bed for toppings.

      Assembly:

      • For Mediterranean Chickpea Salad, mix all ingredients and spoon onto the potato.
      • For Creamy Spinach & Feta, wilt spinach in a pan or microwave, then mix with yogurt, feta, oil, and pepper. Spoon over the sweet potato.
      • For Spiced Lentils, toss cooked lentils with cumin, paprika, and salt. Top the sweet potato and finish with garlic yogurt.

      Health Benefits

      • Sweet potatoes are high in fiber, vitamin A (beta-carotene), potassium, and antioxidants.
      • Chickpeas and lentils provide plant-based protein and support gut health.
      • Greek yogurt and feta add calcium and probiotics for digestion.
      • Spinach is rich in iron, magnesium, and anti-inflammatory compounds.

      Nutrition Info (per serving): (varies by topping)

      • Calories: 280–400 kcal
      • Protein: 10–15g
      • Carbohydrates: 35–45g
      • Fat: 8–14g
      • Fiber: 7–10g

      Storage & Meal Prep

      Baked sweet potatoes can be stored whole in the fridge for up to 5 days. Reheat in the oven or microwave and add fresh toppings. Keep toppings in separate containers for best texture.

      Meal prep tip:

      Bake extra potatoes and double your favorite topping to enjoy quick meals throughout the week.

      You can also freeze the baked potatoes (without toppings) by wrapping them in foil or storing them in airtight containers. When ready to eat, thaw in the fridge overnight and reheat thoroughly before adding your toppings.


      Recipe Variations

      • Add hard-boiled eggs, roasted chickpeas, or grilled chicken for extra protein.
      • Try tahini, avocado slices, or hot sauce for different flavors.
      • Swap yogurt with dairy-free alternatives for a vegan version.
      • Use mashed sweet potato as a base for a warm bowl with grains and veggies.
      • Stuff them with leftover chili, curry, or stir-fried veggies for a fridge clean-out meal.
      • Add roasted nuts or seeds for extra crunch and healthy fats.
      • Try flavor combos like black beans and avocado, pesto and tomato, or herbed ricotta with sun-dried tomatoes.

      FAQs

      Can I bake sweet potatoes ahead of time? Yes, bake and store in the fridge for up to 5 days.

      Do I need to peel them? No, the skin is nutritious and tasty when roasted.

      Can I use Japanese or purple sweet potatoes? Absolutely! Just adjust the cook time slightly as they may be denser.

      Are sweet potatoes good for weight loss? Yes! Their fiber content helps keep you full longer while providing steady energy. Just be mindful of high-calorie toppings.

      Can I eat sweet potatoes every day? In moderation, yes. They’re nutrient-dense and safe to eat regularly as part of a balanced diet.


      References

      1. Harvard T.H. Chan School of Public Health – Sweet Potatoes
      2. USDA FoodData Central:Nutrients Database
      3. Cleveland Clinic – Is Yogurt Good for You?

      Recent Posts


      How to Make Perfect Stuffed Sweet Potatoes (Savory & Sweet)

      These stuffed sweet potatoes pair beautifully with side salads, sautéed greens, or a drizzle of tahini dressing for a balanced, nutrient-rich meal.


      Three stuffed sweet potatoes on a plate, each filled with unique toppings—Mediterranean quinoa and feta, spicy black bean and avocado, and banana with almond butter.
      Stuffed Sweet Potatoes

      Introduction

      If you’re looking for a meal that’s as comforting as it is clean, stuffed sweet potatoes are the answer.

      Packed with fiber, antioxidants, and endless flavor possibilities, they’re one of the most versatile healthy foods you can make. Whether you’re craving something savory, sweet, or somewhere in between, this customizable dish will satisfy without compromising your nutrition goals.

      Sweet potatoes have been a staple in many cultures for centuries, thanks to their nutritional value, affordability, and ability to pair well with a variety of ingredients.

      Their natural sweetness develops even more when roasted, giving them a caramelized flavor and a soft texture that’s perfect for stuffing.

      In this recipe, you’ll learn how to make three unique versions of stuffed sweet potatoes: one savory with a Mediterranean twist, one plant-powered Mexican-style, and one slightly sweet and breakfast-inspired.

      All three are gluten-free, meal prep–friendly, and perfect for anti-inflammatory eating. Each variation brings a different taste and texture, while all sharing the same base: perfectly roasted, caramelized sweet potatoes.

      Stuffed sweet potatoes are perfect for:

      • Weeknight dinners
      • Make-ahead lunches
      • Post-workout fuel
      • Cozy weekend meals

      With just a few simple ingredients and minimal effort, you can turn a humble root vegetable into a stunning, Pinterest-worthy plate.

      This dish also offers a wonderful way to reduce food waste by using leftovers creatively. Whether you’re following a plant-based diet, trying to eat more whole foods, or just want to mix up your meal rotation, stuffed sweet potatoes are a nourishing, satisfying, and beautiful choice.


      Equipment You’ll Need For Stuffed Sweet Potatoes

      • Baking tray
      • Parchment paper or foil
      • Fork or knife (for piercing potatoes)
      • Small mixing bowls
      • Spoon for stuffing

      Prep & Cook Time For Stuffed Sweet Potatoes

      • Prep time: 10 minutes
      • Cook time: 45 minutes
      • Total time: 55 minutes
      • Servings: 3 stuffed sweet potatoes (1 per variation)

      Ingredients: Base For Stuffed Sweet Potatoes

      • 3 medium sweet potatoes, scrubbed
      • 1 tablespoon olive oil
      • Pinch of sea salt

      Savory Mediterranean Style:

      • 1/3 cup cooked quinoa
      • 1/4 cup canned chickpeas, drained
      • 2 tablespoons chopped kalamata olives
      • 2 tablespoons crumbled feta cheese
      • 1 tablespoon chopped parsley
      • Lemon wedge for garnish

      Mexican-Style:

      • 1/3 cup black beans (rinsed and drained)
      • 2 tablespoons corn kernels (fresh or frozen)
      • 2 tablespoons chopped red onion
      • 1 tablespoon salsa or pico de gallo
      • 1 tablespoon mashed avocado or guacamole
      • Sprinkle of chili flakes or cumin (optional)

      Sweet Breakfast-Style:

      • 1 tablespoon almond butter or peanut butter
      • 1/2 banana, sliced
      • Sprinkle of cinnamon
      • 1 teaspoon chia seeds
      • 1 teaspoon maple syrup or honey (optional)


      Recipe For Stuffed Sweet Potatoes

      1. Preheat the oven to 400°F (200°C). Line a baking tray with parchment paper.
      2. Pierce each sweet potato several times with a fork. Rub lightly with olive oil and a pinch of sea salt.
      3. Roast the sweet potatoes for 40–50 minutes, or until soft when pierced with a fork and caramelized on the edges.
      4. Let them cool slightly, then slice each potato down the center lengthwise (do not cut all the way through).
      5. Fluff the flesh with a fork to create space for the filling.

      Assembly:

      • For Mediterranean Style: Mix quinoa, chickpeas, olives, and feta. Spoon into the potato and sprinkle with parsley and a squeeze of lemon.
      • For Mexican-Style: Layer black beans, corn, and red onion. Top with salsa and a dollop of guacamole.
      • For Sweet Breakfast-Style: Spread almond butter inside the potato, layer banana slices, sprinkle with chia and cinnamon, and drizzle with honey.

      Health Benefits For Stuffed Sweet Potatoes

      • Sweet potatoes are rich in beta-carotene, vitamin C, potassium, and fiber.
      • Chickpeas and black beans add plant-based protein and gut-friendly fiber.
      • Healthy fats from olive oil, avocado, and nut butter support brain and heart health.
      • Naturally gluten-free and anti-inflammatory ingredients.
      • Balanced macros for energy, satiety, and blood sugar control.

      Nutrition Info (per serving): (Varies by variation)

      • Calories: 300–400 kcal
      • Protein: 8–14g
      • Carbohydrates: 30–45g
      • Fat: 10–18g
      • Fiber: 7–10g

      Storage & Meal Prep For Stuffed Sweet Potatoes

      Stuffed sweet potatoes can be assembled in advance and stored in airtight containers for up to 4 days in the fridge. To reheat, microwave for 1–2 minutes or bake at 350°F (175°C) until warmed through.

      Pro Tip: Store wet toppings (like guacamole or salsa) separately and add after reheating to preserve texture.


      Recipe Variations:

      • Add cooked ground turkey or shredded chicken to the savory versions
      • Swap quinoa with rice, bulgur, or farro
      • Use tahini or hummus instead of feta
      • Try blueberries and yogurt instead of banana and nut butter
      • Add sautéed spinach or kale for extra greens
      • Sprinkle pumpkin seeds or hemp hearts for crunch and protein

      FAQs:

      Can I microwave the sweet potatoes? Yes, microwave on high for 5–8 minutes (pierced) for a faster option.

      Do I need to peel the sweet potatoes? No, the skins are edible and packed with fiber—just scrub them well.

      Can I freeze stuffed sweet potatoes? It’s best to freeze the roasted potato base separately and add toppings fresh.

      What can I use instead of banana? Sliced apple, berries, or chopped dates work well in the sweet variation.


      References:

      1. Harvard School of Public Health – Sweet Potatoes
      2. USDA FoodData Central – Nutrition
      3. Mayo Clinic – Fiber and Gut Health

      Recent Posts


      Easy Sautéed Chicken with Spinach and Garlic

      This sautéed chicken with spinach pairs perfectly with quinoa, whole-grain pasta, or a side of roasted sweet potatoes.


      Close-up of sautéed chicken breast pieces with wilted spinach and garlic in olive oil, served in a skillet. A vibrant, healthy dish perfect for weeknight meals.
      Sauteed Chicken

      Introduction

      When you need a healthy, protein-packed meal that doesn’t require hours in the kitchen, sautéed chicken with spinach is your go-to. This dish is as simple as it gets—but don’t mistake simple for boring. With just a few ingredients like extra virgin olive oil, fresh garlic, and a squeeze of lemon, you can turn plain chicken and spinach into something flavorful and satisfying.

      What makes this meal especially great is its balance of clean protein, leafy greens, and heart-healthy fats. It’s naturally low in carbs, gluten-free, and fits perfectly into meal plans focused on weight loss, anti-inflammatory diets, or clean eating. Best of all, everything cooks in one pan, making cleanup a breeze.

      This recipe is also incredibly customizable and ideal for those cooking for families or individuals with dietary preferences. You can keep it light and simple, or build it out with additional vegetables, grains, or even a sprinkle of cheese. It’s satisfying enough to serve as a standalone meal, yet versatile enough to become part of a larger spread.

      The flavor profile is fresh and Mediterranean-inspired, thanks to the olive oil, garlic, lemon juice, and leafy greens. It’s a quick way to bring restaurant-style flavor into your own kitchen without added preservatives or unnecessary ingredients. Whether you’re fueling post-workout, preparing for the week, or trying to get dinner on the table fast, this sautéed chicken with spinach is a staple worth mastering.


      Equipment You’ll Need For Sautéed Chicken

      • Large non-stick or cast-iron skillet
      • Sharp knife and cutting board
      • Tongs or spatula
      • Measuring spoons

      Prep & Cook Time For Sautéed Chicken

      • Prep time: 10 minutes
      • Cook time: 12–15 minutes
      • Total time: 25 minutes
      • Servings: 2–3

      Ingredients For Sautéed Chicken

      • 1 lb boneless, skinless chicken breasts, sliced thin
      • 2 tablespoons extra virgin olive oil
      • 3 cups fresh spinach (packed)
      • 2 garlic cloves, minced
      • 1/2 teaspoon sea salt
      • 1/4 teaspoon black pepper
      • 1/2 teaspoon dried oregano (optional)
      • Juice of 1/2 lemon

      Recipe For Sautéed Chicken

      1. Heat the olive oil in a large skillet over medium heat. Make sure the oil is hot enough to sizzle slightly when the chicken touches it, but not so hot that it smokes.
      2. Add chicken slices to the pan in a single layer. Avoid overcrowding the pan to ensure even browning. Cook for 3–4 minutes on the first side until a light golden crust forms.
      3. Flip the chicken using tongs and cook for another 3–4 minutes. The chicken should be firm and opaque when fully cooked. For extra flavor, you can sprinkle in a pinch more salt and pepper while cooking.
      4. Add garlic to the pan once the chicken is nearly done. Stir frequently for 30 seconds to avoid burning the garlic, allowing its flavor to infuse into the oil and chicken.
      5. Add spinach to the pan and stir everything together gently. The spinach will begin to wilt within 1–2 minutes. Continue stirring to mix the greens thoroughly with the chicken and garlic.
      6. Drizzle with fresh lemon juice just before removing the pan from the heat. This brightens the flavors and balances the richness of the olive oil.
      7. Serve immediately while hot, or let cool slightly for meal prep containers. Garnish with extra lemon zest or a sprinkle of crushed red pepper flakes for a touch of heat, if desired.


      Health Benefits For Sautéed Chicken

      • Lean protein: Chicken breast is rich in complete protein and low in fat.
      • Heart-healthy fats: Olive oil contains monounsaturated fats that support cardiovascular health.
      • Anti-inflammatory: Garlic, spinach, and olive oil all offer anti-inflammatory properties.
      • Nutrient-rich greens: Spinach is high in iron, calcium, magnesium, and vitamin K.
      • Low-carb & gluten-free: Perfect for keto, paleo, and diabetic-friendly meal plans.

      Nutrition Info (per serving)

      • Calories: ~285 kcal
      • Protein: ~30g
      • Carbs: ~4g
      • Fat: ~16g
      • Fiber: ~2g
      • Sodium: ~320mg

      Storage & Meal Prep

      Cool leftovers completely before storing in an airtight container. Keep in the fridge for up to 4 days. To reheat, warm gently in a skillet over low heat or microwave for 60–90 seconds.

      For meal prep, pair portions with brown rice, quinoa, or steamed vegetables. You can also slice the chicken and toss it into a salad for an easy high-protein lunch.


      Recipe Variations

      • Add cherry tomatoes for color and a juicy texture boost.
      • Use chicken thighs for a richer flavor and slightly more tenderness.
      • Sprinkle with parmesan or crumbled feta just before serving for a Mediterranean twist.
      • Make it spicy by adding red pepper flakes with the garlic or a splash of hot sauce when serving.
      • Add mushrooms with the chicken for a deeper, umami-rich taste.
      • Incorporate bell peppers or zucchini to bulk up the veggie content.
      • Top with toasted pine nuts or slivered almonds for crunch.
      • Serve over polenta or mashed cauliflower for a comfort food vibe with fewer carbs..

      FAQs

      • Can I use frozen spinach? Yes, thaw it first and squeeze out excess moisture.
      • What other oils can I use? Avocado oil or ghee are great alternatives.
      • Can I make this dairy-free? It already is—just skip optional cheese toppings.
      • How do I keep chicken from drying out? Don’t overcook—thin slices cook fast, so monitor them closely.
      • Can I double the recipe? Yes, just cook in batches to avoid overcrowding the pan.

      References

      1. USDA FoodData Central – Chicken Breast
      2. Harvard T.H. Chan – Expand your healthy cooking oil choices
      3. National Institutes of Health – Spinach

      Recent Posts