Cookie Consent by Free Privacy Policy Generator Update cookies preferences

The Ultimate Guide to Fermented Foods


This article delves into the incredible world of Fermented Foods, guiding you through their gut-healing power. Discover how these probiotic-rich ingredients can transform your health, from improving digestion to boosting your immune system. Learn to choose, prepare, and enjoy Fermented Foods for a happier, healthier you.
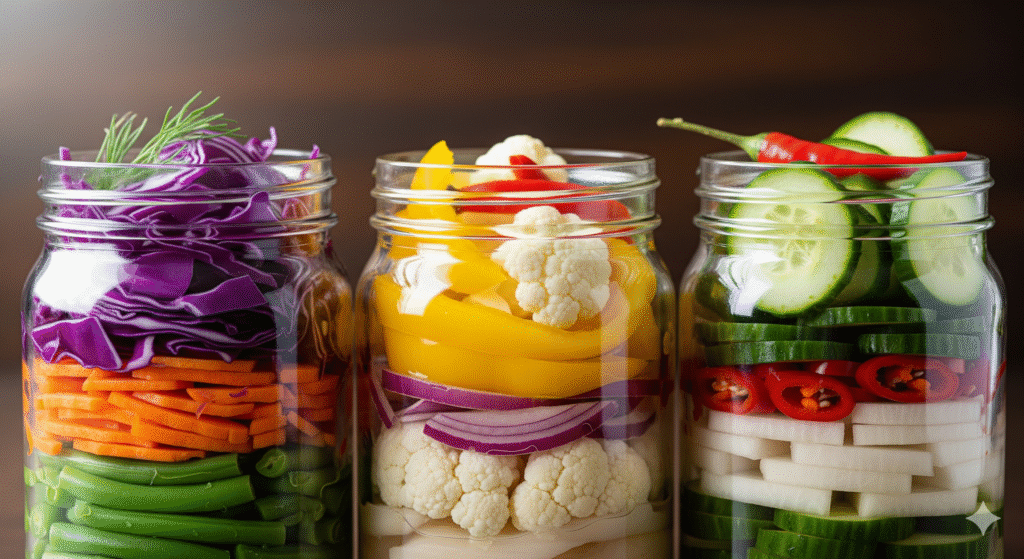

---Alt Text:A close-up horizontal shot of three jars of **fermented foods**. The first jar contains layered purple cabbage, carrots, and green beans. The second holds yellow peppers, red onions, and cauliflower. The third has cucumbers, daikon radish, and red chili peppers. The jars are on a dark wood table.
Fermented Foods


Unlock a Healthier You with Fermented Foods

A healthy gut is essential for overall well-being. It can affect everything from your immune system to your mood. Fermented foods are one of the most powerful tools you have to nourish your gut and support a thriving microbiome. This guide will walk you through what fermented foods are, why they’re so good for you, and how to easily incorporate them into your daily life.

Fermented pickled vegetables are an excellent way to support gut health. Unlike quick-pickled vegetables, which use vinegar to preserve the food and often lack live cultures, fermented vegetables undergo a process called lacto-fermentation. This process uses naturally occurring bacteria (primarily Lactobacillus species) to break down sugars and create lactic acid, which acts as a preservative and gives the vegetables their characteristic tangy flavor.


This post contains affiliate links. If you make a purchase through these links, I may earn a small commission at no extra cost to you.


Fermented Foods and Your Gut Microbiome

This natural process creates a wealth of beneficial bacteria known as probiotics. These live microorganisms, when consumed in adequate amounts, can help balance your gut flora, improve digestion, and even strengthen your immune system.

By adding fermented foods to your diet, you are directly introducing these good bacteria, which can help your gut function more efficiently.

Beyond their probiotic benefits, many fermented foods also contain enzymes and prebiotics that further aid in digestion.

The fermentation process can make nutrients in the food more bioavailable, meaning your body can absorb them more easily. This makes fermented vegetables a nutritional powerhouse that goes beyond their simple ingredients.

While fermented foods have been a part of human diets for thousands of years, they have seen a resurgence in popularity due to growing awareness of gut health.

From classic sauerkraut to spicy kimchi, there’s a wide variety of flavors and textures to explore. By the end of this guide, you’ll be ready to start your own gut health journey with these delicious and powerful foods.


What Are Fermented Foods and Why Do They Matter?


The Magic of Lacto-Fermentation

Fermented foods are created through a process called lacto-fermentation. This is a simple, natural method of food preservation that uses beneficial bacteria to transform vegetables.

This process not only preserves the food but also enhances its nutritional value and creates a unique tangy flavor. The lactic acid produced during fermentation also inhibits the growth of harmful bacteria, making the food safe and healthy to eat.


A Recipe for Fermented Pickled Vegetables

This is a great starting point for anyone new to fermenting. You can use this simple brine to create a variety of delicious fermented pickles.


Time to Prepare: 15 minutes

Time to Ferment: 7-14 days


Equipment

  • 1-quart glass jar with a tight-fitting lid
  • A fermentation weight or small glass jar that fits inside the main jar
  • A large bowl
  • Knife and cutting board

Ingredients

  • 1 lb of mixed vegetables (carrots, radishes, cauliflower florets, bell peppers, or green beans work well)
  • 2 tablespoons of non-iodized sea salt
  • 2 cups of filtered water
  • Optional flavorings: 2-3 cloves of garlic, 1 tablespoon of fresh dill, 1 teaspoon of mustard seeds, or a pinch of red pepper flakes

This post contains affiliate links. If you make a purchase through these links, I may earn a small commission at no extra cost to you.


Instructions

Prepare the Vegetables

Wash all your vegetables thoroughly. Cut them into sticks or florets that will fit snugly into your glass jar, leaving about an inch of space at the top. This extra space is crucial as the vegetables will expand slightly during fermentation.

Make the Brine

In your large bowl, whisk together the filtered water and non-iodized sea salt until the salt is completely dissolved. Using non-iodized salt is important, as iodine can interfere with the fermentation process.

Pack the Jar

Place your prepared vegetables into the clean glass jar. If using any of the optional flavorings, add them now, distributing them evenly throughout the jar. Pack the vegetables tightly but gently to avoid bruising them.

Pour the Brine:

Carefully pour the salt brine over the vegetables, making sure they are completely submerged. Leave that one-inch space at the top of the jar. This is essential for preventing overflow as the fermentation process creates gas.

Submerge the Veggies

Place a fermentation weight or a smaller, clean glass jar on top of the vegetables to keep them fully submerged under the brine. This prevents mold from forming.

Seal and Store

Screw the lid on loosely so that gases can escape. Place the jar in a cool, dark place (away from direct sunlight) to ferment. A pantry or a kitchen cabinet works well.

Monitor the Process

Check your jar daily. You might see small bubbles forming—this is a sign of healthy fermentation. After about 7 days, you can taste the vegetables. They should be tangy and crisp. If you prefer them tangier, let them ferment for a few more days.

Refrigerate

Once the vegetables have reached your desired level of tanginess, tighten the lid and move the jar to the refrigerator. This will slow down the fermentation process and preserve the flavor. The fermented vegetables will last for several months in the fridge.


youtube placeholder image

A List of Gut-Friendly Fermented Foods

Here is a list of fermented pickled vegetables that are great for gut health, offering a variety of flavors and textures to explore.


Classic Fermented Vegetables

  • Sauerkraut: This is arguably the most well-known fermented vegetable. It’s simply fermented cabbage and is packed with probiotics. The fermentation process makes the nutrients in cabbage more bioavailable.
  • Kimchi: A staple of Korean cuisine, kimchi is a spicy, fermented dish typically made from napa cabbage and a variety of seasonings like gochugaru (Korean chili powder), garlic, ginger, and scallions. The mix of vegetables and spices offers a complex flavor and a wide array of beneficial bacteria.
  • Fermented Dill Pickles: True fermented pickles are made with just cucumbers, a salt brine, and spices like dill and garlic. Look for “fermented,” “live cultures,” or “unpasteurized” on the label, and find them in the refrigerated section of the grocery store.
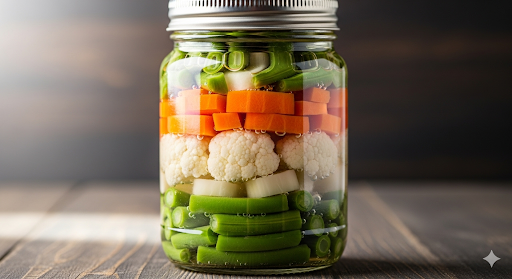
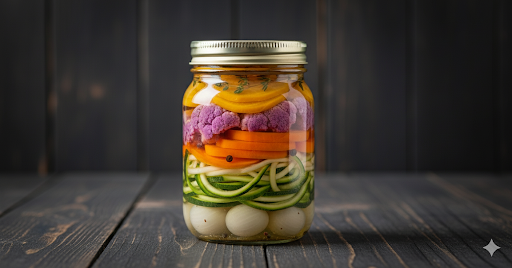
The gallery shows a selection of feremented vegetables in jars. They include: green beans, carrots, cucumber, cauliflower etc.


Other Great Options for Fermentation

The beauty of lacto-fermentation is that you can ferment almost any vegetable. Here are some more you can try:

  • Fermented Carrots: Carrots ferment well on their own or with other vegetables. They maintain their crunch and can be flavored with ginger, garlic, or a hint of turmeric.
  • Fermented Beets: Fermented beets are a beautiful, vibrant food. The fermentation process mellows their earthy flavor and can be used to make a probiotic drink called beet kvass.
  • Fermented Cauliflower and Broccoli: These cruciferous vegetables ferment nicely, developing a tangy flavor that is delicious in salads or as a side dish.
  • Fermented Green Beans: Fermenting green beans gives them a crisp, zesty taste. They’re a fantastic snack or a tangy addition to a meal.
  • Fermented Radishes: Radishes ferment quickly and are great for a beginner fermenter. They maintain their crunch and develop a sharp, tangy flavor.
  • Fermented Garlic and Onions: Fermenting garlic and onions not only preserves them but also makes them easier to digest for some people. They can be used as a flavorful ingredient in many dishes.
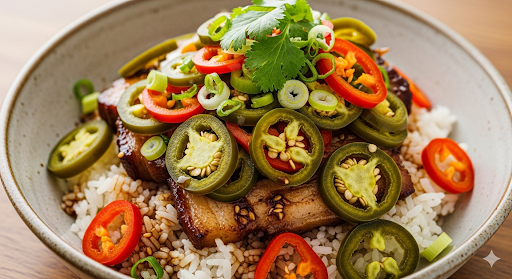
  • Fermented Jalapeños or Other Peppers: For those who like a little heat, fermented peppers are a flavorful and spicy way to get your probiotics.
  • Mixed Vegetable Ferments (Giardiniera): You can create your own mix of fermented vegetables. A common combination includes carrots, cauliflower, celery, and bell peppers. This is a great way to use up a variety of produce.
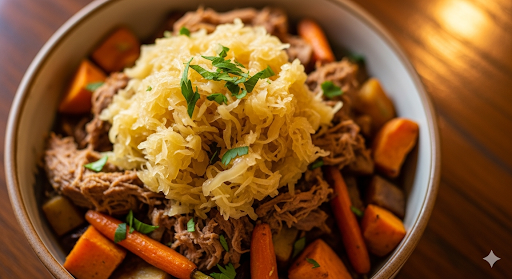
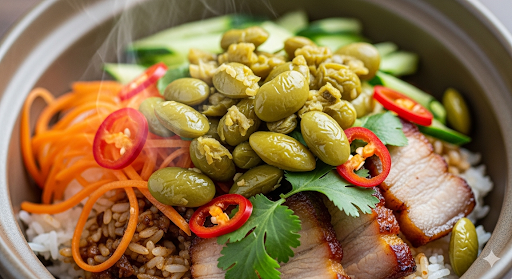
The gallery shows a delicious bowl of food topped with sauerkraut first, the middle image shows food topped with fermented green beans and the final image shows a delicious bowl of food topped with fermented jalapeños and other peppers


Benefits of Fermented Foods for Your Gut Health

Incorporating fermented foods into your diet offers a range of powerful benefits beyond simple digestion.

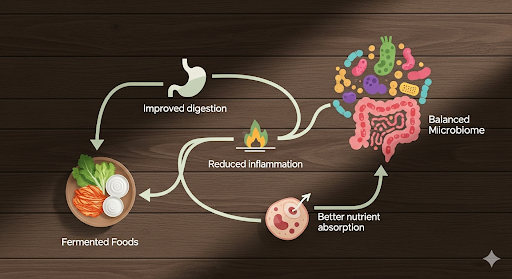
  • Improved Gut Microbiome: The most significant benefit is the introduction of beneficial bacteria to your gut. A balanced gut microbiome is linked to improved digestion, reduced inflammation, and better nutrient absorption.
  • Enhanced Immune Function: A large portion of your immune system is located in your gut. By promoting a healthy gut, fermented foods can help strengthen your body’s natural defenses and make you less susceptible to illness.
  • Better Mood and Brain Health: Research suggests a strong connection between the gut and the brain, often called the “gut-brain axis.” A healthy gut can positively influence mood, reduce stress, and improve cognitive function.
  • Increased Nutrient Bioavailability: The fermentation process breaks down certain compounds, making vitamins and minerals, like B vitamins and iron, easier for your body to absorb and use.
  • Digestive Harmony: Fermented foods can help with common digestive issues such as bloating, gas, and indigestion by supporting a healthy digestive process.

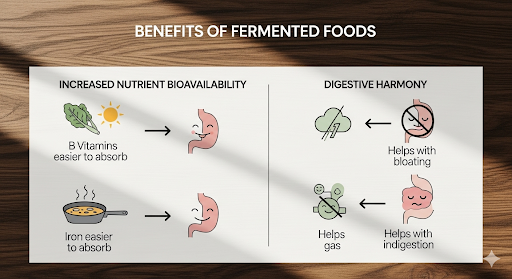
The gallery shows the benefits of fermented foods have on your gut and brain. The next image shows how fermented foods benefits your digestive harmony. And the final image shows how fermented foods can Improved Gut Microbiome.


How to Choose and Eat Fermented Foods

How to Choose Fermented Foods at the Store

When buying fermented vegetables, it’s crucial to check the label. If a product has been pasteurized (heated to kill bacteria for a longer shelf life), it will not contain live probiotics. Look for products specifically labeled as “fermented,” “unpasteurized,” or “live and active cultures.” These are almost always found in the refrigerated section of the store.

How to Incorporate Fermented Foods into Meals

If you’re new to fermented foods, start with a small amount, like a tablespoon or two per day, and gradually increase your intake. This allows your gut microbiome to adjust. Fermented vegetables can be enjoyed in many ways:

  • As a side dish with meals.
  • Topping sandwiches, wraps, or salads.
  • Mixed into grain bowls or stir-fries (add at the end to preserve the cultures).
  • As a flavorful snack on their own.

This post contains affiliate links. If you make a purchase through these links, I may earn a small commission at no extra cost to you.


Final Thoughts

The journey to a healthier gut is an investment in your overall health. By embracing the power of fermented foods, you’re giving your body a natural and delicious way to flourish. Start small, experiment with different flavors, and listen to what your body needs. Your gut will thank you for it.


Frequently Asked Questions (FAQs)

Q: Can I get the same benefits from vinegar-pickled vegetables?

A: No. Vinegar-pickled vegetables, like most jarred pickles in the condiment aisle, are preserved with vinegar and are often pasteurized, meaning they do not contain the live, beneficial bacteria found in lacto-fermented foods. Look for the “unpasteurized” label and find them in the refrigerated section to get the probiotic benefits.

Q: How do I know if my fermentation is working correctly?

A: A successful fermentation will often produce a slight carbonation and a tangy, pleasant smell. You may see small bubbles rising in the jar. If you see mold or a foul odor, the fermentation process may have been compromised, and it’s best to discard the batch and start over.


References

  1. U.S. National Library of Medicine – Fermented Foods
  2. Harvard Medical School – Fermented foods for better gut health
  3. Cleveland Clinic – 5 Reasons to Add More Fermented Foods to Your Diet

Recent Posts

The Ultimate Beanie Burger with Seeds & Sauce


Get ready to elevate your plant-based cooking with the ultimate beanie burger recipe. This guide will walk you through creating a flavorful, protein-packed burger that’s anything but ordinary. Discover a delicious and wholesome meal option that will become a new favorite in your kitchen.


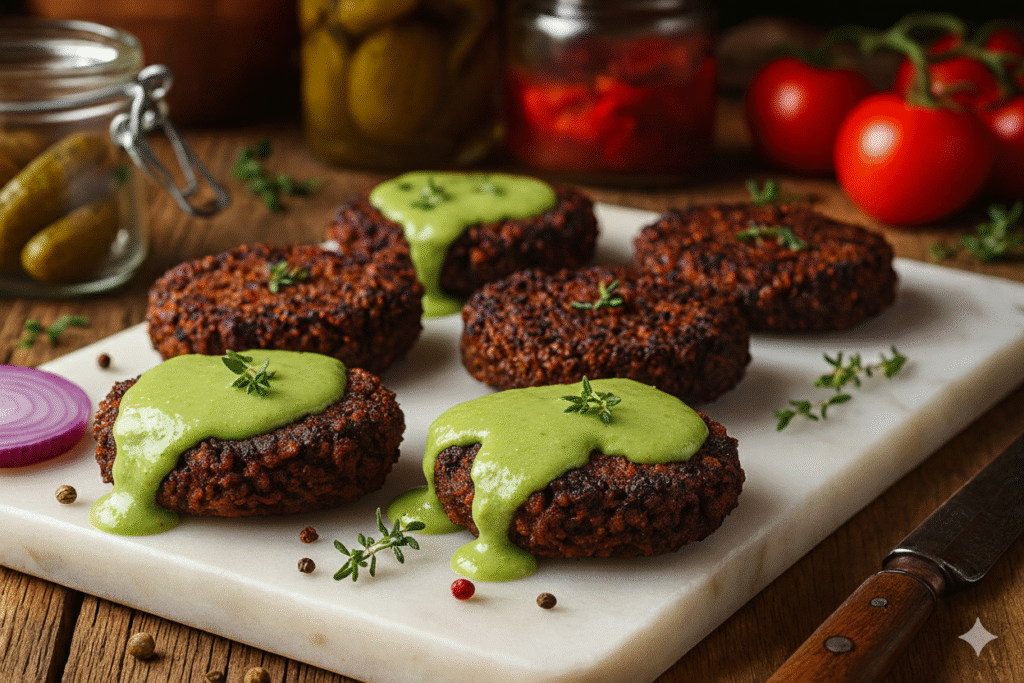
Crispy beanie burger patties made with beans, nuts, and seeds, served on a white marble slab and topped with creamy green avocado sauce.
Beanie burger

A Modern Take on a Classic

Welcome to a world where plant-based eating is not just about substitution, but about celebration. The beanie burger has long been a staple for vegetarians and vegans, but often, it falls short of the hearty, satisfying experience we crave. This recipe changes that narrative entirely. We’ve gone beyond the basics to craft a burger that is rich in flavor, incredible in texture, and deeply nourishing. It’s a culinary journey that transforms simple ingredients into a show-stopping meal, proving that meat-free can be just as, if not more, delicious and fulfilling.

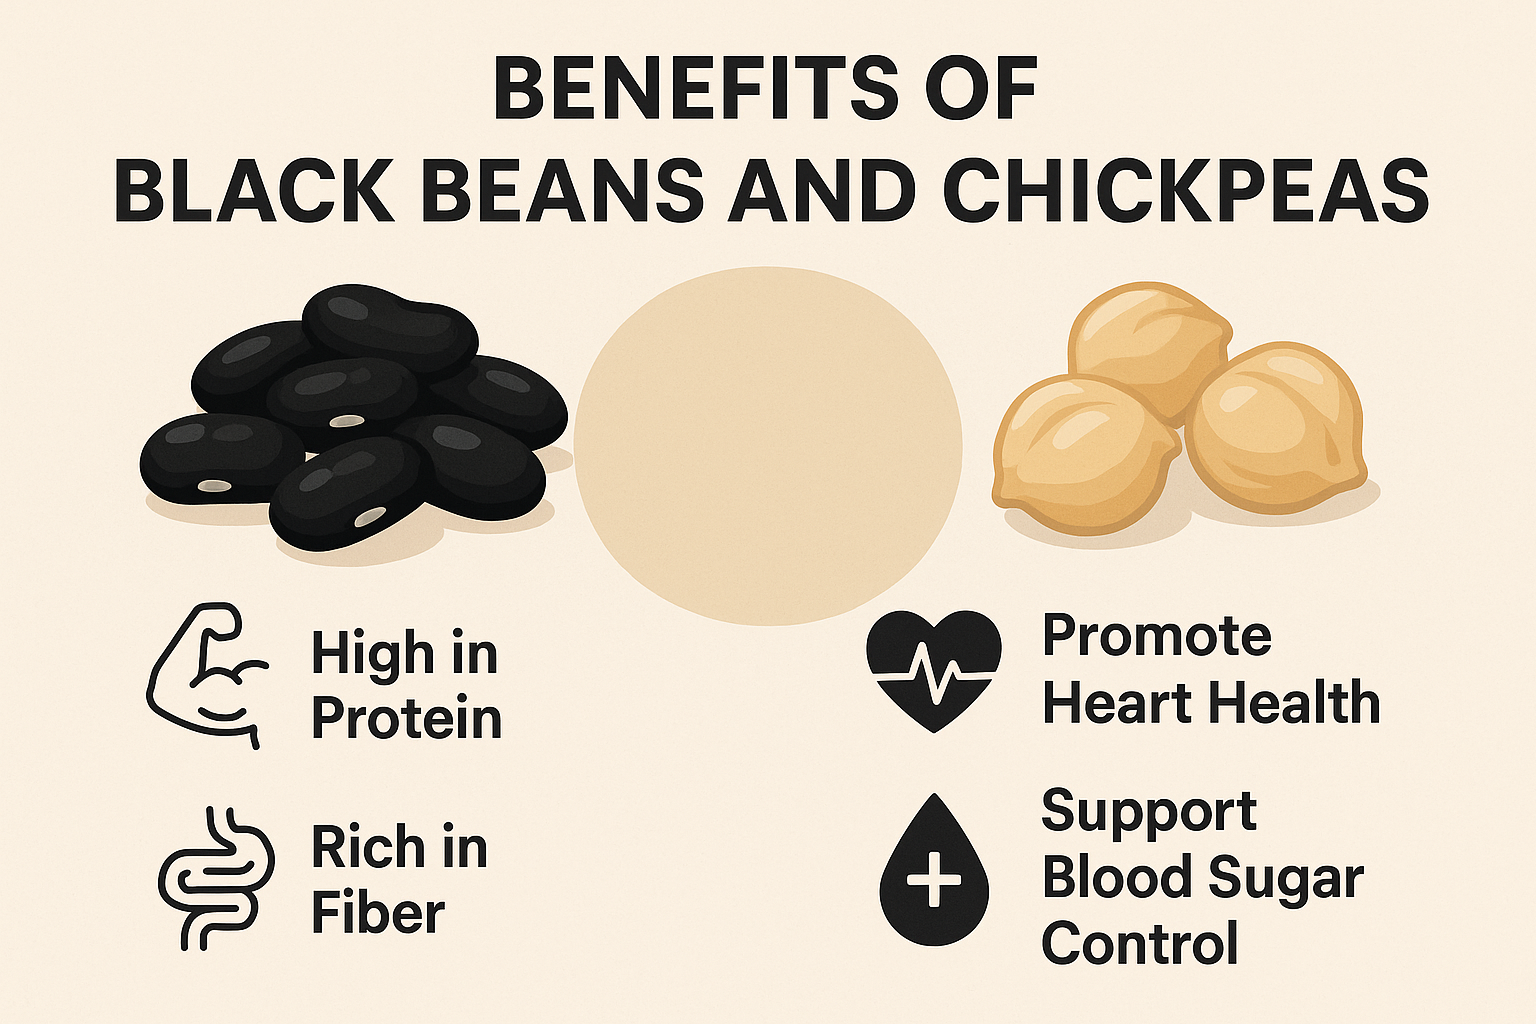
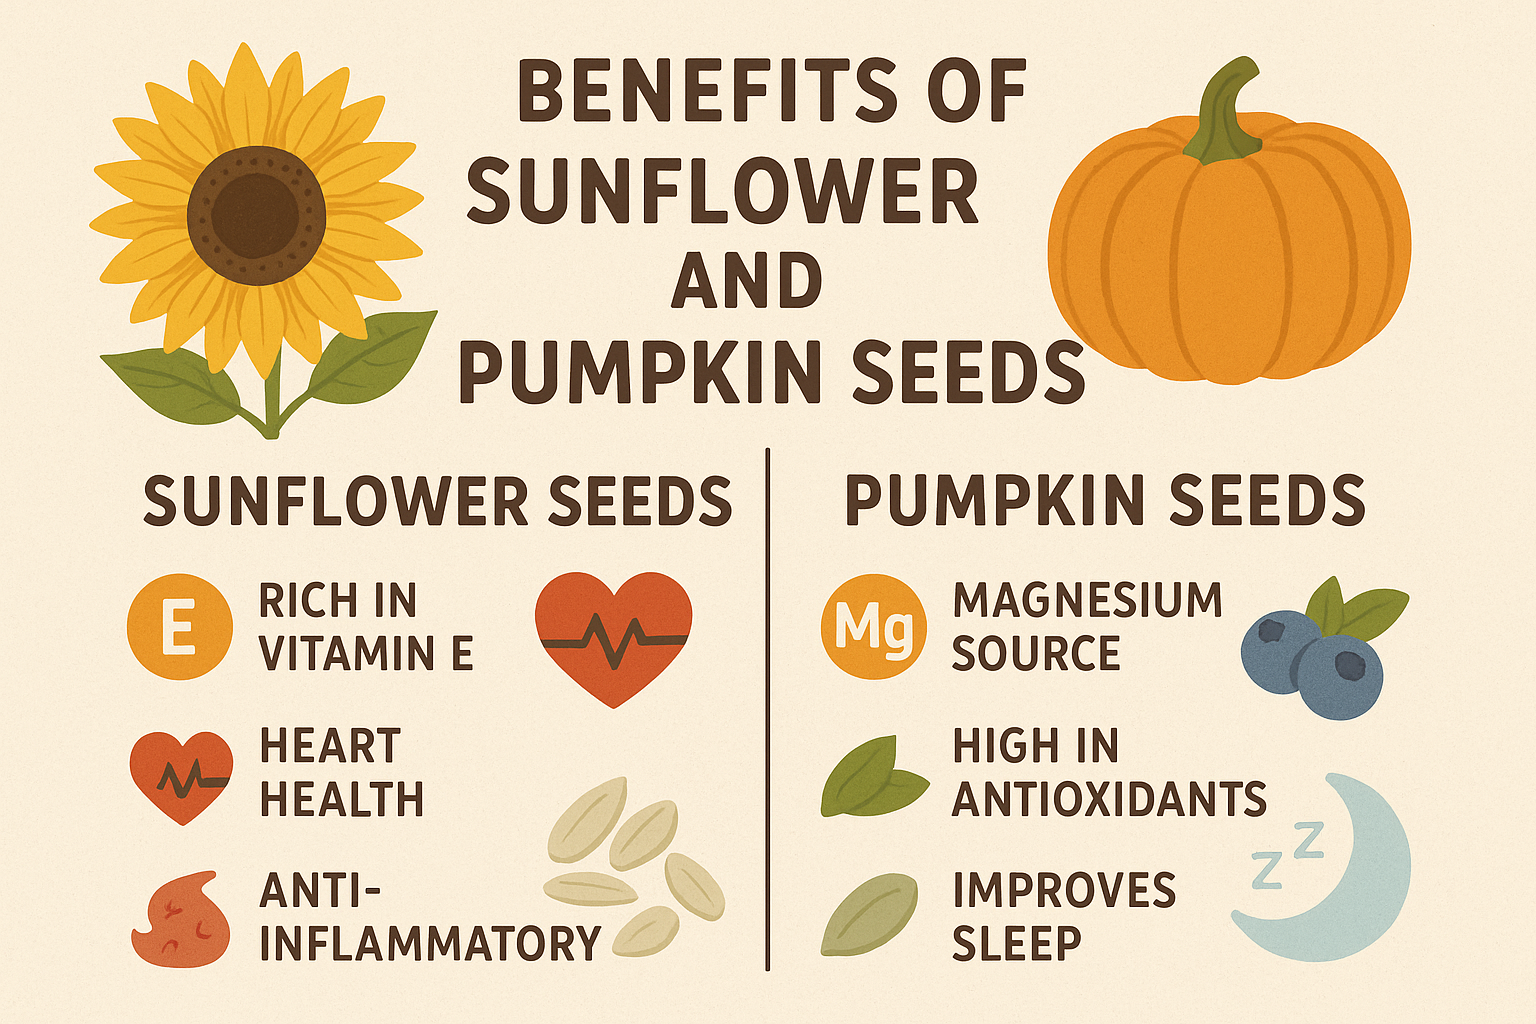
Our journey begins with the foundation: the beans. We’ll be using a mix of black beans and chickpeas, a dynamic duo that provides a robust base, rich in protein and fiber. But what truly sets this recipe apart is the addition of an unexpected hero: seeds. Sunflower and pumpkin seeds are roasted to bring out their nutty flavor, then blended into the patty mix. This not only adds a delightful crunch but also boosts the nutritional profile, packing in healthy fats, vitamins, and minerals. The result is a patty that holds its shape beautifully and delivers a satisfying, substantial bite.


Blending the Ultimate Beanie Burger Mix

But a great burger is only as good as its sauce, and our creamy avocado sauce is the perfect partner. This isn’t your average condiment; it’s a vibrant, fresh, and velvety smooth creation that cuts through the savory richness of the patty. Made with ripe avocados, a squeeze of lime juice, and a handful of fresh herbs, it adds a layer of coolness and brightness that makes every bite sing. It’s a simple addition that makes a world of difference, turning a good meal into a truly memorable one.

This recipe is designed for everyone, from the seasoned plant-based pro to the curious newcomer. We’ve broken down each step to ensure success, guiding you through the process of creating patties that are moist on the inside and perfectly seared on the outside. We’ll cover everything from the right way to drain your beans to the best techniques for cooking to perfection. With a little patience and a lot of love, you’ll be serving up burgers that will impress even the most skeptical of eaters.

So, are you ready to ditch the dry, crumbly patties of the past and embrace a new era of plant-based deliciousness? This ultimate beanie burger with seeds and sauce is more than just a recipe; it’s an invitation to explore the incredible potential of whole foods. It’s a testament to the fact that healthy eating can be exciting, satisfying, and full of flavor. Let’s get cooking!


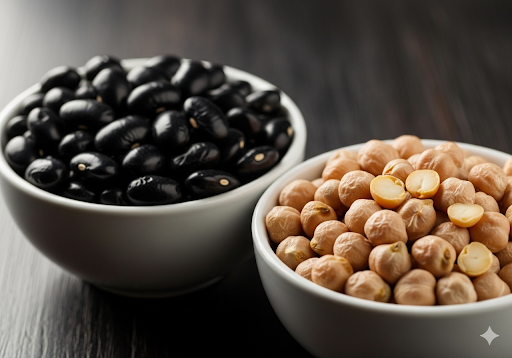
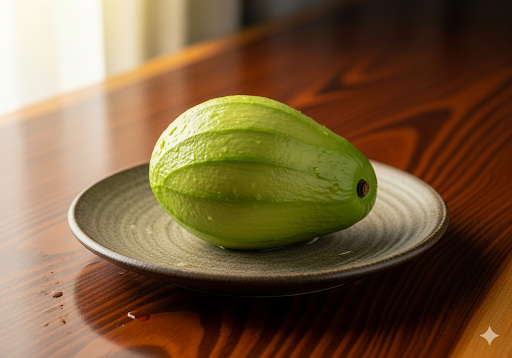
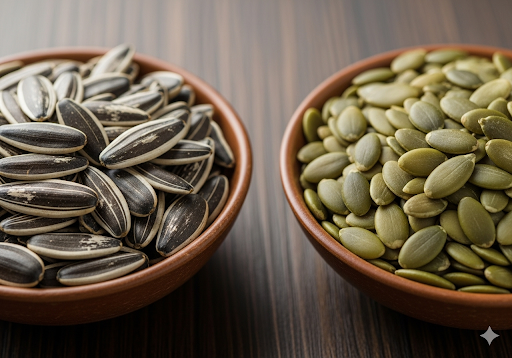
The gallery shows bowls of black beans and chickpeas, peeled avocado and pumpkin and sunflower seeds in a bowl


Time to Prepare & Cook

Time to Prepare: 20 minutes

Time to Cook/Blend: 25-30 minutes

Servings: 6 burgers


View Preview

Nutritional Highlights of this Beanie Burger

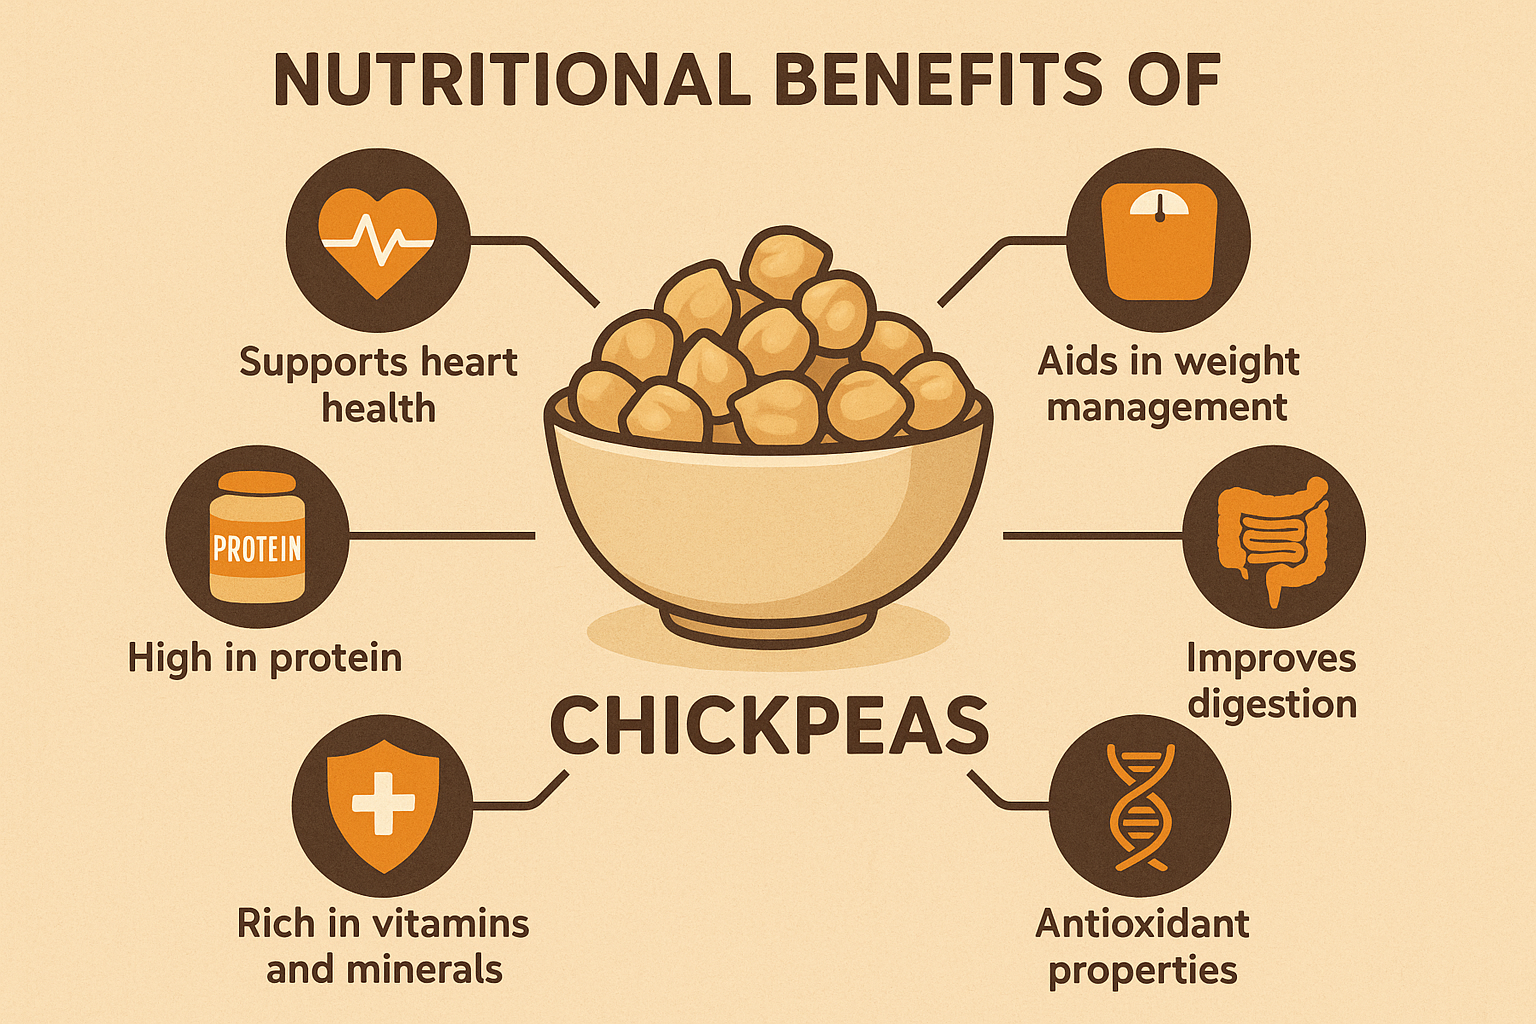
This beanie burger is a powerhouse of nutrition. The black beans and chickpeas provide a significant source of plant-based protein and dietary fiber, which aids digestion and promotes a feeling of fullness.

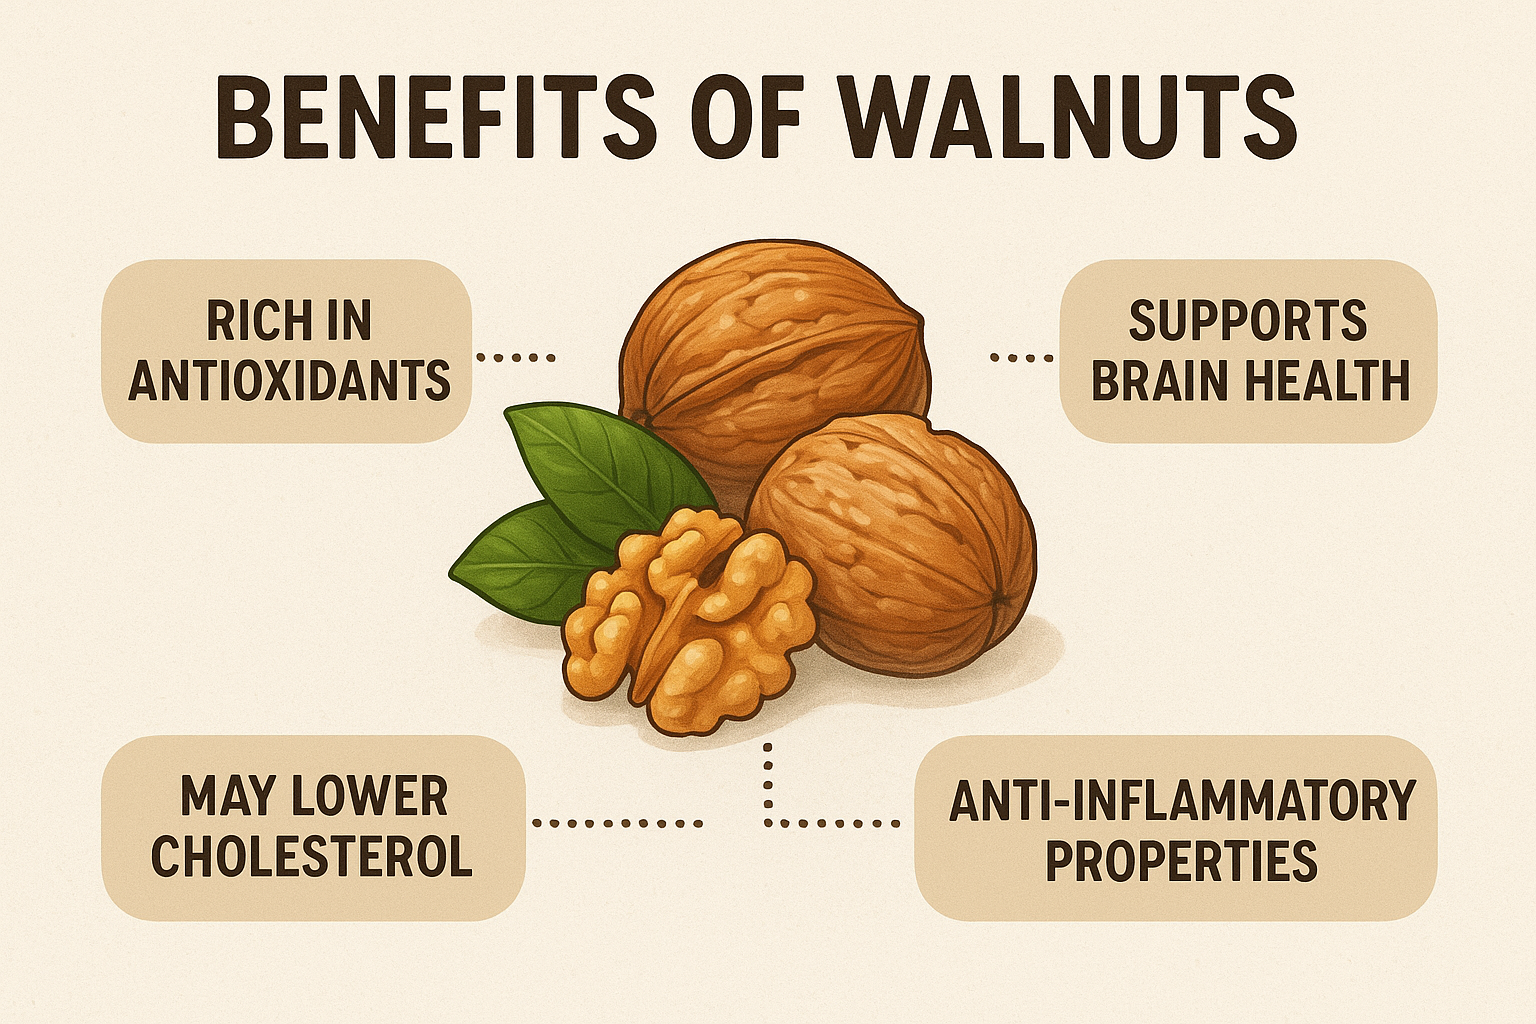
The inclusion of nuts and seeds, such as walnuts, sunflower, and pumpkin seeds, adds a healthy dose of monounsaturated and polyunsaturated fats, including Omega-3 and Omega-6 fatty acids, which are essential for brain health and reducing inflammation. These seeds also contribute a range of micronutrients like magnesium, zinc, and Vitamin E. The avocado sauce is a great source of healthy fats and potassium, while the vegetables and herbs offer a variety of vitamins and antioxidants. This recipe is a fantastic way to nourish your body with wholesome, nutrient-dense ingredients.


Equipment

  • Large mixing bowl
  • Food processor
  • Large skillet or non-stick frying pan
  • Spatula
  • Baking sheet (for oven method)
  • Grill pan or outdoor grill (for grilling method)

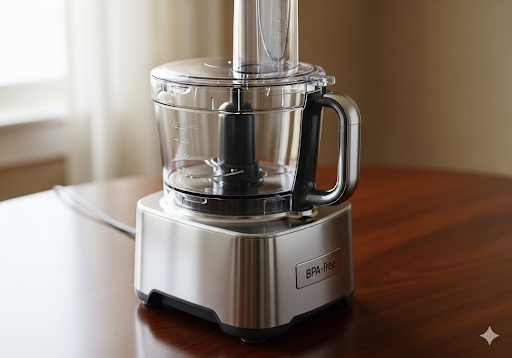
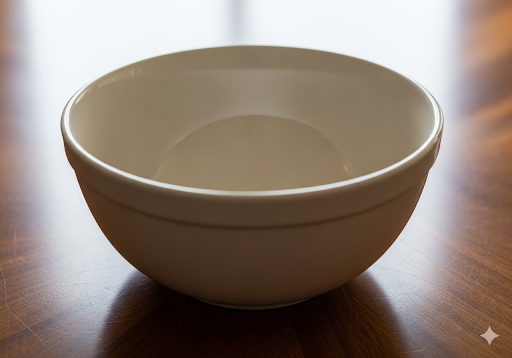
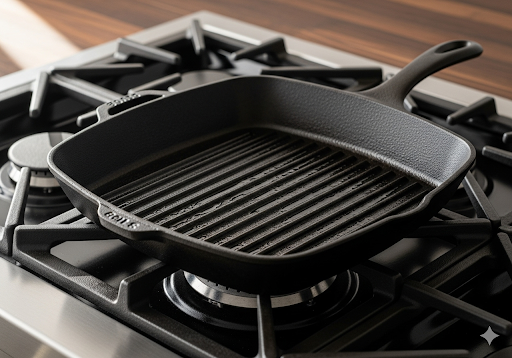
The gallery shows a food processor, mixing bowl and a grill pan.


Ultimate Beanie Burger Ingredients

For the Burgers:

  • 1 (15-ounce) can black beans, rinsed and drained well
  • 1 (15-ounce) can chickpeas, rinsed and drained well
  • 1/2 cup rolled oats
  • 1/4 cup walnuts
  • 1/4 cup raw sunflower seeds
  • 1/4 cup raw pumpkin seeds
  • 1/2 red onion, finely chopped
  • 2 cloves garlic, minced
  • 1 teaspoon smoked paprika
  • 1 teaspoon cumin
  • 1/2 teaspoon chili powder
  • 1/4 cup fresh cilantro, chopped
  • 2 tablespoons olive oil, plus more for cooking
  • Salt and black pepper to taste

For the Avocado Sauce:

  • 1 large ripe avocado
  • 1/4 cup fresh parsley or cilantro
  • 1/4 cup water
  • 1 tablespoon lime juice
  • Pinch of salt

youtube placeholder image

Step-by-Step Instructions for the Perfect Beanie Burger

Step 1: Preparing the Base

The key to a great beanie burger is texture. Start by draining your black beans and chickpeas very well. You can even pat them dry with a paper towel to remove excess moisture, which helps the patties hold their shape. In a large mixing bowl, use a fork or a potato masher to mash the beans and chickpeas. You want to mash them until about 75% of them are broken down, leaving some whole beans for texture. Avoid mashing them into a smooth paste.

Step 2: Toasting the Seeds & Nuts

Toast the sunflower seeds, pumpkin seeds, and walnuts in a small, dry pan over medium heat for 2-3 minutes. This step is crucial for bringing out their nutty flavor. Be careful not to burn them; they should just start to release their aroma. Once toasted, let them cool slightly.


This page contains affiliate links, which means we may earn a small commission if you make a purchase through them, at no extra cost to you. We only recommend products and services that we genuinely believe in and that we think will be helpful to you. Your support helps us to continue creating valuable content. Thank you!


Step 3: Blending the Flavor

In a food processor, combine the toasted seeds, nuts, rolled oats, smoked paprika, cumin, and chili powder. Pulse until the mixture forms a coarse, meal-like consistency. Do not over-process; you are looking for a fine crumb, not a powder. This oat and seed mixture acts as a binder, helping the patties stay together.

Step 4: Creating the Patty Mixture

Add the red onion, minced garlic, and fresh cilantro to the bowl with the mashed beans. Pour the processed oat and seed mixture over the top. Add two tablespoons of olive oil, salt, and pepper. Using your hands or a spatula, thoroughly mix all the ingredients until everything is well combined. The mixture should be firm and easy to form into patties without being too sticky. If it feels too wet, you can add a tablespoon or two of extra rolled oats.

Step 5: Forming the Patties

Divide the mixture into six equal portions. Gently form each portion into a patty, about 3/4 inch thick and slightly larger than your burger bun, as they will shrink slightly when cooked. Press the patties firmly to ensure they are compact and will not fall apart. Place the formed patties on a plate or a baking sheet lined with parchment paper.

Step 6: Preparing the Avocado Sauce

While the patties are resting, prepare the creamy avocado sauce. In a food processor or a high-speed blender, combine the ripe avocado, fresh parsley or cilantro, water, and lime juice. Blend until the mixture is completely smooth and has a creamy, pourable consistency. Add a pinch of salt and blend again. Taste and adjust the seasoning if necessary. You can add a little more water if you want a thinner sauce.

Step 7: Cooking the Beanie Burgers (Skillet Method)

This is the most common method and yields a beautiful, crispy exterior. Heat a large skillet or non-stick frying pan over medium-high heat. Add a tablespoon of olive oil. Once the oil is hot, carefully place the patties in the pan, making sure not to overcrowd it. Cook for about 4-6 minutes per side, or until a dark, crispy crust forms. Use a spatula to gently press down on the patties to ensure even browning.


Alternative Cooking Methods:

  • Oven Method: Preheat your oven to 400°F (200°C). Lightly grease a baking sheet. Place the patties on the sheet and bake for 10-15 minutes, then flip them over and bake for another 10-15 minutes, or until they are firm and golden brown. This method is great for hands-off cooking and a less oily result.
  • Grill Method: Preheat your grill to medium heat. Brush a little olive oil on the patties and the grill grates. Cook for 5-7 minutes per side, or until they have nice grill marks and are heated through. Be gentle when flipping them to prevent breaking.

This page contains affiliate links, which means we may earn a small commission if you make a purchase through them, at no extra cost to you. We only recommend products and services that we genuinely believe in and that we think will be helpful to you. Your support helps us to continue creating valuable content. Thank you!


Step 8: Serving & Enjoying

Once the burgers are cooked, let them rest for a minute. Serve them on your favorite burger buns with fresh lettuce, sliced tomatoes, red onion, and of course, a generous drizzle of the creamy avocado sauce. The contrast of the warm, savory patty and the cool, zesty sauce is what makes this meal so special.


Health Benefits of this Wholesome Meal

This beanie burger recipe is more than just delicious; it’s a nutritional powerhouse. Here are some of the key benefits:

  • Excellent Source of Plant-Based Protein: Black beans and chickpeas are rich in protein, essential for muscle repair and growth, and for keeping you feeling full and satisfied.
  • High in Fiber: The combination of beans, oats, and seeds provides a significant amount of dietary fiber, which supports a healthy digestive system, helps regulate blood sugar levels, and can contribute to heart health.
  • Rich in Healthy Fats: The walnuts, sunflower seeds, and avocado sauce are packed with monounsaturated and polyunsaturated fats. These are “good fats” that are vital for brain function and reducing inflammation.
  • Packed with Vitamins and Minerals: This recipe is a great source of iron from the beans, magnesium from the seeds, and Vitamin E from the nuts. The fresh herbs and vegetables provide a boost of vitamins A, C, and K, as well as a range of antioxidants.
  • Heart-Healthy: By using whole, plant-based ingredients and healthy fats, this recipe supports cardiovascular health and can help lower cholesterol levels.

The gallery shows the nutritional benefts of blackbean and chickpeas, sunflower and pumpkin seeds and walnuts.


Variations to Customize Your Beanie Burger

VariationDescription
Gluten-FreeUse certified gluten-free rolled oats or swap them for an equal amount of almond flour or ground flaxseed meal. Ensure your burger buns are also gluten-free.
Nut-FreeOmit the walnuts. You can increase the amount of sunflower and pumpkin seeds for added flavor and texture.
SpicyAdd a pinch of cayenne pepper or a chopped jalapeño to the patty mixture for a kick of heat. You can also add a few drops of your favorite hot sauce to the avocado sauce.
Different SaucesIf you’re not a fan of avocado, try a simple vegan aioli, a spicy sriracha mayo, or a classic barbecue sauce.
Vegetable SwapInstead of black beans and chickpeas, you can use other beans like kidney beans or cannellini beans. You can also add finely grated carrots or mushrooms for extra moisture and nutrients.

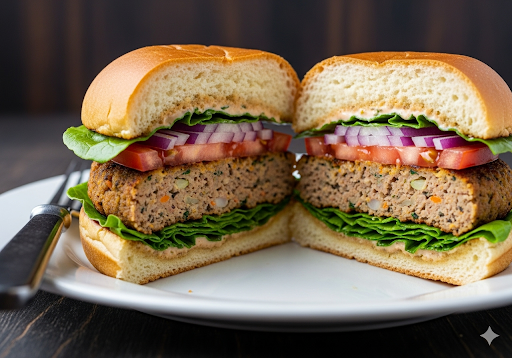
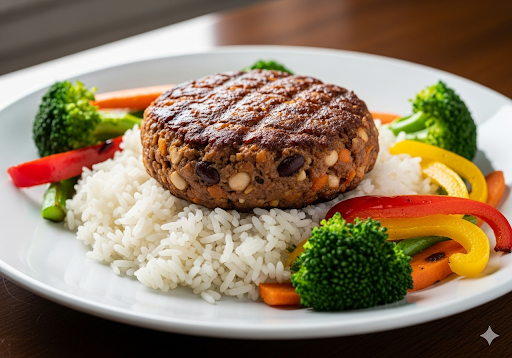
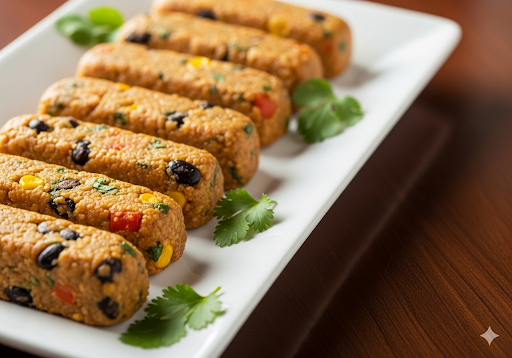
The gallery shows a vegetable burger on a plate, a beanie burger laying on a bed of rice and beanie burgers shaped into fingers.


Final Thoughts

This ultimate beanie burger with seeds and sauce is more than just a recipe; it’s a testament to the incredible potential of plant-based cooking. By taking the time to toast your seeds, form your patties carefully, and craft a vibrant sauce, you are not just making a meal—you are creating a masterpiece. The satisfaction of biting into a homemade burger that is both wholesome and unbelievably delicious is an experience we hope you’ll cherish. So, go ahead, gather your ingredients, and get ready to impress yourself and your loved ones with this truly ultimate beanie burger. It’s a dish that proves that healthy eating can be a celebration of flavor, texture, and creativity.


Frequently Asked Questions (FAQs)

Q: Can I make the burger patties ahead of time?

A: Yes! You can prepare the mixture and form the patties up to 24 hours in advance. Store them in an airtight container in the refrigerator, with parchment paper between each patty to prevent them from sticking. When you are ready to cook, they can go straight from the fridge to the pan or oven.

Q: Why are my beanie burgers falling apart?

A: This is a common issue with bean burgers. It’s often due to excess moisture. Make sure to drain your beans thoroughly and pat them dry. The oats and ground seeds act as a binder, so ensure your oat-seed mixture is well-incorporated. Also, make sure your patties are pressed firmly and not too thick before cooking. Don’t rush the process; a good sear on each side is what helps them stay together.


References

  1. Harvard T.H. Chan – Nuts for the Heart
  2. Academy of Nutrition – Nutritional and health benefits of pulses
  3. USDA FoodData Central – Avocado, raw

Recent Posts


Grilled Plantain Kebabs Made Simple


Learn how to make delicious grilled plantain kebabs that are perfect for any occasion. This simple recipe will show you how to transform a humble ingredient into a mouthwatering dish. Whether you’re a seasoned griller or just starting out, these grilled plantain kebabs are sure to be a new favorite.


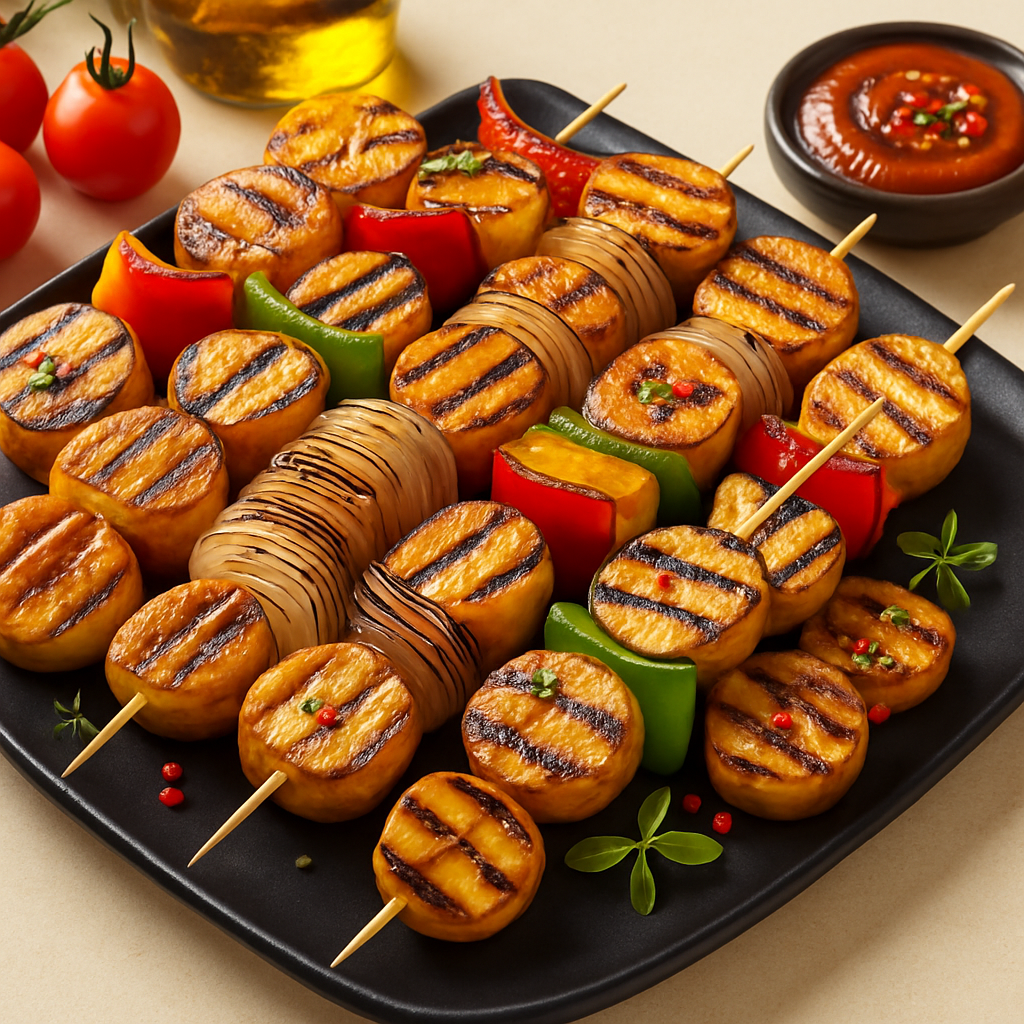
Here’s a clear, SEO-friendly alt text for your hero image:**Alt text:**“Grilled plantain kebabs served on a black rectangular platter with charred plantains, bell peppers, and onions, garnished with fresh herbs and dipping sauce.”Would you like me to also create **Pinterest title + description** for this hero image (separate from the blog title) so you can use it for promotion?
Grilled plantain kebabs

An Introduction to Grilling Plantains

Grilling season is upon us, and while burgers and hot dogs are staples, it’s time to expand your horizons. Have you ever considered grilling plantains? These tropical fruits, a close cousin to the banana, offer a unique and delicious twist to your barbecue. When grilled, they develop a caramelized crust, a smoky aroma, and a soft, sweet interior that’s simply irresistible. This recipe for grilled plantain kebabs is a fantastic way to introduce this versatile ingredient to your menu, proving that healthy, flavorful food can also be easy and fun to make.

Unlike bananas, plantains are starchier and less sweet, making them a perfect canvas for both sweet and savory flavors. The grilling process brings out their natural sweetness while giving them a rich, smoky depth. We’ll be pairing them with colorful bell peppers and onions to create vibrant, eye-catching kebabs that are as beautiful as they are delicious. The combination of the sweet plantains, the crisp-tender vegetables, and a hint of spice creates a balanced flavor profile that will have everyone reaching for seconds.


This page contains affiliate links, which means we may earn a small commission if you make a purchase through them, at no extra cost to you. We only recommend products and services that we genuinely believe in and that we think will be helpful to you. Your support helps us to continue creating valuable content. Thank you!


A Simple and Delicious Grilled Plantain Kebabs Recipe

This recipe is designed with simplicity in mind. We’ll walk you through each step, from selecting the perfect plantains to assembling and grilling your kebabs. Even if you’re a complete beginner in the kitchen or at the grill, you’ll be able to follow along with confidence. The instructions are clear and straightforward, ensuring that your first attempt will be a success. You don’t need any fancy equipment—just a grill and some basic kitchen tools. This is all about making delicious food accessible to everyone.

What makes these grilled plantain kebabs truly special is their versatility. They can serve as a fantastic side dish for grilled chicken or fish, a delightful vegetarian main course, or even a fun appetizer at your next get-together. They are naturally gluten-free and can be easily adapted to fit various dietary needs. Plus, they offer a great way to sneak more whole foods into your diet in a fun and exciting way.

So, get ready to fire up your grill and embark on a culinary adventure. These grilled plantain kebabs are more than just a recipe; they are an invitation to try something new, to explore new flavors, and to create memorable meals. Let’s get cooking and see just how simple it is to make this delightful dish that’s perfect for any occasion.


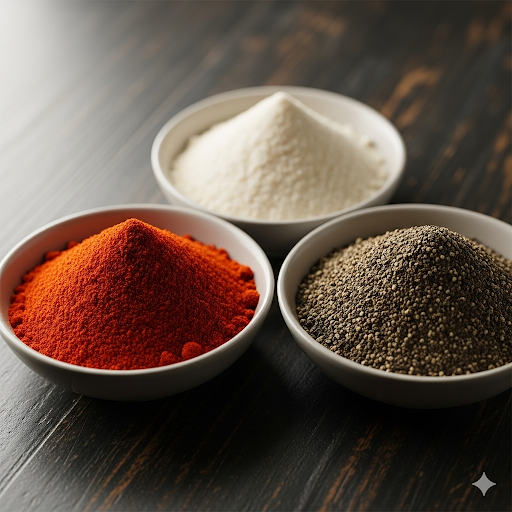
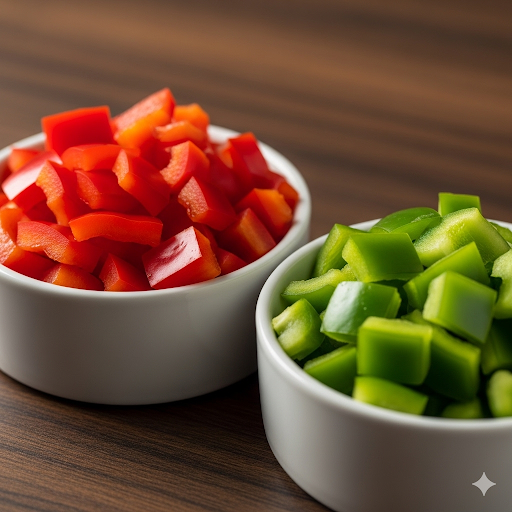
The gallery shows bowls of seasoning, chopped plantain and diced bell peppers.


The Time and Tools for Grilled Plantain Kebabs

Time to Prepare: 15 minutes

Time to Cook: 10 minutes


Equipment

  • Grill (gas or charcoal) or grill pan
  • Large bowl
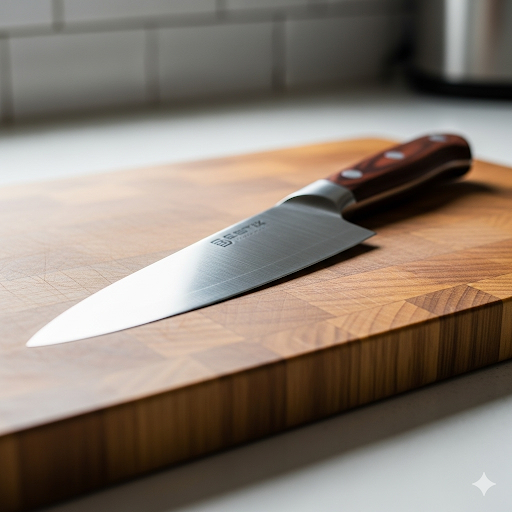
  • Sharp knife and cutting board
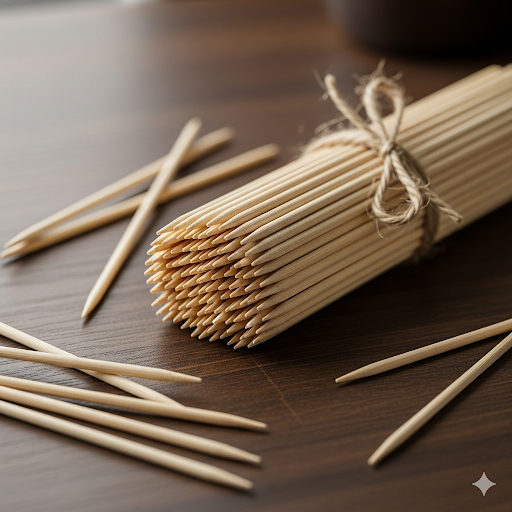
  • Skewers (wooden or metal)
  • Basting brush
  • Tongs
  • Small bowl for the basting mixture

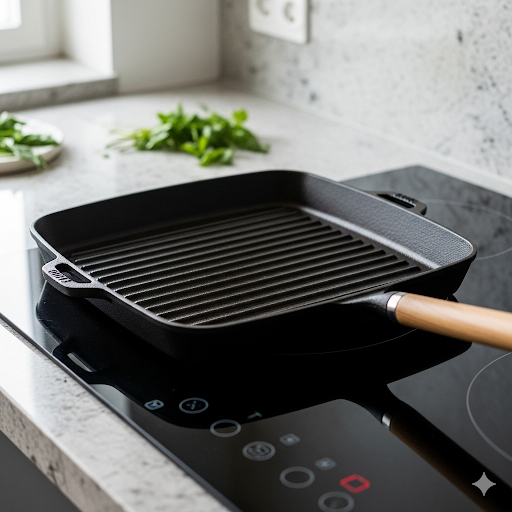
The gallery shows wooden skewers, grill pan and sharp knife.


The Nutritional Benefits of Grilled Plantain Kebabs

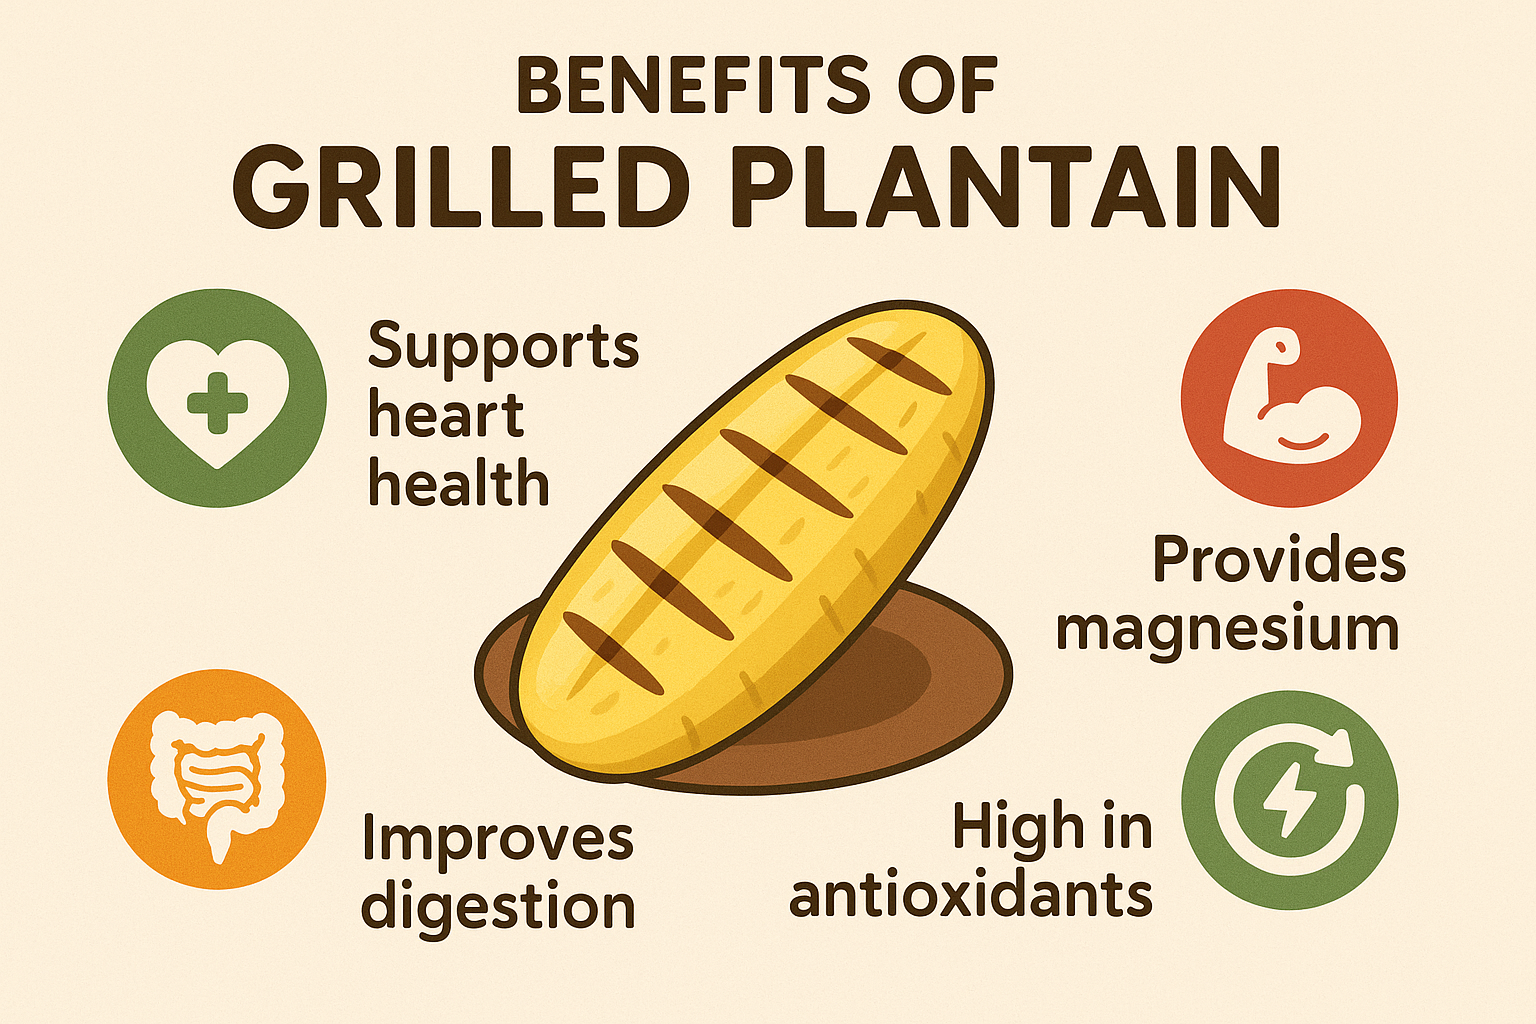
These grilled plantain kebabs are not just delicious; they are also packed with nutritional benefits. Plantains are an excellent source of potassium, a vital mineral for maintaining healthy blood pressure and proper nerve function. They also provide a significant amount of dietary fiber, which aids in digestion, promotes a feeling of fullness, and can help regulate blood sugar levels.

In addition, plantains are rich in vitamins A and C, which are powerful antioxidants. Vitamin A is crucial for good vision and a healthy immune system, while vitamin C helps protect your cells from damage and is essential for collagen production. The colorful bell peppers and onions on the kebabs further boost the nutritional value, adding even more vitamins and antioxidants. This dish is a great way to enjoy a meal that is both satisfying and beneficial for your health.


Ingredients for Delicious Grilled Plantain Kebabs

  • 2 large, ripe plantains (yellow with a few black spots), peeled
  • 1 large red bell pepper, cut into 1-inch pieces
  • 1 large green bell pepper, cut into 1-inch pieces
  • 1 large onion, cut into 1-inch pieces
  • 2 tablespoons olive oil
  • 1 teaspoon smoked paprika
  • 1/2 teaspoon garlic powder
  • 1/4 teaspoon black pepper
  • 1/4 teaspoon salt (or to taste)
  • Optional: a pinch of cayenne pepper for a little heat

Servings: Makes 4-6 kebabs, serving 2-3 people


youtube placeholder image

Step-by-Step Instructions for Grilling Plantains

Step 1: Preparing the Plantains and Vegetables

Start by preparing all of your ingredients. This is a crucial step for ensuring a smooth cooking process.

  • First, peel the ripe plantains. The riper they are, the easier they will be to peel. A good tip is to cut off the ends and then score a line down the length of the peel. This makes it easier to pull the skin off.
  • Once peeled, slice the plantains into half-inch-thick rounds. Try to make them as uniform as possible so they cook evenly on the grill.
  • Next, chop the red and green bell peppers and the onion into pieces roughly the same size as the plantain rounds. This ensures that the vegetables and plantains will fit nicely on the skewers and cook at a similar rate.

Step 2: Coating and Skewering

Now it’s time to get everything ready for the grill.

  • In a large bowl, combine the plantain slices, bell pepper pieces, and onion pieces.
  • Add the olive oil, smoked paprika, garlic powder, salt, and black pepper to the bowl. If you like a little kick, now is the time to add a pinch of cayenne pepper.
  • Toss everything together until the vegetables and plantains are evenly coated in the oil and spices. This seasoning mixture is what will create that delicious, smoky flavor.
  • Carefully thread the seasoned plantain and vegetable pieces onto the skewers, alternating between them to create a colorful and visually appealing kebab. Don’t pack them too tightly; leave a little space between each piece to allow for even cooking.

This page contains affiliate links, which means we may earn a small commission if you make a purchase through them, at no extra cost to you. We only recommend products and services that we genuinely believe in and that we think will be helpful to you. Your support helps us to continue creating valuable content. Thank you!


Step 3: Grilling the Kebabs

There are a few different ways to cook these kebabs, depending on the equipment you have.

  • Charcoal or Gas Grill Method: Preheat your grill to a medium-high heat. A clean and well-oiled grill grate will prevent sticking. Place the kebabs directly on the grill. Cook for about 4-5 minutes per side, or until the plantains have distinct grill marks and are tender inside. You can use tongs to carefully flip them. The vegetables should also be tender-crisp.
  • Grill Pan Method: If you don’t have an outdoor grill, a grill pan works perfectly. Heat the grill pan over medium-high heat with a little oil. Place the kebabs on the pan and cook for the same amount of time, turning them to ensure all sides get those signature grill marks.
  • Oven Method: For an alternative to grilling, you can roast these in the oven. Preheat your oven to 400°F (200°C). Arrange the kebabs on a baking sheet lined with parchment paper. Bake for 15-20 minutes, flipping them halfway through, until the plantains are tender and caramelized. While you won’t get the same smoky flavor, they’ll still be delicious!

Step 4: Serving

Once the kebabs are done, remove them from the grill or pan. Let them rest for a minute or two before serving. They are best served warm, either as a main dish or a side. Enjoy them on their own, or serve with a dipping sauce like a spicy aioli or a chimichurri for an extra burst of flavor.


The Benefits of Grilled Plantain Kebabs

Choosing to make grilled plantain kebabs isn’t just about a unique taste; it’s a smart choice for your health. Beyond the obvious deliciousness, incorporating this recipe into your meal rotation offers several key advantages.

  • A Healthy Twist on Grilling: Grilling can be a healthy cooking method, as it requires minimal added fats. This recipe uses just a small amount of olive oil, allowing the natural flavors of the plantains and vegetables to shine. It’s a great alternative to fattier grilled options, providing a satisfying and wholesome meal.
  • Rich in Nutrients: As mentioned in the nutritional section, plantains are a nutritional powerhouse. They are an excellent source of complex carbohydrates, which provide sustained energy, making this a great option for a post-workout meal or a mid-day energy boost.
  • Easy and Adaptable: The simple preparation makes this recipe accessible to everyone, regardless of their cooking skill level. Its versatility allows you to easily customize it to your tastes or what you have on hand. Don’t have a red bell pepper? Use a yellow one! Want more protein? Add some firm tofu or chicken pieces to the skewers.

The gallery shows the benefits of grilled plantains, bell peppers. The last image shows the benefits of grilled over fried plantains.


Variations for Your Grilled Plantain Kebabs

Want to mix things up? Here are some ideas to customize your grilled plantain kebabs to suit your taste or dietary needs.

  • Spicy Plantain Kebabs: Add 1/2 teaspoon of red pepper flakes or a dash of hot sauce to the oil and spice mixture before tossing the ingredients.
  • Sweet and Savory: Baste the kebabs with a mixture of maple syrup and a little bit of lime juice during the last few minutes of grilling.
  • Protein Boost: Add firm tofu, chicken, or shrimp to the skewers. If using chicken or shrimp, make sure to cut them into similar-sized pieces as the vegetables and marinate them with the plantains.
  • Different Veggies: Feel free to swap out the bell peppers and onions for other vegetables like zucchini, cherry tomatoes, or mushrooms.

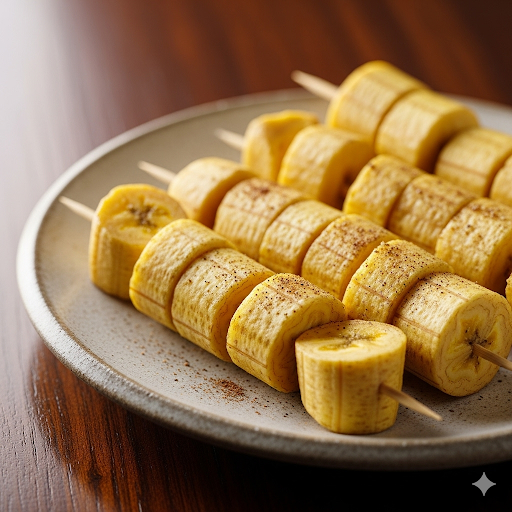
The gallery shows air fryed plantains, plantain fries and Fried plantains.


Final Thoughts on Grilling Plantains

Grilling plantain kebabs is more than just a recipe; it’s an opportunity to create a memorable meal that is both healthy and incredibly delicious. By taking a simple ingredient and preparing it in a new and exciting way, you can elevate your grilling game and introduce a fantastic new dish to your family and friends. The combination of sweet, savory, and smoky flavors is truly unique and will likely become a new favorite.

So next time you are at the grocery store, grab a few ripe plantains. They are often overlooked, but with this recipe, you’ll see just how simple and rewarding it is to turn them into something special. Fire up your grill, gather your ingredients, and enjoy the process of creating these wonderful grilled plantain kebabs. You won’t be disappointed!


Frequently Asked Questions (FAQs)

Q: What’s the difference between a plantain and a banana? Can I use bananas instead?

A: While they look similar, plantains are starchier and lower in sugar than bananas, especially when unripe. They need to be cooked to be eaten, and they hold their shape much better than bananas. You should not use bananas for this recipe, as they will turn mushy on the grill and won’t hold up on the skewers.

Q: How do I know if my plantains are ripe enough for this recipe?

A: For this recipe, you want ripe plantains that are yellow with a few black spots. They should feel firm but give slightly when you press on them. If they are all green, they will be very starchy and not sweet. If they are completely black, they will be very soft and much sweeter, more suitable for a dessert recipe.


References


Recent Posts


Ackee Savoury Doughnuts Made Simple


Dive into a world of Caribbean flavour with these easy-to-follow instructions for delectable Ackee Savoury Doughnuts. This recipe brings a healthy, baked twist to a classic snack, proving that savoury doughnuts can be just as satisfying as their sweet counterparts. It’s a perfect way to introduce yourself to the incredible taste of ackee savoury doughnuts.


A close-up of golden-brown Ackee Savoury Doughnuts, garnished with scallions and served with a dipping sauce on a wooden board
Ackee Savoury Doughnuts

An Introduction to Ackee’s Savoury Side

While most people associate doughnuts with a sugary, sweet glaze, a delightful and flavourful culinary world exists on the savoury side. Savoury doughnuts, or fritters as they are often known in Caribbean cuisine, are a fantastic way to enjoy a unique, hearty snack or a creative appetizer. They offer a perfect balance of a light, fluffy dough and a rich, flavourful filling that awakens the palate in a way that sugary treats simply can’t.

Our recipe elevates this savoury tradition by featuring the celebrated national fruit of Jamaica, ackee. When cooked, ackee has a texture and taste often compared to scrambled eggs, making it a surprisingly perfect star for a savoury dish. Its creamy, slightly nutty profile provides an incredible base for a wide range of spices and vegetables, and its unique properties allow it to hold up beautifully in a baked fritter.

Beyond the Sweet: Irresistible Ackee Savoury Doughnuts Made Simple

This recipe for Ackee Savoury Doughnuts is not just about creating a delicious dish; it’s about exploring a different side of a beloved ingredient and a new way of thinking about comfort food. These delightful bites are a celebration of Caribbean flavours, a testament to the versatility of ackee, and an absolute treat for anyone looking to expand their culinary horizons.

The best part? They are incredibly easy to make. We’ve simplified the process so that even novice cooks can achieve perfectly golden, flavourful fritters every time. The satisfaction of biting into a warm, fluffy exterior to reveal a creamy, savoury filling is a culinary experience you won’t soon forget, and we’ve done it all in a way that is kind to your health.

Whether you’re hosting a party, looking for a unique weekend project, or simply craving a delicious and wholesome snack, these Ackee Savoury Doughnuts are the answer. By choosing to bake them instead of deep-frying, we unlock a healthier version of this incredible snack, without compromising on any of the fantastic flavour. They are as beautiful to look at as they are to eat, and they are guaranteed to become a new favourite in your kitchen.


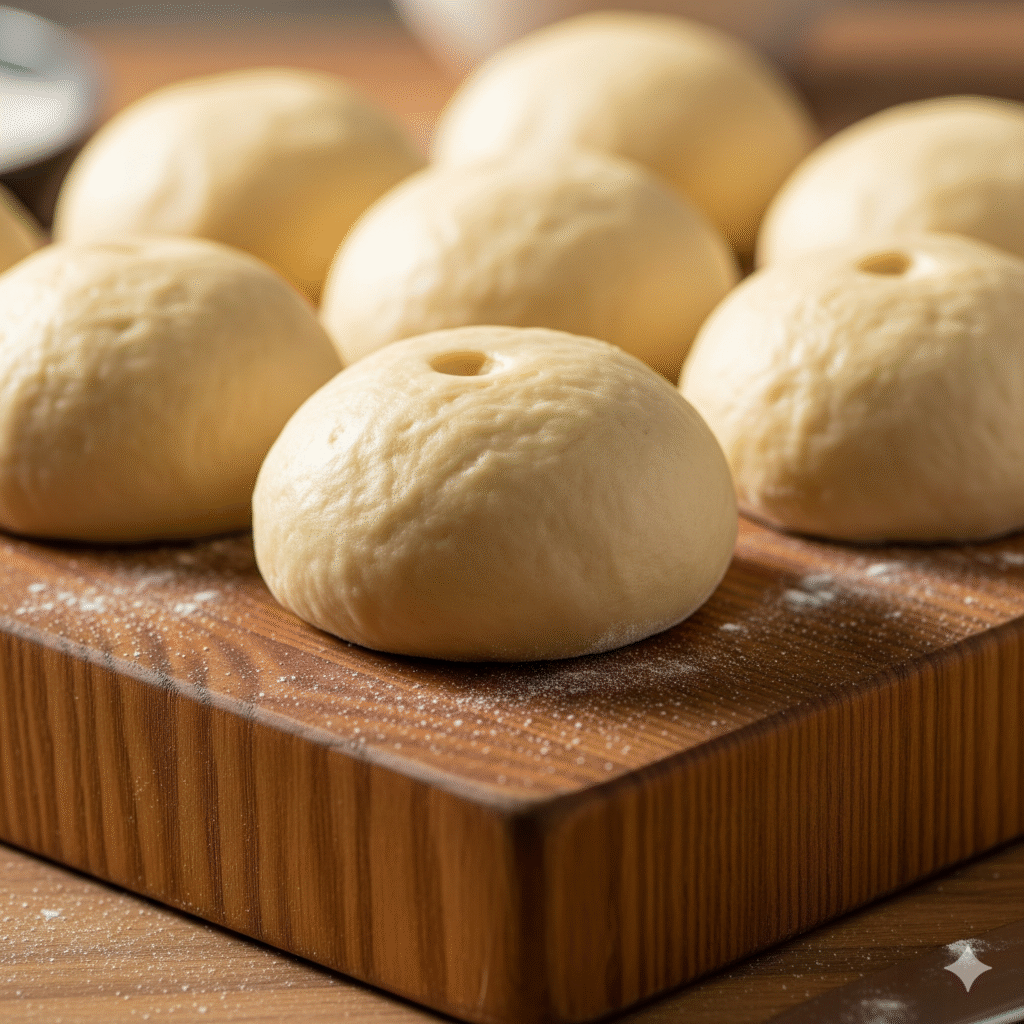
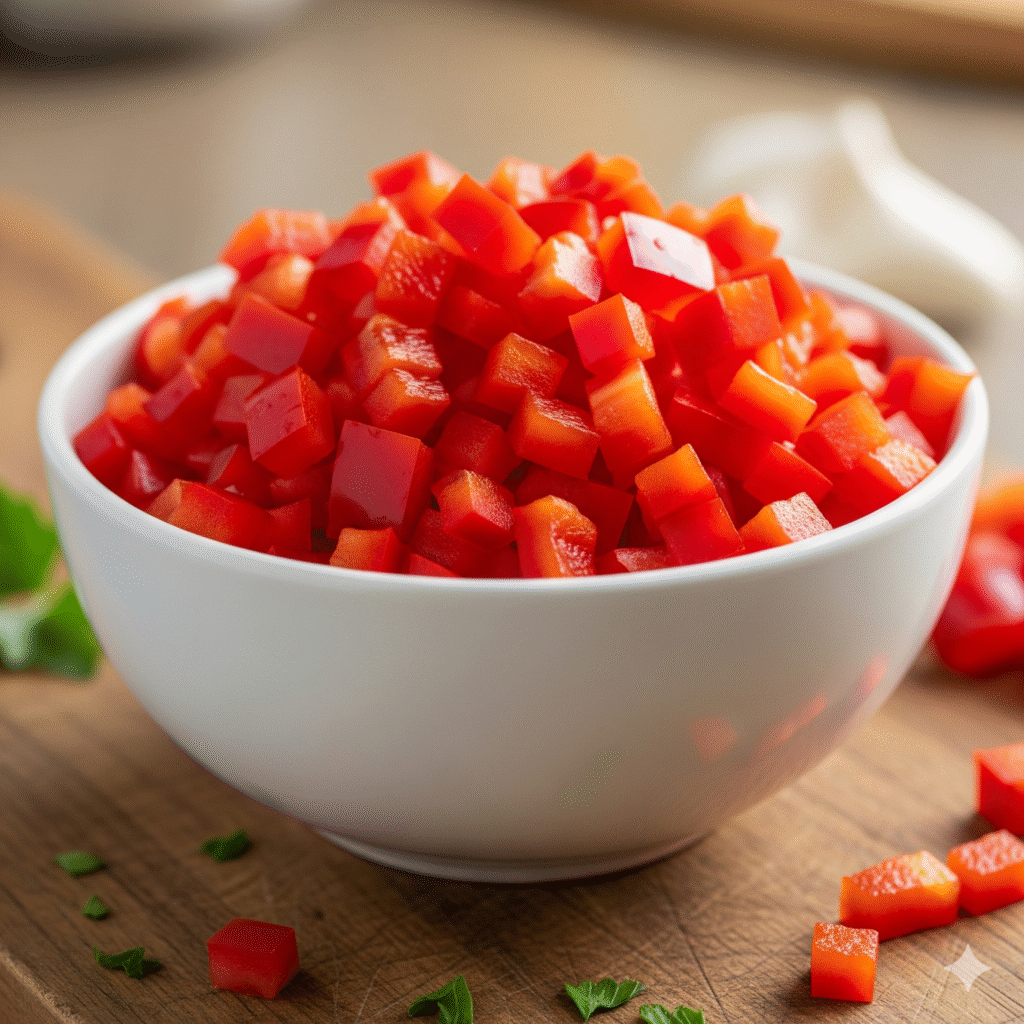
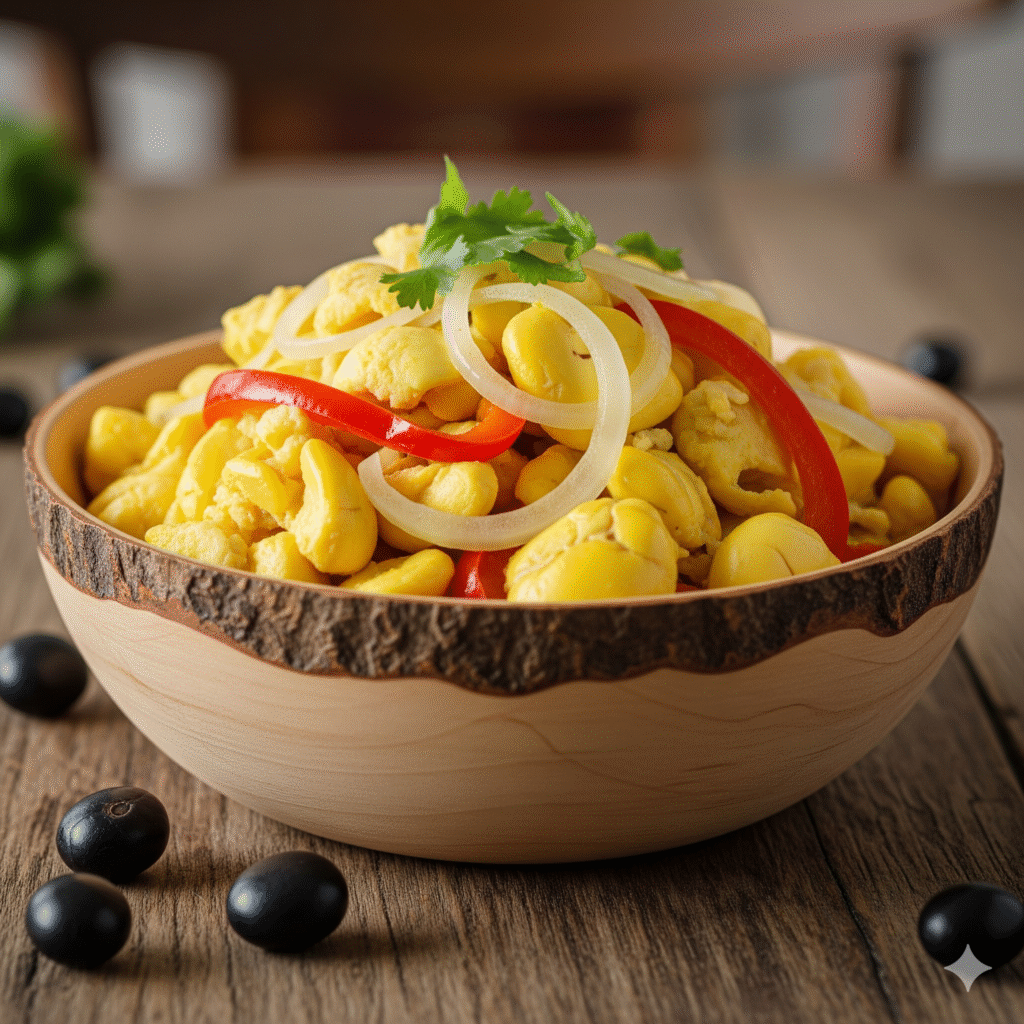
The gallery shows the doughnut dough, chopped bell pepper and a bowl of cooked Ackee.


Baked to Perfection: A Healthier Way to Enjoy Ackee Savoury Doughnuts

Time to Prepare:

40 minutes

Time to Cook/Bake:

25-30 minutes


Servings:

12-15 doughnuts


Nutritional Information (Approximate Per Doughnut):

  • Calories: 120 kcal
  • Protein: 4g
  • Fat: 5g
  • Carbohydrates: 15g
  • Fibre: 2g

Note: Nutritional information is an estimate and can vary based on specific ingredients and cooking methods.


Equipment You’ll Need:

  • Large mixing bowl
  • Medium skillet or frying pan
  • Spatula or mixing spoon
  • Measuring cups and spoons
  • Rolling pin (optional)
  • Baking sheet
  • Parchment paper

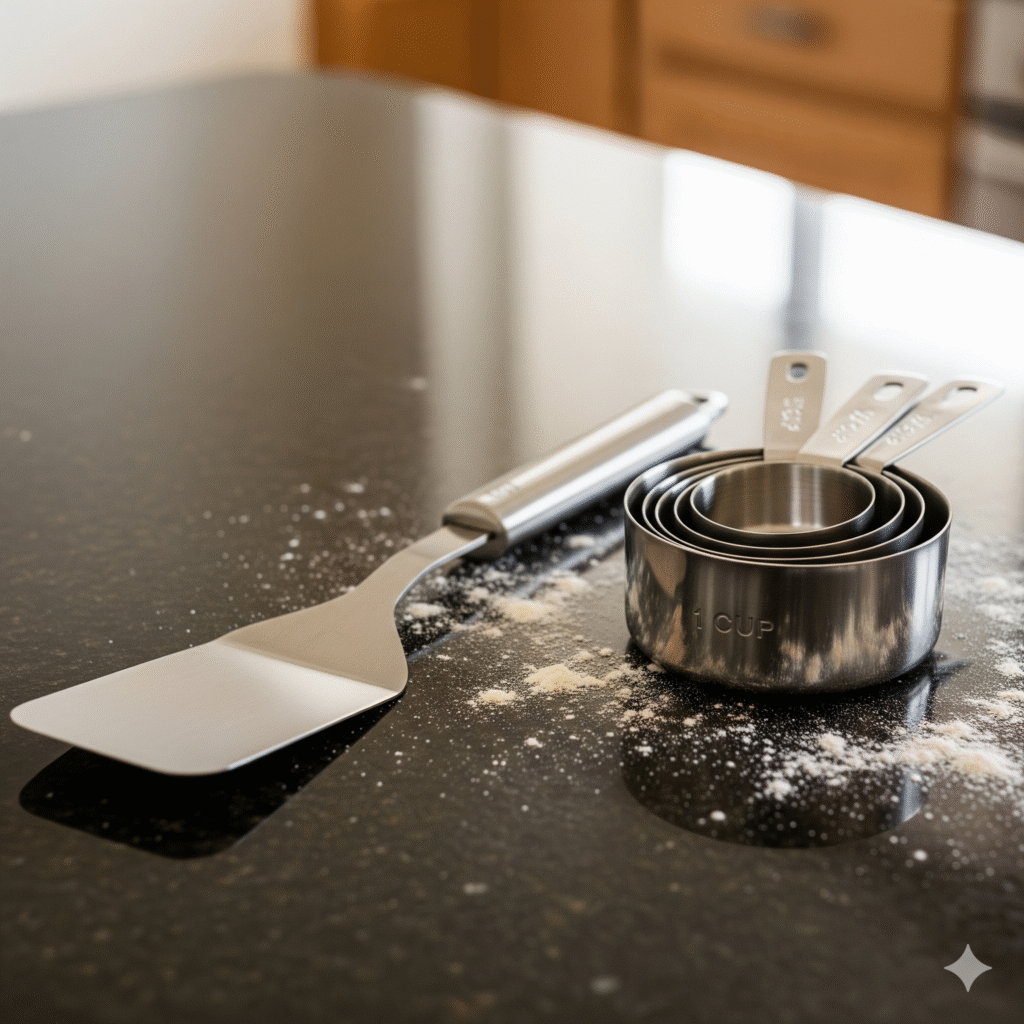
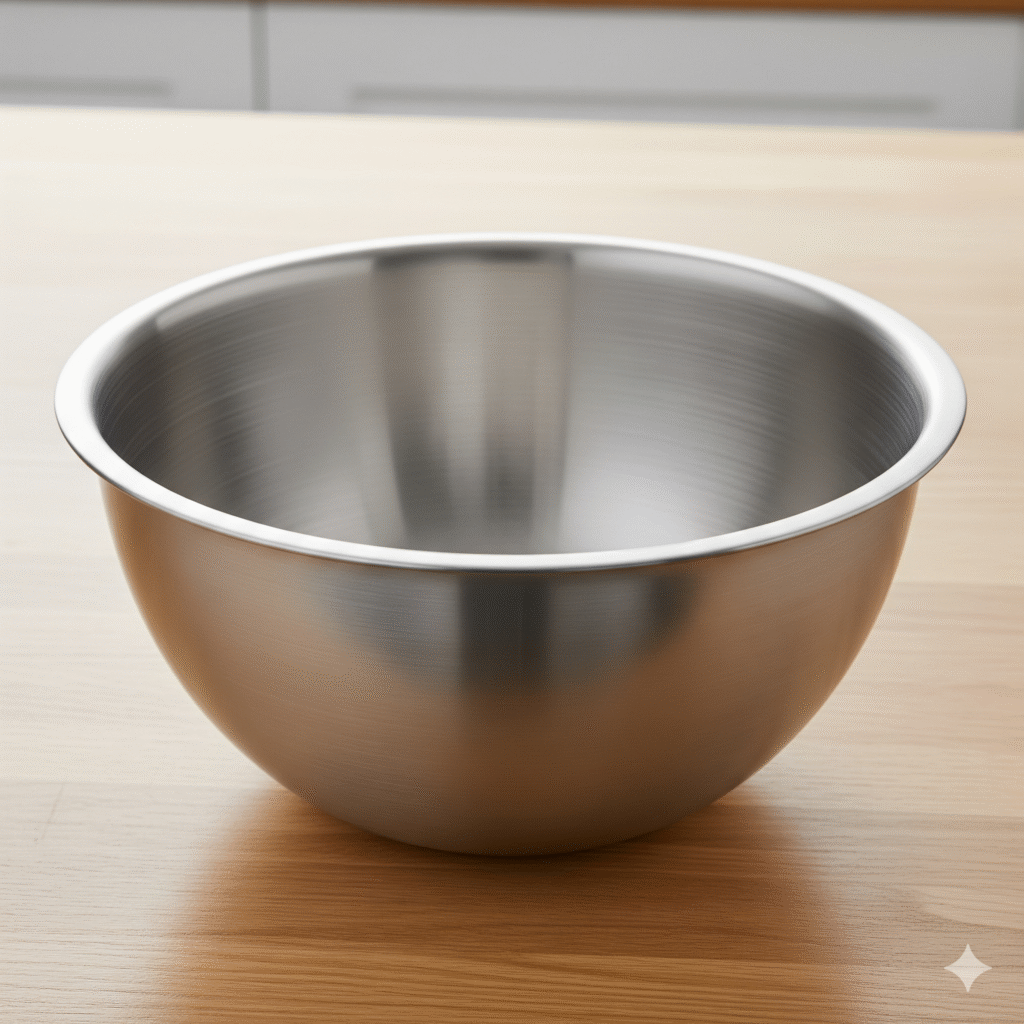
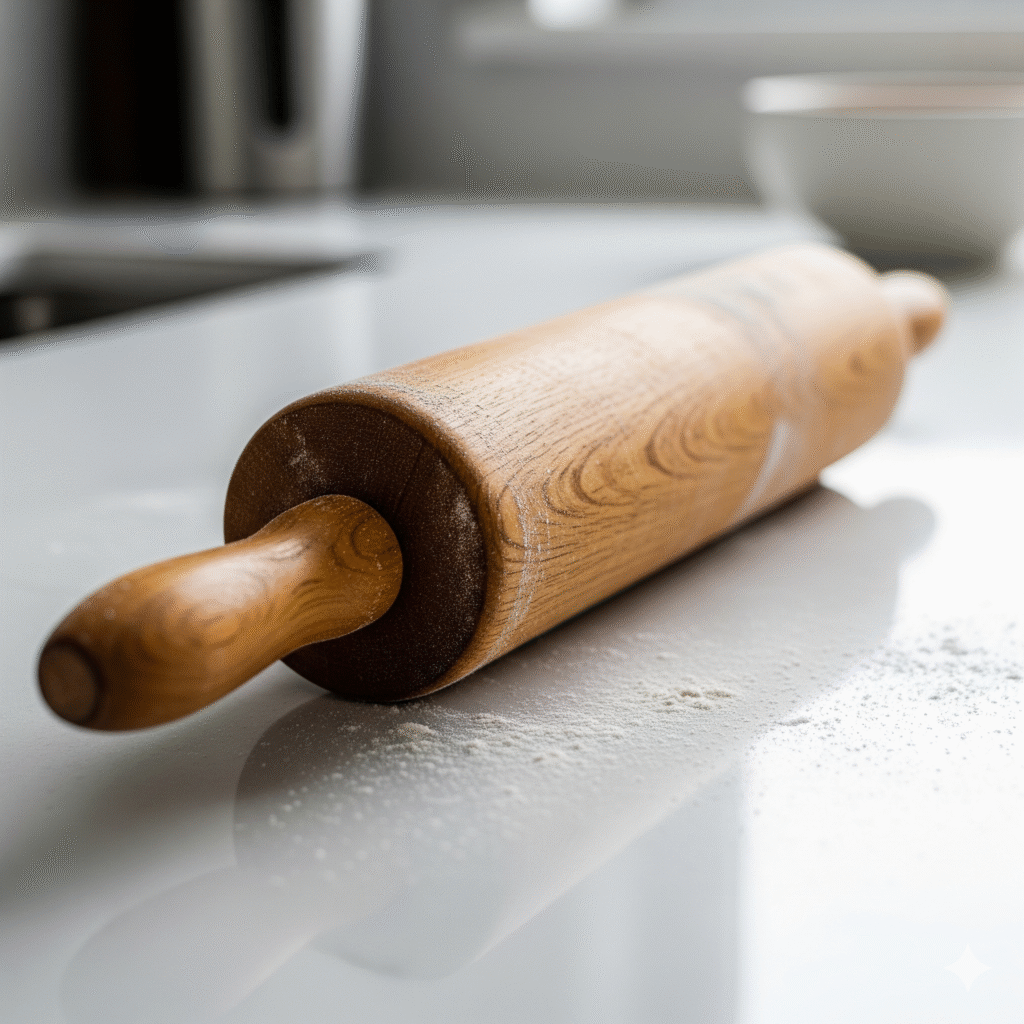
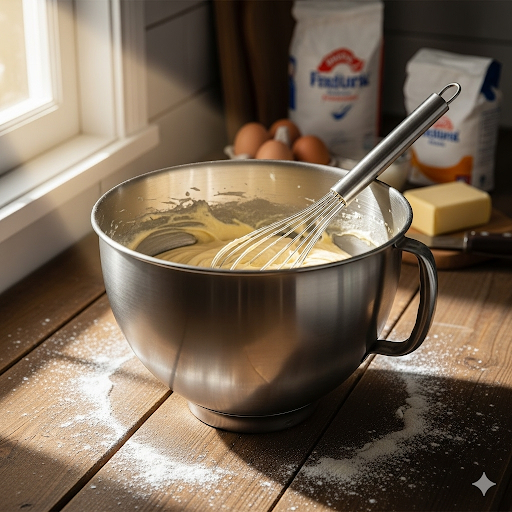
The gallery shows measuring cup, large mixing bowl and a rolling pin which, are some of the equipment used in this recipe.


Ingredients for Your Delicious Doughnuts

For the Dough:

  • 2 cups all-purpose flour
  • 1 tbsp sugar
  • 1 ½ tsp active dry yeast
  • ½ tsp salt
  • ½ cup warm milk (about 110°F / 43°C)
  • 2 tbsp melted unsalted butter
  • 1 large egg, lightly beaten
  • A small amount of olive oil for brushing

For the Ackee Filling:

  • 1 (19 oz) can ackee, drained and rinsed
  • 1 tbsp olive oil
  • ½ cup finely chopped onion
  • ½ cup finely chopped red bell pepper
  • 2 cloves garlic, minced
  • 1 tsp fresh thyme leaves
  • 1-2 tbsp scotch bonnet pepper, finely minced (or to taste)
  • ¼ cup finely chopped green scallions
  • Salt and black pepper to taste

youtube placeholder image

Creating Your Ackee Savoury Doughnuts

Follow these expanded, step-by-step instructions to create your perfect savoury treat.

Activate the Yeast

In your large mixing bowl, combine the warm milk, sugar, and active dry yeast. The milk should be warm to the touch, not hot, as too much heat will kill the yeast. Give it a gentle stir and let it sit for about 5-10 minutes. You’ll know the yeast is activated when a foamy layer forms on the surface. This is a crucial step to ensure a light and fluffy dough.

Prepare the Dough

Add the flour and salt to the activated yeast mixture. Stir it together until a shaggy dough begins to form. Then, add the melted butter and the lightly beaten egg. Continue mixing until the dough comes together into a cohesive ball.

Knead the Dough

Turn the dough out onto a lightly floured surface. Knead it for about 5-7 minutes. This process develops the gluten, which gives the dough its structure and chewiness. The dough should become smooth, elastic, and no longer sticky.

First Rise

Lightly grease the mixing bowl you used earlier. Place the kneaded dough inside, turning it to coat it with a thin layer of oil. Cover the bowl with a clean kitchen towel or plastic wrap. Place it in a warm, draft-free spot and let it rise for about 1 hour, or until it has doubled in size.

Prepare the Ackee Filling

While the dough is rising, you can prepare the filling. Heat the olive oil in a skillet over medium heat. Add the chopped onion and red bell pepper and sauté for 3-4 minutes until they are soft and fragrant. Add the minced garlic, thyme, and minced scotch bonnet pepper, cooking for another minute until the garlic is fragrant. Finally, gently fold in the drained ackee and green scallions. Use a spatula to gently break up the ackee a little, but be careful not to mash it completely. Season with salt and black pepper to your taste, then remove from heat and let the filling cool completely.

Shape and Fill the Doughnuts

Once the dough has risen, punch it down gently to release the air. On a lightly floured surface, divide the dough into 12-15 equal pieces. Roll each piece into a smooth ball. Using your fingers, flatten each ball into a disc, about 3-4 inches in diameter. Place a spoonful of the cooled ackee filling in the centre of each dough disc. Carefully fold the edges of the dough over the filling, pinching them together at the top to seal the filling inside, then roll it back into a smooth ball. Ensure the seams are tightly sealed so the filling doesn’t leak out during cooking.

Second Rise

Arrange the shaped doughnuts on a parchment paper-lined baking sheet, leaving some space between them. Cover them again with a clean towel and let them rise for another 20-30 minutes. This second rise makes them light and airy.

Cooking Your Doughnuts: Baking and Alternative Methods

Baking (Recommended): This method results in a delicious, light, and healthy doughnut. Preheat your oven to 375°F (190°C). Lightly brush the tops of the doughnuts with olive oil for a beautiful golden-brown finish. Place the baking sheet in the preheated oven and bake for 25-30 minutes, or until the doughnuts are golden brown and sound hollow when tapped.

Air-Frying: For a similar light texture, you can air-fry these doughnuts. Preheat your air fryer to 350°F (175°C). Lightly spray the doughnuts with cooking spray. Place them in a single layer in the air fryer basket, ensuring they don’t touch. Air-fry for 8-10 minutes, flipping halfway through, until they are golden brown and cooked through.

Pan-Frying: This is another great alternative. Heat about 1/2 inch of oil in a large skillet over medium-high heat. Carefully place the doughnuts in the pan and cook for 4-5 minutes per side, or until they are golden brown and cooked through. You may need to press down gently on them to ensure they cook evenly.

Serve and Enjoy: Serve your Ackee Savoury Doughnuts warm. They are absolutely delicious on their own, but can also be served with a side of spicy dipping sauce or a fresh salsa for an extra kick.


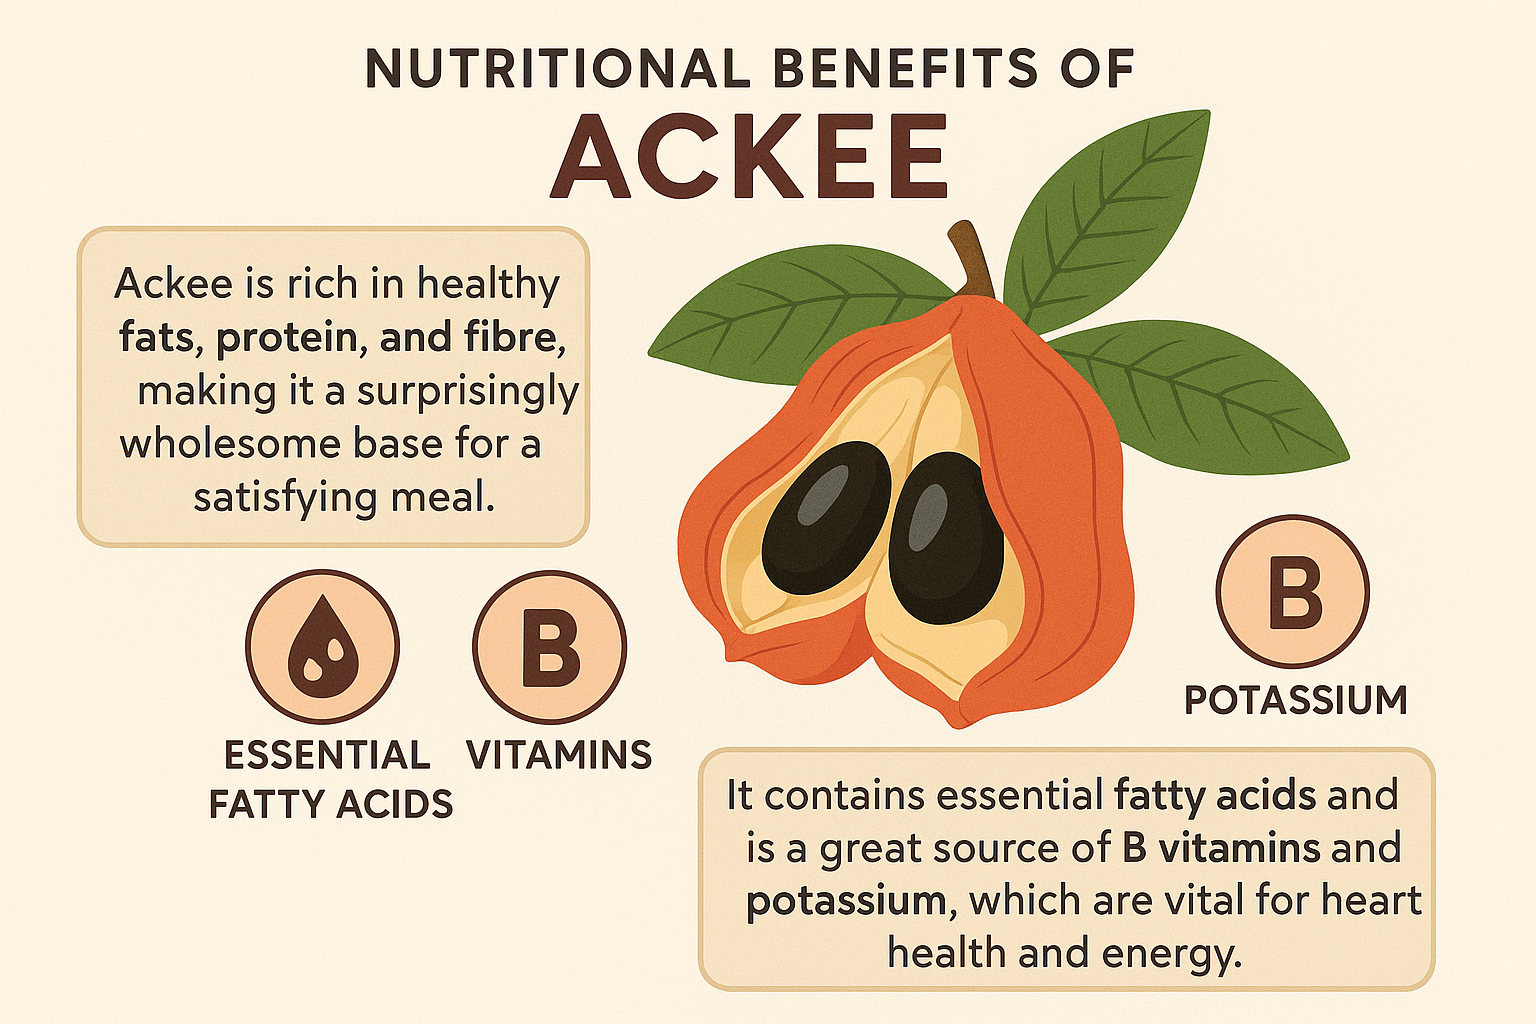
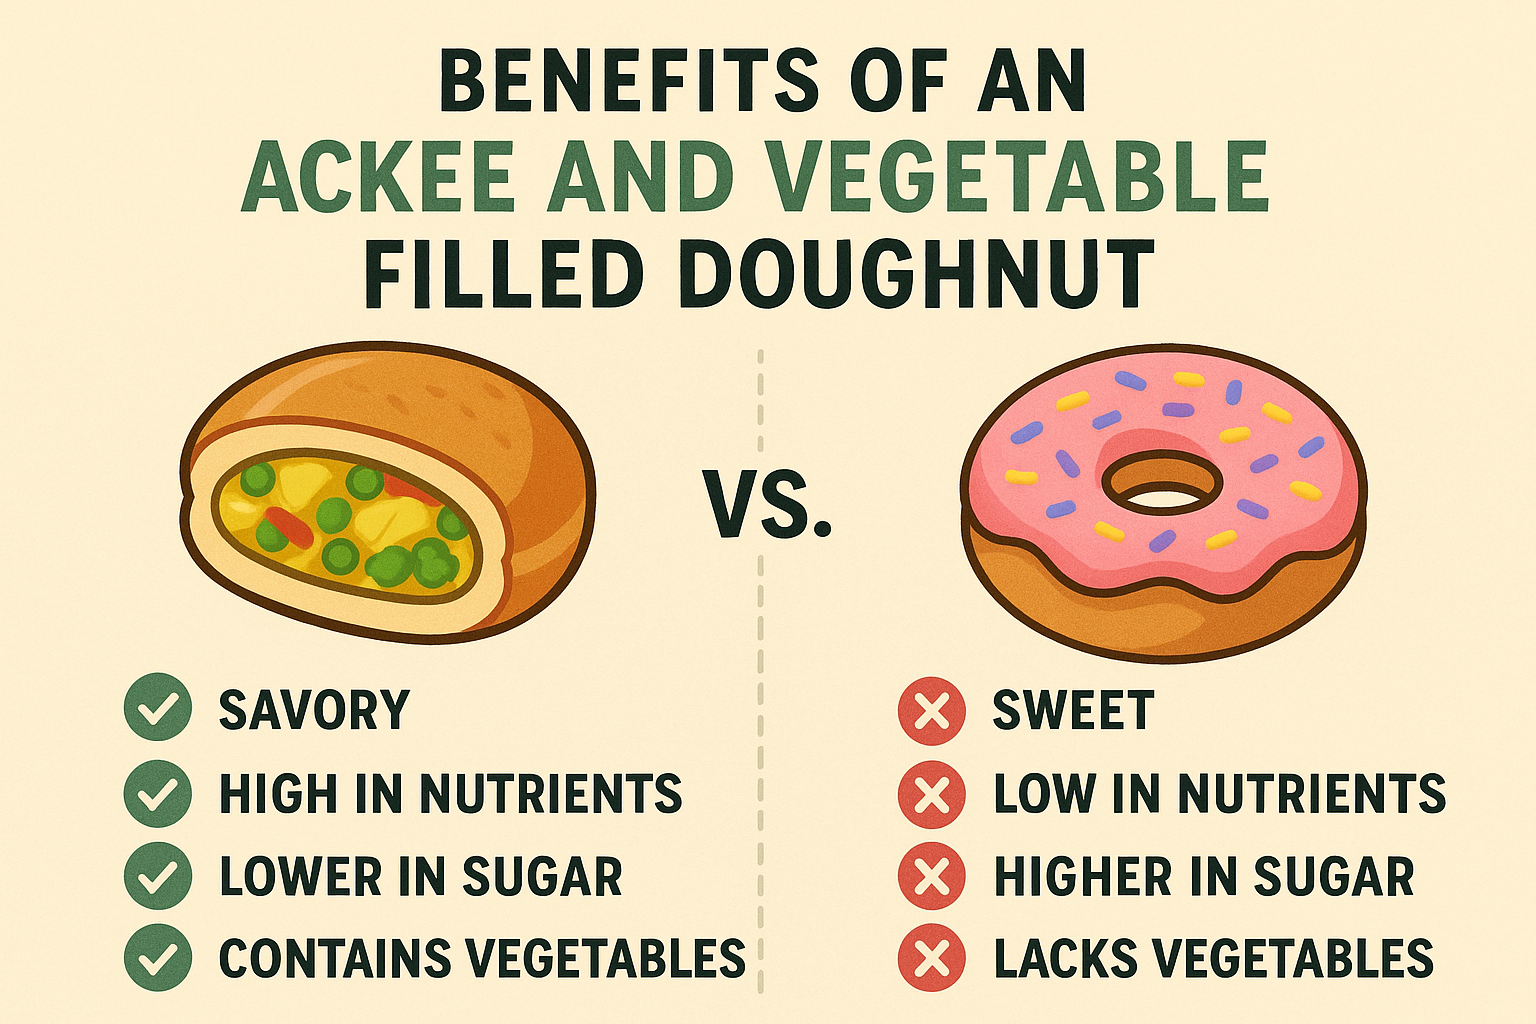
The gallerys show the nutritional benefits for Ackee, then a sweet doughnut is compared to this savory doughnut. The final image shows the benefits of sweet red bell peppers.


The Health Perks of Perfect Ackee Savoury Doughnuts

These Ackee Savoury Doughnuts are more than just a delicious snack; they are packed with health benefits and nutritional value. The star ingredient, ackee, is rich in healthy fats, protein, and fibre, making it a surprisingly wholesome base for a satisfying meal. It contains essential fatty acids and is a great source of B vitamins and potassium, which are vital for heart health and energy.

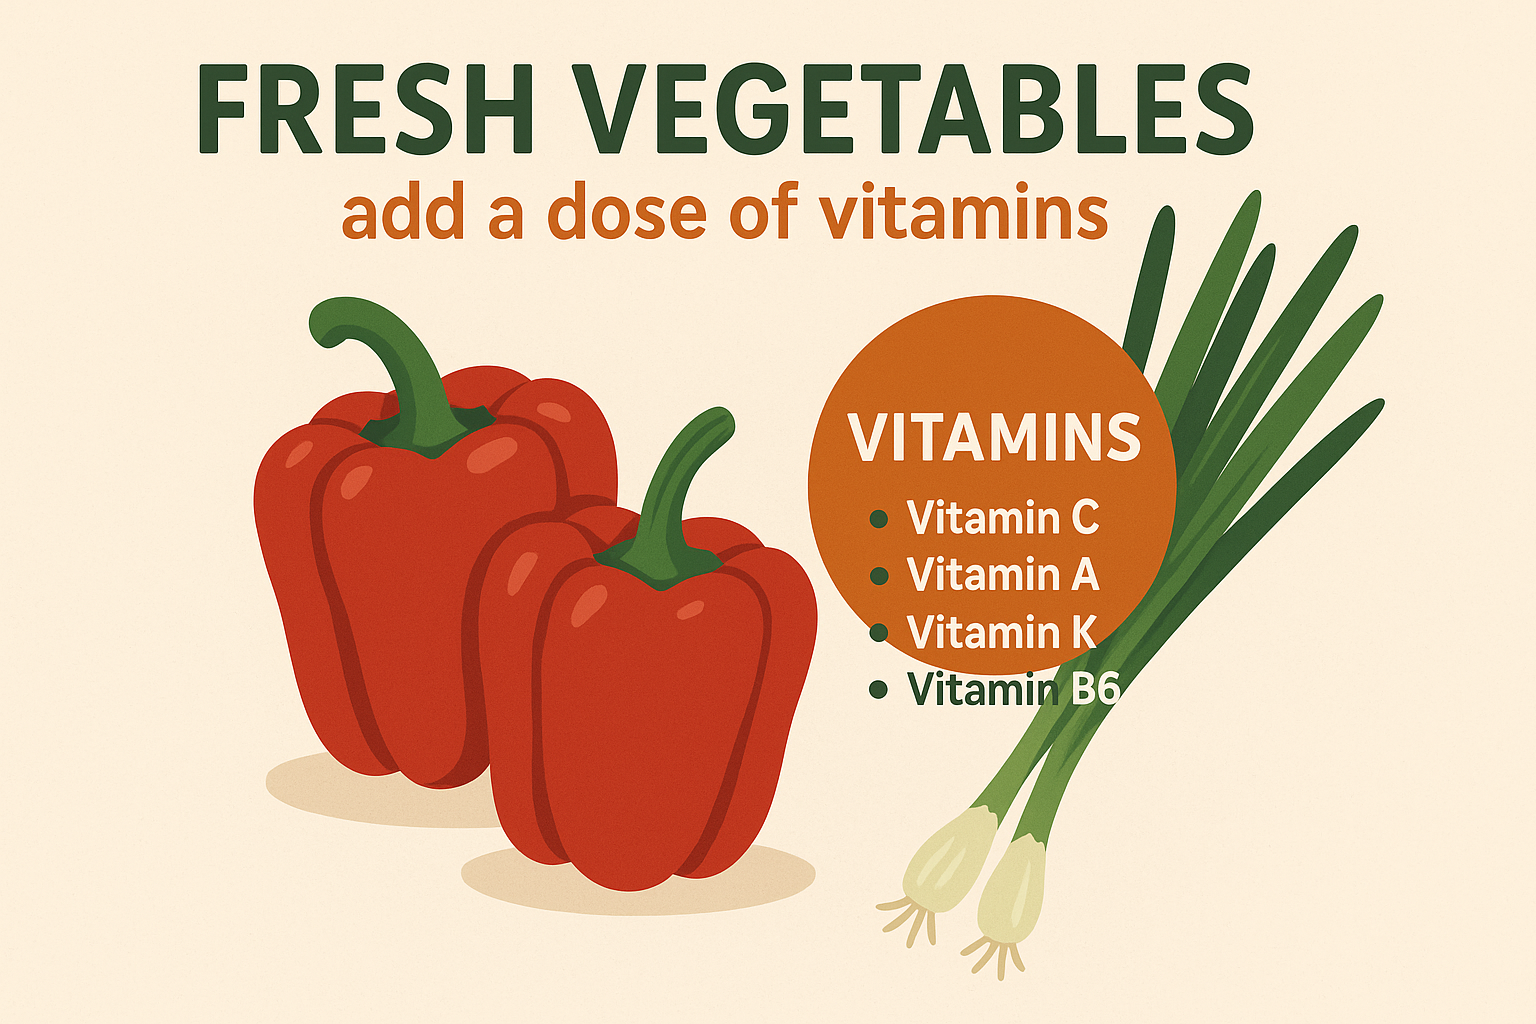
Furthermore, these doughnuts are filled with fresh vegetables like red bell peppers and scallions, which add a dose of vitamins, antioxidants, and a wonderful fresh flavour. The decision to bake these doughnuts instead of deep-frying them dramatically reduces the fat and calorie content, transforming a potentially heavy treat into a lighter, more nutritious snack. Baking allows the dough to retain its fluffy texture without absorbing excess oil, making it a guilt-free indulgence.

The unique flavour combination of the buttery dough and the creamy, savoury ackee filling is a textural and taste experience that sets these doughnuts apart. They are proof that comfort food can be both indulgent and nourishing, providing a satisfying and wholesome treat that everyone can enjoy.


Customizing Your Ackee Savoury Doughnuts

One of the great things about this recipe is its versatility. You can easily adapt the filling to suit your own preferences or dietary needs. Here are a few ideas for customizing your Ackee Savoury Doughnuts.

VariationDescription
Spicy KickIncrease the amount of scotch bonnet pepper or add a pinch of cayenne pepper to the filling.
Cheesy GoodnessAdd a quarter cup of shredded cheddar or Monterey Jack cheese to the cooled ackee filling for a rich, gooey centre.
Veggie PowerIncorporate other finely chopped vegetables into the filling, such as sautéed mushrooms, spinach, or corn.
Herbaceous TwistAdd a tablespoon of finely chopped cilantro or parsley to the filling for a fresh, aromatic flavour.
Smoky FlavourAdd a pinch of smoked paprika or a few drops of liquid smoke to the filling for a deep, smoky undertone.

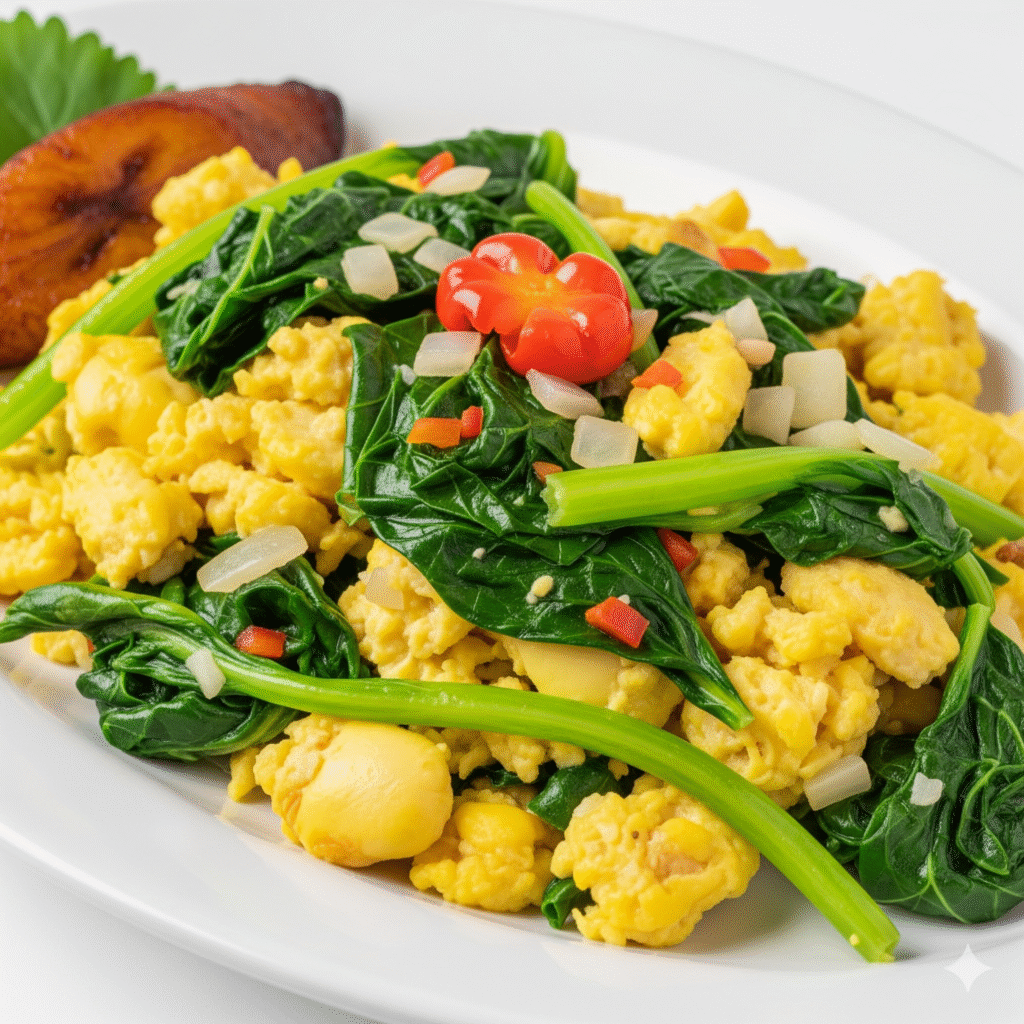
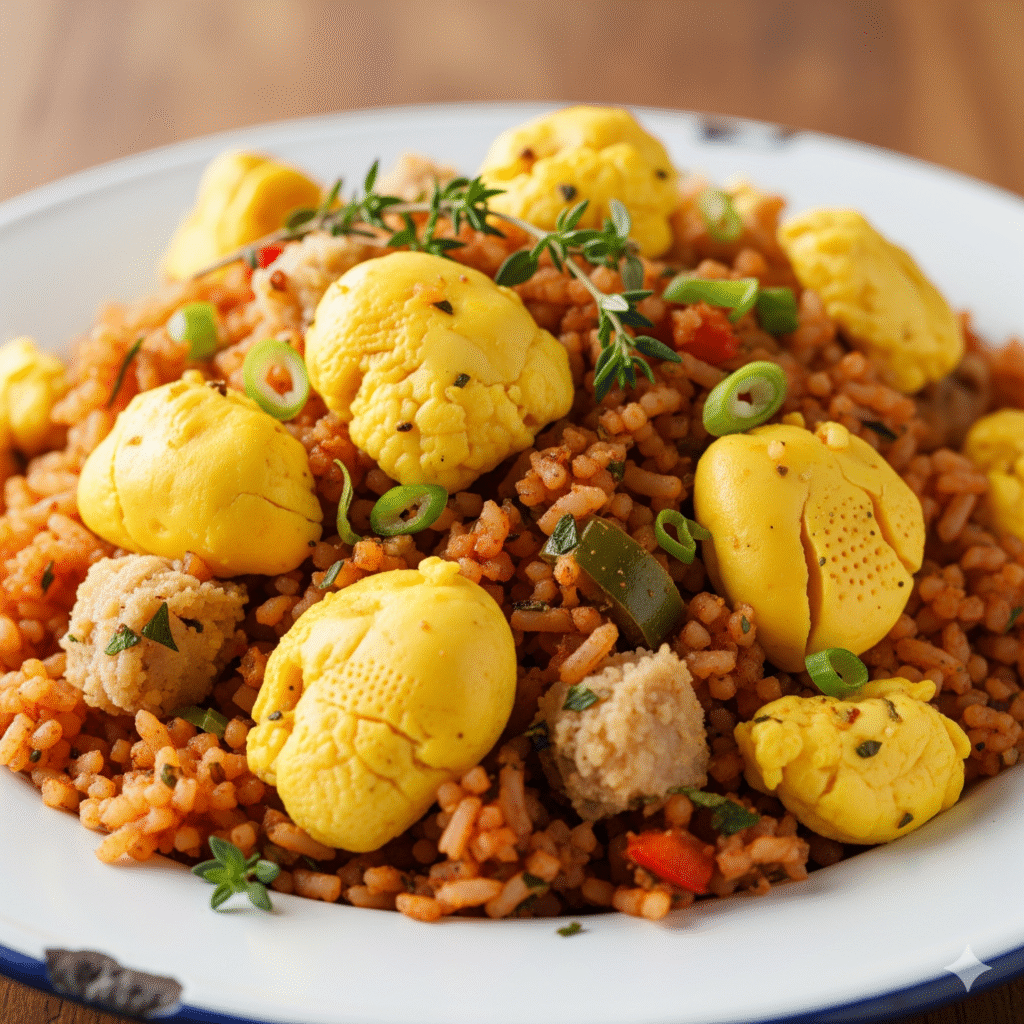
The gallery shows different recipes for Ackee. The first, is ackee and callaloo, the next, saltfish and ackee dumpling and the final image, is ackee and seasoned rice.


Savoury Doughnuts for Every Occasion

These Ackee Savoury Doughnuts are a truly special creation that combines the comforting texture of a classic doughnut with the bold, exciting flavours of Caribbean cuisine. They are a delightful reminder that delicious food doesn’t have to be complicated and that some of the best culinary discoveries are found when we step outside the box. Whether you’re serving them at a brunch, a party, or as a unique weeknight snack, they are sure to impress.

So go ahead, get your hands on some ackee and give this recipe a try. You’ll not only be creating a memorable meal but also embarking on a flavourful adventure that celebrates a rich culinary tradition. These Ackee Savoury Doughnuts are a testament to the fact that with a little creativity, anything is possible in the kitchen.


Frequently Asked Questions About Ackee Savoury Doughnuts

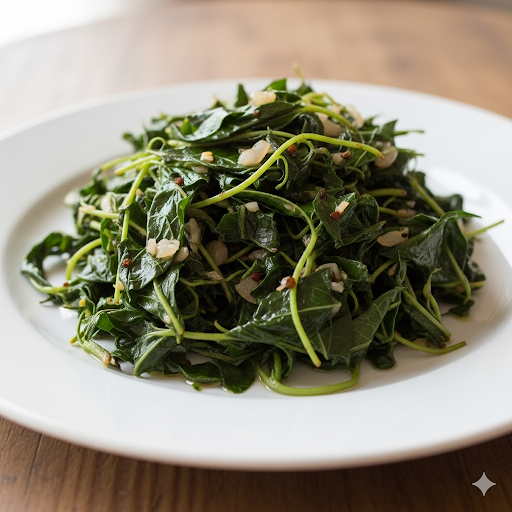
Q: Can I use fresh ackee instead of canned?

A: Yes, you can! If using fresh ackee, ensure it is ripe and has opened naturally on the tree. You must boil the fresh ackee first to remove any toxins before using it in the recipe. The process is a bit more involved, but it will yield a wonderful, fresh flavour.

Q: How do I store leftover doughnuts?

A: Leftover doughnuts can be stored in an airtight container at room temperature for up to 2 days. For a fresher taste, you can reheat them in a toaster oven or air fryer for a few minutes until they are warm and slightly crispy again.


References


Recent Posts


Easy Pasta with Broccoli and White Bean Sauce


Looking for a quick, healthy, and satisfying dinner that doesn’t skimp on flavor? Look no further than this incredible recipe for pasta with a velvety white bean sauce. This is the perfect weeknight meal for anyone seeking a plant-powered, protein-rich dish that’s surprisingly easy to make. Get ready to fall in love with your new favorite pasta sauce!


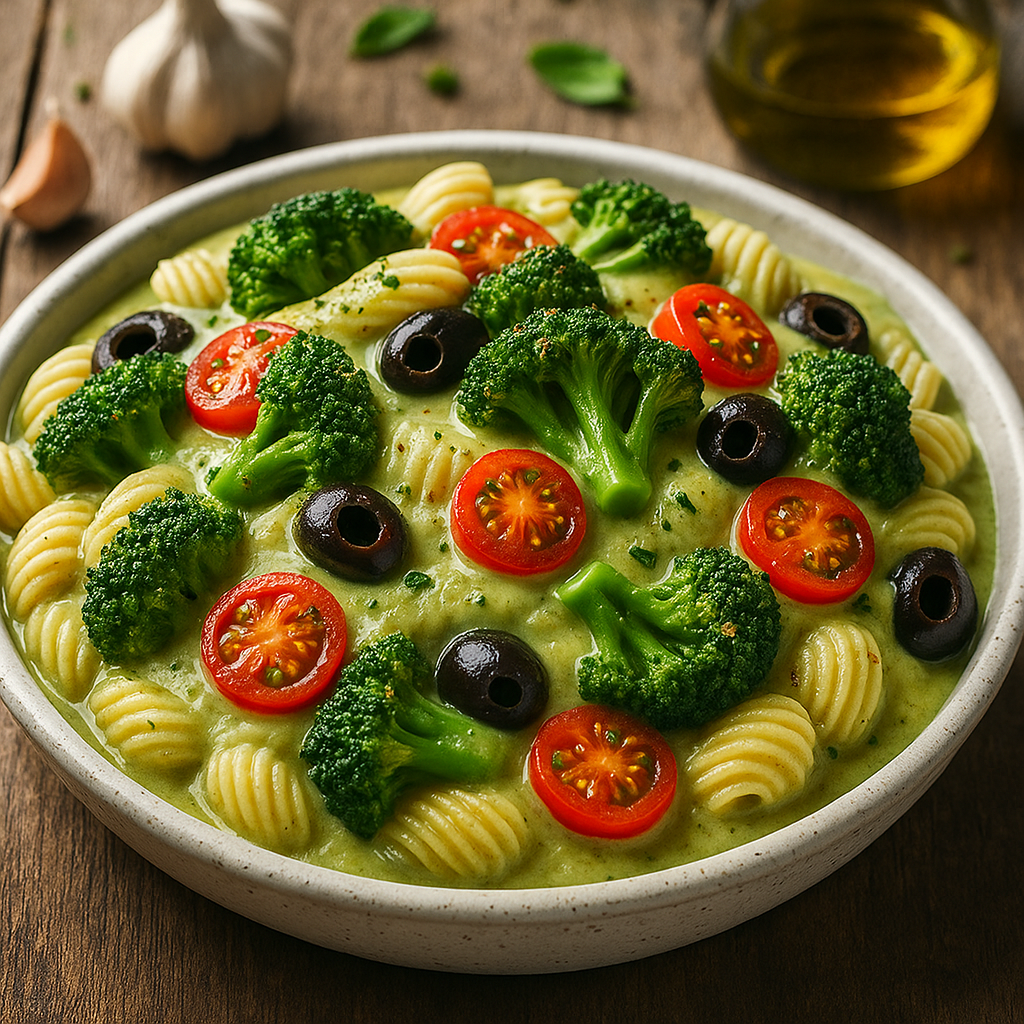
A vibrant bowl of fusilli pasta with bright green broccoli florets, halved cherry tomatoes, black olives, and a creamy green White Bean Sauce, garnished with fresh herbs, on a wooden table.
Pasta with Broccoli

Your New Go-To Weeknight Meal

In the hustle of our daily lives, finding time to prepare a nutritious and delicious meal can feel like a challenge. We often find ourselves reaching for convenience foods that, while quick, might not always be the healthiest or most satisfying option. But what if we told you there’s a recipe that marries speed, health, and incredible flavor into one simple dish? This easy pasta with broccoli and a creamy white bean sauce is exactly that solution. It’s a game-changer for anyone who wants to eat well without spending hours in the kitchen.

This dish is a testament to the power of simple, wholesome ingredients. The star of the show, the white bean sauce, is a marvel of culinary innovation. By using a can of humble cannellini or navy beans, you can create a pasta sauce that is not only rich and creamy but also packed with plant-based protein and fiber. It’s an excellent way to replace heavy cream or cheese-based sauces, offering a lighter, healthier alternative without sacrificing that luxurious, velvety texture we all crave in a pasta dish.

Deliciously Simple: Easy Pasta with a Creamy White Bean Sauce

The beauty of this recipe lies in its versatility and nutritional punch. The sauce acts as a perfect vehicle for a variety of vegetables. In this version, we’ve paired it with bright green broccoli florets and sweet cherry tomatoes, which not only add a pop of color but also a host of vitamins and antioxidants. The garlic provides a savory foundation, while a hint of lemon adds a zesty brightness that cuts through the richness of the sauce. It’s a balanced, satisfying meal that will leave you feeling energized, not weighed down.

This recipe is also incredibly forgiving, making it perfect for both seasoned chefs and kitchen novices. The steps are straightforward, and the ingredients are readily available at any grocery store. The key is in the blending, which transforms the beans into a sauce so smooth you won’t believe it’s made from legumes. This makes it an ideal option for anyone looking to incorporate more plant-based meals into their diet or simply to enjoy a delicious, comforting bowl of pasta.

So, if you’re ready to ditch the jarred sauces and embrace a healthier, more flavorful way to do pasta night, this recipe is for you. It proves that you don’t need a complicated list of ingredients or a lot of time to create something truly special. Get ready to whip up this easy, delicious, and nutrient-packed pasta with a creamy white bean sauce tonight. It’s a meal that feels both indulgent and wonderfully good for you.


The gallery shows a plate cooked of fusilli pasta, white bean sauce and broccoli florets.


The Magic of White Bean Sauce

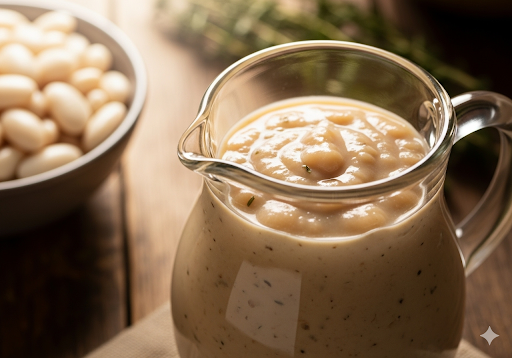
The secret to this dish’s creamy texture is its velvety white bean sauce. Using cannellini or navy beans, this sauce provides a rich, satisfying base that is naturally dairy-free and full of plant-based goodness.


Time to Prepare and Cook Your Pasta

  • Prep Time: 15 minutes
  • Cook Time: 20 minutes
  • Servings: 4

Nutritional Information (Approximate per serving)

  • Calories: 500-600 kcal
  • Protein: 20-25 g
  • Fat: 15-20 g
  • Carbohydrates: 70-80 g
  • Fiber: 10-15 g
  • Vitamin C: 40-50% Daily Value
  • Iron: 15-20% Daily Value

Note: Nutritional values are estimates and can vary based on specific ingredients and serving sizes.


Essential Equipment

  • Large pot for cooking pasta and broccoli
  • High-speed blender or food processor
  • Large skillet or sauté pan
  • Colander
  • Measuring cups and spoons
  • Sharp knife for chopping

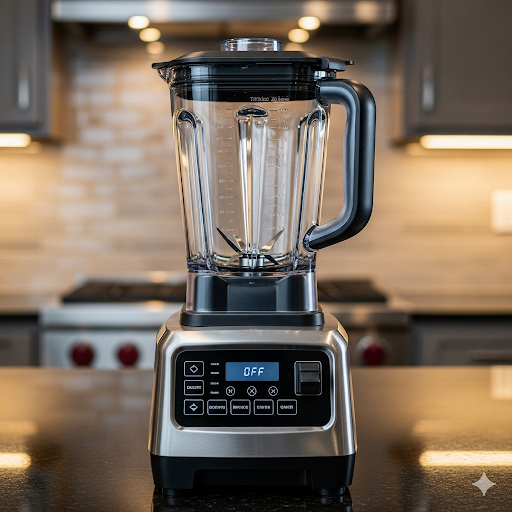
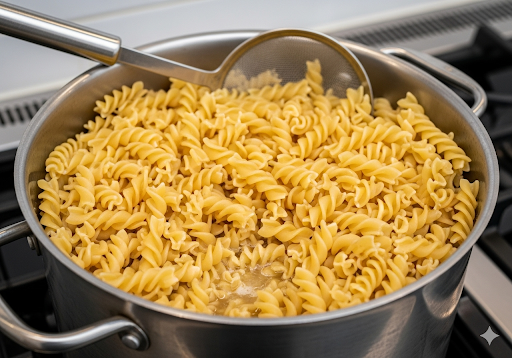
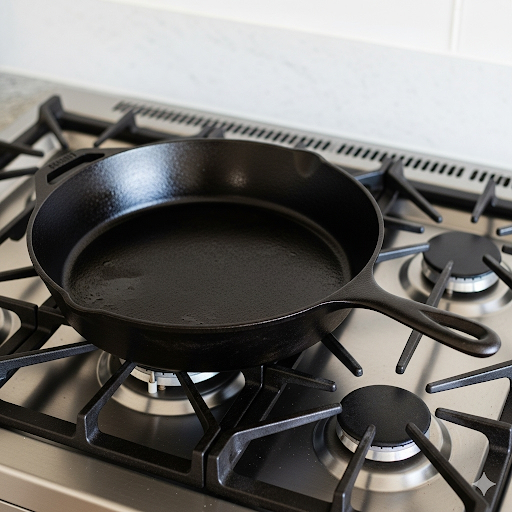
The gallery shows a high speed blender, large pot of cooked pasta and a frying pan on the stove.


Ingredients for a Delicious and Creamy Pasta Dish

For the Pasta and Vegetables

  • 1 lb short pasta (like fusilli, penne, or cavatappi)
  • 1 large head of broccoli, cut into small florets
  • 1 pint cherry tomatoes, halved
  • 1/2 cup black olives, pitted and halved
  • A handful of fresh parsley, chopped for garnish (optional)
  • Extra virgin olive oil for drizzling

For the Creamy White Bean Sauce

  • 1 (15-oz) can cannellini or navy beans, rinsed and drained
  • 3 cloves garlic
  • 2 tbsp nutritional yeast (for a cheesy flavor)
  • 1/4 cup extra virgin olive oil
  • 1/2 cup pasta water (reserved from cooking pasta)
  • Juice of 1/2 lemon
  • 1/2 tsp salt, or to taste
  • 1/4 tsp black pepper

youtube placeholder image

Step-by-Step Instructions for a Simple Pasta Dinner with White Bean Sauce

Boil the Water and Cook the Pasta

Fill a large pot with water and bring it to a rolling boil over high heat. Add a generous pinch of salt to the water to season the pasta as it cooks. Once the water is boiling, add your chosen pasta. Stir it immediately to prevent it from sticking together. Cook the pasta according to the package directions until it’s al dente (firm to the bite).

Add the Broccoli

In the last 3-4 minutes of the pasta’s cooking time, add the broccoli florets to the boiling water with the pasta. This is a great way to cook them both at the same time and save a pot! The broccoli should be bright green and just tender-crisp.

Prepare the Pasta Water

Before draining the pasta and broccoli, use a heat-proof measuring cup to scoop out at least one full cup of the starchy pasta water. This liquid is essential for creating the creamy texture of the white bean sauce and helping it stick to the pasta. Set this water aside.

Drain and Set Aside

Carefully drain the cooked pasta and broccoli together in a colander. Make sure you don’t rinse them! Rinsing will wash away the starch that helps the sauce cling to the pasta. Once drained, set the pasta and broccoli aside.

Make the White Bean Sauce

While the pasta is cooking, you can begin the sauce. In a high-speed blender or food processor, combine the rinsed and drained white beans, peeled garlic cloves, nutritional yeast, olive oil, lemon juice, salt, and pepper. Start blending on low and slowly add the reserved pasta water, a little at a time, until you reach a smooth, creamy consistency. You may not need the full 1/2 cup of water, so add it gradually. Taste the sauce and adjust the seasonings if needed.

Sauté the Vegetables

While the sauce is being blended, heat a large skillet or sauté pan over medium heat. Add a tablespoon of olive oil, and once it’s shimmering, add the halved cherry tomatoes and olives. Sauté for 2-3 minutes until the tomatoes begin to soften and their skins wrinkle slightly. This step deepens their flavor.

Combine Everything

Add the cooked pasta and broccoli to the skillet with the tomatoes and olives. Pour the creamy white bean sauce over the pasta and vegetables. Toss everything gently with tongs until the pasta and vegetables are evenly coated in the sauce. The heat from the pan will warm the sauce through.

Serve and Garnish

Divide the pasta among serving bowls. Garnish each bowl with a sprinkle of fresh chopped parsley and a final drizzle of high-quality extra virgin olive oil. Serve immediately while hot.


Alternative Cooking Methods

  • Baked Version: To create a baked pasta dish, follow all the steps to prepare the pasta, vegetables, and sauce. Instead of just tossing it in a skillet, transfer the combined mixture to a baking dish. Top with a sprinkle of breadcrumbs or a little more nutritional yeast for a crispy crust. Bake at 375°F (190°C) for 15-20 minutes, or until the top is golden and the filling is bubbly.
  • Slower Cooker Sauce: While the pasta and veggies can’t be cooked in a slow cooker, you can create a deeper flavor profile for the sauce. Sauté the garlic in a pan, then transfer it to a slow cooker with the white beans and a bit of vegetable broth. Cook on low for 2-3 hours. Then, blend the mixture as instructed, and proceed with the rest of the recipe.

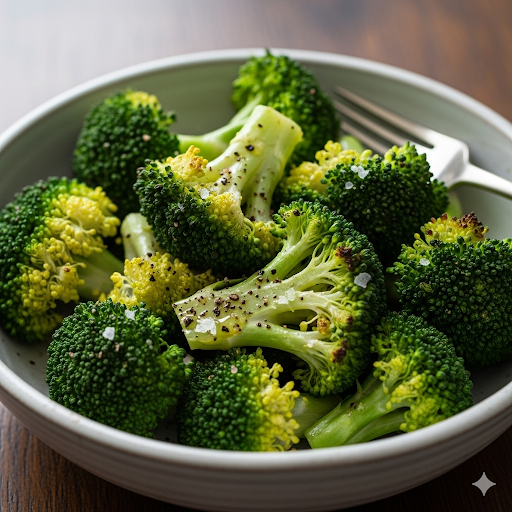
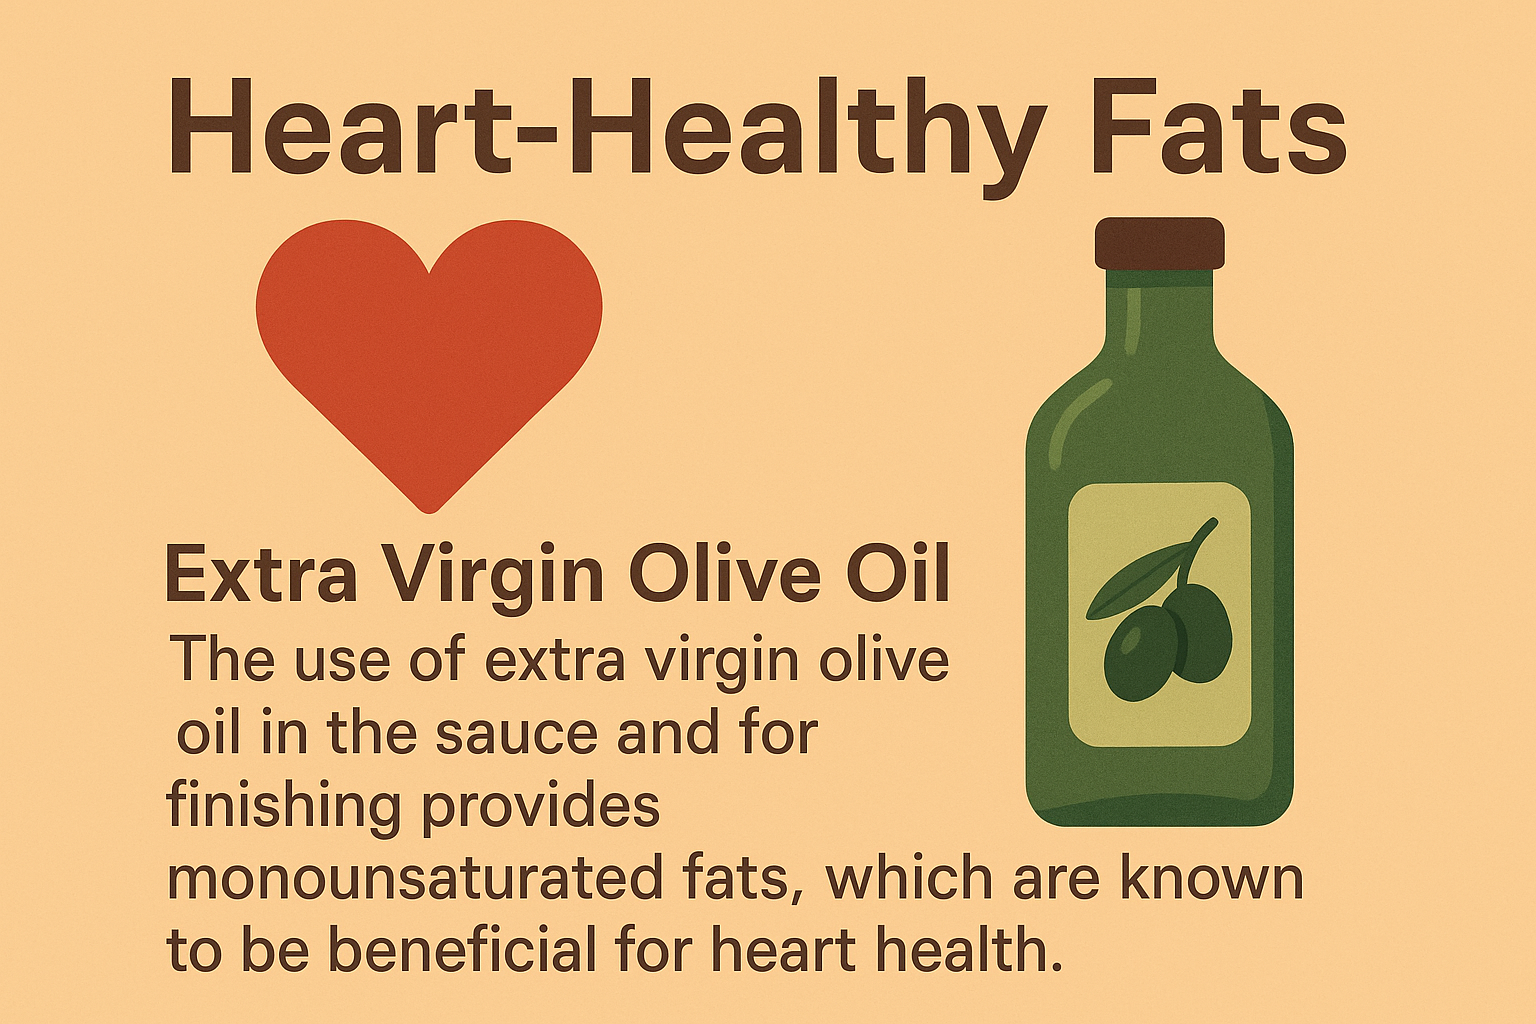
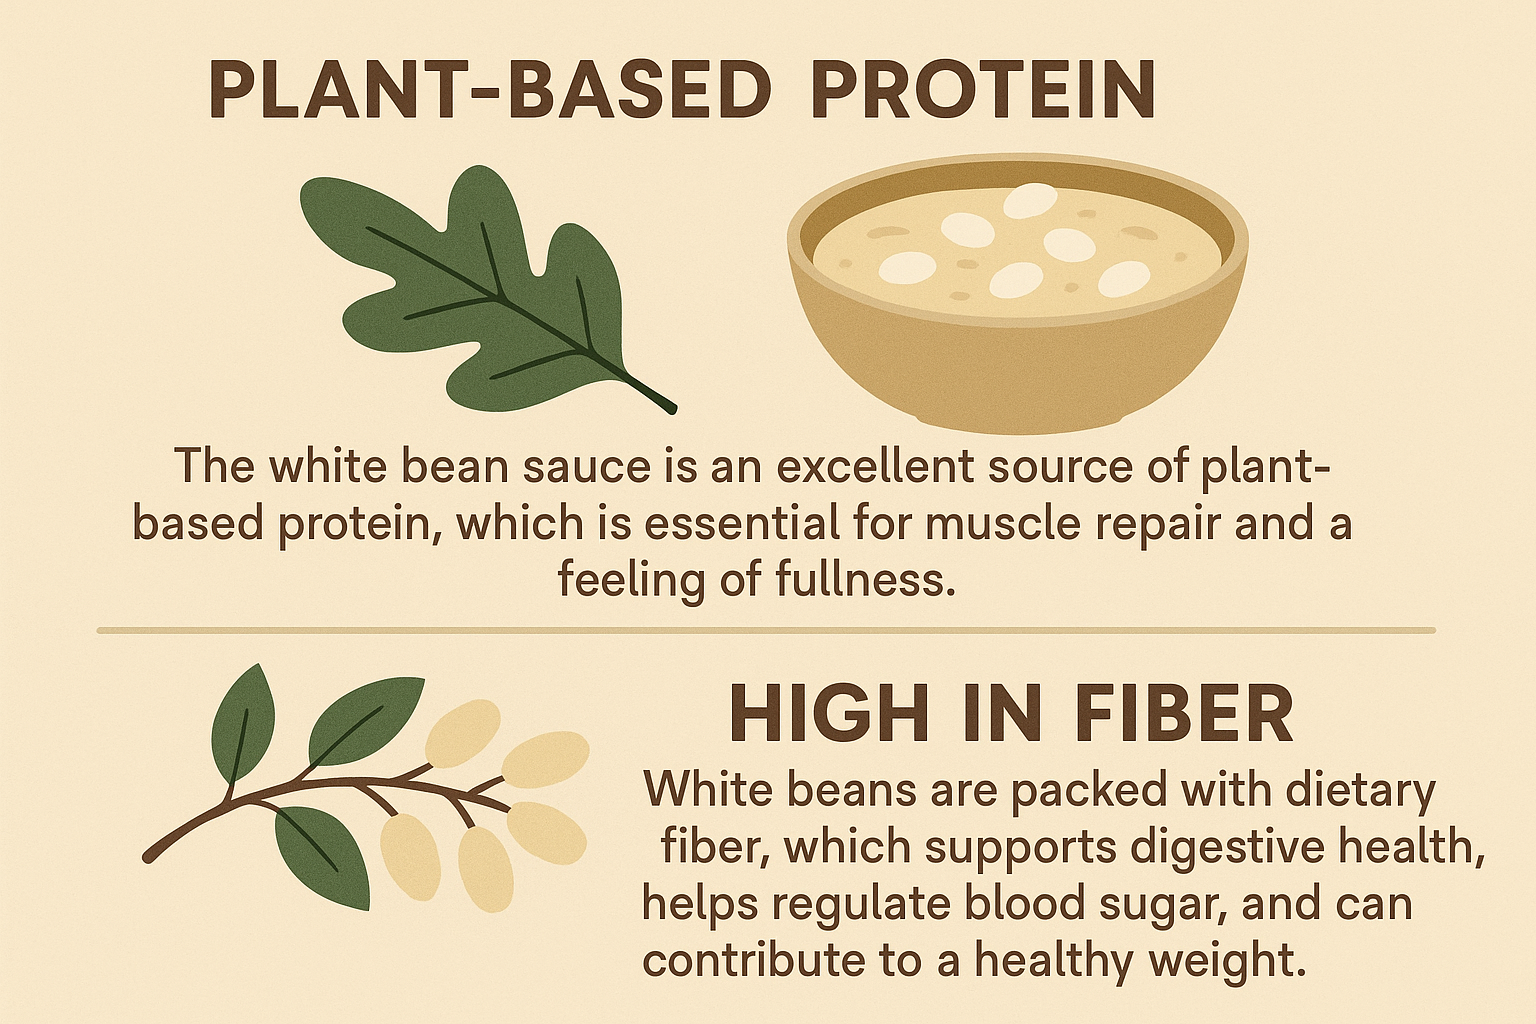
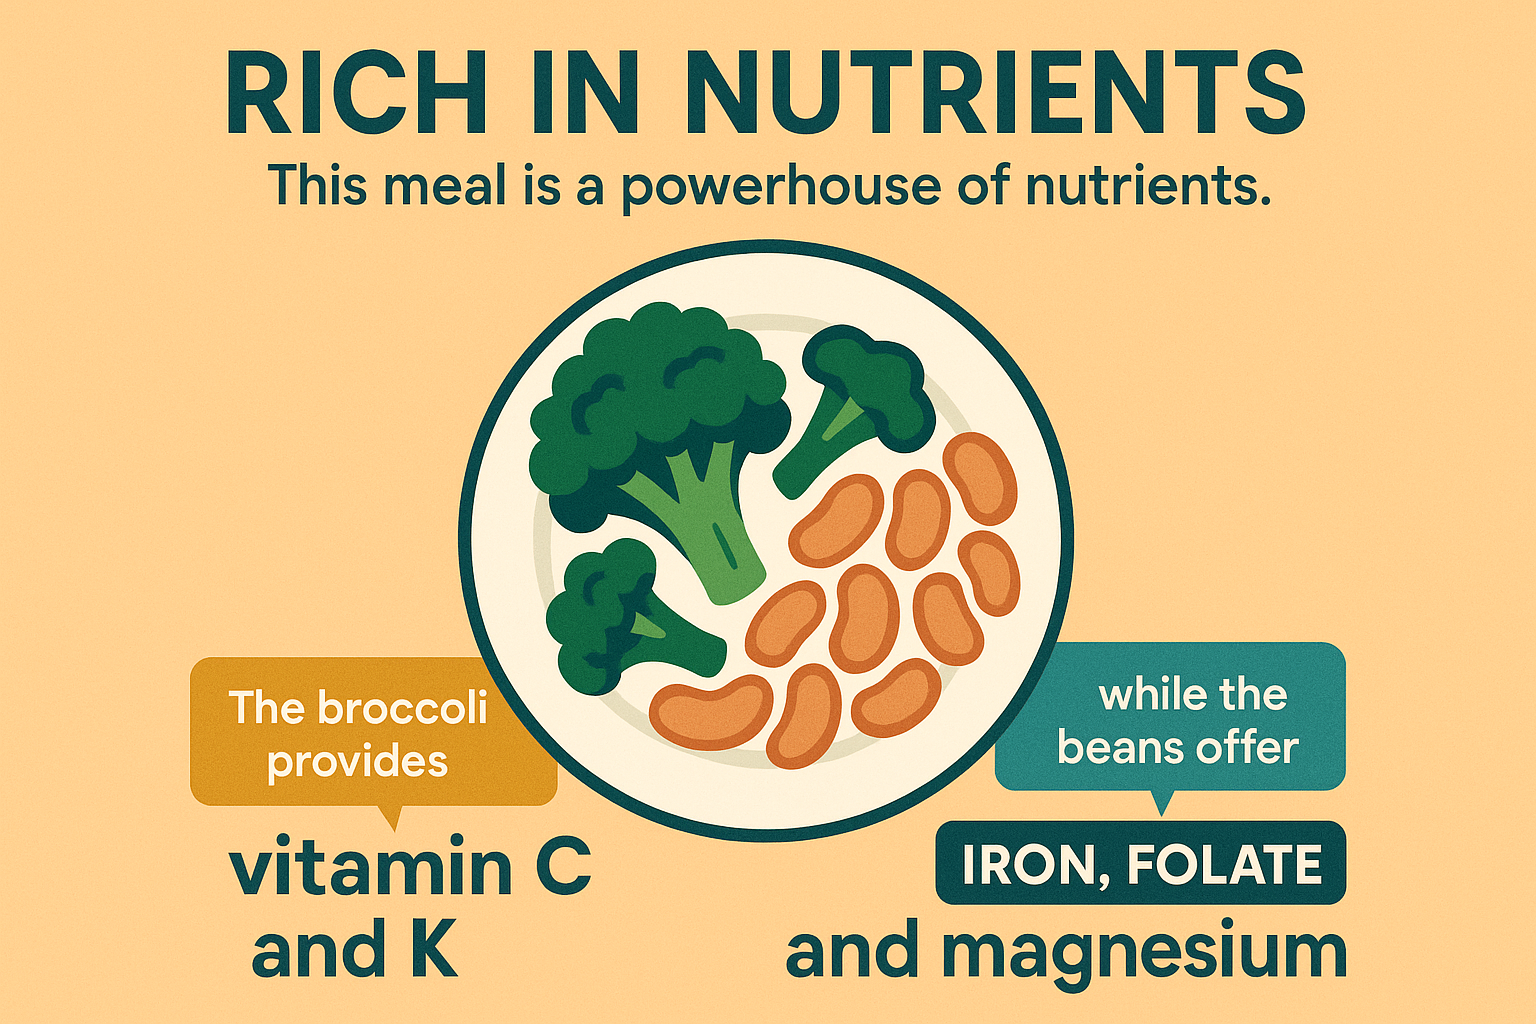
The gallerys shows the health benefits for virgin olive oil, the protein gained from the white beans and the nutrients from broccoli.


Health Benefits of this Pasta Dish with White Bean Sauce

  • Plant-Based Protein: The white bean sauce is an excellent source of plant-based protein, which is essential for muscle repair and a feeling of fullness.
  • High in Fiber: White beans are packed with dietary fiber, which supports digestive health, helps regulate blood sugar, and can contribute to a healthy weight.
  • Rich in Nutrients: This meal is a powerhouse of nutrients. The broccoli provides Vitamin C and K, while the beans offer iron, folate, and magnesium.
  • Heart-Healthy Fats: The use of extra virgin olive oil in the sauce and for finishing provides monounsaturated fats, which are known to be beneficial for heart health.
  • Naturally Dairy-Free: This recipe offers a wonderful, creamy texture without the need for dairy, making it a great option for those with lactose intolerance or who follow a vegan diet.

Variations to Customize Your Meal

VariationDescription
Pesto PowerFor a more vibrant flavor, add a few tablespoons of your favorite vegan or traditional pesto to the blender when making the sauce.
Add More GreensWilt in a few handfuls of fresh spinach or kale to the skillet at the end of the cooking process for an extra boost of vitamins.
Spicy KickAdd a pinch of red pepper flakes to the garlic as you sauté it for a little heat that complements the creamy sauce beautifully.
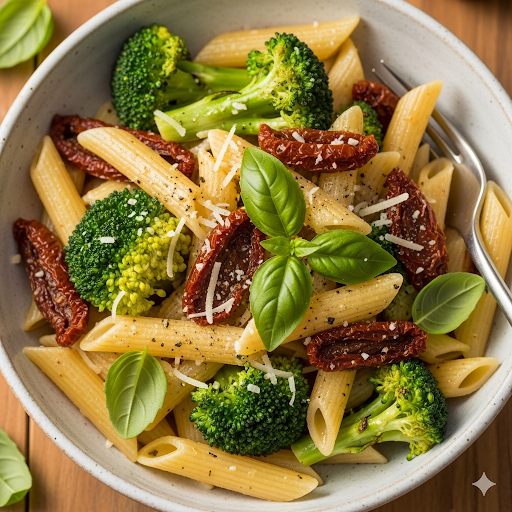
Sun-dried Tomato TwistSwap the cherry tomatoes for sun-dried tomatoes (packed in oil), which will add an intense, savory flavor to the dish.
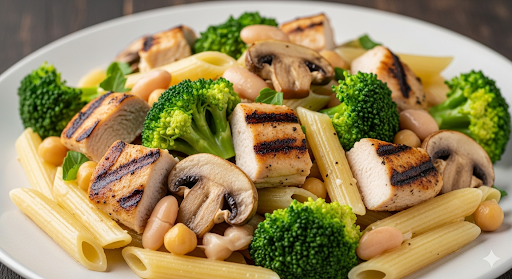
Protein BoostFor a heartier meal, add cooked chickpeas, sautéed mushrooms, or grilled chicken to the finished pasta before serving.

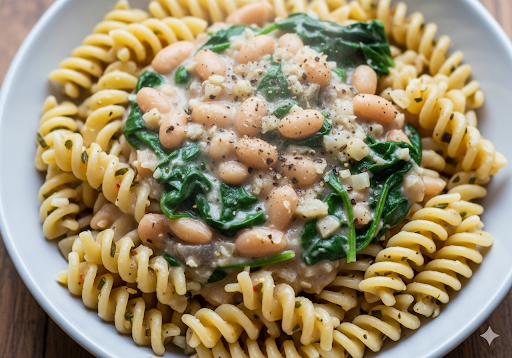
The gallery shows the different variations of this dish: past and broccoli with sun -dried tomates. The next image shows fusilli and chickpeas and the final image shows, penne with mushrooms and broccoli.


Final Thoughts on Your New Go-To Pasta with White Bean Sauce

This recipe for pasta with a creamy white bean sauce is proof that healthy eating can be simple, satisfying, and incredibly delicious. It’s a quick and easy solution for busy weeknights, a fantastic way to incorporate more plant-based foods into your diet, and a meal that will leave everyone at the table happy and full. The velvety texture and rich flavor of the sauce are so good you’ll want to put it on everything. So go ahead, give this recipe a try tonight. It might just become the most requested meal in your home.


Frequently Asked Questions

Q: Can I use a different type of white bean for the sauce?

A: Yes, absolutely! While cannellini and navy beans are ideal for their creamy texture, you can also use Great Northern beans. Just be sure to rinse and drain them well before adding them to the blender.

Q: How can I store leftovers and reheat them?

A: Leftovers of this pasta dish can be stored in an airtight container in the refrigerator for up to 3 days. To reheat, you can either warm it gently in a skillet on the stovetop over low heat or in the microwave. If the sauce seems too thick after reheating, add a tablespoon or two of water to help it reach a creamy consistency again.


References


Recent Posts


How to Make Dasheen Shepherd’s Pie Tonight


Discover the comforting embrace of a classic shepherd’s pie with a unique twist! This guide will walk you through a delightful and nutritious recipe featuring the humble dasheen, a root vegetable that adds a rich, creamy texture and a host of health benefits to this beloved dish. Say goodbye to plain potato and hello to a new family favorite that’s both hearty and incredibly satisfying.


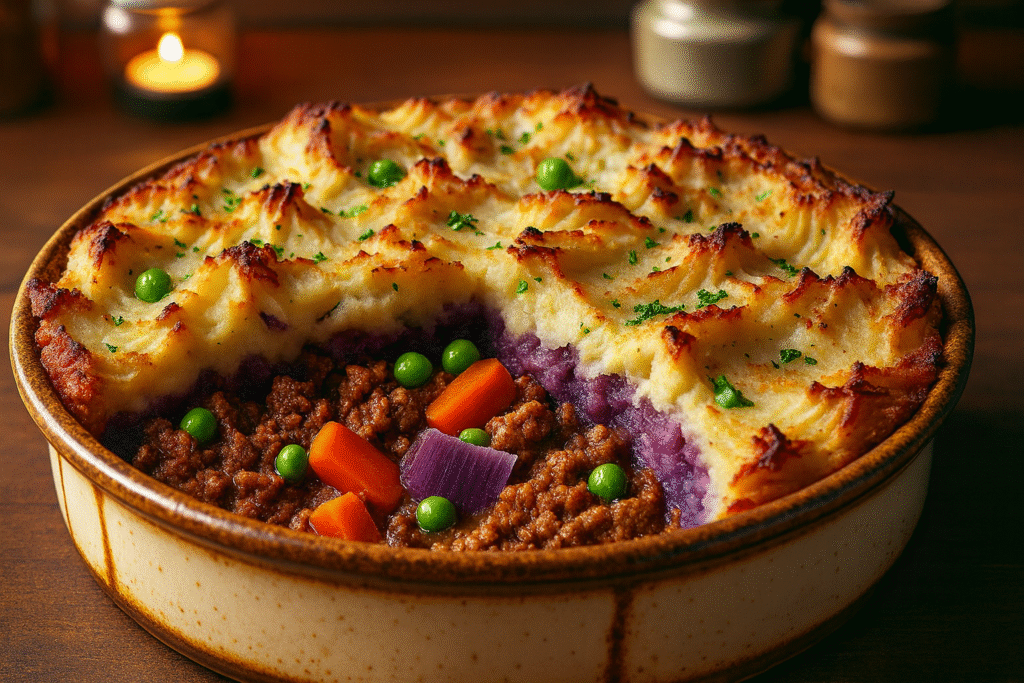
Freshly baked Dasheen Shepherd’s Pie with golden mashed dasheen topping, colorful peas, carrots, and savory ground meat in a rustic dish.
Dasheen Shepherds Pie

A New Twist on a Timeless Favorite

Shepherd’s pie is a dish that evokes feelings of warmth, comfort, and nostalgia. It’s the kind of meal you crave on a chilly evening, a hearty embrace in a bowl. But what if we told you there’s a way to elevate this classic to a new level of creaminess and nutritional goodness? Enter the dasheen, a root vegetable also known as taro, that is about to revolutionize your comfort food game. Its subtle, nutty flavor and incredibly smooth texture make it the perfect candidate for a rich and fluffy topping.

For many, shepherd’s pie is a staple, but the potato topping, while classic, can sometimes be a bit heavy. This new twist offers a lighter, more ethereal quality, absorbing the flavors of butter and seasoning to create a truly unforgettable experience. It’s a simple substitution that has a profound impact on the final dish, transforming it from a mere meal into a culinary revelation. The subtle sweetness of the dasheen complements the savory, rich ground meat filling, creating a perfect balance of flavors.

Why Dasheen is Your New Favorite Root Vegetable

This recipe isn’t just about taste; it’s about introducing a new, healthy ingredient into your cooking repertoire. Dasheen is a powerhouse of nutrients, including dietary fiber, vitamin C, and potassium. By using it in place of or alongside potatoes, you’re not just making a delicious dinner; you’re also making a smarter, more nutritious choice for you and your loved ones. It’s a simple, yet significant, step toward a healthier lifestyle without sacrificing flavor or satisfaction.

Whether you’re a seasoned home cook looking for a new challenge or a beginner wanting to impress your family with a show-stopping meal, this recipe for Dasheen Shepherd’s Pie is accessible and rewarding. We’ll guide you through each step, from preparing the velvety topping to creating the savory, aromatic meat filling. The result will be a dish that is both familiar and excitingly new, a true testament to the power of a single ingredient swap.

So, are you ready to embark on this delicious journey? Let’s dive into the details of this comforting and hearty twist on Shepherd’s Pie. Get your aprons ready, because tonight, we’re making a meal that will be remembered and requested for years to come. This is more than just a recipe; it’s an experience.


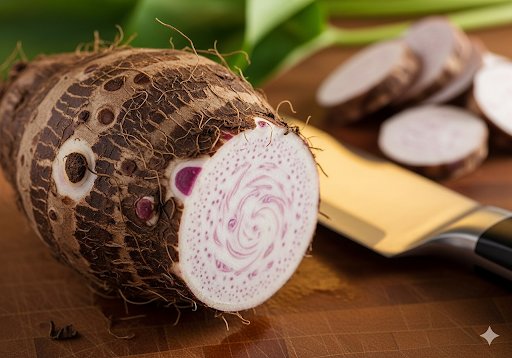
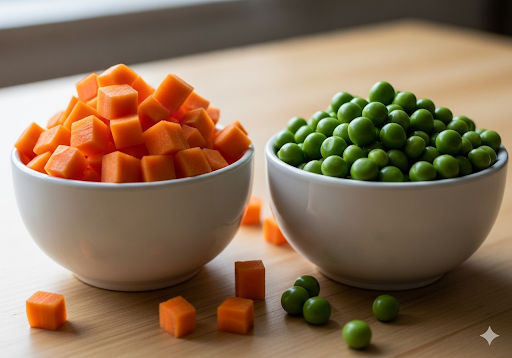
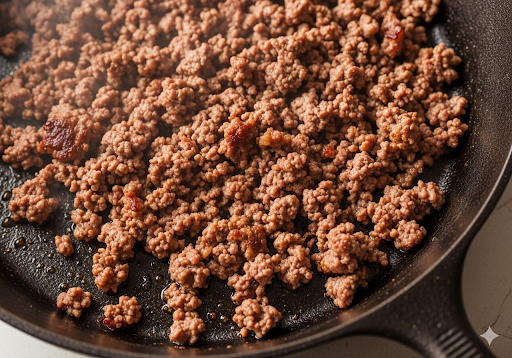
The gallery shows the raw vegetable Dasheen (taro), a bowl of carrots and peas and ground cooked beef.


The Dasheen Difference: Understanding the Star Ingredient

Dasheen, or taro, is a tropical root vegetable with a starchy texture and a slightly sweet, nutty flavor when cooked. It’s a fantastic alternative to potatoes for mashing, as it yields a remarkably creamy and smooth consistency.


Time to Prepare and Cook Your Dasheen Shepherd’s Pie

  • Prep Time: 25 minutes
  • Cook Time: 45 minutes
  • Servings: 6-8

Nutritional Information (Approximate per serving)

  • Calories: 450-550 kcal
  • Protein: 30-35 g
  • Fat: 20-25 g
  • Carbohydrates: 40-50 g
  • Fiber: 5-7 g
  • Vitamin C: 30-40% Daily Value
  • Potassium: 15-20% Daily Value

Note: Nutritional values are estimates and can vary based on specific ingredients and serving sizes.


Essential Equipment

  • Large pot for boiling dasheen
  • Large skillet or pot for the meat filling
  • Potato masher or ricer
  • Mixing bowl
  • 9×13-inch baking dish or similar-sized oven-safe dish
  • Spatula and wooden spoon
  • Measuring cups and spoons

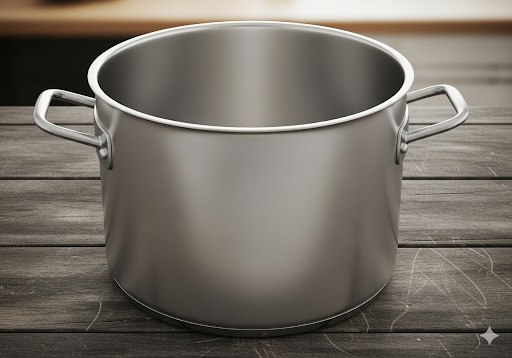
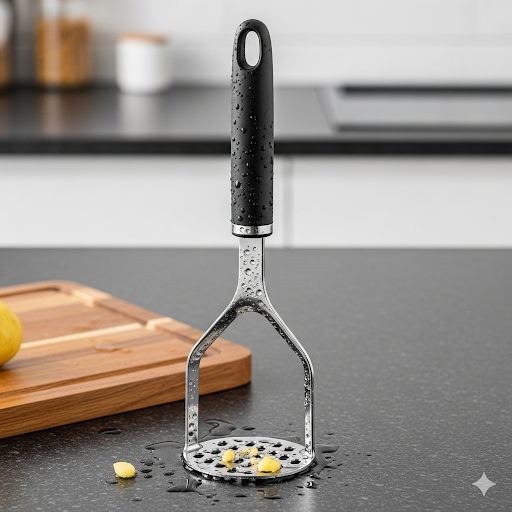
The gallery shows some of the equipment used in this recipe. A large pot, poatato masher and a frying pan on the stove.


Ingredients for a Hearty Dasheen Shepherd’s Pie

For the Dasheen Topping

  • 2 lbs dasheen (taro), peeled and cut into 1-inch cubes
  • 4 tbsp unsalted butter, softened
  • 1/2 cup heavy cream or whole milk, warmed
  • 1/2 tsp salt, or to taste
  • 1/4 tsp black pepper
  • 1/4 cup grated Parmesan cheese (optional)

For the Savory Meat Filling

  • 2 tbsp olive oil
  • 1 large yellow onion, finely chopped
  • 2 lbs ground beef (80/20 fat ratio for flavor) or ground lamb
  • 2 large carrots, peeled and diced
  • 1 cup frozen peas
  • 2 cloves garlic, minced
  • 2 tbsp all-purpose flour
  • 1 1/2 cups beef broth
  • 1/2 cup red wine (optional, for depth of flavor)
  • 2 tbsp tomato paste
  • 1 tbsp Worcestershire sauce
  • 1 tsp fresh thyme leaves (or 1/2 tsp dried thyme)
  • 1 bay leaf
  • Salt and black pepper to taste

youtube placeholder image

Step-by-Step Instructions to Create Your Dasheen Masterpiece

Prepare the Dasheen

Begin by peeling and cubing the dasheen. Dasheen can be a little starchy and can sometimes cause skin irritation, so it’s a good idea to wear gloves while handling it. Place the cubes in a large pot and cover with cold, salted water. Bring to a boil, then reduce the heat and simmer for 15-20 minutes, or until the dasheen is fork-tender. The cubes should mash easily.

Make the Dasheen Mash

Once the dasheen is cooked, drain it thoroughly. Return the dasheen to the hot, empty pot over low heat for a minute to let any remaining moisture evaporate. This is a crucial step for a fluffy, non-watery mash. Add the softened butter, warmed heavy cream, salt, and pepper. Use a potato masher or ricer to mash the dasheen until it’s incredibly smooth and creamy. If you’re using it, stir in the Parmesan cheese until it’s fully incorporated. Set the dasheen mash aside.

Start the Filling

While the dasheen is cooking, you can begin the meat filling. Heat the olive oil in a large skillet or pot over medium-high heat. Add the chopped onion and carrots. Sauté for 5-7 minutes, stirring occasionally, until the onions are soft and translucent.

Brown the Meat

Add the ground beef or lamb to the skillet with the vegetables. Break up the meat with a wooden spoon and cook until it is evenly browned. Drain any excess grease from the pan to prevent the final dish from being too oily.

Build the Flavor

Stir in the minced garlic and cook for another minute until fragrant. Sprinkle the flour over the meat and vegetables, stirring continuously for about two minutes. This step, called the “roux,” helps to thicken the sauce later. Pour in the beef broth and red wine (if using), scraping up any browned bits from the bottom of the pan—this is where a lot of flavor lives!

Simmer the Filling

Stir in the tomato paste, Worcestershire sauce, thyme, and bay leaf. Bring the mixture to a gentle simmer. Reduce the heat to low, cover the skillet, and let the filling simmer for at least 15 minutes, or up to 30 minutes, to allow the flavors to meld. The longer it simmers, the richer the taste.

Add the Final Touches

Remove the bay leaf. Stir in the frozen peas. Taste the filling and adjust the seasoning with salt and pepper as needed. The sauce should be thick and rich.

Assemble the Pie

Preheat your oven to 400°F (200°C). Spoon the savory meat filling evenly into your baking dish.

Top with Dasheen

Dollop the dasheen mash over the meat filling. Use a spatula to spread it evenly from edge to edge. For that classic, rustic look, use the back of a fork to create ridges and peaks on the dasheen topping. These ridges will get beautifully golden and crisp in the oven.

Bake to Golden Perfection

Place the baking dish on a baking sheet to catch any drips and transfer it to the preheated oven. Bake for 20-25 minutes, or until the filling is bubbly at the edges and the dasheen topping is a beautiful golden brown.

Serve and Enjoy

Let the pie rest for 5-10 minutes before serving. This allows the filling to set, making it easier to serve. Garnish with a sprinkle of fresh parsley if desired. Serve hot and enjoy the perfect balance of creamy dasheen and savory meat filling.


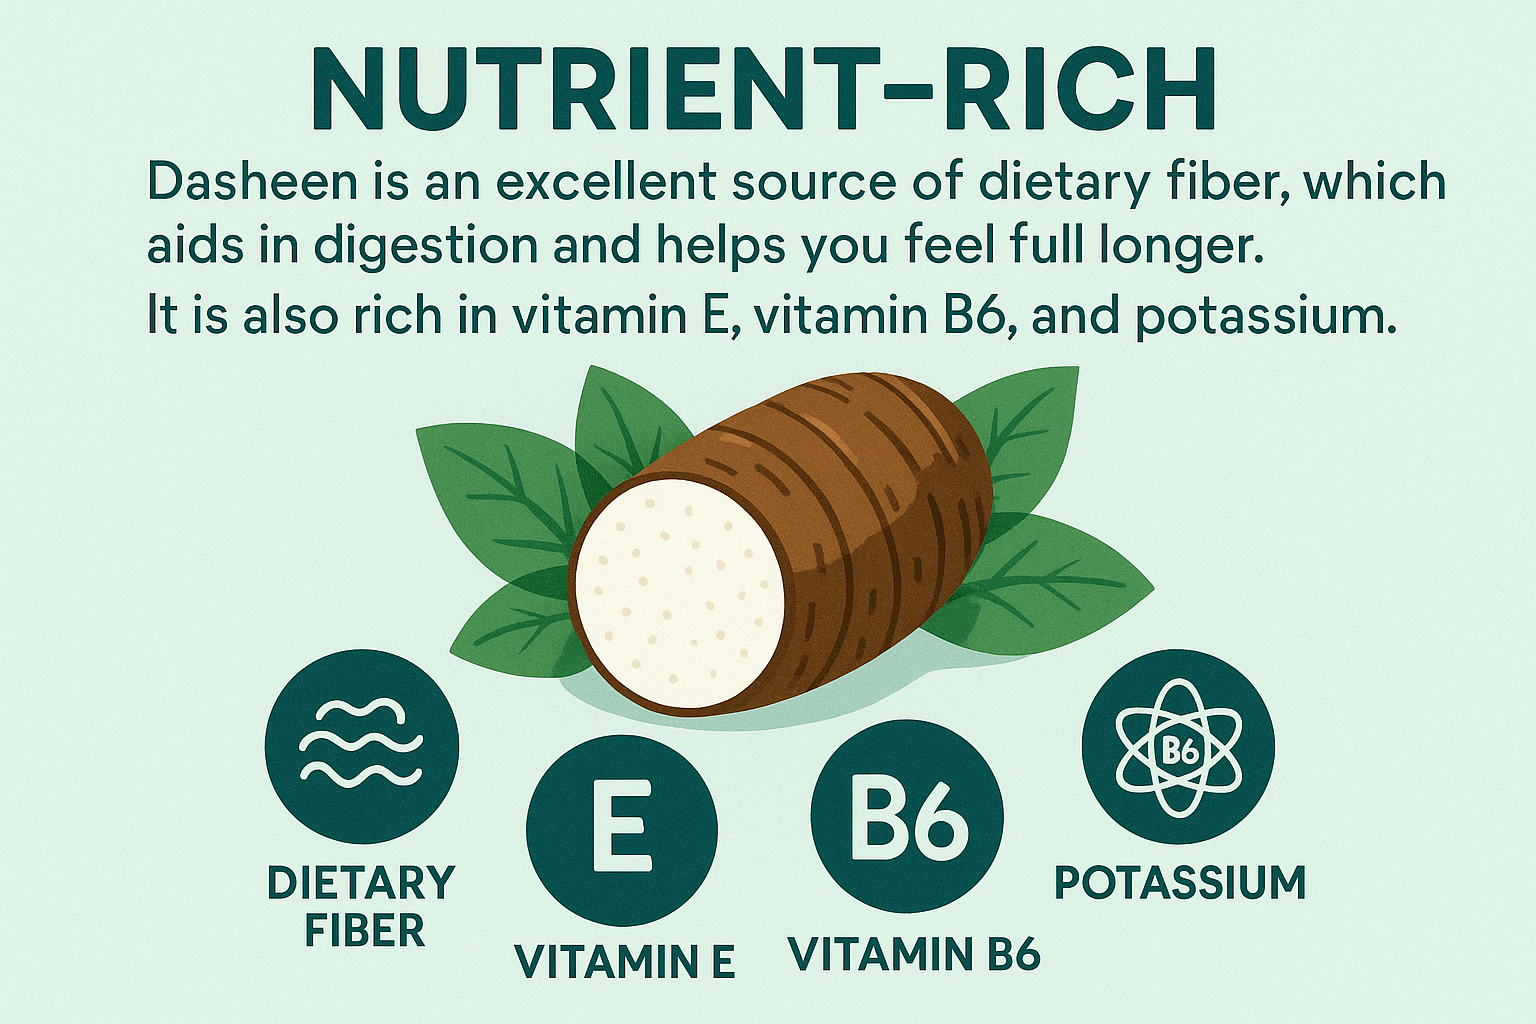
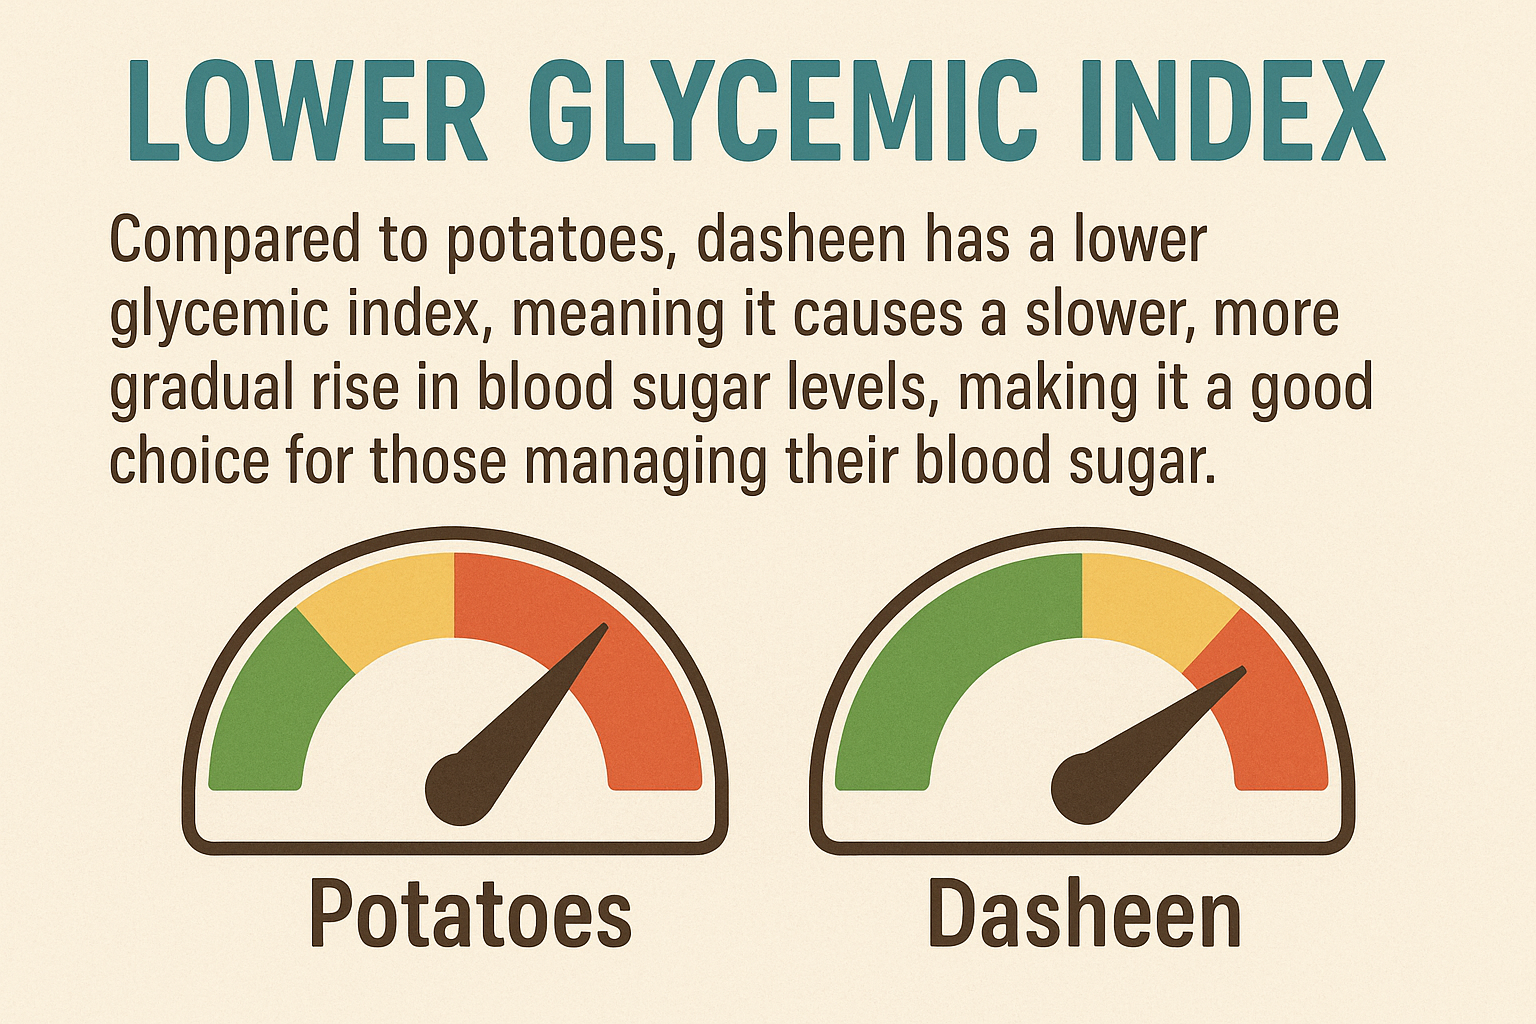
The gallery shows the digestive health you gain from Dasheen, the nutrient rich sources of dietary fibers and the lower glycemic index of dasheen compared to potatoes.


The Key Benefits of a Dasheen-Based Dish

  • Nutrient-Rich: It is an excellent source of dietary fiber, which aids in digestion and helps you feel full longer. It is also rich in vitamin E, vitamin B6, and potassium.
  • Lower Glycemic Index: Compared to potatoes, dasheen has a lower glycemic index, meaning it causes a slower, more gradual rise in blood sugar levels, making it a good choice for those managing their blood sugar.
  • Creamier Texture: It naturally has a velvety, smooth texture when mashed, creating a lighter and more elegant topping that’s still incredibly satisfying.
  • Digestive Health: The high fiber content of dasheen promotes good gut health and can help prevent constipation.
  • Unique Flavor Profile: The subtle, nutty sweetness adds a delicious and unexpected layer of flavor that complements the savory meat filling beautifully.

Creative Variations for Your Dasheen Pie

VariationDescription
Vegetarian DelightSubstitute the ground meat with lentils, mushrooms, and finely diced celery for a hearty, plant-based filling.
Spice It UpAdd a pinch of red pepper flakes to the meat filling for a touch of heat, or include a dash of curry powder for an Indian-inspired twist.
Cheesy GoodnessMix extra grated cheese, such as cheddar or Gruyère, into the mash before spreading it on top for a richer, cheesier crust.
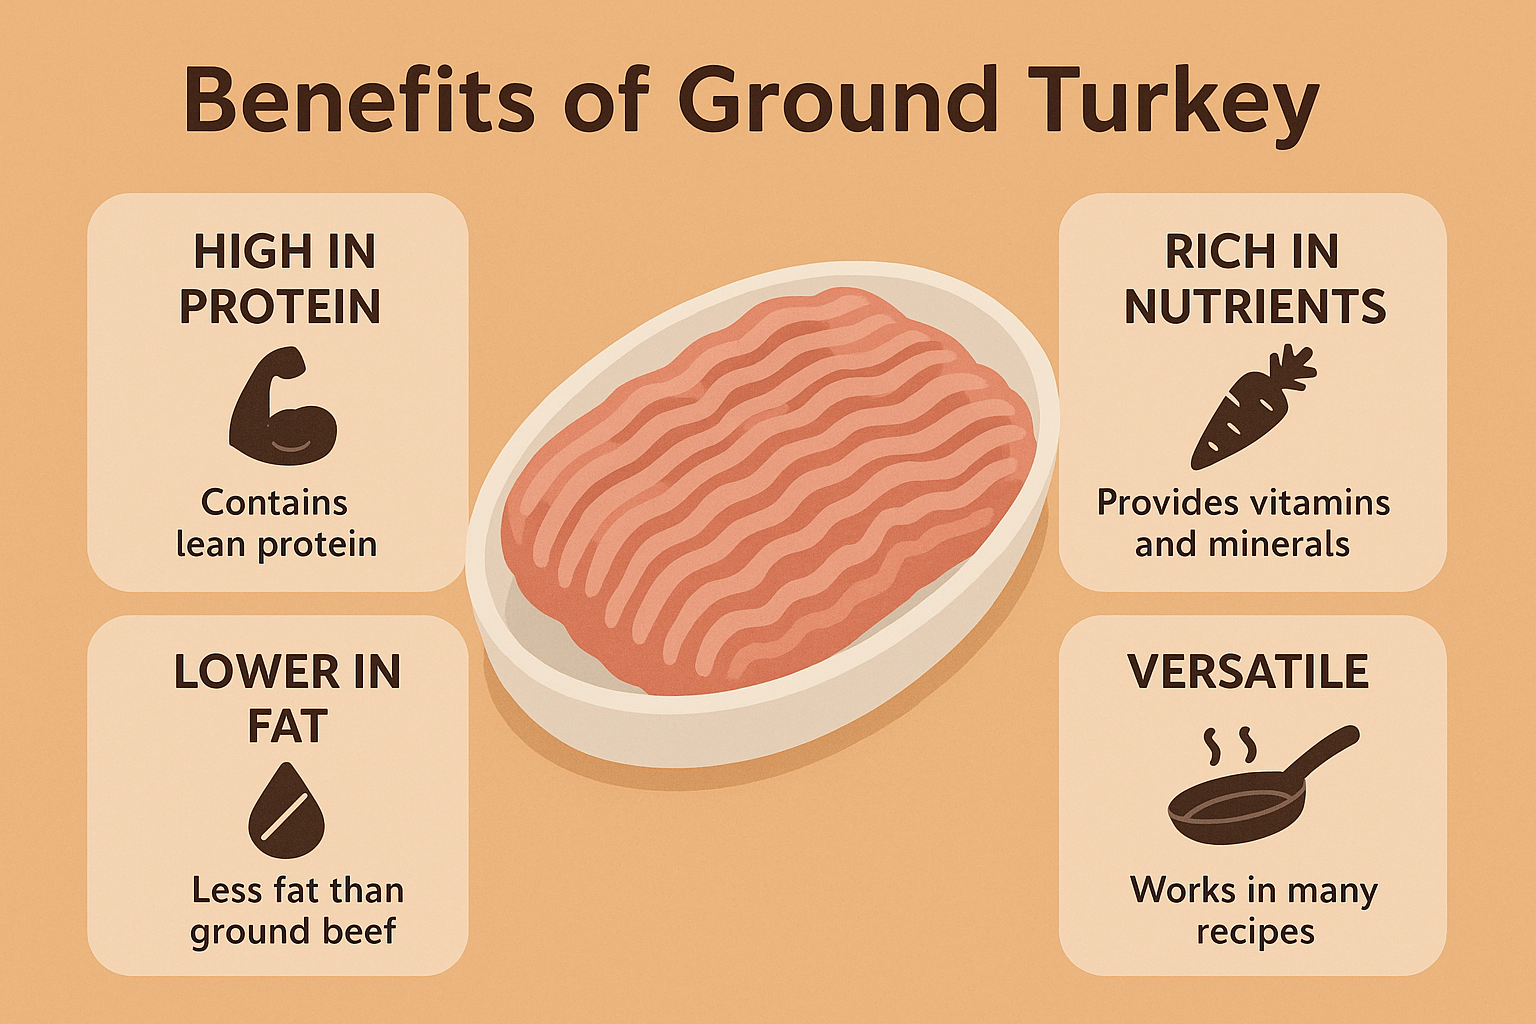
Different ProteinsSwap out the ground beef for ground turkey or ground chicken for a leaner version without sacrificing flavor.
Hidden VeggiesFinely grate zucchini or mushrooms into the meat filling to add extra nutrients and moisture without altering the taste significantly.

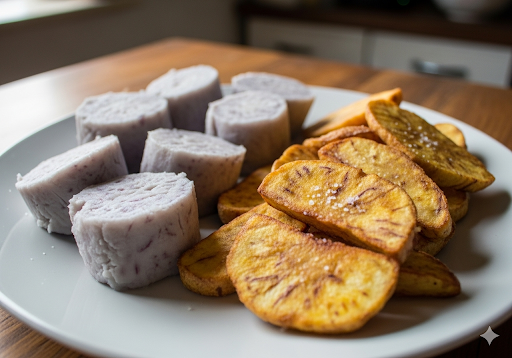
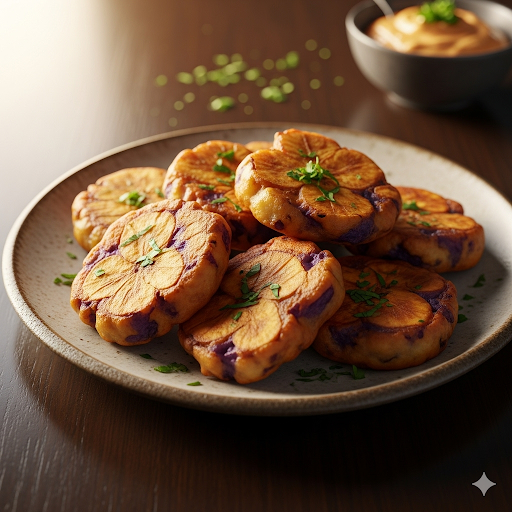
The gallery shows different ways to cook dasheen. The first image is boiled and fried dasheen, and then Dasheen bush bhagi and the last image is Dasheen fritters.


Alternative Cooking Methods for Your Dasheen Shepherd’s Pie

  • Slow Cooker Filling: You can prepare the meat filling in a slow cooker. Brown the meat and sauté the vegetables as instructed, then transfer them to the slow cooker. Add the remaining filling ingredients and cook on low for 4-6 hours or on high for 2-3 hours. This method deepens the flavors beautifully. Then, transfer the filling to the baking dish, top with the prepared dasheen mash, and bake in the oven to brown the top.
  • Air Fryer: While you can’t cook the whole pie in an air fryer, you can get a crispier topping by finishing it there. After assembling the pie, place it in an air fryer safe dish and air fry at 375°F (190°C) for 10-15 minutes, or until the top is golden and the filling is bubbly. This is a great option for smaller, individual-sized portions.

Final Thoughts on Your Dasheen Comfort Food

This Dasheen Shepherd’s Pie is more than just a meal; it’s a testament to how small changes can lead to incredible results. By swapping the traditional potato for dasheen, you’ve not only created a dish that is nutritionally superior but also one that is richer, creamier, and undeniably more flavorful. It’s a comforting classic with an exciting modern twist that will undoubtedly become a staple in your kitchen. So, take the time to prepare this delicious meal tonight, savor every bite, and share this new favorite with your loved ones. The next time you’re craving comfort food, let the dasheen lead the way!


Frequently Asked Questions

Q: Why should I use dasheen instead of potatoes?

A: Dasheen offers a unique, slightly nutty flavor and a creamier, smoother texture than potatoes, which can sometimes be a bit dry or grainy when mashed. Additionally, it has a lower glycemic index and is a great source of dietary fiber and other nutrients, making it a healthier alternative.

Q: Can I make this Dasheen Shepherd’s Pie ahead of time?

A: Absolutely! You can prepare the dasheen mash and the meat filling separately and store them in the refrigerator for up to 2-3 days. When you’re ready to bake, simply assemble the pie and bake as instructed. You can also assemble the entire pie and cover it tightly with plastic wrap before refrigerating. Just add about 10-15 minutes to the baking time if you’re baking it from cold.


References


Recent Posts


Why Jackfruit Is the Next Big Superfood


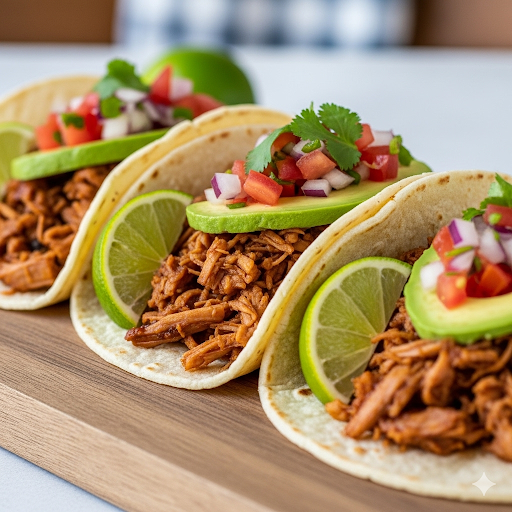
Jackfruit is making waves as a versatile, meat-like ingredient and a nutritional powerhouse. Its unique texture and mild flavor make it the perfect star for everything from savory tacos to sweet desserts. This comprehensive guide will show you why jackfruit deserves a spot in your kitchen.


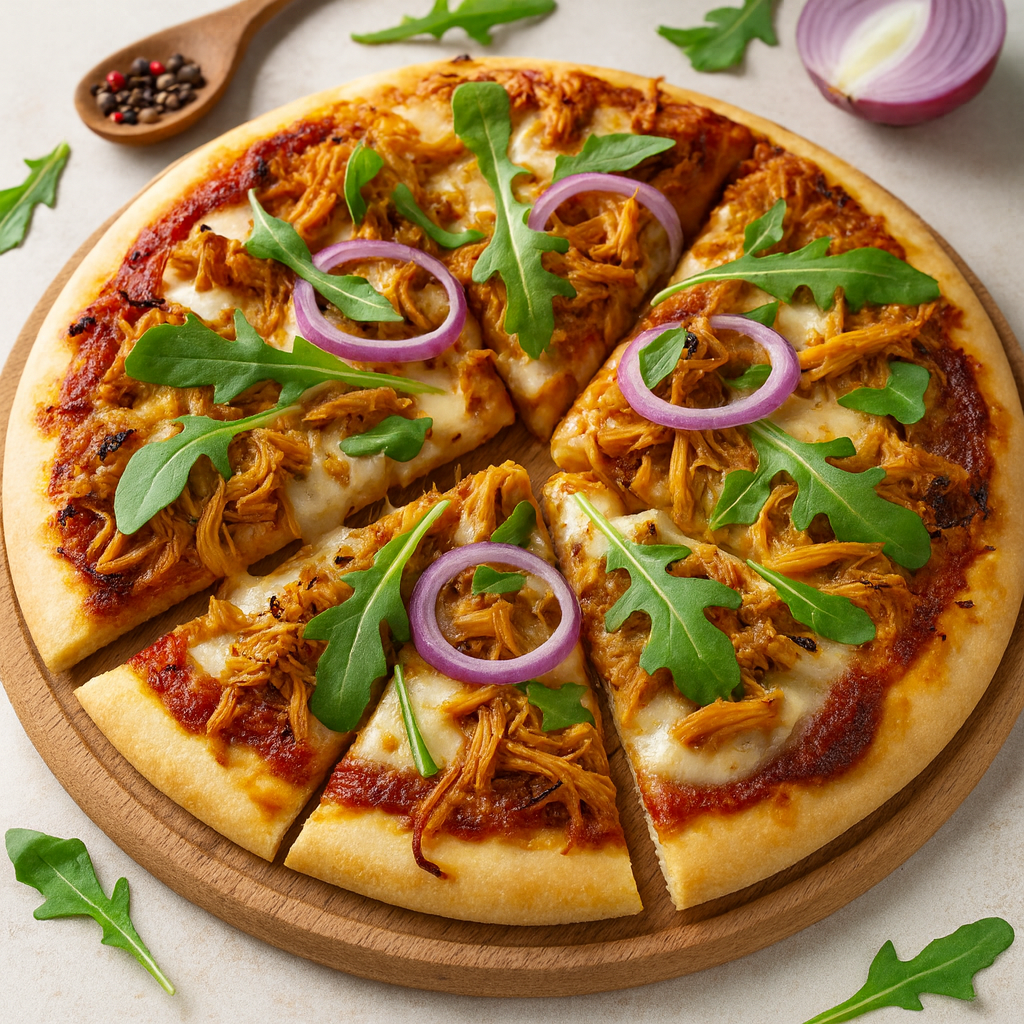
Homemade Jackfruit pizza topped with shredded jackfruit, red onion rings, melted cheese, and fresh arugula on a wooden board.
Jackfruit Pizza

Introduction: The Rise of a Tropical Giant

Have you ever wondered what the next big thing in the world of superfoods might be? While we often hear about kale, quinoa, and acai, a new contender is stealing the spotlight: jackfruit. This massive, spiky fruit from Southeast Asia is no longer just a regional delicacy; it’s rapidly gaining global recognition as a sustainable, incredibly versatile, and nutritionally rich food. Its fibrous, stringy texture, especially when young and unripe, makes it an uncanny substitute for pulled pork or chicken, earning it a prized spot in the kitchens of plant-based enthusiasts and food innovators alike.

The culinary journey of this fruit is a fascinating one. For centuries, it has been a staple in Asian cuisine, utilized in both its unripe and ripe forms. When ripe, its sweet, tropical flavor makes it a perfect addition to smoothies, desserts, and fruit salads. However, it’s the unripe, green version that has captured the attention of the Western world. Its neutral taste acts as a blank canvas, readily absorbing the flavors of any sauce or spice blend it’s cooked with. This adaptability is key to its success as a meat alternative, allowing it to mimic the texture and savory profile of slow-cooked meats in a way that few other plant-based ingredients can.

The Jackfruit Advantage: A Nutritional Powerhouse

Beyond its culinary appeal, jackfruit is a nutritional goldmine. It’s packed with vitamins, minerals, and antioxidants that contribute to overall health and well-being. It’s particularly rich in Vitamin C, which is essential for immune function, and potassium, which plays a crucial role in heart health. Furthermore, its high fiber content promotes digestive health and helps you feel full, making it an excellent choice for those looking to manage their weight. As more people seek out nutrient-dense, plant-based options, the nutritional profile of jackfruit solidifies its position as a true superfood.

The sustainability factor of this fruit also adds to its allure. The trees are prolific producers, yielding a large amount of fruit with minimal resources. They are highly resilient and grow in a variety of climates, making them a more environmentally friendly crop compared to many animal-based proteins. This eco-friendly aspect resonates with a growing number of consumers who are consciously making food choices that have a positive impact on the planet. By choosing jackfruit, you’re not just nourishing your body; you’re also supporting a more sustainable food system.

This article will not only delve into the incredible benefits of this fruit but also provide you with a delicious recipe for a plant-based Pizza, a dish that truly showcases its versatility. This recipe is designed to be accessible for home cooks of all skill levels, ensuring that you can easily transform this humble fruit into a culinary masterpiece. Get ready to explore the world of jackfruit and discover why it’s set to become a staple in your kitchen.


The gallery shows green jackfruit when it comes out of the tin. The next is pizza sauce and the last image shows pizza dough.


Jackfruit BBQ Pizza Recipe

This recipe is a fantastic way to introduce yourself to cooking with jackfruit. It’s savory, satisfying, and a perfect example of how this fruit can be used to create a truly delicious, plant-based meal.

Time to Prepare

30 minutes

Time to Cook/Blend

20-25 minutes

Servings

4-6 people


The gallery shows a frying pan, chopping board and a mixing bowl which are just some of the equipment used for this recipe.


Equipment

  • Large mixing bowl
  • Large frying pan or skillet
  • Baking sheet or pizza stone
  • Measuring cups and spoons
  • Chef’s knife
  • Cutting board

Nutritional Information (Approximate per serving)

  • Calories: 450 kcal
  • Protein: 15g
  • Fiber: 8g
  • Fat: 18g
  • Carbohydrates: 55g
  • Vitamin C: 30% DV
  • Potassium: 15% DV

Ingredients

  • For the BBQ Jackfruit:
    • 1 (20-ounce) can young green jackfruit in brine or water, drained and rinsed
    • 1 tablespoon olive oil
    • 1 small red onion, finely chopped
    • 2 cloves garlic, minced
    • 1 cup your favorite BBQ sauce
    • 1/2 teaspoon smoked paprika
    • 1/4 teaspoon black pepper
    • 1/4 cup vegetable broth
  • For the Pizza:
    • 1 pre-made pizza dough (store-bought or homemade)
    • 1/2 cup pizza sauce
    • 1-1 1/2 cups plant-based mozzarella cheese, shredded
    • 1/2 red onion, thinly sliced into rings
    • A handful of fresh arugula (for garnish)
    • 1-2 teaspoons dried oregano
    • Pinch of red pepper flakes (optional)

youtube placeholder image

Instructions

Prepare the Jackfruit

First, drain the canned jackfruit and rinse it thoroughly to remove the briny flavor. This step is crucial for a clean, neutral taste. Use your hands to squeeze out as much excess water as possible. Then, place this fruit in a large bowl and use your fingers or two forks to shred it. The core pieces can be a bit tough; you can either leave them in for a chewier texture or finely chop them. This is what creates that “pulled meat” consistency.

Sauté the Aromatics

Heat the olive oil in a large skillet or frying pan over medium heat. Add the finely chopped red onion and sauté for 3-4 minutes, or until it becomes soft and translucent. Next, add the minced garlic and cook for another minute until fragrant, being careful not to burn it.

Cook the BBQ Jackfruit

Add the shredded jackfruit to the skillet with the sautéed onions and garlic. Stir well to combine. Pour in the vegetable broth, smoked paprika, and black pepper. Stir everything together and let it simmer for about 5 minutes, allowing the jackfruit to soften and absorb the flavors.

Add the BBQ Sauce

Once the jackfruit is soft, pour in your favorite BBQ sauce. Stir to coat every piece of jackfruit evenly. Reduce the heat to low and let it simmer for another 5-10 minutes. This step is essential for developing a rich, deep flavor and a tender, melt-in-your-mouth texture. Taste and adjust seasoning as needed.

Preheat Oven and Prepare Pizza Dough

While the jackfruit is simmering, preheat your oven to the temperature specified on your pizza dough package (usually around 400°F or 200°C). If you’re using a pizza stone, place it in the oven as it preheats. Stretch or roll out your pizza dough on a floured surface or a baking sheet.

Assemble the Pizza

Spread the pizza sauce evenly over the dough, leaving a small border for the crust. Next, sprinkle a generous layer of plant-based mozzarella cheese. Evenly distribute the prepared BBQ jackfruit over the cheese. Finally, scatter the thinly sliced red onion rings on top.

Bake the Pizza

Carefully transfer the assembled pizza to the hot oven. Bake for 15-25 minutes, or until the crust is golden brown and the cheese is melted and bubbly. The baking time can vary depending on your oven and the type of dough you’re using, so keep a close eye on it.

Garnish and Serve

Once the pizza is cooked, remove it from the oven. Let it cool for a minute before slicing. Top with a handful of fresh arugula for a peppery crunch and sprinkle with dried oregano and red pepper flakes if you like. Serve immediately and enjoy!


Alternative Cooking Methods

While a conventional oven is the standard, you can also make this recipe using other methods for a slightly different result.

  • On the Grill: For a smoky flavor and a crispier crust, cook the pizza on a preheated grill. Place the assembled pizza on a pizza stone or a perforated grilling pan. Cook over indirect medium heat for 10-15 minutes, or until the crust is golden and the cheese is melted.
  • In an Air Fryer: If you have a small air fryer, you can make mini pizzas. Assemble the pizzas on small, air-fryer-safe pans. Cook at 350°F (175°C) for 8-10 minutes, checking halfway through to ensure even cooking. This method is great for quick, single servings.

The Superfood Benefits of Jackfruit

Jackfruit is not just a tasty meat substitute; it’s a nutritional powerhouse. Incorporating it into your diet provides a wide array of health benefits that make it a true superfood.

Digestive Health and Weight Management

Jackfruit is incredibly high in dietary fiber. A single serving can provide a significant portion of your daily fiber needs. Fiber is essential for a healthy digestive system, helping to prevent constipation and promote regularity. This high fiber content also helps you feel full for longer, which can be beneficial for weight management by reducing overall calorie intake.

Immune Boosting Properties

This tropical fruit is an excellent source of Vitamin C, a powerful antioxidant. Vitamin C is crucial for supporting your immune system, helping your body fight off infections and diseases. A strong immune system is your first line of defense against illness, and a diet rich in Vitamin C is a great way to maintain it.

Heart Health

The potassium content in jackfruit is notable. Potassium is an essential mineral that helps regulate blood pressure by counteracting the effects of sodium. A diet rich in potassium can reduce the risk of hypertension and other cardiovascular diseases. The high fiber content also helps lower “bad” LDL cholesterol levels, further contributing to heart health.

Antioxidant Power

Jackfruit contains various phytonutrients like flavonoids, saponins, and tannins. These compounds have powerful antioxidant properties that help fight against free radicals in the body. Free radicals are unstable molecules that can cause cellular damage, leading to chronic diseases and premature aging. By neutralizing these free radicals, the antioxidants in jackfruit help protect your cells and promote long-term health.


This gallery shows the nutritional benefits from jackfruit. These range from digestive health, hearth health and antioxidant powers.


Variations: Get Creative with Jackfruit

The beauty of jackfruit lies in its versatility. You can easily adapt the basic recipe to suit your tastes or dietary needs.

VariationDescription
Spicy JackfruitAdd a teaspoon of sriracha or a pinch of cayenne pepper to the BBQ sauce for a fiery kick.
Pulled “Pork” SandwichesInstead of pizza, use the prepared BBQ jackfruit to make a delicious sandwich. Serve it on a toasted bun with coleslaw.
Tacos or NachosUse the savory variety as a filling for tacos or as a topping for nachos. It pairs perfectly with avocado, salsa, and lime.
Jackfruit “Crab” CakesUse a similar preparation method but with different seasonings (like Old Bay) and a binder to form patties. Cook until golden brown.
Sweet JackfruitUse this ripe for sweet applications. It’s perfect for smoothies, ice cream, or a tropical fruit salad.

The gallery shows the different options for using jackfruit. The first is jackfruit sandwich, the next is the filling for nachos and the last image is pulled jackfruit “Crab” Cakes.


Final Thoughts: Embrace the Versatility of Jackfruit

Jackfruit is more than just a trendy ingredient; it’s a truly remarkable food that offers a unique combination of culinary versatility, nutritional benefits, and environmental sustainability. From savory meat alternatives to sweet tropical treats, its potential in the kitchen is limitless. This humble fruit is a testament to the incredible bounty of nature and provides a delicious, healthy, and ethical choice for anyone looking to diversify their diet. We encourage you to use the canned variety, try this pizza recipe, and explore the endless possibilities. Your taste buds and your body will thank you!


Frequently Asked Questions (FAQs)

What does canned jackfruit taste like?

Canned young green jackfruit, which is what is used for savory dishes, has a very mild, neutral flavor. This is its main advantage, as it allows it to absorb the flavors of whatever sauce or spices you cook it with. Its taste is not fruity at all, which often surprises people who are new to cooking with it.

Can I use fresh jackfruit for this recipe?

Yes, but it’s much more work. Preparing fresh and unripe can be time-consuming due to its sticky, latex-like sap and tough exterior. Canned young jackfruit is the most convenient option for savory recipes and is widely available in most Asian markets or health food stores. Ripe jackfruit is used for sweet dishes.

Where can I buy jackfruit?

Canned young green jackfruit in water or brine is typically found in the international or Asian foods aisle of most major grocery stores. Health food stores like Whole Foods also carry it. You may also find it in specialty stores or online retailers.


References


Recent Posts
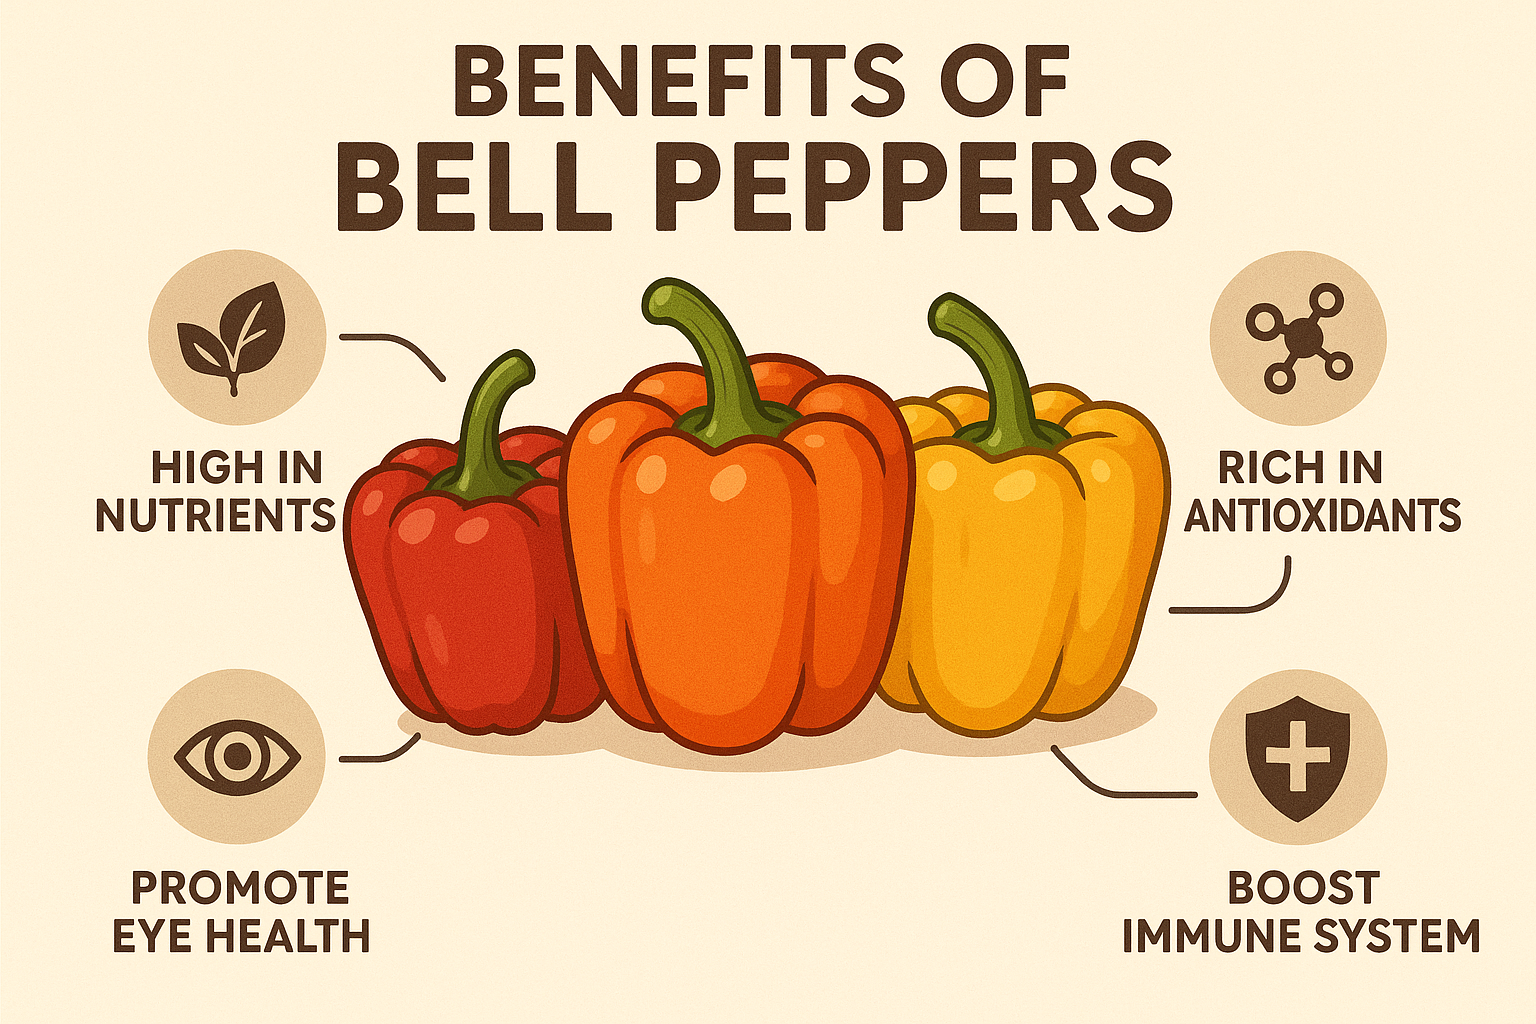


Quick Baked Lemon Salmon You’ll Love


This recipe for Baked Lemon Salmon is more than just a meal; it’s a game-changer for your weekly menu. We believe that healthy eating should be both delicious and incredibly easy to prepare. This simple method ensures you can have a gourmet-tasting dish on your table with minimal effort, making it the perfect go-to.


The image shows Baked Lemon Salmon on a plate.
Baked Lemon Salmon

A Flaky, Flavorful Masterpiece for Any Night of the Week

Are you tired of feeling like healthy eating means hours of prep and complicated recipes? We’ve all been there, standing in the kitchen after a long day, wanting a nutritious meal but lacking the energy to make it happen. The good news is, a truly delicious and nourishing dinner doesn’t have to be a major project. This recipe for Baked Lemon Salmon is the perfect solution, proving that wholesome, impressive food can be ready in a flash.

Imagine serving a beautiful, golden-brown salmon fillet, perfectly flaky and infused with the bright, zesty flavors of lemon and fresh herbs. This isn’t just a fantasy; it’s a delicious reality that can be yours in less than 20 minutes. The simplicity of this dish is its greatest strength, allowing the natural, rich flavors of the salmon to shine without getting lost in a list of complex steps. It’s the kind of meal that makes you feel like a pro chef, even if you’re a complete beginner.

What Makes This Quick Baked Lemon Salmon a Game-Changer

What makes this particular Baked Lemon Salmon recipe so special is how little effort it requires for such a big payoff. By simply layering the salmon with a few key ingredients and baking it, you create a meal that’s both elegant and incredibly simple. It’s a foolproof method that guarantees a perfectly cooked fish every time, freeing you up to enjoy the process and the final result. No more guesswork or worrying about overcooking!

This recipe is more than just a set of instructions; it’s an invitation to simplify your life and eat well. We’ll guide you through every step, from picking the best salmon to mastering the simple technique that ensures your fish is moist and flavorful. You’ll discover how a few fresh ingredients can completely transform a meal, making it an experience to savor. Get ready to add a new staple to your repertoire—a dish you’ll be excited to make again and again.

So, let’s dive in and unlock the secrets to this amazing dish. Whether you’re cooking for one or for a whole family, this guide will empower you to create a healthy, restaurant-quality meal right in your own home. Get ready to bake, relax, and enjoy your way to a healthier, happier dinner routine!


The gallery shows sliced lemons in a bowl, baked salmon and fresh sprigs of dill.


Your Go-To Weeknight Salmon

Time to Prepare: 5 minutes

Time to Cook: 15 minutes

Servings: 4


Nutritional Information (per serving, estimated)

  • Calories: 350-400 kcal
  • Protein: 30-35g
  • Omega-3 Fatty Acids: 1.5-2g
  • Fat: 20-25g (of which Saturated: 3-4g)
  • Sodium: 250-300mg (can be reduced with low-sodium seasonings)
  • Vitamin D: 80% Daily Value
  • Vitamin B12: 200% Daily Value

Essential Equipment for Your Baked Lemon Salmon

Having the right tools on hand makes preparing this Baked Lemon Salmon recipe a breeze. Here’s a short list of what you’ll need to get started:

  • Baking Dish: A large baking dish or sheet pan is perfect for this recipe. A sheet pan with a rimmed edge is ideal to contain the juices and prevent spills.
  • Small Bowl: For whisking together your seasoning mixture.
  • Whisk or Fork: To combine the seasonings smoothly.
  • Cutting Board: A clean, sturdy surface for slicing your lemons and preparing the salmon.
  • Sharp Knife: Essential for easily and cleanly slicing the lemon.
  • Measuring Spoons and Cups: For accurate ingredient measurement, ensuring the perfect balance of flavors in your seasoning.

The gallery shows some of the equipment used in this recipe. The first image is a chopping board, then a baking dish and then a mixing bowl.


Ingredients for Your Perfect Baked Lemon Salmon

Gathering all your ingredients before you start cooking, a practice known as “mise en place,” will make this Baked Lemon Salmon recipe even faster and more enjoyable. The hero image is a great guide for what to include.

  • 4 (6-ounce) salmon fillets, skin on or off
  • 1 large lemon, thinly sliced
  • 1 tbsp olive oil
  • 1 tsp dried dill weed (or 2 tsp fresh dill, chopped)
  • 1/2 tsp garlic powder
  • 1/4 tsp salt
  • 1/4 tsp black pepper
  • Optional: Fresh dill sprigs for garnish and a few pink peppercorns

Step-by-Step Instructions: Mastering Your Baked Lemon Salmon

Follow these clear and detailed steps to create a delicious and healthy Baked Lemon Salmon that will impress even yourself! This simple technique guarantees a moist, flavorful fillet every time.

Preheat Your Oven

Start by preheating your oven to 400°F (200°C). This ensures that your oven is at the correct temperature when you put the salmon in, which is key for a quick and even cook. While the oven heats up, you can get all your other ingredients ready.

Prepare the Salmon and Baking Dish

Pat the salmon fillets dry with a paper towel. This step is important because it helps the skin (if you keep it on) get crispier and helps the seasoning stick better. Place the salmon fillets skin-side down in a baking dish or on a rimmed sheet pan. Leave a little space between each fillet so the heat can circulate.

Create the Flavorful Topping

In a small bowl, combine the olive oil, dried dill, garlic powder, salt, and black pepper. Whisk these ingredients together until they are well combined. The olive oil will help to distribute the seasonings evenly and also keep the fish moist while it bakes.

Season the Salmon

Use a brush or the back of a spoon to spread the seasoning mixture evenly over the top of each salmon fillet. Make sure to get a nice, thin layer over the entire surface. This is where all the wonderful flavor comes from!

Add the Lemon Slices

Take your thinly sliced lemon rounds and arrange them beautifully on top of and around the salmon fillets. You can place a few slices directly on top of the fish and scatter the rest around the sides in the baking dish. The lemon will roast and release its bright, zesty flavor, infusing the salmon as it cooks.

Bake to Perfection

Place the baking dish in the preheated oven. Bake for 12 to 15 minutes. The exact time will depend on the thickness of your salmon fillets. A good rule of thumb is to check the salmon after 12 minutes. The salmon is done when it is flaky when you gently press on it with a fork. It should be opaque all the way through, but still moist. Be careful not to overcook, as salmon can become dry very quickly.

Serve and Garnish

Once the salmon is cooked, carefully remove the baking dish from the oven. The lemon slices will be soft and fragrant, and the pan will have a delicious, golden-colored sauce from the lemon juice and olive oil. You can spoon this sauce over the salmon for extra flavor. For a beautiful finish, garnish with fresh dill sprigs and a few pink peppercorns, as seen in the hero image. Serve immediately with your favorite side dishes.


youtube placeholder image

Alternative Cooking Methods

While baking is a fantastic way to cook this Baked Lemon Salmon, here are a couple of other methods you can use to achieve a similar delicious result.

1. Pan-Seared Lemon Herb Salmon:

  • Prep: Follow all the same steps for preparing the salmon and the seasoning mixture.
  • Cook: Heat a large, oven-safe skillet over medium-high heat. Add a little extra olive oil to the pan. Place the salmon fillets, skin-side down, in the hot skillet. Cook for 4-5 minutes until the skin is crispy and golden. Do not move the fish during this time. Flip the fillets and immediately transfer the skillet to the preheated 400°F (200°C) oven. Add the lemon slices to the skillet.
  • Finish: Bake for 5-8 minutes, or until the salmon is cooked through and flaky. The final bake time is shorter because the pan-searing gets the cooking process started quickly.
  • Pros: Creates an incredibly crispy skin and a juicy interior.
  • Cons: Requires more hands-on time and can get smoky.

2. Air Fryer Lemon Herb Salmon:

  • Prep: Prepare the salmon fillets and seasoning mixture as directed.
  • Cook: Place the salmon fillets in the air fryer basket in a single layer, making sure they are not touching. Air fry at 400°F (200°C) for 8-12 minutes, or until cooked through and flaky. There is no need to flip the fish. Add the lemon slices to the air fryer with the salmon for a flavorful result.
  • Pros: Very quick and produces a wonderfully moist result with little to no oil.
  • Cons: Best for a small number of fillets and may require cooking in batches.

The Benefits of This Baked Lemon Salmon

This isn’t just a simple, delicious meal; it’s a powerhouse of nutrition designed to support your health goals. Incorporating this Baked Lemon Salmon into your rotation offers numerous advantages:

  • Rich in Omega-3s: Salmon is one of the best sources of heart-healthy Omega-3 fatty acids, which are essential for brain function, fighting inflammation, and reducing the risk of chronic diseases.
  • High in Protein: Salmon is a complete protein, meaning it contains all nine essential amino acids. This is crucial for building and repairing muscle tissue, supporting a healthy metabolism, and keeping you feeling full and satisfied.
  • Packed with Vitamins and Minerals: This dish is loaded with a wide array of vitamins and minerals. Salmon is an excellent source of Vitamin B12 and D, while the lemon provides a significant dose of Vitamin C, which is vital for immune support and skin health.
  • Supports Brain and Heart Health: The combination of Omega-3s in the salmon and antioxidants in the lemon and dill makes this meal a fantastic choice for supporting both your cardiovascular and cognitive health.
  • Low-Calorie and Nutrient-Dense: This recipe is naturally low in calories but incredibly high in nutrients, making it an excellent choice for anyone looking to manage their weight or improve their overall diet without sacrificing flavor.
  • Easy to Digest: Salmon is a lean protein that is generally easy for the body to digest, making it a great option for a satisfying dinner that won’t leave you feeling weighed down.

The gallery shows the benefits of Salmon. The first image shows the protein and minerals. The next shows the brain and heart health. And the final image, shows the benefits of Omega-3, in salmon.


Variations: Customize Your Baked Lemon Salmon

One of the best things about this Baked Lemon Salmon is its incredible adaptability. Don’t be afraid to get creative and tailor it to your taste or dietary needs.

Variation CategoryIdeas for Customization
Herb SwapsRosemary & Thyme: For an earthy, aromatic flavor, swap the dill for fresh rosemary and thyme sprigs. Parsley & Chives: For a fresher, more subtle flavor, use a blend of fresh parsley and chopped chives.
Cilantro & Lime: For a zesty, South American twist, use chopped cilantro and lime slices instead of dill and lemon.
Flavor BoostsSpicy Kick: Add a pinch of red pepper flakes or a dash of cayenne pepper to the seasoning mixture.
Sweet Glaze: For a slightly sweet and tangy finish, brush the salmon with a tablespoon of honey or maple syrup mixed with the seasonings before baking.
Umami Notes: Add a teaspoon of low-sodium soy sauce or a dash of mushroom powder to the olive oil mixture.
Garlic Lovers: Use 2-3 cloves of fresh minced garlic instead of garlic powder for a more potent flavor.
Vegetable PairingsAsparagus: Lay fresh asparagus spears in the baking dish with the salmon and drizzle with the same seasoning.
Broccoli: Toss broccoli florets with a little olive oil and salt and roast them alongside the salmon.
Cherry Tomatoes: Halve cherry tomatoes and scatter them around the salmon in the baking dish; they will burst and create a sweet sauce.
Serving SuggestionsGrain Bowl: Serve the salmon over a bed of quinoa, farro, or brown rice.
Salad Topper: Flake the cooked salmon and add it to a fresh spinach or arugula salad with a light vinaigrette.
Low-Carb: Pair the salmon with a side of steamed green beans or roasted zucchini noodles.

The gallery shows salmon with Asparagus, the next is salmon with grains and the final palte shows salmon with broccoli.


Final Thoughts on Your Quick Baked Lemon Salmon

There you have it—a comprehensive guide to creating a delicious and healthy Baked Lemon Salmon that is not only incredibly easy to make but also packed with flavor and nutrition. This recipe is designed to be your weeknight hero, rescuing you from the dilemma of “what’s for dinner?” with a satisfying and healthy answer. By keeping the instructions clear and offering a variety of customization options, we hope to empower you to make this dish your own, adapting it to your preferences and whatever fresh ingredients you have on hand.

Don’t let the simplicity fool you; this salmon delivers on taste, texture, and health benefits, making it an ideal choice for anyone looking to eat well without the fuss. We encourage you to give it a try this week and experience firsthand how a truly quick and delicious dinner can transform your routine. Share your creations, experiment with new ingredients, and enjoy the journey of effortless, healthy home cooking. Get ready to put this recipe on repeat!


Frequently Asked Questions (FAQs)

Q1: Can I use frozen salmon for this recipe?

A1: Yes, you can! Frozen salmon works perfectly for this recipe. Just be sure to thaw it completely before you begin the preparation steps. The best way to thaw it is to place the frozen fillet in the refrigerator overnight. If you’re in a hurry, you can thaw it in a sealed bag under cold running water for about 30 minutes. Be sure to pat it very dry before seasoning to ensure the best texture and flavor.

Q2: How do I know if my salmon is cooked properly?

A2: The best way to tell if your salmon is done is by checking its flakiness. Gently press on the top of the thickest part of the fillet with a fork. If the flesh separates easily into flakes, it’s ready. The color should also be opaque and pale pink all the way through, not translucent. If you have a meat thermometer, the internal temperature should be at least 145°F (63°C) at its thickest point.


References

  1. Harvard T.H. Chan – Fish: Friend or Foe?
  2. American Heart Association – Fish and Omega-3 Fatty Acids
  3. U.S. Department of Agriculture –Salmon

Recent Posts
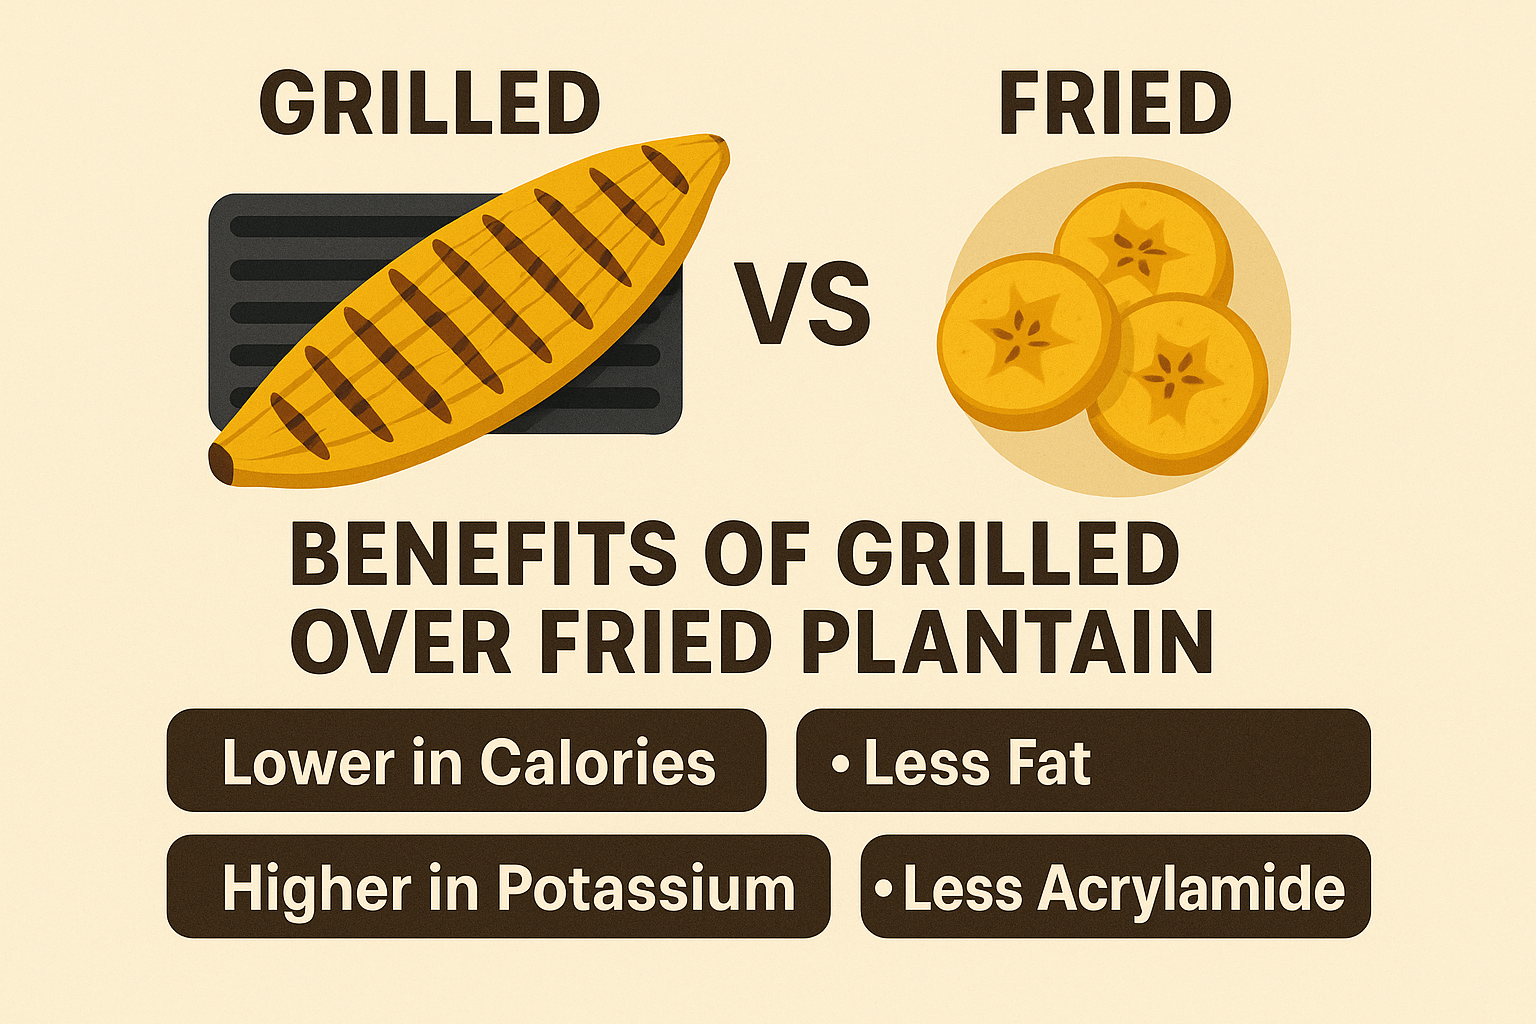


Spaghetti & Turkey Meatballs Made Easy


This recipe for Spaghetti & Turkey Meatballs is a perfect example of comfort food that is both delicious and healthy. We believe that a classic dish should be simple to make without sacrificing flavor. This recipe will show you how to create a satisfying meal that everyone at the table will love.


The image shows Spaghetti & Turkey Meatballs on a plate.
Spaghetti & Turkey Meatballs

A Delicious and Simple Twist on a Classic Comfort Meal

There are few dishes that evoke the same feeling of warmth and home as a big bowl of spaghetti and meatballs. It’s a timeless classic, a meal that brings families together and fills the kitchen with an irresistible aroma. But for many, the idea of making homemade meatballs from scratch feels like a daunting task, reserved only for special occasions or Sunday dinners. We’re here to change that. We want to show you how easy it is to bring this beloved meal to your table on any night of the week.

This isn’t just any meatball recipe; it’s a modern, health-conscious take on a classic. By using lean ground turkey instead of traditional beef, we’re creating a lighter, healthier version that’s just as rich in flavor and wonderfully tender. This simple swap doesn’t just cut down on saturated fat; it also gives the meatballs a delicate texture that pairs perfectly with a vibrant, simple tomato sauce. It’s the kind of dish that makes you feel good about what you’re eating.


Why Our Spaghetti & Turkey Meatballs Recipe is a Game-Changer

What makes this particular Spaghetti & Turkey Meatballs recipe so special is its focus on simplicity and flavor. We’ve streamlined the process to ensure that even the most inexperienced cook can achieve a delicious, restaurant-quality result. The secret lies in a few key ingredients and a straightforward method that builds flavor at every stage. We’ll show you how to form the perfect meatballs, create a rich sauce, and combine it all for a truly satisfying meal that is anything but complicated.

This recipe is more than just instructions; it’s an invitation to reclaim your kitchen and enjoy the process of cooking. We’ll walk you through every step, from selecting the right ingredients to mastering the technique that ensures your meatballs are perfectly cooked and your sauce is full of life. You’ll be amazed at how quickly this classic can come together, giving you more time to spend with the ones you love.

So, let’s dive in and unlock the secrets to this amazing dish. Whether you’re cooking for your family or a simple dinner for yourself, this guide will empower you to create a beautiful and nourishing meal right in your own home. Get ready to mix, roll, and simmer your way to a healthier, happier dinner routine!


The gallery shows a bowl of marinara sauce in a bowl, next is the raw ground Turkey and the final image shows finely chopped onions in a bowl.


Your Go-To Weeknight Meal

Time to Prepare: 15 minutes

Time to Cook: 35 minutes

Servings: 4-6


Nutritional Information (per serving, estimated)

  • Calories: 500-600 kcal
  • Protein: 30-35g
  • Carbohydrates: 60-70g
  • Fat: 15-20g (of which Saturated: 4-5g)
  • Fiber: 7-9g
  • Sodium: 400-600mg (can be reduced with low-sodium ingredients)

Essential Equipment for Your Spaghetti & Turkey Meatballs

Having the right tools on hand makes preparing this Spaghetti & Turkey Meatballs a breeze. Here’s what you’ll need to get started:

  • Large Pot or Dutch Oven: Essential for cooking your spaghetti and simmering the sauce. A heavy-bottomed pot is best for even heat distribution.
  • Large Skillet: For browning the turkey meatballs. A non-stick skillet can be helpful, but any large skillet will work.
  • Large Mixing Bowl: For combining all of the meatball ingredients.
  • Cutting Board and Sharp Knife: For preparing the garlic and other ingredients.
  • Measuring Cups and Spoons: For accurate ingredient measurement.
  • Tongs or Slotted Spoon: For easily transferring the meatballs from the skillet to the sauce.
  • Serving Plate: To plate your finished dish beautifully.

The gallery shows a large pot, chopping board and knife and a frying pan.


Ingredients for Your Perfect Spaghetti & Turkey Meatballs

Gathering all your ingredients before you start cooking, a practice known as “mise en place,” will make this Spaghetti & Turkey Meatballs recipe even faster and more enjoyable. The hero image is a great guide for what to include.

For the Turkey Meatballs:

  • 1 lb (450g) lean ground turkey
  • 1/2 cup whole-wheat breadcrumbs
  • 1/4 cup finely chopped onion
  • 2 cloves garlic, minced
  • 1/4 cup grated Parmesan cheese
  • 1 large egg
  • 1 tbsp fresh parsley, chopped
  • 1/2 tsp dried oregano
  • 1/2 tsp salt
  • 1/4 tsp black pepper
  • 1 tbsp olive oil (for browning)

For the Sauce & Pasta:

  • 1 (24-ounce) jar low-sodium marinara sauce
  • 1 lb (450g) whole-wheat spaghetti
  • Optional: Fresh basil leaves for garnish

youtube placeholder image

Step-by-Step Instructions: Mastering Your Spaghetti & Turkey Meatballs

Follow these clear and detailed steps to create a delicious and healthy Spaghetti & Turkey Meatballs that will impress even yourself! This simple technique guarantees a tender meatball and a flavorful sauce every time.

Prepare the Meatball Mixture

In a large mixing bowl, gently combine the ground turkey, whole-wheat breadcrumbs, chopped onion, minced garlic, grated Parmesan cheese, egg, chopped fresh parsley, dried oregano, salt, and black pepper. Use your hands to mix everything together, but be careful not to overmix, as this can make the meatballs tough. The mixture should be well combined but still light.

Form the Meatballs

Take a small amount of the mixture (about 1.5 to 2 tablespoons) and gently roll it into a round ball in the palm of your hand. Continue this process until all of the mixture has been formed into meatballs. You should get about 16 to 20 meatballs, depending on the size. Place them on a plate or baking sheet as you go.

Brown the Meatballs

Heat 1 tablespoon of olive oil in a large skillet or Dutch oven over medium-high heat. Carefully place the meatballs in the hot pan, making sure not to overcrowd it. If necessary, brown them in two batches. Cook for 5-7 minutes, turning them gently with tongs or a spatula until they are browned on all sides. They do not need to be cooked through at this stage. Once browned, remove the meatballs from the skillet and set them aside on a plate.

Simmer the Sauce

Reduce the heat to low. Pour the jar of marinara sauce into the same skillet or Dutch oven you used for the meatballs. Scrape up any browned bits from the bottom of the pan with a wooden spoon—this is called fond, and it adds incredible flavor to the sauce. Return the browned meatballs to the pan, nestling them into the sauce.

Let it All Simmer

Bring the sauce to a low simmer. Cover the pan and let the meatballs cook gently in the sauce for about 20 minutes. This allows the flavors to meld together and ensures the meatballs are cooked all the way through and become incredibly tender and juicy.

Cook the Spaghetti

While the meatballs are simmering, bring a large pot of salted water to a rolling boil. Add the whole-wheat spaghetti to the boiling water and cook according to the package directions, or until al dente. This usually takes about 9-11 minutes.

Drain and Combine

Once the spaghetti is cooked, carefully drain it in a colander. Do not rinse the pasta, as the starch on the outside helps the sauce cling to it. Return the drained spaghetti to its pot and toss it with a ladle or two of the simmering sauce. This coats the pasta and prevents it from sticking together.

Serve and Garnish

To serve, create a bed of spaghetti on each plate. Top with a few meatballs and a generous amount of sauce. For a beautiful finish, garnish with fresh basil leaves, a sprinkle of grated Parmesan cheese, and a drizzle of extra virgin olive oil, as seen in the hero image. Serve immediately and enjoy!

Alternative Cooking Methods

While browning the meatballs in a skillet is the classic method, you can also bake or air fry them for a less messy process.

1. Baked Meatballs:

  • Prep: Follow all the same steps for preparing the meatball mixture and forming the meatballs.
  • Cook: Arrange the meatballs in a single layer on a parchment paper-lined baking sheet. Bake in a preheated oven at 400°F (200°C) for 15-20 minutes, or until the meatballs are cooked through and browned. There’s no need to turn them.
  • Finish: Once baked, gently add them to the simmering marinara sauce and let them simmer for at least 15 minutes to absorb the flavors.
  • Pros: Less messy and hands-off cooking.
  • Cons: You lose some of the rich flavor from the browned bits in the skillet.

2. Air Fryer Meatballs:

  • Prep: Prepare the meatball mixture and form the meatballs.
  • Cook: Place the meatballs in a single layer in your air fryer basket, ensuring they are not touching. Air fry at 400°F (200°C) for 10-15 minutes, or until cooked through and golden brown.
  • Finish: Once air-fried, add them to the simmering marinara sauce and let them simmer for at least 15 minutes.
  • Pros: Fast and achieves a nice, crispy exterior without a lot of oil.
  • Cons: May require cooking in multiple batches.

The Benefits of This Spaghetti & Turkey Meatballs

This isn’t just a delicious comfort food; it’s a dish packed with nutritional benefits that support your health. Incorporating this Spaghetti & Turkey Meatballs into your rotation offers numerous advantages:

  • High in Lean Protein: Using ground turkey provides a significant amount of lean protein, which is essential for muscle growth, repair, and keeping you feeling full and satisfied.
  • Heart-Healthy: Lean ground turkey is lower in saturated fat compared to ground beef, which is beneficial for heart health. The olive oil used is also a source of healthy monounsaturated fats.
  • Nutrient-Rich: The simple marinara sauce is made from tomatoes, which are a great source of lycopene, a powerful antioxidant that supports heart health.
  • Fiber-Filled: By using whole-wheat spaghetti, you’re adding valuable dietary fiber to your meal. Fiber is crucial for digestive health, blood sugar control, and maintaining a healthy weight.
  • Satisfying and Wholesome: This meal is a complete package—it contains lean protein, complex carbohydrates, and plenty of vitamins and minerals. It’s a truly satisfying meal that fuels your body without leaving you feeling sluggish.

The egallery shows the benefits of ground turkey, marinara sauce and whole wheat spaghetti.


Variations: Customize Your Spaghetti & Turkey Meatballs

One of the best things about this Spaghetti & Turkey Meatballs is its incredible adaptability. Don’t be afraid to get creative and tailor it to your taste or what you have available.

Variation CategoryIdeas for Customization
Pasta SwapsGluten-Free Pasta: Easily swap whole-wheat spaghetti for your favorite gluten-free pasta (made from rice, corn, or quinoa).
Zucchini Noodles: For a low-carb option, serve the meatballs and sauce over spiralized zucchini noodles (zoodles).
Different Shapes: Use penne, rigatoni, or fettuccine for a fun change of texture.
Protein SwapsGround Chicken: Substitute lean ground chicken for the turkey. The result will be very similar.
Lentils or Mushrooms: For a vegetarian option, use a blend of cooked lentils and finely chopped mushrooms as a plant-based substitute for the meat.
Sauce EnhancementsVegetable Boosts: Sauté finely diced carrots, celery, or bell peppers with the onion for added nutrients and flavor.
Spicy Kick: Add a pinch of red pepper flakes to the sauce as it simmers for a little heat.
Creamy Texture: Stir a tablespoon of low-fat cream cheese or a splash of milk into the sauce at the end for a richer finish.
Herb AdditionsRosemary: For an earthy flavor, add a teaspoon of fresh or dried rosemary to the meatball mixture.
Oregano: For a bolder taste, increase the oregano in the meatballs or sauce.
Bay Leaf: Add one bay leaf to the sauce as it simmers and remove it before serving for a subtle herby flavor.

The gallery shows Lentil meatballs, the next is Turkey meatblls and the final bowl are Vegetable meatballs.


Final Thoughts on Your Easy Spaghetti & Turkey Meatballs

There you have it—a comprehensive guide to creating a delicious and healthy Spaghetti & Turkey Meatballs that is not only incredibly easy to make but also packed with flavor and nutrition. This recipe is designed to be your weeknight hero, rescuing you from the dilemma of “what’s for dinner?” with a satisfying and healthy answer. By keeping the instructions clear and offering a variety of customization options, we hope to empower you to make this dish your own, adapting it to your preferences and whatever fresh ingredients you have on hand.

Don’t let the simplicity fool you; this dish delivers on taste, texture, and health benefits, making it an ideal choice for anyone looking to eat well without the fuss. We encourage you to give it a try this week and experience firsthand how a truly simple dinner can transform your routine. Share your creations, experiment with new ingredients, and enjoy the journey of effortless, healthy home cooking. Get ready to put this recipe on repeat!


Frequently Asked Questions (FAQs)

Q1: Why are my meatballs falling apart?

A1: Your meatballs may be falling apart because the mixture is too wet or you haven’t used a binding agent. The breadcrumbs and egg in this recipe are crucial for holding the meatballs together. Make sure you don’t use more than the recommended amount of liquid ingredients and that you don’t overmix the mixture. Gently but firmly rolling them can also help them hold their shape better.

Q2: Can I freeze the meatballs for later?

A2: Yes, you can! This is a great meal prep option. You can either freeze the cooked meatballs on their own or freeze them in the sauce. To freeze cooked meatballs, let them cool completely, then place them in an airtight freezer-safe container or bag. They will last for up to three months. When you’re ready to use them, you can thaw them in the fridge overnight and then reheat them gently in a pot of sauce on the stove.


References

  1. Harvard T.H. Chan – Protein
  2. American Heart Association- Fiber Up, Slim Down
  3. Time Health- What is Lycopene?

Recent Posts



Easy Chickpea Antipasto Log And With Nuts Added


Get ready to elevate your appetizer game! This recipe for an Easy Chickpea Antipasto Log is not only a showstopper but also incredibly simple to make. It’s a fantastic, savory spread that’s perfect for parties, gatherings, or a delicious snack, proving that Chickpea Antipasto is a versatile and healthy choice.


The image shows a Chickpea Antipasto log, covered with nuts and olives.
Chickpea Antipasto

Unveiling a New Party Favorite

Entertaining should be a joy, not a chore. We’ve all been there, scrambling for an appetizer that’s both impressive and easy to prepare. Often, we default to the same tired cheese board or dip, but what if there was a way to make something truly unique and delicious without spending hours in the kitchen? This recipe is the answer, transforming humble chickpeas into a stunning and savory centerpiece that’s guaranteed to be a hit.

The magic of this chickpea antipasto log lies in its vibrant and contrasting textures. The outside is a delightful mix of crunchy nuts, briny olives, and sweet dates, while the inside is a smooth, savory, and firm chickpea base. It looks sophisticated and complex, but the process is surprisingly straightforward. This appetizer is proof that wholesome, plant-based food can be incredibly beautiful and satisfying. It’s perfect for a crowd, but you’ll also find yourself wanting to make it just for yourself.

Unpacking the Flavors of Chickpea Antipasto

Beyond its visual appeal, this log is a testament to the power of simple ingredients working in harmony. Each bite offers a different flavor profile—the earthiness of the chickpeas, the salty pop of olives, the sweetness of dates, and the satisfying crunch of nuts. It’s a culinary adventure on a single platter, a perfect blend of sweet, salty, and savory notes that dance on the palate.

What’s even better is that this recipe is incredibly adaptable. While we provide a specific list of ingredients that work together beautifully, you can easily swap in your favorite nuts, dried fruits, or savory additions. This flexibility makes it a great recipe to keep in your back pocket, ready to be customized for any occasion or to use up whatever ingredients you have on hand.

And if you’re a fan of plant-based recipes or simply looking for a healthy, guilt-free appetizer, this chickpea antipasto log is a perfect choice. It’s packed with protein and fiber from the chickpeas and healthy fats from the nuts, making it a nourishing option that will leave you feeling satisfied, not stuffed. It’s a delicious and wholesome alternative to traditional party dips and spreads.


The gallery shows a bowl of mashed chickpeas, a half covered log, and lemon juice in a jug.


An Easy & Elegant Chickpea Antipasto

Servings: 8-10 people

Time to Prepare: 20 minutes

Time to Cook/Blend: 5 minutes


Nutritional Information (per serving)

Calories: 250

Protein: 10g

Fat: 15g

Carbohydrates: 20g

Fiber: 6g


Essential Kitchen Equipment

  • Can opener
  • Large mixing bowl
  • A fork or potato masher (This is a key tool for creating the correct texture)
  • Small bowl (for the dressing)
  • Whisk or small fork (to mix the dressing)
  • Spatula or spoon (for mixing and shaping)
  • Plastic wrap (or parchment paper)
  • Cutting board
  • Chef’s knife (or a smaller knife for chopping)
  • Serving platter

The gallery shows a potato masher, parchment paper and a mixing bowl. This is just some of the equipment used in this recipe.


Ingredients for Your Chickpea Antipasto Log

Ingredients

For the Chickpea Base:

  • 2 cans (15 oz each) of chickpeas, rinsed and drained
  • 1/4 cup lemon juice
  • 1/4 cup tahini
  • 1 clove garlic, minced
  • 1/2 teaspoon ground cumin
  • 1/2 teaspoon salt
  • 1/4 cup olive oil
  • 1/2 cup chopped sun-dried tomatoes (not in oil)
  • 1/2 cup chopped fresh basil or parsley

For the Log and Coating:

  • 1/2 cup mixed nuts, chopped (cashews, pecans, walnuts, almonds)
  • 1/4 cup green olives, chopped
  • 1/4 cup black olives, chopped

For Garnish (as seen in the image):

  • Whole or halved nuts
  • Cherry tomatoes, halved
  • Fresh thyme or rosemary sprigs

Simple, Step-by-Step Instructions

Prepare the Chickpea Base (The most important step for the final look!)

First, open your two cans of chickpeas. Pour them into a colander in the sink to drain away all the liquid. Rinse them thoroughly under cold running water to wash off any canned taste. Let them drain for a few minutes.

Place about half of the drained chickpeas into a large mixing bowl.

Using a fork or a potato masher, gently mash the chickpeas. You are not trying to create a smooth puree like hummus. The goal is to break up some of the chickpeas so they release a little starch and become creamy, but leave plenty of whole ones intact. Keep mashing until you have a lumpy, coarse mixture with lots of whole chickpeas still visible.

Now, add the remaining whole, unmashed chickpeas to the bowl. This gives the log its beautiful, rustic texture.

Make the Flavorful Dressing

In a separate small bowl, combine the lemon juice, tahini, minced garlic, ground cumin, and salt.

Using a whisk or a small fork, stir these ingredients together vigorously. The tahini will thicken the dressing and act as a glue. Continue mixing until it becomes a smooth, creamy sauce.

Slowly drizzle in the olive oil as you continue to whisk. This will make the dressing even smoother and richer.

Combine and Add Ingredients

Pour the dressing you just made over the chickpeas in the large mixing bowl.

Next, add your chopped sun-dried tomatoes and chopped fresh basil or parsley to the bowl.

Using a spatula or a large spoon, gently fold all the ingredients together. Be careful not to mash the chickpeas any further. The goal is to evenly coat everything in the dressing and distribute the herbs and tomatoes throughout the mixture.


The gallery shows a bowl of mixed nuts and olive for the coating of the log, a half covered chickpea log and a bowl of mashed chickpeas.


Form the Log (The fun part!)

Tear off a large sheet of plastic wrap (about 18-24 inches long) and lay it flat on your counter or cutting board.

Spoon the entire chickpea mixture onto the center of the plastic wrap.

Using your hands or the spatula, begin shaping the mixture into a thick log. Aim for a log that is about 6 to 8 inches long. The plastic wrap is your guide—it helps you press the mixture together and keeps it from sticking to your hands.

Once you have a good log shape, pull the plastic wrap over the top and press down gently to compact it, squeezing out any air and making sure the log is firm.

Create the Nut and Olive Coating

On a clean, flat surface like a cutting board, spread out your chopped nuts and chopped olives. You can use your hands to mix them together slightly.

Carefully unwrap your chickpea log and gently place it in the center of the nut and olive mixture.

Gently roll the log, pressing the nuts and olives firmly onto the outside with your hands. You’ll need to use your fingers to press them on all sides to make sure the entire surface is covered. This is what gives the log its beautiful, varied texture.

Chill and Serve

Once your log is fully coated, re-wrap it tightly in a new piece of plastic wrap.

Place the wrapped log in the refrigerator for at least one hour. This step is essential! The chilling process allows the fats in the tahini and olive oil to solidify, making the log firm enough to hold its shape and be sliced without falling apart.

When you’re ready to serve, unwrap the log and carefully place it on your serving platter.

For a final touch, press the extra whole chickpeas, nuts, and cherry tomatoes onto the top of the log and platter, just like in the picture. This makes the dish look polished and professionally prepared. Enjoy!


youtube placeholder image
Cranberry cheese log

Alternative Method: The No-Fuss Dip

While the log shape is impressive, you can also serve this recipe as a simple, delicious dip. Instead of forming a log, simply transfer the finished chickpea mixture into a beautiful serving bowl. Drizzle with a little extra olive oil and a sprinkle of paprika before serving. This is a great option for a more casual gathering or when you’re short on time.


The Benefits of This Chickpea Antipasto Log

This appetizer isn’t just delicious; it’s also packed with nutritional benefits. Chickpeas, the star of the show, are an excellent source of plant-based protein and fiber, which helps promote a feeling of fullness and supports digestive health.

The healthy fats from the nuts and olive oil contribute to heart health and provide sustained energy.

The olives and sun-dried tomatoes are rich in antioxidants, while the fresh herbs add a boost of vitamins. This recipe is naturally gluten-free and can be made vegan by omitting the feta cheese. It’s a smart and savory choice for any occasion.


The gallery shows the nutritional benefits for chickpeas, sun – dried tomatoes and healthy fats.


A Look at Delicious Variations

This recipe is highly customizable! Here are some ideas to make it your own:

  • Spice it up: Add a pinch of red pepper flakes to the chickpea mixture for a little heat.
  • Different Veggies: Try adding finely chopped roasted red peppers or artichoke hearts to the inside mixture for a different flavor profile.
  • Nut Alternatives: Swap the mixed nuts for pistachios or pine nuts.
  • Cheese Please: For an extra tangy flavor, you could use a little goat cheese instead of feta.
  • Herb Twist: Use fresh oregano or cilantro instead of basil or parsley for a different aromatic kick.

Final Thoughts on Your Easy Chickpea Antipasto

This Easy Chickpea Antipasto Log is more than just a recipe; it’s a way to bring people together with a beautiful and nourishing dish. It proves that healthy food can be the centerpiece of a celebration and that homemade appetizers can be both simple to make and stunning to look at. Whether you’re hosting a party or just looking for a new go-to snack, this recipe is a fantastic choice that you’ll return to again and again.


Frequently Asked Questions (FAQs)

Q: Can I make this a day ahead?

A: Yes! In fact, making it a day ahead allows the flavors to meld together even more. Follow the instructions up to the point of chilling the log. Keep it tightly wrapped in the refrigerator and add the garnish just before serving.

Q: What do I serve with the chickpea antipasto log?

A: This log is incredibly versatile. It pairs perfectly with whole-grain crackers, toasted baguette slices, or fresh vegetable sticks like carrots, cucumbers, and bell peppers. You can also serve it as a side to a main dish or even crumble it on top of a salad.


References

  1. Whole Grains Council Whole grains
  2. American Heart AssociationHealthy Eating
  3. Vegetarian SocietyNutritional advice

Recent Posts
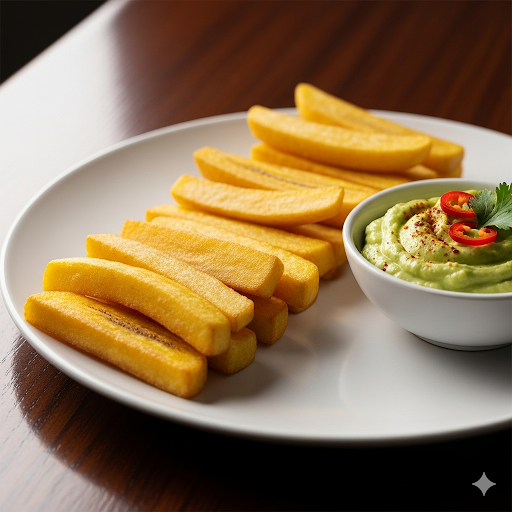


Verified by MonsterInsights