Cookie Consent by Free Privacy Policy Generator Update cookies preferences

20 Saving Money Tips To Try Right Now!

A happy woman smiling as she drops gold coins into a large, transparent glass piggy bank, representing effective Saving Money Tips and the start of a motivated financial journey.

It’s easy to feel overwhelmed by finances, especially when life keeps throwing unexpected expenses your way. We all want a little more breathing room in our bank accounts without giving up everything we love. This guide cuts through the noise to offer 20 practical and relatable Saving Money Tips and budgeting tips that real people can use to start building a stronger financial future right now.


1. Master Your Budget (The Foundation of Saving)

The cornerstone of any successful savings strategy is a clear, functional budget. You cannot effectively save money if you don’t know where your money is currently going. Many people skip this step because they find it intimidating, but modern tools make it easier than ever.

How to Do It: The 50/30/20 Rule

One of the most effective budgeting tips is the 50/30/20 rule, which simplifies spending categories:

  • 50% for Needs: Essential fixed expenses like rent/mortgage, groceries, utilities, and debt minimum payments.
  • 30% for Wants: Non-essential, discretionary spending like dining out, entertainment, hobbies, and shopping.
  • 20% for Savings and Debt Repayment: This portion goes directly into your savings strategy (emergency fund, retirement) and paying down high-interest debt faster.

Example: If your take-home pay is $4,000 per month, allocate $2,000 to needs, $1,200 to wants, and $800 directly to savings/debt.

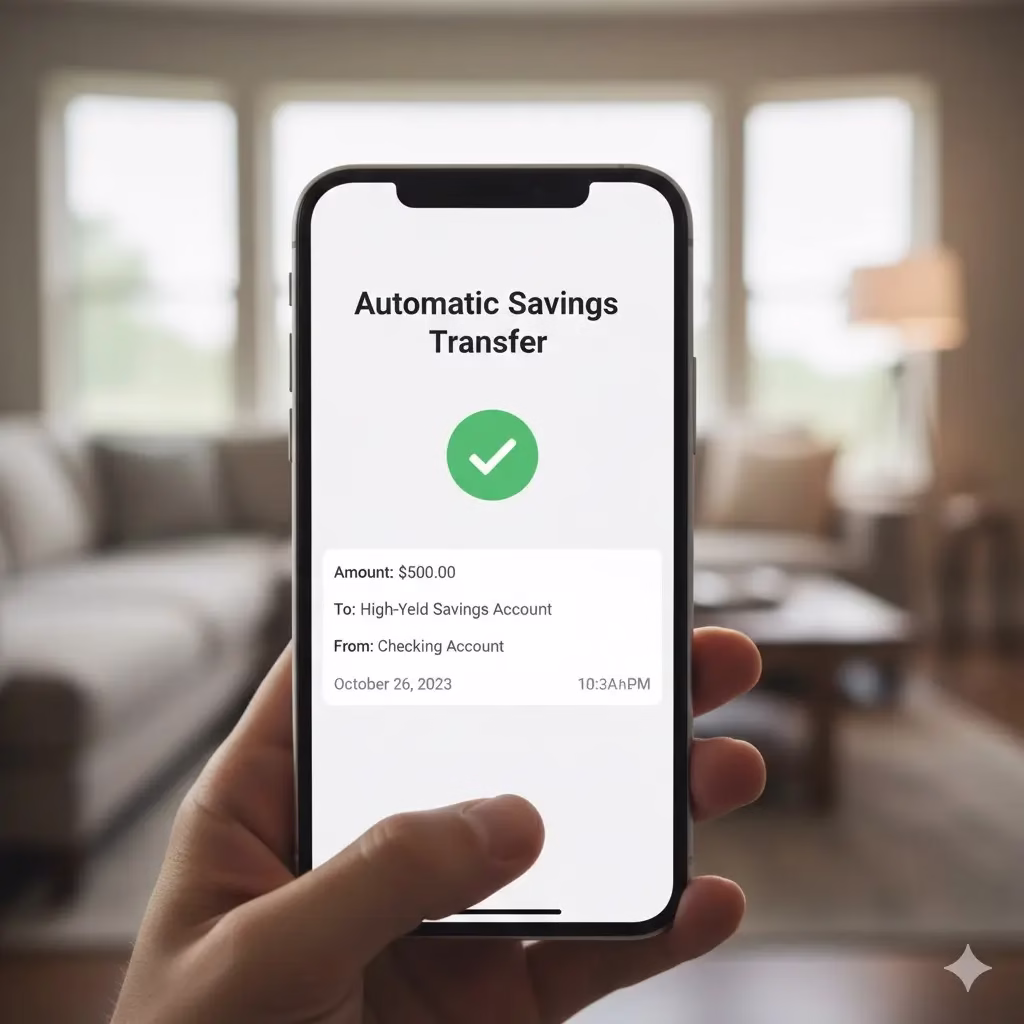
2. Automate Your Savings

This is one of the most powerful money saving techniques because it removes the temptation to spend. If you don’t see the money, you won’t miss it. Saving should be treated as a non-negotiable expense, just like rent.

How to Do It: Set it and Forget it

Contact your bank or use your payroll provider to automatically transfer a fixed percentage or amount of every paycheck into a separate, high-yield savings account the day you get paid. For instance, if you decide your savings strategy includes saving 15% of your income, ensure that 15% is moved before you have a chance to budget it for anything else. This is a game-changer for consistency.

3. Implement the Waiting Period Rule

Impulse buying is a major budget killer. This simple money saving technique gives your rational brain a chance to catch up with your emotional desire to purchase.

How to Do It: The 48-Hour Delay

For any non-essential purchase over a set amount (e.g., $50 or $100), commit to waiting 48 hours before buying it. Put the item in your online cart or write it down. If, after two days, you still feel it’s a necessary or valuable purchase, go ahead. More often than not, the urge will pass, and you’ll save the money.

4. Conduct a Subscription Audit

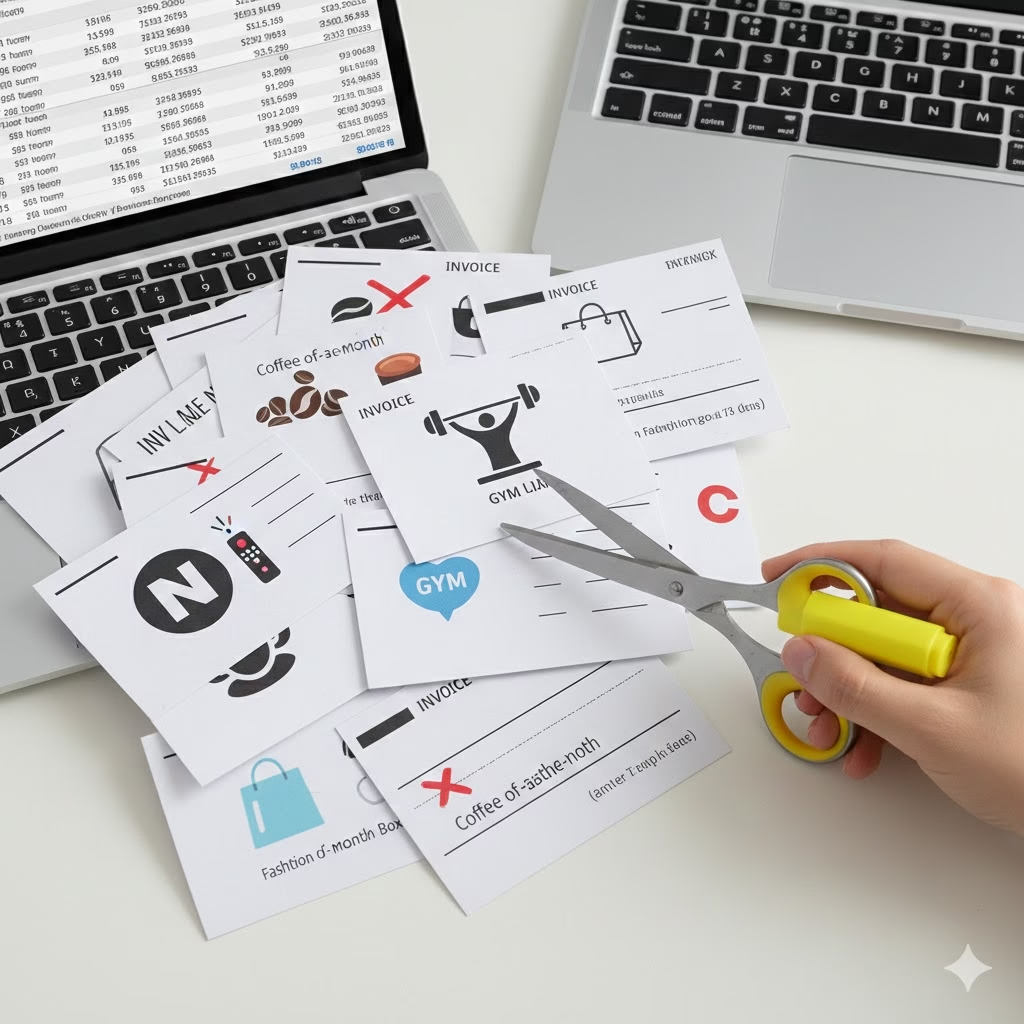
We often sign up for free trials and then forget to cancel, bleeding small amounts of money every month. This audit can reveal easy wins for your budgeting.

How to Do It: The Annual Review

Once every six months, go through your bank and credit card statements line-by-line. Highlight every recurring charge. Ask yourself two questions for each: Do I actively use this? Can I downgrade or share this with a family member? Cancel or pause anything you haven’t used in the last month or two.

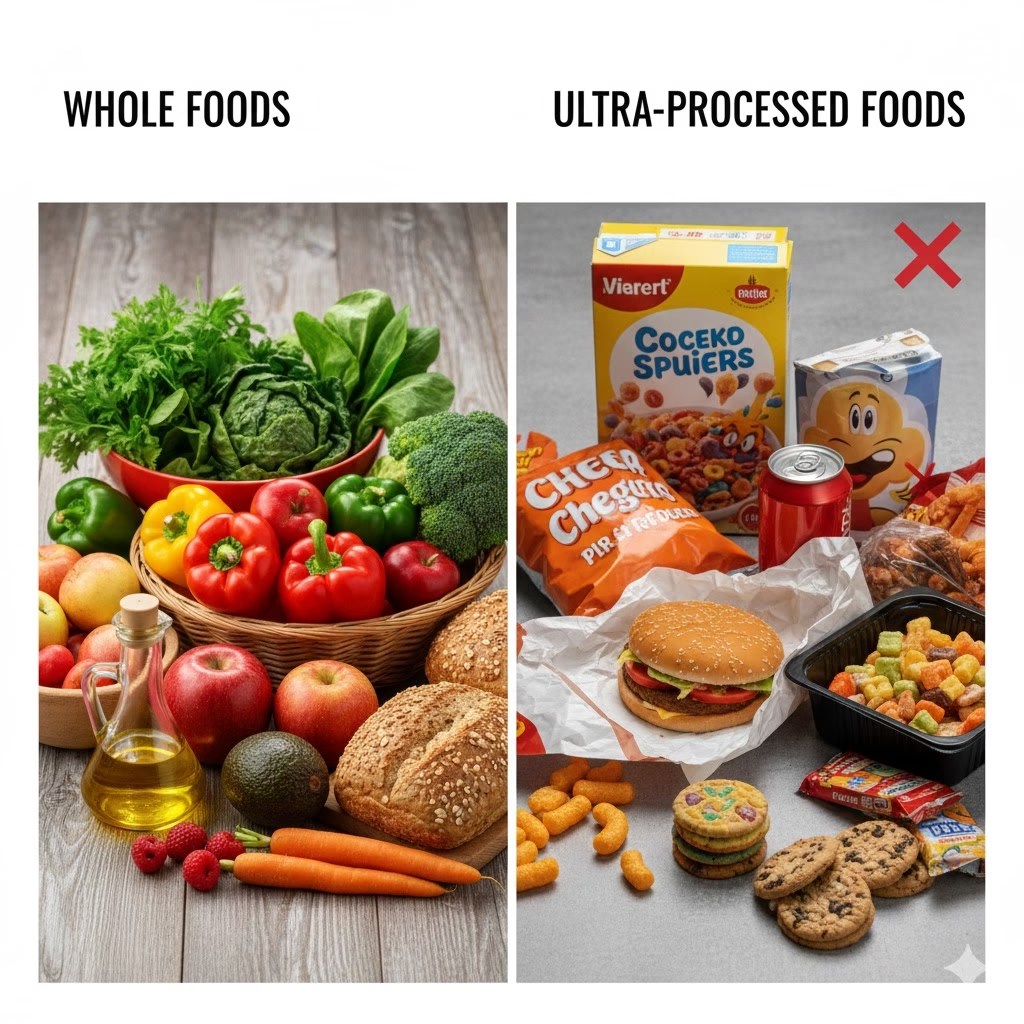
5. Embrace the Home-Cooked Meal

Eating out, even occasionally, significantly impacts your budget. Learning to cook a few simple, cost-effective meals is a core Saving Money Tip.

How to Do It: The 3-Meal Rotation

Plan and master three inexpensive meals that you enjoy and can make in large batches (e.g., lentil soup, chili, or chicken and vegetable stir-fry). Make enough for four servings in one go. You now have dinner for one night and three lunches, drastically cutting down on the cost of takeout lunches and reducing food waste.

6. Negotiate Your Bills

From your internet provider to your car insurance, loyalty is rarely rewarded. Being proactive and calling your service providers is a key money saving technique.

How to Do It: Call and Compare

Call your cable or internet provider and mention that you are considering switching to a competitor. Ask if they can offer you a retention rate or a promotional package. Do this for every service, including mobile phone plans and insurance. You can often save $10 to $50 per month on each call.

7. The Power of “No Spend” Days

This saving money tip focuses on controlling discretionary spending by periodically eliminating it entirely. It’s an effective way to reset spending habits.

How to Do It: Challenge Yourself

Start with one “No Spend Day” per week where you commit to spending zero dollars. This means no coffee shop visits, no takeout, no impulse purchases, and using what you already have. Once successful, consider challenging yourself to a “No Spend Weekend” once a month.

8. Start an Emergency Fund

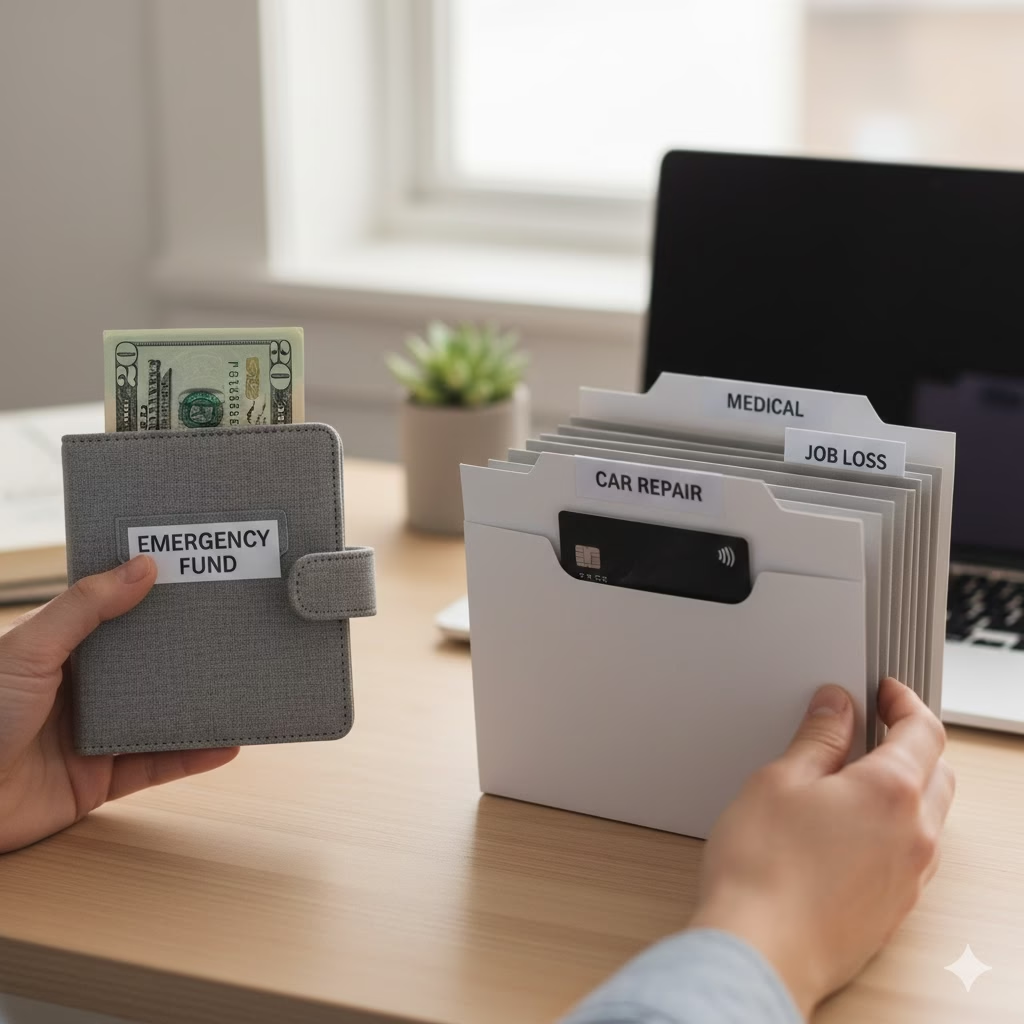
An emergency fund is the shield for your savings strategy. Without one, any unexpected expense (like a car repair or medical bill) will immediately derail your budget and force you into debt.

How to Do It: The $1,000 Milestone

Focus relentlessly on saving a starter amount of $1,000. This is enough to handle most minor emergencies. Once you hit the $1,000 target, pivot your savings strategy to a larger goal: 3-6 months’ worth of living expenses. This money should be kept in a separate, easily accessible (but not too easy) high-yield savings account.

9. Review Your Tax Withholdings

Getting a huge tax refund every year isn’t necessarily a good sign; it means you gave the government an interest-free loan throughout the year. Adjusting your withholdings is a simple money saving technique to give you more take-home pay immediately.

How to Do It: Consult an Expert

Speak with a financial advisor or use an online calculator to determine the correct number of allowances to claim on your W-4 form. The goal is to adjust your withholdings so that your tax liability is close to zero, putting more money in your monthly paychecks that you can then funnel into your savings strategy.

10. Pay Off High-Interest Debt First (The Debt Avalanche)

High-interest debt, like credit cards, acts like a negative savings account, costing you money every day. Aggressively paying this down is the most profitable saving money tip you can follow.

How to Do It: Focus on Interest Rate

List all your debts from highest interest rate to lowest. Commit all extra funds (beyond minimum payments) to the debt with the highest rate. Once that debt is paid off, take the money you were paying on it and apply it to the next highest-rate debt. This is called the Debt Avalanche method, and it saves the most money on interest over time.

11. Use the Library, Not the Bookstore

The cost of books, DVDs, and streaming rentals adds up quickly. Your local public library is a vast, free resource for entertainment and learning.

How to Do It: Get Your Card

Obtain a library card and use their services for books, audiobooks, movies, and magazines. Many libraries also offer free access to online courses and digital magazines, which is a fantastic budgeting tip for personal development without the cost.

12. Reduce Energy Vampires

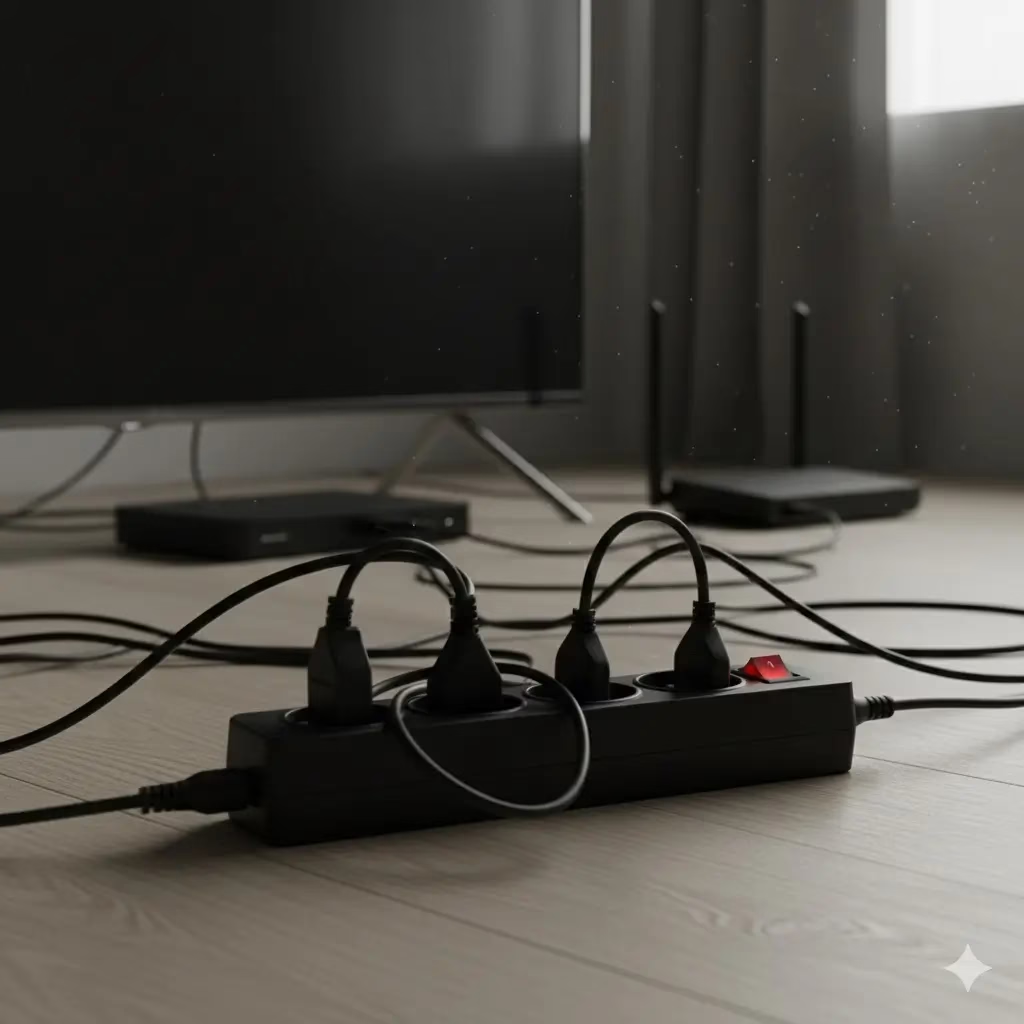
Even when turned off, many electronics (TVs, chargers, coffee makers) continue to draw power, known as ‘phantom load’ or ‘energy vampires’.

How to Do It: Plug Into Strips

Plug all related electronics (like your TV, gaming console, and sound system) into a single power strip. When you are done using them, flip the switch on the power strip off. This simple action can save a noticeable amount on your monthly utility bill, an easy money saving technique.

13. Drive Smart and Maintain Your Vehicle

The way you drive and care for your car directly affects your gas and maintenance costs.

How to Do It: Consolidate Trips and Check Tires

Group errands together to avoid multiple cold starts. More importantly, check your tire pressure monthly. Under-inflated tires decrease gas mileage and wear out faster, costing you more money. Proper maintenance, like timely oil changes, prevents costly, long-term repairs—a smart budgeting tip for vehicle ownership.

14. Embrace Generic and Store Brands

In many cases, the store brand or generic version of a product (especially for staples like medicine, cleaning supplies, and some food items) is virtually identical to the brand-name product, often made in the same factory, but at a significantly lower price.

How to Do It: Start Small

Try swapping three brand-name items in your grocery cart for the generic equivalent on your next shopping trip. If you don’t notice a difference, make the switch permanent. This small saving money tip can easily save you $20-$40 per trip.

15. The Envelope System (For Cash Spenders)

This classic budgeting method is perfect for people who overspend when using a debit or credit card. It provides a visual and physical barrier to spending.

How to Do It: Cash Only Categories

At the start of the month, withdraw the exact amount of cash allocated for your most problematic categories (e.g., dining out, entertainment, and miscellaneous shopping). Place the cash in separate, labeled envelopes. When the cash in an envelope is gone, the spending for that category is over until the next month.

16. Host Potlucks Instead of Going Out

Socializing is important, but a night out can cost upwards of $50 per person. Changing how you socialize is a simple saving money tip.

How to Do It: Make it Collaborative

Instead of suggesting a restaurant, invite friends over for a potluck dinner. Assign categories (one person brings a main dish, another a side, another a dessert, and another drinks). Everyone gets to eat, socialize, and you all save money.

17. Use the “Found Money” Rule

When you receive money you weren’t counting on (a work bonus, a small refund, a gift), it’s easy to treat it as “fun money” and spend it carelessly.

How to Do It: Allocate Unexpected Funds

Commit to putting 50-100% of any unexpected income directly toward your established savings strategy (either the emergency fund or paying down high-interest debt). If you get a $500 work bonus, putting $400 into savings means you get a huge boost while still leaving yourself $100 for a treat.

18. Refinance High-Interest Loans

[Image of a graphic showing a ‘Before’ loan rate at 18% and an ‘After’ rate at 7% on a document.)

If you have debt like a mortgage, student loans, or personal loans, exploring refinancing options can be a highly effective, long-term money saving technique.

How to Do It: Shop Around

Check your credit score and then approach a few different financial institutions to see if you qualify for a lower interest rate on your existing debt. Even a small drop in the interest rate can save thousands of dollars over the life of the loan and free up significant cash flow for your monthly budgeting.

19. Check Unit Pricing at the Grocery Store

The large price on the tag is not always the best indicator of value. The true saving money tip for groceries is using the unit price.11

How to Do It: Read the Fine Print

Every price tag in the grocery store should list the price per unit (e.g., $0.15 per ounce or $0.50 per sheet). Train yourself to compare the unit price between similar items and different sizes. The largest size is often, but not always, the best value.

20. Embrace the Savings Goal Mindset

The most effective savings strategy is one that is motivated by a clear, exciting goal. Saving for “just in case” is less motivating than saving for a dream vacation or a down payment on a home.

How to Do It: Make Goals Specific (SMART)

Give your savings goals a name, an amount, and a deadline. Instead of “Save more money,” write “Save $5,000 for a trip to Portugal by December 2026.” This gives your automatic transfers and budgeting sacrifices purpose, making the process sustainable and rewarding.


Frequently Asked Questions (FAQ)

Q: What is the single best money saving technique I can start today?

A: The most impactful technique is automating your savings. By setting up an automatic transfer from your checking account to a savings account on payday, you ensure that saving happens before you have a chance to spend the money. This makes saving consistent and non-optional, instantly boosting your savings strategy.

Q: How often should I check my budget?

A: You should track your spending daily or every few days to ensure you are sticking to your plan, but you should perform a comprehensive review of your budget at least once a week. A monthly budget review is also essential to compare actual spending against your planned spending and make adjustments for the coming month, following a key budgeting tip.

Q: How much money should I aim to save from my paycheck?

A: A widely recommended benchmark is the 50/30/20 rule, which suggests putting 20% of your after-tax income toward savings and debt repayment.12 If 20% is not feasible right now, start with 5% or 10% and incrementally increase the percentage every few months. The key is to be consistent, as consistency is a crucial Saving Money Tip.

Q: Is it better to save or pay off debt?

A: In most cases, you should first save a small starter emergency fund (e.g., $1,000). After that, the savings strategy priority should be paying off high-interest debt (like credit cards with rates over 10-15%) because the interest you save typically far outweighs the interest you would earn in a typical savings account. Once high-interest debt is gone, you can shift focus entirely to building a full emergency fund and other savings goals.


References


Recent Posts


The Walk-In Pantry Secrets That Makes Sustainable Living Effortless

A brightly lit, wide Walk-In Pantry featuring light wooden shelving organized with uniform glass jars of bulk dry goods (grains, beans, pasta) and natural woven baskets for produce, illustrating an aesthetic and sustainable storage design

We’ve all been there: staring into a dark cabinet, hoping that last bag of flour hasn’t expired. We often find a chaotic mess of half-used items instead of what we need. For years, I struggled to make the most of my small kitchen storage. This stress caused unnecessary waste. But turning my cluttered closet into a functional, well-designed Walk-In Pantry changed how I shop and cook. Learning to master pantry design can simplify your life. It makes sustainable living feel easy and natural.


1. The Foundation of Effortless Sustainability: Why Design Matters

[Image Placement 1.1: A detailed close-up showing well-organized uniform containers on a shelf labeled “Bulk Goods.”]

Most people think that achieving Sustainable pantry ideas is only about what you buy. They focus on choosing local, organic, or bulk foods. That is certainly important. But poor physical design often ruins these good efforts. If you cannot clearly see what you have, you will always buy too much. This leads to food waste, which defeats the purpose of sustainability.

A walk-in pantry gives you the best chance to build sustainability right into the structure. It is different from a small kitchen pantry cabinet or a simple closet. A walk-in space lets you create dedicated areas, ensure good air movement, and see everything easily. It is more than just a storage spot. It becomes an organized, efficient place that supports a low-impact lifestyle.

How to Do It: Defining Zones

Your first step is to turn your walk-in pantry into a sustainable powerhouse. To do this, you must set up specific working zones. This is about more than just organizing things. It is about creating logical and easy habits.

  • The Bulk Zone: Place this area near the entrance or on strong, lower shelves. This is where you keep heavy, large containers. This zone is for dry goods you buy in large amounts, like grains, beans, and flour. Buying in bulk greatly cuts down on packaging waste.
  • The Decant and Display Zone: Use the middle shelves, which are at eye level. This is for your matching glass or ceramic containers. Decanting all food items, from pasta to snacks, immediately removes visual mess. You can easily check your stock. Expiration dates become less important because you are only refilling, not replacing old items.
  • The Root and Produce Zone: Create a cool space low down. Use breathable wire baskets or open wooden crates here. Store onions, potatoes, garlic, and winter squash here. Proper airflow in this area is often forgotten in standard designs. Air circulation keeps produce fresh longer. This means fewer store trips and less spoilage.
  • The Re-Use/Recycling Station: This small zone is very important. Here, you store things like cloth napkins, reusable shopping bags, and glass jars you plan to use for preserving later. Also, keep a separate, clearly labeled bin for soft plastics or items that cannot be recycled easily. This station serves as a strong reminder to grab your reusable items before you leave the kitchen.

2. Maximizing Space: Smart Layouts for Different Pantry Types

Walk-in pantries come in many shapes and sizes. The design must fit the space to truly promote Sustainable pantry ideas. You might have a large room or a compact small pantry room. In either case, the main goal is maximum visibility and easy access.

The Narrow Walk-In Pantry

Many homes have a narrow walk in pantry. This is common in older houses or in closets that were changed into pantries. The design here must focus on shelves that are not deep.

  • Shelving Depth: Do not use deep shelves. The ideal depth is between 10 and 12 inches. This forces you to store items in just one or two rows. This way, you never lose an item in the back or forget about it. This directly stops food waste.
  • Vertical Space: Use the height of the room. Build shelves that go almost to the ceiling. Keep a small, stylish step stool nearby that you can easily tuck away. The highest shelves are perfect for appliances you use less often or for seasonal goods. Store these in light, clearly labeled boxes.

The Small Pantry Room

If your space is a small pantry room that is somewhat square, you can use corner shelving and the back of the door cleverly.

  • Corner Shelves: Corners can be dead space. Instead, put in shallow, spinning corner shelves or lazy Susans. This removes hidden spots where things get lost. This is vital for keeping track of smaller items like spices, oils, or sauces.
  • Door Storage: The back of the pantry door is very valuable space. Put up thin, layered wire racks or clear pocket holders there. This is the perfect place for small jars, spices, and lightweight clips for bulk bags. These are the items that usually make deep shelves look messy.

How to Do It: Material Selection

The materials you choose decide how long your pantry will last and what its environmental impact will be.

MaterialSustainability BenefitDesign Application
Plywood/Bamboo ShelvingLong-lasting, grows quickly, and is often sourced responsibly. Look for FSC certification.Use for the main shelf structure and any counter surfaces.
Glass ContainersCan be reused forever, is non-absorbent, and allows you to see everything. This means you need fewer labels for contents.Use to store and display dry goods, especially in the main viewing zone.
Ceramic CrocksVery durable, non-toxic. They help keep temperatures steady for fermenting or keeping salt or cultures active.Store sourdough starters, homemade fermented foods, or bulk salt.
Natural Fiber BasketsMade from renewable materials like jute, cotton, or seagrass. They allow air to move through.Use them to store root vegetables, reusable shopping bags, or bread.
Milk Paint/Low-VOC PaintBetter for the environment, low in toxic fumes, and provides a clean look.Use on the pantry’s interior walls and ceiling. (This is where your keyword Paint Plates can be subtly integrated for visual aesthetic)

Using low-VOC or milk-based Paint Plates for your walls and trim keeps the air inside your pantry clean. This is a small but important part of creating a truly sustainable storage area.


3. Illumination and Circulation: Essential Sustainable Elements

A sustainably designed walk-in pantry is more than just a dark closet with shelves. It should be a well-lit, breathing system for your food.

The Power of Light

If you cannot see an item, you will not use it. This means it will expire. This simple fact makes lighting a key part of Sustainable pantry ideas.

  • LED Integration: Install long-lasting, low-energy LED strip lights. Put them under the shelves or vertically along the door frame. These lights use very little power and last for a very long time. This reduces replacement waste.
  • Motion Sensors: The best light is one you never forget to switch off. Install motion-sensor switches for your pantry lights. This ensures the light is only on when you open the door and are inside. This saves energy and makes the right habit easy.
  • Natural Light: If you can, put in a small, high window or a sun tube to let in natural light. Natural light is great for seeing things. It also helps stop mold and mildew from growing in the closed space.

The Necessity of Airflow

Good air circulation is vital. This is especially true in a small pantry room where moisture can get trapped easily. Air that does not move causes produce to spoil faster. It can also harm the quality of dry goods.

  • Venting: If your pantry is inside the house, make sure you install a small vent or fan. It could be near the floor. It should connect to your home’s air system or circulate cool air. Air movement is a very effective way to preserve food.
  • Open Shelving: Avoid using closed cabinets inside the walk-in pantry itself. Open shelving allows air to move freely around your stored items. This is much better for keeping food fresh than sealing it in a box with no air flow.

How to Do It: Simple Steps

  1. Switch to Motion: Replace your old light switch with a motion sensor switch.
  2. Add Gaps: Make sure there is one inch of space between the back of your shelves and the wall. This small gap allows air to move naturally up and behind your storage. This prevents cold spots and moisture issues. It improves your Sustainable pantry ideas for preservation.
  3. Use Breathable Baskets: Any containers you use for produce, like potatoes or apples, should let air through. Use woven baskets or open wire bins. Do not use solid plastic containers.

4. Integration with the Kitchen Workflow

The most effective kitchen pantry design saves movement and improves efficiency. A sustainable pantry should be so linked to the kitchen that using it is almost automatic.

The Prep Zone

Within the walk-in pantry, set aside a small counter area or a shelf that pulls out. This will be your “Prep Zone.”

  • Decanting and Weighing: This spot is perfect for bringing in bulk purchases. You can immediately pour them into your permanent containers here. This removes the plastic bags before they ever enter the main kitchen area. It is also the ideal place to keep a small kitchen scale. This allows you to measure and portion mindfully without having to carry large containers to the main countertop.
  • Refill Station: Keep empty jars and cleaning tools here. This includes a small brush for dusting shelves or cleaner for jar lids. Creating a dedicated area for maintenance makes the sustainable practice of cleaning and reusing containers an easy, natural part of your routine.

Linking the Layout to Sustainable Goals

  • Crockery and Cutlery Storage: If you have the room, consider storing sustainable crockery here. This could be your serving platters or special dishes that you do not use often. Moving these heavy items out of your main kitchen cabinets frees up space for your daily items. It also reduces visual clutter. This supports the minimalist side of Sustainable pantry ideas.
  • Recycling Proximity: Put the recycling bin for glass, cardboard, and metal right near the pantry door. This makes disposing of items a simple one-step process when you are unpacking or decanting. It keeps the main kitchen area tidy. This makes the sustainable act of recycling very convenient.

Frequently Asked Questions (FAQ)

Q: How do I incorporate the “Buy Bulk” strategy into a small pantry room?

A: Even a small pantry room can work with bulk buying. Focus on using height. Do not use large, round buckets. Instead, use tall, slim, square or rectangular containers. These fit closely against the wall. Only buy the amount of an ingredient you can completely empty into a permanent container. This ensures you do not have messy half-bags cluttering your shelves.

Q: Is it more sustainable to use plastic or glass containers?

A: Glass requires more energy to make at first. However, it can be reused forever. It is also non-absorbent. This makes it the better choice long-term for Sustainable pantry ideas. Glass lets you see everything perfectly. This prevents waste. It also does not release chemicals into food, unlike some plastics. If you must use plastic, choose containers that are made from recycled materials.

Q: What is the ideal shelf depth for a narrow walk in pantry?

A: For a narrow walk in pantry, the shelves on both sides should be no deeper than 12 inches. A depth of 10 inches is even better. This ensures that standard quart or gallon jars can be placed in a single line. This is the most crucial design point for ensuring you see and use items before they spoil.

Q: Where should I put my reusable bags in a kitchen pantry?

A: Put them on hooks or in a tall, skinny basket on the back of the pantry door. Place them near the exit. The goal is to make them easy to see and easy to grab. They should be the last thing you notice when you leave the pantry. This serves as a strong reminder before you go shopping.


References


Recent Posts


How to Paint Plates That Look Professionally Designed

A beautifully styled, hand-painted plate with a gold rim and a blue watercolor brushstroke sits on a rustic wooden table. Various paint plates supplies like brushes, tubes of paint, and masking tape are visible in the background, hinting at creative plate painting ideas.

There’s nothing quite as satisfying as a gorgeous piece of home decor, especially when you’ve created it yourself. Like many of you, I started my journey with a shaky brush and basic paint plates knowledge. I often had more paint on my hands than on the plate. I’ve spent years experimenting with different materials and techniques, perfecting my plate painting ideas to create truly beautiful painted plates. This guide will fast-track your skills. Your DIY pieces will look like they came straight from a high-end boutique.


The Professional Difference: Why Your Painted Plates Fall Short (and How to Fix It)

The jump from a “homemade” look to a “handmade professional” look relies on a few key details. Amateurs often overlook these details. It’s not about complex artistry. It is about simple preparation, choosing the right materials, and controlled execution. The secret to professional-looking painted plates is simple. You must treat the plate like a valuable canvas that needs care. Don’t just use it as a surface for doodling. We will explore simple, yet powerful, techniques. These techniques will immediately improve the finished product. Your plate painting ideas will truly stand out.

Material Selection Matters: Using the wrong paint is the most common mistake. For a lasting, food-safe finish, you must use paints specifically for ceramic, porcelain, or glass.

  • Acrylic Enamel Paints: These paints dry in the air. They are non-toxic. They often require baking in an oven. This process cures them to a permanent, dishwasher-safe finish. They offer bright colors and cover the surface well.
  • Porcelain Markers/Pens: These are perfect for small details, letters, and sharp lines. They give you the highest level of control for detailed work.
  • Specialty Glaze Paints: These are more difficult to use. They require high-temperature firing. This usually happens in a kiln. They create a true glazed finish. For home crafters, the first two options are usually best.

Surface Preparation: A professional project always starts clean. Before you apply any paint, wash your plate with soap and water. This removes any dust or residue. Next, wipe the surface with rubbing alcohol. This step gets rid of oils from your hands. Oil can repel the paint and cause streaks. This simple step ensures the paint sticks well. It also guarantees a smooth finish.

Design Principles: The Secrets to Standout Plate Painting Ideas

Intentional design creates beautiful art. Otherwise, your project is just a basic craft. Forget designs that are busy or messy. Professionals use principles of simplicity and contrast. They also use the empty space on the plate, called negative space.

Focus on the Edges: The Gold Rim Technique

Focusing only on the rim is an easy way to achieve a high-end look. Many expensive ceramic pieces feature simple, perfect bands of color.

How to Do It:

  1. Prep the Edge: Take a strip of low-tack painter’s tape. Place it exactly where the plate goes from flat to curved. You can also use a strip along the outer edge. This creates a defined, thick border. Press the tape down firmly. This prevents paint from bleeding under the tape.
  2. Apply the Paint: Use metallic paint for the most luxurious look. Gold, silver, or rose gold are good choices. Apply the paint smoothly and evenly. Use a soft, flat-edged brush. Always paint two thin coats. This is much better than one thick coat. Thick coats are more likely to peel. They can also show visible brush strokes.
  3. The Reveal: Remove the painter’s tape immediately and carefully. The paint must still be wet when you do this. This stops the paint from sticking to the tape. It prevents the paint from pulling away from the plate. The result is a perfectly sharp edge.

Minimalist Geometry: Creating Modern Painted Plates

Clean, geometric patterns look expensive and modern. This is one of the best plate painting ideas for beginners. The design uses only straight lines and simple shapes.

How to Do It:

  1. Set the Guide: Use a ruler and a graphite pencil. The pencil marks will disappear when you cure the plate. Use it to lightly mark your pattern. Alternatively, use strips of painter’s tape. You can mark out triangles, stripes, or zig-zags.
  2. Apply the Paint: Use fine-tipped porcelain markers for thin lines. Use a small, flat-edged brush for blocks of color. Work slowly. Keep your hand steady. For stripes, only paint the areas between the tape.
  3. Wait for the Cure: Let the paint dry to the touch before you remove the tape. This avoids smudging. However, do not let it fully harden. If it hardens completely, it can sometimes chip along the edges when you pull the tape.

The Watercolor Wash: Effortless Elegance

This technique looks like specialty glazes. It gives your plates a unique, organic feel.

How to Do It:

  1. Thin the Paint: Dip your brush in ceramic paint. Then, lightly dip it into a solvent or water. The right choice depends on your paint type. The paint should be slightly thinner. It should be runny, but not dripping.
  2. The Application: Lightly brush the thinned paint onto the plate. Use large, sweeping motions. Do not try to cover the plate completely. You want a translucent wash. The goal is a paint layer that shows changes in color and intensity.
  3. Blotting for Texture: The paint must still be wet. Gently dab it with a crumpled piece of plastic wrap or a dry sea sponge. This creates beautiful, cloud-like textures. This method is very forgiving. It helps create truly unique painted plates.

Techniques for Flawless Execution

You can master paint plates by controlling your materials. You also need the right tools.

Tool Control: Mastering the Brush and Pen

A large or stiff brush is a common mistake. For detailed work, buy good quality synthetic brushes. A fine-point round brush is best for details (size zero or one). A small, flat-edged brush works best for straight lines and filling in shapes.

  • The Dotting Tool: Do not use a brush for perfectly uniform polka dots. Polka dots are a classic, professional look. Instead, use a specialized ceramic dotting tool. You can also use the back of a small paintbrush handle. A cotton swab works too. Dip the tool straight into the paint. Place it straight onto the plate. Do not drag or twist it.

Stencils and Transfers: The Secret to Symmetry

You do not need to be an artist to create detailed designs. Professionals often use stencils and transfers. These tools help them achieve precise repetition and perfect symmetry.

  • Temporary Adhesive Stencils: You can cut your own designs out of vinyl. You can also buy pre-made stencils. Stick them firmly to the plate. Use a dabbing motion with a sponge brush. Do not use a sweeping motion. Apply your ceramic paint. This stops paint from bleeding under the stencil edge.
  • Graphite Transfer Paper: Use this paper to move a printed design onto the plate surface. First, lay the transfer paper down. Put your printed design on top of it. Then, trace over the lines with a pencil. The graphite lines guide your painting. The lines are easily removed. They also burn off in the curing process.

Correcting Mistakes Like a Pro

A professional finish means you fix errors before they dry. Always keep cotton swabs nearby. Also have rubbing alcohol or paint thinner handy. The right solvent depends on your paint type. If you make a mistake, immediately dampen a cotton swab. Gently wipe away the wet paint. A clean plate is a reusable canvas. Do not be afraid to wipe the surface clean if a line is not perfect.

Curing and Finishing: The Final Step to Permanence

The curing process is the final step for all your beautiful plate painting ideas. This is the stage that makes your painted plates permanent. It makes them dishwasher-safe and food-safe. Always follow the instructions on your ceramic paint packaging. However, the general method is as follows:

The Baking Method (Most Common for Home Use):

  1. Dry Completely: Let your plates dry in the air for the full recommended time. This is usually twenty-four to forty-eight hours. The paint must be completely dry to the touch before you bake it.
  2. Cold Start: Place the plates in a cold oven. This prevents thermal shock. Thermal shock can cause the plate to crack.
  3. Bake: Set the oven temperature based on your paint maker’s instructions. This is typically between $\text{300}$ and $\text{350}$ degrees Fahrenheit. Once the oven reaches the temperature, bake the plates for the specified time. This is usually thirty to forty minutes.
  4. Cool Down: Turn the oven off. Do not open the door. Let the plates cool down completely inside the oven. This takes several hours or overnight. This slow cooling process is vital for properly setting the paint.

Post-Cure Care: Even after curing, try not to use metal utensils directly on the painted areas. For the longest life, hand-washing your specialty painted plates is always the best choice. However, most baked-on paints can handle the top rack of a dishwasher.


Frequently Asked Questions (FAQ)

Is the ceramic paint food safe after baking?

Yes, most ceramic and porcelain paints that need baking are non-toxic. They are designed to be food safe once fully cured. However, many experts suggest keeping the painted design on the plate’s outer rim. Avoid painting the central eating surface. Knives and forks may scratch the design there. Always check the specific labeling on your paint product.

Can I use regular acrylic paint on plates?

No, regular acrylic paint will chip and wash off easily. This is especially true when it is exposed to water and soap. It is not made to stick to the smooth surface of ceramic or glass. Also, it is not food safe. You must use paints made for ceramic or glass. These paints require heat setting or chemical curing.

What kind of plates should I buy for painting?

The best plates are plain, white, glazed ceramic or porcelain. Glass plates also work well. Make sure they do not have any patterns or textures. Check thrift stores or discount home goods stores. You can find inexpensive, blank canvases there. Do not use plates that are chipped or cracked.

How do I prevent my lines from shaking or wiggling?

You need proper support for a steady hand. Always rest the elbow of your painting hand firmly on the table. Gently rest the heel of your painting hand on the plate itself. You should turn the plate instead of moving your entire arm. This helps you keep a smooth curve or straight line. Using porcelain markers also gives you better control than a traditional brush.


References


Recent Posts


Make Your Own DIY LED Mirror At Home Now!

A large, bright DIY LED mirror standing on a wood floor. The mirror features individual, exposed bulbs around the perimeter, typical of a Hollywood-style vanity mirror or floor mirror. The lighting is on, illuminating the beige wall mirror behind it.

We’ve all been there: standing in front of the mirror, trying to apply makeup or shave, and battling frustrating shadows cast by poor overhead lighting. I used to dread getting ready because my bathroom felt dim and unfriendly. I always wished for that perfect, shadow-free light I’d only seen in professional studios. It turns out that dream isn’t just for Hollywood—it’s totally achievable at home with a DIY LED mirror. This guide shares the exact process I used to upgrade my own mirror. It proves that anyone can tackle a high-impact DIY project and enjoy beautiful, functional lighting in their space.


Introduction: The Secret to Perfect Lighting

Variation of a LED mirror

Good lighting can instantly change a room’s atmosphere. It makes a space feel larger, cleaner, and much more luxurious. Nowhere is this more true than in front of a mirror.

Are you creating a dedicated beauty corner? Are you upgrading a bathroom? Or do you just need a stunning centerpiece for your bedroom? A mirror with integrated lighting is the ultimate statement of functional design.

The good news? You do not need to hire an expensive professional. You also do not need to spend hundreds on a high-end fixture. With a few affordable parts, a free afternoon, and this complete guide, you can build your very own custom DIY LED Mirror. It will look polished and professional.

This project is more than just about how it looks. It is a practical investment for your home. It is also a step toward a greener lifestyle. This is all thanks to the benefits of LED technology. Over the next 1500+ words, we will walk you through everything. This includes choosing the right mirror—be it a huge floor mirror, a sleek wall mirror, or a compact vanity mirror. We will also cover the step-by-step process of installation. You will have all the tools you need to succeed.


Section 1: Why Go LED? Aesthetics, Cost, and The Environment

Choosing to build an LED mirror means choosing better light, saving money long-term, and being good to the environment. Before we get into the details of the build, it is vital to know why LEDs are the best foundation for this project.

Superior Task Lighting

The main benefit of an integrated LED mirror is the quality of light it gives you. Harsh, overhead lights cast ugly shadows under your eyes and chin. LED strips or bulbs placed right around the mirror offer balanced, soft, and shadow-free light.

This is critical for close tasks like shaving, styling hair, or putting on makeup.

When building a vanity mirror, this even lighting is key. You want light that is close to natural daylight. High-quality LED strips often let you choose the color of the light. This is called “Tunable White Lighting.” You can switch between warm (yellowish) and cool (bluish) white light. This helps you see how your look will appear in different places.

Long-Term Cost-Effectiveness

The first cost of good LED parts might be a bit higher than old incandescent lighting. However, the savings over time are huge.

  • Longevity: A high-quality LED strip can last anywhere from 20,000 to 50,000 hours. A traditional incandescent bulb only lasts about 1,000 hours. This is a permanent project like a mirror. This long life means you will not be replacing bulbs for decades.
  • Energy Efficiency: LED lighting uses power very well. It turns up to 95% of the energy it uses into light. Only 5% is lost as heat. Standard incandescent bulbs lose about 80% of their energy as heat. This huge drop in power use means lower electricity bills for you.

Environmental Benefits of LED Technology

When you start a DIY project with new materials, think about the effect on the environment. LED lighting is better than older technologies in many ways:

  1. Lower Energy Use: LEDs use energy very well. This lowers the demand on power plants. It leads to fewer greenhouse gases being put into the air when power is made. LEDs use up to 80% less energy than older lights. Your DIY project actively helps lower your carbon footprint.
  2. No Toxic Materials: Fluorescent bulbs contain a little toxic mercury. You need to dispose of them in a special way to stop pollution. LED lights have no toxic elements. This makes them safer and fully recyclable. They do not cause an environmental risk in landfills.
  3. Less Waste: LEDs last for a very long time. This means fewer products need to be made, packaged, and shipped. One LED bulb can last as long as 25 incandescent bulbs. This saves resources and greatly cuts down on waste over time.

By choosing LED, you are not just saving money. You are also making a good choice for the planet.


Section 2: Selecting Your Mirror and Materials

Your DIY LED Mirror project starts with choosing the right base mirror. Then you must gather all the needed parts. The best part of DIY is that you can make it any size or style. You can make a grand standing mirror or a sleek, modern, frameless wall mirror.

2.1 Choosing Your Base Mirror

The type of mirror you pick will mostly decide how you install the lights:

  • Backlit (Halo Effect): This design makes a soft, glowing halo around the mirror (like the featured image). For this, you need a mirror that can be mounted with a space between the glass and the wall.
    • Best Choice: A mirror with no frame or a framed mirror with a shallow frame. You can easily attach small wooden blocks (spacers) behind it for mounting.
    • Pro Tip: Are you using a large piece, like a floor mirror you plan to lean? You can run the strips along the frame’s backside. This casts light onto the wall. You can also run them along the inner edge of the frame facing the glass. This reflects light outwards.
  • Front-Lit (Hollywood/Vanity Style): This means putting individual bulbs or LED puck lights right onto the glass or frame. This is common for a vanity mirror.
    • Best Choice: A mirror with a wide, flat frame (like an antique mirror with a simple border). You can also use a frameless mirror where the lights stick right to the glass.

2.2 Essential Materials and Tools

You will need the following items to build your LED mirror:

ItemDescriptionPurpose
LED Strip LightingHigh-density, DIY LED Mirror strip (12V or 24V). Look for an IP65 or better rating for use in a bathroom (waterproof/resistant). Pick a color temperature: 3000K (Warm White) for a cozy feel, or 4000K-5000K (Natural/Cool White) for the best task lighting.This is your light source. High density means you won’t see single ‘dots’ of light.
Power Supply (Driver)A DC power supply (transformer) that matches the total power (wattage) of your LED strips.Changes the wall AC power to low-voltage DC power for the LEDs.
LED Channel with DiffuserOptional, but highly suggested. An aluminum channel with a frosted plastic cover.Gives a clean, straight place for the strip. It also softens the light for a seamless look.
Connectors/WireSolderless connectors (clip-on) or thin wire for soldering. You will need this, especially for sharp corners.Used to link separate strips together in a rectangular shape.
Mounting HardwareWood shims/blocks (spacers) for a backlit effect. Or simple mirror hangers for a wall mirror mount.This holds the mirror to the wall with the right space for the lights.
ToolsTape measure, ruler, pencil/marker, drill/driver, wire strippers, strong glue (silicone or heavy-duty mounting tape).Needed for measuring, cutting, and putting the parts together.

Section 3: The Step-by-Step Installation How-To

This guide will focus on the most popular design. This is the Backlit (Halo) DIY LED Mirror. It gives that beautiful, soft glow you see in the uploaded image. This is a perfect project for a wall mirror or a large floor mirror that is mounted securely.

Step 1: Preparation and Measurement

  1. Measure the Border: Use your tape measure to find the total length of the LED strip you will need. Measure the area on the back of the mirror where the light will sit.
  2. Decide Strip Placement: To get an even halo effect, the LED strip should be placed 1 to 4 inches in from the mirror’s edge. This distance, plus the thickness of your mounting blocks (spacers), decides how wide and soft the glow on the wall will be. Mark this line lightly on the back of your mirror using a marker.
  3. Pre-Cut and Test: Cut your LED strips to the right length. Important: Only cut along the designated cut lines (usually marked with a small copper pad). Connect all your strips (use clip-on connectors or solder wire). Plug them into the power supply to make sure every section works. Check that the connections are right (positive to positive, negative to negative).

Step 2: Attaching the LED Strips and Channels

  1. Clean the Surface: Clean the back of the mirror thoroughly along the marked line. Use rubbing alcohol. The glue on the LED strips will not stick well to dust or oil.
  2. Mount the Channels (Suggested): If you are using aluminum channels and diffusers, stick these on first. Put them along your marked perimeter line. Use the channel’s own adhesive or a small bit of strong silicone glue. The channel gives you a clean, straight edge. It also helps spread the light more evenly.
  3. Apply the Strips: Peel the sticky back off your LED strips. Carefully stick them into the channels or right onto the cleaned mirror surface along your marked line. Press down hard for 30 seconds to make sure it sticks well. Tip: For a very clean look, run the wires/connectors only in the corners of the mirror. Only stick the sections with the LED chips down.

Step 3: Wiring and Power Management

  1. Connect to the Driver: Connect the main power cable from your finished LED strip circuit to the low-voltage output side of your LED power supply (driver).
  2. Route the Power Cord: You have two main ways to power the mirror:
    • Plug-In (Visible/Partially Hidden): Run the standard AC power cord (from the driver) down the back of the mirror to an existing wall outlet. Secure the driver and the extra cord neatly to the mirror’s backing. Use heavy-duty mounting tape.
    • Hardwired (Invisible/Professional): This means the power supply is hidden inside the wall or in the back of the mirror frame. It is then connected to a wall switch. If you are not skilled with home electricity (AC power), hire a qualified electrician for this step.

Step 4: Mounting and Final Touches

  1. Install the Spacers: For a halo effect, attach small wooden blocks or spacers to the back of the mirror’s frame. Or you can attach them right to the wall where the mirror will hang. They should be $0.5$ to $1.5$ inches thick. This lets the light spread evenly onto the wall.
  2. Hang the Mirror: Hang the mirror safely onto the wall. Use strong mounting hardware (heavy-duty D-rings, wire, or cleats) meant for the mirror’s weight. Be sure the power cord is not squeezed. The mirror should sit flat against the spacers.
  3. Enjoy: Plug in your mirror and turn on the switch! You have just created a beautiful, modern DIY LED Mirror that changes your space.

Section 4: Advanced DIY Applications and Style Examples

LED strips are very versatile. You can use this light technique on almost any mirror style. This lets you create unique bright spots around your home. The main part of this DIY LED Mirror project is the same. However, the final look changes a lot based on the mirror.

The Hollywood Vanity Mirror (Front-Lit)

This is the classic, high-glamour look. It is perfect for a dedicated dressing table or makeup area.

  • How To Do It: Instead of strips, you will use separate LED vanity bulbs or “puck lights.” These come in kits that are already wired. The bulbs stick right onto the glass surface or the face of a wide mirror frame. This is common on many vanity mirror styles.
  • Key Detail: Keep the spacing even between the bulbs—usually 10 to 12 inches apart. This ensures a clean, shadow-free light across your face. The wires are usually taped or bundled behind the mirror to keep the front tidy.

Backlighting a Large Floor or Standing Mirror

A large, custom floor mirror is a stunning piece. Backlighting it turns it into architectural art.

  • How To Do It: Use the standard backlit method. Place the strip 2-4 inches from the edge of the mirror’s back.
  • Key Detail: Is the mirror a standing mirror that leans against the wall? Then you do not need spacers. The angle already makes the needed gap. Just secure the LED strip to the back of the frame. Make sure the power cord runs cleanly along the floor or wall base. Then plug it in. The light will shine onto the wall behind it, making a dramatic accent wall.

Integrating LED with a Mirror Wall

Are you planning an entire mirror wall? This is a modern trend that uses many mirror panels to make the space look huge. You can use LED strips to mark the edges of the setup.

  • How To Do It: Secure LED strips to the wall behind the seams or edges of your mirror panels. This requires careful planning of the wiring before you stick the mirror panels to the wall.
  • Key Detail: This is a more permanent and complex installation. But the result is a huge, unified surface of light and reflection that is truly amazing. For this large size, think about using a higher-power supply. Also, use a controller to manage all strips from one switch.

Revamping an Antique Mirror

Do not forget about older pieces. Even a beautiful, detailed antique mirror can look new with LED backlighting.

  • How To Do It: The trick is to run the LED strip only on the straight inner edges of the frame. Avoid the fancy carved areas. Use a neutral, soft white LED (3000K). This will go well with the warmth of the old wood or metal frame.
  • Key Detail: The light and shadows playing over the detailed frame of the antique mirror add depth and character. A modern frame cannot match this. This makes the light an accent to the mirror itself.

Section 5: Troubleshooting and Getting The Perfect Finish

Even the most careful DIY person can have small problems. Knowing how to fix them ensures your DIY LED Mirror project ends with a flawless, professional finish.

Common Troubleshooting Issues

IssueCauseSolution
LED Strip Will Not Light UpWrong wire hook-up (positive/negative wires switched); loose connector; the driver is struggling.Check that the positive (+) and negative (-) wires are connected correctly. Fix all clip-on connectors. Make sure the power supply (wattage) is strong enough for the total strip length.
Visible Hotspots/DotsLED strip density is too low (e.g., 30 LEDs/meter instead of 120+); strip is too close to the wall.Use a strip with higher density (120+ LEDs/meter). Use an aluminum channel with a diffuser. Increase the space between the mirror and the wall (use thicker spacers/blocks).
Light Is Uneven or Too HarshPower loss over a long distance.Use a parallel wiring setup instead of one long series line (feed power into both sides of the mirror for larger projects). Use a dimmable driver and a dimmer switch.
Strips Peeling OffMirror surface was not cleaned well.Clean the area again. Stick the strip back using a little RTV silicone glue for a strong, lasting bond.

Achieving the Seamless Finish

The key difference between a homemade project and a professional fixture comes down to two main things:

  1. Soft Light: You want to get rid of the separate “dots” of light from the LED chips. The single best way to do this is to put the LED strips inside an aluminum channel with a frosted diffuser cover. This housing protects the strip. It also acts as a heat sink (making the LED last longer). Most importantly, it smooths the light into one continuous glow.
  2. Hidden Wiring: A truly professional look means you see no wires. If you are not hardwiring it, your goal should be to run the power cord down a seam. Or hide it behind a piece of furniture until it reaches the wall outlet. The power driver (the bulky box) must be safely mounted and hidden behind the mirror or frame. For a wall mirror placed over a vanity mirror, running the wire straight down to the vanity’s surface can make it hard to notice.

Use these advanced tips. Your custom DIY LED Mirror will not only work perfectly. It will also be a polished and impressive piece of home décor.


Frequently Asked Questions (FAQ)

Q: What is the best color temperature for a DIY LED mirror?

A: For grooming and applying makeup (vanity mirror), the best choice is Natural White (4000K to 5000K). This looks most like natural daylight. It gives the most accurate color view. This helps you avoid mistakes with makeup or color. For light that is only for the room (e.g., in a hallway wall mirror), Warm White (2700K to 3000K) is often liked best for its warm, welcoming glow.

Q: Can I put a DIY LED mirror in a bathroom?

A: Yes, you can. But you must use LED strips with a proper rating for water resistance. Look for an IP65 rating or better. This mark means the strip is safe from splashing water and moisture. This is vital for a humid place like a bathroom.

Q: Is it cheaper to DIY or buy a pre-made LED mirror?

A: For a normal-sized mirror, the DIY way is often much cheaper. This is especially true if you already own a mirror. You can build a large, high-quality mirror for $50–$150 in parts. A similar pre-made professional mirror can cost $300–$800 or more. The cost of a DIY LED Mirror is mostly set by the price of the base mirror and how good the LED parts are.

Q: How do I make the light dimmable?

A: You need two things to make your LED mirror dimmable: a dimmable LED driver (power supply) and a dimmer switch that works with it. You can install the switch in the wall. Or you can buy small dimmer controls that connect right to the low-voltage side of the driver. These are often easier to hide behind the mirror.

Q: How do I hide the wires if I don’t want to hardwire it?

A: The simplest way is to hide the power supply (driver) right on the back of the mirror. Use a strong glue for this. Then, run a thin, white cord or cable along a wall baseboard. Or run it down the back of a large piece of furniture (like a dresser or vanity mirror base) to the closest outlet. For a clean finish, use stick-on cable covers. You can paint these to match your wall color.


References


Recent Posts


Make This Vintage Yarn Letter Craft with Free Crochet Patterns

A beautifully styled close-up of two elegant, freestanding 'V' and 'E' letters made with the Yarn Letter Craft technique, featuring a continuous, creamy white crochet rope with delicate swirls, placed on a rustic wooden table next to a ball of yarn, a crochet hook, vintage scissors, and a vase of lavender, capturing a serene, handmade aesthetic.

This guide is dedicated to celebrating the enduring appeal of handmade home decor. Our goal is to connect readers with the satisfying process of creating beautiful items using traditional fiber arts. Mastering the Yarn Letter Craft allows anyone to infuse their space with personalized charm and quality. We believe every successful project starts with clear instruction and inspiration.


Introduction: The Elegance of French Crochet Letters

[Image Placement: A detailed close-up shot of a section of the finished crochet rope letter, highlighting the tight, uniform stitch texture that mimics a cord.]

In the world of crafting, few projects match the beauty and personal touch of the French crochet letters style. This technique creates stunning, rope-like letters that stand on their own. It is a refined Yarn Letter Craft that results in high-quality, heirloom decor.

The unique beauty of these letters comes from their smooth curves and full texture. They look like classic script or calligraphy. They are not made by wrapping a hard shape. Instead, you crochet a narrow tube. You lightly stuff this tube and shape it using internal wire. This method lets you create the detailed, script-like shapes found in classic monograms.

This full guide will teach you how to master this clever diy idea. We will give you the exact free crochet patterns for the continuous rope. We will also detail the materials needed for strength and share the secrets to shaping the cord into a piece of art. Get ready to create custom decor, spell out meaningful words, or craft beautiful monograms that will look perfect in any space.

The finished letters feel wonderful to touch. They have a handmade quality that store-bought items cannot match. They suggest history and careful handwork. This makes them perfect for custom gifts, nursery decor, or adding an elegant touch to shelves.


Understanding the Materials for Structure and Style

You need specific materials to get the classic structure and vintage look of French crochet letters. Your choices must focus on both appearance and stability.

Yarn Selection: Sturdiness and Texture

For this Yarn Letter Craft, the yarn must hold a tight stitch. It should also have a matte finish to increase its vintage appeal.

  • Cotton or Linen Yarn: This is the best choice. Cotton yarn, especially a medium weight, shows the stitches clearly. It does not stretch out too much. The matte finish is key to the old-world look.
  • Color Palette: Choose natural, unbleached colors. Think cream, beige, taupe, or soft grey. Soft, dusty colors (like rose or mint) also work well for nurseries. They keep the vintage feel.
  • Yarn Weight: A medium yarn is usually best. Pair it with a small hook. This is key to making very tight stitches. This tight weave shows the quality of the final piece.

Internal Structure: The Essential Wire

The crochet rope will sag without internal wire. It needs this wire to hold its letter shape.

  • Floral or Craft Wire: You need a wire that is firm enough to hold a curve. It must also be flexible enough to bend by hand or with pliers. A thick floral wire (about sixteen or eighteen gauge) works best. You may need a thicker wire if you make very large letters.
  • Purpose: The wire acts as the skeleton for the letter. It allows you to create sharp points, graceful spirals, and straight lines that stay firm over time.

Stuffing: Volume and Density

The stuffing gives the crochet rope its three-dimensional shape. It also adds a touch of softness.

  • Polyfill or Fiberfill: Use a small amount of standard polyester fiberfill. You want a firm, but not stiff, letter. Do not put in too much stuffing. Too much will distort the crochet stitches.

Essential Tools

  • Small Crochet Hook: Use a hook that is one or two sizes smaller than the yarn suggests. This step is vital for making the tight fabric. This tight fabric defines the high quality of the craft.
  • Pliers (Round and Needle-Nose): You will need these to cut the wire. They are also needed to bend the complex curves. This is especially true for the tight spirals in the elegant French crochet letters style.
  • Tapestry Needle: Use this for weaving in yarn ends. More importantly, use it to stitch the finished rope segments together at the joints. An example is the crossing bar of an ‘A’.

How to Do It: The Core Rope Technique

This section gives you the pattern and instructions for making the core part of your Yarn Letter Craft. This is the continuous rope.

Free Crochet Pattern: The Continuous Single Crochet Tube

This tube is worked in a continuous spiral. This avoids the noticeable seam created by joining stitches.

  1. Starting the Tube: Chain four. Join with a slip stitch (SL ST) into the first chain to make a tiny ring.
  2. Rounds 1 and Onward: Work six single crochets (SC) into the ring. Do not join. Put a stitch marker in the first SC. Keep working SC into each stitch around. Move the marker up each time.
  3. Tension is Key: You must keep your tension very tight throughout this process. The finished tube should be quite narrow. It should be about the size of your thumb.
  4. Length: Keep working in the spiral until your rope is long enough to make your entire letter. You may need enough for a whole word. To estimate the length, draw your letter at its full size. Use a string to trace the lines. Be sure to add extra length just in case. For a small monogram ‘A’, you might need several feet of rope.

Integrating the Structure and Stuffing

Once you have crocheted a good length of the tube, you must add the wire and stuffing. This is needed to give the letter strength. This step is done little by little.

  1. Wire Insertion: Cut a piece of wire slightly shorter than your crocheted section. Gently feed the wire into the center of the tube. The wire should reach the very tip of the tube, where your hook is working.
  2. Stuffing: Use a thin tool, like a pencil end, to push small pieces of polyfill around the wire and into the tube. Stuff the tube lightly, but firmly. It should look full and rounded. Make sure the wire is completely covered.
  3. Continuous Work: Crochet a few more inches. Then stop, insert more wire, and stuff again. Repeat this process constantly: Crochet, insert wire, stuff. Doing this together is key. It helps you control the stuffing and keeps the wire exactly in the center.

Shaping the Letters

This is the creative part of the Yarn Letter Craft.

  1. Sketching: Always use a full-size sketch or template of your letter design.
  2. Bending: Use your hands and pliers to carefully bend the wire and rope into the shape you want. Pay close attention to the tight spirals. These are often seen at the ends of French crochet letters. You must bend these slowly and carefully using needle-nose pliers.
  3. The Final Curve: Once the letter is fully formed, or a section is finished, stitch the rope ends together. Use a tapestry needle. Stitch the different segments of the letter together at their joints. An example is joining the bar of an ‘H’ to its sides. Use the same yarn for stitching. Make sure the connections cannot be seen.

Examples and Styling Ideas

The elegant look of French crochet letters makes them easy to use in many different design styles.

The Monogram Statement

One large monogram letter is a strong focal point. Choose a flowing, script font for bending. Focus on beautiful curves and spirals. Display the letter on a gallery wall or above a bed. Using a very light yarn against a dark wall creates a striking contrast. This contrast keeps the vintage warmth of the material. This technique turns the classic Yarn Letter Craft into a piece of sculpture.

Personalized Quotes and Words

This diy idea lets you spell out full words or short quotes. For words like “CREATE” or “GATHER,” make sure all the letters are the same size. Since they have wire inside, the letters will stand upright when placed on a shelf. This is a great way to add a subtle texture to a simple, modern room.

Incorporating Color Subtly

The main rope should stay a neutral, vintage color. You can add color with small touches. These touches should still fit the soft French crochet letters style.

  • Two-Tone Letters: For a word, switch between a cream color and a dusty blue for every other letter.
  • Embellishment: The rope is the main design. Keep extra decorations simple. You can sew a single, flat crocheted flower or a small piece of vintage lace onto the rope where two lines cross. This draws the eye without making the piece look too busy.

The beauty of this craft is its simple shape, combined with the complex, handmade texture of the continuous rope.


Troubleshooting and Tips for Mastering the Craft

Maintaining Uniform Tension

Keeping the same tension is the most important thing for getting the clean look of the French crochet letters. If your tension changes, the rope will be uneven. This results in a wobbly letter. If your hands get tired, take a break. You can also try using an even smaller hook size to force the stitches to be tighter.

Hiding the Wire

The metal wire must never show or poke through the yarn. There are two ways to prevent this:

  1. Tight Stitches: Using a small hook size makes the fabric dense. This dense fabric hides the wire.
  2. Sufficient Stuffing: The stuffing acts as a soft layer. It keeps the wire centered inside the rope. If the rope feels too heavy or stiff, you may have used too much wire or too much stuffing. This can make shaping the curves hard.

Creating Clean Curves and Spirals

Making the elegant script of the Yarn Letter Craft style takes patience when shaping.

  • Smooth Curves: Use both hands to bend the wire slowly. Focus on making one continuous, smooth curve. Avoid small, sharp bends.
  • Tight Spirals: Use needle-nose pliers for the beautiful flourishes. Start bending the spiral before you stuff the final part of the rope. This gives the wire maximum flexibility. Once shaped, gently stuff the end to help the spiral keep its form.
  • Connecting Segments: When joining parts (like the pieces of a ‘K’ or ‘R’), use the yarn tail and a tapestry needle. Sew the pieces together by only stitching through the side walls of the crochet fabric. Pull the stitches tight to close any gaps at the joint.

Finishing the Ends

The start and end points of the crocheted rope must be hard to see. When you finish the length, cut the yarn. Leave a long tail. Use the tapestry needle to pull the tail through the six stitches at the tube opening. Pull it tight to close the hole. Then, weave the rest of the tail down into the center of the rope. This creates a clean, closed end for the letter.


Frequently Asked Questions

Q: Can I use knitting instead of crochet for the rope?

A: Yes. The i-cord is the knitted version of the continuous crochet tube. It works just as well for making the firm rope needed for this Vintage Yarn Letter Craft. If you prefer knitting, use a simple four-stitch i-cord pattern on double-pointed needles instead of the crochet pattern.

Q: How long does it take to make a single letter?

A: The time depends a lot on the letter size and how complex the shape is. A simple, medium ‘I’ might only take one or two hours. However, a highly styled French crochet letters monogram with complex spirals (like a fancy ‘S’) can easily take four to six hours. This is mostly because the tight, continuous single crochet takes time.

Q: My rope is too stiff. What did I do wrong?

A: Stiffness usually means you used wire that was too thick. It can also mean you stuffed the rope too tightly. This stops the wire from bending easily. Check that your wire is flexible enough to bend by hand. Use just enough polyfill to make the rope round, but not so much that it is rock-hard.

Q: What is the best way to display the finished letters?

A: The letters can stand on their own on any flat surface because of the wire inside. To hang them on a wall, sew a small loop of fishing line or thin yarn to the back. Attach it at a spot that balances the letter’s weight. This is usually the highest point.


References


Recent Posts


The Ultimate Cardboard Craft: A Mosaic Candle Pedestal

A beautifully finished cardboard craft mosaic candle pedestal, made from a yarn cone and shimmering with pearlescent tiles, stands prominently on a dark wooden table with a lit pillar candle. In the background, elegant brass candlesticks and wine glasses suggest a sophisticated dining setting, highlighting the high-end appeal of this DIY project

Are you looking for that perfect centerpiece? The one piece that instantly adds texture, drama, and a touch of expensive elegance to your dining table or mantle, but without the high price tag? You have found it! This cardboard craft project takes the simple, often thrown-away cardboard yarn cone and turns it into a stunning, quality mosaic candle pedestal.

This DIY is inspired by high-end decorator items that feature shimmering mother-of-pearl or elegant glass tiling. You can easily get that beautiful, opulent look using materials that are surprisingly affordable and simple to find.

This guide will show you how to transform what looks like trash into pure treasure. We will cover every step, from preparing your cardboard base to carefully placing each shining mosaic tile. The result will be a stable, beautiful piece that you will be proud to show off for many years.

The Design: Creating an Expensive Look

The appeal of this cardboard crafts pedestal comes from its classic inverted cone shape, which is very stable, and its sparkling, tiled surface. The main secret to making this piece look expensive is the tiles you choose. Using small, square, off-white, or pearlescent tiles mimics the soft glow of natural mother-of-pearl. This gives the finished piece a luxurious, heavy feel. Once complete, the mosaic pedestal catches the light beautifully, making the candle flame look even warmer.

Gathering Your Supplies

Before you start this detailed cardboard craft piece, make sure you have all your materials ready. The quality of your materials, especially the glue and the base, will affect how long your finished piece lasts and how good it looks.

Essential Materials List

  • The Base Structure: You need a sturdy inverted cone shape. The easiest option is a heavy-duty cardboard yarn cone (the kind industrial thread is wrapped around). If you cannot find one, a pre-cut foam or wood cone base, adjusted to the right height and angle, will also work well. If you use cardboard, check that it is clean, dry, and strong.
  • The Tiling Material: You need small square mosaic tiles. For the look in the picture, choose tiles that are very small (about one-quarter inch or less) and have a shimmering, iridescent, cream, or light gold finish. You can use glass, thin mother-of-pearl pieces cut into squares, or even high-quality plastic resin tiles. The number of tiles you need depends on the size of your cone.
  • The Top Platform: This is a flat, circular piece of strong material to hold the candle. It should be made of thick cardboard, wood, or dense plastic. The size must be wide enough to safely hold the pillar candle you plan to use, with a small border around the edge for extra safety.
  • Adhesive: Use a high-strength, waterproof glue or mosaic cement. It must be able to stick your chosen tiles firmly to your cone material (cardboard or wood). Make sure the glue grabs quickly to stop the tiles from sliding down the cone’s slope.
  • Grout (Recommended): Use a pre-mixed or mixable grout in a very light, neutral color, such as white, bone, or pale grey. Grout fills the spaces between the tiles. It also makes the piece stronger and gives it a professional look. If you place your tiles right next to each other with no gaps, you can skip this.
  • Sealer: If you use grout, a grout sealer is important to stop stains. If you plan to use a real wax candle, applying a clear coat sealer over the entire tiled surface can make cleanup easier later.
  • Candle: Use a pillar candle or a battery-operated LED candle. A Note on Safety: If you use a real flame candle, ensure your top platform is completely non-flammable (like wood or thick, fully cured composite) and wide enough to catch any dripping wax.

Tools You Will Need

  • Utility Knife or Box Cutter: Use this for shaping the cardboard cone and cutting out the top disc.
  • Ruler and Pencil: For measuring and marking the cone and the top disc accurately.
  • Sandpaper: Use fine-grit sandpaper to smooth the edges of the top platform.
  • Grouting Tools: You will need a small rubber spatula or trowel to spread the grout, and a damp sponge to wipe away the extra grout.
  • Paper Towels and Rubbing Alcohol: Keep these handy for cleaning up any stray glue or preparing the surface.
  • Tile Nippers (Optional): If you need to cut tiny pieces of tile near the top for a perfect fit, a small pair of nippers made for mosaic tiles will be very helpful.

Sourcing the Perfect Pearlescent Tiles

The entire “high-end” feel of this project relies on choosing tiles that have that soft, shimmering finish, just like real mother-of-pearl. Here are the best material choices and where you can find them:

Genuine Mother-of-Pearl Tiles

For the most authentic and luxurious look, real shell tiles are the top choice. These tiles are made from the inside layer of a shell, called nacre. They have a natural, swirling shine that is impossible to fully copy.

  • Where to Find Them: Look online at stores that sell mosaic craft supplies. They often sell small bags of loose tiles in sizes like ten millimeter squares, which are ideal for small, curved projects like this cone. You can also check specialty tile stores that sell large sheets of mother-of-pearl backsplash tile. Even though a full sheet is expensive, you can cut it into strips or individual squares for your project. This might actually be cheaper per tile than buying small craft bags. Look for colors called “White,” “Natural,” or “Iridescent White.”

Iridescent Glass Mosaic Tiles

This option is great and often costs less. Iridescent glass tiles create a similar effect using a metallic coating baked onto the glass surface.

  • Where to Find Them: Check large craft stores and online mosaic sellers. They carry small glass tiles, sometimes clear or opaque, that come in iridescent finishes. You can often buy these tiles in loose packages or in small sheets attached to a mesh backing. Look for tiles described as “Iridescent,” “Pearl Lustre,” or “Metallic Mix” in light colors like cream, white, or pale beige. Glass tiles often catch the light strongly, giving your piece a bright, glamorous sparkle.

Flexible Shell Veneer Sheets

For a project that is fast and simple, think about using mother-of-pearl veneer sheets. These are super-thin sheets of real shell, sometimes with an adhesive backing or attached to mesh.

  • Where to Find Them: You might find these at stores that sell supplies for detailed woodworking or inlay crafts. They usually come in flat sheets that you can cut with sharp scissors or a utility knife. The best thing about these is that you can cut long strips to wrap continuously around the cone. This reduces the number of visible seams between individual pieces. If you use these, make sure your glue is strong enough to hold the thin veneer firmly to the curved cardboard.

Iridescent Paint on Simple Tiles

If you need to keep costs low, another trick is to use simple, flat white craft tiles. You can paint them with an iridescent medium or a pearl-finish paint before you glue them down. This adds an extra step but gives you total control over the final shine. Just make sure the paint is sealed with a clear, glossy coat to protect the finish before you start grouting.

Step One: Preparing and Stabilizing the Base

The finished piece will only be stable if you prepare the cone base well and attach the candle platform securely.

Shaping the Cone

Start with your inverted cone. Most industrial yarn cones are narrow at the top and wide at the bottom.

First, decide how tall you want your finished pedestal to be. Use a ruler and pencil to mark the spot where you need to cut the cone if the current shape is too tall or too skinny. Use a sharp utility knife to carefully cut the cardboard. Make sure the top and bottom cuts are perfectly flat and straight across the cone. This is vital so the final piece sits straight and level. Use fine sandpaper to smooth any rough edges on the cardboard. Wipe off any dust or grit, as it can stop the glue from sticking well.

Making and Attaching the Top Platform

The top platform needs to be strong enough to hold the candle without wobbling.

Measure the narrow diameter of the cone’s top opening. You need a circle of material that is slightly wider than this opening, and also wider than the candle you plan to use. A good size for a standard pillar candle is between four and six inches across.

Draw the desired size onto your wood, thick plastic, or dense cardboard. Carefully cut out the circle using a utility knife or a saw. Use sandpaper to smooth all the edges of the circle until they are perfectly round and flat.

Apply a thick, even layer of your strong adhesive to the top opening of the cone. Carefully center the newly cut platform disc on the glue and press it down hard. Place something heavy (like a large book) on the top disc and let the glue dry completely. This curing time is extremely important—do not rush this step, because the stability of the whole project relies on this strong bond. We recommend letting structural glue dry for a full twenty-four hours.

Step Two: The Art of Mosaic Tiling

Tiling is the stage where being patient and accurate pays off, turning the simple cone into a shimmering masterpiece. This is the longest part of the project. You will work from the bottom up, making sure each row is perfectly straight.

Starting the First Row

Start at the widest part of the cone—the bottom edge. This first row sets the standard for all the rows that follow.

Apply a thin, even layer of adhesive to a small section of the cone near the bottom edge. Work on about a quarter of the cone’s circle at a time. Do not try to glue the entire cone at once, as the glue will dry before you can place all the tiles.

Start placing your first row of tiles. Line up the bottom edge of the tiles with the bottom edge of the cone. Press each tile firmly into the glue. The tiles should either touch each other lightly or have a very small, even space between them. If you leave a space for grout, make sure that space is exactly the same size all the way around the cone. Continue placing tiles until the entire bottom edge is covered with the first row. Use a ruler often to check that the top edge of this first row is level all the way around the piece.

Adding More Rows

Once the first row is secure and has started to set (this helps stop the tiles from sliding down the slope), begin the second row directly above the first.

Because the cone slopes and gets smaller at the top, you will notice that the space available for the tiles slightly shrinks with each row. This is the biggest challenge when tiling a cone. You have two choices: you can keep the space between the tiles the same and end up with a wider gap at the end of the row, or you can slightly reduce the space between tiles as you move up the cone. For a smooth, beautiful finish, slightly reducing the space between tiles as you move up is usually the better choice.

Apply glue for each row separately. Work slowly and focus on keeping the horizontal lines straight as you wrap the tiles around the cone. Because of the cone’s angle, the top rows will naturally have fewer tiles than the bottom rows. This means you must be careful with alignment in each new row so that the vertical lines of the tile columns look as straight as possible, even with the cone’s curve.

Finishing the Tiling

Keep adding rows until the tiled surface meets the edge of the top platform disc. You might need to use your tile nippers to carefully cut the tiles in the top row. This ensures you get a perfectly clean, straight line right next to the circular platform. You can use a file or sandpaper to smooth the rough edges of any tiles you cut before you glue them down.

Allow the entire tiled surface to dry for at least twenty-four to forty-eight hours. The tiles must be completely solid and impossible to move before you go to the next step.

Step Three: Grouting and Finishing the Mosaic

Grouting is the step that makes the mosaic look professional, smooth, and complete. It blends the individual tiles into one solid surface. It also protects the cardboard base and holds all the tiles securely in place.

Applying the Grout

Once the glue is totally dry, mix your grout according to the instructions on the package. If you chose a sanded grout, check that the gaps between your tiles are wide enough for the sand particles. If the gaps are very small, or if there are no gaps, you need to use an unsanded grout.

Use a small rubber spatula or trowel to scoop up some grout. Press it firmly into all the gaps between the tiles. Work in small areas, making sure the grout fills every empty space. The goal is to make the grout level with the surface of the tiles, creating a smooth line.

Cleaning and Polishing

As soon as you finish grouting a section, start the cleanup process right away.

Take a damp (not soaking wet) sponge and wipe the surface of the tiles diagonally across the grout lines. This action cleans the tile surface without pulling the wet grout out of the gaps. Wash the sponge often in a separate bucket of water. Repeat this until the tile surfaces are mostly clean.

After the entire cone is grouted and cleaned with the damp sponge, let the grout sit for about an hour. A cloudy film, called “grout haze,” will form on the tiles.

Use a piece of dry cheesecloth or a soft, dry rag to gently rub the tiles. This removes the haze and polishes the tile surfaces until they shine. This polishing step is key to making the pearlescent finish truly stand out. Be careful not to accidentally remove any grout during this final buffing.

Curing and Sealing

Allow the grout to cure completely as directed by the manufacturer. This can take up to seventy-two hours. Try not to touch or move the pedestal much during this time.

After the full curing time, apply the grout sealer. This is strongly recommended because it protects the light-colored grout from dirt, dust, and any candle wax that might drip. Follow the instructions for the sealer product. You will usually brush it over the grout lines and wipe away any excess from the tile surface. A good quality sealer will make your candle pedestal last longer and keep it beautiful.

Step Four: The Final Assembly and Display

A beautifully finished cardboard craft mosaic candle pedestal, made from a yarn cone and shimmering with pearlescent tiles, stands prominently on a dark wooden table with a lit pillar candle. In the background, elegant brass candlesticks and wine glasses suggest a sophisticated dining setting, highlighting the high-end appeal of this DIY project

Your beautiful mosaic cone pedestal is now finished. The last steps are setting up your display.

Place your chosen pillar candle or battery-operated LED candle securely on the top platform. The wide, flat disc should make it very stable.

To copy the elegant table setting shown in the inspiration picture, arrange several simple brass or golden candlestick holders around the base of your new pedestal. You can use holders of different heights. This arrangement adds visual interest and blends the metallic texture with the shine of your mosaic.

Place your creation on a dark wood table or against a richly textured fabric to make the colors pop. This will emphasize the warm glow of the candle, immediately upgrading your space with a centerpiece that looks like it came from an expensive boutique. This simple cardboard craft has truly become a statement piece of luxury and personal style.


References


Recent Posts


Create the Ultimate Shabby Chic Wall Art (It’s Easier Than You Think!)

Detailed close-up of handmade string art featuring an ornate skeleton key silhouette made with light grey thread on weathered, whitewashed pallet wood. The piece is styled on a pink dresser with pearls, emphasizing the Shabby Chic Wall Art aesthetic.

String art is a wonderfully hands-on craft. It allows you to transform simple materials into sophisticated décor. This project guides you through creating an ornate, antique-style skeleton key. It is mounted on a weathered, whitewashed wood base. This artwork perfectly captures the romantic elegance of the shabby chic aesthetic, making it stunning Shabby Chic Wall Art. This article provides a complete guide to crafting the piece, finding the perfect intricate design, and exploring key variations in color and material. These variations adapt this technique to suit almost any interior design style.


Understanding the Intricate Key Pattern

The most important part of this design is reproducing the look of an antique skeleton key. This type of key has a decorative bow (the top loop) and an intricate bit (the notched end). This project relies on a detailed silhouette, unlike simple geometric string art.

How to Find the Pattern:

  1. Search for Templates: The best way to find this pattern is to search online. Use terms like “ornate skeleton key silhouette” or “vintage skeleton key drawing.” Look for a graphic with high detail, especially in the bow and the bit. The complexity and realism of your finished string art rely completely on the precision of this outline.
  2. Edit and Size: Once you find a good image, use a basic photo editor or a word processing program. Resize the key to fit your wood base. It should fill most of the board so that no detail is lost (e.g., a 14- to 16-inch key on a 12- by 18-inch board). Make sure the lines of the printed image are clean and sharp.
  3. Print: Print the design onto paper. If the key is too big for one sheet, print it in sections. Then, tape the sections together very carefully. Ensure the key’s lines align perfectly across the seams. This paper printout will become your template for placing the nails accurately.
  4. Download: Click Here to download this version

Materials You Will Need

  • Wood Base: Rustic wood planks, like distressed pallet wood, roughly 12″ x 18″. The wood must be strong enough to hold the nails. It should also have a naturally weathered appearance. You can use Plywood or MDF, but they will need extra surface texturing to look rustic.
  • Paint: White or very light grey chalk paint, or thinned acrylic paint for the whitewashing process.
  • Nails: Small silver-colored brad nails or tacks (e.g., 3/4 inch). Nails with a slightly wider head are better, as they help hold the thread securely.
  • String/Thread: Light grey or silver embroidery floss, thin linen thread, or fine metallic thread. (More options are available in the String and Yarn Variations section).
  • Tools: Hammer, fine-grit sandpaper, ruler, pencil, tape, tweezers, and the printed key template.

Step-by-Step Instructions

Section 1: Preparing the Weathered Wood Base

  1. Prep the Wood: If you use separate wood planks (like true pallet wood), secure them together. You can use wood glue and small backing supports. Clean the wood surface well before you start.
  2. Initial Distressing: Lightly sand the wood. Focus on rounding the edges and corners to give the wood a softened, aged feel. For intentional wear, you can randomly score the surface with a knife. You can also lightly dent the wood with a chain or hammer to make it look used over many years.
  3. The Whitewash Technique: Apply a very thin, watery layer of white or light grey paint over the entire wood surface. Proper dilution is key; the paint should be thin enough to be transparent. Immediately wipe off most of the paint with a clean, damp rag. This process, called whitewashing, lets the wood grain and faint colors show through the thin white layer. This creates the perfect base for a shabby chic look. Let the paint dry completely.
  4. Final Touches: Once the paint is dry, use fine-grit sandpaper. Lightly sand the base again. Focus on areas that would naturally show the most wear, like edges and corners. This step enhances the aged, “shabby chic” look by letting the rustic wood beneath peek through the paint layer.

Section 2: Nailing the Key Outline

  1. Position the Template: Center your printed key template exactly on the dried wood base. Secure it firmly with small pieces of tape.
  2. Mark Nail Placement: Use the template as a guide. Lightly mark dots along the entire edge of the skeleton key design.
    • Detail Areas: The bow and intricate bit are critical. Place the nails closer together here (about 1/4 inch apart). This ensures you capture the key’s delicate curves and fine details.
    • Shaft Area: Along the straighter shaft of the key, you can space the nails a bit further apart (up to 1/2 inch). This will not compromise the final shape.
  3. Hammer the Nails: Carefully hammer the silver brad nails into all the marked points. It is crucial to drive the nails to a consistent depth. Leave about 1/4 to 1/3 inch of the nail shaft showing. Consistency is important; it prevents the final thread lines from sagging.
  4. Remove the Template: Gently tear the paper template away from the board. Use tweezers to remove any small scraps of paper that might be trapped under the nail heads.

Section 3: Creating the Ethereal String Web

The goal of the stringing process is to create a delicate, “airy web.” This web defines the key’s shape without creating a dense, solid block of color. This approach ensures the weathered wood background remains visible as part of the finished artwork.

  1. Start the String: Tie a secure knot of the light grey or silver thread around the base of any nail on the key’s edge. Trim the excess string tail neatly.
  2. Establish the Outline: Before you start filling the inside, loop the string completely around every single nail on the outline, going around once. This step is necessary. It reinforces the key’s border and makes the final shape look clean and defined.
  3. Fill with Random Crossings: Start filling the empty space inside the outline. Run the string between nails in a random, criss-crossing pattern.
    • Focus on Length: Run the string from one nail to a distant nail on the key’s opposite side. Then, loop it around a nail nearby, and run it across the space again.
    • Maintain Airiness: Avoid making neat, parallel lines. Also, do not run the thread so many times that the shape becomes solid. The finished stringing should look like a soft, delicate web. By limiting the density, you allow the whitewashed wood background to show through. This creates the unique ethereal quality needed for this design.
  4. Finish the Art: Continue filling until the key’s form is clearly visible. The interior texture should be satisfying, but stop before the inside becomes too heavy. Once you are done, tie a final knot securely around one of the nails. Trim the thread closely to the knot. Tuck the loose end neatly into the surrounding strings.

Section 4: Color Variations for Any Interior Style

The light grey thread on a whitewashed base is ideal for Shabby Chic. However, you can change the skeleton key design to fit almost any interior style. You do this simply by changing the colors of the base and the thread. This table shows popular variations and the aesthetic each one creates:

Interior StyleBase FinishNail ColorString/Thread ColorResulting Aesthetic
Bohemian/EclecticNatural, dark stained wood (e.g., walnut or deep oak).Copper or BrassDeep Teal, Mustard Yellow, or MagentaThe colors are rich, grounding, and vibrant. The dark base makes the thread color stand out dramatically.
Modern FarmhouseMatte Black or Dark Grey paint.Silver or Galvanized SteelCrisp White or CreamThis creates a high-contrast, clean, and graphic look. It offers a clean, updated rustic feel.
Industrial/MinimalistRaw concrete slab or unpainted, smooth wood.Black or Dark GunmetalSingle Color Black or Charcoal GreyThis provides subtle texture over a solid shape. The string adds visual density without color being the main focus.
Coastal/NauticalLight Blue or Aqua paint, heavily distressed.White or SilverDeep Navy Blue or Rope-colored Jute/HempThe look is fresh, airy, and textured. It evokes the feeling of artifacts weathered by the sea.
Art Deco/GlamSmooth, high-gloss painted wood (e.g., navy or emerald).Gold or Shiny BrassMetallic Gold, Silver, or Black Sparkle ThreadThis style is luxurious, geometric, and high-shine. It focuses on the contrast of metallic and polished surfaces.
Scandinavian/NordicLight, unfinished Birch or Ash wood.White or Light GreyCharcoal Grey, Forest Green, or Deep RedThe overall feel is earthy, simple, and functional. The natural wood texture is the star of the piece.

Section 5: Exploring String and Yarn Variations

The type of thread you choose directly affects the finished string art. It influences the perceived weight, texture, and level of detail. The original design used thin embroidery floss for an “airy web.” But using other materials can drastically change the final look of the piece.

String TypeThickness/CompositionBest ForVisual Effect and Notes
Embroidery FlossThin, usually six strands that can be split.Intricate designs, fine detail, gradient work.It creates a fine, delicate line. And is excellent for the key design because it allows for high detail and minimal density. It is available in thousands of colors.
Crochet ThreadAvailable in various sizes (e.g., Size 10 is common). It is thicker than floss.Solid color filling, designs that need a slightly bolder line.This provides a smoother, cleaner line than floss. Its strength makes it very reliable for pulling the thread tight.
Baker’s TwineMedium thickness, often made of two twisted colors (e.g., red and white).Rustic, vintage, or whimsical designs. Good for creating a striped pattern.This adds a distinct rustic texture and character. The two-tone twist creates a bold, noticeable line that is less delicate.
Thin Yarn (Acrylic/Cotton)Thicker than thread, with a softer, sometimes fuzzy texture.Larger projects, simple shapes, children’s string art.It creates a soft, plush, and cozy texture. Because it is thick, it covers the background quickly. And is less suitable for very fine details like the key bit.
Metallic ThreadThickness is similar to floss, often made of polyester or rayon.High-glamour, luxury, or accenting small details.It is reflective and highly visible. It adds a sophisticated shimmer to the artwork. It can be slippery to work with, but it has a big visual impact.
Linen/Hemp CordThicker, rough texture.Bohemian, natural, or Coastal styles.This gives the art an organic, earthy feel. The natural thickness and slight stiffness of the fibers give the finished piece a raw, tactile texture.

Key Considerations for String Selection:

  • Detail vs. Thickness: For the intricate key design, choose thinner threads (floss, crochet thread). These are best for capturing the delicate turns of the bow and bit. Save thicker yarns for larger, simpler silhouette projects.
  • Strength: Make sure the string is strong enough to be pulled taut without breaking. Weak thread results in a saggy, undefined image.
  • Texture: Think about how the string’s texture will look against the nails and wood. A fuzzy yarn will appear much softer than a smooth, highly reflective metallic thread.

By learning the core technique and then trying these variations in base color, thread type, and color palette, you can easily recreate this elegant skeleton key string art. The finished piece will perfectly complement any space in your home.


References and Resources

Here are some resources that may be helpful when planning your string art project or sourcing materials. There is no affiliation with any of these suppliers:


Recent Posts


The Simple Truth About Processed Foods and Your Gut

A vibrant, colorful bowl of gut healthy meals on a wooden table, showcasing a variety of whole foods that stand in stark contrast to processed foods. This meal, designed for optimal gut health, includes quinoa, roasted carrots, spinach with pomegranate and walnuts, sliced avocado, a boiled egg, shredded beets, a dollop of yogurt with chia seeds, and a serving of kimchi.

We all know that what we eat has a huge effect on our health, especially our gut health. But today, walking through the grocery store is confusing. Shelves are full of processed foods that are fast, flavorful, and easy. Unfortunately, many of these packaged items look nothing like the whole foods they came from, making it harder to choose gut healthy meals.

This shift in our diet has started a hidden fight inside our bodies. This fight is mainly against a critical system: our gut.

For too long, we ignored the complex life inside our digestive system. This is our gut microbiome. It is a busy community of trillions of tiny living things, like bacteria and fungi. This community is key to many important jobs. It helps us digest food and absorb nutrients. It controls our immune system and even affects our mood. When this delicate balance is upset, the results can be serious. You might feel simple gut discomfort, or you could face chronic health problems.

The evidence is clear. Many people are suffering from gut-related issues.

  • The American College of Gastroenterology reports that 60 to 70 million Americans are dealing with digestive diseases.
  • Conditions like Irritable Bowel Syndrome (IBS) affect about 10-15% of people worldwide. Many more suffer from daily bloating, gas, stomach pain, and general gut issues.
  • Data also shows a large and global increase in inflammatory bowel diseases (IBD). This affects millions. Experts believe diet and environment are major factors.
StatisticDescription
60 to 70 million AmericansThe estimated number of people in the United States affected by digestive diseases, according to the American College of Gastroenterology.
10-15% of the global populationThe estimated percentage of people worldwide affected by Irritable Bowel Syndrome (IBS).
MillionsThe general scope of people impacted by a significant rise in inflammatory bowel diseases (IBD) globally.

The truth is simple: our gut health is in trouble. A main cause is sitting right on our plate. It is the industrial food system and its heavy focus on ultra-processed foods.

What Are Processed Foods, Really?

We need to understand what we mean by “processed foods.” The term can cover a lot. Cutting an apple or freezing peas is a type of processing. The real problem, however, is with ultra-processed foods (UPFs).

These are products made in a factory. They are usually ready-to-eat or quick to heat up. They contain few, if any, real whole foods. Companies make them using cheap ingredients. They are engineered to taste amazing, sell for a high profit, and last a long time on the shelf. These foods include many familiar items:

  • Packaged snacks like chips, cookies, and pastries
  • Sweetened drinks
  • Ready-to-eat breakfast cereals
  • Instant meals and noodles
  • Processed meats like sausages, hot dogs, and deli slices
  • Candy and most fast food meals

The issue with UPFs is not just that they are changed. The key issue is how they are changed, what they contain, and what they are missing.

The Simple Truth: How Processed Foods Harm Your Gut

Science clearly shows that eating processed foods often harms your gut. Here is a closer look at what happens:

1. The Fiber Problem: Good Bacteria Go Hungry

The biggest problem with processed foods is their serious lack of dietary fiber. Fiber is more than just material to help you go to the bathroom. It is the main source of food for the friendly bacteria in your gut.

When these good microbes ferment fiber, they create important compounds. These are called Short-Chain Fatty Acids (SCFAs). Butyrate, acetate, and propionate are three key SCFAs. They are vital for your body because they:

  • Keep your intestinal lining strong and healthy.
  • Help fight inflammation.
  • Give energy to your colon cells.
  • Support your immune system.

If your diet is low in fiber, your good bacteria starve. This reduces the number of different microbes in your gut. This imbalance is called dysbiosis. It allows bad bacteria to grow easily. Dysbiosis is the root of poor gut health.

2. Sugar, Bad Fats, and Inflammation

Processed foods usually have high amounts of added sugars, trans fats, and saturated fats.

  • Too Much Sugar: Eating lots of simple sugar can make harmful, inflammatory bacteria and yeasts grow faster. This leads to an unbalanced gut. It can also hurt your gut lining, causing a “leaky gut.” When the gut lining is too porous, toxins and food particles leak into the blood. This starts inflammation across your whole body.
  • Unhealthy Fats: Eating too much of certain fats, like hydrogenated vegetable oils, causes problems. High levels of Omega-6 fatty acids without enough Omega-3s can also hurt the gut. These fats create an inflammatory state and weaken the gut barrier.

3. Additives: The Sneaky Gut Disruptors

The various additives in processed foods are a major health concern. They are not normal cooking ingredients. Companies add them to make food taste, look, and feel better, and to extend its shelf life. Many have been shown to negatively affect the gut.

  • Emulsifiers: Common emulsifiers are everywhere, in things like ice cream and salad dressing. Examples include CMC (E466) and Polysorbate 80 (P80, E433). Studies show they can hurt the protective mucus layer in the gut. They change the gut bacteria. This can lead to increased gut permeability, or “leaky gut,” and chronic swelling.
  • Artificial Sweeteners: These are promoted as healthier than sugar. But sweeteners like sucralose (E955) and aspartame (E951) change the makeup and function of your gut microbes. These changes can affect how your body handles sugar and may lead to inflammation.
  • Nitrates and Nitrites: These are preservatives found in processed meats. They can form compounds in your gut that harm bacteria. This is linked to inflammation and a higher risk of some cancers.

4. Loss of Good Nutrients: The Cycle Gets Worse

When you fill your plate with processed foods, you eat less whole, nutritious food. This is a negative cycle. You miss out on the vital vitamins, minerals, antioxidants, and diverse fibers. These good things are found in fruits, vegetables, whole grains, and beans. Your gut needs these elements to stay strong. This constant lack reduces your good bacteria and makes your gut weak.

The Big Impact: More Than Just Stomach Aches

The effect of a processed food diet goes far beyond occasional gas or bloating. A damaged gut and a porous lining are now known to cause many long-term health issues:

  • Digestive Problems: Long-term gut inflammation is a key feature of IBD and worsens IBS symptoms.
  • Metabolic Issues: The link between gut imbalance and obesity, type 2 diabetes, and insulin resistance is becoming clearer. A sick gut changes how your body processes sugar and stores fat.
  • Immune Problems: A “leaky gut” may play a role in some autoimmune diseases. It can cause your immune system to overreact.
  • Mental Well-being: Your gut and brain constantly talk to each other. An unhealthy gut can change your mood, increase anxiety, and affect how you think. This is due to changes in brain chemicals and body inflammation.
  • Weakened Defenses: A large part of your immune system is in your gut. When the gut is damaged, your ability to fight off sickness and stay healthy is lowered.

Taking Back Control: Your Gut Health Plan

A vibrant, colorful bowl of gut healthy meals on a wooden table, showcasing a variety of whole foods beneficial for gut health. Ingredients include quinoa, roasted carrots, spinach with pomegranate and walnuts, sliced avocado, a boiled egg, shredded beets, a dollop of yogurt with chia seeds, and a serving of kimchi.

The good news is that your gut can heal quickly. It responds well to simple, positive changes. By choosing your food carefully, you can start to bring back balance.

Focus on Real, Whole Foods

The key to a healthy gut is to go back to the basics:

  • Eat Lots of Fiber: Eat many different kinds of fruits, vegetables, beans, nuts, seeds, and whole grains. These are the prebiotics your good bacteria love.
  • Choose Clean Proteins: Select fish, chicken, eggs, and plant-based proteins.
  • Add Healthy Fats: Use avocados, olive oil, and fatty fish that are rich in Omega-3s.
  • Try Fermented Foods: Eat foods rich in good bacteria, like yogurt, kefir, sauerkraut, and kimchi. This helps replace and boost your good microbes.

Read Labels Smartly

You need to be a detective when you shop. Don’t trust only the words on the front of the package.

  • The Ingredient List: If the list is long or has words you cannot easily say, or if it lists many additives (especially emulsifiers), put the product down.
  • The Nutrition Panel: Check the levels of added sugar, saturated fat, and fiber. Look for more fiber and less sugar.

Cook Food at Home More Often

Cooking gut healthy meals gives you full control. You know exactly what you are eating and you can avoid hidden additives and heavy processing. Try new, easy recipes and enjoy feeding your body well.

A Simple Support for Your Gut: Making Health Easy

Even when you try your best, life gets busy. Stress, travel, and the occasional less-than-perfect meal can all throw your gut off balance. This is where extra help can make a real difference.

A solution that fits perfectly into a modern, health-focused life is Regular Girl.

This amazing product is a great way to support your digestion and keep your gut balanced. Regular Girl is a proven prebiotic fiber. It uses Sunfiber®, which comes from guar beans. This is not a harsh fiber; it is a soluble fiber that works as a powerful prebiotic. It gently feeds your good gut bacteria without causing the common side effects of other fibers, like gas or bloating.

Why is Regular Girl so perfect for people who travel or eat on the go? It is easy to use and very accessible. It is a powder with no color and no taste. And dissolves completely in any cold drink or soft food. This means you can easily get your daily fiber, no matter where you are.

Trying to find gut healthy meals when you travel is often difficult. Packing Regular Girl in its handy single-serving packs makes it easy to support your gut health anywhere. It helps you stay regular, boosts your good gut bacteria, and makes those important Short-Chain Fatty Acids. It gives your gut everything it needs to stay strong and healthy.


Conclusion

The link between processed foods and gut problems is clear. Our modern diet—high in factory ingredients and low in vital fiber—has created a widespread gut crisis. By understanding how these foods hurt our bodies, we can make better, smarter choices.

The single most powerful step you can take is to eat a diet of whole, unprocessed foods. For reliable support, especially when life is busy, adding a high-quality prebiotic like Regular Girl can give your gut the boost it needs. Your gut is key to your immune system, your brain, and your overall health. It is time to treat it with the care it deserves.


References


Recent Posts


How To Make A DIY Pom Pom Rug

A fluffy, round DIY Pom Pom Rug in vibrant colors (yellow, teal, coral, and gray) lies on a wooden living room floor. A white cat is curled up asleep on the rug, which is surrounded by comfortable sofas and a coffee table, showcasing the inviting texture of the Pom Pom Rug.

Ever found yourself scrolling through Pinterest, mesmerized by the sheer coziness of a fluffy pom pom rug, only to sigh at the thought of the price tag? I’ve been there! As a self-proclaimed craft enthusiast with a love for budget-friendly decor, I’ve spent countless hours experimenting with yarn and scissors to bring those dreams to life. Join me on this creative journey, and let’s transform humble pom poms into a luxurious rug that reflects your unique style and warms your home.


Introduction To Your Ultimate Guide to Cozy Crafting

There’s something undeniably enchanting about a pom pom rug. Its soft, tactile surface invites you to sink your toes in, adding an instant touch of whimsy and warmth to any space. From nurseries and playrooms to cozy reading nooks and bohemian living areas, a DIY Pom Pom Rug is a versatile decor piece that speaks volumes about comfort and handcrafted charm. While store-bought versions can often come with a hefty price tag, crafting your own is not only incredibly satisfying but also allows for complete customization in terms of size, color, and texture.

This comprehensive guide will walk you through every step of creating your very own Pom Pom Rug, from choosing the right materials to the final assembly. We’ll delve into the nuances of making perfect pom poms, explore different rug bases, and provide tips and tricks to ensure your project is a resounding success. Get ready to unleash your inner crafter and transform simple yarn into a luxurious, one-of-a-kind rug!

Why Make Your Own Pom Pom Rug?

Beyond the undeniable joy of creating something with your own hands, there are numerous compelling reasons to embark on this DIY journey:

  • Cost-Effective: While yarn can add up, it’s generally far more economical to make a Pom Pom Rug than to purchase a high-quality, handcrafted one. Plus, you can often find great deals on yarn at craft stores or even repurpose old sweaters.
  • Customization Galore: This is where the real magic happens! You have complete control over the color palette, allowing you to perfectly match your existing decor or create a vibrant statement piece. Experiment with different yarn weights and textures for a truly unique finish.
  • Therapeutic and Relaxing: The repetitive motion of making pom poms can be incredibly meditative and stress-relieving. It’s a wonderful way to unwind and engage in a creative activity.
  • Unique Home Decor: A handmade Pom Pom Rug is a conversation starter. It adds a personal touch and a sense of coziness that mass-produced items simply can’t replicate.
  • Skill Building: Learning to make a Pom Pom Rug enhances your crafting skills, opening doors to other exciting pom pom crafts and DIY projects.

What You’ll Need: Gathering Your Supplies

Before you dive into the delightful world of pom pom making, it’s essential to gather all your materials. Here’s a comprehensive list:

  1. Yarn: This is the star of the show!
    • Type: Acrylic yarn is highly recommended for beginners due to its affordability, wide color range, durability, and ease of washing. Wool blends can also be beautiful but may require more delicate care. Avoid very thin or slippery yarns as they can be harder to work with and may not create dense enough pom poms.
    • Quantity: This is the most frequently asked question! The amount of yarn you’ll need depends heavily on the size of your rug, the density of your pom poms, and the size of your pom poms. As a general guideline, a small bath mat size (approx. 24×36 inches) can require anywhere from 10 to 20 skeins of standard worsted weight yarn (around 170g/364 yards per skein). It’s always better to overbuy and return extra than to run out mid-project. For a large rug, plan on significantly more.
    • Color Palette: Decide on your color scheme. Will it be a monochromatic dream, a vibrant rainbow, or a subtle ombre?
  2. Pom Pom Makers: While you can make pom poms with cardboard or even your hands, dedicated pom pom makers are a game-changer for speed, consistency, and ease.
    • Sizes: You’ll likely want a consistent size of pom pom for your rug, so pick one or two sizes of maker. A medium-large size (e.g., 6-9 cm or 2.5-3.5 inches in diameter) is generally ideal for a fluffy rug.
  3. Sharp Scissors: A good pair of sharp fabric scissors is crucial for trimming your pom poms neatly. Dull scissors will lead to frustrating, uneven results.
  4. Rug Base: This is what your pom poms will be tied onto.
    • Non-Slip Mesh Mat: This is the most popular and easiest option. Look for rubberized or non-slip mesh mats, often found in the bath or rug section of department stores, or craft stores. They come in various sizes and can be easily cut to your desired shape. The open weave provides a perfect grid for tying on pom poms.
    • Canvas Mesh: Similar to the above but often more rigid, useful for larger rugs that need more structure.
    • Anti-Fatigue Mat (with holes): Some craft savvy individuals use these for very large, thick rugs, cutting holes where needed. This is a more advanced option.
  5. Crochet Hook (Optional but Recommended): A medium-sized crochet hook can be incredibly helpful for pulling the yarn tails through the mesh base, especially if your pom poms are very dense.
  6. Measuring Tape/Ruler: For cutting your rug base to size.
  7. Marker (Optional): To mark your rug base if you’re cutting a specific shape.

Step 1: Crafting Your Perfect Pom Poms (The Fun Part!)

This is the most time-consuming but arguably the most satisfying part of making a Pom Pom Rug. You’ll need many pom poms, so put on your favorite podcast or show and get comfortable.

Using a Pom Pom Maker:

  1. Open the Maker: Most pom pom makers consist of two halves, each with two arms that open and close. Open all four arms of your maker.
  2. Wrap the First Half: Take your yarn and begin wrapping it around one half of the pom pom maker’s arches. Wrap evenly and densely. The more yarn you wrap, the fuller and denser your pom pom will be. Aim for a generous, almost bulging amount of yarn.
  3. Close and Repeat: Once one half is wrapped to your desired density, close those two arms. Now, wrap the second half of the pom pom maker in the same manner.
  4. Close the Maker: Once both halves are wrapped, close the remaining two arms, ensuring they click securely into place. You should now have a fully wrapped circle of yarn, with a channel running along the edge where the arms meet.
  5. Cut the Yarn: Carefully take your sharp scissors and begin cutting along the groove created by the closed arms of the pom pom maker. Cut slowly and deliberately, ensuring you cut every strand of yarn.
  6. Tie the Center: This is a crucial step! Cut a separate piece of strong yarn, about 10-12 inches long. This will be your tying string. Wrap it around the center groove of the pom pom maker, between the two halves you just cut. Pull it as tightly as you possibly can and tie a double knot (or even a triple knot for extra security). Pull really tight – this is what holds your pom pom together. Leave the long tails of this tying string intact; these will be used to attach the pom pom to your rug base.
  7. Open and Reveal: Gently open the arms of the pom pom maker, then separate the two halves. Voila! Your pom pom will emerge.
  8. Trim and Shape: Your pom pom will likely look a little shaggy at this point. This is where the magic of trimming comes in. Hold the pom pom and gently roll it between your hands to fluff it out. Then, using your sharp scissors, carefully trim any long, uneven strands to create a perfectly spherical and dense pom pom. Don’t be afraid to trim generously; a well-trimmed pom pom is a happy pom pom! The more you trim, the denser and more professional your pom pom will look.

Pro Tip for Consistency: To ensure all your pom poms are roughly the same size and density, try to wrap the yarn around the maker the same number of times for each pom pom. You’ll get a feel for it after making a few.

Estimating Pom Pom Quantity:

This is tricky, but here’s a rough guide for a standard 2.5-3 inch pom pom:

  • For a small bath mat (approx. 2ft x 3ft): 150-250 pom poms
  • For a medium rug (approx. 3ft x 5ft): 400-600 pom poms
  • For a large rug (approx. 5ft x 7ft): 800-1200+ pom poms

Start by making a batch of 50-100 pom poms to get a feel for the process and yarn usage. Remember to save those long tying tails!

Step 2: Preparing Your Rug Base

Once you have a decent pile of pom poms, it’s time to prepare your canvas.

  1. Measure and Cut: Determine the desired size and shape of your Pom Pom Rug. Lay out your non-slip mesh mat and use a measuring tape and marker to outline your rug. Cut the mesh carefully with sharp scissors. Rectangles and squares are easiest for beginners, but don’t shy away from circles, ovals, or even more abstract shapes if you’re feeling adventurous.
  2. Consider Edges: If your mesh mat is prone to fraying, you might want to reinforce the edges by folding them over and stitching them, or using fabric glue. However, often the density of the pom poms will conceal the edges, so this step might be optional depending on your mesh.

Step 3: Attaching the Pom Poms to the Base

This is where your rug starts to take shape!

  1. Placement Strategy:
    • Full Coverage: For a truly luxurious and dense rug, you’ll want to attach pom poms to every available hole in the mesh. This is the most common and visually appealing method.
    • Patterned: If you’re using multiple colors, decide on a pattern – stripes, a checkerboard, a random scattering, or a specific design. Lay out a few pom poms on the mesh before tying them to visualize your pattern.
  2. The Tying Process:
    • Take one of your trimmed pom poms.
    • Thread the two long tying tails of the pom pom through adjacent holes in the mesh rug base.
    • Flip the rug base over.
    • Tie a very tight double or triple knot with the two yarn tails on the underside of the mesh. Pull as tightly as you can to secure the pom pom firmly to the base.
    • Trim the excess yarn tails close to the knot, but not so close that the knot might unravel.
    • Repeat, Repeat, Repeat! Continue this process, attaching pom poms until your rug base is completely covered. For the densest rug, ensure each pom pom is snug against its neighbors. This prevents the mesh from showing through and creates that coveted plush feel.

Using a Crochet Hook: If you find it difficult to push the yarn tails through the mesh, especially with very dense pom poms, insert a crochet hook from the underside of the mesh through the desired holes. Catch the yarn tails with the hook and pull them through to the back.

Step 4: Finishing Touches and Care

You’ve done it! Your beautiful DIY Pom Pom Rug is complete. Now for a few final considerations.

  1. Final Trim (Optional): Once all your pom poms are attached, you might notice some unevenness in the overall height of the rug. You can gently go over the entire surface with your sharp scissors, carefully trimming any rogue strands or slightly taller pom poms to create a uniform, smooth surface.
  2. Shake it Out: Give your new rug a good shake outdoors to remove any loose yarn fibers from the trimming process.
  3. Non-Slip Backing (If Needed): If your chosen rug base isn’t inherently non-slip, consider adding a non-slip rug pad underneath for safety, especially in high-traffic areas.

Caring for Your Pom Pom Rug:

The longevity of your Pom Pom Rug depends on the yarn you chose and how well you care for it.

  • Spot Cleaning: For small spills, gently blot with a damp cloth and mild detergent.
  • Vacuuming: Use a vacuum with a hose attachment or set to a very low suction. Avoid beater bars as they can damage the pom poms.
  • Washing (Acrylic Yarn): For acrylic yarn rugs, you might be able to machine wash on a delicate cycle in cold water, preferably inside a large mesh laundry bag. Lay flat to air dry. Always test a single pom pom first to see how it holds up.
  • Washing (Wool or Delicate Yarns): Hand wash in cool water with a wool-safe detergent. Gently squeeze out excess water (do not wring!) and lay flat on a clean towel to air dry, reshaping as needed.
  • Re-Trimming: Over time, pom poms might get a little “shaggy” from foot traffic. You can periodically re-trim them to restore their shape and fluffiness.

Examples and Inspiration for Your Pom Pom Rug

The beauty of a DIY Pom Pom Rug lies in its endless possibilities. Here are some ideas to spark your creativity:

Color Play:

  • Monochromatic Bliss: Choose different shades of a single color (e.g., various blues, grays, or pinks) for a sophisticated, subtle effect.
  • Gradient Glory: Arrange pom poms from darkest to lightest to create a beautiful ombre effect.
  • Rainbow Extravaganza: Use every color of the rainbow for a playful, vibrant rug perfect for a child’s room or a creative space.
  • Earthy Tones: Combine creams, browns, greens, and burnt oranges for a natural, bohemian vibe.
  • High Contrast: Pair black and white, or deep navy with bright yellow for a bold statement.

Shape Shifters:

  • Classic Rectangle/Square: Easy to plan and execute, ideal for entryways, bathrooms, or bedside rugs.
  • Charming Circle/Oval: Adds softness and a whimsical touch, perfect for nurseries or reading nooks.
  • Custom Shapes: Imagine a cloud-shaped rug for a child’s room, a heart-shaped rug for a romantic touch, or even a letter of the alphabet for a personalized gift.

Texture Talk:

  • Uniform Fluff: Using the same yarn weight and pom pom size throughout creates a consistent, cloud-like surface.
  • Mixed Textures: Experiment with different yarn types – some fuzzy, some smooth, some chunky – to add tactile interest. Be mindful of washing instructions if mixing yarn types.
  • Varying Sizes: While generally not recommended for a rug due to unevenness underfoot, using slightly different sized pom poms could create a “pebbled” or organic look, more suited for a wall hanging or decorative mat.

Advanced Pom Pom Crafting Tips

Ready to take your Pom Pom Rug to the next level?

  • Double Yarn Wrapping: For extra dense and luxurious pom poms, wrap two strands of yarn around the maker simultaneously. This speeds up the process and creates a super full pom pom.
  • Yarn Blending: Wrap two different colored strands of yarn together for a marbled or heathered effect within a single pom pom. This is fantastic for adding subtle depth to your design.
  • No-Show Knots: If you’re worried about the knots on the back of the rug being too bulky, you can try threading the yarn tails under the mesh and tying them to other strands of yarn on the back of the pom pom itself, rather than directly to the mesh. However, this requires very strong, secure knots and might be less durable than tying to the mesh.
  • Edge Finishing: For a very clean edge, make sure the pom poms along the perimeter of your rug are particularly dense and well-trimmed, possibly even slightly larger to “tuck” over the edge of the mesh.

Conclusion: Embrace Your Inner Maker!

Creating a DIY Pom Pom Rug is more than just a craft project; it’s an investment in cozy comfort and personal expression. While it requires patience and a good amount of yarn, the reward of sinking your toes into a luxurious, handmade rug that you brought to life is truly unparalleled. From choosing your perfect color palette to trimming those final fluffy spheres, every step of this journey is an opportunity to infuse your home with warmth and creativity. So, gather your supplies, put on some music, and get ready to create a masterpiece that will be cherished for years to come. Happy crafting!


FAQs about Your DIY Pom Pom Rug

Q: How long does it take to make a DIY Pom Pom Rug?

A: This is entirely dependent on the size of your rug and how quickly you make pom poms. A small bath mat could take 10-20 hours, while a large living room rug could easily be 50+ hours. It’s a project best approached in stages!

Q: Can I use different sized pom poms on one rug?

A: While aesthetically interesting, using wildly different sized pom poms can make the rug uneven underfoot and potentially a tripping hazard. If you want variety, stick to very subtle size differences (e.g., 2.5 inch and 3 inch pom poms) or reserve larger pom poms for the edges.

Q: My pom poms aren’t fluffy! What am I doing wrong?

A: This usually means you haven’t wrapped enough yarn around the maker. Go back and wrap more densely! Also, ensure you’re trimming them aggressively enough to create that dense, spherical shape. Don’t be afraid to cut.

Q: How do I prevent my pom poms from falling off?

A: The key is in the tying! Ensure you are pulling the center tying string as tightly as possible before knotting, and then tie the pom pom to the rug base with very tight double or triple knots. Leaving longer tails on the tying string can also help prevent unraveling.

Q: What’s the best type of yarn for a Pom Pom Rug?

A: For durability, ease of care, and cost-effectiveness, acrylic yarn is generally the best choice. It comes in a vast array of colors and holds its shape well. Wool blends can be beautiful but often require more delicate care.

Q: Can I make a Pom Pom Rug without a pom pom maker?

A: Yes, you can use cardboard cutouts or even your fingers. However, a pom pom maker will significantly speed up the process, result in more uniform pom poms, and is generally less frustrating for a project requiring so many individual pom poms.

Q: How do I clean my Pom Pom Rug?

A: Spot clean for small spills. For a full clean, if made with acrylic yarn, you might be able to machine wash on a delicate cycle in a mesh bag and air dry flat. Always test a single pom pom first. For wool, hand washing is recommended. Avoid harsh detergents and direct heat.


References


Recent Posts


How To Make A Pom Pom Headband

A handcrafted Pom Pom Headband featuring soft pink, creamy white, and subtle gold glitter pom poms, artfully arranged on a light-coloured woven fabric, bathed in bright, natural light. This lovely example of Pom Pom crafts showcases the charm of diy Pom Poms.

As someone who loves adding a personal touch to every outfit, I’ve found that DIY accessories are the best way to make a statement. I’m always looking for simple, satisfying Pom Pom crafts, and making Pom Poms is surprisingly therapeutic. If you’re ready to dive into the world of fun, fuzzy Pom Pom projects and create your own custom diy Pom Poms, this guide is for you. Get ready to transform a simple headband into a playful, custom Pom Pom Headband creation that perfectly reflects your style!


Introduction

The humble pom pom, a simple sphere of yarn, holds incredible potential for adding whimsy, texture, and personality to almost anything. While often associated with winter hats, the pom pom is experiencing a vibrant renaissance in DIY fashion and home décor. Few projects are as satisfying, approachable, and customisable as the Pom Pom Headband.

A handcrafted Pom Pom Headband is more than just an accessory; it’s a wearable piece of joy. It allows you to play with colour palettes, experiment with different textures, and create a truly unique piece that can’t be found in any high-street shop. Whether you’re crafting a bold, statement piece for a festival, a subtle accent for everyday wear, or a themed accessory for a special event, this guide will walk you through the entire process. We will cover the essential materials, two distinct methods for creating perfect diy Pom Poms, and detailed instructions on securely assembling your charming, one-of-a-kind accessory.

If you’re ready to dive into the wonderful world of Pom Pom crafts, let’s begin this fun, fuzzy adventure!

I. Gathering Your Materials

Before you begin creating your beautiful accessory, gathering all your tools and materials is crucial. This helps ensure a smooth and enjoyable crafting experience.

A. Essential Supplies

  • Headband: Choose a comfortable, plain headband. Plastic or metal are ideal as they offer a firm base. For a seamless look, pick a colour that matches your main yarn colour, or choose a neutral colour like black or white.
  • Yarn: This is the heart of your project. You can use any type of yarn, but medium-weight (worsted/aran) acrylic or wool is often the easiest for beginners.
    • Tip: Varying the yarn type (e.g., adding a metallic or textured yarn) can add great depth to your Pom Poms.
  • Scissors: You will need two types:
    • Sharp Fabric Scissors: For cutting the yarn cleanly after winding.
    • Small, Precision Scissors (optional, but helpful): For trimming and shaping the finished pom poms.
  • Strong Adhesive: A glue gun (recommended for quick and secure bonding) or a strong craft glue suitable for fabric/plastic.1
  • Strong Thread/Thin Wire: For securely tying the centre of your Pom Poms. Embroidery floss or a strong kitchen string works well.

B. Optional Decorative Elements

  • Felt or Foam: A strip of thin felt can be glued to the top of the headband first to provide a non-slip, high-grip surface for the pom poms to adhere to.
  • Beads, Sequins, or Rhinestones: For adding extra embellishment to the finished piece.
  • Pom Pom Maker Tool: While not strictly necessary (as shown in Method 2), this plastic tool makes the process of making uniform pom poms faster and easier.

II. How to Make Your Pom Poms (Pom Pom Crafts Core)

The next step is creating the stars of the show: the Pom Poms. The number you need will depend on the size of the pom poms you create and the coverage you desire on the headband. A full coverage band usually requires between 10 to 20 medium-sized pom poms. We will explore two popular and effective methods.

Method 1: The Cardboard Template (The Classic Method)

This is the traditional, cost-effective way to make perfectly round Pom Poms.

  1. Create the Template: Cut two identical doughnut shapes from stiff cardboard. The outer diameter determines the final pom pom size, and the inner hole needs to be large enough to easily pass your scissors and yarn through. For a medium pom pom (approx. 2 inches/5 cm), aim for an outer diameter of about 3.5 inches (9 cm) and an inner hole of 1 inch (2.5 cm).
  2. Wind the Yarn: Hold the two cardboard rings together. Begin winding your yarn around both rings simultaneously, passing it through the centre hole. Keep the tension consistent. The fuller you wind, the denser and more robust your pom pom will be. Wind until the centre hole is almost entirely filled and winding becomes difficult.
  3. Cut the Yarn: Carefully insert the blade of your sharp scissors between the two cardboard rings and begin cutting the yarn all the way around the outside edge. Keep the cardboard rings firmly pressed together so the yarn doesn’t shift.
    • [Image Placement 1: A close-up shot of the yarn being carefully cut between the two cardboard templates.]
  4. Tie the Centre: Cut a separate, 12-inch piece of strong thread or yarn. Carefully slide this thread between the two cardboard rings and wrap it tightly around the entire centre bunch of cut yarn. Tie a secure double or triple knot. Pulling this knot extremely tight is the secret to a durable pom pom.
  5. Remove and Fluff: Gently slide the cardboard rings off (you may need to tear them slightly). Fluff your pom pom and give it a good shake.

Method 2: The Fork or Fingers Method (The Small Pom Pom Method)

This is great for creating tiny or small pom poms, or if you don’t have cardboard on hand.

  1. Winding: Hold a fork (for tiny Pom Poms) or your two fingers tightly together (for small pom poms). Wrap the yarn around the prongs of the fork or your fingers. Again, the more you wrap, the denser the pom pom.
  2. Securing the Centre: Cut a piece of strong thread or yarn and thread it between the centre prongs of the fork (or between your two fingers). Pull this thread tight and tie a very secure knot around the centre of the wrapped yarn.
  3. Removing and Cutting: Slide the yarn loop off the fork or your fingers. Now, insert your scissors into the loops on both the top and bottom sides and cut them all open.
  4. Shaping: Proceed to step 5 of Method 1 (Trimming and Shaping).

III. Trimming and Shaping Your Pom Poms

No matter which method you use, this step is crucial for achieving that perfectly round, professional-looking Pom Pom.

  1. The ‘Haircut’: Hold the pom pom by the tie thread (the one you secured the centre with). Use your sharp scissors to trim any stray, uneven strands. This is like giving your pom pom a haircut. The goal is to create a consistent, spherical shape.
    • [Image Placement 2: A shot showing the trimming process, with the crafter holding the pom pom by the centre thread and trimming a section.]
  2. Roll and Trim: Roll the pom pom between your hands occasionally to expose new long strands, then trim them. Continue this process until you are satisfied with the shape and density. Don’t be afraid to trim generously; a little sacrifice of yarn results in a much better final product.
  3. Repeat: Make all your pom poms. Try to make them as uniform as possible, but remember that handmade items naturally have character and slight variations.

IV. Designing and Assembling the Headband

Now for the exciting part: turning your beautiful diy Pom Poms into a finished accessory!

A. Design Options and Examples

Before gluing, lay out all your pom poms along the headband to plan your design.

  • The Full Rainbow: Use 6-8 different bright colours and arrange them in a colourful spectrum down the band.
    • [Image Placement 3: A full Rainbow Pom Pom Headband example.]
  • The Cluster Crown: Concentrate the pom poms only on the top section of the headband (the central 6-8 inches), leaving the sides bare. Use varying sizes of Pom Poms in complementary colours for a playful crown effect.
    • [Image Placement 4: A Headband design showing only a central cluster of different-sized pom poms.]
  • Monochrome Elegance: Use a single colour of yarn (e.g., pale pink, deep emerald, or black) but mix the texture of the yarn (e.g., plain acrylic and fuzzy velvet yarn) for a sophisticated yet playful look.
  • The Side Accent: Place a small cluster of 3-5 pom poms just above one ear for a subtle, asymmetrical accent.

B. The Assembly Process (“How To Do It”)

  1. Prepare the Headband: Clean the surface of the headband to ensure the glue adheres properly. If you are using a felt strip base (recommended for better grip), glue the felt strip to the top arc of the headband now and let it dry completely.
  2. Apply Glue: If using a hot glue gun, apply a small bead of glue directly onto the headband where you want your first pom pom to sit. Work in small sections.
  3. Attach the Pom Pom: Immediately press the base of the first Pom Pom firmly onto the glue. Hold it in place for several seconds until the glue cools and sets.
    • Crucial Tip: The pom pom’s strongest point is where the centre tie is. Try to orient this flat part of the pom pom against the headband for the best attachment.
  4. Continue Gluing: Work your way along the headband, placing the pom poms as close together as you like to achieve your desired density. If using multiple sizes, alternate them for visual interest.
  5. Secure the Gaps: Once the main pom poms are attached, look for any noticeable gaps between them. You can use a small dab of glue and press the fluffy sides of the adjacent pom poms together to eliminate any visible headband space.
    • [Image Placement 5: A close-up showing the pom poms being glued tightly next to each other on the headband.]
  6. Curing Time: Allow the finished Pom Pom Headband to cure for several hours (or according to your glue’s instructions) before wearing to ensure maximum durability.

V. Troubleshooting Common Pom Pom Crafts Issues

Even experienced crafters encounter little snags. Here are solutions to common Pom Pom crafts issues:

ProblemCauseSolution
Pom Pom is not dense/falls apart.Not enough yarn was wound; the centre tie was not tight enough.Ensure the centre hole of your template is almost completely filled with yarn. Use strong string and pull the centre knot extremely tight (it should indent the yarn).
Pom Pom is not perfectly round.The yarn wasn’t cut evenly, or it hasn’t been trimmed enough.Trim more! Use the ‘roll and trim’ technique described in Section III until the shape is a uniform sphere.
Pom Poms are falling off the headband.The wrong glue was used, or the base wasn’t clean.Use a high-quality, flexible, and strong craft glue (like hot glue or E-6000). Consider using a felt strip on the headband base for a better grip surface.

VI. Caring for Your Pom Pom Headband

To keep your bespoke creation looking its best:

  • Spot Clean Only: Avoid submerging the headband in water. If it gets dirty, spot clean the affected Pom Pom gently with a damp cloth and a tiny bit of mild soap.
  • Reshape: If a pom pom loses its fluff, gently roll it between your palms to restore its shape. If the yarn is looking fuzzy, you can give it a quick, light trim.
  • Storage: Store the headband in a way that the pom poms aren’t crushed (e.g., hanging it on a hook or placing it on a mannequin head).

VII. Advanced Pom Pom Ideas

Once you have mastered the basic Pom Pom Headband, consider these advanced applications of your Pom Poms knowledge:

  • Multi-Coloured Pom Poms: Wind two or three different colours of yarn onto the template simultaneously for a marbled effect.
  • Shaped Pom Poms: Use clever trimming techniques to shape your pom poms into hearts, ovals, or even small animal ears for a novelty headband.
  • Tassel Integration: Combine small pom poms with handmade tassels, alternating them along the headband for a bohemian look.

FAQ (Frequently Asked Questions)

Q: Can I use different sizes of pom poms on one headband?

A: Absolutely! Mixing small, medium, and large Pom Poms adds wonderful texture and dimension. A popular design involves placing the largest pom pom in the centre and gradually decreasing the size toward the sides.

Q: How can I make my pom poms extra fluffy?

A: Fluffiness comes from three factors: winding the yarn very densely, using a fluffy yarn type (like wool or an acrylic blend), and trimming the finished pom pom until it’s a tight, even sphere. Some people gently brush the finished pom pom with a wire brush to tease the fibres, but be gentle so it doesn’t fall apart.

Q: My finished pom poms are too heavy. How can I fix this?

A: Heavy pom poms are usually caused by using a very thick or heavy type of yarn. For future projects, use a lighter-weight yarn, such as a double knitting (DK) or worsted weight acrylic. You can also try making fewer or smaller pom poms to distribute the weight across the headband.

Q: Do I have to use a specific type of yarn?

A: No, but acrylic yarn is highly recommended for beginners. It’s affordable, durable, comes in every colour imaginable, and holds its shape well. Natural fibres like cotton tend to be less fluffy, and specialty yarns like chenille can be tricky to cut evenly.

Q: Is it better to use a pom pom maker tool or the cardboard method?

A: The best method is the one you prefer. A dedicated pom pom maker tool provides consistency, especially if you need many identical Pom Poms. The cardboard or fork methods are excellent if you’re on a budget or only making a few, and they allow for great customisation of size.


Reference Section


Recent Posts