Cookie Consent by Free Privacy Policy Generator Update cookies preferences

10 Benefits of Mood Lighting You Need Now

A cozy living room at night, showcasing effective mood lighting. Multiple warm lighting sources, including a floor lamp, a table lamp, and hidden LED strips, create soft ambient lighting. This layered approach offers inviting lighting ideas for a relaxing atmosphere.

We’ve all been there: sitting under harsh, fluorescent light. This light can make our home feel less like a sanctuary and more like a bland office space. It’s easy to forget that light is a powerful tool. It’s also one of the most affordable tools we have for creating an atmosphere that truly supports our well-being. This article looks into the simple switch from stark illumination to warm lighting and ambient lighting. This change, driven by clever lighting ideas, can alter everything. It offers ten powerful reasons why a few intentional adjustments of Mood Lighting can instantly upgrade your life while being good for the environment. Get ready to turn down the brightness and turn up the good vibes.


Introduction

Lighting is often the last thing we think about when designing a room. Still, it controls how we feel in that space more than any paint color or furniture piece. You wouldn’t wear sunglasses inside. So, why use lighting that works against your mood, focus, and natural body clock?

Mood lighting is also called ambient lighting or accent lighting. It is the planned use of different light sources, colors, and brightness levels. This is done to create a certain atmosphere or feeling in a room. It means moving away from single, strong overhead lights. Instead, you use a layered, softer glow. This change is not just about looks. It greatly helps your health, how much you produce, and your budget.

This full guide breaks down the ten key benefits of adding warm lighting and dynamic lighting ideas to your life. It includes practical examples and simple “how to do it” guides to make the switch easy.

1. Better Sleep and Circadian Rhythm Support

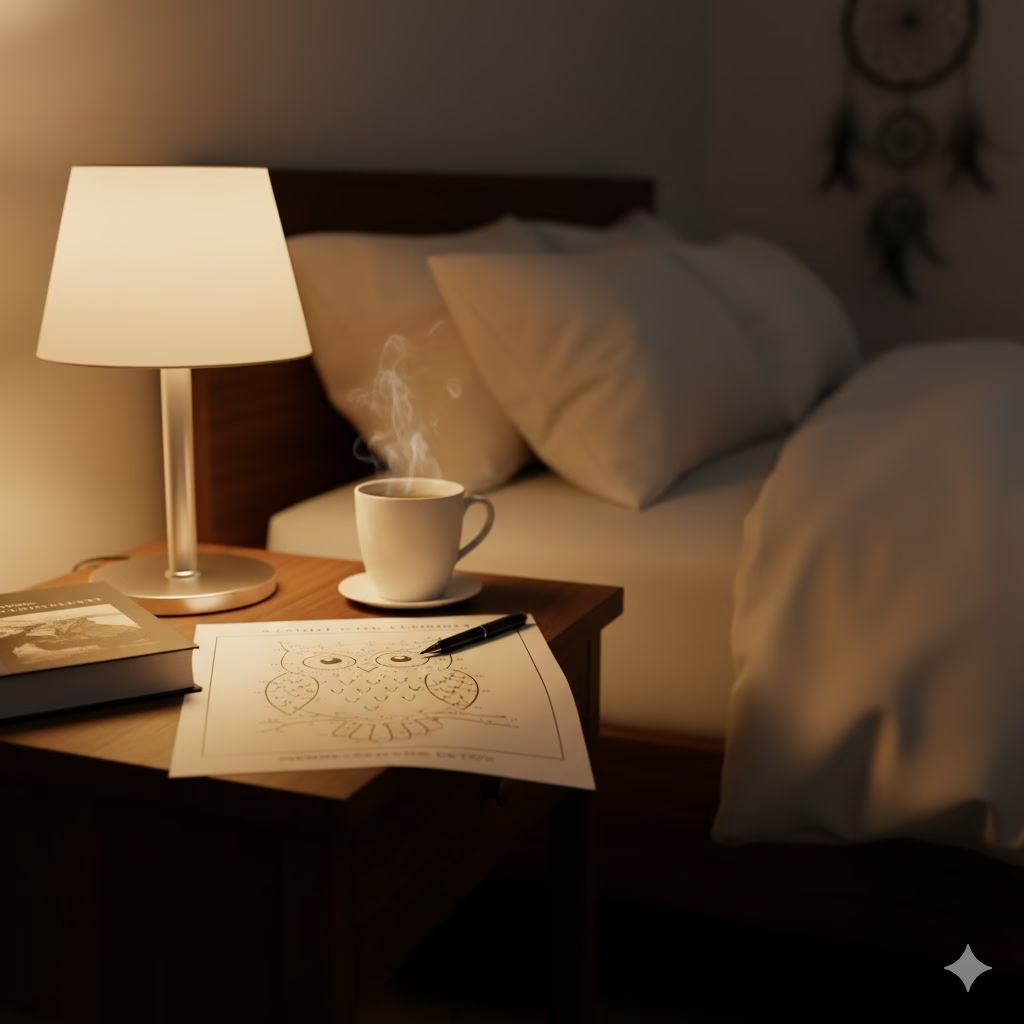
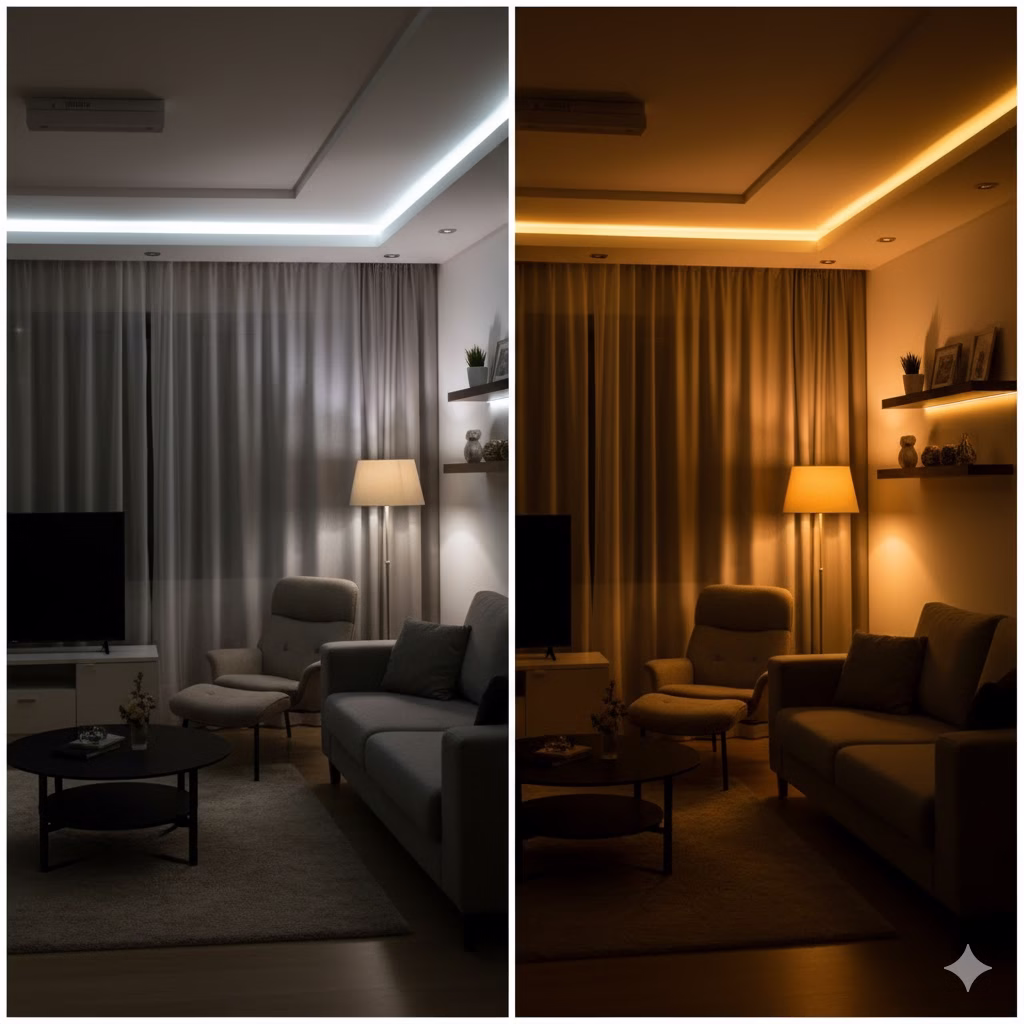
Blue light comes from screens and cool-toned LED bulbs. This light stops the body from making melatonin. Melatonin is the hormone that tells your body it is time to sleep. Mood lighting, especially warm lighting in the evening, is vital. It helps control your natural sleep-wake cycle, or circadian rhythm.

  • The Benefit: Switch to dimmer, warmer lighting after the sun sets. Your body will naturally get ready for rest. This helps you fall asleep faster and get better deep sleep.
  • How to Do It: Change the harsh overhead bulbs in your bedroom and main areas. Use smart bulbs or dimmable fixtures set to a color temperature of 2700 K or lower. About one hour before bed, turn off the bright lights. Only use low-level lamps or reading lights.
  • Example: Use a smart bulb in a bedside lamp. Set the color to a deep amber or red in the hours just before sleeping.

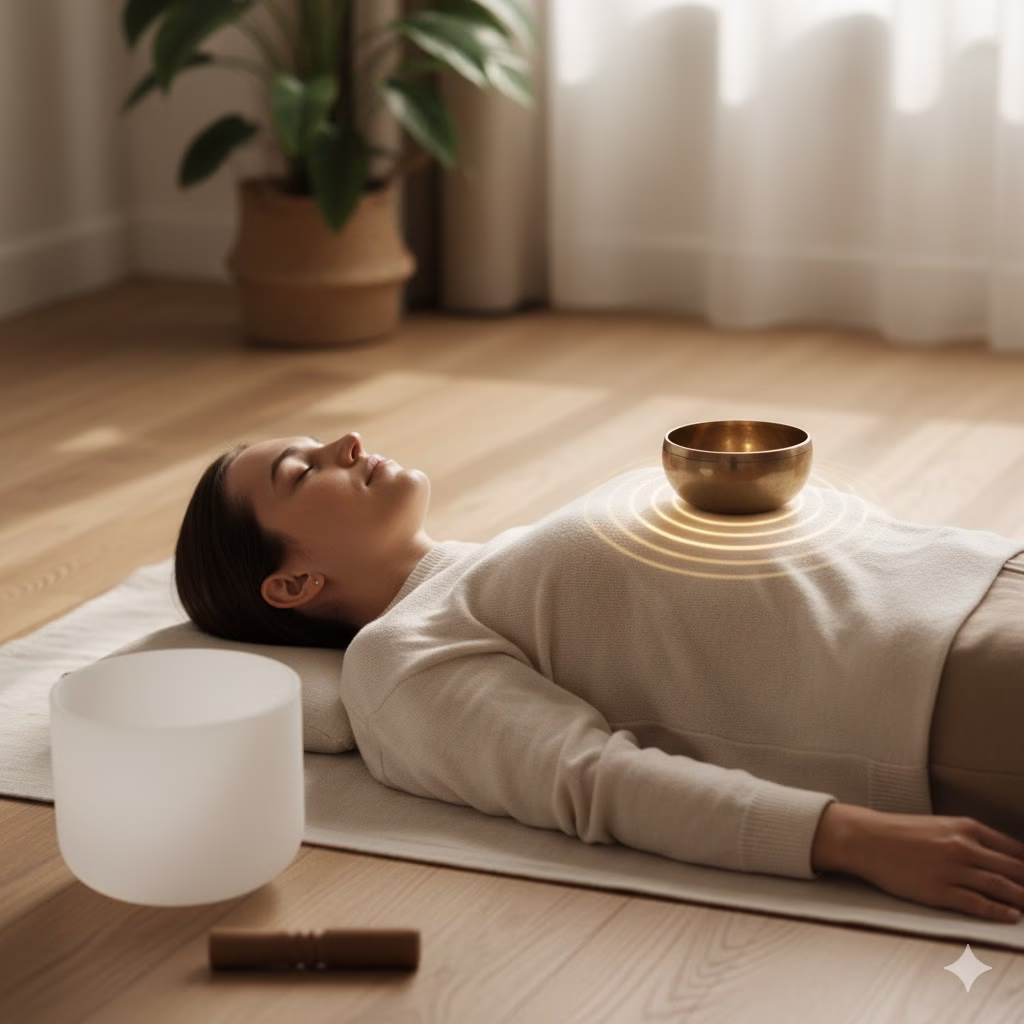
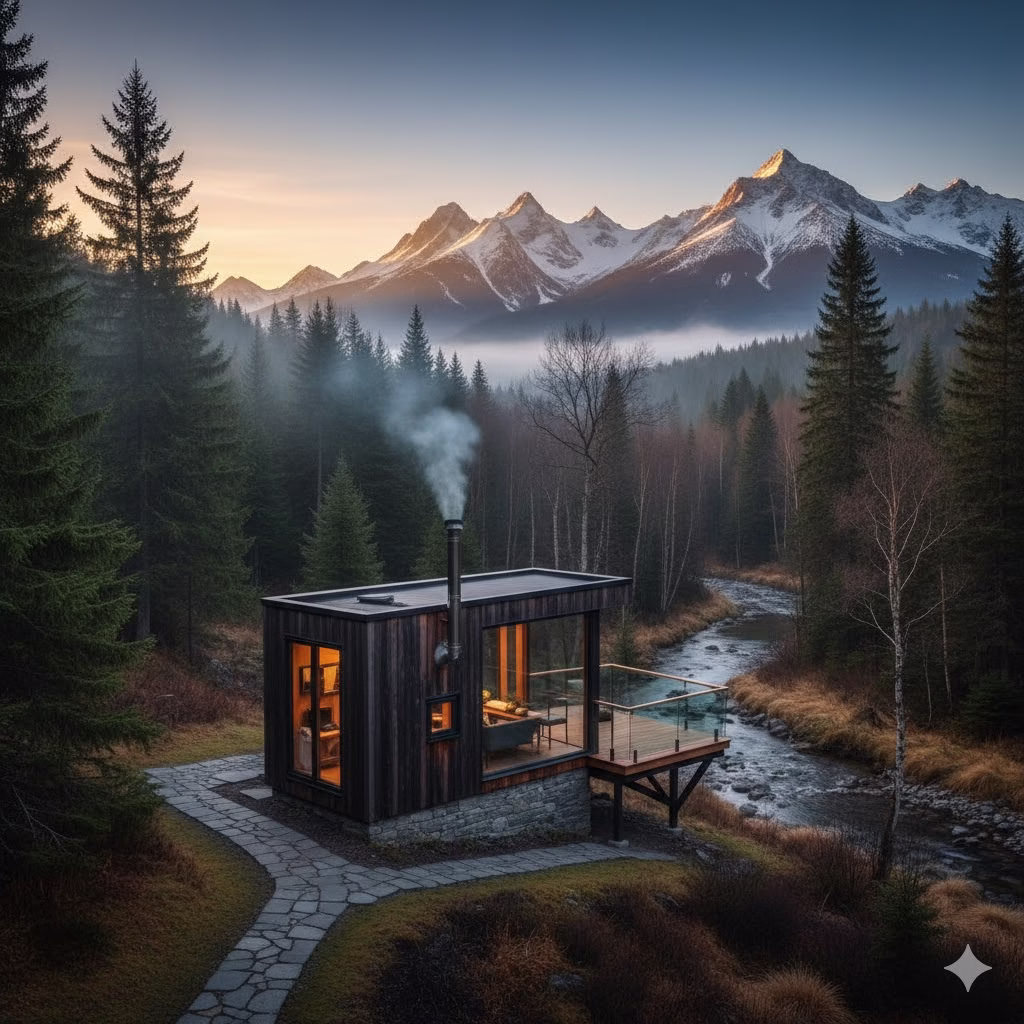
2. Instant Stress Reduction and Relaxation

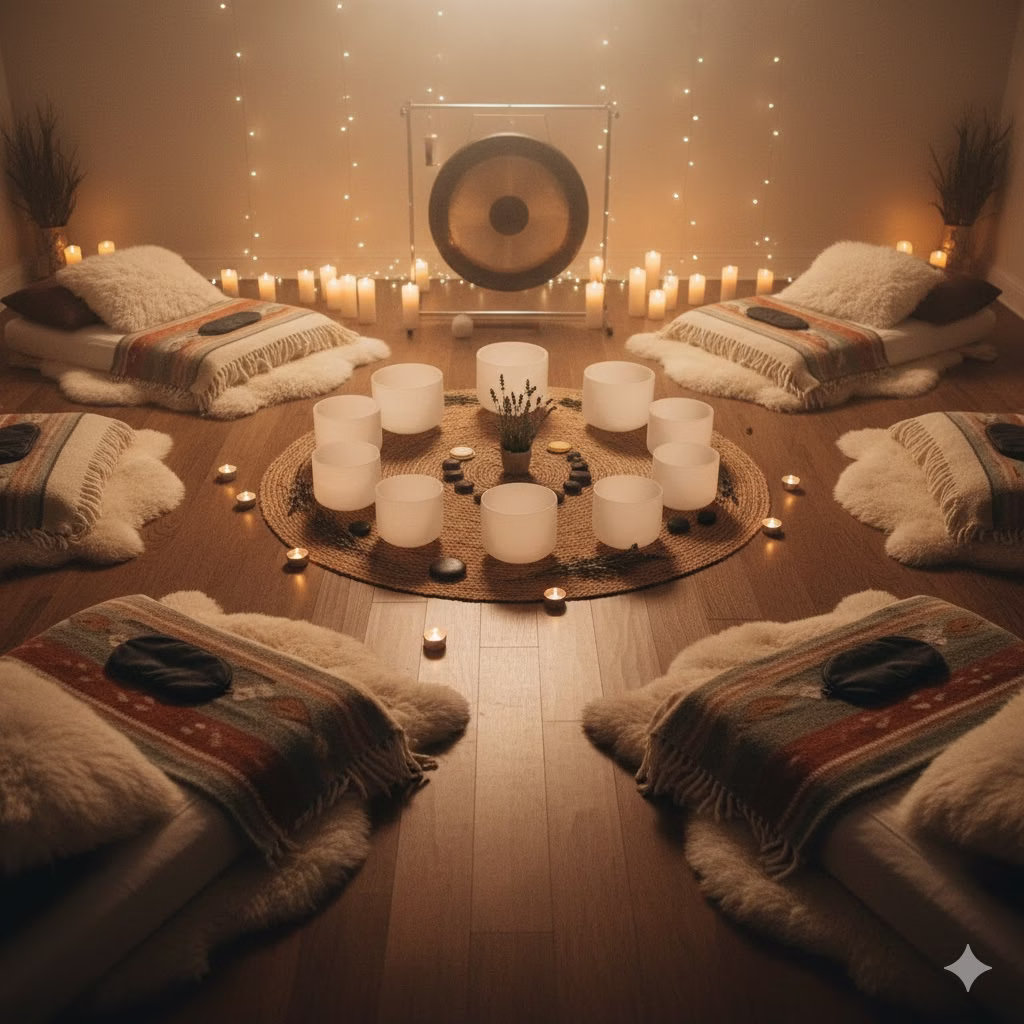
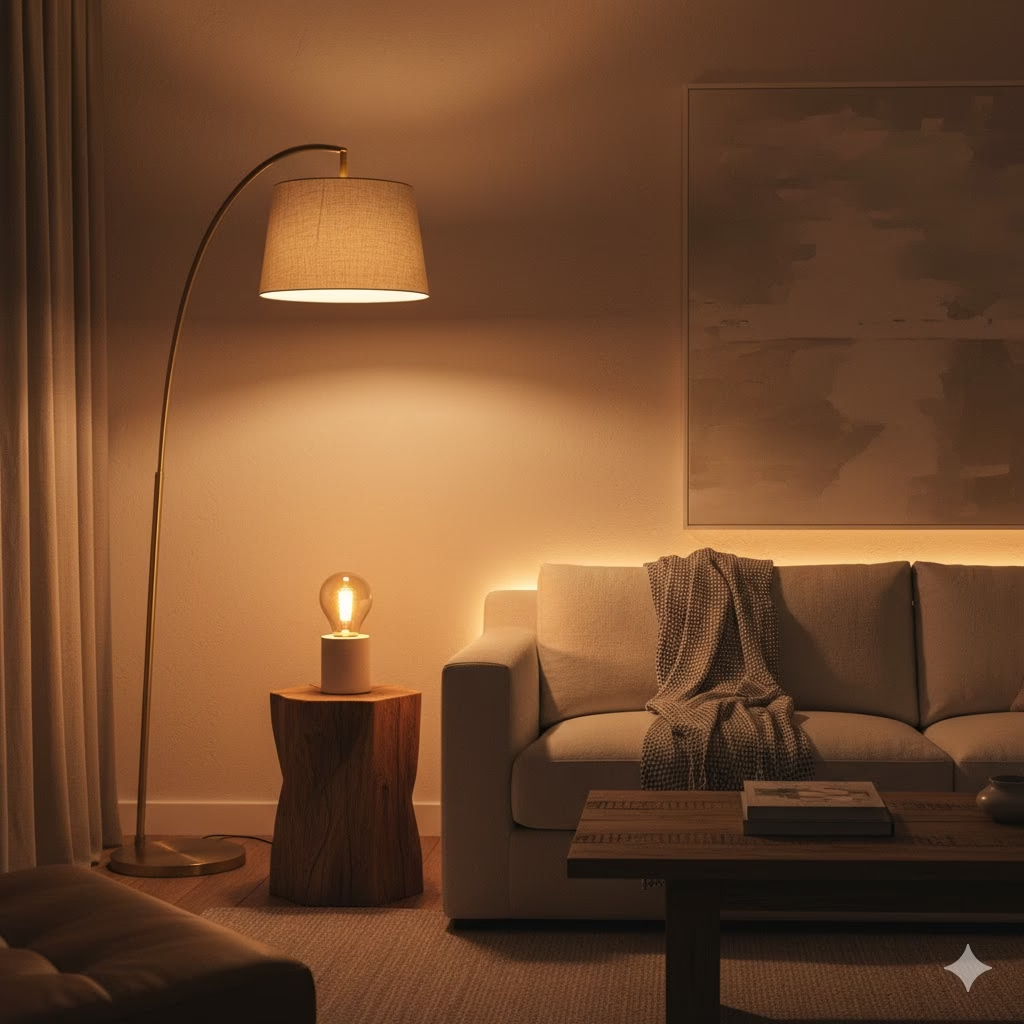
Few things are less calming than a brightly lit room. Dim, gentle light naturally signals safety and calm to the brain. Very bright light is often linked to alertness, work, or even danger.

  • The Benefit: Mood lighting creates a peaceful haven. It lowers your heart rate and increases calm. This makes it perfect for relaxing after a tough day.
  • How to Do It: Use several small, low-power accent lights. These could be small spotlights, fairy lights, or candles. Place them at different heights instead of using one central light. Use uplighting to wash walls in soft light. This removes sharp shadows.
  • Example: Put a Himalayan salt lamp or a small projector lamp in a corner where you do yoga or meditation.

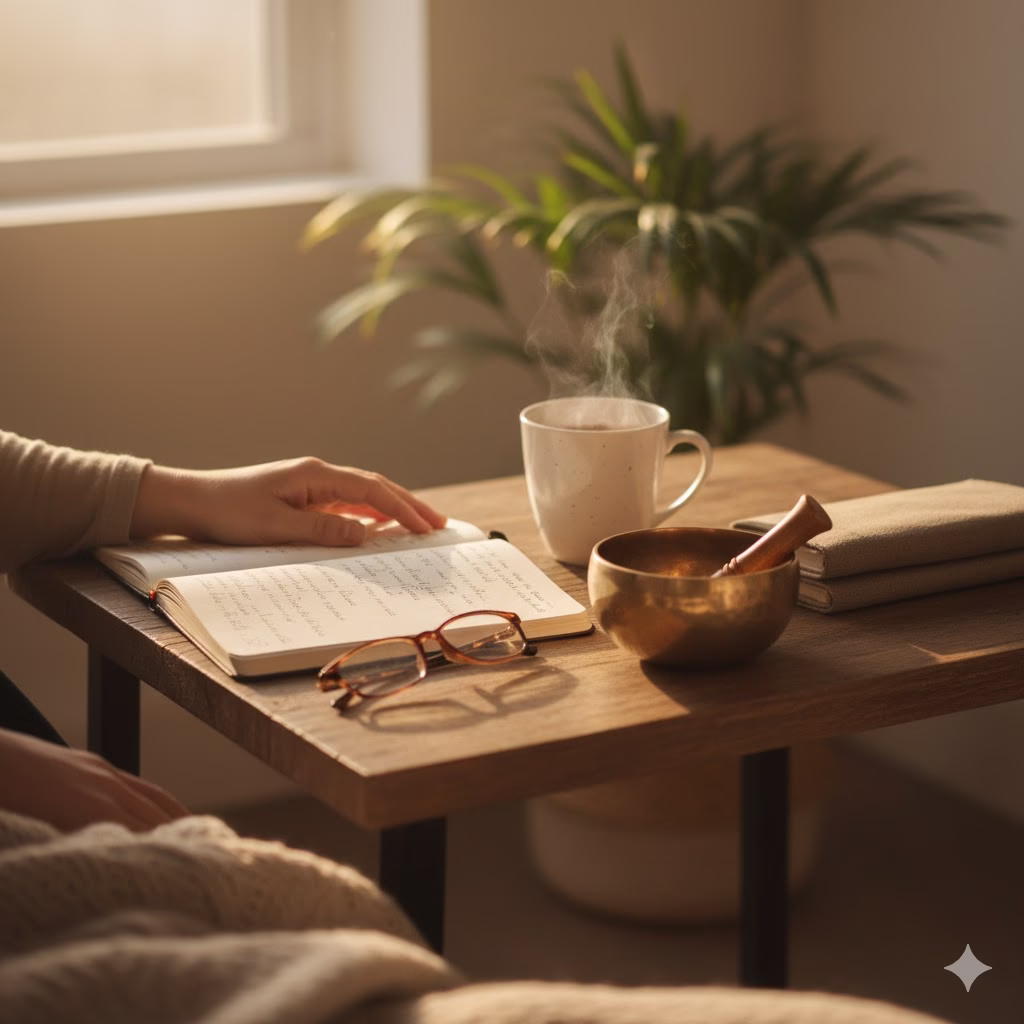
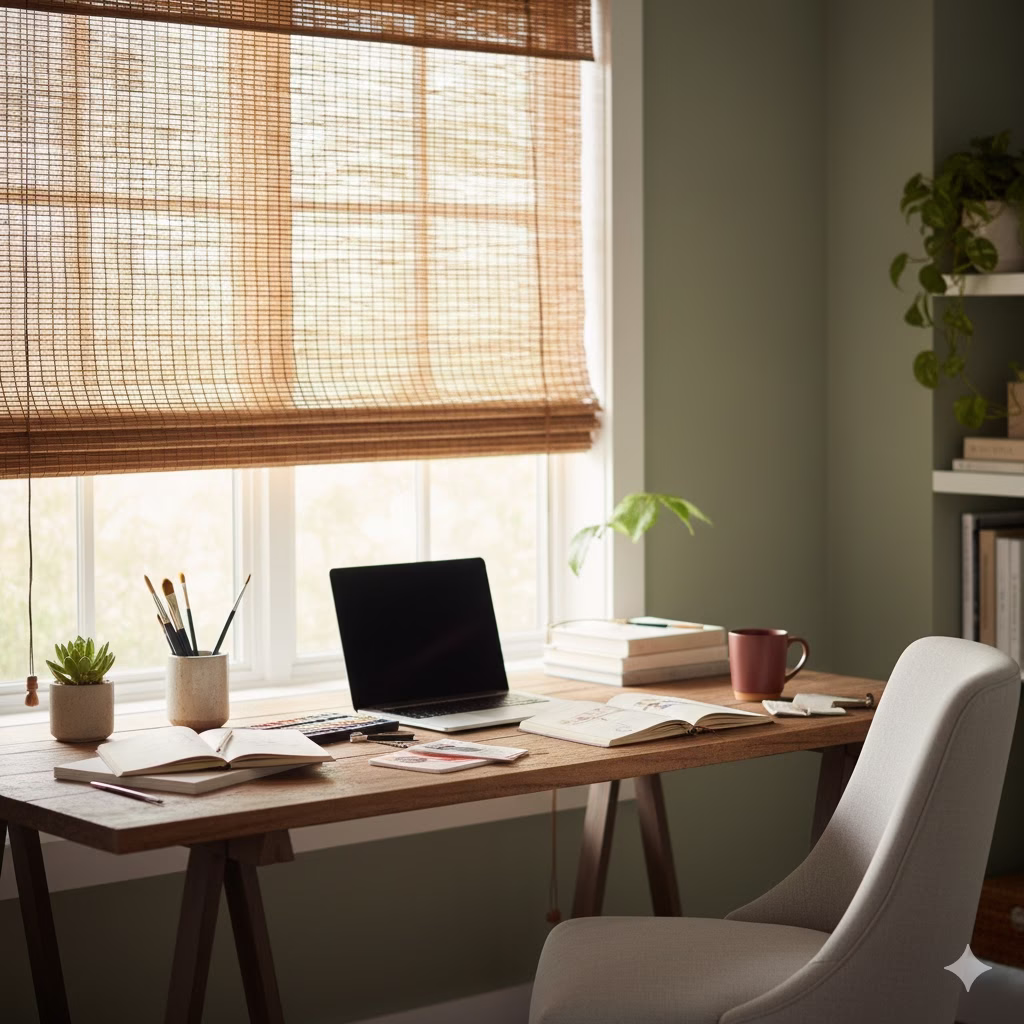
3. Boosting Productivity and Focus

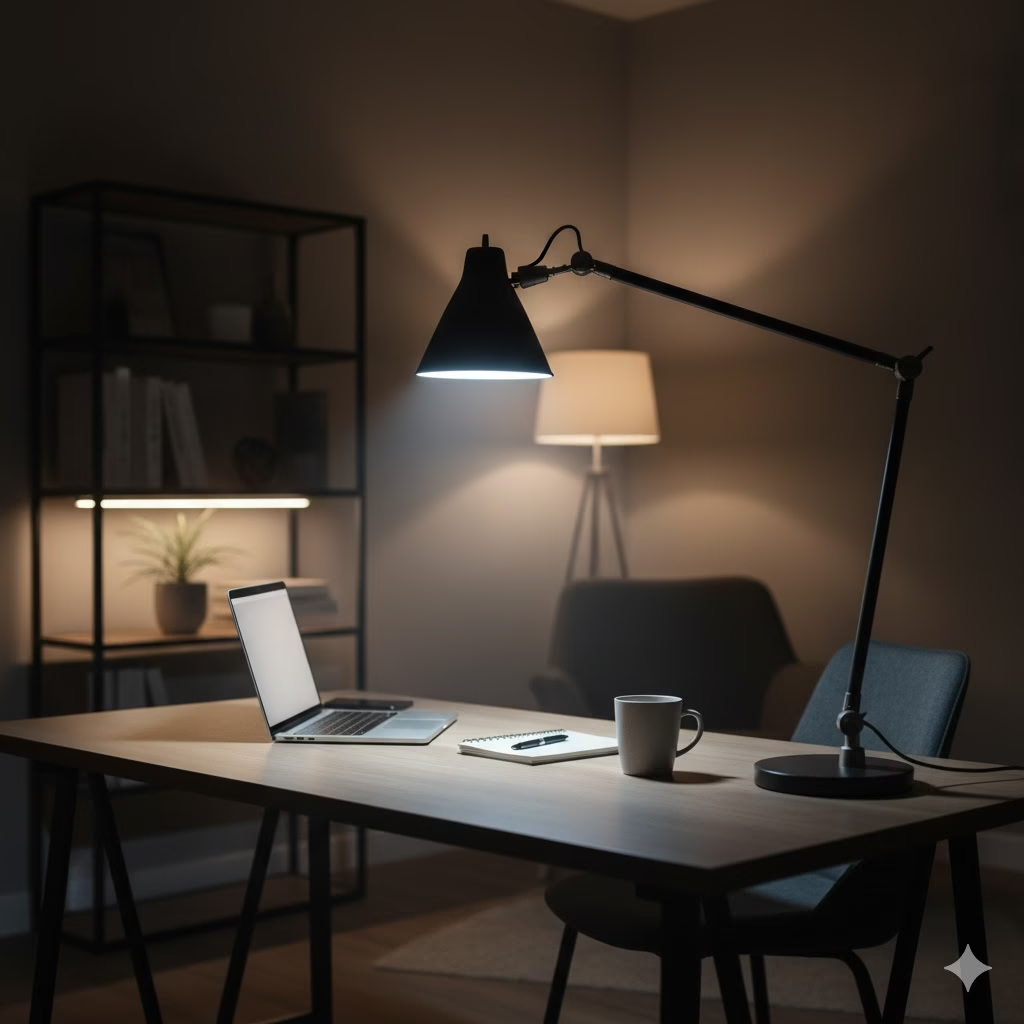
Warm light is great for relaxing. However, the right mood lighting can also improve your focus. Smart lighting can remove strain on your eyes. It can also create a dedicated spot for focused work.

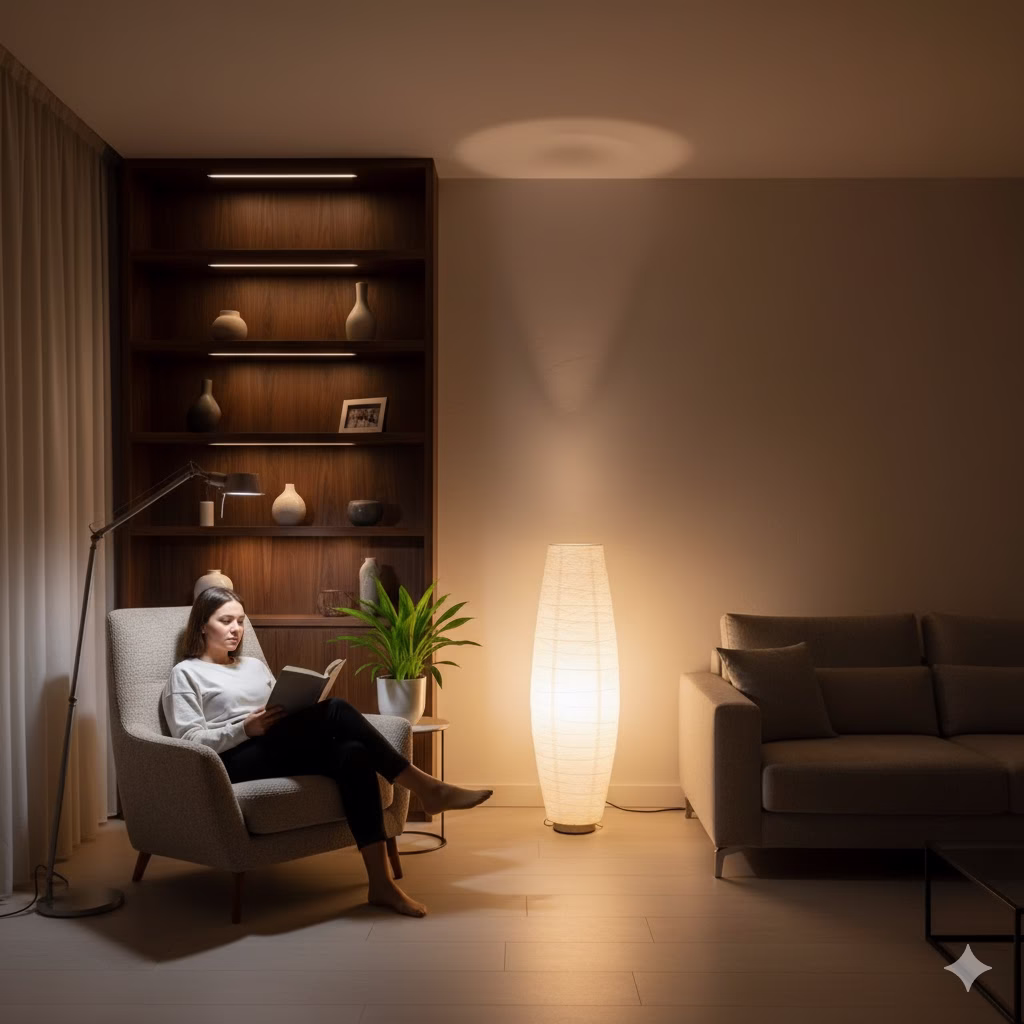
  • The Benefit: Create a focused light area (task ambient lighting) on your work surface. Keep the surrounding light dim. This lowers distraction and mental tiredness.
  • How to Do It: Use an adjustable desk lamp directly over your work area. The light should be a bit cooler, but not harsh, white light (around 4000 K). It is crucial to dim the overhead lighting. This keeps your attention on the task.
  • Example: Install LED strips under cabinets in a home office. This lights your desk without creating glare.

4. Energy Efficiency and Cost Savings

One of the most practical benefits of smart lighting ideas is the positive effect on your electricity bills and the planet.

  • The Benefit: Mood lighting mainly uses LED technology and less total power. You use less energy by using many small, efficient sources instead of one large fixture. This helps your wallet and is good for the environment.
  • How to Do It: Change all old incandescent or halogen bulbs to modern LED versions. Install timers or smart home systems. These can automatically dim or turn off lights when they are not needed.
  • Example: Put dimmers on all wall switches. Dimming a light by just 25% can save a large amount of energy during the bulb’s life.

5. Enhancing Aesthetics and Home Decor

Mood lighting is the hidden tool designers use to make a room look expensive, detailed, and complete. It highlights architecture and textures that flat overhead light simply covers up.

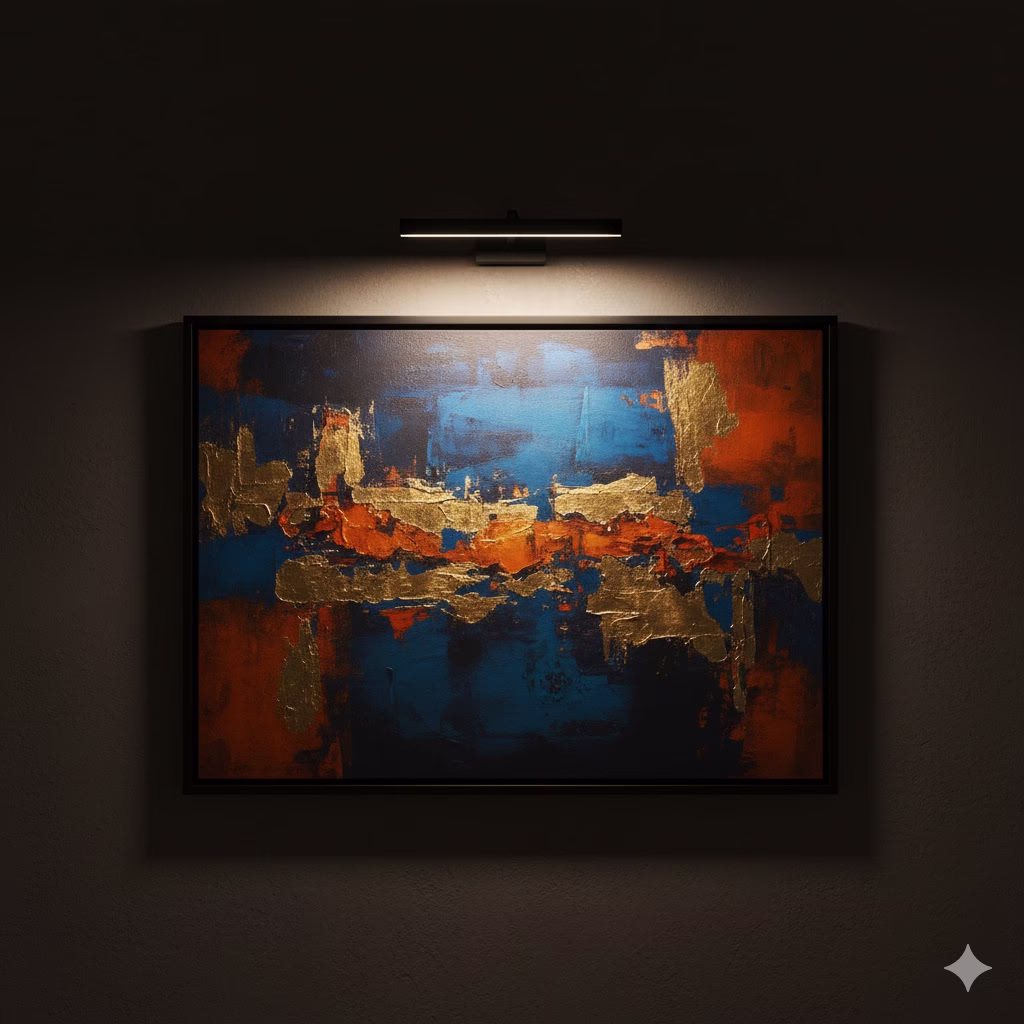
  • The Benefit: Layered lighting adds visual depth and layers. It draws the eye to key areas like artwork, shelves, or textured walls. This makes your space feel richer and more interesting.
  • How to Do It: Use the “three-point lighting” rule. Use ambient light (a general soft glow), task light (for function), and accent light (to highlight objects) in every main room.
  • Example: Use picture lights over framed art. Or, install recessed floor lighting to highlight the texture of a stone fireplace.

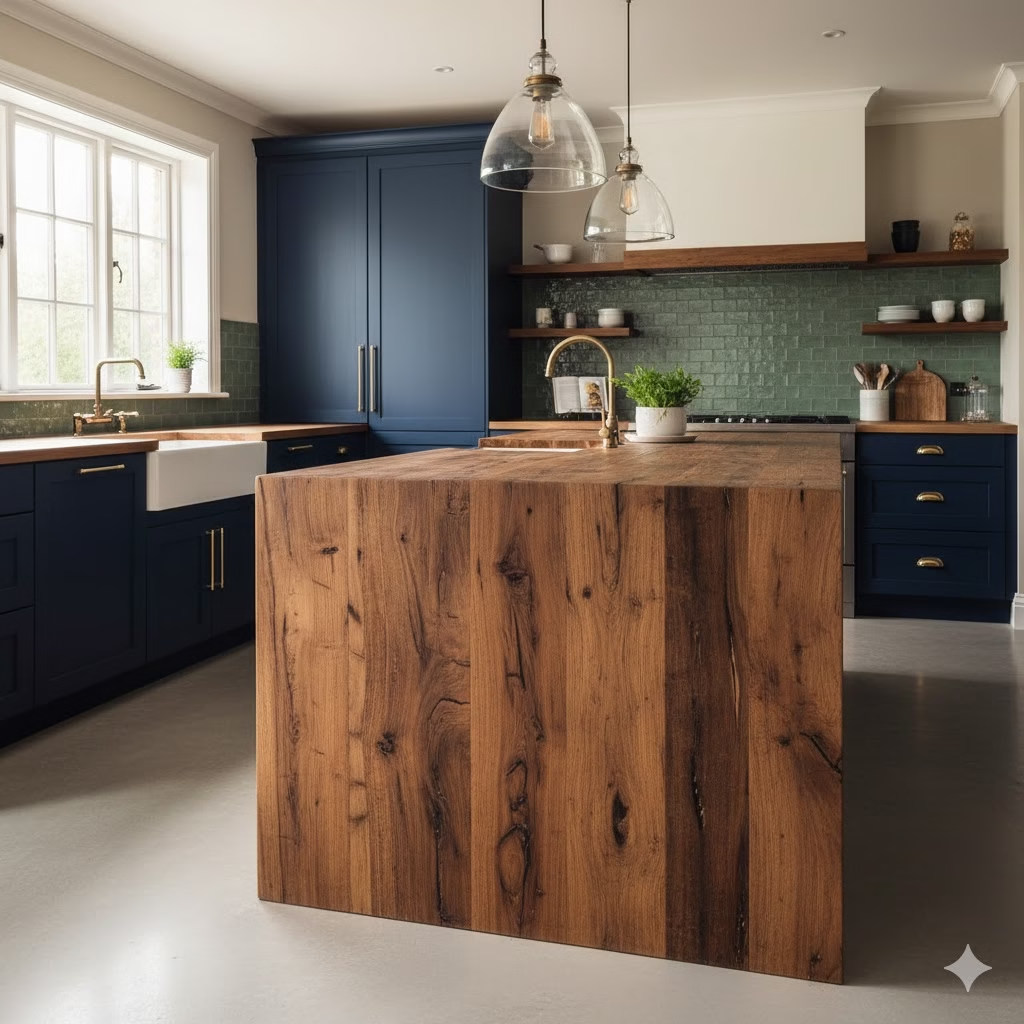
6. Versatility for Any Activity

A single overhead light can only be used for one purpose. A layered mood ambient lighting system can change its use instantly. It can match any activity, from cooking to having guests over.

  • The Benefit: You can instantly change the feeling of one room for many different needs. It can be bright and clear for cleaning. It can be warm and dim for a movie night. Or, it can be colored and active for entertaining.
  • How to Do It: Buy a smart lighting system that lets you save “scenes.” Program scenes like “Movie Night” (low light, warm color) and “Dinner Prep” (bright, focused light over the counter).
  • Example: In a kitchen, use bright under-cabinet lighting to prepare food. Then, switch to pendant lights on a low dimmer for eating.

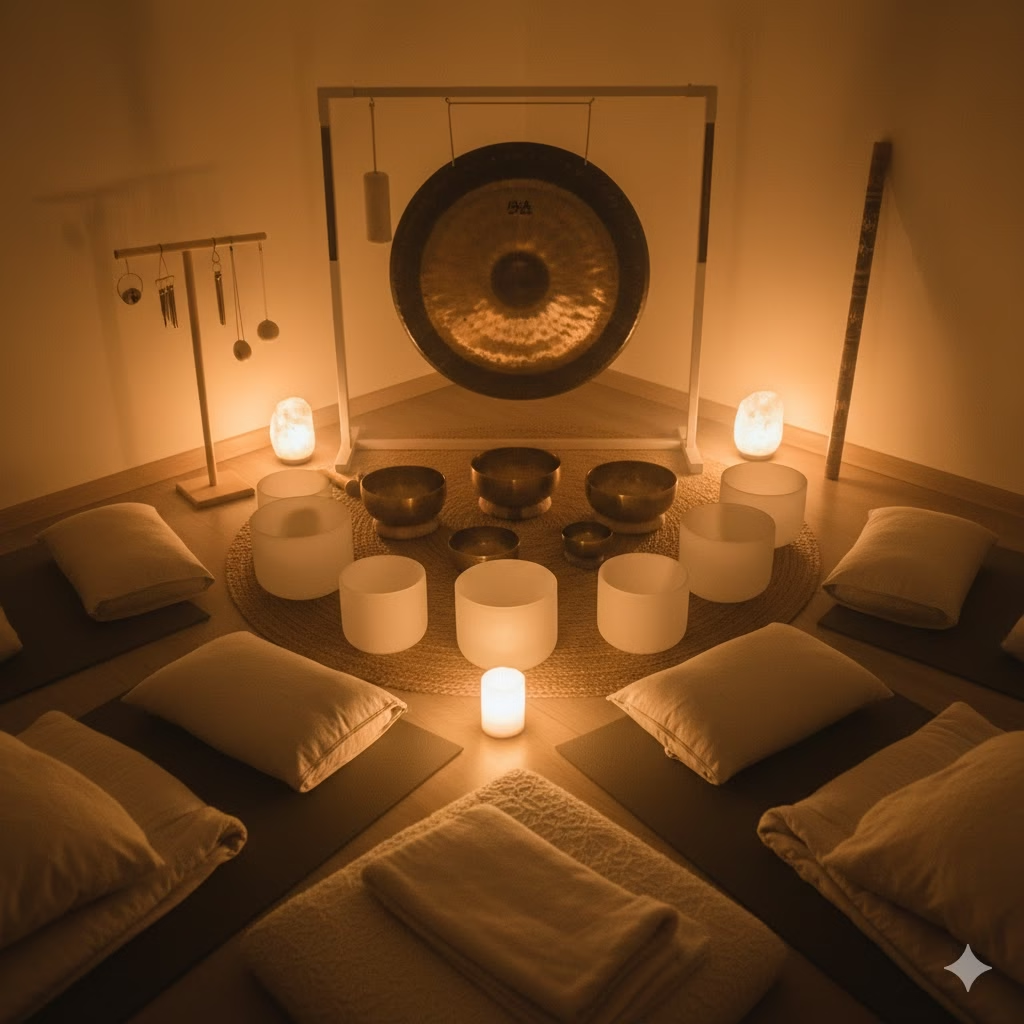
7. Better Social Interaction and Guest Comfort

Think about the atmosphere of your favorite restaurant or bar. It is almost always soft, spread out, and low-level. This type of lighting makes people feel closer and more talkative.

  • The Benefit: Soft, nice lighting makes people feel more comfortable and relaxed. This helps them open up and stay longer. It also avoids strong shadows that can be unflattering.
  • How to Do It: Keep light sources below eye level. Use lamps on side tables and floor lamps with shades that spread the light. Never use bulbs that are completely uncovered.
  • Example: For a dinner party, turn off all overhead lights. Only use candles and table lamps.

8. Improved Mental Well-being and SAD Management

Light exposure directly affects brain chemicals that control mood, like serotonin. The quality of your indoor light is very important, especially during dark winter months.

  • The Benefit: Smart mood lighting can copy natural daylight cycles. Or, it can bring a soothing warm lighting when natural light is scarce. This helps keep mood and energy levels steady.
  • How to Do It: Use “full-spectrum” or daylight bulbs (around 5000 K to 6500 K) in the morning to boost energy. Then, switch to warm light in the afternoon and evening.
  • Example: Place a light therapy lamp (if you need one) near your desk during morning work hours. This gives you a dose of fake daylight.

9. Increased Home Safety and Navigation

Layered lighting is not just for feeling good. It is a key safety tool, especially for moving around at night.

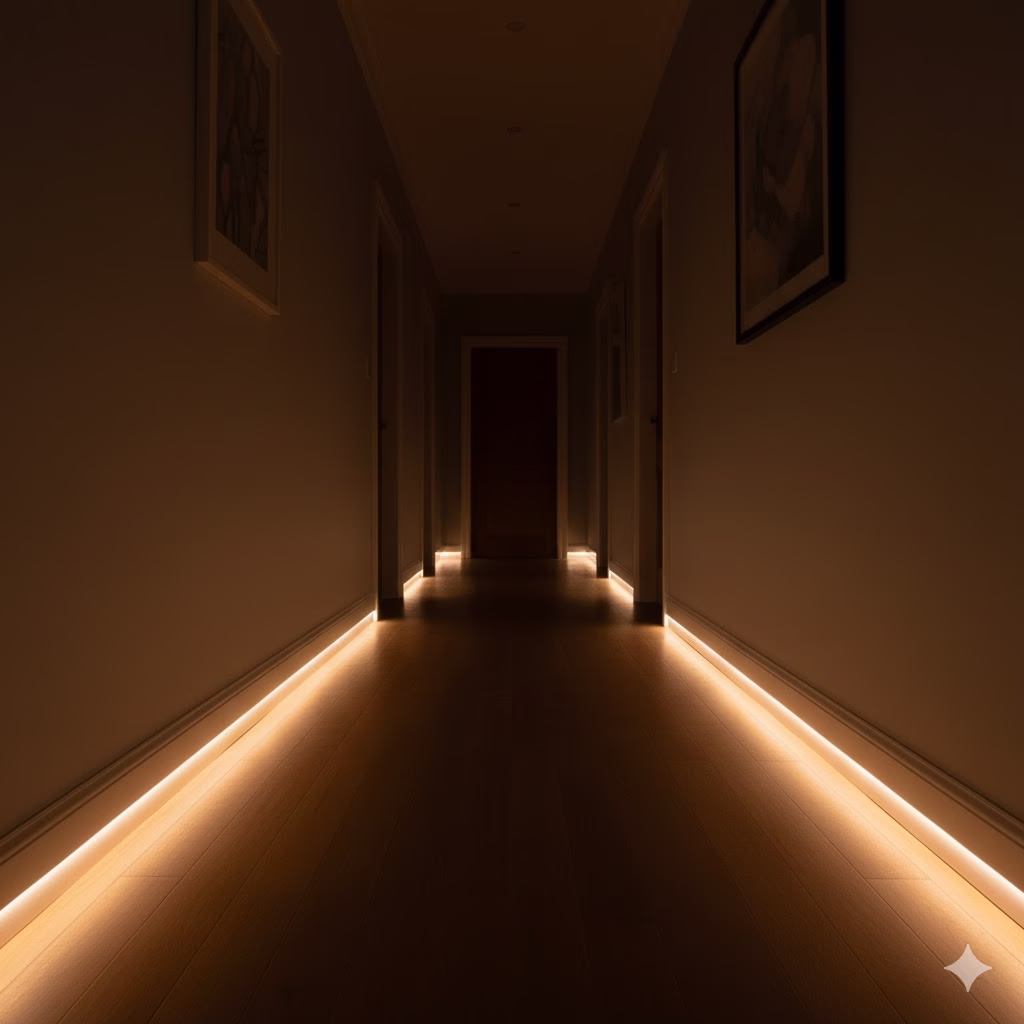
  • The Benefit: Lights placed well on the floor or baseboard show safe paths. They do this without being too bright. This prevents falling without interrupting your sleep cycle.
  • How to Do It: Put low-level, motion-activated strip lights in hallways, stairs, and bathrooms. These lights should be a very warm lighting color.
  • Example: Install small LED strips under the edge of stair treads. They turn on when they sense movement after it gets dark.

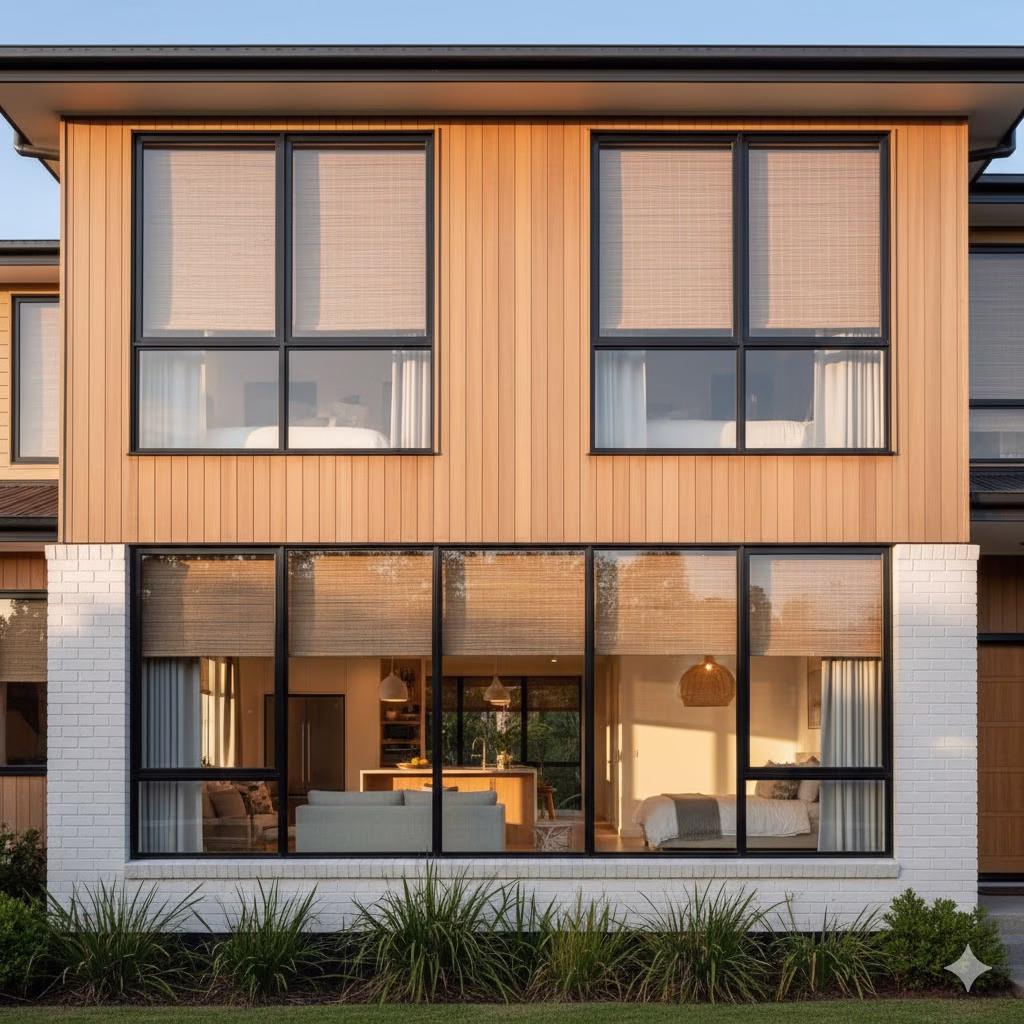
10. Maximizing the Sense of Space

Smart lighting can greatly change how big and shaped a room feels. This is a big help for small homes or oddly shaped spaces.

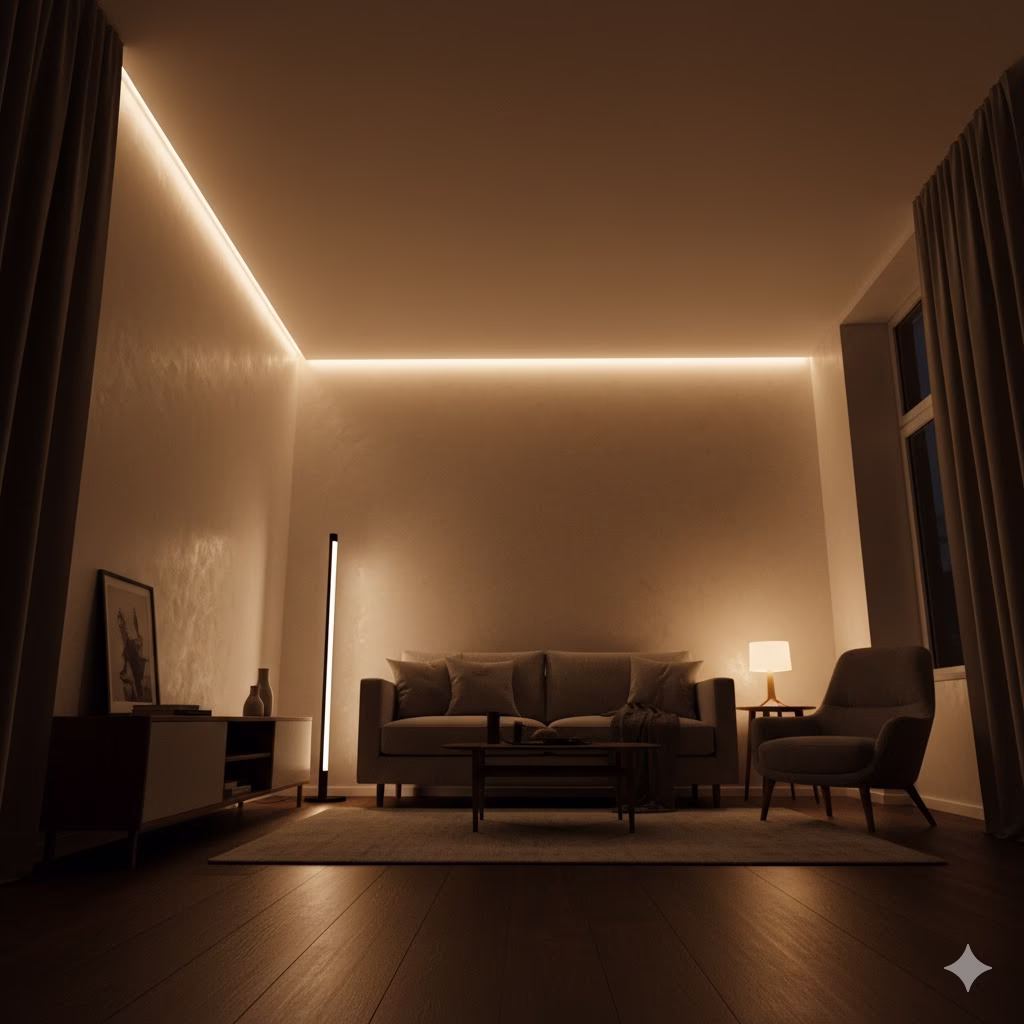
  • The Benefit: When you light up walls or ceilings, you make the eye look up or out. This makes the room feel larger and more open.
  • How to Do It: Use uplighters. These are floor lights that shine light onto the ceiling. They make the ceiling look higher. Install track lighting to direct attention to the far corners of the room.
  • Example: Put thin, vertical floor lamps in corners. They brighten where the walls and ceiling meet.

How to Achieve Mood Lighting: A Simple Guide

Using mood lighting is not about buying every gadget. It is about the careful use of three main types of lighting:

1. Ambient Lighting (General Light)

This is the overall light that fills the room. It should be soft, spread out, and the least powerful light layer.

  • How-To: Use dimmers on all main light fixtures. Use wall sconces or large hanging lights with shades that soften the light. Aim for a warm lighting color temperature (around 2200 K to 3000 K).

2. Task Lighting (Work Focus)

This is bright, focused light for a certain activity. Examples include cooking, reading, or working.

  • How-To: Put direct light sources where the activity happens. Examples are desk lamps, floor lamps over a chair, or under-cabinet lights. The light should shine on the task, not the whole room.

3. Accent Lighting (Highlighting Features)

This is the dramatic layer. It is used to draw the eye to architectural details, art, or plants.

  • How-To: Use light that aims in one direction. This includes track lights, small spotlights, picture lights, and recessed lights. Always place these lights to skim a texture or focus on an object.

Frequently Asked Questions (FAQ)

Q: Are colored smart bulbs (RGB) truly good for relaxing?

A: Yes, if used carefully. White light is best for daily work. However, specific colors can be very effective for setting a mood. Deep, rich colors like amber, red, and warm orange are best for calming and getting the body ready for sleep. This is because they block blue light waves. Avoid brighter colors like blue or green in the evening.

Q: What is the best color temperature for warm lighting?

A: Warm lighting is in the range of 2200 K to 3000 K on the Kelvin scale. For the most comfortable, relaxing effect, aim for 2700 K or lower. Above 3500 K, the light becomes “cool” or blue-white. This is better for alertness and work tasks.

Q: Is it costly to change to mood lighting?

A: Not always. You can start by buying dimmable LED bulbs and simple plug-in timers. These are cheap. The most expensive part is often putting in wired smart switches. However, the long-term energy savings from using LED bulbs and being good for the environment usually pay for this cost. Start by focusing on changing the bulbs in the lamps you use most.

Q: Can mood lighting really help me focus?

A: Definitely. The key is to create a difference in brightness. Make a bright, focused area of light on your task (like a book or keyboard). Keep the rest of the room dimly lit. This lowers visual distractions. This focused light setting trains your brain to concentrate on the thing being lit.

Q: Where should I avoid overhead lighting completely?

A: It is a good idea to avoid harsh overhead lighting in the main bedroom, except when cleaning. In the living room and dining room, use overhead lighting only for effect or when necessary. Use lamps, wall sconces, and floor lighting ideas for your general ambient lighting.


References


Recent Posts


10 Reasons Sound Bowls Are The New Self-Care

Close-up, softly lit photograph of a hammered brass Tibetan singing bowl and wooden mallet resting on a linen cloth. This image symbolizes the simple, ancient practice of sound healing and sound bowls, essential for modern self care.

We’ve all been there—scrolling through endless self-care guides and feeling more stressed than relaxed. Life moves fast, and finding five minutes to truly unplug can feel impossible. But what if the secret to deep, effective self-care was as simple as a comforting, gentle sound? Discover the power of sound bowls. I used to deal with daily burnout. Now, I find peace in the quiet power of sound healing. I want to show you why this ancient practice is the easy, modern wellness trend you need right now.


In our modern world, everything moves fast. We are always online. Because of this, the search for true self-care has become huge. We try many routines, diets, and new products. But we often miss the simple way to find real peace inside. This is where sound bowls come in. They are also called singing bowls. This ancient practice is now the most helpful and easy wellness trend available.

These bowls are made to hum deeply. They can be made of brass (Tibetan) or pure quartz crystal (Crystal singing bowls). They make a sound that vibrates through your whole body. This is more than just music. It is a type of non-medical sound therapy. It helps your body and mind reach a state of deep, healing rest. This is called auditory wellness. This is why adding sound healing to your daily routine is the new, important form of self-care.

Here are 10 strong reasons why sound bowls should be a part of your wellness routine:


1. Fast Stress Reduction

We live in a time of high, constant stress. Our biggest self-care need is something that works right away. The deep, lasting tones of the singing bowls immediately calm your nervous system. When the sound waves hit, they help the brain change from a fast-paced state (Beta) to a calmer one (Alpha or even Theta). These brainwave patterns are linked to deep relaxation and quiet thought.

Example: Think about coming home after a busy, bad day. Your heart is racing, and your mind is full of noise. Hitting a bowl just once instantly stops this cycle of frantic thoughts. The sound itself becomes what you focus on. It takes the place of your worries.

How to do it (Quick De-Stress):

  • Find a calm place and sit easily.
  • Take three slow, deep breaths in and out.
  • Gently strike or rub the bowl’s edge.
  • Close your eyes and just listen. Wait until the sound completely stops. This takes about 30 to 60 seconds. It works like a powerful reset button for your mind.

2. A Big Help for Anxiety Relief

Many people ask, “How do singing bowls help with anxiety?” The answer is that the bowls help bring the body into balance. Anxiety relief happens because the steady vibrations slow your heart rate. They also make your breathing steady. This turns on the parasympathetic nervous system (PNS). This is the system for “rest and digest.” Using these sounds often teaches your body how to stop the “fight-or-flight” response more easily.

Example: If you feel a little nervous before a social event, a 10-minute sound bath at home can calm you down. It works like a natural helper. It lowers stress hormones and helps your emotional balance.


3. Much Better Sleep Quality

Good sleep is the most important part of self-care. When the mind is too busy, it often causes problems sleeping. Using sound bowls before you go to bed helps you move from the day’s mental chatter to a state of pre-sleep calm. The theta brainwaves that the tones create are the key to deep, healing sleep.

How to do it (Sleep Ritual):

  • Keep a small Tibetan singing bowl near your bed.
  • Five minutes before you turn off the light, play the bowl nonstop for two or three minutes while lying down.
  • Focus on the sound. Let it wash over your body. Do not try to solve problems or plan for tomorrow.
  • The vibration will gently get your body ready for deep relaxation and better rest.

4. The Deep Focus of Mindfulness

Mindfulness means being fully present right now. Sound bowls are the perfect tool for this practice. When you meditate, you must focus on your breath or body feelings. The sound of the bowl is different. It is an outside sound that grabs your attention. It easily pulls you into Mindful self-care practices. You don’t have to try hard to focus.

Example: If you feel distracted, try this. Listen to the bowl’s sound fade away—from loud ring to whisper to silence. This simple act forces you to pay close attention to the now. You just watch the sound without judging it.


5. A Simple Meditation Aid

Many people find sitting still for meditation hard. Sound bowls offer a soft, guiding way to start. They give your mind something lovely and simple to focus on. This stops the frustrating thought, “Am I doing this right?” The strong, clear sounds act like a steady musical note. This lets your brain settle into a calm rhythm much faster than just silence. This makes them great for new users. They are also good for experienced people who want a deeper state.


6. Whole-Body Pain Management

Sound therapy does not replace a doctor. However, the deep state of deep relaxation and brainwave change helps greatly with pain management. When your body is highly stressed, you feel pain more strongly. By lowering stress and turning on the PNS, the brain can better control how it senses long-term or sharp pain. This often leads to less pain from tension in the body.

Example: Using a bowl when you have a headache or tight muscles can help those areas relax. This can offer a natural choice instead of always tensing up your muscles.


7. Lowering Blood Pressure and Heart Rate

The effects of using sound therapy often are clear. By causing lasting deep relaxation, singing bowls have been shown to help lower blood pressure. They also help keep your heart rate regular. This is a sign of a calmer, stronger nervous system. This benefit shows that sound bowls are more than just relaxing. They are a tool for preventive auditory wellness.


8. Balancing Your Body’s Energy (Chakra Healing)

Many sound healing people use crystal singing bowls benefits for their link to the body’s seven main energy centers, called chakras. Each crystal bowl is often tuned to a certain musical note (C, D, E, F, G, A, B). Each note matches a certain chakra. People believe these clear, pure tones help clear energy blocks. This leads to good energy flow and emotional balance. This practice of tuning yourself is a deep, whole-body type of self care.

Example: Play the note ‘F’. This note goes with the Heart Chakra. Focus on feelings of kindness and love. This can be a strong mindful self-care practices ritual.


9. Better Creativity and Focus

Sound bowls help your brain enter Alpha and Theta states. This opens a path to the hidden part of your mind. That is where creativity comes from. A few minutes of sound meditation aid can clear away mental fog. This leaves you with sharper focus. It gives you new energy for work, art, or solving problems. Incorporating sound healing into daily routine is not just about resting. It is about making your mind work better.


10. The Best Easy Wellness Trend

The last and best reason that sound bowls are the new self-care is how easy they are. They do not require hard work. Unlike a tough yoga class or a complex recipe, using a bowl takes almost no training. It takes very little time. You can do a sound bath at home alone. It can be for 60 seconds or for an hour. This is an easy way to get a big result. It is a wellness trend that leads to lasting auditory wellness.

Example: You do not have to be a musician or an expert. If you can tap a glass, you can use a singing bowl well. The sound does all the work for you.


How to Put Sound Bowls Into Your Routine

Incorporating sound healing into daily routine is simple. Here are the basic steps and methods to start using them:

The Basic Playing Techniques

1. The Strike (Gonging)

  • Hold the bowl strongly in the palm of your non-dominant hand. Do not let it rest on your fingers. That will make the sound quiet.
  • Hold the mallet like you hold a pen.
  • Gently hit the outside wall of the bowl near the edge.
  • Let the sound get loud and then completely fade. This is best for a quick break and stress reduction.

2. The Rub (Singing)

  • Hit the bowl once to start the sound.
  • Hold the mallet strongly against the outside rim of the bowl.
  • Use light, even pressure. Move the mallet around the rim in a slow, continuous circle. It is like stirring soup in a pot.
  • Keep your wrist straight. Do not go too fast. The sound will slowly grow into a long, deep tone. This way is best for longer meditation aid sessions and deep relaxation.

Getting Started Checklist

Routine GoalTimeHow to Use Bowls
Morning Clarity3 minutesHit a Crystal Bowl three times to start the day with a clear plan and focus.
Mid-Day Focus60 secondsA single strike on a Tibetan Bowl to stop being distracted and renew work energy.
Evening Wind-Down5-10 minutesPlay a bowl nonstop while doing light stretches or deep breathing. This gets you ready for improved sleep quality.
Emotional Check-inAs neededPlay a bowl linked to the Heart or Solar Plexus chakra. This helps with emotional balance.

Choosing Your Sound Bowl

The two main kinds of sound bowls give you slightly different self-care experiences:

  • Tibetan Singing Bowls: They are usually made from metal (often seven kinds of metal). They make a deep, complex sound with rich, earthy extra tones. They are great for feeling grounded and for quick stress reduction.
  • Crystal Singing Bowls: They are made from very pure crushed quartz (silica). They make clear, clean, louder sounds that last longer. They are often used for specific work like chakra healing.

It does not matter which kind you pick. The benefits of using sound healing will change your life. Start simply. Listen closely. Let the ancient sound become your new way to find self-care.


Frequently Asked Questions (FAQ)

What is the difference between a sound bowl and a singing bowl?

The names sound bowls and singing bowls mean the same thing. They are the same tool. The word “singing” is used because when you rub the edge with a mallet, the bowl makes a sound that lasts and lasts, like singing.

Are crystal bowls better than Tibetan bowls?

One is not better than the other. They just feel different. Tibetan singing bowls have a more complex, deep tone. This is great for general deep relaxation. Crystal singing bowls benefits include clearer, more lasting notes. Many people who use them prefer them for specific work, like chakra healing. Your choice depends on the sound you like and your main goal (e.g., grounding versus energy work).

Do I need to learn meditation to use them?

No, you do not. This is one of the best parts of this wellness trend. The sound itself is a form of easy meditation aid. You only need to sit and listen. The vibrations naturally guide your brain into the right state for stress reduction and anxiety relief. You are doing auditory wellness just by listening.

What is a “sound bath at home”?

A sound bath at home is just a focused time when you use your sound bowls to surround yourself with the sound. You can play one bowl for 15 minutes. Or, you can play many bowls if you have them. The goal is to let the sound wash over you, like water in a bath. This helps bring about deep relaxation.


References

  1. NIH – The transformative power of music
  2. Science Direct – The human health effects of singing bowls
  3. Psychology Today – The Healing Power of Sound as Meditation

Recent Posts


The Ultimate Eco-Friendly Decor Hack

A cozy living room with natural light streaming through an eco-friendly bamboo shade on a large window. A light-colored sofa, throw blanket, and potted plants create a relaxed, sustainable living space. Keywords: bamboo shades, eco-friendly, living room, natural light, window coverings, sustainable decor.

For anyone striving for a beautiful, custom-feeling home without breaking the bank or contributing to fast décor culture, the struggle is real. For years, making significant changes felt daunting, as if sustainable living meant sacrificing style. But after discovering the simple, transformative power of bamboo shades (the ultimate Eco-Friendly window coverings), it becomes clear that high impact and Zero waste principles can go hand-in-hand. This is the simple change using bamboo that can make any space feel like a mindful home.


Introduction: More Than Just a Quick Fix

In the world of home décor, we see many passing trends. We are often pushed to buy the newest colors, the latest materials, and constantly upgrade our homes. But what if the best “hack” was not about following a trend? What if it was about making a simple, thoughtful choice that offers timeless style and a measurable positive impact?

Let us talk about bamboo shades. These natural woven window coverings are more than just a style choice. They are an important piece of the sustainable living movement. And offer an Eco-Friendly update that is both beautiful and responsible. They perfectly mix texture, light, and ethical sourcing. They can change a room’s entire feeling with little effort and maximum benefit.

This article will show why bamboo shades are the ultimate Zero waste décor hack. We will cover everything from their sustainable origins to a detailed, simple guide on how to measure, install, and style them in your home.


The Bamboo Advantage: Why It Is the Best Sustainable Material

To understand why bamboo shades are a great Eco-Friendly hack, you must first know about the amazing qualities of the material itself.

Rapid Growth and Earth Benefits

Bamboo is not a tree; it is actually a type of grass. It is one of the fastest-growing plants on earth. Some kinds can grow up to three feet in a single day. This fast growth means it can be cut often without the need for replanting, making it a highly renewable resource. Hardwood can take many decades to grow fully. In contrast, bamboo reaches full growth in only three to seven years.

This fast growth also makes bamboo excellent at storing carbon. Bamboo forests take in much more carbon dioxide and produce more oxygen than similar stands of trees. This makes it a key tool in fighting climate change. Choosing bamboo helps reduce the carbon in the air.

Low Environmental Impact

Growing bamboo is very low-impact. It grows well naturally and usually does not need large amounts of pesticides, weed killers, or too much water. These things are often used when growing cotton, timber, and many man-made materials. Also, cutting bamboo does not usually need heavy machines. This helps to prevent soil erosion and minimizes harm to animal habitats. The roots of bamboo also help to hold the soil in place. This is especially true on sloped land. This further stops erosion and runoff.

Zero Waste and Breaking Down Naturally

At the end of their long life, the natural fibers of bamboo shades can break down fully. This is a very important part of the Zero waste idea. This is very different from man-made window coverings like vinyl or plastic blinds. These often sit in landfills for hundreds of years. Even making bamboo products usually creates less waste. This is because almost all parts of the plant can be used.


The Aesthetic Impact: Making Your Home Stylish with Natural Texture

Being sustainable does not mean you have to give up style. In fact, bamboo shades are a favorite of designers precisely because they are beautiful and fit many looks.

The Beautiful Light Filter

One of the best things about woven bamboo shades is how they soften the sunlight. They do not block light entirely, like a blackout curtain, or reflect it harshly, like aluminum blinds. Instead, bamboo spreads the light out. This fills the room with a warm, golden, and very soft light. This effect immediately improves the mood of the room. It makes the space feel cozy, airy, and inviting. This also increases the perceived value of your home.

Texture Is Key to Modern Style

In homes with minimalist, modern, or simple Nordic design, texture is often more important than color. Bamboo adds a rich, natural layer of texture. This grounds the space and adds depth without the need for busy patterns. The natural colors of the woven fibers change (from light honey to deep caramel). This makes the shades visually interesting. They match almost any décor style, whether you like coastal, boho, or mid-century modern looks.

Bringing the Outside In

Bamboo is a material that links the inside of your home with the natural world outside. This link is key to biophilic design. This is the idea that people have a natural need to connect with nature. By using bamboo shades as your window coverings, you are easily applying a key rule of healthy, relaxing design.


The “How-To”: Making the Simple Switch to Bamboo Shades

This section explains the “decor hack” part. Replacing old, possibly unsafe, or non-recyclable window coverings with bamboo is a simple job that gives big rewards. Here is the easy, step-by-step guide.

Step 1: Measure Carefully for the Best Fit

Getting your measurements correct is the most important part of putting up the shades. Bamboo shades look best when they fit perfectly. You have two main choices for mounting them: inside mount and outside mount.

A. Inside Mount: The shade goes inside the window frame. This gives a clean look, like it was built in. This is best if your window trim is decorative.

  • Measure the width at the top, middle, and bottom of the window opening. Use the smallest number.
  • Measure the height from the top of the opening to the window sill.
  • Note: Most companies will take off a small amount of space (usually 1/4 inch to 1/2 inch) from your width measurement. This is to make sure the shade fits without rubbing. Always check what the seller suggests.

B. Outside Mount: The shade is put on the wall or window trim outside the opening. This is a good choice for windows that are slightly crooked, or if you want to make a window look bigger.

  • Decide how wide and tall you want the shade to be. A good tip is to add 3 to 6 inches to the width on each side. That means 6 to 12 inches in total. Also, add 3 to 6 inches above and below the window opening.
  • Tip: Adding extra width stops gaps where light can peek through. It also makes the window look more substantial and custom-made.

Step 2: Pick Your Style of Weave and Lining

  • Weave Tightness: Tighter weaves offer more privacy and block more light. Looser, thin weaves offer the most texture and light filtering. Choose based on what the room is used for. For example, bedrooms often need tighter weaves or linings.
  • Lining: For bedrooms or bathrooms that need full privacy, choose shades that come with a privacy or blackout lining. Look for cotton or recycled materials for an extra Eco-Friendly touch. The lining is put on the back. It completely hides the view through the bamboo fibers.

Step 3: Installation Is Quick and Simple

Bamboo shades are usually easy to put up. This makes them a true do-it-yourself decor hack.

  1. Mark the Brackets: Hold the top piece of the shade up to where you will mount it. This can be inside the window frame or on the wall. Use a pencil to mark where the mounting brackets will go. Make sure your marks are level.
  2. Drill Starter Holes: Use a drill bit that is slightly smaller than your screws to drill starter holes. Helpful Hint: If drilling into drywall, use wall anchors for extra support. If drilling into wood trim, just drill into the wood.
  3. Attach the Brackets: Screw the mounting brackets into place firmly.
  4. Hang the Shade: The top bar of the shade usually snaps right into the brackets you installed. Gently push the top bar into the brackets until you hear a solid click.

Sustainable Living: How Shades Lead to a Better Lifestyle

Switching to bamboo shades is a great starting point. The real benefit of this Eco-Friendly hack is the mindset it helps create. It is a way into a larger philosophy of sustainable living.

The Zero Waste Idea

The main goal of Zero waste is to send as few items as possible to a landfill. By choosing a natural, renewable, and biodegradable material like bamboo, you are supporting a circular system. This simple choice sets an example for what you buy in the future:

  • Seek Natural Fibers: Use this idea when buying bedding, towels, and blankets. Look for things like organic cotton, linen, or hemp.
  • Focus on Long-Term Use: Buy items that are made to last. This reduces the need to replace things often. Bamboo shades are strong and can easily last for ten years or more if cared for well.
  • Support Good Supply Chains: When buying bamboo shades, look for companies that clearly share their ethical sourcing and manufacturing steps.

Insulation and Energy Saving

Bamboo shades help create a more sustainable home by saving energy. The woven material creates a layer that helps stop heat from moving through the glass. In the summer, they lower the heat coming in from the sun. This means your air conditioning does not have to work as hard. In the winter, they can help stop heat from going out.

This reduction in energy use does two good things. It lowers your utility bills and also cuts down your home’s total carbon emissions. This is a great win for both your money and the planet.


Practical Examples and Ideas for Styling

Bamboo shades are very versatile. They fit easily into almost any room in your home.

The Living Room: Privacy and Warmth

  • The Look: Put a medium-dark bamboo shade with sheer white linen drapes on each side. The drapes frame the window and add a soft feel. The bamboo shades add texture and allow you to control privacy.
  • How-To: Hang the sheer drapes on a separate, wider curtain rod. Put this rod a few inches above the window frame. The bamboo shade is installed inside the frame. This creates layers for controlling the light.

The Bedroom: Better Rest and Texture

  • The Look: Choose a tightly woven bamboo shade that has a full blackout lining. This ensures the room is completely dark for sleeping. It still keeps the natural look during the day.
  • How-To: Use the blackout bamboo shade mounted inside the frame. Combine this with blackout curtains hung on an outside-mounted rod. This double layer is the best way to block light.

The Bathroom: Water Resistance and Durability

  • The Look: Use a lighter-colored, tightly woven shade. This allows for maximum light while still giving full privacy. Bamboo naturally resists water. This makes it a better choice than some fabrics in areas with high moisture.
  • How-To: Make sure your bathroom has good airflow. Think about treating the shades with a mild, non-toxic wood sealer if they are right next to the shower or sink.

Maintenance and Long Life: Keeping Your Shades Perfect

Another Eco-Friendly benefit of bamboo shades is that they last a long time and are easy to care for. This is part of their Zero waste status.

  1. Dust Regularly: The best way to care for them is with regular, gentle dusting. Use a feather duster, a clean, soft cloth, or the brush attachment of your vacuum cleaner on a low setting. This stops dust from building up and making them look dull.
  2. Clean Small Spots: For small spots or spills, use a cloth that is only slightly damp. Do not soak the bamboo. Use a very mild, non-toxic soap. Dab the spot gently. Immediately wipe it dry with a clean, dry cloth.
  3. Cord Care: Keep the operating cords from tangling. Check the moving parts now and then. Most shade parts are simple. They can often be fixed or replaced by parts from the company. This helps the whole product last longer.
  4. Avoid Water Spray: Never spray water directly onto the bamboo. It resists water, but too much water can make the fibers and operating strings weak.

By taking care of them in this simple, easy way, your Eco-Friendly bamboo window coverings can last for many years. This proves that the sustainable choice is often the strongest and most money-saving choice over time.


Conclusion

The path to a more thoughtful and Eco-Friendly home does not have to begin with a huge, expensive remodel. Often, the best results come from the easiest, most intentional choices. Bamboo shades are the ultimate Zero waste decor hack. They give an immediate, noticeable upgrade to your space. At the same time, they fit perfectly with the ideas of sustainable living.

When you choose this natural material for your window coverings, you are doing more than just dressing a window. You are making an investment in the health of your home, your planet, and your personal style.


References


Recent Posts


The Ultimate Mind Hack: Connect the Dots for Adult Focus

A focused adult, wearing glasses, intently works on an intricate connect the dots printable with a pencil. This image captures the essence of using Sensory Activities as a Mind Hack for adult focus.

We’ve all been there: staring at a screen, our minds wandering, struggling to focus on a task. Finding a simple way to reset your brain feels like a huge challenge in today’s noisy world. This article shows you a surprisingly easy, low-tech way to skip digital noise and fully engage your attention using connect the dots printables. Get ready to find your new favorite Mind Hack tool—one of the best Sensory Activities—for better focus, less stress, and total control over your thoughts.


Introduction: Why Our Attention Fails and How to Fix It

The modern world has quietly attacked our focus. We are constantly pulled between emails, social media, news, and long to-do lists. This non-stop mental load creates what experts call “attention residue.” This means our minds are always stuck on past tasks, making deep, steady focus seem impossible.

To solve this high-tech problem, we often need a simple, low-tech fix. While meditation and complex brain games are helpful, the most effective tools are often the easiest to use. Think about connect the dots—not the easy puzzles from childhood, but detailed, hard designs made into smart printables for grown-ups. This activity is more than just a trip down memory lane; it’s a powerful, hands-on Mind Hack. It forces your brain to be in the moment, instantly making your concentration better.

The Simple Science Behind the Focus Boost

Why does drawing lines between numbered dots help adults focus so much? It works because of a few simple rules about how your mind and brain work:

1. It Demands Step-by-Step Attention

Connect the dots is a sequential task. You cannot skip numbers. You must follow the path from 1 to 2, then to 3, and so on. This rule forces your brain to pay steady, directed attention. When you read a paper or scroll online, your mind can easily jump or wander. But the rules of the puzzle keep your mental energy locked onto the next small step. This step-by-step nature helps train the front part of your brain—the part in charge of focus and planning—to stay on the task.

2. The Great Feeling of Flow State

When a task is hard enough to challenge you but easy enough for you to do well, you enter a mental state called Flow. In Flow, the world outside disappears. All your attention is given to the activity. Hard connect the dots designs for adults, especially those with many hundreds of points, are just right to start this state. The activity has a clear goal (the final picture) and gives instant feedback (the line you draw). This reduces distractions and increases full involvement. This highly focused state is the main power of the Mind Hack.

3. Using Your Senses: The Sensory Activities Power

The physical act of holding a pen or pencil and pressing it onto paper uses your sense of touch. This physical feedback ties you to the moment. It is a powerful way to stop your mind from wandering. As one of many good sensory activities, connect the dots gives you a solid, real-world anchor. You see the line appear. And feel the paper under your hand. You hear the pencil scratch the surface. This full sensory experience shuts down the mental paths that usually let worry and scattered thoughts rush in.


Connect the Dots to Stop Stress and Worry

This activity does more than just boost focus; it also helps you manage your feelings.

How It Stops Worry

Worry often comes from thinking too much about the past or fearing the future. Because connect the dots needs all your brain’s effort in the current moment, it acts as a worry blocker. It keeps your mind busy. If your brain is working hard to find number 457 among many dots, it cannot worry about a meeting you have next week. This is a form of active meditation.

An Escape from Screens

For people who feel overloaded by digital devices, the physical, printable format is very important. Moving from a bright screen to a piece of paper tells your brain to change gears. You stop consuming (scrolling, reading) and start creating (drawing, connecting). This small change helps break the cycle of digital addiction, making these printables a key part of any plan to take a break from screens.


How to Use This Mind Hack Every Day

To make connect the dots a true focus tool, you must use it with a clear purpose. Here is how you can use it to get the most benefit:

1. Get the Right Tools

  • The Printable: For a real focus test, choose complex designs. Look for connect the dots printables that have a high number of dots, ideally 500 or more. More dots mean more time in the Flow state.
  • The Pen or Pencil: Use a tool that feels good to hold. A fine-point pen (like a 0.5 mm size) makes you draw carefully and slowly. This strengthens the sensory activities part of the task.
  • The Paper: Use high-quality paper. The feel of strong paper is much better than thin paper. This adds to the sensory activities you feel.

2. Set Up Your Space

Treat this time as a planned, important mental rest. Do not let anything interrupt it.

  • Block the Time: Set aside 15 to 30 minutes. This is enough time to get into Flow without getting tired.
  • Stop Distractions: Turn off your phone and leave it in another room. Close all tabs on your computer. This Mind Hack works only if your space is quiet and focused.
  • Use Quiet Sound: Play simple music without words, or use special binaural beats. These sounds are known to help you focus.

3. The Focused Method

Do not rush the activity. The real goal is the process, not just the final drawing.

  • Breathe First: Before you start, take three slow, deep breaths. This simple act helps calm your body.
  • Find the Number: Do not let your eyes wander randomly. Decide to find the very next number (like 124) before you start scanning the page. This practice makes your attention focused and ordered.
  • Draw Slowly: Draw the line slowly and with care. Watch the line as it appears. Drawing the line between the dots slowly is the main thing that makes this Mind Hack work.

Examples of the Mind Hack in Action

How can this simple task fit into your busy daily life?

The Busy Leader’s Mid-Day Restart

A busy manager needs to start three hours of complicated work. Instead of just jumping in and feeling tired, they use a connect the dots printable for 20 minutes. This short session wipes away the distraction left from their morning meetings. It allows them to start the complex work with a mind that is fresh and laser-focused. This simple task is more helpful than just a coffee break.

The Creative Person’s Block Remover

A writer or designer cannot think of any new ideas. Staring at a blank screen only makes them more worried. By taking part in the sensory activities of connecting dots, they keep the logical side of their brain busy. This brief switch lets the creative side of their mind work on the problem quietly. When they go back to their creative work, the block is often gone.


The Evening Calm-Down

Many adults find it hard to stop thinking about work and fall asleep. Instead of looking at their phone or watching TV—which keeps the brain awake—they finish a part of a connect the dots printable. The quiet, step-by-step task calms their body. It tells the brain that the day’s work is over. This leads to easier and deeper sleep.


More Than Just Dots: Other Simple Sensory Activities

While connect the dots is a star player in the adult focus game, you can add other simple, hands-on sensory activities to make your Mind Hack skills even stronger:

  • Coloring with Pencils: Just like dots, adult coloring books give you a structure. They need fine hand movements, demanding your attention in the moment.
  • Play Dough or Sand: The feeling of playing with soft, moving material is very calming. You can even do this while taking short breaks from the screen.
  • Jigsaw Puzzles: Finding the right shapes and colors gives you a similar focused, rewarding challenge that works step-by-step.

The main idea is to move away from deep thinking and digital input. Instead, focus on real, physical action.


Conclusion: Taking Back Your Attention

When we look for better ways to work and less stress, we often miss the easiest tools. Adult connect the dots printables are a strong, simple Mind Hack. They use basic mental rules—focused steps, Flow state, and sensory activities—to make your concentration sharper. By adding this simple habit to your day, you are not just finishing a puzzle. You are actively teaching your brain to ignore distractions, hold focus, and finally, take back control of your most important resource: your attention.


Frequently Asked Questions (FAQ)

Q: Does this activity truly help my mind, or is it just for fun?

A: It truly helps. The activity uses the front part of your brain that controls tasks like planning and focus. It can also cause a Flow state, which is a deep, mentally restful state. The slow, step-by-step nature of connecting dots is a known method for reducing stress and worry by keeping your mind on the present moment, much like mindful meditation.

Q: When is the best time to use the Connect the Dots Mind Hack?

A: The best times are when you are changing tasks.

  1. Before a big task: Use it for 15 minutes to clean up the mental mess from your last activity. This prepares your mind for focus.
  2. During an afternoon crash: Use it instead of checking social media. Social media often leaves you more tired.
  3. Before sleeping: Use it as a relaxing activity. It tells your brain the busy day is over, helping you sleep better.

Q: Where can I find printables that are hard enough for adults?

A: Search online for things like “extreme connect the dots,” “adult focus printables,” or “1000 dot puzzles.” Look for pictures that are abstract, geometric, or realistic. These usually have many dots and are made to give you the greatest focus challenge.

Q: How is this different from adult coloring books?

A: Both are great sensory activities. But connect the dots forces you to focus in a more step-by-step way. With coloring, you can choose any color and area. With connect the dots, the strict rule of following the numbers makes your focus stronger and more directed. This is often better for a quick mental “reset.”


References

  1. NIH – Optimal Experience and Personal Growth
  2. HRbartender – 5 Business Lessons Learned from Adult Dot to Dot


How To Make Ear Muffs With Pairs Of Socks

A pair of finished, cozy, cream-colored DIY Ear Muffs made from knitted socks, resting on a rustic wooden table next to the simple materials (socks, headband) used to create this winter Accessory.

There’s nothing worse than that biting, sharp chill that creeps into your ears on a cold morning walk, turning a pleasant outing into a painful dash home. As a lifelong budget-conscious DIYer who constantly seeks out creative uses for everyday items, I’ve often found myself staring at a pile of mismatched socks and wondering how to save them from the landfill. This simple project merges those two struggles, providing a warm, custom solution for winter Accessories and a genuinely satisfying upcycling win. It’s a project anyone can do, transforming a simple pair of old socks into something genuinely useful and incredibly cozy Ear Muffs.


Introduction: The Genius of Upcycled Winter Warmth

In a world increasingly focused on sustainability and mindful consumption, finding creative ways to repurpose everyday items has become an exciting challenge. One of the most common textile items that often ends up discarded or sitting in the “single socks” basket is, quite simply, the sock. This article dives into a brilliantly simple, cost-effective, and deeply satisfying DIY project: turning a pair of soft, cozy socks into functional Ear Muffs.

This isn’t just a thrifty hack; it’s a way to create custom winter Accessories that reflect your style while keeping the chill at bay. The materials are minimal, the process is straightforward, and the result is a plush, warm set of Ear Muffs ready for the coldest weather. Whether you’re trying to save money, reduce textile waste, or just love a good crafting session, this guide will walk you through the transformation, step-by-step.


Why Choose Socks for DIY Ear Muffs?

Socks are a surprisingly perfect material for this project due to several inherent qualities:

  • Insulation: They are designed to keep feet warm, meaning their material (usually cotton, wool, or a thermal blend) provides excellent insulation for the ears.
  • Stretch and Conformity: The knitted structure of socks allows them to stretch easily, making them simple to slip over a headband and conform comfortably to the ear’s shape without being too tight.
  • Softness: Socks are inherently soft against the skin, which is ideal for a garment meant to cover a sensitive area like the ears.
  • Availability: Almost everyone has spare socks, especially the orphaned singles that have lost their mate. This project gives those lonely textiles a new purpose.

Materials Checklist: What You Need

The beauty of this project lies in its simplicity. You likely already have everything you need lying around your home.

ItemQuantityNotes
Socks1 Pair (2 individual socks)Choose thick, plush, and soft material for maximum warmth. Crew socks or tube socks work best.
Headband1A simple, flexible plastic or metal headband is ideal. It should be wide enough to provide structure.
Scissors1 PairSharp fabric scissors for clean cuts.
Needle and ThreadOptionalMatching color, for a more secure or finished look. Fabric glue can also be substituted.

The Step-by-Step Guide: How to Make Ear Muffs

Follow these simple steps to transform your spare socks into stylish and functional Ear Muffs.

Step 1: Preparing the Socks

The key to a good sock Ear Muff is ensuring the sock is the right size and shape to cover your ear comfortably.

  1. Select Your Pair: Choose two socks that are the same size, color, and thickness. Ensure they are clean and free of holes.
  2. Determine the Cutting Point: Lay one sock flat. You want the main, padded, toe end of the sock to be the muff itself. Measure about 4 to 5 inches (10 to 12 cm) from the toe end of the sock. This measurement will vary slightly depending on the size of the sock and your ear size, but it is a good starting point.
  3. Cut the Sock: Using sharp scissors, cut straight across the sock at your determined measurement. You will now have a closed toe piece—this is your future muff—and the remaining leg portion. Repeat this process for the second sock. Discard or save the leg portions for another craft project (e.g., as wrist warmers).

Step 2: Preparing the Headband

The headband provides the essential structure that holds the Ear Muffs in place.

  1. Mark the Muff Placement: Place the headband on your head. Use a marker or a small piece of tape to indicate the two points on the band that sit directly over your ears. This ensures the finished Ear Muffs will cover your ears perfectly.
  2. Measure the Headband: Now that you know where the socks need to sit, measure the width of the headband at those ear points. This is the amount of space you need to open on the cut end of your sock pieces.

Step 3: Creating the Opening for the Headband

This is the most critical step for a professional-looking finish. You need to create a slit in the cut edge of the sock pieces to slide the headband through.

  1. Locate the Center: Take one of your cut sock pieces (the toe end). Fold the cut edge in half to find the exact center.
  2. Cut the Slit: Make a small, straight horizontal incision (a slit) in the center of the cut edge. The slit should be just wide enough to accommodate the width of the headband. Start small—you can always make it bigger, but you can’t make it smaller. Aim for a slit of about half an inch (1.25 cm) initially, then widen if necessary to match the headband’s width. Do not cut the entire way across the sock.
  3. Reinforce (Optional but Recommended): To prevent the slit from fraying or stretching out too much over time, you can quickly hand-stitch a small running stitch around the edge of the slit. Alternatively, a drop of fabric glue or Fray Check can be applied. Repeat for the second sock.

Step 4: Attaching the Muffs to the Headband

This is where the magic happens and the transformation into functional Ear Muffs occurs.

  1. Thread the Headband: Take one sock piece and carefully slide the narrow end of the headband through the slit you just created.
  2. Position the Muff: Gently pull the sock piece down the headband until the toe end (the padded part) is positioned exactly over the ear mark you made in Step 2. The sock should be taut but not overly stretched.
  3. Secure the Muff (Crucial): To prevent the muff from sliding off or spinning around, you need to secure the sock to the headband.
    • No-Sew Method: Apply a line of strong fabric glue inside the sock, around the headband’s perimeter. Press firmly and allow it to dry completely according to the glue’s instructions.
    • Sewing Method: Use a needle and thread (matching color) to sew the sock directly to the headband. You can use a simple whipstitch or a blanket stitch, sewing all the way around the slit opening for maximum security.
  4. Repeat: Repeat Steps 1 through 3 for the second sock piece and the other side of the headband.

Step 5: The Finishing Touches and Customization

Your basic Ear Muffs are now complete! Before wearing them, you can take a few extra minutes for comfort and style.

  1. Test the Fit: Try the Ear Muffs on. Check that the toe of the sock fully covers your ear and that the headband feels comfortable. If they are too loose, you may need to go back and secure the socks more tightly or use slightly smaller socks.
  2. Customize with Accessories: This is where you can truly make them your own. You can embellish your new Accessories with things like:
    • Buttons or Patches: Sew decorative buttons or embroidered patches onto the outer side of the muffs.
    • Faux Fur Trim: Glue a small strip of faux fur around the edge of the sock for a luxe, high-end look.
    • Ribbons/Bows: Tie small bows near the base of the muff for a playful touch.
    • Monogramming: Use fabric paint or embroidery thread to add your initials.

Examples of Sock Choices and Their Results

The type of sock you choose will heavily influence the look, feel, and warmth of your finished Ear Muffs.

Sock TypeProsConsIdeal Look/Feel
Wool Hiking SocksExcellent warmth and insulation. Very durable.Can be bulky; might be scratchy if not lined.Chunky, rustic, and extremely warm outdoor Ear Muffs.
Fuzzy Slipper SocksSupreme softness and comfort. Often brightly colored.Less durable; not as windproof as wool.Plush, cozy, and perfect for indoor or light outdoor use.
Thick Athletic Crew SocksGood stretch; often come in solid, neutral colors.Material might be slightly thinner than specialty thermal socks.Sleek, modern, and practical Accessories for running or gym wear.
Patterned Novelty SocksFun, unique patterns and colors.Pattern alignment can be tricky; warmth varies.Whimsical, personalized, great statement Accessories.

Maintenance and Care

To ensure your upcycled Ear Muffs last for many cold seasons to come:

  • Washing: If you secured the socks with only glue, hand-wash the muffs and spot-clean the headband. If they are securely sewn, they can usually be machine-washed on a gentle, cold cycle, but air-drying is highly recommended to preserve the shape and the headband’s integrity.
  • Storage: Store them flat or hanging when not in use. Avoid crushing them, as this can permanently misshape the headband and flatten the insulation.
  • Inspecting: Regularly check the attachment points for any signs of wear or separation, and mend them quickly with a needle and thread or a touch of fabric glue.

This simple project not only provides you with a much-needed winter accessory but also offers a satisfying way to reduce waste and embrace the DIY spirit. With just a pair of socks and a few minutes of your time, you’ll be ready to face the winter chill in style.


Frequently Asked Questions (FAQ)

Q: Can I use mismatched socks for this project?

A: Absolutely! If you are making the Ear Muffs to wear under a hood or if you enjoy an eclectic style, using mismatched colors or patterns can be a fun way to customize your Accessories. Just ensure the socks are the same material and thickness so the finished muffs feel balanced and look symmetrical in terms of size and bulk.

Q: My headband is too thin. Will it still work?

A: A thin, flexible metal headband will still work, but it may be less comfortable and provide less structure. For a thin headband, you may want to wrap the entire headband with a strip of felt or a piece of the sock leg you cut off earlier before attaching the muffs. This will cushion the band and give the muffs a sturdier base to attach to, resulting in more comfortable and secure Ear Muffs.

Q: I don’t have a spare headband. What is a good substitute?

A: The headband’s function is structural and must be flexible and sturdy. Good substitutes include:

  • The wire frame from a piece of inexpensive costume jewelry or a defunct, wired headphone band (ensure there are no sharp edges).
  • A sturdy, flexible piece of plastic or coat hanger wire that has been shaped into a comfortable curve and covered in tape or fabric to prevent scratching.

Q: Can I stuff the socks for extra warmth?

A: Yes, you can! For maximum warmth and a puffier look, you can add a small amount of stuffing, such as polyester fiberfill (batting), or even pieces of an old cotton t-shirt, before you secure the sock to the headband. Ensure you distribute the stuffing evenly and gently so the muff doesn’t look lumpy. This technique creates a superior thermal barrier for your DIY Ear Muffs.

Q: How long will this project take?

A: Once you have gathered your materials, the cutting, assembling, and securing process typically takes no more than 15 to 30 minutes. The only time delay is waiting for the fabric glue to fully cure if you opt for the no-sew method.


References


Recent Posts


How To Make A Sound Bath

A dimly lit, aesthetically pleasing room set up for a Sound Bath, featuring various sound healing instruments like singing bowls, gongs, and chimes, surrounded by comfortable mats and blankets for a calming Sensory experience.

Ever feel like your brain has too many tabs open? We’ve all been there—juggling work, life, and the endless mental to-do list. I found my own quiet reset button in the soothing world of sound and vibration, a practice known as a Sound Bath. This guide is for anyone looking to tap into a deeply calming practice, showing you exactly how to transform your living room into a sanctuary of resonant healing through beneficial Sensory Activities that provide deep Sensory relaxation.


The Transformative Power of a Sound Bath

A Sound Bath isn’t like taking a shower. Instead, it’s a time when you lie down and are completely surrounded by sound waves. These waves come from special instruments. They are designed to wash over you, from your head to your toes. The sound changes the way your brain works, moving it into a very deep, restful state. This state is often the same kind of deep rest you get when you meditate well.

The main idea behind a Sound Bath is called entrainment. This is a big word for a simple concept: your brain loves to match rhythms. When external sounds are steady and rhythmic, your brainwaves naturally start to follow them. By using instruments that create long, complex, and beautiful tones, a sound bath gently guides your brain. It moves your mind away from the busy Beta state (where you’re focused and working) down to the relaxed Alpha state. It then takes you even deeper into the restorative Theta state.

This practice is a powerful Sensory activity. It uses both your sense of hearing and your sense of touch (feeling the vibrations). The sounds and the strong vibrations help your body let go of tension. They calm your entire nervous system. They also give you an emotional reset. This makes the sound bath a vital tool for dealing with the stress of modern life.

Key Benefits of a Sound Bath

  • Less Stress and Worry: It calms the part of your nervous system that handles “fight-or-flight.”
  • Better Sleep: It helps you relax deeply, which leads to more restful nights.
  • Deep Calm: It helps your brain switch into those deep, quiet meditative states.
  • Aids in Pain Relief: The gentle shaking from the sound can help relax tight muscles.
  • Emotional Release: Sound can help you move emotions that feel stuck.
  • Clearer Focus: The mental rest can make you think more clearly afterward.

Essential Instruments for Your Sound Bath

The instruments you choose are the very heart of your Sound Bath. Professional sessions might have huge gongs. However, you can create a powerful and effective Sensory experience right at home with just a few key pieces. Look for instruments that create a long, rich, and harmonic sound. We call this non-linear sound.

1. Singing Bowls (The Core)

Singing bowls are usually the most important part of the sound experience. They come in two main styles:

  • Crystal Singing Bowls (Made of Quartz): These bowls are tuned to specific notes. Often, these notes match the body’s energy centers, or chakras. They make pure, long-lasting, airy tones. You play them by tapping them with a rubber stick or rubbing the rim with a suede-covered wand. A set of three bowls (for example, C, D, and G notes) gives you a great starting range.
  • Himalayan/Tibetan Singing Bowls (Made of Metal): These are made from several metals mixed together. They create a warmer, deeper, and more complex sound with many layers. They are fantastic because they create strong vibrations you can feel deep inside your body.

2. Chimes and Cymbals (The Details)

These smaller instruments add texture and a delicate, high-frequency sound. They are often used to mark the beginning or end of your session.

  • Kosmis/Zaphir Chimes: These small, tuned chimes ring beautifully. They create delicate, bell-like chords (they often have names like Terra, Aqua, Sun, and Air). They are perfect for introducing a light, gentle energy.
  • Tingshas (Small Tibetan Cymbals): Use these only now and then. They make a sharp, very clear, high-pitched sound. They are often used to clear energy or to gently signal listeners to become alert again when the session finishes.

3. Gongs (The Deep Immersion)

A very large gong might be too much for your home. However, a smaller, handheld therapeutic gong (like a 20-24 inch gong) can offer amazing depth. Gongs create a huge wave of sound. This wave can physically vibrate the person listening. This helps the mind quickly drop into a deep, unconscious state.

4. Other Instruments for Fun Textures

  • Rainsticks: Use these to copy the sound of water falling. They help create a calming, natural environment.
  • Ocean Drum: This makes the soothing, back-and-forth sound of ocean waves.
  • Tuning Forks: These are great for sending direct, focused vibration and sound to specific areas.

How to Do It: Setting Up Your Home Sound Bath

Making a truly great Sound Bath is a mix of simple setup, choosing the right instruments, and playing them in a thoughtful, easy way.

Step 1: Getting the Space Ready

The right environment is key for deep relaxation and full Sensory enjoyment.

  • Where to Hold It: Pick a spot that is quiet and warm. Make sure you won’t be interrupted for the entire session.
  • Comfort is Key: You must be comfortable. Put down thick yoga mats, bring pillows, blankets, and use an eye mask. An eye mask is highly recommended because it helps you reach the deeper Theta state. Listeners should lie on their backs (the Savasana position).
  • Light and Smell: Turn the lights down low. Use natural light or light candles safely. You can also use a diffuser with calming oils like lavender or frankincense. This helps your sense of smell join the Sensory experience.
  • Instrument Setup: Put all your instruments where you can reach them easily while sitting down. As the facilitator, you should be able to move between instruments smoothly without stopping the flow.

Step 2: The Sound Bath Flow

A normal Sound Bath session, even a short one at home, has a clear structure: starting, going deep, and coming back.

A. Centering (The Start: 5-10 minutes)

  1. Grounding: Tell everyone (or yourself) to lie down. Take three deep breaths. Set a clear intention for the session (like “to let go of tension,” or “to feel more clear”).
  2. Introducing the Sound: Start with the quietest sounds you have. Gently shaking a rainstick or playing the Zaphir chimes gives a soft, inviting signal that the journey is beginning.
  3. Warming up the Bowls: Start playing your singing bowls very softly. Focus on rubbing the rims to create long, soft, humming tones. Don’t strike them yet. Let each tone last a long time, allowing the sound to fill the room gently.

B. Immersion (The Core: 20-30 minutes)

This is the part where the sound becomes richer and deeper.

  1. Building the Sounds: Bring in your second and third bowls. Now you can start striking the bowls gently, then rubbing them. The main idea here is not to play a song. Instead, you want to create a rich, layered sound environment made of overlapping tones.
  2. Using the Gong: If you have a gong, introduce it slowly. Start by tapping it very lightly. Then, slowly tap it a little harder. You want to build the sound to a gentle high point, then let it fade. Never strike it too hard or too loudly. The complex sounds of the gong are highly effective at moving your brainwaves into deep rest.
  3. Going with the Flow: Let your own feelings guide you. The Sound Bath should have waves of sound—moments when the sound is at its fullest, followed by quiet periods or very soft sounds. This contrast is what lets the brain truly relax. Move between your instruments smoothly. A Tibetan bowl can ring for a minute, then fade out as you bring in the soft rhythm of an Ocean Drum, before going back to the crystal bowls.

C. Return (The Ending: 5-10 minutes)

You must bring people back to a wakeful state slowly and gently. This is important so you don’t shock the nervous system.

  1. Slowing Down: Lower the volume and complexity of the sounds slowly. Stop using the largest or loudest instruments. Go back to soft, single-bowl tones.
  2. The Signal: Use one clear, high-pitched sound to say the session is over. This might be one final, soft tap of a Tingsha cymbal, or a brief ring from the Zaphir chimes. This sound acts like an anchor for the mind.
  3. Silence: Allow for 2 to 5 minutes of complete silence after the last sound. This time is very important. It lets the body and mind fully process and absorb the deep relaxation they just experienced.
  4. Grounding: Gently tell listeners to slowly move their fingers and toes. Then, move their hands and feet. They should roll onto their side before slowly sitting up.

Playing Techniques and Mindset

The best Sound Bath sessions aren’t about being a skilled musician. They are about being present and using the right technique.

The Soft Strike and Rub

When playing bowls, use a light touch. Hitting them too hard creates a harsh, metal clanging sound instead of a beautiful, rich tone.

  • Crystal Bowls: Use a rubber-tipped stick for a pure, clear tap. When you rub the rim, use steady pressure and move at an even speed. This stops the sound from wavering or making a scratchy noise.
  • Metal Bowls: Use a stick covered in felt or suede. Start by tapping the bowl, then immediately begin rubbing the rim. This is often called the ‘singing’ technique.

The Power of Rhythm and Quiet

Do not keep a strict, steady beat. The most healing part of a Sound Bath is that the sound is non-linear, meaning it’s not rhythmic. The lack of a predictable rhythm is what stops your mind from focusing and allows it to completely relax and wander.

  • Pace: Play slowly. Let each sound completely stop before you start the next one.
  • Silence: Use quiet moments on purpose. The space of silence between the sounds is just as important as the sounds themselves. It allows your mind to feel the leftover vibration and let the relaxation set in.

Example Sequence for a 45-Minute Home Sound Bath

This is just an example. You should always feel free to adjust the timing as it feels right.

Time (Approx.)ActivityInstruments UsedPurpose/Sensory Focus
0:00 – 0:05Centering/Intention SettingRainstick, Soft ChimesGentle start, engaging your hearing.
0:05 – 0:15Warm-Up/Initial ImmersionOne small Crystal Bowl (rubbed), One Metal Bowl (tapped)Setting the first tone and vibration level.
0:15 – 0:30Deep Immersion/Peak SoundTwo Crystal Bowls, Gong (light tapping), Ocean DrumBuilding complex sounds, leading to deep rest.
0:30 – 0:40Winding DownSoft tapping on one Metal Bowl, Zaphir ChimesGetting quieter and simpler, preparing to rest.
0:40 – 0:42Signal/EndTingsha Cymbals (one gentle tap)Clear sound to mark the very end of the session.
0:42 – 0:45IntegrationComplete SilenceEssential time for your mind and body to absorb the experience.

Sensory Activities and Sound: The Deep Connection

The act of taking a Sound Bath is a powerful Sensory activity. This is because it calms and balances your nervous system in a way that doesn’t demand effort from you. By focusing on the sound and the vibration you feel, your mind has something gentle to pay attention to. This pulls your focus away from your own thoughts and worries.

Sensory activities are often used in therapy to help regulate the nervous system. The strong vibrations from singing bowls and gongs are actually tactile input, meaning you feel them. The sound waves are felt in your body just as much as they are heard by your ears. This creates a full-body Sensory massage that deeply promotes calm and regulation.

To make the Sensory experience even better, you can add other elements:

  • Weight: Place a small, warm, weighted eye pillow over your eyes. This helps you feel grounded and blocks out light.
  • Warmth: Make sure the room is comfortably warm. Your body temperature naturally drops when you are deeply relaxed.
  • Smell: As mentioned earlier, using diffused essential oils can deepen your Sensory connection to the peaceful space you have created.

Frequently Asked Questions (FAQ)

1. How often should I do a Sound Bath?

Doing this practice regularly is very important for your well-being. Try to do it at least once a week. This helps you build up the benefits of lower stress and a calmer nervous system. Even a quick 15-minute session is very helpful.

2. Can I just use recorded Sound Bath music?

Recorded music can be very relaxing. However, it is missing the live, changing interaction and the intense, physical vibrations that a live Sound Bath offers. Live sound healing gives you much better therapeutic benefits because the sound is complex and changes unexpectedly.

3. What are the best bowls for a beginner Sound Bath?

A great way to start is with one crystal singing bowl. Choose one tuned to the note C or G. These notes are often used because they help you feel grounded and centered. You could also start with one high-quality Tibetan metal bowl. That is a great choice because it is very versatile.

4. Is a Sound Bath safe for everyone?

Yes, for most people, it is safe. If you have conditions that make you sensitive to sound (like severe ringing in the ears) or if you have a pacemaker or metal implants, you should talk to your doctor first. For pregnant women, the gong should be played softly and kept far away.

5. What is the difference between a Sound Bath and sound healing?

A Sound Bath is a relaxing type of sound healing. The person lies down and simply receives the sound. Sound healing is a wider term. It includes many different techniques, both active and passive. These include using specific frequencies, chanting, and placing tuning forks directly on the body for healing results.


References

  1. Healthline – Sound Bath: What It Is, How It Helps, and More
  2. Psychology Today – The Healing Power of Sound as Meditation
  3. NIH – Effects of Singing Bowl Sound Meditation on Mood

Recent Posts


How To Make A Sensory Cuddle Ball

Here is an alt text description for the hero image, incorporating the requested keywords:

Flat lay of colorful fabrics (fleece, corduroy, stripe), ribbon, sewing tools, and jars of filling materials (plastic pellets, lentils, cotton stuffing) for making a DIY Sensory Cuddle Ball. This visual guide supports crafting for calming Sensory Activities.

Searching for simple, affordable ways to keep people—both young and old—engaged and help them manage big feelings through positive Sensory Activities is a common goal for many. It is often the simplest projects, like creating a custom Sensory Cuddle Ball, that yield the biggest rewards in terms of development, calm, and focus for everyone, including active toddlers. This guide offers a project born from the desire to create something truly comforting and tactile for the busy people in our lives. I hope this information helps you create a cherished, handmade item for a child or adult you care about.


1. Introduction: The Magic of the Sensory Cuddle Ball

The world today has a lot of screens. Because of this, kids need hands-on experience and sensory feedback. This is very important for children. Right from birth, babies learn by touching things, grabbing them, and tasting them. As they grow into toddlers, they need sensory input to help them build motor skills, thinking abilities, and emotional control. The Sensory Cuddle Ball is one of the best and easiest ways to give them this help.

What is a Sensory Cuddle Ball? It is a handmade, round item. And is usually soft, strong, and easy to hold. It is made to have many different textures, weights, and sounds. It’s more than just a toy. It is a tool for therapy, an object for comfort, and a great way to start sensory activities. Toys you buy in a store often offer limited interaction. But a homemade Sensory Cuddle Ball can be made just for your child. It can help them if they need deep pressure to feel calm, or if they need exciting sights and sounds to stay interested.

This complete guide will show you everything about how to create an effective Sensory Cuddle Ball at home. We will talk about the necessary materials. And give detailed, easy instructions on how to do it. We will also give examples of different fabrics and fillings you can use. Most importantly, we will show you why this simple item is so valuable for your child’s playtime. Its benefits go far beyond just fun. They help with development and emotional health. Get your supplies ready and start making this rewarding, custom-made tool for your little one.


2. Why Sensory Play Matters

The benefits of the Sensory Cuddle Ball come from how the senses work together. This is called sensory integration. It is how the nervous system takes information from the senses and turns it into the right actions and behaviors. For babies and especially toddlers, playing with the senses is not just fun. It is the basic way they learn about the world and develop key skills. This is why planned Sensory Activities are so important.

When a child plays with a Cuddle Ball, they use many senses at once. They feel the weight and the texture (touch and body awareness). And hear the gentle shake or soft crunch (hearing). They see the different colors and designs (sight). This rich feedback helps their brain process information better. This leads to better organization and function.

The Main Benefits of Sensory Activities

  • Emotional Control: Sensory input, like the deep pressure from a slightly weighted ball, can be very calming. It helps a child calm down a nervous system that is too active. This makes the Cuddle Ball perfect for quiet time, calming tantrums, or making changes easier.
  • Fine Motor Skills: Moving the ball—passing it, squeezing it, or feeling the different seams—makes the small hand muscles stronger. It improves hand-eye coordination. These skills are needed later for things like writing and getting dressed.
  • Learning: Different textures and weights teach concepts like soft and hard, heavy and light, and smooth and rough. Playing with these properties helps build new ideas and grow language skills as the child learns to describe what they feel.

For Sensory Activities toddlers enjoy, the Cuddle Ball is perfect. It is not scary and can be changed easily. The child can control how much input they get. They can tap it softly for a tiny sound or squeeze it hard for comforting pressure. Using a Cuddle Ball every day offers an easy, fun way for children to develop and grow.


3. Materials You’ll Need: The Sensory Palette

A good Sensory Cuddle Ball starts with choosing the right materials. Your goal is to provide many safe, strong, and interesting textures and weights. Before you start cutting and sewing, gather all your supplies.

Here is an alt text description for the hero image, incorporating the requested keywords: Flat lay of colorful fabrics (fleece, corduroy, stripe), ribbon, sewing tools, and jars of filling materials (plastic pellets, lentils, cotton stuffing) for making a DIY Sensory Cuddle Ball. This visual guide supports crafting for calming Sensory Activities.
CategoryRecommended Material ExamplesSensory Benefit Provided
Outer FabricMinky fabric, corduroy, velvet, fleece, satin, cotton prints, repurposed denim, faux fur.Touch (Softness, roughness, smoothness, coolness) and Sight (Color contrast, patterns).
Inner Texture/SoundCrinkly plastic film (sewn inside layers), small bell, plastic rattle inserts, a strip of rough netting.Hearing (Crinkle sound, rattle) and subtle Touch feedback.
Weight/FillingPoly-Fil stuffing (for softness), plastic pellets (for weight and washing), dried rice or beans (for weight, must be sealed well), clean sand.Body Awareness (Deep pressure and weight), and Touch (Squishiness, moldability).
AccessoriesTextured ribbon loops (satin, grosgrain), small teething ring, large wooden beads sewn securely to a loop.Grasping, Mouth Exploration (if safe), and extra Touch excitement.
ToolsSewing machine or hand needle, strong thread, scissors, fabric marker, measuring tape or ruler.Needed for putting it together.

Safety Note: Always be sure that all materials are safe to touch and sewn on tightly. If you use heavy items like rice or plastic pellets, sew the seams twice. This will stop the filling from coming out. This is very important if the ball is for a young child or a child who plays rough.


4. Step-by-Step Instructions: How To Make A Sensory Cuddle Ball

These instructions tell you exactly how to do it. We will use a simple six-panel design. This makes a classic round ball shape that is great for adding different textures.

Step 1: Preparing Your Panels

  1. Cut the Shape: Draw and cut a template for a six-panel ball shape on thick paper. It looks like a long oval, pointed at both ends. The final size is up to you. A ball about eight to ten inches wide is best for cuddling. Add a half-inch of extra fabric around the template for the seam.
  2. Choose and Cut Fabric: Pick your six fabrics. Choose a variety for the best sensory input. Pin your template to the fabric and cut out six panels that are all the same size.
  3. Prepare Small Items: Cut your ribbon loops or tabs into three-inch pieces. If you are adding crinkle material inside, cut a piece slightly smaller than one of your panels.

Step 2: Adding Sensory Elements

  1. Ribbon Loops: Decide where you want the ribbon loops and other things (like teething rings). Put the cut ribbons into the seam allowance on the curved edge of three or four panels. Make sure the cut ends line up with the edge and the loop points inward. Pin them firmly in place.
  2. Sound/Crinkle Layer: If you are using crinkle material or mesh, lay it flat on the back side of one fabric panel. Machine-sew it securely near the edges. This keeps it from moving around inside the finished ball.

Step 3: Sewing the Panels Together

  1. Sew Pairs: Take two panels and place their right sides together. Stich along one long, curved edge, using your half-inch seam allowance. Sew backward at both pointed ends to make the seam strong. Do this until you have three sets of two panels sewn together.
  2. Join the Halves: Put two of your sewn pairs right sides together. Sew them along one of the open curved seams to make a piece with four panels.
  3. Finish the Ball Shape: Put the last two-panel piece right sides together with the four-panel piece. Sew along one seam. Leave the final long, curved seam open for now. You now have a six-panel piece that looks like a flat ball, with one seam open and the two small holes at the top and bottom still open.

Step 4: Stuffing and Finishing

  1. Turn and Shape: Turn the ball shape right-side out through the final open seam. Use a dull tool (like the back of a spoon) to gently push out the pointed ends so the shape is nicely round.
  2. Stuffing: This part controls how the ball feels and how heavy it is. First, push a small amount of Poly-Fil into the two end openings to round them out. Then, start filling the main part. If you add heavy items (rice, pellets), put them in the center. Surround them with Poly-Fil. This keeps the ball soft and its shape even. Stuff it tightly but do not make it too hard. The ball should be soft and easy to squeeze.
  3. Closing the Seam: When the ball feels firm and heavy enough, fold the raw edges of the open seam inward by half an inch. Pin the opening closed. Use a slip stitch (a hand stitch that is hidden) to close the last seam neatly and strongly. Check this seam twice for safety, especially near any heavy material. Your Sensory Cuddle Ball is now done!

5. Enhancing the Experience: Examples of Sensory Textures and Fillings

The best thing about the Sensory Cuddle Ball is that you can make it special. You can add materials that are just right for your child’s sensory needs. If you make a few balls, try different mixes to see what your child likes most. Here are some detailed examples of how to change the ball’s sensory feel.

Texture Combinations for Tactile Seekers

Kids who seek touch love many kinds of surfaces. These choices give strong feedback when touched or squeezed:

  • The Fuzzy-and-Rough Ball: Use panels of very soft, long faux fur or minky fabric. Mix them with panels of rough corduroy or coarse sackcloth. The big difference between the two gives a very interesting and satisfying feeling.
  • The Smooth-and-Cool Ball: Use smooth materials like satin or silk for four panels. Then, add two panels of thin, tightly woven linen. You can also sew in a small, smooth, flat plastic disc (like a coaster, covered safely in soft padding). This gives the child a cool, hard spot to press, which appeals to the sense of temperature.
  • The Raised Texture Ball: Use fabrics that already have a raised pattern, like thick waffle knit. You can also use denim with heavy stitching or fabric with felt shapes (like stars or bumps) sewn on securely.

Filling Examples for Proprioceptive Input (Weight and Pressure)

Body awareness input, or knowing where your body is, is key to staying calm and focused. Weight is the main factor here.

Weight TypeSensory BenefitBest Practice
Plastic Poly PelletsCan be washed, gives deep pressure, shifts weight (good for rolling and shaping).Best for young toddlers. They are safe and will not grow mold if the ball gets wet. Use a liner bag inside for the most safety.
Dried Lentils or RiceNatural weight, feels fine-grained, great for squeezing into the ball’s shape.Must be sealed very well and kept dry. Good for weighted items for older children to keep on their lap.
Small River Stones (Polished)Gives a unique, cool weight and a clear shifting feel.Only for older children. Must be completely wrapped in thick padding or fleece and double-sealed inside a small bag before being put in the Cuddle Ball.
Fiberfill (Poly-Fil) OnlyVery soft and squishy, great for comfort and gentle holding.Use this for a lighter ball where the feeling of touch is more important than deep pressure.

Integrating Auditory and Visual Stimuli

Sensory play is not just about touch. Add sounds and sights to make your Sensory Cuddle Ball a complete sensory activities item.

  • The Rattle Panel: Sew a small plastic rattle insert or a few dried beans/pebbles into a small pouch. Place this pouch inside one specific panel area. When the child taps that spot, they get focused sound feedback.
  • The Mirror Panel: Sew a small piece of safe, reflective vinyl or a secure, shatterproof plastic mirror (like those in baby toys) onto one panel before assembly. This helps with visual tracking.
  • High-Contrast Patterns: Make sure one panel uses a pattern with strong differences, like black-and-white stripes or squares. This is very stimulating for young eyes.

6. Cuddle Ball Care and Safety Tips

To keep your handmade Sensory Cuddle Ball safe and useful for sensory activities for a long time, follow these rules:

  • Security Check: Before giving the ball to a child, pull hard on all seams. This is extra important if you used heavy materials or attached small items like beads or rings. Pull firmly on all ribbon loops. The seams must be strong enough for active play.
  • Washing Weighted Balls: If the ball has natural weight (rice, beans, sand), do not wash it in a machine. Water will spoil the filling. Only clean spots with a damp cloth and gentle soap. Let it dry completely in the air.
  • Washing Washable Balls: If your ball only has Poly-Fil or plastic pellets, you can usually wash it gently in the machine on a cold cycle. Put it inside a laundry bag. Tumble dry on low or let it dry completely in the air.
  • Check Often: Look at the ball regularly for loose threads, torn seams, or worn ribbons. Fix or throw away the ball right away if the inside filling is showing. This is vital for toddlers who might still put things in their mouth.

7. Ideas for Using Your Sensory Cuddle Ball

The Sensory Cuddle Ball is a very flexible tool. You can use it for focused help or simple quiet time. Here are some examples of Sensory Activities you can add to your daily routine.

  • The “Feelings” Cuddle: Use the ball to help kids deal with their emotions. When a child feels upset, tell them to squeeze the ball as hard as they need to. The body awareness input helps them manage their strong feelings.
  • Quiet Time Helper: Put the Cuddle Ball in a “calm corner” or a spot for reading. The weight and feel can help the child sit still and focus during story time or quiet play alone.
  • Touch Guessing Game: Put Cuddle Balls with different textures into a bag or container. Have the child reach in and try to name which ball is which (the soft one, the rough one, the one that rattles) without looking. This makes their sense of touch sharper.
  • Movement Play: Roll the weighted ball back and forth. Or, have the child try to carry it across the room in fun ways (on their head, between their knees). The weight gives extra feedback. This makes moving around more fun and helps build body awareness. These are great sensory activities toddlers love since they are always moving.

8. Sensory Cuddle Balls for Adults: Beyond Childhood Comfort

While often associated with children and toddlers, the benefits of Sensory Cuddle Balls are not limited by age. Adults, too, can greatly benefit from the calming and focusing properties of tactile and weighted sensory input. In today’s fast-paced world, stress, anxiety, and the constant digital overload can leave many adults feeling overwhelmed and disconnected. A thoughtfully designed adult Sensory Cuddle Ball can serve as a powerful tool for self-regulation, mindfulness, and sensory relief.

The principles remain the same – providing varied textures, appropriate weight, and engaging tactile elements – but the design and materials often reflect an adult aesthetic and different sensory needs.

Design Considerations for Adult Sensory Cuddle Balls

  • Subtle Aesthetics: Adult versions often feature more subdued color palettes and sophisticated fabric choices. Think deep blues, muted greens, grays, browns, and earthy tones, rather than bright primary colors. Fabrics like faux suede, thick corduroy, soft knit, brushed cotton, or linen blends offer comfort without looking overtly childlike.
  • Weight and Size: Adult Cuddle Balls are typically larger and heavier, ranging from 15 to 25 inches in diameter and weighing between 3 to 8 pounds. This increased weight provides more substantial proprioceptive input, which can be very grounding and calming for adult nervous systems. They can be used as lap weights, body pillows, or for gentle pressure during relaxation.
  • Advanced Tactile Elements: Beyond simple ribbons, adult versions might incorporate more complex tactile elements. These could include firmly sewn-on buttons (large and securely attached), braided rope handles, textured patches of different knits, or even small, smooth polished stones or wooden beads (again, securely encased) within specific sections to offer distinct haptic feedback.
  • Purpose-Driven Use: For adults, these balls are often used in specific contexts:
    • Stress and Anxiety Relief: Holding and squeezing a weighted, textured ball can provide comfort and help reduce feelings of anxiety.
    • Focus and Concentration: For individuals with ADHD or those needing to focus during tasks, the tactile input can act as a constructive fidget, preventing mental wandering.
    • Mindfulness and Grounding: Using the ball during meditation or quiet reflection can help adults stay present and grounded.
    • Sensory Seeking: Some adults naturally seek sensory input, and a Cuddle Ball offers a safe, acceptable way to fulfill this need in various environments.

This image shows a larger Sensory Cuddle Ball, about 18-20 inches in diameter, suitable for adults. It features a sophisticated palette of deep blues, charcoal grays, and muted forest greens, with varied textures like soft faux fur, ribbed corduroy, smooth velvet, and a section of sturdy, slightly coarse canvas. The ball has subtle, securely stitched-in “fidget” elements such as large, smooth wooden beads, a braided rope handle, and a few patches of firmly sewn, tactile nubs (like those found on a massage ball). It is shown resting on a comfortable armchair in a cozy, adult-oriented living space, suggesting its use for stress relief, focus, or sensory comfort.


Frequently Asked Questions (FAQ)

Q: Is the Sensory Cuddle Ball safe for children who mouth objects?

A: If the ball is for a child who still puts things in their mouth, it must only be made with safe, washable fillings like Poly-Fil or plastic pellets. You must not use natural fillings like rice or beans. If the seam breaks, these can be a choking danger. They can also grow mold if they get wet. Make sure all ribbon loops and items are big enough so they are not a strangulation risk, and sew them on three times for strength.

Q: How heavy should a Sensory Cuddle Ball be?

A: The right weight depends a lot on the child’s size and what they need. For a typical toddler, a finished ball that weighs between one and two pounds is usually enough. This gives a calming deep pressure without being too heavy to hold. The ball should feel solid but still soft and easy to hold.

Q: Can I use pre-cut fabric shapes from a quilt kit?

A: Yes, you can use fabric from other projects. If you use square quilt pieces, you might have to change how you put it together. You could make a cube or a rectangle instead of a round ball. The main idea of the Sensory Cuddle Ball—different textures and weight—works for any sewn shape.

Q: What is the main difference between this and a standard plush toy?

A: A normal stuffed toy is mainly for comfort and make-believe play. A Sensory Cuddle Ball is specially made to provide a lot of focused sensory input (touch, sight, weight). Every material choice is strategic. It focuses on the goal of sensory control and development, making it a functional tool for Sensory Activities.


References


Recent Posts


Unplug and Color: Visual Focus for the Modern Mind

Overhead shot of a person's hands using a blue colored pencil to fill in a complex geometric pattern in an adult coloring book. A steaming mug and a muted smartphone are visible in the background, symbolizing a break from digital distraction for Visual Focus and Sensory Activities.

We live in a world with constant notifications, pings, and an endless digital scroll. Like many of you, I have felt the mental exhaustion that comes from trying to keep up with it all. This constant rush often leaves my brain feeling tired and messy. I believe that finding small, easy practices to take back our attention is vital for feeling well. This piece is a simple guide to using a quiet tool—the coloring book—to hit the mental ‘reset’ button. It will help you swap digital stress for real, calming Visual Focus.


The Hidden Price of Always Being Connected

The digital age has made our lives much easier, but it has also brought a hidden, low-level stress that we barely notice. We are experts at switching between tasks. We constantly split our attention among emails, social media, news alerts, and texts. This habit of having divided attention is tiring for the mind. It leads to what experts call attention fatigue or scattered focus.

Our brains were not made to handle this non-stop digital attack. When we are always reachable, our prefrontal cortex—the brain part that handles planning, making choices, and deep concentration—gets overloaded. This results in mental fogginess, a feeling of being overwhelmed, and the inability to focus on one thing for very long. .

The answer is not a huge change or a long trip away. Instead, it is finding simple, easy Sensory Activities that make our mind concentrate on just one task. This is where the quiet, strong practice of adult coloring comes in.

More Than Child’s Play: The Science of Adult Coloring Books

Adult coloring books are not just a fun throwback to childhood. They are a proven and very good way to practice mindfulness easily. Coloring’s healing value comes from its ability to use both sides of the brain at once in an activity that is calm and has no pressure.

  1. The Logical Left Brain organizes the work: picking colors, staying inside the lines, and deciding on a color plan.
  2. The Creative Right Brain is active when choosing shades, mixing tones, and creating the final look.

This balance gently pushes out worrying thoughts. The brain simply does not have the extra space to fret over your to-do list while carefully filling in a hard pattern. It makes you fully present in the moment, giving your mind a ‘digital detox’.

The Power of Pattern and Repeating Shapes

Your book’s theme—focusing on pattern and sight to calm the senses—is based on simple mental rules. Highly detailed, repeated patterns (like mandalas, repeated tile shapes, or geometric designs) naturally help us relax.

  • Familiarity Calms: Our brains like things to be predictable. Complex, repeated patterns offer a visual rhythm that is deeply settling.
  • Optical Flow and Focus: The motion of your pencil tip across the paper, and your focus on small, clear areas, trains your Visual Focus. This deep, concentrated action gives your mind a rest from the wide, spread-out attention needed to watch several screens.

How to Get Clear Focus with Coloring: A Step-by-Step Guide

To truly get the most from adult coloring, you should treat it as a structured Sensory Activity, not just a casual hobby. Follow these steps to get the most focus and calm.

Step 1: Create Your Sensory Calm Spot

A digital break needs a calm physical space.

  • Stop Notifications: You must do this. Turn off your phone sound, close your laptop, and tell people nearby you are taking 15 to 30 minutes of quiet time.
  • Set Up the Scene: Use soft light (maybe a warm desk lamp) and a comfy chair. Think about adding a non-visual sensory touch, such as a gentle, calming smell (like lavender) or quiet music—or choose complete silence.
  • Get Your Tools Ready: Having an organized set of colored pencils, thin pens, or markers ready means you won’t need to break your flow once you start.

Step 2: Pick Your Challenge Wisely

Not all pages are equal when you are seeking Visual Focus.

  • For High Anxiety: Start with simpler, larger patterns that need less detailed work. This gives fast, good results and an easier start into the flow state.
  • For Scattered Focus: Choose very detailed, repeated patterns (like complex mandalas or tile designs). These need intense, steady Visual Focus and are great for training your attention.
  • Try a Unique Adult Coloring Pages Free Printable: Sometimes, a new, fresh design can kickstart your creative side. Search for free geometric or abstract patterns to see what brings your focus to life.

Step 3: Use the 3-Step Focus Method

This method is made to keep your mind fixed on the page.

  1. The Color Choice: Before you touch the page, hold your pencil or pen over the next area and take two deep breaths. Decide on the single color you will use for that spot.
  2. The Visual Anchor: As you start to fill in the space, look closely at the exact spot where your tool meets the paper. Let your sight soften everything outside of that small, clear spot. This is your Visual Focus point.
  3. The Breathing Rhythm: Match your breathing with the movement of your hand. For example, breathe in as you move the pencil down and out as you move it up. This links the physical action, the visual focus, and your inner state.

Expanding Your Sensory Activities: Beyond the Book

While coloring is a strong tool, it is one of many Sensory Activities that can help you unplug and focus.

  • Visual Sensory Activities: Try adult dot-to-dot books, or complex cross-stitch or needlework. These activities use the same need for steady Visual Focus on small details.
  • Touch Sensory Activities: Get your hands fully busy by kneading dough, shaping clay, or sorting small, mixed items (like beads or buttons). The feel of the texture and the repeated movement can be deeply settling.
  • Sound Sensory Activities: Listen to special calming sounds or nature sounds while you color. This adds another layer of sensory input to block out the noise of distraction.

The Lasting Benefits of Visual Focus Practice

The benefits of doing Visual Focus through adult coloring books last long after you put down your pencil.

  • Better Work Focus: By regularly training your brain to ignore distractions while you color, you make the brain paths needed for deep work stronger. This helps with concentration in your job tasks.
  • Fewer Overthinking Thoughts: Coloring offers an ‘active meditation’ that is less scary than traditional meditation. It cuts down on how often and how strongly you ruminate—those loops of worried, negative thoughts. It does this by simply filling the mental space they would usually take up.
  • Better Problem-Solving: Allowing your mind to enter a relaxed, focused state can lead to sudden insights. You are not trying to solve a problem, but by lowering the mental burden, your subconscious mind often finds space to work and create answers.

See coloring not as a treat, but as a necessary part of keeping your mind healthy every day.

Examples of Visual Focus in Action

GoalColoring StrategyThe Mental Shift
High AnxietyPick a hard pattern and use only two strong, opposing colors (e.g., black and red). The clear color choice makes you fully pay attention.Focuses on simple contrast instead of complex choices, sending anxious energy into a careful action.
Digital TirednessUse soft, gentle colors (all blues, greens, or purples) to color a nature pattern.Calming and refreshing for eyes tired from bright screens; needs soft, steady focus.
Brain Fog/SlownessWork on a large, abstract pattern, filling in shapes with strong, random color choices with no plan.Starts creativity and breaks mental stiffness; the visual play is freeing and engaging.

How to Get Started Now

You do not need costly supplies. If you want to try this practice right now, look online for unique adult coloring pages free printable. Grab some pencils or pens, use the 3-Step Focus Method, and give your modern mind the break it needs.


Frequently Asked Questions (FAQ)

Q: How long should a coloring session be to work well?

A: Even 15 to 20 minutes of focused coloring can help a lot. The important thing is quality, not time. Make sure you are fully present and using the focus methods, rather than just coloring while watching TV.

Q: Is it less helpful if I can’t stay perfectly inside the lines?

A: Not at all. The goal is engagement and Visual Focus, not a perfect result. If a small mistake breaks your focus, gently bring your attention back to the movement of your hand and the space you are working on. The process is much more important than the final picture.

Q: What is the best kind of coloring page for stress relief?

A: Very detailed, repeated geometric patterns (like mandalas or complex art patterns) are often said to be the best for lowering stress. Their balanced look creates a sense of order and calm, which helps with Sensory Activities that quiet the nervous system.

Q: How does this compare to other Sensory Activities like knitting or puzzles?

A: All these actions are great for focus because they are structured, repetitive, and need hand skill. Coloring’s special benefit is its use of Visual Focus and the healing power of color. It gives a specific mental rest from words and numbers.

Q: Are there good places to find unique adult coloring pages free printable?

A: Many artists, museums, and libraries offer free coloring pages you can download. Searching for “geometric patterns,” “abstract art outlines,” or “botanical illustrations” often gives great, high-quality, and unique designs.


References

  1. TandFonline – Can Coloring Mandalas Reduce Anxiety?
  2. Mayo Clinic – Mental health benefits of coloring
  3. Healthline – Benefits of Adult Coloring: 9 Reasons to Try It

Recent Posts


How to Make Deliciously Healthy Honey Ginger Chicken

Healthy Honey Ginger Chicken served over brown rice, glistening with a turmeric glaze and garnished with fresh cilantro and sesame seeds. A perfect example of delicious Anti Inflammation Recipes and Anti Inflammation Meals.

If your weeknights feel like a constant scramble between work, family, and the perpetual question of “What’s for dinner?”, you are not alone. I am a busy home cook who believes that healthy eating should never mean sacrificing flavor or spending hours in the kitchen. This Healthy Honey Ginger Chicken recipe is the culmination of my journey to create meals that are both nourishing and exciting, proving that satisfying comfort food can also be deeply beneficial for your well-being. Join me in bringing a little bit of golden, anti-inflammatory goodness to your dinner table tonight as we explore delicious Anti Inflammation Recipes and simple Anti Inflammation Meals.

Introduction: The Golden Rule of Flavor and Wellness

Dinner is often the best part of our day. It is a moment to relax, connect with others, and nourish our bodies. Too often, though, the meals we rush to prepare leave us feeling heavy or unsatisfied. This recipe for Honey Ginger Turmeric Chicken changes that completely. It mixes sweet, savory, and a little bit spicy. It is designed to taste incredible, but it also gives you real, important health benefits.

We are taking basic chicken and making it a powerhouse meal. It is perfect for anyone looking for delicious Anti Inflammation Recipes. Fresh ginger, bright turmeric, and natural honey come together in a simple, deep-penetrating marinade. This article will show you every step. You will learn how to make a perfect, restaurant-quality meal. You can easily add this dish to your rotation of Anti Inflammation Meals.

Understanding the Power of the Ingredients

The true secret of this recipe is the star ingredients: ginger and turmeric. Both have been used for thousands of years in traditional medicine. Their use here turns a simple chicken dish into a truly Healthy Honey Ginger Chicken meal.

The Anti-Inflammatory Superstars

  • Turmeric: The Golden Healer. Turmeric contains a compound called curcumin. Curcumin is a strong antioxidant. It is the main reason this spice is known for fighting inflammation. When we eat turmeric, we give our bodies a natural boost. This boost helps fight long-term inflammation. How to do it: We want your body to absorb the most curcumin possible. To do this, we add a little black pepper to the turmeric. The piperine in pepper greatly helps your body use the curcumin.
  • Ginger: The Digestive Aid. Ginger has long been used to calm stomach issues and ease nausea. Its anti-inflammatory power comes from compounds called gingerols. These compounds also give ginger its strong, warm flavor. In this dish, fresh, grated ginger cuts through the sweetness of the honey. It makes the overall flavor brighter.
  • Honey: Nature’s Sweetener. We use a small amount of honey for flavor. It also creates that wonderful sticky glaze. Honey itself contains antioxidants and trace minerals. We suggest using a high-quality, raw honey. This gives you the best flavor and the most nutrients.

The Supporting Cast: Flavor Builders

  • Soy Sauce or Tamari: This ingredient is vital. It adds a necessary deep and savory umami flavor. Use tamari if you need a gluten-free option.
  • Garlic: Every great marinade needs garlic. It creates a strong, savory base note for the dish.
  • Lime or Lemon Juice: A splash of acid is very important. It tenderizes the chicken meat. It brightens the flavor. This acid balances the sweetness and richness of the honey.

The Prep: Building the Perfect Marinade

If you want ultra-tender and flavorful chicken, you must use an effective marinade. Do not skip this step! It is the base for our Healthy Honey Ginger Chicken.

  • Example: The Consistency Check. Your finished marinade should be thick enough to cling to a spoon. But it must still pour easily. If it is too thin, add a tiny bit more cornstarch or honey. If it is too thick, add a tablespoon of water or lime juice to thin it out.
IngredientMeasurement (Example)Purpose
HoneyHalf a cupSweetener, Glaze Base
Fresh Ginger, gratedTwo tablespoonsSpicy Warmth, Anti-inflammatory
Turmeric PowderOne teaspoonColor, Anti-inflammatory
Garlic, mincedFour clovesAromatic Base
Soy Sauce/TamariThird of a cupUmami, Salt
Black PepperQuarter teaspoonCurcumin Absorption
Lime JuiceOne tablespoonAcidity, Brightness
  • How to do it: Marinating Technique. Mix all the marinade ingredients in a medium bowl. Put your chicken pieces into a large, resealable bag. Chicken thighs are best for keeping the meat juicy, but breast meat works well too. Pour the marinade over the chicken. Make sure every piece is fully coated. Press all the air out of the bag and seal it tightly. Gently rub the chicken to spread the marinade around. Put it in the refrigerator for at least thirty minutes. For the absolute best flavor, marinate for a full four hours, or leave it overnight.

The Cook: Achieving that Perfect Sticky Glaze

Cooking is the moment of change. The marinade turns from a simple liquid into a caramelized, golden glaze. This glaze locks in all the flavor and moisture.

  • Pan-Searing Method (Best for speed and glaze):
    • Take the chicken out of the marinade. Pat the pieces dry slightly. This helps them get a better sear and crust.
    • Heat a tablespoon of high-heat oil (like avocado or coconut oil) in a large skillet. Use medium-high heat.
    • Place the chicken in the skillet. Do not put too many pieces in at once. You might need to cook them in two or three rounds.
    • Sear the chicken for five to seven minutes on each side. It should be deeply golden brown and fully cooked.
    • How to do it: Glaze Reduction. Pour the remaining marinade into the pan. Let it come to a simmer. Use a spoon to scrape up any browned bits stuck to the bottom of the pan. The sugar in the honey will quickly make the sauce thick. It will become a rich, sticky glaze. Turn the chicken pieces to cover them completely in the glaze before you serve.
  • Baking Method (Best for hands-off cooking):
    • Preheat your oven to three hundred and seventy-five degrees Fahrenheit.
    • Line a baking sheet with parchment paper. This makes cleaning up much easier.
    • Place the marinated chicken pieces on the baking sheet. Spread them out evenly.
    • Bake the chicken for twenty to twenty-five minutes. The exact time depends on how thick the chicken pieces are.
    • How to do it: Last-Minute Glaze. In the last five minutes of baking, brush the remaining marinade all over the chicken. For an extra crisp texture, switch the oven to broil. Broil for only one or two minutes. Watch it closely so the chicken does not burn.

Serving Suggestions for an Anti-Inflammation Meal

This Healthy Honey Ginger Chicken is the main dish. But the sides you choose are important. They help you build a complete, Anti Inflammation Meal.

  • Vibrant Vegetables: Serve the chicken over steamed dark, leafy greens. Kale or spinach are great choices. You can also use roasted broccoli and carrots. These vegetables are full of vitamins and fiber.
  • Smart Starches: Skip white rice. Choose fiber-rich complex carbohydrates instead. Brown rice, quinoa, or wild rice are good options. These starches release energy slowly. They are excellent choices for an anti-inflammatory diet plan.
  • Garnish: Do not forget to add finishing touches. Sprinkle toasted sesame seeds, chopped green onions, or fresh cilantro on top. These not only look good, but they add fresh, contrasting flavors too.

Troubleshooting and Common Questions

Even the simplest recipes can have small problems. Here is how to handle a few common issues when you make your Healthy Honey Ginger Chicken.

The Marinade Is Too Runny

If your marinade is not turning into a nice glaze in the pan, it probably needs to be thicker.

  • How to do it: Mix one teaspoon of cornstarch or arrowroot powder with one teaspoon of cold water. This creates a thick paste, or slurry. Whisk this slurry into the sauce as it simmers in the pan. The sauce should become thicker almost instantly.

The Chicken is Burning Before it’s Cooked

This often happens because the mixture of honey and soy sauce contains sugar. Sugar caramelizes and burns quickly if the heat is too high.

  • How to do it: Lower your heat setting to medium. If you are baking, cover the pan loosely with foil for the first fifteen minutes. This traps moisture and stops the surface from burning too fast. Then, remove the foil for the final browning.

Variations on the Recipe

One great thing about this recipe is how easy it is to change. You can easily adjust it to create new Anti Inflammation Meals. Use what you have in your kitchen or fit it to your diet.

  • Vegetarian/Vegan: Use firm tofu or tempeh instead of chicken. Press the tofu well before you marinate it. This helps it soak up all the delicious flavor.
  • Spicy Kick: Add one teaspoon of chili garlic sauce to the marinade. A pinch of red pepper flakes also works. This gives the dish a nice, fiery element.
  • Citrus Burst: Use the zest and juice of an orange instead of lime juice. This creates a brighter, sweeter glaze. It is similar to popular Chinese-American dishes.

Beyond the Chicken: Extending the Anti-Inflammation Focus

Adding Anti Inflammation Recipes to your diet is a continuous, positive habit. This Honey Ginger Chicken is a wonderful place to start. But think about adding these other simple steps:

  • Breakfast Boost: Start your day with a bowl of oatmeal. Stir in a little turmeric and cinnamon.
  • Hydration: Drink water infused with ginger and lemon throughout the day.
  • Fats: Eat healthy fats often. These include avocados, walnuts, and fatty fish. They are full of anti-inflammatory omega-three fatty acids.

Conclusion: A Simple Path to Well-Nourished Eating

This Healthy Honey Ginger Chicken recipe shows that food made with intentional, natural ingredients can be very satisfying. It is also great for your health. By using the power of spices like turmeric and ginger, you are actively choosing better nutrition. You are adding more Anti Inflammation Meals to your life. Best of all, you never have to give up flavor. This meal will surely become a favorite. It is easy enough for a weeknight, but it is good enough to serve to guests. Enjoy the golden flavor and all the feel-good benefits.


Frequently Asked Questions (FAQ)

Q: Can I use ground ginger instead of fresh ginger?

A: Yes, you can, but we highly recommend the fresh kind. Fresh ginger offers a much brighter, stronger flavor. This flavor is essential for this recipe. If you absolutely must use ground ginger, use only one third of a teaspoon. The ground flavor is very strong.

Q: Is this recipe suitable for meal prepping?

A: Absolutely, yes. This Healthy Honey Ginger Chicken keeps very well in the refrigerator. It stays good for up to four days. It is perfect for preparing several healthy lunches or dinners for the week ahead. The sticky glaze will firm up slightly when cold. However, it reheats beautifully in the microwave or on the stovetop.

Q: Where can I find fresh turmeric root?

A: Fresh turmeric root is now easier to find. Look in the produce section of most specialty grocery stores. You might also find it at Asian markets. It is usually placed near the fresh ginger root. If you cannot find the root, using the powder is a perfectly good substitute.

Q: How do I know if the chicken is cooked all the way through?

A: The best way to check if your chicken is safe and cooked right is to use a meat thermometer. Put the thermometer into the thickest part of the chicken. Be careful to avoid hitting the bone. The chicken is done when the internal temperature reads one hundred and sixty-five degrees Fahrenheit.

Q: Can I add vegetables directly to the pan with the chicken?

A: Yes, you can! This is a great way to make this an easy, one-pan Anti Inflammation Meal. Add vegetables that cook quickly, like sliced bell peppers, snap peas, or chopped onions. Add them to the pan during the last ten minutes of cooking time. Make sure they get covered in the delicious glaze.


References


The Best Anti Inflammation Recipes Ever? (Seriously)

A vibrant, overhead shot of a healthy bowl of Vegetables With Ground Beef, brightly lit on a wooden table, emphasizing delicious and effective Anti Inflammation Recipes.

My journey to feeling better didn’t start with a magic pill; it started in my kitchen. Like many people, I was tired of feeling sluggish, dealing with unexplained aches, and wishing for more energy every day. I discovered the amazing power of food to either harm or heal, and that’s when everything changed. Now, I’m sharing the simple, effective Anti Inflammation Recipes like my favorite Vegetables With Ground Beef meal, which helped me transform my health, proving that good eating can be both easy and incredibly satisfying.


If you have ever felt like your body is fighting against you—maybe you have constant tiredness, sore joints, or tummy trouble—you might have chronic inflammation. This word is everywhere now, and there is a good reason why. Inflammation is the root cause of many common health issues today. The great news is that your best tool to fight inflammation is not a medicine; it is the food in your kitchen.

This is more than just a diet. Eating an anti-inflammatory diet is a new way of living. It focuses on giving your body nutrients that actively fight the cell stress that causes inflammation. We will talk about colorful, whole foods. These foods are rich in compounds that protect your body, healthy fats, and fiber.

The idea of changing your diet can feel huge, but anti-inflammatory cooking is actually simple, cheap, and, best of all, delicious. This article will show you how. We will focus on one of the most basic and satisfying meals you can make: Vegetables With Ground Beef. This powerful recipe, along with a full guide on how to add anti-inflammatory ideas to your daily life, will help you start feeling your best right away.


What is Anti-Inflammatory Eating?

Before we look at the recipe, let’s quickly talk about what anti-inflammatory eating really means.

Inflammation is a normal and necessary body reaction. It is how your body protects itself when you get hurt or sick. Think of the redness and swelling around a small cut. That is acute inflammation doing its job well. But when this reaction stays too long and becomes chronic, it starts to damage healthy body parts and cells. Chronic low-grade inflammation is often linked to things we do every day. This includes stress, not enough sleep, and, most importantly, eating bad food.

Anti-inflammatory eating is a plan to lower chronic inflammation. You do this by cutting back on foods that cause it. These include refined sugars, bad fats, and highly processed oils. You increase foods that fight it. These include colorful vegetables, oily fish, nuts, seeds, and special spices.

The Foods That Fight Inflammation Best

To succeed with Anti Inflammation Recipes, you need to know the most important ingredients:

  • Omega-3 Fatty Acids: You find these in oily fish (salmon, sardines), walnuts, and flaxseeds. These fats directly compete with the bad Omega-6 fats that cause inflammation. They are vital for cell health.
  • Antioxidants: You find these in dark colored fruits and vegetables (berries, dark green leaves). They stop free radicals. Free radicals are unstable molecules that damage cells and cause inflammation.
  • Polyphenols: You find these in turmeric, green tea, and cocoa. These are strong plant compounds that powerfully fight inflammation and protect your body.
  • Fiber: You find this in whole grains, beans, and vegetables. Fiber feeds the good bacteria in your gut. A healthy gut is essential for controlling how your body responds to inflammation.


Feature Recipe: Power-Packed Vegetables With Ground Beef

This recipe is a perfect example of a strong anti-inflammatory meal. It is a simple one-pan dish. And it brings together lean protein, a variety of colorful vegetables that fight inflammation, and strong spices. It is easy to change up, fast to make, and is great for leftovers.

Why the Ingredients Fight Inflammation

  • Ground Beef (Grass-Fed is Best): People often worry about red meat, but quality matters a lot. Grass-fed beef is leaner. It has a better balance of anti-inflammatory Omega-3s than beef fed mainly on grain. It also gives you lots of zinc and iron.
  • Broccoli: This vegetable has sulforaphane. This is a compound known for lowering inflammation and protecting against cell stress.
  • Spinach/Kale: These dark leafy greens are full of vitamins A, C, and K. They also have strong compounds that help control inflammation.
  • Turmeric: This golden spice contains curcumin. Curcumin is one of the most studied anti-inflammatory compounds we know of.
  • Garlic and Onions: These vegetables have sulfur compounds. These compounds make your immune system stronger and help control inflammation.
  • Olive Oil (Extra Virgin): This is a healthy fat rich in monounsaturated fats. It also has oleocanthal, a compound that fights inflammation in a way similar to ibuprofen.

Ingredients

  • 1 tablespoon Extra Virgin Olive Oil
  • A pound lean grass-fed Ground Beef
  • 1 medium yellow Onion, cut into small pieces
  • 4 cloves Garlic, cut into small pieces
  • 1 cup chopped Broccoli florets
  • A cup chopped Carrots
  • 1 Red Bell Pepper, cut into small pieces
  • A cup baby Spinach or chopped Kale
  • 1 teaspoon Ground Turmeric
  • 1/2 teaspoon Black Pepper
  • 1 teaspoon Dried Oregano
  • 1/2 teaspoon Sea Salt (add more if you need it)
  • 1/4 cup Bone Broth or Water (optional, to keep it moist)

How to Do It: The Anti-Inflammatory Cooking Method

This way of cooking is planned to give you the best flavor and the most nutrients. It also keeps the steps very simple.

Step 1: Start the Flavor

  1. Heat the Olive Oil in a large skillet or deep pan over medium heat.
  2. Add the chopped Onion. Cook for 5–7 minutes until it looks clear and is soft. (Anti-Inflammatory Benefit: Cooking slowly helps keep the good parts of the oil and onions safe.)
  3. Add the cut Garlic. Cook for just one more minute until you can smell it strongly. (Anti-Inflammatory Benefit: Garlic’s immune-boosting power comes out when you heat it gently.)

Step 2: Cook the Beef and Add Spices

  1. Add the Ground Beef to the pan. Break it up with a spoon. Cook until the meat is fully browned.
  2. Once the beef is browned, pour out any extra fat if you need to.
  3. Stir in the Turmeric, Black Pepper, Oregano, and Sea Salt. (Anti-Inflammatory Benefit: Black pepper is very important. It greatly increases how well your body can use curcumin, the powerful anti-inflammatory compound in turmeric.)

Step 3: Add the Crunchy Color

  1. Add the Carrots and Broccoli florets to the pan. Cook for 5–7 minutes. You want the vegetables to be a little soft but still slightly crunchy. This helps keep their nutrients.
  2. If the pan seems dry, add a small splash of Bone Broth or water. This also helps steam the harder vegetables.

Step 4: The Final Greens

  1. Stir in the chopped Red Bell Pepper and the Spinach or Kale.
  2. Cook for only 2–3 minutes. Stop when the spinach has shrunk down and the bell pepper is still a bit firm. You want to avoid cooking the greens too much. This helps them keep their maximum level of protective compounds.

Step 5: Serve and Boost

  1. Taste the food and add more salt or spices if you want.
  2. Serve right away. For an extra dose of Omega-3s and crunch, you can put a few chopped walnuts or flaxseeds on top of the bowl.


How to Do It: Eating Anti-Inflammatory Meals Every Day

Cooking one anti-inflammatory meal is a good start, but eating like this all the time is the real goal. Here is a ‘how to do it’ guide to make this way of eating easy to stick with.

1. Get the Right Plate Balance

When you plan your meals (breakfast, lunch, and dinner), try to make your plate balanced. This means hitting all the things that fight inflammation:

  • Half of the Plate is Vegetables: Eat a lot of different colors. More colors mean more types of protective compounds you are eating. Look for dark greens, reds, purples, and oranges.
  • One-Quarter of the Plate is Lean Protein: This helps you feel full. It also helps your muscles fix themselves and keeps your immune system strong. Eat chicken, turkey, fish, grass-fed beef (like in our main recipe), eggs, or beans.
  • One-Quarter of the Plate is Healthy Fats or Slow-Burning Carbs: Choose healthy, anti-inflammatory fats like avocados, nuts, seeds, and olive oil. Or, choose carbs with lots of fiber, such as quinoa, oats, brown rice, or sweet potatoes.

2. Use Your Spices Well

Your spice rack is full of concentrated power to fight inflammation. How to do it:

  • Turmeric Paste: Mix turmeric powder with some black pepper and a healthy fat (like coconut oil). This makes a paste. Add a spoonful of this paste to your soups, stews, or cooked eggs every day.
  • Ginger: Add fresh grated ginger to your fruit shakes, teas, or stir-fry dishes. Ginger has gingerols, which are powerful compounds that fight inflammation and protect your cells.
  • Cinnamon: Use this to help keep your blood sugar steady. Keeping blood sugar steady is important for controlling inflammation. Sprinkle it on your morning oats, coffee, or add it when you bake healthy food.
  • Herbs: Use fresh herbs like basil, rosemary, and thyme often. They have natural oils that protect your body.

3. Smart Snacking

Snacking is often where people struggle to eat healthy. How to do it: Stop eating processed snacks that cause inflammation. Start eating these anti-inflammatory snacks instead:

  • Nuts and Seeds: A small amount of walnuts, almonds, or chia seeds gives you Omega-3s, fiber, and vitamin E.
  • Berries and Yogurt: A mix of blueberries or raspberries with plain, unsweetened Greek yogurt. Berries have little sugar and are rich in special protective compounds called anthocyanins.
  • Vegetables and Hummus: Dip carrots, celery, or bell peppers into hummus. This is a satisfying snack with lots of fiber.


Sample Anti-Inflammatory Meal Plan

Eating different foods helps you stick to the plan for a long time. It also makes sure you get all the nutrients you need. Here are examples of easy Anti Inflammation Recipes to fill out your day:

MealFocus on Anti-Inflammatory FoodsExample Recipe
BreakfastFiber, Omega-3s, Protective CompoundsCooked oats topped with flaxseeds, blueberries, and a sprinkle of cinnamon.
LunchLean Protein, Dark Greens, Healthy FatsBig salad with grilled chicken or chickpeas, mixed green leaves, avocado, and dressing made with lemon juice and olive oil.
DinnerLean Protein, Many Colors, SpicesVegetables With Ground Beef (our main recipe) served over a small amount of quinoa or shredded cauliflower.
SnackHealthy Fats, FiberApple slices with nut butter, or a hard-boiled egg.

The Power of the Gut

A lot of inflammation starts in your gut. If your gut bacteria are not balanced (this is called dysbiosis), it can harm the gut lining. This lets molecules that cause inflammation get into your blood.

How to do it:

  • Eat Fermented Foods: Eat foods like kimchi, sauerkraut, yogurt with live bacteria, or kefir. These foods are full of good bacteria (probiotics) that help balance your gut.
  • Eat Foods with Prebiotics: Prebiotics are the food for your good gut bacteria. You find them in onions, garlic, asparagus, bananas, and oats. Our Vegetables With Ground Beef recipe uses onions and garlic for this very reason.

Why the Vegetables With Ground Beef Recipe Works So Well

This specific recipe is very powerful. It directly addresses many things that cause inflammation. At the same time, it gives your body the basic materials it needs to repair itself:

  1. It Has No Refined Sugar: Unlike many ready-made meals or take-out foods, this recipe has no sugar added. This helps keep your blood sugar levels steady, which is very important for managing inflammation.
  2. It is Packed with Nutrients: By combining lean protein, lots of colorful vegetables, and strong spices, you are giving your body a huge dose of vitamins, minerals, and plant nutrients in one simple dish.
  3. Its Good for Your Gut: The high amount of fiber from the broccoli, carrots, and spinach helps keep your gut healthy and full of many different kinds of good bacteria.
  4. It is Flexible: You can easily swap the beef for ground turkey, lentils, or tofu. You can also change the vegetables based on what you have or what is in season. This helps stop you from getting bored with eating well. You can add a little chili pepper for an extra kick that also helps your body fight inflammation.

Sticking With It: Tips for Success

Making this change needs effort, but the benefits—more energy, less pain, and better health—are worth the work.

  • Prepare Meals Ahead of Time: Cook large amounts of basic foods on a Sunday. Cook things like the Vegetables With Ground Beef mix, quinoa, or roasted root vegetables. Having healthy food ready means you will not grab easy, unhealthy, high-inflammation foods when you are busy.
  • Stay Hydrated: Drink plenty of water. Drinking enough water is necessary for every body process, including flushing out inflammatory waste.
  • Check Food Labels: You need to look carefully. Look for hidden sugars, bad fats (trans fats), and fake ingredients, especially in sauces, dressings, and packaged snacks. If you cannot understand an ingredient, it is usually best to avoid it. Try to eat whole foods that only have one ingredient as much as you can.

Embracing Anti Inflammation Recipes is not about taking food away. It is about eating a lot of good food. It is about choosing bright, nourishing foods that actively help your body, instead of hurting it. Start with this simple and filling Vegetables With Ground Beef recipe. You will quickly begin to feel the amazing power of food.


Frequently Asked Questions (FAQ)

Q: Does all red meat cause inflammation?

A: Not necessarily. The studies show that the kind of red meat you eat matters most. Highly processed meats (like hot dogs or cold cuts) often cause inflammation. Lean, grass-fed ground beef, like the kind in our recipe, is better for you. It has less fat overall and more Omega-3s compared to beef fed on grain. It can be part of a healthy diet if you do not eat too much of it.

Q: Can I use frozen vegetables for the Vegetables With Ground Beef recipe?

A: Yes, absolutely. Frozen vegetables are usually picked when they are at their best and quickly frozen. This means they keep most of their nutrients. You might need to cook them a bit longer than fresh vegetables to make sure they are fully heated.

Q: How fast will I see a change when I eat an anti-inflammatory diet?

A: This is different for everyone. Some people feel better digestion and have more energy within one or two weeks. For others, it might take many weeks or months to notice a difference in long-term problems like sore joints. Staying consistent is the key to seeing good results over time.

Q: What is the single biggest change I should make today?

A: Stop eating added sugar and processed vegetable oils (like soy, corn, and cottonseed oils). These two things are thought to be the strongest causes of chronic inflammation in modern food. If you use natural sweetness and healthy fats like olive oil and avocado oil instead, you will see an immediate and important benefit.

Q: Do I need to stop eating gluten on this diet?

A: Not everyone has to stop eating gluten completely. If you have celiac disease or a doctor says you are sensitive to gluten, then you must avoid it. For other people, the goal should be to choose whole grains with lots of fiber (like oats, brown rice, or quinoa) instead of foods made from refined white flour. Refined grains can cause blood sugar to spike and add to inflammation.


References


Recent Posts