This article explores 5 simple recipes specifically crafted to help alleviate back pain. Discover how incorporating certain foods into your diet can support spinal health and reduce discomfort. Learn to cook delicious meals that are both good for your taste buds and your back.
Fight Back Pain on Your Plate: 5 Simple Recipes
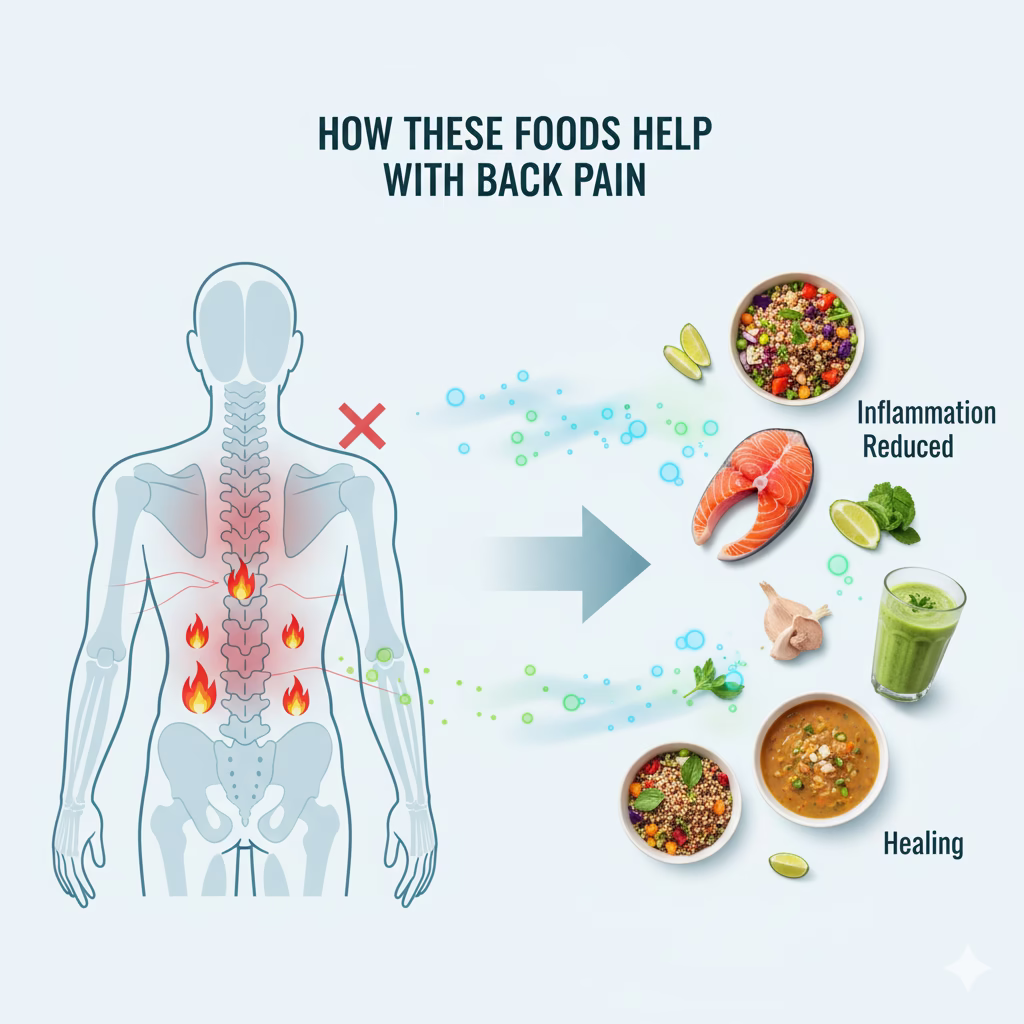
Living with back pain can be a difficult challenge. It can limit your movement, mess up your sleep, and make every day harder. If you deal with long-term back pain, you know that finding good relief is key. While things like therapy and medicine are important, the food you eat plays a huge, yet often overlooked, part in how you feel. The foods on your plate can either stir up more pain and swelling, or they can give your body the tools it needs to heal and lessen the ache. This article shows you how smart food choices can be a great friend in your path to a life with less pain.
Inflammation is a main reason for many kinds of back pain, especially from sore muscles, joint issues, or disc problems. When your body is fighting constant inflammation, it can make pain worse and slow down natural healing. The great news is that many everyday foods are natural inflammation fighters. By choosing ingredients that are rich in things like antioxidants, healthy omega-3 fats, and key vitamins and minerals, you can actively calm inflammation inside your body. This way of eating not only helps with the pain but also keeps your whole body healthy, leading to a stronger, more flexible back.
The Power of 5 Simple Recipes and Anti-Inflammatory Foods
Thinking of food as medicine is a strong idea, especially for long-term problems like back pain. Certain nutrients have been shown by science to help reduce swelling, fix damaged tissues, and even make nerves work better—all key factors for a healthy back. For example, magnesium helps your muscles relax, and Vitamin D is vital for strong bones and a good immune system. Making sure to include these nutrient-packed foods in your diet, such as through these 5 simple recipes, creates a combined effect that boosts their power to relieve pain. This simple approach puts you in charge of your health, turning your kitchen into a place of wellness.

Besides specific nutrients, how healthy your overall diet is truly impacts your body’s ability to manage pain. Highly processed items, white sugar, and bad fats can all lead to body-wide inflammation, which makes back pain feel worse. On the flip side, eating mostly whole, natural foods like fresh fruits, vegetables, lean meats, and good fats gives your body the building blocks it needs to repair, rebuild, and protect itself. Changing to an anti-inflammatory diet is about more than just avoiding bad foods; it’s about enjoying a wide range of colorful ingredients that actively help your health and reduce discomfort.
In the next sections, we will share five delicious and simple recipes designed to help ease back pain. Each one uses ingredients known for their power to fight swelling and lower pain, giving you an easy and enjoyable way to eat foods that heal every day. Get ready to feed your body, excite your taste buds, and take a big step toward a life free from constant back pain.
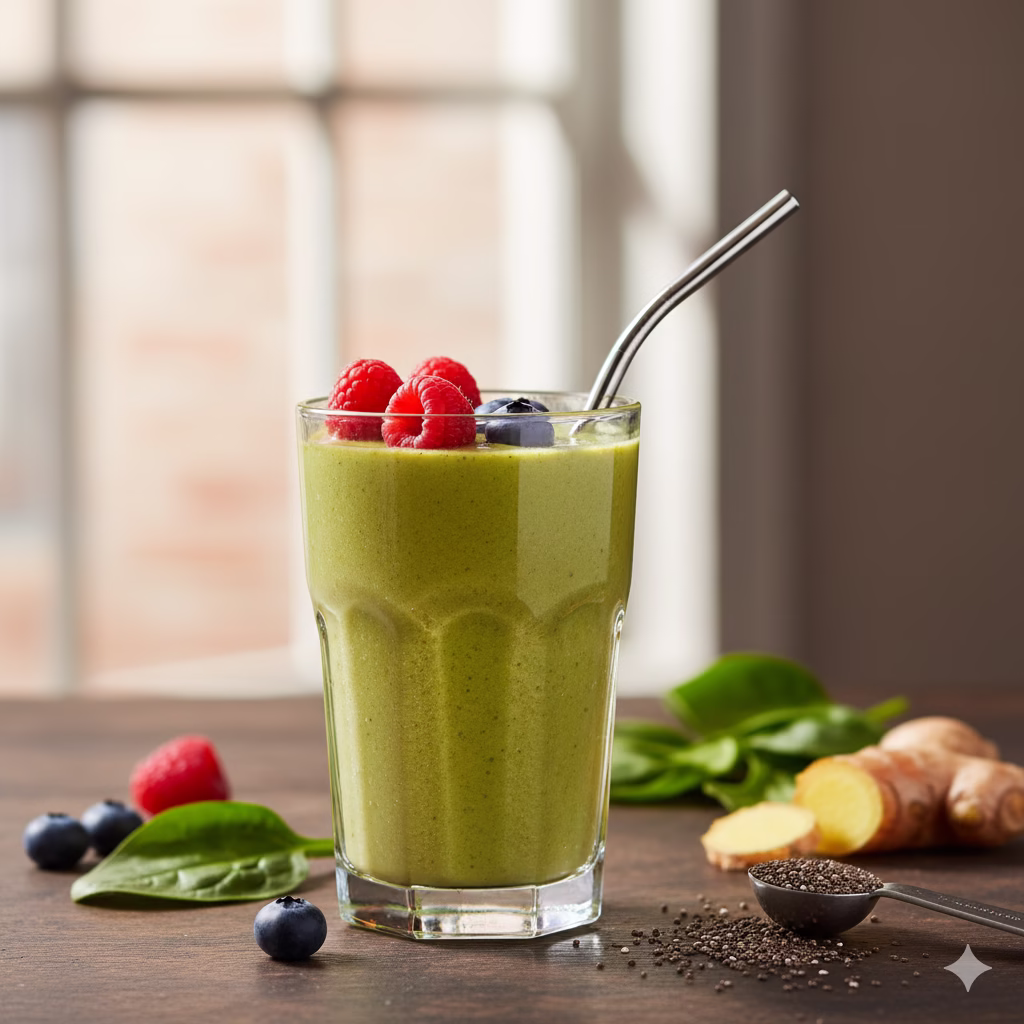
Recipe 1: Anti-Inflammatory Turmeric & Ginger Power Smoothie
This bright smoothie is full of strong anti-inflammatory ingredients. It is the perfect way to start your day with a shot of pain-fighting nutrients. Turmeric and ginger are famous for their natural way to ease pain.
Servings: 1
Equipment:
- High-speed blender
- Measuring cups and spoons
- Small, sharp knife (for turmeric and ginger)
Time to Prepare: 5 minutes
Time to Cook/Blend: 2 minutes
Nutritional Information (per serving, estimated):
- Calories: Around 250-300
- Protein: About 5-7g
- Fats: About 8-10g
- Carbohydrates: About 40-50g
- Fiber: About 8-10g
- Rich in Vitamin C, K, Manganese, and Potassium.
Ingredients:
- A cup plain almond milk (choose unsweetened)
- 1 ripe banana, peeled and frozen (this makes the smoothie cold and thick)
- A full cup of fresh spinach, washed and packed tight
- 1 inch piece of fresh turmeric root, peeled and chopped (or use 1 teaspoon of dried turmeric powder)
- 1/2 inch piece of fresh ginger root, peeled and chopped (or use 1/2 teaspoon of dried ginger powder)
- 1 tablespoon chia seeds (to add omega-3s and fiber)
- 1/2 teaspoon black pepper (this is a must for turmeric to work best)
- Optional: 1 scoop of vanilla or plain protein powder (for extra fullness)
Step-by-Step Instructions for Your Turmeric & Ginger Smoothie:
Get Ready: Collect all your ingredients and make sure they are washed and ready. If you are using fresh turmeric and ginger, peel them gently with a spoon or small knife. Then, cut them into small pieces so the blender can mix them well.
Add Liquid First: Pour the unsweetened almond milk into your high-speed blender container. Starting with the liquid helps the blades spin easily and stops the other foods from sticking at the bottom.
Place the Leafy Greens: Next, drop in the fresh spinach. Because spinach is light and soft, it will blend down very smoothly with the milk.
Add the Harder Foods: Now, add the frozen banana pieces, along with the chopped fresh turmeric and ginger. If you are using powders, add them here. The frozen banana is what makes your drink cold and creamy.
Mix in the Power Boosters: Sprinkle the chia seeds into the blender. Next, add the vital black pepper. The pepper has a substance called piperine, which greatly helps your body soak up the good parts of the turmeric (curcumin). Add your optional protein powder now, too.
Blend Well: Secure the lid tightly on your blender. Start the blender on a low speed, then slowly move up to the highest setting. Blend for one to two minutes, or until the mix is super smooth and creamy. Make sure there are no chunks of turmeric, ginger, or spinach left. If the mix seems too thick, just add a bit more almond milk and blend again quickly.
Enjoy: Pour your bright, anti-inflammatory smoothie into a glass and drink it right away!

5 Simple Recipes: Benefits for Your Body
- Turmeric: Contains curcumin, a very strong compound that fights swelling and can help lessen joint pain.
- Ginger: Known to ease pain and fight inflammation, working like a natural pain reliever.
- Spinach: Has lots of Vitamins K and C, plus antioxidants that protect cells and reduce swelling.
- Chia Seeds: An excellent source of omega-3 fatty acids, which are key to cooling down body-wide inflammation.
- Banana: Gives you potassium and magnesium, which are needed for healthy muscle action and stopping cramps.
Variations for Your Smoothie:
| Variation Type | How to Change the Recipe |
| Fruity Fun | Add 1/2 cup frozen pineapple or mango for a sweeter taste and bromelain (in pineapple), an enzyme that fights swelling. |
| Green Power | Add kale instead of, or in addition to, the spinach for a mix of extra vitamins. |
| Nutty Taste | Include 1 tablespoon of almond butter for healthy fats and protein, making it even creamier. |
| Warm Kick | A small pinch of cayenne pepper can make your blood flow better and add a healthy spice. |
| Sweeter Touch | Use a little bit of raw honey or maple syrup if you like it sweeter. The banana often makes it sweet enough. |
Recipe 2: Salmon Dinner with Healthy Roasted Veggies
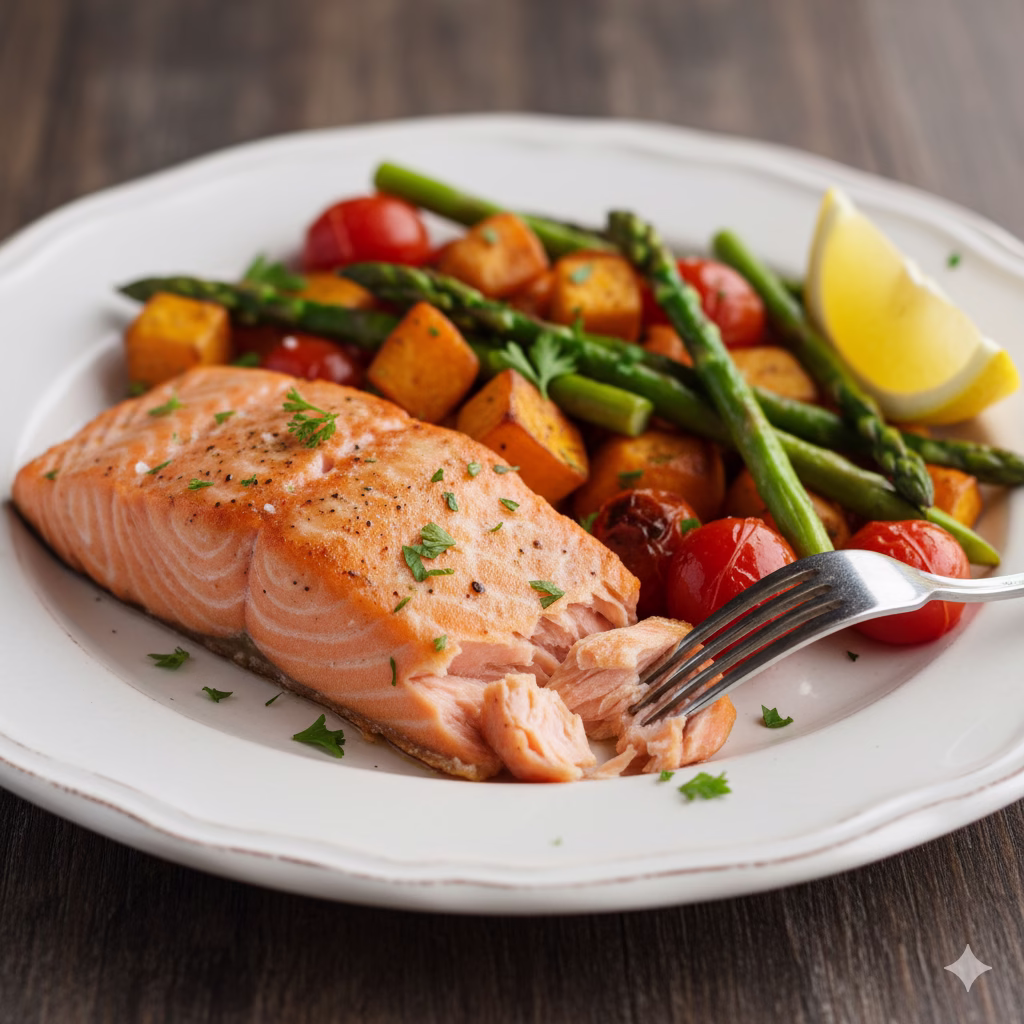
This meal is well-rounded, mixing salmon rich in omega-3s with sweet potatoes and asparagus that fight inflammation. It is a perfect dinner to support a healthier back.
Servings: 2
Equipment:
- Baking sheet (large size)
- Parchment paper
- Small bowl
- Measuring spoons
- Sharp knife
- Cutting board
Time to Prepare: 15 minutes
Time to Cook: 25-30 minutes
Nutritional Information (per serving, estimated):
- Calories: Around 450-500
- Protein: About 30-35g
- Fats: About 20-25g (good fats from salmon)
- Carbohydrates: About 35-40g
- Fiber: About 8-10g
- Full of Omega-3s, Vitamin D, B vitamins, Magnesium, and Beta-carotene.
Ingredients:
- 2 (6 oz) salmon fillets (you can choose skin on or off)
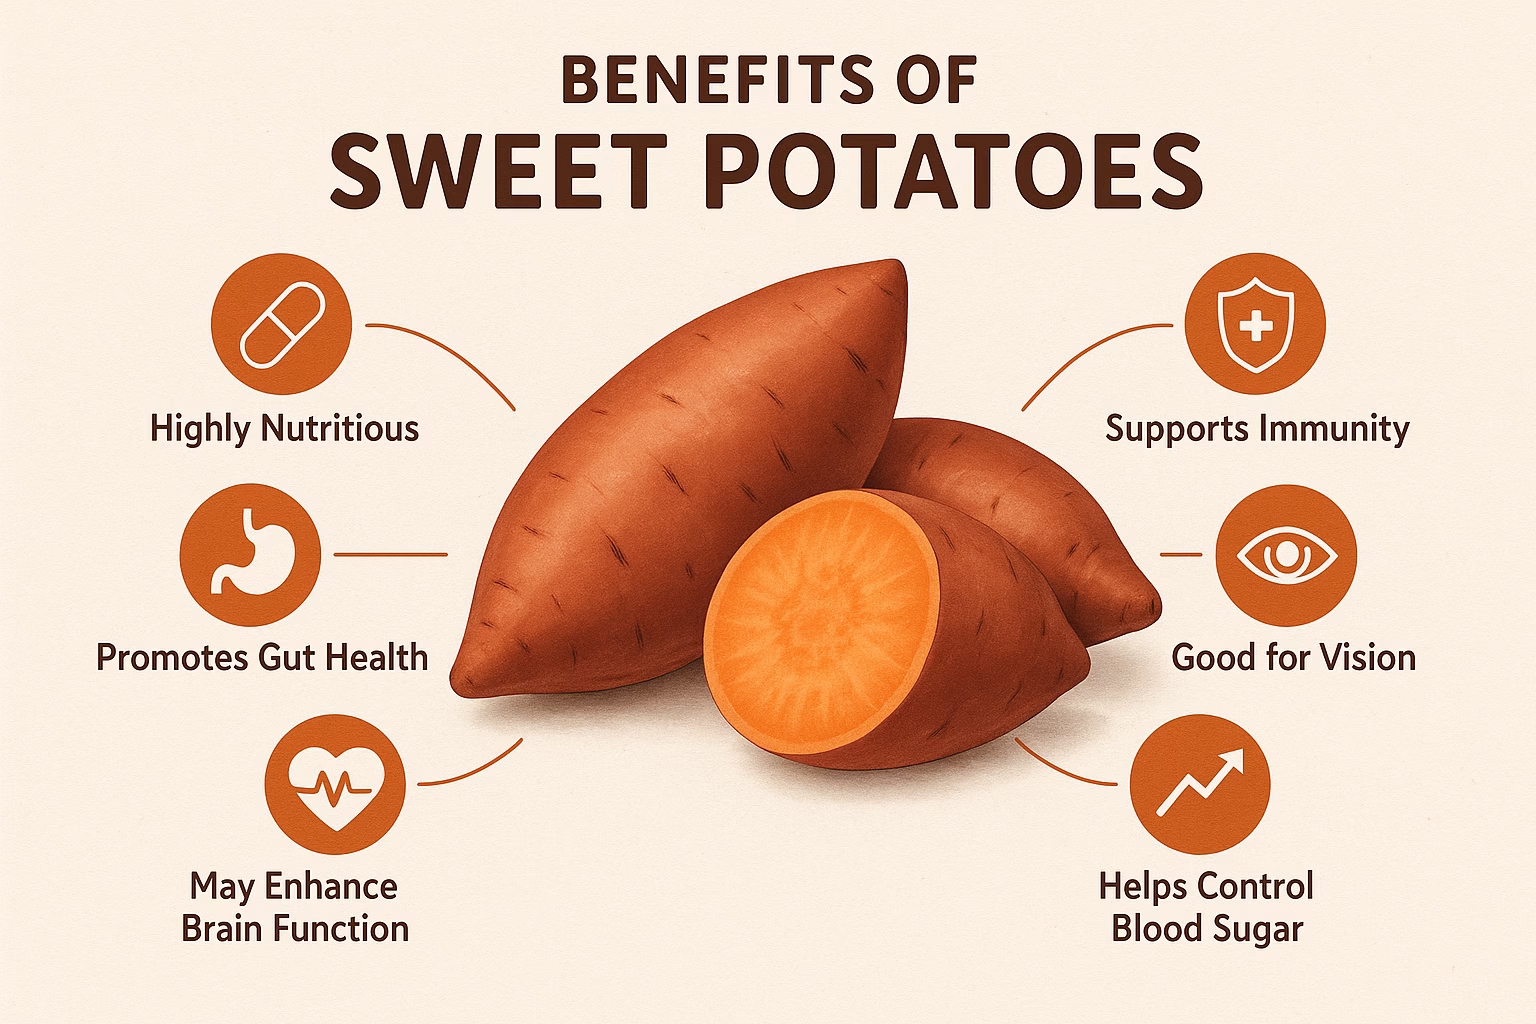
- 2 medium sweet potatoes, peeled and cut into 1-inch cubes
- 1 bunch of asparagus (about 1 pound), with the tough ends snapped off
- 2 tablespoons olive oil, divided into two parts
- 1 whole lemon, use half sliced for the top, and half for fresh juice
- 1 teaspoon dried dill
- 1/2 teaspoon garlic powder
- Salt and black pepper to your taste
Step-by-Step Instructions for Your Salmon and Veggies:
Heat Oven and Set Up Pan: Turn your oven to 400°F (200°C) to heat up. Line a large baking sheet with parchment paper; this makes clean-up quick and easy.
Prepare Sweet Potatoes: In a small bowl, mix the diced sweet potatoes with 1 tablespoon of the olive oil, a sprinkle of salt, and pepper. Spread them out on one side of the lined baking sheet in a single, even layer.
Start Roasting Potatoes: Put the baking sheet with the sweet potatoes into the hot oven. Let them roast for 15 minutes. This head start helps the potatoes, which are denser, cook evenly with the fish later.
Ready the Asparagus and Fish: While the sweet potatoes are cooking, get the asparagus and salmon ready. Snap off the woody, tough ends of the asparagus. Gently pat the salmon fillets dry with a paper towel.
Season Everything: Use the same bowl you used for the potatoes (no need to wash it). Toss the asparagus with the remaining 1 tablespoon of olive oil, the garlic powder, and a dash of salt and pepper. Place the seasoned asparagus on the baking sheet next to the partly cooked sweet potatoes. Now, put the salmon fillets on the sheet, too. Sprinkle the dried dill, salt, and pepper evenly over the salmon. You can also place one of the thin lemon slices on top of each salmon fillet.
Finish Cooking: After the potatoes have cooked for 15 minutes, add the salmon and seasoned asparagus to the baking sheet. Return the sheet to the oven and cook for another 10 to 15 minutes. The salmon is done when it is fully cooked and flakes apart easily with a fork. The vegetables should be tender but still slightly crisp.
Serve: Carefully take the baking sheet out of the oven. Squeeze a bit of fresh lemon juice over the cooked salmon and vegetables before you serve it. Serve this healthy meal right away!
Alternative Cooking Method: Pan-Fried Salmon and Sautéed Veggies
For a faster meal, you can pan-fry the salmon and cook the sweet potatoes and asparagus in separate pans.
- Pan-Fry Salmon: Heat 1 tablespoon of olive oil in a non-stick frying pan over a medium-high heat. Season the salmon with the dill, salt, and pepper. Place the salmon in the pan with the skin-side down first. Cook for 4 to 5 minutes until the skin is crisp. Then, turn the fish over and cook for another 3 to 5 minutes until it is cooked through.
- Sauté Vegetables: In a different pan, heat 1 tablespoon of olive oil. Add the diced sweet potatoes and cook, stirring every so often, for 10 to 12 minutes until they are tender. Add the asparagus pieces during the last 5 minutes of cooking. Season with garlic powder, salt, and pepper.
5 Simple Recipes: Benefits for Your Back
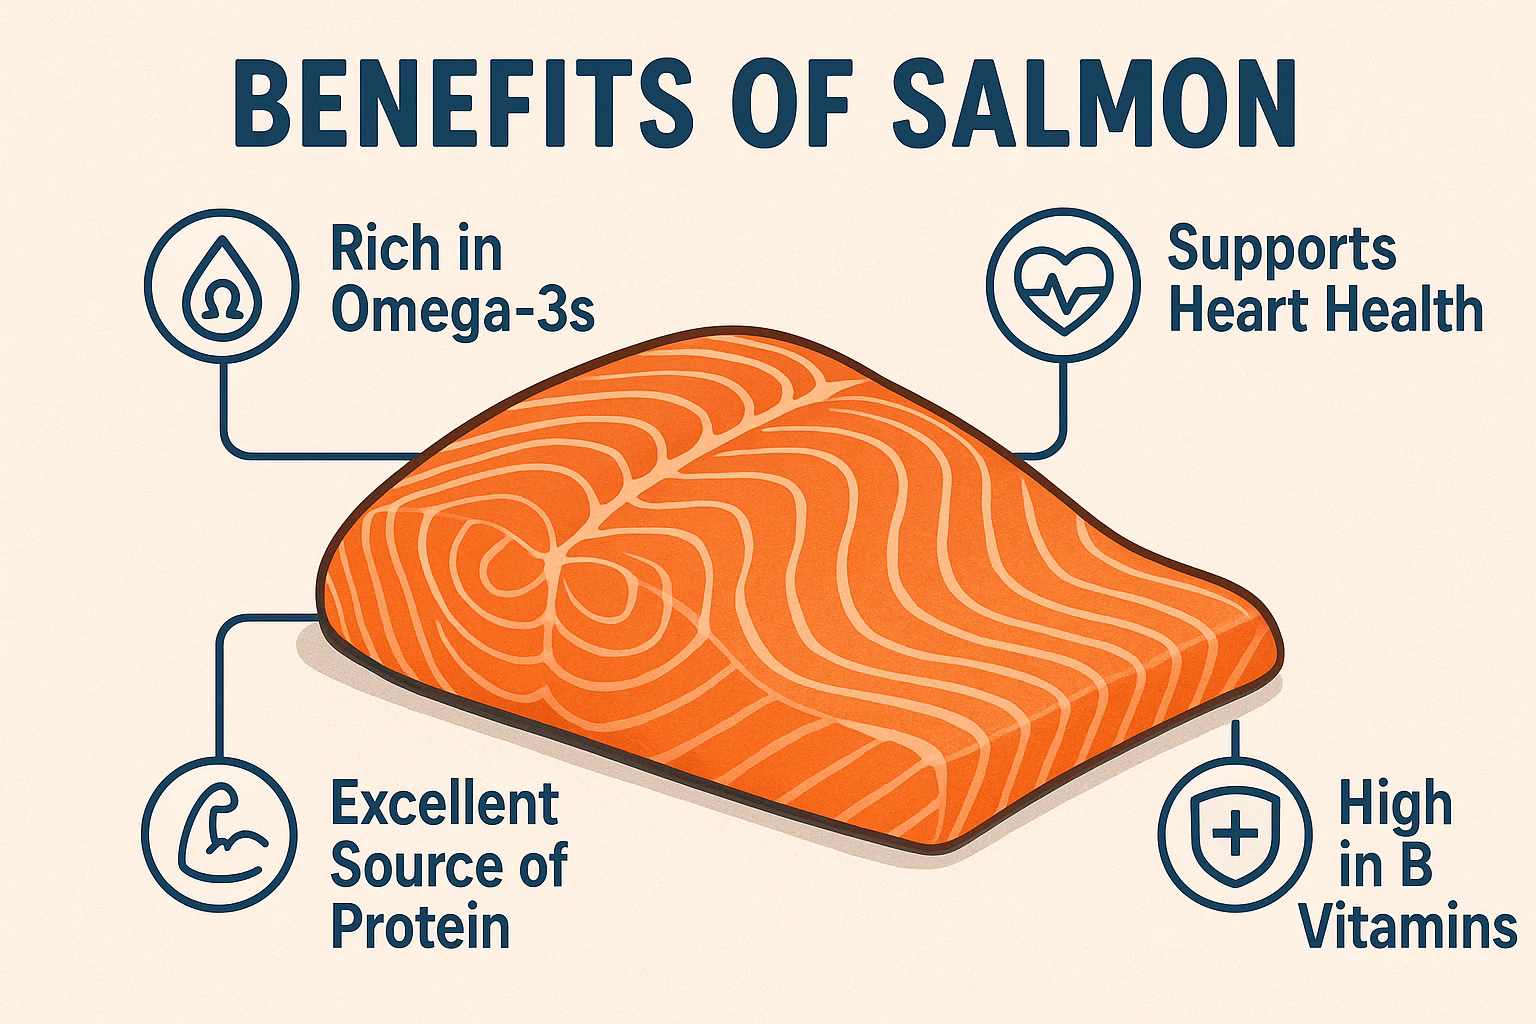
- Salmon: Contains lots of omega-3 fatty acids (EPA and DHA). These are powerful anti-inflammatories that can lower joint pain and stiffness.
- Sweet Potatoes: High in beta-carotene (which turns into Vitamin A) and Vitamin C. These are strong antioxidants that help fight inflammation. They also give you complex energy-giving carbs.
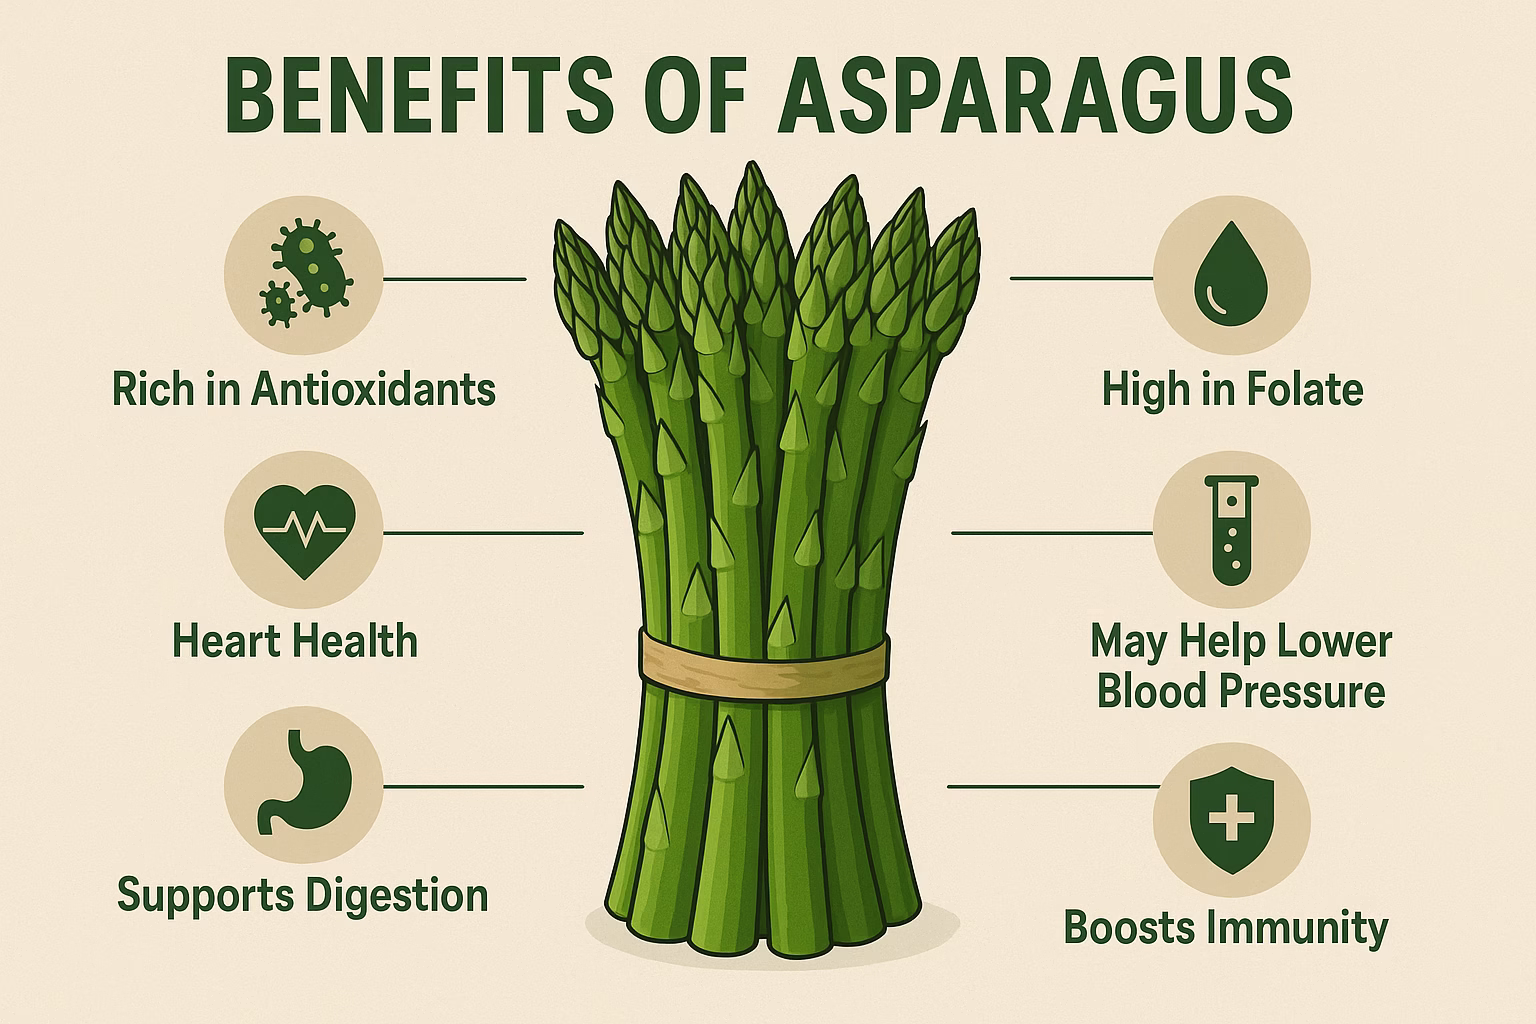
- Asparagus: A great source of Vitamin K, which is needed for healthy bones, and folate, which supports nerve health. It also has compounds that fight inflammation.
Variations for Your Salmon Meal:
| Variation Type | How to Change the Recipe |
| Herbal Change | Try using fresh thyme or rosemary instead of dill for a different, fresh taste. |
| Different Veggies | Swap out the asparagus for chopped broccoli or bell peppers, or add them in for more color and nutrients. You may need to change cooking times a little. |
| Spicy Touch | Add a pinch of crushed red pepper flakes to the vegetables or a light dusting of paprika on the salmon for a bit of heat. |
| Add a Sauce | Top the meal with a small spoonful of fresh pesto or a simple homemade lemon-tahini dressing for extra flavor and health boosts. |
Recipe 3: Power Quinoa Salad with Anti-Inflammatory Vegetables
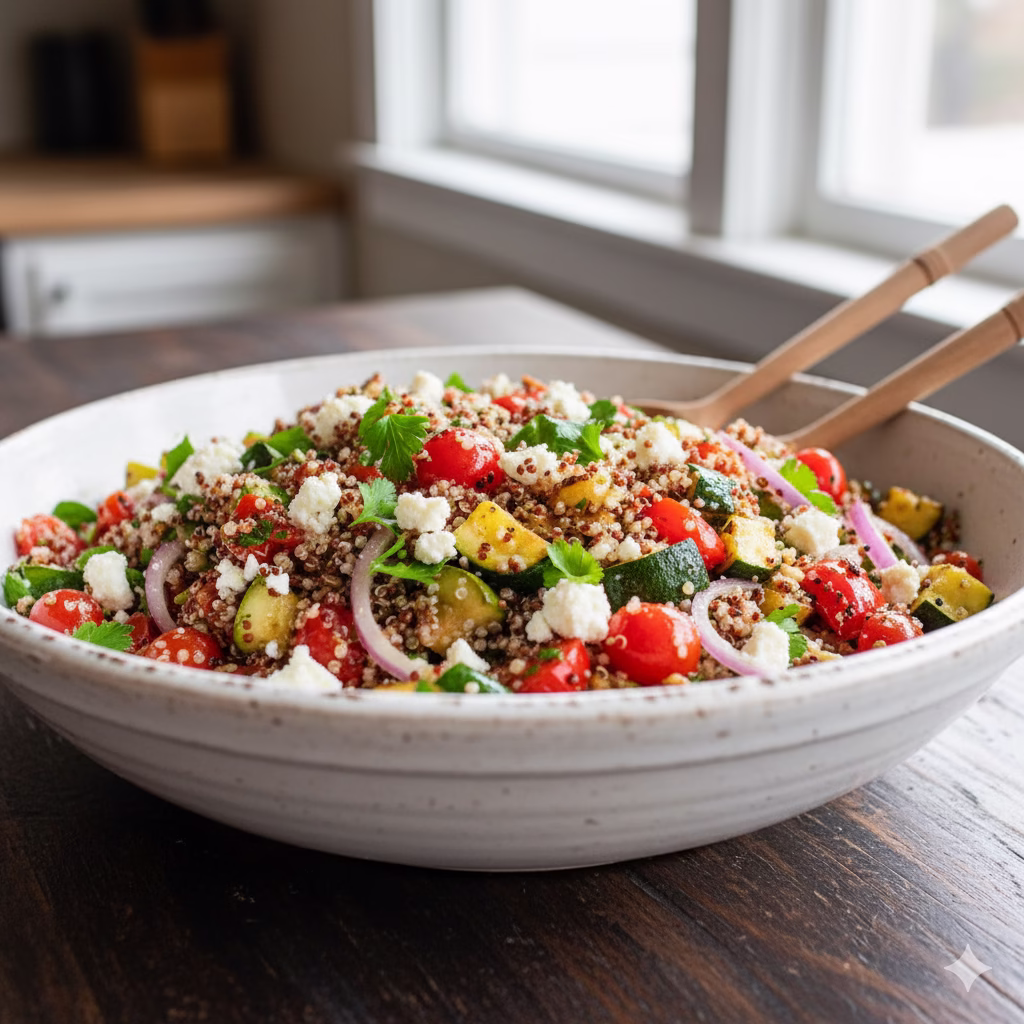
This complete quinoa salad is a wonderful source of protein from plants, fiber, and many anti-inflammatory vegetables. It’s perfect for making ahead of time or for a healthy, soothing lunch.
Servings: 4
Equipment:
- Medium pot with a lid (for cooking quinoa)
- Baking sheet
- Parchment paper
- Large bowl for mixing
- Small bowl (for making the dressing)
- Whisk
- Sharp knife
- Cutting board
Time to Prepare: 20 minutes
Time to Cook: 30-35 minutes
Nutritional Information (per serving, estimated):
- Calories: Around 380-420
- Protein: About 15-18g
- Fats: About 15-18g (mostly healthy fats)
- Carbohydrates: About 45-50g
- Fiber: About 10-12g
- High in Magnesium, Manganese, Folate, Iron, and many antioxidants.
Ingredients:
- 1 cup quinoa, rinsed very well
- 2 cups vegetable broth or water
- 1 large red bell pepper, seeds removed and cut into small cubes
- A zucchini, cut into small cubes
- 1 cup cherry tomatoes, cut in half
- 1/2 red onion, sliced very thinly
- 1/2 cup crumbled feta cheese (if you like, adds flavor and calcium)
- 1/4 cup fresh parsley, chopped
- 2 tablespoons olive oil, divided
- 1 tablespoon balsamic vinegar
- 1 teaspoon dried oregano
- Salt and black pepper to your taste
Step-by-Step Instructions for Your Quinoa & Roasted Veggie Salad:
- Cook the Quinoa: Start by rinsing the quinoa under cool running water in a fine strainer. This step is important to wash away a bitter coating called saponin. Put the rinsed quinoa with 2 cups of vegetable broth or water in a medium-sized pot. Bring the liquid to a strong boil, then turn the heat to its lowest setting. Put the lid on and let it gently simmer for 15 minutes, or until all the liquid has been soaked up. Take the pot off the heat and let it sit, covered, for 5 more minutes. Finally, fluff the quinoa with a fork and let it cool down a little.
- Heat Oven and Prep Pan: While the quinoa is cooking, preheat your oven to 400°F (200°C). Line a large baking sheet with parchment paper.
- Prep and Flavor Vegetables: Cut the red bell pepper, zucchini, and slice the red onion and cherry tomatoes as directed. In a large bowl, mix the diced bell pepper, zucchini, and sliced red onion. Drizzle 1 tablespoon of the olive oil over them. Sprinkle with the dried oregano, salt, and pepper. Toss everything well so the vegetables are lightly coated.
- Roast Vegetables: Spread the seasoned vegetables on the prepared baking sheet in a single layer. Roast them for 20 to 25 minutes. Make sure to stir them halfway through so they cook evenly. They should be soft but slightly crisp, with a little bit of brown color. Add the halved cherry tomatoes for only the last 5 to 7 minutes of roasting, as they cook very fast.
- Mix the Salad: In a clean, large mixing bowl, combine the cooled, fluffy quinoa and all the roasted vegetables.
- Whip Up the Dressing: In a small bowl, quickly whisk together the remaining 1 tablespoon of olive oil, the balsamic vinegar, and a little salt and pepper.
- Combine and Finish: Pour the dressing mixture over the quinoa and vegetable mix. Add the chopped fresh parsley and the crumbled feta cheese (if you choose to use it). Gently toss everything together so the dressing and ingredients are spread out evenly.
- Serve: You can eat this quinoa salad warm or at room temperature. It also keeps well in the fridge, making it great for leftovers.
5 Simple Recipes: Benefits of this Healing Quinoa Salad:
- Quinoa: A protein that contains all the essential amino acids. It is high in magnesium, which helps muscles relax and can reduce painful spasms.
- Bell Peppers: An excellent source of Vitamin C, a strong antioxidant that helps make collagen (important for body tissues) and fights swelling.
- Zucchini: Has few calories and a lot of water. It provides helpful antioxidants.
- Red Onion: Contains quercetin, a natural plant compound that has anti-inflammatory power.
- Olive Oil: A healthy fat that has monounsaturated fatty acids and antioxidants that help to reduce inflammation in the body.
Variations for Your Quinoa Salad:
| Variation Type | How to Change the Recipe |
| Protein Power | Add grilled chicken pieces, chickpeas, or black beans for a bigger protein boost. |
| Fresh Herbs | Add fresh mint or basil to the salad for a different, lively smell and flavor. |
| Nutty Texture | Sprinkle a handful of toasted slivered almonds or walnuts on top for good fats and crunch. |
| Citrus Flavor | Use fresh lemon juice and its grated peel instead of balsamic vinegar for a brighter, more zesty taste. |
Recipe 4: Warming Lentil Soup with Rich Leafy Greens
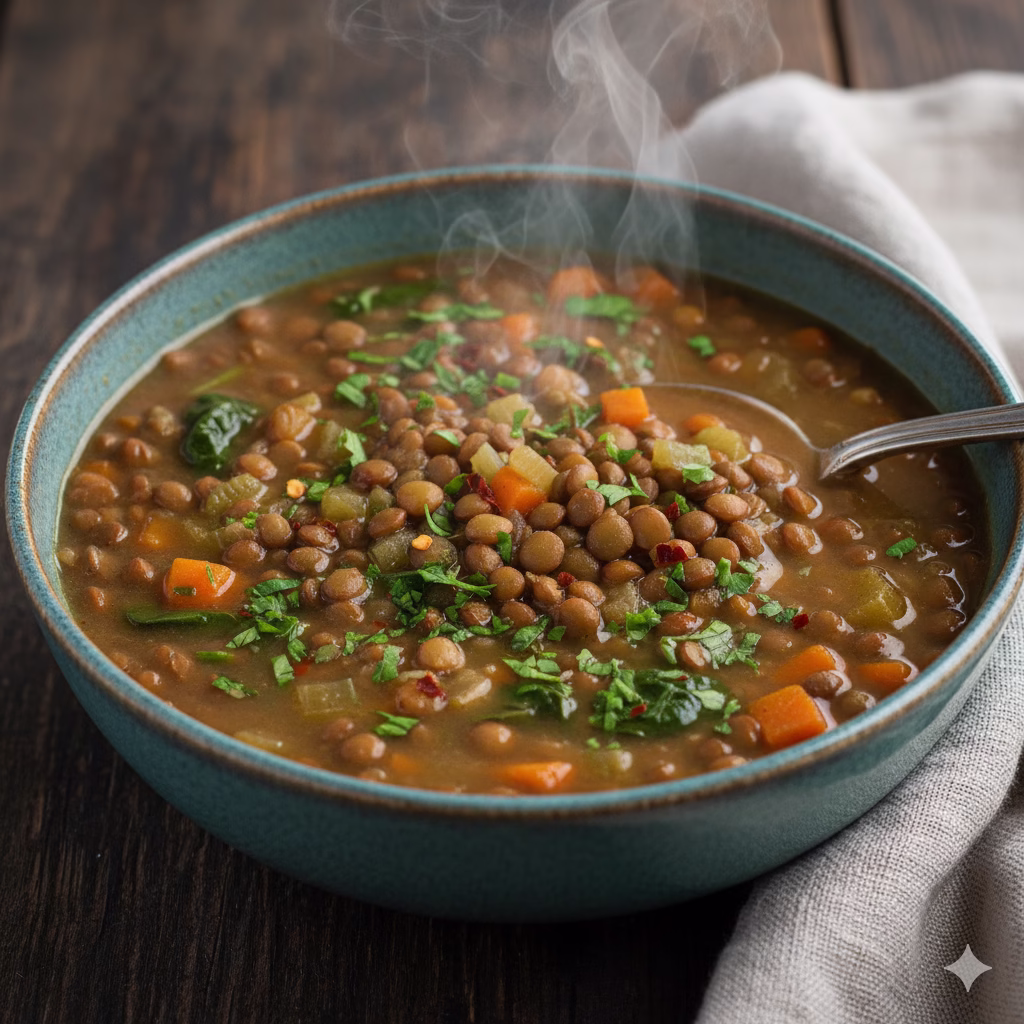
This cozy lentil soup is a great source of plant-based protein, fiber, and key minerals. It’s a gentle and filling meal that helps your body heal from back pain. It is warm, comforting, and full of healthy goodness.
Servings: 6
Equipment:
- Large, heavy pot or a Dutch oven
- Cutting board
- Sharp knife
- Measuring cups and spoons
- Ladle
Time to Prepare: 15 minutes
Time to Cook: 45-50 minutes
Nutritional Information (per serving, estimated):
- Calories: Around 300-350
- Protein: About 18-22g
- Fats: About 8-10g
- Carbohydrates: About 45-50g
- Fiber: About 15-20g
- Full of Iron, Folate, Manganese, Magnesium, and B vitamins.
Ingredients:
- 1 tablespoon olive oil
- 1 large onion, chopped into small pieces
- 2 carrots, peeled and cut into small cubes
- 2 celery stalks, cut into small cubes
- 3 cloves garlic, crushed or minced finely
- 1 cup green or brown lentils, rinsed well
- 6 cups vegetable broth (low sodium is best)
- 1 (14.5 oz) can of diced tomatoes, do not drain the liquid
- 1 teaspoon dried thyme
- 1/2 teaspoon dried rosemary
- 1 bay leaf
- 4 cups fresh spinach or kale, chopped roughly
- Salt and black pepper to taste
- Optional: a small squeeze of fresh lemon juice right before serving
Step-by-Step Instructions for Your Lentil Soup:
- Soften the Vegetables: Heat the olive oil in your large pot or Dutch oven over a medium heat setting. Add the chopped onion, diced carrots, and diced celery. Cook these vegetables for 5 to 7 minutes, stirring every now and then, until they start to become soft. This process is called sweating the vegetables.
- Add Garlic and Herbs: Stir in the minced garlic, dried thyme, and dried rosemary. Cook for just one more minute until you can smell the strong, pleasant scent of the herbs. Be very careful not to let the garlic burn, as this will make it taste bitter.
- Mix in Lentils and Broth: Put the rinsed lentils into the pot. Pour in the 6 cups of vegetable broth, and then add the can of diced tomatoes without draining the liquid. Drop the bay leaf into the mixture.
- Cook the Soup: Turn the heat up until the soup starts to boil. Then, immediately reduce the heat to a very low setting. Cover the pot with the lid and let the soup simmer gently for 30 to 35 minutes. Cook until the lentils are completely soft and tender. Make sure to stir the soup occasionally to prevent the lentils from sticking to the bottom.
- Stir in the Greens: Once the lentils are tender and fully cooked, take out and throw away the bay leaf. Stir the chopped fresh spinach or kale into the soup. Cook for just 3 to 5 minutes more, or until the leafy greens have softened and wilted into the soup.
- Season and Serve: Taste the soup and add salt and black pepper until the flavor is perfect for you. If you want a brighter taste, stir in a small squeeze of fresh lemon juice before serving. Use a ladle to pour the hearty, healing soup into bowls.
Alternative Cooking Method: Simple Slow Cooker Soup
- Put Ingredients Together: Place all the soup ingredients (everything except the fresh greens and the optional lemon juice) into your slow cooker pot.
- Cook Slowly: Set the slow cooker to the low setting and cook for 6 to 8 hours, or set it to high and cook for 3 to 4 hours. The lentils should be tender when done.
- Add Greens: Stir in the fresh spinach or kale during the last 30 minutes of cooking time. Cook until the greens are soft. Season with salt and pepper and serve.
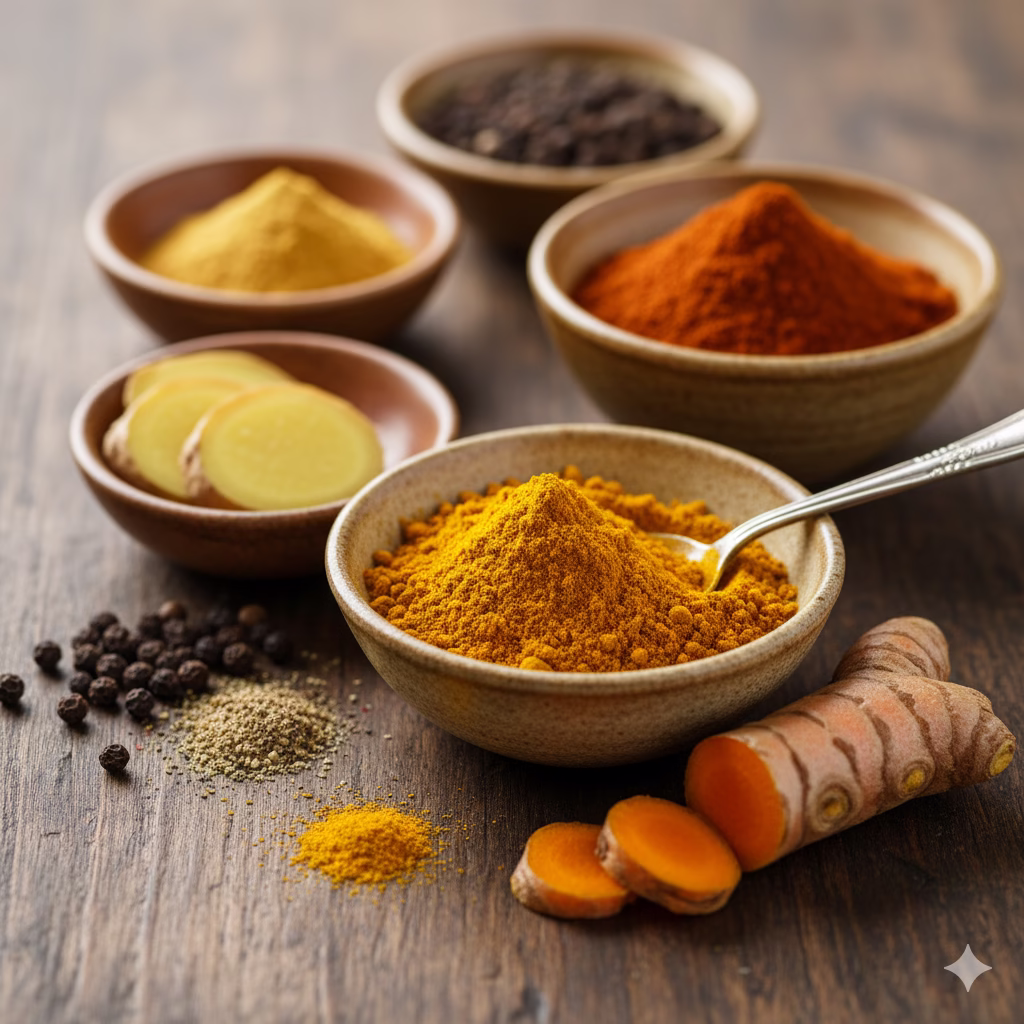
📸 Insert image of a variety of anti-inflammatory spices like turmeric, ginger, and black pepper in small bowls
5 Simple Recipes: Benefits for Your Body
- Lentils: High in plant protein, fiber, and iron. They give lasting energy and help keep muscles strong, which is vital for back health. They also have folate and magnesium.
- Carrots & Celery: Rich in antioxidants and fiber, which help your body stay healthy and your gut work well.
- Spinach/Kale: Full of Vitamin K, which is necessary for strong bones, and it helps reduce inflammation. They are also packed with Vitamin C and other antioxidants.
- Tomatoes: Contain lycopene, a very strong antioxidant that helps lower swelling and protect your cells.
Variations for Your Lentil Soup:
| Variation Type | How to Change the Recipe |
| Spice Level | Add a tiny pinch of crushed red pepper flakes with the garlic for a nice warmth. |
| Add Grains | Stir in 1/2 cup of already cooked brown rice or barley at the end to make the soup even more filling. |
| Herbal Freshness | Top the soup with fresh chopped cilantro or basil for an extra layer of strong flavor. |
| Creamy Style | Scoop out and blend a small portion of the soup, then pour it back in before adding the greens for a thicker, smoother texture. |
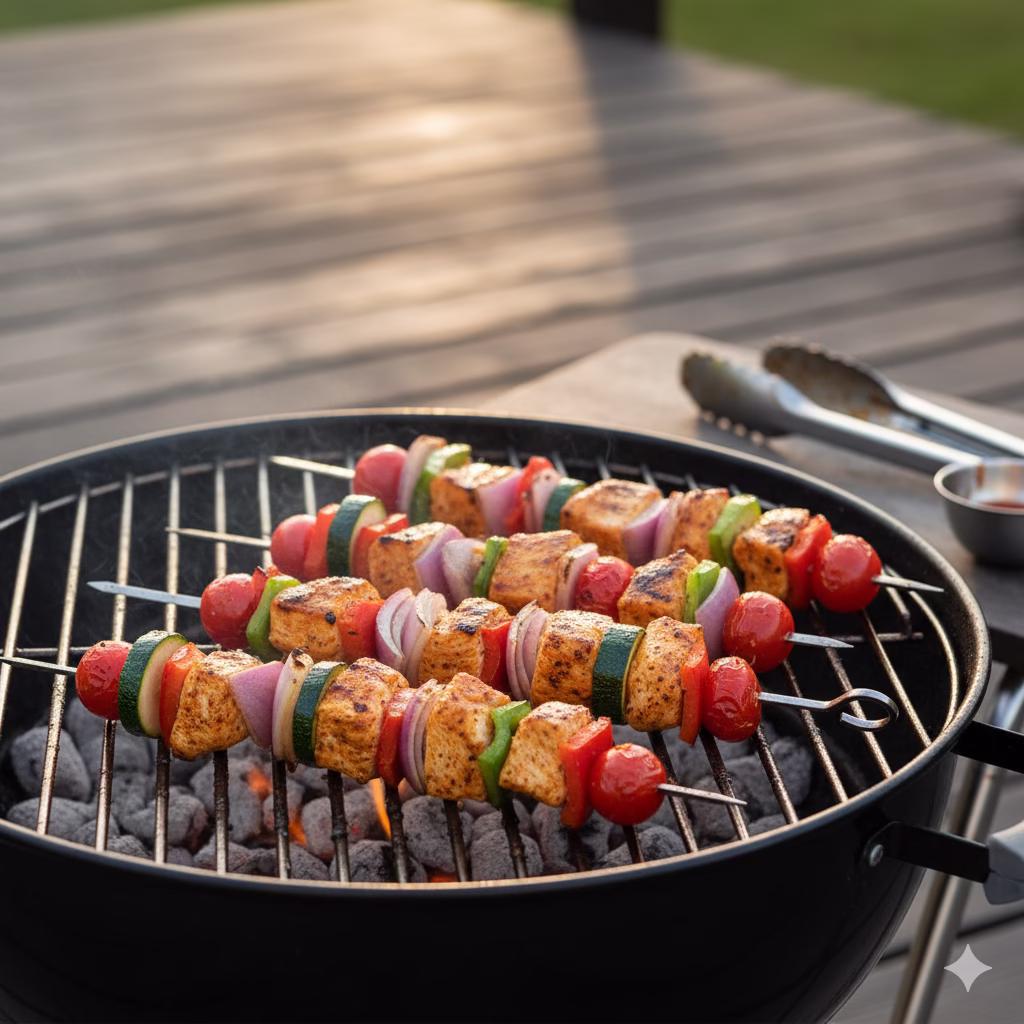
Recipe 5: Chicken & Veggie Skewers with Healing Marinade
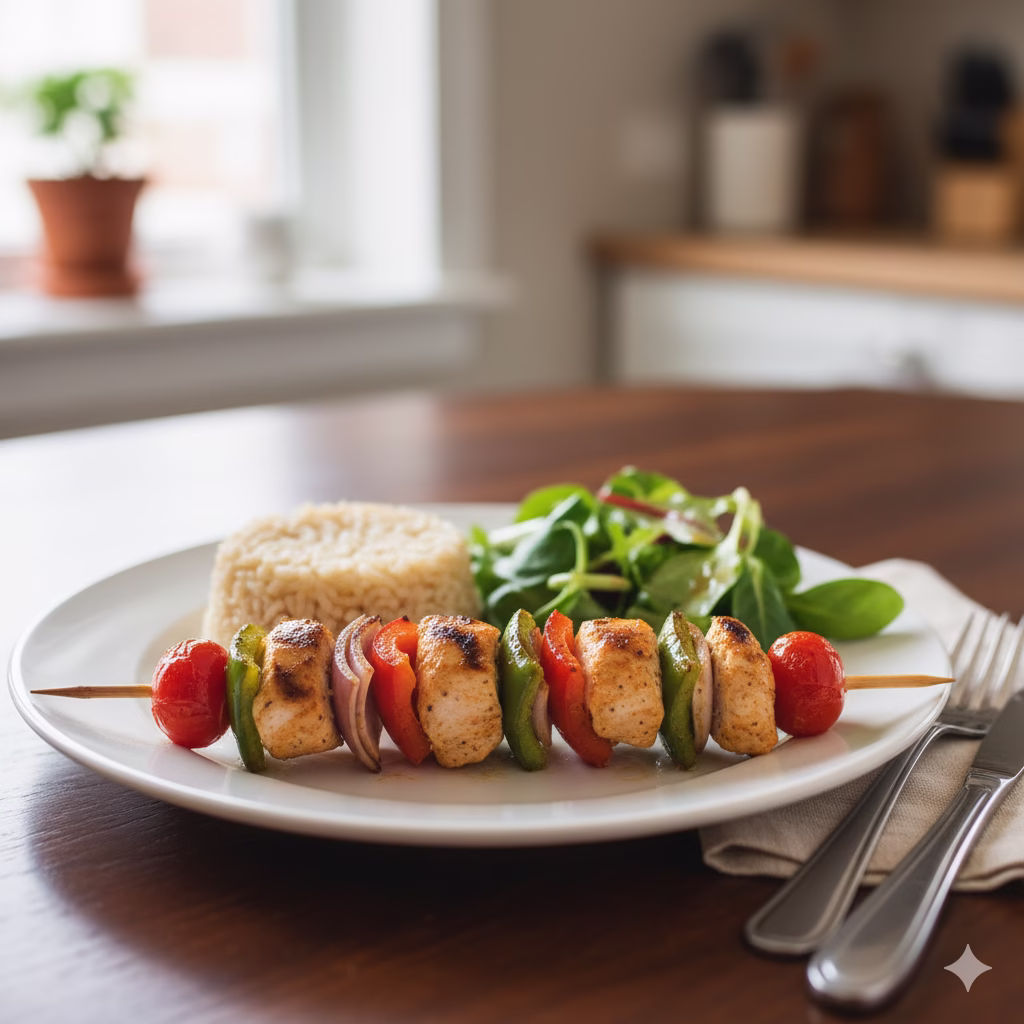
These flavorful skewers are an easy and tasty way to eat lean protein and many colorful, anti-inflammatory vegetables. The marinade not only makes them delicious but also works to fight pain from the inside out.
Servings: 4
Equipment:
- Grill, grill pan, or oven with a baking sheet
- Medium bowls (2)
- Whisk
- Sharp knife
- Cutting board
- Metal skewers or wooden skewers (soak wooden ones in water for 30 minutes)
Time to Prepare: 20 minutes + 30 minutes marinating
Time to Cook: 15-20 minutes
Nutritional Information (per serving, estimated):
- Calories: Around 350-400
- Protein: About 35-40g
- Fats: About 15-20g
- Carbohydrates: About 15-20g
- Fiber: About 4-6g
- Great source of lean protein, Vitamin C, Vitamin B6, Potassium, and various antioxidants.
Ingredients:
- 1.5 pounds of chicken breast, boneless and skinless, cut into 1-inch cubes
- 1 red bell pepper, cut into 1-inch squares
- 1 green bell pepper, cut into 1-inch squares
- A red onion, cut into 1-inch pieces
- 1 zucchini, cut into 1-inch pieces
- Cherry tomatoes (optional, for extra color)
For the Anti-Inflammatory Marinade:
- 1/4 cup olive oil
- 2 tablespoons apple cider vinegar
- 1 tablespoon Dijon mustard
- 2 cloves garlic, crushed or minced
- 1 teaspoon dried oregano
- 1/2 teaspoon smoked paprika
- Salt and black pepper to your taste
Step-by-Step Instructions for Your Chicken & Veggie Skewers:
Make the Marinade: In a medium bowl, whisk all the marinade ingredients together: the olive oil, apple cider vinegar, Dijon mustard, minced garlic, dried oregano, smoked paprika, salt, and black pepper. Mix until it looks smooth.
Marinate the Chicken: Put the cubed chicken breast into a separate bowl or a zip-top plastic bag. Pour about half of the marinade mixture over the chicken, making sure all the pieces are fully covered. Mix it up well. Cover the bowl or seal the bag and put it in the refrigerator for at least 30 minutes. You can marinate it for up to 2 hours to let the flavors really soak in. Keep the remaining half of the marinade to use on the vegetables.
Prepare Vegetables: While the chicken is marinating, prepare the vegetables. Cut the red pepper, green pepper, red onion, and zucchini into 1-inch pieces.
Season Vegetables: Take the large bowl and put the cut vegetables in it. Pour the reserved half of the marinade over the vegetables and toss them gently until they are all coated.
Build the Skewers: If you are using wooden skewers, you must soak them in water for at least 30 minutes first so they don’t burn on the grill. Now, thread the marinated chicken and the seasoned vegetables onto the skewers, switching them around (chicken, then pepper, then onion, etc.). Try to put the ingredients close but not squished together so they all cook evenly.
Heat Your Cooking Surface:
For the Grill: Heat your outdoor grill to a medium-high setting.
In a Grill Pan: Heat a grill pan over medium-high heat on your stove.
For the Oven: Turn your oven to 400°F (200°C). Line a baking sheet with parchment paper.
Cook the Skewers:
Grilling/Grill Pan: Place the skewers on the hot grill or grill pan. Cook for 15 to 20 minutes total. Turn the skewers every 4 to 5 minutes to ensure all sides cook well. The chicken is done when it is fully cooked and no longer pink inside (it should reach an internal temperature of 165∘F or 74∘C). The vegetables should be slightly soft and have nice grill marks.
Oven Roasting: Place the skewers onto the prepared baking sheet. Roast them for 20 to 25 minutes. Flip the skewers over halfway through the cooking time. The chicken is done when fully cooked, and the vegetables are tender.
Serve: Carefully remove the skewers from the heat. Serve them right away with a side of brown rice or a fresh green salad for a complete, healthy meal.
5 Simple Recipes: Benefits of this Skewer Recipe
- Chicken Breast: A very lean and healthy source of protein, which is needed to fix and rebuild muscles. This is very important for back health.
- Bell Peppers: They are a super source of Vitamin C, a strong antioxidant that is key for making collagen (needed for connecting tissues) and calming inflammation.
- Onion & Garlic: These vegetables have natural compounds that fight swelling and help your body’s immune system work better.
- Olive Oil & Apple Cider Vinegar: Give you healthy fats and help to keep your body less acidic, which is beneficial for reducing inflammation.
Variations for Your Skewers:
| Variation Type | How to Change the Recipe |
| Extra Spice | Add a pinch of chili powder or more smoked paprika to the marinade for a slightly warmer, richer taste. |
| More Veggies | You can include button mushrooms, fresh cherry tomatoes, or even pieces of pineapple for different textures and flavors. |
| Protein Swap | Try using large shrimp or cubes of firm tofu instead of the chicken for a different kind of protein. You will need to cook them for less time. |
| Fresh Top | Sprinkle fresh chopped cilantro or mint over the skewers after they are cooked for a light, fresh flavor burst. |
Final Thoughts on 5 Simple Recipes
Choosing an anti-inflammatory diet is a strong and active way to handle and decrease back pain. The 5 simple recipes shared here are more than just tasty; they are thoughtfully put together to give your body what it needs to fight inflammation, keep your muscles and bones strong, and improve your overall health.
By picking the right foods, you give your body the power to heal itself. You turn your kitchen into a powerful spot for pain relief. Remember to be consistent. Include these 5 Simple recipes and the healthy ideas behind them in your daily life, and you should start feeling more comfortable, moving better, and having less back pain. Start today, and give your back the good food it deserves!
Frequently Asked Questions (FAQs) About Back Pain & Diet
Q1: How quickly can changing my diet help me with back pain?
A1: The time it takes to feel better from back pain by changing your diet can be very different for each person. It depends on how bad your pain is, what is causing it, and how regularly you stick to the diet. Some people might notice small improvements in just a few weeks. For others, it might take a few months to feel a big change. It is important to be patient and keep up the healthy eating. Dietary changes work to reduce overall swelling and help your body heal slowly over time. If you combine these 5 Simple recipes with other treatments, like physical therapy, you might see results sooner.
Q2: If I have back pain, are there any foods I should avoid for sure?
A2: Yes, certain foods are known to cause inflammation, which can make back pain worse. You should try to avoid foods that are highly processed, refined sugars, bad trans fats (often found in fried and baked foods), too much red meat and processed meats, and white, refined starches. Cutting back on these foods and instead choosing whole, natural, anti-inflammatory foods can truly help to lower your pain levels. Also, think about any foods that you personally might be sensitive to, as these can also cause hidden inflammation in your body.
References
- Harvard Health Publishing – Foods that fight inflammation
- Arthritis Foundation – Anti-Inflammatory Diet Do’s and Don’ts
- NIH – Omega-3 Supplements
Recent Posts