I’m just like you—someone who struggles to find the perfect gift that truly says, “I see you.” I’ve spent too many hours wandering store aisles, only to grab something generic. That’s why I finally embraced the power of Homemade Gifts, realizing that the real present is the time and love poured into the creation. My philosophy is simple: if I can make it, anyone can, and the look on a loved one’s face when they realize you made them something with your own two hands? That’s instant joy.
The Timeless Joy of Homemade Gifts
In a world saturated with mass-produced goods, the simple act of giving a homemade gift stands out as an act of profound care. It transcends monetary value, offering a piece of your time, your creativity, and your heart. Whether you’re celebrating a birthday, a major holiday, a housewarming, or simply want to say “thank you,” a thoughtful DIY project is always the perfect choice. These homemade gifts are not only practical and beautiful, but they are also designed to be approachable for crafters of all skill levels, ensuring that you can create instant joy for your friends and family no matter the occasion.
We’ve curated a list of eight universally loved projects that are sure to delight anyone on your list, complete with step-by-step instructions and ideas for personalization.
1. Infused Oils or Vinegars
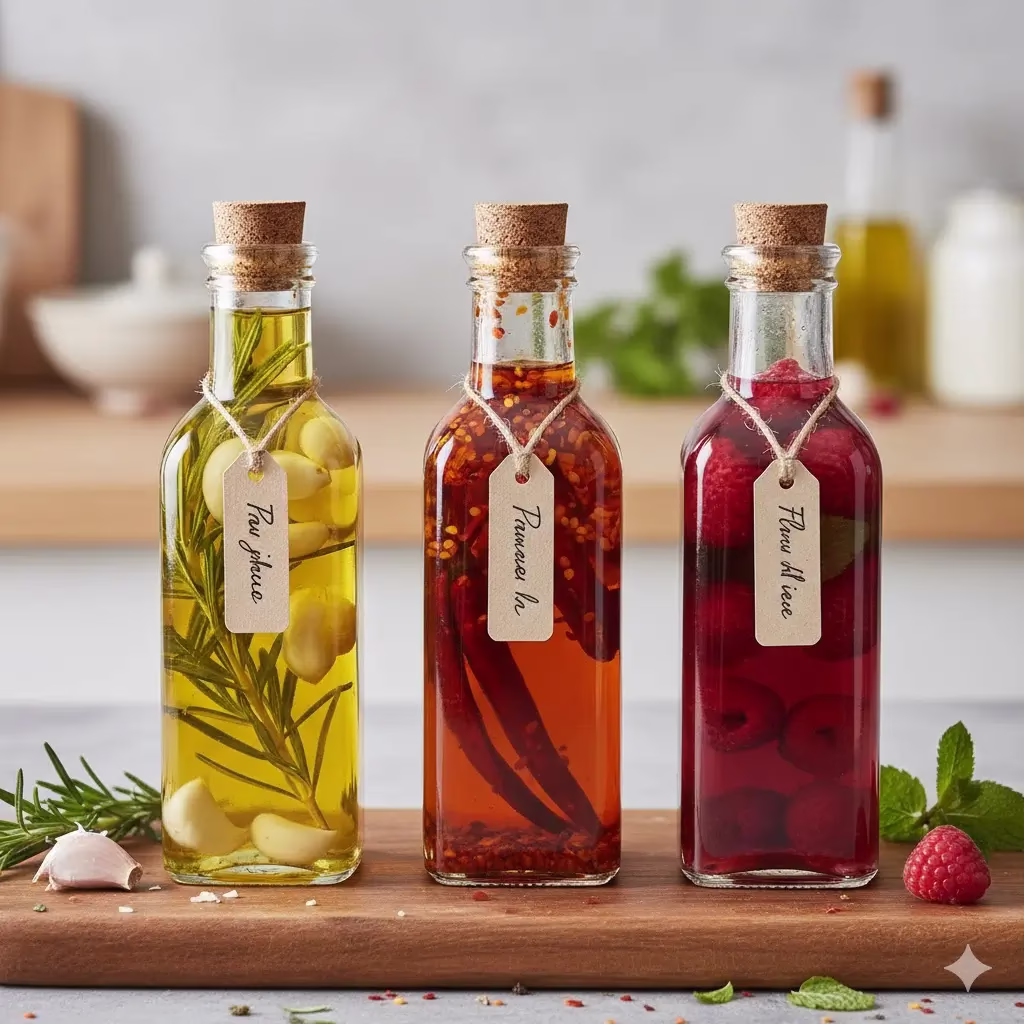
Infused oils and vinegars are a sophisticated yet simple gift that elevates any home cook’s pantry. They can be used to dress salads, marinate meats, or simply serve as a delicious bread dip. The beautiful presentation of the herbs and spices suspended in the liquid makes this gift as visually appealing as it is functional.
What You’ll Need:
- A carrier liquid: High-quality extra virgin olive oil (for oils) or white wine or apple cider vinegar (for vinegars).
- Infusion ingredients: Fresh rosemary sprigs, thyme, whole garlic cloves, dried chili flakes, lemon or orange zest (pesticide-free), peppercorns.
- Containers: Clean, sterilized glass bottles with airtight stoppers or corks.
- Optional: Decorative labels and ribbon.
How to Do It:
The Hot Infusion Method (Best for Oils with Dried Herbs/Spices):
- Prepare the ingredients: If using garlic, slightly crush the cloves to release their flavor. Ensure all fresh herbs are completely dry to prevent mold growth.
- Gently warm the oil: In a saucepan over very low heat, gently warm the olive oil to about 130∘F (55∘C). Do not let it smoke or boil. Warming helps the oil absorb the flavors.
- Combine and steep: Pour the warm oil into the sterilized bottle. Add your chosen infusion ingredients—for example, three sprigs of rosemary and five peeled garlic cloves.
- Cool and store: Seal the bottle and allow it to cool completely before gifting. Store in a cool, dark place. The oil should be used within 2-3 weeks, or the recipient can strain the solids out after a week of infusing to extend the shelf life.
The Cold Infusion Method (Best for Vinegars and Fresh Herbs):
- Prepare the ingredients: Wash and gently bruise the fresh herbs (e.g., basil, oregano) or fruits (e.g., raspberries) to release their aromatics.
- Combine: Place the ingredients inside the sterilized bottle. For every cup of vinegar, use about 1/4 cup of fresh herbs or fruit.
- Pour and seal: Pour the vinegar over the ingredients, filling the bottle completely. Seal tightly.
- Infuse: Let the vinegar sit for 1-2 weeks in a cool, dark place, shaking gently every few days. Taste periodically. Once the flavor is to your liking, strain the solids out before bottling it for the final gift.
2. Homemade Vanilla Extract
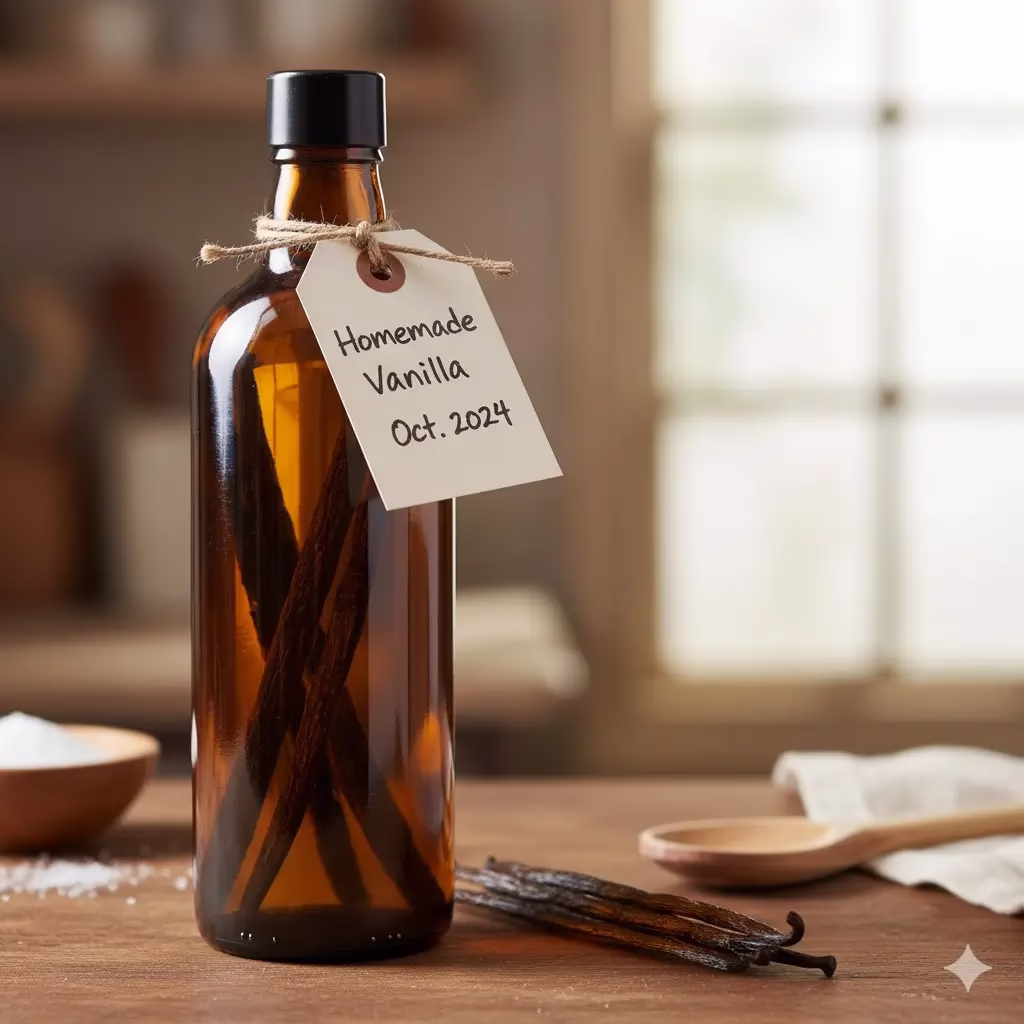
This gift is the epitome of simple elegance. Homemade vanilla extract requires only two ingredients, but it takes time to reach perfection, making the eventual gift a rich, concentrated labor of love. It’s perfect for bakers and cooks, as the quality far surpasses store-bought varieties.
What You’ll Need:
- Vanilla Beans: Grade B vanilla beans are best for extracting (they are less visually appealing but have a lower moisture content, concentrating the flavor). Plan on 5 to 6 beans per 8 ounces (240ml) of alcohol.
- Alcohol: 80-proof (or 40\%) vodka, rum, or bourbon. Vodka is the most neutral and allows the vanilla to shine.
- Containers: Small, airtight glass bottles (dark glass is preferable to protect the extract from light).
How to Do It:
- Prepare the beans: Slice each vanilla bean lengthwise with a sharp knife, leaving about 1/2 inch (1cm) uncut at the ends. This exposes the vanilla caviar inside, maximizing flavor release.
- Combine: Place the sliced beans inside the glass bottle.
- Fill and seal: Pour the alcohol over the beans until they are completely submerged. Seal the bottle tightly.
- Infuse (The Waiting Game): Attach a label with the date. The extract needs to infuse for a minimum of 8 weeks, but the flavor will deepen significantly over 6-12 months. When gifting, attach a note explaining that the extract gets better with age and that they can “top up” the bottle with more alcohol as they use it.
3. Layered DIY Spice Blends in a Jar

A gorgeous, multi-layered jar of a homemade spice blend is an incredibly thoughtful and visually striking gift. It tells the recipient, “I want you to eat delicious food,” and encourages them to get creative in the kitchen. This works well for BBQ rubs, taco seasoning, or a beautiful Italian herb blend.
What You’ll Need:
- Spices: Choose high-quality, fresh spices. Examples: Smoked paprika, oregano, cumin, chili powder, onion powder, garlic powder, salt, pepper.
- Container: A clean, clear glass jar with a tight-fitting lid (e.g., a small mason jar).
- Tools: Small funnel, measuring spoons.
How to Do It:
- Choose a recipe: Select a blend that the recipient will love. For a classic BBQ Rub, the layers might be:
- 1 tablespoon coarse salt (bottom layer)
- 2 tablespoons brown sugar (layer 2)
- 1 tablespoon smoked paprika (layer 3)
- 1 teaspoon garlic powder (layer 4)
- A teaspoon onion powder (layer 5)
- 1 teaspoon black pepper (layer 6)
- 1/2 teaspoon cayenne pepper (top layer)
- Layer carefully: Using a small funnel, add one spice at a time, being careful not to jostle the jar too much. The trick is to create distinct, colorful horizontal stripes. Use a chopstick or the back of a spoon to gently press the spices down between layers.
- Seal and decorate: Seal the jar tightly. Create a decorative tag that includes the name of the blend (e.g., “The Ultimate Grill Master Rub”) and, crucially, a printed recipe card detailing how they should use the blend and how to mix the spices before use.
4. Scented Bath Salts
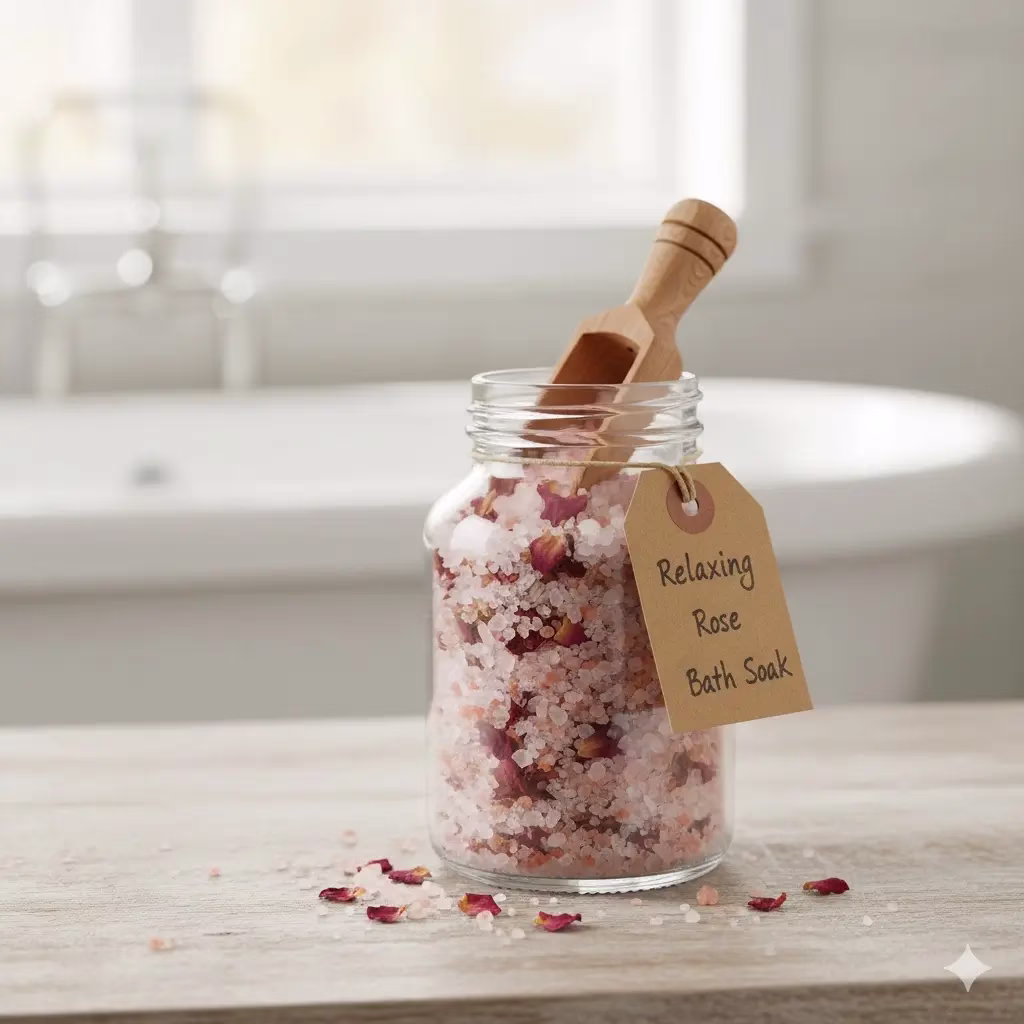
A spa-like experience in a jar, scented bath salts are a luxurious and easily scalable homemade gift. They promote relaxation and self-care, making them perfect for anyone who deserves a moment of peace—which is pretty much everyone.
What You’ll Need:
- Salts: Epsom salts are necessary for muscle relaxation, and sea salt or pink Himalayan salt can be added for texture and minerals.
- Essential Oils: High-quality, therapeutic-grade oils (e.g., lavender for relaxation, peppermint for invigoration, or citrus for a mood boost).
- Optional: Dried flowers (chamomile, rose petals, lavender buds) for visual appeal.
- Container: Airtight glass jar.
How to Do It:
- Measure the salts: For a standard-sized gift jar (about 16 ounces or 450g), measure out the salts. A 3:1 ratio of Epsom to sea salt works well.
- Add fragrance: For every cup of salts, add 10−20 drops of essential oil. Start conservatively—you can always add more, but you can’t take it away.
- Mix thoroughly: Place the salts and oils in a large bowl. Using a spoon or whisk, mix vigorously to ensure the essential oils are evenly distributed.
- Add botanicals (optional): Gently fold in the dried flowers.
- Package: Transfer the mixture to the airtight jar. Seal it, and attach a tag with a use suggestion: “Add 1/2 cup to a warm bath and soak for 20 minutes.”
5. “Open When…” Letters
This is a deeply personal and heartfelt homemade gift that provides comfort or a laugh when the recipient needs it most. It is an investment of time, but the emotional return is priceless.
What You’ll Need:
- A stack of paper (colored or decorative if desired).
- A series of envelopes (at least eight, but the more the better).
- A nice pen.
- A decorative box or container to hold the finished letters.
How to Make It:
- Brainstorm Titles: Create a series of letter titles for different moods or occasions. The key is to make the titles specific and relevant to the recipient’s life. Examples include:
- “Open when you’re feeling lonely.”
- “Open when you need a laugh.”
- “Open when you’ve had a bad day.”
- “Open when you need to remember how far you’ve come.”
- “Open on a random Tuesday.”
- “Open when you’re celebrating a big win.”
- “Open when you miss me.”
- “Open when you need to know a secret.”
- Write the Letters: In each envelope, write a sincere, personalized letter.
- For the “lonely” letter, share a happy memory of the two of you and a list of things you love about them.
- For the “laugh” letter, write down a shared inside joke, a funny story, or simply draw a ridiculous doodle.
- For the “bad day” letter, include words of encouragement and a reminder of their strength.
- Add Small Items: You can add small, relevant items to the envelopes to enhance the experience:
- A teabag, hot chocolate packet, or a small piece of chocolate for the “Feeling blue” letter.
- A funny photo of you two for the “Need a laugh” letter.
- A piece of confetti or a cutout star for the “Celebrating a big win” letter.
- Finalize: Seal the letters and clearly write the “Open When…” title on the outside of each envelope. Place them all in a decorative box and present the gift with an explanation of how and when to use them.
6. A “Jar of Awesome”
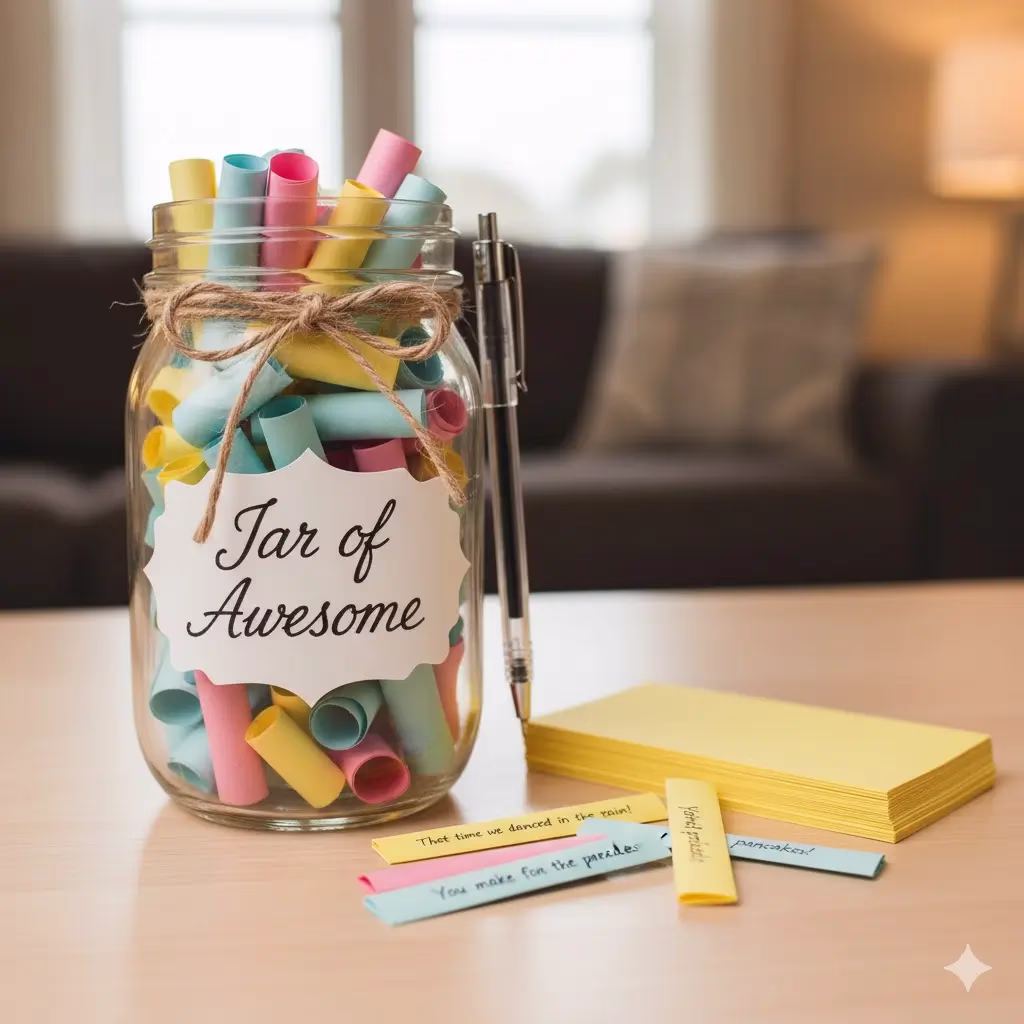
This simple, thoughtful homemade gift encourages gratitude and reflection by providing a collection of happy memories. It’s an instant mood-lifter and a powerful reminder of a relationship’s depth.
What You’ll Need:
- A clean, medium to large glass jar (a mason jar or a repurposed decorative jar works well).
- Small slips of colored paper or card stock.
- A fine-tipped pen.
- Optional: Ribbons, paint, or stickers for decoration.
How to Make It:
- Decorate the Jar: Clean the jar thoroughly. Decorate it with ribbons, paint, or a beautifully printed or handwritten label that says, “Jar of Awesome,” “Happy Moments,” or “Reasons to Smile.”
- Seed the Jar: The key to this gift is to get it started. On small slips of paper, write down your favorite memories, silly inside jokes, personal compliments, or moments of pride you’ve shared with the recipient. For example:
- “That time we got lost driving and found the best hidden diner.”
- “I love your laugh!”
- “Remember when you aced that presentation?”
- Include Blank Slips: Crucially, include a generous stack of blank slips of paper and a pen tied to the jar. This is so the recipient can add their own “awesome” moments—things they are proud of, funny things that happened, or moments of gratitude—throughout the year.
- Instructions: Provide instructions that the recipient should only open the jar on a bad day, or perhaps at the end of the year (New Year’s Eve) to reflect on all the good things that happened.
7. DIY Stovetop Potpourri Mix

Store-bought air fresheners can be overwhelming and artificial. A DIY stovetop potpourri mix, however, fills a home with a natural, gentle, and welcoming aroma that is instantly comforting. It is a fantastic homemade gift for a host, a neighbor, or a housewarming.
What You’ll Need:
- Container: Small, clear cellophane or glassine bags, or a decorative mason jar.
- Ingredients: Choose a theme:
- Winter/Holiday: Dried orange slices, cinnamon sticks, whole cloves, fresh rosemary.
- Autumn: Apple slices, vanilla bean, star anise, allspice berries.
- Spring/Summer: Lemon slices, vanilla extract, mint leaves.
How to Do It:
- Dry the fruit: Slice citrus fruits (oranges, lemons) thinly. Bake them on a low temperature (around 175∘F or 80∘C) for several hours until they are dry and firm, but not burnt. Alternatively, you can buy pre-dried slices.
- Measure and combine: Measure out the ingredients. A good starting point is 1/4 cup of cinnamon sticks/star anise, 1/2 cup of dried fruit slices, and 1 tablespoon of whole cloves or peppercorns.
- Package beautifully: Layer the ingredients in the cellophane bag or jar so the recipient can see the beautiful components.
- Add Instructions: Attach a tag with simple instructions: “Pour the contents into a small saucepan. Cover with 3 cups of water. Bring to a simmer, and let the gentle scent fill your home, adding more water as needed.”
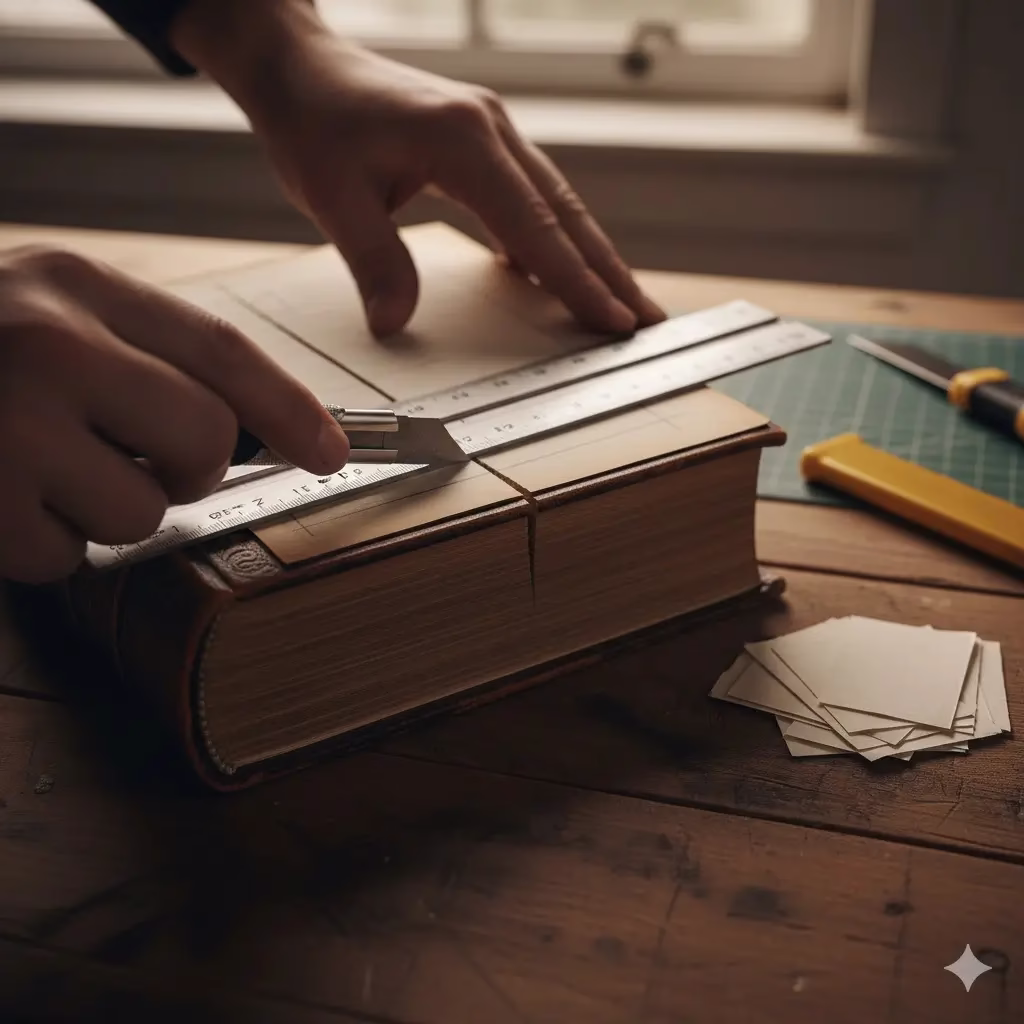
8. Recycled Book Knife Block

For the handy and design-conscious recipient, this is a unique, stylish, and incredibly clever gift. It takes an old, unwanted hardcover book and repurposes it into a functional and beautiful kitchen object, celebrating both cooking and literature. This is the most challenging of the eight projects, but the result is a truly impressive, one-of-a-kind piece.
What You’ll Need:
- A book: A large, thick hardcover book that is no longer wanted. A decorative, vintage cover is a bonus.
- Tools: A ruler, a pencil, a rotary cutter or sharp utility knife, and a cutting mat.
- Hardware: A small rubber-band clamp or c-clamp, and two bolts, washers, and wing nuts to bind the book (optional, but recommended).
- Filling: Wooden skewers or bamboo chopsticks, about the length of the book’s spine.
How to Do It:
- Hollow the book (The “Block”):
- Open the book to the title page. Using a ruler, measure a 1-inch (2.5cm) border from the outer edge of the page.
- Use the pencil to mark the cutting lines. This border will hold the structure together.
- Carefully use the rotary cutter or utility knife to cut through the pages along your lines. This requires patience and many passes—cut about 20−30 pages at a time to keep the cut clean. You are hollowing out a rectangular space in the center of the book’s pages, leaving the cover and the small border intact.
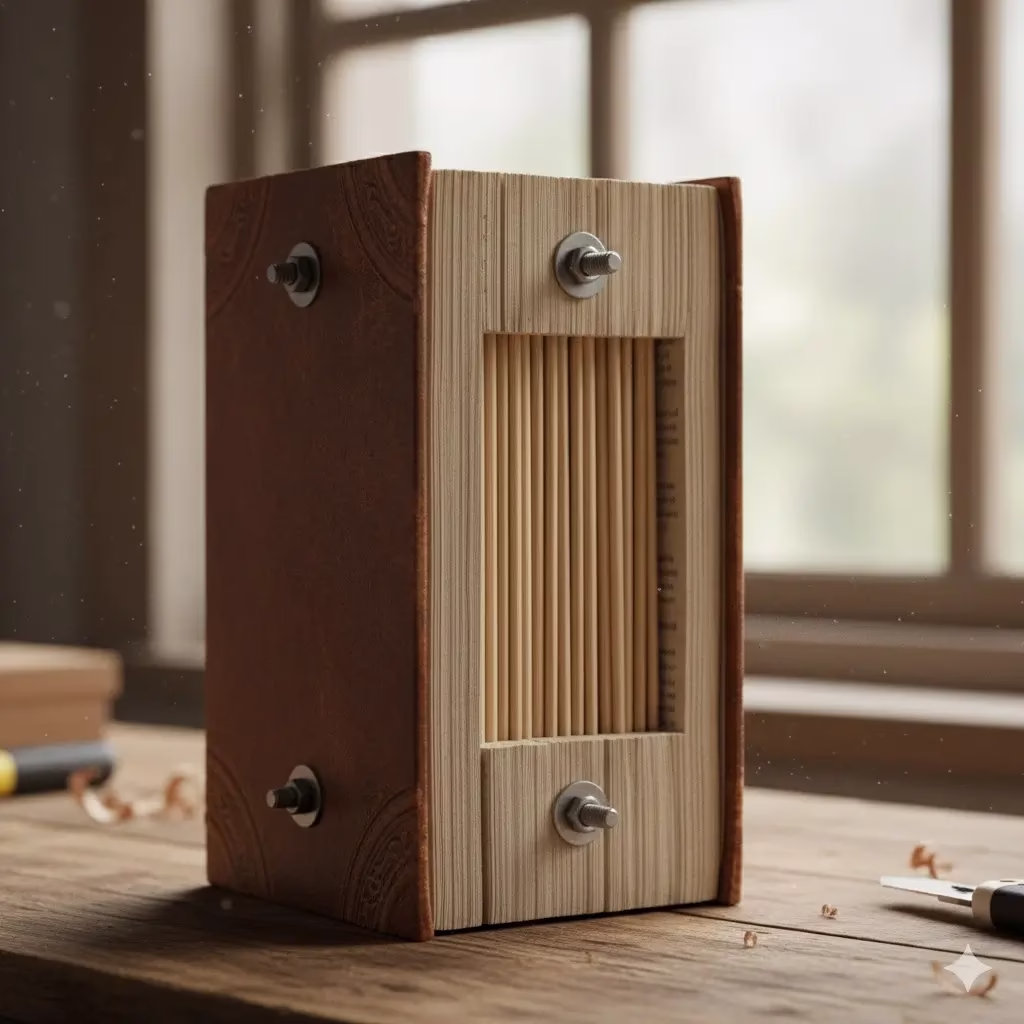
- Bind the pages: Once the center is hollowed, apply a strong craft glue to the inside edges of the border you left. Clamp the book shut and let it dry overnight. This fuses the pages together, turning them into a solid block.
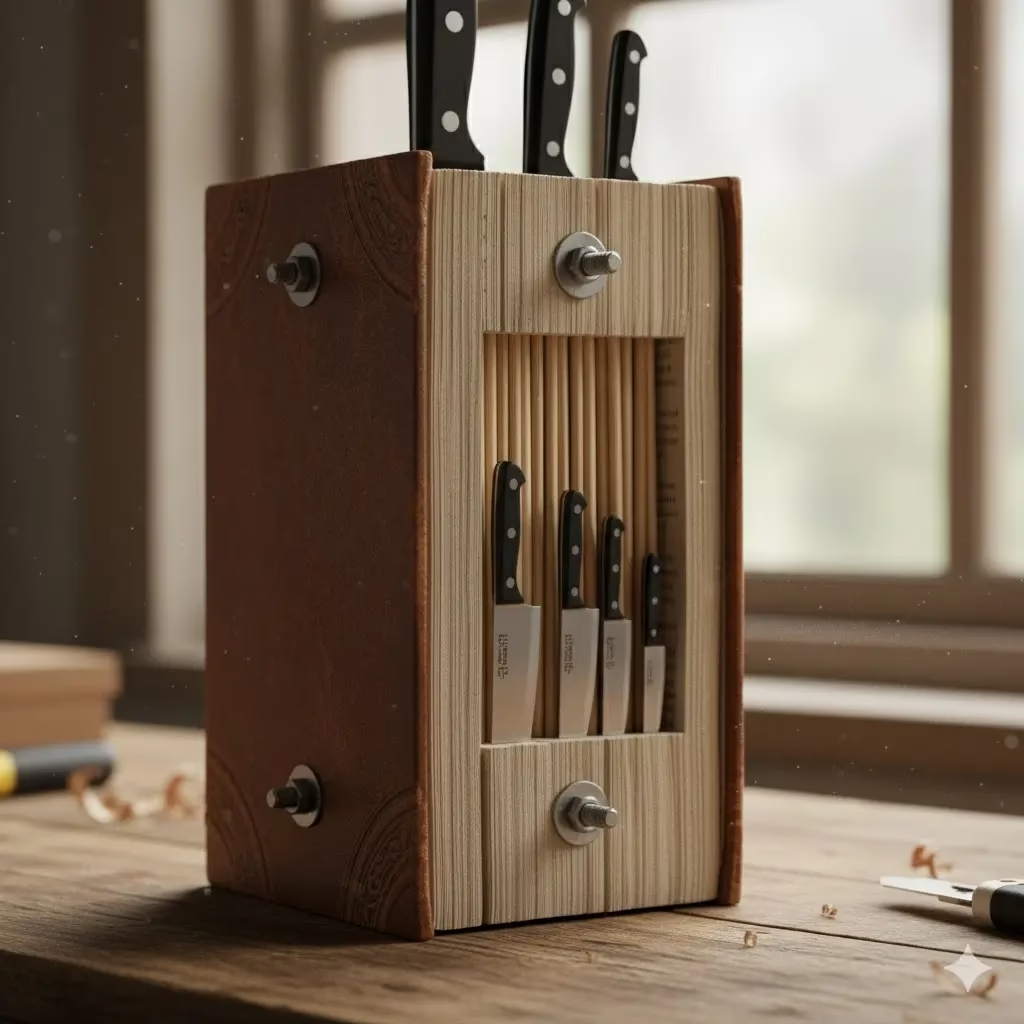
- Add the skewers: The bamboo skewers or chopsticks are what hold the knives upright. Cut them to size so they fit neatly inside the hollowed-out area, standing upright. Pack them in tightly.
- Final Polish: Optionally, you can drill two small holes near the spine (top and bottom) and thread a bolt through, securing it with a washer and wing nut. This adds a nice industrial look and provides extra structural integrity. Present the knife block with a clean, sharp knife inside to demonstrate its use.
The Joy of the Homemade Gift
The true power of homemade gifts lies in the story they tell. They say, “I spent time, not just money.” By choosing one of these eight projects—from the culinary delight of vanilla extract to the deep emotional connection of the “Open When…” letters—you are giving something infinitely more valuable than a store-bought item. You are gifting an experience, a memory, and a piece of yourself, ensuring that the instant joy you feel creating the gift is multiplied when your loved one receives it. So grab your supplies, put on some music, and start crafting a little happiness today.
Frequently Asked Questions (FAQ)
Q: How far in advance do I need to start making these homemade gifts?
A: Most of the gifts are quick, requiring only an hour or two of active time (e.g., bath salts, spice blends). However, some require significant lead time:
- Homemade Vanilla Extract: Needs at least 8 weeks to infuse, but 6-12 months is ideal. Start this one a year in advance!
- Infused Oils/Vinegars: Needs 1-2 weeks to infuse fully.
- “Open When…” Letters: The writing process is time-consuming and can take several hours, depending on how many letters you choose to write.
Q: Are homemade gifts suitable for professional colleagues or bosses?
A: Yes, absolutely, provided you choose an appropriate item. Culinary gifts like Infused oils or vinegars and the DIY stovetop potpourri mix are excellent, universally appreciated, and professional choices. Avoid highly personal gifts like the “Open When…” letters or the “Jar of Awesome,” which are better suited for close friends and family.
Q: What is the shelf life of the infused oils and vinegars?
A: Infused vinegars have a very long shelf life, often many months, as the acid acts as a preservative. Infused oils are slightly trickier. To avoid the risk of botulism, it is crucial that the fresh ingredients (like garlic or herbs) are completely strained out after 5-7 days of infusion. If fresh ingredients remain, the oil should be stored in the refrigerator and consumed within 2-3 weeks. For extended shelf life without refrigeration, use only dried herbs, spices, and dried citrus zest.
Q: How can I make a homemade gift look more professional?
A: Presentation is key for any homemade gift. Invest in high-quality, matching containers (clear glass jars for visibility), use printed or professionally designed labels instead of hasty handwritten tags, and use ribbon, twine, or wax seals to add a finishing touch. The extra effort in presentation elevates the gift from a craft project to a treasured item.
Q: I’m not a great cook. Can I still make the spice blend or vanilla extract?
A: Definitely! The spice blend simply requires measuring and layering—no actual cooking skills are needed. Homemade vanilla extract only requires pouring and waiting. The process is almost entirely hands-off. Don’t let a lack of cooking confidence deter you from these simple, high-impact culinary homemade gifts.
Reference Section
- Extension – How to Safely Make Infused Oils
- Parisianspure – Infused Oils Benefits And Warnings
- UCLAhealth – Health benefits of gratitude
Recent Posts