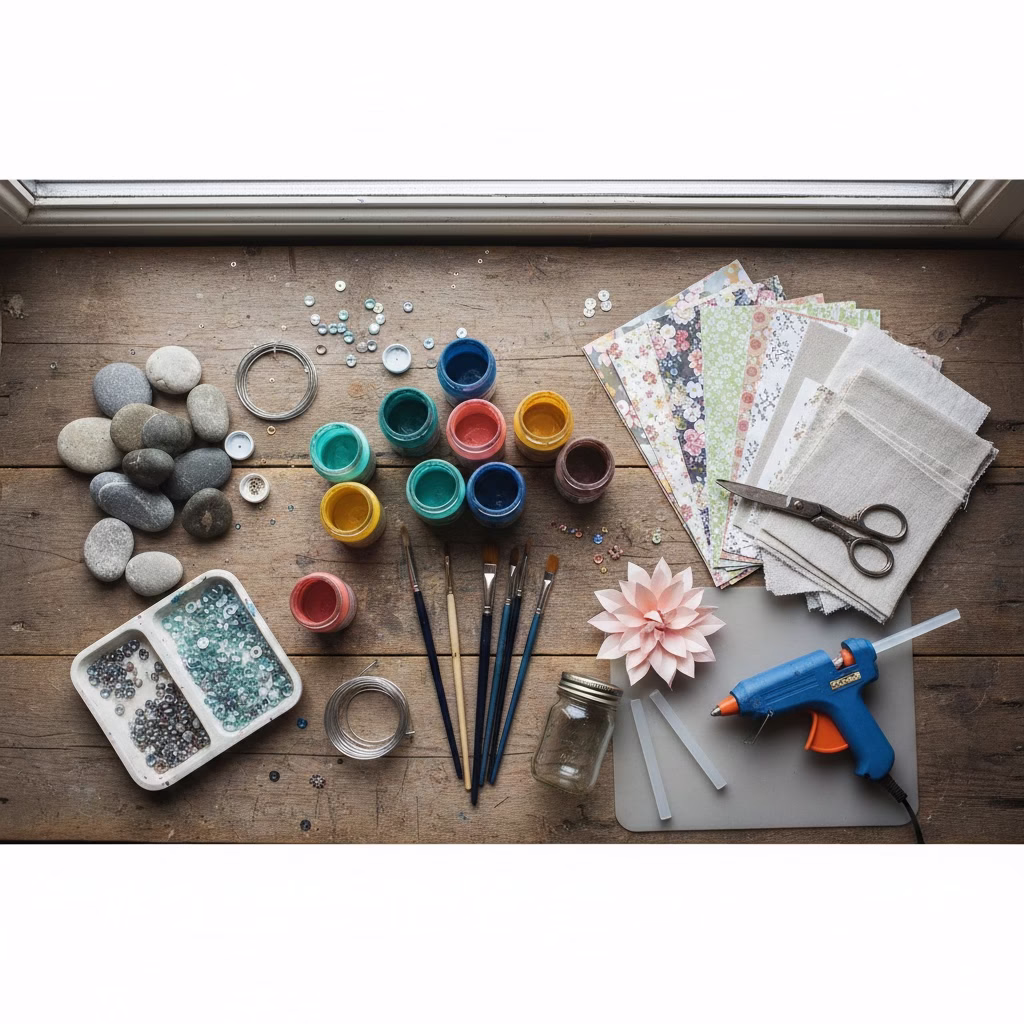
This guide is here to help you find joy in making things. We know that working with your hands is a great way to relax and feel good. We want to show you that you do not need lots of money or training to be creative. These ideas use items you likely have at home or can buy cheaply. We hope you enjoy these fun and easy Crafts For Adults.
Introduction: Why You Should Start Crafting Today
Life can be very busy. We rush from work to chores and often forget to take a break. It can be hard to find time for yourself. But did you know that making things with your hands can help you feel better? It is true. Crafting allows your mind to rest. It helps you focus on just one thing at a time. This can lower your stress. It can also make you feel proud when you finish a project.
You do not need to be a professional artist. And you do not need a big studio. You also do not need expensive tools. The best crafts are often the simplest ones. You can use things you already have in your house. You can also find great supplies at low prices. Many people love dollar tree crafts because they are cheap and fun.
This article lists ten easy craft ideas for adults. You can start any of these projects right now. We have chosen crafts that are quick to learn. They are perfect for beginners. You can do them alone to relax. Or, you can do them with friends for a fun night in. We will guide you through each step. And tell you what you need. We will also give you tips to make your project look great.
So, clear off your table. Put on some good music. Get ready to make something beautiful. Let’s get started.
1. Painted Rocks: Small Art for Everyone

This is one of the easiest ways to start being creative. Painted rocks are very popular right now. You might have seen them in parks or gardens. People call them “Kindness Rocks.” The idea is simple. You find a rock, paint it, and leave it for someone else to find. It spreads joy. But you can also keep them. They look great in your own garden or on your desk.
Why You Will Love It:
It is free to find rocks. The painting part is very relaxing. You can paint anything you want. It does not have to be perfect. Even simple dots look amazing.
What You Need:
- Smooth rocks. Look for river stones or beach pebbles.
- Acrylic paint. This paint covers well and dries fast.
- Paintbrushes. You need a mix of sizes. Small ones are good for details.
- Clear sealer. This protects the paint from rain.
How to Do It:
First, you must clean your rocks. Wash them with soap and warm water. Scrub off any dirt. Let them dry completely. The paint will stick better to a clean, dry rock.
Next, paint a base coat. This is the background color. You might paint the whole rock white, black, or blue. Let this layer dry. Now comes the fun part. Add your design. You can paint a ladybug or a flower. You can write a happy word like “Hope” or “Love.” If you are not good at drawing, just use dots. Dip the back of your paintbrush in paint. Press it on the rock. It makes a perfect circle.
Finally, protect your art. Wait until the paint is totally dry. Then, add a clear sealer. You can brush it on or spray it on. This keeps the colors bright.
2. Paper Flowers: Blooms That Last Forever

Fresh flowers are beautiful, but they die quickly. Paper flowers last for a long time. You can make a whole bouquet that never wilts. This is a great skill to learn. You can use these flowers to decorate gifts. You can also put them in a vase for your home. It is a very cheap craft to try.
Why You Will Love It:
You only need paper and glue. It is very clean work. You can do this while watching TV. It is also very fast. You can make a flower in just a few minutes.
What You Need:
- Colorful paper. Construction paper or crepe paper works well.
- Scissors. Make sure they are sharp.
- Glue. A glue stick or hot glue gun is best.
- Green wire or sticks. These are for the stems.
How to Do It:
Start with a simple rose. Cut a circle out of red or pink paper. It does not need to be a perfect circle. Now, cut a spiral into the circle. Start at the outside edge. Cut round and round until you get to the center. You will have a long strip that looks like a spring.
Now, roll it up. Start at the outside end of the spiral. Roll the paper tightly. Keep rolling until you reach the center of the circle. Let the roll loosen up a little bit. It will start to look like a flower. Put a drop of glue on the center tab at the bottom. Press the rolled paper onto the glue. Hold it for a minute.
You can make leaves out of green paper. Glue them to the bottom of the flower. If you want a stem, glue the wire to the bottom. Make five or six of these for a pretty bunch.
3. Decoupage Jars or Vases: New Life for Old Glass
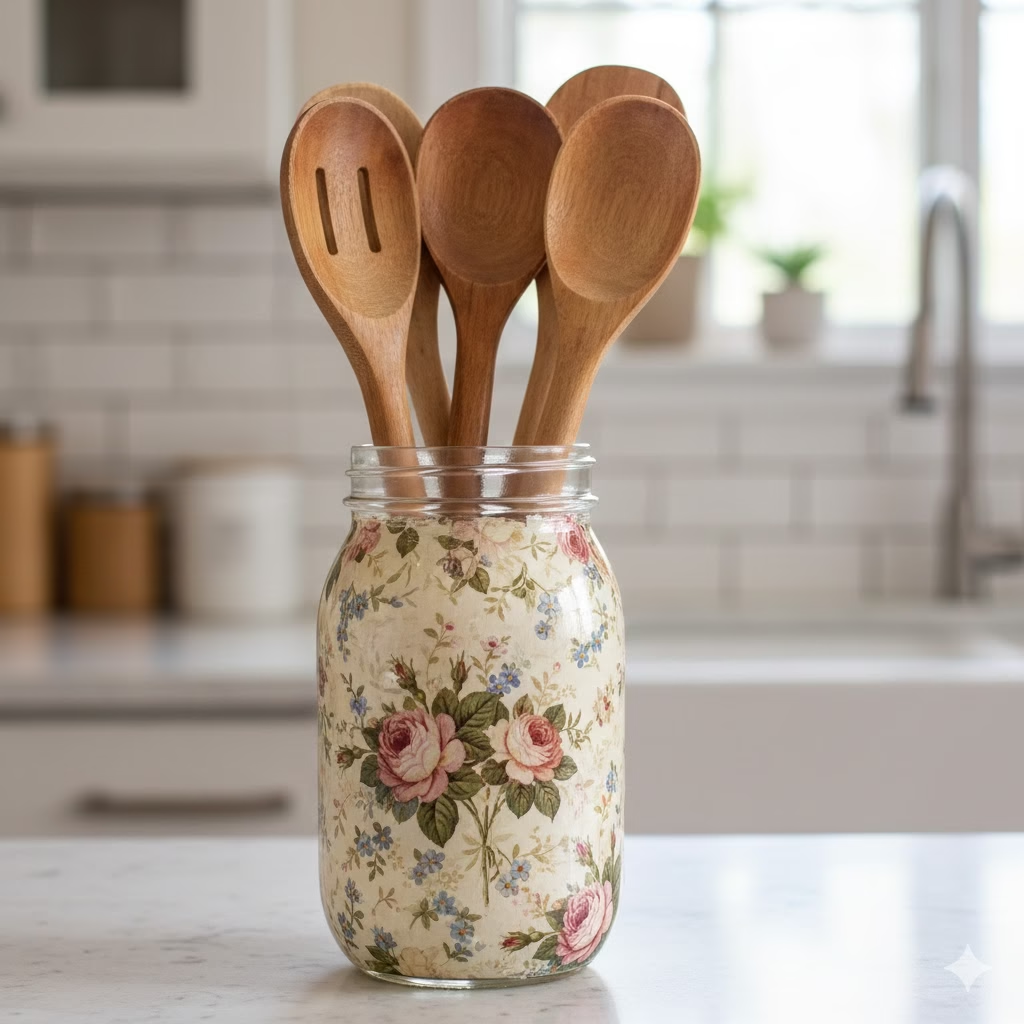
Decoupage is a fancy word for a simple technique. It just means gluing paper onto an object. This is a perfect way to recycle. You can save empty pickle jars or sauce jars. With a little paper, you can turn them into beautiful vases or pencil holders. This is one of the best dollar tree crafts because you can buy glass vases for one dollar.
Why You Will Love It:
It is very easy to fix mistakes. If you put the paper in the wrong spot, just move it. The glue dries clear, so it is very forgiving.
What You Need:
- Clean glass jars or vases. Remove all the labels first.
- Decorative paper. You can use tissue paper, napkins, or magazines.
- Mod Podge. This is a special glue and sealer in one.
- A foam brush.
How to Do It:
First, clean your jar very well. Use rubbing alcohol to remove any grease. Next, prepare your paper. You can cut it into shapes. Or, you can rip it into small pieces. Ripped edges look very cool and artistic.
Dip your brush into the Mod Podge. Paint a thin layer onto the glass. Place a piece of paper on the wet glue. Paint more Mod Podge over the top of the paper. Use your brush to smooth it out. You want to get rid of any air bubbles.
Keep adding paper pieces. Overlap them slightly. Cover the whole jar. Or, you can just make a design in the center. When you are done, paint one last coat of Mod Podge over everything. It will look white at first. Do not worry. It dries clear and shiny. Let it dry overnight.
4. Friendship Bracelets: Fun with Knots
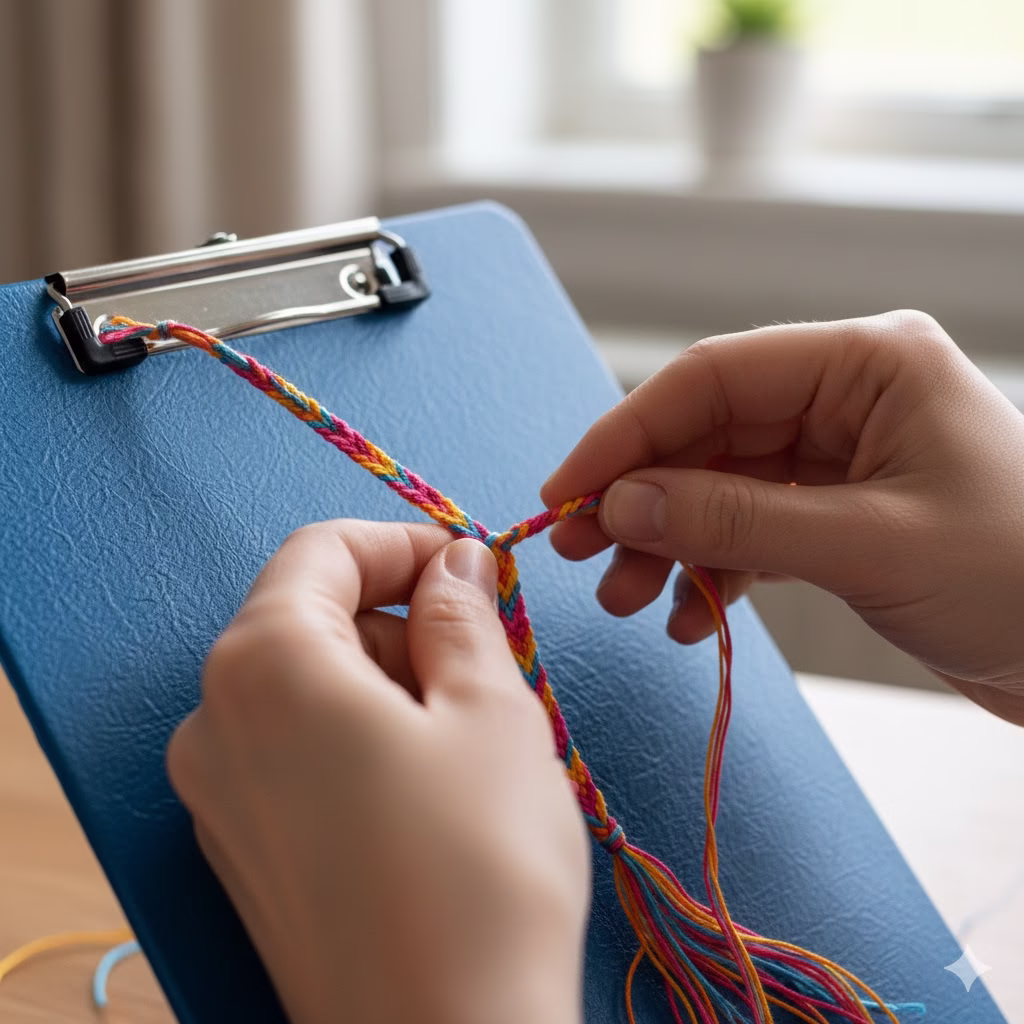
Do you remember making bracelets at summer camp? This craft is just as fun for adults. It is very nostalgic. Weaving the string is a repetitive motion. This helps your brain relax. It is like meditation. These bracelets make wonderful gifts for your friends.
Why You Will Love It:
The supplies are very small. You can carry them in your bag. You can make bracelets on the bus or in a waiting room. It is a great way to pass the time.
What You Need:
- Embroidery floss. This comes in every color you can imagine.
- Tape or a safety pin. This holds the bracelet while you work.
- Scissors.
How to Do It:
Pick three or four colors of thread. Cut them about an arm’s length. Tie all the strings together in a knot at one end. Tape this knot to a table or your jeans. This keeps it steady.
Separate the strings. Take the string on the far left. Cross it over the string next to it to make a number “4” shape. Loop the tail under and pull it tight. This is your first knot. Do this twice on each string. Work your way across the row.
Then start again with the new string on the left. Keep going until the bracelet is long enough for your wrist. Tie a knot at the end. You can braid the loose ends to make ties. There are many patterns to learn, but simple stripes are the best place to start.
5. DIY Magnets: Useful Art
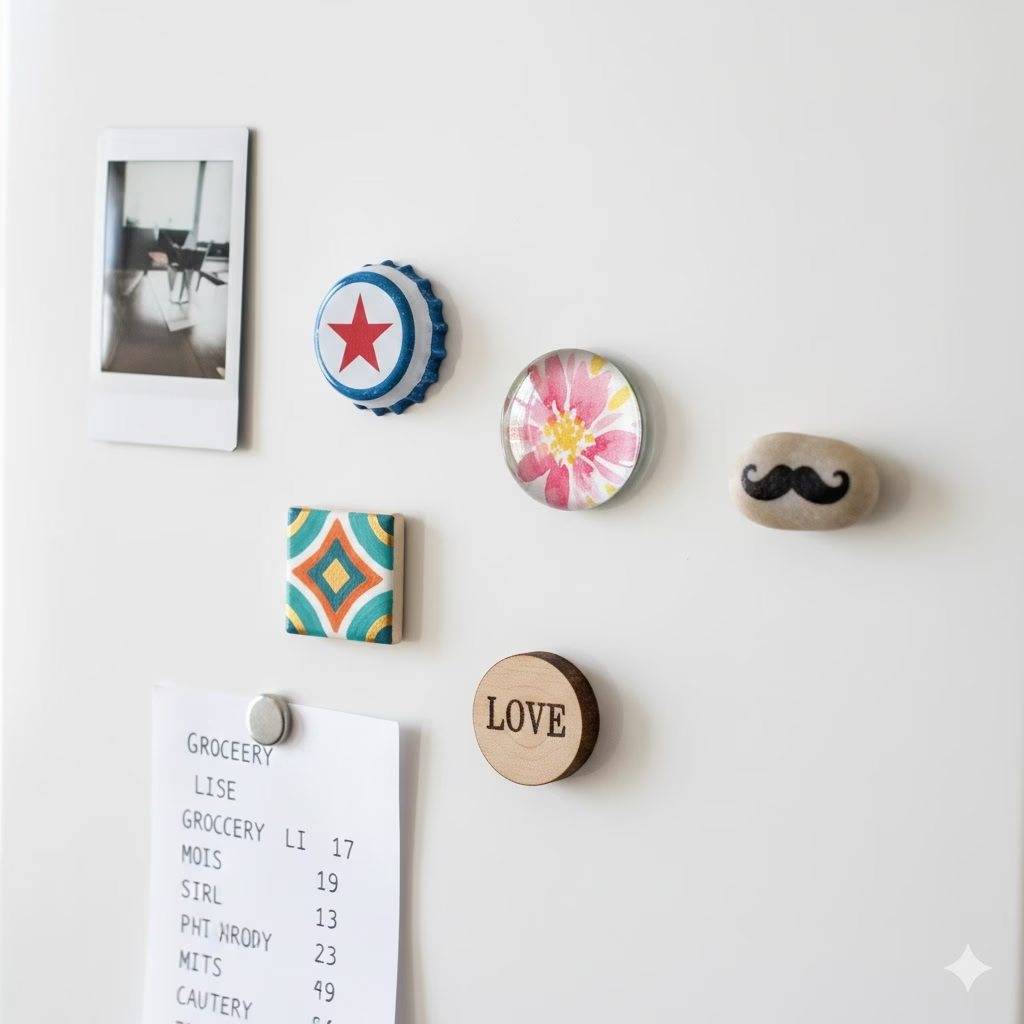
Everyone uses magnets. We put them on the fridge to hold photos or lists. Why use boring gray magnets? You can make custom ones that match your style. This project is super fast. It is also a great way to use up small scraps of paper or fabric.
Why You Will Love It:
These are very useful. You will use them every day. They also make cute little gifts. You can make a set of four in less than 30 minutes.
What You Need:
- Strong magnets. You can buy these at a craft store.
- Strong glue. Super glue or E6000 works best.
- Items to decorate. Try bottle caps, flat glass gems, or wood shapes.
How to Do It:
Let’s make glass gem magnets. These are very popular Crafts For Adults. You need clear, flat glass marbles. You can find these in the floral section of a dollar store.
First, find a picture you like. It could be from a magazine or a photo. It needs to be small. Place the glass gem over the picture. Trace around the gem with a pencil. Cut out the circle of paper.
Put a little clear glue on the front of the picture. Press it onto the flat back of the glass gem. The image will show through the glass. It acts like a magnifying glass. Let it dry. Then, glue the magnet to the back of the paper. Wait for the glue to set completely. Now it is ready for your fridge.
6. Pressed Flower Art: Nature on Display
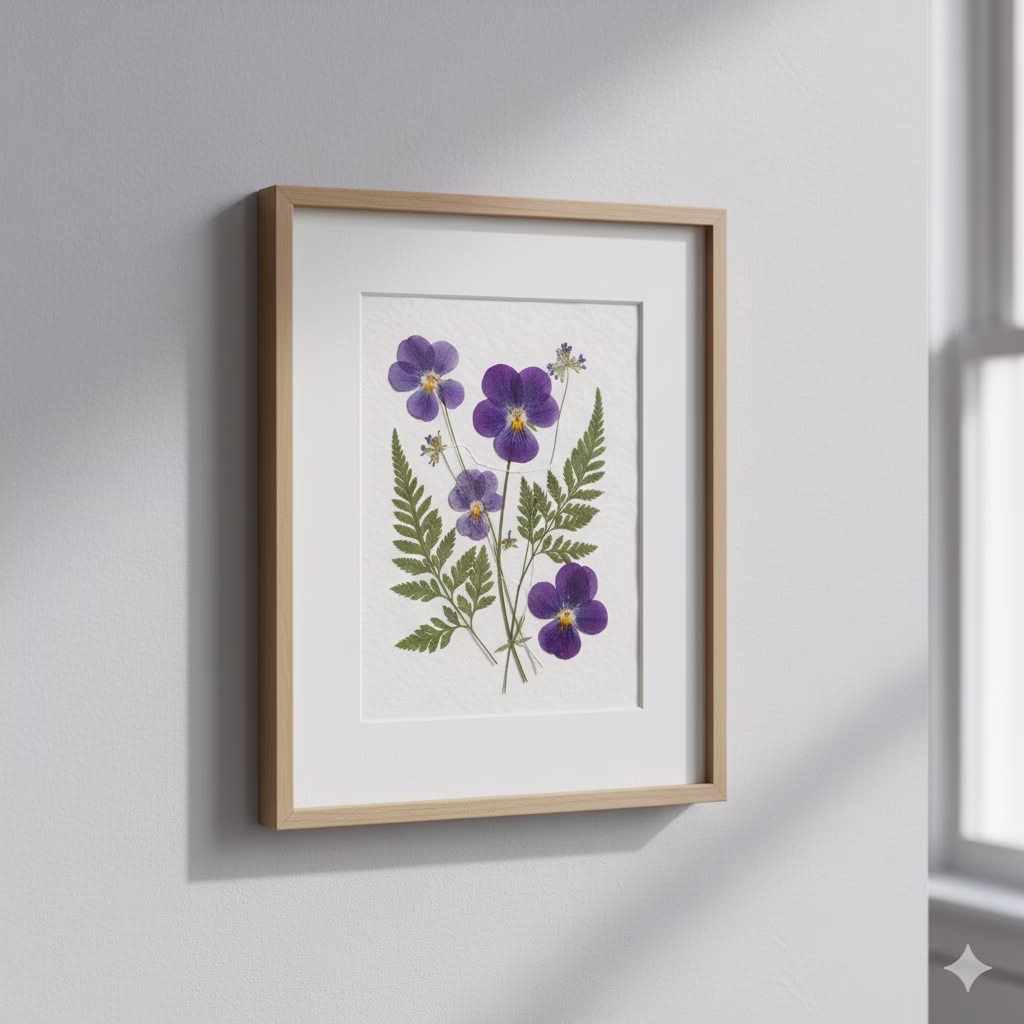
Flowers are lovely, but they fade. Pressing them keeps their beauty forever. You can turn them into wall art. This craft connects you with nature. It encourages you to go outside and look for pretty leaves and blooms.
Why You Will Love It:
It is slow and peaceful. Arranging the dried flowers is like doing a puzzle. The result is always elegant.
What You Need:
- Dried flowers. You can buy them or press your own in a heavy book.
- Cardstock paper or a blank canvas.
- White liquid glue.
- Tweezers.
How to Do It:
If you want to press your own flowers, pick them on a dry day. Place them between two sheets of plain paper. Put them inside a big, heavy book. Wait for two weeks. They will become flat and dry.
Now, take your paper or canvas. Lay out your dry flowers. Do not glue them yet. Play with the design. Maybe you want a circle shape. Maybe you want them to look like a meadow. Move them around until you are happy.
Pick up a flower with your tweezers. Put a tiny dot of glue on the back. You do not need much. Place it gently on the paper. Press down lightly. Do this for all the flowers. Let the glue dry. You can put your art in a frame to protect it.
7. Handmade Paper Beads: Jewelry from Trash
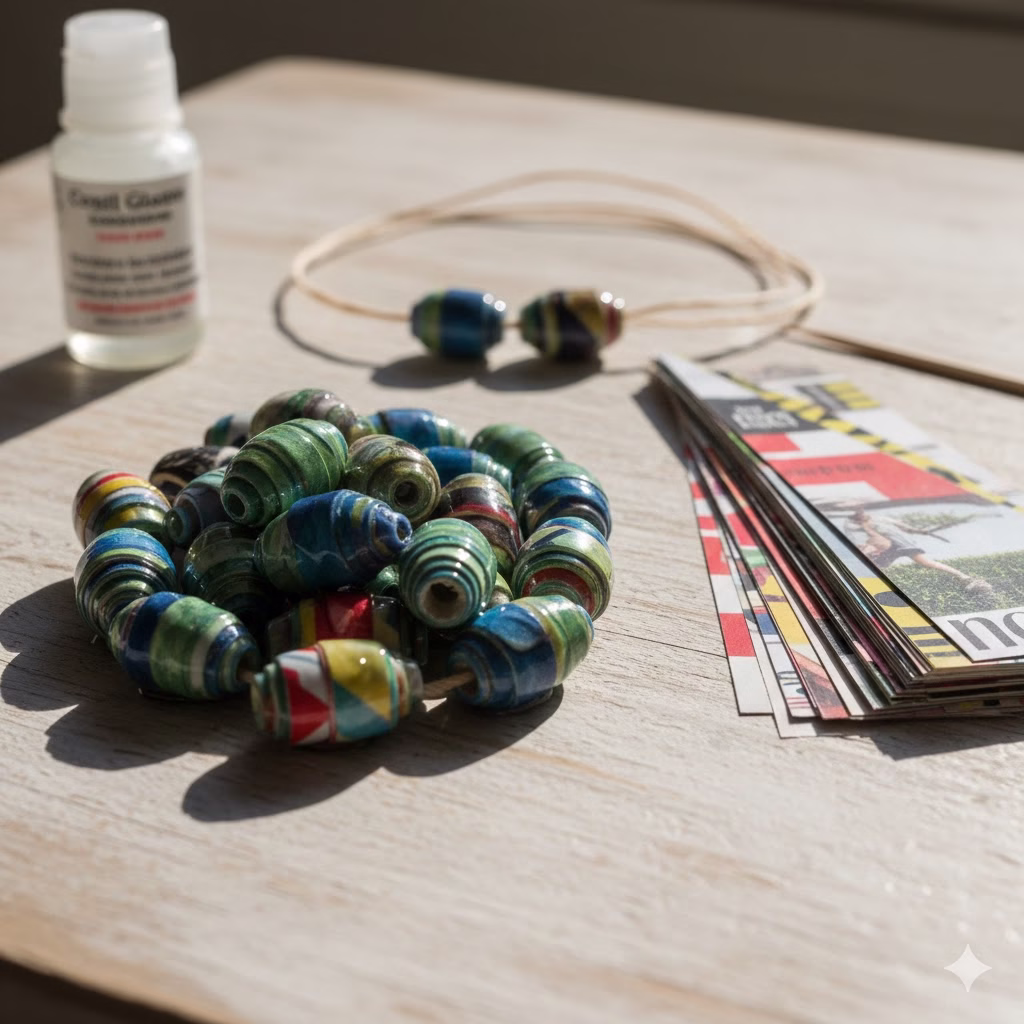
You can make beads out of paper. It sounds strange, but it works. They become hard and shiny. You can use old junk mail, newspapers, or magazines. This is very good for the planet because you are reusing waste. It is one of the most creative craft ideas for adults.
Why You Will Love It:
It is magical to watch a strip of paper turn into a bead. You can make custom colors. It costs almost nothing to make.
What You Need:
- Paper. Glossy magazine pages are great.
- A ruler and pencil.
- Toothpicks.
- Glue stick.
- Clear nail polish.
How to Do It:
You need to cut the paper into long triangles. The base of the triangle should be about one inch wide. The tip should be very pointy. The strip should be long, maybe 10 inches.
Take a toothpick. Place the wide end of the paper strip against the toothpick. Start rolling the paper around the toothpick. Roll it very tight. Keep it centered. As you roll, the paper will get narrower.
When you get to the tip, add a dab of glue. Press the tip down to seal the bead. It should look like an oval shape. Leave the bead on the toothpick. Paint over the bead with clear nail polish. This makes it shiny and hard. It also protects it from water. Once it is dry, slide it off the toothpick. You can now string it onto a necklace.
8. No-Sew Fabric Coasters: Easy Home Decor
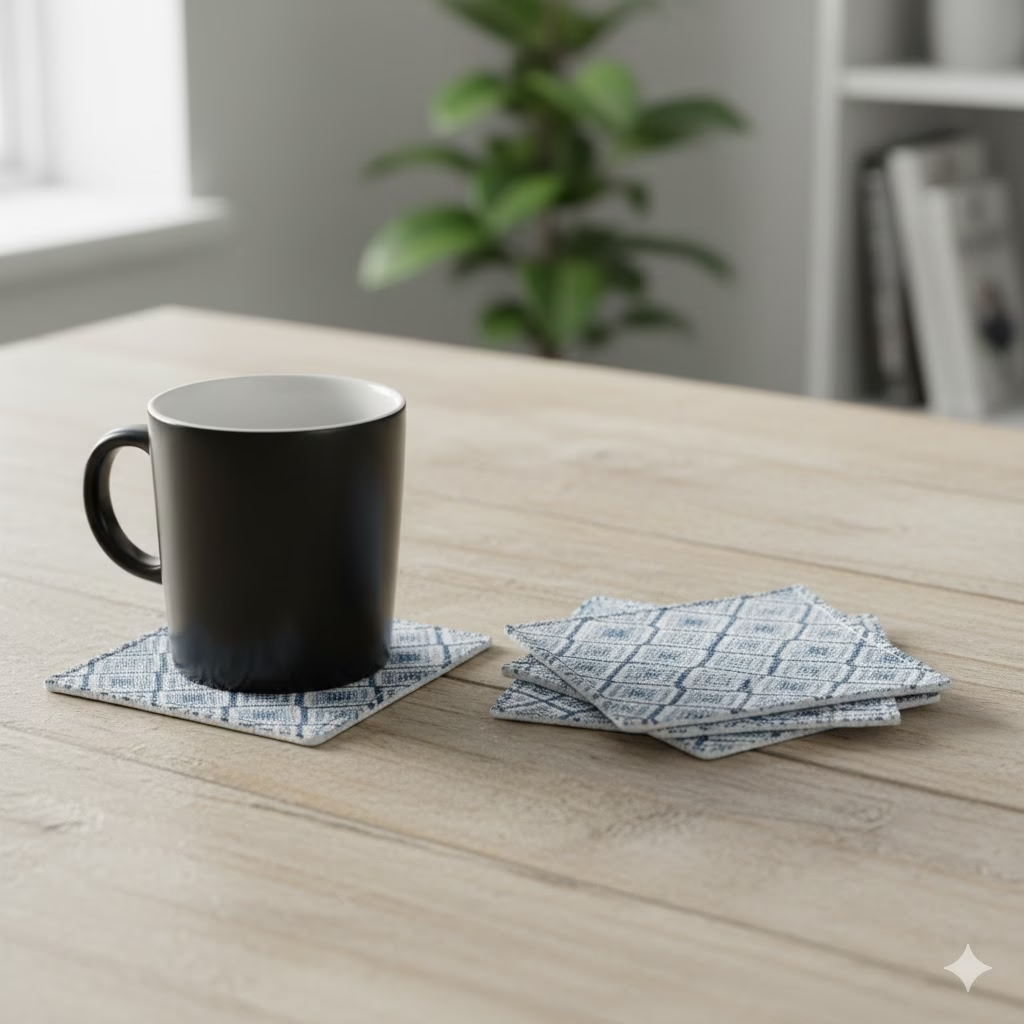
Fabric coasters protect your tables. They also add color to your room. Usually, you need to sew them. But there is a trick. You can use a special glue that melts with an iron. This makes the project very fast and easy.
Why You Will Love It:
You do not need a sewing machine. You do not need a needle and thread. It is a great way to use up small scraps of fabric.
What You Need:
- Cotton fabric. Pick two patterns that look good together.
- Fusible interfacing. This is the “glue” sheet. You can buy it at fabric stores.
- An iron.
- Scissors.
How to Do It:
Cut two squares of fabric. They should be about 4 inches by 4 inches. Cut a square of the interfacing the same size. The interfacing feels like paper, but one side is rough. That is the glue side.
Sandwich the layers. Put one piece of fabric face down. And the interfacing on top, with the rough side down. Put the second piece of fabric on top, face up.
Heat up your iron. Press the iron onto your fabric sandwich. Hold it for about 10 seconds. The heat melts the glue inside. It sticks the two pieces of fabric together. Now you have a stiff, sturdy square. You can trim the edges with zigzag scissors if you want. That’s it!
9. Custom Painted Doormat: A Warm Welcome
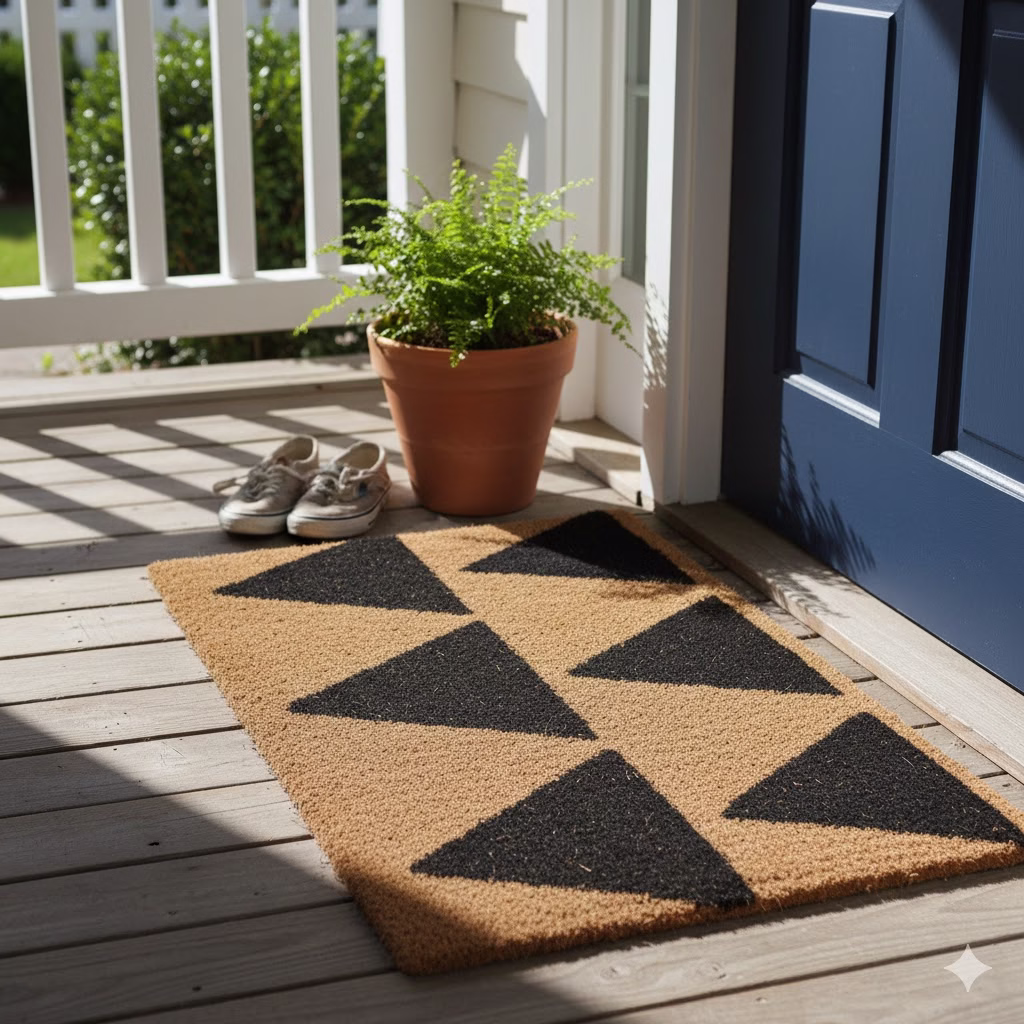
The front door is the first thing people see. You can make it look welcoming with a custom mat. Plain mats are cheap. You can find them at hardware stores. With a little paint, you can make it look like a designer piece.
Why You Will Love It:
It makes a big impact. And is very satisfying to peel off the tape and see your design. It is a fun outdoor project.
What You Need:
- A plain coir doormat. This is the brown, rough kind.
- Outdoor acrylic paint. Black is a good color to start with.
- Masking tape or a stencil.
- A stiff paintbrush.
How to Do It:
Decide on a design. Geometric shapes are easy. You can use masking tape to make stripes or triangles. Press the tape down really hard. You want it to stick to the rough fibers.
Dip your brush in the paint. Do not use too much paint at once. Dab the paint onto the mat. Do not brush it side to side. Push the paint down into the mat. This is called stippling. It helps you get sharp lines.
Cover all the open areas with paint. You might need two coats. When you are done, peel off the tape slowly. This is the best part. You will see your crisp, clean lines. Let the mat dry outside for a full day before you step on it.
10. Beaded Accessories: Style Your Way
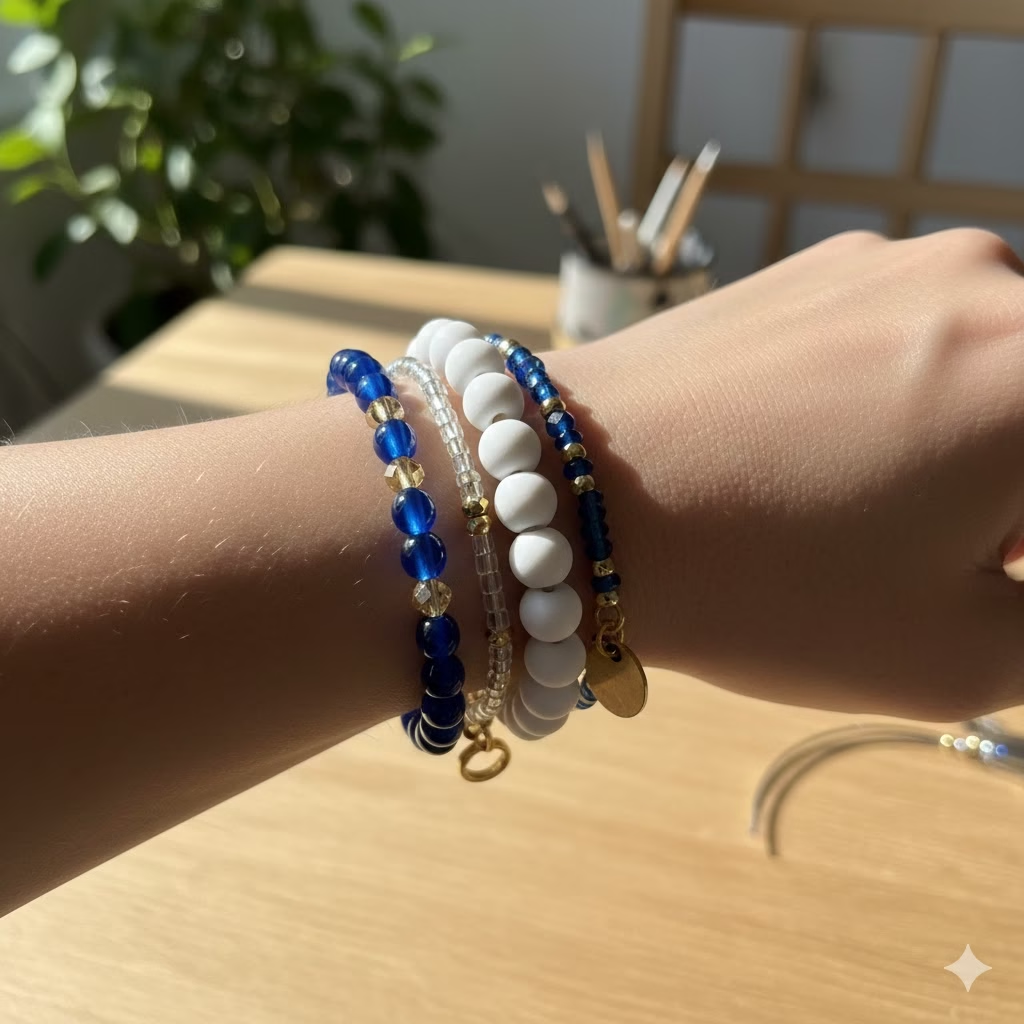
Making jewelry is a classic craft. It is one of the best Crafts For Adults because the results are wearable. You can make bracelets, anklets, or chains for your glasses. Beading is simple but requires focus. It is very calming.
Why You Will Love It:
You can match your jewelry to your outfits. It is much cheaper than buying jewelry at the store. The design options are endless.
What You Need:
- Beads. You can use glass, wood, or plastic beads.
- Elastic cord. This is stretchy and easy to use.
- Scissors.
- Super glue.
How to Do It:
First, plan your design. Lay your beads out on a towel. The towel stops them from rolling away. You can do a pattern like “blue, white, blue, white.” Or you can do a random mix.
Cut a piece of elastic cord. Make it a little longer than your wrist. Put a piece of tape on one end. This stops the beads from falling off.
Start threading the beads onto the cord. Keep going until it is the right length. Wrap it around your wrist to check. When it fits, tie the two ends together. Use a strong knot. Tie it two or three times. Put a tiny drop of super glue on the knot. This ensures it will never come undone. Trim the extra string. Now wear your new bracelet with pride.
Conclusion: Time to Start Creating
We hope this list has inspired you. Crafting is not just about making things. It is about taking time for yourself. It is about clearing your mind. The ten projects listed here are simple steps into the world of making.
Remember, the goal is to have fun. Do not worry if your first try is not perfect. Enjoy the process. Feel the texture of the paper. Watch the colors of the paint mix. These simple moments bring calm to a busy day.
Whether you choose dollar tree crafts to save money or spend time making a special gift, you are doing something good for your soul. Pick one project from this list. Gather your supplies. Start crafting right now. You might be surprised at what you can create.
External References
- Macrame for beginners – Macrame for Beginners
- The social easel – Mixed Media Heart
- Create to donate – 29 Easy Paper Flower Tutorials To DIY
Recent Posts