To successfully create dried orange slices, mastering the process of oven-drying orange slices is the secret to finding the perfect balance between heat and airflow. If the temperature is too high, the natural sugars in the fruit will caramelize and burn, leaving you with brown, bitter circles. If the temperature is too low, the process takes an eternity, and you risk the fruit molding before it dries.
Using an oven is a fantastic zero waste way to preserve citrus without needing a specialized dehydrator. By following these precise temperature guidelines and techniques, you can ensure your slices retain their vibrant color and potent aroma.
Finding the Sweet Spot: Temperature Settings
The goal of drying fruit is evaporation, not cooking. For the best results, you want to keep your oven at the lowest possible setting.
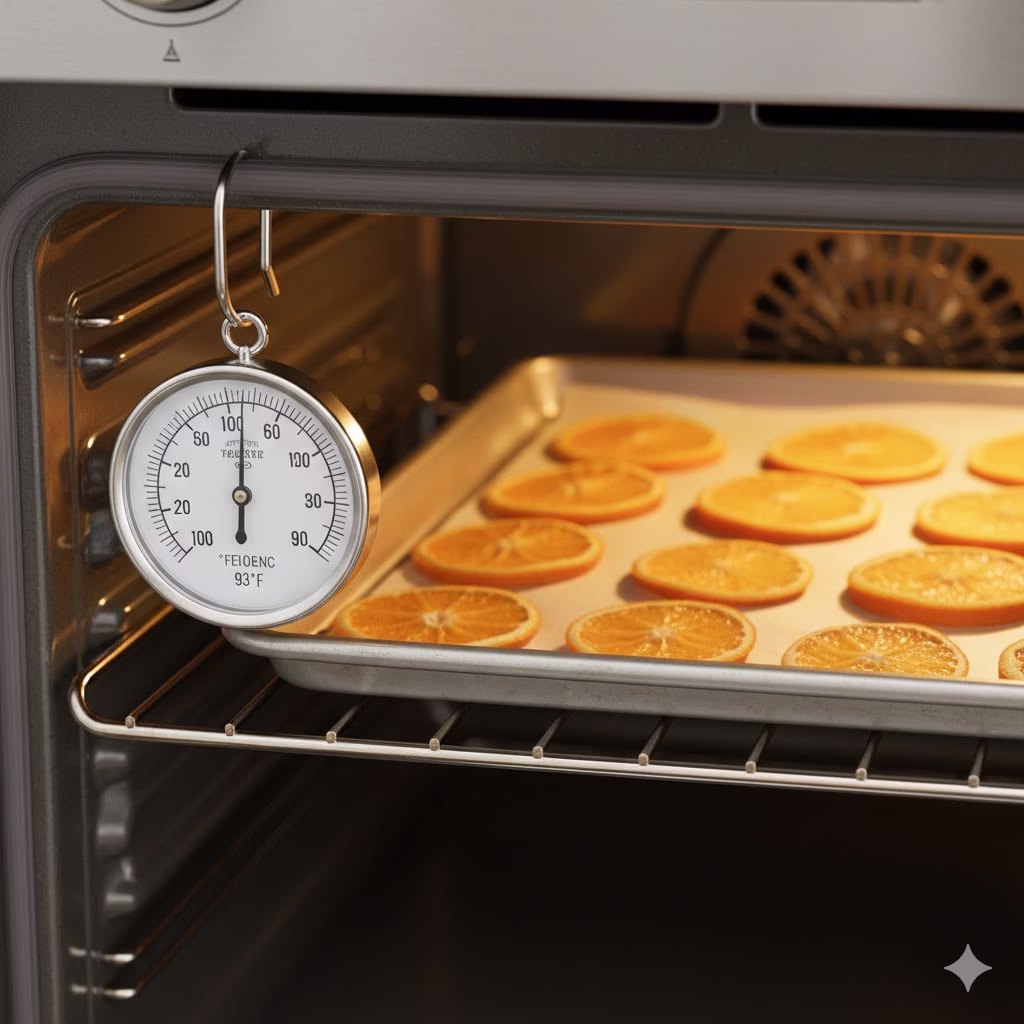
- The Ideal Range: 170°F to 200°F (75°C to 95°C).
- The “Low and Slow” Rule: If your oven has a “warm” setting that sits around 150°F (65°C), this is actually the gold standard. It will take longer (anywhere from 4 to 6 hours), but the color of the Dried Orange Slices will remain bright and translucent rather than turning a muddy copper.
- Convection Settings: If your oven has a “Convection” or “Fan Forced” mode, use it. The moving air speeds up the evaporation process significantly and helps prevent “hot spots” that can scorch individual slices.
Step-by-Step Oven Preparation

To achieve the best results for your Food Ideas, preparation is just as important as the temperature.
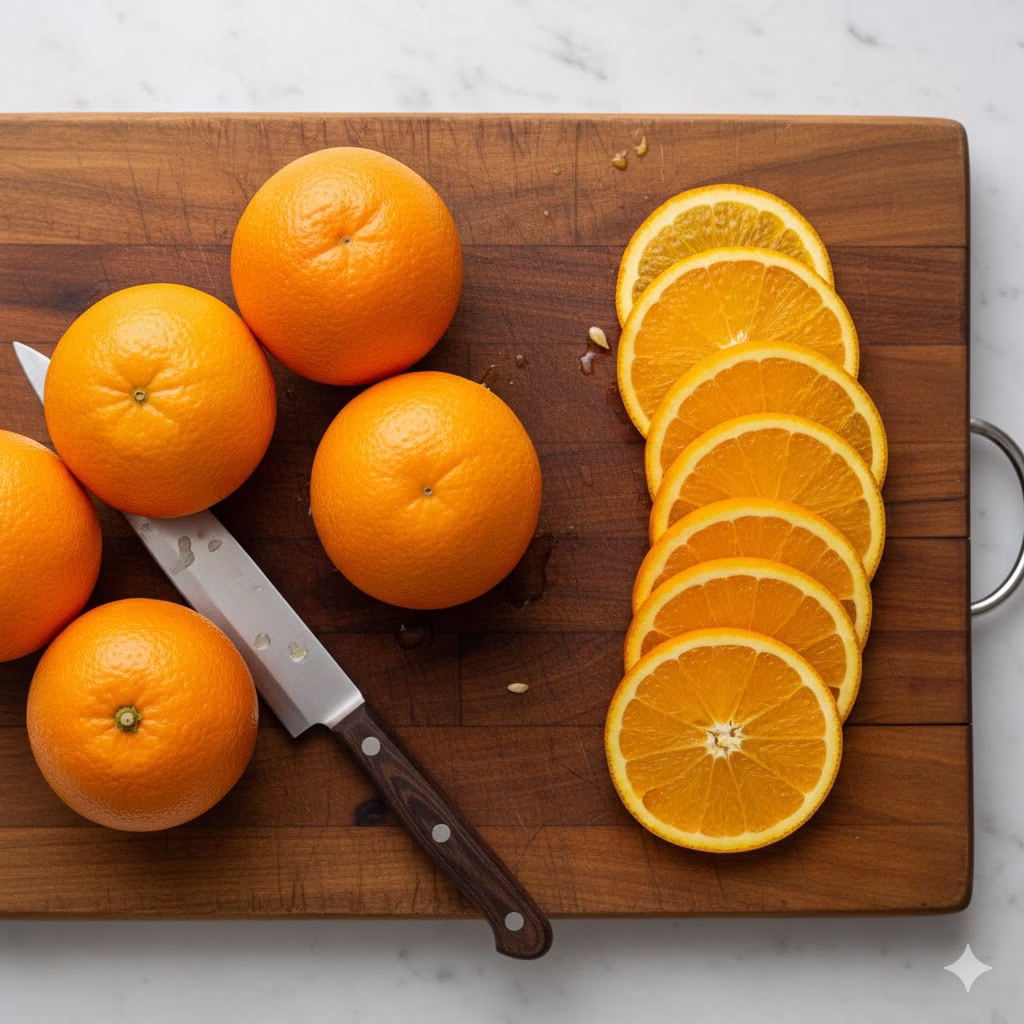
- Uniform Slicing: Use a mandoline or a very sharp serrated knife to cut slices between 1/8 and 1/4 inch thick. Consistent thickness ensures they all finish drying at the same time.
- Blotting: Before placing them in the oven, pat both sides of the slices with a clean kitchen towel to remove excess surface moisture.
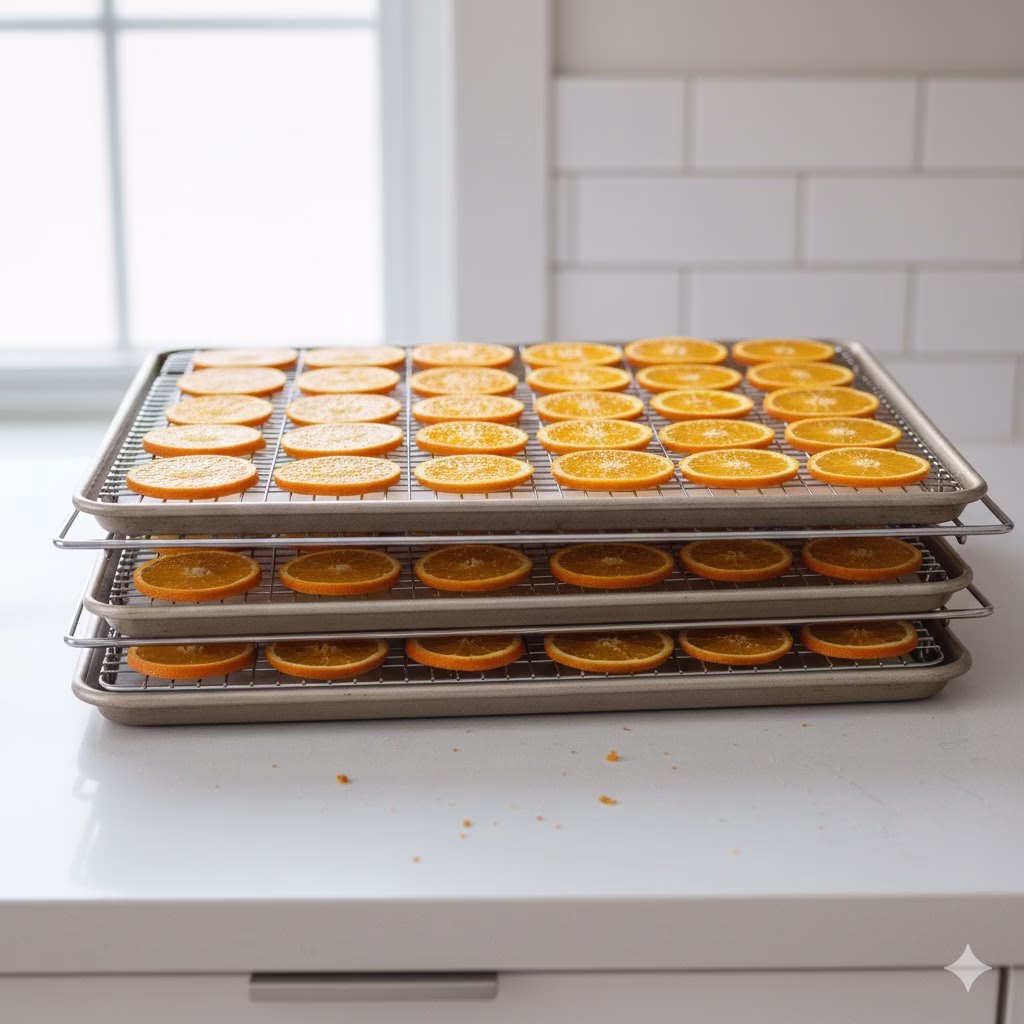
- The Rack Method: Do not place slices directly on a baking sheet. Instead, place a wire cooling rack inside a large baking sheet. This allows air to circulate under the fruit, preventing the need to flip them constantly and ensuring they don’t stick to the metal.
- Air Circulation: If your oven doesn’t have a fan, you can “crack” the oven door slightly (if safe to do so) using a wooden spoon. This allows moisture to escape the oven chamber, speeding up the drying time.
How to Tell When They Are Done

Because every oven is calibrated differently, you should start checking your Dried Orange Slices at the 3-hour mark.
- The Touch Test: The slices should feel tacky but not wet. Once they are fully done, they will feel brittle or like “leathery” plastic.
- The Snap: Take one slice out and let it cool for two minutes on the counter. If it becomes crisp and snaps when bent, the batch is finished.
- Storage: Always let the slices cool completely before putting them in an airtight jar. Any residual heat will create steam, which leads to mold—the enemy of zero waste preservation.
References
- ucanr – Dehydrating Basics
- Pubs ext – Using Dehydration to Preserve Fruits, Vegetables, and Meats
- Belt drying – The Ultimate Guide to Preventing Mold in Dried Foods
Related Articles
- Try These 8 Simple Recipes For Dried Orange Slices
- How to Dry Orange Slices in an Air Fryer
- How to Store Dried Orange Slices for Maximum Longevity