Cookie Consent by Free Privacy Policy Generator Update cookies preferences

How to Make Deliciously Healthy Honey Ginger Chicken

Healthy Honey Ginger Chicken served over brown rice, glistening with a turmeric glaze and garnished with fresh cilantro and sesame seeds. A perfect example of delicious Anti Inflammation Recipes and Anti Inflammation Meals.

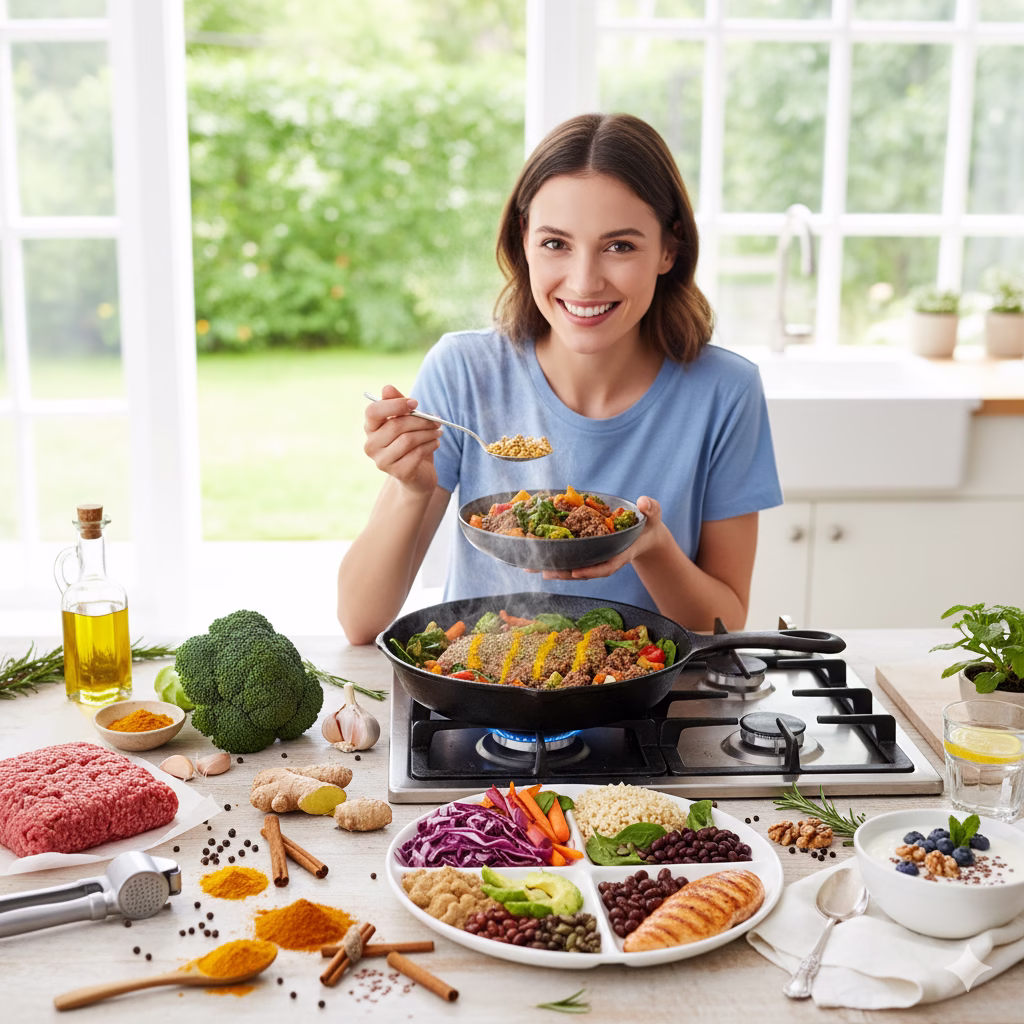
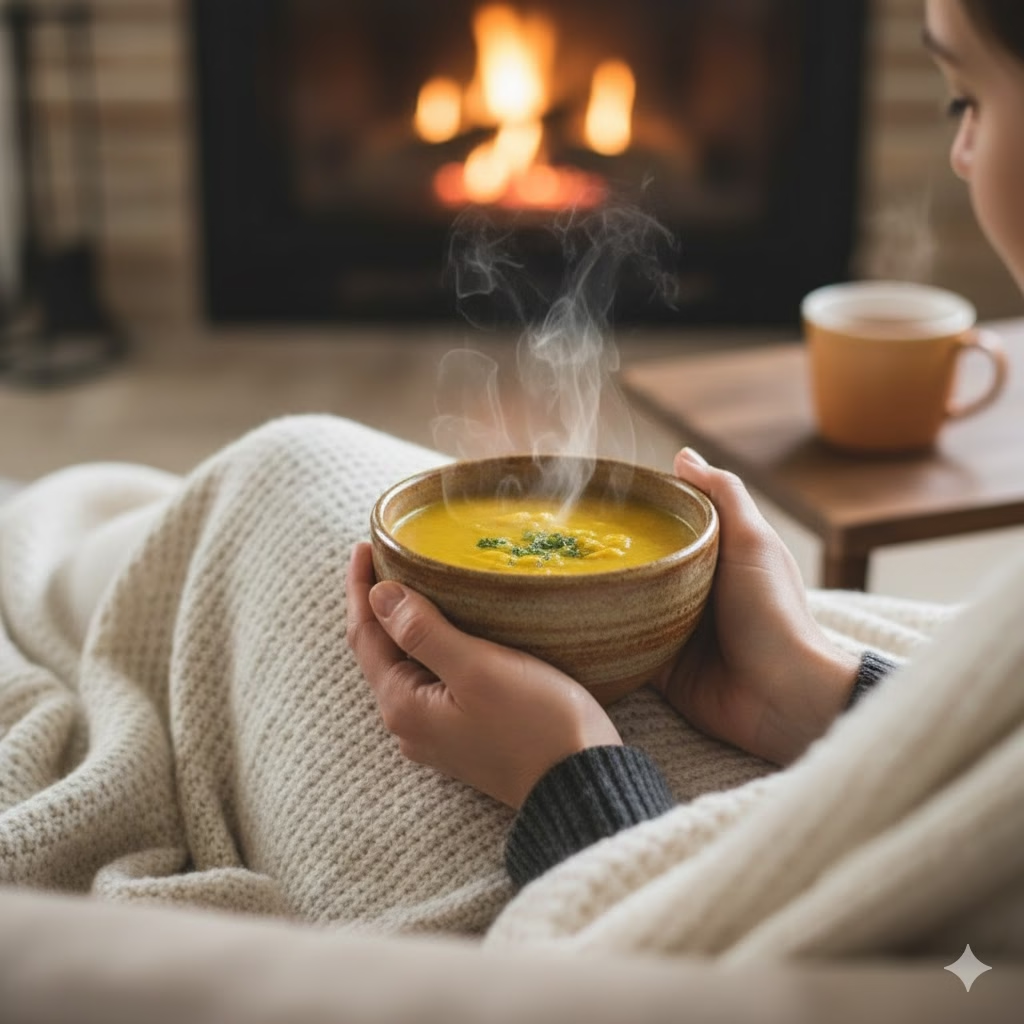
If your weeknights feel like a constant scramble between work, family, and the perpetual question of “What’s for dinner?”, you are not alone. I am a busy home cook who believes that healthy eating should never mean sacrificing flavor or spending hours in the kitchen. This Healthy Honey Ginger Chicken recipe is the culmination of my journey to create meals that are both nourishing and exciting, proving that satisfying comfort food can also be deeply beneficial for your well-being. Join me in bringing a little bit of golden, anti-inflammatory goodness to your dinner table tonight as we explore delicious Anti Inflammation Recipes and simple Anti Inflammation Meals.

Introduction: The Golden Rule of Flavor and Wellness

Dinner is often the best part of our day. It is a moment to relax, connect with others, and nourish our bodies. Too often, though, the meals we rush to prepare leave us feeling heavy or unsatisfied. This recipe for Honey Ginger Turmeric Chicken changes that completely. It mixes sweet, savory, and a little bit spicy. It is designed to taste incredible, but it also gives you real, important health benefits.

We are taking basic chicken and making it a powerhouse meal. It is perfect for anyone looking for delicious Anti Inflammation Recipes. Fresh ginger, bright turmeric, and natural honey come together in a simple, deep-penetrating marinade. This article will show you every step. You will learn how to make a perfect, restaurant-quality meal. You can easily add this dish to your rotation of Anti Inflammation Meals.

Understanding the Power of the Ingredients

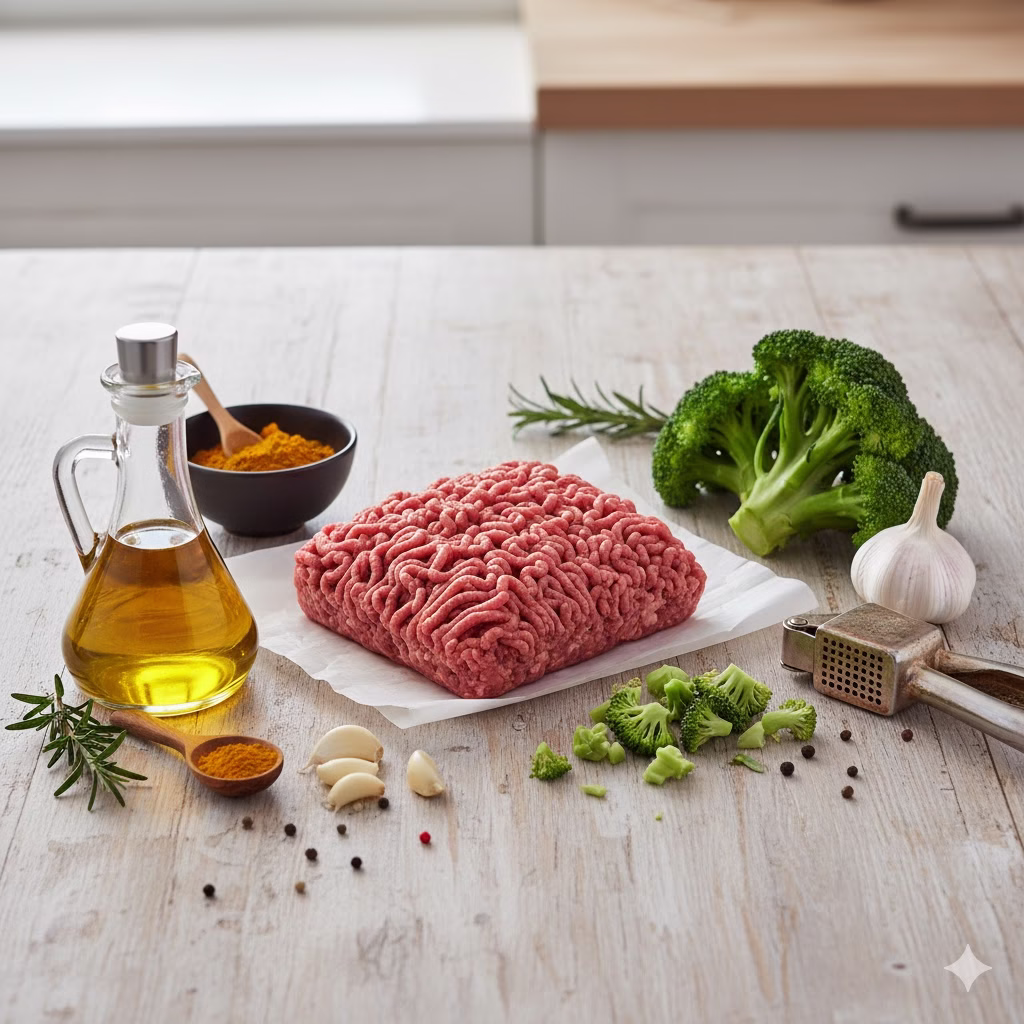
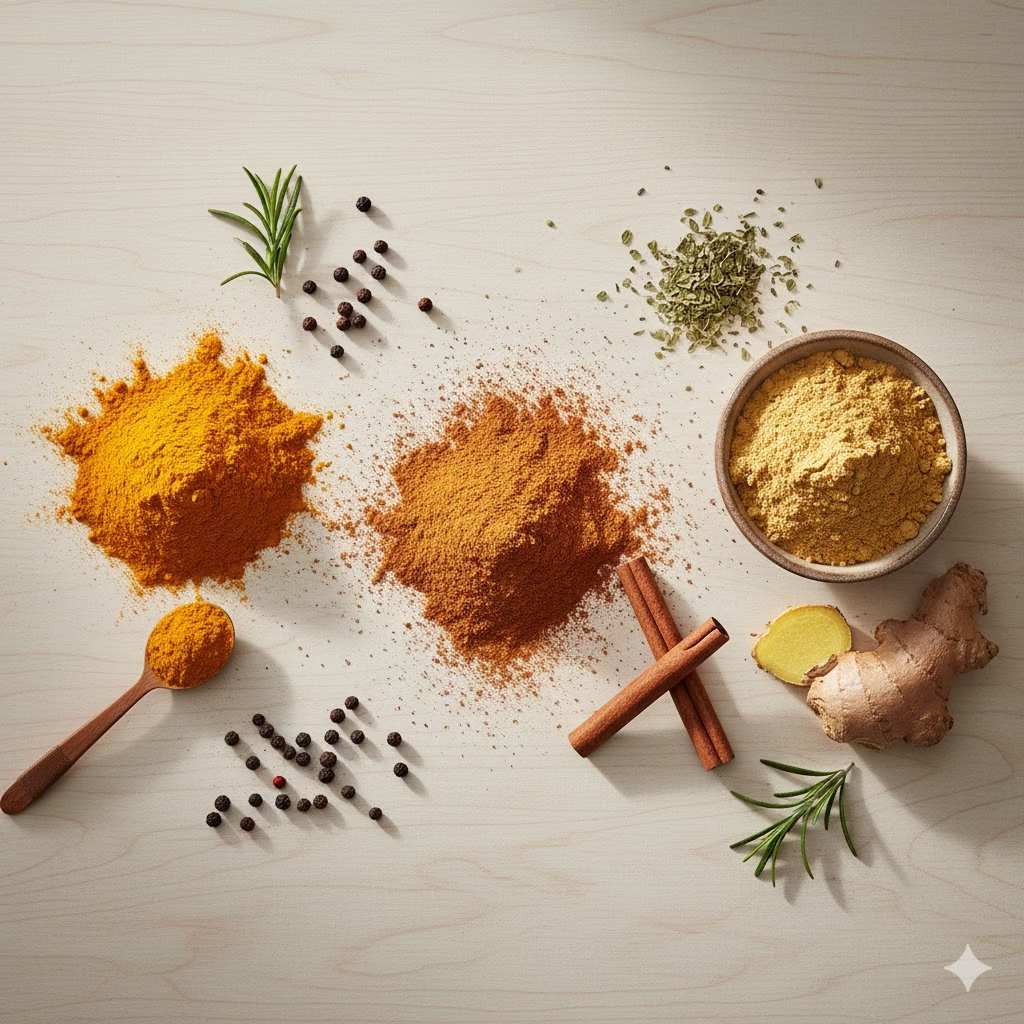
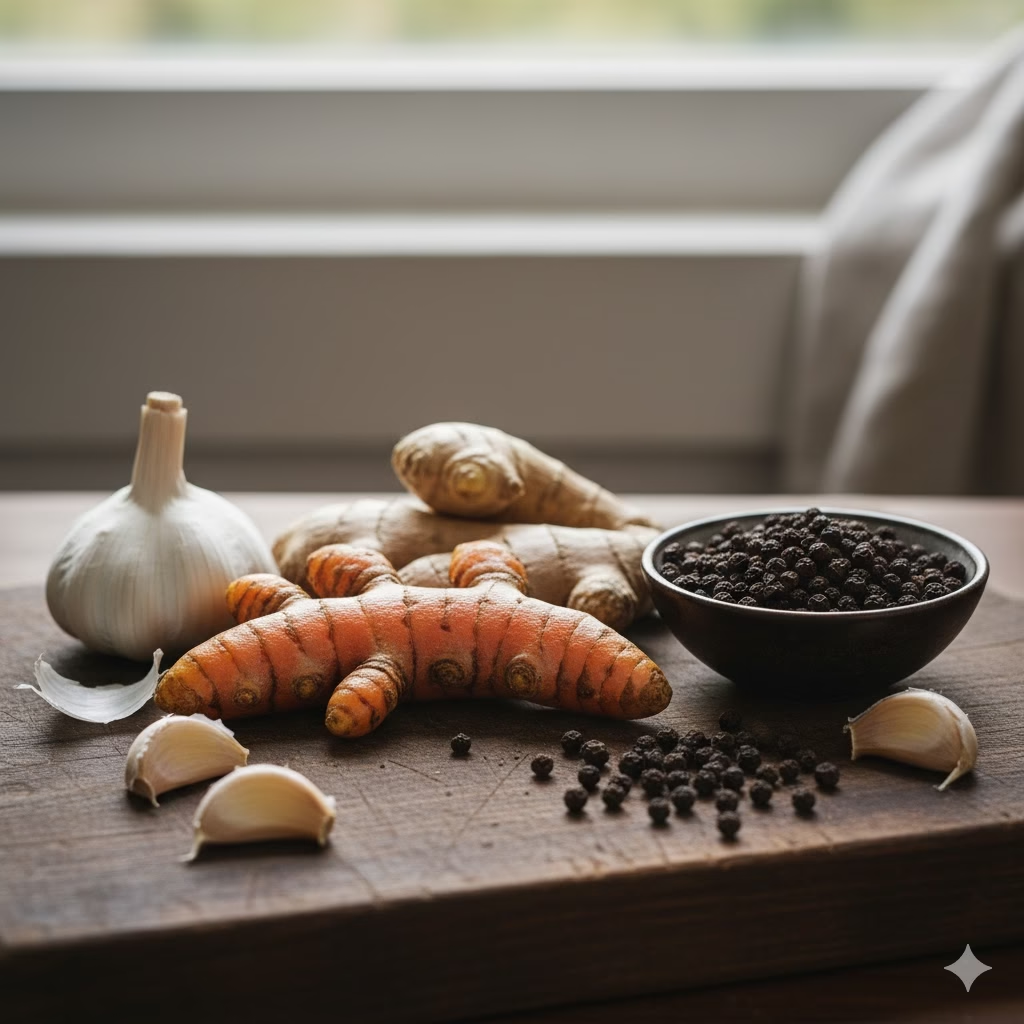
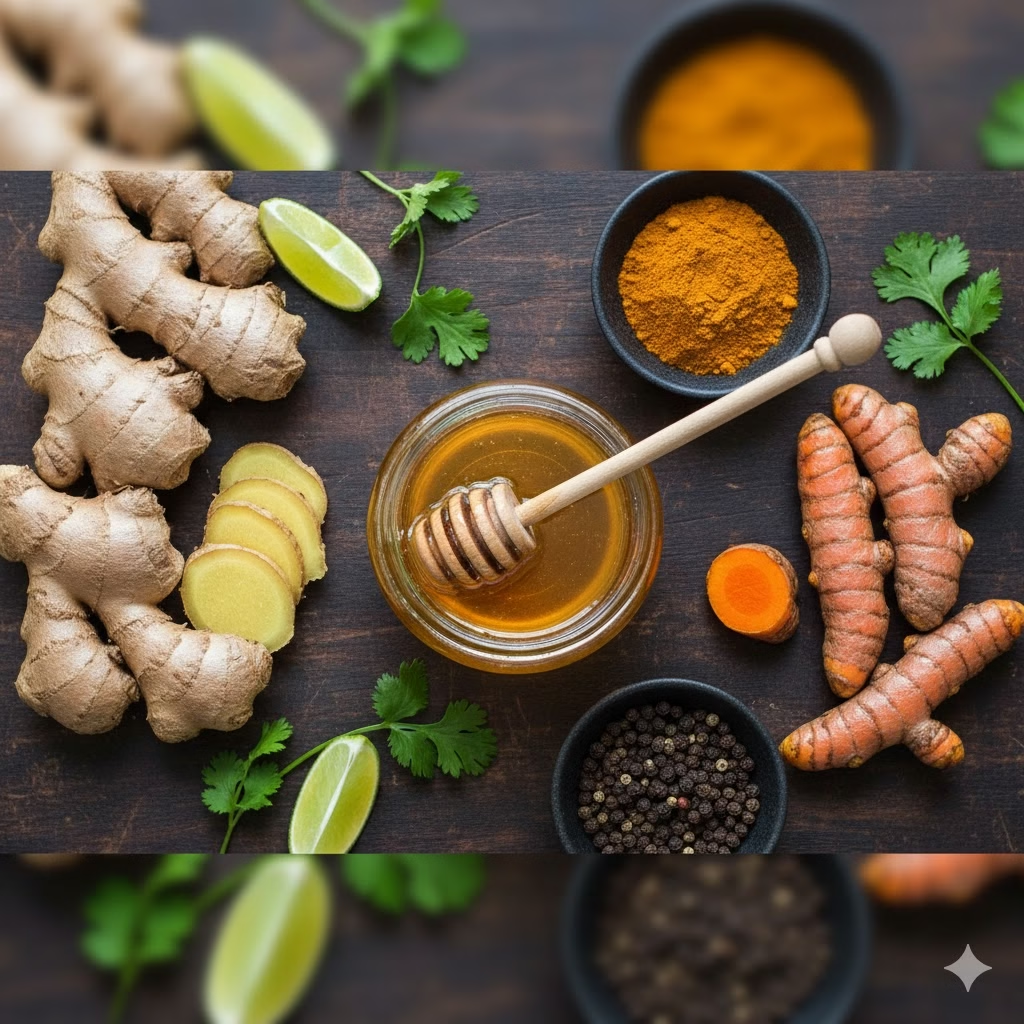
The true secret of this recipe is the star ingredients: ginger and turmeric. Both have been used for thousands of years in traditional medicine. Their use here turns a simple chicken dish into a truly Healthy Honey Ginger Chicken meal.

The Anti-Inflammatory Superstars

  • Turmeric: The Golden Healer. Turmeric contains a compound called curcumin. Curcumin is a strong antioxidant. It is the main reason this spice is known for fighting inflammation. When we eat turmeric, we give our bodies a natural boost. This boost helps fight long-term inflammation. How to do it: We want your body to absorb the most curcumin possible. To do this, we add a little black pepper to the turmeric. The piperine in pepper greatly helps your body use the curcumin.
  • Ginger: The Digestive Aid. Ginger has long been used to calm stomach issues and ease nausea. Its anti-inflammatory power comes from compounds called gingerols. These compounds also give ginger its strong, warm flavor. In this dish, fresh, grated ginger cuts through the sweetness of the honey. It makes the overall flavor brighter.
  • Honey: Nature’s Sweetener. We use a small amount of honey for flavor. It also creates that wonderful sticky glaze. Honey itself contains antioxidants and trace minerals. We suggest using a high-quality, raw honey. This gives you the best flavor and the most nutrients.

The Supporting Cast: Flavor Builders

  • Soy Sauce or Tamari: This ingredient is vital. It adds a necessary deep and savory umami flavor. Use tamari if you need a gluten-free option.
  • Garlic: Every great marinade needs garlic. It creates a strong, savory base note for the dish.
  • Lime or Lemon Juice: A splash of acid is very important. It tenderizes the chicken meat. It brightens the flavor. This acid balances the sweetness and richness of the honey.

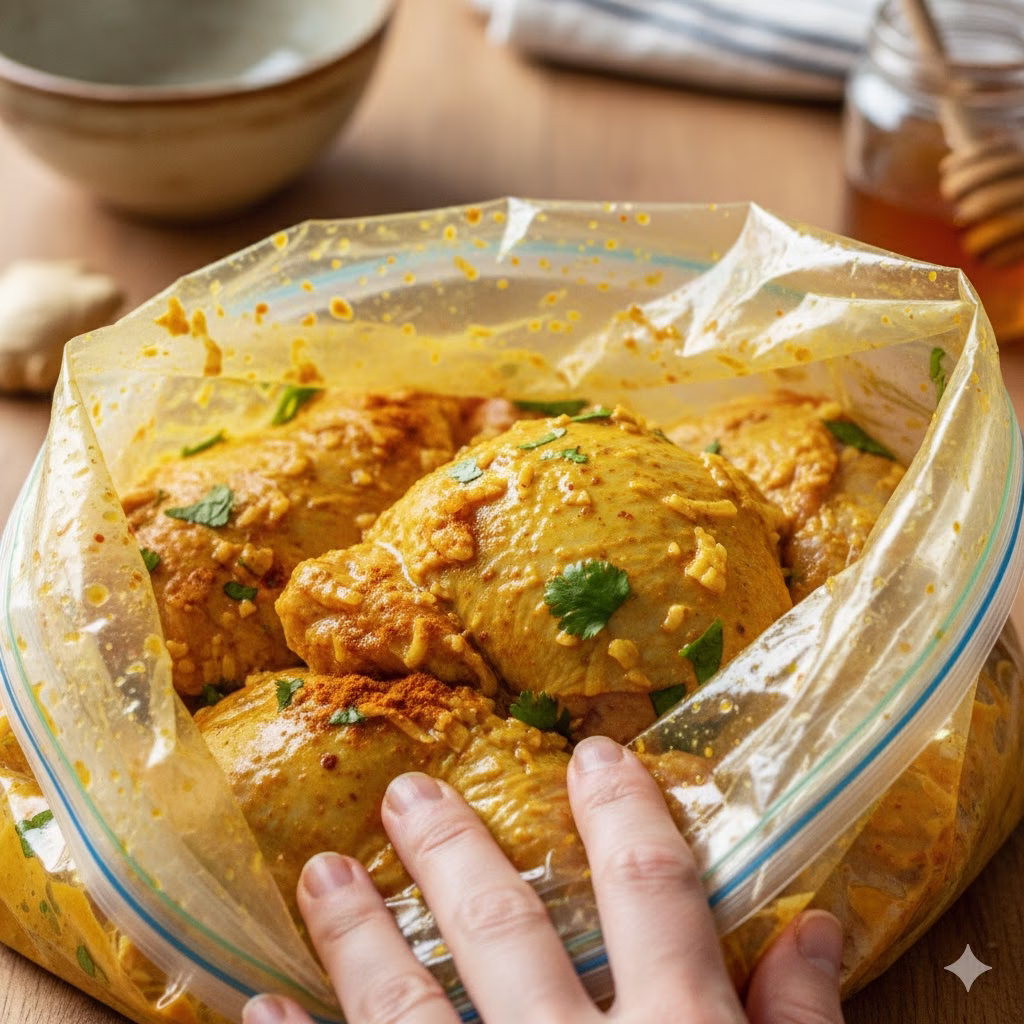
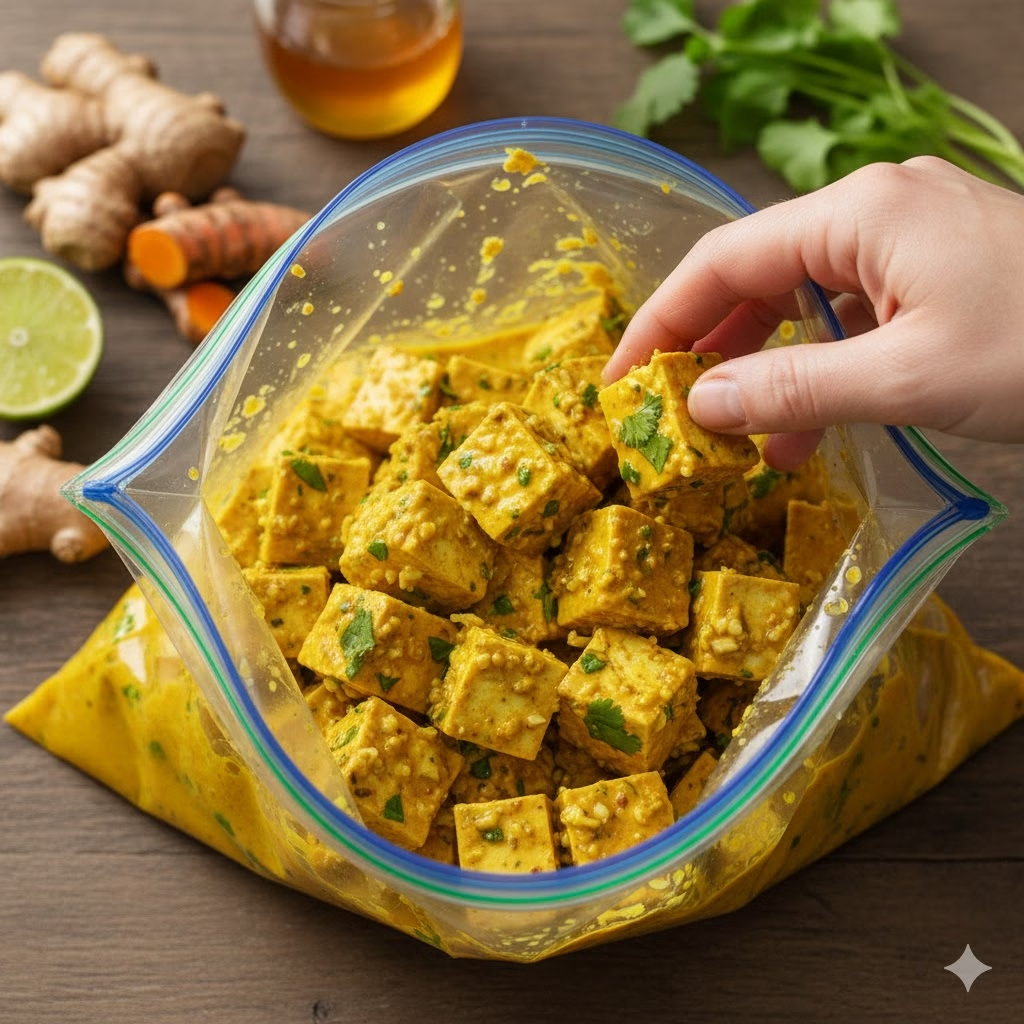
The Prep: Building the Perfect Marinade

If you want ultra-tender and flavorful chicken, you must use an effective marinade. Do not skip this step! It is the base for our Healthy Honey Ginger Chicken.

  • Example: The Consistency Check. Your finished marinade should be thick enough to cling to a spoon. But it must still pour easily. If it is too thin, add a tiny bit more cornstarch or honey. If it is too thick, add a tablespoon of water or lime juice to thin it out.
IngredientMeasurement (Example)Purpose
HoneyHalf a cupSweetener, Glaze Base
Fresh Ginger, gratedTwo tablespoonsSpicy Warmth, Anti-inflammatory
Turmeric PowderOne teaspoonColor, Anti-inflammatory
Garlic, mincedFour clovesAromatic Base
Soy Sauce/TamariThird of a cupUmami, Salt
Black PepperQuarter teaspoonCurcumin Absorption
Lime JuiceOne tablespoonAcidity, Brightness
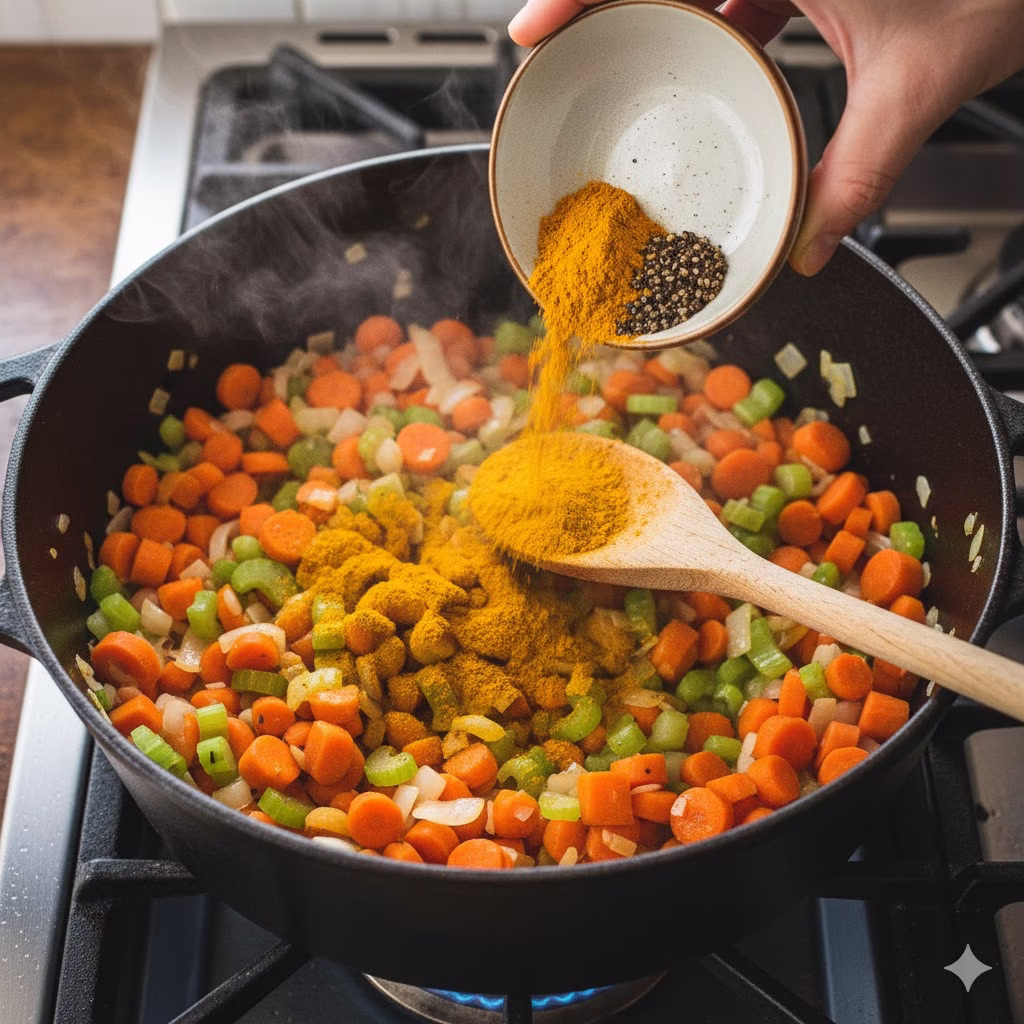
  • How to do it: Marinating Technique. Mix all the marinade ingredients in a medium bowl. Put your chicken pieces into a large, resealable bag. Chicken thighs are best for keeping the meat juicy, but breast meat works well too. Pour the marinade over the chicken. Make sure every piece is fully coated. Press all the air out of the bag and seal it tightly. Gently rub the chicken to spread the marinade around. Put it in the refrigerator for at least thirty minutes. For the absolute best flavor, marinate for a full four hours, or leave it overnight.

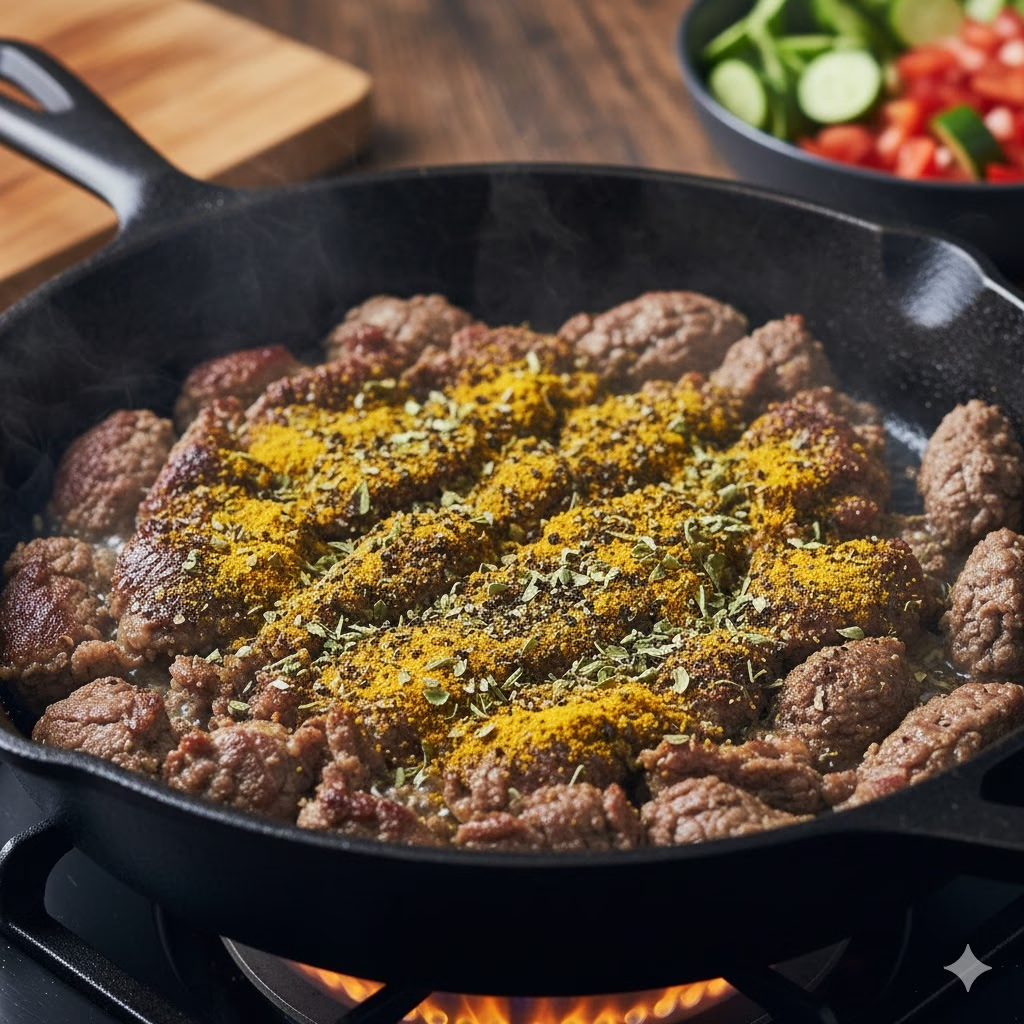
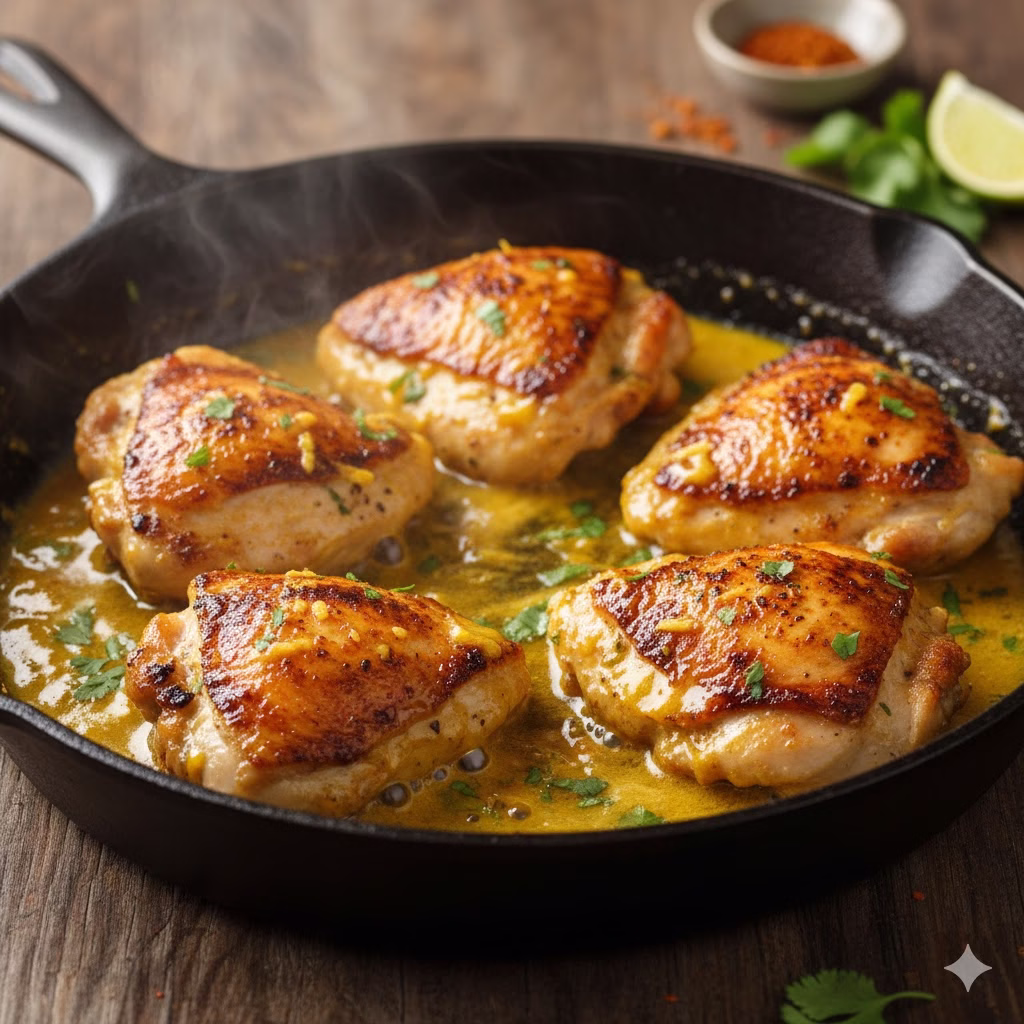
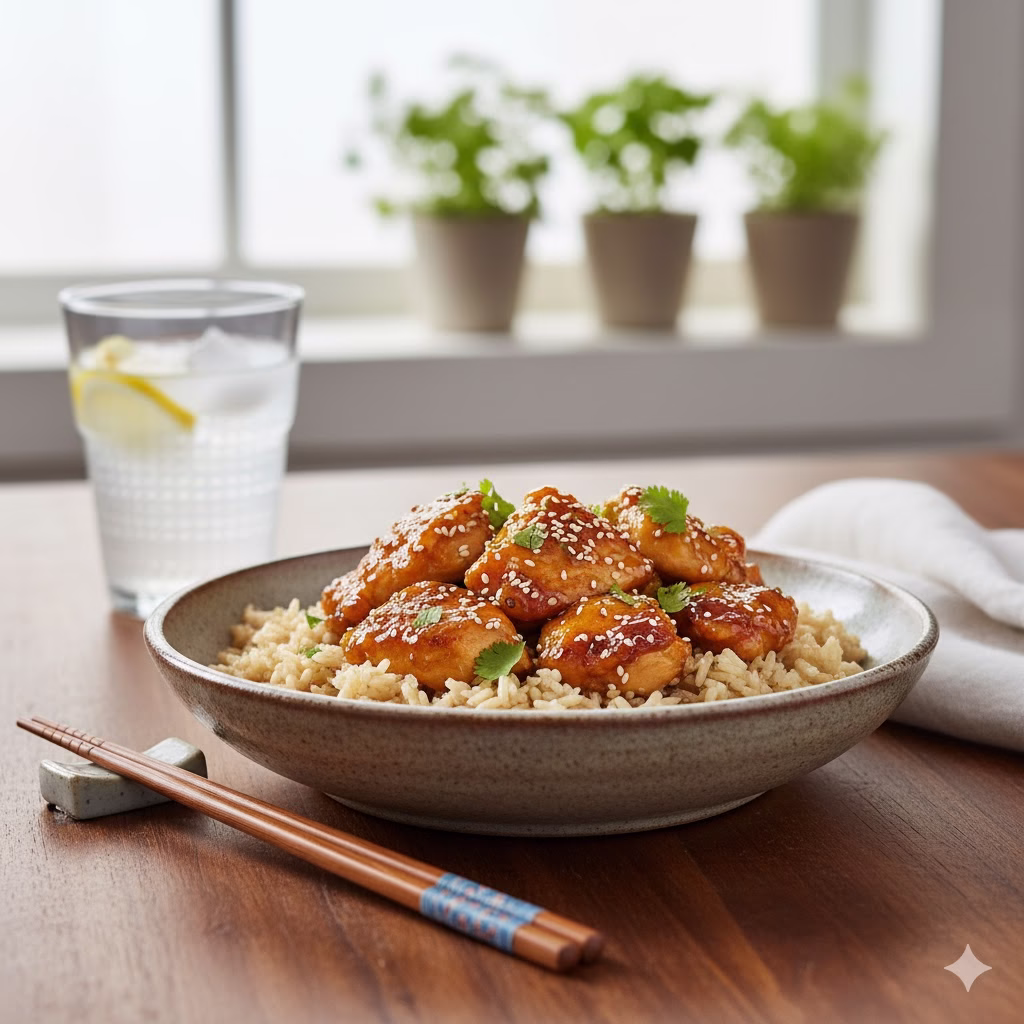
The Cook: Achieving that Perfect Sticky Glaze

Cooking is the moment of change. The marinade turns from a simple liquid into a caramelized, golden glaze. This glaze locks in all the flavor and moisture.

  • Pan-Searing Method (Best for speed and glaze):
    • Take the chicken out of the marinade. Pat the pieces dry slightly. This helps them get a better sear and crust.
    • Heat a tablespoon of high-heat oil (like avocado or coconut oil) in a large skillet. Use medium-high heat.
    • Place the chicken in the skillet. Do not put too many pieces in at once. You might need to cook them in two or three rounds.
    • Sear the chicken for five to seven minutes on each side. It should be deeply golden brown and fully cooked.
    • How to do it: Glaze Reduction. Pour the remaining marinade into the pan. Let it come to a simmer. Use a spoon to scrape up any browned bits stuck to the bottom of the pan. The sugar in the honey will quickly make the sauce thick. It will become a rich, sticky glaze. Turn the chicken pieces to cover them completely in the glaze before you serve.
  • Baking Method (Best for hands-off cooking):
    • Preheat your oven to three hundred and seventy-five degrees Fahrenheit.
    • Line a baking sheet with parchment paper. This makes cleaning up much easier.
    • Place the marinated chicken pieces on the baking sheet. Spread them out evenly.
    • Bake the chicken for twenty to twenty-five minutes. The exact time depends on how thick the chicken pieces are.
    • How to do it: Last-Minute Glaze. In the last five minutes of baking, brush the remaining marinade all over the chicken. For an extra crisp texture, switch the oven to broil. Broil for only one or two minutes. Watch it closely so the chicken does not burn.

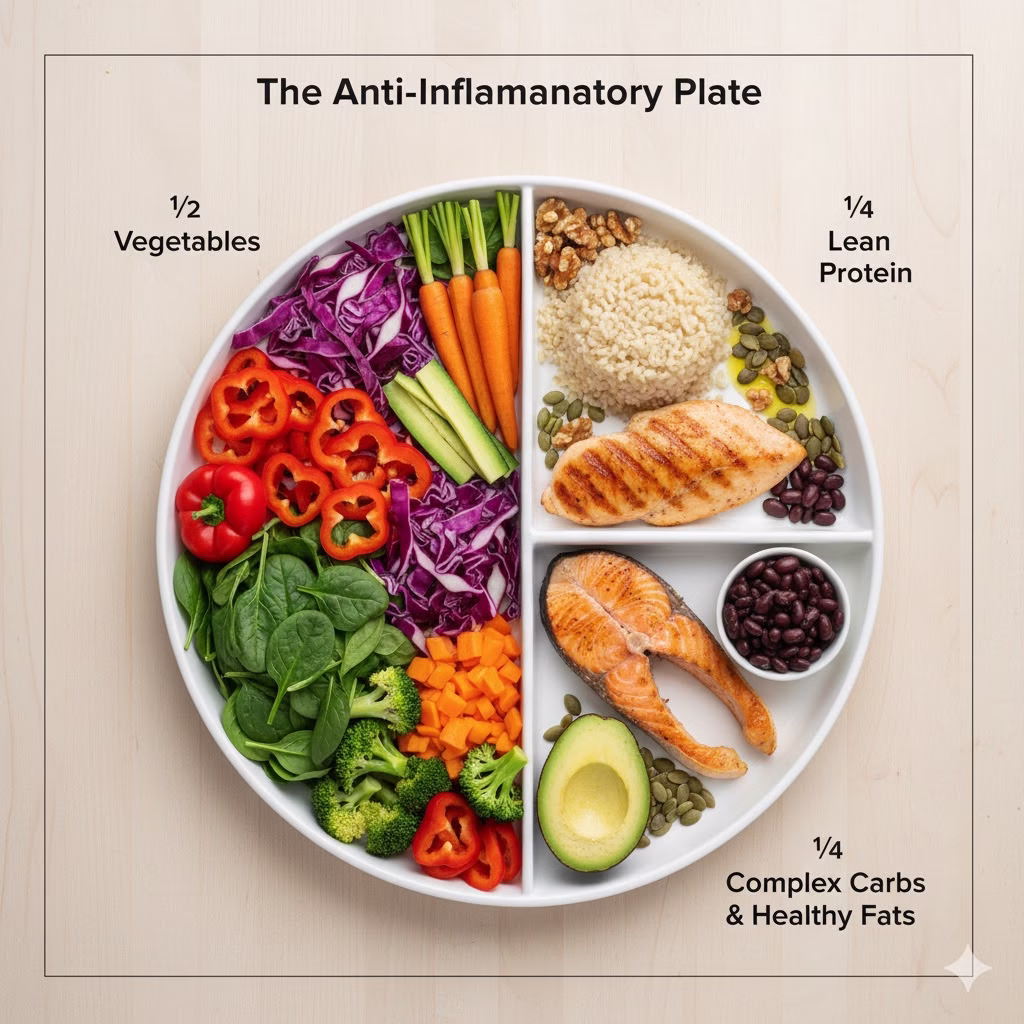
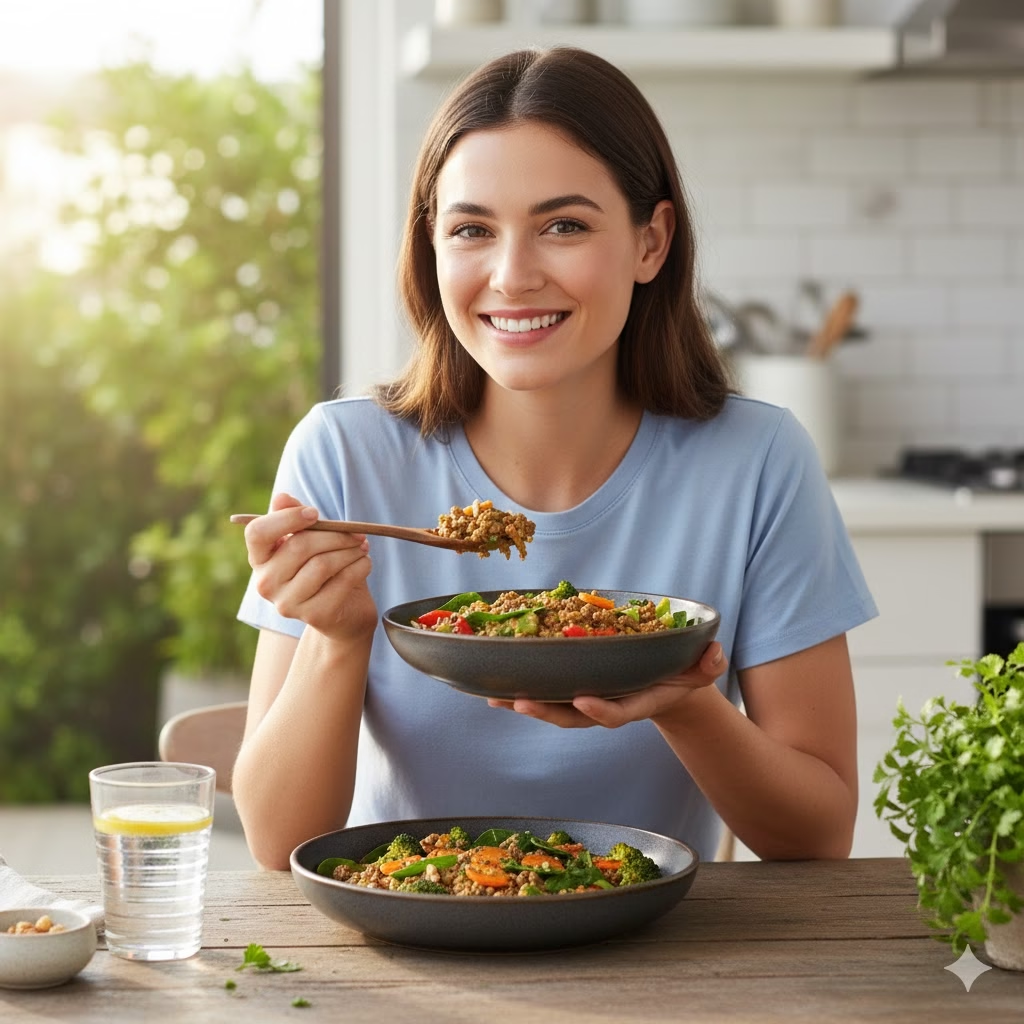
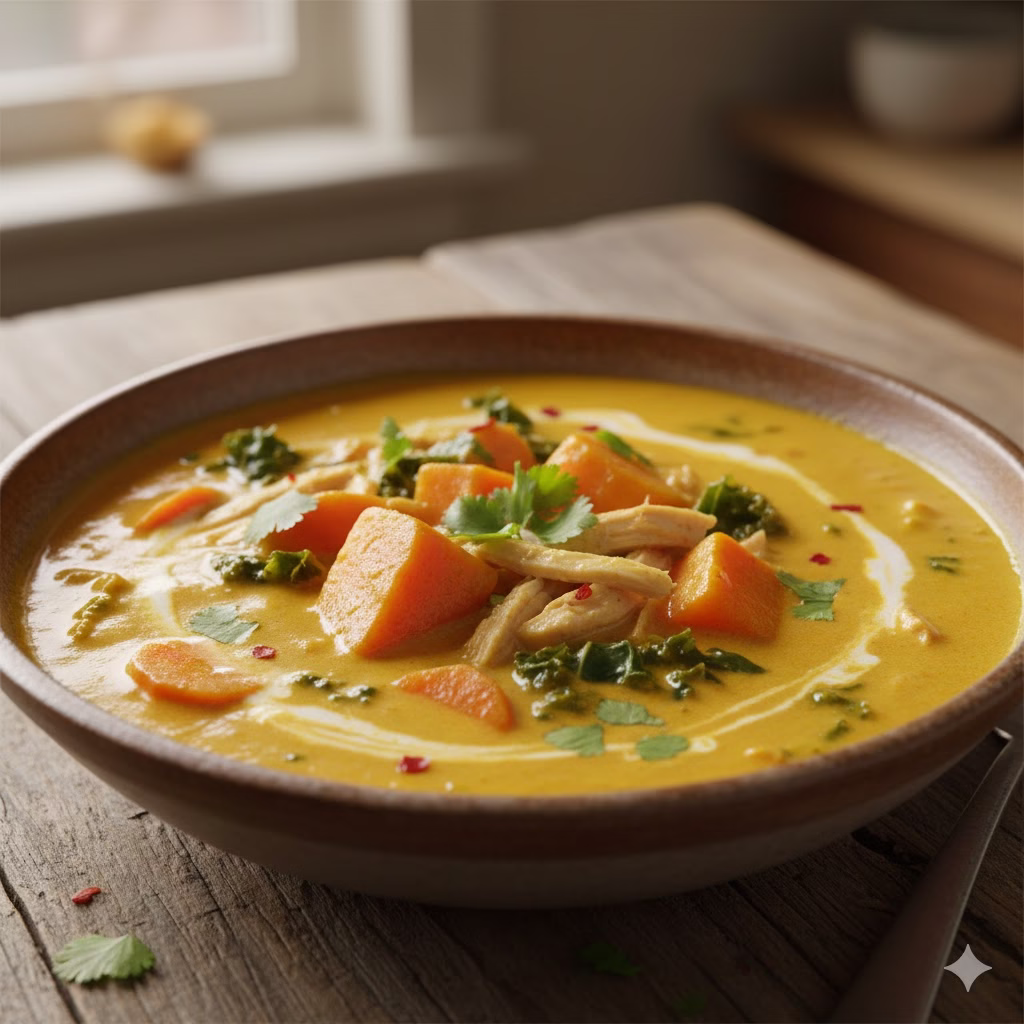
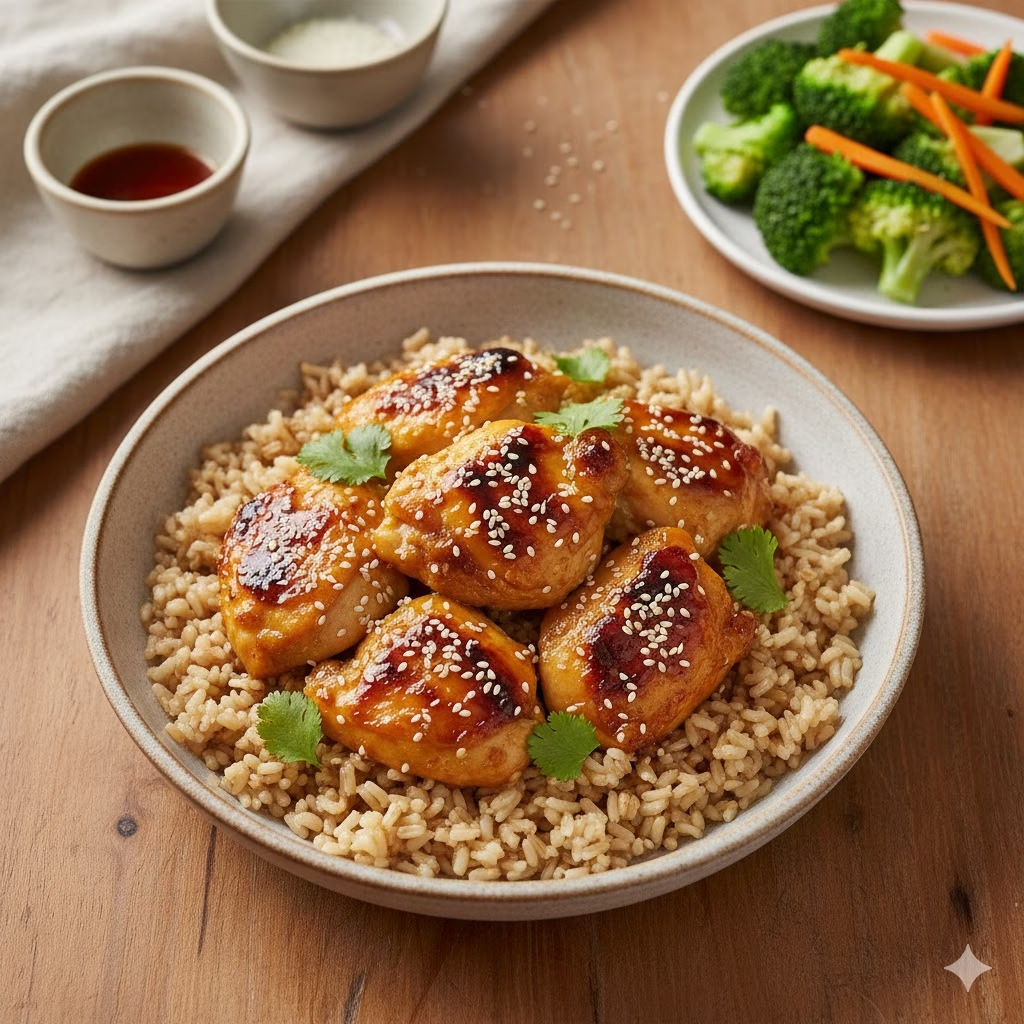
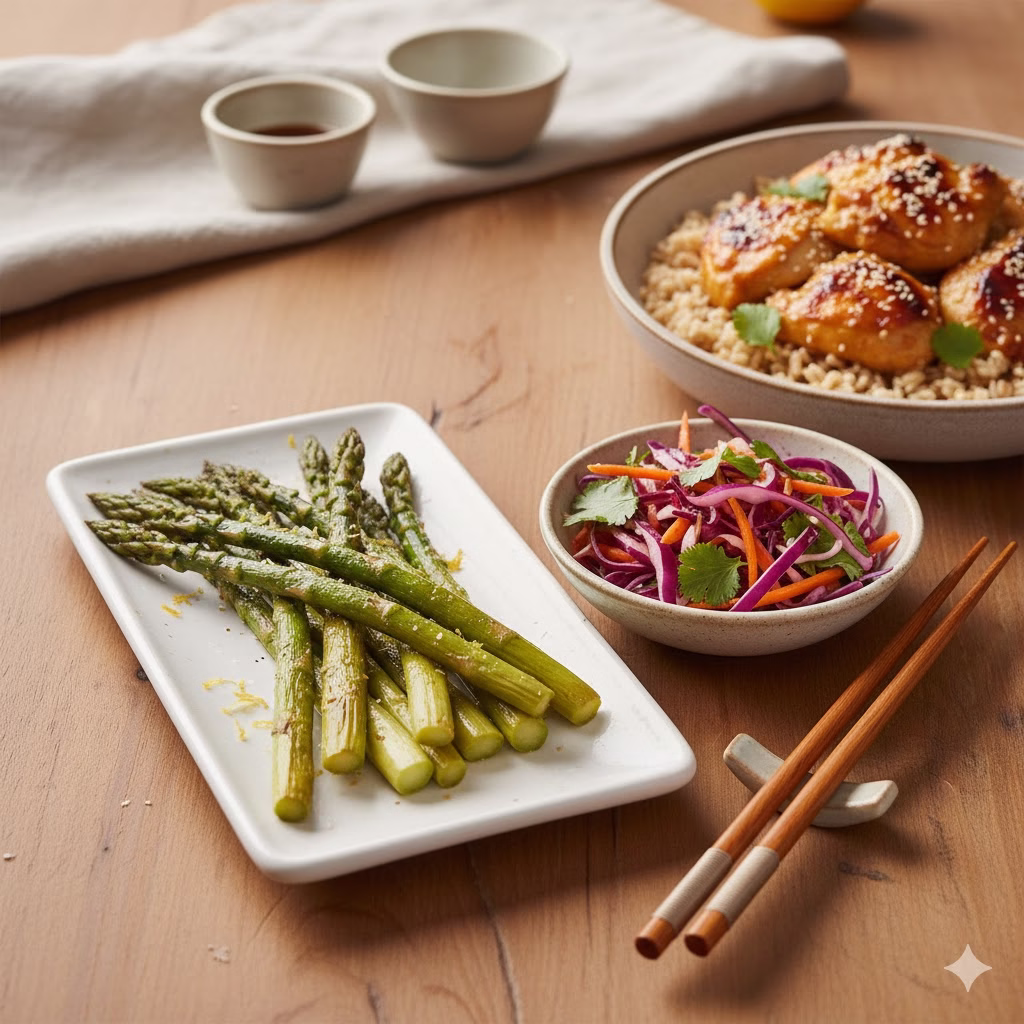
Serving Suggestions for an Anti-Inflammation Meal

This Healthy Honey Ginger Chicken is the main dish. But the sides you choose are important. They help you build a complete, Anti Inflammation Meal.

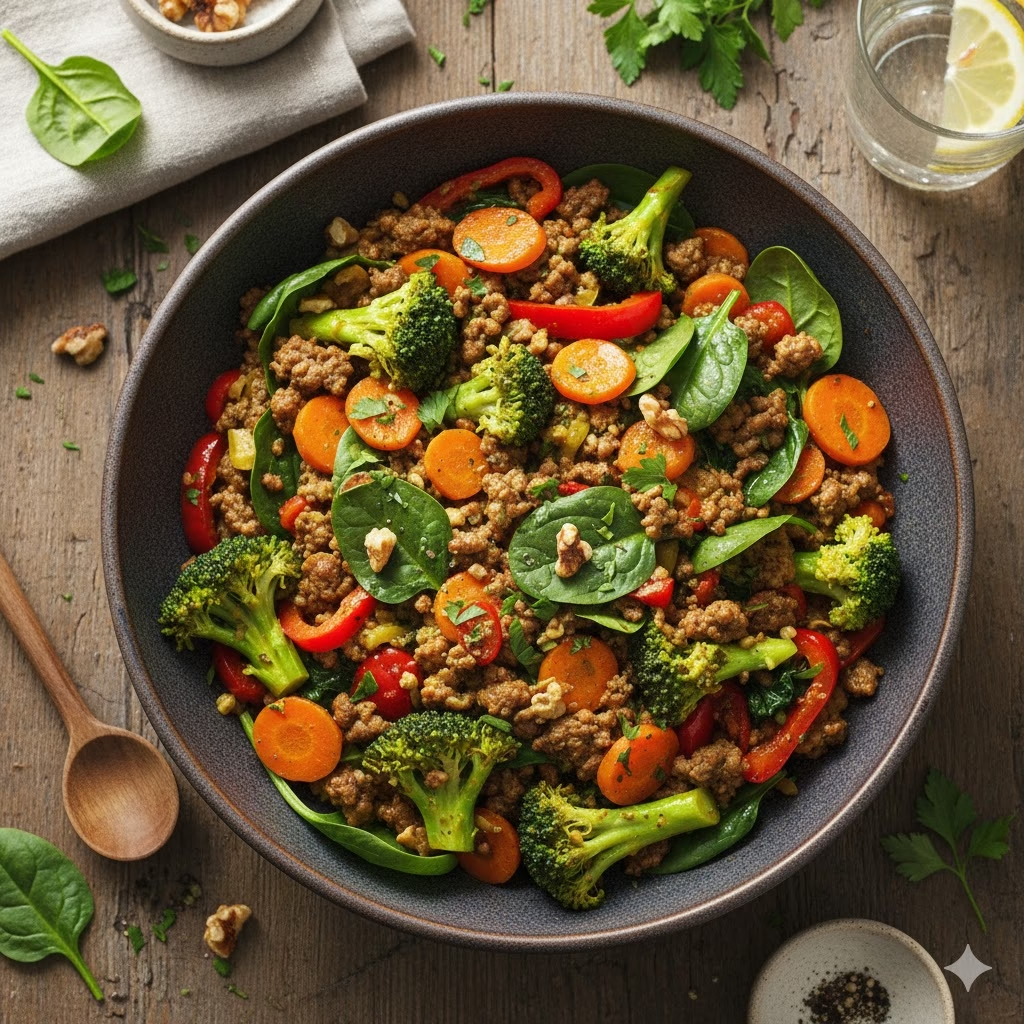
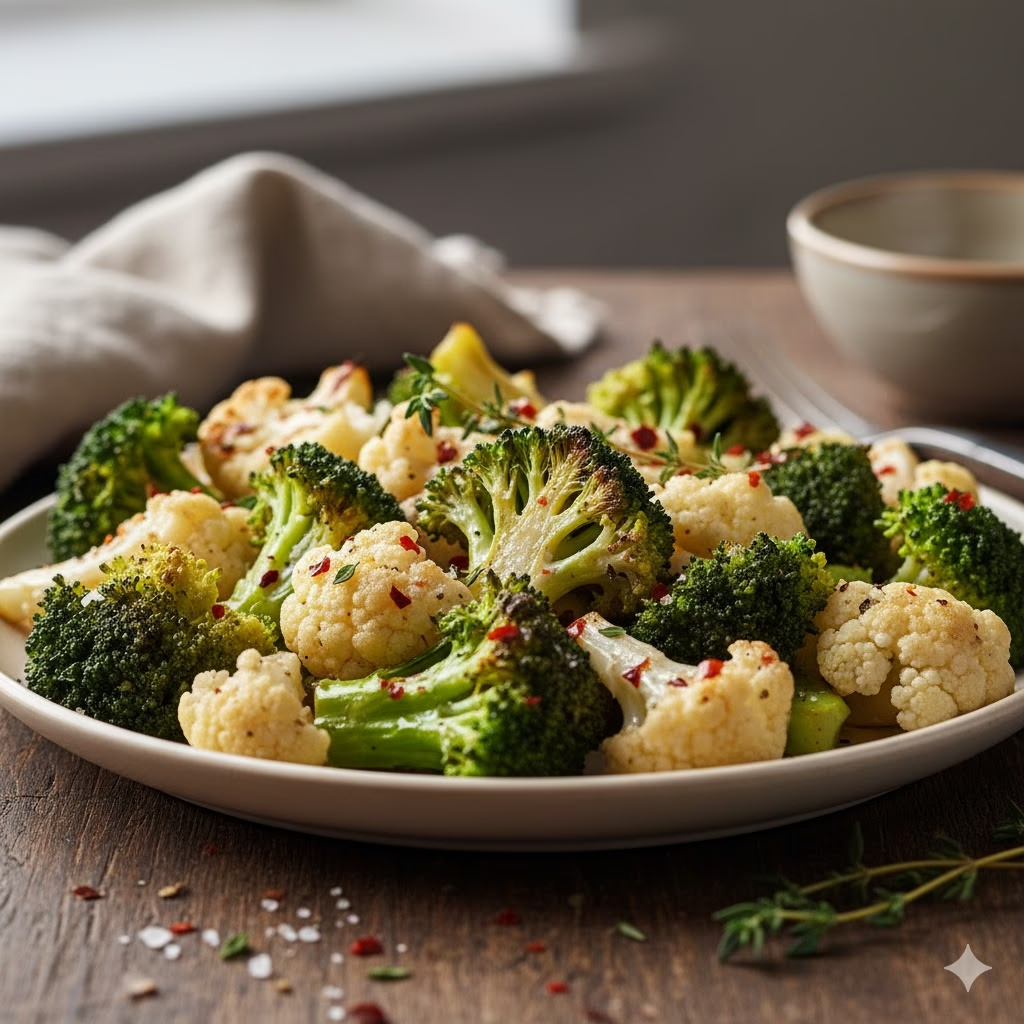
  • Vibrant Vegetables: Serve the chicken over steamed dark, leafy greens. Kale or spinach are great choices. You can also use roasted broccoli and carrots. These vegetables are full of vitamins and fiber.
  • Smart Starches: Skip white rice. Choose fiber-rich complex carbohydrates instead. Brown rice, quinoa, or wild rice are good options. These starches release energy slowly. They are excellent choices for an anti-inflammatory diet plan.
  • Garnish: Do not forget to add finishing touches. Sprinkle toasted sesame seeds, chopped green onions, or fresh cilantro on top. These not only look good, but they add fresh, contrasting flavors too.

Troubleshooting and Common Questions

Even the simplest recipes can have small problems. Here is how to handle a few common issues when you make your Healthy Honey Ginger Chicken.

The Marinade Is Too Runny

If your marinade is not turning into a nice glaze in the pan, it probably needs to be thicker.

  • How to do it: Mix one teaspoon of cornstarch or arrowroot powder with one teaspoon of cold water. This creates a thick paste, or slurry. Whisk this slurry into the sauce as it simmers in the pan. The sauce should become thicker almost instantly.

The Chicken is Burning Before it’s Cooked

This often happens because the mixture of honey and soy sauce contains sugar. Sugar caramelizes and burns quickly if the heat is too high.

  • How to do it: Lower your heat setting to medium. If you are baking, cover the pan loosely with foil for the first fifteen minutes. This traps moisture and stops the surface from burning too fast. Then, remove the foil for the final browning.

Variations on the Recipe

One great thing about this recipe is how easy it is to change. You can easily adjust it to create new Anti Inflammation Meals. Use what you have in your kitchen or fit it to your diet.

  • Vegetarian/Vegan: Use firm tofu or tempeh instead of chicken. Press the tofu well before you marinate it. This helps it soak up all the delicious flavor.
  • Spicy Kick: Add one teaspoon of chili garlic sauce to the marinade. A pinch of red pepper flakes also works. This gives the dish a nice, fiery element.
  • Citrus Burst: Use the zest and juice of an orange instead of lime juice. This creates a brighter, sweeter glaze. It is similar to popular Chinese-American dishes.

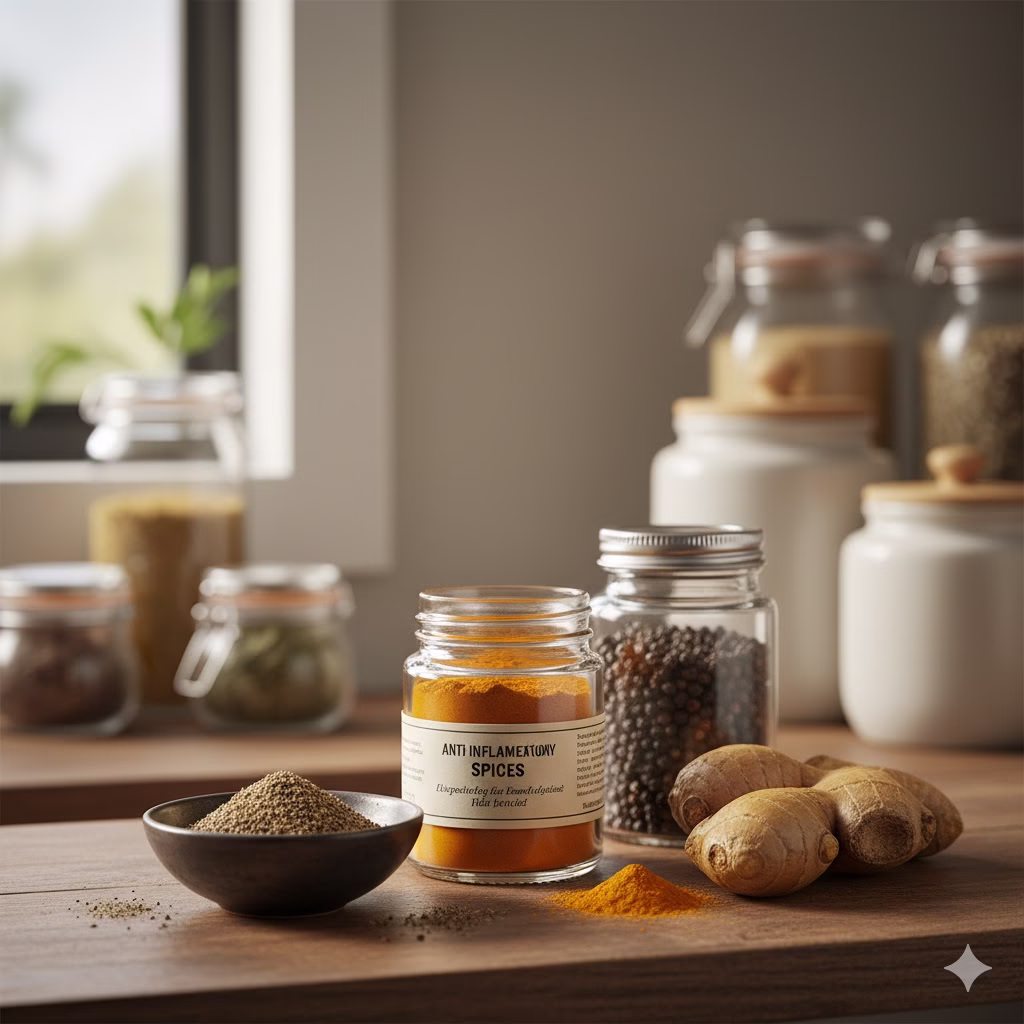
Beyond the Chicken: Extending the Anti-Inflammation Focus

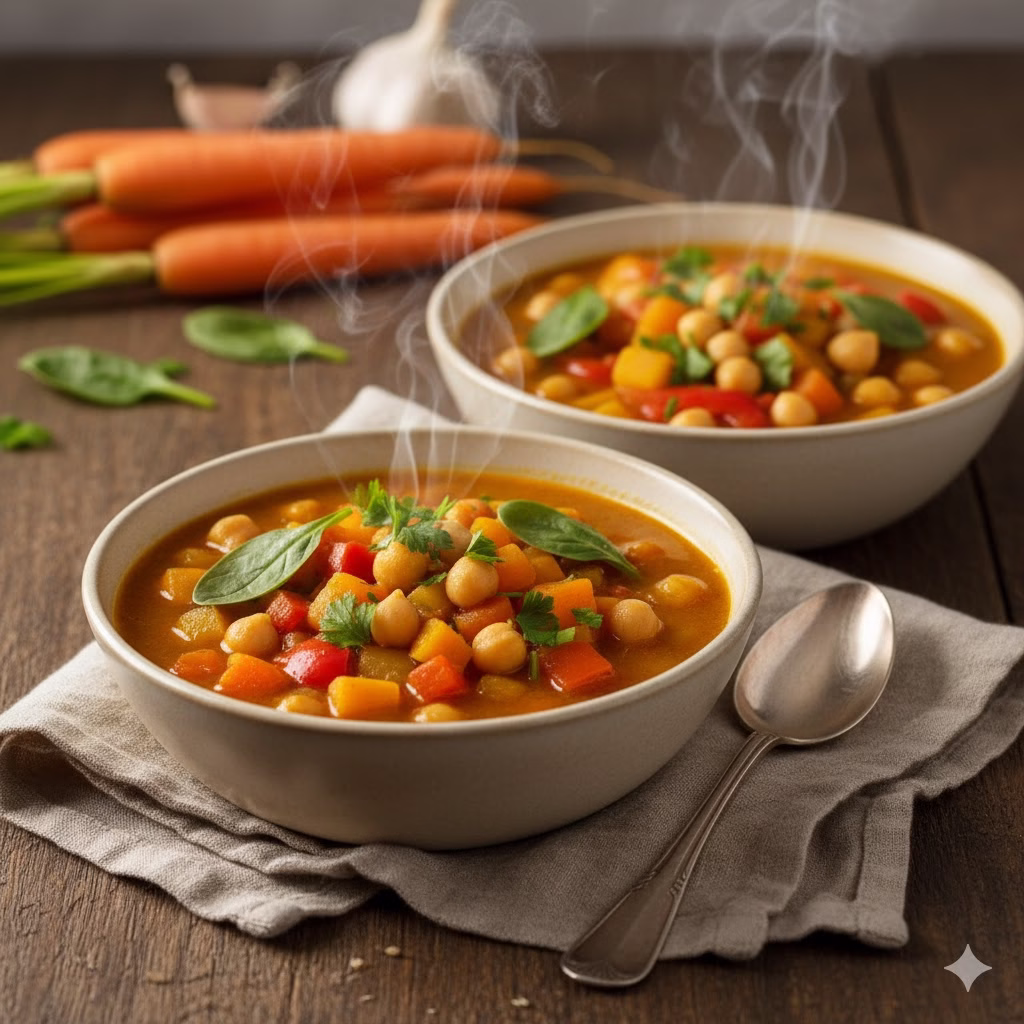
Adding Anti Inflammation Recipes to your diet is a continuous, positive habit. This Honey Ginger Chicken is a wonderful place to start. But think about adding these other simple steps:

  • Breakfast Boost: Start your day with a bowl of oatmeal. Stir in a little turmeric and cinnamon.
  • Hydration: Drink water infused with ginger and lemon throughout the day.
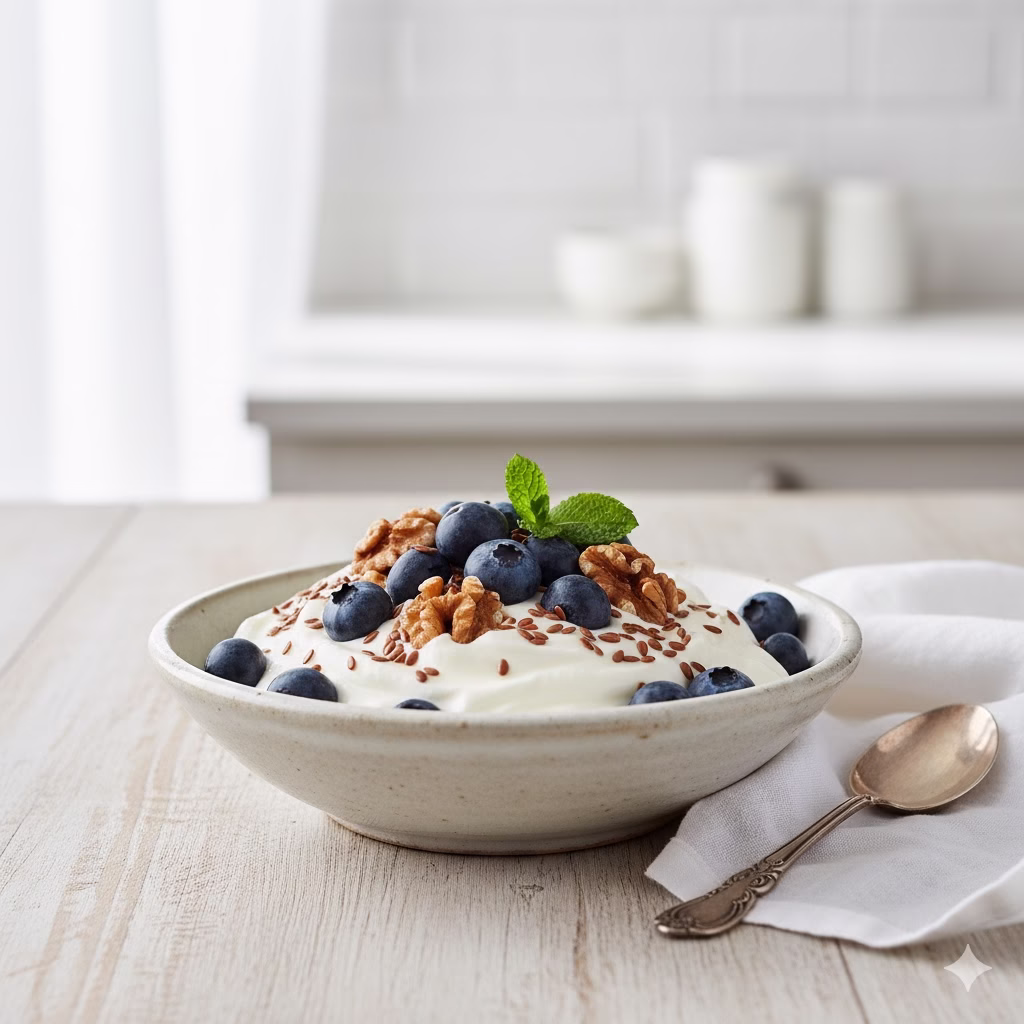
  • Fats: Eat healthy fats often. These include avocados, walnuts, and fatty fish. They are full of anti-inflammatory omega-three fatty acids.

Conclusion: A Simple Path to Well-Nourished Eating

This Healthy Honey Ginger Chicken recipe shows that food made with intentional, natural ingredients can be very satisfying. It is also great for your health. By using the power of spices like turmeric and ginger, you are actively choosing better nutrition. You are adding more Anti Inflammation Meals to your life. Best of all, you never have to give up flavor. This meal will surely become a favorite. It is easy enough for a weeknight, but it is good enough to serve to guests. Enjoy the golden flavor and all the feel-good benefits.


Frequently Asked Questions (FAQ)

Q: Can I use ground ginger instead of fresh ginger?

A: Yes, you can, but we highly recommend the fresh kind. Fresh ginger offers a much brighter, stronger flavor. This flavor is essential for this recipe. If you absolutely must use ground ginger, use only one third of a teaspoon. The ground flavor is very strong.

Q: Is this recipe suitable for meal prepping?

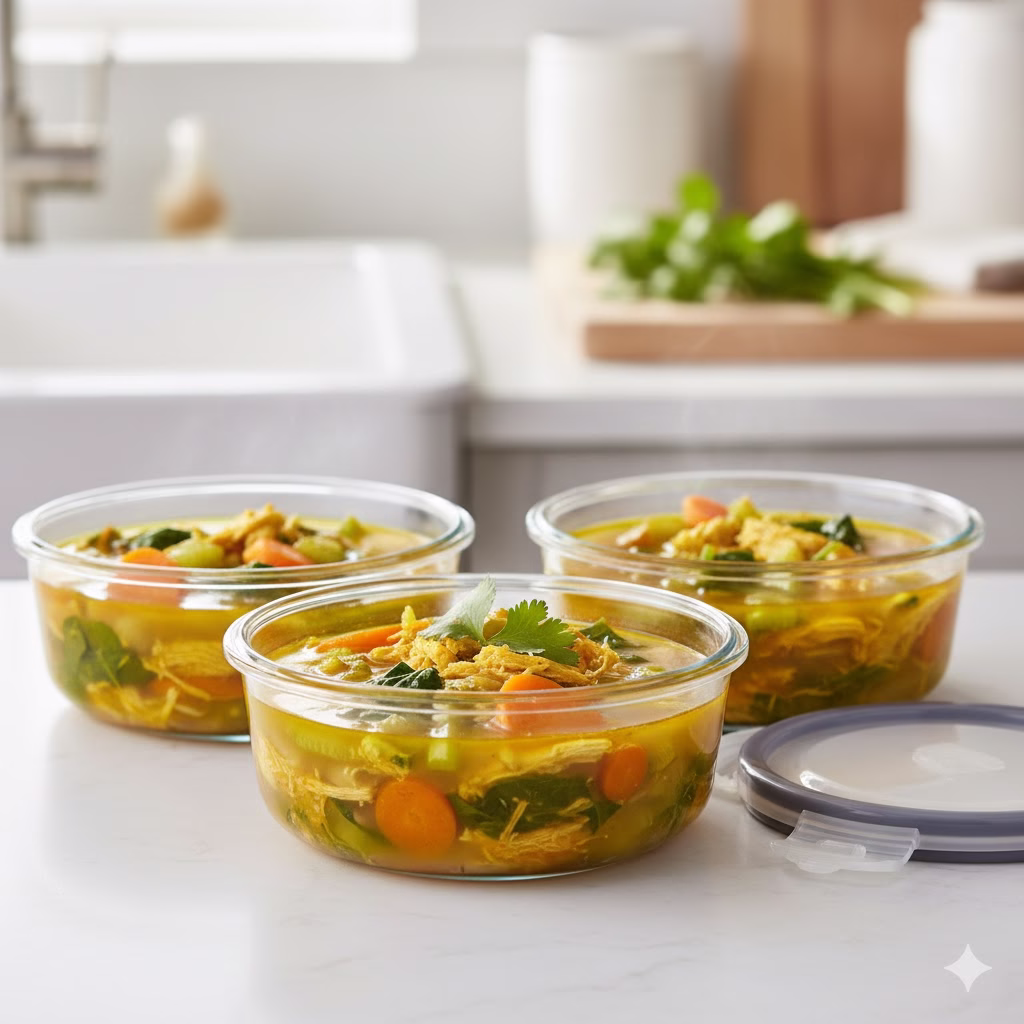
A: Absolutely, yes. This Healthy Honey Ginger Chicken keeps very well in the refrigerator. It stays good for up to four days. It is perfect for preparing several healthy lunches or dinners for the week ahead. The sticky glaze will firm up slightly when cold. However, it reheats beautifully in the microwave or on the stovetop.

Q: Where can I find fresh turmeric root?

A: Fresh turmeric root is now easier to find. Look in the produce section of most specialty grocery stores. You might also find it at Asian markets. It is usually placed near the fresh ginger root. If you cannot find the root, using the powder is a perfectly good substitute.

Q: How do I know if the chicken is cooked all the way through?

A: The best way to check if your chicken is safe and cooked right is to use a meat thermometer. Put the thermometer into the thickest part of the chicken. Be careful to avoid hitting the bone. The chicken is done when the internal temperature reads one hundred and sixty-five degrees Fahrenheit.

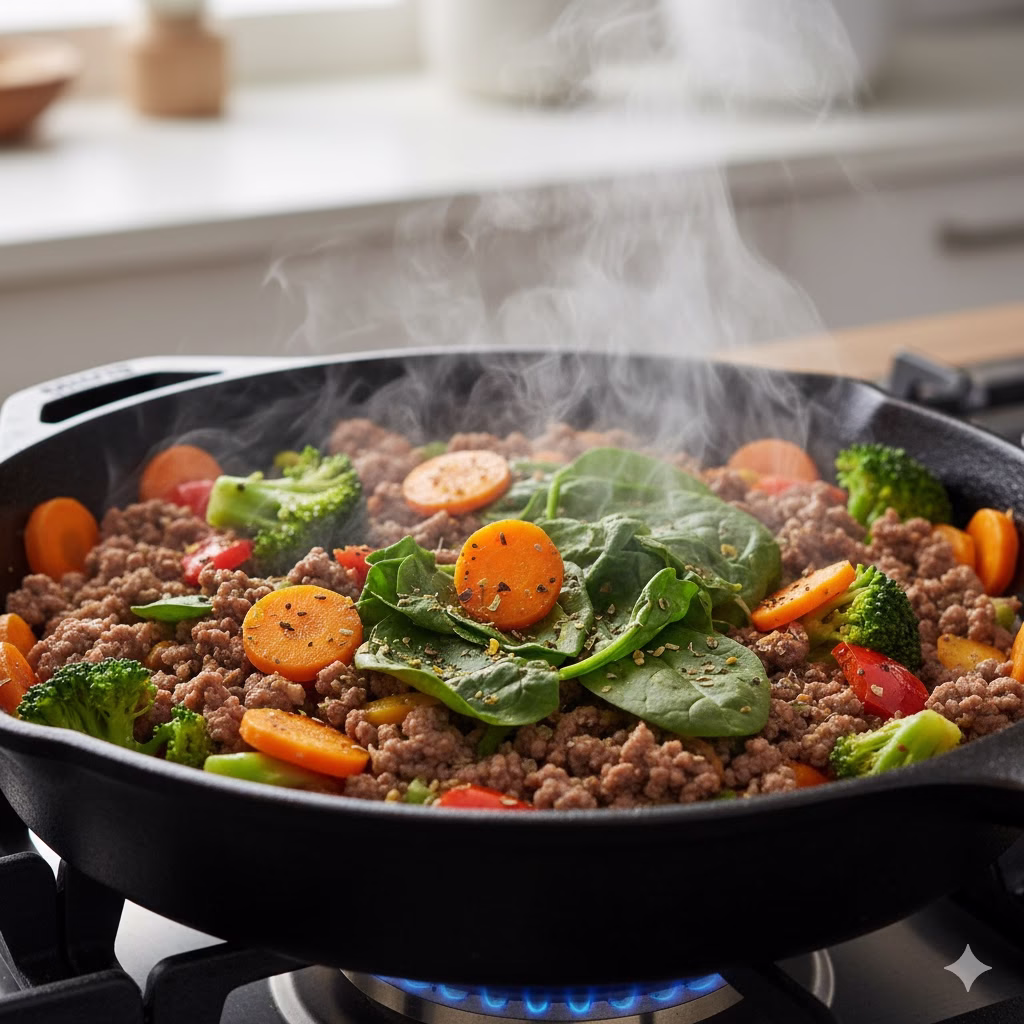
Q: Can I add vegetables directly to the pan with the chicken?

A: Yes, you can! This is a great way to make this an easy, one-pan Anti Inflammation Meal. Add vegetables that cook quickly, like sliced bell peppers, snap peas, or chopped onions. Add them to the pan during the last ten minutes of cooking time. Make sure they get covered in the delicious glaze.


References


The Best Anti Inflammation Recipes Ever? (Seriously)

A vibrant, overhead shot of a healthy bowl of Vegetables With Ground Beef, brightly lit on a wooden table, emphasizing delicious and effective Anti Inflammation Recipes.

My journey to feeling better didn’t start with a magic pill; it started in my kitchen. Like many people, I was tired of feeling sluggish, dealing with unexplained aches, and wishing for more energy every day. I discovered the amazing power of food to either harm or heal, and that’s when everything changed. Now, I’m sharing the simple, effective Anti Inflammation Recipes like my favorite Vegetables With Ground Beef meal, which helped me transform my health, proving that good eating can be both easy and incredibly satisfying.


If you have ever felt like your body is fighting against you—maybe you have constant tiredness, sore joints, or tummy trouble—you might have chronic inflammation. This word is everywhere now, and there is a good reason why. Inflammation is the root cause of many common health issues today. The great news is that your best tool to fight inflammation is not a medicine; it is the food in your kitchen.

This is more than just a diet. Eating an anti-inflammatory diet is a new way of living. It focuses on giving your body nutrients that actively fight the cell stress that causes inflammation. We will talk about colorful, whole foods. These foods are rich in compounds that protect your body, healthy fats, and fiber.

The idea of changing your diet can feel huge, but anti-inflammatory cooking is actually simple, cheap, and, best of all, delicious. This article will show you how. We will focus on one of the most basic and satisfying meals you can make: Vegetables With Ground Beef. This powerful recipe, along with a full guide on how to add anti-inflammatory ideas to your daily life, will help you start feeling your best right away.


What is Anti-Inflammatory Eating?

Before we look at the recipe, let’s quickly talk about what anti-inflammatory eating really means.

Inflammation is a normal and necessary body reaction. It is how your body protects itself when you get hurt or sick. Think of the redness and swelling around a small cut. That is acute inflammation doing its job well. But when this reaction stays too long and becomes chronic, it starts to damage healthy body parts and cells. Chronic low-grade inflammation is often linked to things we do every day. This includes stress, not enough sleep, and, most importantly, eating bad food.

Anti-inflammatory eating is a plan to lower chronic inflammation. You do this by cutting back on foods that cause it. These include refined sugars, bad fats, and highly processed oils. You increase foods that fight it. These include colorful vegetables, oily fish, nuts, seeds, and special spices.

The Foods That Fight Inflammation Best

To succeed with Anti Inflammation Recipes, you need to know the most important ingredients:

  • Omega-3 Fatty Acids: You find these in oily fish (salmon, sardines), walnuts, and flaxseeds. These fats directly compete with the bad Omega-6 fats that cause inflammation. They are vital for cell health.
  • Antioxidants: You find these in dark colored fruits and vegetables (berries, dark green leaves). They stop free radicals. Free radicals are unstable molecules that damage cells and cause inflammation.
  • Polyphenols: You find these in turmeric, green tea, and cocoa. These are strong plant compounds that powerfully fight inflammation and protect your body.
  • Fiber: You find this in whole grains, beans, and vegetables. Fiber feeds the good bacteria in your gut. A healthy gut is essential for controlling how your body responds to inflammation.


Feature Recipe: Power-Packed Vegetables With Ground Beef

This recipe is a perfect example of a strong anti-inflammatory meal. It is a simple one-pan dish. And it brings together lean protein, a variety of colorful vegetables that fight inflammation, and strong spices. It is easy to change up, fast to make, and is great for leftovers.

Why the Ingredients Fight Inflammation

  • Ground Beef (Grass-Fed is Best): People often worry about red meat, but quality matters a lot. Grass-fed beef is leaner. It has a better balance of anti-inflammatory Omega-3s than beef fed mainly on grain. It also gives you lots of zinc and iron.
  • Broccoli: This vegetable has sulforaphane. This is a compound known for lowering inflammation and protecting against cell stress.
  • Spinach/Kale: These dark leafy greens are full of vitamins A, C, and K. They also have strong compounds that help control inflammation.
  • Turmeric: This golden spice contains curcumin. Curcumin is one of the most studied anti-inflammatory compounds we know of.
  • Garlic and Onions: These vegetables have sulfur compounds. These compounds make your immune system stronger and help control inflammation.
  • Olive Oil (Extra Virgin): This is a healthy fat rich in monounsaturated fats. It also has oleocanthal, a compound that fights inflammation in a way similar to ibuprofen.

Ingredients

  • 1 tablespoon Extra Virgin Olive Oil
  • A pound lean grass-fed Ground Beef
  • 1 medium yellow Onion, cut into small pieces
  • 4 cloves Garlic, cut into small pieces
  • 1 cup chopped Broccoli florets
  • A cup chopped Carrots
  • 1 Red Bell Pepper, cut into small pieces
  • A cup baby Spinach or chopped Kale
  • 1 teaspoon Ground Turmeric
  • 1/2 teaspoon Black Pepper
  • 1 teaspoon Dried Oregano
  • 1/2 teaspoon Sea Salt (add more if you need it)
  • 1/4 cup Bone Broth or Water (optional, to keep it moist)

How to Do It: The Anti-Inflammatory Cooking Method

This way of cooking is planned to give you the best flavor and the most nutrients. It also keeps the steps very simple.

Step 1: Start the Flavor

  1. Heat the Olive Oil in a large skillet or deep pan over medium heat.
  2. Add the chopped Onion. Cook for 5–7 minutes until it looks clear and is soft. (Anti-Inflammatory Benefit: Cooking slowly helps keep the good parts of the oil and onions safe.)
  3. Add the cut Garlic. Cook for just one more minute until you can smell it strongly. (Anti-Inflammatory Benefit: Garlic’s immune-boosting power comes out when you heat it gently.)

Step 2: Cook the Beef and Add Spices

  1. Add the Ground Beef to the pan. Break it up with a spoon. Cook until the meat is fully browned.
  2. Once the beef is browned, pour out any extra fat if you need to.
  3. Stir in the Turmeric, Black Pepper, Oregano, and Sea Salt. (Anti-Inflammatory Benefit: Black pepper is very important. It greatly increases how well your body can use curcumin, the powerful anti-inflammatory compound in turmeric.)

Step 3: Add the Crunchy Color

  1. Add the Carrots and Broccoli florets to the pan. Cook for 5–7 minutes. You want the vegetables to be a little soft but still slightly crunchy. This helps keep their nutrients.
  2. If the pan seems dry, add a small splash of Bone Broth or water. This also helps steam the harder vegetables.

Step 4: The Final Greens

  1. Stir in the chopped Red Bell Pepper and the Spinach or Kale.
  2. Cook for only 2–3 minutes. Stop when the spinach has shrunk down and the bell pepper is still a bit firm. You want to avoid cooking the greens too much. This helps them keep their maximum level of protective compounds.

Step 5: Serve and Boost

  1. Taste the food and add more salt or spices if you want.
  2. Serve right away. For an extra dose of Omega-3s and crunch, you can put a few chopped walnuts or flaxseeds on top of the bowl.


How to Do It: Eating Anti-Inflammatory Meals Every Day

Cooking one anti-inflammatory meal is a good start, but eating like this all the time is the real goal. Here is a ‘how to do it’ guide to make this way of eating easy to stick with.

1. Get the Right Plate Balance

When you plan your meals (breakfast, lunch, and dinner), try to make your plate balanced. This means hitting all the things that fight inflammation:

  • Half of the Plate is Vegetables: Eat a lot of different colors. More colors mean more types of protective compounds you are eating. Look for dark greens, reds, purples, and oranges.
  • One-Quarter of the Plate is Lean Protein: This helps you feel full. It also helps your muscles fix themselves and keeps your immune system strong. Eat chicken, turkey, fish, grass-fed beef (like in our main recipe), eggs, or beans.
  • One-Quarter of the Plate is Healthy Fats or Slow-Burning Carbs: Choose healthy, anti-inflammatory fats like avocados, nuts, seeds, and olive oil. Or, choose carbs with lots of fiber, such as quinoa, oats, brown rice, or sweet potatoes.

2. Use Your Spices Well

Your spice rack is full of concentrated power to fight inflammation. How to do it:

  • Turmeric Paste: Mix turmeric powder with some black pepper and a healthy fat (like coconut oil). This makes a paste. Add a spoonful of this paste to your soups, stews, or cooked eggs every day.
  • Ginger: Add fresh grated ginger to your fruit shakes, teas, or stir-fry dishes. Ginger has gingerols, which are powerful compounds that fight inflammation and protect your cells.
  • Cinnamon: Use this to help keep your blood sugar steady. Keeping blood sugar steady is important for controlling inflammation. Sprinkle it on your morning oats, coffee, or add it when you bake healthy food.
  • Herbs: Use fresh herbs like basil, rosemary, and thyme often. They have natural oils that protect your body.

3. Smart Snacking

Snacking is often where people struggle to eat healthy. How to do it: Stop eating processed snacks that cause inflammation. Start eating these anti-inflammatory snacks instead:

  • Nuts and Seeds: A small amount of walnuts, almonds, or chia seeds gives you Omega-3s, fiber, and vitamin E.
  • Berries and Yogurt: A mix of blueberries or raspberries with plain, unsweetened Greek yogurt. Berries have little sugar and are rich in special protective compounds called anthocyanins.
  • Vegetables and Hummus: Dip carrots, celery, or bell peppers into hummus. This is a satisfying snack with lots of fiber.


Sample Anti-Inflammatory Meal Plan

Eating different foods helps you stick to the plan for a long time. It also makes sure you get all the nutrients you need. Here are examples of easy Anti Inflammation Recipes to fill out your day:

MealFocus on Anti-Inflammatory FoodsExample Recipe
BreakfastFiber, Omega-3s, Protective CompoundsCooked oats topped with flaxseeds, blueberries, and a sprinkle of cinnamon.
LunchLean Protein, Dark Greens, Healthy FatsBig salad with grilled chicken or chickpeas, mixed green leaves, avocado, and dressing made with lemon juice and olive oil.
DinnerLean Protein, Many Colors, SpicesVegetables With Ground Beef (our main recipe) served over a small amount of quinoa or shredded cauliflower.
SnackHealthy Fats, FiberApple slices with nut butter, or a hard-boiled egg.

The Power of the Gut

A lot of inflammation starts in your gut. If your gut bacteria are not balanced (this is called dysbiosis), it can harm the gut lining. This lets molecules that cause inflammation get into your blood.

How to do it:

  • Eat Fermented Foods: Eat foods like kimchi, sauerkraut, yogurt with live bacteria, or kefir. These foods are full of good bacteria (probiotics) that help balance your gut.
  • Eat Foods with Prebiotics: Prebiotics are the food for your good gut bacteria. You find them in onions, garlic, asparagus, bananas, and oats. Our Vegetables With Ground Beef recipe uses onions and garlic for this very reason.

Why the Vegetables With Ground Beef Recipe Works So Well

This specific recipe is very powerful. It directly addresses many things that cause inflammation. At the same time, it gives your body the basic materials it needs to repair itself:

  1. It Has No Refined Sugar: Unlike many ready-made meals or take-out foods, this recipe has no sugar added. This helps keep your blood sugar levels steady, which is very important for managing inflammation.
  2. It is Packed with Nutrients: By combining lean protein, lots of colorful vegetables, and strong spices, you are giving your body a huge dose of vitamins, minerals, and plant nutrients in one simple dish.
  3. Its Good for Your Gut: The high amount of fiber from the broccoli, carrots, and spinach helps keep your gut healthy and full of many different kinds of good bacteria.
  4. It is Flexible: You can easily swap the beef for ground turkey, lentils, or tofu. You can also change the vegetables based on what you have or what is in season. This helps stop you from getting bored with eating well. You can add a little chili pepper for an extra kick that also helps your body fight inflammation.

Sticking With It: Tips for Success

Making this change needs effort, but the benefits—more energy, less pain, and better health—are worth the work.

  • Prepare Meals Ahead of Time: Cook large amounts of basic foods on a Sunday. Cook things like the Vegetables With Ground Beef mix, quinoa, or roasted root vegetables. Having healthy food ready means you will not grab easy, unhealthy, high-inflammation foods when you are busy.
  • Stay Hydrated: Drink plenty of water. Drinking enough water is necessary for every body process, including flushing out inflammatory waste.
  • Check Food Labels: You need to look carefully. Look for hidden sugars, bad fats (trans fats), and fake ingredients, especially in sauces, dressings, and packaged snacks. If you cannot understand an ingredient, it is usually best to avoid it. Try to eat whole foods that only have one ingredient as much as you can.

Embracing Anti Inflammation Recipes is not about taking food away. It is about eating a lot of good food. It is about choosing bright, nourishing foods that actively help your body, instead of hurting it. Start with this simple and filling Vegetables With Ground Beef recipe. You will quickly begin to feel the amazing power of food.


Frequently Asked Questions (FAQ)

Q: Does all red meat cause inflammation?

A: Not necessarily. The studies show that the kind of red meat you eat matters most. Highly processed meats (like hot dogs or cold cuts) often cause inflammation. Lean, grass-fed ground beef, like the kind in our recipe, is better for you. It has less fat overall and more Omega-3s compared to beef fed on grain. It can be part of a healthy diet if you do not eat too much of it.

Q: Can I use frozen vegetables for the Vegetables With Ground Beef recipe?

A: Yes, absolutely. Frozen vegetables are usually picked when they are at their best and quickly frozen. This means they keep most of their nutrients. You might need to cook them a bit longer than fresh vegetables to make sure they are fully heated.

Q: How fast will I see a change when I eat an anti-inflammatory diet?

A: This is different for everyone. Some people feel better digestion and have more energy within one or two weeks. For others, it might take many weeks or months to notice a difference in long-term problems like sore joints. Staying consistent is the key to seeing good results over time.

Q: What is the single biggest change I should make today?

A: Stop eating added sugar and processed vegetable oils (like soy, corn, and cottonseed oils). These two things are thought to be the strongest causes of chronic inflammation in modern food. If you use natural sweetness and healthy fats like olive oil and avocado oil instead, you will see an immediate and important benefit.

Q: Do I need to stop eating gluten on this diet?

A: Not everyone has to stop eating gluten completely. If you have celiac disease or a doctor says you are sensitive to gluten, then you must avoid it. For other people, the goal should be to choose whole grains with lots of fiber (like oats, brown rice, or quinoa) instead of foods made from refined white flour. Refined grains can cause blood sugar to spike and add to inflammation.


References


Recent Posts


You NEED This Turmeric Chicken Soup: Quick Anti-Inflammatory Fix!

A steaming, beautifully presented bowl of golden Turmeric Chicken Soup, garnished with fresh cilantro, on a rustic wooden table next to a spoon, highlighting its comforting and healthy appeal as a Turmeric Chicken Soup.

Like many of you, I used to think the only cure for feeling run down was coffee and a nap. I struggled with constant aches, bloating, and that general “blah” feeling. Then, I realized my diet was the key to change. I’m just a regular person who found huge relief and energy by focusing on simple, delicious, anti-inflammatory foods. Now, I’m sharing the secret weapon—a soul-soothing, golden soup—the Turmeric Chicken Soup that made the biggest difference in my journey back to health.


The Golden Remedy: Why Turmeric Chicken Soup Is Your Ultimate Anti-Inflammatory Meal

Do you want to feel truly healthy? We all do. And want aches and pains to disappear. We want endless energy. But modern life often gets in the way. Stress, processed foods, and being constantly busy can lead to chronic inflammation.

This silent issue is a root cause of many common health problems. It causes joint pain. And leads to digestive issues. It makes you feel fatigued and can even cause skin problems.

The great news is that fighting back is simple. You don’t need a complicated detox. You don’t need expensive supplements. Sometimes, the most powerful medicine is already in your kitchen.

It’s Turmeric Chicken Soup. This is more than just comfortable food. It is a powerful, science-backed drink that fights inflammation. It is simply disguised as a delicious dinner. This soup uses the powerful effects of turmeric. It also includes other healthy, dense nutrients. This makes the soup more than a cold remedy. It is a proactive defense system for your entire body.

In this guide, we will look closely at why this soup works so well. We will give you a detailed “how-to” with easy examples. We will show you exactly how to make this delicious meal a key part of your anti-inflammatory lifestyle.

I. The Science Behind the Golden Glow: Key Anti-Inflammatory Ingredients

This recipe works because its ingredients work together powerfully. This is especially true for the main ingredient: turmeric.

1. Turmeric (The Anti-Inflammatory Powerhouse)

The active substance in turmeric is curcumin. Curcumin is a natural plant chemical. It has strong anti-inflammatory effects that are proven by science. And works by targeting many steps in the body’s process of inflammation. It does this at the molecular level. And lowers the amount of inflammatory molecules the body produces (Aggarwal & Harikumar, 2009).

How to Do It: You must pair turmeric with black pepper to get the most benefit. Black pepper has a substance called piperine. Piperine helps your body absorb curcumin much better. It can increase absorption by up to 2000% (Shoba et al., 1998). Our recipe uses a generous amount of black pepper for the maximum health benefit.

2. Chicken Broth (The Gut Healer)

The soup base is very important. If you use bone broth, it is full of collagen and gelatin. It also has amino acids like proline and glycine. These substances are vital for repairing and protecting your gut lining. This gut lining is often called the “second brain.” A strong, healthy gut stops inflammatory particles from getting into your bloodstream.

How to Do It: Broth from the store is fine if you are in a rush. However, making your own bone broth is best. Simmer chicken bones slowly for 8 to 24 hours. This process creates the highest amount of healing compounds.

3. Garlic and Ginger (Immune Boosters)

Both garlic and ginger have natural substances. People have used them for a long time. Scientists also recognize their power. They fight inflammation and act as antioxidants. Ginger contains gingerols. These compounds can stop the creation of chemicals that cause inflammation (Grzanna et al., 2005).

How to Do It: Use plenty of garlic and ginger! Don’t be shy. Add them early when you cook (after softening the onions). This will infuse the oil. It builds a very strong flavor base.

4. Leafy Greens and Vegetables (Antioxidant Load)

Adding vegetables like spinach, kale, carrots, and celery is important. They provide essential vitamins, minerals, and antioxidants. These antioxidants help neutralize free radicals. Free radicals are a main cause of inflammation in the body.

How to Do It: Add greens that cook fast, like spinach or chopped kale, right at the end. Stir them until they just wilt. This simple step keeps their highest level of nutrients.

II. The Core Recipe: Turmeric Chicken Soup

This recipe is simple and strong. It aims for high anti-inflammatory benefits without losing any of the great taste.

Turmeric Chicken Soup

Prep Time: 15 minutes

Cook Time: 45 minutes

Servings: 6–8

Ingredients

CategoryIngredientQuantityNotes
ProteinChicken Breast or Thighs1.5 lbs (boneless, skinless)Can be pre-cooked and shredded
AromaticsYellow Onion, finely chopped1 large
AromaticsCarrots, sliced or diced3 medium
AromaticsCelery, sliced3 stalks
AromaticsFresh Garlic, minced4−6 cloves
AromaticsFresh Ginger, grated1 tablespoonUse more for extra potency
Anti-InflammatoryGround Turmeric Powder2 teaspoonsDo not skimp!
Anti-InflammatoryBlack Pepper, freshly ground1/2 teaspoonEssential for turmeric absorption
Liquid BaseChicken Broth (low sodium)8 cupsUse bone broth if possible
Flavor/FinishBay Leaves2
Flavor/FinishLemon Juice (freshly squeezed)2 tablespoonsBrightens flavor at the end
GreensBaby Spinach or Kale2 cups, packedOptional, for added nutrients
FatsOlive Oil or Coconut Oil2 tablespoonsFor sautéing aromatics
SeasoningSalt (to taste)

Instructions: How to Do It

  1. Prep the Foundation (Sautéing): Use a large pot or Dutch oven. Heat the olive oil over medium heat. Add the chopped onion, carrots, and celery. Cook gently for 5–7 minutes. The onions should become clear. The vegetables should start to soften. This step is called “sweating.” It builds a vital flavor base.
  2. Activate the Powers (Turmeric & Aromatics): Add the minced garlic and grated ginger. Cook for 1 minute until they smell fragrant. Now, add the ground turmeric and black pepper. This step is crucial. Stir quickly for about 30 seconds. The heat and fat (oil) will help wake up the curcumin in the turmeric.
    • Example: By adding the turmeric right into the oil, you create a rich paste. This paste spreads the color and flavor throughout the soup very well.
  3. Simmer and Infuse (Broth & Chicken): Pour in the chicken broth. Add the bay leaves and the chicken pieces. (The chicken can be raw or pre-cooked and shredded.) Bring the soup to a soft boil. Then, quickly lower the heat to a gentle simmer.
    • If using raw chicken: Cook, covered, for 20–25 minutes. The chicken is done when it reaches an internal temperature of 165∘F or 74∘C.
    • If using pre-cooked chicken: Simmer for 15–20 minutes. This lets the flavors mix together perfectly.
  4. Shred and Return (If Using Raw): Take the cooked chicken out of the pot very carefully. Put it on a cutting board. Shred the chicken using two forks. Put the shredded chicken back into the pot. Remove and throw away the bay leaves.
  5. Final Touches (Greens & Acid): Stir in the packed spinach or kale. Stir until the greens just wilt (about 1 minute). Take the pot off the heat. Stir in the fresh lemon juice. Season the soup with salt until it tastes perfect to you.
  6. Serve: Scoop the soup into bowls. Put fresh herbs on top (like parsley or cilantro). This adds a last burst of flavor and color.

III. Expanding the Anti-Inflammatory Recipes: Variations and Examples

The main recipe is already a powerhouse of nutrition. But you can easily change and improve your Turmeric Chicken Soup. You can make it fit your taste and diet needs. This will boost its anti-inflammatory power even more.

1. Boost the Antioxidant Load (More Veggies)

  • Sweet Potato/Butternut Squash: Add cubed sweet potatoes or squash in Step 1. They offer complex carbs and beta-carotene. Beta-carotene is a very strong antioxidant.
    • Example: Add 1 cup of peeled and cubed butternut squash along with the carrots and celery.
  • Mushrooms: Include 1 cup of sliced shiitake or cremini mushrooms. Some substances in mushrooms, like beta-glucans, help the immune system. They also help lower inflammation.

2. Make it a Full Meal (Grains and Fiber)

  • Lentils or Chickpeas: Add 1/2 cup of pre-cooked lentils or a can of rinsed chickpeas. Add these during the last 15 minutes of simmering. These foods add fiber. Fiber helps keep your gut bacteria healthy. A healthy gut is key to controlling inflammation.
  • Gluten-Free Grains: Stir in 1/2 cup of pre-cooked quinoa or brown rice at the end. This makes the soup more filling.

3. Spice it Up (For Targeted Relief)

  • Chili/Cayenne: Add a tiny bit of cayenne pepper. This adds some heat. It also contains capsaicin. Capsaicin can help lower the feeling of pain. Add this in Step 2.
  • Coconut Milk: For a soup that is richer and creamier, stir in 1/2 cup of full-fat coconut milk (make sure it is unsweetened). Do this near the end of cooking. Coconut milk adds healthy fats. These fats help your body absorb nutrients better. It also gives the soup a lovely, comforting texture.

IV. Making Turmeric Chicken Soup a Lifestyle

You need to be consistent when fighting long-term inflammation. This soup is perfect for cooking ahead of time. You will always have a quick, healing meal ready to go.

Meal Prep How-To

  1. Large Batch Cooking: Always make two or three times the amount of the recipe. The soup freezes well. The flavors taste even better the next day after sitting in the refrigerator.
  2. Storage:
    • Refrigeration: Once the soup is cool, store it in containers that seal tightly. It lasts for up to 4 days.
    • Freezing: Let the soup cool. Ladle it into containers that are safe for the freezer. You can also use large freezer bags. Lay them flat for easy stacking. You can freeze the soup for up to 3 months.
  3. The “Soup Shot” Example: Do you struggle with sharp, local pain? (Like a knee flare-up.) Keep a small jar of the thick broth (without the chicken or veggies) in the fridge. Heat a small amount. Drink it like a hot shot in the morning. This gives you a fast dose of anti-inflammatory relief.

V. Beyond the Bowl: Other Anti Inflammatory Recipes

Turmeric Chicken Soup is a great food. But you need to eat other Anti Inflammatory Recipes every day for a full health plan.

Quick Anti-Inflammatory Swaps

MealAnti-Inflammatory Recipe/SwapBenefit
BreakfastTurmeric SmoothieMix berries (high in antioxidants), spinach, almond milk, and 1/2 tsp of turmeric/pepper mix.
LunchSalmon SaladUse wild-caught salmon (full of Omega-3 fatty acids). Place it over mixed greens with an olive oil/lemon dressing.
SnackAvocado ToastUse whole-grain or sourdough bread. Top it with mashed avocado (healthy fats). Sprinkle with chili flakes.
DinnerRoasted VegetablesRoast broccoli, cauliflower, or Brussels sprouts in olive oil. These green veggies contain substances that reduce inflammation.

Choose these healthy, nutrient-rich meals often. Meals like our wonderful Turmeric Chicken Soup help you heal. You are taking charge of your health. You are moving toward better, lasting well-being.


Frequently Asked Questions (FAQ)

Q: How often should I eat Turmeric Chicken Soup to see benefits?

A: Everyone is different, so results will vary. However, many people who start eating anti-inflammatory foods notice better energy and less pain within two to four weeks. If you want to focus on healing, try to eat a bowl 3 to 4 times a week. This is especially helpful when you are stressed or feel sick.

Q: Can I use fresh turmeric root instead of powder?

A: Yes, absolutely! Fresh turmeric root is amazing. You will need to grate it into very small pieces. A good guide is to use about three times more fresh root than powder. For this recipe, use about 2 to 3 inches of grated root.

Q: I don’t eat chicken. Can this be a vegetarian Anti Inflammatory Recipe?

A: Yes, it can! You can make a vegetarian version. Replace the chicken with chickpeas, lentils, or firm tofu. Use a high-quality vegetable or mushroom broth. The main anti-inflammatory benefits come from the turmeric, ginger, garlic, and vegetables, which you still use.

Q: Does heating the turmeric destroy the curcumin?

A: Cooking gently, like simmering in this soup, does not harm the curcumin very much. In fact, cooking turmeric with fat (the oil) helps your body absorb it better. The most important thing is that you must always include the black pepper.

Q: What is the best type of oil to use for the highest anti-inflammatory benefit?

A: Extra Virgin Olive Oil (EVOO) is usually the best choice. It has many healthy fats and plant chemicals. These chemicals, like oleocanthal, have anti-inflammatory effects much like common pain relievers. Coconut oil is also a great choice because it contains healthy medium-chain fats.


References


Recent Posts


10 Reasons To Go On Vacation In A Tiny House

A modern, dark-wood tiny house with large windows sits nestled on a stone path next to a flowing river, backed by a dense pine forest and snow-capped mountains at sunrise, perfectly capturing a serene and isolated mountain Vacation spot.

In a world that often demands more—more space, more things, more complexity—finding a moment to just be can feel like a luxury. We’ve all felt the familiar drag of life’s endless to-do list, which is why a Vacation is essential. The next time you need to reset, consider shrinking your world, just for a little while. This is the simple secret behind the growing joy of a tiny house getaway.


Introduction

The tiny house movement has caught the attention of many people. It is not just a new way to live full-time, but also a fresh and very meaningful way to take a Vacation. Escaping the routine of our big, traditional lives does not need a huge resort or an expensive, high-maintenance villa. Instead, it often requires the opposite: a smart, perfectly sized space. This space helps you focus on the world outside and the people you are with.

A tiny house Vacation is your chance to try out a simpler, minimalist life. It is a time to step away from constantly buying things. It lets you lower your impact on the environment. You trade your large home’s cleaning tasks for extra time to watch the sunrise. Far from feeling cramped, a well-designed tiny home offers a deep sense of freedom. You are not just renting a space; you are choosing a way of thinking. This mindset focuses on important experiences instead of too many things.

The benefits of choosing a tiny house for your next trip are huge, from saving money to feeling closer to nature. What follows are 10 strong reasons why this small dwelling leads to a truly big adventure.


1. Reconnect with Nature and Yourself

One of the best and most immediate benefits of a tiny house Vacation is that you will be very close to nature. Hotels are often built in busy city areas. Tiny house rentals, however, are usually set in beautiful, quiet spots. These include forests, mountain hideaways, lakeside areas, or gentle meadows.

The careful design of most tiny homes makes this connection even stronger. They often have huge windows, folding doors, and big decks. These features make the line between the cozy inside and the great outdoors less clear. This means your living room view is always changing. The sound of birds is your morning alarm. And watching the stars is your evening entertainment.

This forced closeness to nature is a great cure for modern-day stress. It helps you take a real break from your screens. It encourages you to put down your phone and instead read a book, use a hiking map, or talk with your travel partner. This is more than just a change of view; it is a vital reset for your mind and feelings.

Example: Picture yourself waking up in a tiny house in the Scottish Highlands. A tall window next to your bed perfectly frames the misty mountains. You walk out onto a small wooden deck, and the only sound is the gentle wind. This feeling of being truly immersed in nature is a healing experience you cannot get in a standard hotel.


2. Save Money Right Away

For many people, the first reason they like the tiny house idea is the money they save. This benefit works perfectly for a Vacation. Renting a tiny house is almost always cheaper than booking a traditional hotel room or a big holiday rental of the same quality and unique style.

The lower cost of your stay frees up a lot of your budget. Instead of spending too much on expensive nightly rates, you can use that money for great activities. This might include a local cooking lesson, a guided fishing trip, great meals at local places, or just making your trip a few days longer. The tiny house makes high-quality travel affordable. It changes what ‘luxury’ means—it is not about the size; it is about great design and location for a much lower price.

How to do it: Budgeting Brilliance

  • Compare Prices: When you plan your trip, compare the cost of a nice tiny home in a good area (like near a National Park) with a regular-sized rental. You will often find the tiny house offers a more special, custom-built experience for less cash.
  • Use the Kitchen: Tiny houses almost always come with a small but full kitchen. Cooking just a few meals a day in your tiny home greatly cuts down on eating-out costs. This adds up to big savings throughout your Vacation.

3. Enjoy the Happiness of Simple Living

A tiny house shows you the best of smart design. It makes you live with only what you truly need. This limit is surprisingly freeing. When you only have space for a few outfits, a couple of books, and the basic items, the stress of clutter and endless choices disappears.

This simple living rule of “less is more” directly helps your mind during your Vacation. Less space means less time spent cleaning, organizing, or looking for lost things. It is a chance to live mindfully. You become very aware of every item you bring and use. This simplicity allows you to step off the continuous cycle of buying things. You can focus purely on relaxing, connecting with others, and exploring. The simple home leads to a simpler, calmer mind.


4. See Clever, High-Quality Design

Tiny houses are not just simple sheds; they are often amazing pieces of architecture. Since the space is small, every part is planned with great care. This leads to truly smart, high-quality, and often custom-made design details.

When you choose a tiny house for your Vacation, you often stay in a space with luxury finishes. These would be too costly to use in a regular-sized home. Think about custom-built cupboards, high-end taps and fittings, beautiful wooden parts, and clever ways to save space, like beds that fold into the wall or sliding walls. The experience is often special, unique, and deeply personal. It gives you a level of charm and skilled work that large hotel chains cannot match.

Example: Some tiny houses are converted shipping containers with cool, modern interiors. Others are handmade wooden cabins with a sleeping loft that has a skylight for perfect night-time viewing. This wide range of unique design makes choosing your rental an adventure on its own.


5. Take a Real Break from Screens

While many tiny house rentals offer Wi-Fi, more and more hosts are offering cabins made just for a break from screens. These often sit far from strong phone service, which encourages you to turn off your devices on purpose.

The tiny house setting perfectly supports this goal. Without the large rooms and endless TV channels of a hotel, your attention naturally moves to activities that do not involve screens. You might find yourself reading more, playing board games (often provided by the host), writing, drawing, or just having a talk without any interruptions. This intentional break from the digital world is likely the most helpful part of the Vacation for many tired, modern travelers.

How to do it: The Digital Detox Lockbox

  • Many tiny house retreats made for digital breaks offer a simple lockbox. The process is clear: when you arrive, put all your non-essential electronics (phones, laptops, tablets) into the box. Agree not to open it until you leave. This small step creates an immediate, strong barrier between you and your digital life. It makes sure you get the full benefits of the experience.

6. Keep Your Environmental Impact Small

If you care about the planet, a tiny house Vacation is a choice you can feel good about. Because they are so small, tiny homes naturally need much less material to build. They also use much less energy to heat and cool.

Many rental tiny houses go even further. They often have sustainable technology that gives you a true off-grid experience. These may include:

  • Solar Panels: These provide clean energy from the sun.
  • Composting Toilets: These greatly reduce the amount of water used.
  • Rainwater Systems: These collect water for uses like washing (not drinking).

Staying in such a space connects you clearly to sustainable living. You can enjoy a relaxing Vacation with a much smaller carbon footprint. This feeling of being a responsible traveler is a growing and important part of the modern getaway.


7. Enjoy Complete Privacy and Quiet

In a hotel, you share walls, hallways, and public areas with many other guests. A tiny house, however, gives you total and complete privacy. These units are usually placed on private land. They are often far apart from others in a small group, or completely alone in a remote spot.

This quiet and separation is ideal for a trip for two, a private place for serious creative work, or simply a calm space for people who need to recharge alone. You control your surroundings. You are free from the noise of neighbours or the need to talk with staff. The tiny house becomes your own private safe place in nature.

Example: Think about a tiny house set on a vineyard or a busy farm. Though the farm might welcome visitors, your tiny home is hidden away on a far corner of the land, looking out over the fields. You can watch the local work from a distance or go out to join in. All the while, you have a personal, private base to return to.


8. Try Out the Tiny House Lifestyle

Perhaps you have thought about moving to a smaller house, building your own tiny home, or making your life simpler. A tiny house Vacation offers the perfect, easy way to try this lifestyle for yourself. It is a practice run—a weekend test drive of a big life change.

This direct experience helps you answer practical questions before you commit long-term:

  • How does it feel to cook in a very small kitchen?
  • Are you okay climbing a ladder to get to a high bed?
  • Do you truly like the simple way of dealing with storage and living space?

By trying the tiny house life on your Vacation, you gain helpful knowledge. This makes sure that if you do decide to go tiny forever, you do so with confidence and clear thinking.


9. Get Closer to Local Communities

Tiny houses are generally located outside of the main tourist areas. This places you closer to real local communities and unique cultural experiences. This is very different from the common, less personal feeling of staying in a large corporate hotel.

Staying in a tiny house often means buying your food from a local farm stand. You can visit a small bakery or eat a meal at a local, favourite restaurant that is not a chain. Hosts often give personal suggestions. They share their inside knowledge of the best trails, hidden spots, and community events. This deeper look into the local culture makes your Vacation much richer than a regular tourist trip.

How to do it: Maximise Local Engagement

  • Ask Your Host: Before you arrive, email your host. Ask for their top three favourite local spots, such as cafes, hiking paths, or shops. These ideas are extremely helpful.
  • Visit a Farmer’s Market: Plan one of your tiny house meals around fresh food from a local market. This supports the people in the area and makes sure you are eating very fresh, seasonal food.

10. Start Creative Ideas and Focus Better

The small, focused environment of a tiny house is surprisingly good for creative thinking and deep work (if you need to work). Experts have noted that a few limits on your environment can actually improve focus and creativity. When everything has its place, and you are free from the distractions of a large, messy home, your mind has room to wander and create in a useful way.

Many tiny house rentals are sought out by writers, artists, and people who work remotely. They look for a calm, focused retreat. The peace of nature combined with the simple function of the home creates the perfect state of ‘flow’ for starting a creative project or enjoying a meaningful time of personal thought.


How to Book Your Tiny House Vacation

Booking a tiny house is easy now, thanks to specialized rental websites and booking platforms.

1. Finding the Perfect Tiny House

  • Special Platforms: Companies (both big and small) that only focus on tiny houses or off-grid experiences are great places to look first, as they offer carefully chosen options.
  • General Booking Sites: Major holiday rental websites now have sections for ‘Tiny House’ or ‘Cabin’. Use the search filter for ‘Unique Stays’ or ‘Tiny Homes’ to find what you need.

2. Key Things to Look For

  • Location: Decide what kind of nature you want: beach, forest, desert, or mountains. Search by the region or by the nearest National Park.
  • Things You Need: Be clear about your must-haves. Do you need Wi-Fi to work, a hot tub for luxury, or are you aiming for a fully off-grid trip (which means no electric plug-ins)?
  • Beds: Check the sleeping arrangements carefully. Tiny houses often have raised bedrooms reached by a ladder. Make sure this works for everyone in your group.

3. Getting Ready for Your Stay

  • Pack Light (Very Important): Space is tight. Pack only a few key outfits, items that have many uses (like travel soap), and only essential devices. You will be glad your bags are not blocking the floor.
  • Bring Fun Activities: Assume the Wi-Fi will be weak or non-existent. Pack physical books, a deck of cards, or a small board game.
  • Plan Simple Meals: Since storage and fridge space are small, plan simple meals. Buy groceries often and locally, instead of trying to buy a whole week’s worth of food at once.

FAQ

Q: Are tiny houses comfortable enough for a long Vacation?

A: Yes, they are. Modern tiny houses are designed to be comfortable and fully useful. They are small, but they have full bathrooms, comfy beds (often in a loft), temperature control, and kitchens with good equipment. The smart design means every space is used well, so you do not have to give up comfort.

Q: Can a family stay in a tiny house?

A: Many tiny houses are built for two people. However, more and more are being built to hold families. They often have two separate loft areas or one bed on the main floor and one loft. Always check the listing for the exact number of beds and how many people can stay. Look for tiny houses on wheels (THOWs) or custom-built tiny cabins, as they can have different layouts.

Q: What is the main difference between a tiny house and a cabin Vacation?

A: A tiny house is defined by its small size (usually under 400 square feet). It is also based on the idea of simple, efficient, and often sustainable living. A cabin might also be small, but it might not have the same level of smart architecture or focus on efficient, multi-use space and green technology that defines the tiny house movement. Tiny houses offer a focused, intentional experience of living small.

Q: Is it possible to go completely off-grid?

A: It is absolutely possible. Many tiny house rentals are made specifically for an off-grid experience. They use solar power, gas, and water collection systems. If you want a complete break from the electricity grid, look for words like “off-grid,” “digital detox,” or “solar powered” in the rental description. Be ready to use less power for items like hair dryers.


Reference Section


Recent Posts


Creating Museum-Quality Art at Home (No Skill Needed!)

A high-impact, minimalist textured canvas art piece in off-white hangs above a chic wooden console table in a bright, modern room. This elegant Art at Home piece showcases the beauty of DIY textured wall decor, complementing a black vase and books.

Like many people, I thought beautiful, statement-making Art at Home belonged only in expensive galleries. My own walls were often bare or covered in prints that felt lifeless. I struggled with decorating on a budget. Then I found simple ways to turn cheap materials into sophisticated DIY Wall Art and elegant Wall Hangings. This completely changed my home and my creative outlook. Now, I want to show you how you can achieve that same high-end look without any art experience.


Introduction: The Key to High-End Art

For centuries, people viewed art as a difficult skill. It needed special training and costly materials. But modern art movements, like Abstract Expressionism, proved something different. Impact comes from concept, texture, and size, not just technical skill.

The most beautiful art you see in design magazines looks complex, but it is often made using simple methods. This guide will make the process easy. We will turn intimidating projects into fun weekend activities. Are you looking for new Wall Hangings? Do you need easy DIY Wall Art ideas? Do you simply want to make sophisticated Art at Home? We will cover three easy techniques that guarantee stunning, museum-quality results.


Project 1: The Minimalist Sculptural Canvas

Contemporary high-end art often uses heavy texture, few colors, and a large size. This technique is surprisingly easy. It requires zero drawing or painting ability. The focus is completely on surface and dimension.

What You’ll Need (The Art at Home Toolkit)

  • Canvas: Pick a deep-edge canvas for a gallery style. For a big impact, choose a size of at least 24in×36in.
  • Joint Compound or Spackling Paste: This is cheap and found at any hardware store. It acts as your sculpting material.
  • Trowel, Palette Knife, or Old Credit Card: Use these tools for spreading the material and adding texture.
  • Acrylic Paint (Optional): Use matte white, beige, or a deep charcoal for a sleek finish.
  • Caulk Gun and Caulk (Optional): Use this for creating raised, controlled lines.

How To Do It: Creating Abstract Texture

Step 1: Prepare Your Space

Place your canvas flat on a surface you can protect. You can apply a layer of primer, but for textured art, you can often start right on the raw canvas.

Step 2: Add the Base Layer of Texture

Use a large trowel or palette knife. Scoop up a lot of the joint compound. Start spreading an uneven, thick layer across the canvas. Do not try to make it perfect. Variation and randomness are your goals. Push the compound around. Create high spots and low areas.

Step 3: Adding Controlled Detail (Optional)

You can create a sculptural effect that is popular in modern DIY Wall Art. Load your caulk gun with clear or white caulk. Slowly and carefully, draw straight lines, curves, or simple geometric shapes onto the wet compound. These shapes will look very dramatic once the piece dries.

Image Placement 2: Process Shot

Step 4: The Final Swipe

Take a long, flat object, like a piece of cardboard or a ruler. Drag it lightly over the surface. This will flatten some high spots. It will also leave deep channels and ridges. This mimics a professional method called impasto. The finished surface will catch light beautifully. This gives it that expensive, museum-worthy finish.

Step 5: Drying and Finishing

Let the compound dry completely. This might take 24 to 48 hours, depending on how thick it is. Once it is dry, you have two choices. You can leave it the natural color (usually matte white). This is the truly minimalist look. Or, you can paint it a single, sophisticated color using matte acrylic paint.


Project 2: Abstract Watercolor Bleeding (High-Contrast Art)

Maybe you do not like texture. If so, the drama of high-contrast color bleeding is an easy way to create sophisticated Abstract Expressionist Art at Home. With this method, the material does the hard work. The resulting pieces look complicated but are actually simple to make.

What You’ll Need

  • Watercolor Paper or Bristol Board: Choose a heavy kind, 140lb or more. This stops the paper from bending or buckling.
  • Liquid Watercolor Ink or Acrylic Ink: Use highly pigmented liquid colors for the best “bleed” effect. Only use 2 to 3 colors that look good together (for example, Prussian Blue, Burnt Sienna, and Gold).
  • Spray Bottle: Fill this with plain water.
  • Large Flat Brush: Use this to wet the paper.
  • Eye Droppers or Small Pipettes: Use these for precise control when adding ink.

How To Do It: Controlled Flow and Contrast

Step 1: Prepare the Paper

Tape your paper down to a stiff backing board with painter’s tape. This stops it from warping. You can also just work on a very flat, protected table. Use the large flat brush. Completely soak the area where you plan to add the color. The paper must be very wet, not just damp. This is essential for letting the colors flow.

Step 2: Dropping the Color

Fill your pipette or dropper with one color. Hold the dropper close to the paper. Drop small, concentrated spots of ink onto the wet surface. Watch as the water immediately pushes the pigment outward. This creates beautiful, unpredictable bursts of color.

Step 3: Adding the Second Color

Let the first color settle for a moment. Then, add your second color. Drop it near, but not directly on the first color pool. The inks will meet and mix at the edges. This creates a soft transition, like a natural gradient. A brush cannot easily copy this effect.

Step 4: Activating the Flow

Pick up the paper and gently tilt it. Let gravity pull the colors into controlled streaks. Or, use the spray bottle. Lightly mist water right onto the color pools. This will make the colors bleed and blur even more. The less you touch it with a brush, the more natural and professional the result will look.

Step 5: Framing for Impact

Once it is dry, put it in a simple, museum-style frame. A thin profile in black or natural wood, plus a wide, white mat, will improve the look instantly. This turns your abstract study into true museum-quality art at home.


Project 3: The Oversized Textile Wall Hanging

Not all high-end DIY Wall Art needs a frame. Large Wall Hangings made of fabric are a great way to add warmth, texture, and quiet to a room. This is a very good approach for making a centerpiece above a couch or a bed.

What You’ll Need

  • Fabric: Choose a heavy, textured fabric. Good options are raw canvas, linen, duck cloth, or a thick cotton drop cloth. Use a natural, plain color for the most sophisticated feel.
  • Dye or Fabric Paint (Optional): You can create a soft, dipped color effect with fabric dye.
  • Wood Dowel or Branch: You will use this to hang the fabric. The dowel should be a little wider than your fabric.
  • Twine or Rope: Use this for hanging the textile.
  • Sewing Machine or Fabric Glue: Use this to create a simple sleeve for the dowel.

How To Do It: Simple, Large Textile Art

Step 1: Prepare the Fabric

Cut your fabric to the size you want. A long, narrow piece often looks best for a modern Wall Hanging. For example, 3ft wide by 5ft tall. Finish the raw edges. You can use a sewing machine or strong fabric glue to make a clean hem.

Step 2: The Hanging Sleeve

Fold the top edge of the fabric over by about 2in. Sew or glue it down to make a sleeve, also called a casing. Make sure the dowel can slide through this sleeve easily.

Step 3: Applying Texture (The Shibori Method)

A subtle pattern improves the look. This step is optional. The Japanese shibori method (a type of tie-dye) works very well. Scrunch or fold a section of the fabric. Secure it tightly using rubber bands. Dip only the bottom half of the fabric into a bucket of diluted fabric dye. When the fabric dries and you remove the ties, you will see soft, organic patterns. This makes the Art at Home piece look high-concept.

Step 4: Put It Together

Slide your wood dowel or natural branch through the sleeve at the top. Tie a length of strong twine or rope to both ends of the dowel. Your large, museum-worthy Wall Hanging is now ready to mount on the wall.


Key Principles for Museum-Quality DIY Wall Art

The success of your DIY Wall Art is less about skill. It is more about using four main design principles:

1. The Power of Size

A small piece of art on a large wall looks out of place. A large piece of art on any wall makes a statement. To get that gallery look, always choose a size bigger than you think you need. A piece that fills two-thirds of the empty wall space will look more important and more expensive.

2. Focus on Texture

Texture makes everything equal. If you use few colors (like shades of white, black, or grey), the viewer will focus on the three-dimensional surface. This is why joint compound or thick textiles work so well. They add depth that a flat print cannot offer.

3. Use Few Colors

Professional galleries often display art that uses a simple, limited color plan. Stick to one, two, or maybe three colors at most. Choose colors that are muted, like earthy tones, or use strong neutral colors. This keeps the focus on the form and texture. It creates a refined, curated feeling.

4. Professional Display

Do not forget how important the frame and the hanging method are.

  • Framing: Choose frames with thin, clean lines. Use black, white, or natural wood. For prints, use a mat that is very wide. This creates “negative space,” a trick used by professional galleries.
  • Hanging: Make sure your Wall Hangings or framed art are hung at eye level. The middle of the artwork should be about 57in from the floor.

Expanding Your Collection: More Art at Home Ideas

Idea 1: The Magazine Collage (Clean Minimalism)

How To Do It: Find pages from fashion or architecture magazines. Look for large areas of color, black and white images, or interesting text. Cut these into simple geometric shapes. Carefully arrange them onto a board or a canvas. Seal the whole surface using only matte Mod Podge. The precise layering and clean cuts create a sharp, graphic style. This often looks like early 20th century abstract art.

Idea 2: Line Drawing on Linen

How To Do It: Buy a piece of raw, unbleached linen or drop cloth. Stretch it over a wood frame. Use a thick black paint pen or a permanent marker. Draw a single, continuous, slightly imperfect line. Draw a simple figure, face, or landscape. The natural feel of the linen combined with the single, bold line creates a very modern, gallery-worthy piece of Art at Home.

Idea 3: Shadow Box Assemblage (Wall Hangings from Found Objects)

How To Do It: Find an old shadow box or a deep picture frame. Collect small objects that are all the same color (for example, all white, all rusty metal, or all natural wood pieces). Glue them inside the shadow box. Use strong glue. Create a repeating pattern or an abstract scene. This turns simple found items into a 3D Wall Hanging. It adds depth and interest to your space.


Frequently Asked Questions (FAQ)

What is the cheapest material for large-scale DIY Wall Art?

The cheapest and most useful material is a simple cotton painter’s drop cloth. They come in very large sizes. They have a beautiful natural texture. You can use them as a canvas for the sculptural project or as the fabric base for Wall Hangings. You can usually find one big enough for a small wall for less than the cost of one store-bought print.

Do I truly need ‘no skill’ to make the sculptural canvas?

Yes, that is true. The sculptural canvas works because the texture is meant to be uneven and random. There is no correct or incorrect way to spread the joint compound. Your “mistakes” are what give the art its unique look and depth. This mimics the expressive style of professional abstract art. It is the perfect DIY Wall Art project for anyone starting out.

How can I protect the finished surface of my DIY art?

For painted pieces (ink or acrylic), spray a final layer of matte or satin varnish. This will seal the surface. It protects it from dust and keeps the color from fading. For the sculptural joint compound art, spray a clear matte topcoat after it is fully dry. This prevents the surface from getting scuffed.

What is the best way to hang large, heavy DIY Wall Art?

Always use two separate picture hooks or D-rings. Place them about one-third of the way down from the top edge on the back of the piece. This makes sure the weight is spread out evenly. It also stops the piece from tilting. For very large Wall Hangings or canvases, use wall anchors if you cannot find wall studs.


References


Dream Backyard Landscaping Ideas That Will Blow Your Mind

A breathtaking, multi-level backyard landscape featuring a pool, a fire pit area with built-in seating, and a dining pergola covered in flowering vines, all bathed in warm, soft sunlight. This is a stunning example of luxury Backyard Landscaping design.

Hey there, fellow dreamers and garden lovers! Like many, I’ve spent lots of time looking at pictures, wishing for a backyard that feels like a peaceful spot just for me. My journey to change outdoor spaces started with a small, boring patch of grass and a big dream. Through trying, learning a lot about Backyard Landscaping, and loving the process of making beautiful, useful spaces, I’ve found the ways to turn those amazing ideas into real places. Join me as we explore how to plan the backyard of your dreams, one inspiring idea at a time!


Do you feel tired of looking at a plain green area? Do you wish for a backyard that is fun and relaxing, instead of feeling like work? Many people feel this way. Our backyards are part of our homes. They are a space ready to be changed into a peaceful outdoor haven. This is where you can make memories, find peace, and enjoy nature. Do not worry. Making a dream backyard landscaping plan does not need a huge budget. It also does not need a team of experts. With a few good ideas, smart planning, and some hard work, you can build a wonderful and real outdoor paradise. This space will truly amaze you.

This full guide will show you fresh backyard landscaping ideas. It will give you easy “how-to” advice. It will also tell you about being sustainable. This makes sure your outdoor space is kind to the planet and also very beautiful. Get ready to use all the potential of your yard!

Defining Your Dream: What Does “Amazing” Mean to You?

Before we look at specific designs, take a minute to think about your perfect outdoor space. Is it a lively spot for parties? And is it a quiet garden for thinking? Is it a play area for children and pets? Or is it a garden that grows food? Knowing what you care about most and how you live is the first key step. It is key for any successful backyard landscaping project.

Think about these things:

  • Purpose: Do you want to host, relax, garden, play, or eat?
  • Style: Do you like modern, rustic, simple, or tropical looks?
  • Time for Upkeep: How much time will you spend taking care of it?
  • Budget: Be real about how much money you can spend.
  • Weather and Land: What plants grow well where you live? What natural features does your yard have?

Once you know what you want, the fun part starts.

Section 1: Making Zones for Great Use and Easy Flow

A very effective backyard landscaping trick is to make separate “zones” in your yard. This makes the space seem bigger and much more useful. Think of it like making different rooms in your house, but outside.

Idea 1: The Outdoor Living Room – Comfort Outside

Bring your indoor comfort to the outdoors. An outdoor living room is a set area for sitting, reading, and casual get-togethers.

How to Do It:

  1. Mark the Space: Use paving stones, a wood deck, or a large outdoor rug to show the edges of this area. A cover like a pergola or a big umbrella can give shade. It also helps define the “ceiling.”
  2. Soft Seating: Buy tough, weather-proof sofas, chairs, and footrests with soft cushions. Outdoor throw pillows and blankets make it feel extra cozy.
  3. Feeling and Light: Use string lights, lamps, and maybe an outdoor fireplace or fire pit. This adds warmth and light at night. A small, easy-to-move outdoor speaker can play music for the right mood.
  4. Mixing in Plants: Use large plants in pots, hanging baskets, or raised garden beds around the edges. This makes the space softer. It connects the spot with the natural yard.

Idea 2: The Outdoor Dining Spot – Eating Outside

Why eat inside? You can eat under the stars or in the warm afternoon sun. A special place for dining makes every meal better.

How to Do It:

  1. Where to Put It: Pick a spot that is easy to reach from the kitchen. Keep it away from paths where people walk a lot. Think about morning sun for breakfast or evening shade for dinner.
  2. Strong Base: A patio made of natural stone, concrete, or a strong wood deck gives a firm spot for your dining set.
  3. Dining Set: Choose strong, weather-safe furniture. Make sure it fits your overall backyard style. Tables that can be made longer are great for guests.
  4. Shade and Light: A big patio umbrella, a roll-out cover, or a pergola with climbing plants (like wisteria) gives needed shade. Put in outdoor lights like wall lamps, hanging lights, or focused spotlights for eating at night.

Section 2: Adding Water Features for Calm and Sound

Not many things add as much calm and beauty to backyard landscaping as water features. The gentle sound of water running can hide city noise. It makes a very peaceful feeling.

Idea 3: Still Ponds and Fountains – Quiet Look and Sound

Whether it is a still pond that shows the sky or a bubbly fountain, water is lovely to watch.

How to Do It:

  1. Pond Spot: Choose a spot that is fairly flat. It should get some sun. Do not put it under trees that lose their leaves (to keep the leaves out). Dig the shape of the pond. Line it with a special pond liner. Add the right filter system.
  2. Water Plants: Use water plants like lilies, irises, and tall grasses. These make it look nice and help clean the water naturally.
  3. Fountain Setup: Many fountains that stand alone are simple to put in. Just place them, fill them, and plug them in. For bigger, custom fountains, make sure the water pipes and electricity are set up right.
  4. Lighting: Lights under the water in ponds or bright lights aimed at fountains can look magical when it is dark.

Idea 4: Winding Stream or Waterfall – Nature’s Music

For a more real feel, a small stream or waterfall that cycles the water can look like a natural scene.

How to Do It:

  1. Plan the Path: Use a garden hose to mark the way your stream or waterfall will go. Think about height changes to make natural drops.
  2. Lining and Rocks: Dig out the path. Line it with pond liner. Place different sizes of rocks and pebbles carefully. This makes it look like real small rapids and pools.
  3. Pump System: A pump placed in the lowest part of the stream pushes water back up to the highest point. This makes the water flow all the time.
  4. Planting: Plant plants that love water, like ferns and hostas, along the sides. This helps connect the water feature to the rest of the yard landscaping.

Section 3: Sustainable Backyard Landscaping and Green Choices

A truly amazing backyard is not just pretty. It is also good for the earth. Making sustainability part of your yard landscaping makes your space healthier. It helps the planet, too. This means using less water, helping local plants and animals, and making less waste.

Idea 5: Dry Landscaping and Low-Water Gardens – Beauty with Less Water

Dry landscaping, or xeriscaping, uses plants that need very little water. This is great for simple backyard ideas and saving this precious resource.

How to Do It:

  1. Smart Plan: Put plants that need the same amount of water together. Make low spots or rain gardens to catch and soak up rainwater.
  2. Better Soil: Mix in natural materials to the soil. This helps the soil hold water better.
  3. Right Plants: Pick native plants that are used to your local weather. Find plants that need little water. These include types of cacti, lavender, and many tall grasses.
  4. Use Mulch, Always Use Mulch: Put a thick layer of natural mulch (wood chips, leaves) around plants. This stops weeds. It keeps the soil wet. It also keeps the soil temperature steady.

Idea 6: Bee Gardens and Native Plants – Helping Local Nature

Invite useful insects, birds, and butterflies to your yard. Plant native species. Make a friendly place for these tiny helpers.

How to Do It:

  1. Find Native Plants: Ask local plant shops for a list of plants that grow naturally in your area. These plants work best with your weather and soil. They give food and shelter for local animals.
  2. Have Many Kinds: Plant a wide mix of flowers. Make sure they bloom at different times of the year. This gives food all year long.
  3. No Bug Killers: Use natural ways to control pests. This keeps the helpful insects safe.
  4. Water Source: A shallow bird bath or a small water area gives a place for wildlife to drink.

Section 4: Making the Most of Small Areas and Simple Backyard Ideas

Even the smallest yard can become a great haven. Simple backyard ideas focus on smart plans, items that do more than one thing, and growing plants vertically. This uses the small space in the best way.

Idea 7: Vertical Gardens and Living Walls – Grow Up, Not Out

When you do not have much room on the ground, grow up! Walls of plants look amazing. They can even grow food for you.

How to Do It:

  1. Pick Your System: You have choices. These range from simple stacked planters and hanging pockets to fancy wall systems with built-in watering.
  2. Check Sunlight: Pick plants that can handle the light on your vertical wall. Small cacti, ferns, herbs, and small yearly flowers are popular choices.
  3. Install It: Attach your vertical garden safely to a strong fence, wall, or stand-alone frame. Make sure water can drain out properly.

Idea 8: Small Fire Pits and Seating – Cozy Spots

A fire pit is a great spot to gather. Even small yards can fit one.

How to Do It:

  1. Be Safe First: Make sure your fire pit is far away from buildings, low branches, and anything that can burn. Check the rules in your area.
  2. Size and Type: For simple backyard ideas, think about a metal fire bowl you can move. Or try a small, ready-made stone fire pit kit.
  3. Built-in Seats: Do not use big chairs. Think about making seats that are part of the structure around the fire pit. This saves room. It can also act as a low wall if you plan it well.

Section 5: The “How-To” Basics for Your Dream Backyard Landscaping

To make these ideas happen, you need some basic skills and knowledge.

Planning and Design (The Map for Success)

  1. Study Your Land: Know the special details of your yard. Note the sunlight during the day, existing trees or structures, soil type, water drainage problems, and the common wind direction.
  2. Draw a Plan: Draw a map of your yard to scale. Try out different ways to place your zones, paths, and main features. This is where your backyard landscaping vision becomes clear.
  3. Choose Plants: Look up plants that work well in your weather (hardiness zone). Consider their need for sun, soil type, and how big they will get. Think about how they look all year long. Also, remember sustainability. Choose native types when you can.
  4. Pick Materials: Think about paving stones, gravel, wood, stone, and other decorations. These items add a lot to the look and feel of the space.

Execution and Setup (Getting Your Hands Dirty)

  1. Clear the Area: Take out unwanted weeds, trash, and old structures.
  2. Leveling and Drainage: Make sure the ground slopes correctly, away from your house. Fix any standing water issues with special drains or by changing the slope of the ground.
  3. Do Hardscaping First: Put in patios, paths, walls, and large water features before you plant. This protects the newly planted areas from damage.
  4. Get the Soil Ready: Mix in compost and other natural matter to your soil. This gives your plants a healthy base.
  5. Planting: Dig holes that are twice as wide as the plant’s root ball. Water them well after planting. Remember how big plants will grow so they do not get too crowded.
  6. Watering System: Think about putting in drip lines or soaker hoses. These are efficient for watering and good for sustainability efforts.
  7. Mulch: Put a layer of natural mulch, 2 to 4 inches thick, around all your plants. This keeps water in, stops weeds, and makes the soil better over time. This is a very important step for healthy yard landscaping.
  8. Lighting: Put in outdoor lights for safety. Use them to show off your beautiful features after the sun goes down.

Section 6: Adding the Final Touches – Making Your Yard Landscaping Great

The small details are what truly make a backyard “mind-blowing.”

Idea 9: Smart Lighting Plans – Setting the Mood

Lighting does more than just help you see. It completely changes the look and feel of the space.

How to Do It:

  1. Use Different Lights: Mix work lights (for cooking), accent lights (to show off features), and ambient lights (for a general glow).
  2. LED Lights: Use LED lights. They save energy and last a long time, which is great for sustainability.
  3. Timers and Sensors: Put in timers or motion sensors. This makes it easy to use and saves energy.
  4. Path Lights: Help guests walk safely with soft lights along your walkways.

Idea 10: Art and Decor – Showing Your Style

Just like inside your home, outdoor art and decorations add your own touch.

How to Do It:

  1. Garden Art: Choose art that can handle the weather and matches your style.
  2. Outdoor Rugs and Pillows: Add color and texture to your sitting areas.
  3. Wind Chimes: Bring gentle sounds into your space.
  4. Bird Feeders and Houses: Welcome birds and add a bit of living nature to your yard.

Conclusion: Your Dream Yard Is Ready

Changing your backyard into a truly amazing place is a mix of being creative, planning well, and working with your hands. Use these great but real backyard landscaping ideas. Make useful zones. Add calm water features. Focus on sustainability. Make the most of even the smallest areas. By doing this, you can create an outdoor place that shows your style. It will make your life better. Always remember, your yard is your own special canvas. Be bold with your dreams, get inspired, and enjoy the great journey of making your vision come to life. Happy yard landscaping!


Frequently Asked Questions (FAQ)

Q1: What is the price to landscape a backyard completely?

A1: The price changes a lot. It depends on the size, how complex the plan is, the materials you use, and if you do the work yourself or hire experts. Simple backyard ideas, mostly done by you with basic plants, might cost a few hundred dollars. More detailed plans with a lot of hardscaping, special features, and professional work can easily cost many thousands of dollars. Start with a budget and pick the most important things first.

Q2: What are some good, easy-to-care-for plants for backyard landscaping?

A2: There are many choices! Look at native plants. They need less help once they are growing well. Also consider ornamental grasses, small cacti, lavender, coneflowers, and certain bushes. A thick layer of mulch also means less work for you.

Q3: Can I really do large backyard landscaping projects myself, or do I need a professional?

A3: Yes, you can! Many parts of yard landscaping are easy to do yourself, as long as you plan well and are patient. Hardscaping like laying stones or building a deck can be harder. But skilled people can do it. For very complex tasks, like a lot of ground leveling, big water features, or tricky electric work, it is helpful to ask a professional for advice.

Q4: How important is sustainability in backyard landscaping?

A4: Sustainability is very important. It reduces your impact on the environment. And saves resources, especially water. It helps local wildlife. It can even make your bills lower. Using dry-landscaping methods, native plants, composting, and smart watering makes your backyard healthier and stronger.

Q5: What are some simple backyard ideas for someone with a small yard?

A5: For small yards, focus on vertical growth (walls of plants, stacked planters). Use furniture that has more than one purpose (benches with storage). Create cozy spots with small fire pits. Use light colors to make the area seem bigger. Choose plants carefully (small types of trees or bushes). Every little bit of space is important!


References


Recent Posts


Maximize Your Mini-Space: The Ultimate Small Backyard Landscaping Reveal

A beautifully designed small backyard with a living wall, fire pit, and defined seating areas, showcasing effective Small Backyard Landscaping.

Like many homeowners, I’ve faced the dilemma of looking at a tiny outdoor space and wondering if it’s even worth the effort to landscape. For years, my own small yard felt more like an afterthought than a functional extension of my home. But necessity truly is the mother of invention, and I eventually learned that limited space simply demands more creative, focused Small backyard landscaping design. Now, I’m excited to share the strategies that turned my cramped corner into an inspiring, multi-functional oasis, proving that any small backyard can be a magnificent retreat.


The modern home often comes with a modern challenge. This challenge is a decidedly un-modern-sized backyard. Your outdoor area may feel more like a small patio than a lush yard. If so, you are not alone. The dream of a large garden, an expansive lawn, or an outdoor kitchen often seems impossible. This is true when you face limited square footage.

However, the size of your yard does not control the scope of your vision. Small Backyard Landscaping is not about reducing your ideas. Instead, it is about making them bigger and better. It is a precise design focus. It aims to maximize every vertical inch and horizontal foot. This turns limits into chances for creativity. By using smart design rules, you can change a neglected patch into a useful, beautiful, and highly personalized outdoor room.

This full guide will walk you through the core concepts. It includes practical examples and step-by-step instructions. These steps will help you achieve the ultimate small backyard reveal. We will focus on new, sustainable design and powerful yard landscaping techniques.

I. Change Your Mindset: Design for Scale, Not Size

The first step for any successful Small Backyard Landscaping project is to change how you look at the space. Think of your small space not as a tiny yard. Think of it as an outdoor room. Every room—indoor or out—needs a clear purpose.

How to Do It: Define Your Zones

Before you buy any plants or paving stones, decide what your yard needs to do.

  1. Prioritize: You likely cannot fit a full dining set, a fire pit, and a large vegetable garden. Choose one or two main functions. Do you need a private reading corner? Do you need an outdoor dining space for two? Or maybe you need a play area for a small pet?
  2. Sketch it Out: Create a simple top-down sketch of your yard. Use a ruler to help you imagine the size of things. Mark off the areas you want. For example, mark “Dining Area,” “Relaxation Nook,” and “Vertical Garden.” Even a small yard can hold two separate zones if you separate them smartly.
  3. Use Psychological Tricks: Larger pavers or decking planks can trick your eyes. They make you think the space is bigger. Laying them in a diagonal pattern is one of the oldest simple backyard ideas. This method creates the illusion of depth.

II. Maximize Vertical Space: Use the Power of the Wall

In small yards, the ground area is precious. The key to great yard landscaping here is to look up. Vertical gardening is one of the most effective and sustainable ways to add plants and function. It does this without sacrificing any floor space.

How to Do It: Vertical Solutions

  • Living Walls and Trellises: Put up a simple trellis against a fence or wall. Use it for climbing plants like clematis, jasmine, or edible grapes. This adds visual appeal. It also hides ugly boundaries. For a more modern look, build a system of small planters. Bolt them right onto the wall to create a living green wall.
  • Tiered Shelving: You can reuse old wooden pallets. Or you can buy slim, tiered plant stands. These stands can hold a variety of herbs, succulents, or flowers. This creates a focused spot that makes the eye move up.
  • Tool Storage and Function: Vertical space is not just for plants. Use wall-mounted hooks and shelving to store your gardening tools. You can also store lighting or even a fold-down table. This makes your design functional.

Example: The Culinary Wall

A great example of vertical Small Backyard Landscaping is making a “culinary wall.” Use hanging baskets or pocket planters to grow herbs like mint, basil, and rosemary. You can also grow small vegetables like strawberries and cherry tomatoes. This turns a plain wall into a fragrant, useful, and good-looking centerpiece. It perfectly shows off simple backyard ideas.

III. Hardscaping for Flow and Function

Hardscaping is the non-living part of your yard. This includes things like paving, walls, and decking. It is the structure that holds up your plants (softscaping). In a small space, the right hardscaping can mark paths. It can also create the look of a larger area.

How to Do It: Strategic Hardscaping

  • Minimal Materials: Stick to just one or two main materials for your hardscaping. Too many textures and colors can make the space feel busy and small. A single, continuous surface makes the space feel larger and better put together. Use either decking or stone pavers.
  • Curved Lines: Straight lines are neat, but gentle curves can make the space look longer. Even a short winding path suggests a journey. It makes the yard feel deeper than it really is.
  • Multi-Purpose Furniture: Buy furniture that can do more than one thing. A built-in bench, for example, gives you a place to sit. It can also be used for storing cushions or garden supplies. This is a smart move for efficient Small Backyard Landscaping.

Example: The Floating Deck

Do not pour a large concrete slab. Instead, think about building a small, raised “floating” deck in one corner. This small change in height quietly separates the yard into a lounge area. Install low-voltage LED strip lighting under the deck. This creates a soft light. It makes the deck seem to float. This adds a modern, roomy feel to your yard landscaping.

IV. Smart Softscaping: Picking Plants for Limited Space

When choosing plants for your small yard, focus on quality over quantity. Every plant must be worth the space it takes. Choose plants that look good across multiple seasons. They should have good shape and stay a manageable size. This focus on careful choice is a key part of sustainability. Planning well reduces waste. It also reduces the need to replace plants often.

How to Do It: Plant Selection

  • Use Texture and Shape: Put plants with large leaves next to plants with fine textures. Examples are hostas next to ferns or grasses. The difference in texture adds visual depth and richness. This is a classic simple backyard idea used by all designers.
  • Container Gardening is Essential: Use nice, well-chosen planters instead of digging big garden beds. Containers allow you to move plants easily. You can adapt them for different seasons or needs. Use large containers. They should be at least 15 to 20 inches wide. Use them as focal points. Small pots create clutter. A few large ones create a strong impact.
  • Vertical Focus Trees: Choose thin, column-shaped trees. Look for small types of juniper or ornamental pears. Use these instead of wide, spreading varieties. They give you the height and shade of a tree. They do this without using up your important ground area.

Example: The Rule of Three

Use a design rule called the “Thriller, Filler, Spiller” when planting in a container or small bed.

  • Thriller: This is a tall, impressive plant for the center. Think of a fountain grass or a canna lily.
  • Filler: These are medium-sized plants. They fill out the middle. Examples are impatiens or petunias.
  • Spiller: These are trailing plants. They hang over the edge. Examples are creeping jenny or sweet potato vine.This creates a deep, layered look. It adds a lot of interest to your yard landscaping.

V. Lighting, Water, and Mirrors: Making Things Look Bigger

These elements are the secret tools for Small Backyard Landscaping. They do not take up much room. But they have a huge effect on the feel of the space, especially at night.

How to Do It: Creating Atmosphere

  • Strategic Lighting: Do not use harsh, bright lights. Use soft lights that point in a certain direction. Use them to show off your best features. You can highlight a favorite plant, a textured wall, or a water feature. Draped string lights define the “ceiling” of your outdoor room. This makes the space feel closed-in and cozy.
  • The Power of Reflection: Putting an outdoor mirror on a fence or wall is an amazing trick. It reflects light, views, and greenery. This instantly doubles the size you think your yard is. Frame the mirror nicely. Make it look like a window onto another part of the garden.
  • Sound and Movement: A small, self-contained water feature adds a calming sound. It could be a bubble fountain or a simple tiered bowl. This masks city noise. It brings a feeling of calm and movement into the space. These features are often great examples of simple backyard ideas that add big value.

VI. Embrace Sustainability in Small Spaces

A small yard gives you a great chance to focus on sustainability. Less space means less to care for. It also means less use of resources. However, it needs choices made with thought.

How to Do It: Sustainable Practices

  • Native and Drought-Tolerant Plants: Pick plants that naturally grow in your area. They need less water, fertilizer, and bug control. This makes them a low-effort, sustainable choice for your Small Backyard Landscaping.
  • Rain Collection: Include a thin rain barrel in your design. This gives you free, sustainable water for your containers. It lessens how much you need to use city water. This is an important step in eco-friendly yard landscaping.
  • Composting: Maybe you cannot fit a big compost bin. If so, look into compact systems. These include worm farms or small tumbling composters. They turn kitchen and garden waste into rich soil for your containers.

Example: Permeable Paving

For your hardscaping, think about materials that water can pass through. Use gravel, permeable pavers, or decomposed granite. These materials are better than solid concrete. They let rain soak straight into the ground. This reduces water runoff. It also improves the local water supply. This strongly supports overall sustainability.

VII. A Step-by-Step Guide to Your Small Backyard Transformation

Are you ready to begin? Use this easy process to set up your ultimate Small Backyard Landscaping project.

  1. Vision and Audit (The Planning Phase):
    • Measure your space exactly.
    • Note where the sun hits during the day. Check morning, noon, and evening.
    • Decide on your two main useful areas. For example, Dining and Relaxation.
  2. Hardscape First (The Foundation):
    • Install your main floor. This could be decking, pavers, or gravel.
    • Build any lasting structures. This means raised beds, built-in benches, or vertical supports.
  3. Vertical Integration (The Ascent):
    • Put up trellises, mirrors, or shelves on any border walls or fences.
    • Now is the best time to run any wires needed for permanent lighting.
  4. Softscape Placement (The Greenery):
    • Place your large, main containers and fill them with plants.
    • Plant any permanent beds or borders. Use the Thriller, Filler, Spiller method where it works best.
    • Install your sustainable items, like a small rain collector.
  5. Furnishing and Lighting (The Polish):
    • Bring in your furniture that has more than one use.
    • Set up your final decorative lighting. This means string lights and spot lights. Set up any water features.
    • Step back and enjoy your maximized mini-space!

Frequently Asked Questions

Q: How can I make my small yard look wider?

A: The best trick is to make the eye look across the space, not toward the back. Use horizontal lines in your decking or paving. Put one main horizontal item across the view from the house. This could be a long, low planter or bench. This makes people look sideways. It makes the space feel broader.

Q: What is the best color for small backyard landscaping?

A: Lighter colors for hard surfaces are best. Think of light gray pavers or light-colored wood stain. These colors reflect light. They make the space feel bright and larger. For plants, use cool colors like blues, purples, and whites in the back corners. These colors seem to fade into the distance. This helps the illusion of depth in your yard landscaping.

Q: Should I use a fence or a hedge for privacy in my small backyard?

A: Fences often use space better. They are flat. A hedge is lovely and sustainable, but it can use up valuable ground space. If you pick a fence, think about painting it a dark color, like black or charcoal. This makes the boundary seem to disappear. It highlights the plants in front of it.

Q: How can I add a water feature when I have very little space?

A: Look for fountains that hang on the wall. Or use small tabletop fountains. They give you the nice sound of water. They do this without needing any floor space. You can also turn a nice ceramic pot into a simple “bubble fountain” with a small pump. This is one of the most effective simple backyard ideas for luxury without the size.

Q: Are raised garden beds a good choice for a small yard?

A: Yes, they are, but only if they are built-in and also work as seating. Typical, separate raised beds can feel bulky. They take up too much floor space. A better choice for Small Backyard Landscaping is often a vertical garden. Or you can use a thin, border-style raised bed along a wall. This keeps the middle of the area open and clear.


References


Recent Posts


The Only Landscaping Guide You’ll Ever Need: Stunning Results Guaranteed

A vibrant, sustainable front yard featuring native plants, permeable pathways, and lush garden beds under a warm, golden hour sun, showcasing beautiful and eco-friendly home landscaping.

Ever stared at your yard and felt completely overwhelmed? We’ve all been there—dreaming of a beautiful, functional outdoor space but having no idea where to even start with your Landscaping. This simple guide is written just for you: the homeowner and garden enthusiast who wants a gorgeous landscape without harming the planet. Join me as we break down the basics and make your outdoor living better than ever.


Section 1: Landscaping with a Purpose: Why Sustainability Matters

Landscaping has traditionally been all about making your home look good. But today, a truly stunning landscape does so much more. It needs to be healthy, easy to care for, and kind to the environment. This is what we call sustainability in your yard.

Sustainable landscaping means we stop fighting nature and start working with it. It focuses on using less water, avoiding harsh chemicals, helping local wildlife, and using resources wisely. The ultimate goal is to create a beautiful, low-maintenance, and tough garden that lasts.

How to Start: Your Yard’s Report Card

Before you buy anything, you must study your site. This crucial first step is the secret to successful Garden Design and long-term sustainability. It saves you time and money later on.

How to Do It:

  1. Watch the Sun and Shade: Spend a day tracking how the sun moves across your property. Note which areas get sun all day (full sun), some sun (partial sun), and almost no sun (shade). Matching plants to these spots means they will naturally thrive, and you won’t need to baby them later.
  2. Get to Know Your Soil: Do a simple soil test. You can buy kits at any garden center. Find out your soil’s pH (how acidic or alkaline it is) and what it is made of (sand, silt, or clay). Plants have very specific soil needs. Match the plant to your existing soil, and you cut down on buying expensive soil amendments.
  3. Spot Water Problems: Look for wet spots, dry hills, or areas sheltered from the wind. Pay attention to where water collects during a big rainstorm. Areas that hold water are perfect for creating rain garden features. This helps the water sink into the ground and stops dirty runoff from leaving your property.

Section 2: Simple Steps for Amazing Garden Design

Great Garden Design uses simple rules to make a space that works well, looks beautiful, and fits with your home. It’s about creating smooth pathways, giving different areas their own purpose, and picking materials that will last forever.

The Three Main Pieces of Design

  1. Hardscape (The Structure): This means all the non-living parts: patios, walking paths, walls, and fences. For sustainability, always choose materials that water can pass through. Use things like gravel, loose stone, or special permeable pavers for your paths. This allows rainwater to soak into the soil, feeding your plants instead of rushing down the street.
    • Example: Take out an old solid concrete driveway. Replace it with a beautiful path made of spaced flagstones that have sand and fine gravel between them. Water can now sink right into the earth.
  2. Softscape (The Plants): This is your entire planting plan: all the trees, bushes, flowers, and groundcover. The main rule here is simple: The Right Plant in the Right Place. Focus on plants that are native to your local area. Native species already know how to live in your climate and soil. This means they need much less water, less fertilizer, and almost no help fighting pests compared to foreign plants.
  3. Define Your Zones: Divide your landscaping into areas that each have a clear job. This is extremely important if you are tackling Small Backyard Landscaping.
    • The Fun Zone: Your patio, deck, or a cozy fire pit area.
    • The Work Zone: Your compost pile, tool storage, or a simple clothesline.
    • The Food Zone: Your vegetable garden, herbs, or fruit trees.
    • The Nature Zone: Areas filled with native plants to attract local birds and insects.

Section 3: Making the Most of Small Backyard Landscaping

If your yard is small, that is actually a good thing! Small Backyard Landscaping gives you unique chances to be creative and focus your efforts. The main goal is to make the area feel bigger than it really is and make sure every inch has a purpose.

How to Do It: Tricks for Tiny Spaces

  1. Go Up, Not Out: Use vertical space by putting planters, trellises, and shelves on walls and fences. Vertical gardens make your eye travel up, making the space seem taller. They also let you grow way more plants without using up precious ground area.
    • Example: Put up a simple metal grid on your garage wall. Train climbing beans, beautiful roses, or morning glories to grow up it. This adds stunning visual interest and saves space.
  2. Use Angles: When building paths or laying out your patio, run the lines diagonally instead of parallel to your house. This simple design trick fools your brain into seeing a much longer, more interesting space.
  3. Plant in Layers: Create depth by using plants of different heights and textures. Put the tallest plants, like thin evergreens or tall grasses, at the very back. Then, plant shorter and shorter things toward the front. This layering creates depth and makes your small space feel deep and full.

Section 4: Save Water: The Smart Landscaping Approach

Saving water is the most powerful thing you can do for sustainability in your landscaping. The practice of xeriscaping means reducing or even removing the need for extra watering.


How to Do It: Easy Water Management

  1. Stop Wasting Water: Traditional sprinklers lose a lot of water to wind and heat. Switch to drip irrigation or simple soaker hoses. These systems slowly drip water right onto the roots of your plants. This smart method can save you up to half of the water you use now.
  2. The Magic of Mulch: Put a thick layer (about three inches is perfect) of organic mulch—like wood chips, shredded leaves, or straw—around all your plants. Mulch is like a blanket for your soil. It keeps the moisture in the ground and stops the sun from drying it out. It also keeps weeds down. Plus, as it breaks down, it naturally feeds your soil.
  3. Catch the Rain: Install a simple rain barrel connected to one of your roof’s downspouts. You can use this free, natural rainwater to water your flowerpots and beds. This is an ideal solution for Small Backyard Landscaping where you want to maximize every natural resource.

Section 5: Healthy Gardens: No Chemicals Allowed

A sustainable landscape is a buzzing, healthy place. For true sustainability, you must stop using harsh chemical fertilizers and pesticides. These things pollute our water and kill the helpful insects and tiny life forms that keep your soil healthy.


How to Do It: Building a Natural Ecosystem

  1. Invite Good Guests: Plant many different types of native flowers that bloom all year long, from early spring to late fall. This provides a steady supply of food for local bees, butterflies, and hummingbirds. This practice is key to having a vibrant, healthy garden.
    • Example: Include native milkweed (which Monarch butterflies love), bright coneflower, and purple aster in your flower beds.
  2. Love Your Soil: Start a simple composting system in your yard. Composting your kitchen scraps and yard waste creates a super-rich soil food called humus. Humus makes your soil hold more water and stay healthier. Healthy soil is the base of any successful, low-effort landscaping project.

  1. Let Nature Handle Pests: Instead of spraying chemicals, bring in helpful insects. You can buy and release ladybugs to eat annoying aphids. Or, plant herbs like dill, fennel, and coriander. These herbs attract tiny, beneficial wasps that naturally prey on many common garden pests.

Section 6: Keep it Easy: Maintenance for the Long Run

A sustainable landscaping plan is designed to be easy to maintain, but “easy” does not mean you do nothing. You still need to do a few important tasks to keep your beautiful garden looking stunning year after year.

Key Tasks for the Year

  • Weeding: Keep your mulch layers thick to help prevent weeds. Pull out any weeds that manage to sprout by hand before they drop seeds.
  • Trimming: Cut back trees and shrubs at the correct time of the year to keep them healthy and looking good. Avoid cutting them too aggressively, as this can weaken them over time.
  • Water Check: Once a year, check your drip system for any clogs or leaks. This makes sure your water is delivered to your plants as efficiently as possible.

Section 7: The Final Details That Make an Impact


The small finishing touches are what turn good landscaping into stunning Garden Design.

  1. Smart Lighting: Use low-energy LED or solar-powered lights to highlight beautiful features, light up your paths, and create a cozy evening mood. This uses very little electricity and lets you enjoy your outdoor space longer.
  2. Repurpose Materials: Bring natural things like large, interesting rocks or driftwood into your landscaping. You can also use repurposed items, like old wooden barrels or thick pieces of reclaimed wood. This gives your yard character and fits perfectly with sustainability by using materials you already have.

Frequently Asked Questions (FAQ)

Q: What is the single best thing I can do for sustainable landscaping?

A: The most impactful change is to shrink your traditional lawn or replace it with native, tough plants that do not need much water. Regular grass needs huge amounts of water and chemicals, making it the least sustainable part of most home landscaping.

Q: Do I really need to hire a professional for Garden Design?

A: Not if you do not want to. For projects like Small Backyard Landscaping, a simple plan based on your yard’s needs is often enough. Use the sun analysis and zoning tips from this article to create a rough sketch before you start digging.

Q: What is the most important element of sustainable hardscape?

A: The most important word is “permeability.” This means choosing materials for your paths and driveways that let rainwater soak into the earth, like gravel or pavers with open joints. This stops runoff and filters water, which is a key part of long-term sustainability.

Q: Are raised garden beds better for a vegetable garden?

A: Yes, in most cases. Raised beds offer much better drainage, warm up faster in the spring, and let you completely control the quality of your soil. They are an excellent choice for intensive Small Backyard Landscaping and growing your own food.

Q: What are the best plants for a low-maintenance garden that saves water?

A: This depends on your region, so always check local guides. Generally, look for local native plants, succulents, ornamental grasses, and tough perennial flowers like lavender and sedum. These are naturally adapted to need very little help in your garden.


Reference Section


Recent Posts


The Tunisian Crochet Stitches Everyone Is Obsessed With Right Now

Close-up of a person's hands actively working on a Tunisian crochet project with a long, cabled Tunisian crochet hook, showcasing multiple loops on the hook. The image highlights the intricate texture of Tunisian Crochet Stitches being created, with a basket of yarn in soft colors and a steaming mug in the background, suggesting a cozy crafting atmosphere.

Hi there, I’m just like you—a fiber enthusiast who always has at least three projects going at once and a perpetually growing yarn stash. I started my journey with regular crochet and knitting, but when I discovered the unique woven texture of Tunisian Crochet, I was completely hooked (pun intended!). There’s a magic in this technique that produces stunning, boutique-quality fabrics, and I’m thrilled to share the essential Tunisian Crochet Stitches that have captured the entire crafting community’s heart. Let’s dive in and elevate your hook game!


Introduction: A New Craze in the Fiber World

For years, the fiber world was dominated by the classic elegance of knitting and the versatile simplicity of traditional crochet. But there’s a craft that combines the best of both, yielding a beautiful, dense, woven fabric that is suddenly taking over social media feeds and pattern libraries: Tunisian Crochet.

Also known as Afghan Crochet, this unique technique uses a longer hook (often with a flexible cable) to hold multiple loops on the hook, much like knitting, but with a single crochet hook. The fabric it creates is distinctive, often thicker, and less stretchy than traditional crochet, making it perfect for sturdy items, cozy blankets, and warm garments.

But what truly sets it apart are the extraordinary Tunisian Crochet Stitches you can create. They range from solid and knit-like to light and lacy, and a few key patterns have become the runaway stars of the moment. If you’ve been looking for an engaging new technique to tackle a stunning Tunisian Crochet Patterns project, you’ve come to the right place.

In this guide, we’ll explore the most popular Tunisian Crochet Stitches, provide step-by-step instructions on how to do them, include examples of projects, and share essential tips to master this addictive craft.

Close-up of a person's hands actively working on a Tunisian crochet project with a long, cabled Tunisian crochet hook, showcasing multiple loops on the hook. The image highlights the intricate texture of Tunisian Crochet Stitches being created, with a basket of yarn in soft colors and a steaming mug in the background, suggesting a cozy crafting atmosphere.

The Three Foundation Stitches: Your Essential Toolkit

Before we dive into the viral stitches, you must master the fundamental building blocks of Tunisian Crochet. Every subsequent pattern builds upon these basic techniques.

1. The Foundation Row (FR)

Every project begins with a foundation chain and an initial forward pass.

How to Do It:

  1. Chain (Ch): Start with a simple chain (Ch) of any desired number of stitches.
  2. Forward Pass (FP): Insert your hook into the back bump of the second chain from the hook, yarn over (YO), and pull up a loop. Leave the loop on the hook.
  3. Repeat this process in the back bump of every chain across the row. You should end the Forward Pass with the same number of loops on your hook as your initial chain count.
  4. Return Pass (RP): Do not turn your work. YO and pull through one loop (this creates your turning chain/edge).
  5. YO, and pull through two loops. Repeat the bracketed step (YO, and pull through two loops) until only one loop remains on your hook. This loop counts as the first stitch of your next row.

2. Tunisian Simple Stitch (TSS)

The TSS is the most common and arguably the most important stitch. It creates a beautiful, woven texture that resembles small square tiles.

How to Do It:

  1. Forward Pass (FP): Skip the first vertical bar (the loop on your hook counts as the first stitch).
  2. Insert your hook under the next vertical bar from right to left (or front to back).
  3. YO and pull up a loop. Leave the loop on the hook.
  4. Repeat Step 2 and 3 across the row until you reach the final stitch.
  5. Edge Stitch: For the last stitch, insert your hook under both the front and back loops of the last vertical bar to create a clean, non-curling edge. YO, pull up a loop.
  6. Return Pass (RP): Work the standard return pass (Ch 1, then YO, pull through 2 loops across).

Example Project: Washcloths, dishcloths, or a simple striped scarf.

3. Tunisian Purl Stitch (TPS)

This is the stitch you use to counteract the notorious curl of Tunisian crochet fabric! It creates a series of horizontal bumps that closely resemble the purl stitch in knitting.

How to Do It:

  1. Forward Pass (FP): Skip the first vertical bar.
  2. Bring the yarn to the front of your work.
  3. Insert your hook under the next vertical bar (just like TSS).
  4. Bring the yarn to the back of your work.
  5. YO and pull up a loop. Leave the loop on the hook.
  6. Repeat Steps 2-5 across the row, remembering to work the final edge stitch under both loops.
  7. Return Pass (RP): Work the standard return pass.

Example Project: Ribbing for hats, cuffs, or an entire blanket with beautiful drape.


The Current Obsession: Viral Tunisian Crochet Stitches

These three stitches are currently trending in Tunisian Crochet Patterns for their unique texture, ease of learning, and stunning results.

1. The Tunisian Knit Stitch (TKS)

If you love the look of knitting but prefer using a crochet hook, this is your new favorite stitch. It creates a solid fabric that looks nearly identical to stockinette knitting. It’s also incredibly popular for warm accessories and garments.

How to Do It:

  1. Forward Pass (FP): Skip the first vertical bar.
  2. Instead of inserting your hook under the vertical bar (like TSS), you will insert your hook between the front and back vertical bars, going straight through the center of the stitch from front to back.
  3. YO and pull up a loop. Leave the loop on the hook.
  4. Repeat across the row, remembering to work the final edge stitch under both loops.
  5. Return Pass (RP): Work the standard return pass.

Examples: Beanies, cardigans, and throw blankets where a tight, knit-look fabric is desired.

2. The Tunisian Honeycomb Stitch

This advanced-beginner stitch is pure texture magic. It creates a gorgeous, subtle grid or waffle-like fabric that is famous for having significantly less curl than many other stitches. It’s a two-row repeat that alternates the Tunisian Simple Stitch (TSS) and the Tunisian Purl Stitch (TPS).

How to Do It (2-Row Repeat):

  • Row 1 (FP): TSS in the next vertical bar, then TPS in the following vertical bar. Repeat from the beginning of the sentence across the row, ending with a TSS (if starting with a TSS). Work the final edge stitch under both loops.
  • Row 1 (RP): Work the standard return pass.
  • Row 2 (FP) – Switching the pattern: TPS in the next vertical bar (where you worked a TSS in the previous row), then TSS in the following vertical bar (where you worked a TPS in the previous row). Repeat from the beginning of the sentence across, ensuring you alternate the stitches from the row below. Work the final edge stitch under both loops.
  • Row 2 (RP): Work the standard return pass.
  • Repeat Rows 1 and 2 for the Honeycomb Pattern.

Examples: Scarves, cowls, cushion covers, and structured bags.

3. The Tunisian Smock Stitch

The Tunisian Smock Stitch is an eye-catching, highly textured stitch that creates a stunning, woven effect reminiscent of diamond shapes or basketry. It’s a wonderful stitch for heavier-weight yarns and structured projects.

How to Do It (Forward Pass, 2-Row Repeat):

  • Row 1 (FP): Skip the first vertical bar. Work a standard TSS in the next stitch. Then, for the remainder of the row, you will be working Tunisian Simple Stitch 2 Together (TSS2tog).
    • TSS2tog: Insert your hook under the next two vertical bars simultaneously, YO, and pull up a loop. Leave the loop on the hook.
    • Repeat TSS2tog across the row. The row will end with one vertical bar remaining. Work the final edge stitch in the last vertical bar under both loops.
  • Row 1 (RP): Work the standard return pass.
  • Row 2 (FP) – Offset Row: Skip the first vertical bar. Work the next stitch as a TSS. This places the single TSS in the center of the two stitches you worked together in the row below.
    • Repeat TSS2tog across the row. Work the final edge stitch.
  • Row 2 (RP): Work the standard return pass.
  • Repeat Rows 1 and 2 for the Smock Pattern.

Examples: Textured blankets, rugs, and thick, warm jackets.


Mastering Tunisian Crochet: Tools & Tips

To truly master these popular Tunisian Crochet Stitches and tackle ambitious Tunisian Crochet Patterns, you’ll need the right equipment and a few pro tips.

The Right Tools

  • The Hook: You need a specialized Tunisian hook. These are significantly longer than standard crochet hooks, allowing you to hold an entire row of loops. For larger projects, a hook with a flexible cable attached is essential.
  • The Size: The general rule of thumb is to use a hook that is at least 2-3 sizes larger than the size recommended on your yarn label. This is crucial for counteracting the natural density and stiffness of the fabric and helping to minimize the frustrating curl.

The Curl Conundrum: How to Beat It

The most common frustration with Tunisian Crochet is the fabric’s tendency to curl aggressively. This is due to the structure of the Forward Pass—it uses up more yarn than the Return Pass, pulling the fabric inward.

Expert Tips to Minimize Curl:

  1. Use a Larger Hook: As mentioned, this is the number one trick.
  2. Use a Curl-Reducing Stitch: Patterns that incorporate the Tunisian Purl Stitch (like the Honeycomb Stitch or a simple Ribbing) will curl significantly less than all-Simple Stitch projects.
  3. Add a Border: Once your project is complete, add a simple border of single crochet (UK double crochet) stitches around the edge. This provides weight and structure, flattening the edges.
  4. Block Aggressively: Blocking is essential for all Tunisian Crochet items. Wet or steam-block your finished piece and pin it aggressively to the desired dimensions to permanently set the stitches and remove the curl.

Why the Obsession? The Benefits of Tunisian Crochet

Why are so many crafters dropping their needles and standard hooks to pick up this technique?

FeatureTunisian CrochetTraditional Crochet
Fabric LookDense, woven, often knit-like (especially TKS).Varied, from open/lacy to dense, but with distinct “V” stitches.
Fabric DrapeLess stretchy horizontally, often heavier and more structured.Generally more stretchy and flowy.
Stitch VisibilityExcellent for showcasing complex colourwork (like fair isle or plaid).Good, but colourwork texture is often less defined.
Error FixingEasier to ‘frog’ (unravel) back to a previous row without losing stitches, similar to a dropped knit stitch.Generally easier to ‘tink’ (un-crochet stitch by stitch).
Finished EdgeA natural, neat edge is created by the technique, making borders optional.Edges often require a separate finishing row for a polished look.

The ability of Tunisian Crochet to mimic the polished, woven look of knitting while retaining the speed and ease of using a single hook is what makes it such a breakout star in the fiber arts community. Its unique structure means you can create Tunisian Crochet Patterns for garments that feel substantial, blankets that are extra warm, and accessories that have beautiful, defined texture.

Inspiration: Projects for Every Stitch

Ready to get started? Here are some simple project ideas for your new favorite Tunisian Crochet Stitches:

  • For the Beginner: A simple Tunisian Simple Stitch (TSS) scarf. It’s the perfect way to practice your tension and get comfortable with the Forward and Return Passes.
  • For the Cozy Crafter: A baby blanket using the Tunisian Knit Stitch (TKS). The dense fabric is incredibly warm, and the knit look makes it a stunning gift.
  • For the Textured Lover: A sophisticated two-tone cushion cover using the Tunisian Honeycomb Stitch in contrasting colours for maximum visual impact.
  • For the Garment Maker: A warm winter cowl or hat using the Tunisian Smock Stitch. The fabric’s thickness makes it ideal for cold weather accessories.

Frequently Asked Questions (FAQ)

Q1: What kind of hook do I need for Tunisian Crochet?

A: You will need a Tunisian crochet hook, which is longer than a standard hook, usually 10 to 14 inches. For projects wider than a scarf (like blankets or shawls), you will need a hook with a flexible cable attached to hold all the loops.

Q2: Does Tunisian Crochet use more yarn than regular crochet or knitting?

A: Yes, generally, Tunisian Crochet uses more yarn than traditional crochet or knitting for a project of the same size. This is due to the unique construction where the yarn is worked in two passes, creating a denser fabric. Plan for slightly more yarn than you would for a standard crochet project.

Q3: How do I read a Tunisian Crochet pattern?

A: Tunisian Crochet Patterns are unique because they are split into a Forward Pass (FP), where you pick up loops and load them onto the hook, and a Return Pass (RP), where you work the loops off. The instructions will specify the stitch for the FP, and the RP is almost always the same (chain 1, then YO, pull through 2 loops across).

Q4: How do I finish a Tunisian Crochet project?

A: To finish, you must bind off all the loops on the last Forward Pass using a slip stitch bind off. Insert your hook as instructed by the last stitch, YO, and pull through the loop on the work and the loop on the hook (a slip stitch). This flattens the final edge and locks the stitches. You should then block the finished item.


References


Recent Posts


Simple Crochet Ideas: 10 Wall Hangings To Make Right Now

A collection of four finished wall hangings—a mountain tapestry, a long textured piece, a large mandala hoop with tassels, and a chevron bobble piece above a small rainbow—showcasing diverse Crochet Ideas for modern, bohemian home decor.

I know the feeling: you have a beautiful skein of yarn and a desire to make something gorgeous, but you need a project that feels achievable. That’s where the magic of the crochet wall hanging comes in! It’s the perfect blend of quick satisfaction, skill-building practice, and home decor that genuinely reflects your unique style. As a fellow crafter, I’ve found that working on these smaller, focused Crochet Ideas is the best way to unwind after a long day. You get to play with texture and color without the commitment of a huge blanket, and you get to finish a project in a weekend—which, let’s be honest, is the best feeling in the world.


The world of crochet ideas is vast, but wall hangings offer an accessible entry point for beginners and a canvas for intricate designs for experienced hands.From the sleek lines of tapestry to the bohemian fringe of bobbles, these projects are highly customizable and make for perfect gifts or statement pieces in your own home. You’ll primarily be using fundamental crochet stitches, and thankfully, many excellent free crochet patterns exist to guide your journey.

The Foundation: Key Materials and Techniques

Before diving into the 10 ideas, let’s cover the essentials you’ll need for almost any wall hanging project:

  • Yarn: Worsted weight (Size 4) cotton or acrylic is the most versatile. Cotton creates crisp stitches perfect for geometric designs, while acrylic provides a softer, cozier drape. You can also experiment with bulky yarn for a quicker project or specialty yarns like macrame cord for a textured look.
  • Hook: Match your hook size to your yarn weight, typically H-8 (5.0mm) to J-10 (6.0mm) for wall hangings.
  • Hanging Mechanism: A natural piece of driftwood, a wooden dowel, or a sturdy metal ring/embroidery hoop are the most common choices.
  • Tools: Scissors and a tapestry needle for weaving in ends and attaching fringe.
A collection of four finished wall hangings—a mountain tapestry, a long textured piece, a large mandala hoop with tassels, and a chevron bobble piece above a small rainbow—showcasing diverse Crochet Ideas for modern, bohemian home decor.

1. The Simple Single Crochet Tapestry

This is the ultimate beginner wall hanging and a perfect starting point for exploring colorwork.

  • Key Crochet Stitches: Single Crochet (SC).
  • How To Do It: The Single Crochet (SC) stitch creates a tight, square fabric, which is ideal for working with color charts or graphs. You will carry the yarn color not currently in use along the top of your stitches, encasing it within the SC stitches of the current color. This is called tapestry crochet.
  • Example/Pattern Idea: Choose a simple geometric design like a triangle or a heart. Chain a foundation row, and then use your graph to switch colors at the beginning of the appropriate stitch, ensuring you pull through with the new color on the last yarn over of the previous stitch.
  • Free Crochet Patterns Note: Search for free crochet patterns using the term “tapestry chart” to find simple graphics you can adapt.

2. The Textured Bobble Stitch Wall Hanging

For a deeply tactile and modern look, the Bobble Stitch is your go-to among great crochet ideas.

  • Key Crochet Stitches: Single Crochet (SC), Bobble Stitch (BO).
  • How To Do It: The Bobble Stitch is essentially five double crochet stitches worked into the same stitch, but with the last loop of each double crochet held on the hook until the very end, and then all loops are closed together. This creates a rounded “popcorn” effect. The bobbles should always pop out on the front (Right Side) of your work. You’ll typically work rows of SC in between the bobble rows to give the bobbles definition.
  • Example/Pattern Idea: Create a simple design with evenly spaced rows of bobbles, or form a diagonal line or diamond shape. Bobble patterns are often worked with simple charts where a colored square indicates where a bobble should be placed.

3. The Minimalist Half Double Crochet (HDC) Block

Sometimes, the simplest crochet stitches create the most elegant piece. The Half Double Crochet (HDC) provides a lovely dense fabric that hangs beautifully.

  • Key Crochet Stitches: Half Double Crochet (HDC).
  • How To Do It: Start with a simple rectangular panel worked entirely in HDC. The texture comes from working into the third loop (or “back bump”) of the HDC stitch instead of the top two loops, which pushes a small decorative ridge to the front. This is a very subtle and sophisticated texture.
  • Example/Pattern Idea: Use a neutral, single color yarn and attach a wooden dowel at the top. The beauty is in the straight lines, even tension, and the simplicity of the finished panel.

4. The Quick Granny Square Wall Hanging

Granny squares aren’t just for blankets! They are fantastic crochet ideas for quick, modular wall art.

  • Key Crochet Stitches: Chain (CH), Double Crochet (DC), Slip Stitch (SL ST).
  • How To Do It: Crochet a large, classic granny square (or join several smaller ones) until you reach your desired size. The open laciness of the classic granny stitch creates a beautiful, airy feel.
  • Example/Pattern Idea: Use a simple four-round granny square and join nine of them (3×3 grid) for a colorful statement. For a modern twist, use a solid color for the entire square to highlight the geometric structure rather than the color changes.

5. The Mandala Ring Wall Hanging

A beautiful, circular piece of art that looks much more complicated than it is. This is one of the most popular crochet ideas for home decor.

  • Key Crochet Stitches: Varies, but usually includes DC, Puff Stitches, and cluster stitches for texture.
  • How To Do It: Work in the round using varying heights of crochet stitches to build a circular piece. Once complete, stretch and block the mandala, and then simply sew it onto a metal craft hoop or a piece of wooden embroidery hoop.
  • Example/Pattern Idea: Search for free crochet patterns for mandalas. Often, the beauty is in the vibrant color changes and the intricate-looking but repetitive stitch work.

6. The Rainbow Arch Wall Hanging

Perfect for a nursery or a space that needs a pop of fun color.

  • Key Crochet Stitches: Half Double Crochet (HDC) or Single Crochet (SC).
  • How To Do It: This is typically worked in short rows, where you increase at the beginning and end of each row to form a half-circle or an arch shape. You change colors after every row or two to create the striped rainbow effect. Stitches are then worked around a piece of flexible wire or stuffed and sewn onto a fabric backing for structure.
  • Example/Pattern Idea: Use five to seven bright colors, working a small segment of SC for each color, one on top of the other, to create the iconic arch shape.

7. The Chevron or Zig-Zag Panel

This is a classic fabric design that translates beautifully into a wall hanging.

  • Key Crochet Stitches: Double Crochet (DC), and simple increases/decreases to create the peaks and valleys.
  • How To Do It: The Chevron pattern is created by increasing in the center of the peak (working multiple stitches into one stitch) and decreasing at the bottom of the valley (skipping stitches or working a DC2TOG/DC3TOG). Maintaining your stitch count is key here.
  • Example/Pattern Idea: Use two contrasting colors (a bright color and a neutral, like white or cream) and switch colors every two rows to emphasize the zig-zag effect.

8. The Modern Pocket Wall Hanging

Combining form and function, the pocket wall hanging is both decorative and useful.

  • Key Crochet Stitches: Single Crochet (SC) for a solid base, and Double Crochet (DC) or Treble Crochet (TR) for an open-weave pocket.
  • How To Do It: First, crochet a flat, rectangular base using a tight crochet stitch like SC. Then, crochet a separate square or rectangle for the pocket. Finally, sew the pocket onto the base along three edges (leaving the top open).
  • Example/Pattern Idea: Use a tight SC for the main panel and a decorative puff or shell stitch for the pocket itself. This is a great idea for holding remote controls, glasses, or small crafting supplies near your favorite armchair.

9. The Laced Shell Stitch Wall Hanging

For a softer, more romantic feel, the Shell Stitch adds beautiful, scalloped texture.

  • Key Crochet Stitches: Single Crochet (SC), Double Crochet (DC), Chain (CH).
  • How To Do It: The Shell Stitch is created by working several DC stitches (typically 5 or 7) into a single stitch or chain space, then anchoring that shell with an SC stitch a few stitches over. This repetitive motion creates a beautiful, lacy fan effect.
  • Example/Pattern Idea: Work the whole piece in a single, soft, pastel color or a creamy white to let the texture of the shell stitch truly shine. The drape of this piece is often lighter and more ethereal than a solid panel.

10. The Simple Fringe and Tassel Hanging

This idea focuses less on complex crochet stitches and more on the art of assembly and embellishment.

  • Key Crochet Stitches: Varies—often just a solid panel of SC or HDC.
  • How To Do It: Crochet a simple rectangular panel. The main effort goes into the embellishment. Create long tassels or a dense fringe by wrapping yarn around a book or piece of cardboard, cutting one end, and attaching the strands evenly along the bottom edge using a lark’s head knot or by simply looping them through the stitches.
  • Example/Pattern Idea: A simple SC panel in a muted color (like sage green or mustard yellow) is instantly elevated by adding contrasting white or cream-colored fringe and oversized tassels at the corners.

How to Finish Your Wall Hanging

Every great wall hanging needs a professional finish.

  1. Attach to the Dowel: Lay your crocheted panel face-up with the dowel resting just above the top edge. Using a tapestry needle and a length of yarn, stitch the top edge of the crochet fabric around the dowel. Alternatively, you can slip stitch the fabric directly over the dowel rod for a cleaner look.
  2. Add the Hanger: Cut a long piece of yarn (approximately 20–30 inches, depending on your desired drop) and tie each end securely to the ends of the dowel. Adjust the loop until it hangs evenly.
  3. Block (Optional but Recommended): Blocking your finished piece by wetting it and pinning it into the correct shape will straighten the edges and open up the crochet stitches, giving your wall hanging a more refined, professional look.

By focusing on just a few basic crochet stitches, and experimenting with these different crochet ideas and free crochet patterns, you can quickly fill your home with beautiful, handmade decor.


Frequently Asked Questions (FAQ)

Q: What is the best yarn for a beginner wall hanging?

A: A worsted weight (medium, size 4) acrylic or cotton blend yarn is generally recommended. It’s affordable, easy to work with, and clearly shows your crochet stitches.

Q: How do I prevent my wall hanging from curling at the edges?

A: Curling is common, especially with single crochet. Blocking the finished piece (wetting it thoroughly and pinning it flat to dry) is the most effective way to eliminate curling and straighten your edges. You should also ensure your tension is not too tight, which can exacerbate the issue.

Q: Where can I find reliable free crochet patterns for these projects?

A: Many designers and yarn companies offer free crochet patterns on their websites, particularly for smaller home decor items. Reputable sources often include sites associated with major yarn brands. Search specifically for “free wall hanging pattern” alongside keywords like Crochet Ideas. Also See the reference section below.

Q: What is “Tapestry Crochet” and why is it used for wall hangings?

A: Tapestry crochet is a colorwork technique where you carry yarn colors you are not using inside the stitches you are making. It creates a dense, non-stretchy fabric that prevents colors from showing through and is perfect for creating pictures, patterns, and geometric designs, making it one of the most useful crochet stitches for wall art.


References


Recent Posts