Cookie Consent by Free Privacy Policy Generator Update cookies preferences

Start Strong: 21 Motivational Quotes for Your Best Morning

A calm, sunlit scene showing a mug of steaming coffee next to an open journal, representing a successful morning routine powered by Motivational Quotes and intention.

A belief in the power of positive psychology and structured morning routines is central to this work. This perspective holds that the first hour of the day sets the tone for the remaining twenty-three. The struggle against the snooze button and the feeling of starting behind can be overcome through Motivational Quotes that provide a game-changing solution of simple, daily inspiration. The core goal is to help you transform your mornings from a chaotic rush into a deliberate ritual, powered by one effective quote at a time.


Introduction: The Power of a Perfect Start

The moment your alarm clock sounds, you stand at a crossroads. Do you hit snooze and start the day with a frantic rush, or do you rise with intention and seize the power of a fresh start? The way you approach your morning is, perhaps, the single most critical factor in determining your overall productivity, mood, and success.

A truly successful day isn’t about working harder; it’s about starting smarter. And one of the simplest, yet most profound, ways to shift your mindset from groggy to great is through the consistent application of positive, motivational quotes.

This isn’t just about reading a nice phrase; it’s about using these 21 powerful statements as mental anchors—tools to help you establish a strong, positive, and proactive foundation for your best day. We’ll explore these quotes, look at practical examples, and show you exactly how to do it by integrating them into a personalized morning ritual that works.


Part I: The Quotes—21 Daily Anchors for Success

We’ve organized these 21 motivational quotes into three sections, targeting the core areas where morning inspiration is needed most: Mindset, Action, and Perseverance.

A. Quotes for Mindset: Setting the Mental Stage

The first battle of the day is often fought in your mind. These quotes are designed to help you defeat doubt, embrace gratitude, and choose a positive outlook before your feet even hit the floor.

  1. “The best way to predict the future is to create it.”Peter Drucker
    • The Spark: A reminder that you are the architect of your day. Stop waiting for things to happen and start making them happen.
  2. “Today’s actions are tomorrow’s results.”Unknown
    • The Spark: A clean, direct link between your morning efforts and your evening rewards.
  3. “An early-morning walk is a blessing for the whole day.”Henry David Thoreau1
    • The Spark: Emphasizes the physical movement and nature connection that resets the brain.
  4. “Your mind is a powerful thing. When you fill it with positive thoughts, your life will start to change.”Unknown
    • The Spark: Focuses on the internal choice of perspective that the morning offers.
  5. “The only way to do great work is to love what you do.”Steve Jobs
    • The Spark: Encourages you to find purpose and passion in the mundane or challenging tasks ahead.
  6. “I get up every morning and it’s going to be a great day. You never know when it’s going to be over, so I refuse to have a bad day.”Paul Henderson
    • The Spark: A defiant commitment to positivity, regardless of external circumstances.
  7. “Happiness is not something readymade. It comes from your own actions.”Dalai Lama
    • The Spark: Underscores that a joyful day is built, not found.

B. Quotes for Action: Overcoming Inertia

The second hurdle is simply getting started. These motivational quotes are designed to kick inertia to the curb, prioritizing small steps and forward momentum over perfection.

  1. “Well begun is half done.”Aristotle
    • The Spark: A powerful incentive to put effort into your first task. Once you start, the hard part is over.
  2. “You don’t have to be great to start, but you have to start to be great.”Zig Ziglar2
    • The Spark: Relieves the pressure of perfection. Focus on the start, not the finish.
  3. “The journey of a thousand miles begins with a single step.”Lao Tzu
    • The Spark: Ideal for those with large, intimidating goals. Reminds you that the most important step is the current one.
  4. “Action is the foundational key to all success.”Pablo Picasso3
    • The Spark: A forceful reminder that planning is nothing without execution.
  5. “Don’t count the days, make the days count.”Muhammad Ali4
    • The Spark: Emphasizes quality and intent over passive time passing.
  6. “Take the first step in faith. You don’t have to see the whole staircase, just take the first step.”Martin Luther King Jr.
    • The Spark: Encourages rising even when the whole day’s schedule feels overwhelming or uncertain.
  7. “If you want to achieve greatness, stop asking for permission.”Unknown
    • The Spark: A fierce call for self-reliance and decisiveness in your morning tasks.

C. Quotes for Perseverance: Handling the Bumps

Not every morning will be easy. These quotes prepare you for the inevitable challenges, setbacks, and moments of self-doubt that may arise mid-morning.

  1. “Our greatest weakness lies in giving up. The most certain way to succeed is always to try just one more time.”Thomas Edison
    • The Spark: A powerful reminder that success is often found just beyond the point of quitting.
  2. “It does not matter how slowly you go as long as you do not stop.”Confucius5
    • The Spark: Focuses on consistency and momentum rather than speed. Perfect for slow starters.
  3. “The only limits are the ones you set in your own mind.”Unknown
    • The Spark: A direct challenge to the mental barriers that cause procrastination or self-sabotage.
  4. “A river cuts through rock, not because of its power, but because of its persistence.”Jim Watkins
    • The Spark: An evocative analogy for the quiet, continuous effort required for long-term goals.
  5. “Believe you can and you’re halfway there.”Theodore Roosevelt
    • The Spark: The foundational quote for self-efficacy. Belief is the true engine of action.
  6. “When you arise in the morning, think of what a precious privilege it is to be alive—to breathe, to think, to enjoy, to love.”Marcus Aurelius
    • The Spark: A deeply philosophical prompt for gratitude, which fuels perseverance.
  7. “The struggle you’re in today is developing the strength you need for tomorrow.”Robert Tew6
    • The Spark: Shifts perspective on today’s difficulties, seeing them not as obstacles, but as training.

Part II: How to Do It—Creating a Motivational Morning Ritual

Reading a quote is one thing; truly internalizing it and using it to change your behavior is another. Here is your step-by-step guide on how to do it—how to seamlessly weave these motivational quotes into an unstoppable morning routine.

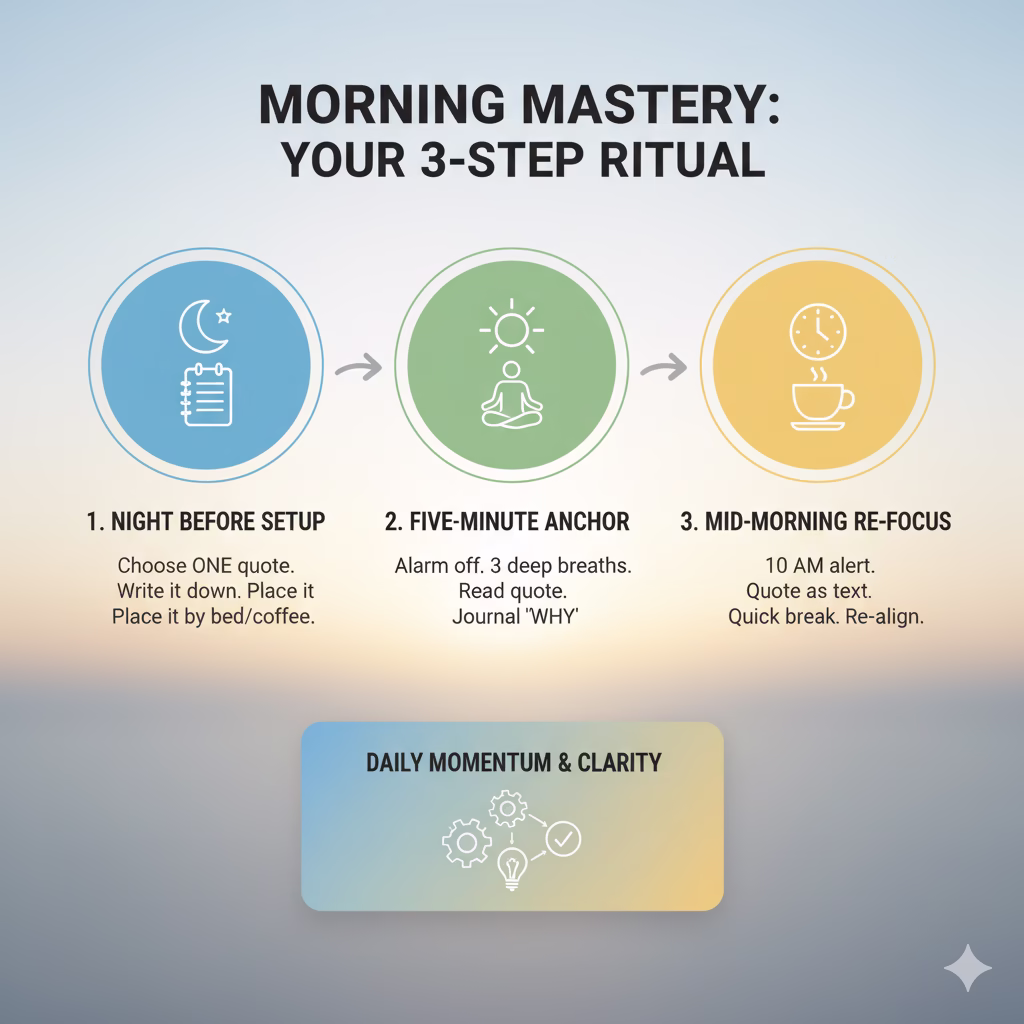
1. The Pre-Awakening Setup

The best morning starts the night before. This is where you prepare the quote as your mental “fuse.”

How to Do It:

  • The Night-Before Selection: Before you go to bed, select one quote from the list above that resonates with your biggest challenge for the next day. If you struggle with starting a big project, choose Quote #10 (“The journey of a thousand miles…”).
  • Physical Placement: Write this single quote on a sticky note and place it where your eyes will naturally fall first thing: on the bathroom mirror, on the bedside table next to your phone, or taped to your coffee maker.

2. The Five-Minute Morning Anchor

Do this immediately after turning off your alarm and before checking your phone or email. This is the period of maximum mental malleability.

How to Do It:

  • The Three-Breath Integration: Stand up (or sit up straight). Read your chosen quote slowly. Close your eyes and take three deep, intentional breaths. On the inhale, visualize yourself successfully completing the action related to the quote (e.g., actually starting the difficult project). On the exhale, release the resistance or doubt you feel.
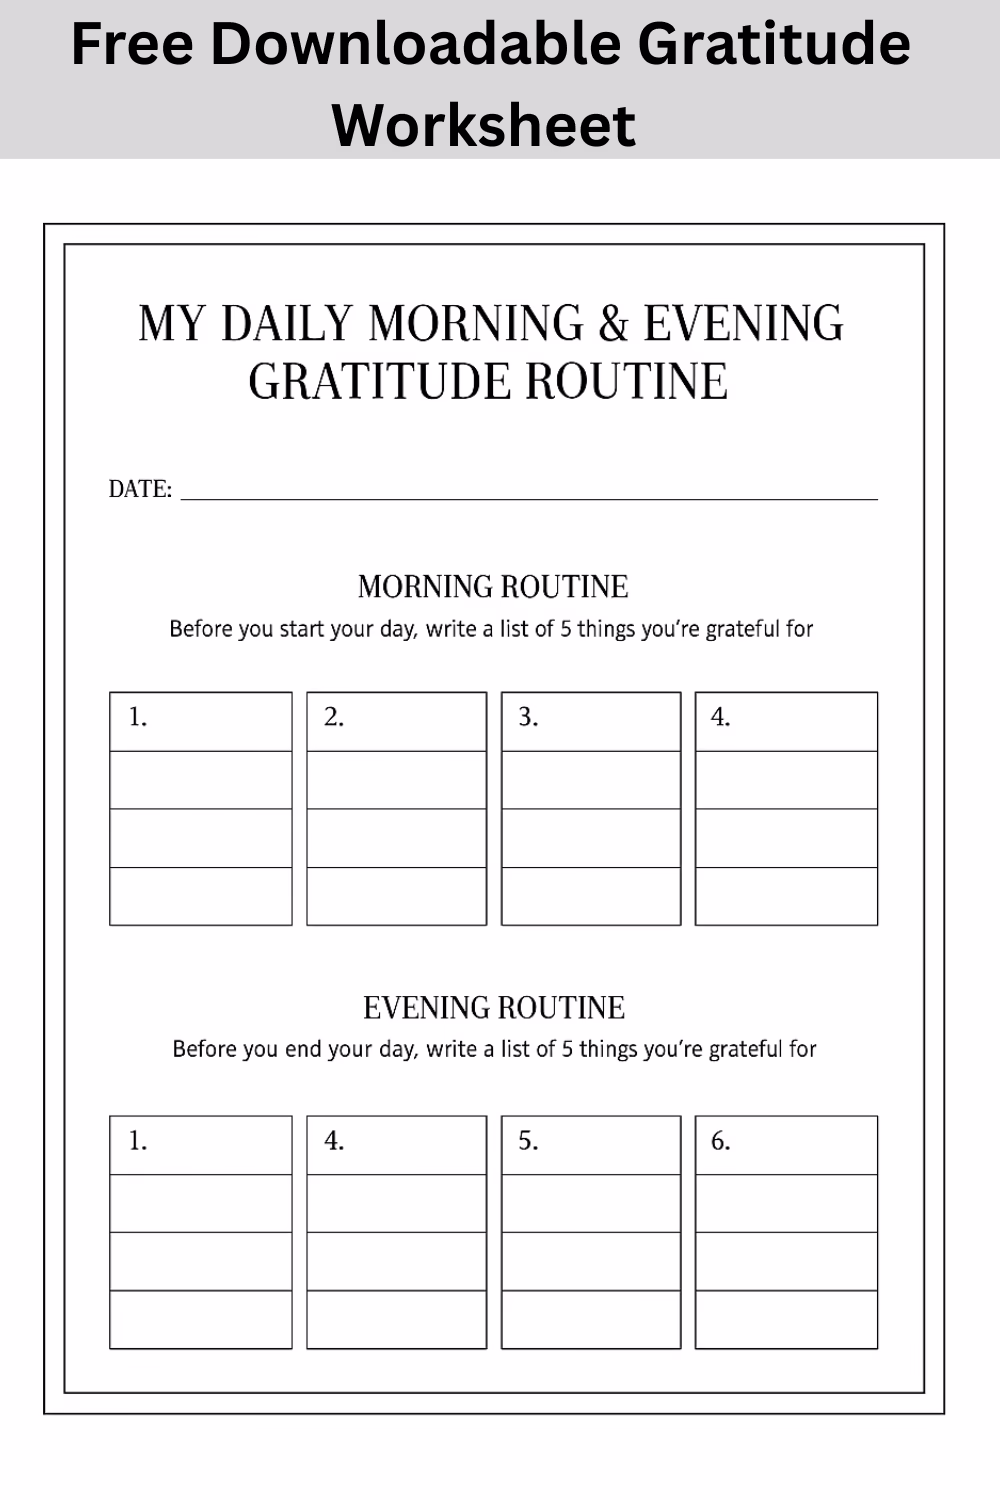
  • The “Why” Connection: Ask yourself, “Why is this quote important for me today?” Write a single sentence answer in a dedicated journal or even on the back of the sticky note. This forces a deeper, personal connection beyond mere reading.

3. The Mid-Morning Re-Focus

Even a strong start can fade by 10 AM. You need a planned re-engagement to keep the momentum going.

How to Do It:

  • Digital Anchor: Set a non-intrusive phone alert for 10:00 AM (or whenever you typically hit a slump). Make the alert text your chosen quote for the day.
  • The Coffee Break Review: When the alarm sounds, take a 60-second coffee or water break. Say the quote out loud (even if quietly). This is a micro-meditation that resets your focus and reminds you of the intention you set hours ago.

Part III: Examples of Quote-to-Action Implementation

To make this practical, let’s look at three common morning challenges and how a specific quote can be used as the solution.

Challenge 1: Overcoming Procrastination on a Big Task

The Scenario: You know you need to tackle a dense report or a major organizational task, but the size of it makes you want to check email for an hour instead.

The Quote-Solution: “Well begun is half done.”Aristotle (Quote #8)7

The How-To:

  1. Read and Believe: You tell yourself, “The hardest part is the first 15 minutes.”
  2. Define the ‘Begin’: You don’t commit to finishing the report. You commit to defining ‘well begun’ as writing the first paragraph or outlining the first three sections.
  3. The Result: By simplifying the initial task, you overcome the mental barrier. As Aristotle promised, once you’ve started, the momentum carries you forward, and the rest feels exponentially easier.

Challenge 2: Battling Negativity or a Bad Mood

The Scenario: You spilled your coffee, traffic was terrible, and you’re already feeling resentful about the day ahead.

The Quote-Solution: “I get up every morning and it’s going to be a great day. You never know when it’s going to be over, so I refuse to have a bad day.”Paul Henderson (Quote #6)

The How-To:

  1. Acknowledge, Then Reframe: You recognize the minor frustration (spilled coffee) but consciously separate it from the entire day’s potential.
  2. Verbal Commitment: You quietly state the quote to yourself. You make a firm, defiant decision: “That was a bad event, but I refuse to let it be a bad day.”
  3. The Result: The quote acts as a psychological buffer, preventing a small annoyance from escalating into a negative spiral that poisons hours of work.

Challenge 3: Feeling Unmotivated to Exercise

The Scenario: You planned a morning workout, but your bed feels irresistibly comfortable, and the thought of breaking a sweat is draining.

The Quote-Solution: “It does not matter how slowly you go as long as you do not stop.”Confucius (Quote #16)

The How-To:

  1. Reduce the Scope: Instead of committing to the full 45-minute routine, you tell yourself, “I only have to do the first five minutes.”
  2. Apply the Quote: You focus entirely on the ‘do not stop’ part. You allow yourself to move slowly, even lazily, but you focus on continuous, incremental motion.
  3. The Result: Once you are dressed and moving, the ‘inertia of rest’ is replaced by the ‘inertia of motion.’ You often find that once you’ve started and your blood is pumping, you happily complete the full workout, all because you prioritized consistency over intensity.

Part IV: Sustaining the Motivation

Consistency is the ultimate key. Motivational quotes work best not as a one-time jolt, but as a recurring theme.

How to Do It:

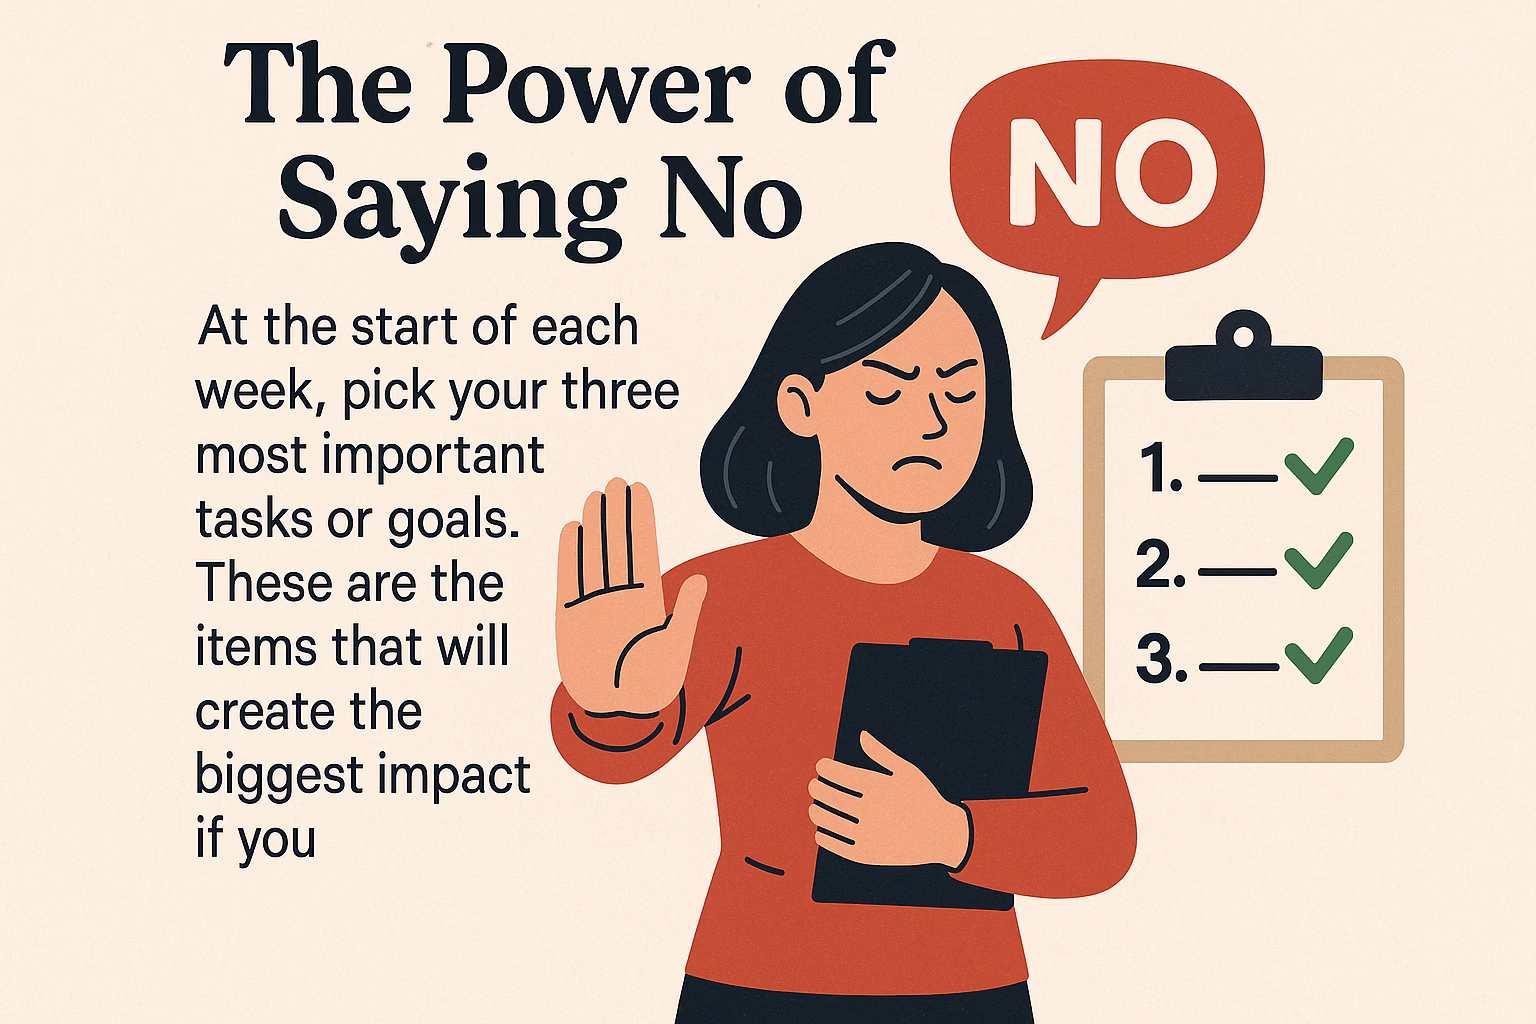
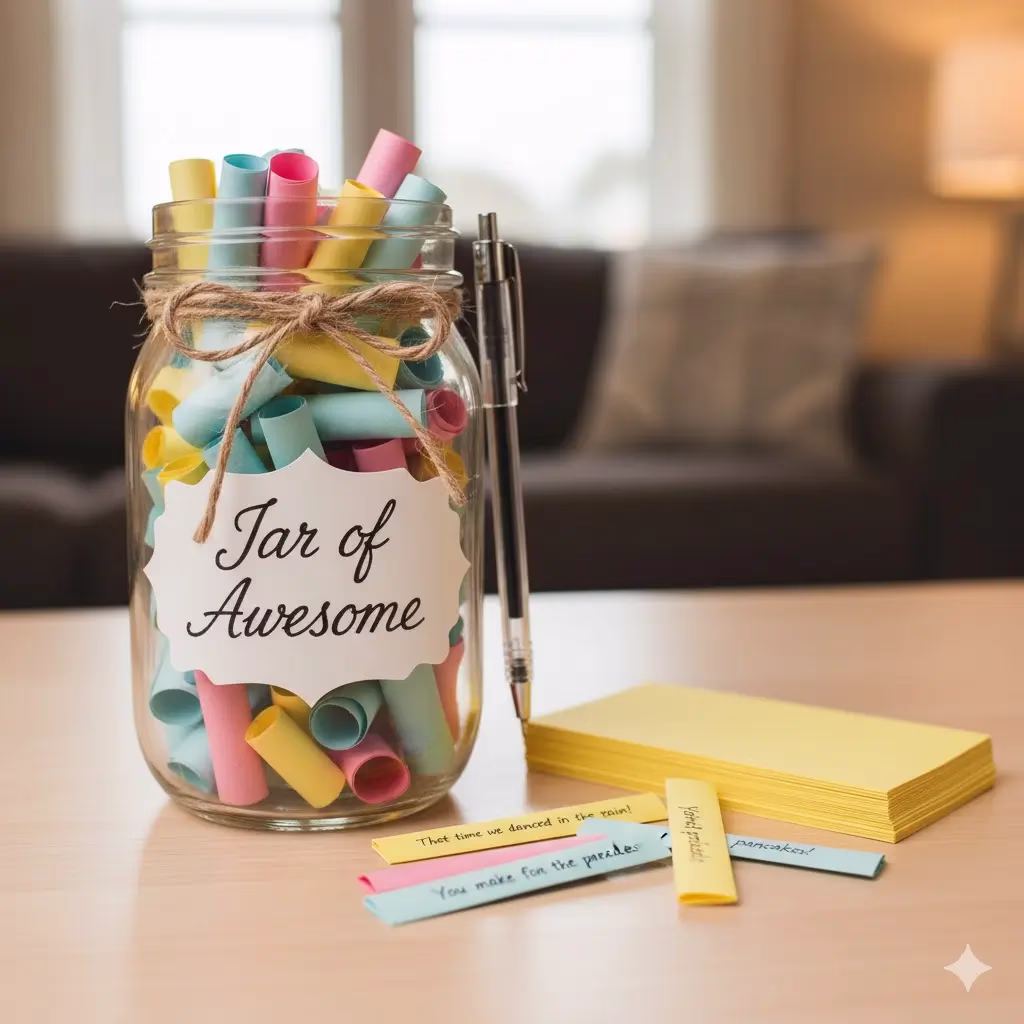
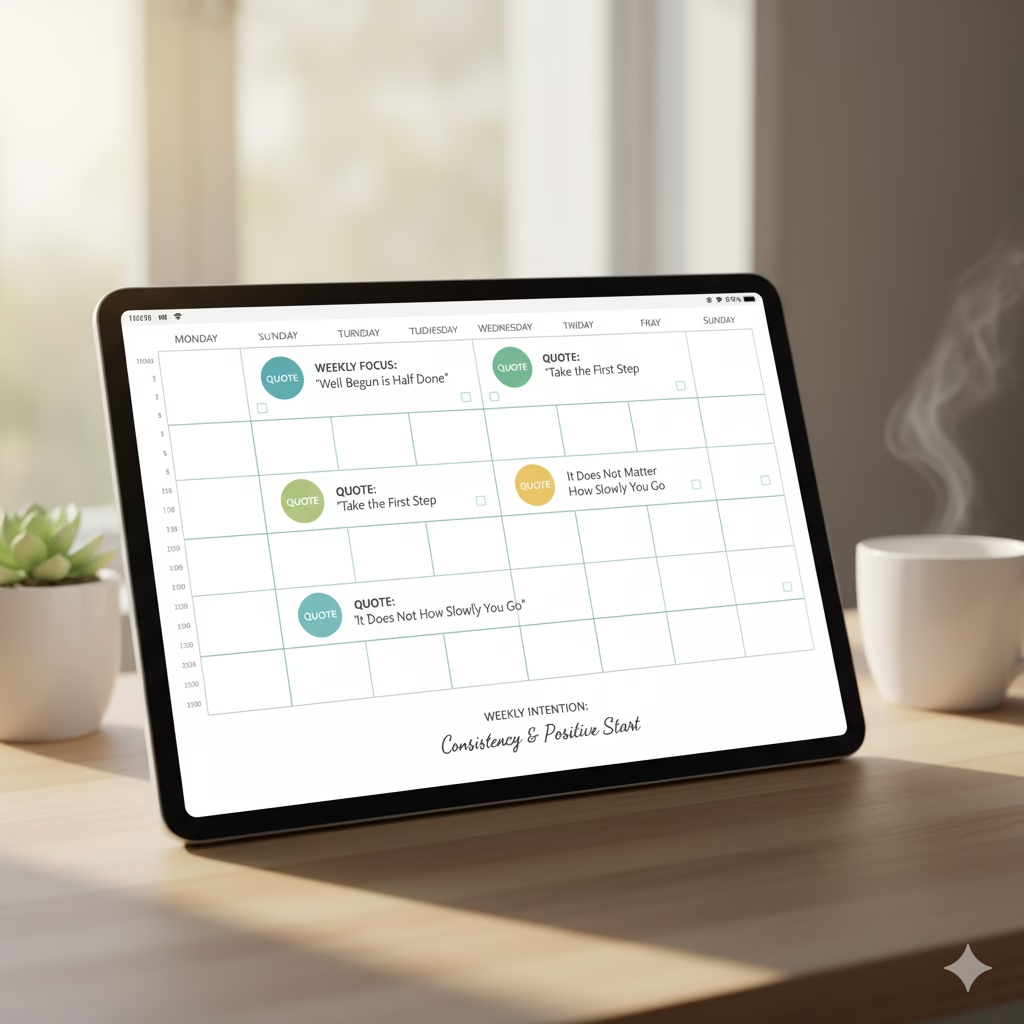
  • The Quote Library: Create a physical or digital “library” of these 21 quotes (and others you love). On Sunday evening, plan your “Quote of the Day” for the entire week. This automates your morning inspiration.
  • Visual Reinforcement: Use a digital desktop background or a simple framed print with your current favorite quote. This visual cue ensures the inspiration is a passive part of your environment.
  • Share the Spark: Text your “Quote of the Day” to an accountability partner or friend. Teaching or sharing a concept is the highest form of learning and commitment.

By consciously choosing how you start, you’re not just waking up; you’re programming your mind for success. Use these 21 motivational quotes as the blueprint for your best morning, and watch the positive ripple effect spread throughout your entire day.


Frequently Asked Questions (FAQ)

Q: Why do motivational quotes work, and isn’t it just a temporary feeling?

A: Motivational quotes work because they act as affirmations and cognitive anchors. They use concise language to communicate complex ideas about persistence, action, and positive thinking, immediately reframing a potentially negative or overwhelmed mindset. While the feeling might be temporary, the intentional shift in focus—from dread to action—is a skill that becomes permanent with practice.

Q: Should I use a new quote every day, or stick with one?

A: For maximum effectiveness, we recommend choosing one quote for the week (or at least for 3-4 days). Constantly switching reduces the chance of internalizing the message. By focusing on one quote, you can truly apply it to various situations and challenges, making the teaching of the quote a deep-seated part of your behavior.

Q: What if I forget to read the quote in the rush of the morning?

A: The best way to prevent this is by using a physical cue (the sticky note by the bed/mirror) and linking it to an existing habit. For example, make a rule: I will not pour my coffee until I have read the quote. Or: I will not check my phone until I have repeated the quote. This is called habit stacking and ensures the inspirational moment is protected from your rush.

Q: Are there certain times of day I should avoid checking motivational quotes?

A: Be mindful of using them too late at night. While they can inspire, some highly action-oriented quotes might stimulate your mind and interfere with quality sleep. Save the action-driven quotes for the morning and use calming, gratitude-focused statements (like Quote #20) for evening reflection.


References


Recent Posts


How to Cultivate Gratitude and Shift Your Perspective

Open journal on a wooden table with steam rising from a mug, glasses, and a pen. The journal page has headings like Gratitude and "A Shift in Perspective," symbolizing the start of a daily practice.

Life often throws curveballs, leaving us feeling overwhelmed or uninspired. I’ve been there, searching for ways to find more joy and meaning in the everyday chaos. This journey led me to the profound practice of gratitude, a simple yet powerful tool that completely reshaped my view of the world. Join me as I share how embracing thankfulness can truly change everything.


The Profound Power of Daily Gratitude

In a world that often focuses on what we lack, what’s next, or what’s wrong, it’s easy to get caught in a cycle of unhappiness. We look at highlight reels, compare our private lives with others’ perfect images, and constantly try to get more. But what if the key to deep happiness, strength, and a better life wasn’t found in getting more things? What if it was found in appreciating what we already have? This is the core of gratitude. Learning to use it is one of the most powerful changes you can make.

Gratitude is more than just saying “thank you.” It’s a deep appreciation for things that are valuable and important to you, and a general feeling of thankfulness. It is a conscious choice you make and a way to look at the world, even when things are hard. This doesn’t mean ignoring pain or pretending everything is fine; rather, you see the good things that exist along with the bad. You find light even in dark times, and you understand that every event, good or bad, adds to the rich story of your life.

The benefits of practicing gratitude are huge and well-known. Studies show that people who are grateful feel more happy emotions. They are more awake, more eager, and more focused. And are more likely to support others emotionally. They are less bothered by minor aches and sleep better. Gratitude does more than just make you feel good. It changes your brain. It makes the parts of your brain linked to reward and fairness work better. It’s a great skill everyone can have, and it costs nothing to learn.

So, how do we move past simple thank-yous and truly make gratitude a part of our daily lives? It starts with regular, focused practice.

Understanding the Main Ideas of Gratitude

Before we look at the methods, it helps to know why gratitude is so strong.

  1. Focus: You cannot be grateful for something you don’t see. Focus is the base of gratitude. It lets us be present and notice the good things in our lives, no matter how small. It means slowing down and truly looking.
  2. Appreciation: This is the central feeling of gratitude. It’s the emotional reaction to seeing the value or benefit of something. This can be for a major event or just a small comfort.
  3. Seeing the Source: Gratitude often means seeing where the good comes from. This could be another person, a higher power, nature, or just luck. It helps you feel more connected to others and the world.
  4. Change in View: This is where the magic really happens. Gratitude helps us look at situations from a new angle. Instead of focusing on problems, it asks us to see what went right, what we learned, or what new chances came up.

Simple Ways to Cultivate Gratitude

Building gratitude is a long-term path, not a quick stop. It needs steady work, but the rewards are priceless. Here are some clear, actionable ideas to make gratitude a part of your daily life.

1. Start a Gratitude Journal

Keeping a gratitude journal is one of the best and most popular methods. This routine helps you think about things you are thankful for every day. It makes those good feelings stronger and helps you see more good things in your day-to-day life.

How to Do It:

  • Be Regular: Choose a time each day to write. Morning or evening works best for most people.
  • Be Clear: Don’t just write “I’m grateful for my family.” Instead, try “I’m grateful for my sister’s fun laugh on our call today. It made my morning better.”
  • Choose a Number: Start by listing 3 to 5 things each day. They don’t need to be big things. Often, the smallest things matter the most.
  • Don’t Stress: If you have trouble thinking of items, think about your five senses. What did you see, hear, smell, taste, or feel today that you liked?
  • Vary Your List: Try not to list the same things too often. This trains your brain to look for new reasons to be thankful.

Example:

  • Day 1: “Thankful for the warm coffee this morning, my comfy chair, and the sound of birds outside my window.”
  • Day 2: “Thankful for how well my coworker handled that hard client, the sunlight, and the chance to learn a new skill today.”

2. The Gratitude Walk

This is a wonderful way to mix focus and gratitude with being active.

How to Do It:

  • Go Outside: Walk in your area, a park, or even just your yard.
  • Notice Your World: As you walk, truly look at your surroundings. What do you see? Bright colors of flowers, a spiderweb’s pattern, a friendly face? What do you hear? Singing birds, kids playing, the wind? What do you smell? Freshly cut grass, flowers, rain?
  • Say Thanks Inside: For each thing you notice, mentally say a thank you. “I’m grateful for the fresh air.” “I like the beauty of that old tree.” “Thankful for the sound of laughter.”
  • Be Natural: Don’t force the feeling. Just observe the world and let feelings of thanks come naturally.

Example: Walking past a park, you might see bright red roses and think, “How lovely! I’m grateful for the time someone spent growing these, and for the simple pleasure they give me.”

3. Gratitude Jar

This is a great long-term project. It lets you actually see your blessings grow over time.

How to Do It:

  • Get a Jar: Pick a jar, box, or container you like and can easily reach.
  • Write Things Down: When something good happens or you feel thankful, write it on a small slip of paper.
  • Fill the Jar: Fold the paper and drop it into the jar.
  • Look Back and Reflect: On New Year’s Eve, your birthday, or whenever you need a lift, open the jar and read all your notes. It’s a very powerful reminder of the good things in your life.

Example: After a hard day, you might come home to a hot meal made by your partner. Write, “Grateful for my partner’s care and the tasty dinner tonight.”

4. Expressing Gratitude to Others

This goes past just thinking to yourself. It actively makes your relationships and sense of connection stronger.

How to Do It:

  • Say Thanks Out Loud: Make a point to really thank people during your day. Thank your coffee maker, a bus driver, a coworker who helped you, or a family member.
  • Write Notes/Messages: When someone does something especially kind or helpful, write them a note, email, or text message. Make sure to say exactly what you appreciate.
  • Gratitude Visits: For someone who has greatly helped your life, plan a time to visit them. Express your gratitude in person. This can be very meaningful for both of you.

Example: Instead of a quick “thanks” to your friend who helped you move, try, “I want to say how much I appreciate you taking the time to help me move last week. I could not have done it alone, and knowing you were there meant a lot to me.”

5. Gratitude Meditation or Affirmations

If you like quiet, thoughtful routines, adding gratitude to meditation can be very rewarding.

How to Do It:

  • Guided Meditations: Search for “gratitude meditation” online or on apps. These often guide you to think about different sources of thanks.
  • Do It Yourself: Sit calmly, close your eyes, and think about things you are grateful for. Focus on the warm, appreciative feeling in your chest.
  • Positive Statements: Repeat positive statements of gratitude all day, such as, “I am grateful for all the good things in my life,” or, “Every day I find new reasons to be thankful.”

Example: During a meditation, you might picture a loved one, a calm place, or a recent success. Let the feeling of gratitude for each one wash over you.

6. The “Three Good Things” Exercise

This is a simple but strong technique, often used in mental wellness.

How to Do It:

  • Before Bed: Each night, think of three specific good things that happened that day.
  • Say Why: For each item, briefly explain why it happened or why you are thankful for it. This helps you truly feel the positive event.

Example:

  1. “My presentation at work went well because I spent extra time getting ready.”
  2. “I had a good talk with my neighbor because we have not talked in a while, and it felt good to catch up.”
  3. “The weather was perfect for my evening walk. I appreciated the cool air after a warm day.”

7. Balancing Negative Thoughts

Gratitude is not about ignoring problems. It’s about finding balance. When a bad thought comes up, try to actively find a counter-thought of thanks.

How to Do It:

  • See the Negative: Do not push away bad feelings. See them first.
  • Find the Good Side: Then, consciously look for something to be thankful for in that moment or in a different part of your life.
  • Focus on Growth: Even in hard times, try to find the lesson, the growth, or the strength you gained.

Example:

  • Bad thought: “Ugh, I’m stuck in traffic again; this is so annoying.”
  • Gratitude counter: “I’m grateful to have a reliable car. This gives me a chance to listen to my favorite music.”
  • Bad thought: “I didn’t get that job promotion I wanted.”
  • Gratitude counter: “I’m grateful for the skills I gained during the interview process, and for the helpful coworkers I already have.”

Shifting Your Perspective: How Gratitude Changes Your Life

Building gratitude is not just about feeling good right now. It is about deeply changing the way you see the world. This new way of seeing things has huge, long-term benefits.

1. More Strength and Resilience

Life will bring tough times, upsets, and hurt. Gratitude doesn’t stop these things from happening, but it gives you a strong tool to handle them. When you regularly focus on what is good, you build a store of positive feelings inside. You can use this during hard times. You learn to see problems not just as stops, but as chances to grow, learn, and become stronger.

For example, if you lose your job, feeling afraid and angry is normal at first. But a grateful view might also let you feel thankful for the skills you learned in that role. It might let you feel thankful for the time you now have. It might show you a new chance to try a different career you have always wanted.

2. Better Relationships

When you show gratitude to others, you make your connections stronger. People feel valued, noticed, and liked, which naturally brings them closer to you. This creates a good cycle: you feel good when you say thanks, they feel good when they get it, and your relationship improves. A grateful person is also more likely to forgive, feel less anger, and show more care, which are all key parts of healthy relationships.

When you take time to see a friend’s steady help or a partner’s daily kind acts, it strengthens those good things. It makes both of you feel more loved and safe.

3. Higher Self-Esteem and Less Comparison

Gratitude helps you focus on your own good things, instead of looking at what others have. When you value your own path, your own strengths, and your own life, you are less likely to fall into the trap of comparing yourself to others. This leads to feeling better about yourself. It brings a greater sense of being happy with who you are and what you have.

The gratitude jar or journal example is a great way to do this. By always listing your own unique blessings, you reinforce your self-worth.

4. More Optimism and Happiness

Focusing on good things trains your brain to notice more of the good in the world. This doesn’t mean you stop seeing problems. It means your normal way of thinking moves toward being hopeful. You start expecting good things to happen. This, in turn, can lead to more good things actually happening.

This simple shift changes your daily experience. You see challenges as temporary and less important than the overall good in your life.

5. Better Sleep and Health

Studies show a clear link between gratitude and physical health. Grateful people report fewer health issues and have stronger immune systems. They often feel more motivated to take care of their bodies, like exercising and eating well. Also, practicing gratitude just before bed can calm the mind. It clears away the worries of the day. This leads to faster, more restful sleep.

Try writing in your gratitude journal right before you turn out the light. Focusing on positive things is a great way to set the stage for a calm night.

Moving Forward: Making Gratitude Last

The hardest part of any practice is staying with it. Here are final tips to ensure gratitude becomes a long-term part of who you are.

Set Reminders: Use your phone, sticky notes, or a daily event (like brushing your teeth) as a cue to stop and think of one thing you are thankful for.

  • Mix It Up: If journaling feels dull, switch to the gratitude jar or the walk for a week. Use different methods to keep the practice feeling fresh.
  • Be Patient with Yourself: Some days will be easier than others. If you skip a day or a week, do not worry. Just start again. The goal is progress, not perfection.
  • Share the Practice: Talk to family or friends about what you are learning. Start a dinner table tradition where everyone shares one thing they are grateful for.

Gratitude is a truly powerful tool. It is always there, waiting for you to pick it up. By making it a regular part of your life, you are choosing to focus on the abundance that already exists. This choice will not only change your perspective but also improve your relationships, your resilience, and your entire experience of the world. Start today, and watch your world get brighter.


Your Free Daily Gratitude Routine Template

You’ve learned the steps to cultivate gratitude and shift your perspective. Now, it’s time to put those concepts into action!

We’ve created a simple, beautifully designed downloadable PDF template to help you establish a consistent practice morning and night. This tool is designed to make gratitude a simple, 5-minute routine, helping you start your day with intention and end it with peace.

What’s Included in Your Free Template:

  • Morning Routine: A dedicated section to quickly list the good things in your life before the stress of the day begins. This sets a positive tone and primes your mind for optimism.
  • Evening Routine: A section for reflection to help you acknowledge the specific blessings, lessons, or moments of kindness you experienced that day. This clears your mind for better sleep.
  • Consistency Tracking: Dated entries to help you track your progress as you build this new, positive habit.

Click the image or the button below to download your “My Daily Morning & Evening Gratitude Routine” template now!


Frequently Asked Questions (FAQ)

Q: Is practicing gratitude just ignoring my real problems?

A: No, not at all. Gratitude is not about pretending problems don’t exist. It’s about seeing the whole picture. When you focus only on problems, you see only darkness. Gratitude helps you see the light that coexists with the darkness. It makes you stronger and better able to solve those problems.

Q: How long does it take before I feel the benefits of gratitude?

A: Many people report feeling a mood lift right away. You may feel calmer just by writing in your journal for the first time. Research suggests that the deep, long-term changes—like increased optimism and better sleep—can appear after just a few weeks of consistent, daily practice.

Q: What if I have a really bad day and can’t think of anything to be grateful for?

A: On the hardest days, aim small. You don’t have to be grateful for the bad situation itself. Try being thankful for small comforts:

  • The fact that you have water to drink.
  • A bed to sleep in.
  • The fact that the difficult day is now over.
  • The strength to have made it through the day.

Q: Can I practice gratitude for big things, like winning the lottery?

A: You can, but it is often better to focus on small, everyday things. Why? Big, rare events give a quick burst of joy, but the small things are available every day. Being grateful for little things (like a good cup of tea or a short wait in line) teaches your brain to find happiness in the day-to-day. This makes the practice much more powerful.

Q: Do I have to write things down, or can I just think about them?

A: Thinking about what you’re thankful for is good, but writing it down is much more effective. Writing helps to slow down your thoughts and process the feelings more deeply. It gives the feeling a physical anchor and makes it real. It also creates a record you can look back at later.


Reference Section


Recent Posts


5 Simple Healthy Sandwiches You Can Make Today

A wooden cutting board displays four healthy sandwiches made with whole-grain bread and fresh ingredients including avocado, tomato, spinach, hummus, sprouts, turkey, and tuna salad, arranged neatly on a rustic dark wooden table.

There’s something timeless about the perfect sandwich — it’s simple, satisfying, and endlessly customizable. For busy people, it’s the ultimate healthy meal that doesn’t feel like “diet food.” These recipes are all about balance — crisp veggies, lean proteins, and hearty whole-grain bread that keep you full and fueled. Whether you’re working from home or packing lunch for tomorrow, these healthy sandwiches are easy to love and even easier to make.


Why Healthy Sandwiches Are the Perfect Everyday Meal

Healthy sandwiches are not just convenient; they’re an ideal mix of macronutrients that help sustain energy throughout the day. By choosing whole-grain bread over white, you increase fiber intake, which improves digestion and keeps you full longer. Lean proteins like chicken, turkey, or tuna support muscle repair, while fresh vegetables add antioxidants and essential vitamins.

Think of a healthy sandwich as a mini-meal that checks every nutritional box — a quick, balanced way to eat well without sacrificing flavor or time.


1. The Classic Chicken & Avocado Power Sandwich

This sandwich is high in protein, rich in healthy fats, and bursting with flavor. Avocado provides creamy texture and heart-healthy monounsaturated fats, while grilled chicken gives you lean protein that keeps you energized for hours.

Ingredients:

  • 2 slices of whole-grain bread
  • ½ ripe avocado, mashed
  • 1 small grilled chicken breast (sliced)
  • 1 handful of baby spinach or mixed greens
  • 2 slices of tomato
  • A squeeze of lemon juice
  • Salt and pepper to taste

How to Make It:

  1. Toast the whole-grain bread lightly.
  2. Spread the mashed avocado evenly on one slice.
  3. Layer the grilled chicken, tomato slices, and spinach.
  4. Add a pinch of salt, pepper, and lemon juice for brightness.
  5. Top with the other slice of bread and cut in half diagonally.

Pro Tip: For meal prep, grill several chicken breasts at once and store them in the fridge for up to three days.


2. Tuna & Greek Yogurt Crunch Sandwich

Forget the mayo! Using Greek yogurt instead adds protein and probiotics while keeping the sandwich creamy and light. The celery and pickles add crunch, making every bite refreshing.

Ingredients:

  • 2 slices of whole-grain bread
  • 1 can of tuna (in water), drained
  • 2 tbsp Greek yogurt
  • 1 celery stalk, finely chopped
  • A tbsp chopped dill pickle or relish
  • 1 tsp Dijon mustard
  • Salt and pepper to taste
  • Lettuce leaves

How to Make It:

  1. Mix tuna, Greek yogurt, celery, pickle, and mustard in a bowl.
  2. Add salt and pepper to taste.
  3. Spoon the mixture over one slice of bread.
  4. Top with lettuce and the second slice of bread.
  5. Slice in half and serve with cucumber sticks on the side.

3. Veggie Hummus & Sprout Sandwich

For a plant-based twist, this veggie-packed option is bursting with flavor and color. The hummus acts as both a spread and a protein source, while the sprouts and crunchy veggies give it texture and freshness.

Ingredients:

  • 2 slices of whole-grain bread
  • 3 tbsp hummus (any flavor you love)
  • ¼ cucumber, thinly sliced
  • ½ red bell pepper, thinly sliced
  • 1 small carrot, grated
  • A handful of alfalfa or broccoli sprouts
  • A pinch of black pepper

How to Make It:

  1. Spread hummus generously on both slices of bread.
  2. Layer cucumber, bell pepper, carrot, and sprouts.
  3. Season with a bit of pepper.
  4. Press the sandwich gently and slice it in half.

Variation: Add sliced avocado or roasted red peppers for extra richness.


4. Turkey, Cranberry & Spinach Sandwich

This one tastes like Thanksgiving in a sandwich — a perfect balance of sweet, savory, and tangy. It’s ideal for using leftover turkey or rotisserie chicken.

Ingredients:

  • 2 slices of whole-grain bread
  • 2–3 slices of turkey breast (or chicken)
  • 1 tbsp light cream cheese or Greek yogurt spread
  • 1 tbsp cranberry sauce (sugar-free preferred)
  • Handful of fresh spinach
  • A few thin slices of red onion

How to Make It:

  1. Spread cream cheese on one slice and cranberry sauce on the other.
  2. Layer turkey, spinach, and onion.
  3. Close the sandwich and press gently.
  4. Cut in half and enjoy immediately.

5. Egg, Spinach & Tomato Breakfast Sandwich

Healthy sandwiches aren’t just for lunch — this one makes mornings easier and better. The protein from eggs and fiber from whole-grain bread make it a satisfying breakfast that keeps you full for hours.

Ingredients:

  • 2 slices of whole-grain bread or one whole-grain English muffin
  • 1 egg (fried or scrambled)
  • 1 slice of low-fat cheese (optional)
  • 1–2 tomato slices
  • 1 handful of baby spinach
  • Salt and pepper to taste

How to Make It:

  1. Cook your egg as preferred (fried or scrambled).
  2. Toast your bread or English muffin.
  3. Layer spinach, tomato, and egg.
  4. Add cheese if desired, and season with salt and pepper.
  5. Serve warm or wrap it for an on-the-go meal.

Tips for Building Healthier Sandwiches

Building healthy sandwiches is all about smart choices. Here’s how to make any sandwich better for you without compromising on flavor:

1. Choose the Right Bread

Always go for 100% whole-grain or sprouted bread. It has more fiber, vitamins, and a lower glycemic index than white bread.

2. Lean Protein Is Key

Pick chicken breast, turkey, tuna, eggs, tofu, or legumes. These options are high in protein and low in saturated fat.

3. Add the Crunch

Fresh vegetables like cucumbers, spinach, bell peppers, and sprouts add crunch and nutrients without many calories.

4. Swap the Spread

Use hummus, avocado, Greek yogurt, or mustard instead of mayonnaise for a lighter, healthier sandwich.

5. Portion Control

Keep it balanced. One protein source, one or two veggies, and healthy spreads are plenty.


How to Meal Prep Healthy Sandwiches for the Week

If you’re busy, meal prepping sandwiches can save you time and ensure you always have a nutritious option ready.

1. Prep Your Proteins in Advance

Grill or bake chicken, boil eggs, or make a tuna salad mix early in the week. Store in airtight containers in the fridge.

2. Wash & Slice Veggies

Keep sliced tomatoes, cucumbers, spinach, and peppers ready in separate containers.

3. Assemble Fresh

To avoid soggy bread, assemble sandwiches just before eating. Or, layer spreads and greens between bread and wet ingredients to act as a barrier.

4. Store Smart

Wrap sandwiches tightly in parchment paper and refrigerate for up to 24 hours.


Creative Variations to Try

  • Mediterranean Chicken Sandwich: Add olive tapenade, grilled chicken, feta, and roasted red peppers.
  • Caprese Veggie Sandwich: Layer fresh mozzarella, tomato, basil, and a drizzle of balsamic glaze.
  • Spicy Tuna Melt: Use Greek yogurt-tuna mix with jalapeños and low-fat cheese, toasted in a pan.
  • Eggplant & Hummus Veggie Stack: Roast thin eggplant slices and pair with hummus and baby spinach.

Benefits of Eating Healthy Sandwiches

  • High in Fiber: Whole-grain bread aids digestion and supports gut health.
  • Protein-Packed: Lean proteins support metabolism and muscle repair.
  • Low in Added Sugar: Avoiding sugary condiments keeps your energy stable.
  • Easy & Customizable: You can adjust ingredients based on dietary goals or what’s in your fridge.

Frequently Asked Questions (FAQ)

1. What’s the healthiest bread for sandwiches?

Whole-grain, sprouted, or sourdough bread is best. They’re higher in fiber, vitamins, and minerals than white bread.

2. Can I make healthy sandwiches without meat?

Yes! Try plant-based proteins like hummus, tofu, beans, or lentil patties.

3. How do I keep sandwiches from getting soggy?

Place moisture-heavy ingredients (like tomatoes) in the middle, with greens or spreads as a barrier. Avoid assembling too far in advance.

4. Are wraps healthier than bread?

Not always. Some wraps have more sodium and calories. Always check labels and look for whole-grain options.

5. What can I pair with my sandwich for a balanced meal?

Add a side of fruit, yogurt, or a small salad for a well-rounded meal.


References

  1. Nutrition Source – Whole Grains
  2. Heart – Picking Healthy Proteins
  3. Mayo Clinic –Tips for a heart-healthy sandwich

Recent Posts


5 Ultimate Ways To Use whole Grain Bread

A variety of whole grain bread forms displayed on a kitchen counter, including a whole loaf topped with seeds, a stack of sliced bread, and a pile of small, toasted cubes (croutons).

As a busy individual who’s always looking for ways to make healthy eating both exciting and convenient, I’ve often found myself with that last half-loaf of whole grain bread, wondering how to give it new life. No one wants to waste good food, especially when it’s as nutritious as whole grain bread. Join me as I share some of my favorite, healthy, and incredibly versatile uses for this kitchen staple, ensuring no slice ever goes to waste again!


Introduction: The Unsung Hero of Healthy Eating

Overhead shot of a sliced loaf of whole grain bread on a cutting board, surrounded by bowls of fresh berries, eggs, chopped vegetables, cheese cubes, olive oil, and herbs, showcasing the versatile and healthy uses of whole grain bread ingredients.

Whole grain bread is more than just a vehicle for sandwiches; it’s a powerhouse of nutrition, packed with fiber, essential vitamins, and minerals. Yet, many of us often relegate it to the same few uses, sometimes even letting a few slices go stale before we can finish the loaf. What if I told you that your trusty whole grain bread could be the star of countless healthy, delicious, and incredibly creative meals? This article will dive deep into five ultimate ways to utilize whole grain bread, transforming it from a simple pantry item into a versatile ingredient that elevates your culinary game. Say goodbye to food waste and hello to a world of wholesome possibilities!

The beauty of whole grain bread lies not only in its nutritional profile but also in its adaptability. Its hearty texture and slightly nutty flavor make it an excellent base for both sweet and savory dishes. From breakfast to dinner, and even as a healthy snack, whole grain bread can be reinvented in ways you might never have imagined. We’ll explore innovative recipes that are not only good for you but also bursting with flavor, proving that healthy eating doesn’t have to be boring or repetitive. So, grab your loaf of whole grain bread, and let’s embark on a journey to unlock its full potential!


1. Breakfast Casserole or Strata: A Wholesome Morning Marvel

Kickstart your day with a nutritious and satisfying meal that can be prepared ahead of time, making your mornings a breeze. A whole grain bread breakfast casserole, also known as a strata, is the ultimate solution for busy individuals or anyone looking to enjoy a wholesome and hearty breakfast without the fuss. This dish combines the goodness of whole grain bread with eggs, cheese, milk, and an array of your favorite healthy vegetables and lean meats, creating a balanced and flavorful start to your day.

Why it’s healthy: Whole grain bread provides complex carbohydrates for sustained energy and fiber for digestive health. Eggs are a fantastic source of protein, and incorporating plenty of vegetables boosts your intake of vitamins, minerals, and antioxidants. Using low-fat cheese and lean protein options keeps the dish healthy and satisfying.

How to do it:

Ingredients:

  • 8-10 slices of whole grain bread, cut into 1-inch cubes (stale bread works best!)
  • 1 tablespoon olive oil
  • A cup chopped bell peppers (any color)
  • 1 cup chopped spinach or kale
  • 1/2 cup chopped onion
  • Half a cup chopped mushrooms
  • 1/2 cup cooked lean protein (e.g., diced chicken sausage, turkey bacon, or vegetarian crumbles)
  • 8 large eggs
  • 1.5 cups milk (dairy or unsweetened almond milk)
  • 1/2 teaspoon salt
  • 1/4 teaspoon black pepper
  • 1/2 cup shredded low-fat cheddar cheese or mozzarella
  • Optional: a pinch of red pepper flakes for a kick, fresh herbs like chives or parsley for garnish

Instructions:

  1. Prepare the bread: Lightly toast the whole grain bread cubes if they are fresh, or use stale bread directly. This helps them absorb the egg mixture without becoming soggy. Arrange the bread cubes evenly in a greased 9×13 inch baking dish.
  2. Sauté vegetables: In a large skillet, heat olive oil over medium heat. Add bell peppers, onion, and mushrooms, and sauté until softened, about 5-7 minutes. Stir in the spinach or kale until wilted.
  3. Layer the casserole: Sprinkle the sautéed vegetables and cooked lean protein evenly over the bread cubes in the baking dish.
  4. Whisk the egg mixture: In a large bowl, whisk together the eggs, milk, salt, and pepper until well combined.
  5. Pour and soak: Pour the egg mixture evenly over the bread and vegetable layers. Gently press down on the bread to ensure all cubes are saturated.
  6. Refrigerate: Cover the baking dish with plastic wrap and refrigerate for at least 4 hours, or preferably overnight. This allows the bread to fully absorb the egg mixture, resulting in a more flavorful and cohesive casserole.
  7. Bake: Preheat your oven to 375°F (190°C). Remove the casserole from the refrigerator about 30 minutes before baking. Sprinkle with shredded cheese.
  8. Cook until golden: Bake for 45-55 minutes, or until the casserole is puffed, golden brown, and a knife inserted into the center comes out clean.
  9. Serve: Let the casserole rest for a few minutes before slicing and serving. Garnish with fresh herbs if desired.

This breakfast casserole is not just delicious; it’s a fantastic way to utilize leftover whole grain bread and pack your morning meal with nutrients. It’s perfect for meal prepping and feeding a crowd!


2. Homemade Whole Grain Croutons: Crispy, Flavorful, and Never store-bought again!

Forget those store-bought croutons loaded with unhealthy oils and artificial flavors. Making your own whole grain croutons is incredibly simple, economical, and allows you to control the ingredients for a truly healthy and delicious outcome. These crispy bites are perfect for adding texture and flavor to salads, soups, and even as a healthy snack on their own.

Why it’s healthy: By making them at home, you use healthy fats like olive oil and natural seasonings, avoiding trans fats and excessive sodium often found in commercial versions. Whole grain bread maintains its fiber content, making these croutons a far superior choice.

How to do it:

Ingredients:

  • 4-6 slices of whole grain bread, preferably slightly stale, cut into 1/2-inch cubes
  • 2 tablespoons extra virgin olive oil
  • 1/2 teaspoon garlic powder
  • 1/2 teaspoon dried oregano
  • 1/4 teaspoon dried basil
  • Salt and black pepper to taste
  • Optional: a pinch of red pepper flakes for heat, grated Parmesan cheese (add after baking if desired)

Instructions:

  1. Preheat oven: Preheat your oven to 350°F (175°C).
  2. Prepare bread: Cut your whole grain bread into uniform 1/2-inch cubes. Stale bread works best as it’s less likely to become soggy.
  3. Season: In a large bowl, drizzle the bread cubes with olive oil. Toss gently to ensure all cubes are lightly coated.
  4. Add spices: Sprinkle with garlic powder, oregano, basil, salt, and pepper. Toss again until the seasonings are evenly distributed.
  5. Bake: Spread the seasoned bread cubes in a single layer on a baking sheet.
  6. Toast to perfection: Bake for 10-15 minutes, tossing once halfway through, until the croutons are golden brown and crispy. Keep a close eye on them to prevent burning, as oven temperatures can vary.
  7. Cool and store: Let the croutons cool completely on the baking sheet. They will become even crispier as they cool. Store in an airtight container at room temperature for up to a week.

These homemade whole grain croutons are a game-changer for any salad or soup, providing that satisfying crunch and a burst of flavor without any unhealthy additives.


3. Savory Whole Grain Stuffing or Dressing: The Heart of Your Healthy Feast

Stuffing or dressing made with whole grain bread offers a healthier twist on a classic comfort food. Often associated with holiday meals, this versatile dish can be enjoyed year-round as a wholesome side or even a light meal. Using whole grain bread adds a deeper flavor profile and a significant boost of fiber compared to traditional white bread stuffings.

Why it’s healthy: Whole grain bread provides complex carbohydrates and fiber, making the dish more filling and promoting digestive health. By loading it with plenty of vegetables like onions, celery, and herbs, you increase its nutrient density. Using low-sodium broth and healthy fats like olive oil further enhances its health benefits.

How to do it:

Ingredients:

  • 10-12 slices of whole grain bread, cut into 1-inch cubes (stale bread is ideal)
  • 2 tablespoons olive oil or butter
  • 1 cup chopped yellow onion
  • 1 cup chopped celery
  • 1/2 cup chopped carrots
  • 2 cloves garlic, minced
  • 1 teaspoon dried sage
  • 1/2 teaspoon dried thyme
  • 1/4 teaspoon black pepper
  • 1/2 teaspoon salt
  • 2 cups low-sodium vegetable or chicken broth
  • 1/4 cup chopped fresh parsley
  • Optional: 1/2 cup chopped apples for a touch of sweetness, or cooked mushrooms for added umami

Instructions:

  1. Preheat and toast (optional): Preheat your oven to 350°F (175°C). If your bread is fresh, spread the cubes on a baking sheet and bake for 10-15 minutes until lightly toasted and dried out. If using stale bread, you can skip this step.
  2. Sauté aromatics: In a large skillet or Dutch oven, melt olive oil or butter over medium heat. Add onion, celery, and carrots and sauté until softened, about 8-10 minutes.
  3. Add garlic and herbs: Stir in the minced garlic, dried sage, dried thyme, salt, and pepper. Cook for another 1-2 minutes until fragrant.
  4. Combine ingredients: In a large bowl, combine the toasted whole grain bread cubes with the sautéed vegetable mixture. Add the fresh parsley and optional apples or mushrooms.
  5. Moisten with broth: Gradually pour in the low-sodium broth, tossing gently until the bread cubes are evenly moistened. You might not need all the broth, depending on the dryness of your bread. The mixture should be moist but not soggy.
  6. Transfer to baking dish: Transfer the stuffing mixture to a greased 9×13 inch baking dish.
  7. Bake: Cover the baking dish with foil and bake for 30 minutes.
  8. Brown: Remove the foil and bake for an additional 15-20 minutes, or until the top is golden brown and crispy.
  9. Serve: Let rest for a few minutes before serving.

This whole grain stuffing is a comforting and wholesome addition to any meal, providing a healthy dose of fiber and flavor.

4. Baked “Chips”: Your Healthy Dipping Companion

Looking for a healthy alternative to fried potato chips? Whole grain bread can be transformed into incredibly satisfying and crispy baked “chips” that are perfect for dipping in hummus, guacamole, salsa, or any of your favorite healthy spreads. These are a fantastic way to use up leftover bread and create a guilt-free snack.

Why it’s healthy: This method eliminates deep-frying, significantly reducing unhealthy fats and calories. Whole grain bread provides complex carbohydrates and fiber, making these chips more filling and nutritious than many commercial snack options. You control the seasonings, avoiding excessive sodium and artificial additives.

How to do it:

Ingredients:

  • 4-6 slices of whole grain bread
  • 1-2 tablespoons extra virgin olive oil
  • 1/2 teaspoon garlic powder
  • 1/2 teaspoon paprika (smoked or sweet)
  • 1/4 teaspoon onion powder
  • Salt and black pepper to taste
  • Optional: A pinch of cayenne pepper for heat, dried herbs like oregano or rosemary.

Instructions:

  1. Preheat oven: Preheat your oven to 375°F (190°C).
  2. Prepare bread: Cut the whole grain bread into very thin strips or triangles. The thinner the pieces, the crispier your “chips” will be.
  3. Season: In a medium bowl, toss the bread pieces with olive oil until lightly coated.
  4. Add spices: Sprinkle with garlic powder, paprika, onion powder, salt, and pepper. Toss again to ensure even distribution of seasonings.
  5. Bake: Spread the seasoned bread pieces in a single layer on a large baking sheet. Ensure they are not overcrowded, as this will prevent them from crisping evenly.
  6. Crisp to perfection: Bake for 8-12 minutes, flipping halfway through, until golden brown and crispy. Baking time will vary depending on the thickness of your bread and your oven. Watch them closely, as they can go from perfectly crisp to burnt very quickly.
  7. Cool and serve: Let the “chips” cool completely on the baking sheet. They will become even crispier as they cool. Serve immediately with your favorite healthy dips, or store in an airtight container for up to 3-4 days.

These baked whole grain bread chips are a versatile and healthy snack that satisfies your craving for crunch without compromising on your health goals.


5. Whole Grain Bread Pudding with Berries: A Guilt-Free Dessert

Who says whole grain bread can’t be used for dessert? This wholesome bread pudding takes a classic comfort dessert and gives it a healthy makeover. By using whole grain bread, less sugar, and plenty of fresh berries, you can enjoy a delicious and satisfying treat that’s rich in fiber and antioxidants.

Why it’s healthy: Whole grain bread provides the base with beneficial fiber. Reducing added sugar and incorporating natural sweetness from berries significantly lowers the glycemic load. Berries are packed with antioxidants, and using lower-fat milk and eggs provides protein and essential nutrients.

How to do it:

Ingredients:

  • 6-8 slices of whole grain bread, cut into 1-inch cubes (slightly stale is great)
  • 2 large eggs
  • 1 large egg yolk
  • 1.5 cups milk (dairy or unsweetened almond milk)
  • 1/4 cup maple syrup or honey (adjust to taste)
  • 1 teaspoon vanilla extract
  • 1/2 teaspoon ground cinnamon
  • Pinch of nutmeg
  • 1 cup mixed fresh or frozen berries (strawberries, blueberries, raspberries)
  • Optional: 1 tablespoon melted butter for greasing, a sprinkle of chopped nuts (almonds, walnuts) for topping

Instructions:

  1. Preheat oven: Preheat your oven to 350°F (175°C). Lightly grease an 8×8 inch baking dish.
  2. Arrange bread: Place the whole grain bread cubes evenly in the prepared baking dish.
  3. Whisk custard: In a large bowl, whisk together the eggs, egg yolk, milk, maple syrup (or honey), vanilla extract, cinnamon, and nutmeg until well combined.
  4. Soak bread: Pour the egg mixture evenly over the bread cubes. Gently press down on the bread to ensure all pieces are saturated. Let it sit for 15-20 minutes to allow the bread to absorb the custard.
  5. Add berries: Gently fold in the mixed berries.
  6. Bake: Bake for 35-45 minutes, or until the pudding is set, golden brown on top, and a knife inserted into the center comes out clean (it may still be slightly jiggly in the middle, which is fine).
  7. Cool and serve: Let the bread pudding cool slightly before serving. It’s delicious warm, perhaps with a dollop of Greek yogurt or a sprinkle of chopped nuts.

This whole grain bread pudding is a delightful and healthy way to satisfy your sweet tooth while enjoying the benefits of whole grains and fresh fruit.


Conclusion: Unleash the Power of Whole Grain Bread

As we’ve explored these five ultimate and healthy ways to use whole grain bread, it’s clear that this humble ingredient holds incredible potential beyond the usual sandwich. From a hearty breakfast casserole to crispy baked chips, and from savory stuffing to a delightful dessert, whole grain bread can be transformed into an array of nutritious and flavorful dishes. These recipes not only help reduce food waste but also elevate your cooking, proving that healthy eating can be both creative and incredibly satisfying.

Embracing these versatile uses for whole grain bread means you’re investing in your health, enjoying delicious meals, and making the most out of every loaf. So, the next time you find yourself with extra whole grain bread, don’t let it go to waste. Instead, view it as an opportunity to experiment, innovate, and bring wholesome goodness to your table. Your taste buds and your body will thank you!


FAQ

Q1: Can I use fresh whole grain bread for these recipes, or does it have to be stale?

A1: While stale whole grain bread is often preferred for recipes like croutons, stuffing, and breakfast casseroles because it absorbs liquids better without becoming soggy, you can absolutely use fresh bread. If using fresh bread, it’s often a good idea to lightly toast or dry it out in the oven first for about 10-15 minutes to achieve a similar effect.

Q2: How long can homemade whole grain croutons be stored?

A2: Homemade whole grain croutons can be stored in an airtight container at room temperature for up to a week. For optimal crispness, ensure they are completely cool before storing.

Q3: Can I freeze the whole grain breakfast casserole?

A3: Yes, the whole grain breakfast casserole freezes beautifully! After baking and cooling, you can cut it into individual portions and freeze them in airtight containers or freezer bags for up to 2-3 months. Thaw in the refrigerator overnight and reheat in the microwave or oven.

Q4: Are these “baked chips” suitable for weight loss?

A4: Yes, baked whole grain bread “chips” can be a great addition to a weight loss plan when consumed in moderation and paired with healthy dips. They are significantly lower in fat and calories than fried chips and provide beneficial fiber, which helps with satiety.

Q5: What are the benefits of using whole grain bread over white bread in these recipes?

A5: Whole grain bread offers numerous health benefits over white bread, including higher fiber content (aiding digestion and satiety), more essential nutrients like B vitamins, iron, magnesium, and selenium. It also has a lower glycemic index, meaning it causes a slower, steadier rise in blood sugar levels, which is better for sustained energy and blood sugar control.


References


Recent Posts


The Gift of a Waste Free Wrap: Beautiful & Sustainable Ideas

A neutral-colored linen or burlap drawstring fabric pouch, tied securely at the top with natural twine and embellished with a sprig of fresh rosemary. This reusable bag is a beautiful example of Waste Free Wrap for small gifts.

Feeling the pang of guilt as wrapping paper piles up after celebrations? You’re not alone. We all want to show love through thoughtful gifts, but the environmental cost of traditional wrapping can be a heavy burden. This article is for anyone ready to embrace creativity, reduce waste, and add an extra layer of meaning to their presents using Waste Free Wrap ideas. Join us as we explore the beautiful world of sustainable gift giving!


Why Embrace the Waste Free Wrap Philosophy?

The magic of giving and receiving gifts is a cherished tradition, but what happens once the last present is opened and the confetti settles? Often, it’s a mountain of discarded wrapping paper, plastic ribbons, and sticky tape destined for landfill. Annually, in the UK alone, around 227,000 miles of wrapping paper are used, much of which isn’t recyclable due to glitter, plastic coatings, or foil. In the US, the amount of waste increases by 25% between Thanksgiving and New Year’s, with much of that being holiday-related packaging.

But what if there was a way to make your gifts even more special, while simultaneously showing love for our planet? Enter the world of waste free wrap. It’s about more than just sustainability; it’s about adding a unique, personal touch that often becomes part of the gift itself, creating a deeper connection and lasting memory. This comprehensive guide will equip you with beautiful, sustainable, and surprisingly simple ways to transform your gift-giving experience.

Why Choose Waste-Free Wrap? The Environmental and Emotional Benefits

Before we dive into the “how-to,” let’s briefly touch on the compelling reasons to make the switch:

  1. Environmental Impact: Reduces landfill waste, conserves natural resources (trees, water, energy), and lessens pollution associated with manufacturing and transporting traditional wrapping materials.
  2. Cost Savings: While there might be an initial investment in a few reusable items, over time, you’ll save money by not constantly buying single-use wrapping paper and accessories.
  3. Unique Aesthetic: Waste-free wrapping often boasts a charming, rustic, or elegant appeal that stands out from mass-produced options. It communicates thoughtfulness.
  4. Adds Value to the Gift: When your wrap is a beautiful scarf, a useful tote bag, or a lovely tin, it becomes an extension of the gift itself, offering a dual purpose.1
  5. Inspires Others: Your efforts can inspire friends and family to consider their own impact, spreading a ripple effect of conscious consumption.

It’s clear that moving towards a waste free wrap philosophy isn’t just a trend; it’s a mindful choice with far-reaching benefits.

The Pillars of Waste-Free Wrapping: Reusable, Recyclable, Compostable, and Upcycled

When considering your options, think about these categories:

  • Reusable: Materials that can be used again and again, ideally for wrapping or as part of the gift itself. (e.g., fabric, baskets, tins)
  • Recyclable: Materials that can be processed and turned into new products after use. (e.g., plain paper, cardboard)
  • Compostable: Organic materials that will break down naturally into nutrient-rich soil. (e.g., natural twine, real leaves)
  • Upcycled: Giving a second life to an item that would otherwise be discarded. (e.g., old maps, newspaper, cereal boxes)

Most effective waste free wrap strategies combine elements from all these pillars.

Section 1: Fabric Fantastic – The Art of Furoshiki and Beyond

Fabric is arguably the most elegant and truly zero-waste option for gift wrapping. It’s infinitely reusable and adds a luxurious touch.

1.1 Furoshiki: The Japanese Art of Fabric Wrapping

Furoshiki is a traditional Japanese wrapping cloth that has been used for centuries to transport goods, bundle clothes, and, of course, wrap gifts.2 It’s an incredibly versatile and beautiful method that requires no tape, scissors, or ribbon.

How to Do It:

  • Choose Your Fabric: A square piece of fabric is ideal. Common sizes are 45cm x 45cm (17×17 inches) for small items, or 70-90cm x 70-90cm (27-35 inches) for larger or multiple items.
    • Ideas for Fabric:
      • Scarves: A new scarf can be part of the gift!
      • Bandanas/Handkerchiefs: Great for smaller items.
      • Tea Towels/Cloth Napkins: Practical and charming.
      • Fabric Scraps: Got an old pillowcase, sheet, or unloved shirt? Cut it into a square, hem the edges (or leave them raw for a rustic look), and you’ve got instant Furoshiki.
      • Pre-made Furoshiki: You can purchase these from sustainable retailers.
  • Basic Wrap Method (for square/rectangular items):
    1. Lay your fabric flat, diamond-style (corner pointing up).Place the gift in the center.Bring the bottom corner up over the gift and tuck it under.Bring the top corner down over the gift.Gather the remaining two side corners and tie them securely in a knot on top of the gift. You can do a simple square knot or a more decorative bow.
  • Bottle Wrap Method:
    1. Lay the bottle across the center of the fabric, diagonally.Fold two opposite corners over the bottle and roll it up.Gather the ends and tie them securely above the bottle neck.
  • Image Placement: Furoshiki bottle wrap example.

1.2 Beyond Furoshiki: Other Fabric Ideas

  • Reusable Bags as Gifts: Place your present inside a beautiful tote bag, a drawstring produce bag, or even a small backpack. The bag itself is part of the gift!
    • How to Do It: Simply place the gift inside the bag. You can add a tag tied to the handle.
  • Fabric Pouches/Sachets: For small gifts like jewelry or toiletries, sew simple fabric pouches from scraps.3 These can be tied with a ribbon or drawstring.
    • How to Do It: Cut two rectangles of fabric, sew three sides, hem the top, and add a drawstring or ribbon channel.

Section 2: Upcycled & Repurposed Wonders – Giving Materials a Second Life

This category is all about creativity and resourcefulness. Look around your home – you likely have plenty of potential waste free wrap materials!

2.1 Paper with a Past

Traditional wrapping paper is often not recyclable due to plastic coatings, glitter, or foil.4 But many other paper products are perfect for upcycling.

  • Newspaper: The ultimate classic.
    • How to Do It: Use the comic sections for a burst of color and fun, or the black and white pages for a sophisticated, minimalist look. Use natural twine and a sprig of greenery for decoration.
  • Brown Paper Bags: Sturdy and versatile.
  • How to Do It: Cut open paper grocery bags, turn them inside out (if there’s branding you don’t want), and use the plain brown paper. Decorate with stamps, drawings, or hand-written messages.
  • Old Maps, Sheet Music, Calendars, or Posters: These offer incredible visual interest.
    • How to Do It: Simply wrap your gift as you would with any paper. These are often strong enough to not require excessive tape.
    • Examples: Wrap a travel-themed gift in an old map, or a musical instrument in sheet music.
  • Kids’ Artwork: The most personal touch!
    • How to Do It: Use a child’s drawings or paintings (perhaps not their masterpieces, but older ones!) as wrapping paper for family members.
  • Seed Paper: A truly unique option.
    • How to Do It: Purchase seed paper (paper embedded with plant seeds) and use it to wrap small gifts. The recipient can then plant the “paper” to grow flowers or herbs. Ensure the paper is truly compostable/biodegradable.

2.2 Boxes, Baskets & Jars: Containers as Gifts

Why wrap a gift when the container can be the gift itself, or at least beautifully reusable?

  • Decorative Tins: Keep those attractive cookie or tea tins. They are perfect for small gifts, baked goods, or crafting supplies.
    • How to Do It: Simply place your gift inside. Add a bow or tag if desired.
  • Wooden Boxes or Crates: For larger or multiple items, a wooden box can be a beautiful presentation and then repurposed for storage.
  • Baskets: Fill a basket with several smaller gifts to create a “hamper.” The basket can then be used for storage, picnics, or décor.
  • Mason Jars/Glass Bottles: Ideal for homemade treats, bath salts, spice mixes, or small trinkets.5
    • How to Do It: Fill the jar, tie a ribbon or fabric scrap around the lid, and attach a tag.

Section 3: The Finishing Touches – Sustainable Fasteners and Embellishments

This is where your waste free wrap truly shines. Ditch the plastic ribbon, glitter, and synthetic bows for natural, reusable, or compostable alternatives.

3.1 Eco-Friendly Fasteners

  • Natural Twine & String: Hemp, jute, cotton, or raffia twine are excellent choices. They are biodegradable and add a rustic charm.
    • How to Do It: Simply tie around your wrapped gift or container.
  • Fabric Scraps as Ribbons: Cut strips from old t-shirts, sheets, or leftover fabric to create unique, soft ribbons.6
    • How to Do It: Tear or cut fabric into strips of desired width and tie around the gift. No need to finish the edges if you like a frayed look.
  • Washi Tape or Paper Tape: While not entirely free of waste, these are far superior to plastic-based sticky tape. Washi tape is often made from natural fibers like bamboo or hemp and is biodegradable.7 Water-activated paper tape is also a good option.
    • How to Do It: Use instead of regular sellotape for paper wraps.
  • Safety Pins/Buttons: For fabric wraps, you can sometimes secure folds with a decorative safety pin or a vintage button.

3.2 Beautiful & Biodegradable Embellishments

This is where nature and your craft supplies come together.

  • Natural Elements (Compostable):
    • Greenery: A sprig of pine, rosemary, eucalyptus, or holly.
    • Dried Flowers/Herbs: Lavender, dried orange slices, cinnamon sticks.
    • Seed Pods/Pinecones: Collect these on a nature walk.
    • How to Do It: Tuck these under twine or ribbon, or hot glue them to a tag.
  • Reusable Ornaments/Charms:
    • Small Christmas Ornaments: Attach a small, new ornament that becomes part of the gift.
    • Thrifted Brooches/Charms: Find unique pieces at charity shops to add a vintage touch.
    • How to Do It: Tie onto ribbon or twine.
  • Homemade Gift Tags:
    • Upcycled Cardboard: Cut tags from old cereal boxes, greeting cards, or shipping boxes.
    • Plantable Seed Paper Tags: As mentioned before, a truly regenerative option.
    • Hand-Stamped Tags: Use natural kraft paper or upcycled cardboard and rubber stamps.
    • How to Do It: Punch a hole, write your message, and attach with twine.

Section 4: Practical Tips for a Seamless Transition

Making the switch to waste free wrap doesn’t have to be overwhelming. Here are some practical tips:

  1. Start Small: Don’t feel pressured to completely overhaul your wrapping habits overnight. Pick one or two ideas to try first.
  2. Build a Stash: Over time, collect fabric scraps, interesting tins, baskets, and natural elements. Keep a “waste-free wrap kit” box handy.
  3. Communicate: If you’re using fabric that you’d like back, let the recipient know with a gentle note or by saying, “This scarf is part of your gift, but if you don’t need it, I’d love to reuse it for another gift!”
  4. Embrace Imperfection: Hand-wrapped gifts with natural elements will never look as “perfect” as machine-produced paper. This is their charm! Embrace the rustic beauty.
  5. Think Outside the Box: What unconventional items could you use? An old sweater sleeve for a wine bottle? A piece of burlap? A vintage tablecloth? The possibilities are endless.

References


Recent Posts


Halve Your Learning Time: Unlocking the Secrets of Deep Practice

A man holds his hand to his forehead, looking frustrated, stressed, and thinking hard, next to the bold text headline 'Halve Your Learning Time' and a call-to-action about accelerating learning mastery. The text addresses the struggle with slow progress and offers a solution for cutting down the Learning Time.

Have you ever felt stuck on a learning plateau? It’s frustrating to put in hours and see minimal gains. I’ve been there—learning new languages, software, and musical instruments. But what if there was a way to dramatically cut down your learning time? What if you could achieve mastery faster than you ever thought possible? Join me as we explore how to unlock your true learning potential.


Stop Wasting Hours: Why Quality Over Quantity Halves Your Learning Time

In today’s fast-paced world, learning new skills quickly is essential. Yet, many of us learn in ways that are inefficient. We often think that more hours mean more progress. In reality, it is the quality of those hours that truly matters.

What if you could cut your learning time in half? What if you could achieve a deeper, stronger understanding? This is not just a dream; it’s the promise of Deep Practice.

The Lie of “Effort” vs. The Strength of “Depth”

Think about how you typically learn something new. Maybe you read a book, watch a tutorial, or repeat a task many times. These actions are useful, but they often fail to boost your learning speed. We often confuse “hard work” with “smart work.” We spend hours just receiving information or doing things mindlessly. Then we are surprised when our skills do not grow fast enough.

Deep Practice, a concept made famous by Daniel Coyle, completely changes this old way of learning. It’s not about how much you practice, but how you practice. It’s a very focused type of learning. It actively targets your flaws, pushes you to the very edge of your current ability, and builds strong brain pathways.

The main idea is simple yet powerful: true learning happens when you are always working at the edge of your skill. You must make mistakes, and then fix them. This struggle is not a sign of failure. It is the engine that speeds up your progress.

What Exactly Is Deep Practice? The Core Rules

Deep Practice is not a single tool. It is a philosophy built on key rules. Knowing these will help you use Deep Practice for almost any learning goal.

1. The Sweet Spot: Working at Your Skill Limit

This is the most important part. Deep Practice happens when you always push yourself just past what you can do easily. If a task is too simple, you are not learning. You are just repeating old habits. If a task is too hard, you will get frustrated and quit. The “sweet spot” is the tough zone. Here, you make errors, but you can also find and correct them. This is where your brain actively builds new connections.

  • Example: If you learn a new language, do not just review words you know. Try to build sentences using new grammar rules and words you are unsure about. You will make errors. But the act of trying and fixing those errors is where you learn deeply.

2. Smart Repetition: The “Mistake-Focus” Method

Deep Practice is not senseless repetition. It is about focused, smart repetition. You find one specific weakness or hurdle. You focus hard on fixing it. Then you try again, making small changes each time based on your last errors.

  • Example: A musician does not just play a song repeatedly. They find a hard part. And play it slowly. They isolate the tough chord changes. And then speed it up a little, and they repeat only that short section. They do this until it is smooth. Then they put it back into the song. They are actively looking for and fixing errors.

3. High-Quality Feedback: Inside and Out

To get better, you must know what you are doing wrong. More importantly, you must know why. Feedback comes from several places:

  • Internal: Your own honest review. (e.g., “That chord was bad,” “My body felt off-balance.”)
  • External: A teacher, mentor, friend, or even a tool that gives you clear facts. (e.g., a golf sensor, a language tutor, a code checker).
  • Example: A basketball player records their free throws. They watch the video. They notice their elbow moves out. This outside view helps them adjust their feeling for the correct shot form.

4. The Power of “Chunking”: Making Things Simple

Complex skills can feel too big to handle. Deep Practice suggests breaking a big skill into smaller, easy-to-manage “chunks.” Master each chunk one by one. Then connect them together. This lets your brain build skill in small steps. It makes the whole skill seem less scary.

  • Example: Learning to build a complex software app can feel huge. Instead, you first learn how to take user input (chunk 1). Then you learn how to show data (chunk 2). Then you learn how to connect to a database (chunk 3). You slowly join these parts. You master one piece before moving to the next.

5. Keep Going and Be Patient: Love the “Struggle”

Deep Practice is often hard. It can feel frustrating because you always make errors. But this struggle is the signal of growth. Persistence means more than just showing up. It means staying engaged and thoughtful, even when you do not succeed right away.

  • Example: Learning to juggle three balls means dropping them, again and again. A Deep Practitioner knows these drops are not failures. They are key bits of info that show where to make changes. They keep trying, knowing each drop makes their hand skills better.

How Deep Practice Changes Your Brain: Myelin and Pathways

The science behind Deep Practice is amazing. It is based on brain biology. When you practice in a tough, focused way, you are building and strengthening the nerve circuits for that skill.

Specifically, Deep Practice helps grow myelin. This is a fatty shield around nerve fibers (axons) in your brain. Think of myelin like the plastic cover around an electric wire. More myelin means electrical signals (information) move faster and more smoothly. When you push yourself and fix errors, your brain adds more myelin around the right nerve circuits. This makes them work quickly and surely.

This means Deep Practice does not just make you better at a skill. It makes your brain more efficient at doing that skill. This is why experts can do hard things with great speed and ease. Their brain pathways are heavily shielded with myelin.


How to Use Deep Practice: A Simple Guide

Ready to halve your learning time? Here is how you can use Deep Practice in your daily learning, for any skill you want to gain.

Step 1: Name Your Skill and Break It Down

  • What to do: Clearly say what skill you want to improve. Then, break it into its smallest, most basic parts or “chunks.”
  • How to do it: If learning guitar, do not think “play guitar.” Think “master the C chord,” then “move smoothly from C to G,” then “fingerpicking pattern one.” If learning to write, it might be “write a strong opening,” “structure an argument,” or “write short sentences.”

Step 2: Find Your Weakest Link (The “Sweet Spot”)

  • What to do: Find the specific part within a chunk that is the hardest. This is where you make the most mistakes. This is your current “sweet spot” for growth.
  • How to do it: Be honest with yourself. If learning new software, is it remembering the quick keys, understanding one function, or fixing errors? If learning a sport, is it your backhand, your serve, or your footwork?

Step 3: Focus Hard and Use “Mistake-Focused” Repetition

  • What to do: Spend a practice session on only that weak link. Go slowly. Pay close attention. Do not be afraid to make errors. Each error is key information.
  • How to do it:
    • Go Slow: If learning a dance move, do it in slow motion. If learning a math formula, write out every single step.
    • Isolate: Practice only the hard part. Do not do the whole sequence.
    • Change It Up: Do not just do the same thing. Try a slightly different position, speed, or method. What if I move my hand just here? What if I use this other word order?
    • Picture It: Before you try, see the perfect action in your mind.

Step 4: Get and Use High-Quality Feedback

  • What to do: Actively look for facts that tell you how well you are doing and how to improve.
  • How to do it:
    • Fix Yourself: After each try, stop and think. What went wrong? Why? How can I change it?
    • Record Yourself: Video or audio gives you an unbiased view of your work.
    • Get a Teacher: An experienced person can spot problems and give targeted advice.
    • Use Tools: Apps, software data, or special gear can give you facts-based feedback.

Step 5: Embrace the Struggle and Keep Going

  • What to do: Know that feeling annoyed and failing are normal parts of Deep Practice. They show that you are in the learning zone.
  • How to do it:
    • Have a Growth Mindset: See tough moments as chances to improve, not as walls.
    • Short, Intense Blocks: A 20-30 minute block of Deep Practice is better than 2 hours of weak learning.
    • Be Regular: Doing it often is better than doing it for a long time only once in a while.
    • Be Proud of Small Wins: Notice when you finally get that tough part right or understand a complex idea.

Step 6: Join It All Up

  • What to do: Once you have mastered a chunk, put it back into the larger skill. Practice the movement between the chunks.
  • How to do it: If you mastered the C chord, now practice moving from C to G, and then G to D. If you learned how to write a good opening, now practice writing that opening and connecting it smoothly to your main point.

Real-World Examples of Deep Practice at Work

Deep Practice is not just for top athletes or great musicians. It is a key rule that works in any field.

Coding:

A junior coder learning a new programming tool does not just read the manual. They choose a small, hard feature to build, like a user login system. And write the code. When they run into errors. They carefully fix each one. Then check the guide for specific functions. They try again until it works. This hands-on, problem-solving method is Deep Practice.

Learning a New Language:

Instead of just learning verb charts, a language student might try to speak for five minutes using only the past tense. They will stumble and make many errors. While pushing themselves to use the grammar right now. They get instant feedback from the effort to talk.

Public Speaking:

Someone who wants to speak better in public will not just practice in their head. They will record themselves giving a certain part of a speech. And watch it back. They find any strange pauses or filler words. Then they re-record that exact part, focusing only on fixing those issues.

Sports:

A tennis player who has trouble with their serve will not just hit 100 balls without a goal. They will work with a teacher. And focus on one thing (like the wrist snap). They hit a few serves. And get feedback. They adjust. They repeat this, trying to feel the correct movement.


Fixing Common Deep Practice Problems

Deep Practice is not always simple. Here are some common problems and how to get past them:

  • Frustration: This is a good sign! It means you are pushing your limits. Remember that struggle equals growth. Take short breaks and return with strong focus.
  • No Feedback: Go find it! Record yourself. Ask a friend who knows the subject. Use tools online.
  • Getting Off Track: Deep Practice needs intense focus. Set up a place with no distractions. Plan short, specific time blocks for practice.
  • Do not Know What to Practice: If you are stuck, go back to Step 1 & 2. Break the skill down more. Or ask experts for advice on the basic parts you need to learn.

Conclusion: Your Fast Path to Mastery

Halving your learning time is not about finding a magic trick. It is about choosing a much better way to learn. By using the rules of Deep Practice—working at your skill limit, repeating with a focus on mistakes, using feedback, and dealing with the struggle—you can unlock your brain’s huge power for fast skill growth.

Stop working harder and start working smarter. The ability to learn quickly and deeply is one of the best skills you can have. Accept the challenge, enjoy the process, and watch your learning time decrease as your skill level speeds up.


Frequently Asked Questions (FAQ)

Q1: Is Deep Practice only for body skills like sports or music?

A1: Not at all! While you see it in those areas, Deep Practice works well for mental skills too. This includes coding, writing, languages, solving problems, and thinking strategically. The rules of pushing your limits and smart repetition work everywhere.

Q2: How long should a Deep Practice session be?

A2: Quality is more important than amount. A 20 to 30 minute session of strong, focused Deep Practice is often better than an hour of passive learning. You want to stay in that “sweet spot” at the edge of your ability without getting too tired. Shorter, more frequent sessions are usually best.

Q3: Can I mix Deep Practice with other learning methods?

A3: Yes, completely! Deep Practice works well with other methods. For example, you can use passive learning (like reading a book) to grasp an idea. Then you use Deep Practice to actively use and internalize it. You can also schedule your Deep Practice sessions using spaced repetition systems.

Q4: How do I know if I’m doing Deep Practice the right way?

A4: You are in the Deep Practice zone if you feel challenged. You should be making errors and then actively trying to fix them. It should not feel simple or automatic. If it feels too easy, you are likely not pushing yourself enough. The key is the struggle followed by making changes.

Q5: What if I do not have a coach or teacher for feedback?

A5: While a coach is great, you can get good feedback in other ways. Record yourself (video or audio). Ask a knowledgeable friend to watch. Or judge your own work very carefully after each attempt. The important thing is to clearly see what went wrong and how to improve.


References


Recent Posts


How to Be Productive Without Sacrificing Your Life

A serene, sunlit scene of a person sitting on the floor, surrounded by many puzzle pieces, focused on connecting a glowing piece to a small sprout. This visual metaphor represents the process of organized, productive effort, assembling life's priorities for balanced personal growth.

Feeling constantly busy but never truly caught up? My journey used to be a relentless cycle of ticking off tasks. I felt exhausted and disconnected from what truly mattered. I’ve learned that true Productive living isn’t about doing more, but about living smarter. Join me as I share the practical insights and shifts that helped me reclaim my time, energy, and joy. You can thrive without sacrificing your life.


Beyond Busy: How to Be Productive and Keep Your Life

In our always-on world, “productivity” has become an idol. We chase it relentlessly. And often sacrifice our well-being, relationships, and peace of mind. We are told to hustle harder. And optimize every minute. We stack our to-do lists higher. We believe that sheer volume of output equals success. But what if this constant chase makes us less effective, more stressed, and unfulfilled?

This article will not add more to your plate. It will not make you feel guilty for sleeping in. It is about a major change in perspective. True productivity is not measured by hours worked or tasks completed. It is measured by the meaningful output you create without sacrificing the life you are working for. And it means working smarter. It means living richer. It means finding a steady rhythm that helps you rather than drains you.

Let’s drop the idea that productivity requires burnout. We will build a new framework. This new system lets accomplishment and well-being exist together.

The Myth of More: Why Being Busy Fails Us

For too long, the story of productivity has been about lack and endless effort. We confuse being busy with being important. We confuse rest with laziness. This creates a terrible cycle:

  • The Busy Trap: Society, work, and our own inner voices tell us we are falling behind if we are not constantly working. This causes huge pressure to fill every second.
  • The Burnout Cycle: Pushing past our natural limits causes exhaustion. And leads to poor focus. It causes bad decisions. It eventually leads to physical and mental burnout. The goal we are chasing becomes impossible to reach.
  • Sacrificing Life for Work: Hobbies disappear. Family time is cut short. Sleep is treated like a luxury. Our mental health is ignored. We might be “productive” at work. However, we are often “unproductive” in life.

This is not a long-term plan. We need to redefine what it means to be truly productive.

Redefining Productivity: Focus on Quality, Not Volume

True productivity means intentional output. It focuses on what truly matters. And aligns your actions with your values and goals. It is not about working longer hours. Or about making the hours you do work count. It is about:

  • Impact, not Activity: Are you moving the most important projects forward? Or are you just spinning your wheels on tasks that don’t matter?
  • Energy Management: You must recognize that your mental and physical energy changes. Plan your day around these natural energy dips and peaks.
  • Sustainability: Build habits and systems you can keep up over time. This protects you from burnout.
  • Life Integration: Your work-life plan must allow for joy, rest, connection, and personal growth.

With this new understanding, let’s look at simple steps to become truly productive without giving up your life.

Strategy 1: Know Your Priorities – The Power of Saying No

The biggest mistake is trying to do everything. Being productive without sacrificing your life starts with knowing what truly needs your energy.

How to Do It:

  • Identify Your Top 3: At the start of each week, pick your three most important tasks or goals. These are the items that will create the biggest impact if you complete them. Everything else is less important.
  • The Eisenhower Matrix: Sort tasks by Urgency and Importance.
    • Urgent & Important: Do these first (e.g., project deadline, major crisis).
    • Not Urgent & Important: Schedule them (e.g., strategic planning, exercise, skill development).
    • Urgent & Not Important: Delegate them (e.g., some emails, minor team requests).
    • Not Urgent & Not Important: Eliminate them (e.g., most social media scrolling, unnecessary meetings).
  • Practice Saying “No”: Politely decline requests that don’t fit your goals or your capacity. Remember this: every “yes” to something is a “no” to something else. That “no” is often to your own well-being or most important work.

Strategy 2: Manage Your Energy, Not Just Your Clock

Time is limited, but your energy changes throughout the day. Knowing your personal energy rhythms is much better than just watching the clock.

How to Do It:

  • Find Your Peak Energy Times: Are you sharpest in the morning? Or do you work best in the afternoon? Track your energy levels for one week.
  • Schedule High-Impact Work During Peak Times: Use your high-energy blocks for your “Top 3” tasks. This is when you should do your most challenging, creative, or focused work.
  • Save Low-Energy Tasks for Low-Energy Times: Administrative work, email, data entry, or routine meetings can be done when your focus is naturally lower.
  • Take Smart Breaks: Our brains cannot sustain intense focus for hours. Short, planned breaks (5-15 minutes every 60-90 minutes) actually improve productivity.
    • Example: Mark used to push through his afternoon slump. Now, he takes a 15-minute walk outside instead. He returns to his desk feeling new. He often solves problems that seemed too difficult just minutes before.

Strategy 3: Set Boundaries – Protect Your Life

One of the biggest sacrifices we make is mixing work and life. Strong boundaries are key for sustainable productivity and a happy personal life.

How to Do It:

  • Define Your “Workday End”: Decide exactly when your workday stops. Stick to that time every day. Tell your colleagues about this boundary if you need to.
    • Example: Jessica closes her laptop at 5:00 PM every day. There are no exceptions. She uses the time after 5:00 PM for family and hobbies. She worried at first about missing things. However, knowing her “off” time was sacred made her more focused at work.
  • Set “Do Not Disturb” Zones/Hours: Mute alerts. Close extra tabs. Put your phone away during focused work blocks or personal time. This prevents switching your mental focus. Switching focus is a huge productivity killer.

Designate “Non-Negotiable” Life Activities: Block out time in your calendar for personal health. This includes exercise, meal prep, quality time with loved ones, and hobbies. Treat these calendar slots like important work meetings.

Strategy 4: Make Your Environment Work for You

Your physical and digital spaces heavily affect your ability to focus and be productive. A messy, distracting environment quickly leads to feeling overwhelmed.

How to Do It:

  • Tidy Your Workspace: A clean desk reduces visual distractions. Keep only the items you need for the current task.
    • Example: Before starting work, Alex spends five minutes cleaning her desk. This simple act creates a clear physical space. This clear space leads to a clearer mental space for her work.
  • Reduce Digital Distractions: Close unneeded browser tabs. Turn off desktop alerts. Put your phone on silent and leave it out of sight. Think about using website blockers during focused work periods.
  • Choose Your Soundscape: Some people need silence. Others focus better with instrumental music or nature sounds. Find what helps you concentrate best.
  • Optimize Comfort: Make sure your workspace has good light. Natural light is best. Use an ergonomic chair. Physical discomfort is a major distraction.

Strategy 5: Delegate and Automate – Use Your Time Wisely

You do not have to do every task yourself. Learning to delegate and automate tasks frees up your valuable time and energy. This allows you to focus on higher-impact work and personal interests.

How to Do It:

  • Delegate When Possible:
    • In Your Job: Find tasks that another person (a team member, a virtual assistant) could handle well. Trusting others improves with practice.
    • In Your Personal Life: Can you pay for help with chores (cleaning, yard work)? Can family members take on more duties?
    • Example: Maria, a small business owner, spent hours on basic social media scheduling. She hired a part-time virtual assistant. This freed her time for client relations and strategic business development. These were her highest-impact tasks.
  • Automate Routine Tasks:
    • Digital Tools: Use email filters, calendar reminders, and finance apps to automate repetitive actions.
    • Personal Routines: Set up automatic bill payments. Get recurring grocery deliveries. Pre-plan your meals for the week.
    • Example: Chloe prepares her coffee maker the night before to save time. She also lays out her workout clothes. These small automations save minutes and reduce decision fatigue.

Strategy 6: Embrace Rest – The Key to Being Productive

This strategy might seem illogical. Our culture values constant work. It sees rest as a luxury or a sign of failure. But quality rest is not the opposite of productivity. It is the essential base for sustained productivity.

How to Do It:

  • Prioritize Sleep: Aim for 7 to 9 hours of good sleep each night. Lack of sleep greatly reduces clear thinking, decision-making, creativity, and emotional control.
    • Example: Liam used to boast about sleeping only 5 hours. But he was making careless mistakes at work and was easily angered at home. He committed to 8 hours of sleep. He quickly saw huge gains in focus, problem-solving, and his general mood.
  • Schedule True Downtime: This means more than just “not working.” It means doing activities that truly refresh you.
    • Active Rest: Exercise, hobbies, time in nature, and connecting with loved ones.
    • Passive Rest: Reading for fun, listening to music, meditation, or just relaxing quietly.
  • Take Micro-Breaks: Even very short breaks (looking away from your screen for a minute, stretching) stop mental fatigue.
  • Commit to Disconnection: Regularly step away from screens and notifications. Fully enjoy non-work activities. This is vital for reducing stress and sparking creative thinking.

Strategy 7: Be Present – Focus on the Moment

In our rush to be productive, we often live in the future. We plan the next task. We worry about the next deadline. This mental time-travel steals the present moment. It lessens our ability to fully engage with either work or life.

How to Do It:

  • Single-Task Intentionally: When you work on a task, only work on that task. When you are with family, be fully with your family. Stop the urge to constantly juggle tasks or think about what’s next.
    • Example: David is eating dinner with his children. He consciously puts his phone away and listens only to their talk. And finds these moments are much better. He returns to work the next day feeling less stressed and more connected.
  • Mindful Transitions: Take a moment to clearly switch gears between different activities. Take a deep breath before starting a new task. Before you leave work for home, take a minute to mentally close your workday.
  • Engage Your Senses: Notice the details whether you are working or resting. What do you see, hear, smell, or feel? This simple act brings you to the present. It makes your experience richer.
    • Example: Sarah is walking her dog. She focuses on the feeling of the sun and the sounds of the birds. She notices the path beneath her feet. This simple walk becomes a mini-meditation that recharges her.
  • Practice Gratitude: Regularly think about what you are thankful for, both at work and in your personal life. This changes your outlook from one of lack to one of plenty. This improves your overall happiness and makes your hard work feel more valuable.

Conclusion: Take Control of Your Time

True productivity is not a race to the bottom of your to-do list. It is a thoughtful path toward meaningful results and long-term well-being. You can achieve new levels of effectiveness that improve your life, not hurt it. Just follow these steps: prioritize your tasks, manage your energy, set firm boundaries, optimize your workspace, delegate wisely, embrace rest, and practice being present.

Remember this: the goal is not to be busy. The goal is to be productive in a way that lets you flourish. Your life is not a sacrifice for the sake of output. It is a rich fabric woven with intention, accomplishment, and joy. Start using these strategies today. Reclaim your time, your energy, and your life.


Frequently Asked Questions

Q1: What is the biggest error people make when trying to be productive?

A1: The biggest error is thinking “busy” is the same as “productive.” People often fill their days with low-impact tasks. They constantly react to outside demands. They forget to plan strategically or rest properly. True productivity focuses on impact and planned output.

Q2: How quickly can I see results from these strategies?

A2: You can see immediate improvements, often within a few days. Implementing the Eisenhower Matrix and setting a firm “workday end” boundary quickly reduces stress. You will feel more in control right away. The long-term results—better focus and less burnout—build up over several weeks.

Q3: Is it okay to use the Pomodoro Technique with these strategies?

A3: Yes, absolutely. The Pomodoro Technique (focused work followed by short breaks) is an excellent tool for Strategy 2 (Managing Energy). It helps you maintain high focus during your peak energy blocks and ensures you take those vital, strategic breaks.

Q4: What if my job or boss makes setting boundaries difficult?

A4: Start small. Begin with the boundaries you can control. For example, turn off email alerts on your phone after hours. Use your “Top 3” priorities to justify saying “no” to lower-value tasks. Talk to your boss about impact, not hours. Say, “To ensure I deliver on Project X, I need dedicated, uninterrupted time between 9 a.m. and 11 a.m.” This frames the boundary as a benefit to the company’s productivity, not just your personal preference.


References


Recent Posts


The Hidden Health Benefits of a Good Cry

A man sits on a couch in a dimly lit living room, holding a woman close in a comforting embrace. The woman is leaning her head on his shoulder, with her eyes closed, appearing to be crying or deeply distressed. The man has his arm around her, holding her hand. Nearby, a box of tissues and a cup of tea suggest support during a difficult time, highlighting the emotional health aspect of the moment.

I used to think of crying as a weakness, something I had to hide. Years of stuffing down emotions taught me a hard truth: trying to be “strong” all the time is simply exhausting and detrimental to mental health. This journey led me to discover the powerful healing that comes from just letting the tears fall. I believe that embracing your emotions, even the messy ones, is the ultimate act of self-care and strength.


Why We Must Rethink Crying to Boost Our Health

A lump forms in your throat. Your vision blurs. A warm wetness slides down your cheek. Crying is one of the most natural and strong human experiences. It’s a language everyone knows. Still, in many modern cultures, we often treat crying like a failure or a sign of weakness. People often tell us to “be tough,” “stop being dramatic,” or “just get over it.” But what if this natural, sometimes messy, rush of feeling is not a problem at all? What if it is a powerful, biological tool for healing and keeping us well?

Crying is far from being a sign of being fragile. A good cry is a key function with big and surprising health benefits. These benefits are both physical and mental. It is time to forget the social shame. We must start seeing tears as a vital part of a balanced, emotionally smart life.

The Three Kinds of Tears: Not All Crying is Equal

Before we talk about the good things crying does, we need to know that tears are complex. Science groups them into three main types. Each one has a different job:

  1. Basal Tears: These are the constant, unseen tears. They always keep your eyes wet, fed, and safe from dust and dirt. They are key for clear sight and eye health.
  2. Reflex Tears: Irritants cause these tears. Smoke, onions, or a stray eyelash can trigger them. Their job is simply to protect. They flush out foreign objects using a quick flow of fluid.
  3. Emotional Tears (Psychic Tears): These are the tears linked to sadness, happiness, worry, or loss. Emotional tears have different chemicals than basal or reflex tears. They hold more stress hormones, like ACTH and prolactin. Many believe the act of weeping helps the body get rid of these extra hormones.

It is this last type—the emotional cry—that gives us the most helpful, healing value.


The Physical Health Payoffs of Crying

The good things crying does are not just in your head. We can actually measure them in your body’s chemicals and how your body works.

1. Stress and Toxin Release: The Body’s Chemical Cleanse

When your body is stressed all the time, hormones and chemicals build up. Emotional crying works like a natural, biological release valve. As we noted, emotional tears contain hormones related to stress. When you weep, you are truly lowering the amount of these chemicals in your system.

One main idea is that crying helps your body go back to normal balance (homeostasis) after a time of major emotional stress. Studies looking at the chemicals in emotional tears support this. They show that tears carry away substances linked to stress. This provides a deep, cleansing effect. That is why you often feel a sense of ease—a physical feeling of being “lighter”—after a long, strong cry.

2. Pain Reduction: A Natural Analgesic

It may sound strange, but crying can act as a light pain killer. Research suggests that emotional tears cause your body to release endorphins and oxytocin. These natural brain chemicals are often called “feel-good” hormones. They help calm both body and mind pain. Oxytocin makes you feel especially calm and cozy. Endorphins work to dull pain. This chemical process can lift your mood and lessen distress. It works as an internal way to comfort yourself.

3. Mood Elevation: The Post-Cry “Reset”

Crying does more than just release stress; it can make your mood better right away. When you stop tears, you hold physical tightness in your body. This can raise your heart rate and cause shallow breathing. A full, deep cry often means taking quick, deep breaths (sobbing). This helps to control your breathing and slow your heart rate down.

Once the main crying stops, this body control—along with the release of endorphins—acts like a “reset” switch for your central nervous system. This often leaves you in a better mood than before you started crying. This is true unless you have clinical depression.

4. Better Sleep: Cooling Down to Wind Down

Stress and worry are known to ruin sleep. A good cry helps your body get ready for rest. It does this by physically releasing stored tension and lowering the amount of stress hormones that keep you awake. Many people say they feel tired, but also deeply calm, after crying. This makes it easier to fall asleep faster. It also helps you get a deeper, more refreshing rest. This is a vital, but often forgotten, benefit for your total mental health.


The Psychological and Interpersonal Benefits

The good things about crying are not just for our bodies. They are also very important for our mental well-being and how we connect with others.

1. Emotional Regulation: Processing and Acknowledgment

One of the strongest mental benefits of crying is its role in handling our feelings. Crying is not just showing sadness. It is the act of admitting you have a feeling. When you let yourself cry, you are giving time and proof to the emotions you are having. This could be sadness, joy, anger, or deep sorrow.

If you block your feelings, it can cause emotional numbness. It can lead to avoiding problems. It stops you from fully dealing with the real issue. By letting tears fall, you are engaging with your inner life. This is the crucial first step to solving problems. This active processing is key to having a stable mind over time.

2. Communication and Social Bonding

A man sits on a couch in a dimly lit living room, holding a woman close in a comforting embrace. The woman is leaning her head on his shoulder, with her eyes closed, appearing to be crying or deeply distressed. The man has his arm around her, holding her hand. Nearby, a box of tissues and a cup of tea suggest support during a difficult time, highlighting the emotional health aspect of the moment.

Tears are a powerful way to talk without words. When we cry near others, we show that we feel weak or upset. This signal is recognized all over the world. It brings out empathy, kindness, and a desire to help in those who see it.

This power of tears to get help and comfort is an important function that developed over time. Getting support during a moment of weakness makes social bonds stronger. It creates deeper closeness. It makes us feel like we belong. In a world that often feels lonely, this real connection is very valuable for mental health.

3. Self-Soothing and Calm

The feeling of tears on your face helps to calm you down. So does the way your emotional state cools off after. Crying can be a private, inner tool for managing upset feelings. You simply slow down, give in to the feeling, and let your body take control. This simple act can be deeply grounding. It brings you back to the present moment. It moves you away from thoughts that feel too much to handle.


How to Do It: Embracing the Good Cry

Knowing the benefits is one thing. Actually letting yourself have a good cry is another. This is especially true if you have trained yourself for years to hold tears back. Here is a guide on how to cry in a safe, healing, and effective way.

Step 1: Find a Safe Space

You need to feel safe and private to let your feelings out. This is especially true if you worry about being seen. Find a time and place where no one will bother you or judge you. This might be your bedroom, a locked bathroom, your car, or a quiet spot outside. The goal is to make a place where you feel completely free to let everything go.

Step 2: Spot the Trigger or Need

Sometimes tears just happen. But often, something specific causes them. Take a moment to name how you feel: I am feeling too stressed by my job. I am sad about a recent loss. I am angry about an argument. Naming the feeling proves it is real. It lets you focus the energy of your cry.

  • Example A (Loss): You have been trying to stay strong all week after losing someone special. You decide to look at old pictures or listen to a song that reminds you of them. You let the memory bring on the tears.
  • Example B (Stress/Overwhelm): You feel huge pressure from your deadlines. You take a 15-minute break, put your head on your desk, and picture the stress leaving your body with each sob.

Step 3: Use a Starter (If Needed)

If you need to cry but cannot quite get started, you might need something to help.

  • Music: Play songs that you know bring strong feelings to the surface.
  • Media: Watch a very moving scene from a film or a commercial that makes you feel emotional.
  • Writing: Write down exactly what is bothering you. Do not hold back. Write until the feeling takes over.
  • Memory: Choose to remember a time of great sadness, happiness, or frustration.

The goal is not to force sadness. The goal is to give yourself permission to feel what is already waiting under the surface.

Step 4: Allow the Full Release

Once the tears begin, do not fight them. Let your face get wrinkled. Let the sobs come out. Do not worry about how you look or how long it lasts. This is the stage where the bad chemicals leave your body. Focus on your breathing. Let the deep, shaky breaths calm your nervous system. Remember that this is an act of caring for yourself.

Step 5: The Post-Cry Wind-Down

What you do after the crying stops is the most important part. This is the reset phase.

  • Drink: Crying uses water. Drink a glass of water to replace it.
  • Wash: Clean your face to remove the salt and help with puffiness.
  • Ground: Do something to bring yourself back to the present. This could be stretching for five minutes, taking a short walk, or using a mindful exercise to feel the cool air on your skin.
  • Be Kind to Yourself: Accept your vulnerability with kindness. Do not criticize yourself for being emotional. Say instead, “I truly needed that. I let go of a lot of stress.”

What Happens When You Don’t Cry?

Always stopping your tears can hurt your health. Blocking feelings does not make them vanish. It simply pushes them inside your mind and body. This forced holding-in of emotion is linked to:

  • Body Problems: Blocked feelings can show up as headaches, tight muscles (especially in the jaw, neck, and shoulders), stomach issues, and maybe even heart problems over time due to constant stress.
  • Stiff Mind: Avoiding feelings that are hard can make your mind stiff. This makes you less flexible and harder to adapt when life gives you problems.
  • Misplaced Anger: Sadness that is not dealt with often comes out as being easily annoyed, being too critical, or having sudden, strong anger at things that are not the real problem.
  • By letting yourself cry, you are choosing proactive health over chronic stress.

Crying and Society

It is important to discuss the deep cultural differences when we talk about crying, especially between men and women. For years, men have been taught that crying is “not manly.” They see it as a threat to their strength. This leads to them blocking their feelings a lot. Women are more socially allowed to cry. However, they can be judged for being “too emotional” or “crazy.”

It is important for everyone’s health to break down these rigid, harmful ideas. The basic biology of tears is the same for all humans. The chemical release is the same. Knowing this lets us challenge these old rules. Real strength is not in having no feelings. True strength is in having the courage to feel and process your feelings honestly.


The Hidden Health Benefits of a Good Cry: Summary

Benefit CategorySpecific AdvantageHow It Works
Physical HealthReduces Stress & Releases ToxinsFlushes out stress hormones (like ACTH) from the body.
Physical HealthProvides Natural Pain ReliefCauses the release of endorphins and oxytocin.
PsychologicalHelps Emotional ProcessingAccepts and proves complex inner feelings are real.
InterpersonalBuilds Social ConnectionShows you are weak and brings comfort and empathy from others.
WellnessImproves Mood and Sleep QualityResets the nervous system and slows the heart rate after strong feeling.

FAQ

Q: I rarely cry. Does this mean I have a problem? [Image 10: Person looking thoughtfully/calmly]

A: Not always. How often you cry is very personal. It depends on your culture, nature, and life events. Some people handle stress in other ways, such as exercise or talking. But, if you want to cry but cannot, or if you feel numb all the time, it might mean you are blocking emotions. Talking to a health expert may help.

Q: Is it possible to cry too much?

A: Crying is good for your health. However, if you cry too much and cannot stop, or if it stops you from living your daily life for weeks without a clear cause, it might be a sign of a mental health issue. This could be depression or anxiety. If you worry about how often or how hard you cry, please get professional health advice.

Q: Why do I feel worse right after I cry?

A: The moments after crying can feel tiring, physically draining, or even painful (from tension and eye strain). The real “health benefit” is usually felt 20-30 minutes after the crying stops. This is when your nervous system has fully reset. If you always feel worse, be sure to be kind to yourself and take care of your body (water, rest) during the time you wind down.

Q: Are happy tears different from sad tears?

A: The feelings they show are different. But scientifically, tears of intense happiness have chemicals very similar to tears of sadness. Both types of tears are caused by strong emotion. They both work to bring your body’s nervous system back to a normal, balanced state.


References

Note: This section lists resources related to the article’s content for further reading and context.


Recent Posts


Less is More: Your New 3 Ingredient Recipes

A vibrant collage showcasing five healthy 3 ingredient recipes: golden salmon patties with lemon, a bowl of shredded buffalo chicken on lettuce, warm cinnamon pears, fresh Caprese skewers, and Swiss cheese mushroom chicken with a side salad

We’ve all been there: staring into the fridge, feeling overwhelmed by a list of ingredients that seems endless, and opting for takeout instead. The dream of healthy, home-cooked food often clashes with the reality of a busy life and a complicated pantry. But what if eating well didn’t require a dozen spices or hours of prep? We’re here to prove that you can create nutritious, satisfying meals using just three simple ingredients. This article is your guide to kitchen freedom, showing you how to unlock maximum flavor and health benefits with minimum fuss using these amazing 3 ingredient recipes. Say goodbye to complex recipes and hello to simple, delicious meals that anyone can master.


The Philosophy of Three: Why Less Truly is More

In a world full of culinary complexity, adopting the “rule of three” can revolutionize your approach to food. The beauty of 3 Ingredient Recipes lies in their simplicity and accessibility. They demand less shopping time, less money, and less clean-up.

The Benefits of Kitchen Minimalism

  1. Reduced Food Waste: When you only buy three main items for a dish, you are far less likely to end up with wilted produce or half-used spice jars going bad. You use what you buy, creating a more sustainable kitchen.
  2. Increased Confidence: Beginner cooks often feel intimidated by lengthy ingredient lists. These streamlined recipes build confidence by delivering guaranteed success with minimal steps. They are an ideal entry point to making more of your own food.
  3. Faster Prep and Cooking: A three-ingredient meal often means three steps or less. This dramatically cuts down on the time spent in the kitchen, making it easier to stick to a healthy diet, even on your most hectic days.
  4. Health Focus: By concentrating on just a few whole, high-quality ingredients, you naturally gravitate towards dishes that are unprocessed and nutrient-dense.

This guide is dedicated to showing you five distinct, healthy dishes—ranging from quick snacks to satisfying main courses—that each require only three core ingredients. Ready to simplify your plate? Let’s dive in.


1. Salmon Patties Snack: The Protein Power-Up

This recipe is a champion of convenience. It’s quick, packed with protein and healthy fats, and requires no chopping or complicated steps. These low-carb patties are fantastic for a fast snack, a light lunch, or even served atop a fresh salad for a complete meal.

How to Make It: Detailed Instructions

Ingredients:

  • 5 oz canned salmon (drained well)
  • 1 egg
  • 1 cup of shredded Monterey Jack cheese (or your favorite cheese that melts well)

Preparation Time: 5 minutes

Cook Time: 10–14 minutes

Yields: 3 medium-sized patties

Step-by-Step Guide:

  1. Prep the Salmon: Open the can of salmon and drain off any excess liquid. You can use a fork to press the salmon against the lid before fully opening, or simply dump the contents into a fine-mesh sieve. Transfer the drained salmon into a medium mixing bowl.
  2. Combine the Mixture: Crack the egg into the bowl with the salmon. Add the entire cup of shredded Monterey Jack cheese. Use a fork or your hands to thoroughly combine the ingredients. The mixture should hold together well—the cheese and egg act as the primary binding agents. This is a crucial step to ensure the patties don’t fall apart during cooking.
  3. Form the Patties: Divide the mixture equally and gently form it into three small, round patties. They should be about half an inch thick and firm enough to handle. If the mixture feels a little wet, you can chill them in the fridge for 10 minutes to help them set, though this is usually unnecessary.
  4. Heat the Skillet: Place a non-stick skillet or frying pan over medium heat. Add approximately 1 teaspoon of olive oil (or your preferred cooking oil) to lightly coat the bottom of the pan. Let the oil heat for a minute until it shimmers slightly.
  5. Cook to Perfection: Carefully place the three patties into the heated skillet. Cook them for 5–7 minutes on the first side. You are looking for a beautiful, golden-brown crust to form.
  6. Flip and Finish: Gently flip the patties using a thin spatula. Cook for another 5–7 minutes on the second side until they are golden brown all over and heated through. The cheese inside will be gooey and melted.
  7. Serve: Remove from the pan and let them rest on a paper towel for a moment to absorb any excess oil. These are delicious served warm on their own, or with a simple dollop of plain yogurt or a squeeze of fresh lemon.

2. Buffalo Chicken: The Low-Carb Slow-Cooker Star

This is the ultimate “dump and go” recipe. It requires virtually no active cooking time and delivers a massive return of flavor. The resulting buffalo chicken is low-carb, high-protein, and incredibly versatile—perfect for topping salads, filling lettuce wraps, stuffing tacos, or simply eating by the forkful.

How to Make It: Detailed Instructions

Ingredients:

  • 1.5 lbs boneless, skinless chicken breast (about 3–4 pieces)
  • 1 packet of ranch dressing mix (the dry seasoning kind)
  • 1 cup of your favorite wing sauce

Preparation Time: 2 minutes

Cook Time: 4–6 hours (low)

Yields: Approximately 4–6 servings

Step-by-Step Guide:

  1. Gather and Prep: Retrieve your 4-quart (or larger) slow cooker. There is no need to cut or trim the chicken breasts unless you prefer smaller pieces.
  2. The Dump: Place all 1.5 pounds of chicken breast directly into the bottom of the slow cooker.
  3. Season and Sauce: Pour the entire cup of wing sauce over the chicken. Then, open the packet of dry ranch dressing mix and sprinkle the contents evenly over the sauced chicken. You do not need to add any additional water or liquid. The chicken will release its own moisture as it cooks.
  4. Set It and Forget It: Place the lid securely on the slow cooker. Set the cooker to the low setting. Allow the chicken to cook undisturbed for 4 to 6 hours. The chicken is ready when it is falling-apart tender and easily shreds. Avoid lifting the lid during cooking, as this lets out heat and extends the required cooking time.
  5. Shred and Mix: Once the chicken is fully cooked, turn the slow cooker off or to the “keep warm” setting. Use two forks to shred the chicken directly in the cooker. It should pull apart very easily.
  6. Coat and Serve: Once shredded, toss the chicken thoroughly with the sauce remaining in the bottom of the pot until every piece is coated in the delicious buffalo-ranch mixture. Serve immediately. This is excellent prepared ahead of time and reheats beautifully for meal prep.

3. Cinnamon Pears: A Warming Fiber Treat

This simple recipe transforms an ordinary piece of fruit into a warm, comforting, and incredibly nutritious side dish or snack. Pears are naturally high in fiber, and cooking them lightly makes their inherent sweetness pop, without the need for any added sugar. This preparation is especially good for those with sensitive digestion.

How to Make It: Detailed Instructions

Ingredients:

  • 2 pears (Bartlett or Bosc work well)
  • half a teaspoon of ground cinnamon
  • 2–3 tablespoons of water

Preparation Time: 5 minutes

Cook Time: 8–10 minutes

Yields: 2 servings

Step-by-Step Guide:

  1. Prep the Pears: Wash the two pears thoroughly. Using a vegetable peeler, carefully remove the skin from both pears. Once peeled, core the pears to remove the seeds and tough center. Then, dice the fruit into even, bite-sized pieces—about half an inch.
  2. Set Up the Steamer: Pour 2–3 tablespoons of water into a small or medium saucepan. You need just enough water to create steam without the water level touching the bottom of your steamer basket.
  3. Cinnamon Toss: Place the diced, peeled pears into a steamer basket. Sprinkle the half teaspoon of ground cinnamon over the pears. Gently toss them in the basket or in a separate bowl until all the pieces are lightly coated with the spice.
  4. Start Steaming: Place the steamer basket into the saucepan, making sure the pears are elevated above the water. Cover the pot with a tight-fitting lid.
  5. Cook: Turn the heat on high to quickly bring the water to a boil. Once boiling, reduce the heat immediately to low to maintain a gentle steam.
  6. Check for Doneness: Steam the pears for 8 to 10 minutes. The cooking time will depend on the ripeness of the pears; firmer pears will take longer. The pears are finished when they are easily pierced with a fork but still hold their shape. They should be tender, not mushy.
  7. Serve: Carefully remove the steamer basket from the pot. Serve the warm, spiced pears immediately. They can be enjoyed as a side dish to a savory meal or as a light, sweet dessert.

4. Caprese Skewers: The Effortless Appetizer

Caprese is the definition of fresh, simple, and elegant. These skewers take the classic Italian salad and transform it into an incredibly easy-to-assemble appetizer or snack. They require absolutely zero cooking and are perfect for a 3 Ingredient Recipes party, a mid-day snack, or a vibrant side dish.

How to Make It: Detailed Instructions

Ingredients:

  • Cherry tomatoes (or grape tomatoes)
  • Small mozzarella balls (often called bocconcini)
  • Fresh basil leaves

Preparation Time: 10 minutes

Cook Time: 0 minutes

Yields: As many skewers as you wish to make

Step-by-Step Guide:

  1. Prep the Ingredients: First, wash the cherry tomatoes and the basil leaves. Gently pat the basil leaves dry. If your small mozzarella balls are packaged in water or brine, drain them thoroughly. If you can only find larger mozzarella balls, simply cut them into bite-sized cubes roughly the size of your cherry tomatoes.
  2. Gather Supplies: Get your package of small wooden skewers (about 6 inches long) ready. You can also use toothpicks for a smaller bite.
  3. Assemble the Skewers: The key to a beautiful Caprese skewer is the order and presentation. For a classic, appealing look, follow this order for each skewer:
    • Start by threading one cherry tomato onto the skewer, pushing it about halfway down.
    • Next, thread one small mozzarella ball (bocconcini).
    • Finish by folding a fresh basil leaf in half (or threading a small one whole) and pushing it onto the end.
  4. Repeat: Continue this process until you have used all your ingredients or have made the desired number of skewers.
  5. Serve: Arrange the finished skewers artfully on a serving platter. While not required for the 3 Ingredient Recipes challenge, you can optionally drizzle them with a good quality balsamic glaze or a pinch of salt and pepper just before serving to take the flavor to the next level.

5. Swiss Cheese and Mushroom Chicken: The Quick Dinner

This recipe delivers a satisfying, high-protein, low-carb meal that feels much more complex than the 3 Ingredient Recipes this suggests. The creamy melted Swiss cheese and savory mushrooms transform a plain chicken breast into a hearty weeknight dinner.

How to Make It: Detailed Instructions

Ingredients:

  • 4 boneless, skinless chicken breasts
  • 1 can (around 10 ounces) of mushrooms, fully drained
  • 4 slices of Swiss cheese

Preparation Time: 5 minutes

Cook Time: 20 minutes

Yields: 4 servings

Step-by-Step Guide:

  1. Prep and Season: Pat the chicken breasts dry with a paper towel. This step is important for achieving a good sear. While not counted in the three ingredients, you may want to add a little salt and black pepper to both sides of the chicken now for best flavor.
  2. Heat the Pan: Place a large skillet over medium-high heat. Add approximately 1 teaspoon of cooking oil (such as olive oil or canola) to the pan and allow it to heat until a drop of water sizzles immediately.
  3. Brown the Chicken: Carefully place the four chicken breasts into the hot pan. Brown them for about 5 minutes per side. The goal here is not to cook them through, but to develop a nice, golden-brown crust for flavor and texture.
  4. Add Mushrooms: Once the chicken is browned on both sides, reduce the heat to medium. Add the fully drained can of mushrooms to the pan, scattering them around the chicken. If you are adding any other optional seasonings (like a dash of garlic powder or onion powder), now is the time to do it.
  5. Finish Cooking: Continue to cook the chicken and mushrooms for another 15 minutes. The precise time depends on the thickness of your chicken breasts. To ensure safety, the chicken is fully cooked when its internal temperature reaches 165∘F (74∘C) and the juices run clear. The mushrooms will soften and release their moisture.
  6. Melt the Cheese: Once the chicken is cooked through, place one slice of Swiss cheese on top of each chicken breast.
  7. Cover and Serve: Cover the skillet with a lid or a sheet of aluminum foil. Allow the cheese to melt for about 1 to 2 minutes until it is perfectly gooey and dripping over the mushrooms. Serve the chicken immediately with the mushrooms on the side or spooned over the top.

FAQs: Questions on 3 Ingredient Recipes

Q: Can I use different types of ingredients?

A: Absolutely! The goal of these 3 Ingredient Recipes is to inspire you to simplify. Feel free to swap out ingredients based on your dietary needs or what you have on hand. For example, in the Salmon Patties, you can swap Monterey Jack for cheddar or Parmesan. For the Swiss Cheese Chicken, you could use provolone or mozzarella. The core concept—the minimalist framework—is what you are keeping.

Q: Do optional seasonings count as an ingredient?

A: No, in the spirit of these 3 Ingredient Recipes, staples like salt, pepper, and common cooking oils (like olive oil or butter used for cooking) do not count toward the three-ingredient limit. They are considered pantry essentials that are always available. The three ingredients are the core components that define the dish’s main flavor and substance.

Q: Are these meals nutritionally complete?

A: These recipes are all designed to be healthy, high in protein, or fiber-rich. For a fully balanced, nutritionally complete meal, you can easily pair these dishes with a simple, staple side. For example, serve the Buffalo Chicken with a simple side salad, or the Swiss Cheese Chicken with a baked sweet potato. The base of the meal is simple, allowing you to easily add a healthy carbohydrate or vegetable without complexity.

Q: Can I make substitutions for the protein sources?

A: Yes, the recipes are quite flexible. The Buffalo Chicken recipe would work equally well with pork tenderloin or turkey breast, though the cooking time may vary slightly. The Salmon Patties could be made with canned tuna or drained mashed chickpeas for a vegetarian option, though you may need to adjust the binding agent slightly.


Reference Section


Recent Posts


The Ultimate List: 8 Homemade Gifts for Instant Joy

A rustic wooden box filled with a stack of sealed, labeled "Open When..." envelopes, tied with twine, symbolizing heartfelt Homemade Gifts for emotional support.

I’m just like you—someone who struggles to find the perfect gift that truly says, “I see you.” I’ve spent too many hours wandering store aisles, only to grab something generic. That’s why I finally embraced the power of Homemade Gifts, realizing that the real present is the time and love poured into the creation. My philosophy is simple: if I can make it, anyone can, and the look on a loved one’s face when they realize you made them something with your own two hands? That’s instant joy.


The Timeless Joy of Homemade Gifts

In a world saturated with mass-produced goods, the simple act of giving a homemade gift stands out as an act of profound care. It transcends monetary value, offering a piece of your time, your creativity, and your heart. Whether you’re celebrating a birthday, a major holiday, a housewarming, or simply want to say “thank you,” a thoughtful DIY project is always the perfect choice. These homemade gifts are not only practical and beautiful, but they are also designed to be approachable for crafters of all skill levels, ensuring that you can create instant joy for your friends and family no matter the occasion.

We’ve curated a list of eight universally loved projects that are sure to delight anyone on your list, complete with step-by-step instructions and ideas for personalization.


1. Infused Oils or Vinegars

Infused oils and vinegars are a sophisticated yet simple gift that elevates any home cook’s pantry. They can be used to dress salads, marinate meats, or simply serve as a delicious bread dip. The beautiful presentation of the herbs and spices suspended in the liquid makes this gift as visually appealing as it is functional.

What You’ll Need:

  • A carrier liquid: High-quality extra virgin olive oil (for oils) or white wine or apple cider vinegar (for vinegars).
  • Infusion ingredients: Fresh rosemary sprigs, thyme, whole garlic cloves, dried chili flakes, lemon or orange zest (pesticide-free), peppercorns.
  • Containers: Clean, sterilized glass bottles with airtight stoppers or corks.
  • Optional: Decorative labels and ribbon.

How to Do It:

The Hot Infusion Method (Best for Oils with Dried Herbs/Spices):

  1. Prepare the ingredients: If using garlic, slightly crush the cloves to release their flavor. Ensure all fresh herbs are completely dry to prevent mold growth.
  2. Gently warm the oil: In a saucepan over very low heat, gently warm the olive oil to about 130∘F (55∘C). Do not let it smoke or boil. Warming helps the oil absorb the flavors.
  3. Combine and steep: Pour the warm oil into the sterilized bottle. Add your chosen infusion ingredients—for example, three sprigs of rosemary and five peeled garlic cloves.
  4. Cool and store: Seal the bottle and allow it to cool completely before gifting. Store in a cool, dark place. The oil should be used within 2-3 weeks, or the recipient can strain the solids out after a week of infusing to extend the shelf life.

The Cold Infusion Method (Best for Vinegars and Fresh Herbs):

  1. Prepare the ingredients: Wash and gently bruise the fresh herbs (e.g., basil, oregano) or fruits (e.g., raspberries) to release their aromatics.
  2. Combine: Place the ingredients inside the sterilized bottle. For every cup of vinegar, use about 1/4 cup of fresh herbs or fruit.
  3. Pour and seal: Pour the vinegar over the ingredients, filling the bottle completely. Seal tightly.
  4. Infuse: Let the vinegar sit for 1-2 weeks in a cool, dark place, shaking gently every few days. Taste periodically. Once the flavor is to your liking, strain the solids out before bottling it for the final gift.

2. Homemade Vanilla Extract

This gift is the epitome of simple elegance. Homemade vanilla extract requires only two ingredients, but it takes time to reach perfection, making the eventual gift a rich, concentrated labor of love. It’s perfect for bakers and cooks, as the quality far surpasses store-bought varieties.

What You’ll Need:

  • Vanilla Beans: Grade B vanilla beans are best for extracting (they are less visually appealing but have a lower moisture content, concentrating the flavor). Plan on 5 to 6 beans per 8 ounces (240ml) of alcohol.
  • Alcohol: 80-proof (or 40\%) vodka, rum, or bourbon. Vodka is the most neutral and allows the vanilla to shine.
  • Containers: Small, airtight glass bottles (dark glass is preferable to protect the extract from light).

How to Do It:

  1. Prepare the beans: Slice each vanilla bean lengthwise with a sharp knife, leaving about 1/2 inch (1cm) uncut at the ends. This exposes the vanilla caviar inside, maximizing flavor release.
  2. Combine: Place the sliced beans inside the glass bottle.
  3. Fill and seal: Pour the alcohol over the beans until they are completely submerged. Seal the bottle tightly.
  4. Infuse (The Waiting Game): Attach a label with the date. The extract needs to infuse for a minimum of 8 weeks, but the flavor will deepen significantly over 6-12 months. When gifting, attach a note explaining that the extract gets better with age and that they can “top up” the bottle with more alcohol as they use it.

3. Layered DIY Spice Blends in a Jar

A gorgeous, multi-layered jar of a homemade spice blend is an incredibly thoughtful and visually striking gift. It tells the recipient, “I want you to eat delicious food,” and encourages them to get creative in the kitchen. This works well for BBQ rubs, taco seasoning, or a beautiful Italian herb blend.

What You’ll Need:

  • Spices: Choose high-quality, fresh spices. Examples: Smoked paprika, oregano, cumin, chili powder, onion powder, garlic powder, salt, pepper.
  • Container: A clean, clear glass jar with a tight-fitting lid (e.g., a small mason jar).
  • Tools: Small funnel, measuring spoons.

How to Do It:

  1. Choose a recipe: Select a blend that the recipient will love. For a classic BBQ Rub, the layers might be:
    • 1 tablespoon coarse salt (bottom layer)
    • 2 tablespoons brown sugar (layer 2)
    • 1 tablespoon smoked paprika (layer 3)
    • 1 teaspoon garlic powder (layer 4)
    • A teaspoon onion powder (layer 5)
    • 1 teaspoon black pepper (layer 6)
    • 1/2 teaspoon cayenne pepper (top layer)
  2. Layer carefully: Using a small funnel, add one spice at a time, being careful not to jostle the jar too much. The trick is to create distinct, colorful horizontal stripes. Use a chopstick or the back of a spoon to gently press the spices down between layers.
  3. Seal and decorate: Seal the jar tightly. Create a decorative tag that includes the name of the blend (e.g., “The Ultimate Grill Master Rub”) and, crucially, a printed recipe card detailing how they should use the blend and how to mix the spices before use.

4. Scented Bath Salts

A spa-like experience in a jar, scented bath salts are a luxurious and easily scalable homemade gift. They promote relaxation and self-care, making them perfect for anyone who deserves a moment of peace—which is pretty much everyone.

What You’ll Need:

  • Salts: Epsom salts are necessary for muscle relaxation, and sea salt or pink Himalayan salt can be added for texture and minerals.
  • Essential Oils: High-quality, therapeutic-grade oils (e.g., lavender for relaxation, peppermint for invigoration, or citrus for a mood boost).
  • Optional: Dried flowers (chamomile, rose petals, lavender buds) for visual appeal.
  • Container: Airtight glass jar.

How to Do It:

  1. Measure the salts: For a standard-sized gift jar (about 16 ounces or 450g), measure out the salts. A 3:1 ratio of Epsom to sea salt works well.
  2. Add fragrance: For every cup of salts, add 10−20 drops of essential oil. Start conservatively—you can always add more, but you can’t take it away.
  3. Mix thoroughly: Place the salts and oils in a large bowl. Using a spoon or whisk, mix vigorously to ensure the essential oils are evenly distributed.
  4. Add botanicals (optional): Gently fold in the dried flowers.
  5. Package: Transfer the mixture to the airtight jar. Seal it, and attach a tag with a use suggestion: “Add 1/2 cup to a warm bath and soak for 20 minutes.”

5. “Open When…” Letters

A rustic wooden box filled with a stack of sealed, labeled "Open When..." envelopes, tied with twine, symbolizing heartfelt Homemade Gifts for emotional support.

This is a deeply personal and heartfelt homemade gift that provides comfort or a laugh when the recipient needs it most. It is an investment of time, but the emotional return is priceless.

What You’ll Need:

  • A stack of paper (colored or decorative if desired).
  • A series of envelopes (at least eight, but the more the better).
  • A nice pen.
  • A decorative box or container to hold the finished letters.

How to Make It:

  1. Brainstorm Titles: Create a series of letter titles for different moods or occasions. The key is to make the titles specific and relevant to the recipient’s life. Examples include:
    • “Open when you’re feeling lonely.”
    • “Open when you need a laugh.”
    • “Open when you’ve had a bad day.”
    • “Open when you need to remember how far you’ve come.”
    • “Open on a random Tuesday.”
    • “Open when you’re celebrating a big win.”
    • “Open when you miss me.”
    • “Open when you need to know a secret.”
  2. Write the Letters: In each envelope, write a sincere, personalized letter.
    • For the “lonely” letter, share a happy memory of the two of you and a list of things you love about them.
    • For the “laugh” letter, write down a shared inside joke, a funny story, or simply draw a ridiculous doodle.
    • For the “bad day” letter, include words of encouragement and a reminder of their strength.
  3. Add Small Items: You can add small, relevant items to the envelopes to enhance the experience:
    • A teabag, hot chocolate packet, or a small piece of chocolate for the “Feeling blue” letter.
    • A funny photo of you two for the “Need a laugh” letter.
    • A piece of confetti or a cutout star for the “Celebrating a big win” letter.
  4. Finalize: Seal the letters and clearly write the “Open When…” title on the outside of each envelope. Place them all in a decorative box and present the gift with an explanation of how and when to use them.

6. A “Jar of Awesome”

This simple, thoughtful homemade gift encourages gratitude and reflection by providing a collection of happy memories. It’s an instant mood-lifter and a powerful reminder of a relationship’s depth.

What You’ll Need:

  • A clean, medium to large glass jar (a mason jar or a repurposed decorative jar works well).
  • Small slips of colored paper or card stock.
  • A fine-tipped pen.
  • Optional: Ribbons, paint, or stickers for decoration.

How to Make It:

  1. Decorate the Jar: Clean the jar thoroughly. Decorate it with ribbons, paint, or a beautifully printed or handwritten label that says, “Jar of Awesome,” “Happy Moments,” or “Reasons to Smile.”
  2. Seed the Jar: The key to this gift is to get it started. On small slips of paper, write down your favorite memories, silly inside jokes, personal compliments, or moments of pride you’ve shared with the recipient. For example:
    • “That time we got lost driving and found the best hidden diner.”
    • “I love your laugh!”
    • “Remember when you aced that presentation?”
  3. Include Blank Slips: Crucially, include a generous stack of blank slips of paper and a pen tied to the jar. This is so the recipient can add their own “awesome” moments—things they are proud of, funny things that happened, or moments of gratitude—throughout the year.
  4. Instructions: Provide instructions that the recipient should only open the jar on a bad day, or perhaps at the end of the year (New Year’s Eve) to reflect on all the good things that happened.

7. DIY Stovetop Potpourri Mix

Store-bought air fresheners can be overwhelming and artificial. A DIY stovetop potpourri mix, however, fills a home with a natural, gentle, and welcoming aroma that is instantly comforting. It is a fantastic homemade gift for a host, a neighbor, or a housewarming.

What You’ll Need:

  • Container: Small, clear cellophane or glassine bags, or a decorative mason jar.
  • Ingredients: Choose a theme:
    • Winter/Holiday: Dried orange slices, cinnamon sticks, whole cloves, fresh rosemary.
    • Autumn: Apple slices, vanilla bean, star anise, allspice berries.
    • Spring/Summer: Lemon slices, vanilla extract, mint leaves.

How to Do It:

  1. Dry the fruit: Slice citrus fruits (oranges, lemons) thinly. Bake them on a low temperature (around 175∘F or 80∘C) for several hours until they are dry and firm, but not burnt. Alternatively, you can buy pre-dried slices.
  2. Measure and combine: Measure out the ingredients. A good starting point is 1/4 cup of cinnamon sticks/star anise, 1/2 cup of dried fruit slices, and 1 tablespoon of whole cloves or peppercorns.
  3. Package beautifully: Layer the ingredients in the cellophane bag or jar so the recipient can see the beautiful components.
  4. Add Instructions: Attach a tag with simple instructions: “Pour the contents into a small saucepan. Cover with 3 cups of water. Bring to a simmer, and let the gentle scent fill your home, adding more water as needed.”

8. Recycled Book Knife Block

For the handy and design-conscious recipient, this is a unique, stylish, and incredibly clever gift. It takes an old, unwanted hardcover book and repurposes it into a functional and beautiful kitchen object, celebrating both cooking and literature. This is the most challenging of the eight projects, but the result is a truly impressive, one-of-a-kind piece.

What You’ll Need:

  • A book: A large, thick hardcover book that is no longer wanted. A decorative, vintage cover is a bonus.
  • Tools: A ruler, a pencil, a rotary cutter or sharp utility knife, and a cutting mat.
  • Hardware: A small rubber-band clamp or c-clamp, and two bolts, washers, and wing nuts to bind the book (optional, but recommended).
  • Filling: Wooden skewers or bamboo chopsticks, about the length of the book’s spine.

How to Do It:

  1. Hollow the book (The “Block”):
    • Open the book to the title page. Using a ruler, measure a 1-inch (2.5cm) border from the outer edge of the page.
    • Use the pencil to mark the cutting lines. This border will hold the structure together.
    • Carefully use the rotary cutter or utility knife to cut through the pages along your lines. This requires patience and many passes—cut about 20−30 pages at a time to keep the cut clean. You are hollowing out a rectangular space in the center of the book’s pages, leaving the cover and the small border intact.
  2. Bind the pages: Once the center is hollowed, apply a strong craft glue to the inside edges of the border you left. Clamp the book shut and let it dry overnight. This fuses the pages together, turning them into a solid block.
  3. Add the skewers: The bamboo skewers or chopsticks are what hold the knives upright. Cut them to size so they fit neatly inside the hollowed-out area, standing upright. Pack them in tightly.
  4. Final Polish: Optionally, you can drill two small holes near the spine (top and bottom) and thread a bolt through, securing it with a washer and wing nut. This adds a nice industrial look and provides extra structural integrity. Present the knife block with a clean, sharp knife inside to demonstrate its use.

The Joy of the Homemade Gift

The true power of homemade gifts lies in the story they tell. They say, “I spent time, not just money.” By choosing one of these eight projects—from the culinary delight of vanilla extract to the deep emotional connection of the “Open When…” letters—you are giving something infinitely more valuable than a store-bought item. You are gifting an experience, a memory, and a piece of yourself, ensuring that the instant joy you feel creating the gift is multiplied when your loved one receives it. So grab your supplies, put on some music, and start crafting a little happiness today.


Frequently Asked Questions (FAQ)

Q: How far in advance do I need to start making these homemade gifts?

A: Most of the gifts are quick, requiring only an hour or two of active time (e.g., bath salts, spice blends). However, some require significant lead time:

  • Homemade Vanilla Extract: Needs at least 8 weeks to infuse, but 6-12 months is ideal. Start this one a year in advance!
  • Infused Oils/Vinegars: Needs 1-2 weeks to infuse fully.
  • “Open When…” Letters: The writing process is time-consuming and can take several hours, depending on how many letters you choose to write.

Q: Are homemade gifts suitable for professional colleagues or bosses?

A: Yes, absolutely, provided you choose an appropriate item. Culinary gifts like Infused oils or vinegars and the DIY stovetop potpourri mix are excellent, universally appreciated, and professional choices. Avoid highly personal gifts like the “Open When…” letters or the “Jar of Awesome,” which are better suited for close friends and family.

Q: What is the shelf life of the infused oils and vinegars?

A: Infused vinegars have a very long shelf life, often many months, as the acid acts as a preservative. Infused oils are slightly trickier. To avoid the risk of botulism, it is crucial that the fresh ingredients (like garlic or herbs) are completely strained out after 5-7 days of infusion. If fresh ingredients remain, the oil should be stored in the refrigerator and consumed within 2-3 weeks. For extended shelf life without refrigeration, use only dried herbs, spices, and dried citrus zest.

Q: How can I make a homemade gift look more professional?

A: Presentation is key for any homemade gift. Invest in high-quality, matching containers (clear glass jars for visibility), use printed or professionally designed labels instead of hasty handwritten tags, and use ribbon, twine, or wax seals to add a finishing touch. The extra effort in presentation elevates the gift from a craft project to a treasured item.

Q: I’m not a great cook. Can I still make the spice blend or vanilla extract?

A: Definitely! The spice blend simply requires measuring and layering—no actual cooking skills are needed. Homemade vanilla extract only requires pouring and waiting. The process is almost entirely hands-off. Don’t let a lack of cooking confidence deter you from these simple, high-impact culinary homemade gifts.


Reference Section


Recent Posts