Cookie Consent by Free Privacy Policy Generator Update cookies preferences

Why Brown Noise Is the New Coffee for Your Brain

Split image comparing the effects of stimulants and sound. One side shows an active, steaming cup of coffee, and the other side shows a person wearing headphones, calmly focused on a laptop, illustrating the deep concentration achieved with Brown Noise.

We’ve all hit that afternoon slump, grabbed another coffee, and ended up with the jitters but no extra focus. I’ve spent countless hours looking for tools to help me concentrate without the caffeine crash. This deep dive into Brown Noise reveals the secret to sustained, calm focus that feels like finding an inner silence.


Brown Noise: The Focus Hack That Went Viral

In the quest for peak productivity, we’ve tried everything: cold showers, fancy supplements, and, of course, endless coffee. But what if the most powerful focus tool isn’t something you consume, but something you simply listen to?

Enter Brown Noise. This sound has exploded across social media and wellness apps, hailed by students, remote workers, and those with ADHD alike. It’s often described as a deeper, richer alternative to the classic white noise. But calling it “the new coffee” is more than just a catchy phrase. Brown Noise doesn’t inject energy; it clears the fog, calms the jitters, and builds a solid foundation for deep, sustained focus.

But what exactly is Brown Noise? How does this low, rumbling sound manage to silence mental chatter better than a double espresso? We’re diving deep into the science and practical application of the most powerful sonic tool in your wellness toolkit.


What is Brown Noise? Deconstructing the Noise Color Spectrum

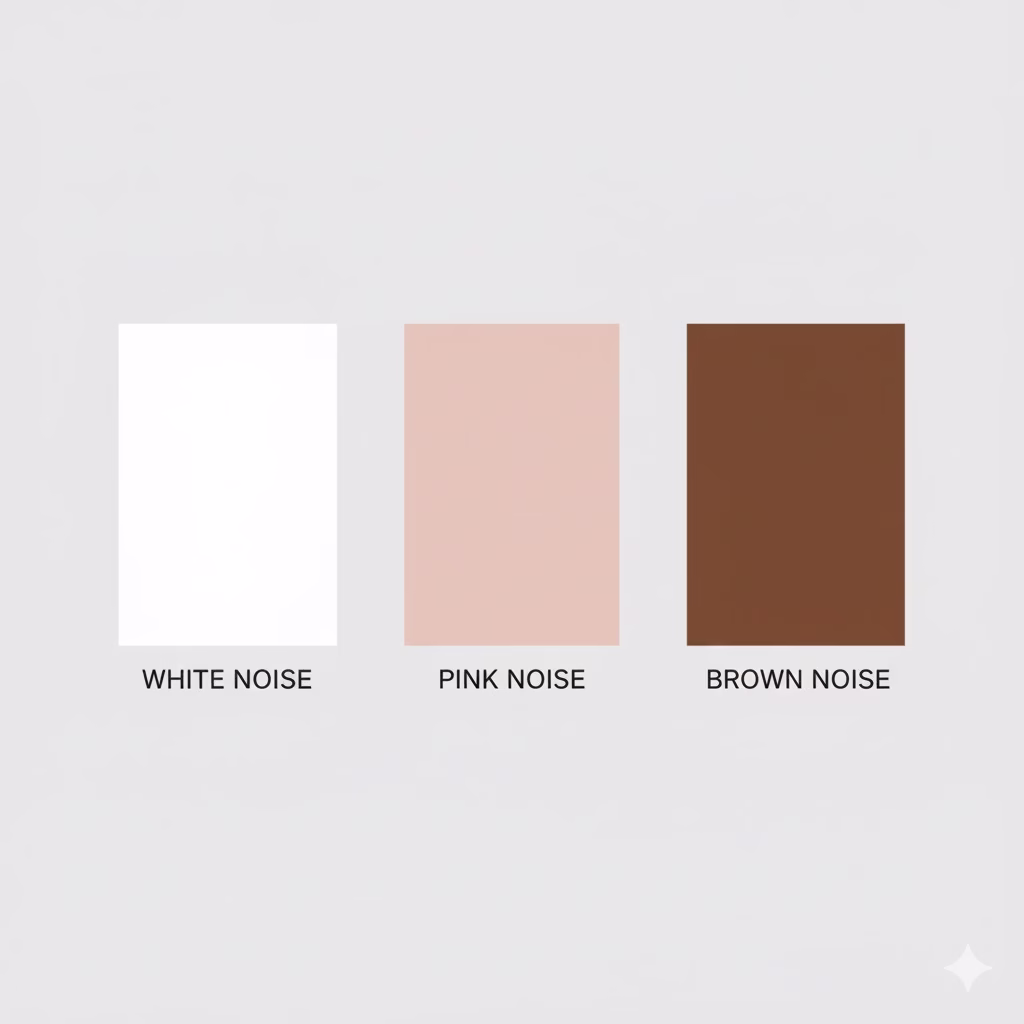
To understand why Brown Noise works so well, we first need to understand where it sits on the spectrum of “colored noise.” These colors aren’t about light; they are a way to categorize sounds based on their frequency distribution—meaning which pitches carry the most energy.

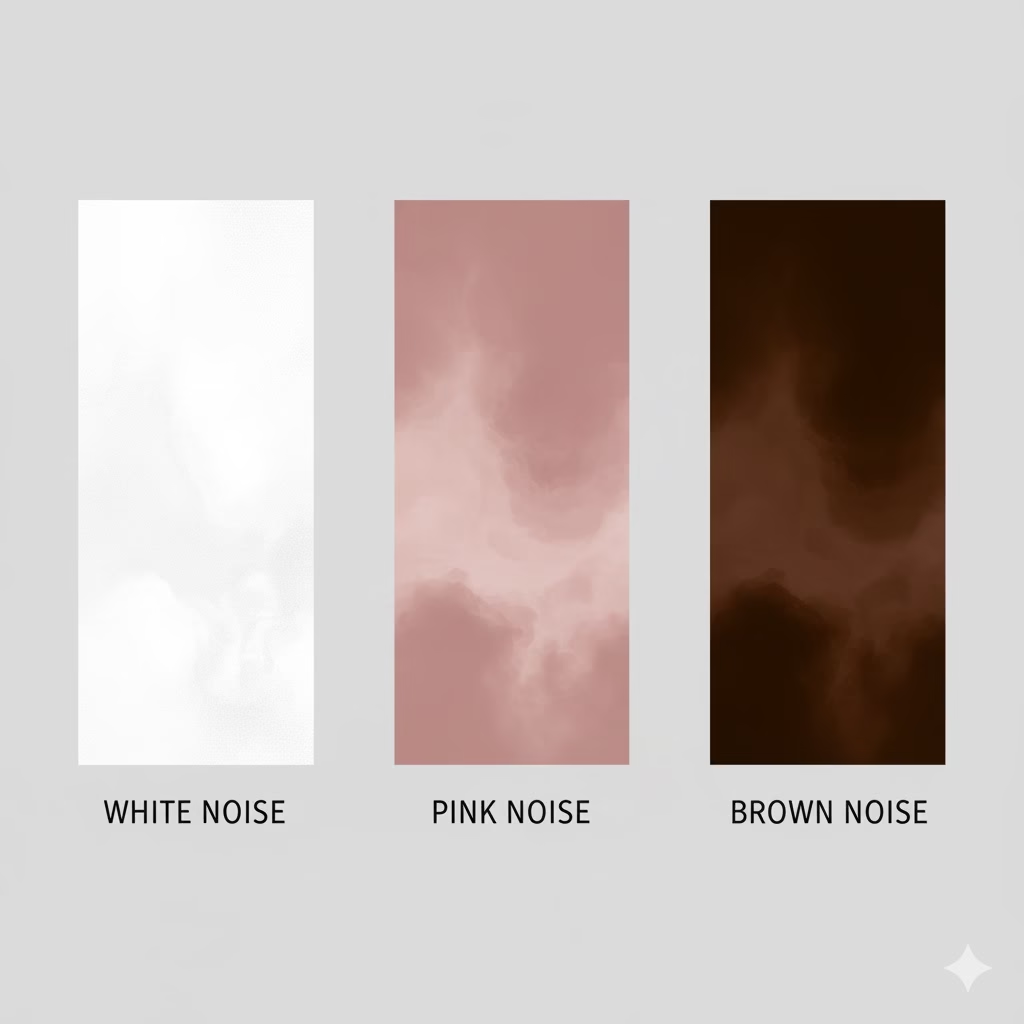
A. White Noise: The Jack-of-All-Frequencies

White Noise is the most famous. It contains all audible frequencies at an equal volume. Think of it as static on an old television or the sound of a hissing radiator.

  • Pro: It’s great at sound masking because it covers the whole audio spectrum.
  • Con: Many people find it harsh, buzzy, or high-pitched, which can be irritating over long periods.

B. Pink Noise: The Natural Balance

Pink Noise is like a gentle version of white noise. It distributes energy more heavily in the lower frequencies. This creates a deeper, smoother sound that many find more pleasant. Think of steady, heavy rainfall, wind rustling through leaves, or the rhythm of a steady human heartbeat.

  • Focus: It’s primarily studied and used for promoting deeper, more stable sleep.

C. Brown Noise: The Deep Rumble that Grounds You

Brown Noise (sometimes called Red Noise) places the vast majority of its energy into the lowest frequencies—the bass end of the spectrum. It’s the deepest and most powerful of the three.

  • What it Sounds Like: A low, powerful roar, the rumble of distant thunder, the sound of a strong waterfall, or the deep exhaust hum of an airplane.
  • The Focus Benefit: Its deep, rumbling quality effectively dampens high-frequency distractions and creates a feeling of being acoustically “cocooned.” It calms the central nervous system without putting you to sleep.

The Science: Why Brown Noise is Better Than Caffeine for Focus

Coffee stimulates the body, increasing heart rate and adrenaline. Brown Noise works by doing the exact opposite: it calms the mind to improve focus.

1. The Auditory Comfort Blanket

Our brains are programmed to react to sudden changes in sound. A slamming door, a car horn, or even a sudden thought can break concentration. This is your “fight or flight” system kicking in.

Brown Noise is the perfect neutralizer. Its low, consistent hum fills the sound field, masking these sudden environmental “spikes.” The low frequencies are perceived as less jarring and more constant than the sharp, high pitches in white noise. By eliminating the auditory alerts, your brain relaxes, and your mental energy is redirected from vigilance to the task at hand.

2. Calming the Overstimulated Mind

For individuals with highly active minds, such as those with ADHD or generalized anxiety, the brain can struggle to filter out irrelevant stimuli. This makes sustained concentration feel impossible.

Research suggests that consistent auditory input, like Brown Noise, provides a form of gentle auditory stimulation that occupies the brain’s filtering mechanisms. This allows the executive function parts of the brain (responsible for focus and decision-making) to function more efficiently. Instead of the sound being a distraction, it becomes a predictable background texture, helping the brain lock onto the task. It’s like turning down the volume on your internal noise and turning up the volume on your task.

3. Lowering Cortisol and Anxiety

Unlike caffeine, which spikes cortisol (your stress hormone), the calming effect of low-frequency Brown Noise helps reduce stress. When your nervous system isn’t constantly on high alert, your body’s stress response decreases. This physical state of calm is critical for the type of deep work that requires concentration, memory, and analytical thinking—activities coffee often makes jumpy, but Brown Noise makes smooth.


Brown Noise in Practice: Your Productivity Playbook

Ready to swap your third cup of coffee for this low-frequency focus tool? Here is your guide to using Brown Noise for maximum mental clarity.

A. The Focus Zone: Deep Work Sessions

Goal: Sustained concentration and blocking distracting voices or external noise.

  • How to Use: Play Brown Noise at a low, steady volume that is just loud enough to mask nearby human voices or keyboard clicking. Avoid using music with it, as that provides a rhythm that can be distracting.
  • Best Time: Ideal for the “deep work” block (e.g., coding, writing, studying complex material) or that post-lunch slump when your energy naturally dips.
  • Tip: Experiment with the depth. Some apps allow you to adjust the “darkness” of the Brown Noise. A deeper rumble is often more effective for focus.

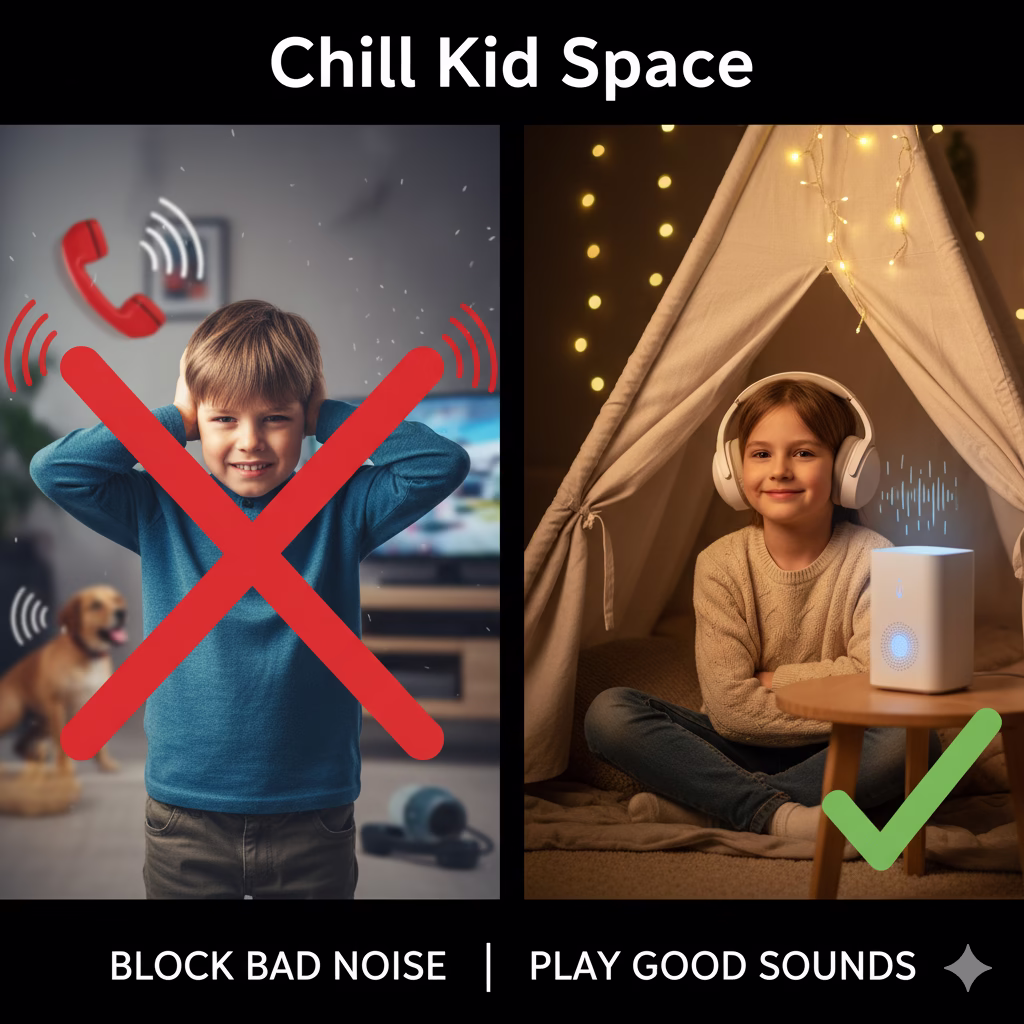
B. The Anti-Anxiety Shield: Calming the Jitters

Goal: Reducing internal anxiety, preventing racing thoughts, and maintaining mental equilibrium.

  • How to Use: Listen to Brown Noise through headphones during stressful moments or when starting a daunting task. The headphone use intensifies the grounding sensation.
  • Best Time: Use it 10-15 minutes before a presentation, a difficult meeting, or an intense planning session. It helps preemptively calm the nervous system.
  • Tip: Combine it with a simple breathing exercise: listen to the rumble, and try to match the rhythm of your deep exhale to the sustained sound.

C. The Wind-Down: Trading Jitters for Sleep

While Pink Noise is often cited for sleep, Brown Noise excels at turning off the “thinking mind,” making it an incredible asset for falling asleep when anxiety or mental hyperactivity is the problem.

  • How to Use: Set a timer and play the Brown Noise through a speaker in your room (not headphones, as they can be uncomfortable all night). Keep the volume low.
  • Best Time: Play it for at least 30 minutes during your wind-down routine (reading, stretching, no screens).
  • Tip: If you wake up in the middle of the night, turning the Brown Noise back on can quickly stop the mind from racing and pull you back into sleep.

Troubleshooting: Getting the Most From Your Brown Noise

If you’ve tried Brown Noise and didn’t feel an effect, the issue might be in the application. Follow these best practices to ensure success.

1. Volume is Everything

The mistake most users make is playing the noise too loudly. It should not be distracting or overwhelming. It needs to be just loud enough to act as a sonic filter—that’s the sweet spot. If you can hear the sound and the background distractions, turn it up slightly. If the sound itself is bothering you, turn it down. Never blast it, especially when using headphones.

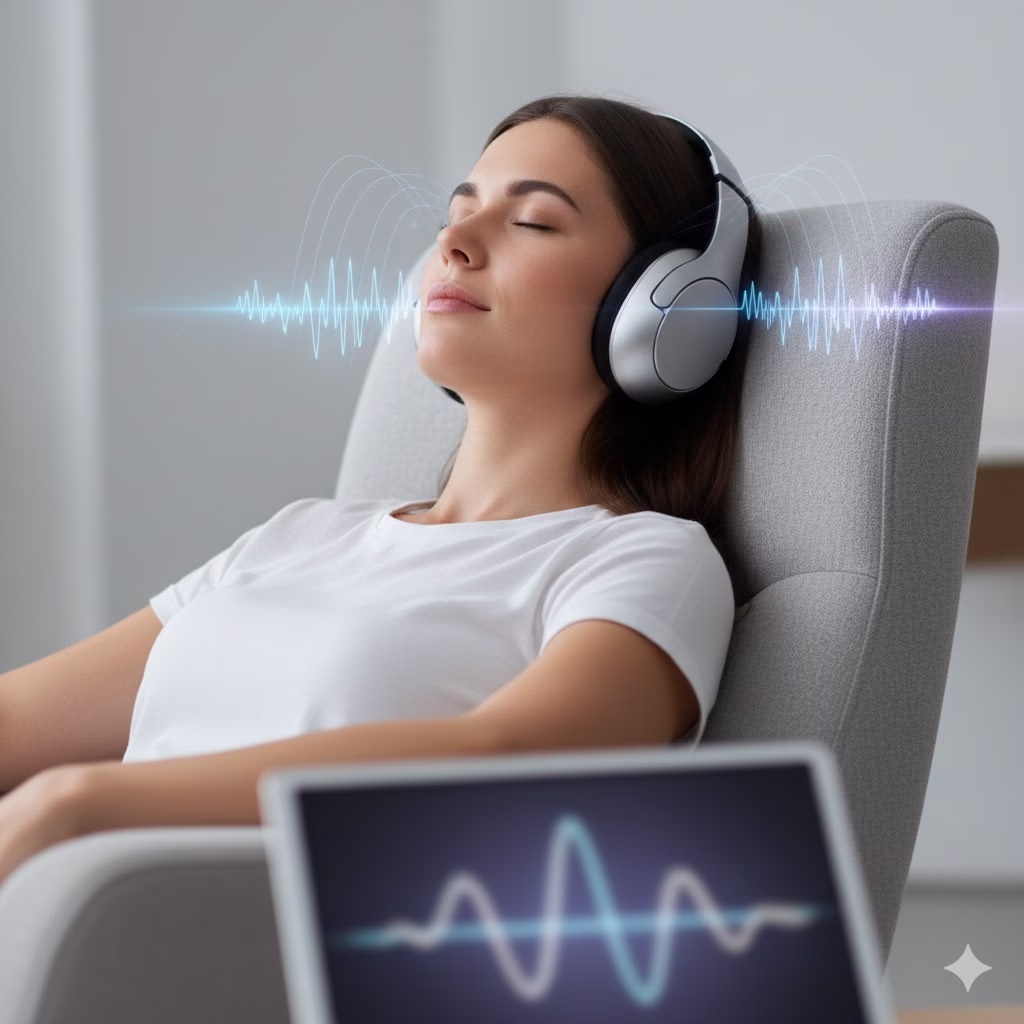
2. Headphones vs. Speakers

  • For Focus/Study: Use headphones. This creates a private, sealed environment where the masking effect is maximized.
  • For Sleep/Ambient Calm: Use a good quality speaker placed a few feet away. This allows the sound to fill the room naturally and creates a less intense experience for the nervous system.

3. Avoid Mixing Sounds

When first experimenting with Brown Noise for focus, avoid mixing it with music (even instrumental or ambient tracks). Your brain will try to process two different types of input, which defeats the purpose of the single, consistent focus tool. Once you are comfortable, you may find that light instrumental tracks can be added, but always start with the pure noise.

4. It’s a Tool, Not a Cure

Brown Noise is a powerful productivity tool, but it’s not a substitute for core wellness habits. It won’t work miracles if you are severely sleep-deprived, malnourished, or overly stressed. Think of it as the ultimate accelerator for existing healthy habits, not a complete replacement for the mental clarity you gain from breaks and good nutrition. It enhances your current state of calm; it doesn’t create it from scratch.


Conclusion: Trading Brown Noise for Deep Focus

The popularity of Brown Noise marks a shift in how we approach focus and energy. We are moving away from external, stimulating fixes (like coffee and energy drinks) and towards internal regulation through simple, accessible tools.

Brown Noise is the ultimate digital detox for your ears. By providing your brain with a low, consistent rumble, you are effectively giving it permission to stop listening for threats and to finally settle down. It’s a sustainable, side-effect-free way to silence the noise, conquer distractions, and achieve the deep, calm focus you need to excel. Try swapping your next afternoon caffeine hit for thirty minutes of Brown Noise—your brain will thank you for the smooth, focused clarity.


References:

  1. WebMD – Binaural Beats: What Are They and What Are the Benefits?
  2. NIH – Pink noise
  3. Health Harvard – Can white noise really help you sleep better?

Recent Posts


Find Your Focus: Best Meditation Sounds Ideas

Close-up shot of a person meditating indoors in soft sunlight, their hand resting in a mudra position near a headphone cord, illustrating the use of specific audio for deep focus and calming Meditation Sounds.

We have all experienced problems getting to sleep, struggled to quiet a racing mind, or needed some help to focus during a busy day. This guide is built on the shared human need for peace and clarity, exploring how meditation sounds are one of the most accessible tools we have—can instantly guide us toward a calmer state. We’ve explored various techniques, from ancient bowls to modern noise technology, to bring you practical, simple ideas. Start transforming your focus and deepening your practice today.


Using Meditation Sounds to Calm a Busy Mind

The world is loud, and our minds are even louder. If you find it tough to focus during meditation, you’re not alone. We often think of meditation as silence, but for many, a carefully chosen sound can act like a shortcut, instantly pulling you into a state of peace. Sound gives your mind a gentle job to do: listen. This helps prevent your thoughts from running wild.

But what sounds work best? You have tons of options, from the simple sound of rain to advanced technology. We’ll explore the best meditation sounds for focus, deeper relaxation, and a better meditation practice. This guide will show you how to choose the right sonic tools that match your needs, whether you are trying to relax after work, deepen your yoga practice, or simply fall asleep faster.


Why Do Meditation Sounds Help You Focus? The Science of Entrainment

Science shows that sound isn’t just background noise; it actually changes your brain. Our brains work on electrical patterns called brainwaves. Different sound rhythms and frequencies can literally push or “entrain” your brain to change its pattern.

This is why a fast, loud song makes you feel alert, and a slow, gentle sound makes you feel sleepy. We want to move your brain away from those fast, anxious patterns and toward the slow, peaceful ones.

Listening to the right sounds can:

  • Lower Stress Hormones: Soothing sounds slow your heart rate, lower your blood pressure, and reduce the stress hormone cortisol. This helps your body switch from “fight or flight” mode to “rest and digest” mode.
  • Block Distractions: Consistent sounds create an audio bubble against sudden, loud noises (like car horns or neighbors) that could break your focus.
  • Anchor Your Focus: They give your mind a gentle job to do—listen to the sound—which is much easier than telling your mind to do nothing at all. This technique is especially useful for beginners.

Top Picks for Best Meditation Sounds

The best sound for you is the one that feels right. Try these popular options to see what works!

1. The Power of Nature Sounds: Connecting with the Natural World

Nature sounds are the oldest form of sound therapy. They make us feel safe, grounded, and peaceful. Studies show that natural sounds change the way we connect to our environment, promoting healing.

A. Water Sounds: The Rhythmic Flow

The constant, flowing nature of water is incredibly effective because it is both complex and repetitive.

  • Ocean Waves : The gentle, steady sound of ocean waves is incredibly rhythmic. The rise and fall of the waves mimic the natural rhythm of your breath. This provides a deep, easy focus that is great for long meditation sessions or simply clearing mental noise.
  • Rain and Water : The soft, continuous pitter-patter of rain or the white noise of a running shower can create a cozy, insulating auditory environment. This helps block outside noise and fosters a sense of being warm and safe indoors. Try using the sound of a babbling brook for a slightly higher-pitched, more lively soundscape.
  • Distant Thunderstorms: For many, the low rumble of distant thunder and the accompanying rain is comforting. The deep, low brown noise elements in thunder can be highly effective for anxiety relief.

B. Forest & Wildlife Ambience: Grounding and Calm

These sounds help you feel connected to the earth, which is key for a grounding meditation practice.

  • Birdsong: The cheerful chirping of birds can uplift the spirit and connect you to the vibrancy of life. It’s excellent for morning meditations when you want to feel energized and awake, but still peaceful.
  • Wind Rustling Leaves: The soft whispers of wind through trees can be incredibly grounding. It offers a subtle, textural sound that doesn’t demand attention, allowing you to easily shift your focus inward.
  • Forest Night Sounds: These include sounds like crickets and cicadas. Their rhythmic chirping acts as a natural metronome, which is very helpful for slowing your inner pace and transitioning to sleep.

2. Tones, Bowls, and Ancient Instruments

These sounds leverage specific frequencies and vibrations to guide your mind and body.

A. Singing Bowls and Gongs

These ancient instruments make rich, sustained tones that you feel in your body, not just hear with your ears. This vibration is thought to travel through the body’s tissues, helping to release tension.

  • Sound Baths: These are immersive sessions (or recordings) using bowls, gongs, and chimes. They are perfect for deep rest and can sometimes feel like a mental reset button. The sounds are often used for chakra balancing and promoting spiritual well-being.
  • Tibetan Chanting / Mantras: Repeating a simple word or phrase (like “Om” or “Aum”) is a form of sound-based meditation. The vibration of your own voice and the rhythm of the chant helps anchor your mind, making it easier to stay present.

B. Healing Frequencies: Solfeggio & Others

These sounds are based on the idea that certain pure tones hold a beneficial effect on the body.

  • Solfeggio Frequencies: These specific musical tones (e.g., 528 Hz, known as the “Miracle Tone”) are believed to promote healing and positive change. The 432 Hz frequency, for example, is often called the “healing frequency” and is believed to bring about greater mental clarity.
  • Ambient Music: Look for slow, simple instrumental music with no lyrics. Drone music (long, sustained tones) or soft flute music are excellent choices for background focus.

3. Smart Sounds for Deep Sleep and Focus: Colored Noise

Need to block out a noisy environment? Colored noise creates a wall of sound that is constant and non-threatening. This masks the sudden, jarring noises that tend to snap your brain out of relaxation.

A. The Color Spectrum of Noise 🎧

  • White Noise: A steady hiss, like a fan. It’s perfect for sound masking because it covers a huge range of noise.
  • Pink Noise: Softer and lower than white noise. It has more energy in the low frequencies (like a gentle shower or distant wind). Studies suggest Pink Noise is better than White Noise at promoting deeper, more stable sleep by reducing brainwave complexity.
  • Brown Noise: The deepest, lowest sound (like a strong waterfall, heavy surf, or low roar). It is highly effective for calming an overstimulated mind and is often used by people with ADHD or anxiety for intense focus and grounding.

B. Brainwave Entrainment: Binaural and Isochronic Tones

These techniques work by directly guiding your brainwaves into a desired state, making them among the best meditation sounds for achieving specific goals.

  • Binaural Beats: You must use headphones for these to work. Your left ear hears one frequency, and your right ear hears a slightly different one. Your brain then creates a third “beat” that helps to entrain your brain.
    • Alpha Waves: Best for relaxed focus, which is ideal for yoga or a light, mindful break.
    • Theta Waves: Best for deep meditation, accessing creativity, and emotional healing.
    • Delta Waves: Best for restorative, deep sleep and anti-aging benefits.
  • Isochronic Tones: These use a single tone that quickly turns on and off. They are also highly effective for brainwave entrainment and can be used without headphones, though headphones are still recommended for the best experience.

4. Guided Audio: Letting Go of Control

If your mind races and you find it difficult to stop, letting a calm voice take the lead can be the easiest path to relaxation.

  • Guided Meditation: A calming voice walks you through the entire process. This can involve breathwork, a body scan (where you focus on feeling different parts of your body), or a beautiful visualization. This method is the single best meditation sound idea for beginners.
  • Sleep Stories: These are deliberately boring or calm narratives for adults. They keep your active, worried mind slightly busy with a gentle storyline (like a slow train journey or a walk in a cozy village). This prevents your mind from dwelling on anxious thoughts and allows you to drift into sleep.
  • ASMR (Autonomous Sensory Meridian Response): These are sounds that trigger a physical, tingling sensation, often starting on the scalp and moving down the spine. Whispering, gentle tapping, or slow-motion sounds are popular triggers. While not a traditional meditation sound, many people use ASMR to achieve intense physical and mental relaxation before sleep.

How to Choose the Best Meditation Sounds for You

Finding your favorite sound is a personal journey. Your body and mind will tell you what works best.

  1. Match Your Goal to the Sound:
    • Deep Sleep: Choose Pink Noise, Delta Binaural Beats, or gentle Rain.
    • Focus/Work: Choose Brown Noise, Forest Ambiance, or Alpha/Beta Binaural Beats.
    • De-stress/Calm Anxiety: Choose Guided Meditation, Singing Bowls, or Ocean Waves.
  2. Test the Volume: The volume is key. Sound should be loud enough to mask other noises but never so loud that it causes tension. Keep the volume at a low, comfortable level, especially for sleep.
  3. Invest in Quality Audio: For the full, therapeutic effect of Binaural Beats, quality headphones are essential. For colored noise or ambient music, a good quality speaker (not your phone’s built-in speaker) can make a huge difference in the richness and depth of the sound.
  4. Listen to Your Body: If a sound makes you feel more alert, tense, or irritated, stop using it immediately! Some people find white noise too harsh; others find high-pitched chimes stressful. Pay attention to how your shoulders, jaw, and breath respond. The best sounds should make your body feel softer, slower, and heavier.

Elevate Your Practice with Meditation Sounds

Integrating the best meditation sounds into your routine can be a game-changer. Whether you’re drawn to the ancient vibrations of a singing bowl, the soothing rhythm of ocean waves, or the precise frequencies of binaural beats, there’s a world of auditory support waiting to deepen your practice. Take the time to explore, listen, and allow sound to guide you to a more focused, peaceful, and centered state of being.


References:

  1. NIH – Associations between Nature Exposure and Health
  2. WebMD – Binaural Beats: What Are They and What Are the Benefits?
  3. Mayoclinic – Meditation: A simple, fast way to reduce stress

Recent Posts


Unlock Super Soft Feet with This Post-Soak Foot Balm

Pantry Pedicure post-soak foot balm being massaged onto a foot on a towel, showcasing the balm's ability to create Super Soft Feet after a homemade foot soak.

Treat your feet to the ultimate pantry pedicure with this simple, all-natural balm. Made from ingredients you already have, this recipe is the perfect way to lock in moisture after a warm, homemade foot soak. You’ll be amazed at how quickly this balm helps you achieve super soft feet!


Introduction: Time for Super Soft Feet

We ask a lot of our feet! After a long day, a warm foot soak feels amazing. But the last step—adding moisture—is often forgotten. That’s where the Pantry Pedicure Post-Soak Foot Balm comes in.

Stop buying expensive creams. This balm is a simple, strong mix made from natural ingredients found in your kitchen. It is made to lock in moisture from your soak, treat dry heels, and leave your feet feeling fresh and new.


The Recipe: Post-Soak Foot Balm

This recipe is easy and effective. It uses a few key items: a hard oil base, a liquid oil for smooth rubbing, and essential oils for a great scent.

IngredientWhy You Need It
1/4 cup Coconut OilDeeply moisturizes, light, and fights germs.
2 tablespoons Shea ButterVery rich, great for fixing dry, cracked skin.
1 tablespoon Olive Oil or Almond OilAdds extra food for your skin and helps the balm glide.
10-15 drops Peppermint Essential OilMakes feet cool and fresh. Helps tired, sore feet.
5-7 drops Tea Tree Essential OilCleans skin and is great for foot health.
Optional: 1 teaspoon Cornstarch or Arrowroot PowderMakes the balm less oily for a smoother feel.

Simple Steps for Super Soft Feet

  1. Melt It: Put your bowl with the Coconut Oil, Shea Butter, and Olive/Almond Oil over a small pot of hot water (a double boiler). Stir until everything is melted and clear.
  2. Mix & Cool: Take the bowl off the heat. If you use cornstarch, mix it in well now until it is smooth.
  3. Add Scent: Let the mixture cool for a few minutes. It should still be liquid but not hot. Stir in the Peppermint and Tea Tree Essential Oils.
  4. Pour & Wait: Pour the liquid balm into a clean jar. Let it cool completely until it turns solid and creamy. You can put it in the fridge to set faster.

Your Super Soft Feet Care Plan

The balm works best when you use it the right way. Follow these simple steps for great results:

Step 1: The Soak

Use warm water. Add 1/2 cup of Epsom salts (or even Baking Soda) to help calm pain and make rough skin soft. Soak your feet for 10 to 15 minutes.

Step 2: Rub Away Rough Skin

When your skin is still soft, use a pumice stone or foot file. Gently rub off dead skin on your heels and rough spots. Be gentle—do not scrub too hard!

Step 3: Put on the Balm

Pat your feet dry, but let them stay a little wet. Scoop out some Post-Soak Foot Balm. Rub it deeply into your whole foot. Focus on your heels, soles, and toes.

Tip: Sleep Mask for Super Soft Feet

For very dry feet, put the balm on before bed. Then, put on a pair of soft cotton socks. The socks trap the moisture and heat. This lets the balm work deeply all night. You will wake up to much softer feet!


Why Natural Works Best

Using kitchen ingredients means you know exactly what is going on your skin.

  • Shea Butter: It has lots of healthy fats and vitamins. This makes it great for making skin soft.
  • Peppermint Oil: It has menthol. This gives a natural cooling effect that helps tired, swollen feet feel better.
  • Tea Tree Oil: This oil helps keep the skin on your feet clean and healthy, especially between your toes.

This easy, homemade balm shows that the best care is often found right in your pantry. Enjoy your spa-quality Pantry Pedicure!


References


Recent Posts


The Magic of Fruit and Veggie Fertilizers

A close-up shot shows a hand using a small wooden spoon to sprinkle light-brown Fruit and Veggie Fertilizers powder from a labeled glass jar onto the soil of a thriving potted houseplant (a Fiddle-Leaf Fig).

Living without gardens doesn’t mean you can’t be a zero waste gardener; it just means you have to be smarter about your resources. Discover how to transform kitchen scraps and food waste into potent, all-natural Fruit and Veggie Fertilizers. This simple shift turns every urban window sill into a sustainable, thriving green space.


Do you want to live a zero waste life? You can start right now with your houseplants! Most people throw away fruit peels and veggie skins every day. But these scraps are free, natural food for your plants. This is true zero-waste gardening for anyone living without gardens.

This simple process turns your kitchen waste into powerful Fruit and Veggie Fertilizers. It works well for your plants, saves you money, and helps the planet by cutting down on trash.

This is more than just throwing things out. It’s about being mindful of the resources you use. When you feed your plants with scraps, you close the loop: the food you buy helps the food you grow.

But remember the rule: Don’t just put a banana peel in the dirt! You must prepare the scraps first.


Why You Must Prepare the Scraps for Fruit and Veggie Fertilizers

It’s okay to bury raw food scraps outside. Gardens have lots of dirt, space, and living organisms to break things down fast. But your indoor plants live in small, closed pots. Putting raw scraps directly into pots causes big problems:

1. The Pest Problem with Fruit and Veggie Fertilizers

Raw food attracts bugs like fungus gnats, fruit flies, and other small, unwelcome insects. They are drawn to the rotting food in the moist soil. Once they move in, they can spread throughout all your indoor plants.

2. The Mold and Smell Problem with Fruit and Veggie Fertilizers

In a small pot, food rots very slowly because there isn’t enough air (oxygen). This is called anaerobic decay. This process makes bad smells and causes mold to grow on the surface and under the soil. This mold can hurt your plant’s roots.

3. The Slow Feeding Problem

Decomposition takes a long time indoors. Your soil doesn’t have all the bacteria and worms that an outdoor garden has. This means the nutrients stay locked inside the peels for months. Your plant won’t get the food it needs when it needs it.

4. The Root Danger Problem (Salts and Acidity), with Fruit and Veggie Fertilizers

As food scraps break down, they can create concentrated salts or acids. In a small pot, these compounds build up fast. This sudden spike can cause nutrient burn (salt burn) on the roots, which quickly damages or kills the plant. Prepared fertilizers fix this by spreading the nutrients evenly.

You need two simple, clean ways to prepare your Fruit and Veggie Fertilizers for safe use.


Method 1: Liquid Fertilizer (Compost Tea)

This liquid food is the easiest way to give your plants a quick, gentle boost. They can absorb it right away. This is often called “Compost Tea” because it’s like steeping tea bags.

The Simple Steps:

  1. Collect Peels: Gather clean peels like potato, carrot, cucumber, and banana. It’s important that your peels are free from wax, oil, or chemical residue.
  2. Soak (Steep): Put the peels in a clean jar or bucket. Cover them with fresh, room-temperature water. Let them sit for 24 to 48 hours. This time lets the nutrients soak out into the water. If you leave it longer than two days, the water can start to spoil.
  3. Strain and Thin: Strain out all the solid pieces. You only want the liquid. This is key: always mix this liquid with an equal amount of fresh water (a 1:1 ratio). This crucial dilution stops the fertilizer from being too strong and hurting the roots.
  4. Apply: Pour the thinned liquid onto the soil. Use this liquid in place of your normal watering.

Advanced Tip: Aerated Compost Tea

Want to make your liquid fertilizer even better? You can use an air pump (like the kind used for fish tanks) and an air stone.

  • Add Air: Drop the air stone into the soaking liquid while the peels steep.
  • Why It Works: Adding air helps good, aerobic (oxygen-loving) bacteria grow faster. This process pulls more nutrients out of the peels and makes the tea more potent and beneficial for the soil’s health.
  • Safety: Always strain and dilute this powerful tea, too!

Application Timing for Fruit and Veggie Fertilizers

  • Tropical Plants (like Pothos, Philodendron): Fertilize every 2 to 4 weeks during spring and summer (the growing season).
  • Succulents and Cacti: Fertilize much less often—maybe once a month or every six weeks. They are very sensitive to too much food.

Method 2: Dried Powder Fertilizer

Use this method if you want to feed your plants slowly over time. This powder is perfect for mixing into new soil or giving a gentle, long-term boost.

The Steps:

  1. Dry Peels: Collect your peels. You must dry them completely until they are hard and crunchy. This is the most important step for safety and storage.
    • Oven Drying: Spread peels on a baking sheet and bake them at a very low heat (around 150-200°F or 65-95°C) for several hours.
    • Air Drying: Lay them on a screen in a warm, dry, breezy spot for several days.
  2. Grind: Use a blender, food processor, or a clean coffee grinder to turn the bone-dry, crunchy peels into a fine powder.
  3. Mix into Soil: The powder feeds the plant slowly because the dry particles break down over time.
    • Top-Dressing: Gently mix about one tablespoon of powder into the top inch of soil for an established plant.
    • New Soil: Mix up to 1/4 cup of powder into a gallon of new potting mix when you repot.

Storing Your Fertilizer Powder

  • Container: Store the dried powder in an airtight container, like a jar with a tight lid.
  • Location: Keep it in a cool, dark, dry place (like a pantry).
  • Shelf Life: Properly dried and stored powder can last for many months, making it easy to create large batches during times when you have lots of scraps (like after a big dinner).

What Nutrients Do Scraps Offer?

For a balanced, comprehensive fertilizer, use a wide variety of scraps. Different kitchen items offer different nutrient profiles that plants need to thrive.

Scrap TypeKey NutrientPlant Benefit
Banana PeelsPotassium (K)Makes strong flowers, improves overall health, and helps the plant manage water.
Potato & CarrotPhosphorus (P), MagnesiumGrows strong, healthy roots. Helps the plant move energy around.
Onion SkinsPhosphorus (P), Iron, CopperHelps the plant resist disease and aids in the production of green chlorophyll.
Orange PeelsPhosphorus, PotassiumGood for general health; the citrus oil helps repel certain indoor insects.
Coffee GroundsNitrogen (N)Essential for lush, green leaf growth (foliage). Use sparingly and dried.
EggshellsCalciumHelps strengthen the plant’s cellular walls and prevents issues like blossom end rot.

The Power of NPK

Plants rely on three main nutrients, often called NPK:

  • N (Nitrogen): This is for leaf and stem growth. Coffee grounds are a great source.
  • P (Phosphorus): This is for root and bloom growth. Potato and carrot peels help here.
  • K (Potassium): This is for overall plant health and water regulation. Banana peels are the winner here.

By mixing coffee grounds, banana peels, and vegetable skins, you create a powerful, balanced Fruit and Veggie Fertilizer blend.


Key Tips and Troubleshooting for Fruit and Veggie Fertilizers

Follow these simple rules to make sure your plants love your homemade Fruit and Veggie Fertilizers and to maintain a clean zero waste home.

1. Safety and Testing

  • Start Small and Observe: Always test new fertilizer on one plant first. If leaves turn yellow or get brown edges (signs of burn), your liquid was too strong. Dilute it more next time.
  • Mix Scraps: Never use just one scrap type in large amounts. Variety is the key to a balanced diet for your plants.
  • Avoid Salt and Sugar: Never use water that had salt in it. Salt kills plant roots. Also, avoid adding sugar, which only feeds bad mold and pests.

2. Troubleshooting Issues

  • Mold on Soil: If you see white or gray mold after using the dried powder, you didn’t dry the peels enough. Carefully scoop out the affected soil and re-top-dress with fresh, completely dry powder.
  • Pests (Gnats): If pests appear after watering with the tea, the tea was likely left soaking for too long and started to ferment or spoil. Ensure you use the tea within the 48-hour window.

3. Timing and Dormancy

  • Active Season: Only fertilize when your plant is actively growing (usually spring and summer).
  • Dormancy: Stop fertilizing completely in the late fall and winter. Plants slow down and don’t need the extra food. Giving them fertilizer when they are dormant can actually harm them by promoting weak growth.

Use these zero-waste tips to help your plants grow strong and lush. By turning your kitchen scraps into powerful Fruit and Veggie Fertilizers, you can enjoy a beautiful, thriving indoor garden while keeping your trash can empty.


References


Recent Posts


7 Simple Kitchen Staples That Will Cleanse Your Home

Close-up of DIY natural cleaning supplies laid out on a rustic table, highlighting the Kitchen Staples used: baking soda, fresh lemons, salt, olive oil, and a glass spray bottle.

The ultimate budget hack: Transform basic Kitchen Staples into powerful, non-toxic cleaners and slash your grocery bill instantly.


Introduction: The Cleaning Kitchen Staples inside Your Pantry

Do you know what makes your store-bought, all-purpose spray work? Usually, it’s just a combination of water, a mild acid, and a lot of artificial fragrance.

The truth is, you don’t need a cabinet overflowing with expensive, harsh chemicals to get a sparkling clean home. The most effective, non-toxic, and budget-friendly cleaning solutions have been hiding in your kitchen all along. We’re talking about simple kitchen staples like vinegar, baking soda, and lemon juice.

These natural ingredients offer triple benefits: they’re incredibly cheap, they’re safe for your family and pets, and they minimize plastic waste when you reuse your own spray bottles.

This guide reveals seven simple, powerful recipes to clean every major area of your home using only the essentials you already have on hand.


I. The All-Purpose Power Spray using Kitchen Staples

This is your daily go-to for cutting light grease, eliminating germs, and wiping down sealed surfaces in the kitchen and bathroom.

IngredientsRatio
White Vinegar (The Acid)1 cup
Water1 cup
Lemon or Orange RindsA handful (optional)

Method:

  1. Pour the vinegar and water into a reusable glass spray bottle. Shake gently to combine.
  2. Optional: The Scent Infusion. To add a fresh scent and counteract the pungent vinegar smell, fill the bottle with citrus rinds (lemon, orange, or grapefruit) or a few sprigs of hearty herbs like rosemary. Let this mixture steep for 1–2 weeks before using, then strain out the solids.
  3. Spray the solution directly onto countertops, sink areas, cabinet fronts, and appliance exteriors. Wipe clean with a microfiber cloth.

Why It Works: White vinegar contains acetic acid, which is a powerful solvent that breaks down dirt, soap scum, and light bacterial buildup. The 1:1 dilution is strong enough to clean effectively without being too harsh on surfaces.

Pro Tip: Do not use vinegar on natural stone surfaces like granite, marble, or unsealed grout, as the acid will chemically etch and dull the finish. Use a mild soap and water solution for these areas instead.


II. Kitchen Staples for: No-Scrub Overnight Oven Paste (Baked-On Grime)

Cleaning a greasy oven is a notorious chore, but this simple paste breaks down heavy, baked-on food while you sleep, requiring only minimal scrubbing later.

IngredientsRatio
Baking Soda (The Scourer)21​ cup (or more)
Water∼3 Tbsp
White VinegarIn a separate spray bottle

Method:

  1. Remove oven racks. In a small bowl, mix the baking soda and water until a thick, spreadable, frosting-like paste forms. Adjust water as needed.
  2. Using a brush or gloved hand, spread the paste all over the interior of your cold oven (avoiding heating elements). The paste will quickly turn brown as it absorbs the cooked-on grime.
  3. Let the paste sit and work its magic overnight (at least 12 hours).
  4. The next morning, wipe away the majority of the dried paste with a damp cloth or sponge.
  5. Spray the remaining paste residue with straight vinegar. It will begin to fizz vigorously as it neutralizes the baking soda, effectively lifting any last stubborn bits. Wipe clean until the surface is residue-free.

Why It Works: Baking soda (sodium bicarbonate) is a mild abrasive that physically scrapes grime without scratching, but it’s also a powerful alkali. Alkalinity is excellent at breaking down acidic, greasy messes from cooked foods, making the grease water-soluble and easy to wipe away.


III. Streak-Free Window & Glass Cleaner (Mirrors & Glass Tables)

If you’ve ever struggled with streaks on your windows, the secret to a flawless finish is a tiny bit of cornstarch.

IngredientsRatio
Warm Water2 cups
White Vinegar41​ cup
Cornstarch (The Anti-Streaker)1 Tbsp

Method:

  1. Mix the ingredients together, stirring or whisking thoroughly to ensure the cornstarch is fully dissolved.
  2. Pour into a spray bottle. Shake well before every single use to redistribute the cornstarch, as it will settle quickly.
  3. Spray onto glass and wipe clean with a lint-free cloth, a microfiber towel, or even crumpled-up newspaper for a crystal-clear, streak-free shine.

Why It Works: The vinegar dissolves the film and residue on the glass. The cornstarch acts as an ultrafine, gentle abrasive that helps to absorb residue and buff the glass to perfection, preventing the annoying streaking that liquid cleaners often leave behind.


IV. Foaming Drain Declogger (Slow Sinks)

This classic reaction is a safe, effective, and chemical-free way to clear minor clogs caused by hair, soap scum, and sludge.

IngredientsRatio
Boiling WaterA kettle full
Baking Soda (The Base)21​ cup
White Vinegar (The Acid)1 cup

Method:

  1. Pour the kettle of boiling water down the slow drain to help loosen initial debris and warm the pipes.
  2. Follow immediately with the dry baking soda. Let it sit for a minute.
  3. Pour the vinegar down the drain. It will start to foam and bubble vigorously as the two ingredients react.
  4. Cover the drain with a stopper or a rag to force the chemical reaction and resulting pressure deep into the pipe where the clog resides.
  5. Let it sit for 15–30 minutes, then flush generously with another round of hot tap water or boiling water.

Why It Works: Mixing baking soda (a base) with vinegar (an acid) creates a large volume of carbon dioxide gas (the fizzing). This gas builds pressure and agitation inside the pipe, physically pushing and breaking up the minor clog.


V. Hardwood & Tile Floor Refresher (All Hard Floors)

This simple, minimal-ingredient formula is perfect for cutting through dirt and foot traffic residue without leaving a dull or sticky film.

IngredientsRatio
Hot Water1 gallon
White Vinegar21​ cup
Liquid Dish Soap1–2 drops (no more!)

Method:

  1. Combine the hot water and vinegar in your mop bucket. Add just a drop or two of mild liquid dish soap—this helps lift heavy dirt but must be minimal to avoid leaving sudsy residue.
  2. Before applying to the floor, ensure your mop is well-wrung out; it should be damp, not dripping. Excess water is bad for hardwood and laminate.
  3. Mop the floor section by section. The highly diluted vinegar ensures a fast-drying, streak-free, and clean finish.

Why It Works: Vinegar’s acidity is fantastic at dissolving mineral buildup (like hard water spots) and removing soap scum left behind by other commercial cleaners. It also provides a mild sanitizing effect, and because it evaporates quickly, it leaves no residue.


VI. Porcelain Scrubbing Powder (Toilets & Tubs)

Forget those blue scouring powders! Baking soda is a natural deodorizer and a perfect mild abrasive for porcelain and fiberglass.

Ingredients
Baking Soda (The Deodorizer)
Salt (optional, for extra scrub)
White Vinegar (in a spray bottle)

Method:

  1. For the toilet, simply sprinkle a generous amount of baking soda into the bowl and let it sit for 5–10 minutes to absorb odors. Scrub and flush.
  2. For sinks, tubs, and showers, sprinkle the baking soda onto a damp sponge or brush. Scrub the surface just as you would with commercial powder.
  3. For stubborn rings or soap scum, sprinkle the baking soda and then spray it liberally with vinegar. Scrub the resulting bubbly paste for enhanced cleaning action.

Why It Works: Baking soda is an alkaline substance that excels at neutralizing odors. Its crystalline structure provides the perfect mild abrasion—strong enough to lift stains and grime without scratching delicate porcelain or acrylic surfaces.


VII. Lemon-Oil Wood Furniture Polish (Cabinets & Tables)

Bring life back to your wooden furniture and cabinets with this simple, Kitchen Staples of conditioning polish.

IngredientsRatio
Olive Oil (The Conditioner)43​ cup
Lemon Juice (Fresh or Bottled)41​ cup

Method:

  1. Combine the olive oil and lemon juice in a jar and shake vigorously. Note: You must shake this mixture well before each application, as the oil and acid will separate quickly.
  2. Dab a small amount onto a soft, lint-free cloth.
  3. Rub the polish into the wood surface, always working with the wood grain.
  4. Use a second, clean, dry cloth to lightly buff the surface until it shines and no oily residue remains.

Why It Works: The olive oil deeply conditions and moisturizes the wood, restoring its luster and helping to minimize the appearance of small scratches. The lemon juice or acid cuts through any grime and dirt while adding a fresh, natural scent.


Conclusion: A Cleaner Home, A Greener Wallet

By relying on these seven simple recipes, you’ve replaced a dozen chemical-laden products with five cheap, non-toxic kitchen staples. You’re not only saving money but also reducing the number of volatile organic compounds (VOCs) and plastic bottles in your home.

Making the switch to natural cleaning is a simple, effective step toward a healthier household. You’ve successfully turned your pantry into the most powerful cleaning store on the block!


Important Safety Notes for Kitchen Staples

  • The Golden Rule of Cleaning: NEVER mix vinegar and bleach. This combination creates highly toxic chlorine gas, which can be fatal. Do not use them in the same cleaning session.
  • Spot Test: Always test a small, inconspicuous area (especially on wood, paint, or tile) when trying a new solution for the first time.

References

  1. University of Arkansas : Clean and Green Homemade Cleaners
  2. The Spruce: How to Make a Homemade Vinegar Cleaning Solution

Recent Posts


Make This Foot Soak For Tired And Achy Feet

A person beginning a natural foot soak to relieve tired feet. The warm water in the wooden barrel is infused with slices of ginger and fresh mint leaves.

This guide shows you the best way to make a Foot Soak at home. This simple therapy will bring great relief to your tired, achy feet. It uses powerful, natural ingredients like common kitchen Salt, warming Ginger, and cooling Mint. Stop searching for expensive cures and start using the easy healing power of your pantry today.


Why Your Kitchen Holds The Secret To Soothed Feet

Your feet are complex body parts. They contain bones, muscles, and ligaments. They carry your entire body weight every single day. Maybe you spent all day on your feet at work. Perhaps you had a challenging workout. Or maybe you have swelling from sitting too long. That heavy, throbbing feeling means your feet need a break. Luckily, you do not need to spend a lot of money at a spa to find relief. The best and purest types of foot care are often right in your pantry.

This foot soak is very soothing and stimulating. We use simple, natural items from your kitchen. It is made to fight tiredness, reduce swelling, and help blood move better. We mix the relaxing power of heat with the strong healing traits of salt, ginger, and mint. This creates a powerful therapy session at home. Stop neglecting your hard-working feet. It is time to turn your kitchen into a luxurious, effective home pharmacy.


Equipment You’ll Need for the Foot Soak

It is easy to create your own spa at home. You only need a few simple tools. Get these items ready before you start your soak:

  1. A large basin, bucket, or plastic tub. It must be deep enough to hold your feet and ankles.
  2. A kettle or pot to heat the water to the right temperature.
  3. A small bowl or mug to soak the ginger and mint.
  4. A spoon or ladle for stirring the ingredients so they mix well.
  5. A clean, soft towel for drying your feet nicely afterward.
  6. Optional: A comfy chair, quiet music, and a good book to help you relax completely.

The Invigorating Kitchen Foot Soak Recipe

This recipe uses ingredients known to quickly increase blood flow and calm muscle pain. It gives targeted comfort for your most tired and sore feet.

Ingredients You Will Need

IngredientAmountPurpose
Hot WaterEnough to comfortably cover your ankles (in a basin/tub)Base for soaking; heat sinks in deep to relax muscles.
Coarse Salt (Sea Salt or Table Salt)1/2 cupA mineral base to ease tension, aches, and minor swelling.
Fresh Ginger (grated or thinly sliced)2 tablespoonsA strong, natural warmer that boosts circulation to ease stiffness.
Fresh Mint Leaves (or 2-3 Black Tea Bags)A generous handful of leavesGives a cooling, pain-relieving effect and a fresh smell to calm your mind.

Step-by-Step Instructions for the Foot Soak

Prepare the Infusion: Start by making a strong liquid soak. Put the fresh ginger and mint in a small heat-safe bowl or mug. Pour one cup of boiling water over them. Let this sit for about 5 minutes. This step is key. It pulls out the best healing parts of the ingredients before you add them to the main water.

Ready the Basin: Fill your foot tub with hot water. It should feel very warm, almost hot, but not burn you. Always check the temperature first.

Add the Base: Stir the coarse salt into the hot water until it mostly dissolves. Swirl the water gently to mix the salt in well.

Combine Aromatics: Carefully pour the ginger and mint liquid into the tub. You can strain out the solid bits if you want a clear soak. You can also leave them in for a gentle scrub. If you use tea bags, put them right into the main bath now.

Soak and Relax: Check the water heat one last time. Put your feet in completely, covering your ankles.

Time: Soak for the needed 15 to 20 minutes. Close your eyes, take deep breaths, and move your toes. Gently stretch your feet to get the most relief from the hot water and the active ingredients.

Finish: Carefully lift your feet out. Pat them completely dry. Be sure to dry well between your toes. Finish by putting on a small amount of a rich moisturizer or a kitchen oil (like coconut or olive oil). This locks in moisture and keeps your skin healthy.

Image Placement: A close-up of feet soaking in the prepared bath, with visible steam and floating ingredients (ginger and mint leaves).


Why This Foot Soak Works Wonders

This recipe works well because of three main effects: hydrotherapy, aromatherapy, and natural chemistry.

  • Thermal Hydrotherapy: Soaking in hot water is simple but effective. It makes your blood vessels wider (called vasodilation). This relaxes the muscles in your feet and legs right away. It lets a rush of fresh, oxygen-rich blood flow into the area. This extra blood helps remove waste products (like lactic acid) that cause muscle pain and tiredness.
  • Aromatherapy and Counter-Irritation: The natural warmth from the ginger and the coolness from the mint work at the same time. The hot water and ginger make you feel warm and increase blood flow. Meanwhile, the menthol in the mint makes you feel cool and acts like a mild painkiller. This refreshing feeling helps your brain ignore the soreness and heaviness.
  • Osmotic Balance: The salt makes the water rich in minerals. This helps reduce swelling and prepares rough skin. The minerals gently draw out extra fluid, which makes your feet feel lighter.

Key Ingredient Benefits for the Foot Soak

Every ingredient does something important to help your feet feel better:

Coarse Salt: The Soothing Base

Using coarse salt helps create a special water solution. This solution can help ease minor swelling by gently pulling extra water from your skin and tissues. The minerals in the salt also soften tough, dry patches. This makes it easier to clean away dead skin after your soak.

Fresh Ginger: The Circulation Booster

Ginger is a great natural remedy for warmth and blood flow. Its main active parts are called gingerols and shogaols. These compounds actively boost blood circulation. Better circulation means your tired muscles get the food they need. It also removes the waste that causes stiffness and pain. This gives deep relief right where you need it.

Fresh Mint/Tea: The Cooling Refresher

Mint has a natural oil called menthol. This oil is known for its strong cooling and mild pain-numbing effects. When the menthol mixes into the warm water, it feels crisp and refreshing. This sensation acts like a natural pain reliever. If you choose Black Tea, the tannic acid is good for tightening your skin. This helps fight sweat and bad foot odors.


Recipe Variations For Different Needs

Once you know the power of the basic ginger and mint soak, you can easily change the recipe. You can use simple kitchen swaps to fix almost any common foot issue.


The Restorative & Deeply Moisturizing Soak

  • Swap: Replace the ginger and mint with 1/4 cup Olive Oil and 1/4 cup Honey. You can also use Coconut Oil.
  • Benefit: This is excellent for dry, cracked feet that need intense moisture. Olive and coconut oils are rich emollients. They create a protective barrier on the skin. Honey is a natural humectant. It draws water into the skin and locks it in. This combination helps skin stay soft and prevents future cracking.

The Deep Cleansing & Odor-Fighting Soak

  • Swap: Replace the ginger and mint with 1 cup Apple Cider Vinegar and 1/4 cup Baking Soda.
  • Benefit: Perfect for getting rid of strong odors or helping with mild athlete’s foot. Vinegar contains acetic acid. This acid is a well-known natural antiseptic. It kills the bacteria and fungus that cause bad smells. The baking soda acts as a neutralizer. It balances the skin’s pH, which fights odor at its source.

The Circulation-Boosting Herbal Soak

Benefit: This variation provides an intense boost for very stiff or swollen ankles. Rosemary is a common kitchen herb known to help increase circulation. Its compounds have a warming effect similar to ginger. The peppermint provides a strong, cooling sensation. This helps numb the feeling of throbbing pain and heaviness.

Swap: Add 2 tablespoons Dried Rosemary and a splash of Peppermint Extract (or a few drops of pure Peppermint Oil mixed with a teaspoon of Olive Oil).

The Softening & Deeply Moisturizing Soak

  • Swap: Use 1 cup Coconut Milk (full-fat) and 1/2 cup Honey instead of the ginger and mint.
  • Benefit: Great for very dry or cracked feet. The rich fat in coconut milk deeply nourishes the skin. Honey is a natural humectant that pulls moisture into the skin and keeps it there.

The Odor-Fighting & Cleansing Soak

  • Swap: Use 1 cup Apple Cider Vinegar and 1/4 cup Baking Soda instead of the ginger and mint.
  • Benefit: Perfect for getting rid of strong foot odors. The acid in the vinegar kills bacteria and fungus. The baking soda is a strong deodorizer that helps correct your skin’s pH balance.

The Purifying & Detoxifying Soak

  • Swap: Use 2-3 Green Tea Bags and the juice of 1 whole Lemon instead of the ginger and mint.
  • Benefit: A light, cleaning soak. Green tea has lots of antioxidants to protect skin. The lemon juice is a mild acid that brightens the skin and gently scrubs it clean. The lemon also leaves a fresh, clean smell.

Storage and Shelf Life

This recipe involves mixing fresh ingredients into water. Because of this, the soak is only good for one time. You must make it and use it right away while the water is warm and the ingredients are strong.

Shelf Life of the Foot Soak

  • Prepared Soak: Throw it away right after you finish. Do not save or reuse the water or the plant parts. They lose their power quickly, and germs can start to grow.
  • Dry Ingredients: Keep the salt, ginger, and mint/tea separate. Store them in closed containers in your pantry or fridge. Follow their normal shelf life to make sure they are fresh for next time.

Frequently Asked Questions

Q: How long should I soak my feet for the best results?

A: Soak for 15 to 20 minutes. Soaking for less time means the ingredients won’t work well. Soaking for too long (over 30 minutes) can actually make your skin dry.

Q: Should I rinse my feet after the soak?

A: It is usually best to give your feet a quick, light rinse with clean water. This is especially true after the odor-fighting soaks. However, after the ultra-nourishing soak, just pat your feet dry. This lets some of the moisturizing oils stay on your skin.

Q: Can this recipe help with cracked heels?

A: The hot water and salt will soften hard skin. But a soak alone is not enough to fix deep cracks. For the best result, use the Softening Soak Variation. Then, immediately use a pumice stone for scrubbing. Finish with a thick cream like coconut oil or shea butter.

Q: Are there any safety precautions I should take?

A: Always test the water with your hand before putting your feet in. This prevents burns. If you have severe diabetes, nerve damage, or open cuts on your feet, talk to your doctor before using any hot water soaks.


References

  1. Healthline6 DIY Foot Soaks to Moisturize, Soothe
  2. Medical News Today6 DIY foot soaks for dry skin
  3. Healthline – 9 Home Remedies Backed by Science

Recent Posts


Why Japandi is the Most Relaxing Design Trend Right Now

A serene Japandi living room featuring a light beige sofa with a knit throw, a low light wood coffee table, and a tall fiddle-leaf fig plant in a white pot. Soft natural light streams in through a large window, highlighting the calming, minimalist design."

Make Your Home a Quiet Place

In our busy, modern world, we all feel rushed. Our homes need to be more than just buildings. We need them to be safe, calm spots. Alerts, calls, and noise fill our days. What we truly want is deep rest. The best style to give us this is Japandi.

Japandi is more than just a passing design look. It is a smart way to live. And it joins the deep ideas of the East with the cozy ideas of the North. It blends the Japanese idea of wabi-sabi. This means loving the beauty in old, simple things. It also uses the Danish idea of hygge. This means focusing on comfort and being happy.

The style looks neat and clean. But it also feels very warm and friendly. Japandi fights the stress of modern life. It creates rooms that help your mind stay clear. And helps you feel close to nature. It gives you a sense of peaceful comfort. This design offers a simple, clear way to have a truly chill-out home.


Clear Your Mind: Japandi’s Simple Rule for Calm

True rest starts with a clear, light mind. Japandi is built to get rid of visual stress. It removes the mess that fills many modern rooms. This careful planning makes the style so helpful for peace.

1. Less Stuff Means Less Worry

Japandi follows one main rule: “less is more.” It does this to help your mental health, not just to look good. The style strictly removes extra items and bright decorations. This quickly stops the small things that stress our brains every day.

  • No Overload: Too many things in a room make your brain work hard. This makes you tired. Japandi uses open, empty space. This is called ma in Japan. It cuts down on how much your brain must process. Doctors say this can help lower your stress hormone levels. You feel a long-lasting sense of peace.
  • Space Means Freedom: Japandi furniture often sits openly. Rooms feel large and bright. This focus on clear space keeps you from feeling closed in. It helps your mind truly rest and recover.

2. Choose Well, Live Better with Japandi Philosophy

In a Japandi home, every item is there for a reason. Nothing is just sitting there.

  • Smart Shopping: You choose things because they work well or look beautiful. Often, they do both. This habit of choosing carefully helps you feel in control. You feel less pressure to buy things all the time. When you own fewer, good items, you spend less time cleaning. You get more energy for things that matter.
  • Easy to Focus: The neat lines and clean surfaces make it easy to pay attention. This helps when you work or read. It also helps when you want to rest. Your mind has fewer things to look at or think about.

Nature Inside: Feel Grounded and Restored

People feel better when they are close to nature. This is called biophilia. Japandi is great at bringing the healing power of the outdoors into your home. This makes your space feel healthy and renewing.

1. Real Materials and Simple Textures

The style uses materials that come straight from the earth. This makes you feel calm and connected.

  • The Comfort of Wood: Japandi uses woods that last. It uses light woods like oak and maple, along with bamboo, cork, linen, and clay. Science shows that seeing and touching these natural items helps lower stress. They help your mood. They look like things found outdoors.
  • The Feel of the Room: Japandi blends the smooth look of Nordic furniture with the rustic feel of Japanese craft. You can see the natural wood grain. You see simple, handmade clay items. This focus on texture stops the room from feeling cold. It makes the space feel very personal and real.

2. Japandi Light and Life

Japandi rooms let in lots of light. They also use living plants very carefully.

  • Light is Everything: The design uses very light curtains, or no curtains at all. This lets in the most natural light. Good light helps your body’s sleep cycle. A good sleep cycle is key for a good mood and deep rest.
  • A Few Good Plants: The style uses only a few plants, chosen for their shape. A small, quiet bonsai tree, a tall snake plant, or a simple fern is common. These plants help your tired mind rest. They make your link to nature stronger.

Balanced Warmth: A Cozy, Clean Feeling

Some simple designs can feel too cold. But Japandi adds the warmth of hygge. This makes sure the space feels cozy and truly comfortable.

1. Perfect Mix: Cozy Meets Neat with Japandi

Japandi’s smart blend is its best feature. It takes the simple, neat look of Japanese design. Then it makes it softer and warmer with Danish hygge.

  • Always Welcoming: This mix means the room never feels cold or too strict. It lets you include items that are old or have small flaws (wabi-sabi). This gives the room character. You feel free to live in the room without worrying about everything being perfect.
  • Enjoy the Moment: By mixing these ideas, Japandi makes you want to slow down. It encourages you to enjoy simple, quiet times. Drink tea. Read a book. Just sit still.

2. Quiet Colors and Soft Layers

The colors and fabrics are all chosen to create a peaceful feeling. They avoid bright colors that would make your mind too active.

  • Calm Hues: Japandi mostly uses soft, earth-like colors. The main colors are warm whites, soft grays, and natural brown woods. You can add darker colors like deep green or charcoal. These nature-based colors create a calm look that helps your body relax.
  • Soft Comfort: The design uses soft, nice-to-touch fabrics. Think about linen bedding, heavy wool blankets, and natural rugs. These layers add comfort. They invite you to sit down and rest.

Japandi: A Plan for a Calm Life

Japandi gives you long-lasting calm. It uses good quality and simple style. It avoids the stress that comes from buying temporary trends.

1. Quality Over Buying New Things

Unlike cheap home items that you replace often, Japandi uses timeless quality and good craft.

  • No Stress Style: Furniture is something you keep for a long time. Pieces are built to last. They are made to stay in style. This removes the stress of needing to buy new things all the time. You buy well once, and then you just relax.
  • Always Simple: The clean lines and soft colors mean a Japandi home will stay peaceful for many years. You can relax in your space without having to change it later.

2. A Philosophy for Living the Japandi way

Japandi is more than just how a room looks. It’s a way of thinking. It asks you to live in a more thoughtful way. By making a beautiful home that truly helps your well-being, Japandi gives you a simple, long-term plan for a happier, very relaxed life. It is the quiet answer to our busy world.


References

  1. Asteroidhealth – The Mental Health Benefits of Minimalism
  2. NIH – Goodbye materialism

Recent Posts


How to Design a Chill Kid Space

Discover the guideline for a happier home by learning how to create a Chill Kid Space a dedicated spot for children to self-regulate, unwind, and process big feelings. This unique zone is designed with soothing colors, gentle lights, and sensory tools to help kids find their calm. Most importantly, it’s essential to remember that this space is a supportive sanctuary, never to be used as a punishment area or for forced time-outs. Give your child the gift of emotional empowerment with their own personal retreat.


Luxurious and fantastical Chill Kid Space designed for calm and comfort. The room features soft, muted pastel walls with a nature mural, a light green textured rug, and multiple floor pillows. Above, the ceiling is painted dark with glowing stars, illuminated clouds, and a large star pendant light. A wooden house-frame canopy bed draped with sheer fabric creates a cozy reading nook in this ultimate children's retreat.

Introduction: Making a Peaceful Chill Kid Space

Life today moves fast. Even children can feel stressed out. School, games, new friends—it all adds up! What if your child had a quiet, special spot just for them? A place where they could slow down and feel better?

This is the idea behind the Chill Kid Space (you can also call it a Calm Corner or Zen Zone). It is a safe place made for kids to handle their feelings and find calm inside. We are not making a sterile “quiet corner.” We are building a vibrant, yet peaceful, area. It’s a comfortable escape from a busy day. It’s a spot where big feelings are okay. This guide will walk you through every step. You will learn how to make this great space in your home.


1. Setting the Scene: Colors and Light for a Chill Kid Space

The look of a Chill Kid Space is the first step to peace. You must use colors and light that tell the brain, “Time to relax!”

The Best Calming Colors

When you pick paint or fabric, stay away from bright, hot colors like red or neon yellow. These colors can make kids hyper. Instead, choose cool, soft colors:

  • Nature Colors: Gentle blues (like the sky), soft greens (like plants), and calm grays are great choices. These colors feel like being outside. They make kids feel safe and stable.
  • Muted Tones: Pale purple, soft pink, and cream are good for walls or big furniture. They help keep the space uncluttered and calm.
  • Keep It Simple: Use your main calm color for most of the space. Then, use a second soft color for chairs or rugs. This keeps the look balanced and easy on the eyes.

Soft and Welcoming Lighting

Bright overhead lights can be harsh and make stress worse. Focus on creating a warm, gentle light instead.

  • Dimmers are Key: If you can, put a dimmer on the main light switch. This is the best way to change the light level based on how your child is feeling.
  • Magical Lights: Use battery-powered fairy lights. Drape them inside a tent or along a shelf. Their soft sparkle is comforting and makes the space feel special.
  • Fun Focus: Add a lava lamp. Its slow, swirling motion is very soothing to watch. A small color-changing LED light that moves slowly through blues and greens is also calming.
  • Soft Daylight: Use thin, sheer curtains. They let in natural light but stop harsh glares. This fills the area with soft, gentle light.

2. Sounds for Stress-Free Moments

Noise can be a big problem for kids who are stressed. A good Chill Kid Space should either block bad noise or play good, calming sounds.

Simple Calming Sound Tools

  • Sound Machines: A good sound machine is a must-have. It can play white noise (a steady sound) to hide distracting household noises. Or, it can play nature sounds like rain or ocean waves, which are steady and relaxing.
  • Quiet Time Helpers: For older kids who need to read or focus, use comfortable noise-canceling headphones. They can listen to soft music, an audiobook, or just enjoy total silence.
  • Mindful Sounds: You can use a gentle chime or a rain stick when your child enters the space. This sound acts like a little signal that says, “Time to breathe deep and relax.” It makes the space feel like a ritual.

Making it Quieter for your Chill Kid Space

Use fabric to soak up extra noise. A thick rug, soft wall hangings, and big cushions help stop echoes. This makes the space feel instantly quieter and safer for a worried child.


3. Sensory Items for Hands-On Relaxation

Touch is a strong way to help kids calm down. When children use their hands with different textures, it helps them focus on the present moment. This helps release restless energy before it turns into a meltdown.

The Best Cozy Textures for a Chill Kid Space

The space should feel soft and inviting to the touch.

  • Heavy Comfort: Use a weighted blanket or a weighted lap pad. The heavy weight feels like a warm, firm hug. This pressure helps turn on the body’s calm response, which is great for anxiety.
  • Super-Soft Things: Fill the space with lots of soft things: a furry rug, a chunky-knit blanket, and velvety plush pillows. These different textures give comfort to their hands and body.
  • The Big Squish: A large beanbag chair or floor cushion is perfect. When kids flop into it, it shapes to their body. This makes them feel safe, held, and secure.

Toys for Busy Hands

Keep a basket of safe, fun toys that help calm energy:

  • Stretching and Squishing: Slime, putty, or play dough are excellent. Kneading and stretching them gives deep input to the hands.
  • Simple Fidgets: Include easy-to-use stress balls, fidget cubes, or pop-its. These toys offer small, repeated movements that help a child focus and feel better.
  • Natural Play: A small tray with kinetic sand or smooth river stones can be used. It is a gentle, quiet way for kids to let out stress by digging and feeling the textures.

4. Comfy Spots to Get Cozy

This is the heart of the Chill Kid Space. It needs a spot that looks so comfy your child is pulled toward it when they feel upset.

Building the Ultimate Corner for a Chill Kid Space

  • The Private Hideout: A teepee tent, a fabric canopy, or a small tunnel gives a child a private, enclosed “cave.” This feels safe and lets them hide away from the busy world.
  • Fun Movement: If you have room, a hanging egg chair or a soft swing is wonderful. The gentle rocking or swinging motion helps the brain organize itself. This can quickly lower anxiety.
  • The Soft Seat: If you have a wide windowsill, add a cushion to make a window seat. Sitting here to look outside is a very peaceful activity.
  • Layer it Up: Always pile on the comfort. Start with a soft rug, add the beanbag or chair, and top it with a blanket and pillows. More layers mean more snuggling options.

5. Fun and Quiet Activities for Mindfulness

The things you put in a Chill Kid Space should be screen-free. They must help the child focus, think quietly, and relax.

Tools for a Quiet Chill Kid Space

  • Reading Time: Keep a basket of your child’s favorite books. Reading is a focused, quiet activity. It gives them an escape into a story.
  • Art for Feelings: A simple art caddy with paper and crayons helps children show how they feel without talking. Coloring books with patterns are great for helping them focus.
  • Breathing Games: Use simple toys to teach deep breathing. A pinwheel that must be gently blown is a fun way to practice slow exhales. A collapsible ball (like a Hoberman Sphere) can be opened and closed to match slow breathing.
  • Simple Tasks: A few simple wooden puzzles or building blocks offer a quiet task. This helps the brain shift its focus away from stress.

6. The Rules of the Space: How to Use the Chill Kid Space

How you use the Chill Kid Space is the most important part. It must be seen as a tool for support, not a place for punishment.

Calling It the “Feel-Better Spot”

  • It is NOT Punishment: This is the most vital rule. The Chill Kid Space must NEVER be used as a “timeout.” If you send your child there as a punishment, it will lose its power to help them feel calm. It must stay a place of comfort.
  • Practice When Calm: Show your child the space when they are already happy. Sit with them. Read a book. Play with the squishy toys. Model how to take a deep breath. They need to know how to use it when they are upset.
  • Teach Them Self-Control: Use positive words. Say, “When your body feels shaky, you can go to your Chill Kid Space,” or “If you are angry, squeeze your stress ball in your Zen Zone.” Let the child choose to use it.
  • No Talking Forced: When the child is in the space, let them be quiet. Don’t push them to talk or explain what happened until they come out feeling calm and ready.

7. Putting It All Together: Designing with Care

The very best Chill Kid Space is one that is easy to use, clean, and loved by your child.

Keeping It Simple and Clean

The key word is minimalist. A calm space must be clutter-free. Only put in the items that truly help them calm down (the blankets, sensory toys, books). Use small boxes or clean shelves to keep everything neat. Too much clutter is visually loud and ruins the peaceful goal of the space.

Let Them Choose

To make sure your child feels good about using their “chill zone,” let them help choose the items. Let them pick the color of the beanbag or the pattern of the blanket. When they feel like the space belongs to them, they will be much more likely to use it as a helpful tool for their feelings.

By mixing soft colors, useful sensory tools, and a supportive plan, you create more than just a room. You create a powerful tool that teaches your child the lasting skill of finding calm.


References


Recent Posts


10 Best Oils & Diffuser To Have In Any Zen Room

If you’re looking to create the perfect Zen room, the right oils and diffuser can work wonders in transforming your space into a peaceful sanctuary. This guide showcases 10 best oils and diffusers to match your vibe, bringing tranquility and aroma to your everyday routine. Let’s get straight into the top picks you’ll love!

Best Oils: Lavender Oil

A serene, softly lit spa scene featuring a bottle of lavender essential oil with a purple label in the center, a bouquet of fresh lavender, several lit white candles, smooth grey river stones stacked and scattered, and a wooden and white essential oil diffuser releasing a stream of mist. The overall color palette is calming purples and soft white. The atmosphere evokes relaxation and aromatherapy. This image is relevant when searching for the Best Oils for relaxation.

Lavender oil is a staple for anyone looking to create a calming atmosphere in their zen room. The image captures the essence of relaxation with a bottle of lavender oil surrounded by soft lighting, candles, and smooth stones. The gentle mist rising from the diffuser adds to the tranquil vibe.

This oil is known for its soothing properties. Just a few drops in a diffuser can help reduce stress and promote better sleep. The soft purple hues in the image reflect the calming nature of lavender, making it a perfect fit for your zen space.

Incorporating lavender oil into your routine is simple. You can use it in a diffuser, mix it with a carrier oil for a massage, or even add it to your bath. It’s one of the 10 best oils to have on hand for creating a peaceful environment.

Roman Chamomile Oil

A bottle of Roman Chamomile oil surrounded by candles and stones, with a diffuser in the background.

Roman Chamomile oil is a fantastic addition to any zen room. This oil is known for its calming properties, making it perfect for relaxation and stress relief. The image shows a bottle of Roman Chamomile oil surrounded by candles and stones, creating a serene atmosphere.

The soft glow of the candles and the gentle steam rising from the diffuser highlight the peaceful vibe that Roman Chamomile brings. This oil is often used in aromatherapy to promote a sense of tranquility. Its sweet, apple-like scent can help soothe the mind and body.

Incorporating Roman Chamomile oil into your zen space can enhance your meditation or yoga practice. Just a few drops in a diffuser can transform your room into a calming sanctuary. It’s one of the top 10 best oils to have for creating a peaceful environment.

Best Oils: Frankincense Oil

A serene zen room with a diffuser emitting mist, surrounded by candles and plants, showcasing frankincense oil.

Frankincense oil is a standout among the 10 best oils for creating a peaceful environment. This oil has a rich history and is known for its calming properties. It’s perfect for meditation and relaxation.

In the image, you can see a beautiful diffuser releasing a gentle mist of frankincense oil. The setup is inviting, with candles and plants that add to the serene vibe. The warm tones and soft lighting make it a great spot for unwinding after a long day.

Using frankincense oil in your diffuser can help clear your mind and enhance your focus. Just a few drops can transform your space into a tranquil retreat. It’s an essential oil that many swear by for its grounding effects.

Whether you’re practicing yoga, meditating, or just enjoying a quiet moment, frankincense oil can elevate your experience. It’s a simple addition that makes a big difference in your zen room.

Best Oils: Bergamot Oil

A diffuser emitting steam surrounded by bottles of bergamot oil and decorative plants.

Bergamot oil is a delightful addition to any zen room. Its fresh, citrusy scent can instantly uplift your mood and create a calming atmosphere. The image showcases a beautiful diffuser surrounded by bottles of bergamot oil, highlighting its importance in aromatherapy.

This oil is known for its ability to reduce stress and anxiety. When diffused, it fills the room with a pleasant aroma that can help you relax after a long day. The gentle mist from the diffuser adds to the soothing experience, making it perfect for meditation or winding down.

Incorporating bergamot oil into your routine is simple. Just add a few drops to your diffuser and let the calming scent envelop you. You can also mix it with other essential oils for a unique blend. It’s one of the top choices among the 10 best oils for creating a peaceful environment.

Vetiver Oil

A serene zen room with a diffuser and vetiver oil bottle surrounded by plants

Vetiver oil is a fantastic addition to any zen room. Its earthy aroma creates a calming atmosphere, perfect for relaxation and mindfulness. The image showcases a serene space filled with lush greenery, a diffuser, and a bottle of vetiver oil, emphasizing the connection between nature and tranquility.

This oil is known for its grounding properties. When diffused, it helps reduce stress and anxiety, making it easier to unwind after a long day. The gentle mist from the diffuser enhances the experience, filling the room with the soothing scent of vetiver.

Incorporating vetiver oil into your routine can be simple. Just add a few drops to your diffuser, and let the calming aroma envelop you. Pair it with soft lighting and comfortable seating to create a perfect spot for meditation or relaxation. It’s one of the top picks in our list of 10 Best Oils for a peaceful environment.

Ultrasonic Diffuser With Auto Shut-Off

An ultrasonic diffuser with essential oils on a table surrounded by bamboo plants.

An ultrasonic diffuser is a fantastic addition to any zen room. The image shows a sleek diffuser surrounded by essential oils, ready to create a calming atmosphere. This type of diffuser uses water and essential oils to produce a fine mist, filling the space with delightful scents.

One of the standout features of this diffuser is its auto shut-off function. This means you can relax without worrying about turning it off. Once the water runs out, it automatically stops working, making it safe and convenient.

Pairing your diffuser with the right essential oils is key. Consider using some of the 10 best oils for relaxation, like lavender or eucalyptus. These oils can enhance your experience and help you unwind after a long day.

Overall, an ultrasonic diffuser with auto shut-off is not just functional; it adds a touch of elegance to your space. It’s a simple way to elevate your zen room and promote a peaceful environment.

Nebulizing Diffuser (Waterless)

A sleek nebulizing diffuser with essential oil bottles on a wooden table surrounded by green leaves.

Nebulizing diffusers are a fantastic addition to any zen room. They work without water, using only essential oils to create a fine mist. This method preserves the integrity of the oils, allowing you to enjoy their full benefits. The image shows a sleek nebulizing diffuser surrounded by essential oil bottles, highlighting its modern design and functionality.

These diffusers are perfect for those who want to fill their space with the pure aroma of their favorite scents. Unlike traditional diffusers, nebulizing diffusers don’t dilute the oils, making them a popular choice for aromatherapy enthusiasts. With just a few drops of your preferred essential oil, you can transform your room into a calming sanctuary.

When looking for the 10 best oils to use with your nebulizing diffuser, consider options like lavender for relaxation, eucalyptus for clarity, and citrus oils for an uplifting atmosphere. Each oil brings its unique properties, enhancing your zen experience.

Quiet Operation (Low Noise Level)

A serene zen room featuring a diffuser, candles, and plants, emphasizing quiet operation.

When creating a peaceful zen room, quiet operation is key. The image shows a sleek diffuser surrounded by soft lighting and candles, setting the perfect mood. A low noise level from your diffuser allows you to focus on relaxation without distractions.

Many of the 10 best oils work wonderfully with diffusers that operate quietly. This means you can enjoy the soothing scents of lavender or eucalyptus while meditating or practicing yoga. The gentle mist rising from the diffuser enhances the calming atmosphere without interrupting your peace.

Choosing a diffuser that emphasizes quiet operation ensures that your zen space remains a sanctuary. You can unwind, read, or simply enjoy the moment without the hum of machinery. This makes it easier to connect with yourself and your surroundings, creating a truly serene environment.

Adjustable Timer And Mist Settings

A stylish diffuser emitting mist, surrounded by candles and plants, creating a calming atmosphere.

When creating a peaceful space, an essential feature to look for in a diffuser is adjustable timer and mist settings. This allows you to customize your experience based on your needs. Whether you want a gentle mist for a short period or a longer session, having control makes a difference.

The image shows a stylish diffuser surrounded by candles and plants, creating a serene atmosphere. The soft glow of the diffuser adds to the calming vibe. With adjustable settings, you can set the mist to run continuously or intermittently, depending on how much fragrance you desire.

Incorporating the right oils can enhance your experience. From the 10 best oils to choose from, each offers unique benefits. Lavender for relaxation, eucalyptus for clarity, or citrus for energy—there’s an oil for every mood. This flexibility in mist settings ensures that your zen room remains a personal retreat, tailored just for you.

Ambient/Soft Led Lighting (With Off Switch)

A cozy zen room with soft LED lighting, plants, and a comfortable chair.

Creating a zen room is all about setting the right mood, and ambient lighting plays a huge role in that. The image showcases soft LED lights that add a warm glow to the space. These lights can transform any room into a peaceful retreat.

The gentle illumination from the LED lights complements the natural elements around, like the plants and stones. This combination helps in fostering a calming environment, perfect for relaxation or meditation. Plus, having an off switch makes it easy to control the lighting based on your needs.

Incorporating these lights with the right oils from the ’10 Best Oils’ list can enhance your zen experience even more. Imagine the soothing scents of lavender or eucalyptus filling the air while you unwind in this serene setting.


References


Recent Posts


An Easy Guide For Lights In your Zen Room

A tranquil Zen room interior featuring soft, warm lights from recessed ceiling fixtures, a tall floor lamp, and a glowing Himalayan salt lamp on a natural wood shelf. The room has light green walls, a light wood floor, and large windows covered with sheer, light-colored curtains, letting in diffused natural lights. Several small bonsai trees and smooth river stones are placed around a central round straw mat with a meditation cushion.

The modern world moves too fast. We all need a quiet spot at home. This private, calm space is a “Zen room.” It is not a luxury. It is a real need for your mental health. The Zen room is based on a simple idea. It aims for peace, quiet, and harmony with nature. This room should be clean. It must help you with your daily practices. These practices include quiet thought, meditation, and gentle yoga. In this space, the noise from outside fades. You can center yourself and find your peace. The right choice of lights is key to making this quiet space work well.

Every item you choose for a Zen room matters. Lighting is the most important element. People often forget about it. They focus on simple furniture and calm colors. They look for natural things like stone or bamboo. But the light in the room sets the mood. It affects your energy. Light that is harsh, bright, or too cool can cause stress. It makes it hard to relax. This type of light quickly ruins the calm mood you want.

Illuminating Your Sanctuary for Serenity and Mindfulness

The right lights work like a gentle hand. They help your mind relax deeply. Good light feels like a soft sunset. It is like the spread of light on a cloudy morning. This soft glow makes you feel safe and warm. You do not need complex fixtures to get this light. You only need to know a few simple rules. These rules honor the Zen focus on nature and simplicity.

If you struggle to calm your mind, look at your lighting. If you feel restless when you sit quietly, your lights may be the problem. You can change your practice a lot by simply adjusting the light. Change the color, type, and place of your light. You can easily turn your space into a peaceful oasis. This guide gives you a simple plan. You can use it to choose the best lighting. It will help you create a truly calm Zen room.

We will look at all the key parts. And will cover the color that brings calm. We will show you the simple way to layer your lighting. This layering adds depth and peace. Get ready to light up your special place. You can welcome a new sense of peace into your home right now.


The Core Rules for Zen Lights

The lights in a Zen room should match the main ideas of Zen. These ideas are simple, natural, and balanced. Your goal is to get rid of visual clutter. You must also remove harsh light. Aim for a gentle, steady flow of light.

Choose a Soft, Warm Glow

The color of the light is the first and most vital choice. This color is called the color temperature. We measure it in Kelvin (K).

  • Warm Color is Best: Choose a warm, soft white light. Look for a color between 2,700K and 3,000K. This light looks like a candle flame. It is also like the gentle light of the sun when it rises or sets. This warm color helps you feel cozy and calm. It is perfect for relaxing and getting ready to meditate.
  • Avoid Cool Tones: Do not use light that is harsh or blue-toned. Avoid anything above 4,000K. These colors wake you up. They are better for work areas, like an office or kitchen. They do not work well in a room where you want to feel peaceful.

Let Natural Lights Enter and Soften It

Natural light is very important in Zen design. It is the best source of good energy, or Qi. Natural light connects you to the outdoors. It makes you feel good.

  • Keep Windows Clear: Use a room with many windows if you can. Use light, sheer curtains. You can also use screens made of rice paper. These items soften bright sunlight. They let light in but hide the harsh edge.
  • The Power of Softness: Direct, bright sun can be a shock. It is just like a bad electric light. Use sheer fabrics or light blinds to fix this. They turn a bright beam into a soft, spread-out light. This light fills the room with a gentle glow. Soft light removes sharp shadows. It is easy on your eyes. This makes it simple to focus inward during quiet time.

Make Light Layers: The Three Simple Parts of Your Zen Lights

A Zen room should not depend on just one ceiling light. The secret to a perfectly calm room is layered lights. This means you mix three kinds of light. You need ambient, task, and accent light. This mix makes the room look deep and peaceful. It gives you control over the mood.

1. Ambient Lights: The Gentle Base

Ambient light is the soft, general light that fills your room. It creates the base for your calm space.

  • Use Indirect Light: The best Zen ambient light is indirect light. This means the light fixture points at a wall or the ceiling. The light bounces off the surface. This reflected light softly lights the room. It keeps the light out of your eyes.
  • Good Fixtures to Use:
    • Wall Sconces: These lights shine up or down the wall. This creates a soft wash of light. It is great for a quiet mood.
    • Shoji-Style Lamps: These lamps look like Japanese lanterns. They have shades made of rice paper or fabric. And they spread light gently and evenly. They fill the space with a soft, calm glow.
    • Dimmable Main Lights: If you need a light on the ceiling, choose a simple one. Be sure it has a dimmer switch. You can turn down the brightness when you are relaxing.

2. Task Lights: Light for What You Do

Your Zen room is for quiet time. But you may want to read, write, or do focused meditation. Task lighting shines a focused beam on a small area. It helps you see without breaking the calm mood.

  • Keep it Subtle: Place task lights to light up a small spot. This might be a reading spot or a small altar. The light must be set to a low power.
  • Good Fixtures to Use:
    • Simple Floor Lamps: Get a floor lamp with a plain shade. Use natural things like linen or paper for the shade. Place it next to a chair.
    • Small Table Lamps: Use a small table lamp with a solid shade. This lamp will send a soft light down. It gives you enough light for your task. It will not cause any distractions.

3. Accent Lights: The Quiet Touches

Accent lighting adds the final peaceful detail. These small lights create a deeper mood. They help you feel grounded and focused.

  • Salt Lamps: These lamps give off a warm, amber light. This glow feels very comforting. Place one on a small table or shelf. It adds an earth-like, soft feeling to your light plan.
  • Candles and Fake Candles: The small, moving light of a candle helps you meditate. Use real, non-scented candles for a natural light. Or, use safe, high-quality LED candles. Place these near your main focus area. They create small areas of soft, moving light.
  • Natural Stone Lights: Find small lights that use natural stone. Things like selenite or amethyst work well. They add a soft, special light. This light reminds you of the natural world, which is key to Zen.

Choose Zen-Inspired Lighting Fixtures and Simple Materials

Your lighting fixtures must look simple. They should follow the Zen ideas of nature and minimalism. The fixture itself should be plain and useful. Do not use decorations that are too showy or flashy.

Natural Things are Best

Choose materials that remind you of the outside world.

  • Wood and Bamboo: These things bring a natural, down-to-earth feel to the room. Use a lamp base made of plain wood. A woven bamboo shade for a hanging light works well. This choice connects your room to nature.
  • Paper and Fabric: Shades made of rice paper, linen, or cotton are great. They soften light perfectly. And prevent harsh glare. They add a soft, pleasant feel to the room.
  • Quiet Colors: The color of the light and shade must be simple. Stick to calm colors like white, cream, beige, or light grey.

Shapes Should Feel Right

Zen design uses shapes to create harmony. Avoid sharp angles. Sharp corners can create harsh energy in Feng Shui.

  • Soft and Curved Shapes: Choose fixtures with soft, round, or natural shapes. This helps positive energy flow better. Look for curved floor lamps or simple, round hanging lights. Choose lamps with clean, smooth lines.
  • Clean and Clear: The fixture must have simple lines. It should not look messy. The light should be a subtle part of the design. It should not be the main, big decoration in the room.

Smart Options for Total Quiet

Today’s technology offers good tools to get the perfect Zen light. These tools help you without adding clutter. Smart lighting gives you control. It helps you set a peaceful mood quickly.

Dimming and Automatic Control

  • Dimmer Switches are Key: This simple change is vital for your Zen room. Dimmers let you control the light. You can make the room brighter for morning stretching. Then, you can dim the lights way down for quiet evening meditation.
  • Smart Systems: You can buy smart bulbs or a control system. These let you change the brightness and color with your voice or phone. You can set “scenes.” For example, a “Meditation” scene sets all lights to a very warm 2,700K. It sets the power to 10%. A “Reading” scene turns up one task lamp. This gives you easy control with a simple design.

Lights to Match Your Activity

You should change your lights based on what you are doing. The goal is always to help your natural rhythm. Use light to support your mental state.

Morning Practice (Active Time)

If you use your Zen room in the morning, use a bit brighter light. But keep it warm. This helps your body wake up gently.

  • Settings: Use natural light a lot. Add your ambient lights. Set them to a medium level, about 50-70% bright. Keep the color warm (2,700K–3,000K).
  • Goal: You want to feel active and ready. The light should be soft, not shocking.

Evening Practice (Quiet Time)

In the evening, the light must be very dim. It should be only warm tones. This tells your body to relax and get ready for sleep. This is your “wind-down” light.

  • Settings: Turn off all the main overhead lights. Use only accent lighting. This means salt lamps or candles. Set these low lights to the lowest power (10-20%). The color must be the warmest possible.
  • Goal: Help your body make sleep hormones. Create a deep, quiet calm.

Fix Your Zen Lights

Even with good plans, you can make small mistakes. These mistakes can stop the calm feeling.

ProblemSymptomZen Lighting Fix
Harsh GlareYou keep blinking or close your eyes often.Use dimmer switches. Change clear bulbs to frosted ones. Use shades made of natural, soft materials like paper or linen.
Cold FeelThe room feels clinical or like an office.Check your bulb color. It must be in the 2,700K–3,000K range. Replace any bulbs that are 4,000K or higher.
Flat LookThe room has light everywhere but looks dull.Use layered lights. Turn off the main light. Use a mix of floor, table, and accent lamps. This creates soft shadows and light areas.

Frequently Asked Questions (FAQs)

Q1: Is it okay to use colored lights in a Zen room?

A: Yes, but you must use them carefully. The main Zen light is soft, warm white. But you can use certain colored lights to help meditation. For example, a soft blue or green light helps you feel calm. It reminds you of nature. This fits the Zen look well. Red or amber light helps you feel grounded. If you use color, keep it low and dim. Use it as a subtle touch. Do not make it the main light source. Do not use bright, shocking colors like neon.

Q2: Should I put a single overhead light in my Zen room?

A: It is best not to. Only one overhead light can be harsh. It creates sharp shadows. This can create “pressurized” energy, which is bad for relaxing. A Zen room needs layered lights. Use a mix of main, task, and accent sources. This mix creates a soft, even, and dynamic glow. If you must use a light on the ceiling, make sure it is simple. It must be dimmable. Also, use a soft cover or shade. This helps to spread the light gently.


Final Thoughts

The right lights are like a quiet friend in your search for peace. They are more than just tools. They are a main part of Zen living. As they help to calm your senses and clear your mind. Use the rules we shared. Keep the color warm and soft. Let natural light in, but diffuse it.

Use layers of light sources. When you do this, you can turn any place into a peaceful sanctuary. This soft light helps your simple decor look good. It helps your mind go deeper into quiet thought. Take action today. Look at the light in your quiet space. Remove any harsh, cool bulbs. Put in a dimmer switch. Add a beautiful salt lamp. These easy changes will bring a deep new sense of peace to your Zen room.


References


    Recent Posts