Cookie Consent by Free Privacy Policy Generator Update cookies preferences

10 Homemade Healthy Takeaways You’ll Love

Craving takeout but want to keep it healthy? You’re in luck! Here are 10 delicious homemade healthy takeaways you can whip up in your kitchen. Each recipe is simple, satisfying, and perfect for those days when you want a tasty meal without the guilt. Get ready to enjoy flavorful plates that you’ll actually feel good about!


Healthy Takeaways: Fish And Chips

A bright and appetizing plate of healthy takeaways is displayed on a rustic wooden table. The dish features two fillets of lightly seasoned, pan-fried white fish, garnished with fresh herbs. They are served alongside a generous portion of vibrant orange sweet potato fries. A small white ramekin holds a creamy dipping sauce, and fresh lemon wedges are ready for squeezing.

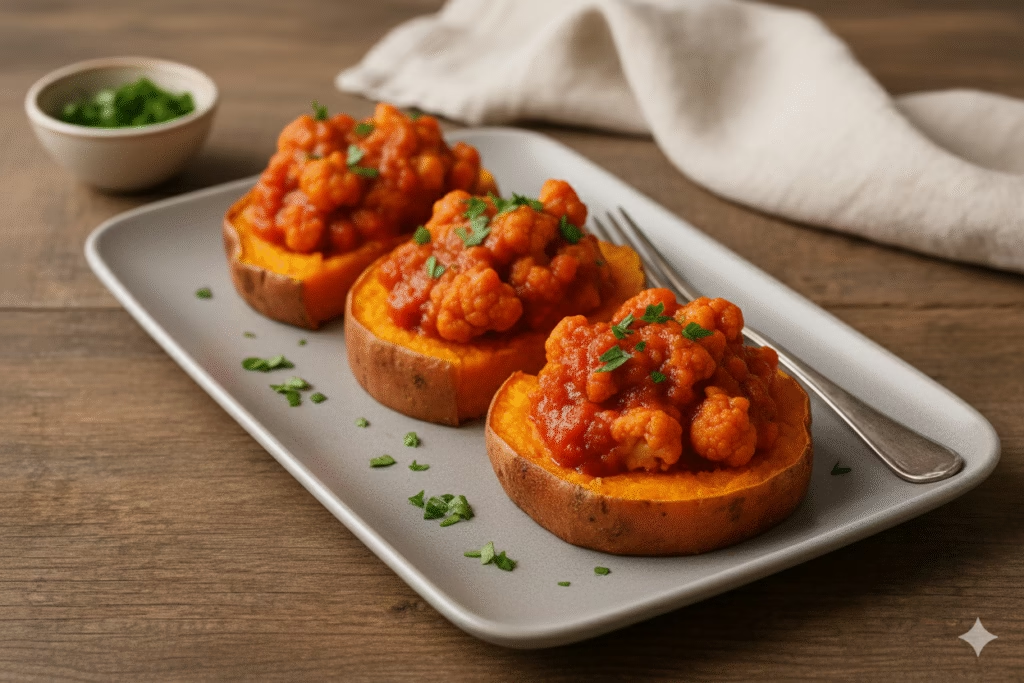
Fish and chips can be a delightful meal, and making a healthy version at home is easier than you think! This dish features perfectly cooked fish paired with sweet potato fries, offering a nutritious twist on a classic favorite.

The image shows a plate of golden-brown fish fillets, lightly seasoned and garnished with fresh herbs. Alongside, you’ll find vibrant sweet potato fries that add a pop of color and flavor. A small bowl of creamy dip sits nearby, perfect for adding a bit of zest to each bite.


Chicken Or Paneer Kebabs

A plate of grilled chicken and paneer kebabs with colorful vegetables and a mint yogurt dip.

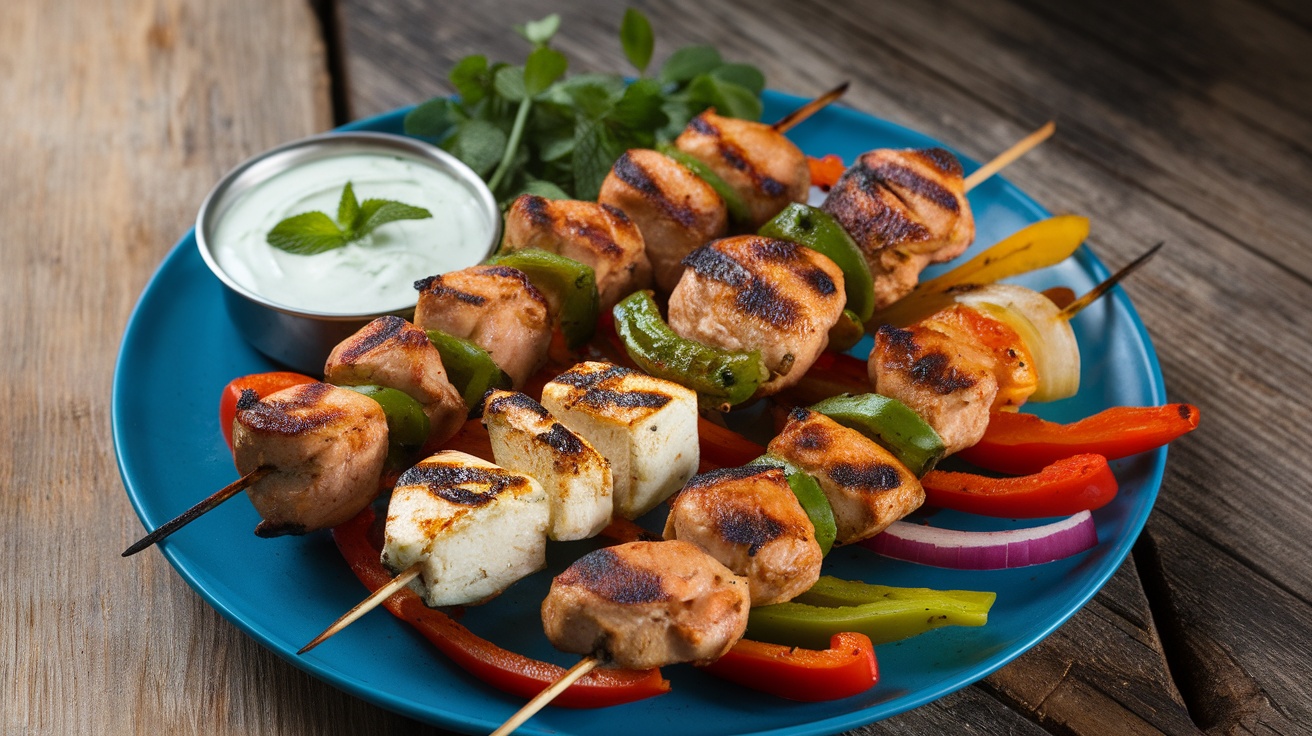
Chicken or paneer kebabs are a fantastic choice for healthy takeaways. They are colorful, flavorful, and packed with nutrition. The image shows skewers of perfectly grilled chicken and paneer, interspersed with vibrant bell peppers and onions. A refreshing mint yogurt dip sits alongside, ready to complement each bite.

Making these kebabs at home is simple. For chicken kebabs, you’ll need boneless chicken pieces, bell peppers, onions, and spices like cumin, coriander, and paprika. For paneer kebabs, swap chicken for paneer cubes and add your favorite veggies. Marinate everything for at least 30 minutes to let the flavors meld.

To cook, thread the marinated ingredients onto skewers and grill them until they are golden brown. Serve with the mint yogurt dip for a delicious and healthy meal. These kebabs are perfect for a quick dinner or a fun gathering with friends.


Healthy Takeaways: Chinese Chicken Curry

A bowl of Chinese Chicken Curry with rice and colorful bell peppers, garnished with cilantro.

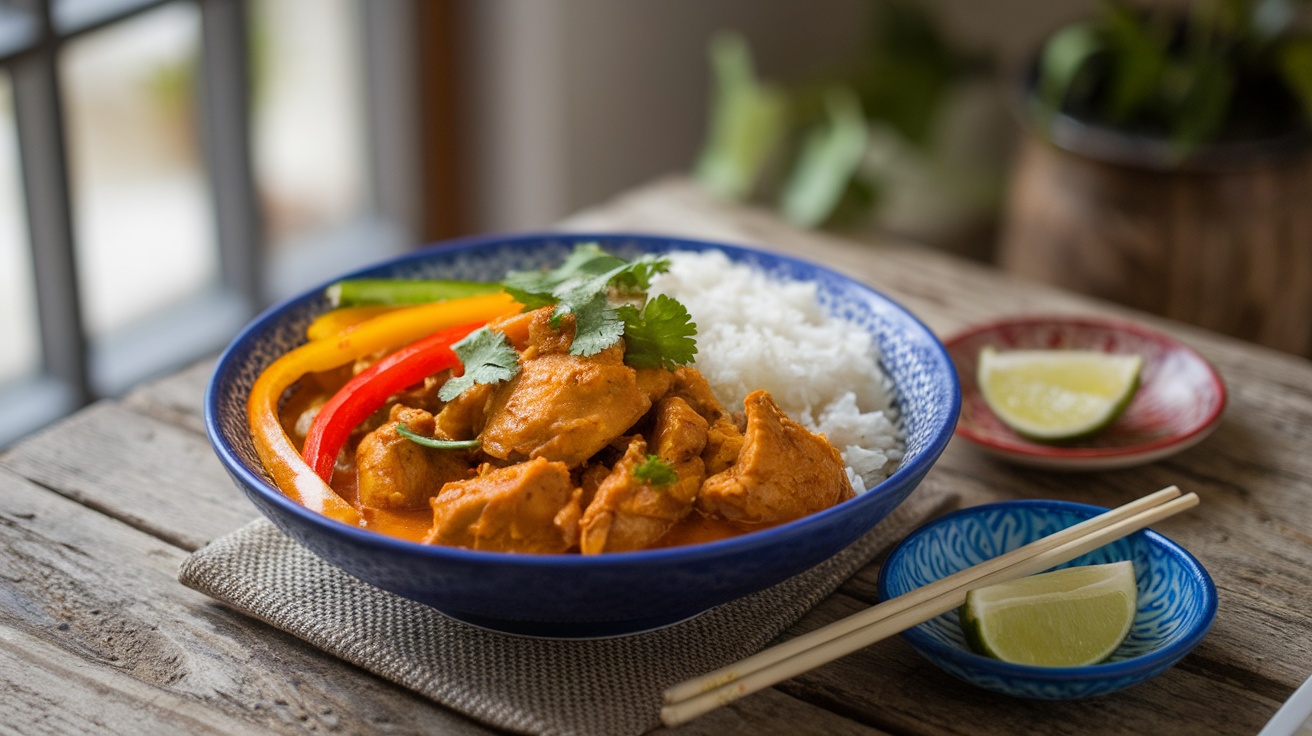
Chinese Chicken Curry is a delightful dish that brings a burst of flavor to your table. This recipe combines tender chicken pieces with vibrant vegetables, all enveloped in a rich, aromatic curry sauce. Served over fluffy rice, it’s a meal that feels comforting and satisfying.

To make this healthy takeaway at home, you’ll need some simple ingredients. Gather chicken breast, bell peppers, onion, garlic, ginger, curry powder, coconut milk, and a splash of soy sauce. These ingredients come together to create a dish that’s not just tasty but also packed with nutrients.

Start by sautéing the garlic and ginger in a pan until fragrant. Add the chicken and cook until browned. Toss in the bell peppers and onion, then sprinkle the curry powder. Pour in the coconut milk and soy sauce, letting it simmer until everything is cooked through. Serve it hot over a bed of rice, and don’t forget to garnish with fresh cilantro for that extra touch!


Healthy Takeaways: Egg Fried Rice

A bowl of healthy egg fried rice with vegetables and green onions on a wooden table.

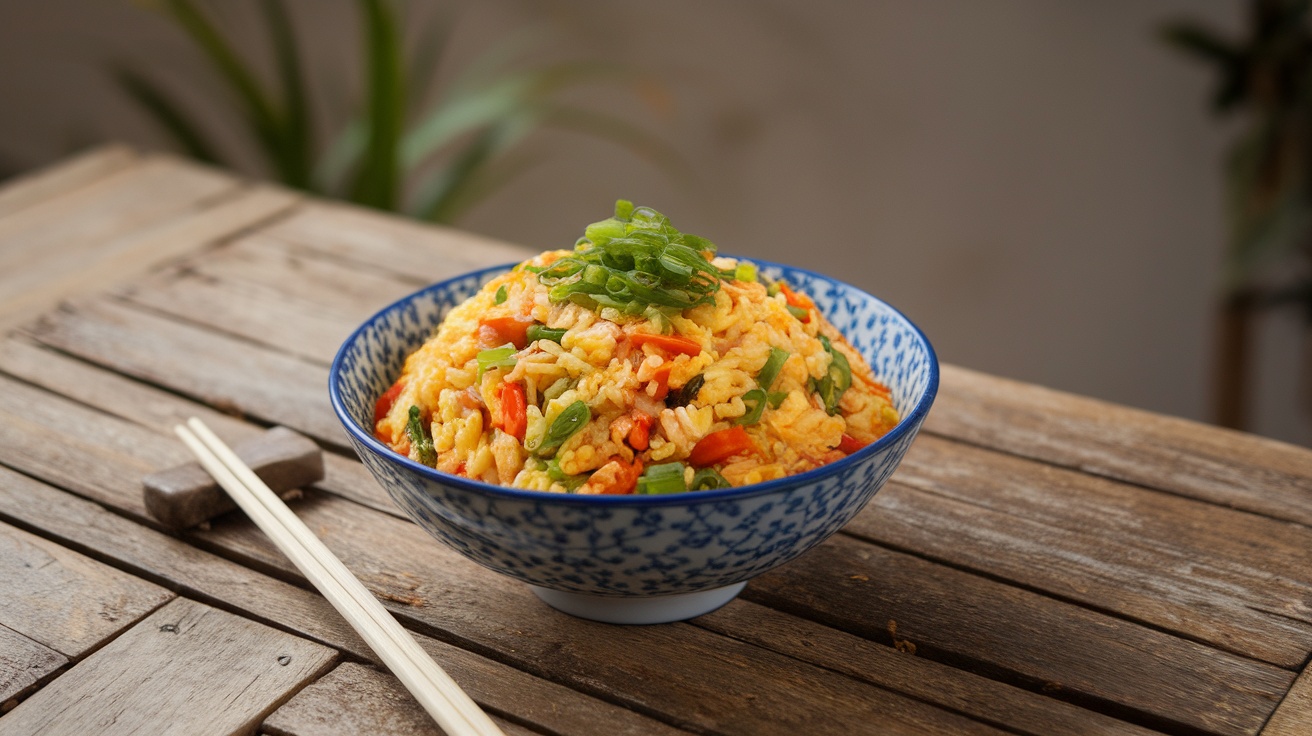
Healthy Egg Fried Rice is a delightful dish that combines the goodness of eggs and vegetables with fluffy rice. This meal is not only tasty but also packed with nutrients, making it a perfect choice for those seeking healthy takeaways.

The image shows a vibrant bowl of egg fried rice, topped with fresh green onions. The colorful mix of ingredients makes it visually appealing and appetizing. It’s a great way to use leftover rice and veggies, turning them into a quick and satisfying meal.

Here’s how to make your own Healthy Egg Fried Rice:

Ingredients

  • 2 cups cooked brown rice
  • 2 eggs
  • 1 cup mixed vegetables (like peas, carrots, and bell peppers)
  • 2 green onions, chopped
  • 2 tablespoons soy sauce
  • 1 tablespoon olive oil
  • Salt and pepper to taste

Steps

  1. Heat olive oil in a pan over medium heat.
  2. Add the mixed vegetables and sauté for about 3-4 minutes until tender.
  3. Push the veggies to one side of the pan and crack the eggs on the other side. Scramble them until fully cooked.
  4. Add the cooked rice, soy sauce, salt, and pepper. Stir everything together until well combined.
  5. Top with chopped green onions before serving.

This Healthy Egg Fried Rice is quick to prepare and makes for a delicious meal any time of the day. Enjoy this tasty dish as a healthy takeaway option!


Healthy Takeaways: Sweet And Sour Chicken

A plate of sweet and sour chicken with colorful bell peppers, pineapple, broccoli, and rice.

Sweet and sour chicken is a classic dish that brings a delightful mix of flavors to your table. This version is healthy, making it a perfect choice for those looking for tasty homemade healthy takeaways.

The vibrant colors in the dish are eye-catching. You can see tender chicken pieces coated in a glossy sweet and sour sauce, surrounded by fresh bell peppers and pineapple chunks. The addition of broccoli adds a nice crunch and a pop of green, making the plate not just delicious but also visually appealing.

To make this dish, you’ll need chicken breast, bell peppers, pineapple, broccoli, and a simple sauce made from vinegar, sugar, and soy sauce. Cooking it at home means you can control the ingredients and make it healthier than takeout.


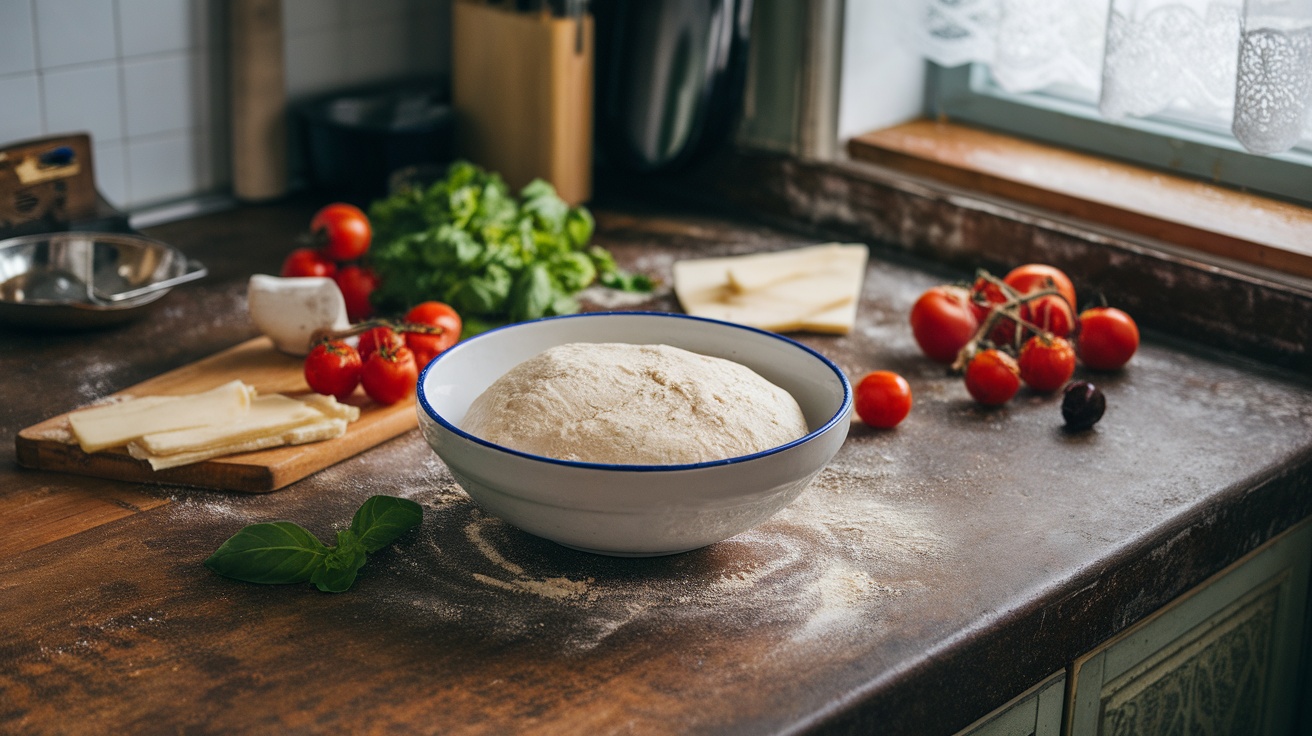
Healthy Takeaways: Homemade Pizza

A homemade pizza topped with fresh vegetables and herbs on a wooden table.

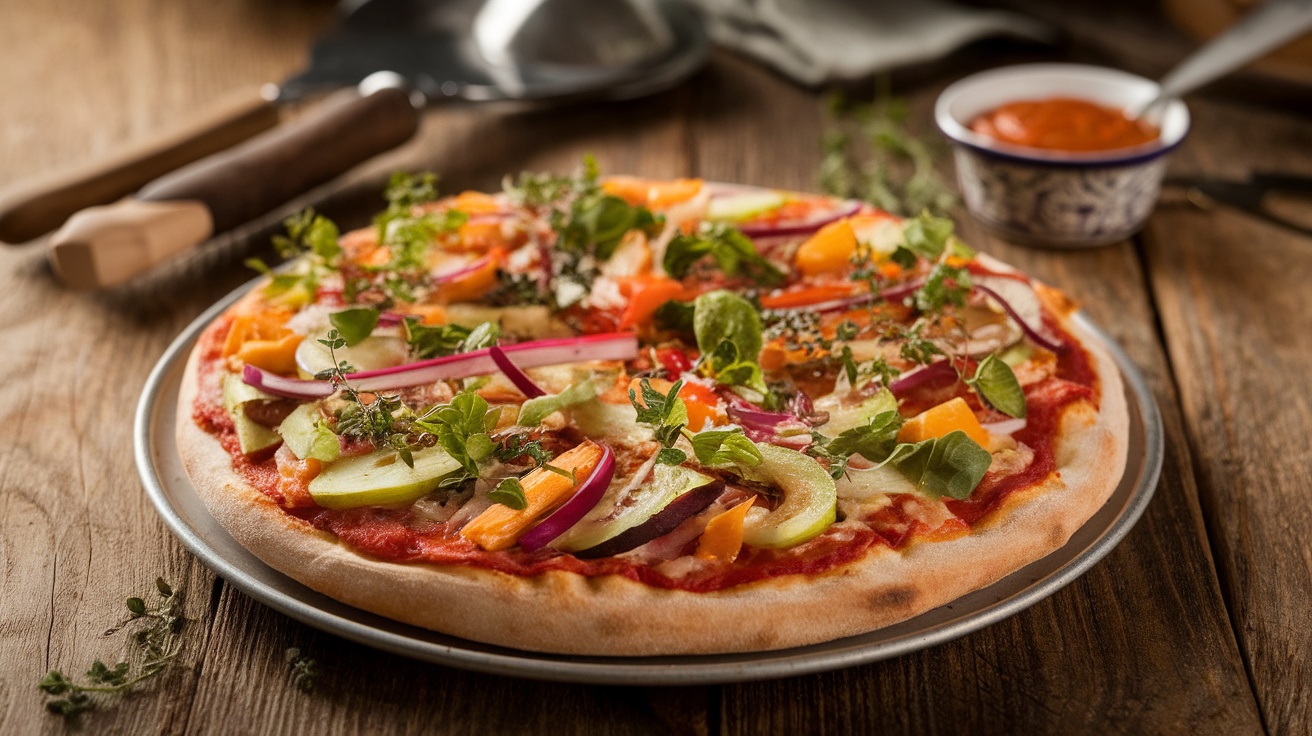
Homemade pizza is a fun and healthy takeaway option that you can easily whip up in your kitchen. The image showcases a vibrant pizza topped with fresh vegetables, making it not just tasty but also nutritious. This is a perfect way to enjoy a classic favorite while keeping it healthy.

To make your own delicious pizza, you’ll need some simple ingredients. Start with a pizza base, which can be store-bought or homemade. For the toppings, gather your favorite vegetables like bell peppers, onions, and leafy greens. Don’t forget the tomato sauce and cheese!

Here’s a quick recipe to get you started:

Preparation (10 Minutes)

  1. Preheat the Oven: Place a pizza stone or baking sheet in the oven and preheat to the highest temperature your oven allows, typically 475∘F to 500∘F (245∘C to 260∘C). Allowing the stone/sheet to heat up ensures a crispier crust.
  2. Prepare the Base: Lightly dust a flat surface (or a piece of parchment paper) with flour or cornmeal. Roll or stretch your pizza dough (store-bought or homemade) into your desired thickness and shape. If using a parchment paper, the transfer to the oven will be easier.
  3. Prepare Toppings: Slice or chop all your favorite vegetables (bell peppers, onions, mushrooms, etc.). If using any meats, ensure they are cooked beforehand.

Assembly (5 Minutes)

  1. Sauce the Base: Spread a thin, even layer of tomato sauce (or pizza sauce) over the dough, leaving about a $1/2$ to 1-inch border for the crust. Avoid oversaucing, as this can make the crust soggy.
  2. Add Cheese: Sprinkle about half of your desired cheese (mozzarella is classic) over the sauce.
  3. Layer Toppings: Distribute your prepared vegetables and other toppings evenly across the pizza. Remember, less is often more! Overloading the pizza can lead to an undercooked center.
  4. Top with Cheese: Sprinkle the remaining cheese over the toppings.

Baking (8–15 Minutes)

  1. Transfer to Oven: Carefully slide the pizza (either directly onto the preheated stone/sheet or using the parchment paper) into the hot oven.
  2. Bake: Bake for 8 to 15 minutes. The exact time will depend on your oven temperature and the thickness of your crust.
  3. Check for Doneness: The pizza is done when the crust is golden brown and the cheese is melted, bubbly, and slightly browned in spots.
  4. Cool and Serve: Use a pizza peel or large spatula to remove the pizza from the oven. Let it cool on a cutting board for 2–3 minutes before slicing.

Enjoy your fantastic homemade pizza!


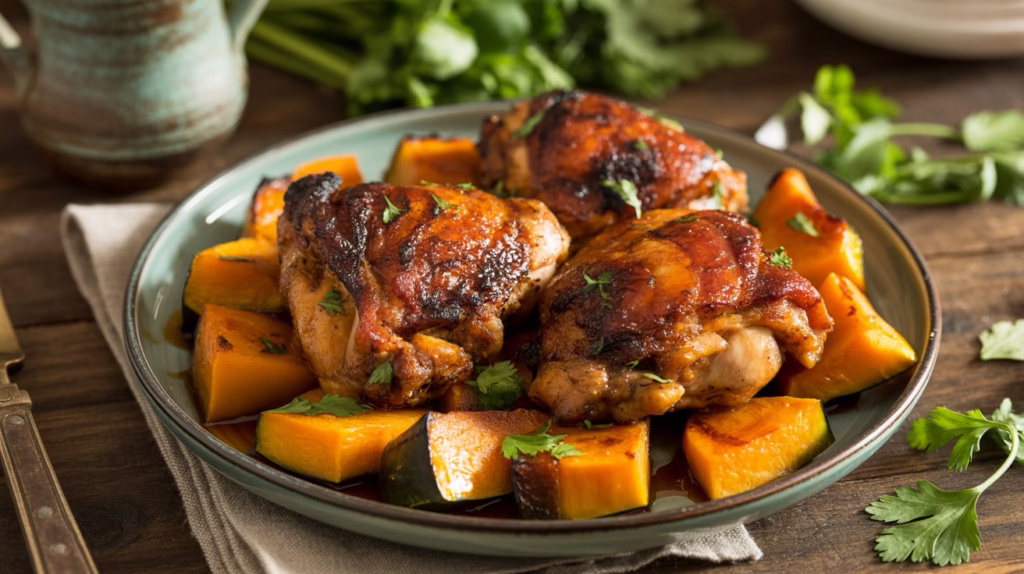
Oven-Baked Crispy “Fried” Chicken

A platter of golden-brown oven-baked crispy chicken with a slice of lemon and fresh vegetables.

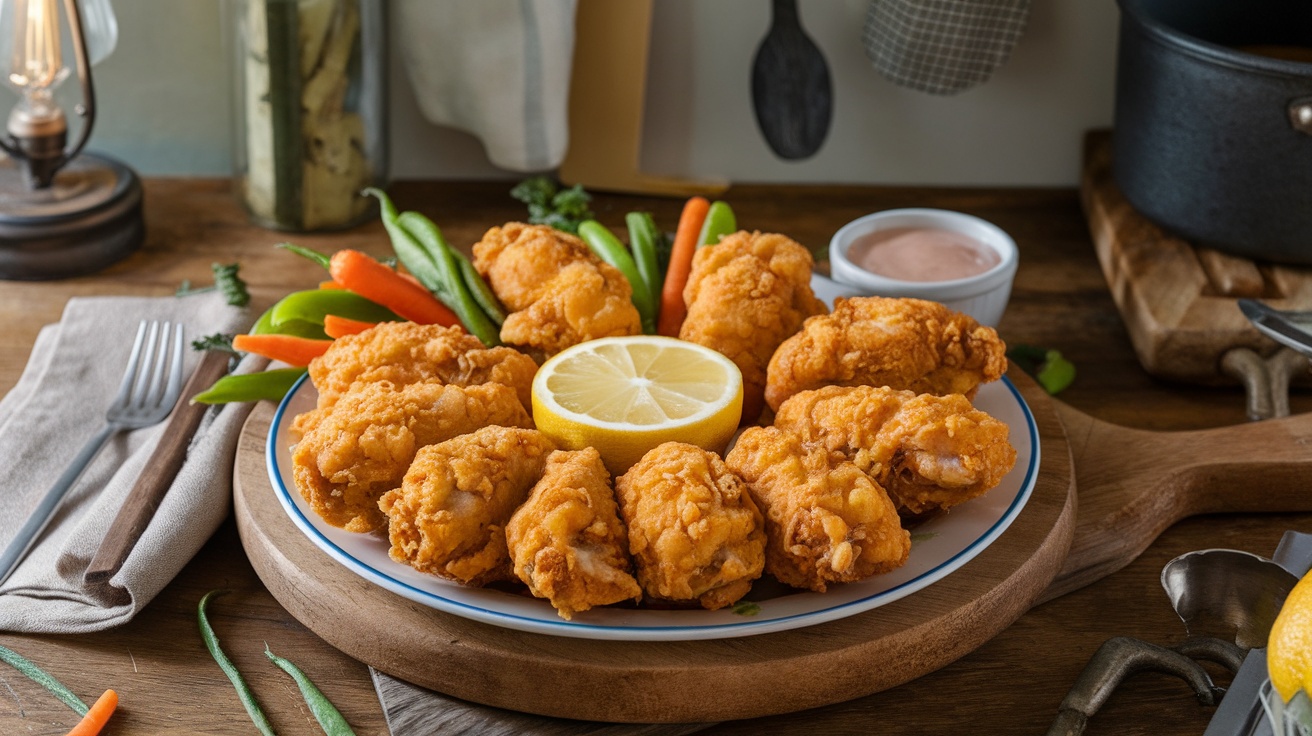
Oven-baked crispy ‘fried’ chicken is a fantastic option for those craving a classic comfort food without the guilt. This dish looks golden and crispy, just like traditional fried chicken, but it’s made healthier by baking instead of frying. The chicken pieces are perfectly arranged on a wooden platter, surrounded by fresh vegetables like carrots and green beans, adding a pop of color and nutrition.

To make this delicious meal, you’ll need some simple ingredients. Gather chicken pieces, breadcrumbs, your favorite spices, and a bit of olive oil. Start by preheating your oven to 400°F (200°C). Coat the chicken in a mix of breadcrumbs and spices, then place them on a baking sheet. Drizzle with olive oil for that extra crunch. Bake for about 30-40 minutes until golden brown and cooked through.

This oven-baked version keeps all the flavors you love while being a healthier takeaway option. Serve it with a side of dipping sauce and enjoy a meal that feels indulgent but is packed with wholesome goodness. Healthy takeaways like this one make it easy to enjoy your favorites without compromising on health!

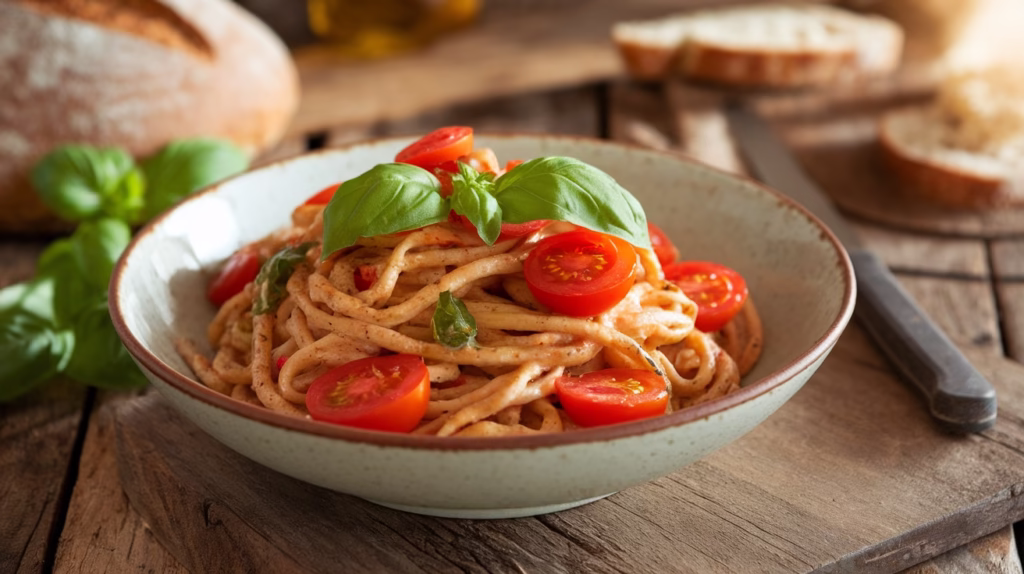
Healthy Takeaways: Homemade Pad Thai

A plate of homemade Pad Thai with shrimp, colorful vegetables, and lime wedges.

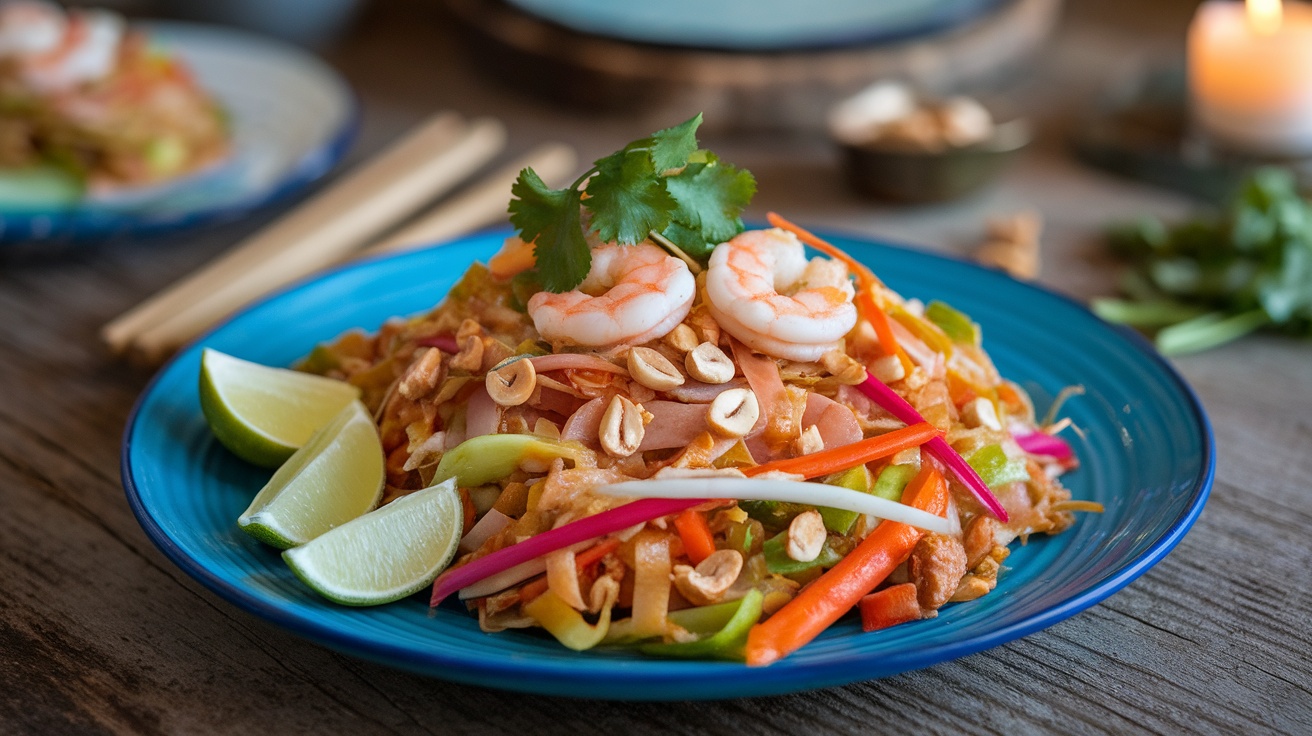
Pad Thai is a classic dish that brings the flavors of Thailand right to your kitchen. This vibrant plate showcases colorful veggies, shrimp, and a delicious sauce that ties everything together. The fresh lime and cilantro on top add a nice touch, making it not just tasty but also visually appealing.

Making your own Pad Thai is a great way to enjoy a healthy takeaway at home. You can control the ingredients and make it as nutritious as you like. Plus, it’s super quick to whip up!

Here’s how to make your own Homemade Pad Thai:

Prep the Ingredients (15 Minutes)

  1. Soak the Noodles: Place 8 oz dried flat rice noodles (Pad Thai style, about 1/4 to 1/2 inch wide) in a large bowl. Cover them completely with very hot tap water. Let them soak for about 15–20 minutes until they are pliable, but still firm and not soft. They should be just past al dente. Drain them immediately and set aside. Note: They will finish cooking in the wok.
  2. Prepare the Sauce: In a small bowl, whisk together the Pad Thai sauce ingredients (e.g., 1/4 cup tamarind concentrate, 3 Tbsp fish sauce, 3 Tbsp sugar, 1/2 tsp chili flakes). Taste and adjust to your preference—it should be a balance of sweet, sour, and salty.
  3. Mise en Place: Chop all your vegetables and proteins (shrimp, tofu, chicken, etc.) so everything is ready to go. The cooking process is very fast!

Cook the Pad Thai (10–12 Minutes)

  1. Sauté the Protein: Heat 2 Tbsp oil in a wok or a very large skillet over high heat. Add your chosen protein (e.g., 1 cup sliced chicken or 8 oz shrimp). Stir-fry for 2–3 minutes until the protein is nearly cooked through. Remove the protein from the wok and set it aside.
  2. Cook the Aromatics: Add another 1 Tbsp oil to the wok, if needed. Add 2 minced garlic cloves and 1/2 cup cubed firm tofu (if using) and stir-fry for 1 minute until fragrant and lightly browned.
  3. Scramble the Egg: Push the aromatics and tofu to one side of the wok. Pour 2 beaten eggs into the empty space. Quickly scramble them until they are just set, then break them up and mix them with the other ingredients in the wok.
  4. Add Noodles and Sauce: Add the drained, soaked rice noodles and the prepared Pad Thai sauce to the wok. Toss everything quickly and continuously with tongs for 1–2 minutes, until the noodles are evenly coated and start to soften completely. If the noodles seem dry, sprinkle in a tablespoon or two of water or broth.
  5. Return Protein and Add Vegetables: Return the cooked protein to the wok. Add 1 cup bean sprouts and 1/4 cup chopped green onions (scallions). Toss for just 30 seconds to heat the sprouts and wilt the green onions slightly.
  6. Final Touches: Stir in 1/4 cup chopped peanuts (save some for garnish).

Serve and Garnish

  1. Transfer the Pad Thai immediately to individual plates.
  2. Garnish generously with a handful of fresh bean sprouts, a wedge of lime for squeezing, chopped peanuts, and a sprinkle of fresh cilantro or chili flakes.

Enjoy your incredible homemade Pad Thai!

Healthy Burgers

A healthy burger with lettuce, tomato, onion, and a side of sweet potato fries.

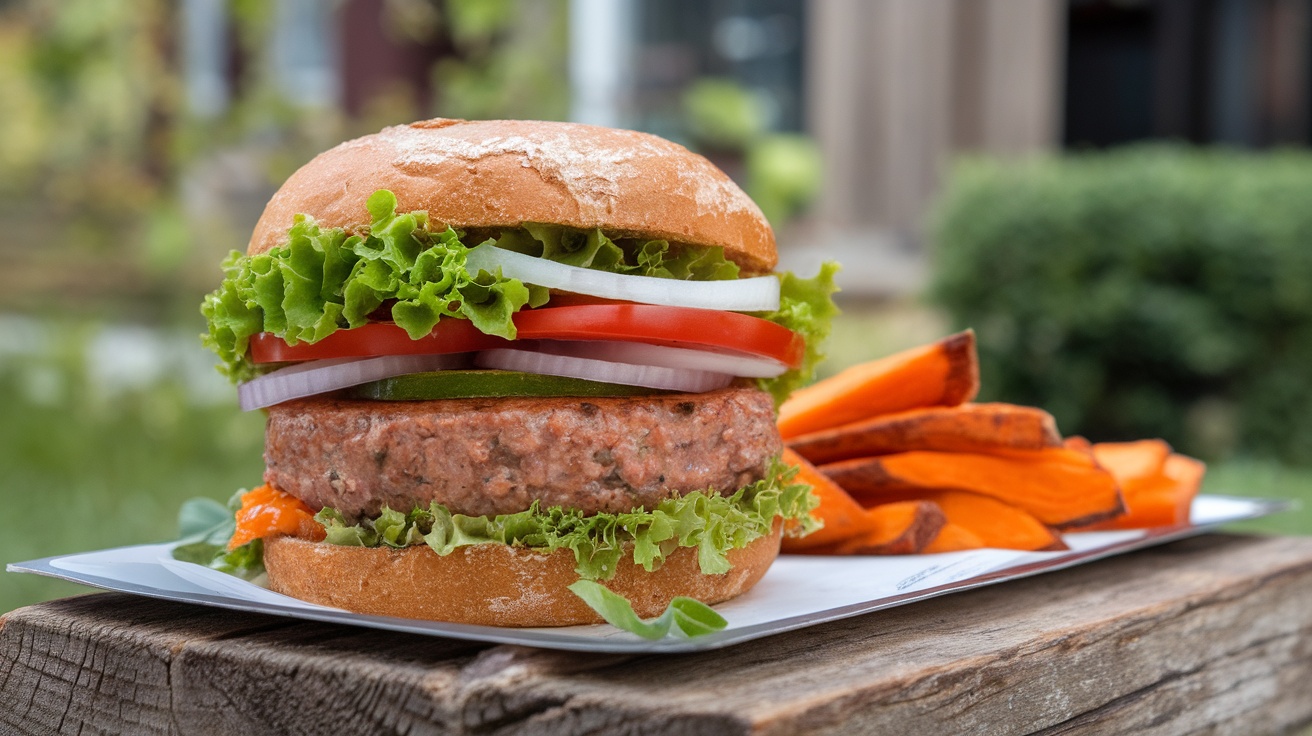
Healthy burgers are a fantastic way to enjoy a classic favorite without the guilt. This image shows a delicious burger loaded with fresh ingredients. The vibrant greens of lettuce and the juicy red tomatoes pop against the soft bun. The patty looks hearty and satisfying, making it a perfect choice for a healthy takeaway.

To make your own healthy burgers at home, you’ll need some simple ingredients. Start with lean ground meat or a plant-based alternative for the patty. Add spices like garlic powder, onion powder, and black pepper for flavor. Top it off with your favorite veggies, like lettuce, tomatoes, and onions.

Here’s a quick recipe to get you started:

Healthy Burger Recipe

Ingredients:

  • 1 lb lean ground turkey or black bean patties
  • A tsp garlic powder
  • 1 tsp onion powder
  • Salt and pepper to taste
  • Whole grain burger buns
  • Fresh lettuce, tomato, onion, and pickles

Instructions:

  1. In a bowl, mix the ground meat or black beans with garlic powder, onion powder, salt, and pepper.
  2. Form the mixture into patties.
  3. Cook on a grill or stovetop until fully cooked through.
  4. Assemble your burger with fresh toppings and enjoy!

Pair your burger with sweet potato fries for a complete meal. These healthy takeaways are sure to satisfy your cravings while keeping things nutritious!

Healthy Takeaways for Chana Masala

A bowl of Chana Masala with rice and naan on a wooden table

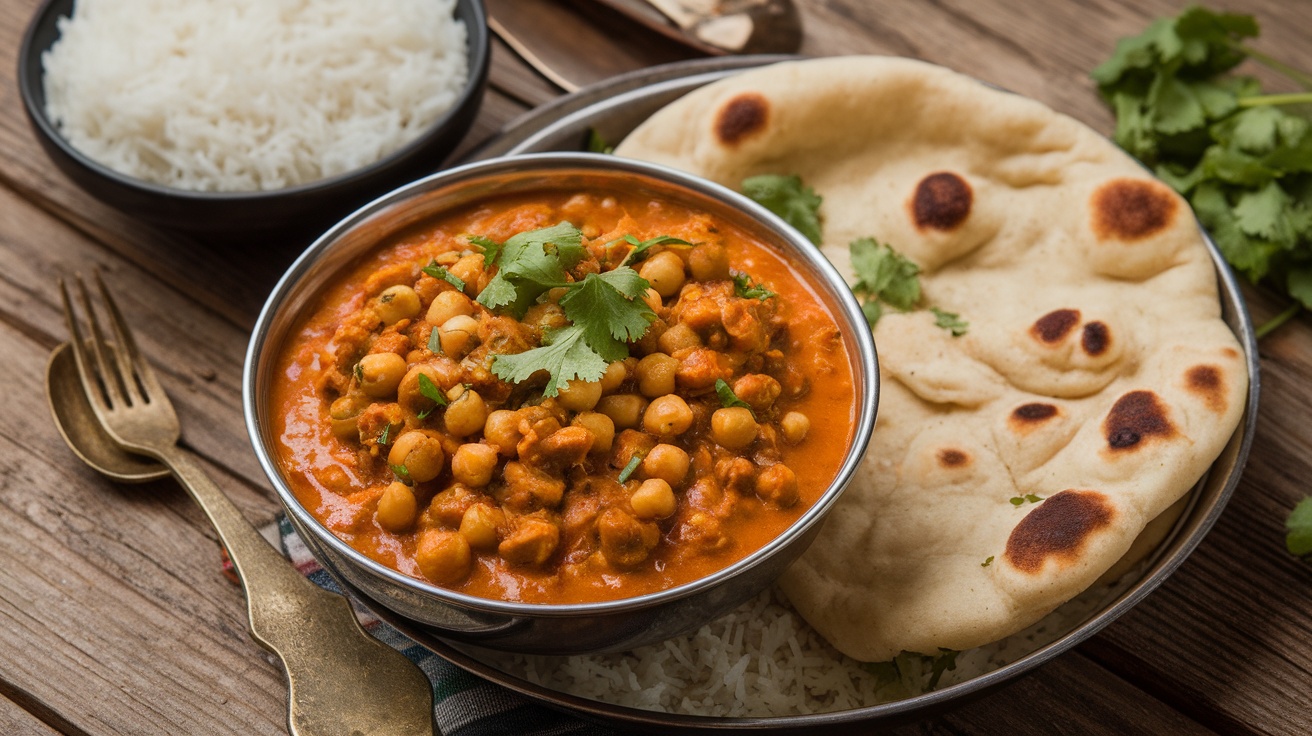
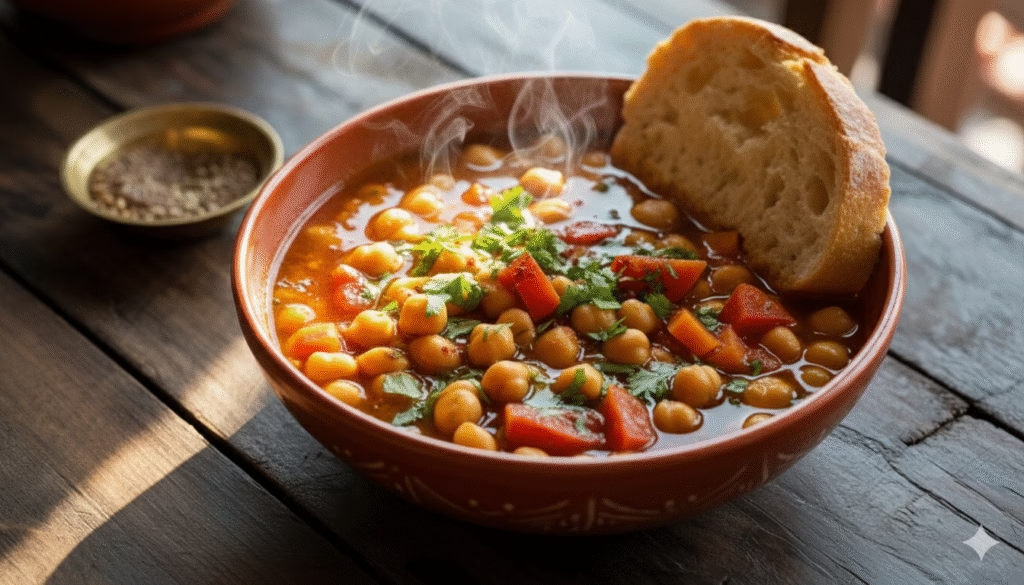
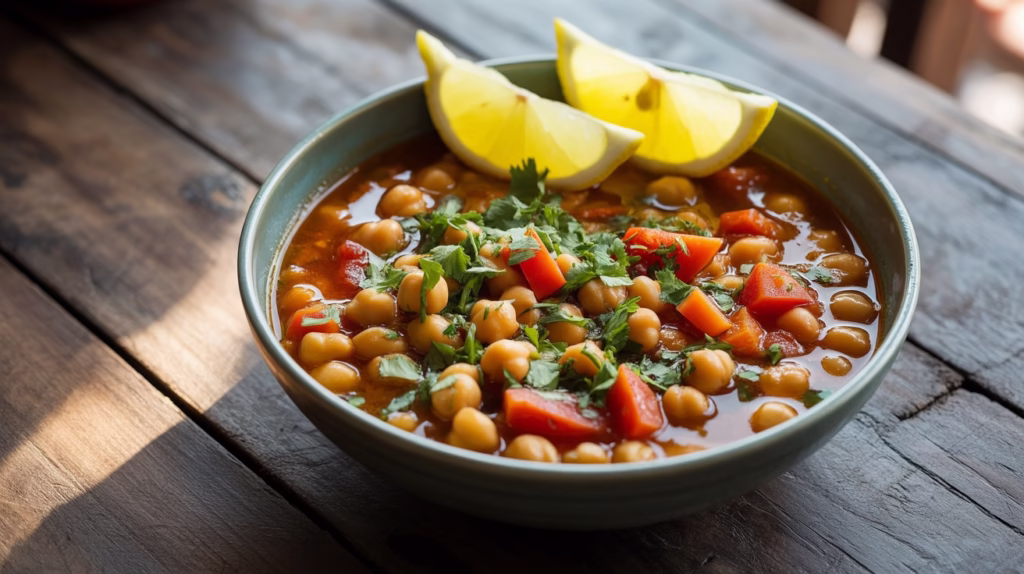
Chana Masala is a delightful dish that brings the flavors of India right to your kitchen. This hearty chickpea curry is not just tasty; it’s also packed with nutrients, making it a perfect choice for healthy takeaways. The vibrant colors in the image show a rich, spiced sauce enveloping tender chickpeas, garnished with fresh cilantro. It’s served alongside fluffy naan and a bowl of rice, creating a comforting meal.

Easy Homemade Chana Masala Instructions

Chana Masala is a flavorful and simple chickpea curry that’s perfect for a satisfying weeknight dinner. Follow these steps to prepare your own!


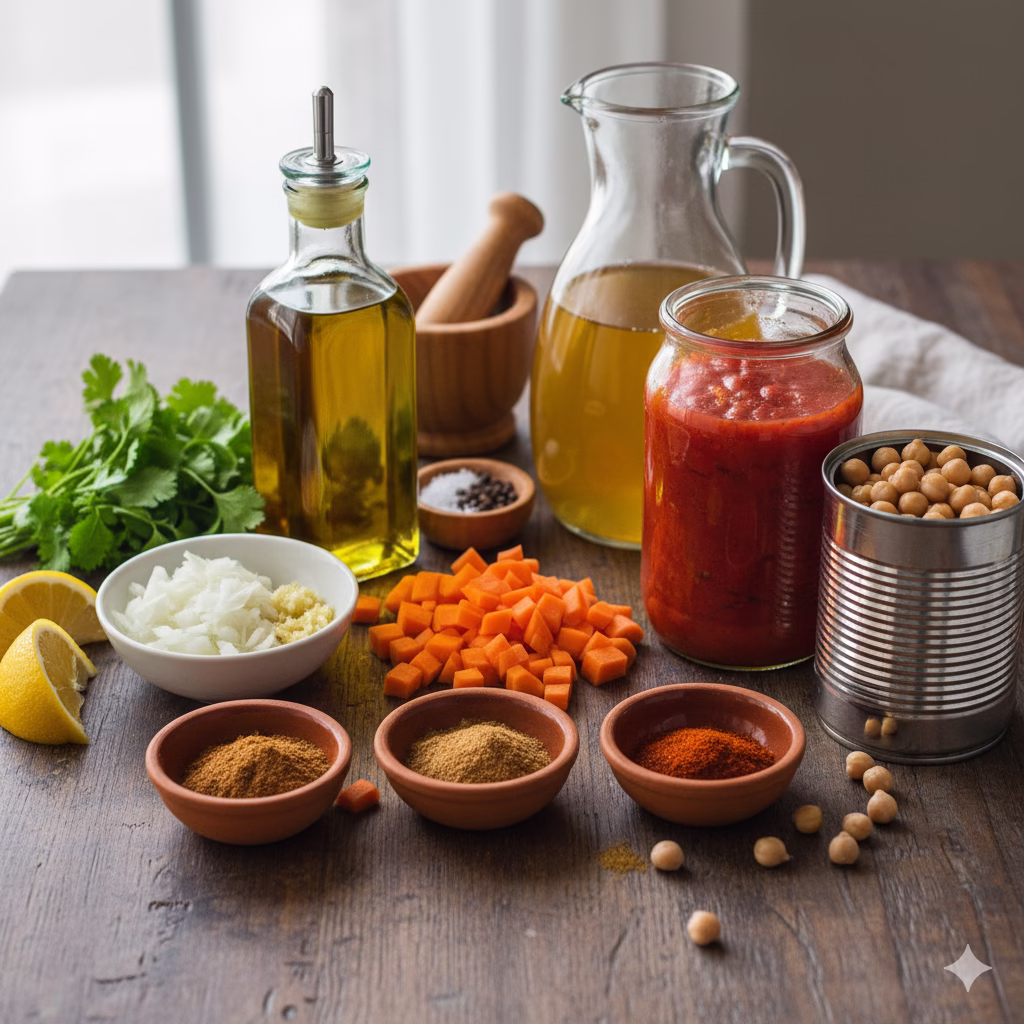
Prep the Ingredients (10 Minutes)

  1. Drain and Rinse: Drain and rinse two 15-ounce cans of chickpeas (or about 3 cups of cooked chickpeas). Set aside.
  2. Dice and Mince: Finely chop 1 medium onion. Mince 2–3 cloves of garlic and finely grate or mince 1 tablespoon of fresh ginger.
  3. Dice Tomatoes: Dice 2 medium fresh tomatoes, or simply open a can of diced tomatoes (about 14.5 oz).
  4. Measure Spices: Measure out your spices into a small dish so they’re ready to go: 1 tsp cumin powder, 1 tsp coriander powder, tsp turmeric, tsp cayenne pepper (optional, for heat), and 1 tsp garam masala.

Cook the Masala Base (15 Minutes)

  1. Sauté Aromatics: Heat 2 tablespoons of oil (like vegetable or canola) in a large pot or Dutch oven over medium heat. Add the chopped onion and sauté for about 5–7 minutes until it’s soft and translucent.
  2. Add Ginger and Garlic: Stir in the minced garlic and grated ginger. Cook for about 1 minute until fragrant.
  3. Bloom the Spices: Reduce the heat to low. Add the cumin, coriander, turmeric, and cayenne pepper (if using) to the pot. Stir continuously for about 30–60 seconds. This step, called “blooming,” releases the spices’ full flavor.
  4. Introduce Tomatoes: Pour in the diced tomatoes (or canned diced tomatoes). Stir well and cook for about 5 minutes, stirring occasionally, until the tomatoes have broken down and the oil starts to separate from the mixture. This is your flavorful masala base.

Simmer and Finish (20 Minutes)

  1. Add Chickpeas and Liquid: Stir in the drained and rinsed chickpeas and 1 cup of water or vegetable broth. Add salt to taste. Bring the mixture to a simmer.
  2. Simmer: Once simmering, reduce the heat to low, cover the pot, and let it cook for 15 minutes. This allows the chickpeas to absorb the rich flavors of the masala.
  3. Adjust Consistency: After 15 minutes, remove the lid. If you prefer a thicker curry, gently mash a few of the chickpeas against the side of the pot with your spoon.
  4. Final Flavoring: Stir in the 1 teaspoon of garam masala and teaspoon of amchur (dried mango powder), if you have it (it adds a lovely tang). Taste and adjust seasoning as needed.
  5. Serve: Serve hot, garnished with fresh cilantro, alongside rice, naan bread, or roti.

Final Thoughts on Healthy Takeaways

Making your own healthy takeaways is one of the easiest and most satisfying ways to take control of your diet without sacrificing flavor. From crispy Oven-Baked Chicken to vibrant Pad Thai and hearty Chana Masala, these 10 recipes prove that you don’t need to choose between convenience and nutrition. By cooking at home, you get to control the amount of oil, salt, and sugar, turning traditionally indulgent favorites into wholesome, guilt-free meals. Embrace the joy of creating these satisfying dishes in your own kitchen—your taste buds and your health will thank you!


Frequently Asked Questions (FAQ)

Q: What is the main benefit of making healthy takeaways at home?

A: The main benefit is ingredient control. When you cook at home, you can choose leaner proteins, reduce excess saturated fat and sodium, use whole grains (like brown rice), and load up on fresh vegetables—all of which drastically improve the nutritional profile compared to traditional restaurant takeout.

Q: Can I use different types of fish for the Healthy Fish and Chips recipe?

A: Yes, you can! Any firm, white fish works well. Good options include cod, haddock, tilapia, or halibut. Baking or air-frying the fish is the key to keeping this a healthy takeaway option.

Q: How can I make these recipes suitable for meal prepping?

A: Many of these recipes are excellent for meal prepping. Dishes like Chinese Chicken Curry, Chana Masala, and Healthy Egg Fried Rice can be cooked in larger batches and stored in airtight containers for up to 3–4 days in the refrigerator. Assemble items like burgers and kebabs right before cooking for the best flavor and texture.

Q: What substitutes can I use to lower the sugar content in the Sweet and Sour Chicken sauce?

A: To reduce sugar, you can use natural sweeteners like honey or maple syrup sparingly, or use sugar-free substitutes like Stevia or monk fruit, adjusting the amount to taste. The goal of a healthy takeaway is to limit refined sugar wherever possible.

Q: I need these meals to be quicker—can I shorten the prep time?

A: Yes. To save time, use pre-chopped vegetables, purchase quick-cooking pre-marinated chicken/paneer for the kebabs, or use canned chickpeas and pre-cooked brown rice for the Chana Masala and Egg Fried Rice. Pre-made, whole-grain pizza crusts are also a great time-saving healthy takeaway option.


References

The principles behind creating healthy takeaways are rooted in basic nutrition and established cooking methods. The following concepts guide the modification of classic takeout dishes:


Recent Posts


The Best Curried Yellow Split Pea and Pumpkin Soup

A rich, yellow split pea and pumpkin soup is served in a rustic brown bowl on a dark wooden table. The creamy, golden soup is topped with whole yellow split peas, chunks of roasted pumpkin, a drizzle of cream, fresh cilantro, and a sprinkle of chili flakes. A small chalkboard sign behind the bowl reads, The Best Curried Yellow Split Pea and Pumpkin Soup. Slices of toasted bread, a vintage spoon, cinnamon sticks, and small decorative gourds complete the autumnal scene by a window.

This curried yellow split pea and pumpkin soup is a nutritious and flavorful dish that combines the earthiness of split peas with the sweetness of pumpkin. The addition of curry spices enhances the overall taste, making it a delightful option for any meal.

The recipe is simple to follow and perfect for those looking to incorporate more legumes into their diet. It’s a great way to enjoy the health benefits of yellow split peas while savoring a comforting bowl of soup.


Vibrant and Comforting Yellow Split Pea and Pumpkin Soup

The curried yellow split pea and pumpkin soup is a delightful dish that brings warmth and nourishment to any table. Its vibrant yellow-orange hue is not only visually appealing but also indicative of the rich flavors that await.

As the creamy texture envelops your palate, the combination of yellow split peas and pumpkin creates a satisfying experience. This soup is perfect for those chilly evenings when a comforting bowl is just what you need.

Served with a slice of crusty bread, it invites you to savor each spoonful while enjoying the rustic charm of a wooden table setting.


Ingredients That Shine

This soup features a harmonious blend of ingredients that work together beautifully. The star of the show, yellow split peas, are not only nutritious but also provide a wonderful base for the soup.

Combined with pumpkin puree, aromatic spices, and creamy coconut milk, each bite is a delightful journey of flavors. The addition of fresh cilantro as a garnish adds a burst of freshness that elevates the dish even further.


Preparation Made Simple for Yellow Split Pea and Pumpkin Soup

Preparing this soup is a straightforward process that can be accomplished in about 50 minutes. Start by rinsing the yellow split peas and chopping the necessary aromatics like onion, garlic, and ginger.

Once the ingredients are prepped, sautéing the aromatics in olive oil sets the stage for the spices to bloom. The fragrant curry powder and cumin infuse the soup with warmth and depth, making it an inviting option for any meal.


Cooking to Perfection for Yellow Split Pea and Pumpkin Soup

After combining the yellow split peas, pumpkin puree, and vegetable broth, let the mixture simmer until the peas are tender. This step is crucial, as it allows the flavors to meld together beautifully.

Using an immersion blender or a traditional blender, puree the soup until it reaches a smooth consistency. Stirring in the coconut milk at the end adds a rich creaminess that complements the other ingredients perfectly.


Cook and Prep Times

  • Prep Time: 10 minutes
  • Cook Time: 40 minutes
  • Total Time: 50 minutes

Nutrition Information

  • Servings: 6 bowls
  • Calories: 250kcal
  • Fat: 12g
  • Protein: 10g
  • Carbohydrates: 30g

Delicious Curried Yellow Split Pea and Pumpkin Soup

This soup features creamy yellow split peas cooked with pumpkin and aromatic spices, resulting in a hearty and satisfying dish. It takes about 50 minutes to prepare and serves 6 people.


Ingredients

  • 1 cup yellow split peas, rinsed and drained
  • 2 cups pumpkin puree (fresh or canned)
  • 1 medium onion, chopped
  • 2 cloves garlic, minced
  • 1 tablespoon fresh ginger, grated
  • A tablespoon curry powder
  • 1 teaspoon ground cumin
  • 4 cups vegetable broth
  • 1 can (14 oz) coconut milk
  • 2 tablespoons olive oil
  • Salt and pepper to taste
  • Fresh cilantro for garnish (optional)

Instructions

  1. Prep the Ingredients: Rinse the yellow split peas and chop the onion, garlic, and ginger.
  2. Sauté Aromatics: In a large pot, heat the olive oil over medium heat. Add the chopped onion, garlic, and ginger, and sauté until the onion is translucent (about 5 minutes).
  3. Add Spices: Stir in the curry powder and cumin, cooking for another minute until fragrant.
  4. Combine Ingredients: Add the yellow split peas, pumpkin puree, and vegetable broth to the pot. Bring to a boil, then reduce the heat to low and simmer for 30 minutes, or until the split peas are tender.
  5. Blend the Soup: Use an immersion blender to puree the soup until smooth, or transfer in batches to a blender. Return to the pot and stir in the coconut milk.
  6. Season and Serve: Season with salt and pepper to taste. Serve hot, garnished with fresh cilantro if desired.

Nutritional Benefits

This Curried Yellow Split Pea and Pumpkin Soup is a nutritional standout, proving that comfort food can also be incredibly wholesome.

The Power of the Yellow Split Pea

The star ingredient, the yellow split pea, is a powerhouse of plant-based nutrition. Each serving delivers an excellent source of protein (around 10g per bowl) and ample dietary fiber. This fiber content is key for promoting digestive health and contributes to a feeling of satiety, helping to keep you full and satisfied long after the last spoonful. Being low in fat and cholesterol-free, yellow split peas make this a heart-healthy foundation for the soup. They also contribute important micronutrients like B vitamins and several minerals.

Vitamins and Minerals from Pumpkin

The inclusion of pumpkin beautifully complements the yellow split pea both in flavor and nutrition. Pumpkin is an outstanding source of Vitamin A in the form of beta-carotene, an antioxidant that’s essential for immune function and eye health. It also provides a dose of Vitamin C and potassium.

A Guilt-Free Indulgence

With just 250 calories per serving, this soup is a nourishing, “guilt-free” indulgence. Its high protein and fiber content ensures your body is fueled and your appetite is satisfied, making it an excellent choice for a light lunch or a hearty appetizer. It truly is a wholesome meal that warms the body while providing essential nutrients.


          Serving Suggestions for Yellow Split Pea

          When it comes to serving, a sprinkle of fresh cilantro on top adds a pop of color and a hint of brightness. This simple garnish transforms the dish into a visually stunning presentation.

          Pairing the soup with crusty bread not only enhances the experience but also makes for a satisfying meal. Whether enjoyed on a quiet evening or shared with loved ones, this soup is sure to warm hearts and bellies alike.


          Final Thoughts for Yellow Split Pea and Pumpkin Soup

          This Curried Yellow Split Pea and Pumpkin Soup is more than just a meal; it’s an invitation to savor the comforting flavors of autumn and enjoy the simple pleasure of a homemade dish. The humble yellow split pea, elevated by aromatic curry spices and the natural sweetness of pumpkin, transforms into a creamy, satisfying, and incredibly nutritious soup. Whether you’re a seasoned cook or a kitchen novice, this straightforward recipe offers a wholesome and flavorful way to incorporate more legumes and vegetables into your diet. We hope this vibrant, warming soup becomes a new favorite in your culinary rotation.


          Frequently Asked Questions (FAQ)

          Q: Do I need to soak the yellow split peas before cooking?

          A: No, soaking the yellow split peas is generally not required for this recipe, as the long simmering time (around 30 minutes) is sufficient to make them tender. However, rinsing them well before cooking is recommended.

          Q: Can I use fresh pumpkin instead of pumpkin puree?

          A: Yes! If using fresh pumpkin, you’ll need to roast and puree it first. Ensure you have about 2 cups of the final puree. You can use types like butternut squash or Hokkaido pumpkin as a flavorful alternative.

          Q: How can I make this soup spicier?

          A: You can easily adjust the heat by adding a pinch of cayenne pepper, a few drops of hot sauce, or a pinch of red chili flakes along with the curry powder and cumin. Garnish with chili flakes for an extra kick!

          Q: Is this recipe vegan?

          A: Yes, this recipe is naturally vegan. The creaminess comes from the yellow split peas, pumpkin, and coconut milk, making it a delicious plant-based meal.

          Q: Can I freeze the leftovers?

          A: Absolutely. This soup freezes very well. Let it cool completely, then transfer it to an airtight, freezer-safe container. It can be stored for up to 3 months. Thaw overnight in the refrigerator and reheat gently on the stovetop.


          References

          While this recipe is a creative fusion of flavors, the health benefits and culinary uses of the key ingredients are well-established.


          Recent Posts


          10 Easy Low Fat Cheese You Can Make

          Cheese lovers can enjoy their favorite flavors without the guilt! Here’s a list of 10 easy low fat cheese you can whip up at home, plus simple recipes to make them. Perfect for snacking, cooking, or topping your favorite dishes, these cheeses are surprisingly simple to create and a tasty way to keep things light.


          Low-Fat Paneer (Indian Cottage Cheese)

          A block of low-fat paneer on a wooden board surrounded by herbs and spices.

          Low Fat Cheese like paneer is a fantastic option for those who want to enjoy a creamy texture without the extra calories. This Indian cottage cheese is versatile and can be used in various dishes, from curries to salads. The image shows a block of fresh paneer, surrounded by herbs and spices, highlighting its natural and wholesome appeal.

          Making low-fat paneer at home is simple and rewarding. You can control the ingredients and enjoy a fresh product. Plus, it’s a great way to incorporate protein into your meals without the fat.


          Low Fat Cheese: Ricotta

          A bowl of low-fat ricotta cheese garnished with herbs and olive oil.

          Low-fat ricotta is a creamy delight that fits perfectly into a healthy diet. This cheese is light, fluffy, and versatile, making it a great addition to many dishes. The image shows a bowl of ricotta drizzled with olive oil and garnished with fresh herbs. It looks inviting and fresh, perfect for spreading on toast or adding to pasta.

          Making Low Fat Cheese like ricotta at home is simple and rewarding. You can enjoy it fresh, knowing exactly what goes into it. Plus, it’s a great way to control the fat content while still enjoying a delicious cheese.


          Low Fat Cheese: Cottage Cheese

          A bowl of low-fat cottage cheese topped with raspberries and mint, with sugar and a measuring cup in the background.

          Low-fat cottage cheese is a fantastic option for those looking to enjoy cheese without the extra calories. It’s creamy, versatile, and packed with protein. The image shows a lovely bowl of cottage cheese topped with fresh raspberries and mint, making it not only delicious but visually appealing too.

          This cheese can be enjoyed in various ways. You can eat it plain, mix it into smoothies, or use it as a topping for salads. Its mild flavor pairs well with both sweet and savory dishes.


          Low-Fat Cream Cheese

          A bowl of low-fat cream cheese with crackers and herbs on a wooden table.

          Low-fat cream cheese is a fantastic option for those looking to enjoy a creamy spread without the extra calories. The image shows a smooth, fluffy cream cheese in a bowl, surrounded by crunchy crackers and fresh herbs. This setup makes it perfect for snacking or as a topping for various dishes.

          Making low-fat cream cheese at home is simple and rewarding. You can control the ingredients and flavors, making it a healthier choice for your meals and snacks.


          Low-Fat Fresh Mozzarella

          A ball of fresh mozzarella cheese on a wooden plate, surrounded by cherry tomatoes and basil leaves.

          Low-fat fresh mozzarella is a delightful cheese that brings a creamy texture and mild flavor to many dishes. This cheese is perfect for salads, pizzas, or just enjoying on its own. The image shows a beautifully crafted ball of mozzarella surrounded by fresh basil and cherry tomatoes, showcasing its versatility and appeal.

          Making a Low Fat Cheese as mozzarella at home is easier than you might think. With just a few ingredients, you can whip up this delicious cheese that’s lower in fat but still full of flavor.


          Low-Fat Queso Fresco

          A bowl of low-fat queso fresco surrounded by tortilla chips and colorful bell peppers on a wooden table.

          Low-fat queso fresco is a delightful cheese that adds a creamy touch to many dishes without the guilt. This cheese is perfect for those looking to enjoy a tasty snack while keeping an eye on their fat intake. The image shows a beautiful spread featuring queso fresco, surrounded by colorful bell peppers and crispy tortilla chips, making it an inviting choice for any gathering.

          Making low-fat queso fresco at home is simple and rewarding. You can enjoy it fresh or use it in various recipes. It pairs wonderfully with chips, salads, or even as a topping for tacos. The fresh herbs and vibrant colors in the image highlight how versatile this cheese can be.


          Low Fat Cheese: Labneh

          A bowl of labneh topped with olive oil and herbs, served with fresh vegetables and bread.

          Labneh is a creamy, tangy cheese that’s perfect for those looking to enjoy low-fat options. This Middle Eastern delight is made by straining yogurt, resulting in a thick, spreadable texture. It’s often drizzled with olive oil and sprinkled with herbs, making it a tasty addition to any meal.

          The image shows a beautiful bowl of labneh, topped with olive oil and herbs, surrounded by fresh vegetables and warm bread. This setup highlights how versatile labneh can be, whether as a dip, spread, or part of a larger meal.

          Making low-fat labneh at home is simple and rewarding. You can enjoy it with veggies, pita, or even as a topping for salads. Let’s dive into the recipe!


          Low-Fat Quark

          A round serving of low-fat quark cheese topped with olive oil and herbs, surrounded by strawberries, blueberries, raspberries, and crackers.

          Low-fat quark is a versatile cheese that packs a punch in flavor while keeping the calories low. This creamy delight is perfect for spreading on crackers or using in various recipes. The image shows a beautifully presented quark topped with olive oil and fresh herbs, surrounded by vibrant fruits and crunchy crackers. It’s not just a treat for the taste buds but also a feast for the eyes!

          Making low-fat quark at home is simple and rewarding. With just a few ingredients, you can whip up this delightful cheese that’s perfect for snacking or adding to your favorite dishes.


          Low Fat Cheese: Ricotta Salata

          A round of low-fat ricotta salata garnished with cherry tomatoes and herbs on a wooden board.

          Low-fat ricotta salata is a delightful cheese that packs flavor without the extra calories. It’s a firmer version of traditional ricotta, making it perfect for grating or slicing. The image showcases a beautifully presented round of ricotta salata, garnished with fresh herbs and cherry tomatoes. This cheese is not only visually appealing but also versatile in the kitchen.

          Making low-fat ricotta salata at home is easier than you might think. You can use it in salads, pastas, or even as a topping for pizzas. Its mild flavor complements a variety of dishes, making it a great addition to your low-fat cheese repertoire.


          Low-Fat Feta

          A bowl of low-fat feta cheese garnished with herbs and cherry tomatoes on a wooden table.

          Low-fat feta is a delightful cheese that brings a fresh and tangy flavor to many dishes. This cheese is perfect for salads, sandwiches, or as a topping on various meals. The image shows a creamy feta served in a rustic bowl, garnished with fresh herbs and cherry tomatoes. It looks inviting and ready to be enjoyed!

          Making low-fat feta at home is easier than you might think. You can control the ingredients and enjoy a healthier version of this classic cheese. Let’s dive into a simple recipe to create your own low-fat feta.


          Frequently Asked Questions (FAQ)

          Q: What is the main benefit of making these cheeses at home?

          A: Making these low-fat cheeses at home allows you to control the ingredients, ensuring they are truly low in fat, free from unnecessary additives, and as fresh as possible. It is also often a very simple and rewarding process.

          Q: How is the fat content reduced in these homemade cheeses?

          A: The fat content is primarily reduced by starting with low-fat or skim milk (or low-fat yogurt, in the case of Labneh and certain Quark recipes). Traditional cheese-making often uses whole milk, which is where most of the fat originates.

          Q: Can I substitute any of these low-fat cheeses for their full-fat counterparts in recipes?

          A: Yes, in most cases, but consider the texture.

          • Low-Fat Ricotta and Cottage Cheese are excellent substitutes in baking and dips.
          • Low-Fat Paneer and Fresh Mozzarella are structurally similar to the full-fat versions, making them great for curries or slicing.
          • Ricotta Salata and Feta are best used where a firm, crumbly texture is needed.

          Q: Do I need special equipment to make these cheeses at home?

          A: No. Most of these soft, fresh cheeses (Paneer, Ricotta, Labneh, Cottage Cheese) require only basic kitchen tools like pots, ladles, cheesecloth or muslin, and strainers. No complex presses or aging equipment are necessary.

          Q: Which of these cheeses is the easiest and fastest to make?

          A: Labneh (strained yogurt) and Low-Fat Paneer are often cited as the easiest and fastest. Labneh simply requires straining yogurt overnight, and Paneer can be ready in under an hour once you have the milk and acid (like lemon juice) ready.

          Q: How long will these fresh, low-fat cheeses last in the refrigerator?

          A: Because they are fresh (not aged), they have a shorter shelf life. Stored in an airtight container, most of these homemade cheeses (like Paneer, Ricotta, and Mozzarella) should be consumed within 3 to 5 days for optimal freshness and safety. Labneh may last slightly longer due to its acidity.


          References


          Recent Posts


          Why We HATE Salads (It’s Not Just the Lettuce)

          What’s the deal with salads? You might think it’s just the boring leafy greens keeping us from enjoying a bowl full of veggies, but there’s a lot more going on. From dressings that don’t quite hit the mark to toppings that can be a total letdown, it’s time to unpack the real reasons behind our salad aversion. Let’s break it down and find out how to make salads not only palatable but fun!

          Salads Are Boring And Flavorless

          A small, unappetizing portion of plain, mixed lettuce greens and sliced cucumber on a beige plate against a white background, demonstrating a boring example of salads.

          Take a look at that salad. It’s a mix of greens, maybe some cucumbers, and not much else. This is what many people think of when they hear the word ‘salad.’ It’s no wonder salads often get a bad rap. They can seem boring and flavorless, especially when they lack exciting ingredients.

          Salads often fall short in the taste department. A plate full of lettuce and a few veggies can feel like a chore to eat. Many people want something that excites their taste buds, not just a pile of greens. When salads are bland, they miss the mark.

          So, how can we change this perception? Adding a variety of ingredients can make salads much more appealing. Think about including proteins like grilled chicken or chickpeas, and vibrant veggies like bell peppers or cherry tomatoes. These additions can transform a boring salad into a flavorful meal.

          Don’t forget about dressings! A good dressing can elevate a salad from dull to delicious. Try homemade vinaigrettes or creamy dressings to add that extra kick. With the right mix of ingredients and flavors, salads can become something to look forward to, not just a side dish.


          Poor Texture (Too Crunchy/Soggy)

          A salad with greens, tomatoes, and croutons on a wooden table.

          When it comes to salads, texture plays a huge role in whether we enjoy them or not. Take a look at the image of this salad. It has a mix of greens, tomatoes, and crunchy croutons. While the croutons add a delightful crunch, the greens can sometimes be too soggy or overly crunchy, leading to a less than pleasant eating experience.

          Too much crunch can be overwhelming. If every bite feels like a workout for your jaw, it can take away from the enjoyment of the meal. On the flip side, soggy greens can make a salad feel limp and unappetizing. No one wants to chew through a pile of wet lettuce!


          The Dressing Problem

          A plate of salad with creamy dressing on top, set on a rustic wooden table.

          When it comes to salads, the dressing can make or break the experience. A salad might look fresh and inviting, but if the dressing is off, it can ruin the whole vibe. Just look at the image of that salad. It’s vibrant and colorful, but the dressing on top is what really draws the eye. It’s creamy and rich, hinting at a flavor that could either elevate the greens or drown them.

          Many people shy away from salads because they associate them with bland dressings. A drizzle of vinegar or a splash of oil often doesn’t cut it. Instead, they crave something more exciting. This is where the dressing problem comes into play. If your dressing is too oily or overly tangy, it can overshadow the fresh ingredients. Nobody wants to eat a salad that feels like a chore.


          Salads Don’T Feel Satisfying

          A fresh salad with lettuce, tomatoes, and cucumbers in a glass bowl, surrounded by other fresh ingredients.

          Salads often leave us feeling unsatisfied. Just look at the image of a fresh salad, vibrant and colorful, yet it can still feel like something is missing. The crisp lettuce and juicy tomatoes are appealing, but they don’t always hit the spot.

          Many people find salads lacking in substance. When you think of a meal, you want something hearty that fills you up. Salads can feel light and airy, which is great for a snack but not always fulfilling for lunch or dinner.

          To make salads more satisfying, consider adding protein. Grilled chicken, chickpeas, or even nuts can transform a simple salad into a meal that keeps you full longer. Tossing in some cheese can also add flavor and richness, making it more enjoyable.

          Another tip is to include grains like quinoa or farro. These ingredients add texture and heartiness, making the salad feel more complete. A good dressing can also elevate the dish, bringing all the flavors together.


          Perceived As “Diet Food” Or Punitive

          A colorful salad in a bowl with a sad emoji overlay

          When we think of salads, many of us picture a bowl of greens, maybe some tomatoes, and a sprinkle of dressing. But let’s be honest: salads often get a bad rap. They’re frequently seen as the boring, guilt-inducing option on a menu. This perception can make them feel more like punishment than a treat.

          The image of a vibrant salad, filled with colorful fruits and veggies, often clashes with the emotions tied to dieting. Instead of being a delightful meal, salads can feel like a chore. This is especially true when they are labeled as ‘diet food.’ People often associate them with restrictions and sacrifices, which can lead to a negative attitude toward healthy eating.

          To change this mindset, we need to rethink how we view salads. They can be packed with flavor and variety, making them enjoyable rather than punitive. Adding ingredients that excite the palate can transform a simple salad into a culinary delight.


          Bitter Greens

          A mix of bitter greens including arugula and radicchio on a wooden surface with olive oil and salt.

          When we think of salads, bitter greens often come to mind. These leafy veggies can be a tough sell. They have a strong flavor that can clash with our taste buds. Many people shy away from salads simply because of these greens.

          In the image, we see a mix of greens, including arugula and radicchio. These are known for their bitterness. While they add depth to salads, they can also be off-putting for some. The dandelion puff in the center is a reminder of how wild and untamed these greens can be.

          So, why do we hate salads? It’s not just the lettuce. It’s the bitterness that can overshadow the freshness we crave. Many people prefer sweeter, milder greens. This preference often leads to a salad that feels more like a chore than a treat.


          The Hassle Of Preparation

          A kitchen scene with various fresh vegetables and a person chopping ingredients for a salad.

          When it comes to salads, the preparation can feel like a chore. Just look at the image: a kitchen filled with fresh ingredients, but also a lot of mess. Chopping veggies, washing greens, and measuring dressings can be overwhelming. It’s easy to see why many people shy away from making salads at home.

          Salads often require several ingredients. You might need lettuce, tomatoes, cucumbers, and more. Each one needs to be prepped, which can take time. If you’re in a hurry, this can be a major turn-off. Who wants to spend their evening chopping away when they could be relaxing?


          Salads Contain Overly Complex Ingredients

          A colorful salad with various fruits, vegetables, and sauces, appearing overly complex.

          When it comes to salads, the ingredients can sometimes feel like a wild mix of everything under the sun. Take a look at the image above. It shows a salad overflowing with fruits, vegetables, and sauces that seem to compete for attention. This chaotic blend can be overwhelming, making you wonder if you’re eating a salad or a dessert!

          Many people shy away from salads that have too many ingredients. A salad should be refreshing, not a puzzle to solve. When you see a bowl piled high with exotic fruits, drizzled sauces, and a variety of greens, it can feel more like a chore than a meal.


          The “Raw” Factor

          A vibrant platter of fresh vegetables and fruits arranged beautifully.

          Salads often get a bad rap, and it’s not just about the lettuce. The image here shows a vibrant array of fresh veggies and fruits, but many people still shy away from salads. Why? The raw factor plays a big role.

          When we think of salads, we often picture a bowl of raw greens topped with a few sad tomatoes and maybe a sprinkle of cheese. This can feel boring and uninspired. The truth is, salads can be so much more than that!

          Take a look at that colorful platter. It’s packed with crunchy carrots, sweet berries, and crunchy nuts. This variety not only makes it visually appealing but also adds different textures and flavors. The raw ingredients can be exciting if you mix them up.


          Some Salads Can Be Surprisingly Unhealthy

          A colorful salad with various toppings including cheese, dressings, and snacks.

          When you think of salads, you might picture a healthy meal. However, not all salads are created equal. The image shows a colorful bowl filled with various ingredients, but many of them can be misleading. Sure, there’s lettuce, but look closer. There are also creamy dressings, sugary toppings, and even processed snacks. These additions can turn a supposedly healthy dish into a calorie bomb.

          Many people add things like cheese, croutons, or heavy dressings without realizing how quickly the calories add up. For example, that drizzle of ranch or blue cheese dressing can pack a hefty calorie punch. If you’re trying to eat healthy, it’s essential to keep an eye on these extras.


          Frequently Asked Questions (FAQ)

          Q: Is it really just the lettuce that makes people dislike salads?

          A: No, the article argues it’s much more than just the lettuce. Common aversions stem from salads being too boring or flavorless, having poor texture (soggy or too crunchy), issues with heavy or bland dressings, a lack of satisfying substance (protein/carbs), and the perception of salads as restrictive “diet food.”

          Q: How can I make my salad more flavorful and less boring?

          A: Focus on variety! Add proteins (grilled chicken, chickpeas, hard-boiled eggs), vibrant vegetables (bell peppers, cherry tomatoes), grains (quinoa, farro), and nuts or seeds. Crucially, use a delicious, homemade dressing to tie the flavors together.

          Q: What is the “dressing problem” and how can I fix it?

          A: The “dressing problem” is when dressings are either too bland (just oil and vinegar) or too heavy, oily, or overly sweet, which can drown out the fresh ingredients. The fix is to use dressings that are flavorful but balanced, such as homemade vinaigrettes, or a creamy dressing used in moderation.

          Q: How can I make a salad feel more satisfying and filling as a meal?

          A: To combat the feeling of a salad being “too light,” you must add substance. This includes incorporating lean proteins (chicken, beans, tofu), healthy fats (avocado, nuts, seeds), and whole grains (quinoa, barley) to provide sustained energy and satiety.

          Q: How do I avoid the bitter taste often found in some greens?

          A: If you dislike bitter greens like arugula or radicchio, simply use milder varieties such as butter lettuce, romaine, or spinach. Alternatively, you can balance the bitterness by adding sweet elements to your salad, like fruits (berries, apples) or a sweet-and-tangy dressing.

          Q: Can salads be unhealthy?

          A: Yes, surprisingly. While the greens and raw vegetables are healthy, salads can become unhealthy “calorie bombs” when loaded with high-fat, high-sugar additions. Be mindful of excessive use of creamy, sugary dressings, large amounts of cheese, candied nuts, and fried croutons.


          References

          1. ClevelandClinic – 5 Health Benefits of Lettuce
          2. WebMD – Health Benefits of Salad Greens

          Recent Posts


          Make This Easy Baked Sweet Potatoes with Cauliflower Ragu

          
Three round slices of baked sweet potatoes, topped with a rich red cauliflower ragu and garnished with fresh parsley, served on a rectangular gray plate with a fork and a small bowl of herbs on a wooden table."

          This recipe for baked sweet potatoes topped with cauliflower ragu is a nutritious and satisfying dish. They are naturally sweet and packed with vitamins, making them a great base for this hearty meal.

          The cauliflower ragu adds a savory element, combining the flavors of garlic, tomatoes, and herbs. This dish is simple to prepare and perfect for a healthy weeknight dinner.


          Deliciously Nutritious Sweet Potatoes

          Baked sweet potatoes serve as a fantastic base for a variety of dishes, offering a naturally sweet flavor and a wealth of vitamins. Their golden, fluffy texture makes them a delightful choice for a wholesome meal.

          When paired with a vibrant cauliflower ragu, they transform into a hearty dish that is both satisfying and nourishing. The combination of flavors creates a delightful experience for the palate, making it an excellent option for any dinner table.

          Cauliflower Ragu: A Flavorful Companion

          The cauliflower ragu adds a savory depth to the sweet potatoes, featuring tender cauliflower mixed with rich tomato sauce. This blend of ingredients not only enhances the dish’s taste but also contributes to its nutritional value.

          Incorporating garlic and herbs into the ragu elevates the overall flavor profile, creating a dish that is comforting yet healthy. The simplicity of the ragu allows the natural sweetness of the potatoes to shine through, making each bite a perfect balance of flavors.


          Preparation Made Easy

          Preparing this dish is straightforward and can be accomplished in about an hour. Start by baking the sweet potatoes until they are tender, allowing their natural sweetness to develop fully.

          While the potatoes are baking, the cauliflower ragu can be prepared in a skillet. Sautéing onions and garlic creates a fragrant base, while adding cauliflower and tomatoes brings the dish together. This method ensures that the ragu is fresh and full of flavor by the time the sweet potatoes are ready.


          Serving Suggestions for Sweet Potatoes

          Once the sweet potatoes are baked, they can be sliced open and fluffed with a fork, creating a perfect vessel for the cauliflower ragu. Topping the sweet potatoes with the ragu not only adds flavor but also makes for a visually appealing presentation.

          Garnishing with fresh parsley adds a pop of color and freshness, enhancing the dish’s overall aesthetic. Serving this meal on a rustic wooden table adds to the inviting atmosphere, making it a delightful choice for family dinners or gatherings with friends.


          Nutritional Benefits for Sweet Potatoes

          This dish is not only delicious but also packed with nutrients. Sweet potatoes are known for their high vitamin content and fiber, making them a healthy choice for any meal. The cauliflower ragu complements this by providing additional vitamins and minerals.

          With a balanced mix of carbohydrates, protein, and healthy fats, this meal is suitable for those looking to maintain a nutritious diet without sacrificing flavor. Each serving delivers a satisfying experience that leaves you feeling nourished and energized.


          Healthy Baked Sweet Potatoes Recipe

          Baked sweet potatoes topped with cauliflower ragu, garnished with parsley, on a rustic wooden table.

          This dish features tender baked sweet potatoes filled with a flavorful cauliflower ragu. The recipe takes about 1 hour from start to finish and serves 4 people.


          Ingredients

          • 4 medium sweet potatoes
          • 1 head of cauliflower, chopped into small florets
          • 1 medium onion, finely chopped
          • 3 cloves garlic, minced
          • 1 can (14 oz) diced tomatoes
          • 2 tablespoons olive oil
          • 1 teaspoon dried oregano
          • 1 teaspoon salt, adjust to taste
          • 1/2 teaspoon black pepper
          • Fresh parsley for garnish

          Instructions

          1. Preheat the Oven: Preheat your oven to 400°F (200°C).
          2. Bake the Sweet Potatoes: Wash the sweet potatoes and pierce them with a fork. Place them on a baking sheet and bake for 45-50 minutes, or until tender.
          3. Prepare the Cauliflower Ragu: In a large skillet, heat olive oil over medium heat. Add the chopped onion and garlic, sautéing until fragrant and translucent (about 3-4 minutes).
          4. Add Cauliflower: Stir in the chopped cauliflower and cook for another 5 minutes, until slightly softened.
          5. Incorporate Tomatoes: Add the diced tomatoes, oregano, salt, and pepper. Simmer for 10-15 minutes, allowing the flavors to meld and the cauliflower to become tender.
          6. Serve: Once the sweet potatoes are done, slice them open and fluff the insides with a fork. Top with the cauliflower ragu and garnish with fresh parsley.

          Cook and Prep Times

          • Prep Time: 10 minutes
          • Cook Time: 50 minutes
          • Total Time: 1 hour

          Nutrition Information

          • Servings: 4 servings
          • Calories: 280kcal
          • Fat: 8g
          • Protein: 6g
          • Carbohydrates: 48g

          Conclusion: A Healthy Choice for Sweet Potatoes

          Baked sweet potatoes topped with cauliflower ragu present a wonderful option for anyone seeking a healthy and delicious meal. The combination of flavors and textures makes this dish a standout choice for any occasion.

          Whether enjoyed on a weeknight or served at a gathering, this dish is sure to impress. Embrace the wholesome goodness of sweet potatoes and the savory richness of cauliflower ragu for a meal that delights the senses.


          Frequently Asked Questions (FAQ)

          Q: Can I use a different vegetable instead of cauliflower for the ragu?

          A: Yes. The ragu works well with many hearty vegetables. Good alternatives include finely diced mushrooms, lentils, or a mix of zucchini and bell peppers. Adjust the cooking time as necessary until the vegetables are tender.

          Q: How can I make this dish spicier?

          A: To add heat, stir in a pinch of red pepper flakes or a dash of hot sauce (like Harissa or a simple chili sauce) into the ragu while it simmers. You could also sprinkle a pinch of cayenne pepper over the sweet potatoes before baking.

          Q: What is the best way to store leftovers?

          A: Store the baked sweet potatoes and the cauliflower ragu separately in airtight containers in the refrigerator. They will keep for 3 to 4 days. Reheat the sweet potatoes in the oven or microwave, and gently warm the ragu on the stovetop.

          Q: I don’t have time to bake the sweet potatoes. Can I microwave them?

          A: Yes, for a quicker option, you can pierce the sweet potatoes several times with a fork and microwave them on high for 5–10 minutes (depending on size) until they are soft. However, baking them will give you a better, crispier skin and a sweeter flavor.

          Q: Can I prepare the cauliflower ragu ahead of time?

          A: Absolutely. The ragu can be made up to 2 days in advance and stored in the refrigerator. Reheating the ragu right before serving is quick and easy.


          References

          1. Healthline – 6 Surprising Health Benefits of Sweet Potatoes
          2. Mayoclinic – Cauliflower: A versatile nutrition superstar
          3. WebMD – The Health Benefits of Tomatoes

          Recent Posts


          The Best Moroccan Chickpea Soup

          A steaming bowl of Moroccan chickpea soup with carrots and diced tomatoes, garnished with fresh cilantro, served in an orange bowl with a slice of rustic bread resting on the rim, set on a dark wooden table in natural light.

          This Moroccan spiced chickpea soup is a flavorful and nutritious dish that showcases the rich culinary traditions of Morocco. Made with chickpeas, tomatoes, and aromatic spices, it offers a delightful combination of warmth and comfort.

          The recipe is simple to follow and can be made in one pot, making it perfect for weeknight dinners or meal prep. You can adjust the spices to your liking and add vegetables for extra nutrition.


          Exploring the Rich Flavors of Chickpea Soup

          The vibrant Moroccan chickpea soup is a delightful representation of the country’s rich culinary heritage. This dish combines the earthiness of chickpeas with the freshness of vegetables, creating a comforting meal that warms the soul.

          With its colorful ingredients like diced tomatoes and carrots, this soup not only pleases the palate but also the eyes. The aromatic spices bring a unique depth, making it a perfect choice for any occasion.


          Ingredients for Chickpea Soup

          Each component of this chickpea soup plays a vital role in achieving its signature flavor. The base starts with sautéed onions and garlic, which provide a fragrant foundation.

          Adding diced carrots introduces a natural sweetness, while the spices—cumin, coriander, and smoked paprika—infuse the soup with warmth and complexity. The chickpeas add heartiness, making this dish satisfying and nutritious.


          The Art of Preparation

          Preparing Moroccan chickpea soup is a straightforward process that can be completed in about 45 minutes.

          Begin by sautéing the aromatics in olive oil, allowing their flavors to meld. Next, incorporate the vegetables and spices, cooking them until fragrant. Finally, combine everything with vegetable broth and let it simmer, allowing the flavors to develop beautifully.


          Serving Suggestions for Chickpea Soup

          Presentation is key when serving this soup. Ladle the steaming chickpea soup into bowls and garnish with fresh cilantro for a pop of color and freshness.

          Offering lemon wedges on the side adds a bright, zesty finish that enhances the overall flavor profile. This simple addition elevates the dish, making each bite a burst of flavor.


          Ingredients

          • 1 tablespoon olive oil
          • 1 medium onion, chopped
          • 2 cloves garlic, minced
          • 2 medium carrots, diced
          • 1 teaspoon ground cumin
          • 1 teaspoon ground coriander
          • 1/2 teaspoon smoked paprika
          • 1 can (14 oz) diced tomatoes
          • 4 cups vegetable broth
          • 1 can (15 oz) chickpeas, drained and rinsed
          • Salt and pepper to taste
          • Fresh cilantro or parsley for garnish
          • Lemon wedges for serving

          Hearty Moroccan Chickpea Soup Recipe

          This chickpea soup features tender chickpeas simmered with tomatoes, carrots, and a blend of spices like cumin and coriander. The recipe takes about 45 minutes from start to finish and serves 6 people.


          Instructions

          1. Sauté Aromatics: In a large pot, heat the olive oil over medium heat. Add the chopped onion and garlic, and sauté until softened (about 3-4 minutes).
          2. Add Vegetables and Spices: Stir in the diced carrots, cumin, coriander, and smoked paprika. Cook for another 2 minutes until fragrant.
          3. Combine Ingredients: Add the diced tomatoes, vegetable broth, and chickpeas to the pot. Bring to a boil, then reduce the heat and simmer for 25 minutes.
          4. Season: Taste and adjust seasoning with salt and pepper as needed.
          5. Serve: Ladle the soup into bowls and garnish with fresh cilantro or parsley. Serve with lemon wedges on the side for a bright finish.

          Cook and Prep Times

          • Prep Time: 10 minutes
          • Cook Time: 35 minutes
          • Total Time: 45 minutes

          Nutrition Information

          • Servings: 6 bowls
          • Calories: 180kcal
          • Fat: 5g
          • Protein: 9g
          • Carbohydrates: 27g

          Nutritional Benefits of Chickpea Soup

          This Moroccan chickpea soup is not only delicious but also packed with nutritional benefits. Each serving contains a healthy balance of protein and carbohydrates, making it a great option for a wholesome meal.

          Chickpeas are known for their high fiber content, which promotes digestive health. The inclusion of vegetables adds essential vitamins and minerals, contributing to a well-rounded dish.


          Perfect for Any Occasion

          Whether it’s a weeknight dinner or a gathering with friends, this chickpea soup fits the bill. Its simplicity and rich flavors make it a crowd-pleaser.

          Moreover, it can easily be adapted to suit various dietary preferences, making it a versatile addition to any meal plan. Enjoying a bowl of this Moroccan chickpea soup is sure to bring warmth and comfort to any table.


          Frequently Asked Questions (FAQ)

          Q: Can I use dried chickpeas instead of canned?

          A: Yes, you can! You’ll need about 1 cup of dried chickpeas, which should be soaked overnight and then cooked until tender (this usually takes 1-2 hours) before adding them to the soup as per the instructions. Be aware that this will significantly increase the total prep and cook time.

          Q: Can I make this soup vegan/vegetarian?

          A: This recipe is naturally vegan and vegetarian as written, utilizing vegetable broth and plant-based ingredients only.

          Q: How can I make the soup spicy?

          A: To add a kick, you can include a pinch of cayenne pepper or a dash of harissa paste (a traditional Moroccan chili paste) along with the other spices in step 2. You can also garnish your bowl with a drizzle of chili oil.


          References


          Recent Posts


          The Top 10 Sources of Healthy Fats You Need

          A creamy, ripe avocado cut in half with the large pit visible, displaying the vibrant green flesh, a sprinkle of coarse salt, and a cluster of cherry tomatoes, symbolizing Healthy Fats and fresh ingredients on a rustic wooden cutting board.

          Healthy fats are essential for our bodies, providing crucial energy, supporting cell growth, and even helping to absorb key nutrients. If you’re looking to enhance your diet with good sources of fats that benefit your health, we’ve compiled a list of the top 10 sources you should definitely include in your meals. From avocados to nuts, these tasty options will keep you satisfied without derailing your wellness goals.


          Avocado

          Avocados are a fantastic source of healthy fats. They are creamy, delicious, and versatile. You can enjoy them in salads, on toast, or even in smoothies. The image shows a perfectly ripe avocado, cut in half to reveal its smooth, green flesh. The pit sits in the center, and a sprinkle of salt adds a touch of flavor.

          These fruits are packed with monounsaturated fats, which are great for heart health. They help lower bad cholesterol levels and can reduce the risk of heart disease. Plus, avocados are rich in vitamins and minerals, making them a nutritious addition to any meal.

          To enjoy avocados, try making guacamole or simply slice them onto your favorite sandwich. You can also blend them into a creamy dressing or dip. The possibilities are endless!


          Salmon & Oily Fish

          Grilled salmon fillets with lemon and herbs, alongside mackerel and colorful vegetables.

          Salmon and other oily fish are fantastic sources of healthy fats that your body craves. These fish are rich in omega-3 fatty acids, which are known for their heart health benefits. Eating salmon can help reduce inflammation and improve overall cardiovascular health.

          In the image, you can see beautifully grilled salmon fillets garnished with fresh herbs and lemon wedges. The vibrant color of the salmon highlights its freshness and quality. Alongside the salmon, there are mackerel and an assortment of colorful vegetables, showcasing a balanced meal.

          Incorporating salmon into your diet is easy. You can grill, bake, or even enjoy it raw in sushi. Pair it with a side of vegetables for a nutritious meal. Remember, healthy fats are essential for brain function and overall well-being, making salmon a great choice for your plate.


          Extra Virgin Olive Oil

          A bottle of extra virgin olive oil pouring into a small dish with olives and olive leaves in the background.

          Extra virgin olive oil is a staple in many kitchens, and for good reason. This golden liquid is packed with healthy fats that can benefit your body in numerous ways. The image shows a bottle of olive oil being poured into a small dish, highlighting its rich color and smooth texture.

          When you choose extra virgin olive oil, you’re opting for a product that is minimally processed. This means it retains more nutrients and antioxidants compared to other oils. The healthy fats found in olive oil can help reduce inflammation and support heart health.

          Using extra virgin olive oil in your meals is easy. Drizzle it over salads, use it for sautéing vegetables, or even dip your bread in it. Its flavor can enhance a variety of dishes, making it a versatile addition to your cooking.

          Incorporating this oil into your diet is a simple way to enjoy the benefits of healthy fats. So next time you’re in the kitchen, reach for that bottle of extra virgin olive oil and enjoy its delicious taste and health perks!


          Walnuts

          A wooden bowl filled with whole and shelled walnuts, surrounded by green leaves.

          Walnuts are not just tasty; they are packed with healthy fats that can benefit your body in many ways. These nuts are rich in omega-3 fatty acids, which are great for heart health. They also contain antioxidants that help fight inflammation.

          The image shows a beautiful wooden bowl filled with walnuts. You can see both the whole nuts and some that have been shelled, revealing their soft, creamy interior. The natural look of the wood and the green leaves around the bowl add a fresh touch, making walnuts even more appealing.

          Incorporating walnuts into your diet is easy. You can toss them into salads, blend them into smoothies, or enjoy them as a snack. They add a nice crunch and a rich flavor to any dish. Plus, they are a great source of protein, making them a perfect choice for those looking to maintain a balanced diet.


          Chia Seeds & Flax Seeds

          A bowl of chia seeds and flax seeds surrounded by strawberries, blueberries, walnuts, and almonds on a cloth.

          Chia seeds and flax seeds are tiny powerhouses packed with healthy fats. These seeds are not just trendy; they offer a range of benefits that can boost your health. Both are rich in omega-3 fatty acids, which are essential for heart health and brain function.

          In the image, you can see a beautiful bowl filled with chia seeds and flax seeds, surrounded by vibrant berries and nuts. This colorful display highlights how easy it is to incorporate these seeds into your meals. You can sprinkle them on yogurt, blend them into smoothies, or even add them to baked goods.

          Chia seeds are known for their ability to absorb liquid, forming a gel-like consistency. This makes them a fantastic addition to puddings and smoothies. Flax seeds, on the other hand, need to be ground for your body to absorb their nutrients effectively. Both seeds are versatile and can enhance your dishes while providing those healthy fats your body craves.


          Healthy Fats in Almonds & Cashews

          A bowl filled with almonds and cashews surrounded by green leaves.

          Almonds and cashews are not just tasty snacks; they are packed with healthy fats that your body loves. These nuts are rich in monounsaturated fats, which can help lower bad cholesterol levels. A handful of almonds or cashews can give you a satisfying crunch while providing essential nutrients.

          Almonds are known for their high vitamin E content, which is great for skin health. They also contain magnesium, which supports muscle and nerve function. On the other hand, cashews are creamy and delicious, offering a good source of zinc and iron. Together, they make a perfect duo for snacking or adding to your meals.

          Incorporating these nuts into your diet is easy. Toss them into salads, blend them into smoothies, or simply enjoy them on their own. They can also be used in various recipes, from nut butter to baked goods. So, next time you’re looking for a healthy fat option, reach for almonds and cashews!


          Healthy Fats in Olives

          A wooden bowl filled with various olives and fresh rosemary, with olive oil drizzled on the surface.

          Olives are not just tasty snacks; they are packed with healthy fats that can benefit your diet. These small fruits come in various colors, like green, black, and purple, each offering unique flavors and nutrients.

          The image shows a beautiful bowl of olives, surrounded by fresh rosemary. This presentation highlights how olives can be a delightful addition to any meal. Whether you enjoy them on their own, in salads, or as part of a Mediterranean dish, they bring a burst of flavor.

          Rich in monounsaturated fats, olives can help reduce bad cholesterol levels. They also contain antioxidants, which are great for overall health. Adding olives to your meals can enhance taste while supporting your heart.

          Next time you’re looking for a healthy snack or a way to spice up your dishes, consider olives. They are versatile and easy to incorporate into your daily routine.


          Eggs

          A variety of eggs including a soft-boiled egg, scrambled eggs, and whole eggs, surrounded by fresh greens and avocado.

          Eggs are a fantastic source of healthy fats that can boost your diet. They come in various forms, from boiled to scrambled, and are packed with nutrients. The image shows a delightful arrangement of eggs, showcasing their versatility. You can see a soft-boiled egg with a golden yolk, ready to be enjoyed.

          Eggs are not just tasty; they are also rich in omega-3 fatty acids, especially if you choose pasture-raised or omega-3 enriched varieties. These healthy fats support heart health and brain function. Plus, eggs are a complete protein, making them a great addition to any meal.

          Whether you enjoy them for breakfast, lunch, or dinner, eggs can be prepared in countless ways. Try them in an omelet with some veggies or as a topping on a salad. The possibilities are endless, and they fit perfectly into a healthy eating plan.


          Healthy Fats in Soybeans / Edamame

          A bowl of edamame sprinkled with salt, surrounded by green leaves on a wooden table.

          Soybeans, often enjoyed as edamame, are a fantastic source of healthy fats. These little green pods are not just tasty; they pack a nutritional punch. Edamame is rich in omega-3 and omega-6 fatty acids, which are essential for heart health and overall well-being.

          These legumes are also high in protein, making them a great snack or addition to meals. You can enjoy them steamed and sprinkled with a bit of salt for a simple treat. Toss them into salads, stir-fries, or even pasta dishes to boost the nutritional value.

          Incorporating edamame into your diet is easy. You can find them in the frozen section of most grocery stores. Just steam or boil them for a few minutes, and they’re ready to eat. They’re not only delicious but also a fun way to add healthy fats to your meals.


          Healthy Fats in Dark Chocolate (70%+ Cacao)

          A bar of dark chocolate with 70% cacao, surrounded by nuts and cacao nibs on a wooden surface.

          Dark chocolate, especially varieties with 70% or more cacao, is a delightful source of healthy fats. It’s rich in antioxidants and can be a great addition to your diet. The image shows a tempting bar of dark chocolate, surrounded by nuts and cacao nibs, highlighting its rich texture and flavor.

          This type of chocolate contains healthy fats that can support heart health. The cacao in dark chocolate is packed with flavonoids, which are known to improve blood flow and lower blood pressure. Enjoying a small piece can satisfy your sweet tooth while providing nutritional benefits.

          When choosing dark chocolate, look for bars that list cacao content prominently. The higher the percentage, the more beneficial compounds it contains. Pair it with nuts for an extra boost of healthy fats and protein. It’s a simple way to enjoy a treat that’s both delicious and good for you!


          Frequently Asked Questions (FAQs)

          Q: Are all sources of fat considered “healthy fats,” and what makes the fats in these top 10 sources beneficial?

          A: No, not all fats are considered healthy; saturated and trans fats should be consumed in moderation. The fats in these top 10 sources (like avocado, salmon, and olive oil) are primarily monounsaturated and polyunsaturated fats (including Omega-3s). These types of healthy fats are beneficial because they help lower bad cholesterol (LDL), support heart and brain health, reduce inflammation, and aid in the absorption of fat-soluble vitamins.

          Q: How can I easily incorporate nuts and seeds like walnuts, chia seeds, and almonds into my daily diet?

          A: Nuts and seeds are very versatile and easy to add to meals! You can sprinkle them over oatmeal, yogurt, or salads for crunch; blend them into smoothies; use them in baking; or simply enjoy a small handful as a quick, satisfying snack. For flax seeds, ensure they are ground for optimal nutrient absorption.


          References

          1. Healthline – 7 Potential Health Benefits of Avocado
          2. ClevelandClinic – 7 Reasons Why Olives Are Healthy for You
          3. Harvard Health – Chia seed benefits: What you need to know

          Recent Post


          Make This Simple Pomegranate chicken with almond couscous

          Two glazed Pomegranate Chicken thighs served on a bed of fluffy almond couscous, garnished generously with fresh pomegranate seeds and chopped parsley, presented on a dark gray plate with a spoonful of extra glaze on the side.

          This pomegranate chicken recipe features tender chicken breasts glazed with a sweet and tangy pomegranate sauce, paired with nutty almond couscous. It’s a delightful dish that combines vibrant flavors and textures, perfect for a weeknight dinner or a special occasion.

          The recipe is easy to follow and can be prepared in under an hour, making it a great option for busy cooks. The almond couscous adds a lovely crunch and complements the juicy chicken beautifully.


          Vibrant Presentation of Pomegranate Chicken

          The dish of pomegranate glazed chicken is a feast for the eyes, showcasing a stunning contrast of colors and textures. The chicken, coated in a glossy red pomegranate sauce, glistens invitingly on the plate.

          Garnished with fresh parsley, it adds a touch of greenery that enhances the overall appeal. This vibrant presentation makes it an excellent choice for both casual dinners and special occasions, capturing attention before the first bite is even taken.


          Cook and Prep Times

          • Prep Time: 10 minutes
          • Cook Time: 35 minutes
          • Total Time: 45 minutes

          Nutrition Information

          • Servings: 4 servings
          • Calories: 350kcal
          • Fat: 12g
          • Protein: 30g
          • Carbohydrates: 30g

          Ingredients for Pomegranate chicken

          • 4 boneless, skinless chicken breasts
          • 1 cup pomegranate juice
          • 2 tablespoons honey
          • 2 tablespoons soy sauce
          • 1 tablespoon olive oil
          • Salt and pepper to taste
          • 1 cup couscous
          • 1/4 cup sliced almonds, toasted
          • 2 cups chicken broth
          • 1/4 cup chopped fresh parsley for garnish

          Instructions

          1. Prepare the Chicken: Season the chicken breasts with salt and pepper on both sides.
          2. Make the Glaze: In a small saucepan, combine pomegranate juice, honey, and soy sauce. Bring to a simmer over medium heat and cook until slightly thickened, about 5-7 minutes.
          3. Cook the Chicken: In a large skillet, heat olive oil over medium-high heat. Add the chicken breasts and cook for 6-7 minutes on each side, or until cooked through. Brush the pomegranate glaze over the chicken during the last few minutes of cooking.
          4. Prepare the Couscous: In a separate pot, bring chicken broth to a boil. Stir in couscous, cover, and remove from heat. Let it sit for 5 minutes, then fluff with a fork and stir in toasted almonds.
          5. Serve: Plate the almond couscous and top with the glazed chicken. Drizzle any remaining pomegranate glaze over the chicken and garnish with chopped parsley.

          Flavorful Almond Couscous

          Accompanying the pomegranate chicken is a bed of fluffy almond couscous, which brings a delightful crunch to the dish.

          The couscous, prepared with chicken broth, absorbs rich flavors while remaining light and airy. Toasted almonds scattered throughout provide a nutty contrast that complements the sweetness of the pomegranate glaze beautifully.


          Quick Preparation for Busy Cooks

          This pomegranate chicken recipe is designed for those who appreciate quick and flavorful meals.

          With a total preparation time of just 45 minutes, it fits perfectly into a busy weeknight schedule. The straightforward steps ensure that even novice cooks can create an impressive dish without feeling overwhelmed.


          Perfect for Any Occasion

          Whether it’s a family dinner or a gathering with friends, this dish is versatile enough to suit various occasions.

          The combination of succulent chicken and nutty couscous makes it a crowd-pleaser. Its vibrant colors and appealing presentation can elevate any dining experience, making it a memorable meal for all.


          Healthful and Satisfying Pomegranate chicken

          Not only is this pomegranate chicken visually appealing, but it also offers a nutritious option for those looking to enjoy a balanced meal.

          With a good source of protein from the chicken and healthy fats from the almonds, it provides a satisfying dish without compromising on flavor. Each serving is designed to be both filling and nourishing, making it a great addition to any meal plan.


          Serving Suggestions and Pairings

          To enhance the dining experience, consider serving the pomegranate chicken with a side of seasonal vegetables or a fresh salad.

          The crispness of the vegetables will complement the rich flavors of the chicken and couscous. For those who enjoy a bit of heat, a sprinkle of chili flakes can add an exciting twist to the dish.


          Quick and Flavorful Pomegranate Chicken Recipe

          This dish showcases succulent chicken coated in a rich pomegranate glaze, served alongside fluffy almond couscous. The recipe takes about 45 minutes to prepare and serves 4 people.


            Final Thoughts on Pomegranate chicken

            Making this Pomegranate Chicken with almond couscous is an easy way to bring vibrant, exotic flavor to your dinner table. The sweet and tangy glaze perfectly complements the tender, caramelized chicken, while the almond couscous provides a light, nutty base to soak up all those delicious juices. This recipe proves that you don’t need a lot of complex steps to create a truly memorable meal. Whether you’re entertaining guests or just looking to elevate a simple weeknight dinner, this dish is sure to impress.


            Frequently Asked Questions (FAQs)

            Q: Can I substitute chicken thighs for chicken breasts in this Pomegranate Chicken recipe?

            A: Yes, absolutely! While the recipe calls for boneless, skinless chicken breasts, you can easily substitute them with boneless, skinless chicken thighs. Chicken thighs typically require a few more minutes of cooking time (check for an internal temperature of 165∘F), but they will become equally tender and absorb the pomegranate chicken glaze beautifully.

            Q: How can I make the pomegranate glaze thicker?

            A: If you prefer a thicker glaze, simmer the mixture of pomegranate juice, honey, and soy sauce for an extra 2-3 minutes. Alternatively, you can mix 1 teaspoon of cornstarch with 1 tablespoon of cold water and whisk the slurry into the simmering glaze. Continue to cook for another minute until the glaze thickens to your desired consistency.


            References

            Healthline – 10 Health Benefits of Pomegranate

            WebMD – Health Benefits of Chicken

            WebMD – Health Benefits of Couscous


            Recent Posts


            Your New Favorite: Honey Harissa Chicken and Squash

            A savory dish of three richly glazed Harissa Chicken thighs with crispy skin, served on a bed of roasted butternut squash cubes, garnished with fresh cilantro, and presented on a rustic wooden table.
            Flavorful Honey Harissa Chicken

              This Honey Harissa Chicken with Roasted Squash is a delightful dish that combines sweet and spicy flavors for a satisfying meal. We marinate the harissa chicken in a blend of honey and spices, which creates a deliciously sticky glaze that pairs perfectly with tender roasted squash. The recipe is simple, and you can prepare it in under an hour, making it an excellent option for a weeknight dinner or a special occasion.


                Flavorful Honey Harissa Chicken

                Honey harissa chicken is a delightful dish that brings together sweet and spicy notes, making it a perfect choice for any meal. The chicken thighs, marinated in a rich blend of honey and harissa paste, develop a sticky glaze that enhances their juiciness.

                When paired with roasted butternut squash, this dish not only satisfies the palate but also pleases the eyes. The vibrant colors of the chicken and squash create an appetizing presentation that is sure to impress guests or family alike.


                Preparation Steps for Harissa Chicken

                To create this dish, begin by preheating your oven to a high temperature, which is essential for achieving that perfect roast. The chicken thighs should be coated in the honey harissa marinade, allowing the flavors to penetrate the meat.

                Meanwhile, the butternut squash cubes are tossed with spices and olive oil, ensuring they are well-seasoned before roasting. This step is crucial for bringing out the natural sweetness of the squash, which complements the spicy chicken beautifully.


                Cooking Techniques

                Roasting is the key technique used in this recipe. By placing the marinated chicken and seasoned squash on a baking sheet, they can cook together, allowing their flavors to meld. The high heat of the oven caramelizes the sugars in both the chicken and squash, resulting in a deliciously sticky texture.

                Monitoring the cooking time is important; the chicken should be cooked through while the squash becomes tender and slightly caramelized. This balance ensures that both components of the dish are perfectly cooked.


                Serving Suggestions

                Once cooked, the honey harissa chicken and roasted squash can be plated beautifully. A sprinkle of fresh herbs like cilantro or parsley adds a pop of color and freshness to the dish. This garnish not only enhances the visual appeal but also adds a layer of flavor that brightens the overall meal.

                Serving this dish on a rustic wooden table setting enhances the warmth and inviting nature of the meal, making it an excellent choice for gatherings or cozy dinners at home.


                Nutritional Benefits

                This honey harissa chicken with roasted squash is not just delicious; it also offers a balanced nutritional profile. Each serving provides a good amount of protein from the chicken, while the butternut squash contributes essential vitamins and minerals.

                With approximately 350 calories per serving, this dish is a satisfying option for those looking to enjoy a hearty meal without overindulging. The combination of healthy fats from olive oil and the natural sweetness of honey makes it a wholesome choice.


                Flavorful Honey Harissa Chicken Recipe

                Honey harissa chicken thighs with roasted butternut squash on a rustic plate, garnished with fresh herbs.

                This dish features juicy chicken thighs marinated in a honey harissa sauce, roasted alongside seasonal squash until caramelized. It serves 4 people and takes about 45 minutes from start to finish.


                Ingredients

                • 4 chicken thighs, bone-in and skin-on
                • 1/4 cup harissa paste
                • 2 tablespoons honey
                • 2 tablespoons olive oil
                • 1 teaspoon salt
                • 1/2 teaspoon black pepper
                • 1 medium butternut squash, peeled and cubed
                • A teaspoon ground cumin
                • 1 teaspoon smoked paprika
                • Fresh cilantro or parsley for garnish

                Instructions

                1. Preheat the Oven: Preheat your oven to 425°F (220°C).
                2. Prepare the Marinade: In a bowl, mix the harissa paste, honey, olive oil, salt, and black pepper.
                3. Marinate the Chicken: Coat the chicken thighs in the marinade and let them sit for at least 15 minutes.
                4. Prepare the Squash: In a separate bowl, toss the cubed butternut squash with olive oil, cumin, smoked paprika, and a pinch of salt.
                5. Arrange on a Baking Sheet: Place the marinated chicken thighs on one side of a baking sheet and the seasoned squash on the other side.
                6. Roast: Bake in the preheated oven for about 25-30 minutes, or until the chicken is cooked through and the squash is tender and caramelized.
                7. Serve: Garnish with fresh cilantro or parsley before serving. Enjoy your honey harissa chicken with roasted squash hot.

                Cook and Prep Times

                • Prep Time: 15 minutes
                • Cook Time: 30 minutes
                • Total Time: 45 minutes

                Nutrition Information

                • Servings: 4 servings
                • Calories: 350kcal
                • Fat: 20g
                • Protein: 25g
                • Carbohydrates: 20g

                Final Thoughts on Harissa Chicken

                Honey harissa chicken thighs paired with roasted butternut squash create a dish that is both visually stunning and packed with flavor. The simplicity of the preparation, combined with the rich taste, makes it a standout option for any occasion.

                Whether you are cooking for a special gathering or a weeknight dinner, this recipe is sure to impress and satisfy. Enjoy the delightful blend of sweet and spicy flavors, and savor every bite of this vibrant meal.


                References


                Recent Posts


                10 Simple Ways to Use Greek Yogurt in Every Meal

                Greek yogurt is a versatile ingredient that’s perfect for adding a creamy texture and a protein boost to your meals. Whether you’re cooking breakfast, lunch, dinner, or even dessert, there’s a place for Greek yogurt at your table. This guide shares 10 simple ways to incorporate Greek yogurt into every meal, featuring tasty recipes and tips on how to apply it for maximum flavor and nutrition.


                High-Protein Parfait/Bowl with Greek Yogurt

                This is a fantastic base for a high-protein parfait or bowl. It’s creamy, thick, and packed with protein, making it a perfect choice for breakfast or a snack. In the image, you can see a delicious parfait layered with fresh berries, granola, and a hint of sweetness. This colorful dish is not just pleasing to the eye; it’s also nutritious and satisfying.

                To make your own high-protein parfait, start with a cup of Greek yogurt. Layer it in a glass or bowl with your favorite fruits, like blueberries, raspberries, and strawberries. Add a sprinkle of granola for crunch and texture. You can also drizzle some honey or maple syrup on top for a touch of sweetness.

                Mixing Greek yogurt with fruits and granola not only enhances the flavor but also boosts the protein content. This makes it a great option for anyone looking to fuel their day with healthy ingredients. Enjoy it as a quick breakfast or a refreshing afternoon snack!


                Fruit Dip/Frosting

                A bowl of Greek yogurt surrounded by fresh fruits like strawberries, apples, and grapes, showcasing a healthy fruit dip.

                Using this as a fruit dip or frosting is a fun and healthy way to enjoy snacks. The creamy texture and tangy flavor make it a perfect match for fresh fruits. Just look at that beautiful spread of strawberries, apples, and grapes surrounding a bowl of Greek yogurt!

                To make a simple fruit dip, start with one cup of Greek yogurt. Add a tablespoon of honey for sweetness and a splash of vanilla extract for flavor. Mix it all together until smooth. This dip pairs wonderfully with sliced apples and strawberries, making it a hit at parties or as a quick snack.

                If you want to use Greek yogurt as a frosting, blend it with some cream cheese and a bit of powdered sugar. This creates a delicious and healthier frosting option for cakes or cupcakes. Spread it generously over your favorite baked goods for a tasty treat!


                Two-Ingredient Pizza Dough with Greek Yogurt

                A bowl of pizza dough on a kitchen counter surrounded by fresh ingredients.

                Making pizza at home is easier than you think, especially with this two-ingredient pizza dough. The star of the show is Greek yogurt, which adds a creamy texture and a boost of protein. You only need Greek yogurt and self-rising flour to whip up this simple dough.

                To start, combine one cup of Greek yogurt with one cup of self-rising flour in a mixing bowl. Stir until a dough forms. If the dough is too sticky, sprinkle in a bit more flour until it’s manageable. Knead it gently on a floured surface for a minute or two.

                Next, roll out the dough to your desired thickness. You can make it thin and crispy or thicker for a chewier crust. Once rolled out, transfer it to a baking sheet or pizza stone. Now, it’s time for toppings! Spread your favorite sauce, sprinkle cheese, and add any toppings you like. Bake at 450°F (230°C) for about 12-15 minutes, or until the crust is golden and the cheese is bubbly.

                This two-ingredient pizza dough is not only quick but also a fun way to get creative with your meals. Using Greek yogurt makes it a healthier option, so you can enjoy pizza guilt-free!


                Fluffy Protein Pancakes

                A stack of fluffy protein pancakes topped with Greek yogurt, fresh berries, and syrup.

                Fluffy protein pancakes are a delicious way to start your day. They are light, airy, and packed with protein, making them a great breakfast option. The secret ingredient? Greek yogurt! It adds creaminess and a protein boost.

                To make these pancakes, you’ll need flour, baking powder, eggs, milk, and, of course, Greek yogurt. Start by mixing the dry ingredients in one bowl and the wet ingredients in another. Then, combine them gently to keep the batter fluffy.

                When it’s time to cook, heat a non-stick skillet over medium heat. Pour in the batter, and watch for bubbles to form on the surface. Flip them over when they’re golden brown. Serve with a dollop of Greek yogurt on top, fresh berries, and a drizzle of maple syrup for that perfect finish!


                No-Bake Cheesecake Cups

                No-bake cheesecake cups topped with fresh berries and mint on a wooden table.

                No-bake cheesecake cups are a delightful treat that’s both easy to make and delicious. These little desserts are perfect for any occasion, and they look stunning too! The image shows a beautiful arrangement of cheesecake cups topped with fresh berries and mint, making them an eye-catching addition to your table.

                To make these cheesecake cups, you’ll need a few simple ingredients: Greek yogurt, cream cheese, sugar, vanilla extract, and graham cracker crumbs. The Greek yogurt adds a creamy texture and a tangy flavor that balances the sweetness perfectly.

                Start by mixing the cream cheese, Greek yogurt, sugar, and vanilla extract until smooth. This mixture forms the base of your cheesecake. Next, prepare the graham cracker crust by crushing the crackers and mixing them with a bit of melted butter. Layer this crust at the bottom of your cups.

                Once the crust is ready, spoon the cheesecake mixture on top. Chill the cups in the refrigerator for a couple of hours to let them set. Before serving, top each cup with fresh berries and a sprig of mint for that extra pop of color and flavor.

                These no-bake cheesecake cups are not just tasty; they’re also a fun way to enjoy Greek yogurt in dessert form. They’re light, refreshing, and sure to impress your guests!


                Frozen Yogurt Bark

                A colorful frozen yogurt bark topped with strawberries, blueberries, raspberries, and nuts on a marble surface.

                Frozen yogurt bark is a simple and fun way to enjoy Greek yogurt. This treat is not only delicious but also packed with nutrients. You can customize it with your favorite toppings, making it a versatile dessert or snack.

                To make frozen yogurt bark, start with a base of Greek yogurt. Spread it evenly on a baking sheet lined with parchment paper. You can use plain or flavored Greek yogurt, depending on your taste.

                Next, add your favorite toppings. Fresh fruits like strawberries, blueberries, and raspberries work great. Nuts like almonds and pistachios add a nice crunch. Drizzle a little honey or maple syrup on top for extra sweetness.

                Once you’ve added your toppings, place the baking sheet in the freezer. Let it freeze for about 2-3 hours or until it’s solid. After that, break it into pieces and enjoy!

                This frozen yogurt bark is perfect for a hot day or as a healthy dessert option. Plus, using Greek yogurt gives it a creamy texture and a boost of protein. Give it a try, and you’ll have a refreshing treat that everyone will love!


                Tzatziki Sauce with Greek Yogurt

                A bowl of tzatziki sauce surrounded by fresh vegetables and pita bread

                Tzatziki sauce is a refreshing dip that brings a taste of Greece to your table. Made with Greek yogurt, it’s creamy and tangy, perfect for pairing with veggies or pita bread. The image shows a vibrant spread with colorful bell peppers, cucumbers, and warm pita, all ready to be dipped into that delicious tzatziki.

                To make tzatziki, you’ll need Greek yogurt, cucumber, garlic, olive oil, lemon juice, and fresh dill. Start by grating the cucumber and squeezing out excess moisture. Then, mix it with Greek yogurt, minced garlic, a splash of olive oil, a squeeze of lemon juice, and chopped dill. Stir until everything is well combined.

                This sauce is not just a dip; it can also be used as a dressing for salads or a topping for grilled meats. The creamy texture of Greek yogurt makes it a versatile ingredient that enhances the flavors of any dish.


                Lighter Chicken Salad

                A bowl of lighter chicken salad with grilled chicken, cherry tomatoes, cucumbers, and a drizzle of Greek yogurt dressing.

                This lighter chicken salad is a delicious way to enjoy a healthy meal. The image shows a vibrant bowl filled with fresh greens, juicy cherry tomatoes, and tender slices of grilled chicken. The creamy drizzle on top is Greek yogurt, which adds a tangy flavor and a boost of protein.

                To make this salad, start with your favorite greens like romaine or mixed lettuce. Add sliced cucumbers and halved cherry tomatoes for a refreshing crunch. Grill or bake some chicken breast, then slice it and place it on top of the salad.

                For the dressing, mix Greek yogurt with a splash of lemon juice, a pinch of salt, and some herbs like dill or parsley. This creamy dressing is a healthier alternative to traditional dressings and pairs perfectly with the fresh ingredients.

                Drizzle the Greek yogurt dressing over the salad just before serving. This not only enhances the flavor but also makes the salad more filling. Enjoy this lighter chicken salad as a satisfying lunch or a light dinner!


                Creamy Chicken Marinade with Greek Yogurt

                A bowl of creamy chicken marinade made with Greek yogurt, garlic, herbs, and lemon, surrounded by fresh ingredients.

                Using Greek yogurt in a chicken marinade is a fantastic way to add flavor and moisture. The creamy texture of Greek yogurt helps tenderize the chicken while infusing it with delicious taste.

                To make this marinade, you’ll need Greek yogurt, garlic, lemon juice, and your favorite herbs. Start by mixing one cup of Greek yogurt with three minced garlic cloves, the juice of one lemon, and a handful of chopped herbs like parsley or dill. This combination creates a zesty and aromatic base.

                Next, place your chicken in a resealable bag or a bowl and pour the marinade over it. Make sure the chicken is well-coated. Let it marinate in the fridge for at least one hour, or overnight for even more flavor. The longer it sits, the more the flavors will develop.

                When you’re ready to cook, simply grill, bake, or pan-sear the chicken. The Greek yogurt will keep the chicken juicy and tender, making every bite a delight. Enjoy your meal with a side of veggies or a fresh salad!


                Better-For-You Creamy Pasta Sauce

                A bowl of creamy pasta topped with Greek yogurt, cherry tomatoes, and fresh herbs.

                Using Greek yogurt in your pasta sauce is a fantastic way to make it creamy without all the extra calories. This simple swap adds protein and a tangy flavor that elevates your dish.

                To make a delicious creamy pasta sauce, start with your favorite pasta. Cook it according to the package instructions. In a separate pan, sauté garlic and onions in a bit of olive oil until they’re soft. Add in some diced tomatoes and let them simmer. Once the tomatoes are cooked down, stir in a generous scoop of Greek yogurt. This is where the magic happens! The yogurt will create a smooth and creamy texture.

                Mix the cooked pasta into the sauce, ensuring every strand is coated. You can also add in some fresh herbs like basil or parsley for extra flavor. For a pop of color and freshness, top your dish with cherry tomatoes and a sprinkle of more Greek yogurt before serving. This not only looks great but also adds a creamy finish that everyone will love.


                References

                Medicalnewstoday – Is Greek yogurt good for you?

                Healthline – 6 Fantastic Health Benefits of Greek Yogurt

                WebMD – Health Benefits of Greek Yogurt


                Recent Posts