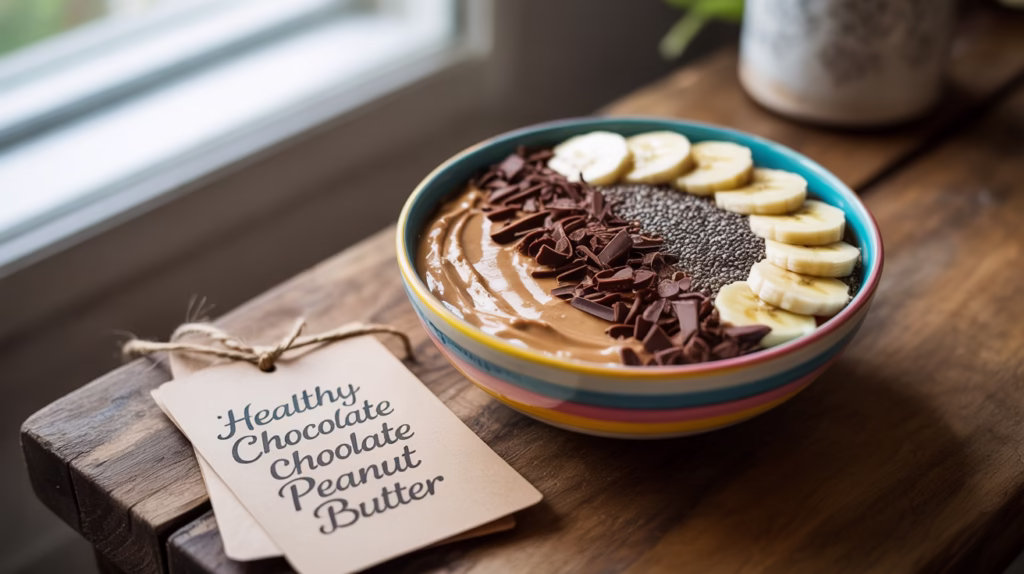
This easy healthy chocolate peanut butter recipe combines the rich flavors of chocolate and peanut butter into a delicious spread. Perfect for toast, smoothies, or straight from the jar, it offers a nutritious alternative to store-bought options.
With simple ingredients and minimal preparation, you can enjoy this delightful treat while controlling the sugar and additives.
Creating Your Own Chocolate Peanut Butter
Imagine a jar of homemade chocolate peanut butter, rich and creamy, ready to elevate your breakfast or snack time. This delightful spread combines the beloved flavors of chocolate and peanut butter, making it a perfect addition to your pantry.
With just a few simple ingredients, you can whip up this nutritious treat in about ten minutes. It’s a fantastic alternative to store-bought spreads, allowing you to control the sweetness and avoid unnecessary additives.
Ingredients for a Delicious Chocolate Peanut Butter
The beauty of this chocolate peanut butter lies in its simplicity. You’ll need natural peanut butter, unsweetened cocoa powder, a sweetener like honey or maple syrup, vanilla extract, and a pinch of salt if desired.
These ingredients come together to create a smooth and creamy texture that spreads beautifully on whole-grain bread. The combination not only satisfies your sweet tooth but also provides a healthy dose of protein and healthy fats.
Quick Preparation Steps
To make your chocolate peanut butter, start by combining the peanut butter and cocoa powder in a mixing bowl. Then, add your chosen sweetener and vanilla extract.
Mix everything until it’s well combined and smooth. Taste the mixture and adjust the sweetness if necessary by adding more honey or syrup. Once you’re satisfied with the flavor, transfer the spread to a clean jar and refrigerate it. The chocolate peanut butter will thicken slightly as it cools, making it even more delightful.
That’s a great idea for adding practical advice!
You should add a short section titled “Mastering Portion Control” directly before the “Serving Suggestions” section, as it introduces the healthiest way to enjoy the spread before giving specific ideas.
Here are a few sentences you could use:
Mastering Portion Control
Because this Chocolate Peanut Butter is so delicious and nutrient-dense, it’s easy to overdo it! Remember that healthy fats are high in calories, even in small amounts. Aim to stick to a serving size of about one to two tablespoons per snack or meal to keep your calories in check while still benefiting from the spread’s protein and satisfying flavor.
Serving Suggestions
This versatile spread can be enjoyed in various ways. Slather it on slices of whole-grain bread for a quick breakfast or snack. It also pairs wonderfully with fresh fruits like bananas or apples, making for a nutritious dip.
Feeling adventurous? Add a spoonful of this chocolate peanut butter to your smoothies for a rich, chocolatey flavor that enhances your drink while providing a boost of energy.
Storage and Shelf Life
Once prepared, your chocolate peanut butter can be stored in the refrigerator for several weeks. Just make sure to keep it in a sealed jar to maintain its freshness.
As it sits, the flavors meld beautifully, making each spoonful even more enjoyable. This homemade spread is not only delicious but also a healthier choice compared to many commercial options.
Nutrition Benefits
Each serving of this chocolate peanut butter offers a satisfying combination of protein and healthy fats, making it a great addition to your diet. With only about 90 calories per serving, it’s a guilt-free indulgence.
By making your own chocolate peanut butter, you’re not just treating yourself to a tasty spread; you’re also making a nutritious choice that can fit into a balanced diet.
Quick and Nutritious Chocolate Peanut Butter
This chocolate peanut butter is made with natural peanut butter, cocoa powder, and a touch of sweetener. It takes about 10 minutes to prepare and can be stored in the refrigerator for several weeks.
Ingredients
1 cup natural peanut butter
1/4 cup unsweetened cocoa powder
2-4 tablespoons honey or maple syrup (adjust to taste)
1 teaspoon vanilla extract
Pinch of salt (optional)
Instructions for Chocolate Peanut Butter
Combine Ingredients: In a mixing bowl, add the peanut butter, cocoa powder, honey or maple syrup, vanilla extract, and salt.
Mix: Stir the ingredients together until well combined and smooth. Adjust sweetness by adding more honey or syrup if desired.
Store: Transfer the chocolate peanut butter to a clean jar with a lid and refrigerate. It will thicken slightly as it cools.
Serve: Use it as a spread on toast, a dip for fruits, or add it to smoothies for a chocolatey flavor.
Cook and Prep Times
Prep Time: 10 minutes
Cook Time: 0 minutes
Total Time: 10 minutes
Nutrition Information
Servings: 16 servings
Calories: 90kcal
Fat: 8g
Protein: 3g
Carbohydrates: 4g
Final Thoughts on Homemade Chocolate Peanut Butter
This Chocolate Peanut Butter recipe is proof that the healthiest food is often the food you make yourself. In just ten minutes, you can create a spread that delivers a powerful combination of protein and healthy fats without the unwanted additives and high sugar often found in store-bought jars.
Whether you’re slathering it on an apple, stirring it into a morning smoothie, or using it to elevate your favorite toast, this easy and flavorful spread is a guilt-free indulgence that ensures you’re fueling your body with quality ingredients. Making this simple swap is a delicious step toward a more balanced and nutritious diet.
If you’re looking to spice up your pasta dishes with healthy Pasta Sauces, you’re in the right place! Here are ten easy-to-make sauces that will add flavor without the extra calories. Whether you’re in the mood for something creamy, tangy, or herbaceous, there’s a sauce here for every palate and any meal. Get your apron on, and let’s get cooking!
Classic Marinara with Hidden Veggies: A Top-Tier Healthy Pasta Sauce
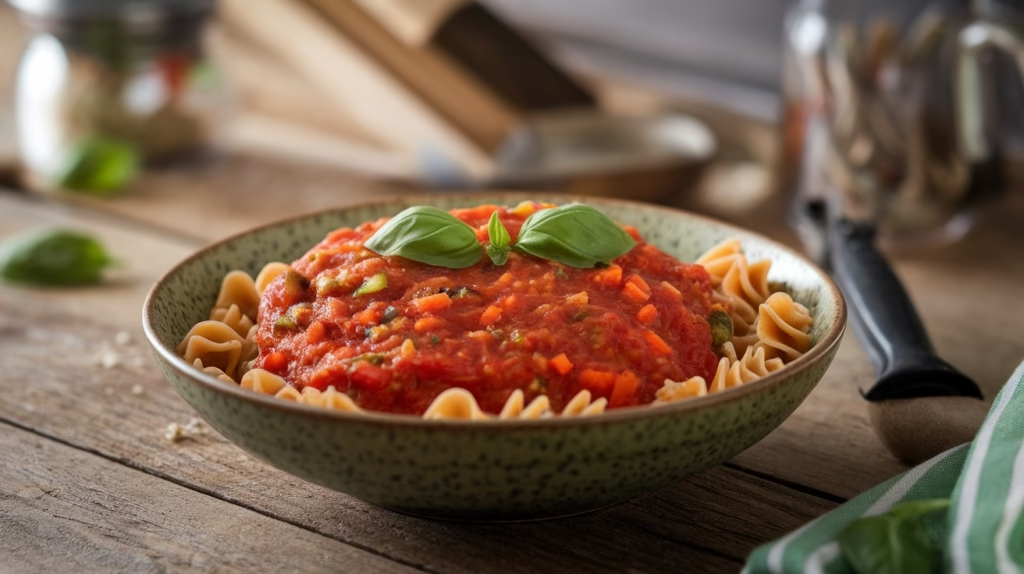
Classic marinara sauce is a staple in many kitchens, and it’s easy to see why. It’s simple, delicious, and pairs well with various dishes. This version takes it up a notch by sneaking in some healthy veggies. You get all the rich flavors of traditional marinara while boosting the nutritional value.
In the image, you can see a vibrant bowl of marinara sauce, beautifully presented over a bed of pasta. The sauce is thick and chunky, with bits of carrots and green peppers peeking through. Fresh basil sits on top, adding a pop of color and a hint of freshness. This dish not only looks appetizing but also promises a burst of flavors.
To make this healthy pasta sauce, you’ll need ingredients like canned tomatoes, garlic, onions, and a mix of your favorite vegetables. Carrots and bell peppers work great for adding sweetness and texture. Start by sautéing the onions and garlic, then add the chopped veggies. Once they soften, stir in the tomatoes and let it simmer.
After about 30 minutes, you’ll have a delicious marinara sauce that’s perfect for any pasta dish. Serve it over whole grain pasta for an extra health boost. This classic marinara with hidden veggies is a great way to enjoy healthy pasta sauces without sacrificing taste!
Homemade Basil Pesto (Lightened): A Fresh Healthy Pasta Sauce
This lightened homemade basil pesto is a game changer for your pasta dishes. The vibrant green color and fresh aroma of basil make it irresistible. You can see the creamy texture in the jar, topped with a sprinkle of pine nuts and a fresh basil leaf. It’s a perfect addition to any healthy pasta sauce collection.
To make this pesto, you’ll need fresh basil, garlic, pine nuts, Parmesan cheese, olive oil, and a squeeze of lemon juice. Start by blending the basil, garlic, and pine nuts until finely chopped. Then, slowly add in the olive oil while blending until smooth. Stir in the Parmesan and lemon juice for that extra zing. This simple process creates a delicious sauce that pairs well with any pasta.
Using this lightened pesto not only enhances the flavor of your dishes but also keeps them healthy. It’s a fantastic way to enjoy pasta while sticking to your wellness goals. So, grab your ingredients and whip up this delightful sauce!
Creamy Butternut Squash Sauce: The Ultimate Healthy Pasta Sauce Swap
This creamy butternut squash sauce is a delightful addition to any pasta dish. The vibrant orange color of the sauce, paired with the spiral pasta, makes for a visually appealing meal. The dish is topped with fresh herbs and a sprinkle of cheese, adding a touch of elegance and flavor.
To make this healthy pasta sauce, you’ll need a few simple ingredients. Start with one medium butternut squash, peeled and cubed. You’ll also need garlic, onion, vegetable broth, and a splash of cream or a dairy-free alternative. Blend these ingredients together for a smooth, creamy texture that clings perfectly to your pasta.
Cooking is easy! First, roast the butternut squash until tender. Sauté the garlic and onion until fragrant, then combine everything in a blender. Add seasoning to taste, and you’re ready to mix it with your favorite pasta. This sauce not only tastes great but also packs a nutritious punch, making it one of the best healthy pasta sauces around!
Avocado-Cilantro Cream: A No-Cook Healthy Pasta Sauce
This Avocado-Cilantro Cream Sauce is a delightful twist on traditional pasta sauces. The creamy texture of ripe avocados blends perfectly with fresh cilantro, creating a vibrant and healthy option for your dishes. The image showcases a bowl of this luscious sauce, surrounded by fresh cilantro, ripe avocados, and a plate of pasta, ready to be dressed with this delicious sauce.
To make this sauce, you’ll need just a few simple ingredients: ripe avocados, fresh cilantro, lime juice, garlic, and a splash of water to achieve the desired consistency. Start by blending the avocados, cilantro, garlic, and lime juice until smooth. Add water gradually until you reach your preferred thickness. This sauce is not only easy to make but also packed with nutrients, making it one of the best healthy pasta sauces you can whip up in no time!
Serve this sauce over your favorite pasta, or use it as a dip for veggies. It’s versatile and adds a fresh, zesty flavor to any meal. Enjoy the creamy goodness and the health benefits that come with it!
Lemon Garlic Sauce with Zucchini: A Light Healthy Pasta Sauce
Lemon garlic sauce with zucchini is a refreshing and light option for your pasta dishes. This sauce brings a burst of flavor that pairs perfectly with the subtle taste of zucchini noodles. The image shows a beautiful bowl of spiralized zucchini, topped with lemon zest and fresh herbs, creating a vibrant and inviting dish.
To make this healthy pasta sauce, you’ll need just a few simple ingredients: fresh zucchini, garlic, lemon juice, olive oil, and parsley. Start by spiralizing the zucchini into noodles. In a pan, heat olive oil and sauté minced garlic until fragrant. Add the zucchini noodles and cook for a couple of minutes until just tender. Finally, stir in lemon juice and zest for that zesty kick.
This sauce is not only quick to prepare but also packed with nutrients. It’s a great way to enjoy healthy pasta sauces without sacrificing flavor. Serve it warm or cold, and feel free to add your favorite protein for a complete meal!
Red Lentil Bolognese: A High-Protein Healthy Pasta Sauce
Red Lentil Bolognese is a fantastic twist on the classic pasta sauce. This dish is not only hearty but also packed with nutrients. The vibrant red sauce, made from lentils, tomatoes, and spices, brings a comforting warmth to any pasta dish.
In the image, you can see a generous serving of this delicious sauce over a bed of spiral pasta. The lentils add a lovely texture, while the fresh basil on top gives it a pop of color and flavor. This is a great example of how healthy pasta sauces can be both satisfying and nutritious.
To make this dish, you’ll need red lentils, canned tomatoes, garlic, onion, and your favorite herbs. Start by sautéing the onion and garlic, then add the lentils and tomatoes. Let it simmer until the lentils are tender. Serve it over pasta for a delightful meal that everyone will love!
“Creamy” Green Sauce (Spinach & Broccoli): A Veggie-Packed Healthy Pasta Sauce
This creamy green sauce is a delightful blend of spinach and broccoli, making it a fantastic choice for healthy pasta sauces. The vibrant green color is not just appealing; it also signals the nutritious ingredients packed inside. The sauce is rich and creamy, perfect for coating your favorite pasta.
To make this sauce, you’ll need fresh spinach, broccoli, garlic, and a few other simple ingredients. Start by steaming the broccoli until tender, then blend it with sautéed garlic and spinach until smooth. Adding a splash of cream or a dairy-free alternative will enhance the creaminess. Toss it with your pasta of choice, and you have a meal that’s both tasty and healthy!
Don’t forget to sprinkle some cheese on top for extra flavor. This sauce is versatile and can be used with various pasta shapes. It’s a great way to sneak in some veggies while enjoying a comforting dish.
Sun-Dried Tomato & Feta: An Antioxidant-Rich Healthy Pasta Sauce
This Sun-Dried Tomato & Feta Sauce is a delightful twist on traditional pasta sauces. The rich red color of the sauce, combined with the creamy feta, makes it visually appealing and delicious. The sun-dried tomatoes add a burst of flavor that pairs perfectly with whole grain pasta.
To make this sauce, you’ll need sun-dried tomatoes, feta cheese, garlic, olive oil, and fresh basil. Start by blending the sun-dried tomatoes with garlic and olive oil until smooth. Then, mix in crumbled feta for that creamy texture. Toss it all together with your favorite pasta, and you will have healthy Pasta Sauces meal ready in no time!
This sauce is not just tasty; it’s also packed with nutrients. Sun-dried tomatoes are rich in antioxidants, while feta adds a nice dose of protein. It’s a great option for anyone looking to enjoy healthy pasta sauces without sacrificing flavor.
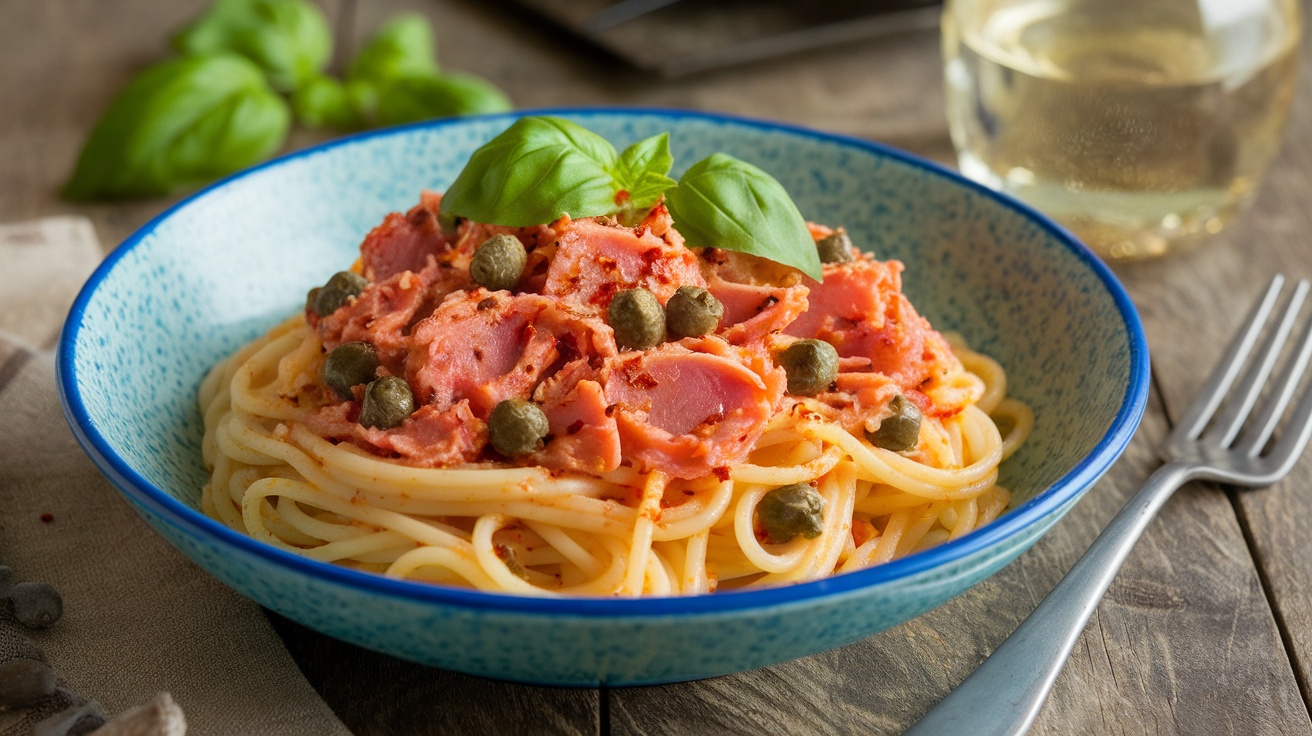
Spicy Tuna And Caper Sauce (Puttanesca Style): A High-Protein Healthy Pasta Sauce
This Spicy Tuna and Caper Sauce brings a twist to the classic puttanesca. The image showcases a beautiful bowl of spaghetti topped with a vibrant mix of tuna, capers, and fresh basil. The colors pop, making it not just a meal but a feast for the eyes.
To whip this into healthy pasta sauces, you’ll need canned tuna, capers, garlic, crushed tomatoes, and a few spices for that kick. Start by sautéing garlic in olive oil, then add the tomatoes and spices. Stir in the tuna and capers, letting the flavors meld together.
Serve this sauce over your favorite pasta, and enjoy a dish that’s not only tasty but also packed with nutrients. It’s perfect for a quick weeknight dinner or a cozy weekend meal.
Roasted Red Pepper Sauce: A Simple & Creamy Healthy Pasta Sauce
Roasted red pepper sauce is a vibrant and tasty addition to any pasta dish. This sauce is not only easy to make but also packed with flavor. The image shows a beautiful bowl of this sauce, garnished with fresh basil, surrounded by garlic, red peppers, and olive oil. These ingredients highlight the freshness and simplicity of this healthy pasta sauce.
To make roasted red pepper sauce, you’ll need a few key ingredients: roasted red peppers, garlic, olive oil, and some fresh herbs. Start by blending the roasted peppers with garlic and olive oil until smooth. You can add salt and pepper to taste. If you like a bit of heat, a pinch of red pepper flakes can spice things up!
This sauce works great with any type of pasta. Toss it with whole grain spaghetti for a healthy twist or use it as a base for a veggie-packed lasagna. The creamy texture and rich flavor will impress everyone at the table. Plus, it’s a fantastic way to eat healthy Pasta Sauces by sneaking in some extra veggies!
Pasta lovers, rejoice! There are plenty of pasta options that are not only tasty but also pack a nutritious punch. From whole grain to veggie-infused varieties, these 10 healthy pasta types will add flavor and health benefits to your meals, making it easier to enjoy your favorite comfort food without compromising on nutrition.
Whole Wheat Pasta
Whole wheat pasta is a fantastic choice for anyone looking to enjoy a healthy meal. Made from whole grain flour, it retains the bran and germ, which means it packs in more nutrients than regular pasta. This gives it a nutty flavor and a slightly firmer texture that many people love.
One of the best things about whole wheat pasta is its health benefits. It is rich in fiber, which helps with digestion and keeps you feeling full longer. This can be especially helpful if you’re trying to manage your weight. Plus, it contains essential vitamins and minerals like iron and magnesium, making it a nutritious option.
Pair whole wheat pasta with fresh ingredients like cherry tomatoes and basil, as shown in the image. This not only enhances the taste but also adds more vitamins and antioxidants to your meal. You can easily whip up a simple dish by tossing cooked pasta with olive oil, garlic, and your favorite veggies.
Incorporating whole wheat pasta into your diet is a delicious way to enjoy a healthy pasta option. Whether you’re making a quick weeknight dinner or a meal prep for the week, it’s a versatile ingredient that fits well into many recipes.
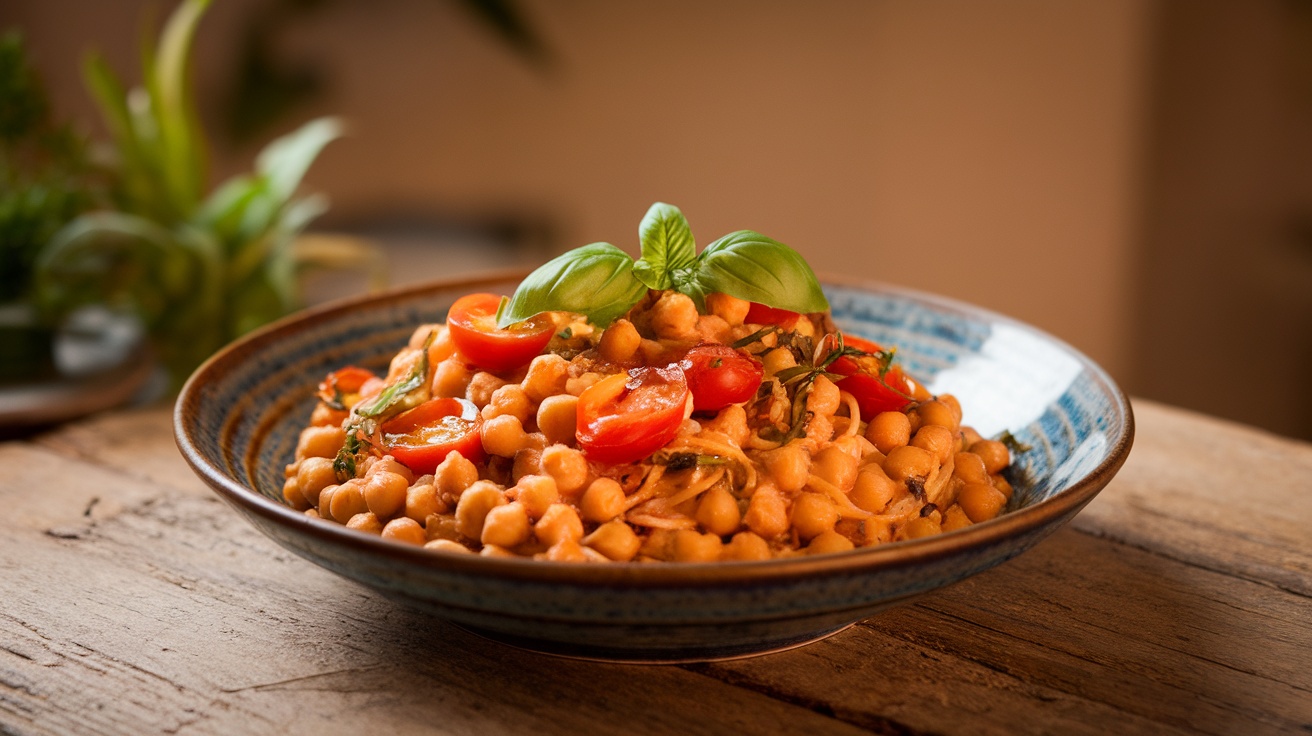
Chickpea Pasta: High-Protein Healthy Pasta
Chickpea pasta is a fantastic alternative to traditional pasta. Made from ground chickpeas, it packs a punch when it comes to nutrition. This pasta is gluten-free, making it a great choice for those with gluten sensitivities.
In the image, you can see a delicious bowl of chickpea pasta topped with fresh cherry tomatoes and basil. The vibrant colors make it not only appealing but also a healthy option for any meal. Chickpea pasta is rich in protein and fiber, which helps keep you full and satisfied.
Cooking chickpea pasta is simple. Just boil it in salted water for about 7-10 minutes until al dente. You can toss it with your favorite sauces or veggies for a quick meal. It’s a great way to enjoy a hearty dish without the carbs of regular pasta.
Overall, chickpea pasta is a healthy pasta choice that offers great flavor and texture. It’s perfect for anyone looking to add more plant-based options to their diet.
Lentil Pasta (Red Or Green Lentil)
Lentil pasta is a fantastic choice for anyone looking to enjoy healthy pasta without sacrificing flavor. Made from red or green lentils, this pasta is packed with protein and fiber, making it a great option for vegetarians and those wanting to boost their nutrient intake.
The image shows a vibrant bowl of lentil pasta topped with fresh basil and cherry tomatoes. This colorful presentation not only looks appetizing but also highlights the fresh ingredients that complement lentil pasta beautifully.
One of the best things about lentil pasta is its health benefits. It’s gluten-free, which is perfect for those with gluten sensitivities. Plus, it has a lower glycemic index compared to traditional pasta, helping to keep blood sugar levels stable. With a good amount of iron and B vitamins, lentil pasta supports overall health and energy levels.
Cooking lentil pasta is simple. Just boil it in water for about 7-10 minutes, and you’re ready to go! Pair it with your favorite sauce or sautéed veggies for a quick, nutritious meal.
Brown Rice Pasta: A Gluten-Free Healthy Pasta Option
Brown rice pasta is a fantastic option for anyone looking to enjoy healthy pasta. Made from whole grain brown rice, it offers a nutty flavor and a chewy texture that many find delightful. This pasta is gluten-free, making it a great choice for those with gluten sensitivities or celiac disease.
One of the standout features of brown rice pasta is its nutritional profile. It is rich in fiber, which aids digestion and helps keep you feeling full longer. This can be especially beneficial if you’re watching your weight. Brown rice pasta also contains essential nutrients like magnesium and B vitamins, which support energy production and overall health.
Cooking brown rice pasta is simple. Just boil it in water for about 8-10 minutes until it reaches your desired tenderness. You can pair it with a variety of sauces and vegetables. Toss in some fresh herbs, like basil or parsley, for an extra burst of flavor. It’s versatile enough to work in salads, stir-fries, or classic pasta dishes.
Incorporating brown rice pasta into your meals can be a delicious way to enjoy healthy pasta while reaping its many health benefits. So, next time you’re in the mood for pasta, give brown rice pasta a try!
Quinoa Pasta: A Complete-Protein Healthy Pasta
Quinoa pasta is a fantastic choice for anyone looking to enjoy healthy pasta. Made from quinoa flour, it offers a unique texture and flavor that sets it apart from traditional wheat pasta.
This pasta is not only gluten-free but also packed with protein and fiber. Quinoa is a complete protein, meaning it contains all nine essential amino acids. This makes it a great option for vegetarians and vegans.
In the image, you can see a vibrant bowl of quinoa pasta mixed with fresh vegetables. This colorful dish not only looks appetizing but also provides a variety of nutrients. Adding veggies boosts the fiber content and adds essential vitamins.
Cooking quinoa pasta is simple. Just boil it in water for about 8-10 minutes, then toss it with your favorite sauce or ingredients. You can create a light lemon dressing or a hearty tomato sauce to complement its nutty flavor.
Overall, quinoa pasta is a healthy alternative that satisfies cravings while keeping your meals nutritious. It’s perfect for anyone wanting to try something new while sticking to a healthy diet.
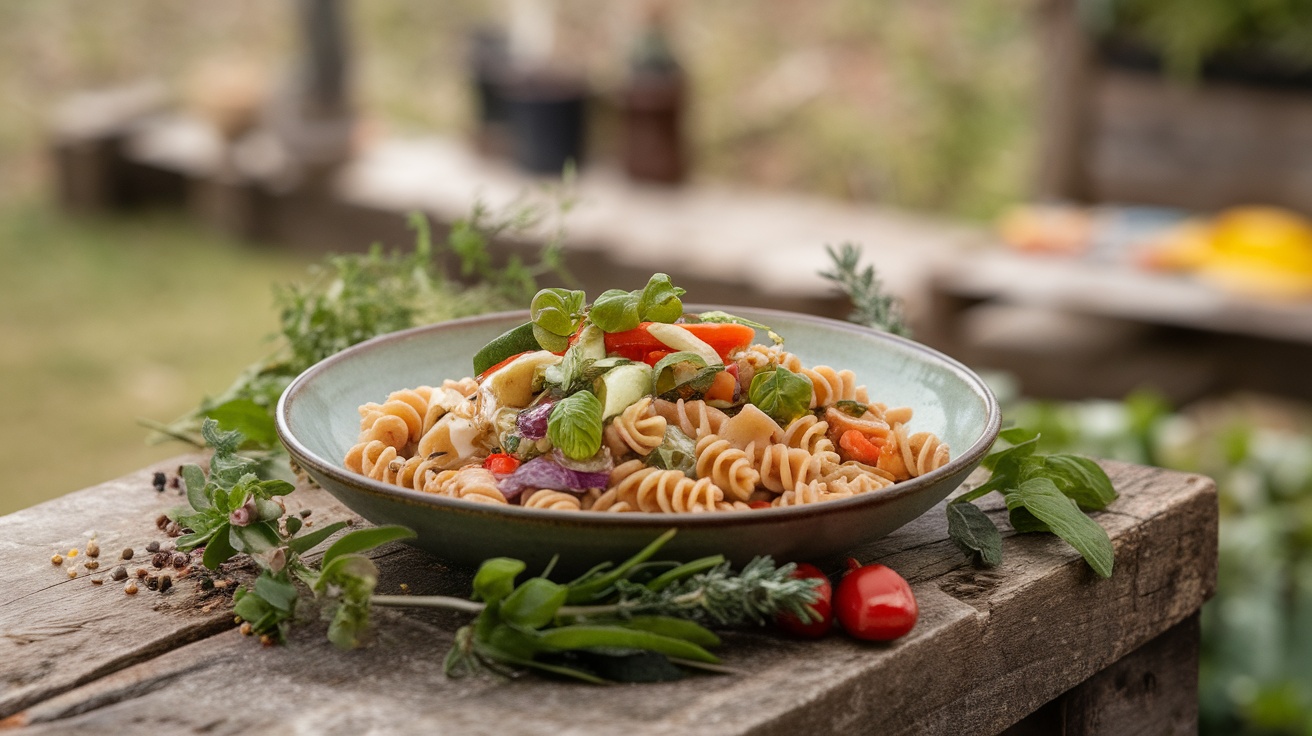
Spelt Pasta: An Ancient Grain Healthy Pasta
Spelt pasta is a fantastic choice for those looking to enjoy healthy pasta options. Made from spelt flour, this pasta offers a nutty flavor and a chewy texture that many find delightful. It’s a great alternative to traditional wheat pasta, especially for those who want to try something new.
One of the standout features of spelt pasta is its nutritional profile. It’s higher in protein and fiber compared to regular pasta, making it a filling option that can help keep you satisfied longer. Plus, spelt is rich in vitamins and minerals like magnesium and iron, which are essential for overall health.
Cooking spelt pasta is just like cooking regular pasta. Simply boil it in salted water for about 7-10 minutes, depending on the thickness. Pair it with fresh vegetables, a light sauce, or even a sprinkle of cheese for a delicious meal. You can see in the image a beautiful bowl of spelt pasta topped with cherry tomatoes and fresh basil, showcasing how vibrant and appetizing this dish can be.
Incorporating spelt pasta into your diet can be a simple way to enjoy healthy pasta while adding variety to your meals. It’s versatile and can be used in salads, casseroles, or served as a main dish. So, if you’re on the lookout for a nutritious pasta option, give spelt pasta a try!
Soba Noodles: Buckwheat Healthy Pasta
Soba noodles are a fantastic choice for anyone looking to enjoy healthy pasta. Made from buckwheat flour, these noodles have a unique nutty flavor and a delightful texture. They are often served cold or hot, making them versatile for various dishes.
One of the best things about soba noodles is their health benefits. They are high in protein and fiber, which can help keep you full and satisfied. Plus, they are lower in calories compared to traditional pasta, making them a great option for those watching their weight.
To prepare a simple soba noodle dish, cook the noodles according to package instructions. Toss them with fresh vegetables like cucumbers, carrots, and bell peppers. A drizzle of soy sauce or sesame oil adds flavor without adding too many calories. Top it off with sesame seeds for a crunchy finish!
Incorporating soba noodles into your meals is a delicious way to enjoy healthy pasta while reaping the benefits of buckwheat. Whether in a salad or a warm broth, they are sure to please your taste buds.
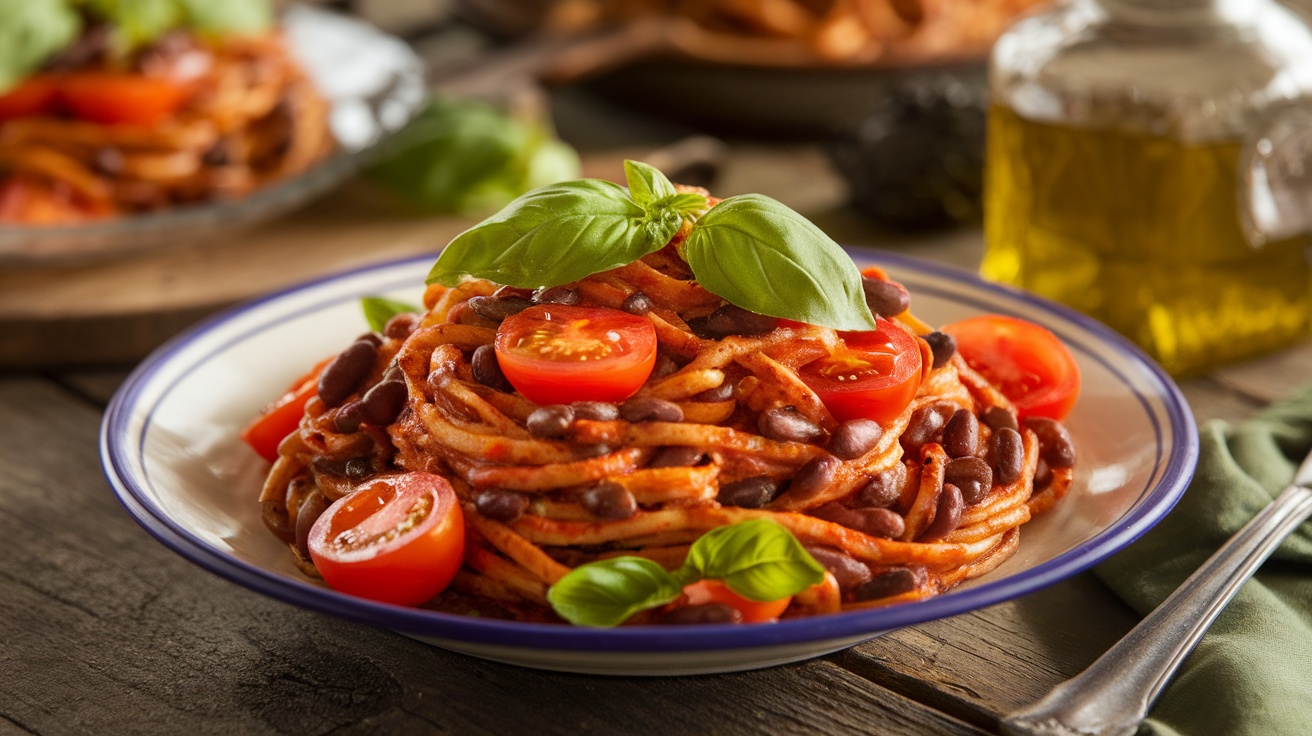
Black Bean Pasta: A High-Antioxidant Healthy Pasta
Black bean pasta is a fantastic option for anyone looking to enjoy healthy pasta. Made primarily from black beans, this pasta is packed with protein and fiber, making it a filling choice. The rich color and unique texture add a fun twist to your meals.
This pasta is not just about looks; it’s also a powerhouse of nutrients. Black beans are known for their high antioxidant content, which can help reduce inflammation and promote heart health. Plus, they are gluten-free, making them a great alternative for those with dietary restrictions.
Cooking black bean pasta is simple. Just boil it for about 6-8 minutes until tender. Pair it with fresh ingredients like cherry tomatoes, basil, and a drizzle of olive oil for a light, healthy dish. You can also add your favorite vegetables or proteins to make it even more satisfying.
Incorporating black bean pasta into your diet can be a delicious way to boost your health. It’s a great source of complex carbohydrates, which provide lasting energy without the crash that comes from refined pasta. So, if you’re looking for a healthy pasta option, give black bean pasta a try!
Zucchini Noodles (Zoodles): Low-Carb Healthy Pasta Alternative
Zucchini noodles, often called zoodles, are a fantastic alternative to traditional pasta. They are made by spiralizing fresh zucchini into long, noodle-like strands. This dish is not only visually appealing but also packed with nutrients.
One of the best things about zoodles is how healthy they are. Zucchini is low in calories and high in vitamins A and C, making it a great choice for anyone looking to eat healthier. They are also gluten-free, which is perfect for those with dietary restrictions.
Making zoodles is super easy. Just spiralize a couple of zucchinis, sauté them for a few minutes, and toss them with your favorite sauce. You can add cherry tomatoes, basil, or even grilled chicken for extra flavor and nutrition. This dish is light, refreshing, and perfect for a quick meal.
So, if you’re looking to switch things up and enjoy a healthy pasta option, give zoodles a try. They’re a delicious way to incorporate more veggies into your diet!
Shirataki Or Konjac Noodles: The Zero-Calorie Healthy Pasta
Shirataki noodles, also known as konjac noodles, are a fantastic option for anyone looking to enjoy healthy pasta. These noodles are made from the konjac plant, which is high in glucomannan, a type of soluble fiber. This fiber is great for digestion and helps keep you feeling full longer.
In the image, you can see a beautifully plated serving of shirataki noodles topped with colorful vegetables. The presentation is eye-catching, making it a delightful dish to serve at any meal. The noodles themselves are translucent and have a unique texture that can be quite satisfying.
One of the best things about shirataki noodles is their low calorie count. They contain almost no calories, making them an excellent choice for those watching their weight. Plus, they are gluten-free, which is a bonus for anyone with dietary restrictions.
To prepare shirataki noodles, simply rinse them under cold water, then add them to your favorite sauce or stir-fry. They absorb flavors well, making them versatile for various dishes. You can enjoy them with a light sauce, sautéed veggies, or even in a soup.
Incorporating shirataki noodles into your meals is a simple way to enjoy healthy pasta while keeping your diet balanced. They offer a unique alternative to traditional pasta, allowing you to indulge without the guilt!
Looking to boost your energy and detox your system? Check out this list of 10 Superfoods that have got your back. Packed with nutrients and vibrant flavors. These green powerhouses are perfect for sprucing up your meals and giving your body the cleanse it deserves. Let’s jump right in!
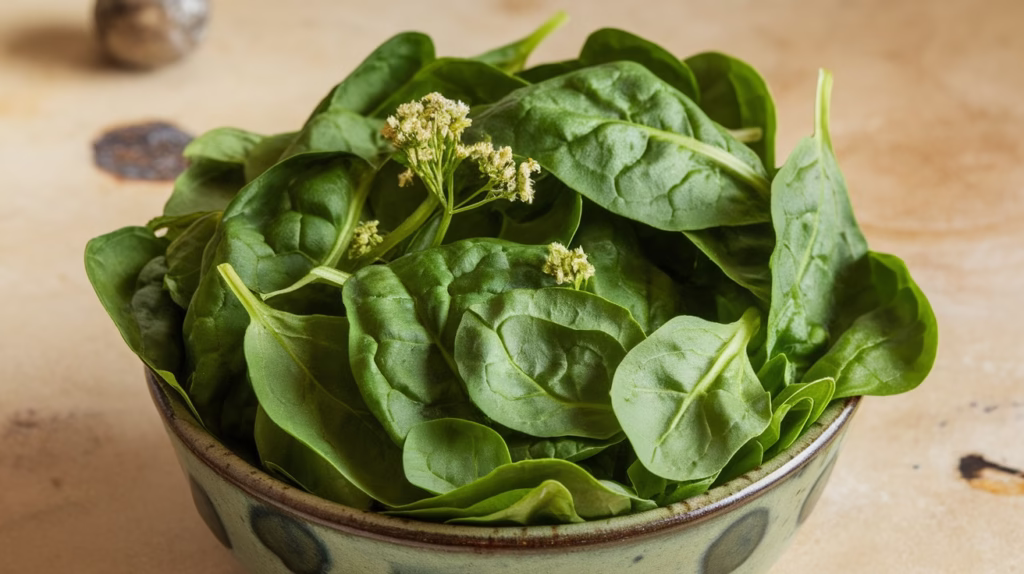
Spinach: The Leafy Green Superfoods
Spinach has earned its status as a quintessential superfood, a reputation stemming from its incredibly dense nutrient profile. This humble leafy green is a powerhouse of essential vitamins and minerals, all delivered for a remarkably low calorie count. It is an exceptional source of Vitamin K, which is vital for bone health and blood clotting. And it is a fantastic source of Vitamin A, which supports vision and immune function. Furthermore, spinach is rich in folate (Vitamin B9) and magnesium. This makes it a critical ingredient for supporting energy production and overall cellular health.
What truly elevates spinach to superfood status is its concentration of powerful antioxidants, including lutein and zeaxanthin. These compounds are particularly renowned for their role in promoting eye health. By filtering out harmful high-energy blue light and protecting against age-related macular degeneration. Additionally, spinach contains plant compounds like nitrates. These have been linked to improved cardiovascular health by helping to regulate blood flow and reduce blood pressure. Its rich antioxidant content also helps combat oxidative stress, thereby reducing the risk of chronic diseases.
Finally, spinach is incredibly versatile and easy to incorporate into a daily diet, making it a practical choice for boosting nutrition. Whether you consume it raw in salads, blended into smoothies, or lightly sautéed as a side dish, its mild flavor is easy to mask or complement. Its high fiber content also aids in healthy digestion and promotes a feeling of fullness, which can support weight management efforts. For those seeking maximum nutritional impact with minimal effort, spinach is an undeniable green superfood champion.
Spirulina: The Blue-Green Superfoods
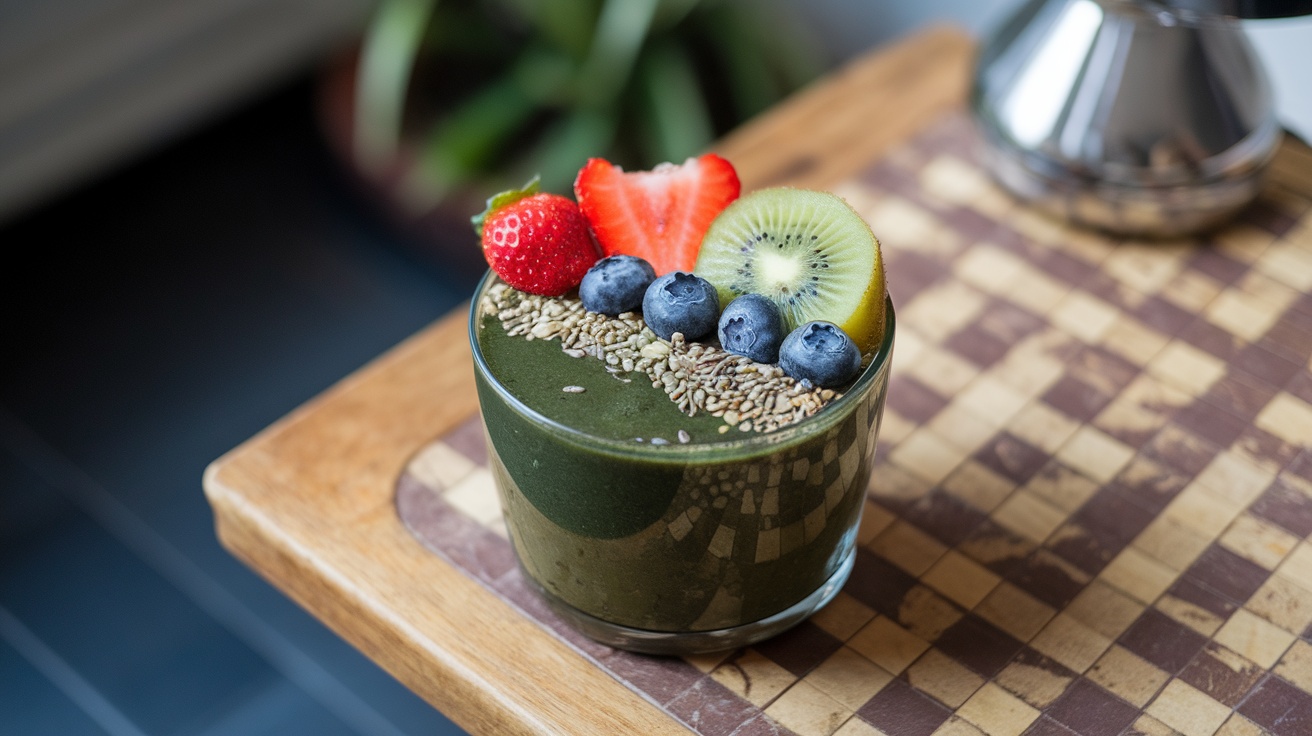
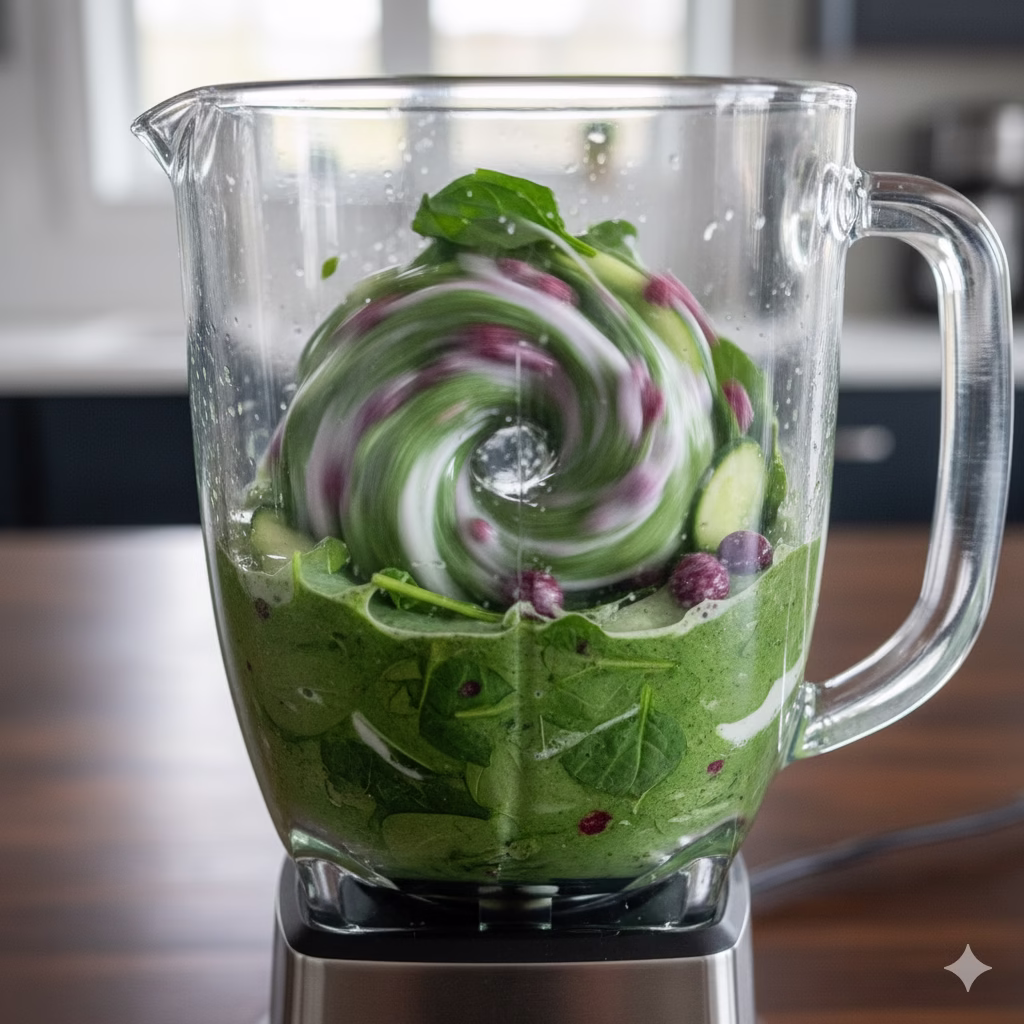
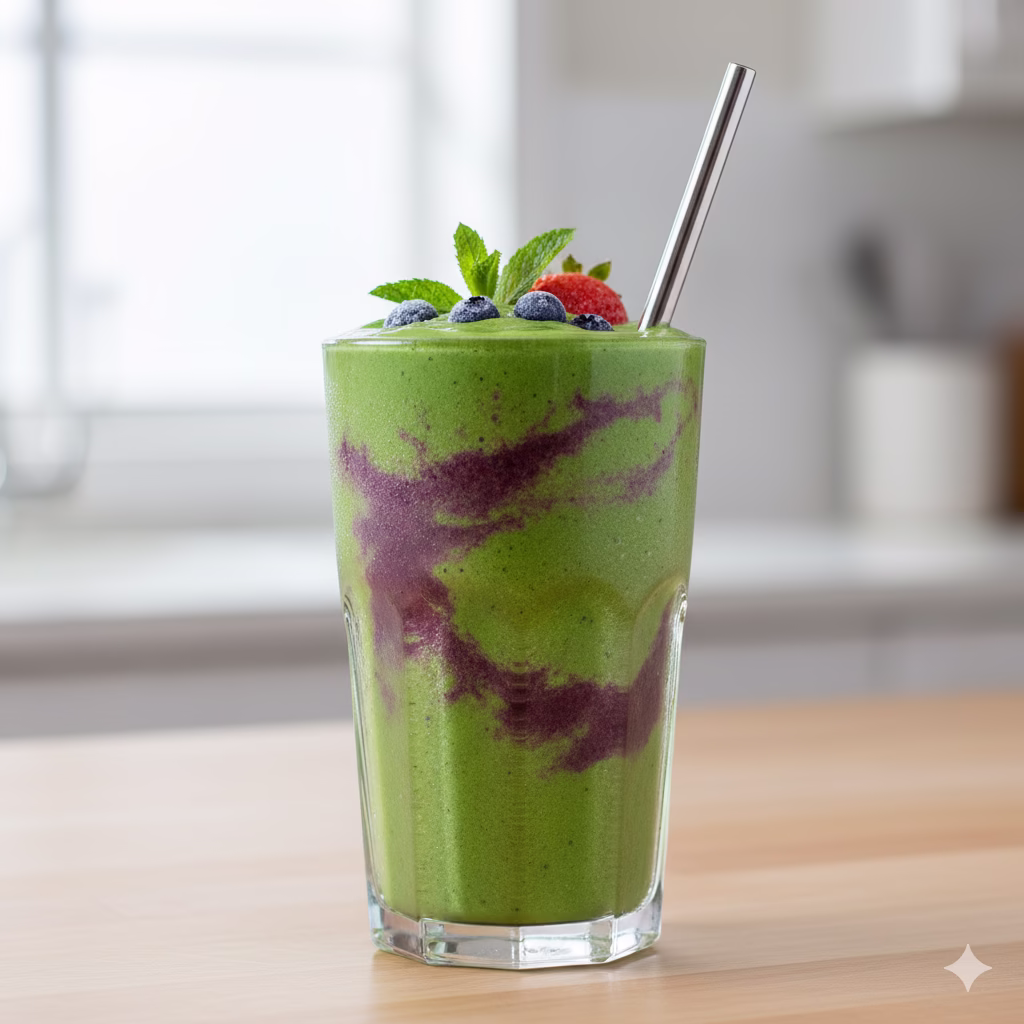
Spirulina is a vibrant blue-green algae that packs a serious punch when it comes to nutrition. This superfood is often found in smoothies, like the one in the image, where it blends beautifully with fruits and seeds. The rich green color hints at its nutrient density, making it a favorite among health enthusiasts.
Incorporating spirulina into your diet can boost your energy levels and support detoxification. It’s loaded with protein, vitamins, and minerals, making it one of the top 10 superfoods. Pair it with other greens like spinach, kale, or broccoli for an even more powerful health boost.
The smoothie shown is topped with fresh fruits like strawberries, blueberries, and kiwi, adding natural sweetness and extra nutrients. This combination not only tastes great but also enhances the detox benefits of spirulina. So, whether you’re looking for an energy lift or a way to cleanse your system, spirulina is a fantastic choice!
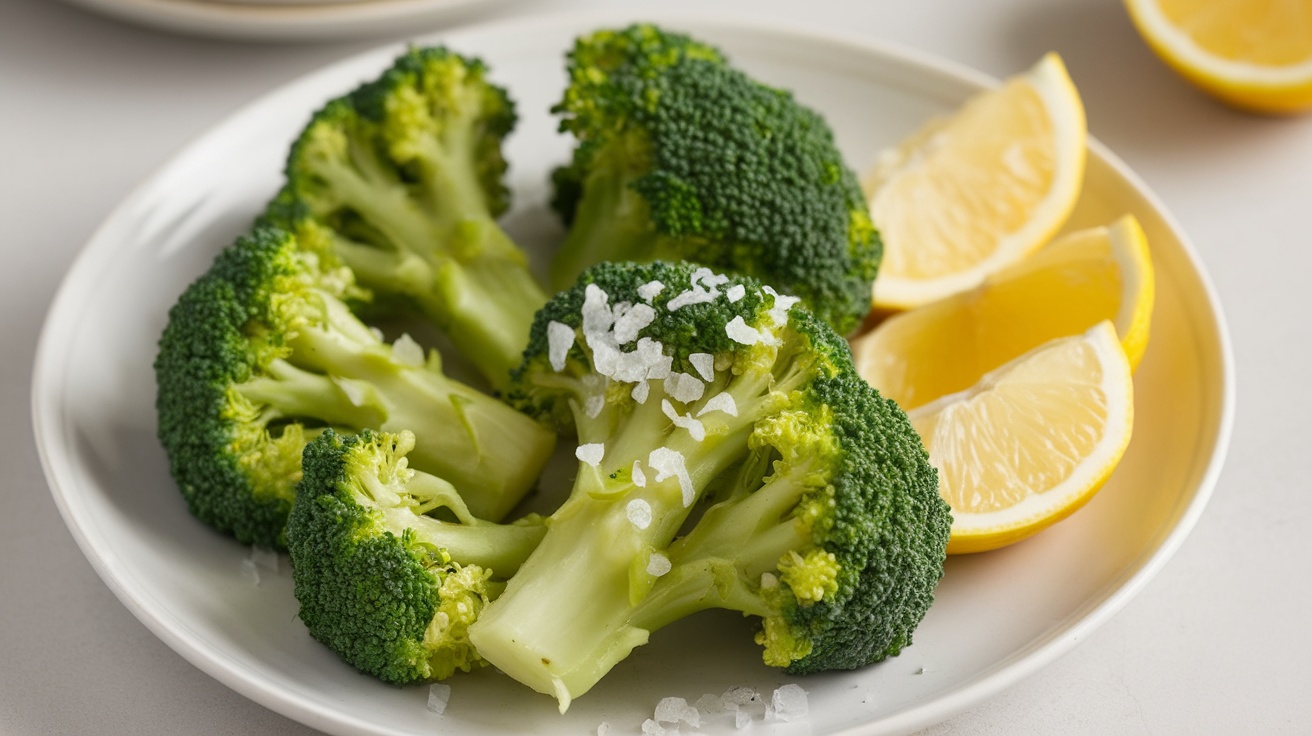
Broccoli: Cruciferous Detox Superfoods
Broccoli is a superstar when it comes to detoxing your body. This vibrant green vegetable is packed with nutrients that help flush out toxins and boost your energy levels. Just look at the fresh, bright florets on the plate, ready to be enjoyed!
Rich in vitamins C and K, broccoli supports your immune system and promotes healthy skin. It’s also loaded with fiber, which aids digestion and keeps you feeling full. Pairing it with a squeeze of lemon adds a zesty flavor while enhancing its detox properties.
Incorporating broccoli into your meals is easy. You can steam it, roast it, or toss it into salads. It’s one of the 10 superfoods that can transform your diet and help you feel your best. So, next time you’re looking for a healthy side dish, remember this cruciferous champion!
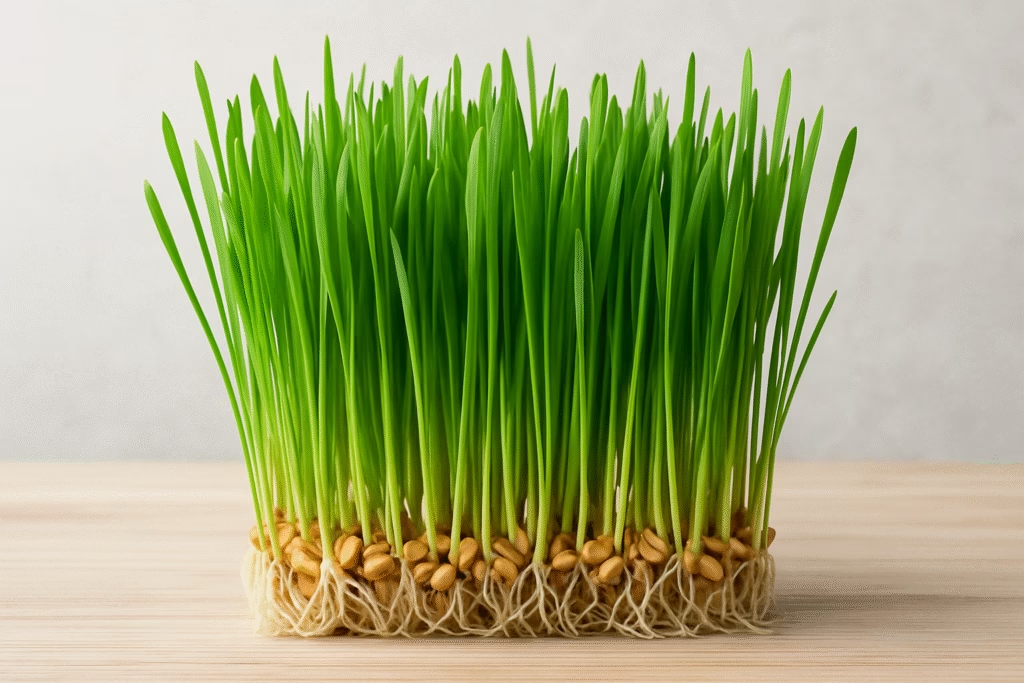
Wheatgrass: The Concentrated Green powerhouse
Wheatgrass, the freshly sprouted leaves of the common wheat plant, is lauded as a potent superfood due to its incredibly concentrated nutritional content. Though consumed as a grass, it is primarily valued for its exceptionally high levels of chlorophyll, the green pigment often referred to as “the blood of plant life” due to its molecular structure being similar to that of human hemoglobin. This high chlorophyll content is believed by many to aid in oxygenating the blood, cleansing the body of toxins, and supporting liver function. Wheatgrass is also rich in an extensive spectrum of vitamins, including A, C, and E, as well as several B vitamins, and numerous minerals like iron, magnesium, and calcium.
The consumption of wheatgrass is also a highly efficient way to intake a variety of amino acids, the building blocks of protein. It contains 17 amino acids, including most of the essential ones that the human body cannot produce on its own. This makes it an almost complete food source, especially valuable for those seeking plant-based nutrition to support tissue repair and energy levels. Due to the difficulty in digesting the fibrous grass itself, it is overwhelmingly consumed in concentrated forms, such as fresh juice, powder, or supplement shots, allowing the body to absorb its powerful nutrients quickly and efficiently.
Despite its intense, earthy flavor, the popularity of wheatgrass persists because of the significant health benefits its proponents claim. Regular consumption is often associated with boosting the immune system, improving digestion, and combating inflammation, thanks to its high antioxidant levels. While often served in small, potent shots, incorporating wheatgrass powder into smoothies or juices offers a convenient way to harness the benefits of this unique green superfood, providing a quick, powerful dose of concentrated vitamins and minerals.
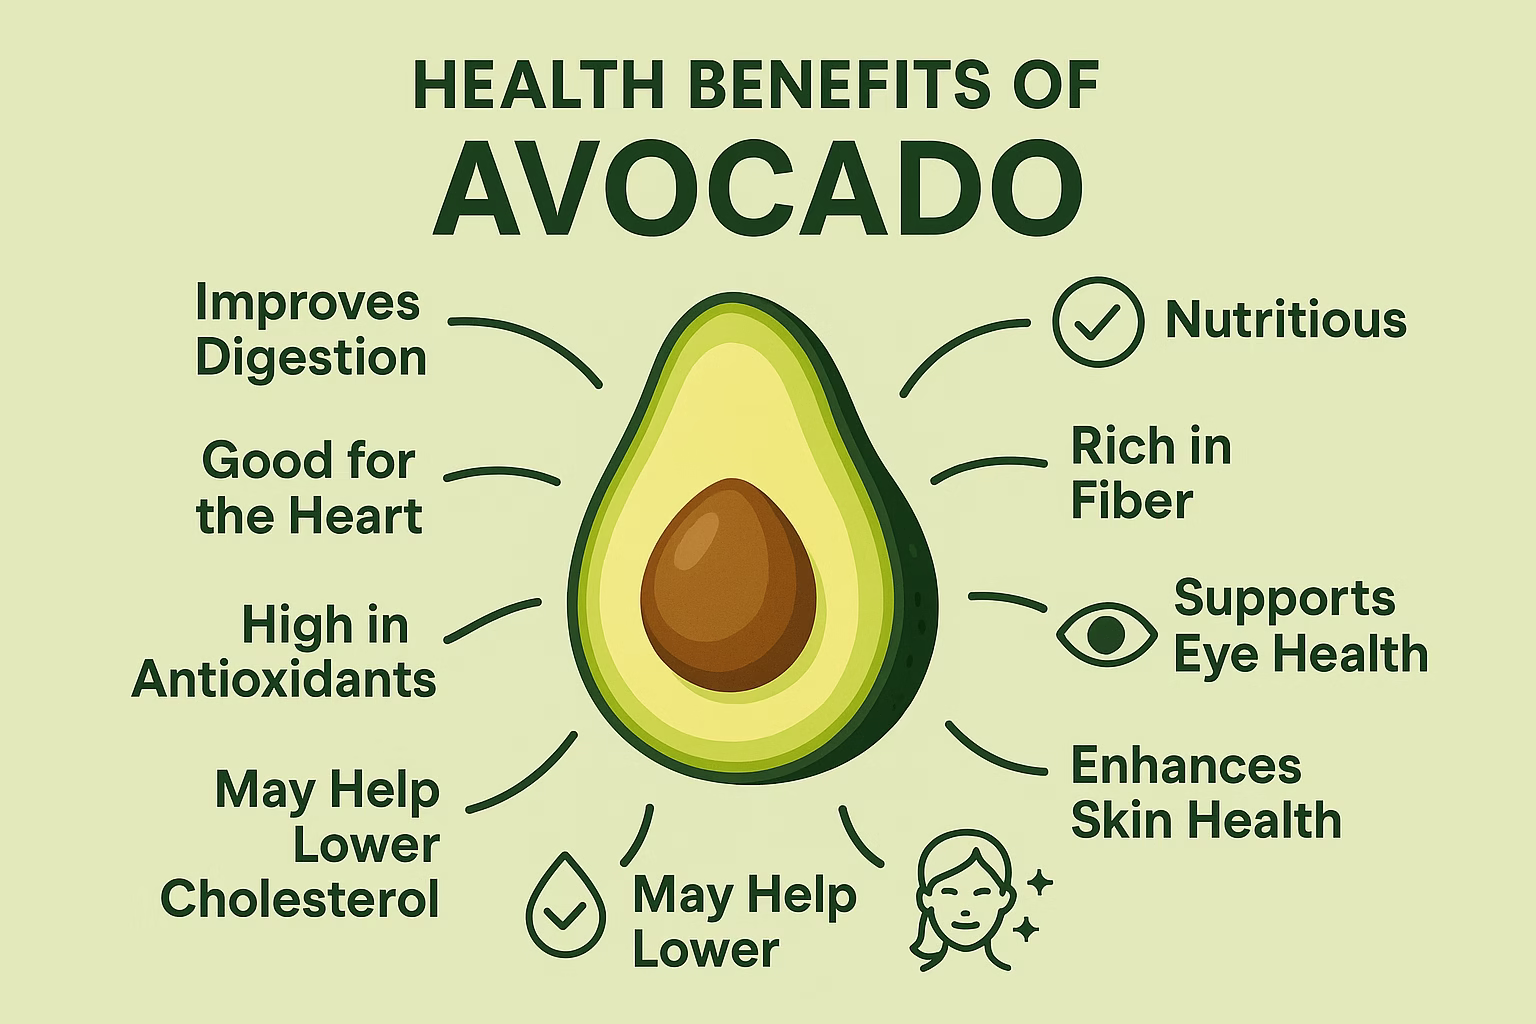
Avocado: Part of the 10 Superfoods
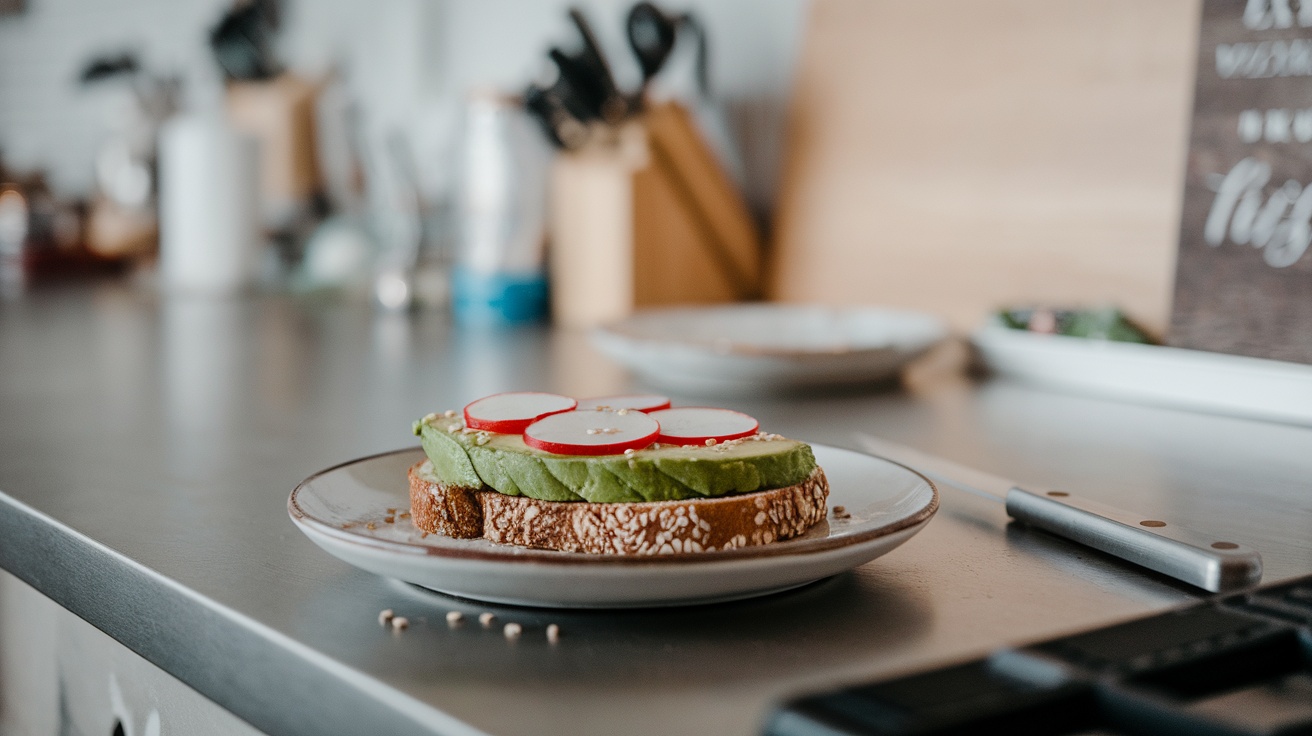
Avocado is a superstar in the world of superfoods. This creamy fruit is not just delicious; it’s packed with nutrients that can boost your energy and support detoxification. The image shows a beautiful slice of avocado spread on whole grain toast, topped with fresh radish slices. This simple dish is a great way to enjoy the benefits of avocado.
Avocados are rich in healthy fats, particularly monounsaturated fat, which is great for heart health. They also contain fiber, vitamins, and minerals that help keep your body running smoothly. Including avocado in your meals can help you feel fuller longer, making it a smart choice for energy.
Pairing avocado with other superfoods like spinach or kale can enhance its nutritional profile. You can easily whip up a smoothie with avocado, spinach, and green tea for a refreshing energy boost. Or, try adding it to salads with broccoli and asparagus for a nutrient-packed meal.
Incorporating avocado into your diet is simple. You can enjoy it on toast, in salads, or even as a creamy addition to smoothies. It’s versatile and delicious, making it a perfect fit for anyone looking to add more superfoods to their meals.
Kale: Nutrient-Dense Leafy Green Superfoods
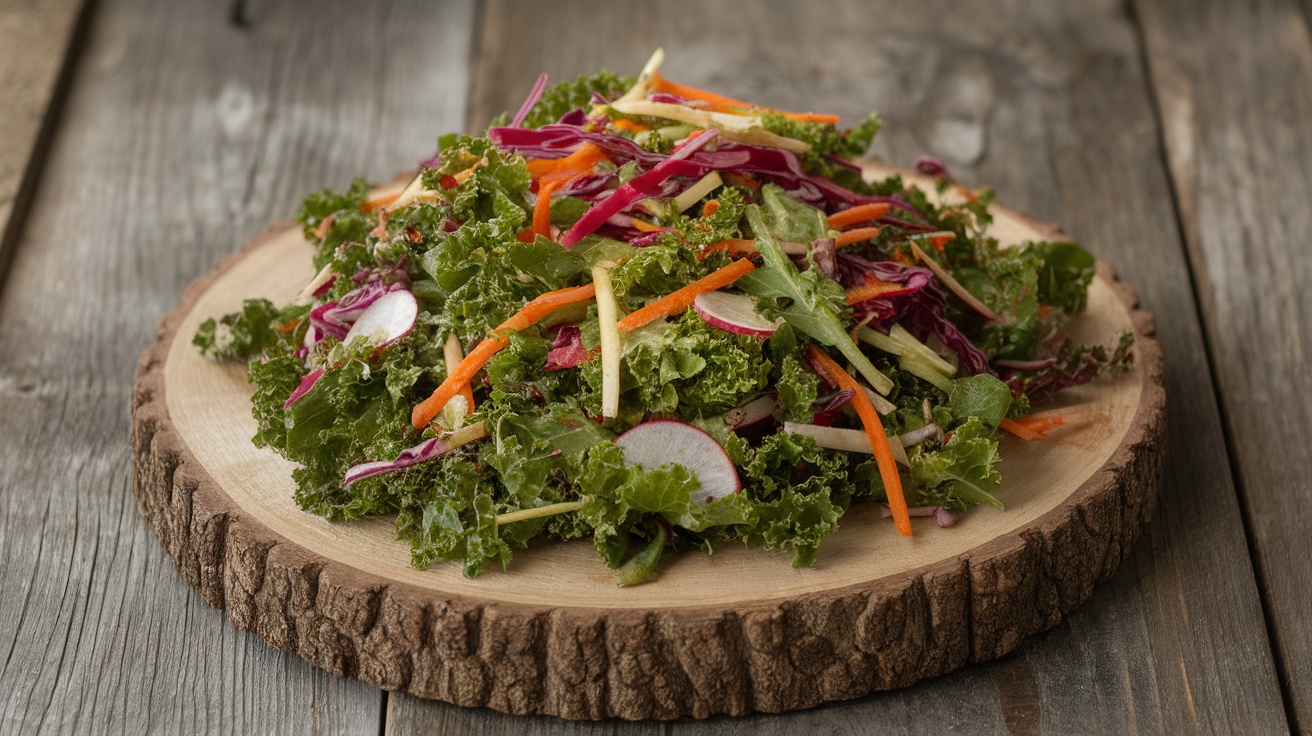
Kale is a superstar in the world of superfoods. This leafy green is packed with vitamins and minerals that can boost your energy and help with detoxification. Just look at that vibrant salad! It’s a colorful mix of kale, radishes, carrots, and other fresh veggies, making it not only nutritious but also visually appealing.
Rich in vitamins A, C, and K, kale supports your immune system and promotes healthy skin. It also contains antioxidants that help fight inflammation. Adding kale to your meals is an easy way to incorporate more nutrients into your diet.
To enjoy kale, try making a simple salad. Just chop the kale and toss it with your favorite dressing. You can add ingredients like avocado, broccoli, or even spirulina for an extra health kick. This salad is a perfect example of how delicious and nutritious a meal can be!
So, if you’re looking for a way to boost your energy and detoxify your body, kale should definitely be on your plate. It’s one of the top 10 superfoods you can easily add to your daily routine.
Swiss Chard: The Vibrant Leafy Green Superfood
Swiss chard is a stunning leafy green vegetable that easily qualifies as a superfood due to its exceptional nutrient density and vibrant composition. Visually arresting with deep green leaves and brightly colored stalks (often red, yellow, or white), it is closely related to beets and spinach. Nutritionally, chard is a powerhouse, offering staggering amounts of vitamins, particularly Vitamin K, which is essential for bone health and proper blood clotting, and Vitamin A, crucial for immune function and vision. It also supplies a significant amount of Vitamin C, a powerful antioxidant, and is a good source of vital minerals like magnesium and iron.
Beyond its basic vitamin profile, Swiss chard is loaded with unique phytonutrients and antioxidants. It contains high levels of carotenoids like lutein and zeaxanthin, which are renowned for protecting eye health and preventing cellular damage from free radicals. Even more distinctive are the various types of betalains—the pigments responsible for the striking colors in its stalks and veins. These powerful antioxidants possess anti-inflammatory properties and have been researched for their potential role in supporting the body’s detoxification processes, especially in the liver.
Incorporating Swiss chard into your diet is a flavorful and simple way to upgrade your meals. Unlike some greens, both the leaves and the stalks are edible, offering different textures—the leaves are tender like spinach, while the stalks are crunchy like celery. Its mild, slightly earthy taste makes it highly versatile; it can be quickly sautéed with garlic and olive oil, blended into soups, or used raw in salads for a nutritional boost. For those looking for a single vegetable that delivers high value in antioxidants, anti-inflammatory compounds, and essential nutrients, Swiss chard is a magnificent green superfood choice.!
Matcha: Antioxidant-Rich Green Tea
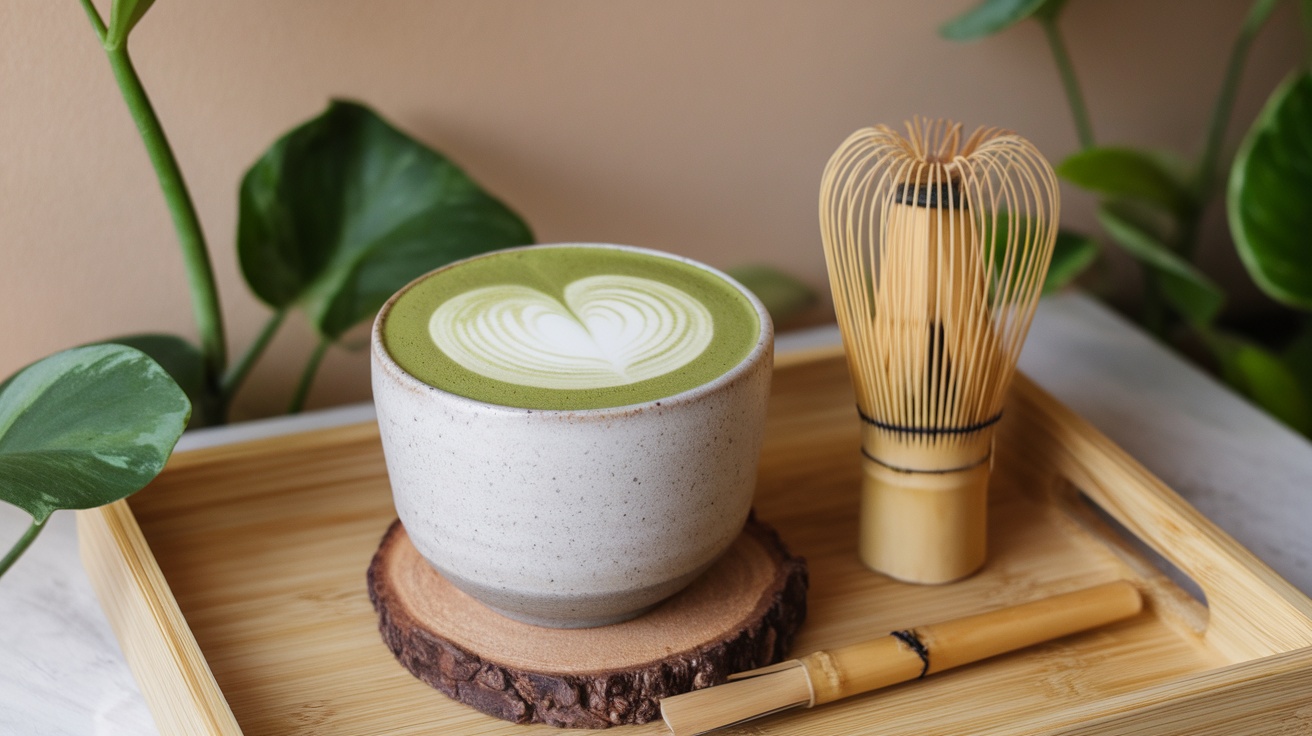
Matcha is more than just a trendy drink; it’s a powerhouse of nutrients. This vibrant green tea is made from finely ground leaves, which means you consume the whole leaf and all its benefits. The image shows a beautifully crafted cup of matcha, topped with a delicate heart design made from steamed milk. It’s not just eye-catching; it’s also packed with antioxidants.
One of the standout features of matcha is its high antioxidant content. These antioxidants help combat free radicals in the body, promoting overall health and wellness. Incorporating matcha into your diet can boost your energy levels and support detoxification. It’s one of the top 10 superfoods you can easily add to your routine.
Making matcha is simple. Just whisk the matcha powder with hot water until frothy. You can enjoy it plain or mix it into smoothies, baked goods, or even lattes. Pair it with other green superfoods like spinach, kale, or spirulina for an extra health kick. Whether you’re sipping it in the morning or as an afternoon pick-me-up, matcha is a delicious way to stay energized and detoxified.
Green Tea: Refreshing and Revitalizing
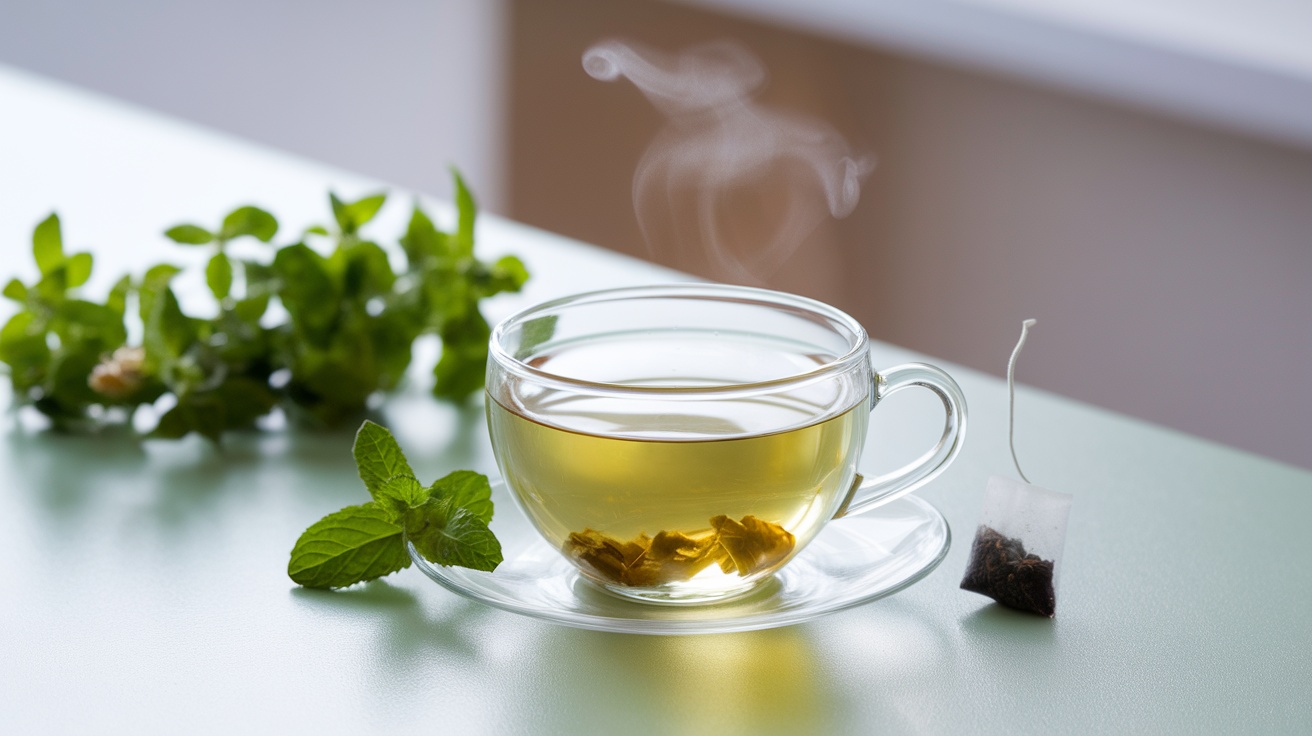
Green tea is a fantastic addition to your diet, especially when you’re looking for a boost of energy and detox benefits. The image shows a steaming cup of green tea, surrounded by fresh mint leaves. This setup perfectly captures the refreshing nature of this drink.
Green tea is packed with antioxidants, which help fight free radicals in the body. This makes it a great choice for detoxing. Plus, it contains caffeine, giving you that gentle energy lift without the jitters often associated with coffee.
Incorporating green tea into your daily routine can be simple. You can enjoy it hot or cold, and it pairs wonderfully with other superfoods like spinach, kale, and avocado. Try blending it into smoothies or using it as a base for refreshing iced drinks.
So, if you’re on the hunt for superfoods that energize and cleanse, green tea should be at the top of your list. It’s not just a drink; it’s a delightful way to enhance your health!
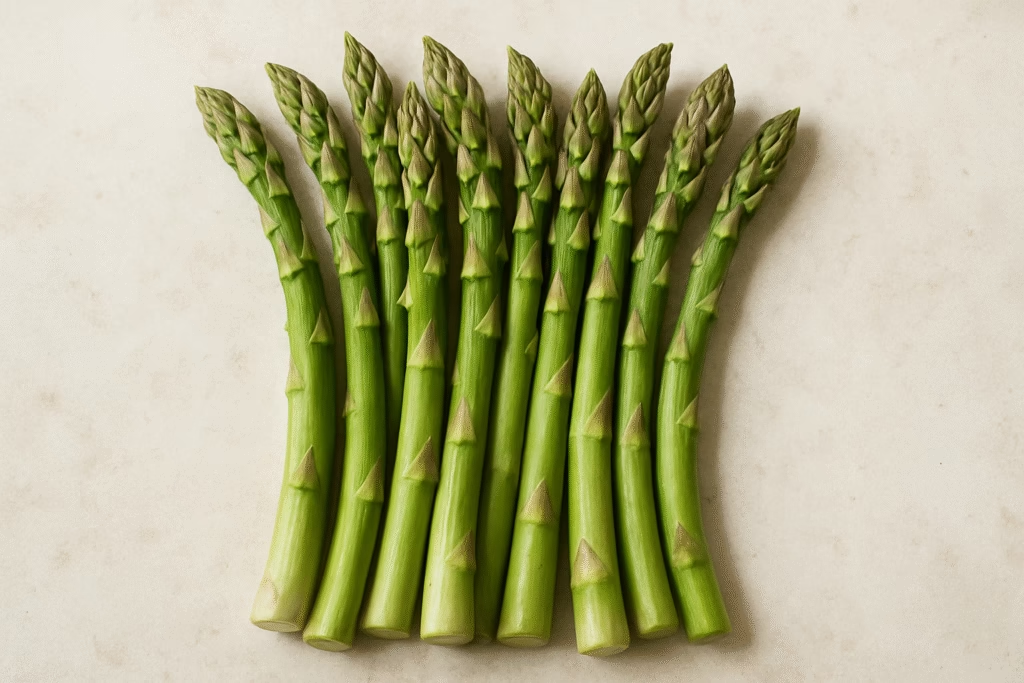
Asparagus: The Springtime Superfood Spear
Asparagus is a tender, distinctively flavored vegetable that earns its superfood title through an impressive concentration of essential nutrients, particularly during its peak spring season. These elegant green spears are notably rich in Folate (Vitamin B9), which is crucial for cell growth, DNA synthesis, and preventing birth defects, making it an excellent food choice for expectant mothers. Asparagus is also an outstanding source of Vitamin K, supporting healthy blood clotting and bone density. Furthermore, it provides a respectable amount of dietary fiber, promoting regularity and contributing to a healthy digestive system.
One of the unique attributes of asparagus is its content of prebiotic fiber (specifically inulin). This special type of fiber is indigestible by human enzymes but serves as a vital food source for the beneficial bacteria (probiotics) residing in the colon. By nourishing these “good” gut bacteria, asparagus helps to maintain a balanced and thriving gut microbiome, which is linked to everything from enhanced immunity to improved mental health. This gut-friendly action helps solidify its reputation as a functional, healthy vegetable.
Beyond its fiber and vitamin content, asparagus is packed with powerful antioxidants, including Vitamin E and various flavonoids like quercetin and kaempferol. These compounds help the body fight oxidative stress and inflammation, protecting cells from damage caused by free radicals. Asparagus also contains a compound called asparagine, a natural diuretic that can help the body flush out excess salt and fluid, aiding in the reduction of mild bloating. Whether steamed, roasted, or grilled, adding these nutrient-dense spears to any meal provides a delicious and meaningful boost to overall health.
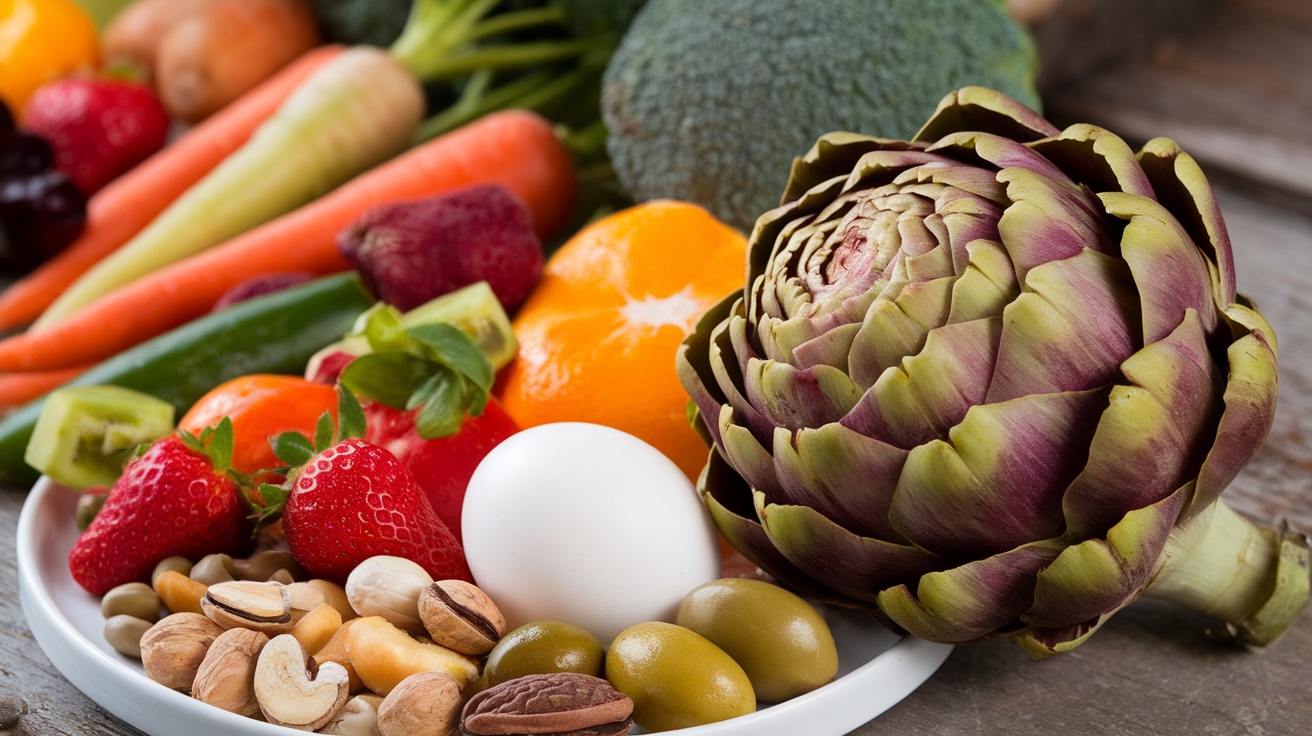
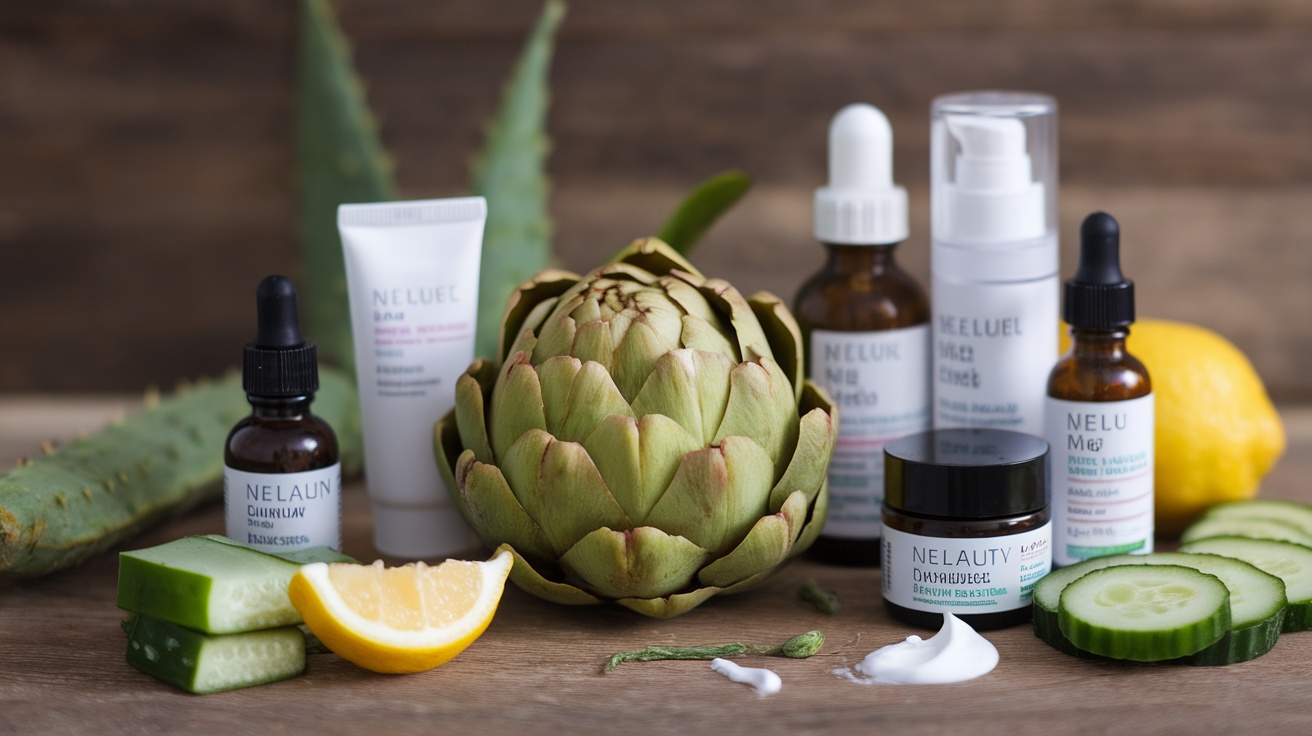
Artichokes might not be the first veggie that comes to mind, but they’re packed with a ton of health benefits you won’t want to miss out on. From aiding digestion to supporting liver health, these leafy greens are nutritional powerhouses. Check out these 10 impressive perks of adding these to your plate!
Artichokes Boosts Nutrient Absorption
Artichokes are not just tasty; they play a big role in helping your body absorb nutrients. This unique vegetable is packed with fiber, which aids digestion and helps your body utilize the vitamins and minerals from other foods.
When you enjoy these alongside other nutrient-rich foods, you enhance your body’s ability to absorb those nutrients. This is especially important for vitamins like A, D, E, and K, which are fat-soluble. The healthy fats found in them can help with this absorption process.
Moreover, theys are rich in antioxidants, which can further support your overall health. They may help lower
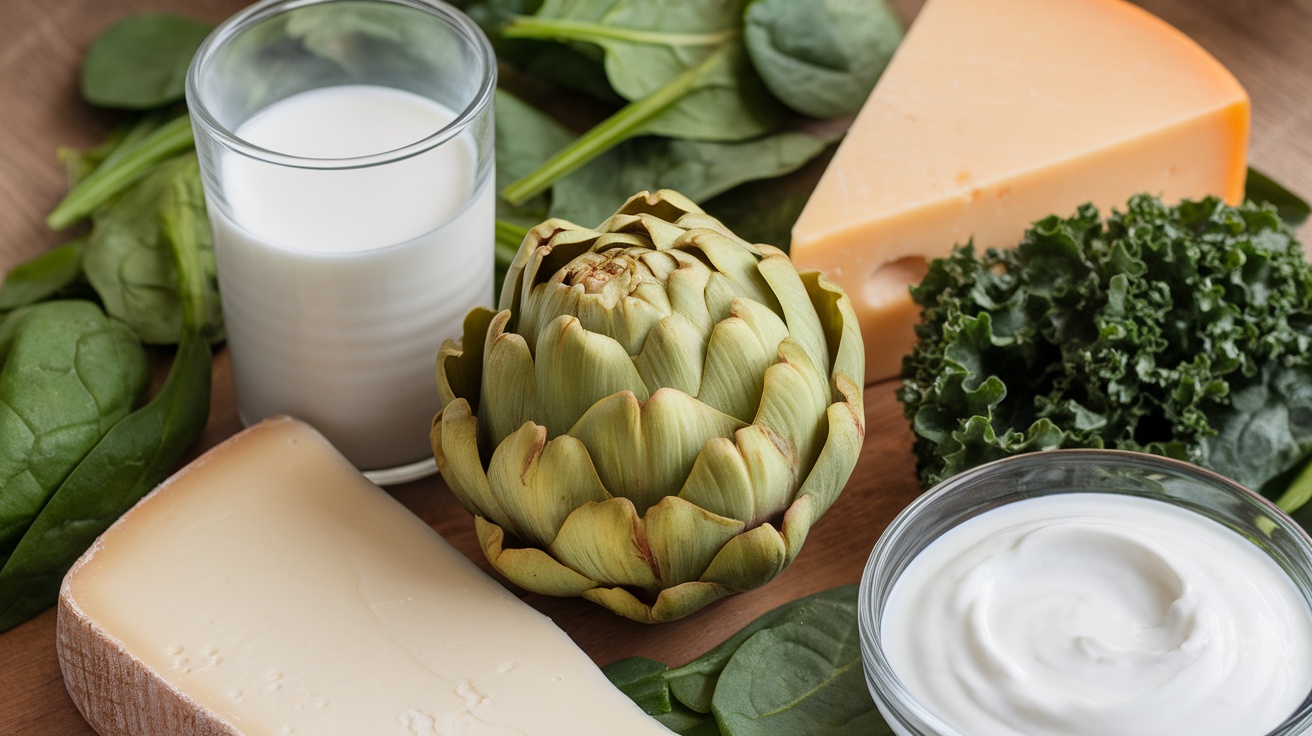
Enhances Bone Health
Artichokes are not just delicious; they also bring some serious benefits for your bones. Packed with nutrients, they can play a key role in maintaining bone density and strength.
In the image, you can see a fresh artichoke surrounded by other nutritious foods like spinach, kale, and dairy products. These ingredients work together to support bone health. Artichokes are rich in vitamin K, which is essential for bone metabolism and helps in calcium absorption.
Including these in your meals can be a tasty way to boost your intake of this important vitamin. Pair them with leafy greens or dairy for a well-rounded approach to bone health. Eating a variety of nutrient-rich foods ensures your body gets what it needs to keep your bones strong.
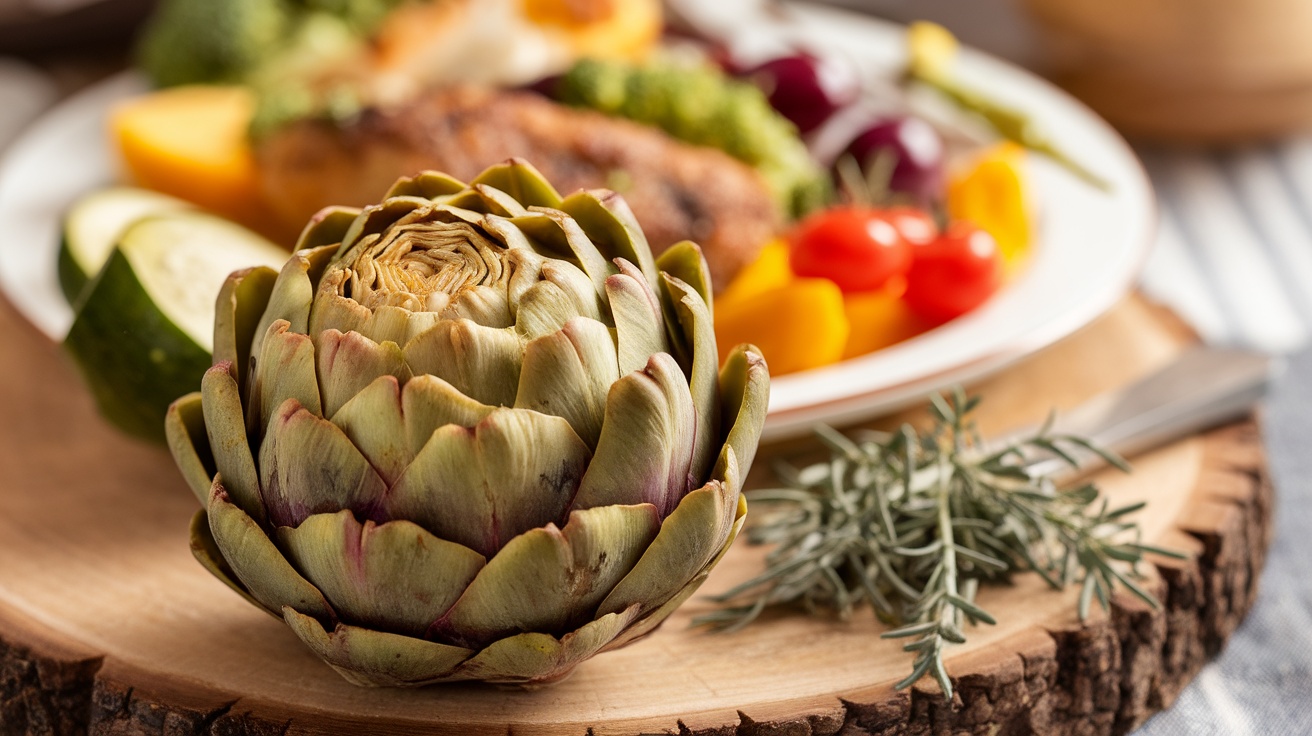
Artichokes Supports Digestive Health
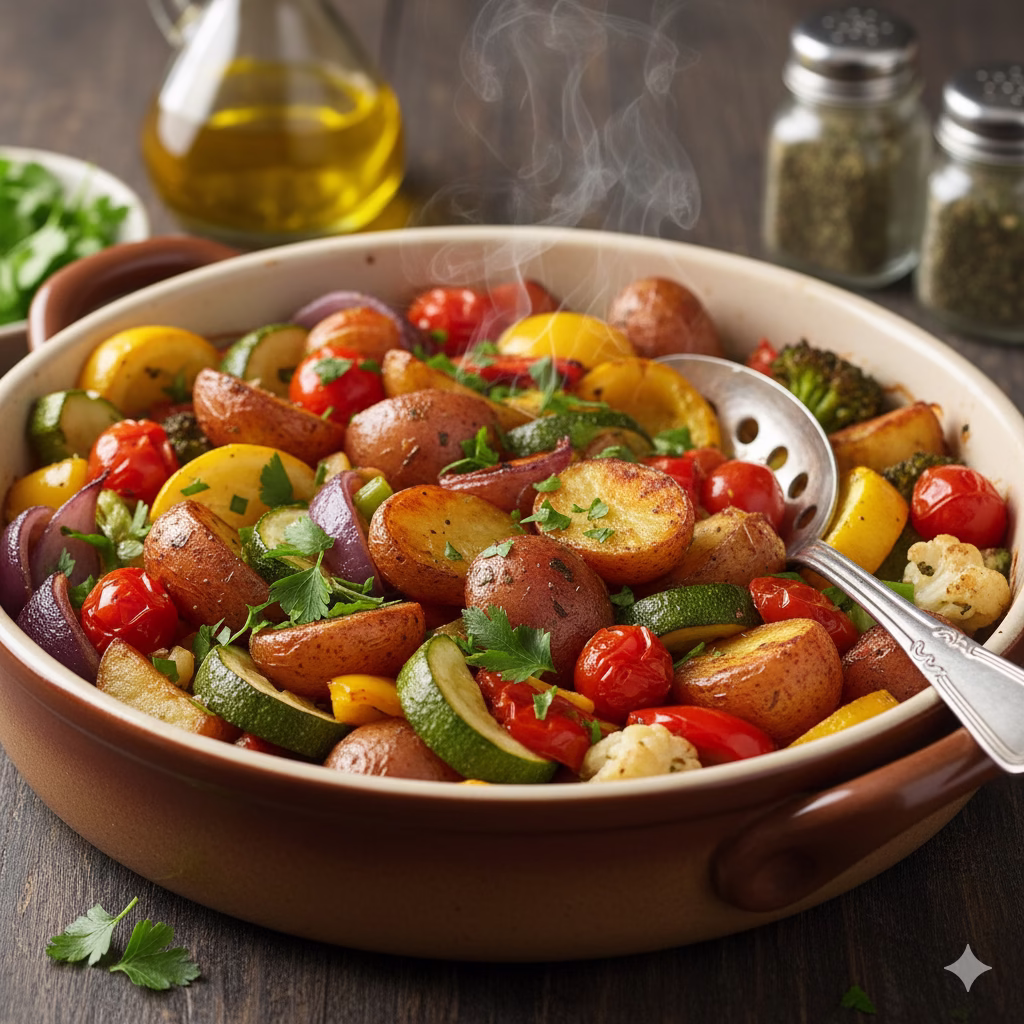
Artichokes are not just a tasty addition to your meals; they are also fantastic for your digestive health. This image shows a fresh artichoke, beautifully displayed alongside a colorful plate of vegetables. The vibrant colors and fresh ingredients highlight the importance of including artichokes in your diet.
This vegetable is rich in fiber, which is essential for a healthy digestive system. Fiber helps keep things moving smoothly in your gut, preventing constipation and promoting regularity. Eating these can aid digestion and help you feel lighter and more comfortable.
Moreover, they contain a unique compound called cynarin. This compound stimulates bile production in the liver, which is crucial for breaking down fats and absorbing nutrients. A healthy liver supports overall digestive health, making artichokes a smart choice for your meals.
For those dealing with digestive issues like Irritable Bowel Syndrome (IBS), artichokes may provide relief. Their high fiber content and natural antioxidants can help soothe the digestive tract and improve symptoms. So, if you’re looking for a delicious way to support your gut health, consider adding artichokes to your plate!
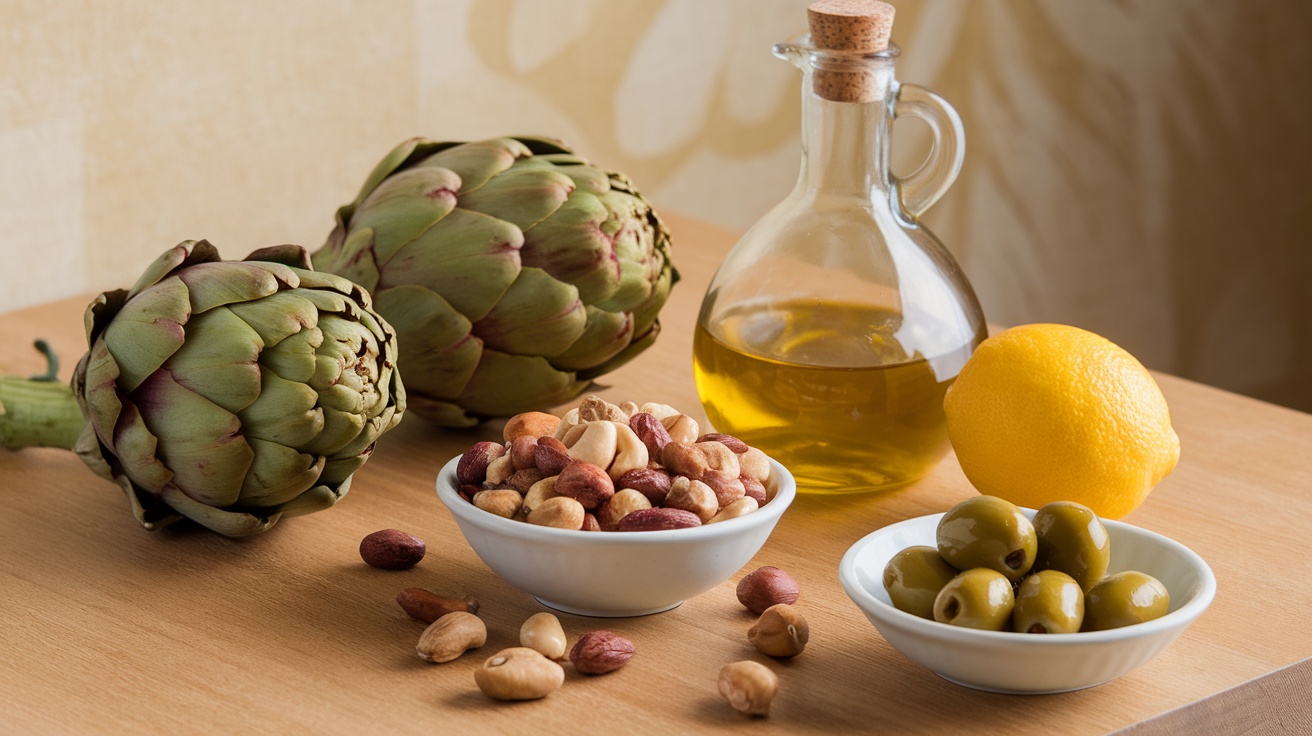
Artichokes Promotes Heart Health
Artichokes are not just tasty; they are also great for your heart. These green vegetables are packed with nutrients that can help keep your heart in top shape. They contain fiber, which is essential for lowering cholesterol levels. Lowering ‘bad’ cholesterol (LDL) is crucial for reducing the risk of heart disease.
The image shows fresh artichokes alongside healthy ingredients like nuts, olive oil, and lemon. These foods complement artichokes well and contribute to heart health. Olive oil, for instance, is rich in healthy fats that can support cardiovascular function.
Artichokes are also high in antioxidants, which help combat oxidative stress in the body. This is important for maintaining overall heart health. Plus, they can help regulate blood pressure, making them a smart choice for anyone looking to improve their heart health.
Incorporating these into your diet can be simple. You can steam them, grill them, or toss them into salads. They not only taste great but also help manage blood sugar levels, making them a fantastic addition to any meal.
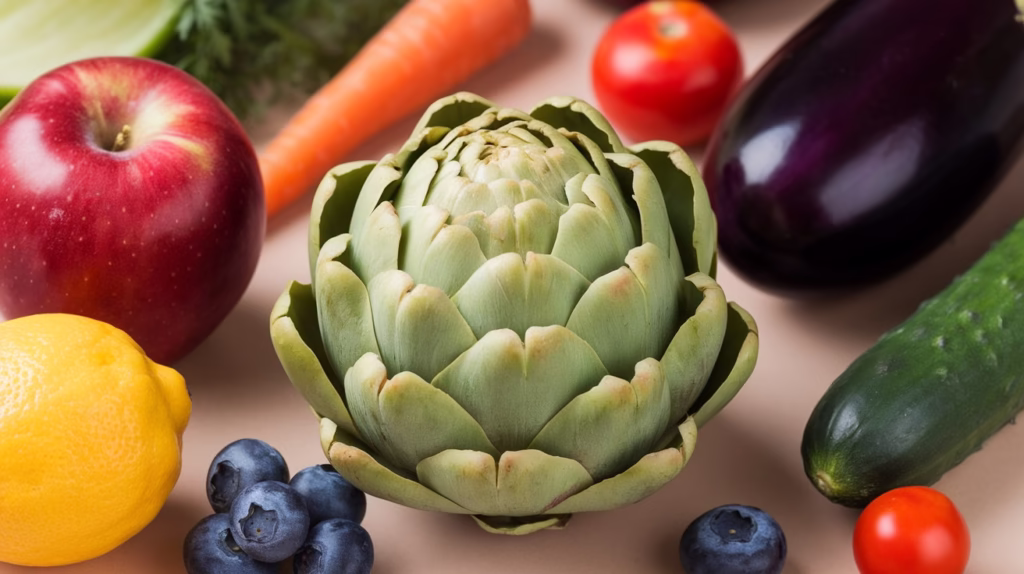
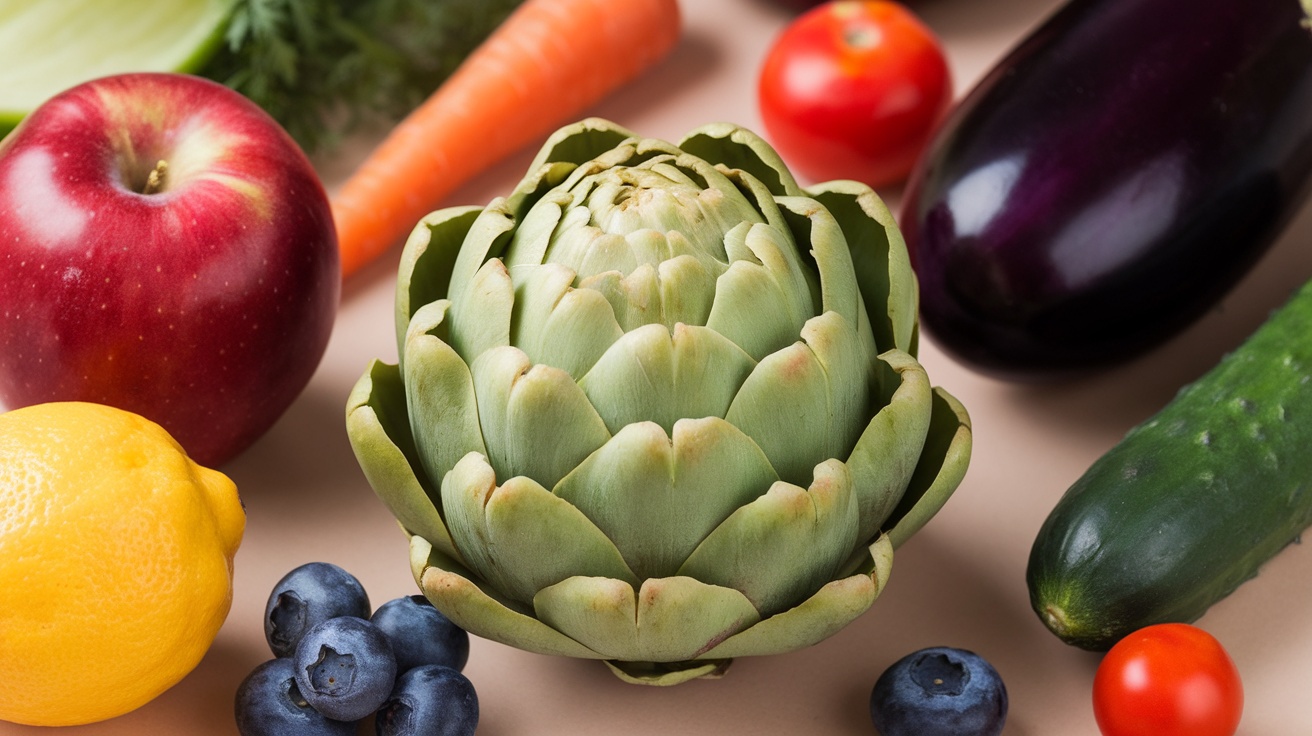
Rich in Antioxidants
Artichokes are not just tasty; they are packed with antioxidants. These powerful compounds help fight free radicals in our bodies. Free radicals can cause damage to our cells, leading to various health issues. By including artichokes in your diet, you can boost your antioxidant intake and support your overall health.
In the image, you can see a vibrant artichoke surrounded by other fresh produce. This colorful display highlights the importance of incorporating a variety of fruits and vegetables into your meals. Each color represents different nutrients and benefits, making your plate not just beautiful but also nutritious.
Artichokes are particularly high in cynarin and silymarin, two antioxidants known for their liver-supporting properties. A healthy liver is essential for detoxification and overall well-being. So, when you enjoy artichokes, you’re not just treating your taste buds; you’re also giving your liver a helping hand.
Moreover, the antioxidants in these may help regulate blood pressure and improve cholesterol levels. This makes them a great addition to a heart-healthy diet. So, the next time you’re at the grocery store, consider picking up some artichokes to enjoy their many health benefits!
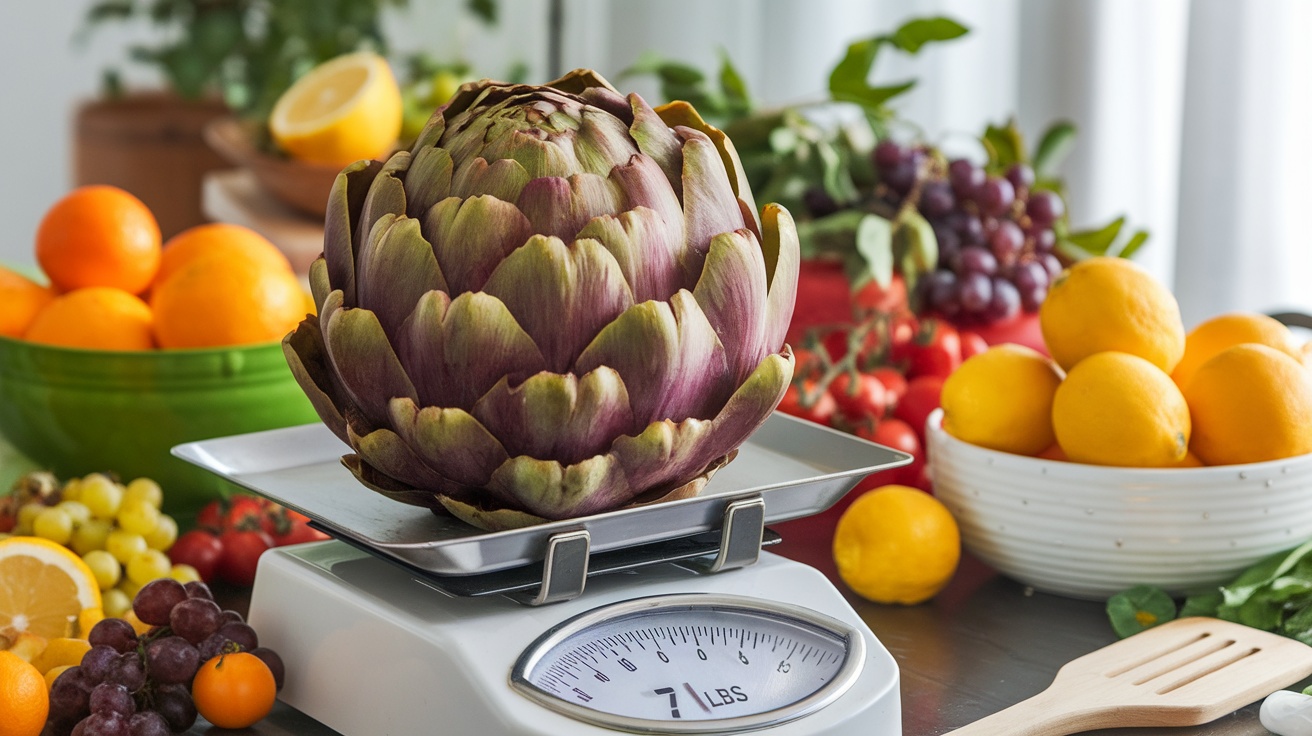
Supports Weight Loss
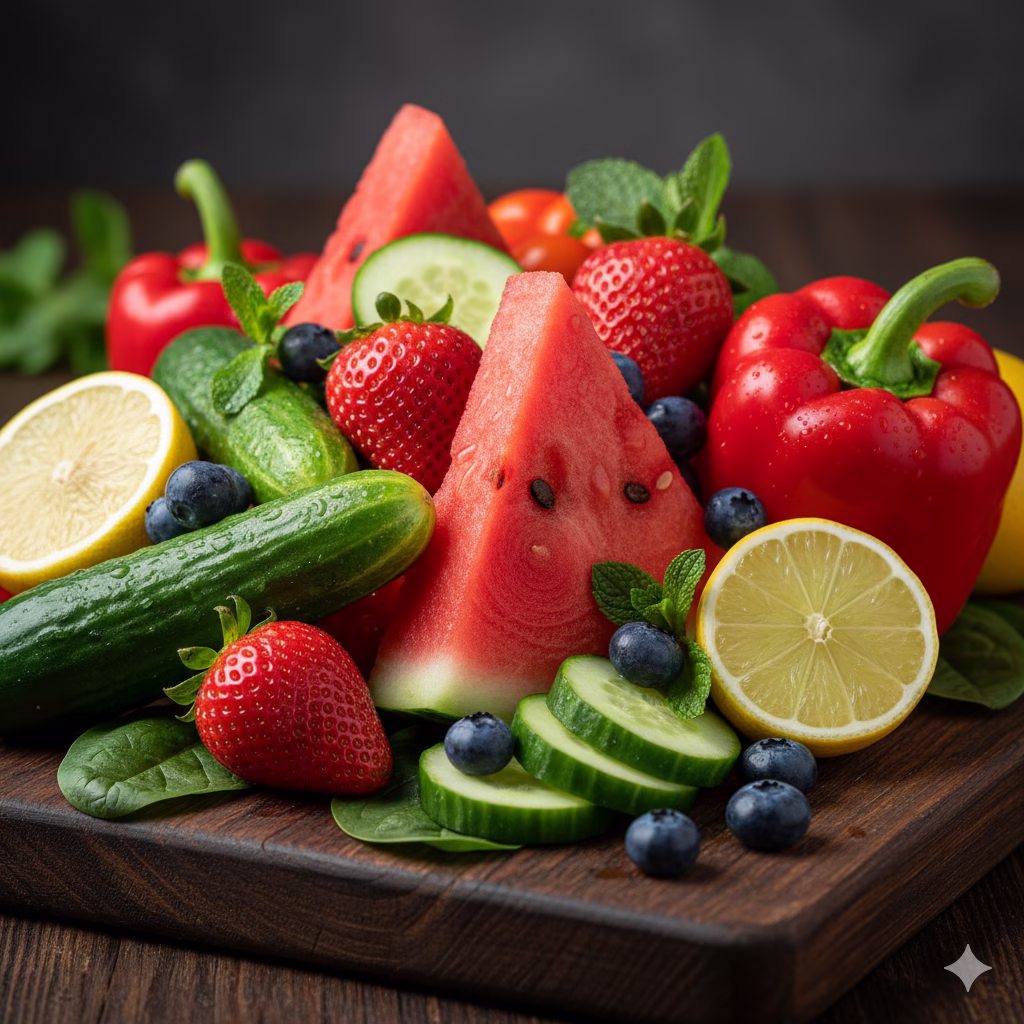
Artichokes are a fantastic addition to any weight loss plan. They are low in calories but packed with nutrients, making them a smart choice for those looking to shed some pounds.
This image shows a beautiful artichoke on a scale, surrounded by a variety of colorful fruits. This visual highlights how artichokes can fit into a healthy diet filled with fresh produce.
One of the key benefits of these are their ability to promote satiety. Eating them can help you feel full longer, which can prevent overeating. This is especially helpful when trying to manage your weight.
Artichokes are also high in fiber, which aids digestion and helps regulate blood sugar levels. This means they can keep your energy levels stable and reduce cravings for unhealthy snacks.
Incorporating artichokes into your meals can be easy and delicious. You can steam them, roast them, or even add them to salads. Their unique flavor can enhance many dishes while supporting your weight loss goals.
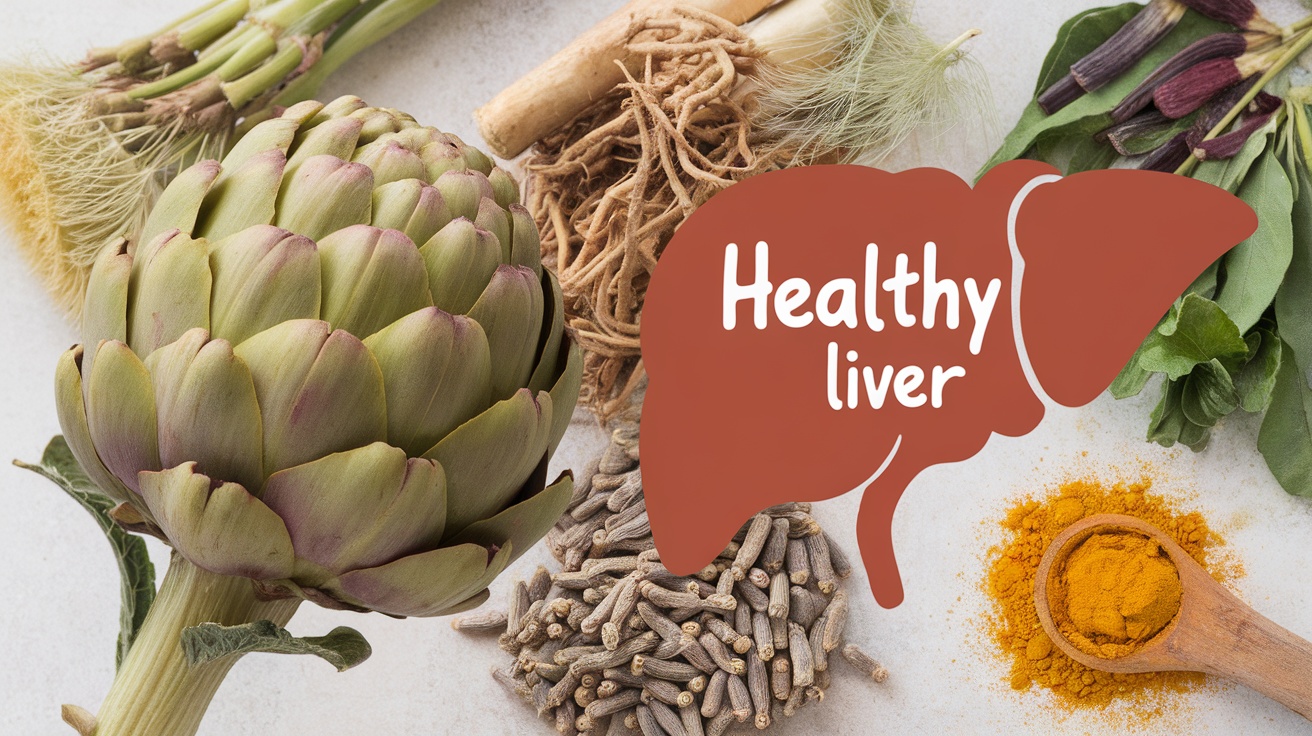
Aids in Liver Function
Artichokes are not just tasty; they are also great for your liver. This image showcases a fresh artichoke alongside various herbs and spices known for their health benefits. The vibrant green of the artichoke stands out, hinting at its rich nutrient profile.
Artichokes contain compounds that support liver health. They help detoxify the liver and promote bile production, which is essential for digestion. This can be particularly helpful if you’ve enjoyed a few too many rich meals.
Incorporating these into your diet can also aid digestion. Their high fiber content helps keep things moving smoothly in your digestive system. Plus, they are rich in antioxidants, which protect your liver from damage.
So, if you’re looking to give your liver a little love, consider adding artichokes to your meals. They can be steamed, grilled, or even added to salads for a nutritious boost. Your liver will thank you!
Helps Regulate Blood Sugar
Artichokes are not just delicious; they can also play a role in managing blood sugar levels. This image shows a fresh artichoke alongside a blood sugar monitor, emphasizing its importance for those keeping an eye on their glucose levels.
Rich in fiber, they help slow down the absorption of sugar in the bloodstream. This can lead to more stable blood sugar levels, making them a great addition to meals for those with diabetes or anyone looking to maintain healthy levels.
Incorporating artichokes into your diet can be simple. You can steam them, roast them, or even add them to salads. Pairing them with other nutrient-rich foods, like berries and nuts shown in the image, enhances their benefits. These foods are also known for their ability to support overall health.
Besides helping with blood sugar, these are packed with antioxidants, support liver health, and may lower bad cholesterol. They can also aid digestion and promote satiety, making them a fantastic choice for weight management.
Artichokes Boosts Immune System
Artichokes are not just tasty; they are also packed with nutrients that can help boost your immune system. This beautiful vegetable, shown alongside garlic and lemon in the image, is rich in antioxidants. Antioxidants fight off free radicals in the body, which can help reduce inflammation and support overall health.
Incorporating artichokes into your meals can be a simple way to enhance your diet. They are high in vitamins C and K, both of which play a role in strengthening your immune response. Vitamin C is known for its ability to help fend off colds and infections, while vitamin K is essential for proper blood clotting and bone health.
Moreover, they aid digestion, which is crucial for a healthy immune system. A well-functioning digestive system helps your body absorb nutrients effectively, ensuring that you get the most out of your food. The fiber in artichokes promotes gut health, which is linked to a stronger immune response.
So, next time you’re looking for a nutritious addition to your plate, consider artichokes. They not only taste great but also provide a variety of health benefits that can keep your immune system in check.
Artichokes Improves Skin Health
Artichokes are not just tasty; they can also work wonders for your skin! Packed with nutrients, these veggies help keep your skin looking fresh and healthy. The image shows a beautiful artichoke surrounded by various skincare products, highlighting the connection between nutrition and skincare.
Rich in antioxidants, they fight off free radicals that can damage your skin. This means they help reduce signs of aging, keeping your skin youthful. Plus, the vitamins and minerals found in artichokes support skin repair and hydration.
Artichokes also aid digestion, which is crucial for skin health. A healthy gut can lead to clearer skin, as it helps flush out toxins. When your body is functioning well internally, it shows on the outside!
Incorporating artichokes into your diet can be a simple way to boost your skin’s health. Whether you enjoy them steamed, grilled, or in a salad, these veggies are a delicious addition to your meals. So, next time you’re looking for a skin-friendly food, remember the artichoke!
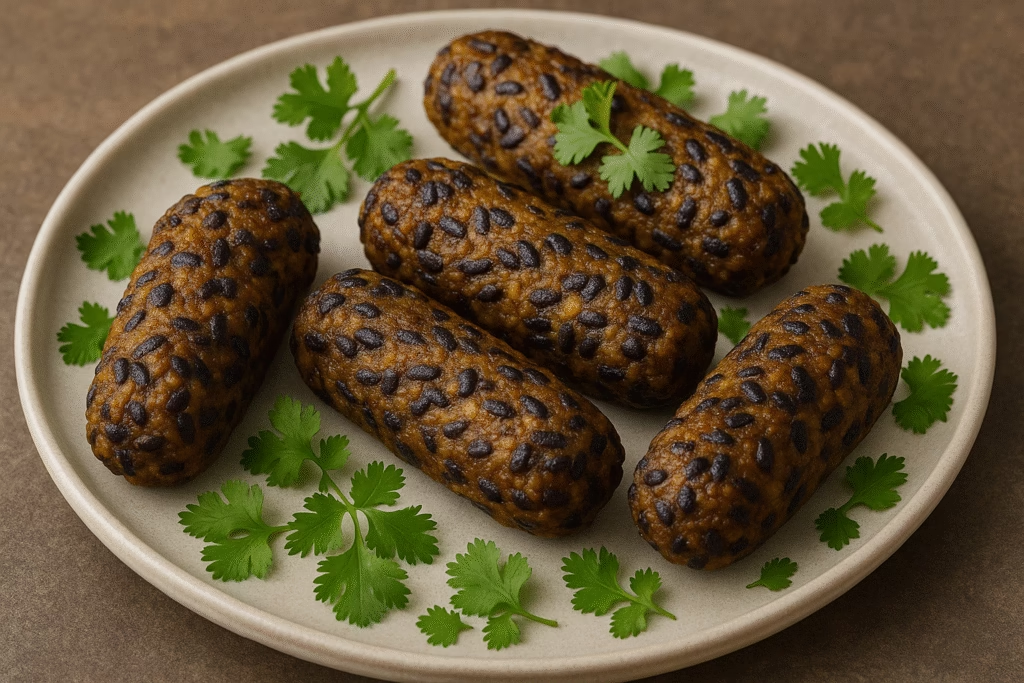
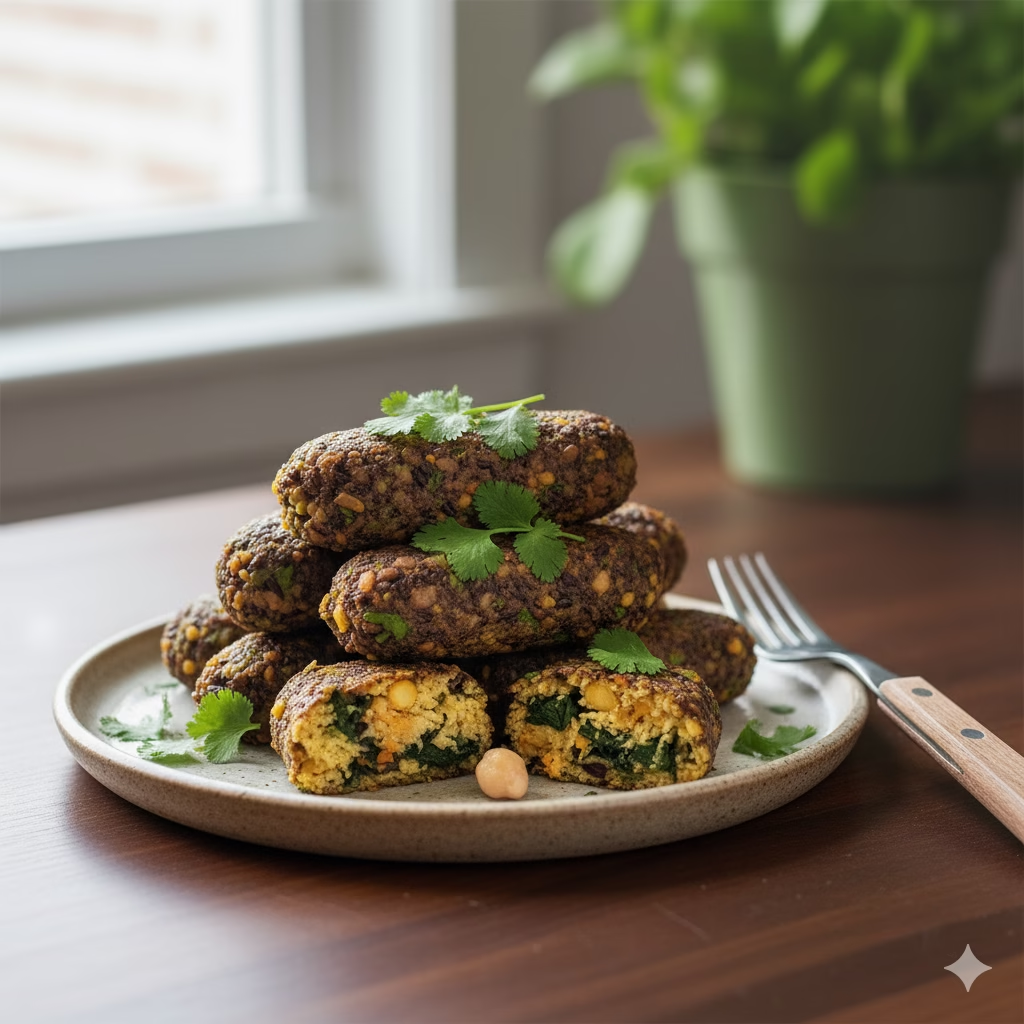
Discover the incredible simplicity of Curried Black Rice in this wholesome and flavorful recipe. Perfect for health-conscious foodies, these patties are a delightful way to enjoy nutritious ingredients. Get ready to transform your meals with this vibrant dish!
A Wholesome Journey into Flavor
In a world full of cooking options, sometimes the most satisfying meals are those that feed both your body and your spirit. Today, we’re making a recipe that does just that. It’s a vibrant, tasty, and very healthy dish that will make your taste buds happy. Imagine a meal where old grains meet simple beans. They are mixed with warm spices and fresh, crisp vegetables. It’s a true mix of textures and tastes. This is not just about cooking. It’s about a wholesome trip to discover the power of plant-based foods.
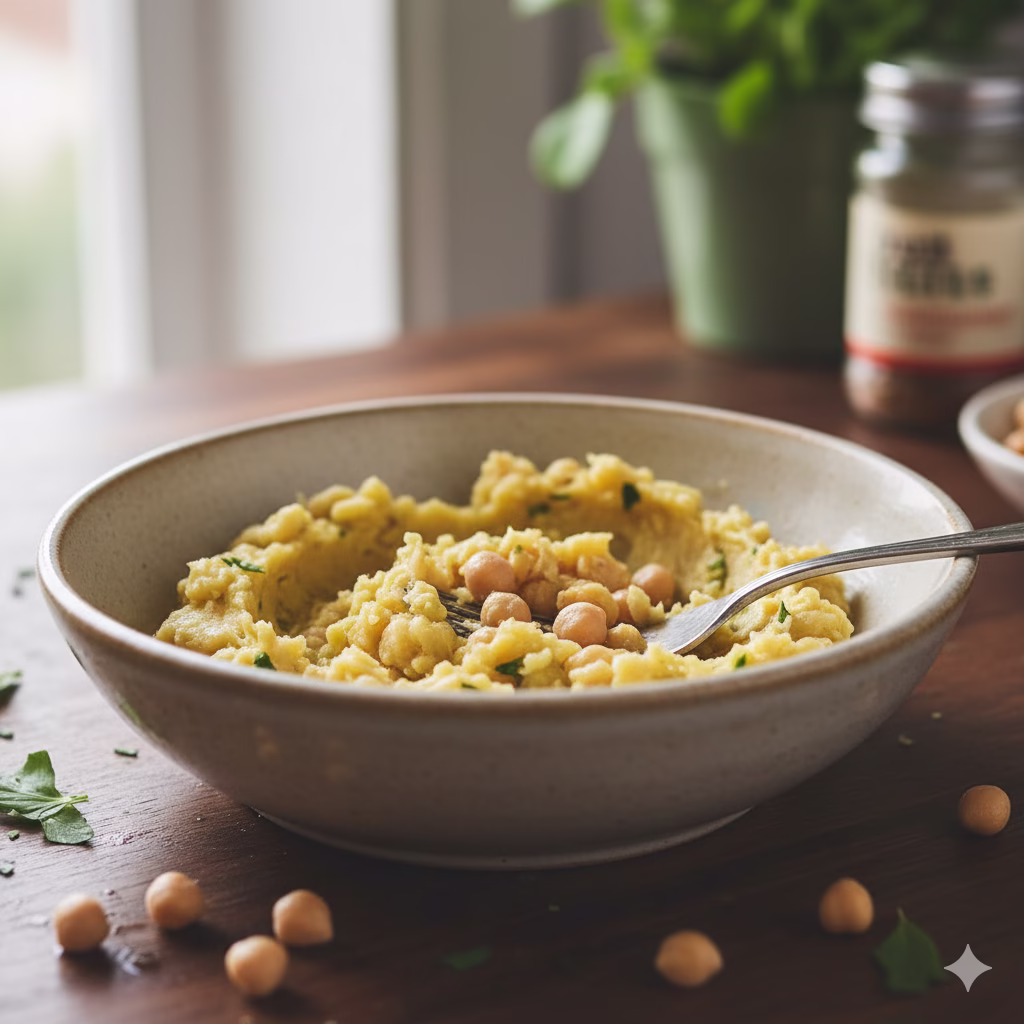
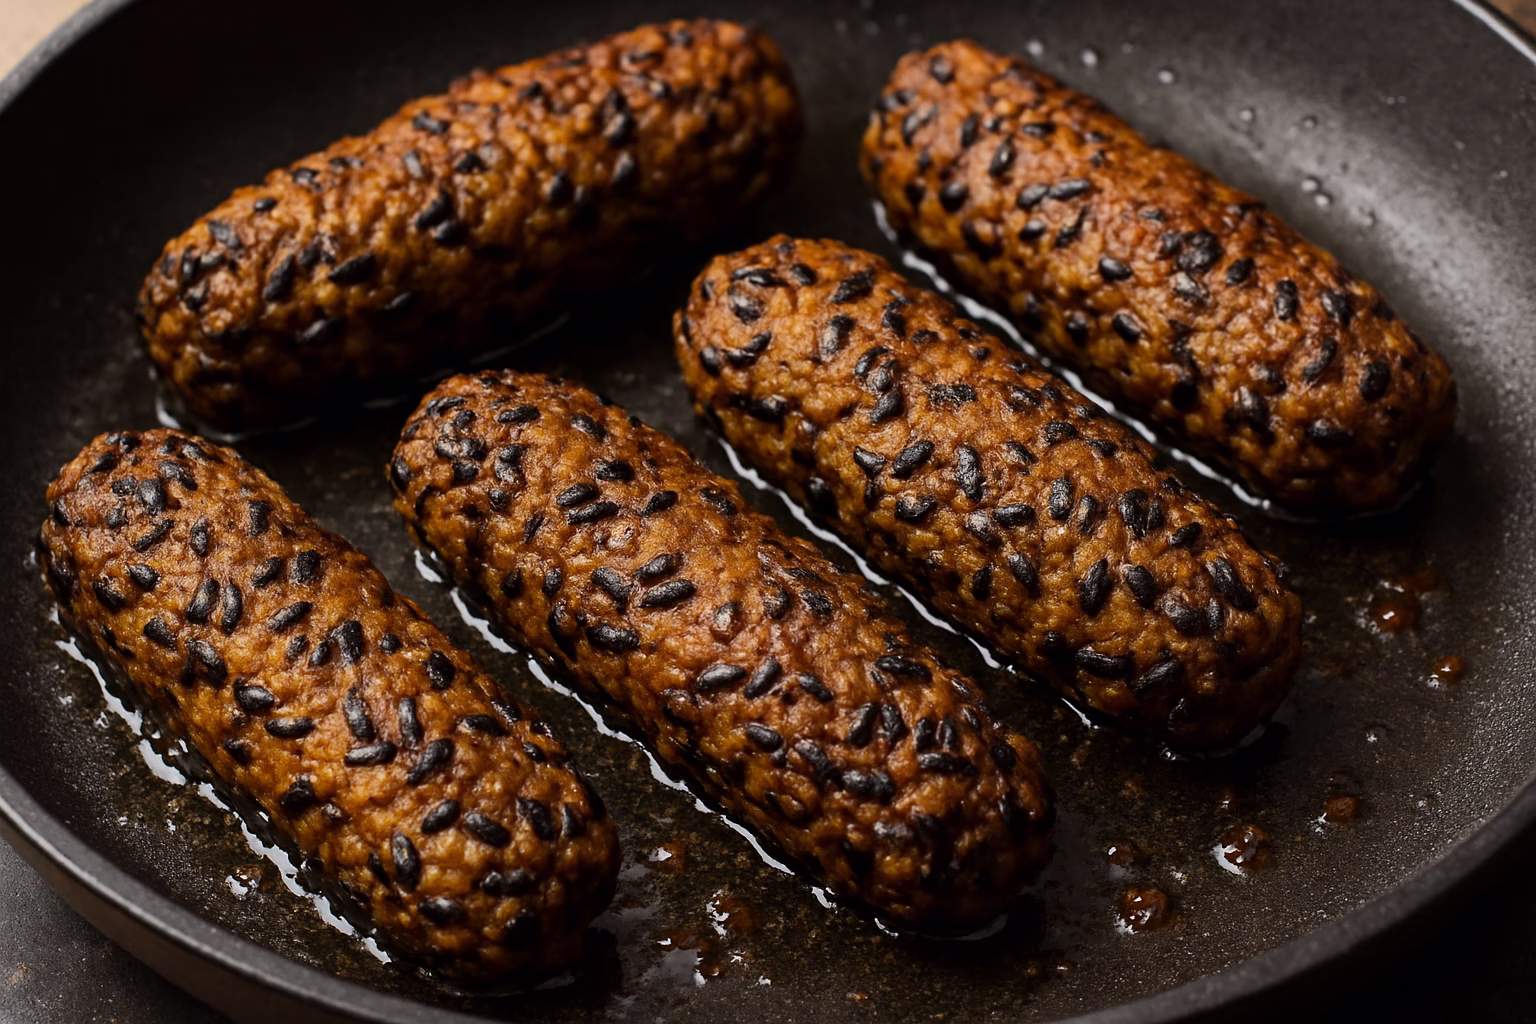
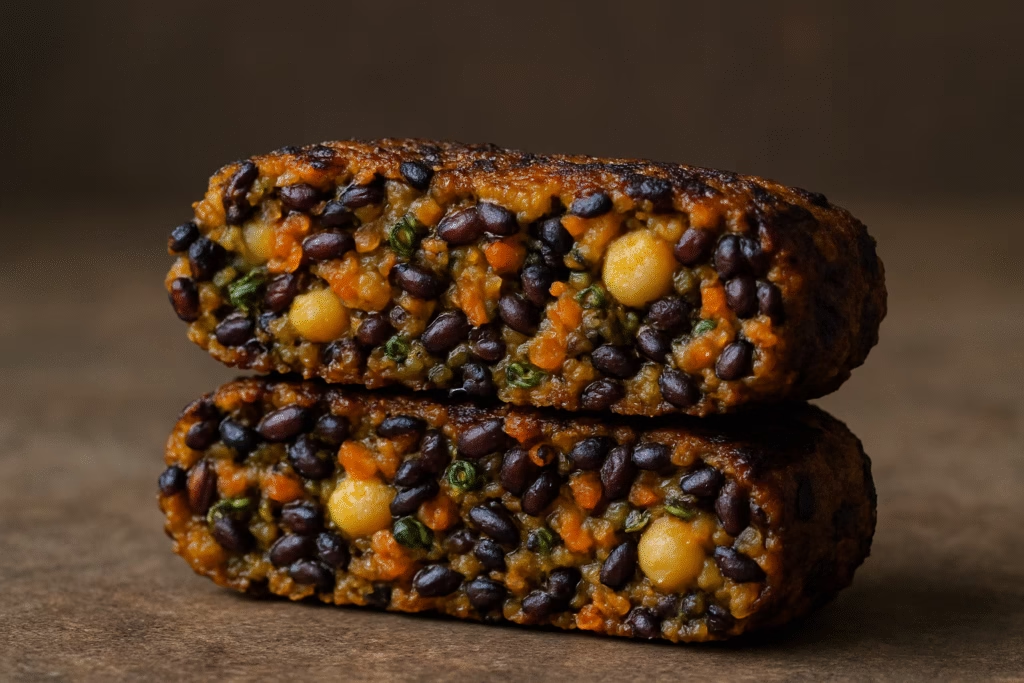
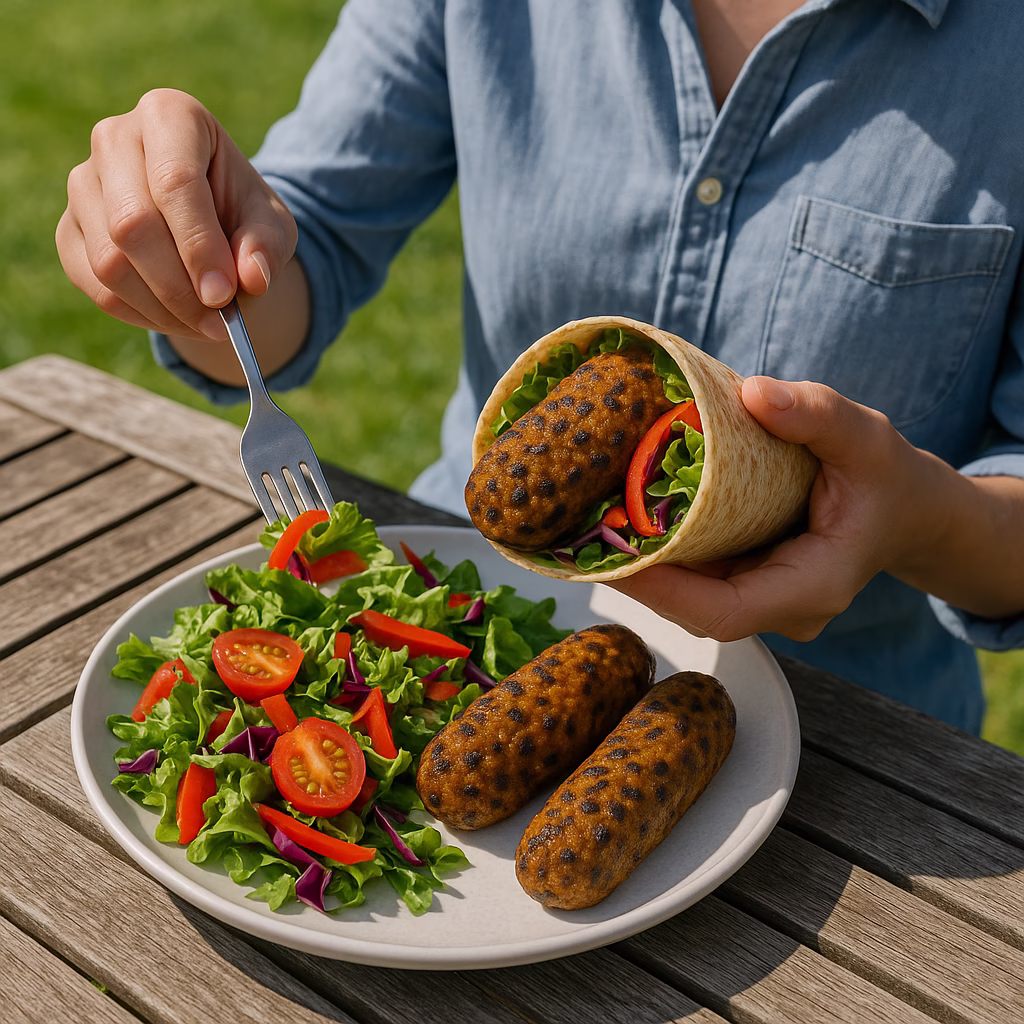
Our cooking adventure is all about black rice. It’s also called “forbidden rice” because long ago, only Chinese emperors could eat it. This dark grain, with its nutty taste, is full of good things. When we mix it with creamy chickpeas and colorful vegetables, it makes the perfect base for patties. These patties are hearty and very tasty. They are not flat like a burger. We are shaping them into sausage-like forms. They are perfect for wraps, salads, or just eating on their own.
The Allure of Curried Black Rice in Your Kitchen
The real magic happens when we add the warm, fragrant curry spices. This mix turns simple ingredients into something special. It adds a deep, warm flavor and a great smell that will fill your kitchen. The earthy taste of Curried Black Rice with sweet vegetables and savory chickpeas creates a perfect balance. It makes every bite a special experience. Whether you cook a lot or are just starting, this recipe is easy and fun.
Get ready to gather your ingredients for a fun cooking time. This recipe is a great choice for meal prep. It’s also a great new meal for your weekly menu. It proves that healthy food can be exciting and full of flavor. We are about to show you how to make something truly special. It’s packed with nutrients and full of taste, all while being simple to do.
So, let’s roll up our sleeves and start making these tasty curried black rice and chickpea patties. You will be surprised at how easy it is to bring such amazing flavors and healthy goodness to your table.
Prep and Cook: Your Timeline
Time to Prepare: 25 minutes
Time to Cook/Blend: 30 minutes
Nutritional Snapshot
Per serving (about 2 patties):
Calories: 280-320 kcal
Protein: 12-15g
Fiber: 8-10g
Healthy Fats: 8-12g
Carbohydrates: 40-45g (mostly complex carbs)
Vitamins & Minerals: Full of B vitamins, iron, magnesium, zinc, and antioxidants.
Note: The nutrition facts are estimates. They can change based on the brand of ingredients and how you cook them.
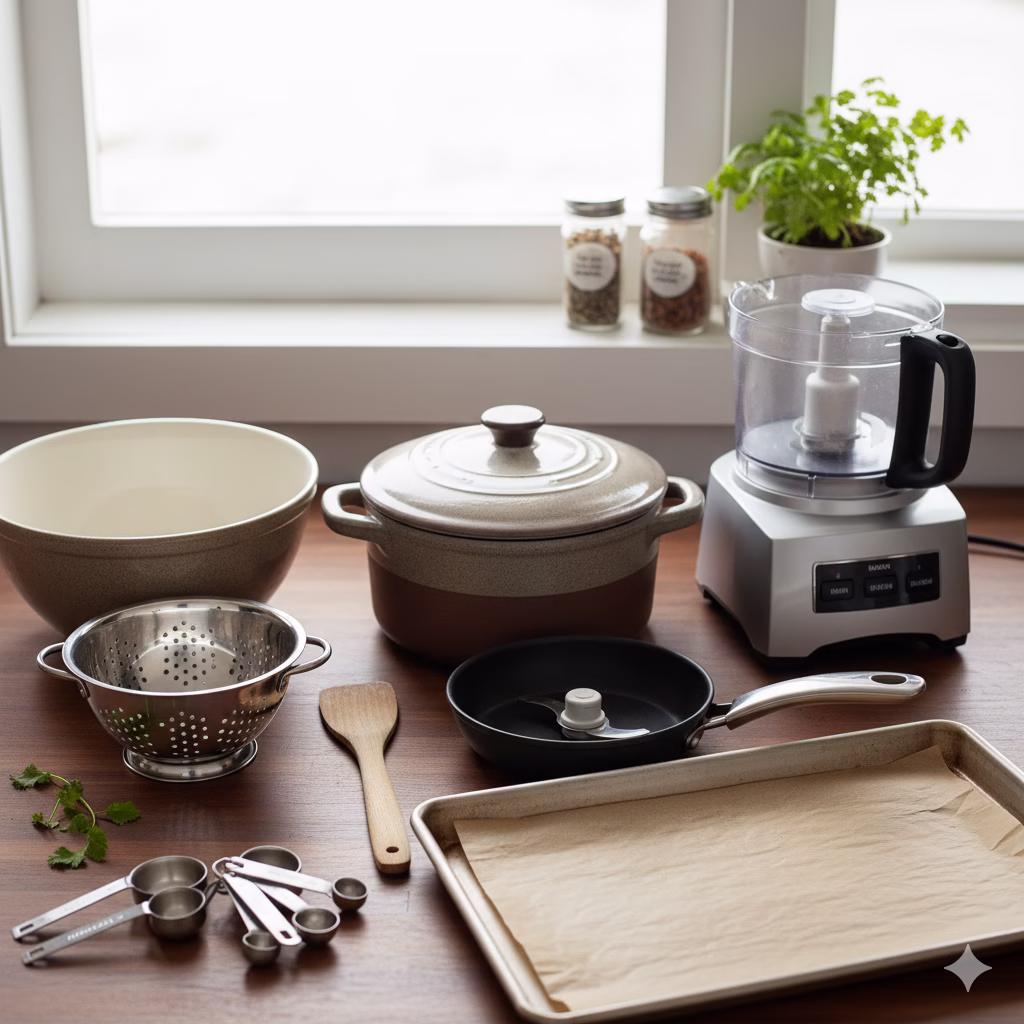
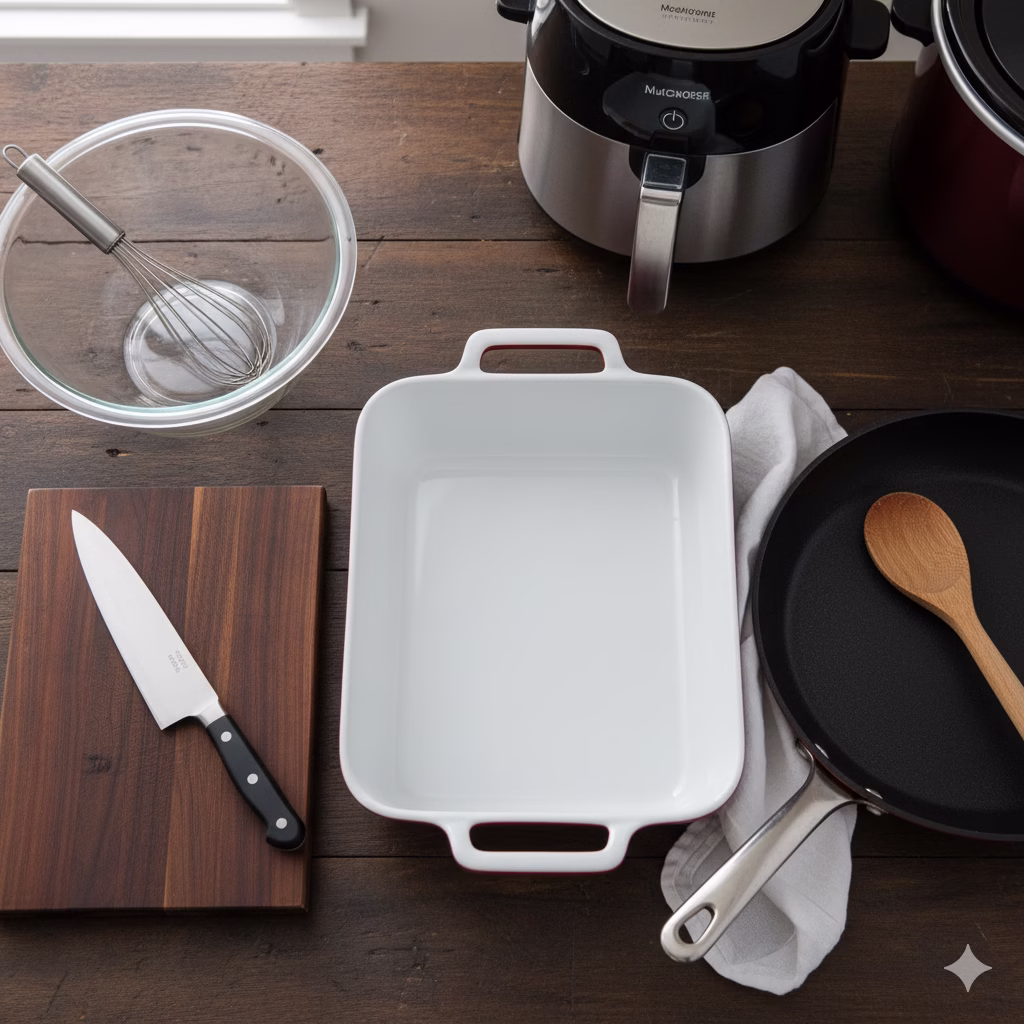
Essential Equipment
Large saucepan with a lid (for cooking rice)
Colander
Large mixing bowl
Food processor
Non-stick frying pan or baking sheet
Spatula
Measuring cups and spoons
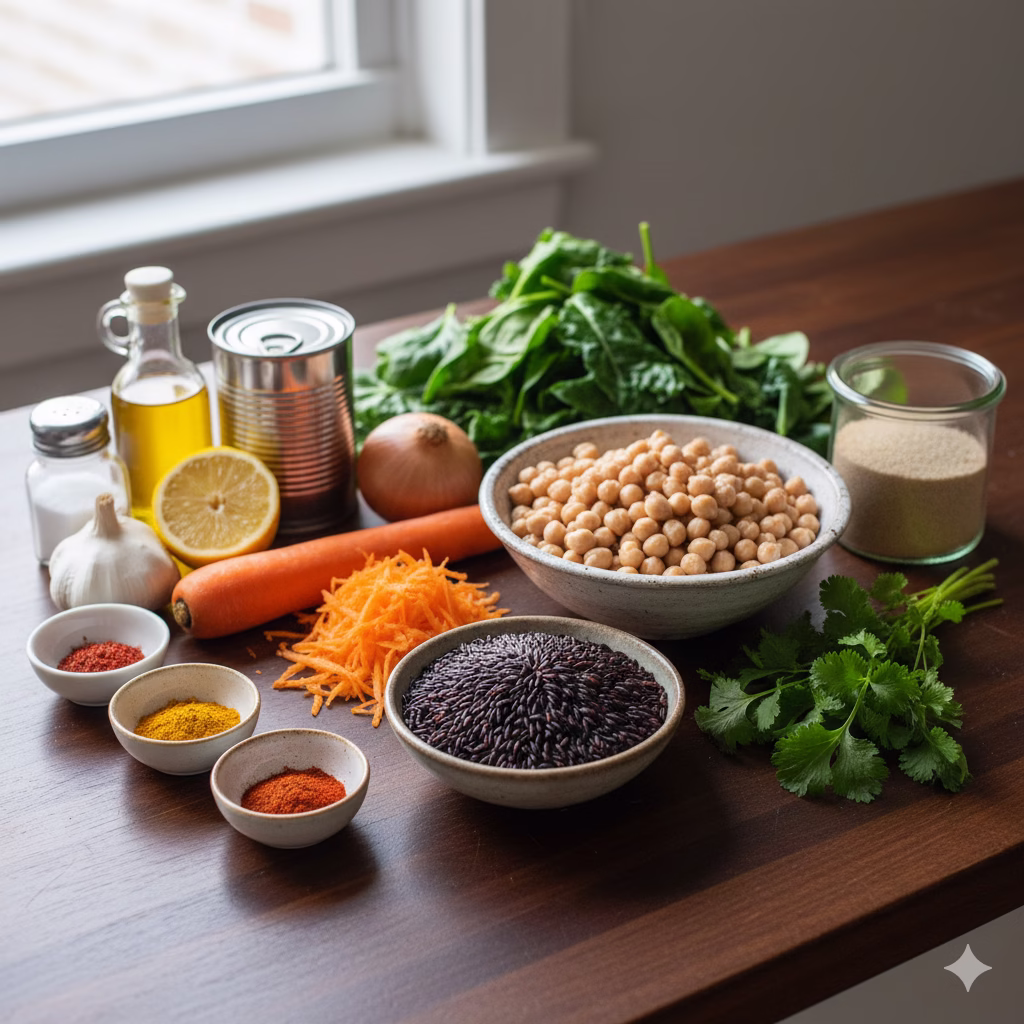
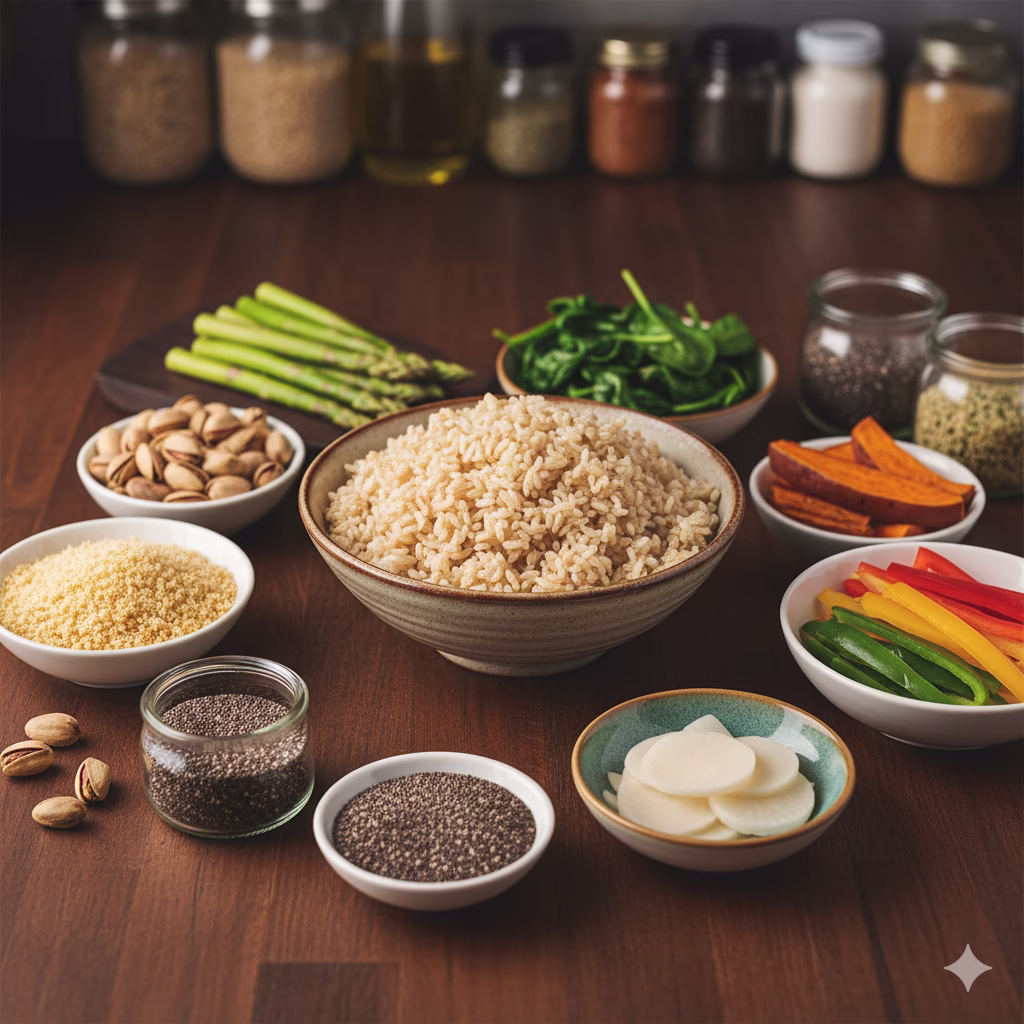
Wholesome Ingredients for Curried Black Rice Patties
This recipe makes about 12-14 patties (Servings: 6-7).
1 cup black rice, not cooked
2 cups vegetable broth or water (for cooking rice)
1 (15-ounce) can chickpeas, rinsed and drained
1 small onion, cut into small pieces
2 cloves garlic, minced
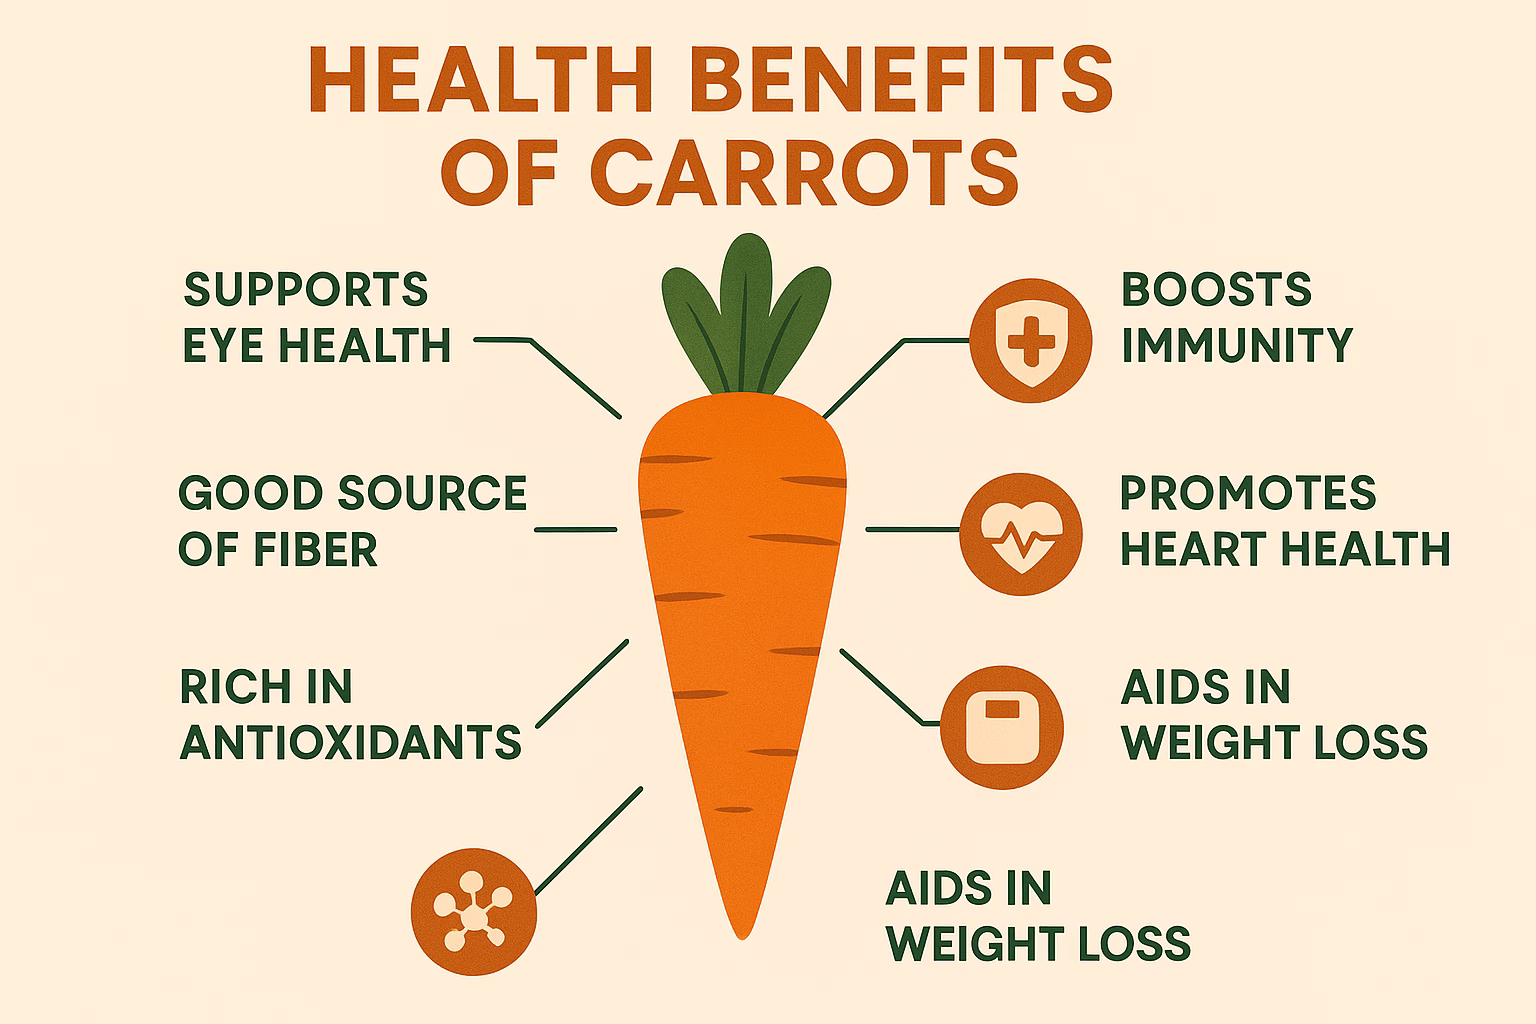
1 large carrot, grated
1 cup finely chopped spinach or kale
1/2 cup fresh cilantro, chopped
2 tablespoons olive oil, divided
2 tablespoons curry powder (add more if you like)
1 teaspoon ground cumin
1/2 teaspoon ground turmeric
1/4 teaspoon cayenne pepper (optional, for a little heat)
1/2 cup whole wheat breadcrumbs (or gluten-free oats for a GF option)
2 tablespoons lemon juice
Salt and fresh ground black pepper to taste
Step-by-Step Instructions: Crafting Your Curried Black Rice Patties
Let’s bring these delicious patties to life! Follow these steps for a perfect batch every time.
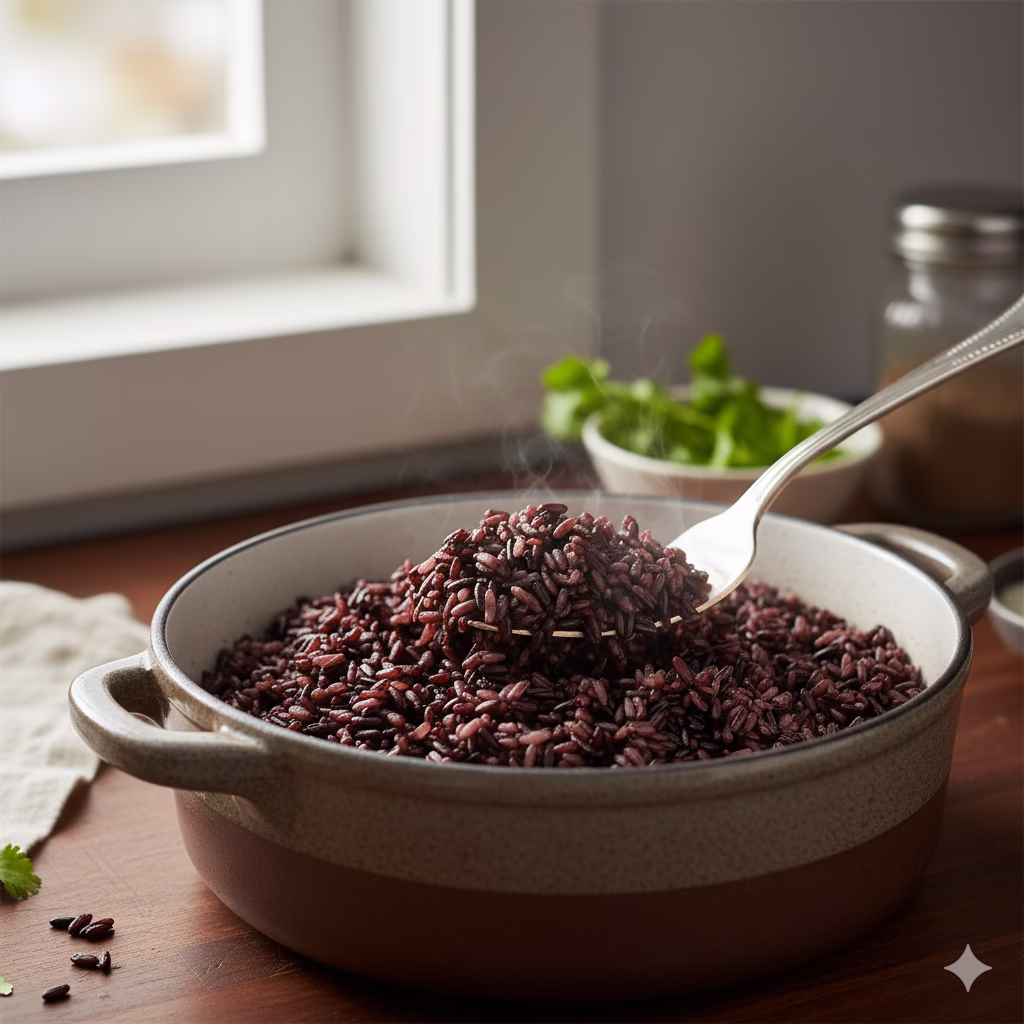
Cook the Black Rice: First, wash the black rice under cold running water in a small strainer. This helps to remove extra starch. Put the washed rice into a large saucepan and add 2 cups of vegetable broth or water. Bring it to a boil over medium-high heat.
Once it is boiling, turn the heat down to low. Cover the pan with a tight lid and let it simmer for about 30-35 minutes. Cook until all the water is gone and the rice is soft but still a little firm. After cooking, take the pan off the heat. Let it sit with the lid on for 5 more minutes. Then, use a fork to fluff the rice. Set it aside to cool a bit.
Cook the Vegetables: While the rice is cooking, heat 1 tablespoon of olive oil in a large non-stick frying pan over medium heat. Add the chopped onion and cook for 5-7 minutes. Stir often, until it becomes soft and clear. Add the minced garlic, grated carrot, and chopped spinach or kale to the pan. Cook for another 3-5 minutes, stirring often, until the vegetables are soft and the spinach/kale has wilted. Take the pan off the heat and set the vegetables aside.
Prepare the Chickpea Mix: In a large mixing bowl, add the washed and drained chickpeas. Use a fork or a masher to mash the chickpeas. You want them to be mostly broken down but still have some lumps. You do not want a smooth paste. Some whole or half chickpeas are good for texture.
Combine All Ingredients: To the bowl with the mashed chickpeas, add the cooled black rice, the cooked vegetables, and the fresh chopped cilantro. Sprinkle in the curry powder, ground cumin, ground turmeric, and cayenne pepper (if you are using it). Add the whole wheat breadcrumbs and lemon juice. Add a lot of salt and fresh ground black pepper to taste.
Mix Thoroughly: Use your hands (or a strong spoon) to mix all the ingredients well. Keep mixing and gently mashing until everything is combined and you can easily form a patty that stays together. The mix should stick together. It should not be too wet or too dry. If it feels too wet, add a little more breadcrumbs. If it’s too dry, add a teaspoon of water or vegetable broth.
Shape the Patties: Take about 2-3 tablespoons of the mixture. Roll it into a sausage-like shape, about 3-4 inches long and 1 inch thick. Put the shaped patties on a baking sheet lined with parchment paper. Do this with the rest of the mixture. You should get about 12-14 patties.
Cooking Methods for Your Curried Black Rice Patties
Pan-Frying (Best for a crispy outside)
Heat Oil: Heat the last 1 tablespoon of olive oil in a large non-stick frying pan over medium heat. You might need to cook the patties in small groups so the pan is not too crowded.
Cook Patties: Carefully put the shaped patties into the hot pan. And cook for 4-6 minutes on each side. Cook until they are golden brown and crispy on the outside and warm all the way through. Flip them gently to cook them evenly.
Baking (For a lighter choice)
Preheat Oven: Heat your oven to 375°F (190°C).
Prepare Baking Sheet: Lightly grease a baking sheet or line it with parchment paper.
Bake Patties: Place the shaped patties on the baking sheet in a single layer. Make sure they do not touch. Bake for 20-25 minutes. Flip them over halfway through. Cook until they are golden brown and firm.
Air Frying (For extra crispiness and less oil)
Preheat Air Fryer: Heat your air fryer to 375°F (190°C).
Arrange Patties: Lightly spray the air fryer basket with cooking spray. Put the shaped patties in the basket in a single layer. Do not crowd them. You will likely need to cook in small groups.
Air Fry: Air fry for 12-15 minutes. Flip them halfway through. Cook until they are golden brown and crispy.
Health Benefits of Curried Black Rice Patties
These delicious patties are not just tasty; they are a powerhouse of nutrition! Each ingredient helps your health in a special way.
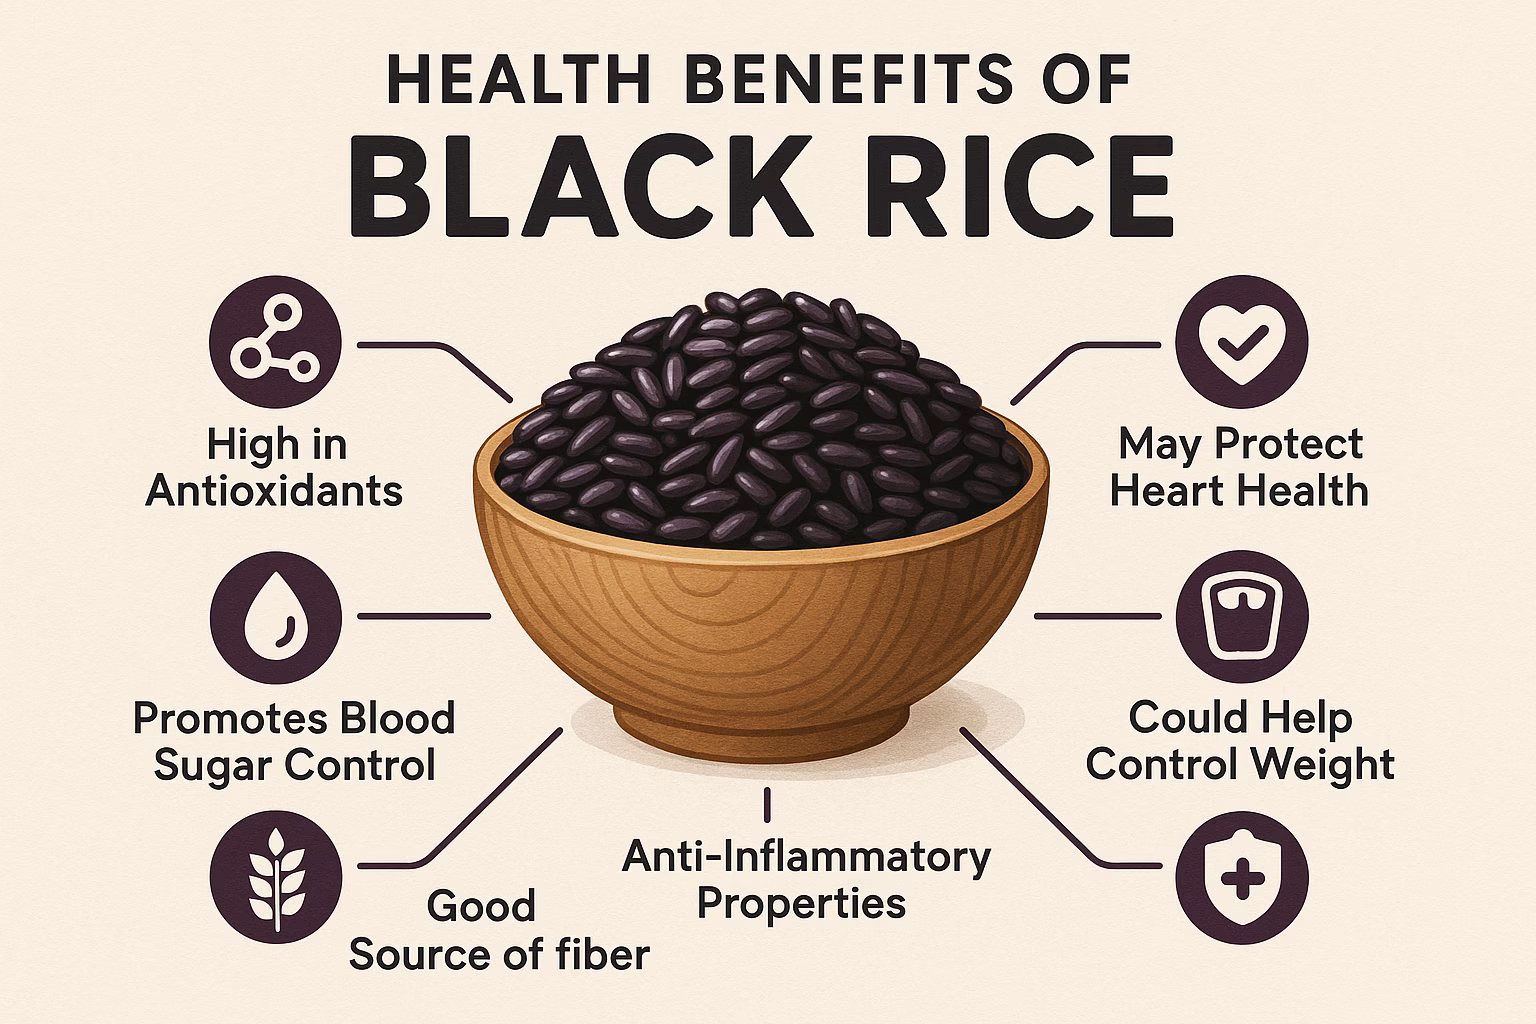
Rich in Antioxidants
Black rice is known for having a lot of anthocyanins. These are the same strong antioxidants found in blueberries. They help fight bad molecules in your body. This lowers stress and supports healthy cells.
Great Source of Fiber
Both black rice and chickpeas are full of fiber. Fiber is important for good digestion. It helps keep you regular and supports a healthy gut. It also helps you feel full, which can help with weight management.
Plant-Based Protein Power
Chickpeas are a great source of plant-based protein. Protein is needed for muscle repair and growth. With protein from black rice, these patties make a complete and filling meal. They are great for people who don’t eat meat or want to eat more plants.
Supports Heart Health
The fiber, potassium, and magnesium in these foods help your heart. They can help control cholesterol levels and blood pressure. The healthy fats from olive oil also help keep your heart healthy.
Full of Vitamins and Minerals
These patties are a treasure chest of important nutrients. They have B vitamins from black rice, iron from spinach, and magnesium from chickpeas. These are all needed for energy, a strong immune system, and healthy bones.
Variations: Customize Your Curried Black Rice Patties
Variation
Description
More Spice
Add a bit more cayenne pepper, a chopped green chili, or a dash of hot sauce to the mix for extra heat.
Gluten-Free Option
Use gluten-free rolled oats (pulsed a little in a food processor) or gluten-free breadcrumbs instead of whole wheat breadcrumbs.
Herby Twist
Try adding other fresh herbs like parsley, mint, or basil for a fresh, great smell.
Extra Veggies
Add other finely grated or chopped vegetables like bell peppers, zucchini, corn, or peas to the mix.
Nutty Crunch
Add 2 tablespoons of finely chopped roasted cashews or peanuts for a fun texture and taste.
Add Cheese
For a non-vegan choice, mix in 1/4 cup of grated Parmesan or nutritional yeast for a cheesy taste.
Smoky Flavor
Add 1/2 teaspoon of smoked paprika to the spices for a nice smoky flavor.
Final Thoughts for Curried Black Rice
There you have it—a truly great recipe for Curried Black Rice and Chickpea Patties with Veg. It is as healthy as it is tasty. We have looked at the great benefits of each ingredient. We have also given you detailed steps to make sure you succeed in the kitchen. These patties are more than just a meal. They are a celebration of healthy, plant-based eating. They show that healthy food can be very exciting and full of flavor.
Whether you need a hearty lunch, a light dinner, or an easy meal prep option, these patties are perfect. They are great in pitas or wraps. They are also good with a fresh green salad or as a side dish. Don’t be afraid to try the variations. Make this recipe your own! We encourage you to get in your kitchen, enjoy the spicy smells, and make a batch of these amazing patties. Share what you make with your friends and family. Inspire others to find the joy of healthy, tasty eating. Happy cooking!
Frequently Asked Questions (FAQs)
Q1: Can I make these patties ahead of time?
A1: Yes, you can! These patties are great for meal prep. You can make the mixture and shape the patties. Then, put them in the fridge for up to 2-3 days before you cook them. Or, you can cook them all the way and store them in a closed container in the fridge for up to 4 days. They reheat well in a pan, oven, or air fryer.
Q2: Can I freeze these Curried Black Rice patties?
A2: Yes, these patties freeze very well! You can freeze them either raw or cooked. To freeze raw patties, place them on a baking sheet and freeze until they are hard. Then, put them in a freezer-safe bag or container for up to 3 months. Cooked patties can be frozen the same way. When you are ready to cook or reheat, you can cook them right from frozen. Just add a few extra minutes to the cooking time. Or, you can let them thaw in the fridge first.
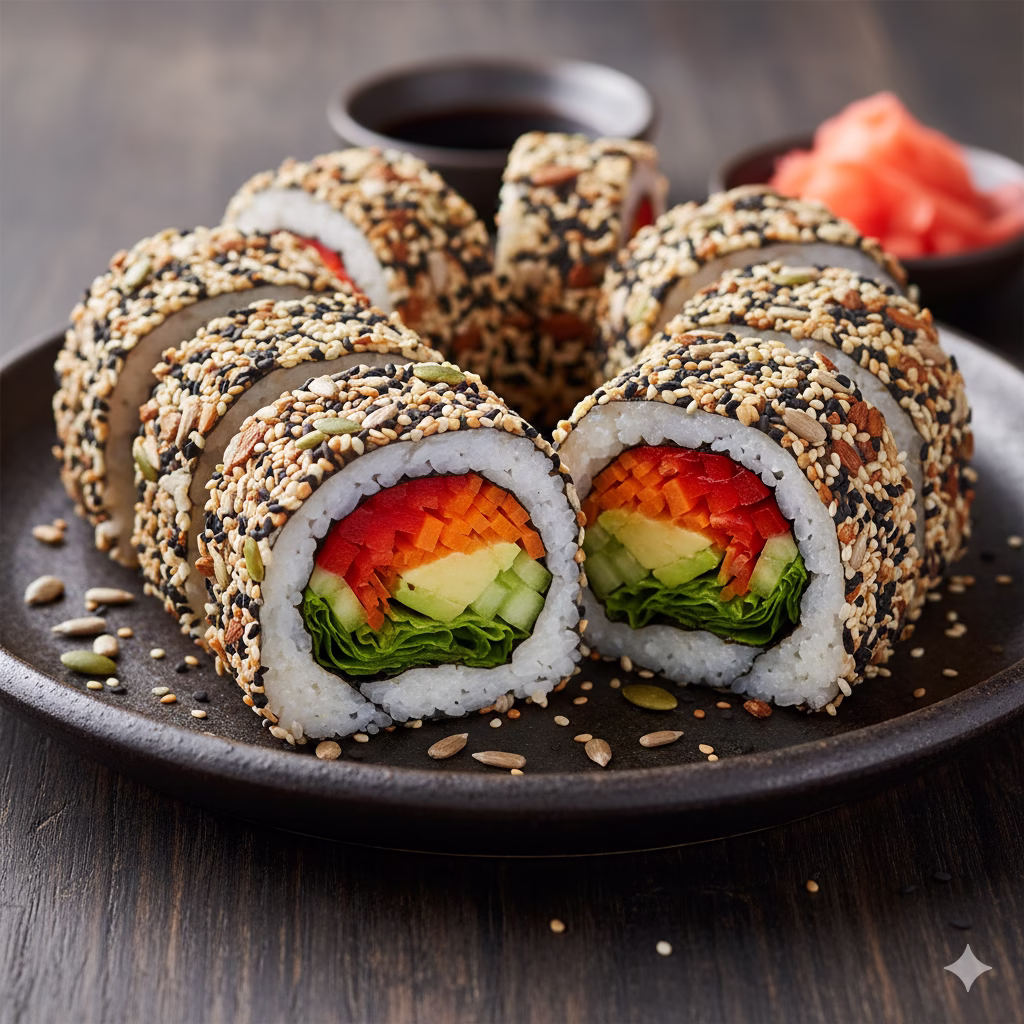
Discover the ultimate plant-based delight with our guide to creating the perfect Veg & Nut-Crusted Sushi. This simple article will empower you to craft a visually stunning and incredibly delicious sushi monster, packed with wholesome ingredients and vibrant flavors. Get ready to impress your taste buds and elevate your home cooking with this unique and satisfying recipe!
Welcome to Your Sushi Adventure!
Have you ever wanted to make a sushi roll that looks amazing and tastes even better? Imagine a huge, vibrant roll, packed with healthy food. It turns a simple meal into a fun, new cooking experience. We aren’t talking about small, average sushi here. We’re talking about a sushi monster—a big, filling roll that is fun to make and delicious to eat. Get ready to start a great journey into making creative sushi. Here, fresh vegetables meet a satisfying crunch from nuts and seeds.
Many people are looking for healthier, plant-based meals these days. Sushi is a popular choice. But sometimes, making sushi at home can seem too hard or boring. This recipe changes all that! It gives you a new, easy way to make plant-based sushi that is both simple and exciting. We will show you how to make a big, stunning roll. It is full of fresh flavors and makes a great meal. This recipe works if you love sushi or are just learning to cook. You will soon be ready to impress yourself and your friends!
The Power of the Veg & Nut-Crusted Sushi
The best part of this special Veg & Nut-Crusted Sushi is how healthy and useful it is. By using many colorful vegetables and a thick crust of different nuts and seeds, we make more than just a meal. We create a complete, healthy food experience. This is not a side dish; it’s the main event. It is designed to be a balanced and very satisfying meal. The crunchy outside and the soft, tasty inside create a great mix of textures. This will make you want to eat more and more, one delicious bite after another.
Forget about difficult cooking steps or hard-to-find food items. Our way of making sushi is easy and relaxing. We planned this recipe carefully so that even people who have never rolled sushi before can get great results. From perfectly seasoned rice to pretty fillings and that amazing, crunchy crust, every part is designed for success. You will be surprised at how simple it is to make something so impressive right in your own kitchen. You will turn simple food into a truly spectacular dish.
So, gather your ingredients, clear your cooking area, and let’s get rolling! This article gives you all the tips, tricks, and easy steps you need to make your very own Veg & Nut-Crusted Sushi monster with confidence. It is more than just a recipe. It is an invite to try new tastes, enjoy healthy eating, and feel proud of making something special from scratch. Let’s dive in and create a masterpiece that is healthy and delicious!
Time to Prepare & Cook Your Veg & Nut-Crusted Sushi
Time to Prepare: 45 minutes
Time to Cook/Chill: 30 minutes (rice cooking) + 30 minutes (chilling) = 1 hour
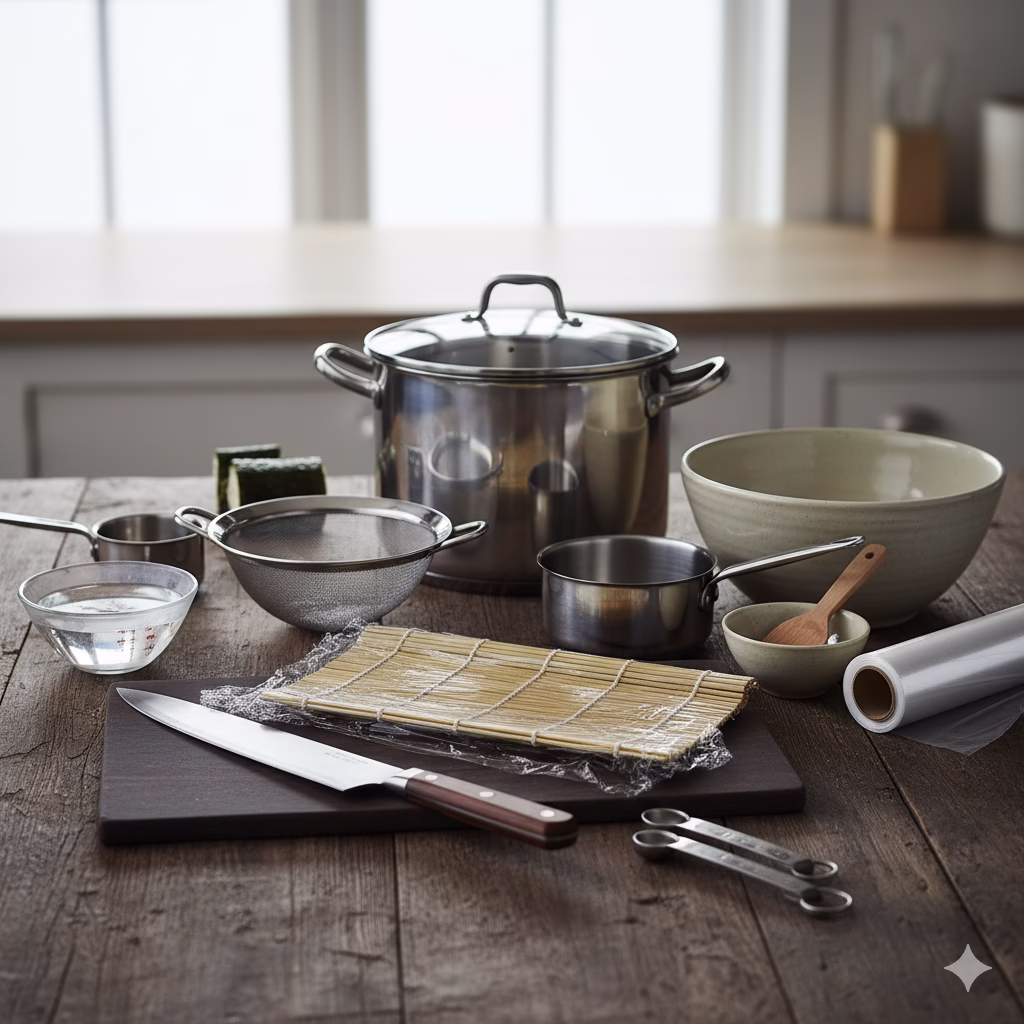
Equipment Needed
Large pot with lid (for rice)
Fine-mesh sieve
Large mixing bowl
Small saucepan (for sushi vinegar)
Sharp knife
Cutting board
Sushi rolling mat (makisu)
Plastic wrap
Measuring cups and spoons
Small bowl with water (for wetting hands)
Nutritional Information (per serving, estimated)
Metric
Amount
Benefit
Calories
350-450 kcal
Good energy source
Protein
10-15g
Supports muscles
Fat
15-25g
Healthy fats for the heart
Carbs
40-50g
Sustained energy
Fiber
5-8g
Aids digestion
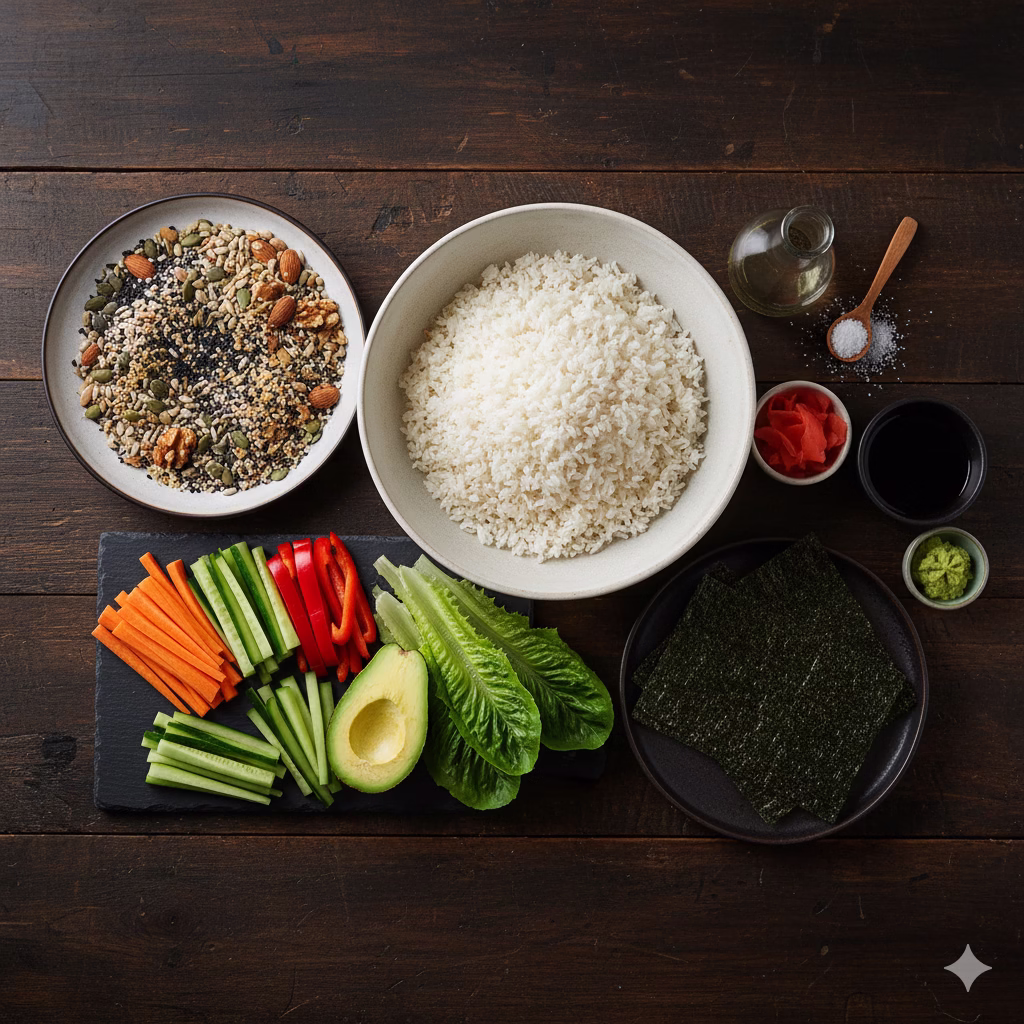
Ingredients for Your Veg & Nut-Crusted Sushi Monster
Servings: This recipe makes 2 large sushi rolls, which gives about 12-16 big pieces. It is enough for 2-4 people as a main meal.
For the Sushi Rice:
2 cups sushi rice (short-grain white rice)
221 cups water
41 cup rice vinegar
2 tablespoons granulated sugar
1 teaspoon salt
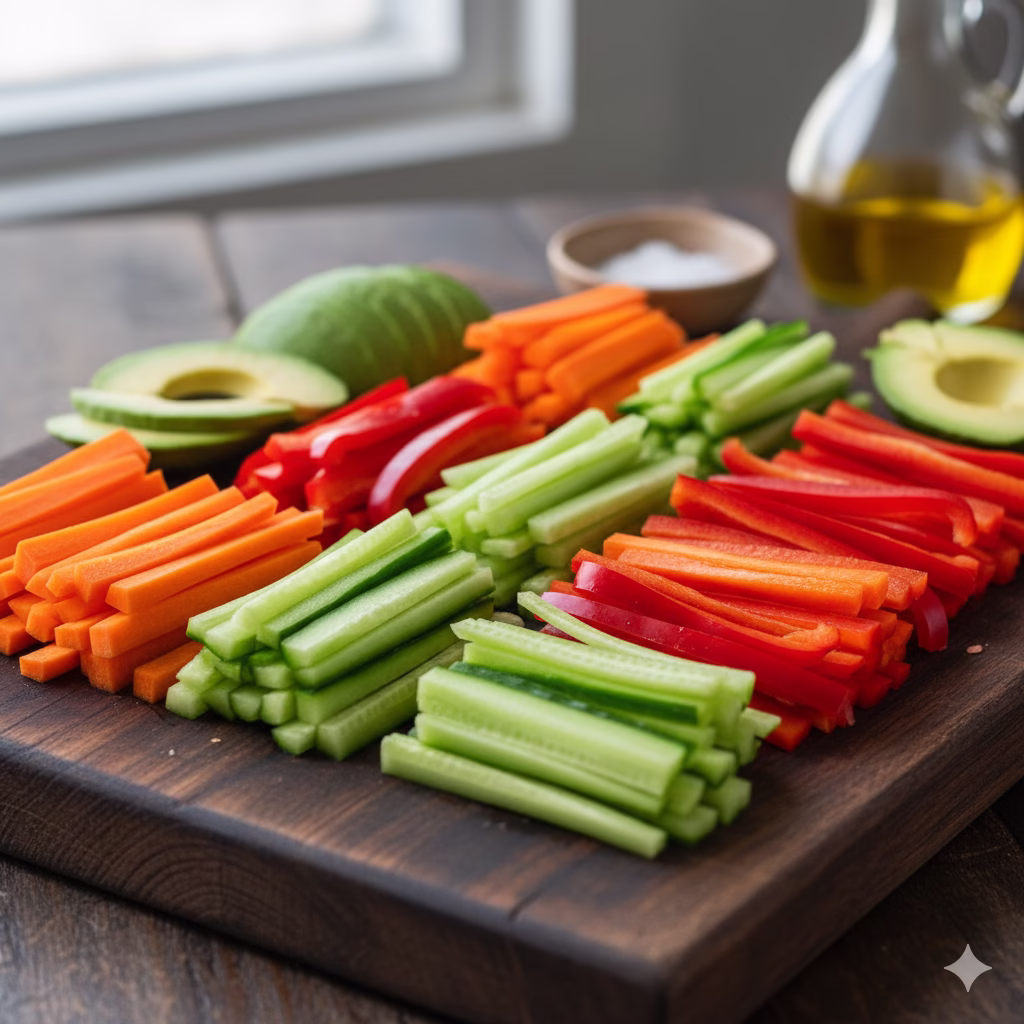
For the Veggie Fillings:
1 large carrot, peeled and cut into thin sticks
21 cucumber, seeds removed and cut into thin sticks
1 red bell pepper, cored and cut into thin strips
21 ripe avocado, sliced
4-5 romaine lettuce leaves, washed and dried
4 sheets nori seaweed (for sushi)
For the Nut & Seed Crust:
Quarter cup sesame seeds (mixed black and white)
A Quarter of a cup chopped almonds
Quarter cup chopped walnuts
2 tablespoons pumpkin seeds
2 tablespoons sunflower seeds
For Serving (Optional):
Soy sauce or tamari
Wasabi
Pickled ginger
Step-by-Step Instructions: Crafting Your Veg & Nut-Crusted Sushi
1. Get the Sushi Rice Ready:
Rinse the sushi rice well in a fine-mesh sieve under cold running water. Do this until the water is clear. This removes extra starch, which helps the rice be fluffy, not sticky.
Put the clean rice into a large pot with a lid that fits tightly. Add 221 cups of cold water.
Bring the water to a boil over medium-high heat. Once it boils, turn the heat down to low. Cover the pot tightly and let it simmer for 15-20 minutes. The water should be fully absorbed. Do not lift the lid during this time!
When the rice is cooked, take the pot off the heat. Let it steam, still covered, for another 10 minutes. This helps the rice cook completely.
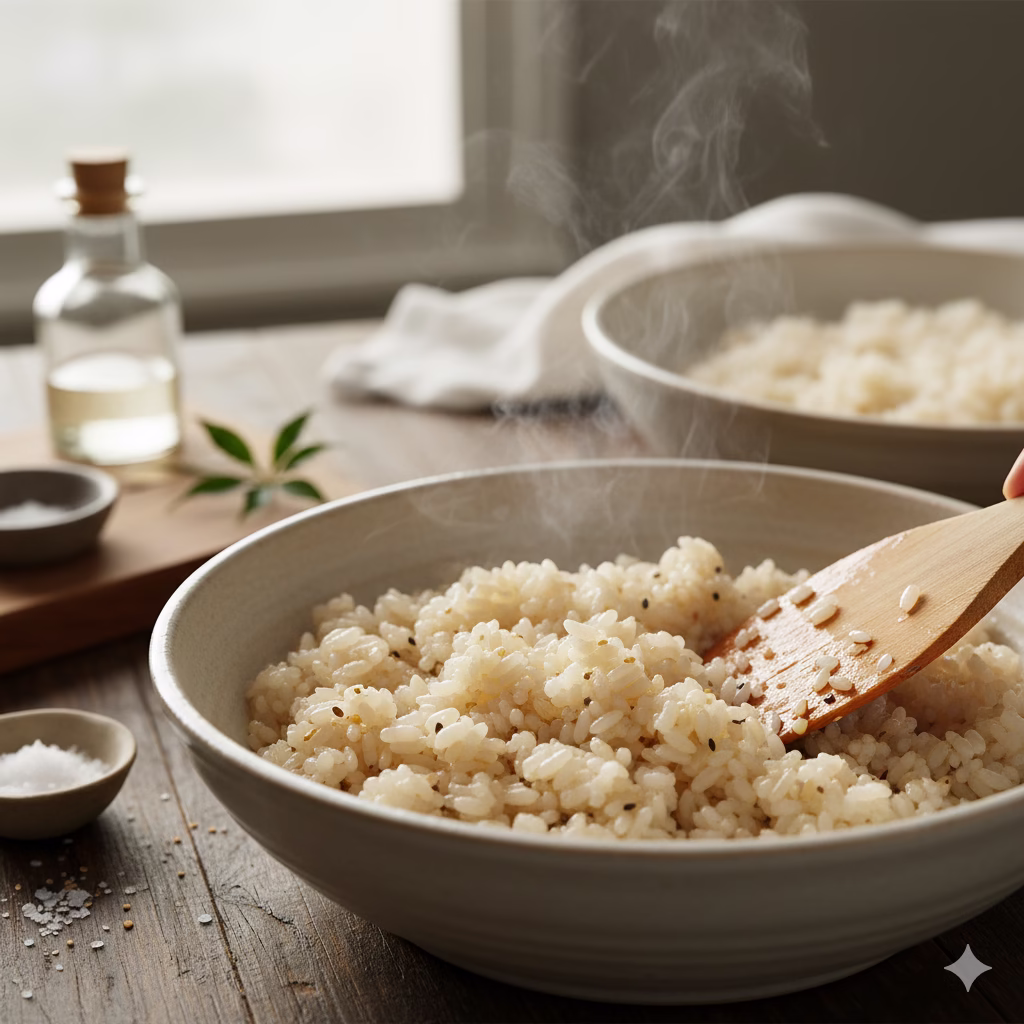
While the rice steams, make the sushi vinegar mix. In a small pot, mix the rice vinegar, sugar, and salt. Heat it over low heat, stirring all the time. Stop when the sugar and salt have fully dissolved. Do not let it boil. Let it cool a little.
Move the hot rice to a large, shallow mixing bowl. Slowly pour the cooled vinegar mix over the rice. Use a wooden spoon or paddle to gently cut and fold the vinegar into the rice. Do not mash the rice grains. This step gives the rice its classic sushi texture.
Cover the rice with a damp cloth or plastic wrap. Let it cool to room temperature. This takes about 20-30 minutes. Do not put warm rice in the fridge; it will get hard.
2. Prepare the Veggie Fillings:
While the rice cools, cut your vegetables. Use a sharp knife to slice the carrot, cucumber, and red bell pepper into thin matchsticks. Try to make the pieces the same size for a good roll.
Slice the avocado right before you build the roll. This stops it from turning brown.
Make sure your romaine lettuce leaves are washed and fully dry.
Place all your cut vegetables neatly on a tray or cutting board. Now they are ready for rolling.
3. Make the Nut & Seed Crust:
In a shallow dish or on a flat plate, mix the sesame seeds, chopped almonds, chopped walnuts, pumpkin seeds, and sunflower seeds. Stir them well until they are mixed. This will be the tasty, crunchy coating for your sushi monster.
4. Assemble Your Sushi Monster:
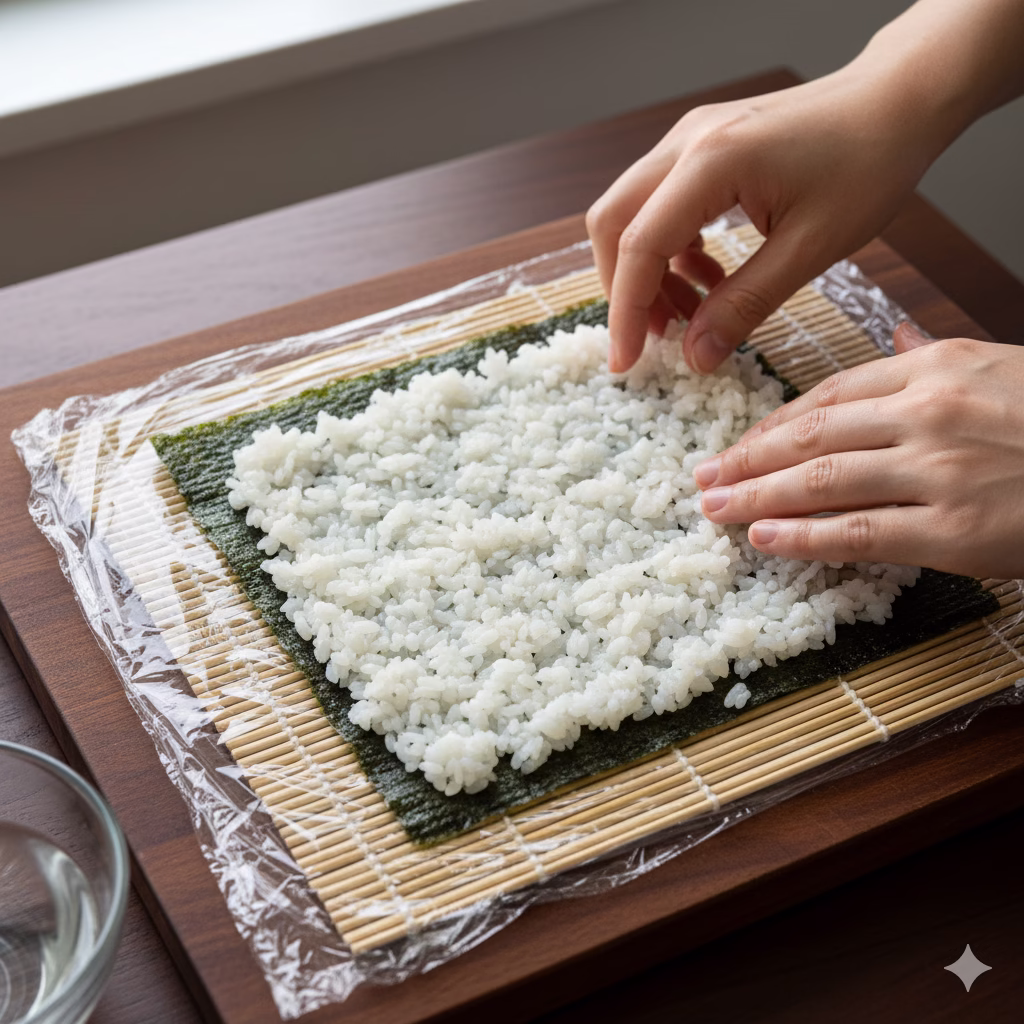
Lay your sushi rolling mat (makisu) flat on a clean table. Cover the entire mat with plastic wrap. This stops the rice from sticking to the mat and makes cleaning easy.
Place one sheet of nori seaweed on the mat, with the shiny side down.
Wet your hands a little with water to stop the rice from sticking. Take about 1/2 to 3/4 cup of the cooled sushi rice. Gently spread it evenly over the whole nori sheet. Leave about a 1/2-inch space clear at the top edge of the nori. Press the rice down gently but firmly.
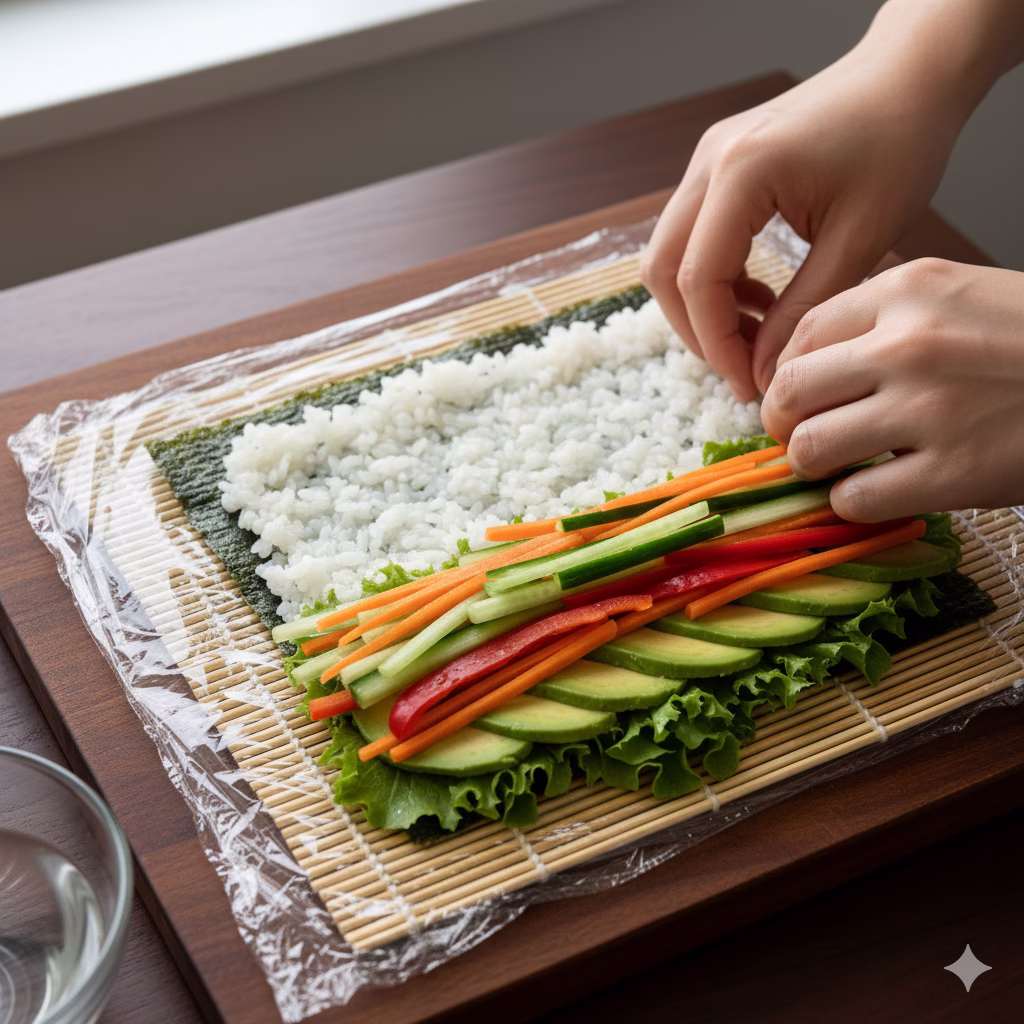
5. Add the Fillings:
Along the bottom edge of the rice (the edge closest to you), place a generous line of your cut vegetables. Start with a layer of romaine lettuce. Then add strips of carrots, cucumber, bell pepper, and finally, slices of avocado. Do not overfill, but make sure the filling is big enough for a “monster” roll.
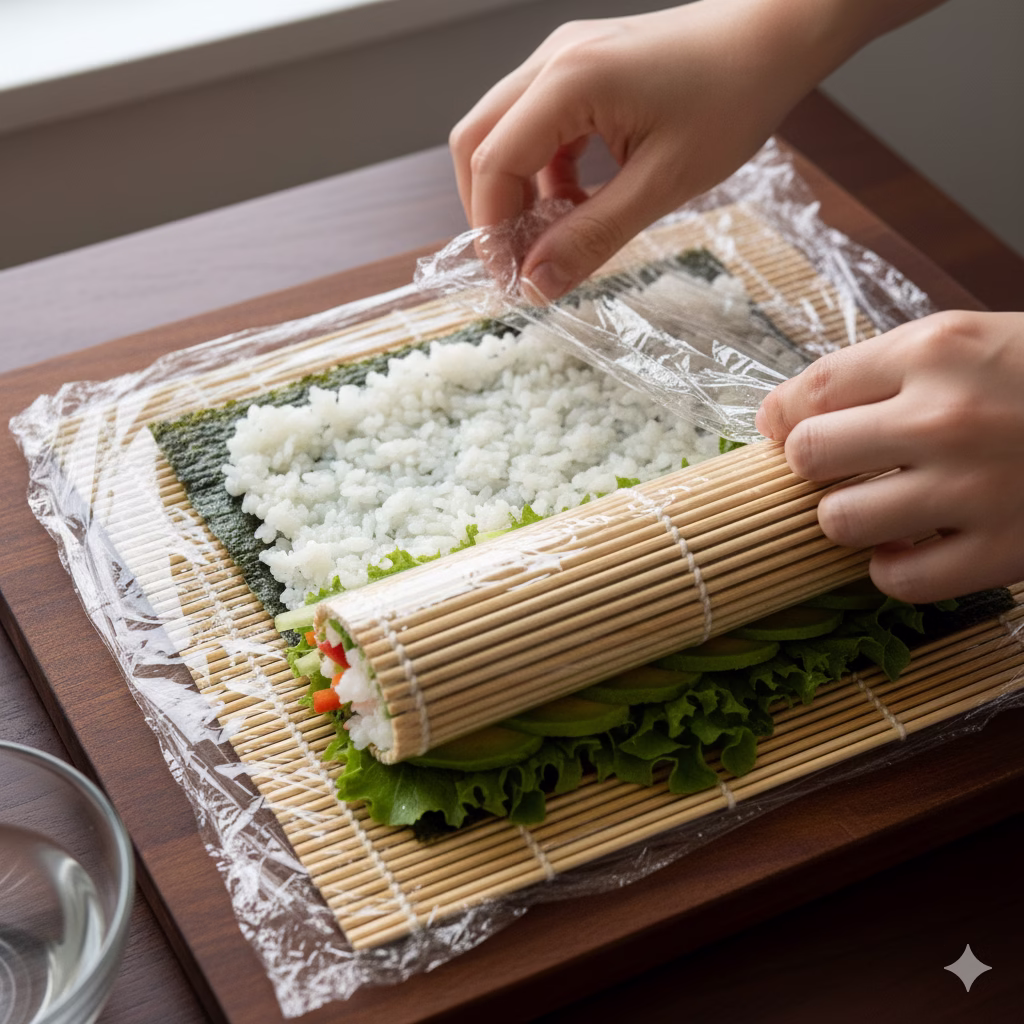
6. The Rolling Technique:
Carefully lift the edge of the sushi mat closest to you. Bring it up and over the fillings. Press down lightly to tuck the fillings in. Then, keep rolling forward. Use a gentle, steady press with your hands.
As you roll, peel the plastic wrap away from the roll with one hand. Guide the roll with your other hand. This helps make a tight, well-formed roll.
When you reach the bare nori edge at the top, wet it a little with a tiny dab of water. This helps to seal the roll shut. Keep rolling until the seam is sealed.
Gently use the mat to shape the roll again. Apply light pressure to make a smooth, firm cylinder.
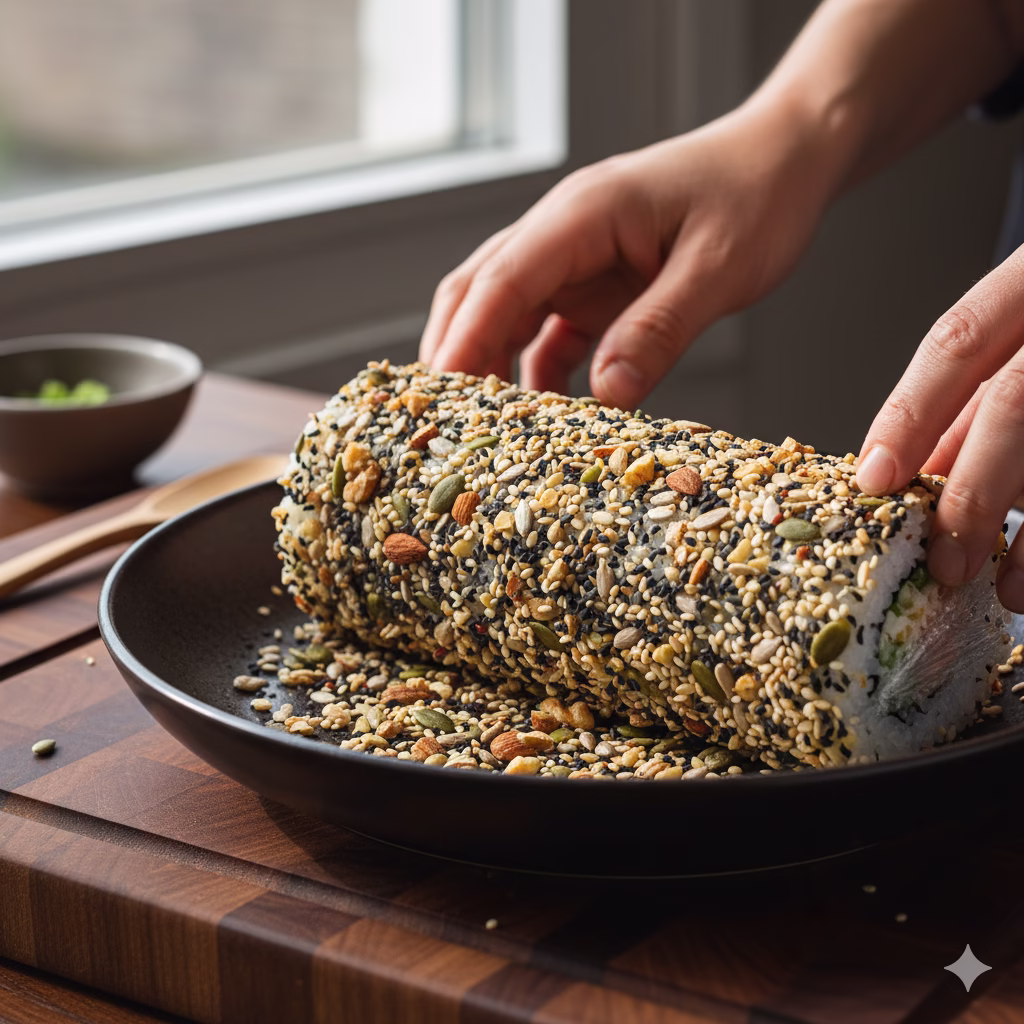
7. Put on the Nut & Seed Crust:
Once your roll is firm, carefully take off the plastic wrap.
Gently move the roll to the shallow dish that holds your nuts and seeds mix.
Roll the sushi monster back and forth. Press lightly until the whole outside is fully covered with the crunchy nuts and seeds. Make sure the crust is thick and even.
8. Slice and Serve:
Place the crusted sushi roll back on a clean cutting board. For easier and cleaner cuts, you can wrap the roll tightly in new plastic wrap. Chill it in the fridge for 20-30 minutes. This helps it become firm.
Use a very sharp knife. Wet the blade a little with water between cuts to stop sticking. Slice the roll into thick, separate pieces. Aim for pieces about 1 to 1.5 inches wide. Start by cutting the roll in half. Then cut each half in half, and so on. This gives you even pieces.
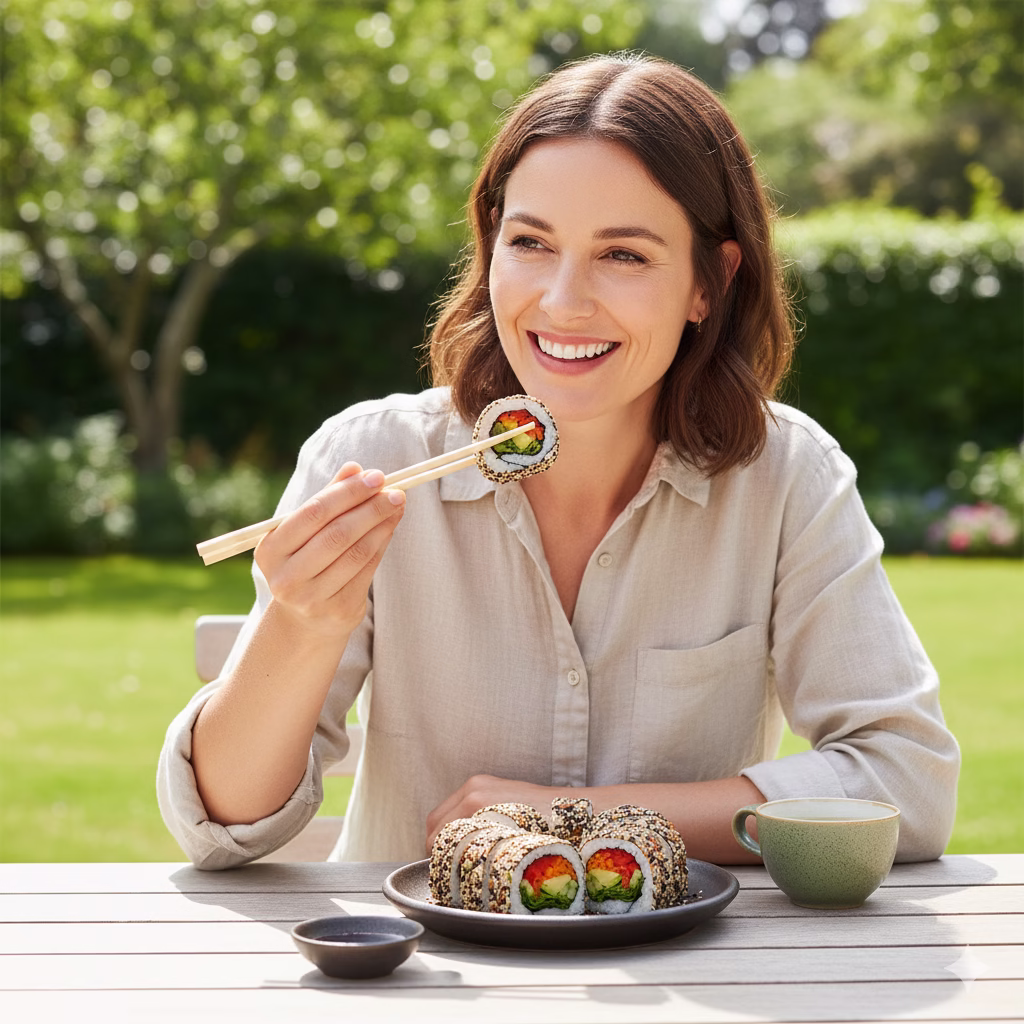
Arrange your beautiful Veg & Nut-Crusted Sushi monster pieces on a serving plate. Serve right away with soy sauce, wasabi, and pickled ginger, if you like.
Benefits of This Veg & Nut-Crusted Sushi
This meal is more than just tasty; it is very healthy! Our Veg & Nut-Crusted Sushi offers many good things for your health:
Plenty of Fiber: The many fresh vegetables, whole nuts, and seeds greatly boost your fiber intake. Fiber is key for good digestion, feeling full, and keeping blood sugar steady.
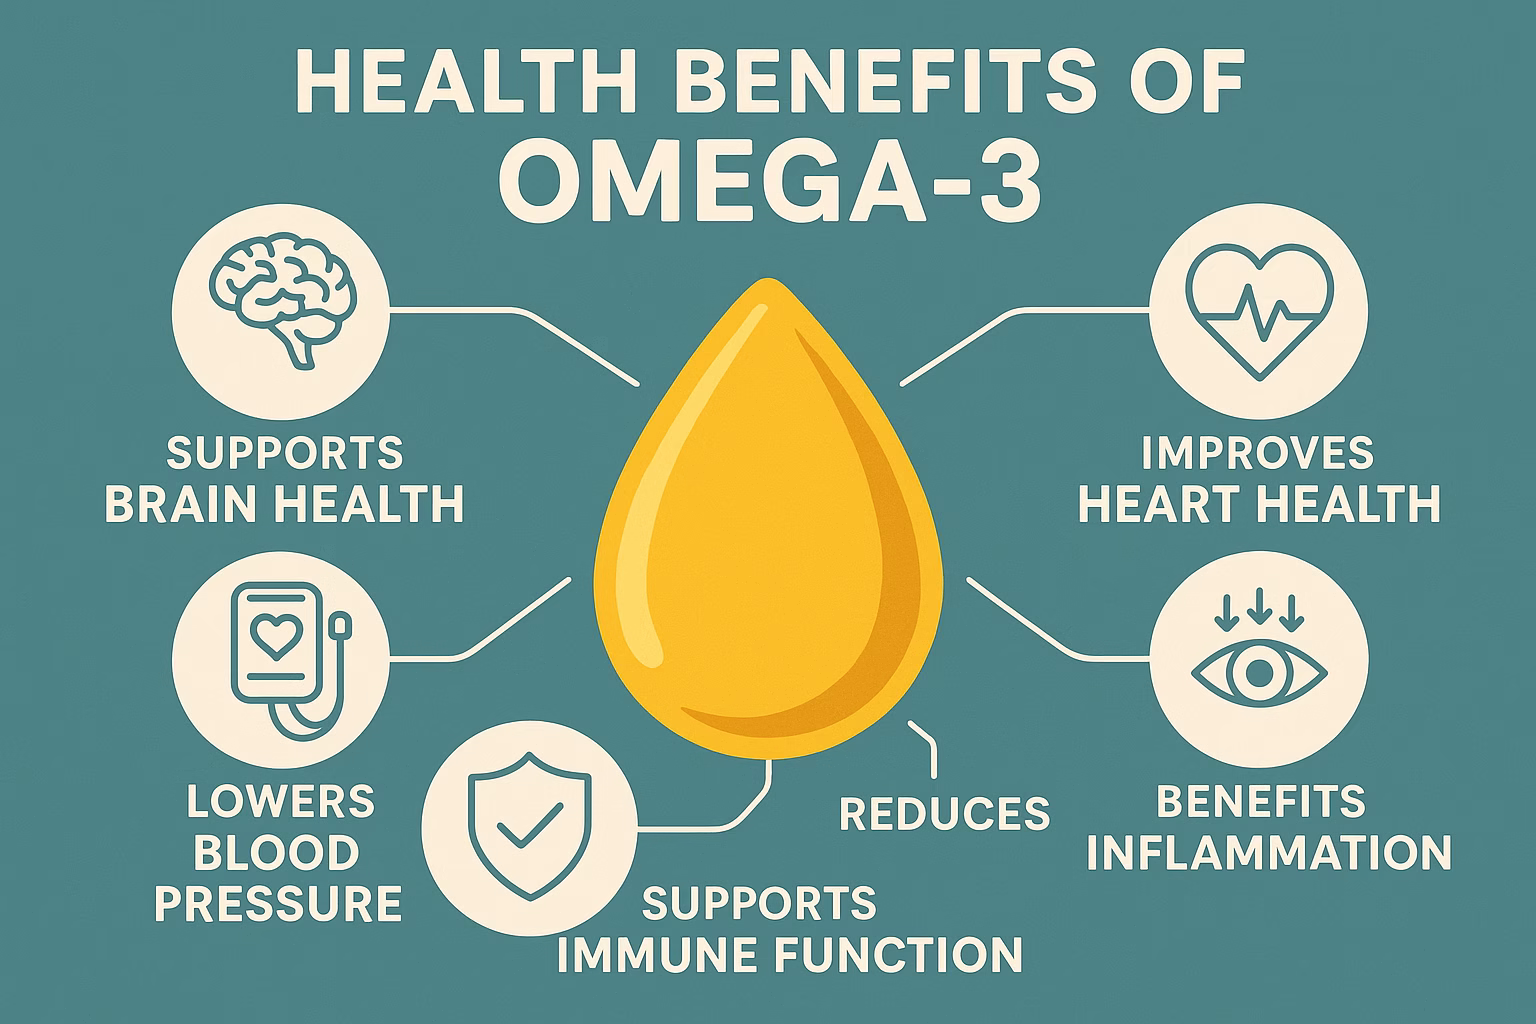
Good for the Heart: The nuts and seeds give you great healthy fats. These include Omega-3 fats, which are known to help your heart and reduce swelling in the body.
Full of Vitamins and Minerals: Every bite gives you many vitamins (like Vitamin A, C, and K) and minerals (magnesium, zinc, iron). These are vital for your whole body, helping your immune system and giving you energy.
Plant-Based Protein: Nuts and seeds add a good amount of plant protein. This makes the dish satisfying and filling for everyone, especially those who don’t eat meat.
Antioxidant Power: The bright colors of the vegetables and the goodness in the nuts and seeds give you many antioxidants. These help keep your body’s cells healthy and safe from harm.
Long-Lasting Energy: The slow-burning energy from the sushi rice, along with the healthy fats and protein, gives you steady energy. This helps you avoid feeling tired later.
Variations: Change Your Veg & Nut-Crusted Sushi
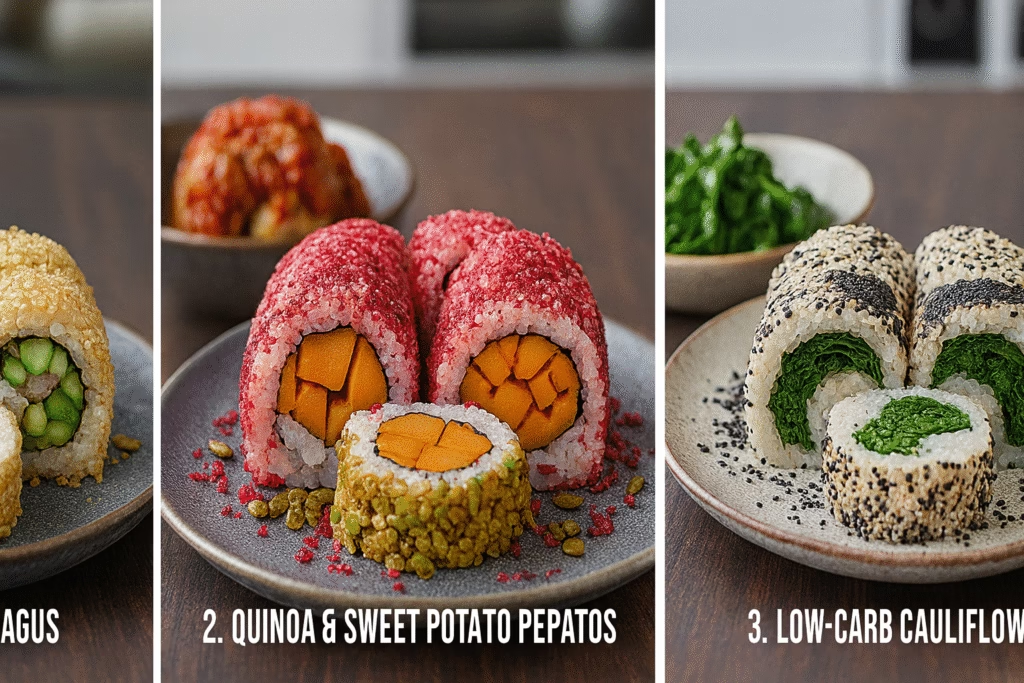
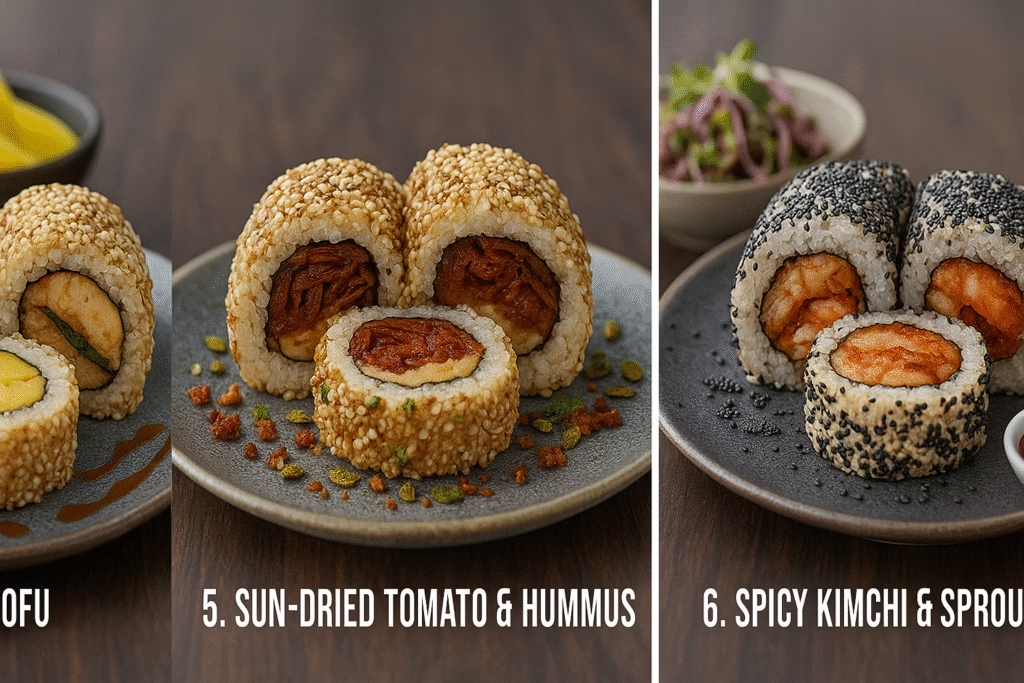
Quinoa & Sweet Potato (in pink) and Low carb Cauliflower Rice & Poppy Seeds (in white)
Part of the Recipe
How You Can Change It
Rice
Use brown sushi rice (more fiber), quinoa, or cauliflower rice (less carb)
Use crushed pistachios, poppy seeds, hemp seeds, or panko breadcrumbs for extra crunch
Flavor Boosters
Add thin mango slices, sun-dried tomatoes, a spread of hummus, or thinly sliced marinated tofu
Spice Level
Mix chili flakes into the nut crust or add a small amount of sriracha inside the roll
Sun Dried Tomato & Hummus (on the left). Spicy Kimchi & Sprouts (on the right)
Alternative Methods for Cooking the Rice
While cooking the rice on the stove is the usual way, here are other easy methods:
Rice Cooker: A rice cooker makes this step very easy. Add the clean sushi rice and water to your cooker. Follow its guide (usually a 1:1 ratio of rice to water). Once cooked, let it rest for 10-15 minutes. Then, move it to a bowl and mix in the sushi vinegar.
Instant Pot/Pressure Cooker: Clean the sushi rice as usual. For every 1 cup of rice, use 3/4 cup of water. Cook on high pressure for 5 minutes. Then, let the pressure go out on its own for 10 minutes. After that, let out any extra pressure quickly. Move the rice to a bowl and add the seasoning.
Final Thoughts: Embrace Your Inner Sushi Artist!
Making your own Veg & Nut-Crusted Sushi monster is a creative and rewarding act. It is a chance to try bright flavors, enjoy the calming process of building the roll, and finally, eat a dish that is both good for you and truly delicious. This recipe shows that healthy eating does not have to be boring. It can be a fun, colorful, and very satisfying thing to do. We hope you get creative with your vegetables, mix up your nuts and seeds, and make this recipe truly yours. Share your sushi monster with friends and family. Inspire others to try healthy, plant-based cooking. Happy rolling!
Frequently Asked Questions (FAQs)
Q1: Can I make this sushi ahead of time?
A1: Sushi tastes best when it’s fresh. You can cut the vegetables and cook the rice a few hours before you need them. Keep the cool rice covered with a damp cloth at room temp. Store the vegetables in the fridge in closed containers. Roll and slice the sushi right before serving for the best taste. If you must make it fully ahead, wrap the finished, uncut rolls tightly and keep them in the fridge for up to 4-6 hours. Slice them just before serving.
Q2: How do I stop the nori from being too hard to chew?
A2: The secret to soft nori is properly cooked and cool rice. Make sure your rice is at room temperature when you spread it. Also, do not use too much rice or press it down too hard. This can make the roll too firm. Finally, serving the sushi soon after you make it helps the nori stay soft before it gets too wet from the fillings.
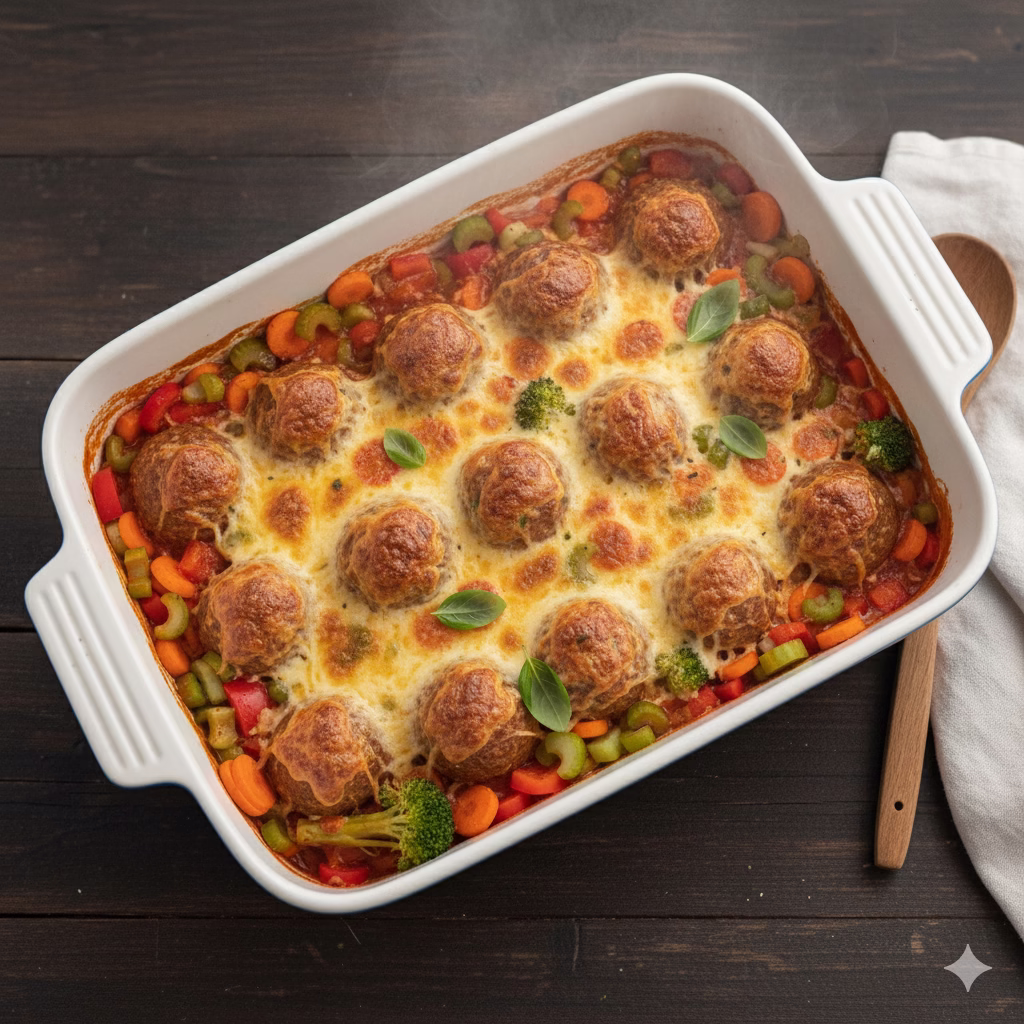
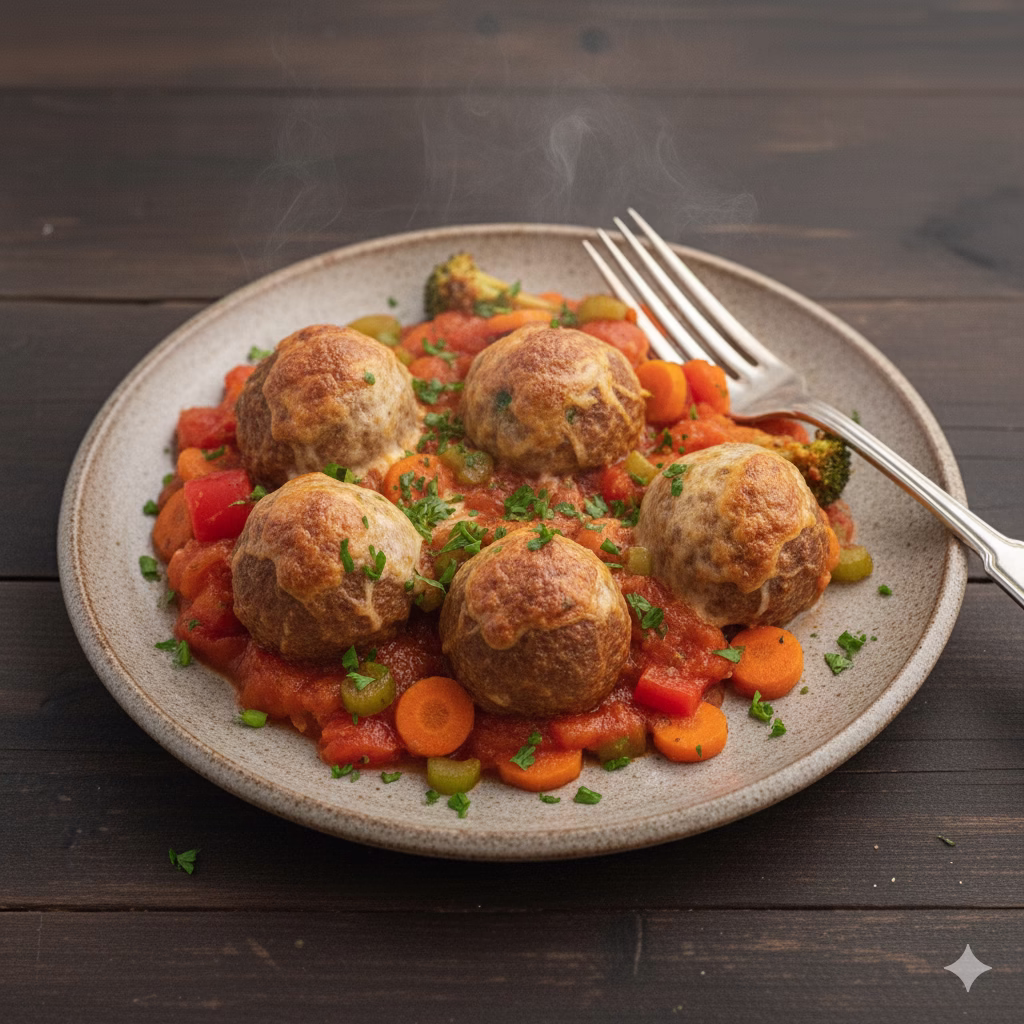
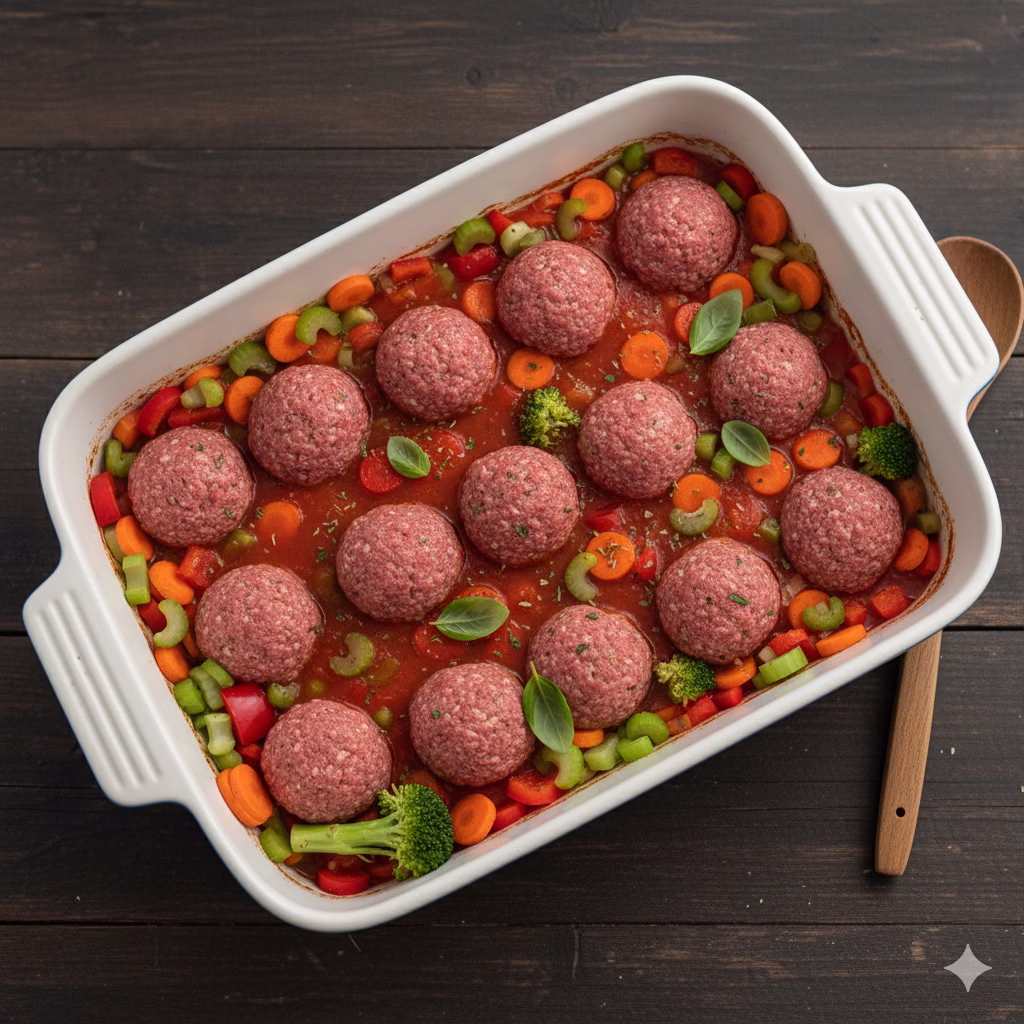
Discover the ultimate comfort food that’s both nutritious and incredibly simple to prepare. This Vegetables With Meatball Casserole recipe is designed for busy weeknights, offering a complete meal in one dish. Get ready to impress your family with a hearty and healthy dinner!
The Ultimate Family Meal: Simple and Vegetables With Meatball Casserole
A Comforting Classic Made Easy
There is nothing better than a warm casserole. It bubbles with flavor straight from the oven. A casserole feels like a hug. It makes you think of home and family. But what if you could make that comfort food healthier? What if you could make it super easy, too? That is what we are doing today. We are sharing our great Vegetables With Meatball Casserole. This is more than just dinner. It is a simple, tasty, and healthy meal.
In our busy lives, finding time to cook a good meal can be hard. We want food that tastes great. And it must also be easy to make. It should not take too much time. It needs to be healthy, too! This recipe fits all those needs. It is very simple. It uses ingredients you can find easily. The oven does most of the hard work for you.
Why You Will Love This Vegetables With Meatball Casserole
The best part of this Vegetables With Meatball Casserole is how flexible and healthy it is. We mix lean protein from the meatballs with many bright, fresh vegetables. This creates a meal that is complete and balanced. It is great for a healthy lifestyle. This dish has a lot of fiber, vitamins, and minerals. It is a smart way to eat more vegetables. You get all the good things from plants while eating a classic comfort food.
Forget using many pots and pans! This casserole is a one-dish meal. This means less cleaning for you. You get more time to relax and enjoy your night. It is perfect for cooking ahead of time. Leftovers taste wonderful the next day. This casserole is perfect if you have a big family. It is also great if you need easy, healthy meals for the week. This recipe is about to become your favorite.
So, get ready to cook! This recipe is truly easy. We will turn simple items into a meal everyone will love. Get ready for a dinner that has flavor, health, and ease all in one dish.
Preparation & Cooking Times
Time to Prepare: 25 minutes
Cooks (Oven Baked): 30-35 minutes
Time to Cook (Air Fryer): 20-25 minutes (at 350°F/175°C)
Time to Cook (Slow Cooker): 3-4 hours on high, or 6-8 hours on low
This recipe makes 6 to 8 servings.
Nutritional Highlights
This Vegetables With Meatball Casserole is a balanced meal. Each serving gives you lean protein. You get key vitamins like A and C from the vegetables. It also has dietary fiber. We use lean meat to keep it low in saturated fats. We use little added sugar. This makes it a heart-healthy choice. It will give you energy. The exact nutrition facts will change based on your ingredients.
Equipment for Your Vegetables With Meatball Casserole
Large mixing bowl
9×13 inch casserole dish (for oven baking)
Cutting board
Sharp knife
Large skillet or non-stick pan (optional, for browning meatballs)
Air fryer (optional, for air fryer method)
Slow cooker (optional, for slow cooker method)
Wholesome Ingredients for Vegetables With Meatball Casserole
For the Meatballs:
1 lb (450g) lean ground turkey or very lean ground beef
½ cup whole wheat breadcrumbs
¼ cup grated Parmesan cheese (use for flavor, if you like)
1 large egg
2 cloves garlic, chopped very small
1 teaspoon dried oregano
½ teaspoon onion powder
Salt and black pepper to taste
1 tablespoon olive oil (for browning, if you choose)
For the Vegetables and Sauce:
1 tablespoon olive oil
1 medium yellow onion, chopped
2 medium carrots, peeled and cut into ½-inch rounds
2 stalks celery, sliced
1 red bell pepper, cut into 1-inch pieces
A cup broccoli florets, cut small
1 (28 oz) can crushed tomatoes (no sugar added)
1 (15 oz) can tomato sauce (no sugar added)
½ cup vegetable broth or water
1 teaspoon dried basil
½ teaspoon dried thyme
Salt and black pepper to taste
½ cup shredded mozzarella cheese (part-skim, for the top, if you like)
Fresh parsley, chopped (to sprinkle on top, if you like)
Step-by-Step Instructions: Creating Your Vegetables With Meatball Casserole
Get ready to make a healthy and filling meal. Follow this guide. It will make sure your Vegetables With Meatball Casserole is perfect.
Step 1: Make the Meatball Mixture
Take a large mixing bowl. Put in the lean ground meat, whole wheat breadcrumbs, Parmesan cheese (if you use it), egg, chopped garlic, dried oregano, onion powder, salt, and black pepper. Use your hands to mix it gently. Stop mixing as soon as it is just blended. Do not mix it too much. That can make the meatballs tough.
Step 2: Roll the Meatballs
Your meat mix is ready. Now, roll it into small balls. They should be about 1 to 1.5 inches wide. This is about the size of a golf ball. This recipe will make about 20 to 24 meatballs. Place them on a plate as you make them.
Step 3: Cut the Vegetables
Time to cut our healthy vegetables. Take your cutting board. Chop the yellow onion. Slice the carrots and celery. Cut out the seeds and chop the red bell pepper. Cut the broccoli into small pieces. Having all your vegetables ready makes cooking simple and fun.
Step 4: Cook Aromatics and Brown Meatballs (Optional)
Heat 1 tablespoon of olive oil in a large pan or skillet. Use medium heat. If you want to brown your meatballs, do it now. Cook them for 2-3 minutes on each side. They should be lightly brown. Take them out of the pan and set them aside. Next, in the same pan, add the chopped onion, carrots, and celery. Cook them for about 5-7 minutes. The onion will become soft and clear. This step gives the casserole great flavor.
Step 5: Mix the Sauce
Now, add the sauce to the cooked vegetables. Pour in the crushed tomatoes, tomato sauce, vegetable broth (or water), dried basil, and dried thyme. Stir everything well until it is all mixed. Add salt and black pepper to make it taste right. If you are using a skillet, let the sauce bubble softly for a moment.
Step 6: Put the Casserole Together (Oven Method)
If you made the sauce in a skillet, pour it into your 9×13 inch casserole dish. If you did not use the skillet, mix all the sauce items and vegetables (carrots, celery, onion, bell pepper, broccoli) right in the casserole dish. Gently place the raw or browned meatballs into the sauce. Make sure they are partly covered by the sauce. Put the chopped red bell pepper and broccoli pieces around the meatballs.
Step 7: Bake It Until Perfect
Cover the casserole dish loosely with aluminum foil. Put it in your oven that you preheated to 375°F (190°C). Bake it for 20 minutes. After 20 minutes, take off the foil. Sprinkle the shredded mozzarella cheese over the top (if you use it). Bake for another 10-15 minutes. The meatballs must be fully cooked. They need to reach a heat of 165°F (74°C) inside. The cheese will be melted and bubbly.
Alternative Cooking Methods for Vegetables With Meatball Casserole
Air Fryer Method: You can cook the meatballs in the air fryer first. Cook the raw meatballs at 375°F (190°C) for 10-12 minutes. Shake the basket halfway through. Make sure they are cooked all the way. While they cook, mix the sauce and vegetables in a small, air-fryer safe pan. Put the cooked meatballs, sauce, and vegetables together. Air fry at 350°F (175°C) for 10-15 minutes. Cook until it is hot and bubbling. Add the cheese for the last 5 minutes.
Slow Cooker Method: This method is very easy. Make your meatballs. You can brown them in a pan first or use them raw. Put all the sauce items, vegetables (carrots, celery, onion, bell pepper, broccoli), and meatballs into your slow cooker. Cook on high for 3-4 hours. Or, cook on low for 6-8 hours. The meatballs should be cooked through. The vegetables should be soft. Stir it sometimes if you can. Add cheese to the top 30 minutes before it is done. Or, just sprinkle it on each plate when you serve.
Step 8: Serve and Garnish
Take the casserole out of the oven. Let it sit for 5-10 minutes before you serve it. This lets the flavors mix well. It also helps the sauce get a little thicker. Put fresh chopped parsley on top if you want. Serve it hot! Enjoy your homemade, healthy Vegetables With Meatball Casserole!
Benefits of This Vegetables With Meatball Casserole
This Vegetables With Meatball Casserole is tasty. It also gives you many health benefits. It is a smart choice for any healthy meal plan.
Full of Nutrients: You get lean protein from the meatballs. You get many vitamins (A, C, K) and minerals from the vegetables. Carrots, celery, bell peppers, and broccoli are full of good things. You also get lots of fiber. This is great for your health and digestion.
A Complete Meal: You do not need to cook side dishes. This casserole has protein, carbs (from veggies), and healthy fats. It is all in one pan. This makes meal planning and cooking much simpler.
Good Protein Source: Using lean ground turkey or beef gives you high-quality protein. Protein helps repair muscles. It makes you feel full. It gives you energy. This is done without too much saturated fat.
Great for Meal Prep: This casserole tastes just as good the next day. Cook a large batch on the weekend. You will have healthy, quick meals for many days. This saves you time and worry.
Kids Love It: The yummy meatballs and mild tomato sauce are a hit with children. The vegetables are soft. This is a fun way to get kids to eat more veggies. They will not even notice!
You Can Change It: This recipe is easy to change for your diet needs. Do you need it to be gluten-free? Use gluten-free breadcrumbs. Do you not eat dairy? Do not add the Parmesan and mozzarella. This means everyone can enjoy it.
Less Cleanup: This is a one-pan meal. You will spend less time washing dishes. You will have more time to relax after dinner.
Variations: Customize Your Casserole
You can change this Vegetables With Meatball Casserole in many ways. Make it fit your tastes, your diet, or what you have at home!
Variation Type
Ideas for Customization
Protein Swaps
Ground Chicken/Pork: Use lean ground chicken or pork for a new taste. Meatless Meatballs: Use store-bought veggie balls. Or, make them from lentils or mushrooms.
Vegetable Boost
Leafy Greens: Stir in some spinach or kale in the last 10 minutes. Root Veggies: Add diced sweet potatoes or squash. They add sweetness and extra nutrients. Mushrooms: Sliced mushrooms add an earthy, savory flavor.
Spice & Flavor
A Little Heat: Add a small pinch of red pepper flakes to the sauce. Fresh Herbs: Try fresh rosemary or sage. Smoky Taste: A teaspoon of smoked paprika adds depth. Extra Savory: Add a little Worcestershire sauce to the meatballs.
Cheese Alternatives
Dairy-Free: Skip the cheese. Or, use a shredded cheese that is dairy-free. Different Cheeses: Try provolone, cheddar, or an Italian cheese blend for the topping.
Sauce Changes
Creamy Sauce: Stir in a splash of heavy cream or coconut milk at the end. Herb Twist: Swirl a tablespoon of pesto into the sauce. It tastes fresh and bright.
Grain Additions
Pasta: Serve the casserole over whole wheat pasta. Quinoa/Rice: Serve it with fluffy quinoa or brown rice. This adds more fiber.
Toppings
Crunchy Onions: Sprinkle with baked crispy onions for a nice crunch. Fresh Basil: Use fresh basil leaves on top for a burst of fresh flavor.
Final Thoughts for Vegetables With Meatball Casserole
We have shared a truly great and very easy recipe for Vegetables With Meatball Casserole. This dish shows that healthy food can be simple. It does not have to be boring. It is a wonderful example of simple, healthy food creating a special, filling meal.
We hope this recipe helps you want to cook. Make a meal that tastes good and makes you feel great. This casserole will be a favorite. It is perfect for family dinners. It is great for meal prepping. Or, you can make it when you want a simple comfort food. Feel free to try the variations. Make the recipe your own! Happy cooking!
Frequently Asked Questions (FAQs), on Vegetables With Meatball Casserole
Q1: Can I make this casserole ahead of time?
A1: Yes, you absolutely can! You can put the whole Vegetables With Meatball Casserole together up to one day before you bake it. Cover it tightly. Keep it in the fridge. When you are ready to bake, add about 10-15 minutes to the cooking time. Bake it until it is fully hot and bubbling. You can also cook it completely, then warm up single servings later.
Q2: What are some good side dishes to serve with this casserole?
A2: This casserole is a full meal. But, if you want a side dish, a simple green salad is a great choice. Use a light dressing on the salad. A piece of crusty whole-grain bread is also good. For extra vegetables, you can serve steamed green beans or asparagus.
Q3: Can I freeze leftovers of the Vegetables With Meatball Casserole?
A3: Yes, this casserole freezes well! Let the casserole cool down all the way. Then, put it into containers that are safe for the freezer. You can freeze it for up to 3 months. Let it thaw overnight in the refrigerator. Then, heat it up in the oven or microwave until it is hot.
Discover the ultimate guide to creating a delicious and wholesome Roast Potato & Veg Casserole. This article will walk you through every step, ensuring a perfect, nutritious meal every time. Get ready to transform your healthy eating with this simple yet satisfying recipe.
Embrace Healthy Meals with a Simple Twist
Finding meals that taste great and are truly healthy can feel tricky today. We all love comfort food, but those classic dishes often have too much unhealthy fat and too many calories. What if you could enjoy a big, satisfying dish that is good for you and tastes amazing, all while being super easy to make? This article shows you how to do just that, with a focus on a wonderful kitchen creation: the simple casserole.
Casseroles are famous because they mix ingredients into a perfect blend of flavors without much fuss. But this isn’t just any casserole. It’s a bright, nutrient-packed meal full of fresh, healthy produce and the yummy taste of perfectly roasted potatoes and veggies. Imagine golden-brown, crispy potatoes that are soft inside, mixed with colorful, tender vegetables, all seasoned just right. It’s a joyful meal!
The Magic of a Simple Roast Potato & Veg Casserole
The best part of a Roast Potato & Veg Casserole is how easy and flexible it is. You can serve it as a cozy family dinner or take it to a party—it always works. Best of all, it’s super nutritious. By roasting, we make the vegetables taste deeper and better. Roasting enhances their sweet flavor and keeps the important vitamins and minerals inside. This cooking method also lets us use very little oil, relying on a light drizzle of heart-healthy olive oil and tasty herbs for an unforgettable experience.
This recipe is more than just instructions; it’s a great start for healthy eating that doesn’t skimp on flavor. It’s perfect for anyone who wants to cook simple meals without giving up quality or health. Whether you cook often or are just starting, these easy steps will help you make a wonderful dish. Get ready to see how good and easy healthy food can be.
Get ready to change how you think about healthy meals. This delightful casserole shows that healthy food can be incredibly tasty, simple, and filling. Let’s start making a meal everyone will love.
Recipe Details for Your Healthy Roast Potato & Veg Casserole
Time to Prepare:
20 minutes
Time to Cook: for Roast Potato & Veg Casserole
40-50 minutes (Oven)
60-70 minutes (Slow Cooker, low setting after initial sauté)
30-40 minutes (Air Fryer, in batches)
Servings:
4-6
Nutritional Information (per serving, estimated)
Calories: 320-380 kcal
Protein: 10-15g
Fat: 12-18g (mostly healthy monounsaturated)
Carbohydrates: 40-50g
Fiber: 8-12g
Vitamin A: Excellent source
Vitamin C: Excellent source
Potassium: Excellent source
Equipment You’ll Need
Large roasting pan or baking sheet
Big mixing bowls
Sharp knife
Cutting board
Measuring cups and spoons
Optional: Air fryer, slow cooker
Ingredients for a Deliciously Healthy Roast Potato & Veg Casserole
To make this colorful and healthy casserole, you’ll need fresh vegetables and basic kitchen items. Pick organic produce when you can for the best taste and health benefits.
1.5 lbs (about 3-4 medium) Yukon Gold or red potatoes, scrubbed clean and cut into 1-inch cubes
1 large red onion, peeled and cut into 1-inch wedges
2 bell peppers (any color), cut into 1-inch pieces
A large zucchini, cut into 1-inch half-moons
1 large yellow squash, cut into 1-inch half-moons
A pint cherry tomatoes, halved
1 cup broccoli florets, bite-sized
1 cup cauliflower florets, bite-sized
4 cloves garlic, minced
3 tbsp extra virgin olive oil
1 tbsp dried oregano
1 tsp dried thyme
21 tsp smoked paprika (optional, for a deeper flavor)
Salt and freshly ground black pepper to taste
41 cup fresh parsley, chopped (for garnish)
Optional healthy additions:
21 cup crumbled reduced-fat feta cheese (add for the last 10 minutes)
1 can (15oz) chickpeas, rinsed and drained (add with vegetables)
Step-by-Step Instructions: Making Your Roast Potato & Veg Casserole
Follow these simple steps to make sure your casserole is perfectly roasted, tender, and full of flavor.
Heat Up the Oven: Start by heating your oven to a hot 400∘F (200∘C). This high heat is crucial for getting those lovely crispy potatoes and tender vegetables. While the oven heats, get your roasting pan or big baking sheet ready. You can line it with parchment paper to make cleanup easier.
Cut the Vegetables: Time to chop! Take your clean potatoes and cut them into 1-inch cubes that are all about the same size. Keeping them uniform helps them cook evenly. Next, cut your peeled red onion into 1-inch wedges. Cut the bell peppers into 1-inch pieces. Slice the zucchini and yellow squash into 1-inch half-moons. Cut the cherry tomatoes in half. Finally, cut your broccoli and cauliflower into bite-sized pieces.
Mix and Season: In a very large bowl, put all the cut vegetables: potatoes, red onion, bell peppers, zucchini, yellow squash, cherry tomatoes, broccoli, and cauliflower. Add the minced garlic. Now, pour the 3 tablespoons of extra virgin olive oil over everything. This healthy fat helps the veggies crisp up and carry the flavors. Sprinkle in the dried oregano, dried thyme, and the optional smoked paprika. Add a good amount of salt and fresh pepper.
Toss Well for Flavor: Use your clean hands or a large spoon to mix all the vegetables well. Make sure every piece is covered with the olive oil and spices. This step is key for a well-flavored casserole and helps the vegetables roast nicely without drying out. Take your time here!
Spread and Roast (Oven Method): Pour the coated vegetables onto your prepared pan. Try to spread them out in a single layer. Do not crowd the pan; use two pans if needed. If they overlap too much, they will steam instead of roast, and you won’t get that nice crispy texture. Put the pan in the hot oven and roast for 40-50 minutes. About halfway through (20-25 minutes), take the pan out and give the veggies a good stir. Keep roasting until the potatoes are soft when poked with a fork and look golden brown.
Add Feta (Optional): If you are adding reduced-fat feta cheese, sprinkle it over the roasted vegetables during the last 10 minutes of cooking. This lets the feta warm up and get a little soft without burning.
Serve and Enjoy: Once the casserole is perfectly roasted, take it out of the oven. Sprinkle lots of fresh chopped parsley on top. The fresh herbs add bright color and flavor. Serve it hot!
Other Ways to Cook Your Healthy Roast Potato & Veg Casserole
While baking in the oven is best, you can use other appliances to make this recipe fit your life.
Slow Cooker Method:
This is great for a “start it and forget it” meal, but it needs a quick cooking step first for the best taste.
Cook First: Heat 1 tablespoon of olive oil in a large pan. Add the potatoes and cook for 5-7 minutes until they start to brown a bit. This first step adds flavor and keeps the potatoes from getting too mushy in the slow cooker. Take the potatoes out and set them aside.
Soften Aromatics: Add the red onion and bell peppers to the same pan and cook for 3-5 minutes until a little soft. Add the minced garlic and cook for one more minute until you can smell it.
Combine: Put the cooked potatoes, onions, and peppers into your slow cooker. Add the rest of the vegetables (squash, tomatoes, broccoli, cauliflower, and chickpeas if using). Pour the rest of the olive oil and all the spices over the top. Mix gently.
Cook: Cover and cook on low for 3-4 hours, or on high for 2-3 hours, until the potatoes are soft.
Garnish: Top with fresh parsley and serve hot. This will be softer than the roasted version, but very tasty and easy.
Air Fryer Method:
Great for small amounts or when you want extra-crispy food with less oil. You’ll need to cook this in several rounds.
Get Veggies Ready: Follow steps 1-4 for cutting and seasoning your vegetables.
Cook in Batches: Put a single layer of seasoned vegetables into your air fryer basket. Don’t pile them high! You will likely have to do 2-3 rounds.
Air Fry: Cook at 375∘F (190∘C) for 15-20 minutes. Shake the basket often (every 5-7 minutes) so they cook and brown evenly. Cook until the potatoes are soft and crispy.
Serve: Mix all the cooked batches in a serving bowl.
Garnish: Top with fresh parsley and eat right away.
Why This Roast Potato & Veg Casserole is Healthy
This is more than just a tasty meal; it’s full of health benefits that help your body feel great. Choosing this casserole is a wonderful choice for your health.
Full of Vitamins
The many vegetables in this casserole give you lots of key vitamins and minerals. Potatoes have Vitamin C, B6, and potassium. Bell peppers and broccoli are packed with Vitamin C. Zucchini and squash offer Vitamin A and cell-protecting antioxidants. These nutrients are vital for a strong immune system and energy.
High in Fiber
With lots of potatoes, broccoli, cauliflower, and other vegetables, this casserole is a great source of dietary fiber. Fiber is important for good digestion, helping to control blood sugar, making you feel full longer, and keeping your gut healthy.
Good for Your Heart
We use extra virgin olive oil, which is a main part of the healthy Mediterranean diet. It has good fats that help your heart and can lower bad cholesterol. Because we use fresh vegetables and very little salt, this dish is great for a heart-friendly diet.
Low in Bad Fats
Unlike many classic comfort casseroles, this recipe has very little saturated fat and cholesterol. It uses plant-based ingredients and just a little fat. This is perfect for keeping cholesterol levels healthy.
Packed with Antioxidants
The colorful vegetables—from red onions and bell peppers to tomatoes—mean you are eating many antioxidants. These helpful compounds protect your body’s cells from damage, which can lower the risk of long-term diseases and support healthy aging.
Helps with Weight Control
This casserole has a lot of fiber and water, and fewer calories for its size. This makes it a great choice for managing your weight. It helps you feel full and satisfied, making it easier to eat the right amount.
Ways to Change Your Healthy Roast Potato & Veg Casserole
This recipe is very flexible! Feel free to change it up based on what you like, what’s in season, or what you need for your diet.
Variation Category
Ideas
Swap the Veggies
Use sweet potatoes instead of white potatoes, or mix both. Add asparagus (in the last 15 mins), green beans, brussels sprouts, or mushrooms.
Add More Protein
Add chickpeas (as suggested) or other beans like cannellini for plant-based protein. For lean meat, add small pieces of chicken breast or turkey sausage (cook them with the vegetables).
Different Flavors
Try fresh rosemary or sage instead of thyme. Add a bit of red pepper flakes for spice, or squeeze lemon juice over the top after roasting for a bright taste.
Cheesy Taste
Sprinkle a bit of nutritional yeast for a cheesy flavor without dairy. If you don’t need to avoid dairy, a little grated reduced-fat Parmesan is a great addition.
Taste of the Mediterranean
Stir in pitted and halved Kalamata olives with the other vegetables. A spoonful of hummus or a drizzle of tahini sauce when serving adds an authentic touch.
Meal Prep
Make a large amount and divide it into containers for easy healthy lunches or dinners all week. It tastes great warmed up later.
Sauce/Dressing
A light drizzle of balsamic glaze after cooking adds a little sweetness and tang. A homemade Greek yogurt dressing with dill and lemon is also wonderful.
Final Thoughts: Easy Steps to Great Health
There you have it—a full guide to making a simple, very healthy, and truly delicious Roast Potato & Veg Casserole. This meal proves how easy and fun healthy eating can be. By using fresh, simple ingredients and easy roasting, you can turn everyday vegetables into a satisfying and filling meal.
We’ve covered everything from how to prepare and cook it, to the health benefits and ways to change the recipe. The best thing about this casserole is that it’s flexible and fits perfectly into any healthy lifestyle. It’s ideal for preparing ahead, feeding your family, or just enjoying a healthy dinner. So, turn on your oven, grab your colorful veggies, and get ready to enjoy the simple magic of this dish! Don’t just read this; go make it and love every tasty bite!
Frequently Asked Questions (FAQs)
Q: Can I use frozen vegetables for this casserole?
A: It’s best to use fresh vegetables for the best texture and flavor. But, you can use some frozen veggies. Pick hard ones like broccoli, cauliflower, or green beans, and put them in the pan with the fresh vegetables. Don’t use frozen potatoes, as they get too watery. You might need to cook them a little longer.
Q: How can I make this casserole a complete meal with more protein?
A: This casserole is already filling, but for more protein, you have great options. As mentioned, adding a can of rinsed chickpeas or cannellini beans when you season the veggies is a wonderful plant-based protein boost. If you want lean meat, cut up raw chicken breast or turkey sausage (into small, even pieces) and mix it with the vegetables before roasting. Make sure any meat is cooked all the way through to 165∘F (74∘C). You can also serve the cooked casserole with grilled fish or lean grilled chicken.
Discover how adding delicious Water Based Fruit & Veg to your diet can supercharge your health. This article explores the amazing benefits and gives you a simple, tasty recipe to get started. Stay hydrated and feel great with nature’s best!
Why Staying Hydrated With Water Based Fruit & Veg
Staying hydrated is super important for your body to work well. In our busy lives, it’s easy to forget to drink enough water. We grab coffee, or sodas, and often don’t sip water as we should. But being well-hydrated does much more than just make you feel refreshed. It helps your energy, sharpens your focus, keeps your skin healthy, and makes sure your digestive system runs smoothly.
While plain water is vital, there’s a yummy way to get more fluids and lots of extra nutrients: eating water-based fruits and vegetables. These natural foods are packed with fluids, plus all the good stuff like vitamins, minerals, and fiber.
The Incredible Benefits of Water Based Fruit & Veg
Think about a crisp cucumber, a juicy watermelon, or a bright tomato. Every bite is a rush of cool liquid mixed with helpful compounds. These foods are usually low in calories and full of antioxidants. Antioxidants are like tiny shields that fight damage in your body. Eating water-rich foods helps you feel full, which can be great for managing weight. The fiber they contain also keeps your gut happy. Choosing Water Based Fruit & Veg is a simple, powerful step toward better health. It’s an easy win that helps you now and later.
We’ll show you some of the best water-rich foods to add to your day. We’ll explain what makes them so good for you. And, to make it fun and easy, we’ve got a super recipe to help you eat more of these hydrating wonders! Get ready to change how you think about staying healthy, one juicy piece of produce at a time.
This special recipe is a simple, tasty way to celebrate the power of Water Based Fruit & Veg. This bright and cooling drink is not just about getting more water; it also has tons of key nutrients, making it a perfect addition to a healthy life. Let’s get blending!
Zesty Green & Berry Hydrator Smoothie
This vibrant smoothie is full of Water Based Fruit & Veg, making it a quick and tasty way to stay hydrated and nourished.
Servings: 2
Time to Prepare: 10 minutes
Time to Cook/Blend: 5 minutes
Equipment:
A good blender (a high-speed one is best for a super smooth drink)
Measuring cups and spoons
Cutting board
Sharp knife
Two tall glasses
Nutritional Information (per serving, estimated):
Calories: 180-220 kcal
Protein: 4-6g
Carbs: 40-50g (Fiber: 8-12g)
Fat: 2-3g
Great source of Vitamin C, Vitamin K, and Potassium.
Ingredients for Your Hydrating Smoothie:
1 cup fresh spinach (water-based green)
½ cup cucumber, peeled and chopped (very high water content)
½ cup frozen mixed berries (strawberries, blueberries, raspberries—also high in water)
A ½ medium banana, frozen (for a nice creamy texture)
½ cup unsweetened coconut water or plain water (the liquid base)
2 tablespoons fresh mint leaves (optional, adds a cool, fresh taste)
1 tablespoon chia seeds (optional, for extra fiber and healthy fats)
½ inch fresh ginger, peeled (optional, adds a little zing)
Step-by-Step Instructions: For Water Based Fruit & Veg
Get Your Greens Ready: First, rinse your fresh spinach well under cool water. Shake off the extra water. If the cucumber has a tough skin, peel it with a vegetable peeler. Then, cut it into small pieces, about half an inch thick. Smaller pieces help the blender work better.
Take Out the Frozen Fruit: Get your frozen mixed berries and the frozen banana half. If you don’t have a frozen banana, a fresh one works too, but the frozen one makes the smoothie colder and creamier, like a milkshake!
Load the Blender: Put all your ingredients into the blender. It’s best to add them in this order:
Start with the liquid first (the coconut water or plain water).
Next, add the spinach and chopped cucumber.
Finally, add the frozen berries and banana.
If you’re using the extra mint, chia seeds, or ginger, put them on top. This order helps the blender blades mix everything properly.
Blend Until Smooth: Close the lid tightly on your blender. Start blending slowly at first to break up the frozen chunks. Then, speed it up to high. Blend until the smoothie is totally smooth and thick, with no little pieces of leaf or fruit left. This usually takes one to two minutes. If the smoothie is too thick and the blender is struggling, add just a tiny bit more liquid (a tablespoon at a time) until it moves easily.
Serve and Enjoy: Once perfect, turn off the blender. Pour the smoothie evenly into your two tall glasses. You can put a sprig of fresh mint on top if you want a nice look. Drink it right away!
Alternative Blending Methods:
Using a Hand Blender: If you only have a stick or immersion blender, you can still make this! Put all the ingredients in a tall jar or pitcher. Make sure the liquid covers most of the solid foods. Stick the blender head all the way in before turning it on. Blend until it’s smooth, moving the blender up and down gently.
Making a Smoothie Bowl (Thicker): If you want a super thick smoothie you eat with a spoon, you can use a food processor. Add slightly less liquid than the recipe calls for. You will need to stop often to scrape the sides with a spoon so everything gets mixed evenly.
Key Benefits of Water Based Fruit & Veg
Eating a lot of Water Based Fruit & Veg gives you many health benefits, not just more fluids. These foods are packed with good stuff that helps your body thrive.
Better Hydration and Body Balance
Foods like cucumber and watermelon have a huge amount of water, which helps you reach your daily water goal. Many also contain natural salts, like potassium from bananas and spinach, which are important for keeping your body’s fluids balanced and helping your muscles and nerves work. This makes them better than just plain water after you exercise.
Lots of Vitamins and Minerals
Beyond water, these fruits and vegetables are full of vitamins like Vitamin C (in berries and spinach), Vitamin K (in spinach and cucumber), and Vitamin A. They also give you minerals that help everything from your immune system to your bones.
Healthy Digestion With Water Based Fruit & Veg
Most water-rich produce also has lots of fiber, which is crucial for a happy digestive system. Fiber makes stool softer and bulkier, which prevents constipation. It also feeds the good bacteria in your gut. Water plus fiber equals a smooth-running system!
Helps with Weight Management
Foods high in water and fiber make you feel full for longer, which can stop you from snacking on extra calories. They are usually low in calories but high in nutrients, making them smart choices if you are trying to keep a healthy weight.
Fights Damage with Antioxidants
Many Water Based Fruit & Veg, especially berries and spinach, are loaded with antioxidants. These helpful compounds fight harmful stress in the body that can lead to long-term sickness. Eating them often can help protect your cells.
Easy Ways to Change Your Hydrating Smoothie
Change up the “Zesty Green & Berry Hydrator Smoothie” to match what you like and what you need with these simple swaps:
Variation Name
Key Ingredient/Change
Benefit/Flavor Profile
Tropical Kick
Add ½ cup fresh pineapple chunks and use coconut water.
Sweet, zesty, and extra hydrating. Pineapple has a helpful enzyme.
Energy Booster
Add 1 scoop of plain or vanilla protein powder.
Keeps you full longer and helps muscles recover after activity.
Tummy Tamer
Add ¼ cup of kefir or plain Greek yogurt.
Adds probiotics for a healthy stomach and makes the texture thicker.
Spicy Wellness
Use 1 inch of ginger and add a tiny shake of turmeric.
Great for fighting inflammation and boosting your body’s defenses.
Bright Citrus
Add the juice of ½ a lime or lemon.
Gives a fresh, zingy flavor and more Vitamin C.
Creamy Treat
Add 1 tablespoon of almond or cashew butter.
Adds healthy fats and protein, making the smoothie richer.
Final Thoughts on Water Based Fruit & Veg
Adding Water Based Fruit & Veg to your meals is one of the easiest and best things you can do for your health. From the crunch of a cucumber to the sweet pop of a berry, these foods are nature’s perfect mix of water, vitamins, and fiber. They help your body work better and make healthy eating taste great. When you eat these bright foods often, in smoothies, salads, or as snacks, you are boosting your energy, helping your digestion, and making your skin glow.
Don’t forget the power of eating your water! Try to include more of these amazing, hydrating foods every day. Play around with different fruits and vegetables. Try new recipes like our Zesty Green & Berry Hydrator Smoothie. You’ll see that feeling healthy can be easy and delicious. Start today! Your journey to a more hydrated, healthier you starts right now.
Frequently Asked Questions (FAQs) About Water Based Fruit & Veg
Q1: What are the best water-based foods to eat for a major hydration boost?
A1: Some of the very best Water Based Fruit & Veg are cucumber (95% water), iceberg lettuce (96% water), celery (95% water), tomatoes (95% water), watermelon (92% water), and strawberries (91% water). These foods are fantastic choices to help you get more fluids and lots of nutrients.
Q2: Can these water-rich foods replace drinking plain water completely?
A2: No, while Water Based Fruit & Veg give you a lot of fluids and great nutrients, they shouldn’t replace drinking plain water entirely. Your body still needs regular water to do important jobs like cleaning your kidneys and controlling your body heat. Think of these water-rich foods as a great way to help you meet your overall hydration goals, not the only source.