Ever found yourself scrolling through Pinterest, mesmerized by the sheer coziness of a fluffy pom pom rug, only to sigh at the thought of the price tag? I’ve been there! As a self-proclaimed craft enthusiast with a love for budget-friendly decor, I’ve spent countless hours experimenting with yarn and scissors to bring those dreams to life. Join me on this creative journey, and let’s transform humble pom poms into a luxurious rug that reflects your unique style and warms your home.
Introduction To Your Ultimate Guide to Cozy Crafting
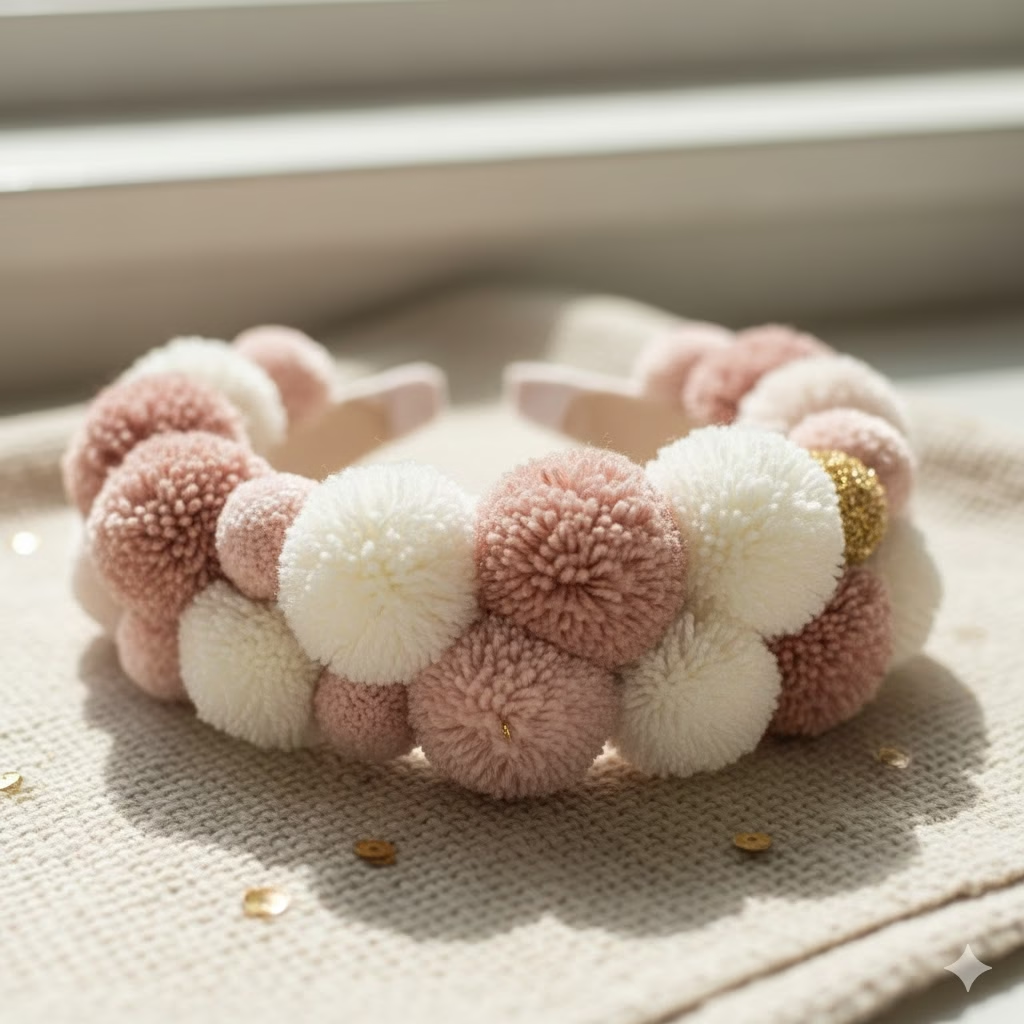
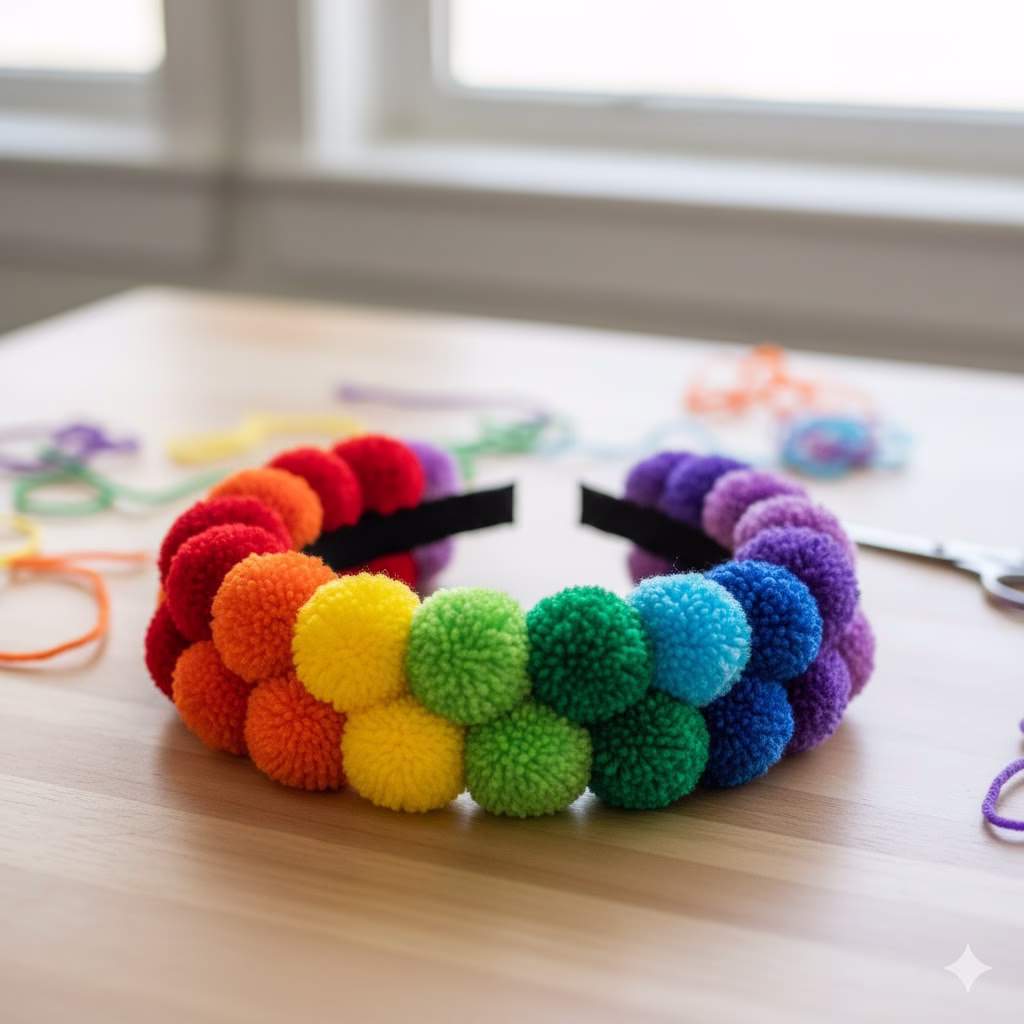
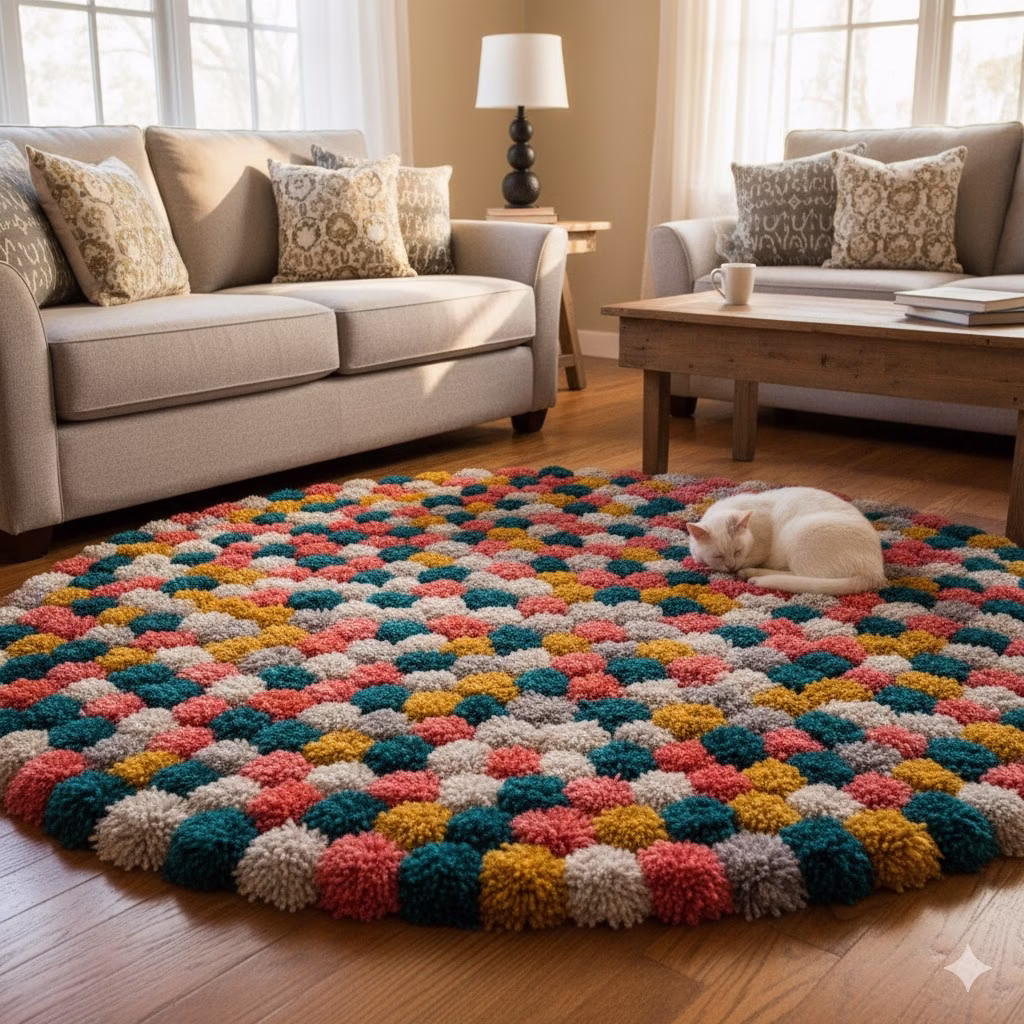
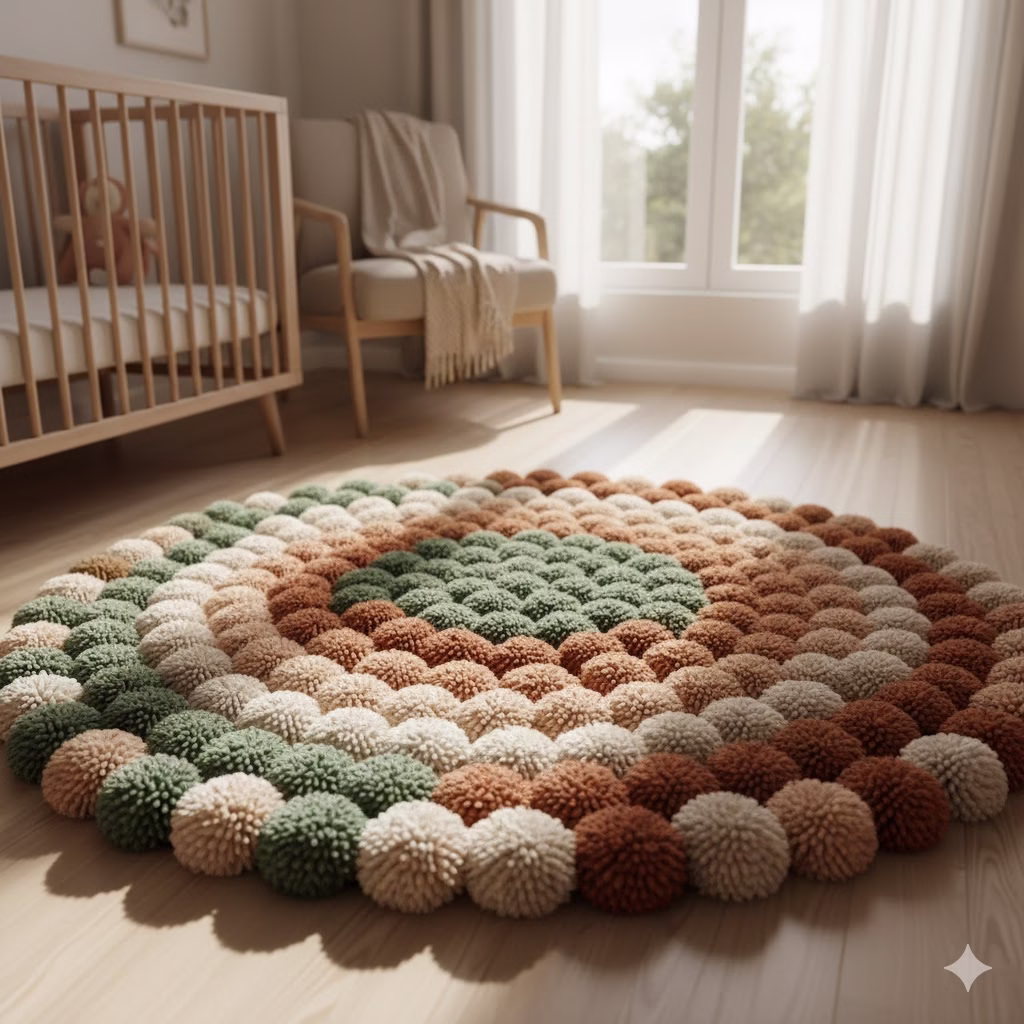
There’s something undeniably enchanting about a pom pom rug. Its soft, tactile surface invites you to sink your toes in, adding an instant touch of whimsy and warmth to any space. From nurseries and playrooms to cozy reading nooks and bohemian living areas, a DIY Pom Pom Rug is a versatile decor piece that speaks volumes about comfort and handcrafted charm. While store-bought versions can often come with a hefty price tag, crafting your own is not only incredibly satisfying but also allows for complete customization in terms of size, color, and texture.
This comprehensive guide will walk you through every step of creating your very own Pom Pom Rug, from choosing the right materials to the final assembly. We’ll delve into the nuances of making perfect pom poms, explore different rug bases, and provide tips and tricks to ensure your project is a resounding success. Get ready to unleash your inner crafter and transform simple yarn into a luxurious, one-of-a-kind rug!
Why Make Your Own Pom Pom Rug?
Beyond the undeniable joy of creating something with your own hands, there are numerous compelling reasons to embark on this DIY journey:
- Cost-Effective: While yarn can add up, it’s generally far more economical to make a Pom Pom Rug than to purchase a high-quality, handcrafted one. Plus, you can often find great deals on yarn at craft stores or even repurpose old sweaters.
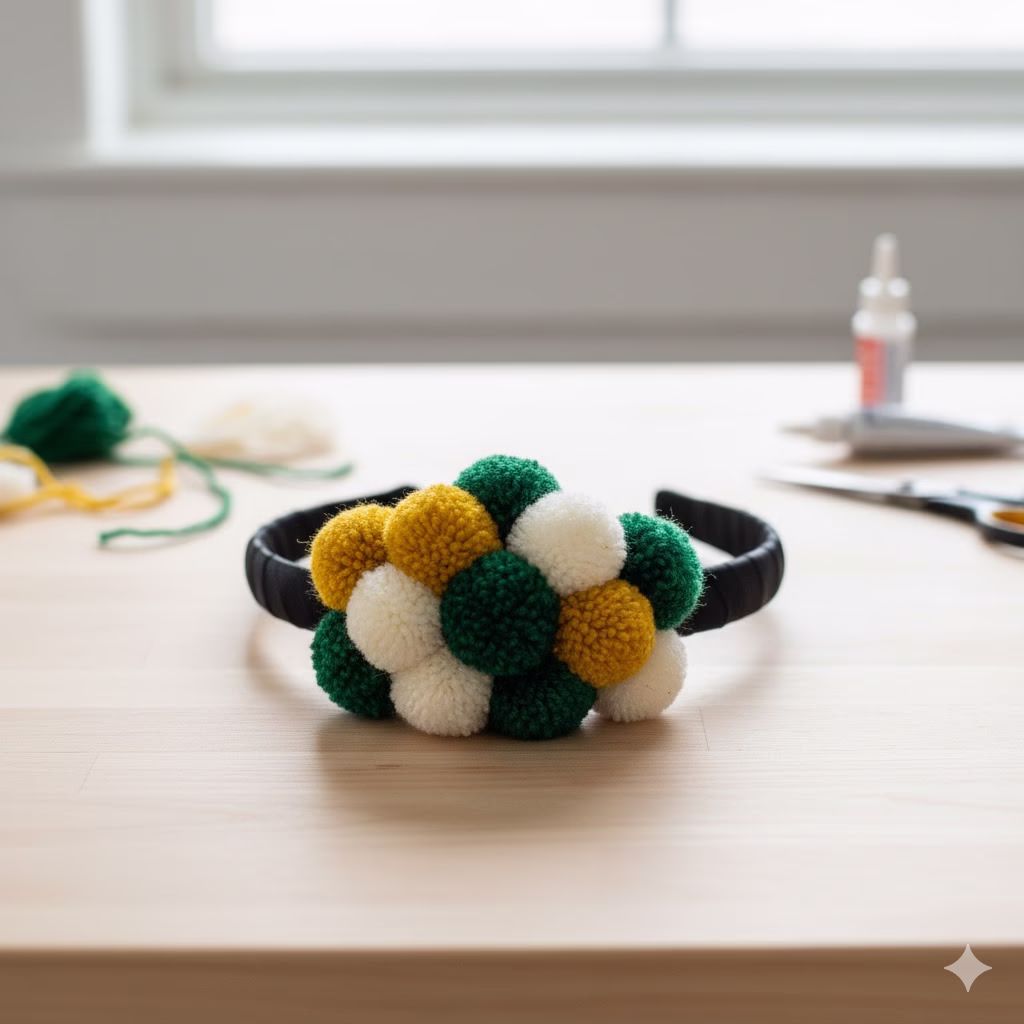
- Customization Galore: This is where the real magic happens! You have complete control over the color palette, allowing you to perfectly match your existing decor or create a vibrant statement piece. Experiment with different yarn weights and textures for a truly unique finish.
- Therapeutic and Relaxing: The repetitive motion of making pom poms can be incredibly meditative and stress-relieving. It’s a wonderful way to unwind and engage in a creative activity.
- Unique Home Decor: A handmade Pom Pom Rug is a conversation starter. It adds a personal touch and a sense of coziness that mass-produced items simply can’t replicate.
- Skill Building: Learning to make a Pom Pom Rug enhances your crafting skills, opening doors to other exciting pom pom crafts and DIY projects.
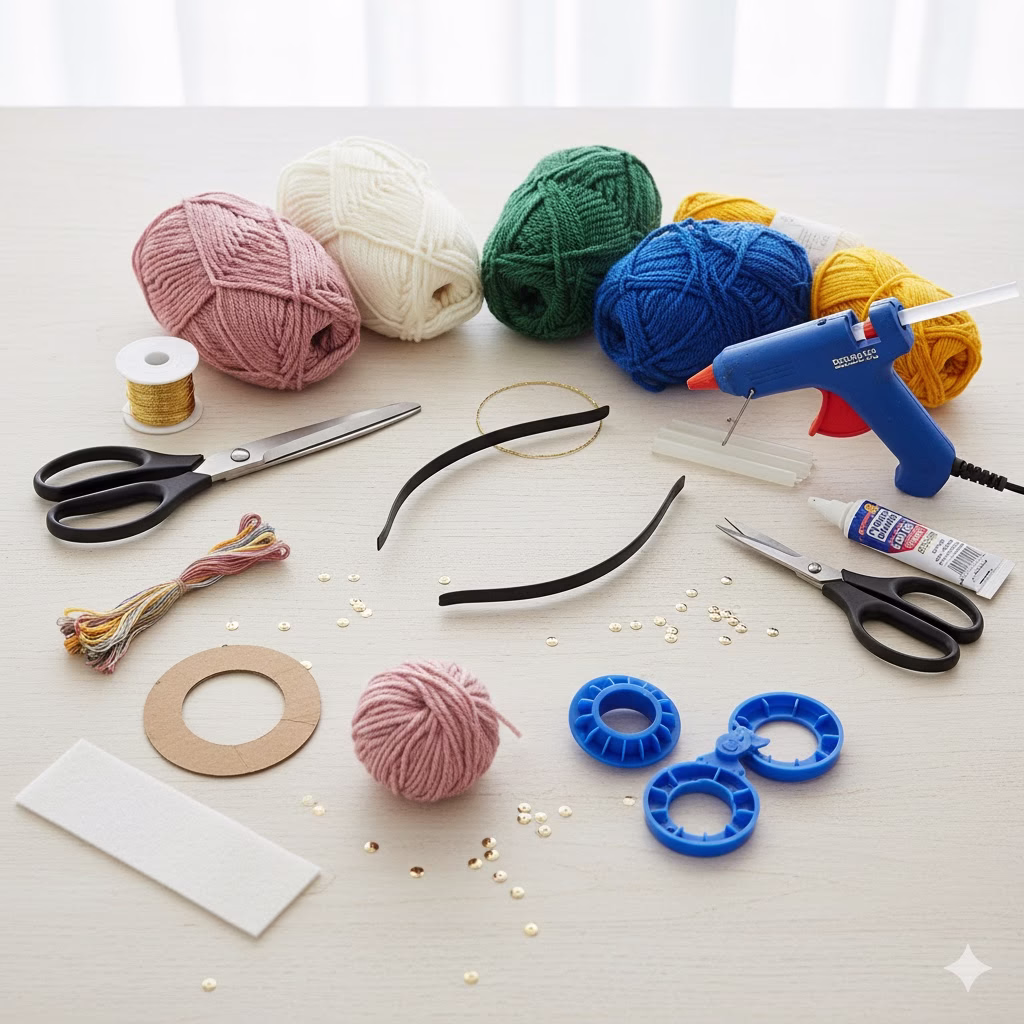
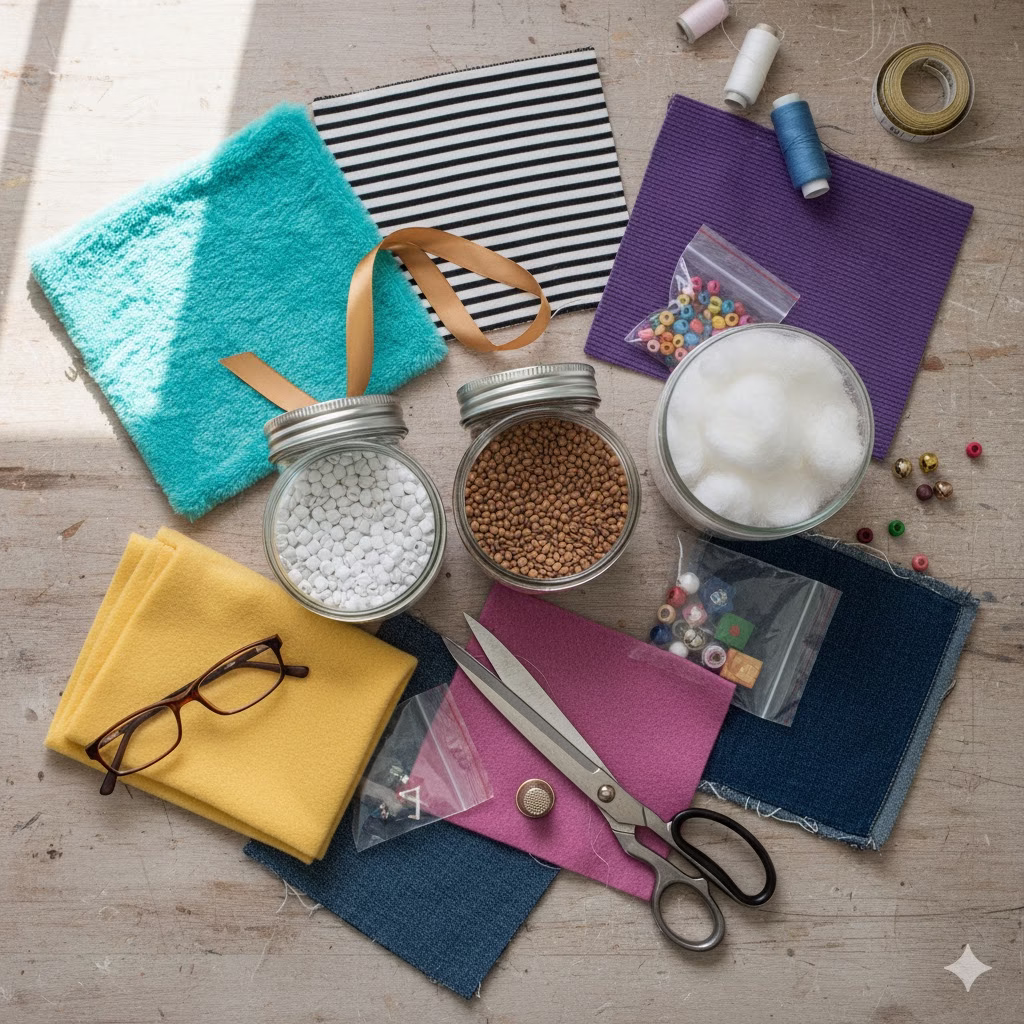
What You’ll Need: Gathering Your Supplies
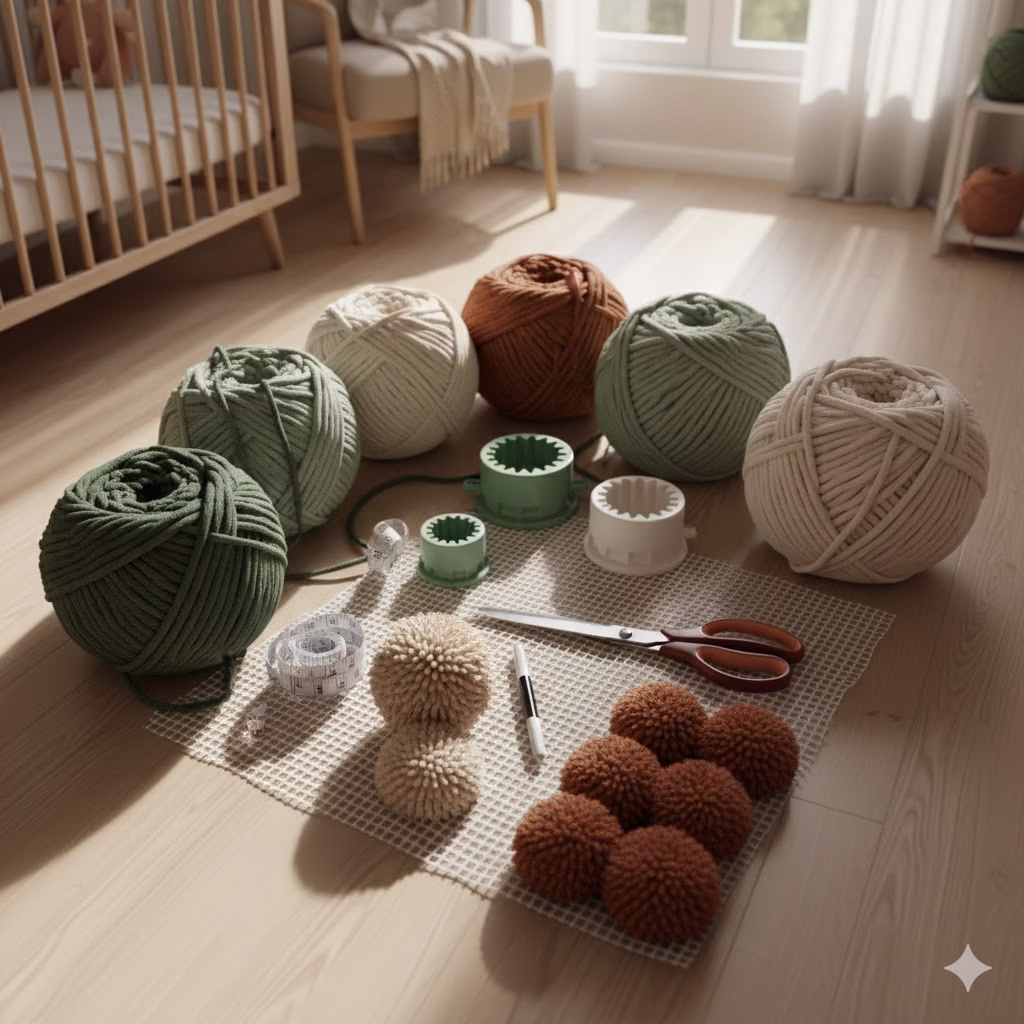
Before you dive into the delightful world of pom pom making, it’s essential to gather all your materials. Here’s a comprehensive list:
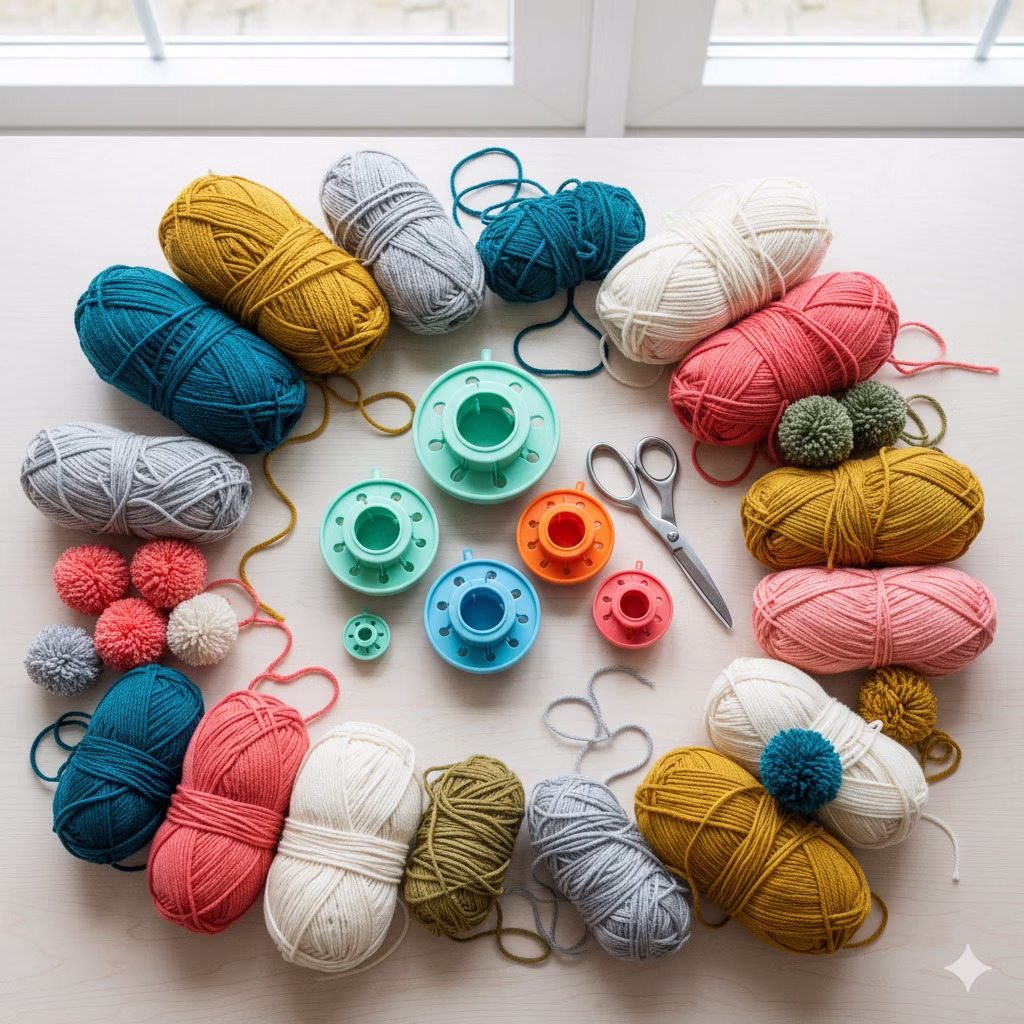
- Yarn: This is the star of the show!
- Type: Acrylic yarn is highly recommended for beginners due to its affordability, wide color range, durability, and ease of washing. Wool blends can also be beautiful but may require more delicate care. Avoid very thin or slippery yarns as they can be harder to work with and may not create dense enough pom poms.
- Quantity: This is the most frequently asked question! The amount of yarn you’ll need depends heavily on the size of your rug, the density of your pom poms, and the size of your pom poms. As a general guideline, a small bath mat size (approx. 24×36 inches) can require anywhere from 10 to 20 skeins of standard worsted weight yarn (around 170g/364 yards per skein). It’s always better to overbuy and return extra than to run out mid-project. For a large rug, plan on significantly more.
- Color Palette: Decide on your color scheme. Will it be a monochromatic dream, a vibrant rainbow, or a subtle ombre?
- Pom Pom Makers: While you can make pom poms with cardboard or even your hands, dedicated pom pom makers are a game-changer for speed, consistency, and ease.
- Sizes: You’ll likely want a consistent size of pom pom for your rug, so pick one or two sizes of maker. A medium-large size (e.g., 6-9 cm or 2.5-3.5 inches in diameter) is generally ideal for a fluffy rug.
- Sharp Scissors: A good pair of sharp fabric scissors is crucial for trimming your pom poms neatly. Dull scissors will lead to frustrating, uneven results.
- Rug Base: This is what your pom poms will be tied onto.
- Non-Slip Mesh Mat: This is the most popular and easiest option. Look for rubberized or non-slip mesh mats, often found in the bath or rug section of department stores, or craft stores. They come in various sizes and can be easily cut to your desired shape. The open weave provides a perfect grid for tying on pom poms.
- Canvas Mesh: Similar to the above but often more rigid, useful for larger rugs that need more structure.
- Anti-Fatigue Mat (with holes): Some craft savvy individuals use these for very large, thick rugs, cutting holes where needed. This is a more advanced option.
- Crochet Hook (Optional but Recommended): A medium-sized crochet hook can be incredibly helpful for pulling the yarn tails through the mesh base, especially if your pom poms are very dense.
- Measuring Tape/Ruler: For cutting your rug base to size.
- Marker (Optional): To mark your rug base if you’re cutting a specific shape.
Step 1: Crafting Your Perfect Pom Poms (The Fun Part!)
This is the most time-consuming but arguably the most satisfying part of making a Pom Pom Rug. You’ll need many pom poms, so put on your favorite podcast or show and get comfortable.
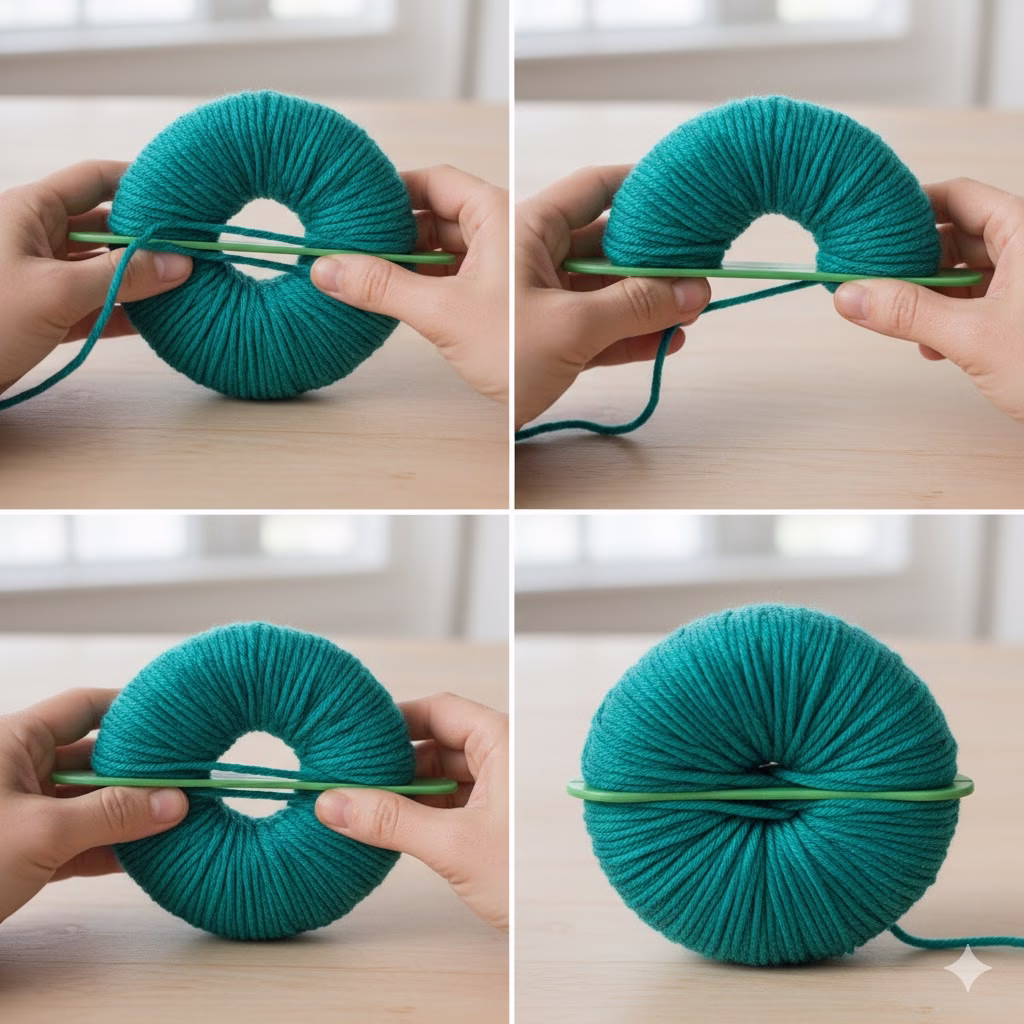
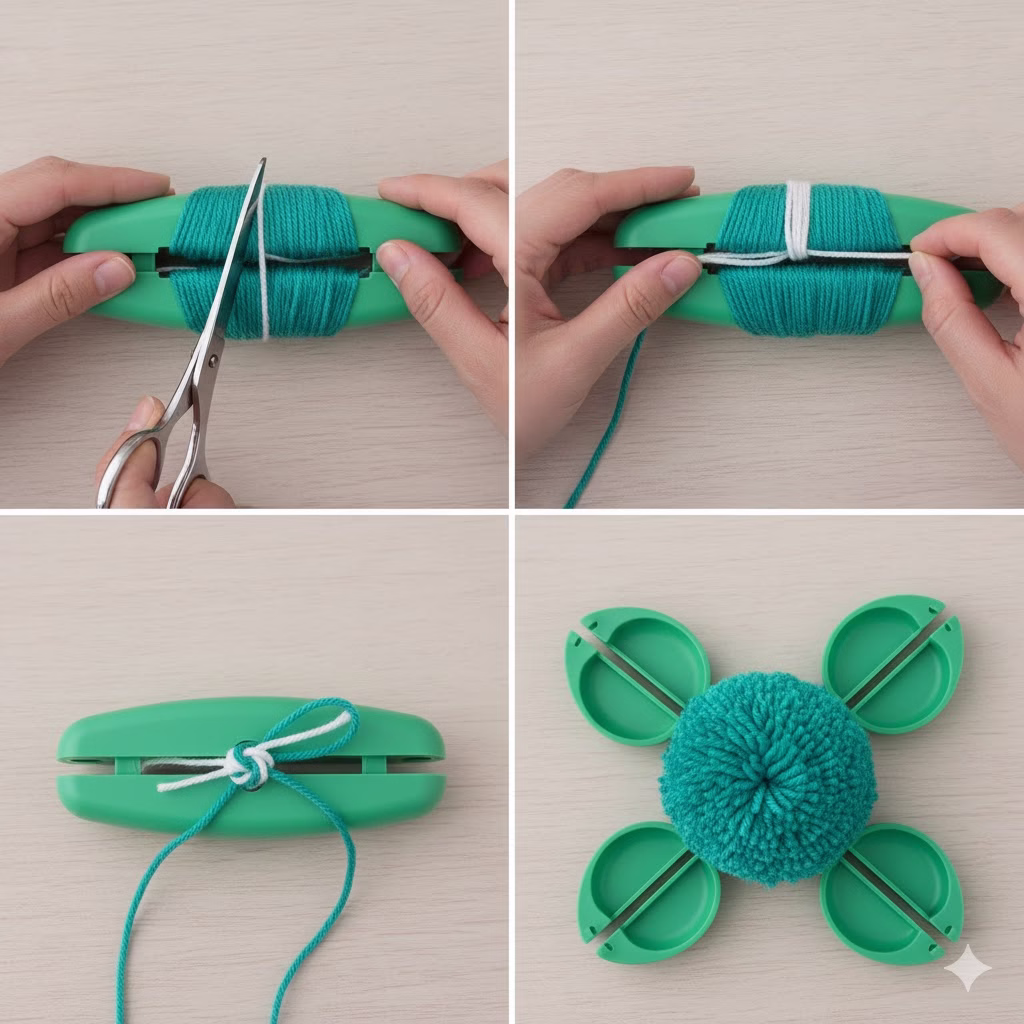
Using a Pom Pom Maker:
- Open the Maker: Most pom pom makers consist of two halves, each with two arms that open and close. Open all four arms of your maker.
- Wrap the First Half: Take your yarn and begin wrapping it around one half of the pom pom maker’s arches. Wrap evenly and densely. The more yarn you wrap, the fuller and denser your pom pom will be. Aim for a generous, almost bulging amount of yarn.
- Close and Repeat: Once one half is wrapped to your desired density, close those two arms. Now, wrap the second half of the pom pom maker in the same manner.
- Close the Maker: Once both halves are wrapped, close the remaining two arms, ensuring they click securely into place. You should now have a fully wrapped circle of yarn, with a channel running along the edge where the arms meet.
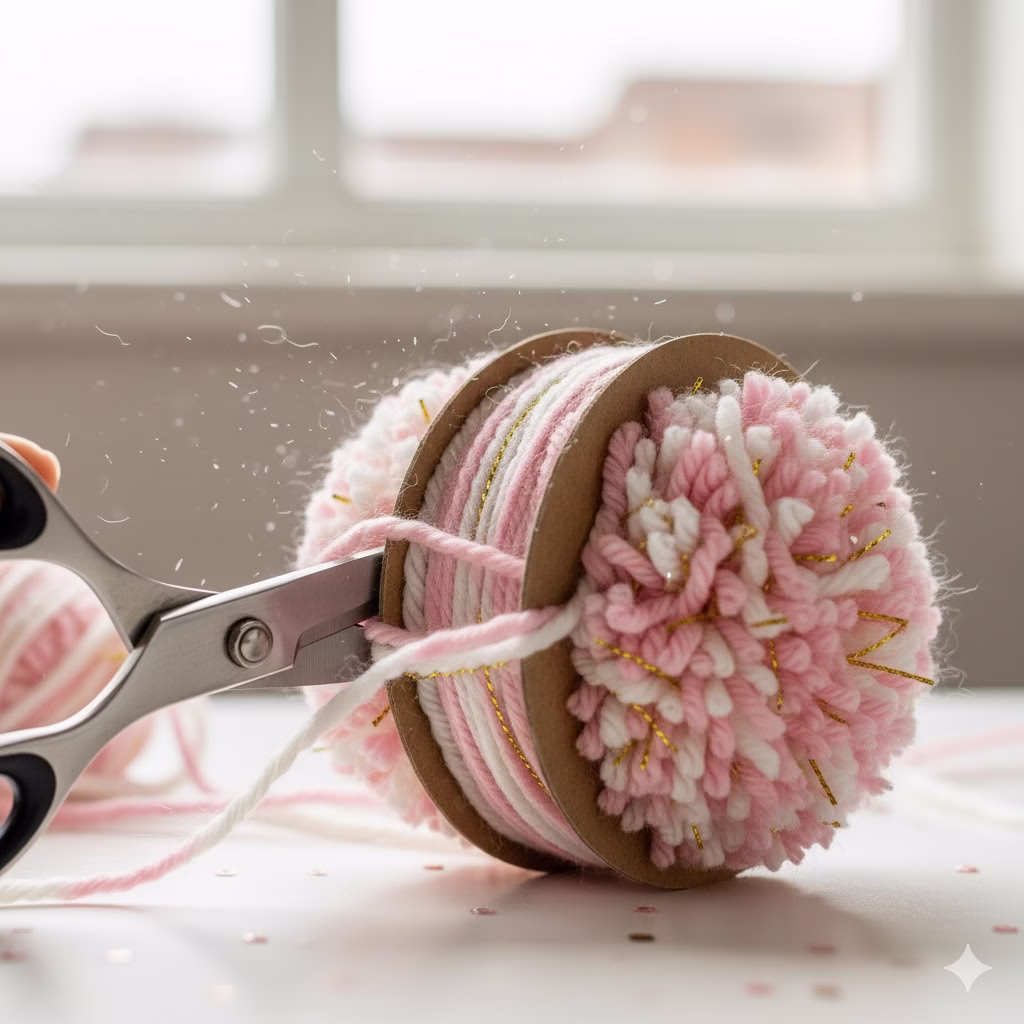
- Cut the Yarn: Carefully take your sharp scissors and begin cutting along the groove created by the closed arms of the pom pom maker. Cut slowly and deliberately, ensuring you cut every strand of yarn.
- Tie the Center: This is a crucial step! Cut a separate piece of strong yarn, about 10-12 inches long. This will be your tying string. Wrap it around the center groove of the pom pom maker, between the two halves you just cut. Pull it as tightly as you possibly can and tie a double knot (or even a triple knot for extra security). Pull really tight – this is what holds your pom pom together. Leave the long tails of this tying string intact; these will be used to attach the pom pom to your rug base.
- Open and Reveal: Gently open the arms of the pom pom maker, then separate the two halves. Voila! Your pom pom will emerge.
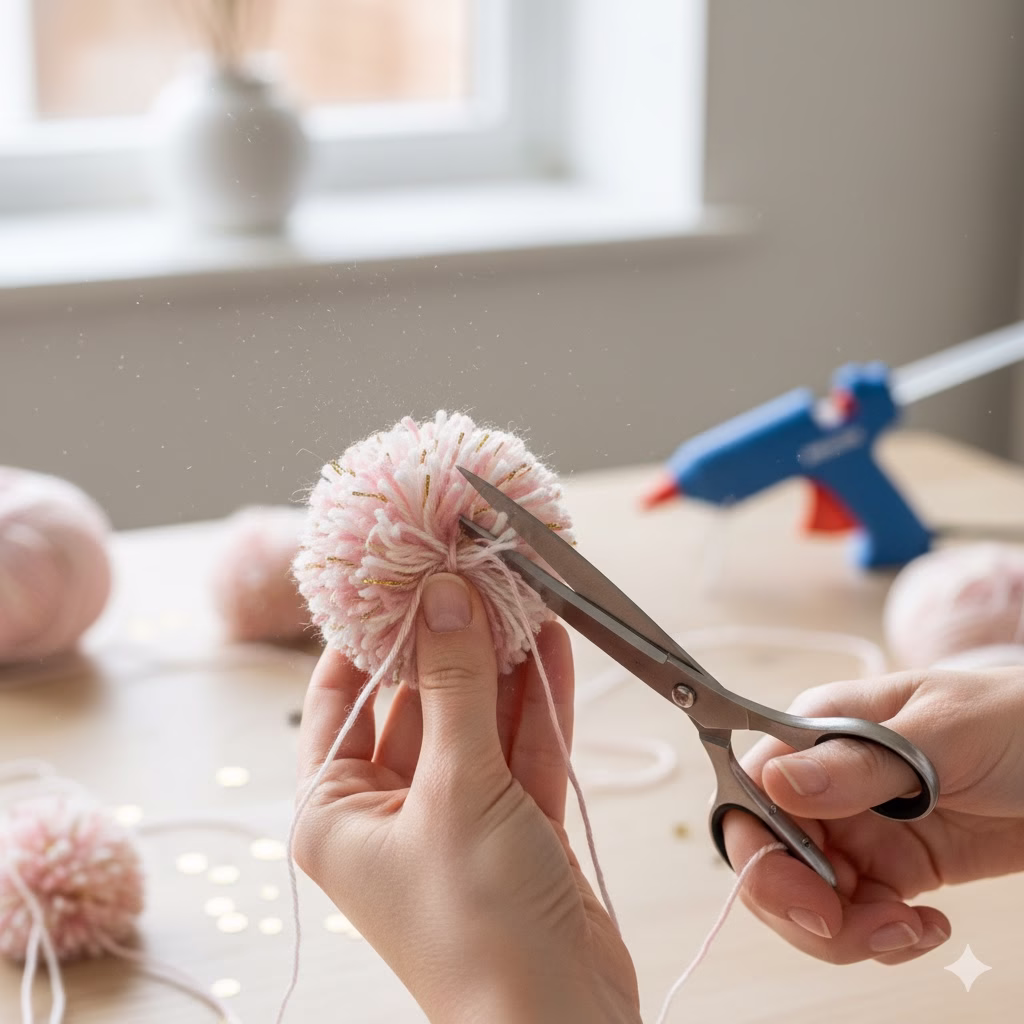
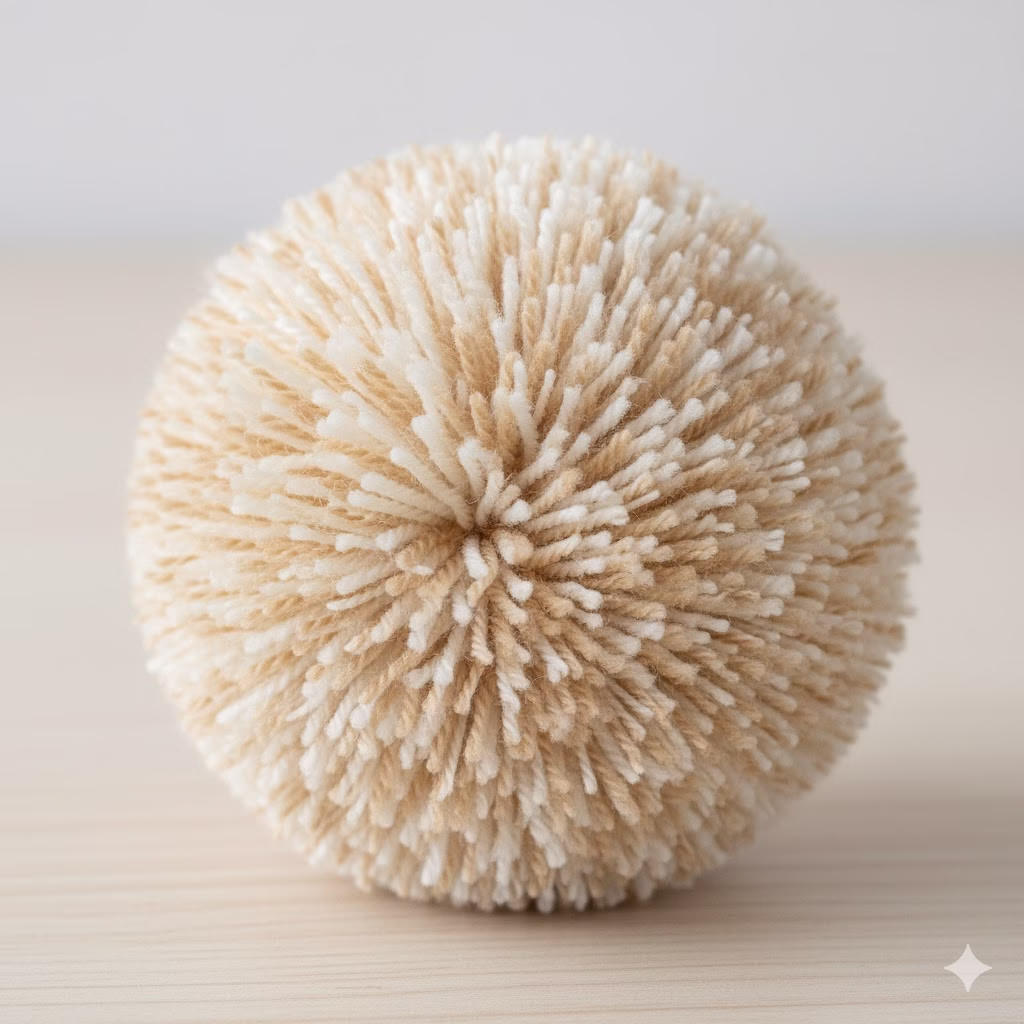
- Trim and Shape: Your pom pom will likely look a little shaggy at this point. This is where the magic of trimming comes in. Hold the pom pom and gently roll it between your hands to fluff it out. Then, using your sharp scissors, carefully trim any long, uneven strands to create a perfectly spherical and dense pom pom. Don’t be afraid to trim generously; a well-trimmed pom pom is a happy pom pom! The more you trim, the denser and more professional your pom pom will look.
Pro Tip for Consistency: To ensure all your pom poms are roughly the same size and density, try to wrap the yarn around the maker the same number of times for each pom pom. You’ll get a feel for it after making a few.
Estimating Pom Pom Quantity:
This is tricky, but here’s a rough guide for a standard 2.5-3 inch pom pom:
- For a small bath mat (approx. 2ft x 3ft): 150-250 pom poms
- For a medium rug (approx. 3ft x 5ft): 400-600 pom poms
- For a large rug (approx. 5ft x 7ft): 800-1200+ pom poms
Start by making a batch of 50-100 pom poms to get a feel for the process and yarn usage. Remember to save those long tying tails!
Step 2: Preparing Your Rug Base
Once you have a decent pile of pom poms, it’s time to prepare your canvas.
- Measure and Cut: Determine the desired size and shape of your Pom Pom Rug. Lay out your non-slip mesh mat and use a measuring tape and marker to outline your rug. Cut the mesh carefully with sharp scissors. Rectangles and squares are easiest for beginners, but don’t shy away from circles, ovals, or even more abstract shapes if you’re feeling adventurous.
- Consider Edges: If your mesh mat is prone to fraying, you might want to reinforce the edges by folding them over and stitching them, or using fabric glue. However, often the density of the pom poms will conceal the edges, so this step might be optional depending on your mesh.
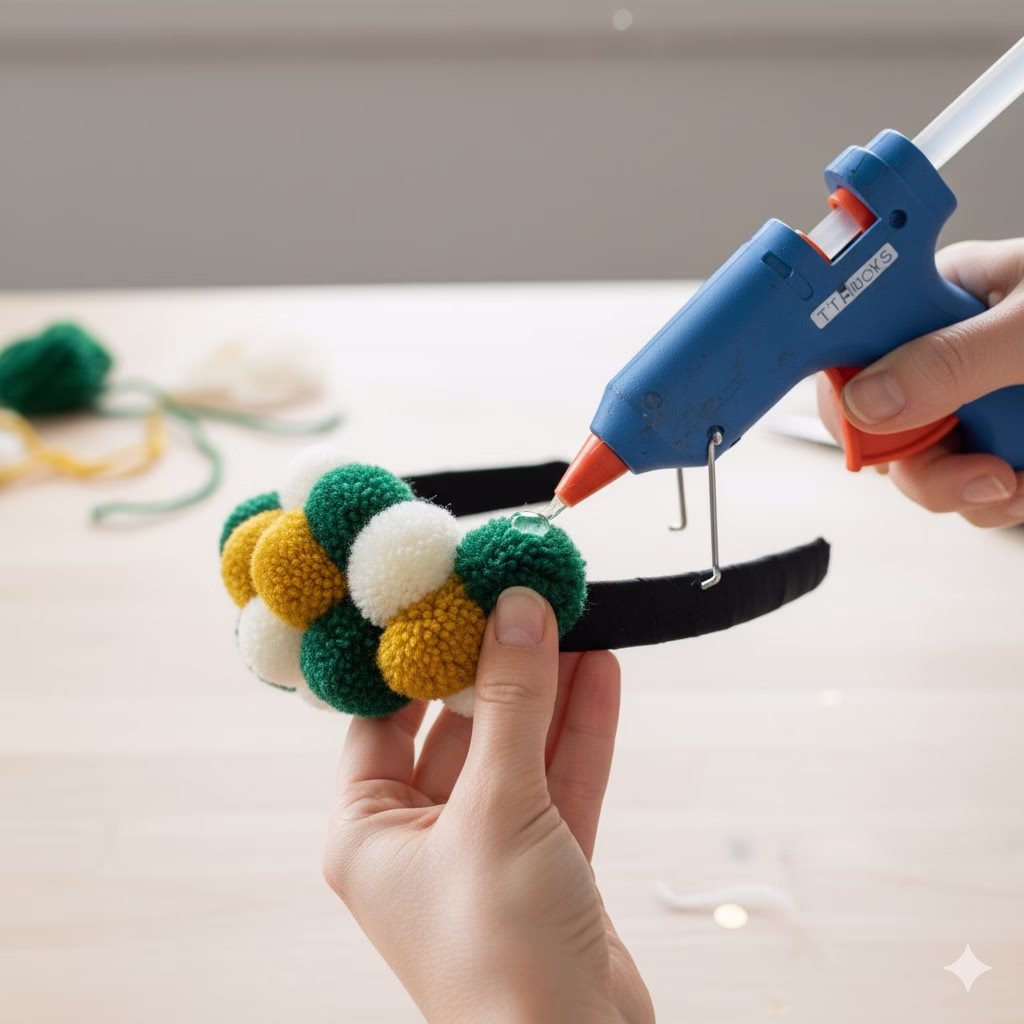
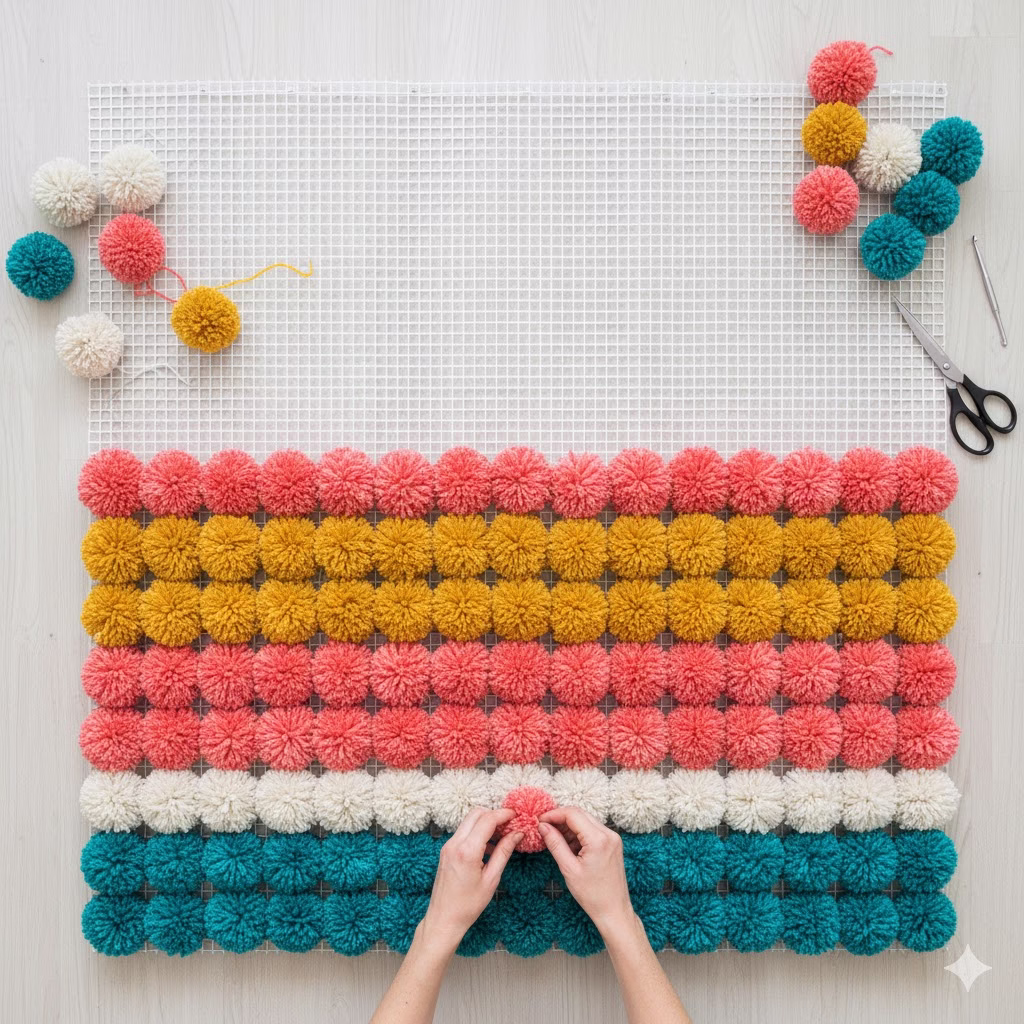
Step 3: Attaching the Pom Poms to the Base
This is where your rug starts to take shape!
- Placement Strategy:
- Full Coverage: For a truly luxurious and dense rug, you’ll want to attach pom poms to every available hole in the mesh. This is the most common and visually appealing method.
- Patterned: If you’re using multiple colors, decide on a pattern – stripes, a checkerboard, a random scattering, or a specific design. Lay out a few pom poms on the mesh before tying them to visualize your pattern.
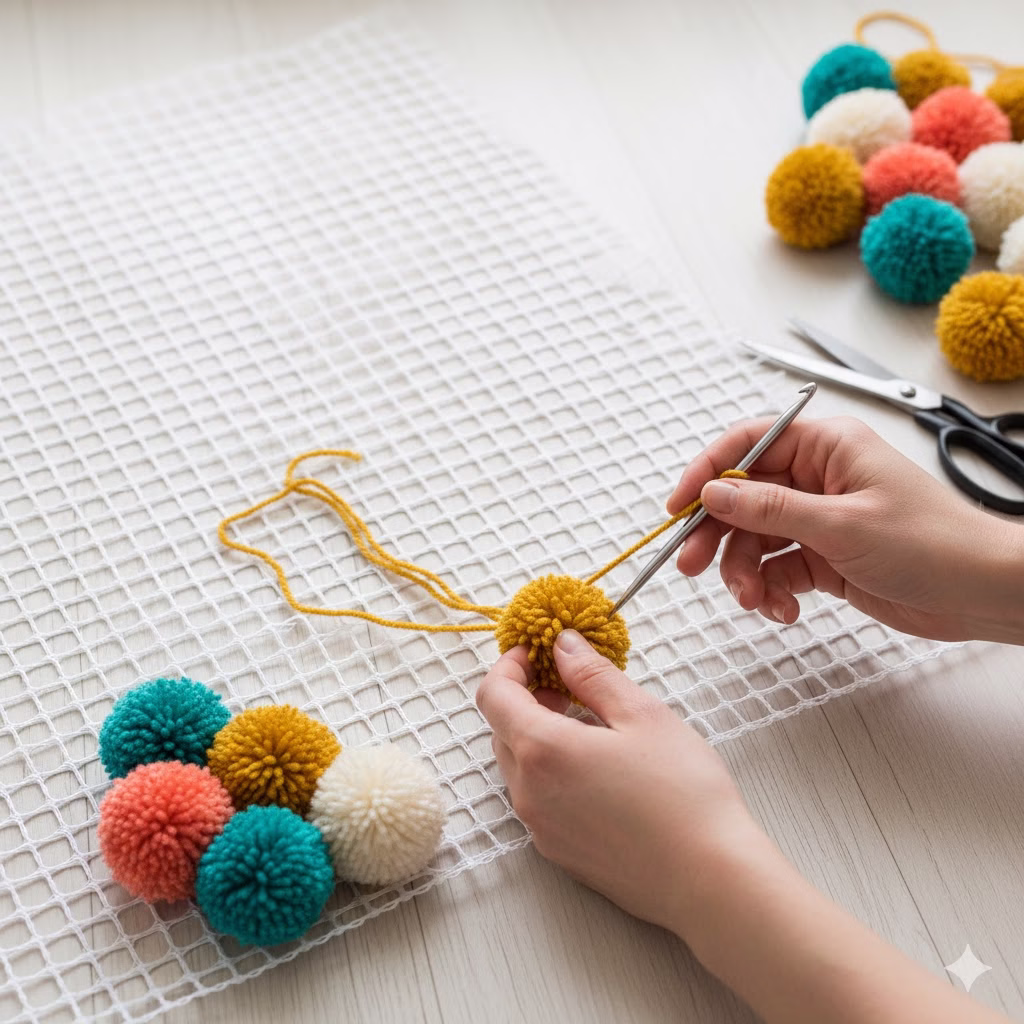
- The Tying Process:
- Take one of your trimmed pom poms.
- Thread the two long tying tails of the pom pom through adjacent holes in the mesh rug base.
- Flip the rug base over.
- Tie a very tight double or triple knot with the two yarn tails on the underside of the mesh. Pull as tightly as you can to secure the pom pom firmly to the base.
- Trim the excess yarn tails close to the knot, but not so close that the knot might unravel.
- Repeat, Repeat, Repeat! Continue this process, attaching pom poms until your rug base is completely covered. For the densest rug, ensure each pom pom is snug against its neighbors. This prevents the mesh from showing through and creates that coveted plush feel.
Using a Crochet Hook: If you find it difficult to push the yarn tails through the mesh, especially with very dense pom poms, insert a crochet hook from the underside of the mesh through the desired holes. Catch the yarn tails with the hook and pull them through to the back.
Step 4: Finishing Touches and Care
You’ve done it! Your beautiful DIY Pom Pom Rug is complete. Now for a few final considerations.
- Final Trim (Optional): Once all your pom poms are attached, you might notice some unevenness in the overall height of the rug. You can gently go over the entire surface with your sharp scissors, carefully trimming any rogue strands or slightly taller pom poms to create a uniform, smooth surface.
- Shake it Out: Give your new rug a good shake outdoors to remove any loose yarn fibers from the trimming process.
- Non-Slip Backing (If Needed): If your chosen rug base isn’t inherently non-slip, consider adding a non-slip rug pad underneath for safety, especially in high-traffic areas.
Caring for Your Pom Pom Rug:
The longevity of your Pom Pom Rug depends on the yarn you chose and how well you care for it.
- Spot Cleaning: For small spills, gently blot with a damp cloth and mild detergent.
- Vacuuming: Use a vacuum with a hose attachment or set to a very low suction. Avoid beater bars as they can damage the pom poms.
- Washing (Acrylic Yarn): For acrylic yarn rugs, you might be able to machine wash on a delicate cycle in cold water, preferably inside a large mesh laundry bag. Lay flat to air dry. Always test a single pom pom first to see how it holds up.
- Washing (Wool or Delicate Yarns): Hand wash in cool water with a wool-safe detergent. Gently squeeze out excess water (do not wring!) and lay flat on a clean towel to air dry, reshaping as needed.
- Re-Trimming: Over time, pom poms might get a little “shaggy” from foot traffic. You can periodically re-trim them to restore their shape and fluffiness.
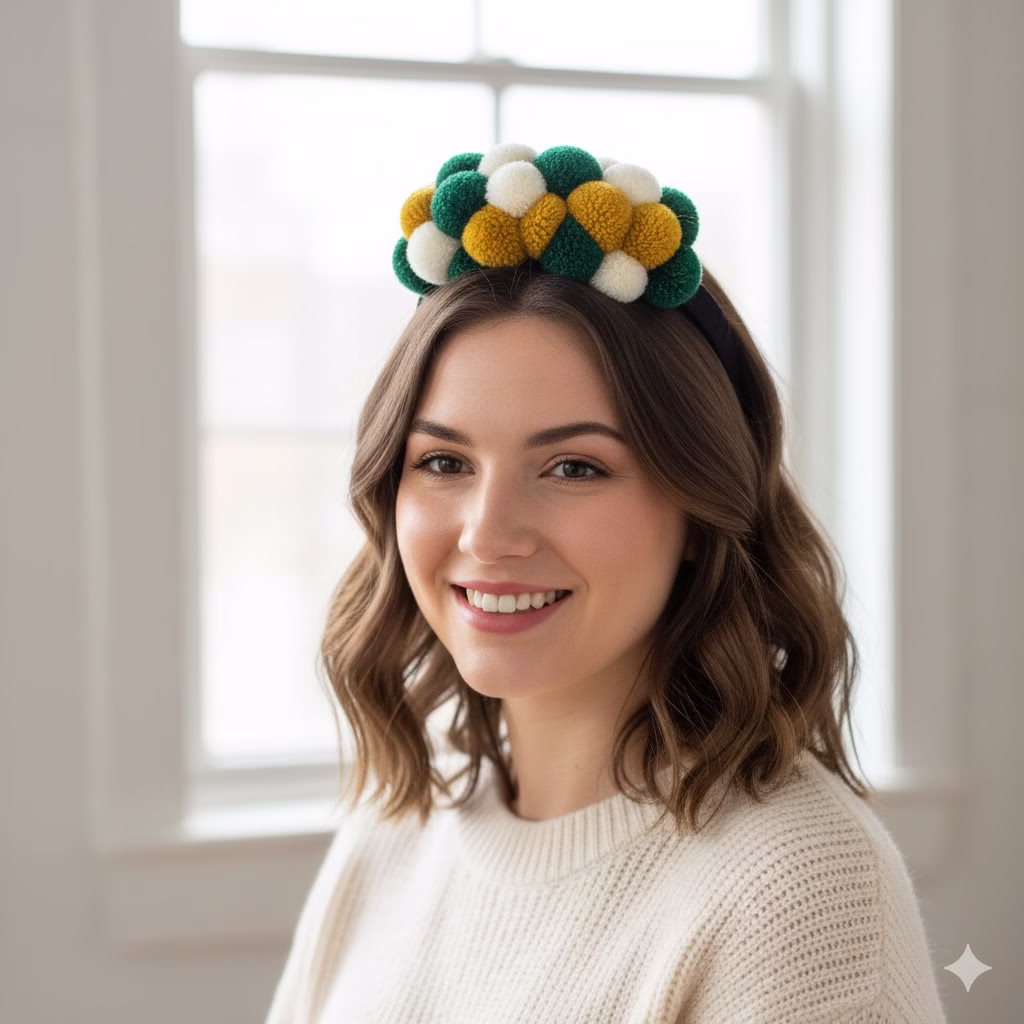
Examples and Inspiration for Your Pom Pom Rug
The beauty of a DIY Pom Pom Rug lies in its endless possibilities. Here are some ideas to spark your creativity:
Color Play:
- Monochromatic Bliss: Choose different shades of a single color (e.g., various blues, grays, or pinks) for a sophisticated, subtle effect.
- Gradient Glory: Arrange pom poms from darkest to lightest to create a beautiful ombre effect.
- Rainbow Extravaganza: Use every color of the rainbow for a playful, vibrant rug perfect for a child’s room or a creative space.
- Earthy Tones: Combine creams, browns, greens, and burnt oranges for a natural, bohemian vibe.
- High Contrast: Pair black and white, or deep navy with bright yellow for a bold statement.
Shape Shifters:
- Classic Rectangle/Square: Easy to plan and execute, ideal for entryways, bathrooms, or bedside rugs.
- Charming Circle/Oval: Adds softness and a whimsical touch, perfect for nurseries or reading nooks.
- Custom Shapes: Imagine a cloud-shaped rug for a child’s room, a heart-shaped rug for a romantic touch, or even a letter of the alphabet for a personalized gift.
Texture Talk:
- Uniform Fluff: Using the same yarn weight and pom pom size throughout creates a consistent, cloud-like surface.
- Mixed Textures: Experiment with different yarn types – some fuzzy, some smooth, some chunky – to add tactile interest. Be mindful of washing instructions if mixing yarn types.
- Varying Sizes: While generally not recommended for a rug due to unevenness underfoot, using slightly different sized pom poms could create a “pebbled” or organic look, more suited for a wall hanging or decorative mat.
Advanced Pom Pom Crafting Tips
Ready to take your Pom Pom Rug to the next level?
- Double Yarn Wrapping: For extra dense and luxurious pom poms, wrap two strands of yarn around the maker simultaneously. This speeds up the process and creates a super full pom pom.
- Yarn Blending: Wrap two different colored strands of yarn together for a marbled or heathered effect within a single pom pom. This is fantastic for adding subtle depth to your design.
- No-Show Knots: If you’re worried about the knots on the back of the rug being too bulky, you can try threading the yarn tails under the mesh and tying them to other strands of yarn on the back of the pom pom itself, rather than directly to the mesh. However, this requires very strong, secure knots and might be less durable than tying to the mesh.
- Edge Finishing: For a very clean edge, make sure the pom poms along the perimeter of your rug are particularly dense and well-trimmed, possibly even slightly larger to “tuck” over the edge of the mesh.
Conclusion: Embrace Your Inner Maker!
Creating a DIY Pom Pom Rug is more than just a craft project; it’s an investment in cozy comfort and personal expression. While it requires patience and a good amount of yarn, the reward of sinking your toes into a luxurious, handmade rug that you brought to life is truly unparalleled. From choosing your perfect color palette to trimming those final fluffy spheres, every step of this journey is an opportunity to infuse your home with warmth and creativity. So, gather your supplies, put on some music, and get ready to create a masterpiece that will be cherished for years to come. Happy crafting!
FAQs about Your DIY Pom Pom Rug
Q: How long does it take to make a DIY Pom Pom Rug?
A: This is entirely dependent on the size of your rug and how quickly you make pom poms. A small bath mat could take 10-20 hours, while a large living room rug could easily be 50+ hours. It’s a project best approached in stages!
Q: Can I use different sized pom poms on one rug?
A: While aesthetically interesting, using wildly different sized pom poms can make the rug uneven underfoot and potentially a tripping hazard. If you want variety, stick to very subtle size differences (e.g., 2.5 inch and 3 inch pom poms) or reserve larger pom poms for the edges.
Q: My pom poms aren’t fluffy! What am I doing wrong?
A: This usually means you haven’t wrapped enough yarn around the maker. Go back and wrap more densely! Also, ensure you’re trimming them aggressively enough to create that dense, spherical shape. Don’t be afraid to cut.
Q: How do I prevent my pom poms from falling off?
A: The key is in the tying! Ensure you are pulling the center tying string as tightly as possible before knotting, and then tie the pom pom to the rug base with very tight double or triple knots. Leaving longer tails on the tying string can also help prevent unraveling.
Q: What’s the best type of yarn for a Pom Pom Rug?
A: For durability, ease of care, and cost-effectiveness, acrylic yarn is generally the best choice. It comes in a vast array of colors and holds its shape well. Wool blends can be beautiful but often require more delicate care.
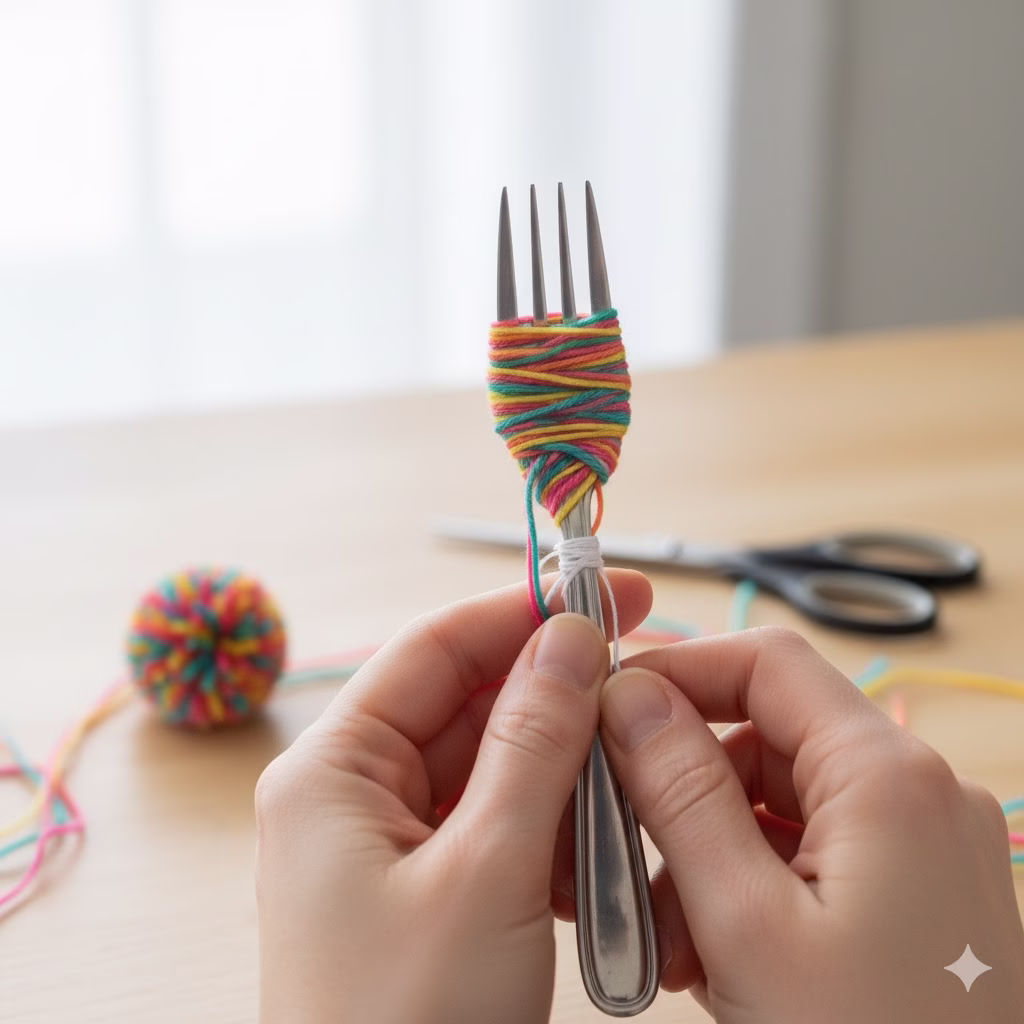
Q: Can I make a Pom Pom Rug without a pom pom maker?
A: Yes, you can use cardboard cutouts or even your fingers. However, a pom pom maker will significantly speed up the process, result in more uniform pom poms, and is generally less frustrating for a project requiring so many individual pom poms.
Q: How do I clean my Pom Pom Rug?
A: Spot clean for small spills. For a full clean, if made with acrylic yarn, you might be able to machine wash on a delicate cycle in a mesh bag and air dry flat. Always test a single pom pom first. For wool, hand washing is recommended. Avoid harsh detergents and direct heat.
References
- The Spruce Crafts – 24 Colorful Pom Pom Crafts We Love
- DIY Candy – Whimsical World of Pom Pom Crafts
Recent Posts