Cookie Consent by Free Privacy Policy Generator Update cookies preferences

Why Jackfruit Is the Next Big Superfood


Jackfruit is making waves as a versatile, meat-like ingredient and a nutritional powerhouse. Its unique texture and mild flavor make it the perfect star for everything from savory tacos to sweet desserts. This comprehensive guide will show you why jackfruit deserves a spot in your kitchen.


Homemade Jackfruit pizza topped with shredded jackfruit, red onion rings, melted cheese, and fresh arugula on a wooden board.
Jackfruit Pizza

Introduction: The Rise of a Tropical Giant

Have you ever wondered what the next big thing in the world of superfoods might be? While we often hear about kale, quinoa, and acai, a new contender is stealing the spotlight: jackfruit. This massive, spiky fruit from Southeast Asia is no longer just a regional delicacy; it’s rapidly gaining global recognition as a sustainable, incredibly versatile, and nutritionally rich food. Its fibrous, stringy texture, especially when young and unripe, makes it an uncanny substitute for pulled pork or chicken, earning it a prized spot in the kitchens of plant-based enthusiasts and food innovators alike.

The culinary journey of this fruit is a fascinating one. For centuries, it has been a staple in Asian cuisine, utilized in both its unripe and ripe forms. When ripe, its sweet, tropical flavor makes it a perfect addition to smoothies, desserts, and fruit salads. However, it’s the unripe, green version that has captured the attention of the Western world. Its neutral taste acts as a blank canvas, readily absorbing the flavors of any sauce or spice blend it’s cooked with. This adaptability is key to its success as a meat alternative, allowing it to mimic the texture and savory profile of slow-cooked meats in a way that few other plant-based ingredients can.

The Jackfruit Advantage: A Nutritional Powerhouse

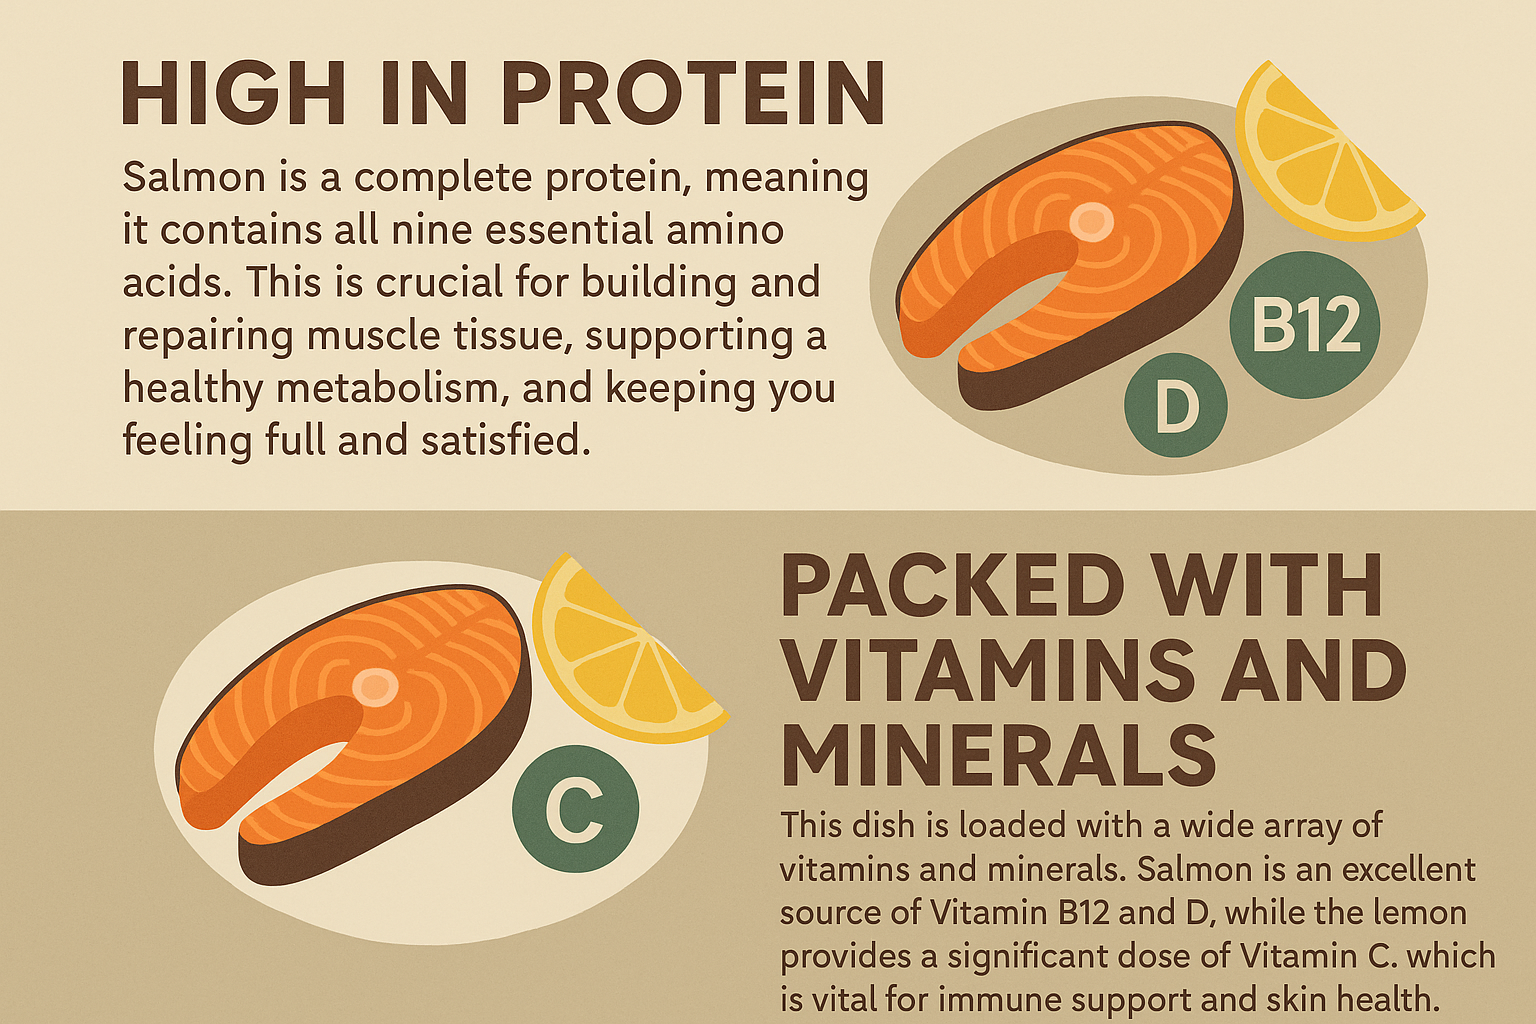
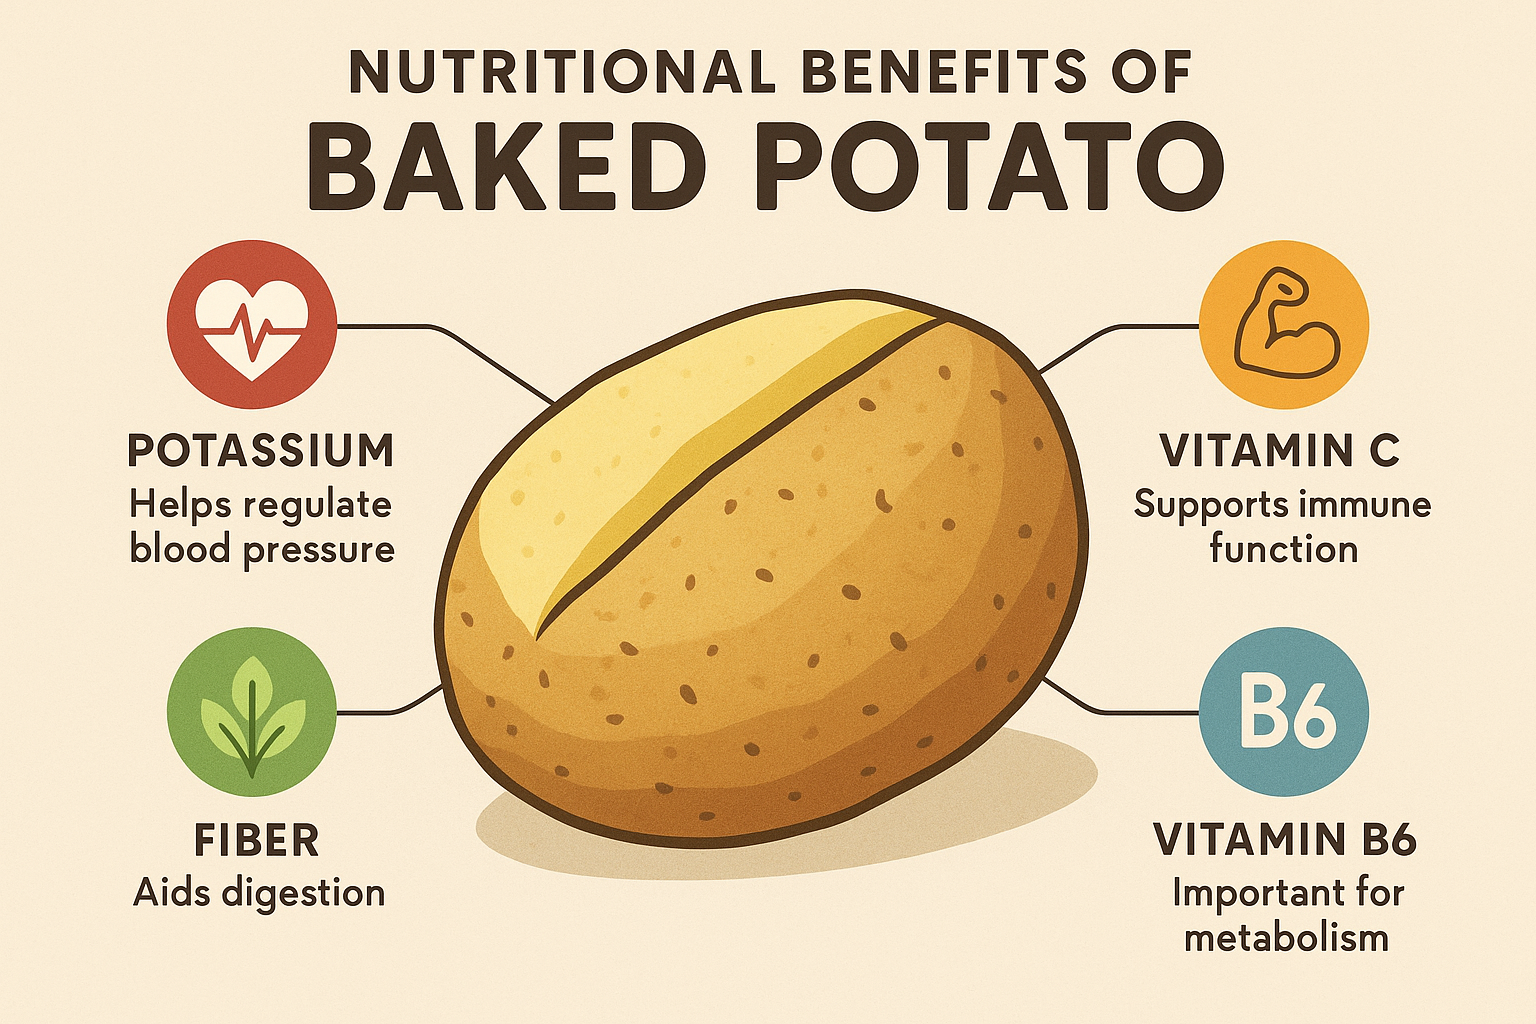
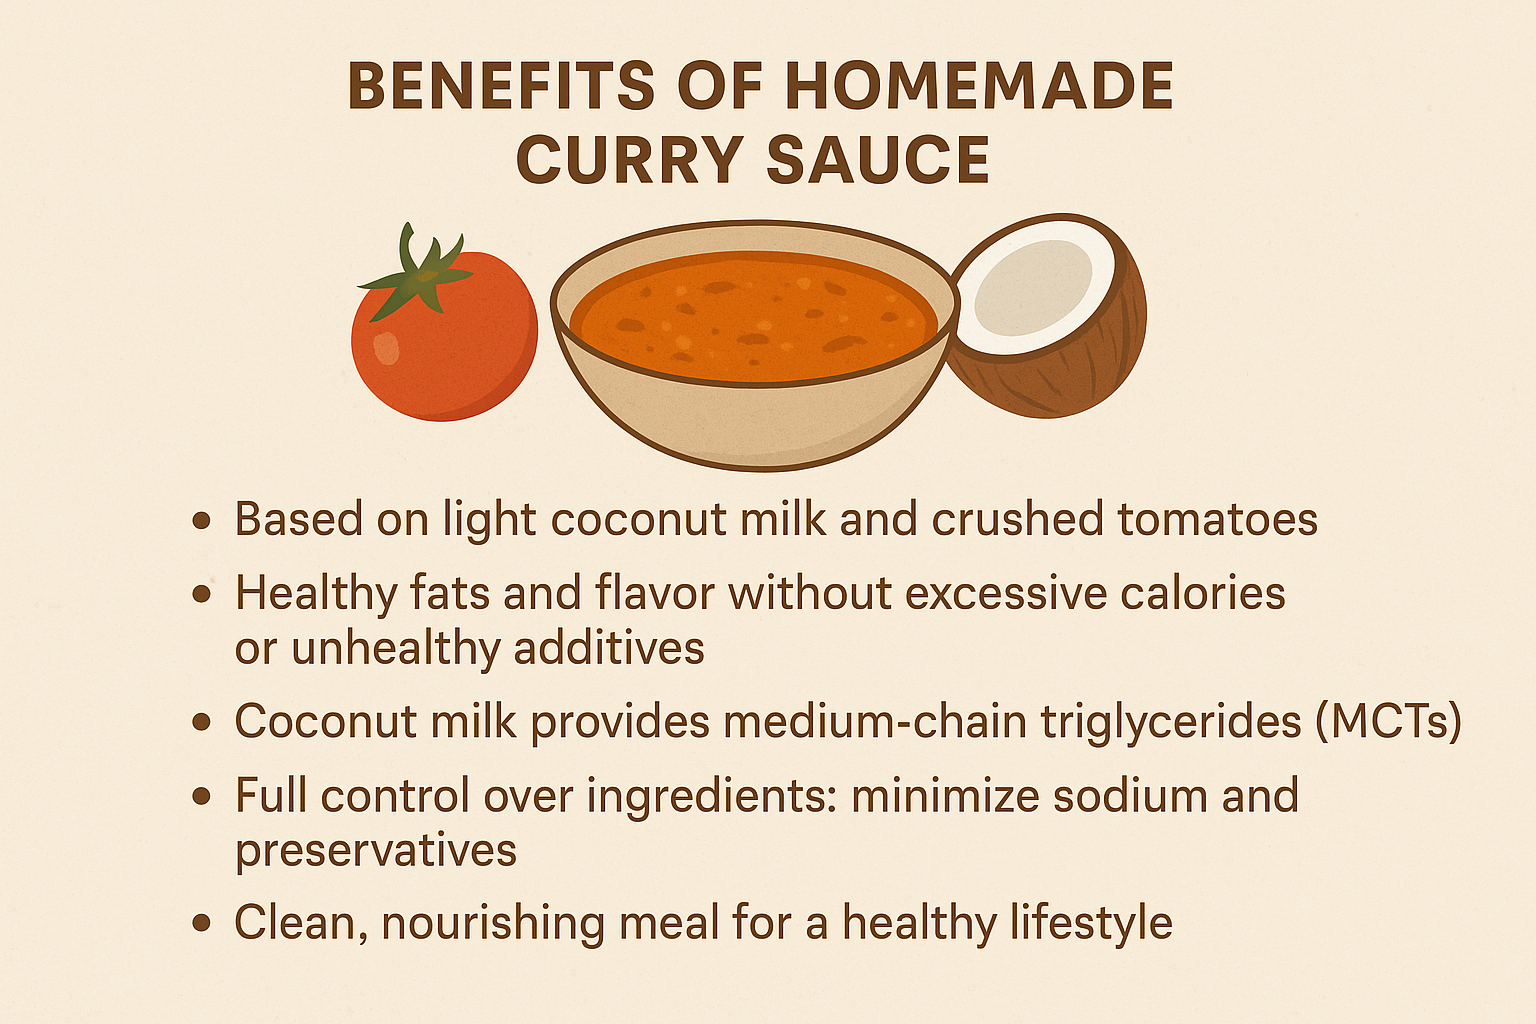
Beyond its culinary appeal, jackfruit is a nutritional goldmine. It’s packed with vitamins, minerals, and antioxidants that contribute to overall health and well-being. It’s particularly rich in Vitamin C, which is essential for immune function, and potassium, which plays a crucial role in heart health. Furthermore, its high fiber content promotes digestive health and helps you feel full, making it an excellent choice for those looking to manage their weight. As more people seek out nutrient-dense, plant-based options, the nutritional profile of jackfruit solidifies its position as a true superfood.

The sustainability factor of this fruit also adds to its allure. The trees are prolific producers, yielding a large amount of fruit with minimal resources. They are highly resilient and grow in a variety of climates, making them a more environmentally friendly crop compared to many animal-based proteins. This eco-friendly aspect resonates with a growing number of consumers who are consciously making food choices that have a positive impact on the planet. By choosing jackfruit, you’re not just nourishing your body; you’re also supporting a more sustainable food system.

This article will not only delve into the incredible benefits of this fruit but also provide you with a delicious recipe for a plant-based Pizza, a dish that truly showcases its versatility. This recipe is designed to be accessible for home cooks of all skill levels, ensuring that you can easily transform this humble fruit into a culinary masterpiece. Get ready to explore the world of jackfruit and discover why it’s set to become a staple in your kitchen.


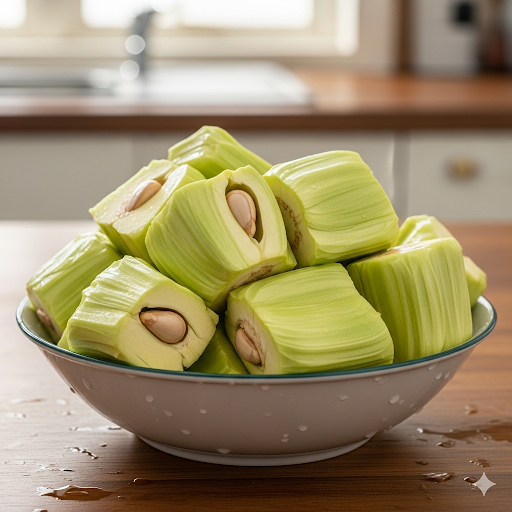
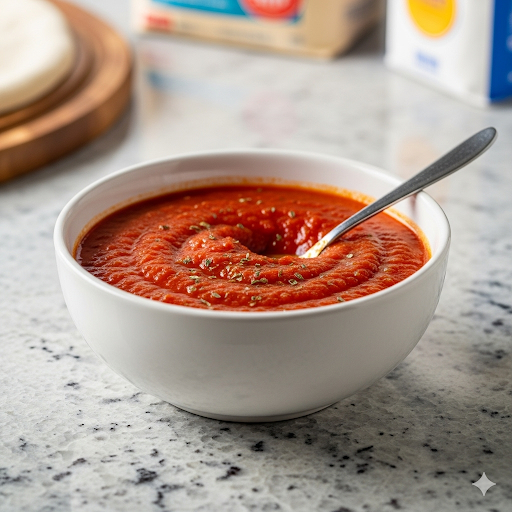
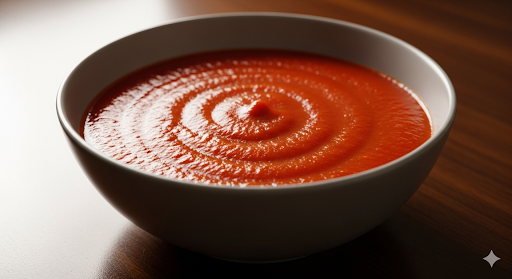
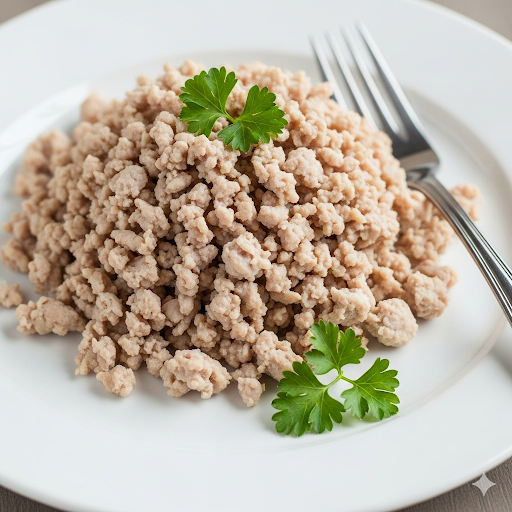
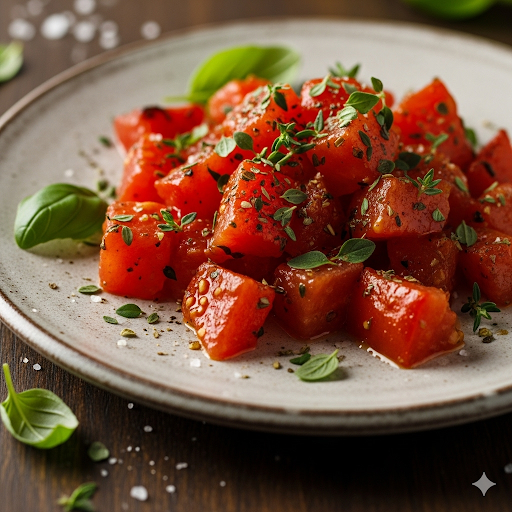
The gallery shows green jackfruit when it comes out of the tin. The next is pizza sauce and the last image shows pizza dough.


Jackfruit BBQ Pizza Recipe

This recipe is a fantastic way to introduce yourself to cooking with jackfruit. It’s savory, satisfying, and a perfect example of how this fruit can be used to create a truly delicious, plant-based meal.

Time to Prepare

30 minutes

Time to Cook/Blend

20-25 minutes

Servings

4-6 people


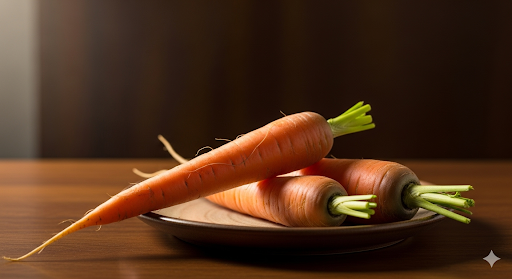
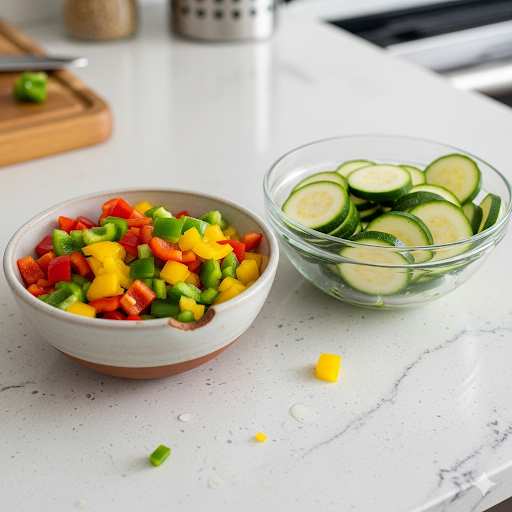
The gallery shows a frying pan, chopping board and a mixing bowl which are just some of the equipment used for this recipe.


Equipment

  • Large mixing bowl
  • Large frying pan or skillet
  • Baking sheet or pizza stone
  • Measuring cups and spoons
  • Chef’s knife
  • Cutting board

Nutritional Information (Approximate per serving)

  • Calories: 450 kcal
  • Protein: 15g
  • Fiber: 8g
  • Fat: 18g
  • Carbohydrates: 55g
  • Vitamin C: 30% DV
  • Potassium: 15% DV

Ingredients

  • For the BBQ Jackfruit:
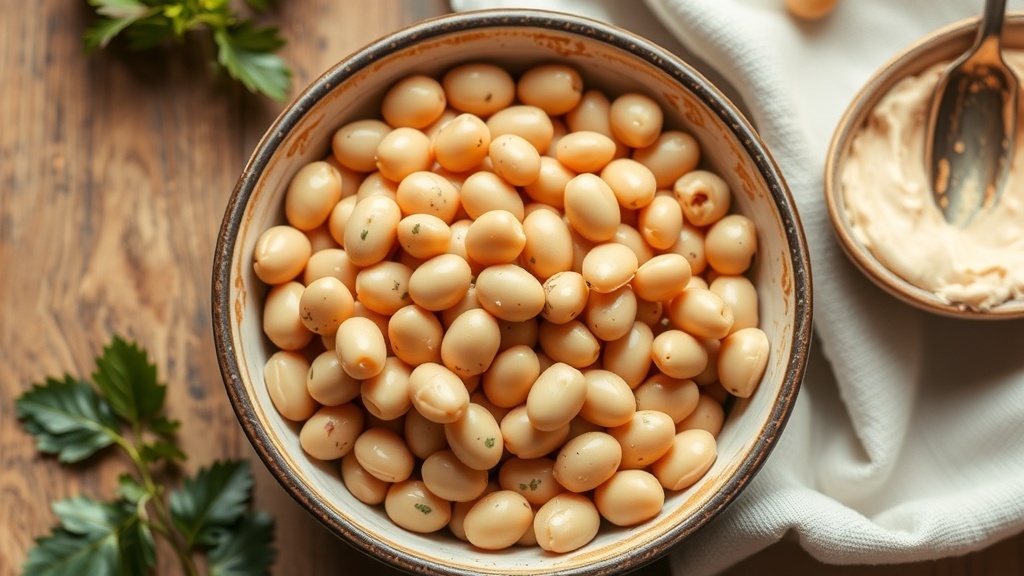
    • 1 (20-ounce) can young green jackfruit in brine or water, drained and rinsed
    • 1 tablespoon olive oil
    • 1 small red onion, finely chopped
    • 2 cloves garlic, minced
    • 1 cup your favorite BBQ sauce
    • 1/2 teaspoon smoked paprika
    • 1/4 teaspoon black pepper
    • 1/4 cup vegetable broth
  • For the Pizza:
    • 1 pre-made pizza dough (store-bought or homemade)
    • 1/2 cup pizza sauce
    • 1-1 1/2 cups plant-based mozzarella cheese, shredded
    • 1/2 red onion, thinly sliced into rings
    • A handful of fresh arugula (for garnish)
    • 1-2 teaspoons dried oregano
    • Pinch of red pepper flakes (optional)


Instructions

Prepare the Jackfruit

First, drain the canned jackfruit and rinse it thoroughly to remove the briny flavor. This step is crucial for a clean, neutral taste. Use your hands to squeeze out as much excess water as possible. Then, place this fruit in a large bowl and use your fingers or two forks to shred it. The core pieces can be a bit tough; you can either leave them in for a chewier texture or finely chop them. This is what creates that “pulled meat” consistency.

Sauté the Aromatics

Heat the olive oil in a large skillet or frying pan over medium heat. Add the finely chopped red onion and sauté for 3-4 minutes, or until it becomes soft and translucent. Next, add the minced garlic and cook for another minute until fragrant, being careful not to burn it.

Cook the BBQ Jackfruit

Add the shredded jackfruit to the skillet with the sautéed onions and garlic. Stir well to combine. Pour in the vegetable broth, smoked paprika, and black pepper. Stir everything together and let it simmer for about 5 minutes, allowing the jackfruit to soften and absorb the flavors.

Add the BBQ Sauce

Once the jackfruit is soft, pour in your favorite BBQ sauce. Stir to coat every piece of jackfruit evenly. Reduce the heat to low and let it simmer for another 5-10 minutes. This step is essential for developing a rich, deep flavor and a tender, melt-in-your-mouth texture. Taste and adjust seasoning as needed.

Preheat Oven and Prepare Pizza Dough

While the jackfruit is simmering, preheat your oven to the temperature specified on your pizza dough package (usually around 400°F or 200°C). If you’re using a pizza stone, place it in the oven as it preheats. Stretch or roll out your pizza dough on a floured surface or a baking sheet.
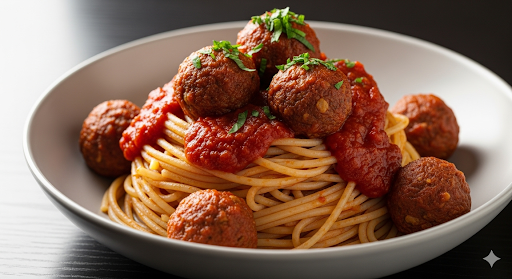
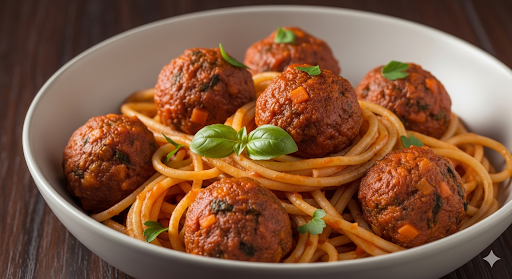
Assemble the Pizza

Spread the pizza sauce evenly over the dough, leaving a small border for the crust. Next, sprinkle a generous layer of plant-based mozzarella cheese. Evenly distribute the prepared BBQ jackfruit over the cheese. Finally, scatter the thinly sliced red onion rings on top.

Bake the Pizza

Carefully transfer the assembled pizza to the hot oven. Bake for 15-25 minutes, or until the crust is golden brown and the cheese is melted and bubbly. The baking time can vary depending on your oven and the type of dough you’re using, so keep a close eye on it.

Garnish and Serve

Once the pizza is cooked, remove it from the oven. Let it cool for a minute before slicing. Top with a handful of fresh arugula for a peppery crunch and sprinkle with dried oregano and red pepper flakes if you like. Serve immediately and enjoy!


Alternative Cooking Methods

While a conventional oven is the standard, you can also make this recipe using other methods for a slightly different result.

  • On the Grill: For a smoky flavor and a crispier crust, cook the pizza on a preheated grill. Place the assembled pizza on a pizza stone or a perforated grilling pan. Cook over indirect medium heat for 10-15 minutes, or until the crust is golden and the cheese is melted.
  • In an Air Fryer: If you have a small air fryer, you can make mini pizzas. Assemble the pizzas on small, air-fryer-safe pans. Cook at 350°F (175°C) for 8-10 minutes, checking halfway through to ensure even cooking. This method is great for quick, single servings.

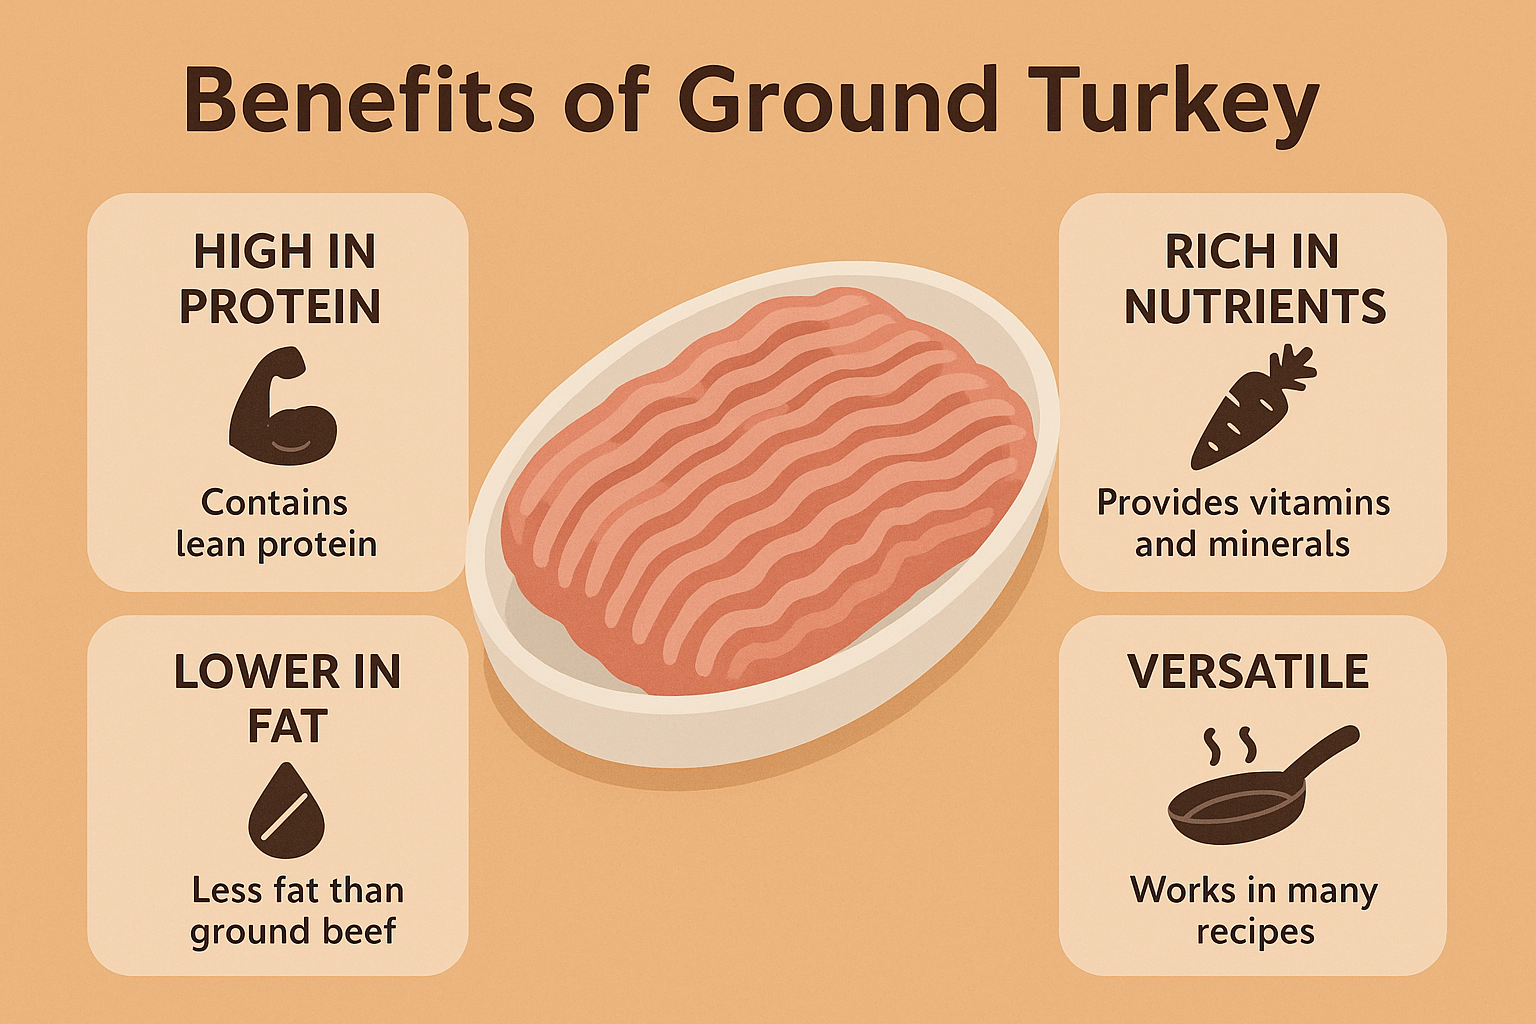
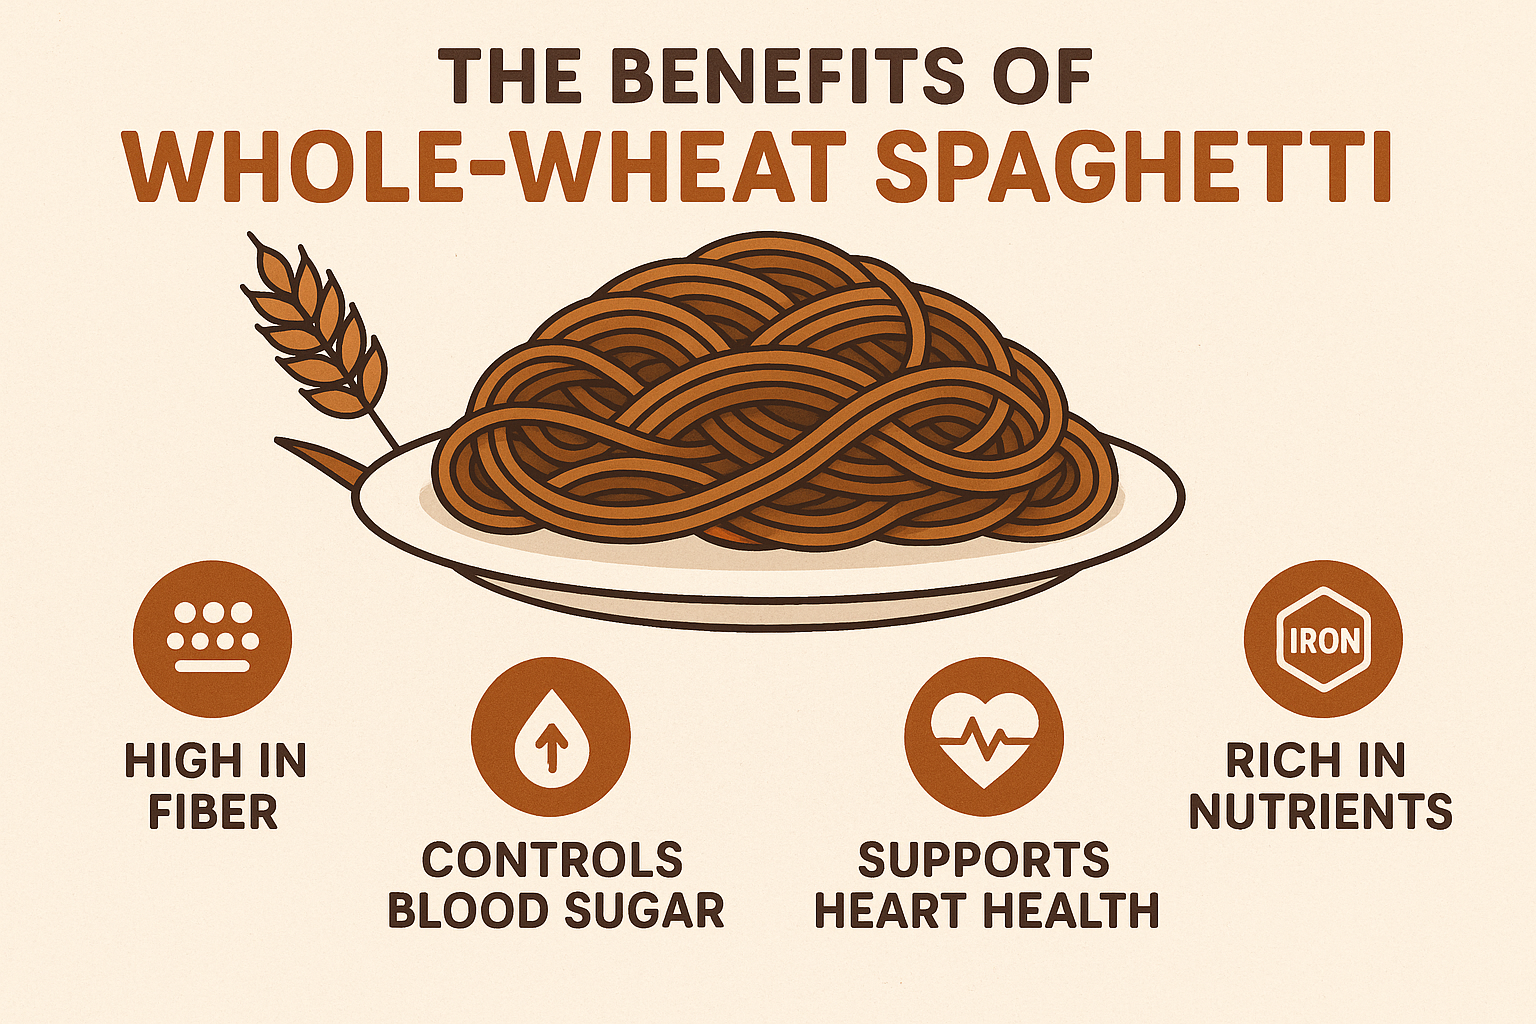
The Superfood Benefits of Jackfruit

Jackfruit is not just a tasty meat substitute; it’s a nutritional powerhouse. Incorporating it into your diet provides a wide array of health benefits that make it a true superfood.

Digestive Health and Weight Management

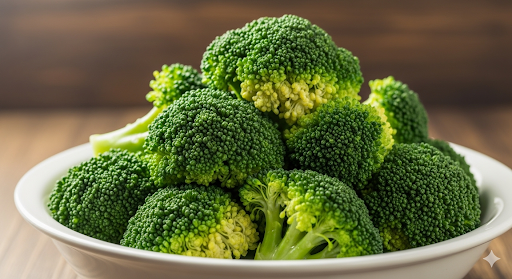
Jackfruit is incredibly high in dietary fiber. A single serving can provide a significant portion of your daily fiber needs. Fiber is essential for a healthy digestive system, helping to prevent constipation and promote regularity. This high fiber content also helps you feel full for longer, which can be beneficial for weight management by reducing overall calorie intake.

Immune Boosting Properties

This tropical fruit is an excellent source of Vitamin C, a powerful antioxidant. Vitamin C is crucial for supporting your immune system, helping your body fight off infections and diseases. A strong immune system is your first line of defense against illness, and a diet rich in Vitamin C is a great way to maintain it.
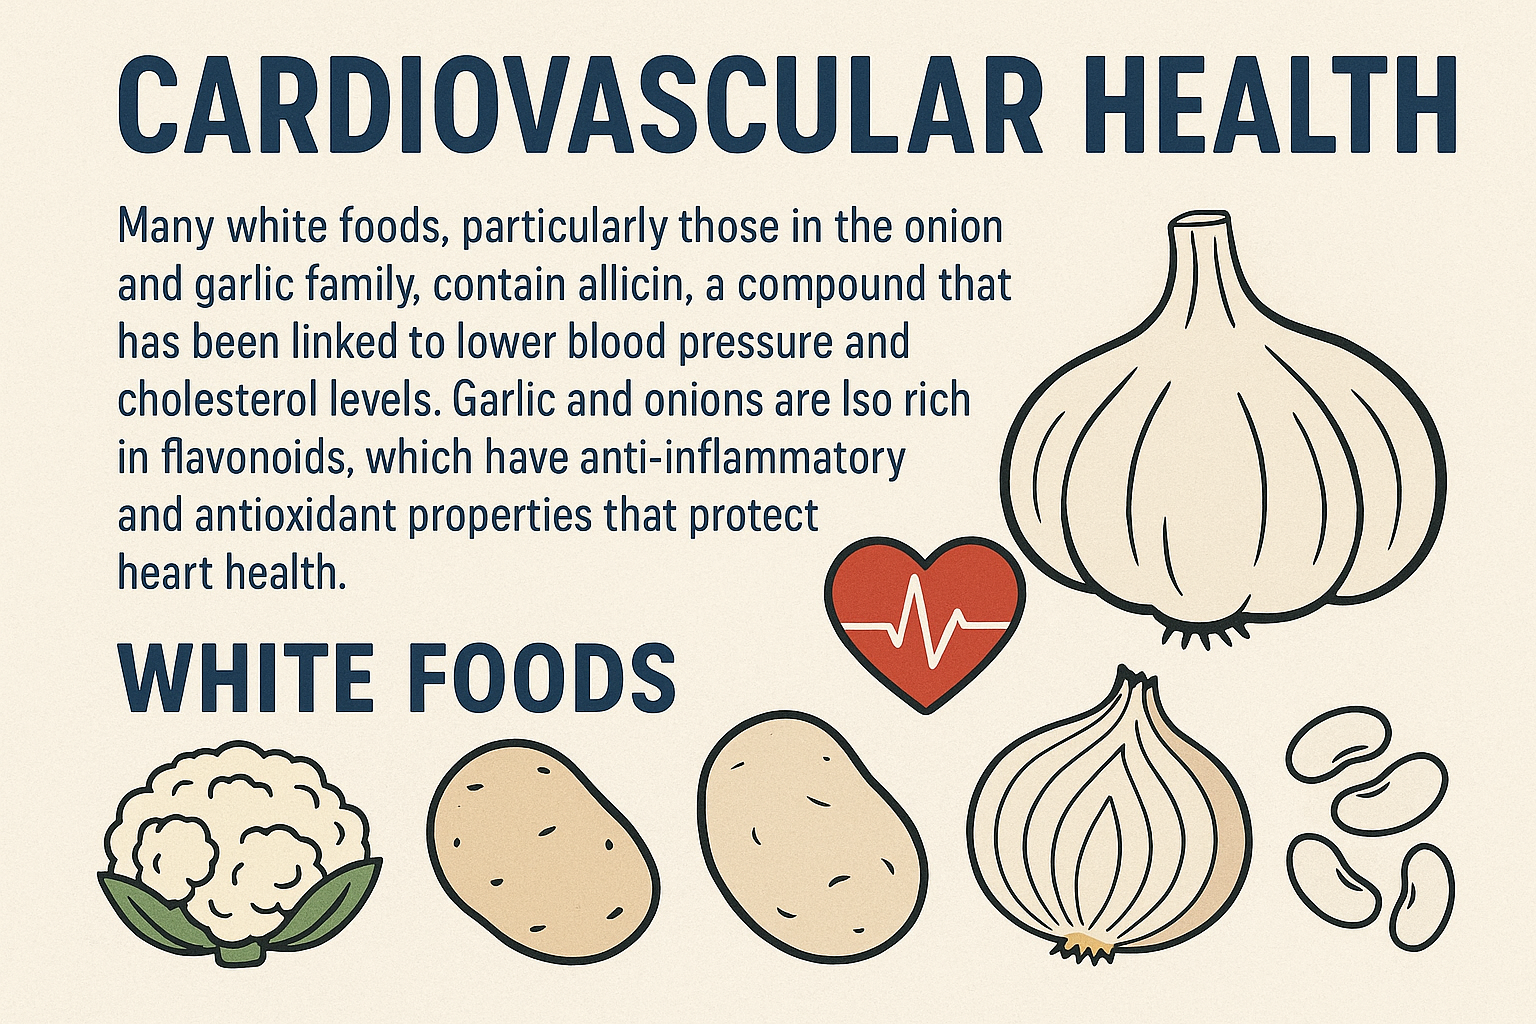
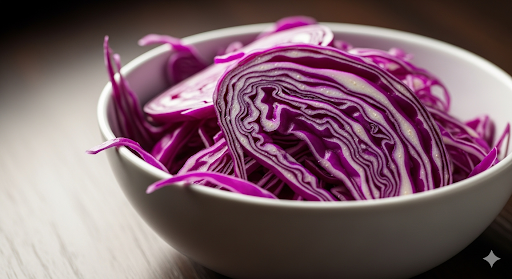
Heart Health

The potassium content in jackfruit is notable. Potassium is an essential mineral that helps regulate blood pressure by counteracting the effects of sodium. A diet rich in potassium can reduce the risk of hypertension and other cardiovascular diseases. The high fiber content also helps lower “bad” LDL cholesterol levels, further contributing to heart health.

Antioxidant Power

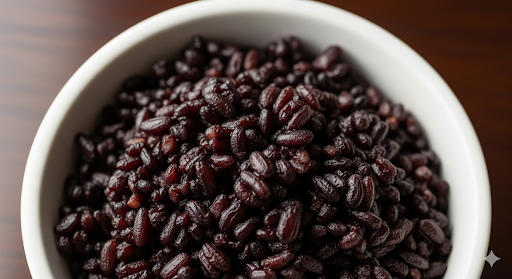
Jackfruit contains various phytonutrients like flavonoids, saponins, and tannins. These compounds have powerful antioxidant properties that help fight against free radicals in the body. Free radicals are unstable molecules that can cause cellular damage, leading to chronic diseases and premature aging. By neutralizing these free radicals, the antioxidants in jackfruit help protect your cells and promote long-term health.


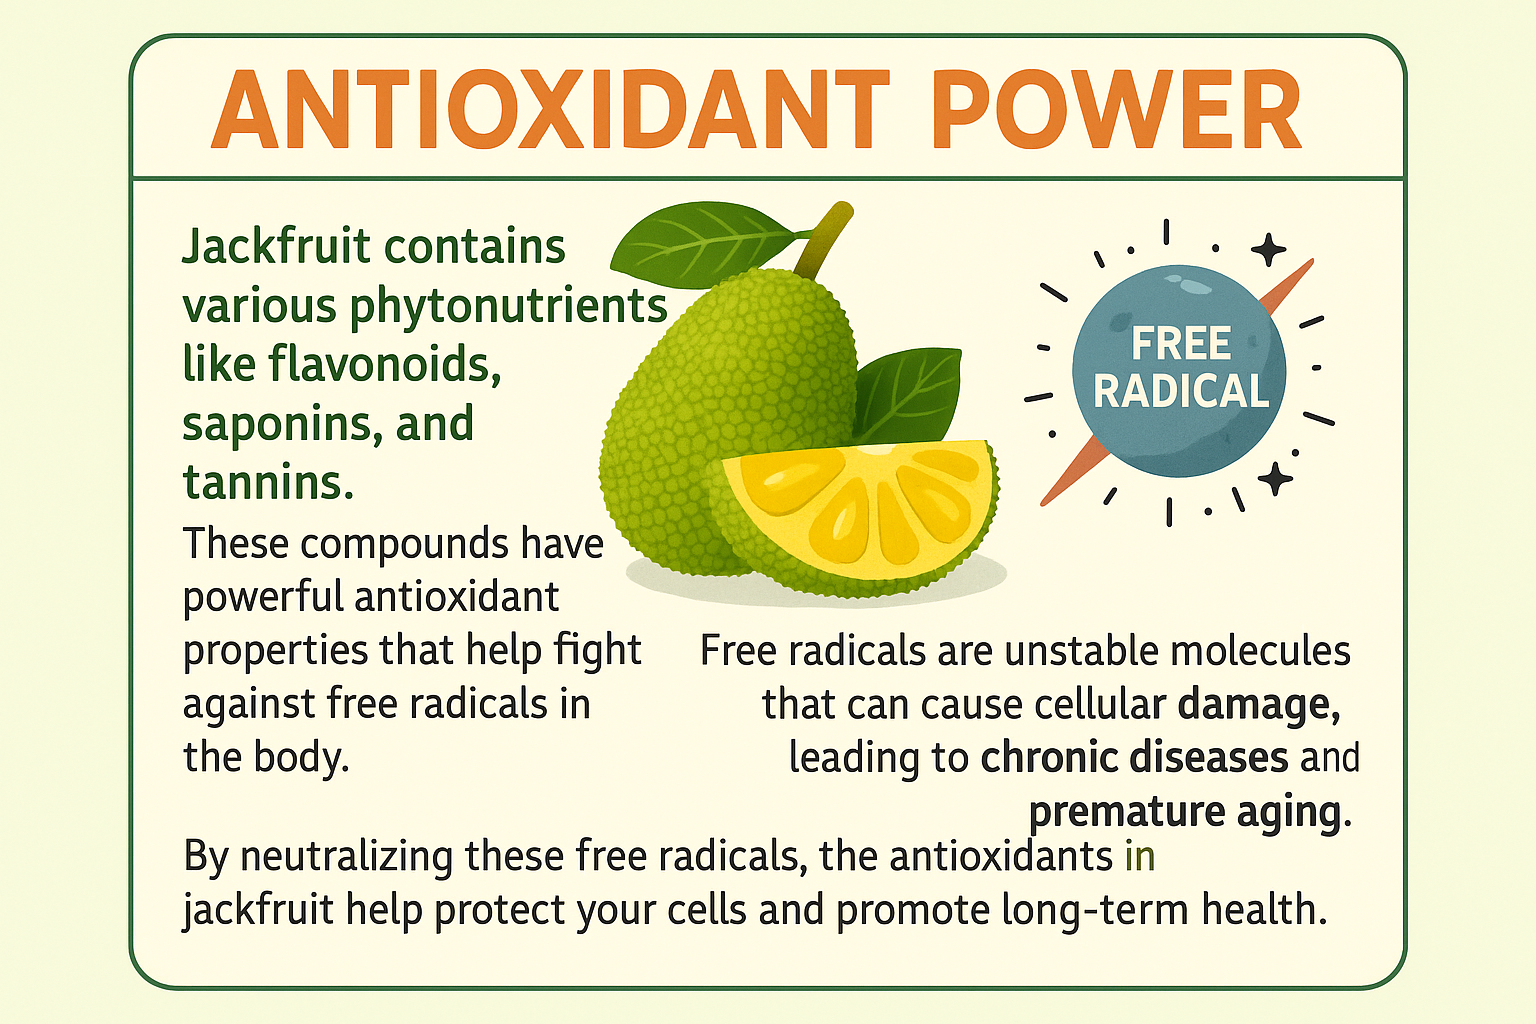
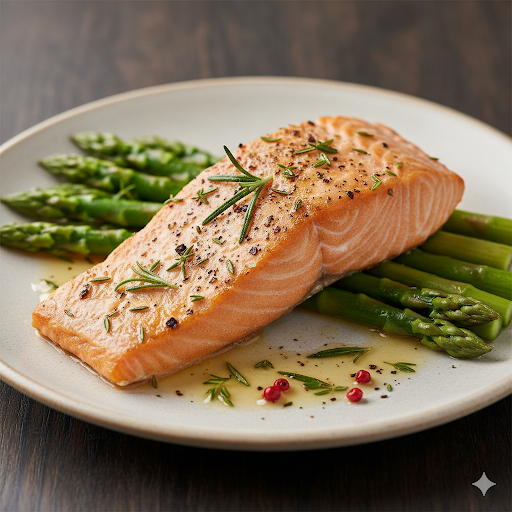
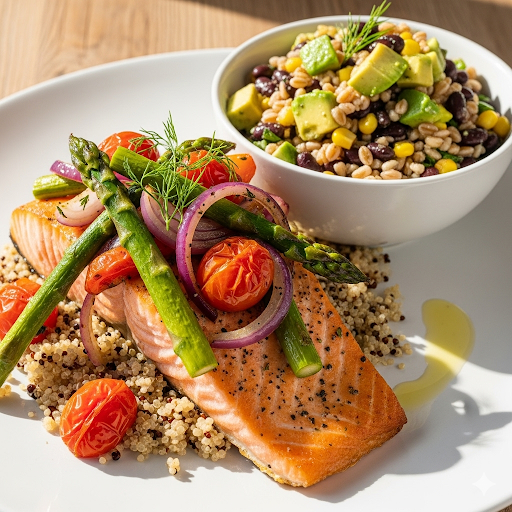
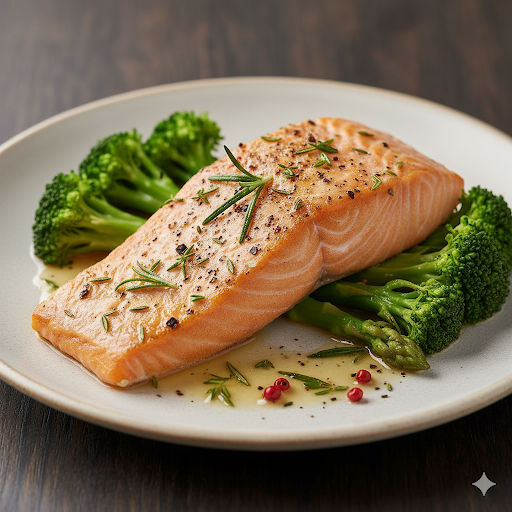
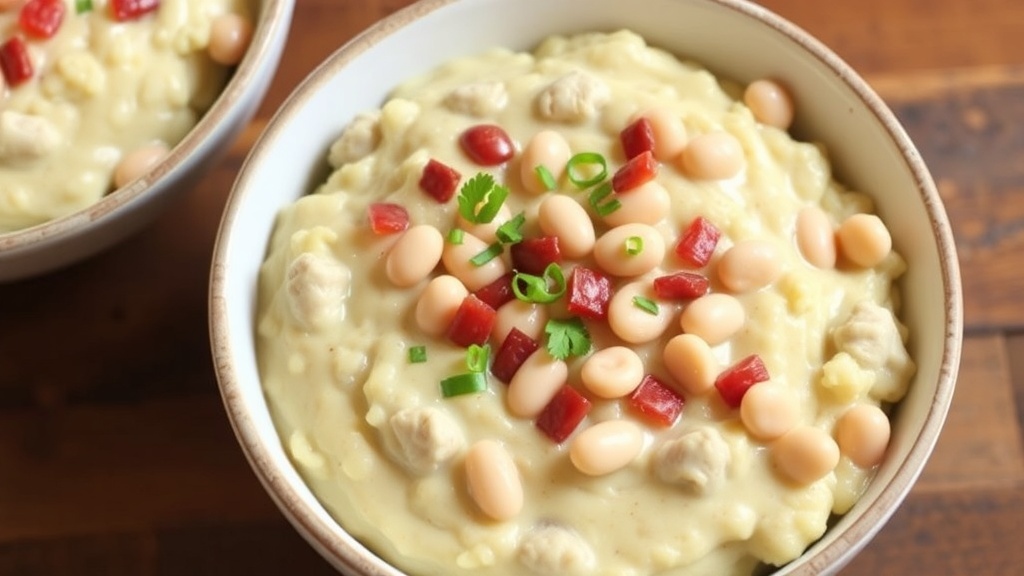
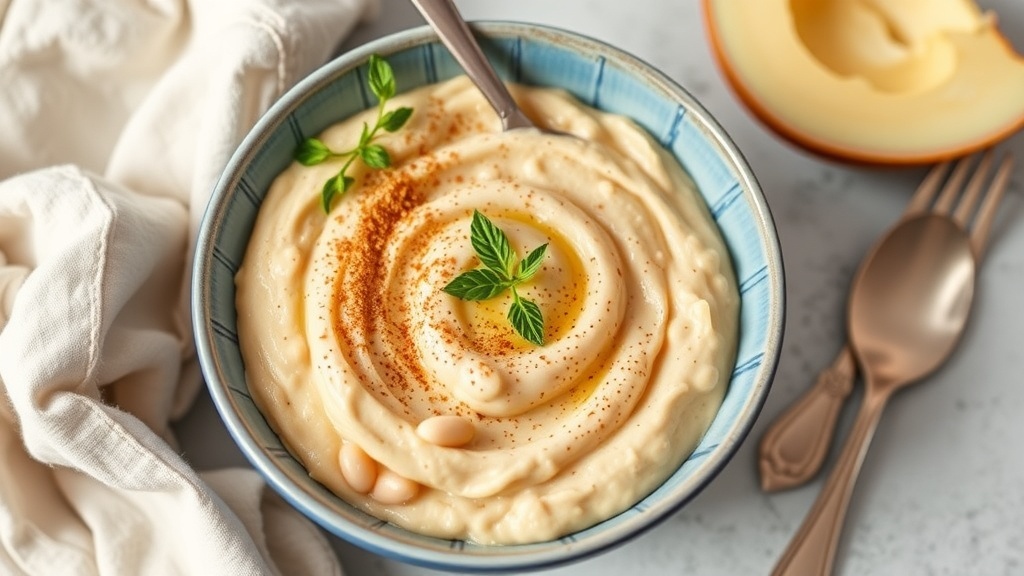
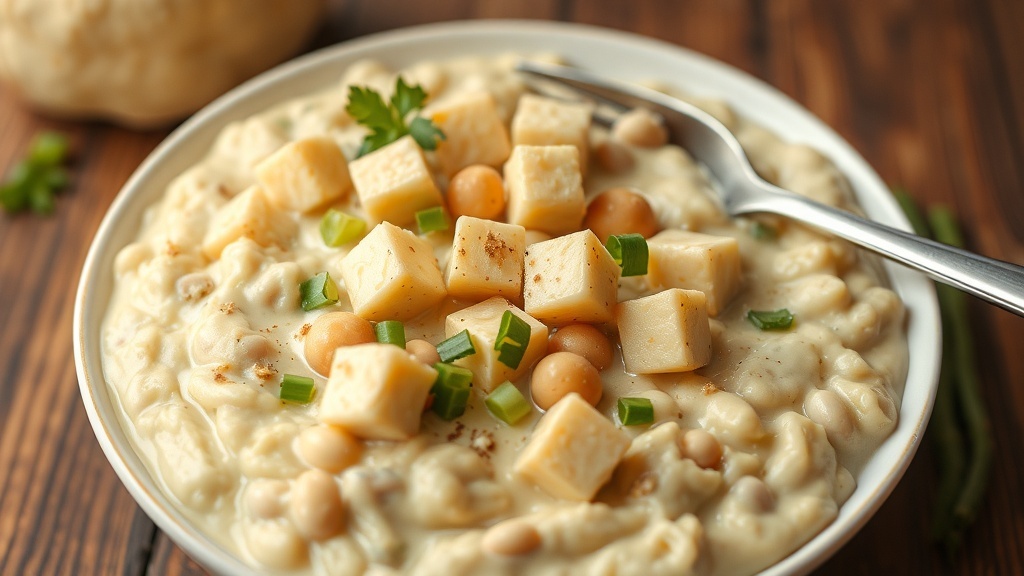
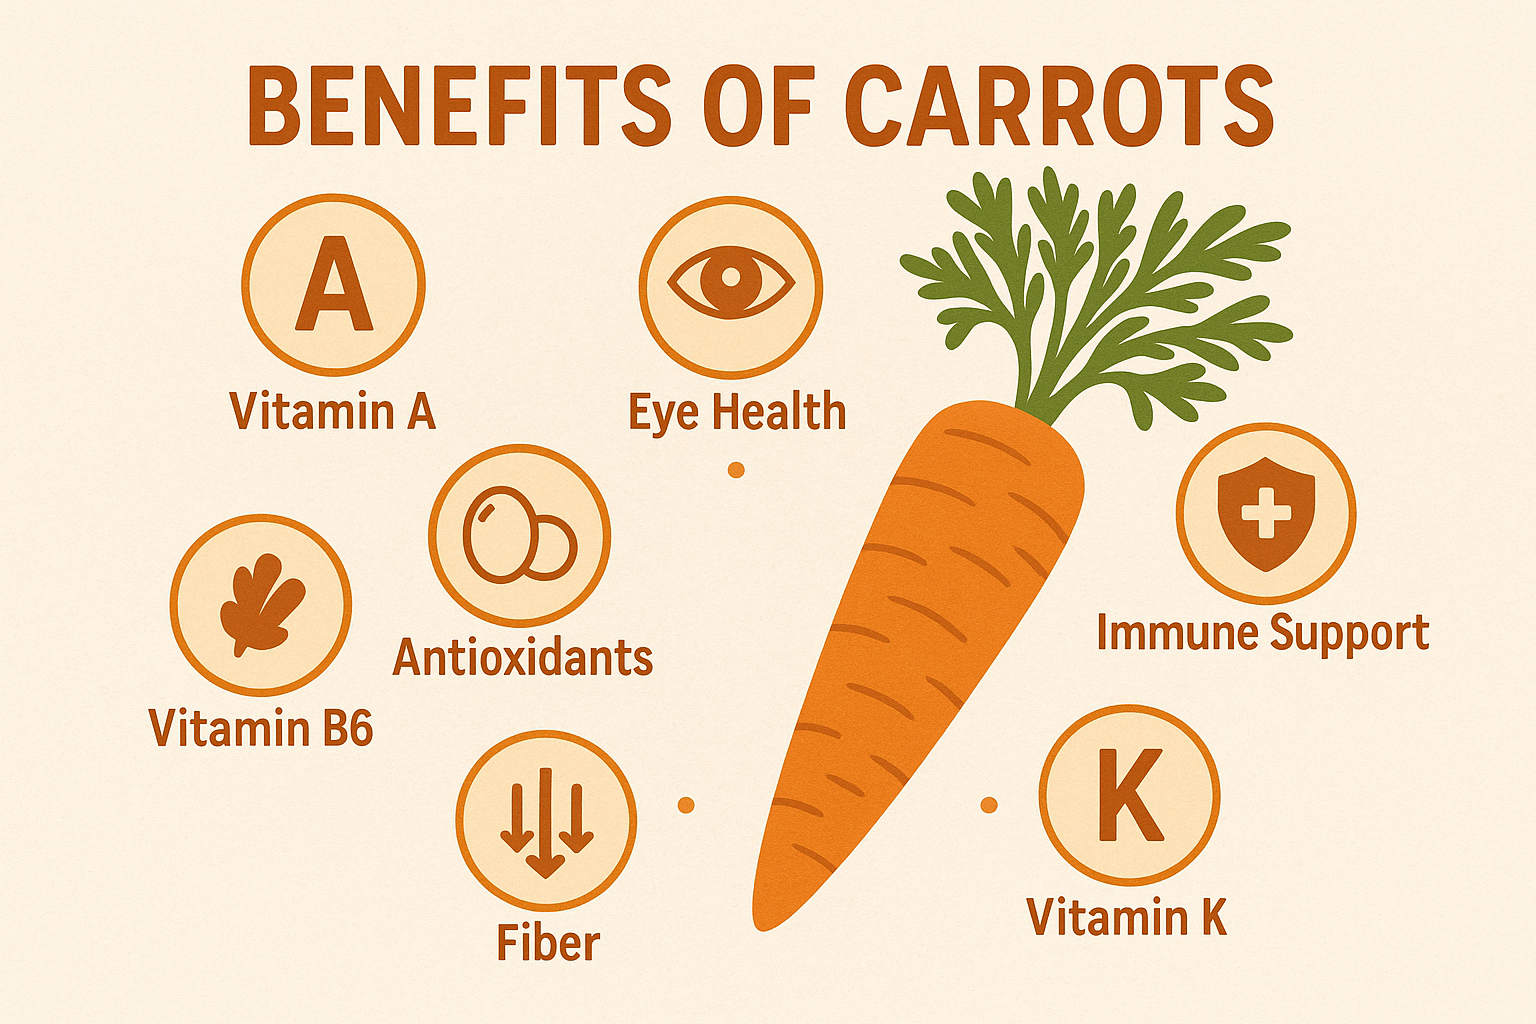
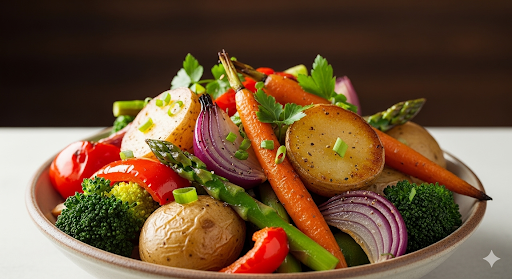
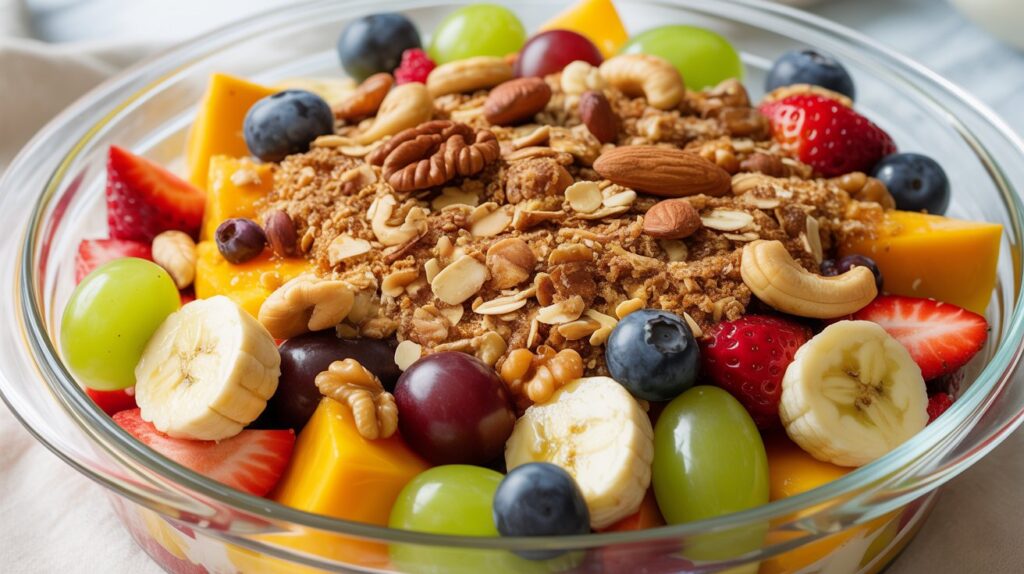
This gallery shows the nutritional benefits from jackfruit. These range from digestive health, hearth health and antioxidant powers.


Variations: Get Creative with Jackfruit

The beauty of jackfruit lies in its versatility. You can easily adapt the basic recipe to suit your tastes or dietary needs.

VariationDescription
Spicy JackfruitAdd a teaspoon of sriracha or a pinch of cayenne pepper to the BBQ sauce for a fiery kick.
Pulled “Pork” SandwichesInstead of pizza, use the prepared BBQ jackfruit to make a delicious sandwich. Serve it on a toasted bun with coleslaw.
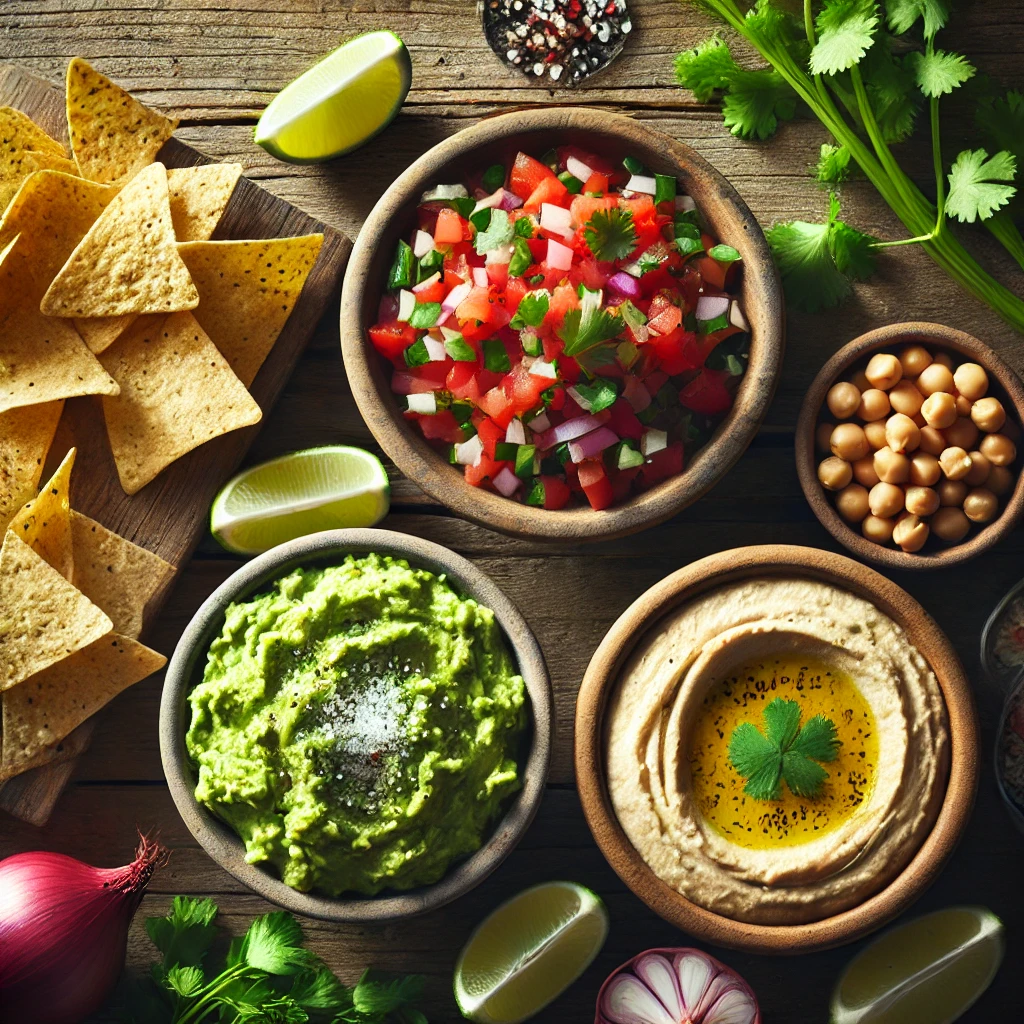
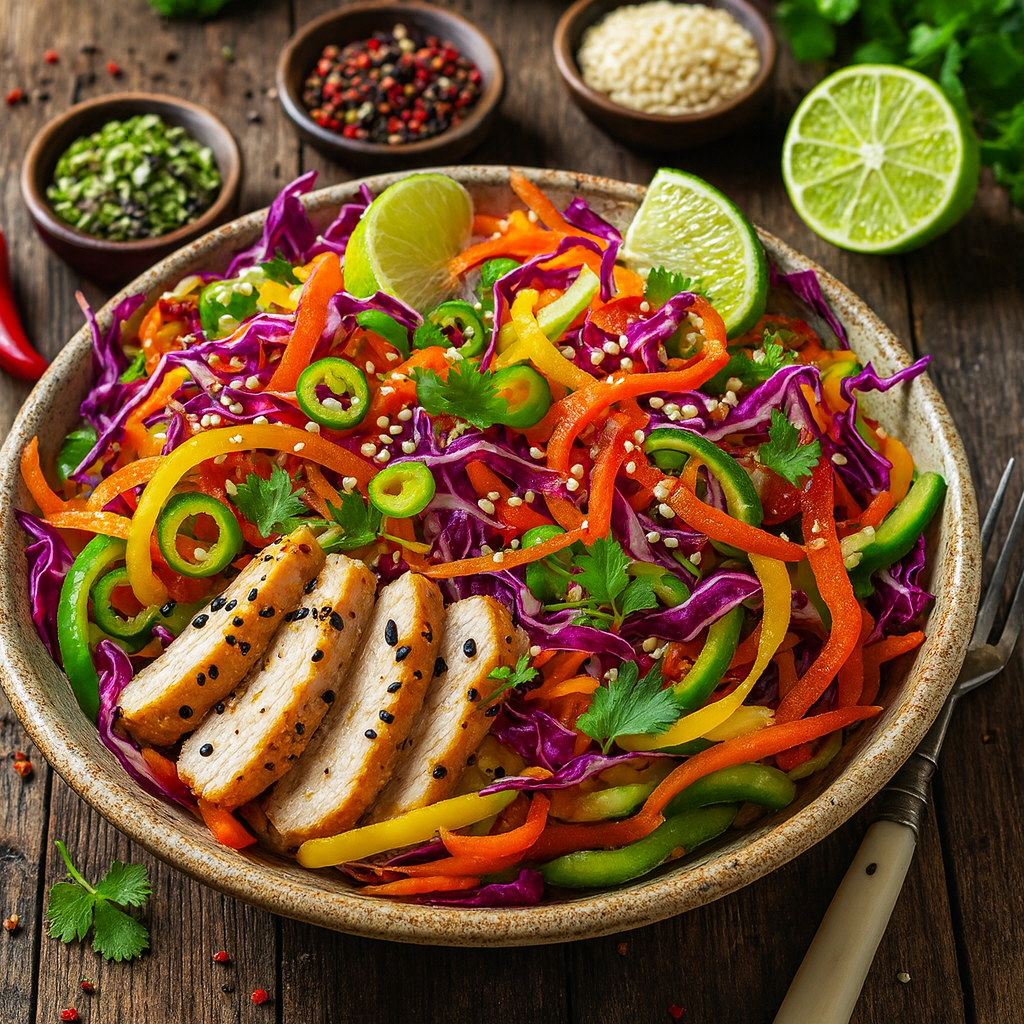
Tacos or NachosUse the savory variety as a filling for tacos or as a topping for nachos. It pairs perfectly with avocado, salsa, and lime.
Jackfruit “Crab” CakesUse a similar preparation method but with different seasonings (like Old Bay) and a binder to form patties. Cook until golden brown.
Sweet JackfruitUse this ripe for sweet applications. It’s perfect for smoothies, ice cream, or a tropical fruit salad.

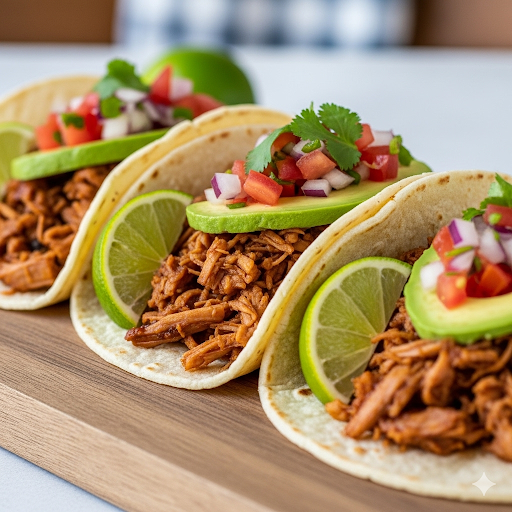
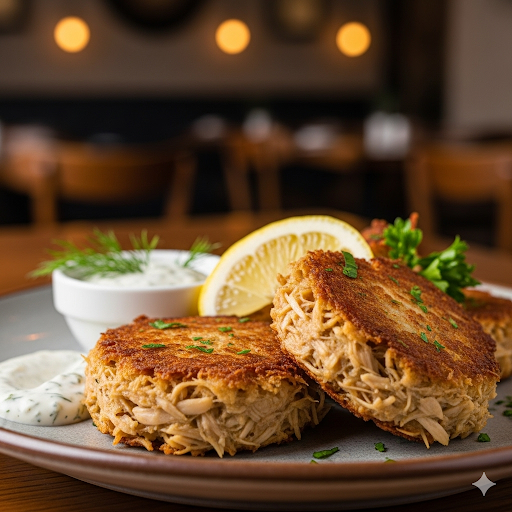
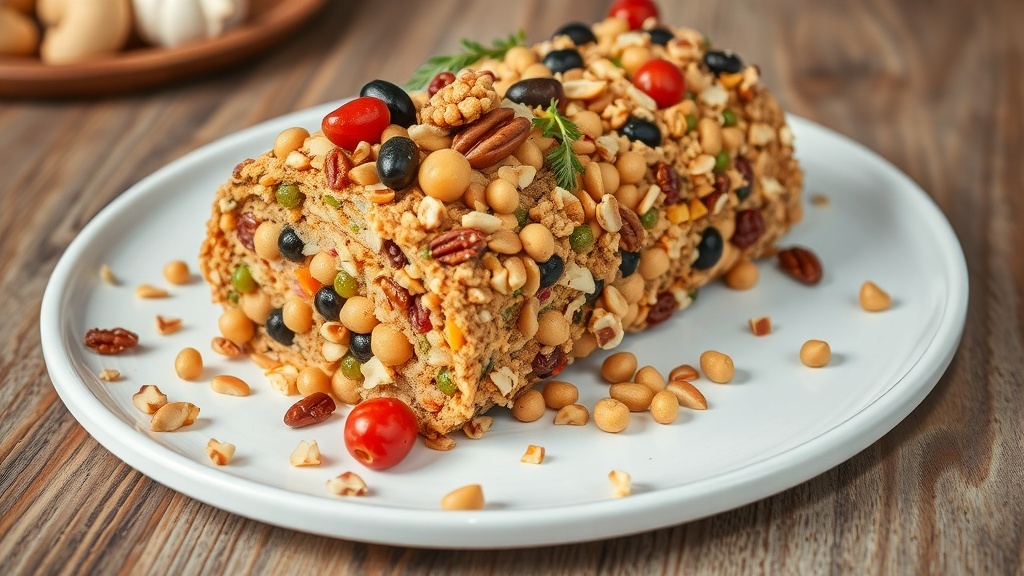
The gallery shows the different options for using jackfruit. The first is jackfruit sandwich, the next is the filling for nachos and the last image is pulled jackfruit “Crab” Cakes.


Final Thoughts: Embrace the Versatility of Jackfruit

Jackfruit is more than just a trendy ingredient; it’s a truly remarkable food that offers a unique combination of culinary versatility, nutritional benefits, and environmental sustainability. From savory meat alternatives to sweet tropical treats, its potential in the kitchen is limitless. This humble fruit is a testament to the incredible bounty of nature and provides a delicious, healthy, and ethical choice for anyone looking to diversify their diet. We encourage you to use the canned variety, try this pizza recipe, and explore the endless possibilities. Your taste buds and your body will thank you!


Frequently Asked Questions (FAQs)

What does canned jackfruit taste like?

Canned young green jackfruit, which is what is used for savory dishes, has a very mild, neutral flavor. This is its main advantage, as it allows it to absorb the flavors of whatever sauce or spices you cook it with. Its taste is not fruity at all, which often surprises people who are new to cooking with it.

Can I use fresh jackfruit for this recipe?

Yes, but it’s much more work. Preparing fresh and unripe can be time-consuming due to its sticky, latex-like sap and tough exterior. Canned young jackfruit is the most convenient option for savory recipes and is widely available in most Asian markets or health food stores. Ripe jackfruit is used for sweet dishes.

Where can I buy jackfruit?

Canned young green jackfruit in water or brine is typically found in the international or Asian foods aisle of most major grocery stores. Health food stores like Whole Foods also carry it. You may also find it in specialty stores or online retailers.


References


Recent Posts


Quick Baked Lemon Salmon You’ll Love


This recipe for Baked Lemon Salmon is more than just a meal; it’s a game-changer for your weekly menu. We believe that healthy eating should be both delicious and incredibly easy to prepare. This simple method ensures you can have a gourmet-tasting dish on your table with minimal effort, making it the perfect go-to.


The image shows Baked Lemon Salmon on a plate.
Baked Lemon Salmon

A Flaky, Flavorful Masterpiece for Any Night of the Week

Are you tired of feeling like healthy eating means hours of prep and complicated recipes? We’ve all been there, standing in the kitchen after a long day, wanting a nutritious meal but lacking the energy to make it happen. The good news is, a truly delicious and nourishing dinner doesn’t have to be a major project. This recipe for Baked Lemon Salmon is the perfect solution, proving that wholesome, impressive food can be ready in a flash.

Imagine serving a beautiful, golden-brown salmon fillet, perfectly flaky and infused with the bright, zesty flavors of lemon and fresh herbs. This isn’t just a fantasy; it’s a delicious reality that can be yours in less than 20 minutes. The simplicity of this dish is its greatest strength, allowing the natural, rich flavors of the salmon to shine without getting lost in a list of complex steps. It’s the kind of meal that makes you feel like a pro chef, even if you’re a complete beginner.

What Makes This Quick Baked Lemon Salmon a Game-Changer

What makes this particular Baked Lemon Salmon recipe so special is how little effort it requires for such a big payoff. By simply layering the salmon with a few key ingredients and baking it, you create a meal that’s both elegant and incredibly simple. It’s a foolproof method that guarantees a perfectly cooked fish every time, freeing you up to enjoy the process and the final result. No more guesswork or worrying about overcooking!

This recipe is more than just a set of instructions; it’s an invitation to simplify your life and eat well. We’ll guide you through every step, from picking the best salmon to mastering the simple technique that ensures your fish is moist and flavorful. You’ll discover how a few fresh ingredients can completely transform a meal, making it an experience to savor. Get ready to add a new staple to your repertoire—a dish you’ll be excited to make again and again.

So, let’s dive in and unlock the secrets to this amazing dish. Whether you’re cooking for one or for a whole family, this guide will empower you to create a healthy, restaurant-quality meal right in your own home. Get ready to bake, relax, and enjoy your way to a healthier, happier dinner routine!


The gallery shows sliced lemons in a bowl, baked salmon and fresh sprigs of dill.


Your Go-To Weeknight Salmon

Time to Prepare: 5 minutes

Time to Cook: 15 minutes

Servings: 4


Nutritional Information (per serving, estimated)

  • Calories: 350-400 kcal
  • Protein: 30-35g
  • Omega-3 Fatty Acids: 1.5-2g
  • Fat: 20-25g (of which Saturated: 3-4g)
  • Sodium: 250-300mg (can be reduced with low-sodium seasonings)
  • Vitamin D: 80% Daily Value
  • Vitamin B12: 200% Daily Value

Essential Equipment for Your Baked Lemon Salmon

Having the right tools on hand makes preparing this Baked Lemon Salmon recipe a breeze. Here’s a short list of what you’ll need to get started:

  • Baking Dish: A large baking dish or sheet pan is perfect for this recipe. A sheet pan with a rimmed edge is ideal to contain the juices and prevent spills.
  • Small Bowl: For whisking together your seasoning mixture.
  • Whisk or Fork: To combine the seasonings smoothly.
  • Cutting Board: A clean, sturdy surface for slicing your lemons and preparing the salmon.
  • Sharp Knife: Essential for easily and cleanly slicing the lemon.
  • Measuring Spoons and Cups: For accurate ingredient measurement, ensuring the perfect balance of flavors in your seasoning.

The gallery shows some of the equipment used in this recipe. The first image is a chopping board, then a baking dish and then a mixing bowl.


Ingredients for Your Perfect Baked Lemon Salmon

Gathering all your ingredients before you start cooking, a practice known as “mise en place,” will make this Baked Lemon Salmon recipe even faster and more enjoyable. The hero image is a great guide for what to include.

  • 4 (6-ounce) salmon fillets, skin on or off
  • 1 large lemon, thinly sliced
  • 1 tbsp olive oil
  • 1 tsp dried dill weed (or 2 tsp fresh dill, chopped)
  • 1/2 tsp garlic powder
  • 1/4 tsp salt
  • 1/4 tsp black pepper
  • Optional: Fresh dill sprigs for garnish and a few pink peppercorns

Step-by-Step Instructions: Mastering Your Baked Lemon Salmon

Follow these clear and detailed steps to create a delicious and healthy Baked Lemon Salmon that will impress even yourself! This simple technique guarantees a moist, flavorful fillet every time.

Preheat Your Oven

Start by preheating your oven to 400°F (200°C). This ensures that your oven is at the correct temperature when you put the salmon in, which is key for a quick and even cook. While the oven heats up, you can get all your other ingredients ready.

Prepare the Salmon and Baking Dish

Pat the salmon fillets dry with a paper towel. This step is important because it helps the skin (if you keep it on) get crispier and helps the seasoning stick better. Place the salmon fillets skin-side down in a baking dish or on a rimmed sheet pan. Leave a little space between each fillet so the heat can circulate.

Create the Flavorful Topping

In a small bowl, combine the olive oil, dried dill, garlic powder, salt, and black pepper. Whisk these ingredients together until they are well combined. The olive oil will help to distribute the seasonings evenly and also keep the fish moist while it bakes.

Season the Salmon

Use a brush or the back of a spoon to spread the seasoning mixture evenly over the top of each salmon fillet. Make sure to get a nice, thin layer over the entire surface. This is where all the wonderful flavor comes from!

Add the Lemon Slices

Take your thinly sliced lemon rounds and arrange them beautifully on top of and around the salmon fillets. You can place a few slices directly on top of the fish and scatter the rest around the sides in the baking dish. The lemon will roast and release its bright, zesty flavor, infusing the salmon as it cooks.

Bake to Perfection

Place the baking dish in the preheated oven. Bake for 12 to 15 minutes. The exact time will depend on the thickness of your salmon fillets. A good rule of thumb is to check the salmon after 12 minutes. The salmon is done when it is flaky when you gently press on it with a fork. It should be opaque all the way through, but still moist. Be careful not to overcook, as salmon can become dry very quickly.

Serve and Garnish

Once the salmon is cooked, carefully remove the baking dish from the oven. The lemon slices will be soft and fragrant, and the pan will have a delicious, golden-colored sauce from the lemon juice and olive oil. You can spoon this sauce over the salmon for extra flavor. For a beautiful finish, garnish with fresh dill sprigs and a few pink peppercorns, as seen in the hero image. Serve immediately with your favorite side dishes.


Alternative Cooking Methods

While baking is a fantastic way to cook this Baked Lemon Salmon, here are a couple of other methods you can use to achieve a similar delicious result.

1. Pan-Seared Lemon Herb Salmon:

  • Prep: Follow all the same steps for preparing the salmon and the seasoning mixture.
  • Cook: Heat a large, oven-safe skillet over medium-high heat. Add a little extra olive oil to the pan. Place the salmon fillets, skin-side down, in the hot skillet. Cook for 4-5 minutes until the skin is crispy and golden. Do not move the fish during this time. Flip the fillets and immediately transfer the skillet to the preheated 400°F (200°C) oven. Add the lemon slices to the skillet.
  • Finish: Bake for 5-8 minutes, or until the salmon is cooked through and flaky. The final bake time is shorter because the pan-searing gets the cooking process started quickly.
  • Pros: Creates an incredibly crispy skin and a juicy interior.
  • Cons: Requires more hands-on time and can get smoky.

2. Air Fryer Lemon Herb Salmon:

  • Prep: Prepare the salmon fillets and seasoning mixture as directed.
  • Cook: Place the salmon fillets in the air fryer basket in a single layer, making sure they are not touching. Air fry at 400°F (200°C) for 8-12 minutes, or until cooked through and flaky. There is no need to flip the fish. Add the lemon slices to the air fryer with the salmon for a flavorful result.
  • Pros: Very quick and produces a wonderfully moist result with little to no oil.
  • Cons: Best for a small number of fillets and may require cooking in batches.

The Benefits of This Baked Lemon Salmon

This isn’t just a simple, delicious meal; it’s a powerhouse of nutrition designed to support your health goals. Incorporating this Baked Lemon Salmon into your rotation offers numerous advantages:

  • Rich in Omega-3s: Salmon is one of the best sources of heart-healthy Omega-3 fatty acids, which are essential for brain function, fighting inflammation, and reducing the risk of chronic diseases.
  • High in Protein: Salmon is a complete protein, meaning it contains all nine essential amino acids. This is crucial for building and repairing muscle tissue, supporting a healthy metabolism, and keeping you feeling full and satisfied.
  • Packed with Vitamins and Minerals: This dish is loaded with a wide array of vitamins and minerals. Salmon is an excellent source of Vitamin B12 and D, while the lemon provides a significant dose of Vitamin C, which is vital for immune support and skin health.
  • Supports Brain and Heart Health: The combination of Omega-3s in the salmon and antioxidants in the lemon and dill makes this meal a fantastic choice for supporting both your cardiovascular and cognitive health.
  • Low-Calorie and Nutrient-Dense: This recipe is naturally low in calories but incredibly high in nutrients, making it an excellent choice for anyone looking to manage their weight or improve their overall diet without sacrificing flavor.
  • Easy to Digest: Salmon is a lean protein that is generally easy for the body to digest, making it a great option for a satisfying dinner that won’t leave you feeling weighed down.

The gallery shows the benefits of Salmon. The first image shows the protein and minerals. The next shows the brain and heart health. And the final image, shows the benefits of Omega-3, in salmon.


Variations: Customize Your Baked Lemon Salmon

One of the best things about this Baked Lemon Salmon is its incredible adaptability. Don’t be afraid to get creative and tailor it to your taste or dietary needs.

Variation CategoryIdeas for Customization
Herb SwapsRosemary & Thyme: For an earthy, aromatic flavor, swap the dill for fresh rosemary and thyme sprigs. Parsley & Chives: For a fresher, more subtle flavor, use a blend of fresh parsley and chopped chives.
Cilantro & Lime: For a zesty, South American twist, use chopped cilantro and lime slices instead of dill and lemon.
Flavor BoostsSpicy Kick: Add a pinch of red pepper flakes or a dash of cayenne pepper to the seasoning mixture.
Sweet Glaze: For a slightly sweet and tangy finish, brush the salmon with a tablespoon of honey or maple syrup mixed with the seasonings before baking.
Umami Notes: Add a teaspoon of low-sodium soy sauce or a dash of mushroom powder to the olive oil mixture.
Garlic Lovers: Use 2-3 cloves of fresh minced garlic instead of garlic powder for a more potent flavor.
Vegetable PairingsAsparagus: Lay fresh asparagus spears in the baking dish with the salmon and drizzle with the same seasoning.
Broccoli: Toss broccoli florets with a little olive oil and salt and roast them alongside the salmon.
Cherry Tomatoes: Halve cherry tomatoes and scatter them around the salmon in the baking dish; they will burst and create a sweet sauce.
Serving SuggestionsGrain Bowl: Serve the salmon over a bed of quinoa, farro, or brown rice.
Salad Topper: Flake the cooked salmon and add it to a fresh spinach or arugula salad with a light vinaigrette.
Low-Carb: Pair the salmon with a side of steamed green beans or roasted zucchini noodles.

The gallery shows salmon with Asparagus, the next is salmon with grains and the final palte shows salmon with broccoli.


Final Thoughts on Your Quick Baked Lemon Salmon

There you have it—a comprehensive guide to creating a delicious and healthy Baked Lemon Salmon that is not only incredibly easy to make but also packed with flavor and nutrition. This recipe is designed to be your weeknight hero, rescuing you from the dilemma of “what’s for dinner?” with a satisfying and healthy answer. By keeping the instructions clear and offering a variety of customization options, we hope to empower you to make this dish your own, adapting it to your preferences and whatever fresh ingredients you have on hand.

Don’t let the simplicity fool you; this salmon delivers on taste, texture, and health benefits, making it an ideal choice for anyone looking to eat well without the fuss. We encourage you to give it a try this week and experience firsthand how a truly quick and delicious dinner can transform your routine. Share your creations, experiment with new ingredients, and enjoy the journey of effortless, healthy home cooking. Get ready to put this recipe on repeat!


Frequently Asked Questions (FAQs)

Q1: Can I use frozen salmon for this recipe?

A1: Yes, you can! Frozen salmon works perfectly for this recipe. Just be sure to thaw it completely before you begin the preparation steps. The best way to thaw it is to place the frozen fillet in the refrigerator overnight. If you’re in a hurry, you can thaw it in a sealed bag under cold running water for about 30 minutes. Be sure to pat it very dry before seasoning to ensure the best texture and flavor.

Q2: How do I know if my salmon is cooked properly?

A2: The best way to tell if your salmon is done is by checking its flakiness. Gently press on the top of the thickest part of the fillet with a fork. If the flesh separates easily into flakes, it’s ready. The color should also be opaque and pale pink all the way through, not translucent. If you have a meat thermometer, the internal temperature should be at least 145°F (63°C) at its thickest point.


References

  1. Harvard T.H. Chan – Fish: Friend or Foe?
  2. American Heart Association – Fish and Omega-3 Fatty Acids
  3. U.S. Department of Agriculture –Salmon

Recent Posts


Spaghetti & Turkey Meatballs Made Easy


This recipe for Spaghetti & Turkey Meatballs is a perfect example of comfort food that is both delicious and healthy. We believe that a classic dish should be simple to make without sacrificing flavor. This recipe will show you how to create a satisfying meal that everyone at the table will love.


The image shows Spaghetti & Turkey Meatballs on a plate.
Spaghetti & Turkey Meatballs

A Delicious and Simple Twist on a Classic Comfort Meal

There are few dishes that evoke the same feeling of warmth and home as a big bowl of spaghetti and meatballs. It’s a timeless classic, a meal that brings families together and fills the kitchen with an irresistible aroma. But for many, the idea of making homemade meatballs from scratch feels like a daunting task, reserved only for special occasions or Sunday dinners. We’re here to change that. We want to show you how easy it is to bring this beloved meal to your table on any night of the week.

This isn’t just any meatball recipe; it’s a modern, health-conscious take on a classic. By using lean ground turkey instead of traditional beef, we’re creating a lighter, healthier version that’s just as rich in flavor and wonderfully tender. This simple swap doesn’t just cut down on saturated fat; it also gives the meatballs a delicate texture that pairs perfectly with a vibrant, simple tomato sauce. It’s the kind of dish that makes you feel good about what you’re eating.


Why Our Spaghetti & Turkey Meatballs Recipe is a Game-Changer

What makes this particular Spaghetti & Turkey Meatballs recipe so special is its focus on simplicity and flavor. We’ve streamlined the process to ensure that even the most inexperienced cook can achieve a delicious, restaurant-quality result. The secret lies in a few key ingredients and a straightforward method that builds flavor at every stage. We’ll show you how to form the perfect meatballs, create a rich sauce, and combine it all for a truly satisfying meal that is anything but complicated.

This recipe is more than just instructions; it’s an invitation to reclaim your kitchen and enjoy the process of cooking. We’ll walk you through every step, from selecting the right ingredients to mastering the technique that ensures your meatballs are perfectly cooked and your sauce is full of life. You’ll be amazed at how quickly this classic can come together, giving you more time to spend with the ones you love.

So, let’s dive in and unlock the secrets to this amazing dish. Whether you’re cooking for your family or a simple dinner for yourself, this guide will empower you to create a beautiful and nourishing meal right in your own home. Get ready to mix, roll, and simmer your way to a healthier, happier dinner routine!


The gallery shows a bowl of marinara sauce in a bowl, next is the raw ground Turkey and the final image shows finely chopped onions in a bowl.


Your Go-To Weeknight Meal

Time to Prepare: 15 minutes

Time to Cook: 35 minutes

Servings: 4-6


Nutritional Information (per serving, estimated)

  • Calories: 500-600 kcal
  • Protein: 30-35g
  • Carbohydrates: 60-70g
  • Fat: 15-20g (of which Saturated: 4-5g)
  • Fiber: 7-9g
  • Sodium: 400-600mg (can be reduced with low-sodium ingredients)

Essential Equipment for Your Spaghetti & Turkey Meatballs

Having the right tools on hand makes preparing this Spaghetti & Turkey Meatballs a breeze. Here’s what you’ll need to get started:

  • Large Pot or Dutch Oven: Essential for cooking your spaghetti and simmering the sauce. A heavy-bottomed pot is best for even heat distribution.
  • Large Skillet: For browning the turkey meatballs. A non-stick skillet can be helpful, but any large skillet will work.
  • Large Mixing Bowl: For combining all of the meatball ingredients.
  • Cutting Board and Sharp Knife: For preparing the garlic and other ingredients.
  • Measuring Cups and Spoons: For accurate ingredient measurement.
  • Tongs or Slotted Spoon: For easily transferring the meatballs from the skillet to the sauce.
  • Serving Plate: To plate your finished dish beautifully.

The gallery shows a large pot, chopping board and knife and a frying pan.


Ingredients for Your Perfect Spaghetti & Turkey Meatballs

Gathering all your ingredients before you start cooking, a practice known as “mise en place,” will make this Spaghetti & Turkey Meatballs recipe even faster and more enjoyable. The hero image is a great guide for what to include.

For the Turkey Meatballs:

  • 1 lb (450g) lean ground turkey
  • 1/2 cup whole-wheat breadcrumbs
  • 1/4 cup finely chopped onion
  • 2 cloves garlic, minced
  • 1/4 cup grated Parmesan cheese
  • 1 large egg
  • 1 tbsp fresh parsley, chopped
  • 1/2 tsp dried oregano
  • 1/2 tsp salt
  • 1/4 tsp black pepper
  • 1 tbsp olive oil (for browning)

For the Sauce & Pasta:

  • 1 (24-ounce) jar low-sodium marinara sauce
  • 1 lb (450g) whole-wheat spaghetti
  • Optional: Fresh basil leaves for garnish


Step-by-Step Instructions: Mastering Your Spaghetti & Turkey Meatballs

Follow these clear and detailed steps to create a delicious and healthy Spaghetti & Turkey Meatballs that will impress even yourself! This simple technique guarantees a tender meatball and a flavorful sauce every time.

Prepare the Meatball Mixture

In a large mixing bowl, gently combine the ground turkey, whole-wheat breadcrumbs, chopped onion, minced garlic, grated Parmesan cheese, egg, chopped fresh parsley, dried oregano, salt, and black pepper. Use your hands to mix everything together, but be careful not to overmix, as this can make the meatballs tough. The mixture should be well combined but still light.

Form the Meatballs

Take a small amount of the mixture (about 1.5 to 2 tablespoons) and gently roll it into a round ball in the palm of your hand. Continue this process until all of the mixture has been formed into meatballs. You should get about 16 to 20 meatballs, depending on the size. Place them on a plate or baking sheet as you go.

Brown the Meatballs

Heat 1 tablespoon of olive oil in a large skillet or Dutch oven over medium-high heat. Carefully place the meatballs in the hot pan, making sure not to overcrowd it. If necessary, brown them in two batches. Cook for 5-7 minutes, turning them gently with tongs or a spatula until they are browned on all sides. They do not need to be cooked through at this stage. Once browned, remove the meatballs from the skillet and set them aside on a plate.

Simmer the Sauce

Reduce the heat to low. Pour the jar of marinara sauce into the same skillet or Dutch oven you used for the meatballs. Scrape up any browned bits from the bottom of the pan with a wooden spoon—this is called fond, and it adds incredible flavor to the sauce. Return the browned meatballs to the pan, nestling them into the sauce.

Let it All Simmer

Bring the sauce to a low simmer. Cover the pan and let the meatballs cook gently in the sauce for about 20 minutes. This allows the flavors to meld together and ensures the meatballs are cooked all the way through and become incredibly tender and juicy.

Cook the Spaghetti

While the meatballs are simmering, bring a large pot of salted water to a rolling boil. Add the whole-wheat spaghetti to the boiling water and cook according to the package directions, or until al dente. This usually takes about 9-11 minutes.

Drain and Combine

Once the spaghetti is cooked, carefully drain it in a colander. Do not rinse the pasta, as the starch on the outside helps the sauce cling to it. Return the drained spaghetti to its pot and toss it with a ladle or two of the simmering sauce. This coats the pasta and prevents it from sticking together.

Serve and Garnish

To serve, create a bed of spaghetti on each plate. Top with a few meatballs and a generous amount of sauce. For a beautiful finish, garnish with fresh basil leaves, a sprinkle of grated Parmesan cheese, and a drizzle of extra virgin olive oil, as seen in the hero image. Serve immediately and enjoy!

Alternative Cooking Methods

While browning the meatballs in a skillet is the classic method, you can also bake or air fry them for a less messy process.

1. Baked Meatballs:

  • Prep: Follow all the same steps for preparing the meatball mixture and forming the meatballs.
  • Cook: Arrange the meatballs in a single layer on a parchment paper-lined baking sheet. Bake in a preheated oven at 400°F (200°C) for 15-20 minutes, or until the meatballs are cooked through and browned. There’s no need to turn them.
  • Finish: Once baked, gently add them to the simmering marinara sauce and let them simmer for at least 15 minutes to absorb the flavors.
  • Pros: Less messy and hands-off cooking.
  • Cons: You lose some of the rich flavor from the browned bits in the skillet.

2. Air Fryer Meatballs:

  • Prep: Prepare the meatball mixture and form the meatballs.
  • Cook: Place the meatballs in a single layer in your air fryer basket, ensuring they are not touching. Air fry at 400°F (200°C) for 10-15 minutes, or until cooked through and golden brown.
  • Finish: Once air-fried, add them to the simmering marinara sauce and let them simmer for at least 15 minutes.
  • Pros: Fast and achieves a nice, crispy exterior without a lot of oil.
  • Cons: May require cooking in multiple batches.

The Benefits of This Spaghetti & Turkey Meatballs

This isn’t just a delicious comfort food; it’s a dish packed with nutritional benefits that support your health. Incorporating this Spaghetti & Turkey Meatballs into your rotation offers numerous advantages:

  • High in Lean Protein: Using ground turkey provides a significant amount of lean protein, which is essential for muscle growth, repair, and keeping you feeling full and satisfied.
  • Heart-Healthy: Lean ground turkey is lower in saturated fat compared to ground beef, which is beneficial for heart health. The olive oil used is also a source of healthy monounsaturated fats.
  • Nutrient-Rich: The simple marinara sauce is made from tomatoes, which are a great source of lycopene, a powerful antioxidant that supports heart health.
  • Fiber-Filled: By using whole-wheat spaghetti, you’re adding valuable dietary fiber to your meal. Fiber is crucial for digestive health, blood sugar control, and maintaining a healthy weight.
  • Satisfying and Wholesome: This meal is a complete package—it contains lean protein, complex carbohydrates, and plenty of vitamins and minerals. It’s a truly satisfying meal that fuels your body without leaving you feeling sluggish.

The egallery shows the benefits of ground turkey, marinara sauce and whole wheat spaghetti.


Variations: Customize Your Spaghetti & Turkey Meatballs

One of the best things about this Spaghetti & Turkey Meatballs is its incredible adaptability. Don’t be afraid to get creative and tailor it to your taste or what you have available.

Variation CategoryIdeas for Customization
Pasta SwapsGluten-Free Pasta: Easily swap whole-wheat spaghetti for your favorite gluten-free pasta (made from rice, corn, or quinoa).
Zucchini Noodles: For a low-carb option, serve the meatballs and sauce over spiralized zucchini noodles (zoodles).
Different Shapes: Use penne, rigatoni, or fettuccine for a fun change of texture.
Protein SwapsGround Chicken: Substitute lean ground chicken for the turkey. The result will be very similar.
Lentils or Mushrooms: For a vegetarian option, use a blend of cooked lentils and finely chopped mushrooms as a plant-based substitute for the meat.
Sauce EnhancementsVegetable Boosts: Sauté finely diced carrots, celery, or bell peppers with the onion for added nutrients and flavor.
Spicy Kick: Add a pinch of red pepper flakes to the sauce as it simmers for a little heat.
Creamy Texture: Stir a tablespoon of low-fat cream cheese or a splash of milk into the sauce at the end for a richer finish.
Herb AdditionsRosemary: For an earthy flavor, add a teaspoon of fresh or dried rosemary to the meatball mixture.
Oregano: For a bolder taste, increase the oregano in the meatballs or sauce.
Bay Leaf: Add one bay leaf to the sauce as it simmers and remove it before serving for a subtle herby flavor.

The gallery shows Lentil meatballs, the next is Turkey meatblls and the final bowl are Vegetable meatballs.


Final Thoughts on Your Easy Spaghetti & Turkey Meatballs

There you have it—a comprehensive guide to creating a delicious and healthy Spaghetti & Turkey Meatballs that is not only incredibly easy to make but also packed with flavor and nutrition. This recipe is designed to be your weeknight hero, rescuing you from the dilemma of “what’s for dinner?” with a satisfying and healthy answer. By keeping the instructions clear and offering a variety of customization options, we hope to empower you to make this dish your own, adapting it to your preferences and whatever fresh ingredients you have on hand.

Don’t let the simplicity fool you; this dish delivers on taste, texture, and health benefits, making it an ideal choice for anyone looking to eat well without the fuss. We encourage you to give it a try this week and experience firsthand how a truly simple dinner can transform your routine. Share your creations, experiment with new ingredients, and enjoy the journey of effortless, healthy home cooking. Get ready to put this recipe on repeat!


Frequently Asked Questions (FAQs)

Q1: Why are my meatballs falling apart?

A1: Your meatballs may be falling apart because the mixture is too wet or you haven’t used a binding agent. The breadcrumbs and egg in this recipe are crucial for holding the meatballs together. Make sure you don’t use more than the recommended amount of liquid ingredients and that you don’t overmix the mixture. Gently but firmly rolling them can also help them hold their shape better.

Q2: Can I freeze the meatballs for later?

A2: Yes, you can! This is a great meal prep option. You can either freeze the cooked meatballs on their own or freeze them in the sauce. To freeze cooked meatballs, let them cool completely, then place them in an airtight freezer-safe container or bag. They will last for up to three months. When you’re ready to use them, you can thaw them in the fridge overnight and then reheat them gently in a pot of sauce on the stove.


References

  1. Harvard T.H. Chan – Protein
  2. American Heart Association- Fiber Up, Slim Down
  3. Time Health- What is Lycopene?

Recent Posts


Eating White: Healthy Foods You Need to Try


Discover the surprising health benefits of ‘eating white.’ This guide explores a variety of nutritious, pale-colored foods. Learn how to incorporate a rainbow of goodness, starting with the surprising ‘eat white’ trend.


The image shows a number of food items that are benefical if you are just Eating White foods, to maintain have a Healthy lifestyle.
Healthy White Foods

The Surprising World of ‘Eating White’ Foods

When it comes to healthy eating, we’re often told to “eat the rainbow.” While this is excellent advice, it can sometimes lead us to overlook a whole category of incredibly beneficial foods: white foods.

These often-misunderstood ingredients are a powerhouse of nutrition, packed with essential vitamins, minerals, and unique compounds that support our well-being in countless ways. From the humble cauliflower to the potent garlic, the world of eating white foods offers a surprising array of flavors and textures that can elevate your meals and boost your health.

Many people mistakenly believe that white foods are simply empty calories, devoid of the nutrients found in their more colorful counterparts. However, this couldn’t be further from the truth. In fact, many white foods, such as mushrooms, onions, and potatoes, are rich in potassium, fiber, and powerful antioxidants. Incorporating these foods into your diet is a simple and delicious way to ensure you’re getting a well-rounded mix of nutrients.

Why You Need to start Eating White Foods

This article will delve into the incredible world of eating white foods, showcasing their nutritional profiles and culinary versatility. We’ll explore not just a list of these foods, but also a delicious and easy-to-follow recipe that incorporates many of them. Get ready to rethink what it means to eat a colorful and healthy diet, starting with the simple, elegant, and powerful white plate.

We’ll focus on a recipe that highlights the versatility and flavor of white ingredients, creating a dish that is both nourishing and satisfying. The goal is to prove that “eating white” isn’t a limitation; it’s an opportunity to discover new flavors and enhance your health. Prepare to be inspired to add more of these wholesome foods to your daily routine.

The recipe we’ll be sharing is a creamy and savory White Bean and Cauliflower Mash, a perfect side dish or a light main course. It’s a testament to how simple ingredients can create something truly special. This dish is not only delicious but also packed with fiber, protein, and essential nutrients that will leave you feeling full and energized.


The gallery shows a bowl of cauliflower florets, a glass of insweetened Almond milk and Navy beans.


A Recipe for Wholesome Comfort: Creamy White Bean and Cauliflower Mash

This recipe is designed to be simple yet incredibly flavorful, proving that healthy eating doesn’t have to be complicated.

It takes cues from the classic mashed potato but swaps in more nutrient-dense ingredients for a lighter, fiber-rich alternative. The combination of creamy beans and soft cauliflower creates a smooth, comforting texture that pairs well with almost any main course.

Time to Prepare: 15 minutes

Time to Cook/Blend: 25-30 minutes

Servings: 4


Nutritional Information For eating white foods

This dish is a nutritional powerhouse. Each serving is rich in plant-based protein and dietary fiber from the white beans, which are excellent for digestive health and help you feel full longer.

The cauliflower provides a significant dose of Vitamin C and Vitamin K, while also being low in calories. Olive oil contributes heart-healthy monounsaturated fats. This recipe is also naturally gluten-free and can be easily made dairy-free by using a non-dairy milk alternative.


Equipment

  • Large pot with a lid
  • Steamer basket (optional, but recommended)
  • High-speed blender or food processor
  • Large mixing bowl
  • Measuring cups and spoons
  • Garlic press or a knife for mincing

The gallery shows some of the equipment used in this recipe.


Ingredients for Eating White foods

  • 1 large head of cauliflower, chopped into florets
  • 2 cans (15 ounces each) of cannellini or navy beans, rinsed and drained
  • 3-4 cloves of garlic, minced
  • 2 tablespoons of extra virgin olive oil
  • ½ cup of unsweetened almond milk or other milk of choice (more for a thinner consistency)
  • Salt and black pepper to taste
  • Optional garnishes: fresh basil leaves, a sprinkle of ground white pepper, a drizzle of olive oil

Step-by-Step Instructions

Prepare the Cauliflower

Wash the head of cauliflower thoroughly. Using a sharp knife, carefully chop the cauliflower into small, uniform florets. This ensures they cook evenly.

Cook the Cauliflower

Place the cauliflower florets into a large pot with a steamer basket and about an inch of water at the bottom. Bring the water to a boil, then cover the pot and steam the cauliflower for 10-15 minutes, or until the florets are very tender and can be easily pierced with a fork.

Alternatively, you can boil the cauliflower directly in the water until soft, but steaming helps retain more nutrients. Once cooked, drain the cauliflower completely, ensuring all excess water is removed. This is a crucial step for achieving a thick, creamy consistency.

Prepare the Aromatics

While the cauliflower is steaming, heat the olive oil in a small pan over medium-low heat. Add the minced garlic and sauté for 1-2 minutes until fragrant. Be careful not to let the garlic brown, as this can make it taste bitter.

Combine and Blend

Transfer the hot, drained cauliflower to a high-speed blender or food processor. Add the rinsed and drained white beans, the sautéed garlic and olive oil, and start with a quarter cup of the milk.

Achieve Creaminess

Begin blending the ingredients on a low speed, gradually increasing to high. Pause the blender occasionally to scrape down the sides with a spatula. Slowly add more milk, a tablespoon at a time, until you reach your desired consistency—smooth and creamy, but not watery. The amount of milk you use will depend on how soft your cauliflower is and how thick you prefer the mash.

Season and Serve

Once the mash is perfectly smooth, transfer it to a serving bowl. Stir in salt and pepper to taste. You’ll likely need more salt than you think to bring out the flavors. Garnish with fresh basil or a drizzle of olive oil for a beautiful finish. Serve immediately while warm.


The Benefits of eating White Foods

‘Eating white’ isn’t about giving up color; it’s about embracing a category of foods with powerful health perks. The key is to include them as part of a balanced diet that also features vibrant fruits and vegetables.

Cardiovascular Health

Many white foods, particularly those in the onion and garlic family, contain allicin, a compound that has been linked to lower blood pressure and cholesterol levels. Garlic and onions are also rich in flavonoids, which have anti-inflammatory and antioxidant properties that protect heart health.

Immune System Support

Certain white foods, like mushrooms, are packed with B vitamins and selenium, which play a critical role in supporting the immune system. The allicin in garlic is also a known immune booster, helping the body fight off infections.

Digestive Wellness

White foods like cauliflower and beans are excellent sources of dietary fiber. Fiber is essential for a healthy digestive system, promoting regular bowel movements and feeding the beneficial bacteria in your gut. This contributes to overall gut health and may reduce the risk of digestive diseases.


The gallery shows the benefits of eating white foods have on your digestive system, your immune system and your cardiovascular health.


Variations to Customize Your Dish

The beauty of this recipe is its flexibility. You can easily adapt it to suit your taste or dietary needs.

Variation CategorySuggestions
Flavor BoostersStir in 1-2 tablespoons of nutritional yeast for a cheesy flavor. Add a pinch of nutmeg or a sprig of fresh thyme to the blender for a different aroma. Roast the cauliflower and garlic before blending for a deeper, nuttier flavor.
Protein & TextureAdd cubed firm tofu or chickpeas to the mash for extra protein. For a richer, creamier texture, stir in a dollop of Greek yogurt or a tablespoon of unsalted butter at the end.
Spice LevelAdd a pinch of white pepper for a subtle heat, or stir in a dash of cayenne pepper for a spicier kick.
Dietary AdaptationsTo make it dairy-free, use a plant-based milk and ensure any added butter is vegan. To make it low-carb, simply use more cauliflower and fewer beans.

The gallery shows different variations to the main recipe. Image one, is Creamy White Bean and Cauliflower Mash, image two, has had cinnamon added and the third image, cubed tofu has been added to the dish.


Final Thoughts on Eating White Foods

Embracing white foods is a simple yet effective way to add more diversity and nutrient density to your diet. They are versatile, delicious, and offer a host of health benefits that are too good to ignore. From the heart-healthy properties of garlic and onions to the gut-friendly fiber in cauliflower and beans, these foods are a testament to the fact that nutritional value isn’t limited by color. So next time you’re at the grocery store, don’t overlook the produce that’s a shade of white. Your body will thank you for it.

This recipe for Creamy White Bean and Cauliflower Mash is just one example of the many delicious ways to incorporate these foods into your meals. We encourage you to experiment with other white ingredients, like mushrooms in a stir-fry, or potatoes in a hearty stew. Start with small changes, and soon, you’ll find that “eating white” becomes a staple in your healthy, vibrant diet.


Frequently Asked Questions (FAQs)

Q: Are white foods really as healthy as colorful ones?

A: Yes! While the “eat the rainbow” philosophy is valuable for ensuring a wide range of nutrients, white foods are not “empty.” They provide unique benefits not found in other foods. For example, garlic contains allicin, and bananas are rich in potassium—both essential for good health. The key is to eat a variety of foods from all color categories.

Q: What are some other healthy white foods I can add to my diet?

A: The list is long and delicious! Consider adding parsnips, turnips, white potatoes (skin on for fiber), white peaches, white asparagus, and jicama to your meals. Each offers a different nutritional profile and can be used in a variety of culinary applications, from roasting to blending.


References


Recent Posts


Stuffed Leek Rolls Made Simple + Delicious


Elevate your culinary skills with this simple and elegant recipe for stuffed leek rolls. This dish offers a fresh and sophisticated take on vegetarian fare, perfect for a light lunch or a stunning appetizer. Prepare to impress your friends and family with these delicious and wholesome stuffed leek rolls.


The image shows Stuffed Leek Rolls with herbs and a healthy vinaigrette
Stuffed leek rolls

An Elegant and Wholesome Delight

Are you looking for a dish that is both stunningly elegant and wonderfully wholesome? Look no further than these stuffed leek rolls. This recipe transforms a humble vegetable into a centerpiece-worthy creation that is as delicious as it is beautiful. The tender, mild flavor of blanched leeks perfectly complements a savory, herbaceous rice and vegetable filling, all brought together with a light and zesty sauce. It’s a dish that feels incredibly special but is surprisingly simple to make, proving that gourmet food doesn’t have to be complicated.

The beauty of this recipe lies in its balanced flavors and textures. The leeks, when prepared correctly, become soft and pliable, their natural sweetness enhancing the filling. We’ll show you exactly how to blanch them to perfection, ensuring they are easy to roll without breaking. The filling itself is a delightful medley of flavors, with fluffy rice, finely chopped vegetables, and fresh herbs that provide a pop of color and freshness in every bite. It’s a wonderful way to enjoy a meal that’s light yet satisfying.


Stuffed Leek Rolls and Their Textural Allure

This dish is a fantastic option for a variety of occasions. It can be served as a sophisticated appetizer at a dinner party, a refreshing side dish to a main course, or even as a light and healthy main meal on its own. It’s naturally gluten-free and can easily be adapted to be vegan, making it a crowd-pleaser for those with different dietary needs. The vibrant presentation will undoubtedly catch the eye of your guests, and the taste will keep them coming back for more.

The versatility of stuffed leek rolls is one of their greatest assets. The filling can be customized to your liking, incorporating different grains, proteins, or vegetables to suit your taste or what you have on hand. The process of blanching the leeks and preparing the filling is broken down into simple, manageable steps, making this recipe approachable for home cooks of all skill levels. You will be guided through each stage, from preparing the leeks to assembling the rolls, ensuring your success.

So, get ready to embrace a new favorite recipe that is as nourishing as it is delicious. These stuffed leek rolls are a testament to the fact that simple, fresh ingredients can create something truly spectacular. We are confident that once you try this recipe, it will become a regular feature in your culinary repertoire. Let’s begin the journey to creating a dish that is not only a feast for the eyes but also a treat for the palate.


The gallery shows leeks on a plate, diced carrots and celery.


Time to Prepare

30 minutes

Time to Cook/Blend

25 minutes


Nutritional Information

Leeks are a key ingredient in this recipe and are a fantastic source of nutrients. They are rich in vitamins K and A, as well as manganese, which is crucial for bone health. They also contain prebiotics, which are beneficial for gut health. The rice provides a good source of complex carbohydrates for sustained energy. The vegetable and herb filling contributes additional vitamins, minerals, and antioxidants. The light vinaigrette dressing uses healthy fats from olive oil. This dish is low in calories, high in fiber, and packed with essential nutrients, making it a very healthy and guilt-free choice.


Equipment

  • Large pot or Dutch oven
  • Large bowl with ice water
  • Cutting board
  • Sharp knife
  • Skillet or frying pan
  • Mixing bowl
  • Whisk
  • Serving plate

The gallery shows some of the equipment used in this recipe.


Ingredients for the Perfect Stuffed Leek Rolls

For the Leek Rolls:

  • 3 large leeks, about 1.5 inches in diameter
  • 1 cup cooked long-grain rice (white or brown)
  • 1/2 cup finely diced carrots
  • 1/4 cup finely diced celery
  • 1/4 cup finely diced bell pepper (any color)
  • 1/4 cup fresh parsley, finely chopped
  • 1/4 cup fresh dill, finely chopped
  • Salt and black pepper to taste

For the Vinaigrette:

  • 1/4 cup extra-virgin olive oil
  • 2 tablespoons fresh lemon juice
  • 1 clove garlic, minced
  • 1 tablespoon fresh parsley, finely chopped
  • Salt and black pepper to taste

Step-by-Step Instructions for Your Stuffed Leek Rolls

Prepare the Leeks

The first and most important step is to prepare the leeks so they are pliable enough to roll. Start by trimming off the tough green tops and the root ends of the leeks. You should be left with the white and light green parts. Cut the leeks into 3-4 inch segments. With a sharp knife, make a single lengthwise cut through the outer layers of each segment, being careful not to cut all the way through the other side. This will allow you to peel the layers apart.

Blanch the Leeks

Bring a large pot of salted water to a rolling boil. Carefully place the leek segments into the boiling water and blanch them for 2-3 minutes. This will soften them. While they are blanching, prepare a large bowl of ice water. Using a slotted spoon, transfer the leek segments from the boiling water directly into the ice water. This “shocking” process immediately stops the cooking and helps the leeks retain their vibrant green color. Once cooled, carefully peel the layers of the leeks apart. You’ll want to use the larger, outer layers for the rolls, as they are the most flexible. Lay the layers out flat on a clean kitchen towel to dry.

Prepare the Filling

In a medium mixing bowl, combine the cooked rice, finely diced carrots, celery, and bell pepper. Add the fresh parsley and dill. Season generously with salt and black pepper. Stir all the ingredients together until they are evenly mixed. This is your chance to taste and adjust the seasoning. The flavors should be vibrant and fresh.

Assemble the Rolls

Lay one of the prepared leek layers on a flat surface. Take about 2-3 tablespoons of the rice filling and place it in a neat line along the bottom of the leek layer. Start at one end and carefully roll the leek up, tucking the filling in tightly as you go, similar to rolling a burrito. The natural stickiness of the rice and the pliability of the leek will help hold the roll together. Repeat this process with the remaining leek layers and filling.

Create the Vinaigrette

In a small bowl, whisk together the extra-virgin olive oil, fresh lemon juice, and minced garlic until well combined. Stir in the fresh parsley and season with salt and black pepper to taste. The dressing should be bright, zesty, and a perfect counterpoint to the savory rolls.

Serve

Arrange the finished stuffed leek rolls standing upright on a beautiful serving platter, similar to the hero image provided. Drizzle the lemon vinaigrette generously over the rolls. You can also serve extra dressing on the side for dipping. Garnish with a few fresh parsley leaves. Serve immediately.


Alternative Cooking Methods

While this recipe is best enjoyed fresh and uncooked after blanching, you can also give the rolls a slightly warm and different texture.

  • Sautéing: After assembling the rolls, you can gently pan-fry them. Heat a small amount of olive oil in a non-stick skillet over medium heat. Place the rolls seam-side down and cook for 2-3 minutes per side, until they are lightly golden and warmed through. This adds a slight crispiness to the outside.

Benefits of Stuffed Leek Rolls

This recipe is not only delicious but also incredibly healthy. Leeks are part of the allium family, along with onions and garlic, and are known for their health benefits. They are a great source of antioxidants and can help reduce inflammation. The high fiber content in leeks and the rice filling supports digestive health and can help you feel full and satisfied. The fresh herbs provide vitamins and minerals, and the olive oil in the dressing is a source of heart-healthy monounsaturated fats. This dish is naturally low in fat and calories, making it an excellent option for anyone looking for a lighter meal without sacrificing flavor.


Variations on Your Stuffed Leek Rolls

VariationDescription
Protein-Packed FillingAdd 1/2 cup of cooked and crumbled firm tofu, lentils, or finely chopped cooked chicken to the rice filling to make it a more substantial meal.
Grain SwapsInstead of rice, try using quinoa, couscous, or bulgur wheat for a different texture and nutritional profile. Cook according to package directions before mixing with the vegetables.
Cheesy DelightStir 1/4 cup of crumbled feta or goat cheese into the rice filling for a tangy, salty flavor that pairs beautifully with the leeks.
Mushroom and HerbSauté some finely chopped mushrooms with a little garlic and thyme and mix them into the filling for an earthy, savory twist.
Spicy KickAdd a pinch of red pepper flakes or a small amount of finely chopped jalapeño to the filling or vinaigrette for a bit of heat.

The gallery shows the different variations of this dish. The first dish is leeks stuffed with mushrooms, the second, is chopped torfu with lentils, and the last, is quinoa and couscous


Final Thoughts on Your New Favorite Stuffed Leek Rolls

This recipe for stuffed leek rolls is a true gem. It’s a testament to the fact that you don’t need complicated techniques or exotic ingredients to create a meal that is both visually impressive and incredibly satisfying. The simple act of preparing and stuffing the leeks turns a regular vegetable into something truly special. We hope this recipe inspires you to get creative in the kitchen and discover the joy of making elegant, healthy dishes. These rolls are perfect for sharing with loved ones and are sure to become a cherished part of your recipe collection.


Frequently Asked Questions (FAQs)

Why do I need to blanch the leeks in ice water?

Blanching in ice water, also known as shocking, is a crucial step. It immediately stops the cooking process, which prevents the leeks from becoming mushy. It also helps them maintain their vibrant green color and crisp-tender texture, which is essential for both the appearance and structure of the rolls.

Can I use different vegetables in the filling?

Yes, absolutely! The filling is very versatile. You can use finely chopped bell peppers of different colors, zucchini, finely shredded cabbage, or even corn. Just ensure the vegetables are finely diced so they blend well with the rice and fit neatly into the leek rolls.


References


Recent Posts


Vibrant Black Rice Bowl You’ll Crave Daily


Discover the secret to a stunningly delicious and healthy meal with this vibrant black rice bowl. This guide will show you how to create a visually spectacular and nutritious dish. Learn how to master the art of building a healthy bowl, starting with the unique and beautiful grain that is black rice.


The image shows Vibrant Black Rice with healthy vegetables
Black rice

The Power of the Bowl

In the world of healthy eating, few things are as satisfying and visually appealing as a well-constructed bowl. It’s a complete meal in one, offering a perfect balance of grains, proteins, and fresh vegetables. But not all bowls are created equal. The key to a truly nourishing and crave-worthy bowl lies in its base. While brown rice and quinoa are popular choices, it’s time to shine a spotlight on a more majestic grain: black rice. Its deep, rich color and slightly nutty flavor make it the perfect foundation for a truly vibrant black rice bowl.

Black rice, also known as forbidden rice, has a long history. It was once reserved exclusively for the emperors of ancient China due to its rarity and exceptional nutritional value. Today, it’s celebrated by health enthusiasts and chefs alike for its incredible health benefits and versatility. It’s not just a beautiful grain; it’s a superfood packed with antioxidants, fiber, and protein. Its unique texture—chewy and slightly sticky—adds a delightful contrast to the crisp, fresh vegetables in this recipe.


The Allure of Vibrant Black Rice

This article will guide you through the process of creating a visually stunning and incredibly vibrant black rice bowl. We’ll provide a step-by-step recipe that is easy to follow, even for beginner cooks, ensuring you can replicate the beauty and flavor of a professional-level dish in your own kitchen. Our recipe combines the earthy black rice with a medley of colorful, crunchy vegetables, healthy fats from avocado, and a simple, zesty dressing that ties everything together.

A great bowl is all about balance. The combination of textures—chewy rice, crunchy cabbage and carrots, and creamy avocado—is just as important as the medley of flavors. This Vibrant Black Rice strikes that balance perfectly, ensuring every bite is a delightful experience. It’s a meal that not only looks good on your plate but also makes you feel good from the inside out.

Get ready to transform your meal prep and dinner routine with this delicious and beautiful recipe. You’ll learn how to cook black rice to perfection and how to arrange your ingredients to create a work of edible art. This isn’t just a recipe; it’s a guide to building a better, healthier, and more satisfying meal.


The gallery shows red cabbage black rice and broccoli in bowls.


Crafting Your Vibrant Black Rice Bowl

This Vibrant Black Rice focuses on creating a harmonious bowl with complementary flavors and textures. The key is to prepare each component with care to ensure the final dish is as delicious as it is beautiful.

Time to Prepare: 20 minutes

Time to Cook: 35-40 minutes

Servings: 2


Nutritional Information

This black rice bowl is a nutritional powerhouse. Black rice is rich in anthocyanin antioxidants, the same compounds found in blueberries and blackberries, which help fight inflammation. The edamame and black rice provide a significant amount of plant-based protein and fiber, promoting satiety and digestive health. Avocado contributes heart-healthy monounsaturated fats and potassium. The array of vegetables—carrots, cabbage, and broccoli—add a wide spectrum of vitamins, including Vitamin C, and minerals.


Equipment

  • Small saucepan with a lid
  • Steamer basket or colander
  • Large mixing bowl
  • Sharp knife
  • Cutting board
  • Grater or julienne peeler
  • Small bowl for dressing
  • Two large serving bowls

The gallery shows some of the equipment used in this recipe.


Ingredients

  • For the Rice:
    • 1 cup black rice, rinsed
    • 2 cups water or vegetable broth
  • For the Vegetables & Toppings:
    • 1 cup edamame, shelled and blanched
    • 1 large carrot, julienned or grated
    • 1 cup purple cabbage, thinly sliced
    • 1 cup broccoli florets, steamed or blanched
    • ½ cup cherry tomatoes, halved
    • 1 avocado, sliced
    • Optional: 2 teaspoons black and white sesame seeds for garnish
  • For the Dressing:
    • 2 tablespoons fresh lime juice
    • 1 tablespoon sesame oil
    • 1 teaspoon soy sauce or tamari
    • 1 teaspoon honey or maple syrup
    • 1 small clove of garlic, minced

Step-by-Step Instructions

Prepare the Black Rice

The first and most important step is to cook this vibrant black rice. Rinse the rice under cold running water in a fine-mesh sieve until the water runs clear. This helps remove any excess starch. Place the rinsed rice and water (or vegetable broth for more flavor) in a small saucepan. Bring to a boil, then reduce the heat to a low simmer. Cover the pot and cook for 30-35 minutes, or until the liquid is absorbed and the rice is tender and chewy. Once cooked, remove from the heat and let it sit, covered, for 5 minutes. Then, fluff with a fork. This resting period allows the steam to finish cooking the rice and makes it perfectly fluffy.

Blanch the Edamame

While the rice is cooking, prepare the other components. If using frozen shelled edamame, bring a small pot of water to a boil. Add the edamame and cook for 2-3 minutes until they are bright green and tender-crisp. Drain and rinse with cold water to stop the cooking process and preserve their vibrant color.

Prepare the Vegetables

Shred the purple cabbage thinly and julienne the carrot. For a more decorative look, use a vegetable peeler to create thin ribbons. Steam the broccoli florets until they are just tender-crisp, about 3-5 minutes. Halve the cherry tomatoes and slice the avocado just before serving to prevent it from browning.

Whisk the Dressing

In a small bowl, whisk together the fresh lime juice, sesame oil, soy sauce, honey or maple syrup, and minced garlic. Taste and adjust the seasoning as needed. If you want a bit of heat, you can add a pinch of red pepper flakes.

Assemble the Bowls

Divide the cooked black rice evenly between two large serving bowls. Arrange the prepared vegetables and toppings neatly on top of the rice. Place the julienned carrots, sliced purple cabbage, blanched edamame, steamed broccoli, and halved cherry tomatoes in separate sections. Make a beautiful fan with the sliced avocado and place it in the center.

Garnish and Serve

Drizzle the dressing evenly over the bowls. Garnish with a sprinkle of black and white sesame seeds. Serve immediately and enjoy the beautiful, healthy meal you’ve created.


Health Benefits of the Vibrant Black Rice Bowl

This recipe isn’t just a treat for the eyes; it’s a nutritional powerhouse designed to nourish your body from the inside out.

Antioxidant Power

Black rice is a superstar when it comes to antioxidants. The deep black color is due to anthocyanins, powerful antioxidants also found in blueberries and acai berries. These compounds are known to fight free radicals, reduce inflammation, and may even protect against certain chronic diseases.

Digestive Health

With both the black rice and edamame, this bowl is packed with dietary fiber. Fiber is crucial for a healthy digestive system, helping to regulate bowel movements and feed the beneficial bacteria in your gut. This contributes to better gut health and overall well-being.

Heart-Healthy Fats

The avocado in this bowl provides a generous dose of monounsaturated fats, which are known to improve cholesterol levels and lower the risk of heart disease. The sesame oil in the dressing also contributes healthy fats and a boost of flavor.


Creative Bowl Variations

Making this bowl is just the beginning. The recipe is highly customizable to fit your preferences or what you have on hand.

Variation CategorySuggestions
Protein AdditionsAdd grilled chicken, baked tofu, pan-seared salmon, or chickpeas for a more substantial meal.
Vegetable SwapsUse thinly sliced cucumber, bell peppers, corn, or roasted sweet potatoes instead of or in addition to the listed vegetables.
Dressing AlternativesSwap the lime dressing for a creamy peanut sauce, a ginger-soy dressing, or a simple vinaigrette.
Nutty CrunchTop with chopped cashews, peanuts, or almonds for extra texture and healthy fats.


Final Thoughts on Your Daily Crave

Creating a vibrant black rice bowl is more than just cooking; it’s an act of self-care. It’s about taking the time to prepare a nourishing and beautiful meal that will fuel your body and delight your senses. The combination of chewy black rice, crisp vegetables, and creamy avocado makes for a meal that is not only satisfying but also one you’ll look forward to every day.

We encourage you to use this recipe as a blueprint and get creative with your own variations. Experiment with different vegetables, proteins, and dressings to find a combination that you truly crave. This bowl proves that healthy eating can be both easy and exciting, bringing a touch of color and nourishment to your daily routine.


Frequently Asked Questions (FAQs)

Q: Is black rice really better for you than brown rice?

A: Both black and brown rice are whole grains and excellent sources of fiber and nutrients. However, black rice stands out for its high level of anthocyanin antioxidants, which are not present in brown rice. It also has a slightly higher protein content. So, while brown rice is very healthy, black rice offers a unique nutritional edge.

Q: Can I meal prep this black rice bowl?

A: Absolutely! You can cook a large batch of black rice at the beginning of the week and store it in an airtight container in the refrigerator for up to 4-5 days. You can also chop and prepare the vegetables in advance. Store the dressing separately and add it right before eating to prevent the vegetables from getting soggy.


References


Recent Posts


The Best Baked Potato & Carrot Salad Ever


Discover a new favorite with this baked potato and carrot salad recipe. It’s a delightful, healthy dish that will quickly become a staple in your meal rotation. The simple preparation and incredible flavor make it a perfect choice for any occasion, proving that a baked potato can be the star of a fresh, modern salad.


This image shows a Baked Potato & Carrot Salad with Parsley & Thyme.
Baked Potato & Carrot Salad

A Fresh Take on a Classic

Say goodbye to heavy, mayonnaise-laden potato salads and hello to a vibrant, fresh, and irresistibly delicious new classic. This recipe for the best baked potato and carrot salad will change the way you think about this beloved dish. It’s a complete departure from the norm, swapping out creamy, often calorie-dense dressings for a light, zesty vinaigrette that lets the natural flavors of the vegetables shine. Instead of boiling, we’ll bake the potatoes and carrots to perfection, creating a delightful texture and a rich, nutty flavor that is simply unmatched.

The secret to this salad’s success lies in the baking process. By roasting the potatoes and carrots, they develop a crispy exterior and a tender, fluffy interior. This method brings out their inherent sweetness and creates a depth of flavor that boiling just can’t achieve. The high heat caramelizes the natural sugars in the vegetables, turning them into golden, savory morsels. It’s a simple step that makes all the difference, transforming a simple side dish into a showstopper.

Baked Potato Perfection: A Celebration of Texture and Flavor

This salad isn’t just about incredible taste; it’s also a celebration of texture. The contrast between the soft, fluffy interior of the potatoes and the slight chewiness of the roasted carrots is a culinary delight. We’ll also be adding a few secret ingredients to our dressing to give it a bright, fresh finish that perfectly complements the roasted vegetables.

Whether you’re looking for a healthy side dish for a summer barbecue, a satisfying lunch, or a light dinner, this baked potato and carrot salad fits the bill. It’s versatile, easy to make, and packed with nutrients. The vibrant colors and inviting aroma will make it a centerpiece at any gathering, and its wholesome nature means you can enjoy it guilt-free.

So, get ready to preheat your oven and prepare for a potato salad revolution. This recipe is designed to be foolproof, even for the most novice of cooks. With clear instructions and helpful tips, you’ll be whipping up this incredible dish in no time, and everyone will be asking for the recipe. Let’s get started on creating a new favorite that’s as good for you as it tastes.


The gallery shows raw carrots and baby potatoes and thyme and parsley on a plate.


Time to Prepare

15 minutes

Time to Cook/Blend

30-35 minutes


Nutritional Information

This baked potato salad is a nutritional powerhouse. Potatoes are a great source of potassium, vitamin C, and B6, and they are surprisingly high in fiber, which helps with digestive health. Carrots are packed with beta-carotene, which the body converts to vitamin A, essential for vision, immune function, and skin health. The dressing, made from healthy fats like olive oil and apple cider vinegar, contributes antioxidants and can help regulate blood sugar. This dish is naturally gluten-free and can easily be made vegan by omitting any dairy in the optional variations. A single serving provides a good balance of carbohydrates for energy, healthy fats, and essential vitamins and minerals, making it a well-rounded and satisfying meal.


Equipment

  • Large baking sheet
  • Parchment paper
  • Large mixing bowl
  • Small bowl or jar for dressing
  • Whisk or fork
  • Cutting board
  • Sharp knife
  • Serving dish

The gallery shows some fo the equipment used for this recipe.


Ingredients for the Perfect Baked Potato Salad

For the Roasted Vegetables:

  • 2 lbs (about 4-5 medium) new potatoes, or baby potatoes, scrubbed clean and cut into 1-inch wedges
  • 1 lb (about 5-6 medium) carrots, peeled and sliced into 1/2-inch thick rounds, or cut into 1-inch pieces
  • 2 tablespoons olive oil
  • 1 teaspoon smoked paprika
  • 1/2 teaspoon garlic powder
  • Salt and black pepper to taste

For the Herb Vinaigrette:

  • 1/4 cup extra-virgin olive oil
  • 2 tablespoons apple cider vinegar
  • 1 tablespoon Dijon mustard
  • 1 clove garlic, minced
  • 2 tablespoons fresh parsley, finely chopped
  • 2 tablespoons fresh dill, finely chopped
  • Salt and black pepper to taste

For Serving:

  • Additional fresh parsley or dill for garnish

Step-by-Step Instructions for Your Baked Potato Creation

Prep the Oven and Veggies

Preheat your oven to 400°F (200°C). Line a large baking sheet with parchment paper to prevent sticking and make cleanup a breeze. While the oven heats up, prepare your vegetables. Make sure the new potatoes are thoroughly scrubbed, but you can leave the skin on for extra flavor and nutrients. Cut them into 1-inch wedges. If using carrots, peel them and cut them into 1/2-inch rounds or 1-inch pieces. The key is to make sure your vegetables are roughly the same size so they cook evenly.

Season and Roast

In a large mixing bowl, toss the potato wedges and carrot pieces with 2 tablespoons of olive oil. Ensure every piece is lightly coated. Next, sprinkle the smoked paprika, garlic powder, salt, and black pepper over the vegetables. Use your hands or a large spoon to toss everything together until the seasoning is evenly distributed. This step is crucial for building the foundational flavor of the salad.

Spread and Bake

Spread the seasoned vegetables in a single, even layer on the prepared baking sheet. It’s important not to overcrowd the pan. If the vegetables are piled on top of each other, they will steam instead of roast, and you won’t get that lovely crispy texture. If you need to, use a second baking sheet. Place the baking sheet in the preheated oven and roast for 30-35 minutes. Halfway through the cooking time (around the 15-minute mark), take the pan out and give the vegetables a gentle stir or flip to ensure they brown evenly on all sides. The vegetables are ready when they are fork-tender and have a beautiful golden-brown color and a slightly crispy exterior.

Prepare the Vinaigrette

While the vegetables are roasting, you can make the simple vinaigrette. In a small bowl or a jar with a lid, combine the extra-virgin olive oil, apple cider vinegar, Dijon mustard, and minced garlic. Whisk these ingredients together until the dressing emulsifies and thickens slightly. Now, stir in the fresh parsley and dill. Season with salt and black pepper to taste. If you’re using a jar, you can simply screw on the lid and shake vigorously to mix everything.

Combine and Serve

Once the roasted vegetables are done, carefully transfer them to a large serving bowl. Pour the herb vinaigrette over the warm vegetables. This is a key step, as the warmth of the potatoes and carrots will help them absorb the flavors of the dressing beautifully. Gently toss everything together until all the vegetables are coated. You can serve this salad warm or at room temperature. Garnish with a little more fresh parsley or dill right before serving for a pop of color and freshness.


Baked potato and carrots


Alternative Cooking Methods

If you don’t want to use an oven, you can prepare a similar version of this salad using an air fryer or even a grill.

  • Air Fryer: For an even crispier result, use an air fryer. Toss the potatoes and carrots with oil and seasoning as directed. Place them in a single layer in the air fryer basket (you may need to do this in batches) and cook at 375°F (190°C) for 20-25 minutes, shaking the basket every 5-7 minutes until they are golden brown and crispy.
  • Grilling: This method adds a lovely smoky flavor. Toss the vegetables with oil and seasoning and place them in a grill basket or on a foil pan with holes. Grill over medium-high heat for 20-25 minutes, stirring occasionally, until tender and lightly charred. This is an excellent option for summer barbecues.

Benefits of Choosing a Baked Potato Salad

Choosing this recipe over a traditional mayonnaise-based salad offers a number of health benefits. The roasting process preserves more of the nutrients in the vegetables compared to boiling, which can leach out water-soluble vitamins. The use of a simple olive oil and vinegar dressing keeps the fat content in a healthier range, opting for beneficial monounsaturated fats instead of saturated fats found in many commercial mayonnaise products. This makes the dish lighter on the digestive system and lower in overall calories.

Furthermore, potatoes, when baked with their skin on, are a great source of fiber, which is crucial for a healthy gut and can help you feel full and satisfied longer. Carrots are rich in beta-carotene, which is a powerful antioxidant. The fresh herbs, parsley and dill, not only add incredible flavor but also provide additional vitamins and antioxidants. This salad is a great way to sneak more vegetables and nutrients into your diet without sacrificing taste or satisfaction.


The gallery shows the nutritional benefits of Carrots, Baked potato and herbs.


Variations on Your Baked Potato Salad

VariationDescription
Creamy VinaigretteFor a slightly creamier texture without the mayo, whisk in 2 tablespoons of plain Greek yogurt or sour cream to the vinaigrette. This adds a tangy richness and a boost of protein.
Herb SwapsDon’t have parsley and dill? Try fresh chives, rosemary, or thyme. Or, use a mix of any of them. Each will lend a unique, aromatic flavor profile.
Protein BoostTurn this side dish into a main course by adding a protein. Think grilled chicken, chickpeas, crumbled feta cheese, or hard-boiled eggs.
Spice it UpFor a fiery kick, add a pinch of cayenne pepper or red pepper flakes to the seasoning mix for the vegetables. You could also mix a little sriracha or hot sauce into the dressing.
Add More VeggiesThe beauty of this salad is its versatility. Add other roasted vegetables like bell peppers, red onion, asparagus, or broccoli. They all roast well alongside the potatoes and carrots.

The gallery shows variations of this recipe. The first, is a Fiery Kick addition, the next, is a creamier version of the baked potato and salad recipe. And the third, is the basic recipe plus added roasted vegetables.


Final Thoughts on Your New Favorite Baked Potato Recipe

This roasted baked potato and carrot salad is more than just a recipe; it’s a modern reinvention of a classic that proves healthy eating can be both delicious and incredibly satisfying.

The simplicity of the ingredients combined with the transformative power of roasting results in a dish that’s rich in flavor, texture, and nutrients. It’s the perfect example of how small changes in preparation can lead to a monumental difference in taste and health benefits.

We encourage you to try this recipe for your next gathering or weeknight dinner. It’s a fantastic way to impress your friends and family with a dish that’s as beautiful to look at as it is delicious to eat. So, go ahead and make a batch today. You’ll be glad you did!


Frequently Asked Questions (FAQs)

Can I make this salad ahead of time?

Absolutely! You can roast the potatoes and carrots and make the dressing up to a day in advance. Store the roasted vegetables in an airtight container in the refrigerator and the dressing separately. When you’re ready to serve, simply combine the two and let them come to room temperature for the best flavor.

What kind of potatoes are best for this recipe?

New potatoes or baby potatoes are ideal because their waxy texture holds up well to roasting without falling apart. You can also use Yukon Gold or red potatoes with great results. Avoid using starchy potatoes like Russet, as they tend to become too soft and crumbly.


References


Recent Posts


Healthy Chili: The Recipe You Need to Try


Chili is the ultimate comfort food, but traditional recipes can be heavy and high in fat. This delicious healthy chili recipe is a game-changer, proving that a hearty, satisfying meal can also be good for you. Get ready for your new favorite dinner!


A steaming bowl of healthy chili, made with lean ground beef, beans, and a variety of colorful vegetables, topped with fresh avocado slices and a dollop of Greek yogurt.
Healthy chilli

A Lighter Twist on a Classic – Healthy Chili

Chili is a dinner staple for good reason. It’s warm, satisfying, and easy to make in a large batch for a week of delicious leftovers. But for all its comforting qualities, a classic chili con carne can often be heavy, loaded with saturated fats and high-calorie ingredients. What if you could capture all that rich, savory flavor and hearty texture in a dish that actually fuels your body? This healthy chili recipe does exactly that. We’ve kept all the deliciousness you love while making smart swaps to boost nutrition and keep things light.

The secret to this recipe lies in two key healthy swaps. First, we trade high-fat ground beef for lean ground turkey. This simple change drastically reduces the saturated fat content without sacrificing any of the satisfying, meaty texture that makes a good chili so comforting. Second, we pack the pot with extra vegetables. We’re not just talking about the traditional onions and tomatoes—we’re adding a colorful medley of bell peppers and fresh zucchini slices. This not only makes the chili more vibrant and appealing but also adds a powerful punch of vitamins, minerals, and fiber to every single spoonful.

Smart Swaps for Maximum Flavor

The result is a dish that is visually stunning and incredibly delicious. The bright colors of the vegetables stand out against the rich, red sauce, while the kidney beans and lean turkey provide a satisfying base. We’ll finish it with a dollop of low-fat Greek yogurt instead of sour cream and a sprinkle of fresh herbs. This approach ensures you get a full-bodied flavor and a creamy texture without the added calories. It’s the perfect bowl for a weeknight dinner or for meal prepping to enjoy all week long.

This recipe is designed to be simple and straightforward, making it perfect for even the most inexperienced cook. The instructions are broken down into easy, manageable steps, so you can build a robust flavor base and bring the entire dish together with confidence. It’s a versatile recipe that welcomes your own creative additions, allowing you to make it uniquely your own.

So get ready to revolutionize your chili game. This is the recipe you’ll come back to again and again—the one that proves that healthy eating is full of flavor and comfort.


The gallery shows a plate of ground beef, a bowl of mixed peppers and cucumber slices and chopped tomatoes.


Time to Prepare and Cook a Healthy Chili

Time to Prepare: 15 minutes

Time to Cook: 30-40 minutes

Servings: 6


Nutritional Information for the Healthy Chili

This healthy chili is a nutritional powerhouse. A single serving is rich in plant-based protein, providing sustained energy and helping with muscle repair. The high fiber content, thanks to the variety of beans, promotes digestive health and keeps you feeling full and satisfied. The vegetables add a wealth of vitamins, minerals, and antioxidants, including Vitamin A from the carrots and Vitamin C from the tomatoes. This soup is naturally low in fat and cholesterol, making it a heart-healthy choice for the whole family.

Beyond its macro-nutrient benefits, the diverse blend of legumes and vegetables in this healthy Chili offers a powerful spectrum of micronutrients. The combination of kidney beans, cannellini beans, and chickpeas provides a comprehensive source of iron, folate, and potassium, which are crucial for red blood cell formation, cellular health, and blood pressure regulation, respectively. The fresh vegetables contribute a vibrant mix of antioxidants and phytonutrients that help protect your body from cellular damage and inflammation. By combining these wholesome, fiber-rich ingredients, this recipe not only supports your physical health but also contributes to your overall well-being, proving that a delicious meal can be both simple and exceptionally nourishing.


Equipment

  • Large pot or Dutch oven
  • Cutting board
  • Sharp knife
  • Ladle

The gallery shows a chopping board, cooking pot and untensils that have been used in this recipe.


Ingredients

For the Chili:

  • 1 tablespoon olive oil (or low-calorie cooking spray)
  • 1.5 lbs lean ground turkey
  • 1 medium yellow onion, diced
  • 2 cloves garlic, minced
  • 1 red bell pepper, diced
  • 1 yellow bell pepper, diced
  • 1 medium zucchini, sliced into rounds
  • 1 (15-ounce) can kidney beans, rinsed and drained
  • 1 (15-ounce) can fire-roasted diced tomatoes
  • 1 (8-ounce) can tomato sauce
  • 2 cups low-sodium vegetable broth
  • 2 tablespoons chili powder
  • 1 teaspoon ground cumin
  • ½ teaspoon dried oregano
  • ¼ teaspoon paprika
  • Salt and black pepper to taste

For Toppings:

  • Low-fat Greek yogurt
  • Fresh cilantro or chives, finely chopped
  • Diced avocado (optional)
  • Sliced jalapeños or red chili peppers (optional)
  • Cherry tomatoes, halved (optional)


Step-by-Step Instructions

Brown the Ground Turkey

Place your large pot or Dutch oven over medium-high heat. Add 1 tablespoon of olive oil or use a low-calorie cooking spray. Add the lean ground turkey and cook, breaking it up with a spoon as it browns, for about 5-7 minutes. Once cooked through, drain any excess fat. This keeps your chili lean and heart-healthy.

Sauté the Vegetables

Reduce the heat to medium. Add the diced onion, red bell pepper, and yellow bell pepper to the pot. Cook for 5-7 minutes, stirring occasionally, until the vegetables begin to soften. This step builds the foundation of flavor for your chili. Next, add the minced garlic and cook for just 1 minute more until fragrant.

Add the Spices and Beans

Stir in the chili powder, ground cumin, dried oregano, and paprika. Cook for about 30 seconds, stirring constantly to toast the spices and release their aroma. This is a crucial step for a rich, well-rounded flavor. Pour in the rinsed and drained kidney beans and stir to combine with the turkey and vegetables.

Simmer to Perfection

Add the can of fire-roasted diced tomatoes (with their liquid), the tomato sauce, and the vegetable broth to the pot. Stir all the ingredients until well-combined. Bring the chili to a boil, then reduce the heat to a low simmer. Cover the pot and let the chili cook for at least 25 minutes, or up to 40 minutes for a deeper flavor. This simmering time allows all the ingredients to meld together into a rich, cohesive dish.

Finish with Zucchini and Seasoning

In the final 5-10 minutes of cooking, stir in the sliced zucchini rounds. Cooking them for a short time will ensure they stay tender-crisp and don’t become mushy. Once the zucchini is tender, taste the chili and season with salt and black pepper as needed.

Serve and Garnish

Ladle the hot chili into bowls. Garnish each bowl with a dollop of low-fat Greek yogurt, a sprinkle of fresh cilantro or chives, and any other desired toppings like cherry tomatoes, avocado, or sliced chili peppers. This is a great way to add a fresh, colorful touch that mirrors the hero image.


The gallery shows the nutritional benefits of Zucchini and bell peppers and kidney beans


Benefits of this Meal

This healthy chili is a nutritional powerhouse that provides a wealth of health benefits. By choosing lean ground turkey over traditional ground beef, you are significantly reducing the amount of saturated fat and calories in your meal without compromising on protein. Lean protein is essential for muscle growth and repair, keeping you feeling full and energized for longer. This makes the chili a fantastic option for those focused on weight management or building muscle mass.

The recipe’s generous use of vegetables, including zucchini and bell peppers, dramatically increases its nutrient density. These vegetables are rich in vitamins, minerals, and antioxidants that support a healthy immune system and help protect the body from chronic diseases. For instance, bell peppers are a great source of Vitamin C, while zucchini adds potassium and B vitamins. These ingredients also contribute a significant amount of dietary fiber, which promotes digestive health and helps maintain stable blood sugar levels.

Finally, the inclusion of kidney beans adds another layer of health benefits. Beans are an excellent source of plant-based protein and are packed with fiber, iron, and folate. They contribute to a feeling of fullness and support a healthy gut microbiome. By opting for low-fat Greek yogurt as a topping, you’re also adding beneficial probiotics and a good dose of calcium, all while achieving that desirable creamy texture without the guilt of full-fat sour cream.


Variations: Customize Your Healthy Chili

This recipe is highly adaptable. Feel free to make substitutions based on what you have in your pantry or your personal preferences.

VariationIngredients to Add/Substitute
A Vegan TwistUse 1.5 lbs of crumbled tempeh or a plant-based ground meat substitute instead of turkey. Add an extra can of beans like black beans or pinto beans.
Crockpot MethodBrown the ground turkey and sauté the vegetables as instructed. Add all ingredients to a crockpot and cook on low for 6-8 hours or on high for 3-4 hours. Stir in the zucchini in the last hour.
Add More VeggiesStir in a handful of corn kernels, mushrooms, or chopped carrots along with the bell peppers.
Spice it UpAdd 1-2 chopped jalapeños or serrano peppers for extra heat. For a smoky flavor, add 1 tablespoon of smoked paprika or a pinch of chipotle powder.
Different GrainsServe your chili over brown rice, quinoa, or on top of a baked sweet potato for a heartier meal.

The images shows the different cooking times for a selection of vegetables.


Final Thoughts: A Wholesome Bowl of Comfort

This healthy chili is more than just a recipe; it’s a celebration of how delicious and satisfying a lightened-up meal can be. It proves that you don’t have to choose between comfort and health. By using lean ground turkey, loading up on vibrant vegetables, and opting for smart toppings, you’ve created a dish that is both deeply comforting and incredibly nourishing. So go ahead, make a big batch, share it with family and friends, and enjoy every single guilt-free spoonful.


Frequently Asked Questions (FAQs)

Q: Can I freeze this chili?

A: Yes! This chili freezes beautifully. Once it has cooled completely, store it in an airtight, freezer-safe container for up to 3 months. When you’re ready to eat, simply thaw it in the refrigerator overnight and reheat it on the stovetop or in the microwave.

Q: What is the best way to reheat leftovers?

A: The best way to reheat leftovers is gently on the stovetop over low to medium heat, stirring occasionally. This prevents the beans and turkey from becoming mushy. You can also use a microwave, but heat it in short bursts to maintain the texture.


References

  1. Harvard T.H. Chan – Healthy Eating Plate
  2. Mayo Clinic – Healthy recipes: Chili
  3. American Heart Association – Protein

Recent Posts


Easy Healthy Spaghetti with Clams in 30 Minutes


There’s a reason spaghetti with clams, or Spaghetti alle Vongole, is a timeless classic. It’s the perfect blend of simple elegance and fresh, briny flavor. This easy, healthy version captures all the magic in under 30 minutes, making it the ideal weeknight dinner.


The image show Spaghetti with Clams . It is topped with vegetables of cherry tomatoes and fresh parsley and a squeeze of fresh lemon juice
Sphagetti with clams

Spaghetti with Clams: A Taste of the Mediterranean

Italian cooking is often celebrated for its ability to create complex, unforgettable flavors from just a few simple, high-quality ingredients. This recipe for spaghetti with clams embodies that philosophy perfectly. It’s a dish that looks and tastes like something you’d enjoy at a seaside trattoria, but it’s surprisingly simple to master in your own kitchen. By focusing on fresh, healthy ingredients and a streamlined process, we’ve created a meal that is both a treat for your taste buds and a boost for your well-being.

Unlike heavier pasta dishes, this recipe is a masterclass in lightness and freshness. We rely on the natural flavors of the sea, complemented by a vibrant mix of Mediterranean staples. The clams release their briny liquor, which forms a delicious, light sauce when combined with garlic, olive oil, and a splash of white wine. To this classic foundation, we add a colorful array of vegetables and herbs—halved cherry tomatoes and bright green broccoli florets—that not only make the dish visually stunning but also enhance its nutritional profile.

The Beauty of Simple Ingredients for Spaghetti with Clams

The beauty of this dish lies in its simplicity. With just a handful of ingredients and a quick cooking time, you can create a meal that is both healthy and satisfying. The tender spaghetti is perfectly coated in the savory sauce, and each spoonful offers a delightful mix of plump clams, sweet tomatoes, and crisp broccoli. The finishing touches—a sprinkle of red chili flakes and a generous amount of fresh parsley—add the final notes of heat and freshness that make this dish truly shine. It’s a recipe designed to make you feel good about what you’re eating, without spending hours on a complicated meal.

This recipe is built to be a visual showstopper, just like the image you’ve provided. The careful arrangement of ingredients, from the upright clams to the scattered basil and vibrant tomatoes, elevates the dish from a simple meal to a work of art. The final result looks elegant and sophisticated, yet the process to get there is completely approachable for home cooks of any skill level.

So, let’s get started on creating this beautiful, nutritious, and incredibly flavorful spaghetti with clams. It’s time to bring a taste of the Italian coast right to your dinner table.


The gallery shows a plate of cooked sphagetti, cooked clams and some of the vegetables used in this recipe.


Time to Prepare and Cook

Time to Prepare: 10 minutes

Time to Cook: 20 minutes

Servings: 2-3


Nutritional Information

This spaghetti with clams dish is a nutritional powerhouse that fits perfectly into a healthy, Mediterranean-inspired diet. The star of the show, the clams, are an excellent source of lean protein and are particularly rich in essential minerals, especially iron and zinc. They also provide a significant amount of Vitamin B12, which is vital for nerve function and red blood cell formation.

Beyond the protein, the recipe’s ingredients are packed with health benefits. The use of extra virgin olive oil provides healthy monounsaturated fats, which are known to be beneficial for heart health. The inclusion of fresh vegetables like cherry tomatoes and broccoli adds a substantial amount of dietary fiber, Vitamin C, and other powerful antioxidants. These nutrients help support your immune system, aid in digestion, and reduce inflammation throughout the body. By combining these wholesome ingredients, you get a meal that is both incredibly flavorful and deeply nourishing.


Equipment

  • Large pot for boiling pasta
  • Large skillet or Dutch oven with a lid
  • Colander or strainer
  • Tongs
  • Serving bowls

The gallery shows large cooking pot with sphagetti, serving bowls and frying pan and colander


Ingredients

  • 8 oz whole wheat or gluten-free spaghetti
  • 1 lb littleneck clams, scrubbed and rinsed
  • 1 tablespoon extra virgin olive oil
  • 3-4 cloves garlic, thinly sliced
  • ½ cup dry white wine (or low-sodium vegetable broth)
  • 1 cup broccoli florets, small
  • 1 cup cherry tomatoes, halved
  • ¼ teaspoon red chili flakes (or to taste)
  • ¼ cup fresh parsley, chopped
  • ¼ cup fresh basil leaves
  • 1 lemon, cut into wedges, for serving
  • Salt and black pepper to taste

Sphagetti with clams


Step-by-Step Instructions for Spaghetti with Clams

Prepare the Pasta

Begin by bringing a large pot of generously salted water to a rolling boil. Add your spaghetti and cook it according to the package directions until it’s perfectly al dente, meaning it’s firm to the bite. For added efficiency, in the last 3 minutes of the pasta’s cooking time, add the small broccoli florets directly to the boiling water to cook alongside the spaghetti.

Sauté the Garlic

While the pasta is cooking, place a large skillet over a medium-high heat. Add the olive oil and the thinly sliced garlic. Cook for about 1 minute, stirring constantly, until the garlic is fragrant and just begins to turn a light golden color. It’s very important not to let it burn, as this will give it a bitter taste.

Steam the Clams

Carefully add the scrubbed clams and the red chili flakes to the skillet with the garlic. Pour in the white wine or low-sodium vegetable broth. Immediately place a tight-fitting lid on the skillet. Increase the heat to high and steam the clams for 5-7 minutes. You’ll know they are ready when they have all opened up. Gently shake the pan a couple of times during this process to help them open more evenly. Be sure to discard any clams that do not open after cooking.

Combine and Sauce

Once the clams have opened, remove the lid. Using tongs, transfer the cooked spaghetti and broccoli directly from the pot into the skillet with the clams and sauce. Toss everything together vigorously. The starchy pasta water clinging to the spaghetti will combine with the clam juices and white wine to create a rich, light, and delicious sauce that coats every strand. Stir in half of the fresh, chopped parsley and season with black pepper to your taste.

Serve and Garnish

To serve, use tongs to carefully transfer the spaghetti and the clam-broccoli mixture into individual serving bowls. Arrange the clams so they stand up around the pasta, giving the dish that layered and elegant look from the hero image. Sprinkle with the remaining fresh parsley and add a few fresh basil leaves on top. Place a lemon wedge on the side of each bowl to be squeezed over the pasta just before eating. Enjoy your meal immediately while it’s hot.


Benefits of Spaghetti with Clams

This healthy spaghetti with clams is a fantastic choice for a nutritious dinner, offering a powerful array of health benefits that make every bite count. The star of the show, the clams, are a lean protein source that is naturally low in fat and calories. They are also packed with essential minerals like iron, which is crucial for red blood cell formation and energy levels, as well as a significant amount of Vitamin B12, which supports brain function and a healthy nervous system.

The recipe’s focus on a simple, olive oil-based sauce rather than heavy creams or butters also contributes to its health profile. Extra virgin olive oil is a cornerstone of the Mediterranean diet and is rich in monounsaturated fats and antioxidants. These healthy fats have been linked to a reduced risk of heart disease and can help lower bad cholesterol levels, making this a heart-healthy meal you can feel good about.

Finally, the generous inclusion of fresh vegetables and herbs elevates this dish from simple to spectacular, both in flavor and nutrition. Broccoli provides a good dose of fiber and Vitamin C, while cherry tomatoes are a great source of lycopene, a potent antioxidant. The fresh parsley and basil not only add a burst of freshness but also provide additional vitamins and micronutrients. This well-rounded combination of protein, healthy fats, fiber, and vitamins creates a meal that is both deeply satisfying and incredibly nourishing.


The gallery shows the nutritional benefits of Olive oil and Clams.


Variations: Customize Your Dish

This recipe is wonderfully versatile. Feel free to swap ingredients to suit your personal tastes or what you have on hand.

VariationIngredients to Add/Substitute
Different SeafoodUse cooked shrimp, mussels, or scallops instead of clams.
Add a ProteinAdd grilled chicken or salmon flakes for a heartier meal.
Gluten-FreeUse gluten-free spaghetti or zucchini noodles instead of traditional pasta.
No WineUse low-sodium vegetable broth to steam the clams for a non-alcoholic version.
More VegetablesAdd chopped spinach, steamed asparagus tips, or peas to the pasta.
Creamier SauceStir in 1/4 cup of heavy cream or plain Greek yogurt at the end for a richer sauce.

The images show pasta, clams, and vegetables being tossed in the pan and the finished meal on a plate.


Final Thoughts: A Simple Recipe, for Spaghetti with Clams

This healthy and easy spaghetti with clams is proof that you don’t need to spend hours in the kitchen to create a memorable meal. By embracing a few fresh, simple ingredients, you can bring the vibrant flavors of the Mediterranean to your table in under 30 minutes. It’s a dish that feels elegant and special, yet is wholesome and perfect for any night of the week. So go ahead, treat yourself to a little taste of the good life, and make this delicious recipe a new staple in your cooking repertoire.


Frequently Asked Questions (FAQs)

Q: Do I have to use fresh clams?

A: While fresh clams provide the best flavor, you can use canned or frozen clams in a pinch. If using canned, be sure to use the liquid in the can as part of the sauce for flavor, but be mindful of the sodium content.

Q: How do I know if my clams are fresh?

A: Fresh clams should be tightly closed. If any are open, tap them gently on the counter. If they close, they are alive and safe to use. If they remain open, discard them.


References

American Heart Association – The benefits of adding a drizzle of olive oil

Harvard T.H. Chan – The Mediterranean Diet

Healthline – What Is Shellfish?


Recent Posts


The Best White Bean And Vegetable Curry Enchiladas


Elevate your weeknight dinner with a burst of flavor and a touch of global inspiration. These vegetable curry enchiladas are a delicious and healthy twist on a beloved classic, proving that comfort food can also be incredibly nutritious. Get ready to impress your taste buds and nourish your body.


The image shows a White bean and Vegetable Curry Enchiladas in a round casserole dish.
Vegetable Curry Enchiladas

A Fusion of Comfort and Healthy Flavors with Vegetable Curry Enchiladas

Enchiladas, a classic Mexican dish, are beloved for their comforting layers of tortillas, fillings, and savory sauce. But what if you could infuse this timeless favorite with the aromatic spices and vibrant vegetables of a traditional curry? This recipe for White Bean and Vegetable Curry Enchiladas does exactly that, creating a harmonious fusion that is both incredibly delicious and wonderfully healthy. It’s a fantastic way to introduce new flavors to your dinner table while ensuring a meal packed with wholesome ingredients that will satisfy everyone.

Our take on enchiladas swaps out heavy, meat-based fillings for a light yet incredibly satisfying blend of creamy white beans and a medley of colorful, nutrient-dense vegetables. Imagine tender corn, crisp bell peppers, and savory black beans, all coated in a rich, mild curry sauce. This creates a filling that is bursting with flavor and texture, making each bite an experience. The use of both white and black beans provides a fantastic source of plant-based protein and fiber, contributing a delightful creaminess that perfectly balances the sweet crunch of the corn.

A Symphony of Flavors and Textures

The magic truly happens when these curry-infused fillings are lovingly wrapped in soft tortillas, bathed in an even richer, homemade curry sauce, and then baked to golden perfection. The result is a dish where every component—from the earthy beans to the sweet vegetables and aromatic spices—comes together in a symphony of flavors. This recipe proves that healthy eating doesn’t mean sacrificing taste; in fact, it often means discovering exciting new combinations that are both good for you and incredibly satisfying.

We’ve meticulously crafted this recipe to ensure it aligns perfectly with the healthy and vibrant image you’ve provided. Every ingredient has been chosen for its nutritional value and its ability to contribute to the rich, appealing aesthetic. The bright colors of the corn, beans, and peppers shine through, promising a meal that is as visually appealing as it is palatable. This isn’t just about making enchiladas; it’s about creating a holistic dining experience that delights the senses and nurtures the body.

So, get ready to embark on a culinary adventure that brings together the best of two worlds. This recipe is designed to be approachable for home cooks of all skill levels, with clear, step-by-step instructions that will guide you to a perfect batch of vegetable curry enchiladas every time. Let’s transform your kitchen into a haven of healthy, global-inspired comfort food.


The gallery shows images of corn tortillas, white beans in a bowl and flour tortillas


Time to Prepare and Cook

Time to Prepare: 30 minutes

Time to Cook: 25-30 minutes

Servings: 4-6 (makes 8 enchiladas)


Nutritional Information

These White Bean and Vegetable Curry Enchiladas are a nutritional powerhouse. Each serving (approximately 2 enchiladas) contains about 400-450 calories, 18-20g of protein, 60-65g of complex carbohydrates, and 12-15g of healthy fats. They are rich in fiber, promoting digestive health and sustained energy. The vegetables provide abundant vitamins A, C, and K, while the variety of beans is an excellent source of plant-based protein, iron, and folate. This meal is naturally low in saturated fat and cholesterol, making it heart-healthy and incredibly satisfying.


Equipment

  • Large, round casserole or baking dish
  • Large skillet or pot
  • Medium saucepan
  • Cutting board
  • Sharp knife
  • Measuring cups and spoons
  • Whisk
  • Can opener

The gallery shows some of the cooking equipment used on this recipe. These are a large pot, measuring cups and casserole dish.


Ingredients

For the Curry Sauce:

  • 1 tablespoon olive oil
  • 1 small yellow onion, finely chopped
  • 2 cloves garlic, minced
  • 1 tablespoon fresh ginger, grated
  • 2 tablespoons mild curry powder
  • ½ teaspoon turmeric powder
  • ¼ teaspoon ground cumin
  • 1 (13.5 ounce) can light coconut milk (full-fat also works for richer flavor)
  • 1 (14.5 ounce) can crushed tomatoes (no salt added)
  • ½ cup vegetable broth (low sodium)
  • 1 tablespoon maple syrup or agave nectar (optional, to balance flavors)
  • Salt and black pepper to taste
  • Fresh cilantro, chopped, for garnish

For the Filling:

  • 1 tablespoon olive oil
  • 1 red bell pepper, finely diced
  • 1 green bell pepper, finely diced
  • 1 (15 ounce) can cannellini beans (white kidney beans), rinsed and drained
  • 1 (15 ounce) can black beans, rinsed and drained
  • 1 cup corn (canned or frozen, thawed)
  • 8 corn or flour tortillas (6-inch size)
  • ½ cup shredded low-fat mozzarella cheese (or dairy-free alternative)

Vegetarian Bean Enchiladas


Step-by-Step Instructions for Vegetable Curry Enchiladas

Prepare Your Baking Dish

Preheat your oven to 375°F (190°C). Lightly grease a large, round casserole or baking dish. This will prevent the enchiladas from sticking and make cleanup easier.

Start the Curry Sauce

In a medium saucepan, heat 1 tablespoon of olive oil over medium heat. Add the finely chopped yellow onion and sauté for 3-5 minutes until it softens and becomes translucent. Stir in the minced garlic and grated fresh ginger, cooking for another minute until fragrant. Be careful not to let the garlic brown.

Build the Sauce’s Flavor

Add the mild curry powder, turmeric powder, and ground cumin to the saucepan. Stir continuously for about 1 minute, allowing the spices to toast and release their aromatic flavors. This step is crucial for a rich, deep curry taste.

Simmer the Sauce

Pour in the light coconut milk, crushed tomatoes, and vegetable broth. Stir everything together until well combined. Bring the sauce to a gentle simmer, then reduce the heat to low and let it cook for 10-15 minutes. This allows the flavors to meld beautifully. If desired, stir in the maple syrup or agave nectar to add a touch of sweetness that balances the savory and spicy notes. Season with salt and black pepper to your taste preferences.


    The gallery shows curry sauce in a pan. Chopped vegetables and white beans in a bowl.


    Prepare the Filling Vegetables

    While the sauce simmers, heat 1 tablespoon of olive oil in a large skillet over medium heat. Add the finely diced red bell pepper and green bell pepper. Sauté for 5-7 minutes, stirring occasionally, until the vegetables are tender-crisp. You want them cooked but still with a slight bite. Remove the skillet from the heat. Add the rinsed and drained cannellini beans, black beans, and corn to the vegetable mixture. Spoon about half a cup of your prepared curry sauce into the vegetable and bean filling and mix well. This will bind the filling and infuse it with rich curry flavor.

    Assemble the Enchiladas

    Lay out one tortilla on a clean surface. Spoon a generous amount of the curry vegetable and bean filling down the center of the tortilla. Carefully roll up the tortilla tightly and place it seam-side down in your prepared round baking dish. Arrange the enchiladas in a circle, with the ends meeting in the center. Repeat this process with the remaining tortillas and filling.


    Cover and Bake

    Once all the enchiladas are arranged in the baking dish, pour the remaining curry sauce evenly over the top, making sure to cover them completely. Sprinkle the remaining shredded mozzarella cheese over the sauce.


    The gallery shows finished enchiladas on a plate, garnished with fresh cilantro, various ingredients for enchilada variations and enchiladas in the baking dish.


    Bake to Perfection

    Place the baking dish in your preheated oven and bake for 25-30 minutes, or until the enchiladas are bubbly, the cheese is melted and lightly golden, and the tortillas are tender.

    Garnish and Serve

    Carefully remove the baking dish from the oven. Let the enchiladas cool for a few minutes before serving. Garnish generously with fresh chopped cilantro. These vegetable curry enchiladas are best served warm, offering a comforting and flavorful meal.


    Benefits of These Healthy Vegetable Curry Enchiladas

    These White Bean and Vegetable Curry Enchiladas are a nutritional powerhouse, making them an excellent choice for anyone looking for a wholesome and satisfying meal. The use of various beans provides a fantastic source of plant-based protein and dietary fiber, which are crucial for muscle health, satiety, and digestive well-being. Fiber helps regulate blood sugar levels and promotes a healthy gut, while protein keeps you feeling full and energized for longer, preventing unnecessary snacking.

    The vibrant array of vegetables—bell peppers, corn, and beans—contributes a wealth of vitamins, minerals, and antioxidants. Bell peppers are rich in Vitamin C, boosting immune function, while corn and black beans provide key vitamins and minerals. These components work synergistically to support overall health, reduce inflammation, and protect your cells from damage, making every bite a step towards better health.

    Furthermore, the homemade curry sauce, based on light coconut milk and crushed tomatoes, offers healthy fats and flavor without excessive calories or unhealthy additives often found in store-bought sauces. Coconut milk provides medium-chain triglycerides (MCTs) which can be easily metabolized for energy. By making this dish from scratch, you have full control over the ingredients, allowing you to minimize sodium and artificial preservatives, ensuring a clean and truly nourishing meal that fits perfectly into a healthy lifestyle.


    The images show the benefits of vegetables used in this recipe and the benefits of homemade curry sauce.


    Variations: Customize Your Curry Enchiladas

    This recipe is incredibly versatile! Feel free to experiment with different ingredients to suit your taste or dietary needs.

    VariationIngredients to Add/Substitute
    Spicy KickAdd ½ teaspoon red pepper flakes to the curry sauce or a chopped jalapeño to the filling.
    Extra ProteinStir in 1 cup cooked chickpeas or lentils to the filling for more plant-based protein.
    Different VeggiesAdd chopped zucchini, sweet potato (roasted first), or green beans to the filling.
    Grain-FreeUse large lettuce leaves or steamed cabbage leaves instead of tortillas for a low-carb option.
    Vegan CheeseSubstitute mozzarella with your favorite dairy-free shredded cheese.
    Creamier SauceUse full-fat coconut milk for a richer, more indulgent curry sauce.

    Final Thoughts: A Flavorful Path with Vegetable Curry Enchiladas

    These White Bean and Vegetable Curry Enchiladas are a testament to how creative and exciting healthy eating can be. By blending global flavors with wholesome ingredients, we’ve created a dish that is both deeply satisfying and incredibly nutritious. This recipe is an invitation to explore new tastes, to enjoy the process of cooking, and to feel good about every bite you take. They are perfect for a family dinner, a meal prep solution, or an impressive dish to share with friends. Embrace the vibrant flavors and comforting warmth of these enchiladas, and make them a new favorite in your healthy culinary repertoire.


    Frequently Asked Questions (FAQs)

    Q: Can I prepare the curry sauce and filling ahead of time?

    A: Absolutely! You can make the curry sauce and the vegetable and bean filling up to 2-3 days in advance. Store them separately in airtight containers in the refrigerator. When you’re ready to make the enchiladas, simply assemble and bake as directed. This makes it an excellent option for meal prepping.

    Q: Can I freeze these enchiladas?

    A: Yes, these enchiladas freeze well! You can assemble the enchiladas in the baking dish, cover tightly with foil (or an airtight lid if your dish has one), and freeze for up to 2-3 months. To cook from frozen, bake at 375°F (190°C) for 45-60 minutes, or until heated through and bubbly, removing the foil for the last 15-20 minutes to allow the cheese to brown. You can also freeze baked leftovers.


    References

    1. Harvard T.H. Chan – Legumes and Pulses
    2. Mayo Clinic – Dietary fiber
    3. Academy of Nutrition and Dietetics – Healthy Weight Loss

    Recent Posts