Cookie Consent by Free Privacy Policy Generator Update cookies preferences

Make The Best Pasta salad Ever!


This article will guide you through creating a unique and flavorful Pasta Salad that is far from ordinary. You’ll learn to combine simple ingredients like pasta, grilled chicken, and fresh vegetables with unexpected additions like sweet mandarin oranges and nutrient-rich chia seeds to create a truly unforgettable meal. The versatility of this Pasta Salad makes it perfect for a busy weeknight dinner or a light, refreshing lunch.


The image shows a bowl of pasta salad. It contains fruit and nuts plus grilled chicken
Pasta Salad

Why This Pasta Salad Is a Game-Changer

Have you ever found yourself in a food rut, making the same old recipes on repeat? It’s a common challenge for even the most enthusiastic home cooks. This recipe for the best Pasta Salad ever is here to help you break free from that routine. We’re taking a beloved classic and giving it a fresh, modern twist that’s not only delicious but also packed with nutrients and vibrant flavors. This isn’t your grandmother’s creamy macaroni salad; it’s a bright, satisfying, and refreshingly different dish that will become a new favorite in your repertoire.

What makes this particular Pasta Salad so special is its incredible balance of textures and tastes. Imagine the satisfying chewiness of perfectly cooked pasta, the crispness of fresh green peppers, the sweet pop of cherry tomatoes, and the savory tenderness of grilled chicken. Then, we introduce an unexpected burst of citrus from mandarin oranges, which cuts through the richness of the creamy, herbed dressing. Finally, a sprinkle of nuts and seeds adds a delightful crunch and an extra layer of healthy goodness.

Low-Effort, High-Reward Cooking

This dish is also a testament to how simple ingredients can come together to create something truly extraordinary. It’s a low-effort, high-reward meal that’s perfect for meal prepping, packing for a picnic, or serving at your next barbecue. The ingredients are easy to find and the steps are straightforward, making it accessible for cooks of all skill levels. Even if you’ve never made a Pasta Salad before, this recipe will guide you to a perfect result every single time.

Beyond its amazing flavor, this Pasta Salad is a nutritional powerhouse. It’s a complete meal in a single bowl, offering a fantastic balance of carbohydrates, lean protein, and healthy fats. The vibrant colors in the salad aren’t just beautiful to look at; they’re a sign of the wide array of vitamins and antioxidants you’re getting with every bite. The combination of ingredients supports everything from digestive health to energy levels, making it a smart choice for your body.

So, get ready to discover a new way to enjoy a classic. This recipe for the best Pasta Salad ever is more than just a meal; it’s an invitation to have fun in the kitchen and nourish your body with every spoonful. Let’s get started on this culinary adventure and prepare a dish that’s sure to impress everyone who tries it.


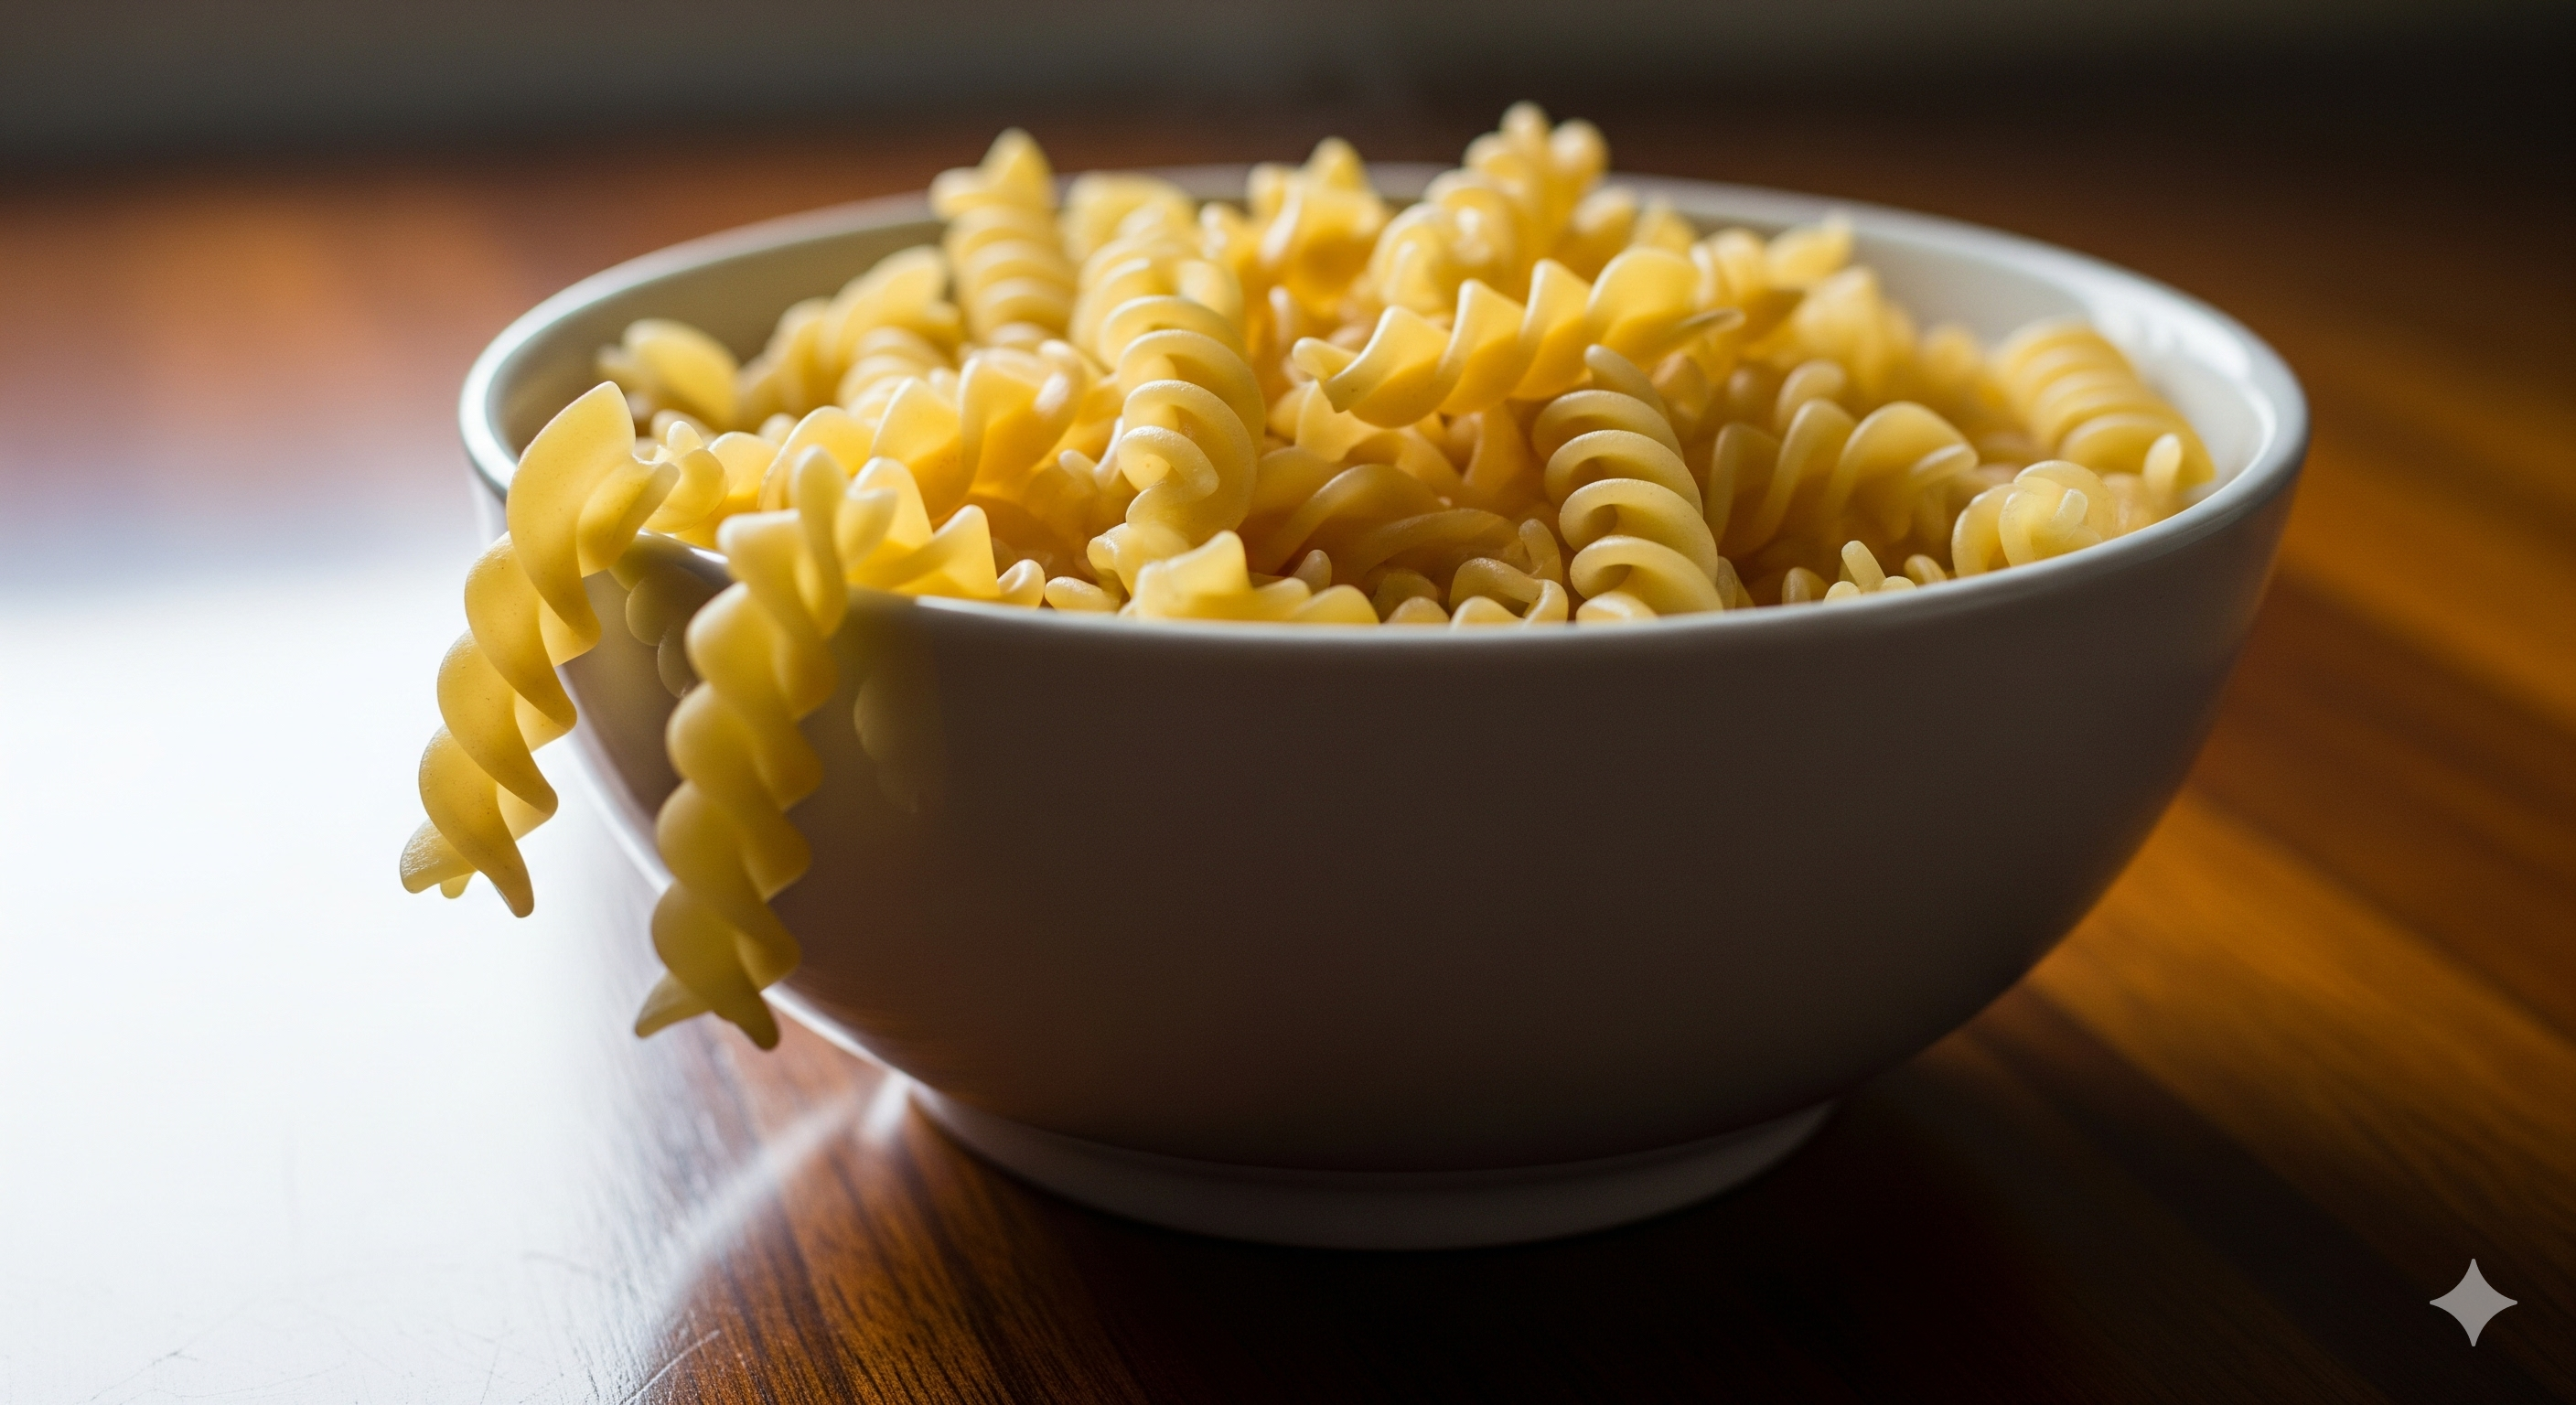
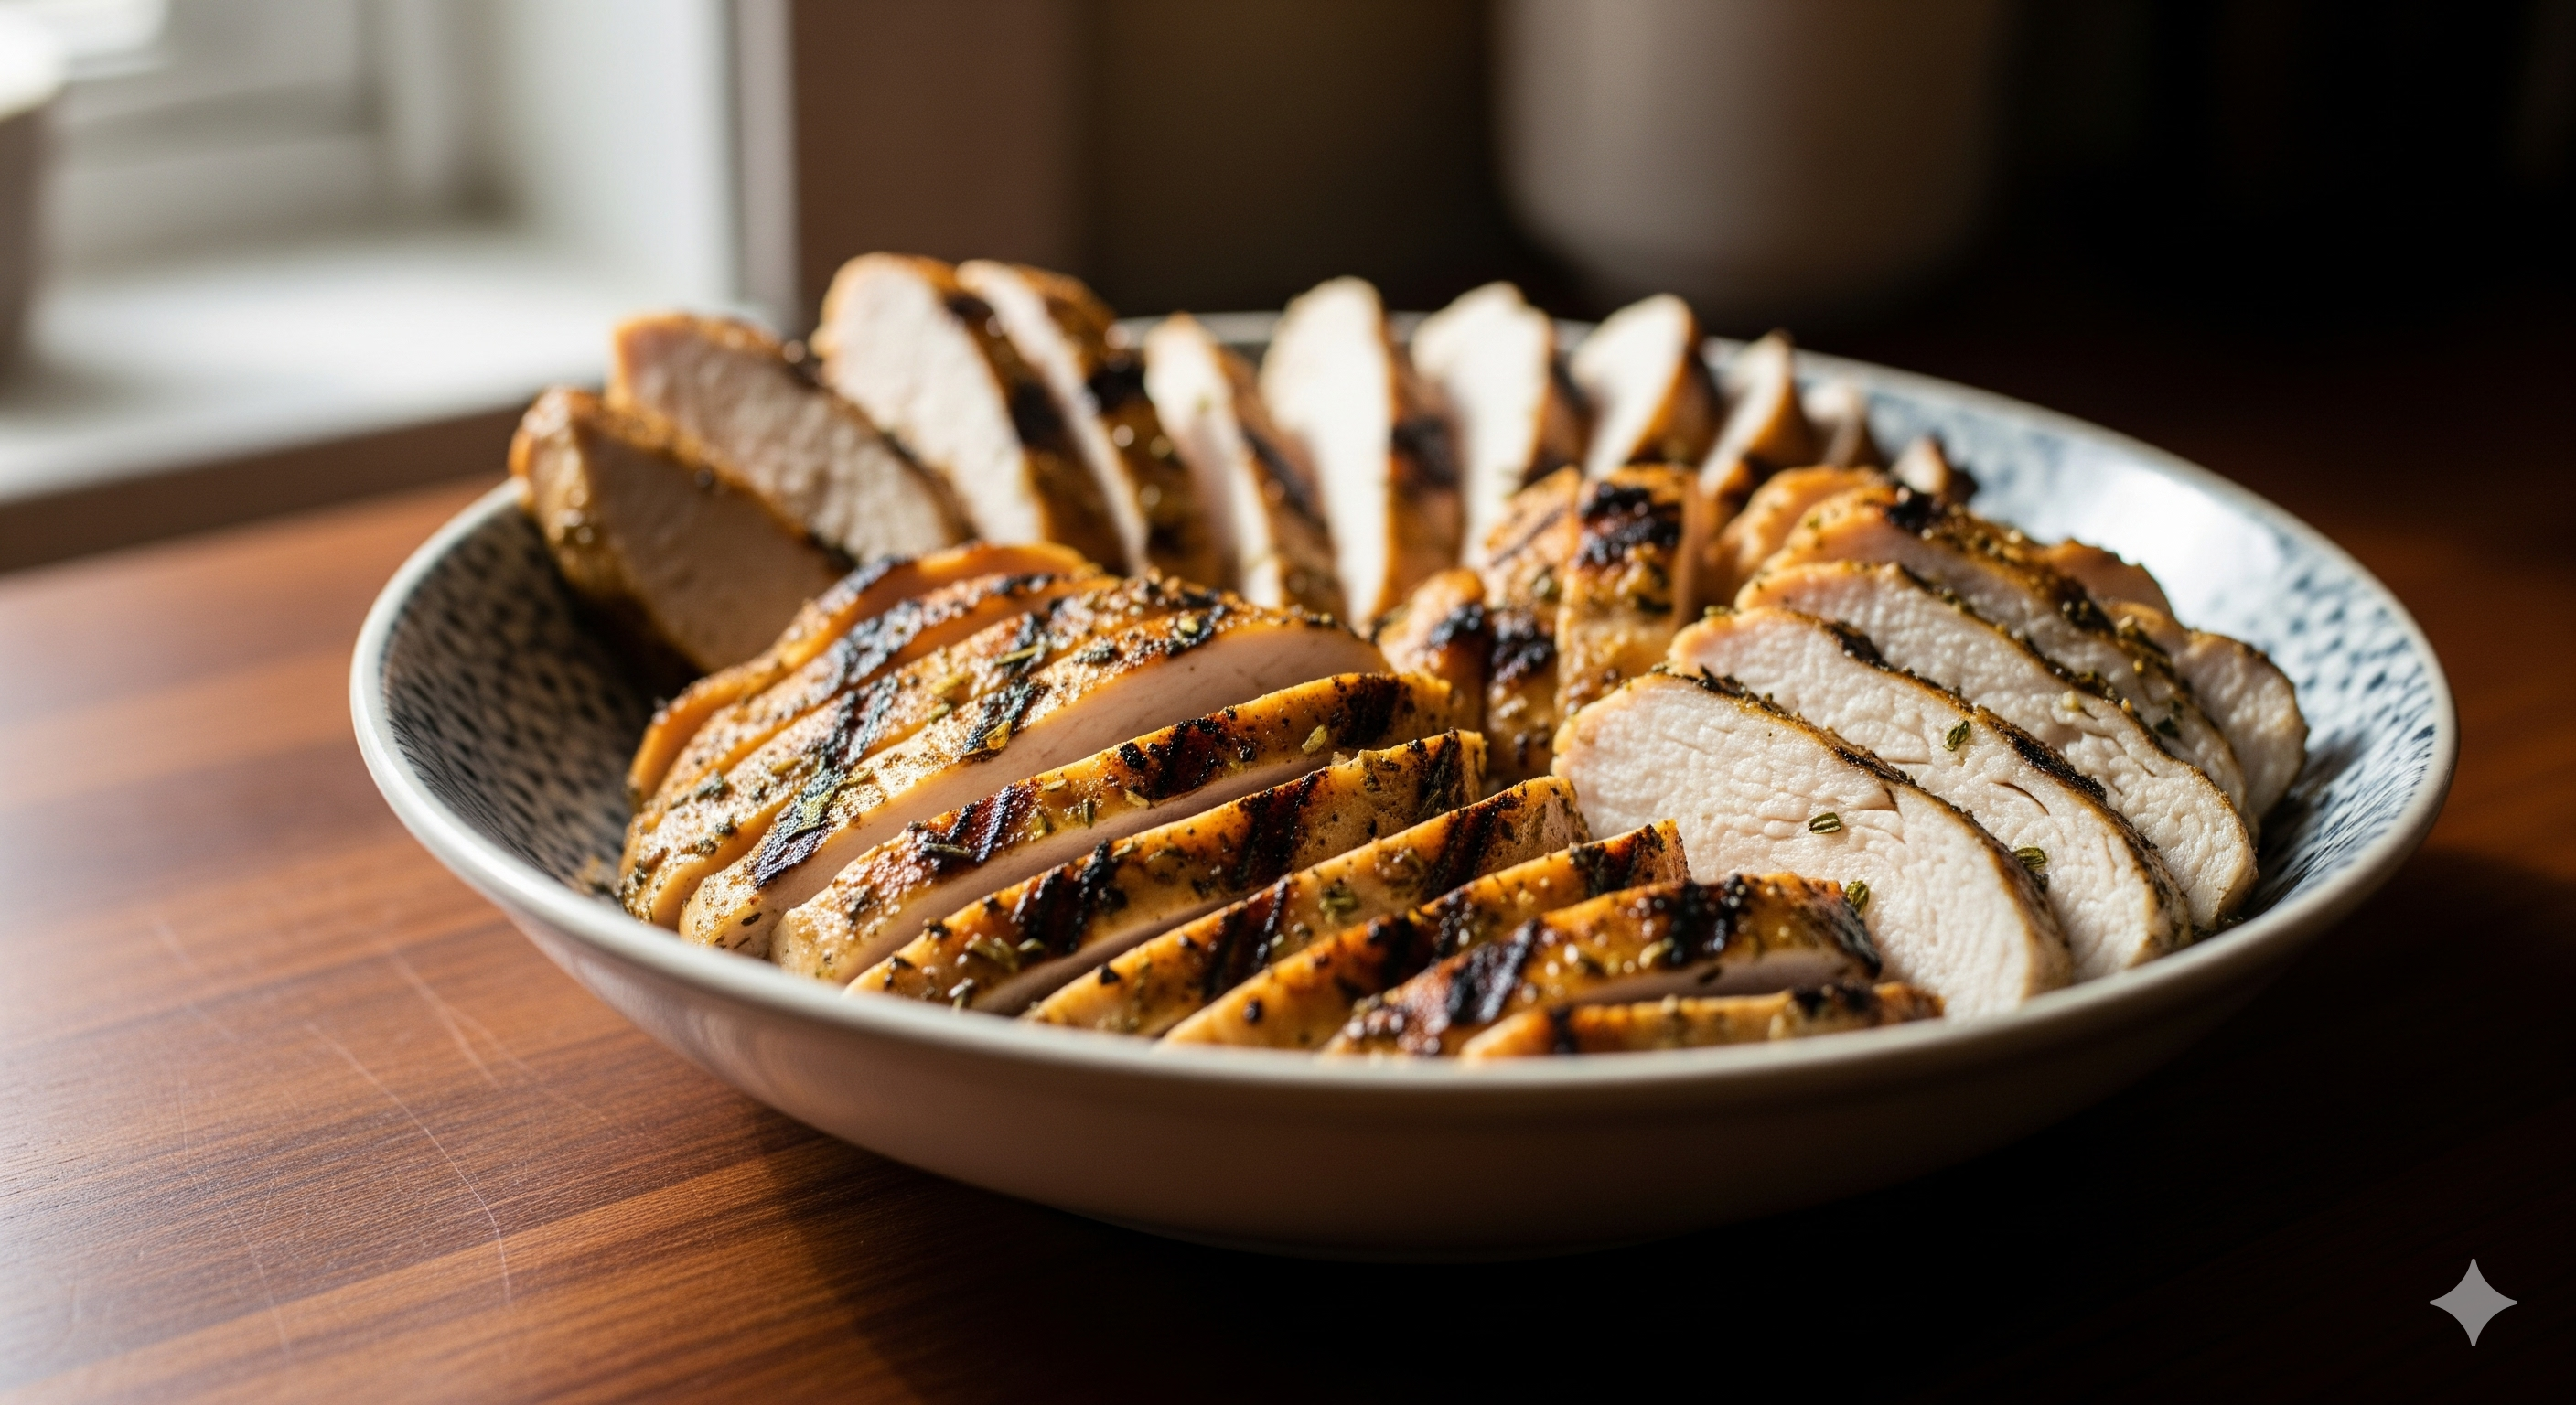
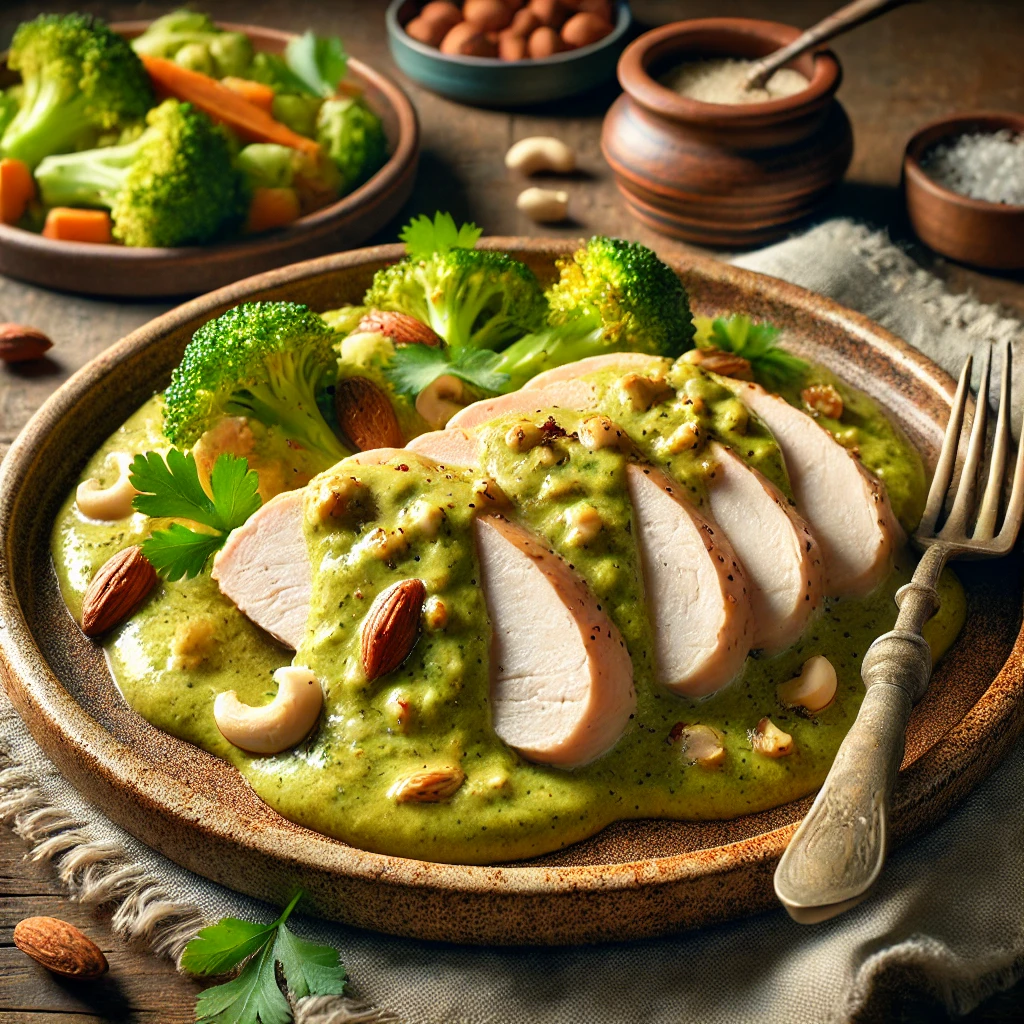
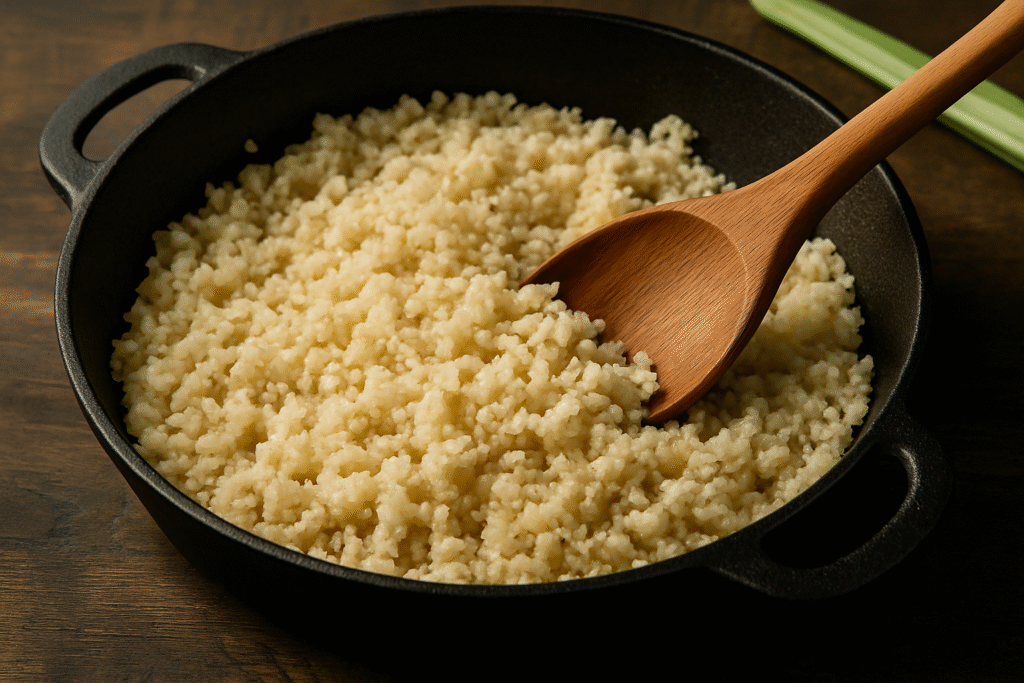
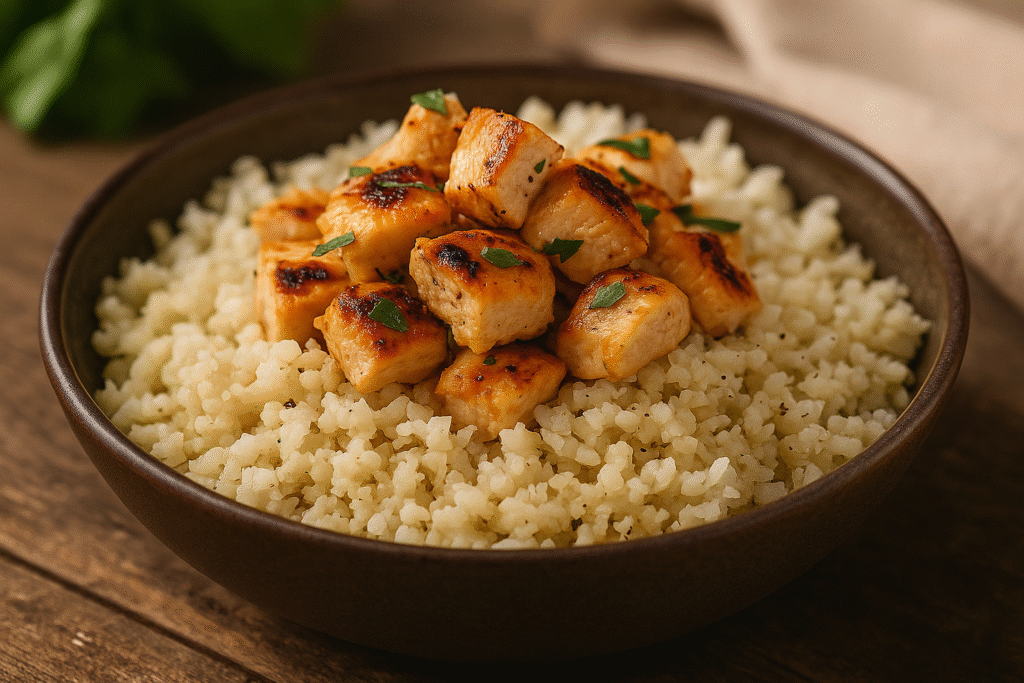
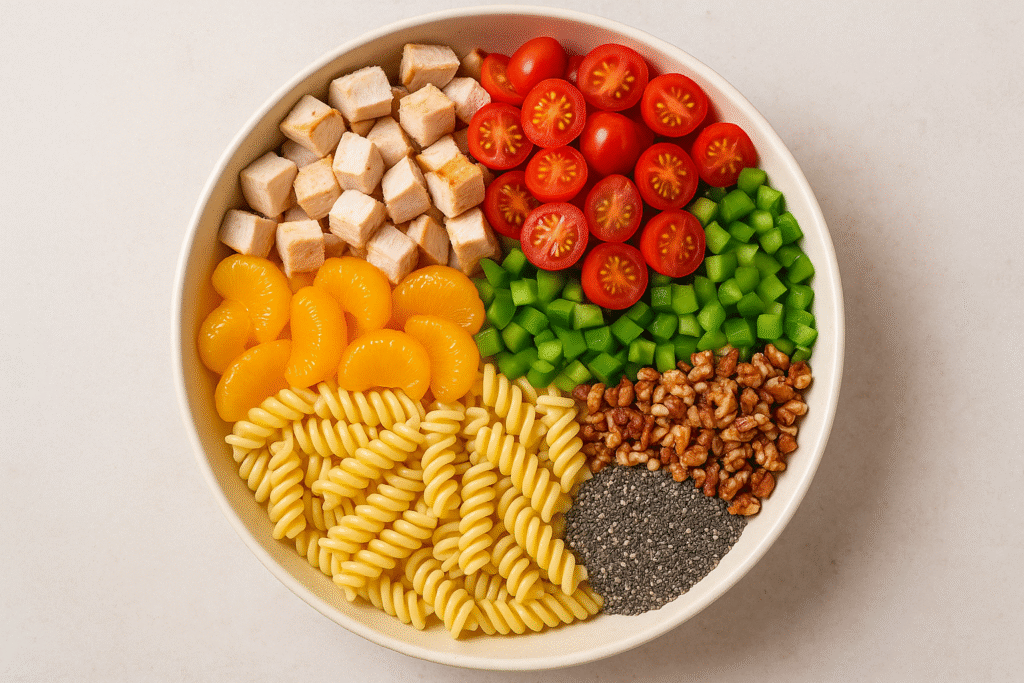
The gallery shows cooked pasta, bell peppers and grilled chicken


Your Best Pasta Salad Recipe


Time to Prepare: 20 minutes

Time to Cook/Blend: 15 minutes

Servings: 6


Nutritional Information

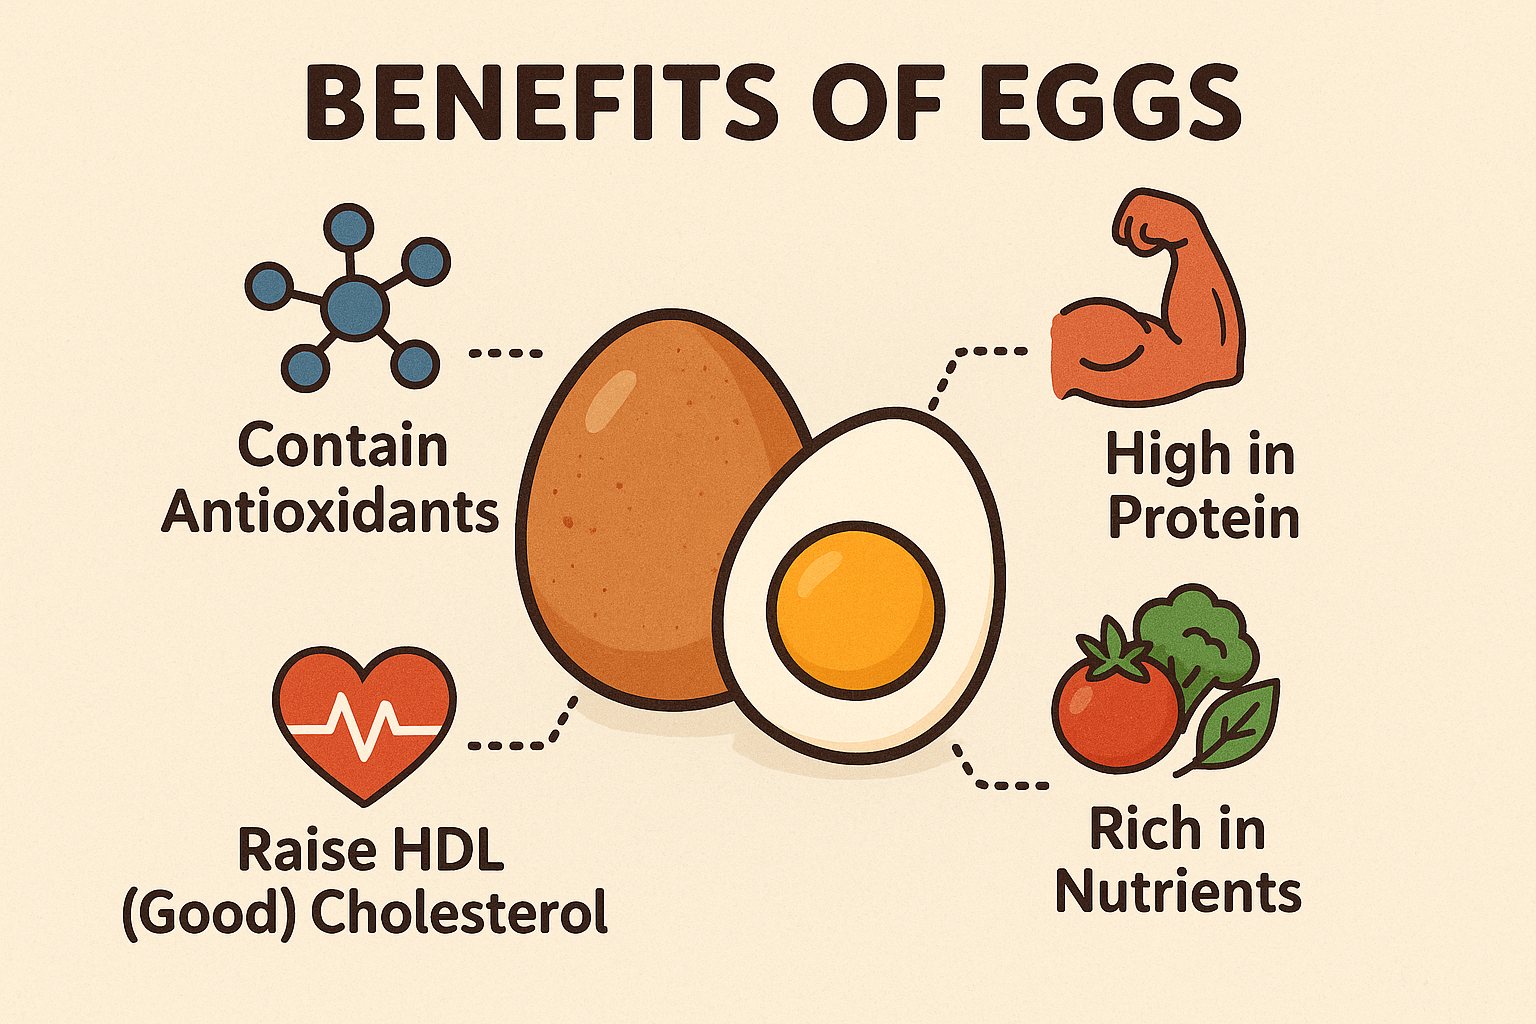
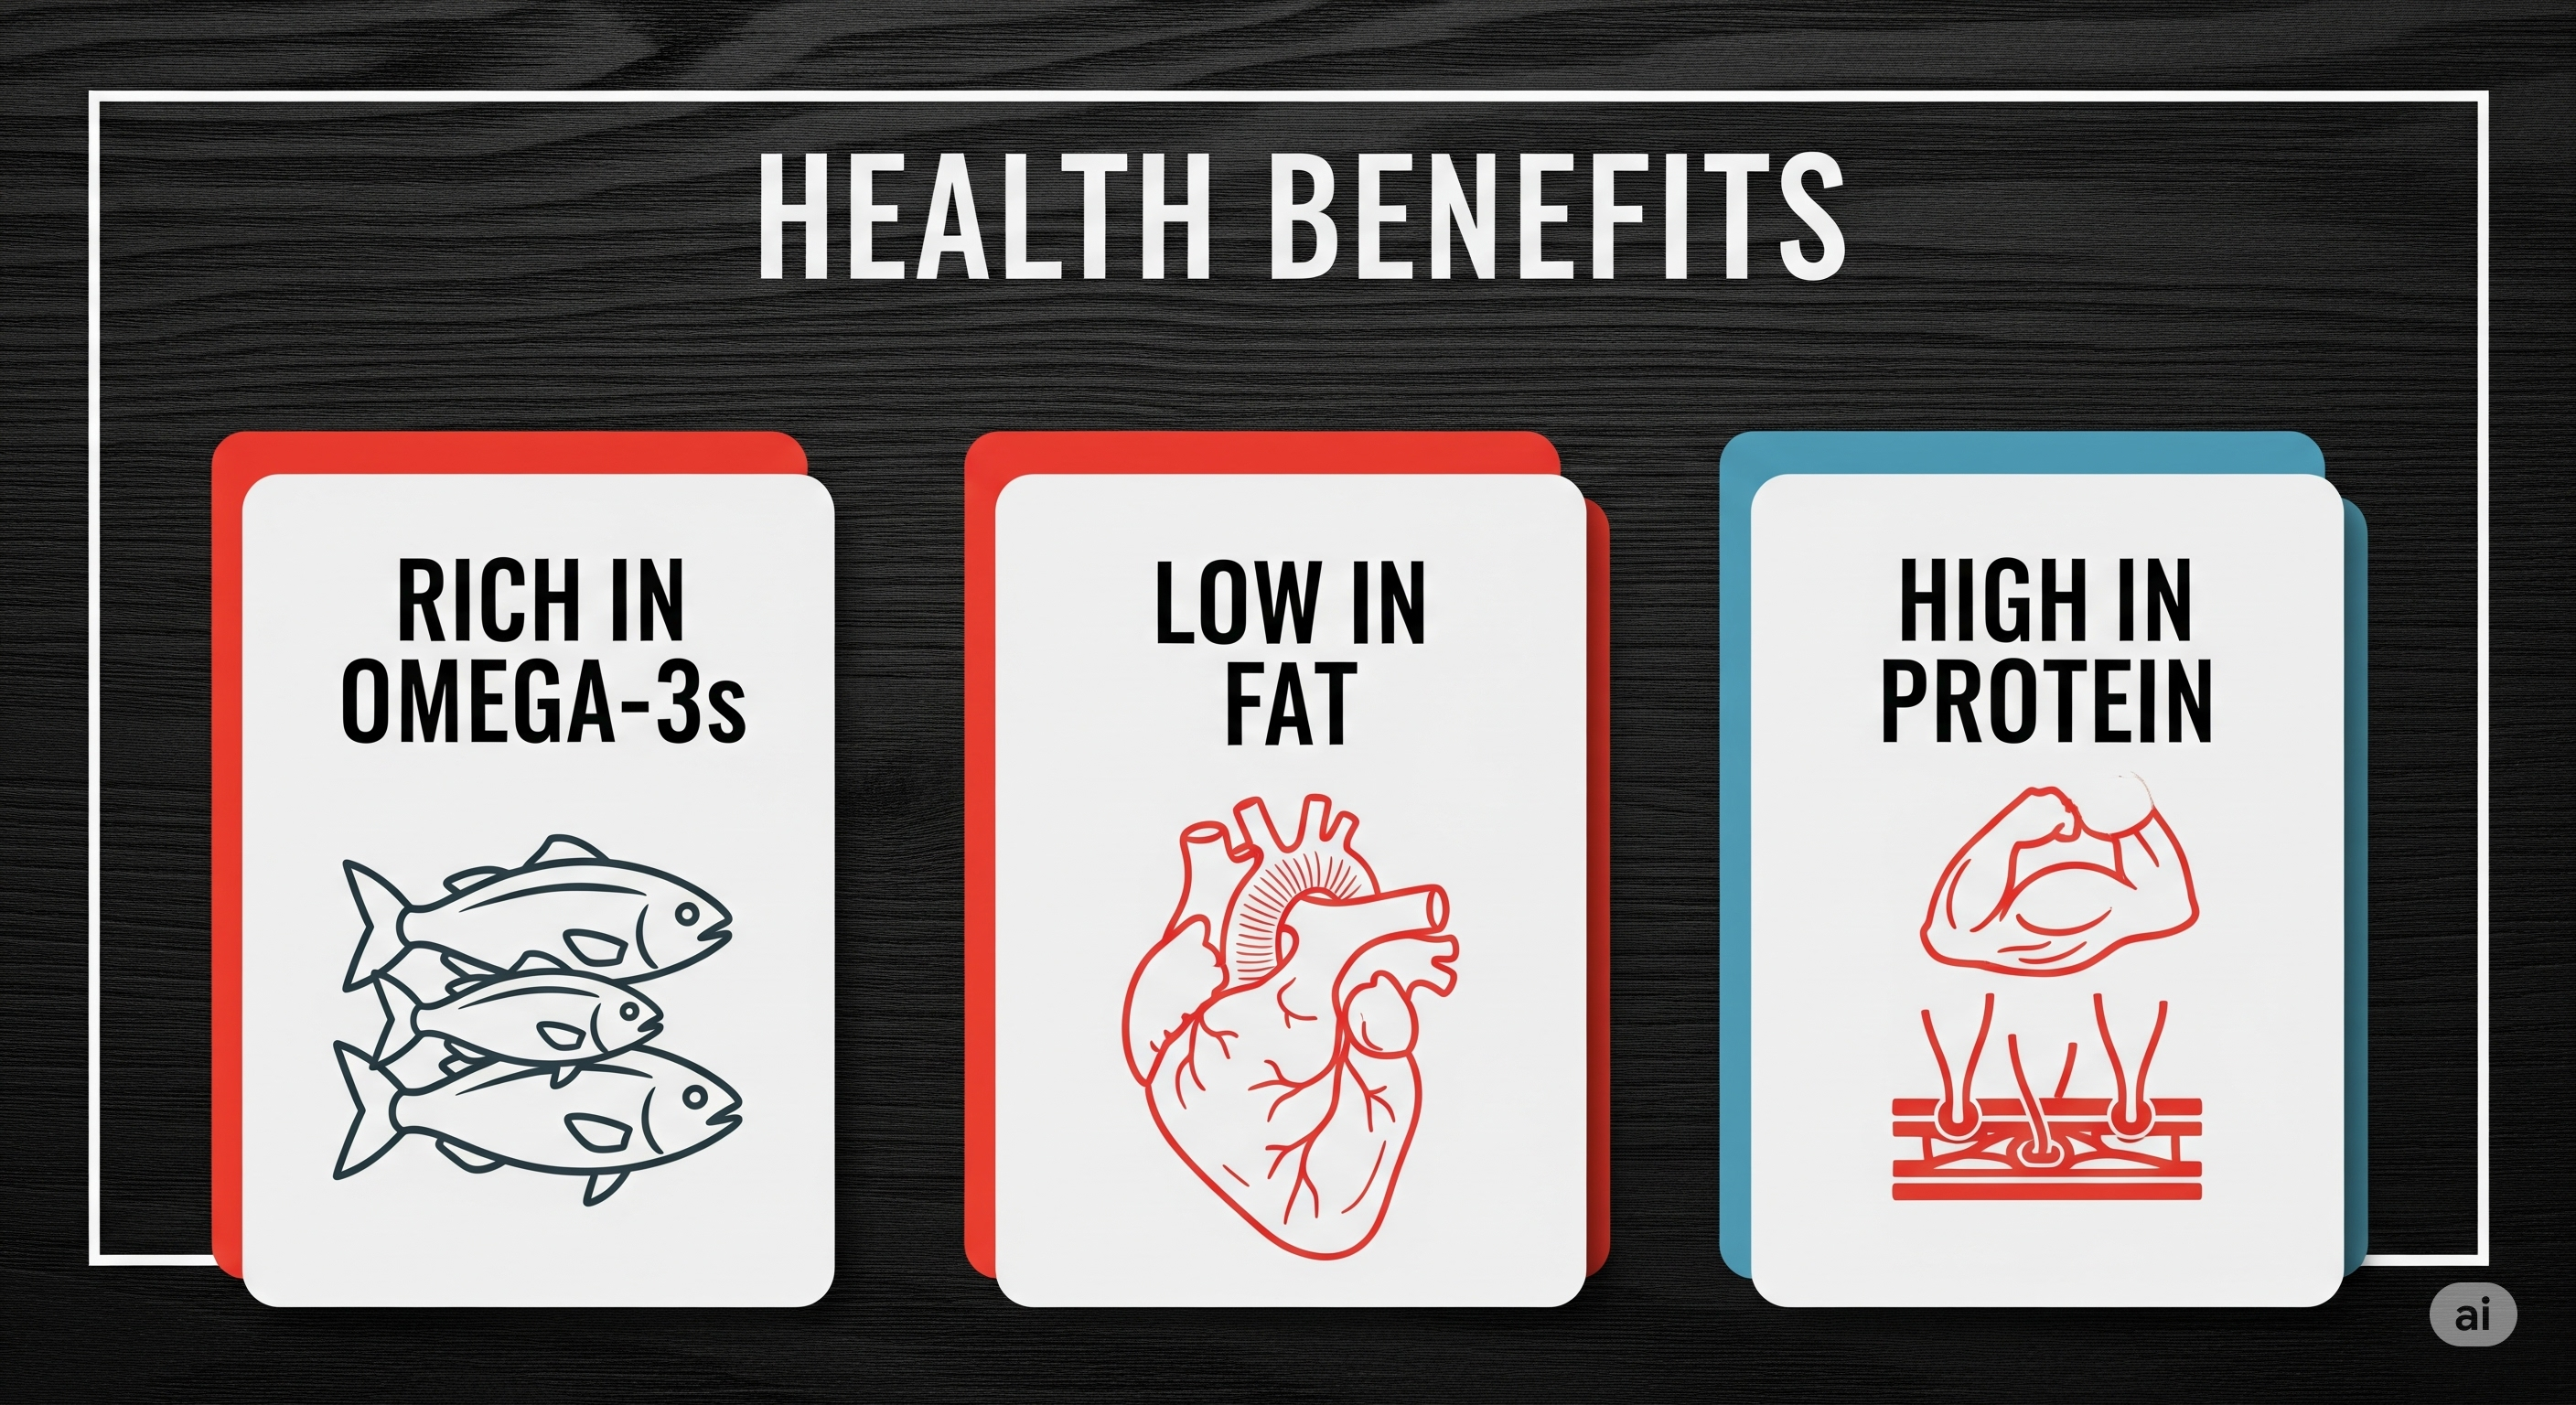
This Pasta Salad recipe is more than just tasty; it’s a complete, well-balanced meal. A single serving provides a healthy mix of macronutrients. The pasta serves as a source of complex carbohydrates for sustained energy, while the grilled chicken provides high-quality lean protein, essential for muscle repair and keeping you feeling full.

The nuts and seeds contribute healthy monounsaturated fats and fiber, which aid in satiety and heart health. The wide variety of fresh vegetables and mandarin oranges are rich in vitamins, minerals, and antioxidants, supporting a robust immune system. The yogurt-based dressing reduces saturated fat compared to traditional mayonnaise-based versions, making it a lighter and healthier choice.
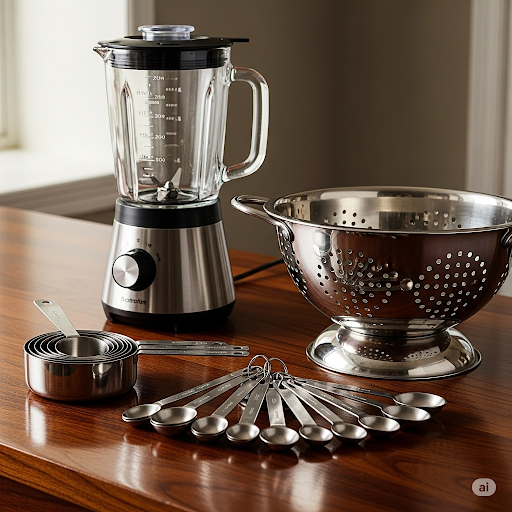

Equipment

  • Large pot or Dutch oven
  • Large mixing bowl
  • Cutting board and sharp knife
  • Small bowl for dressing
  • Whisk
  • Large colander
  • Spoon or tongs for mixing
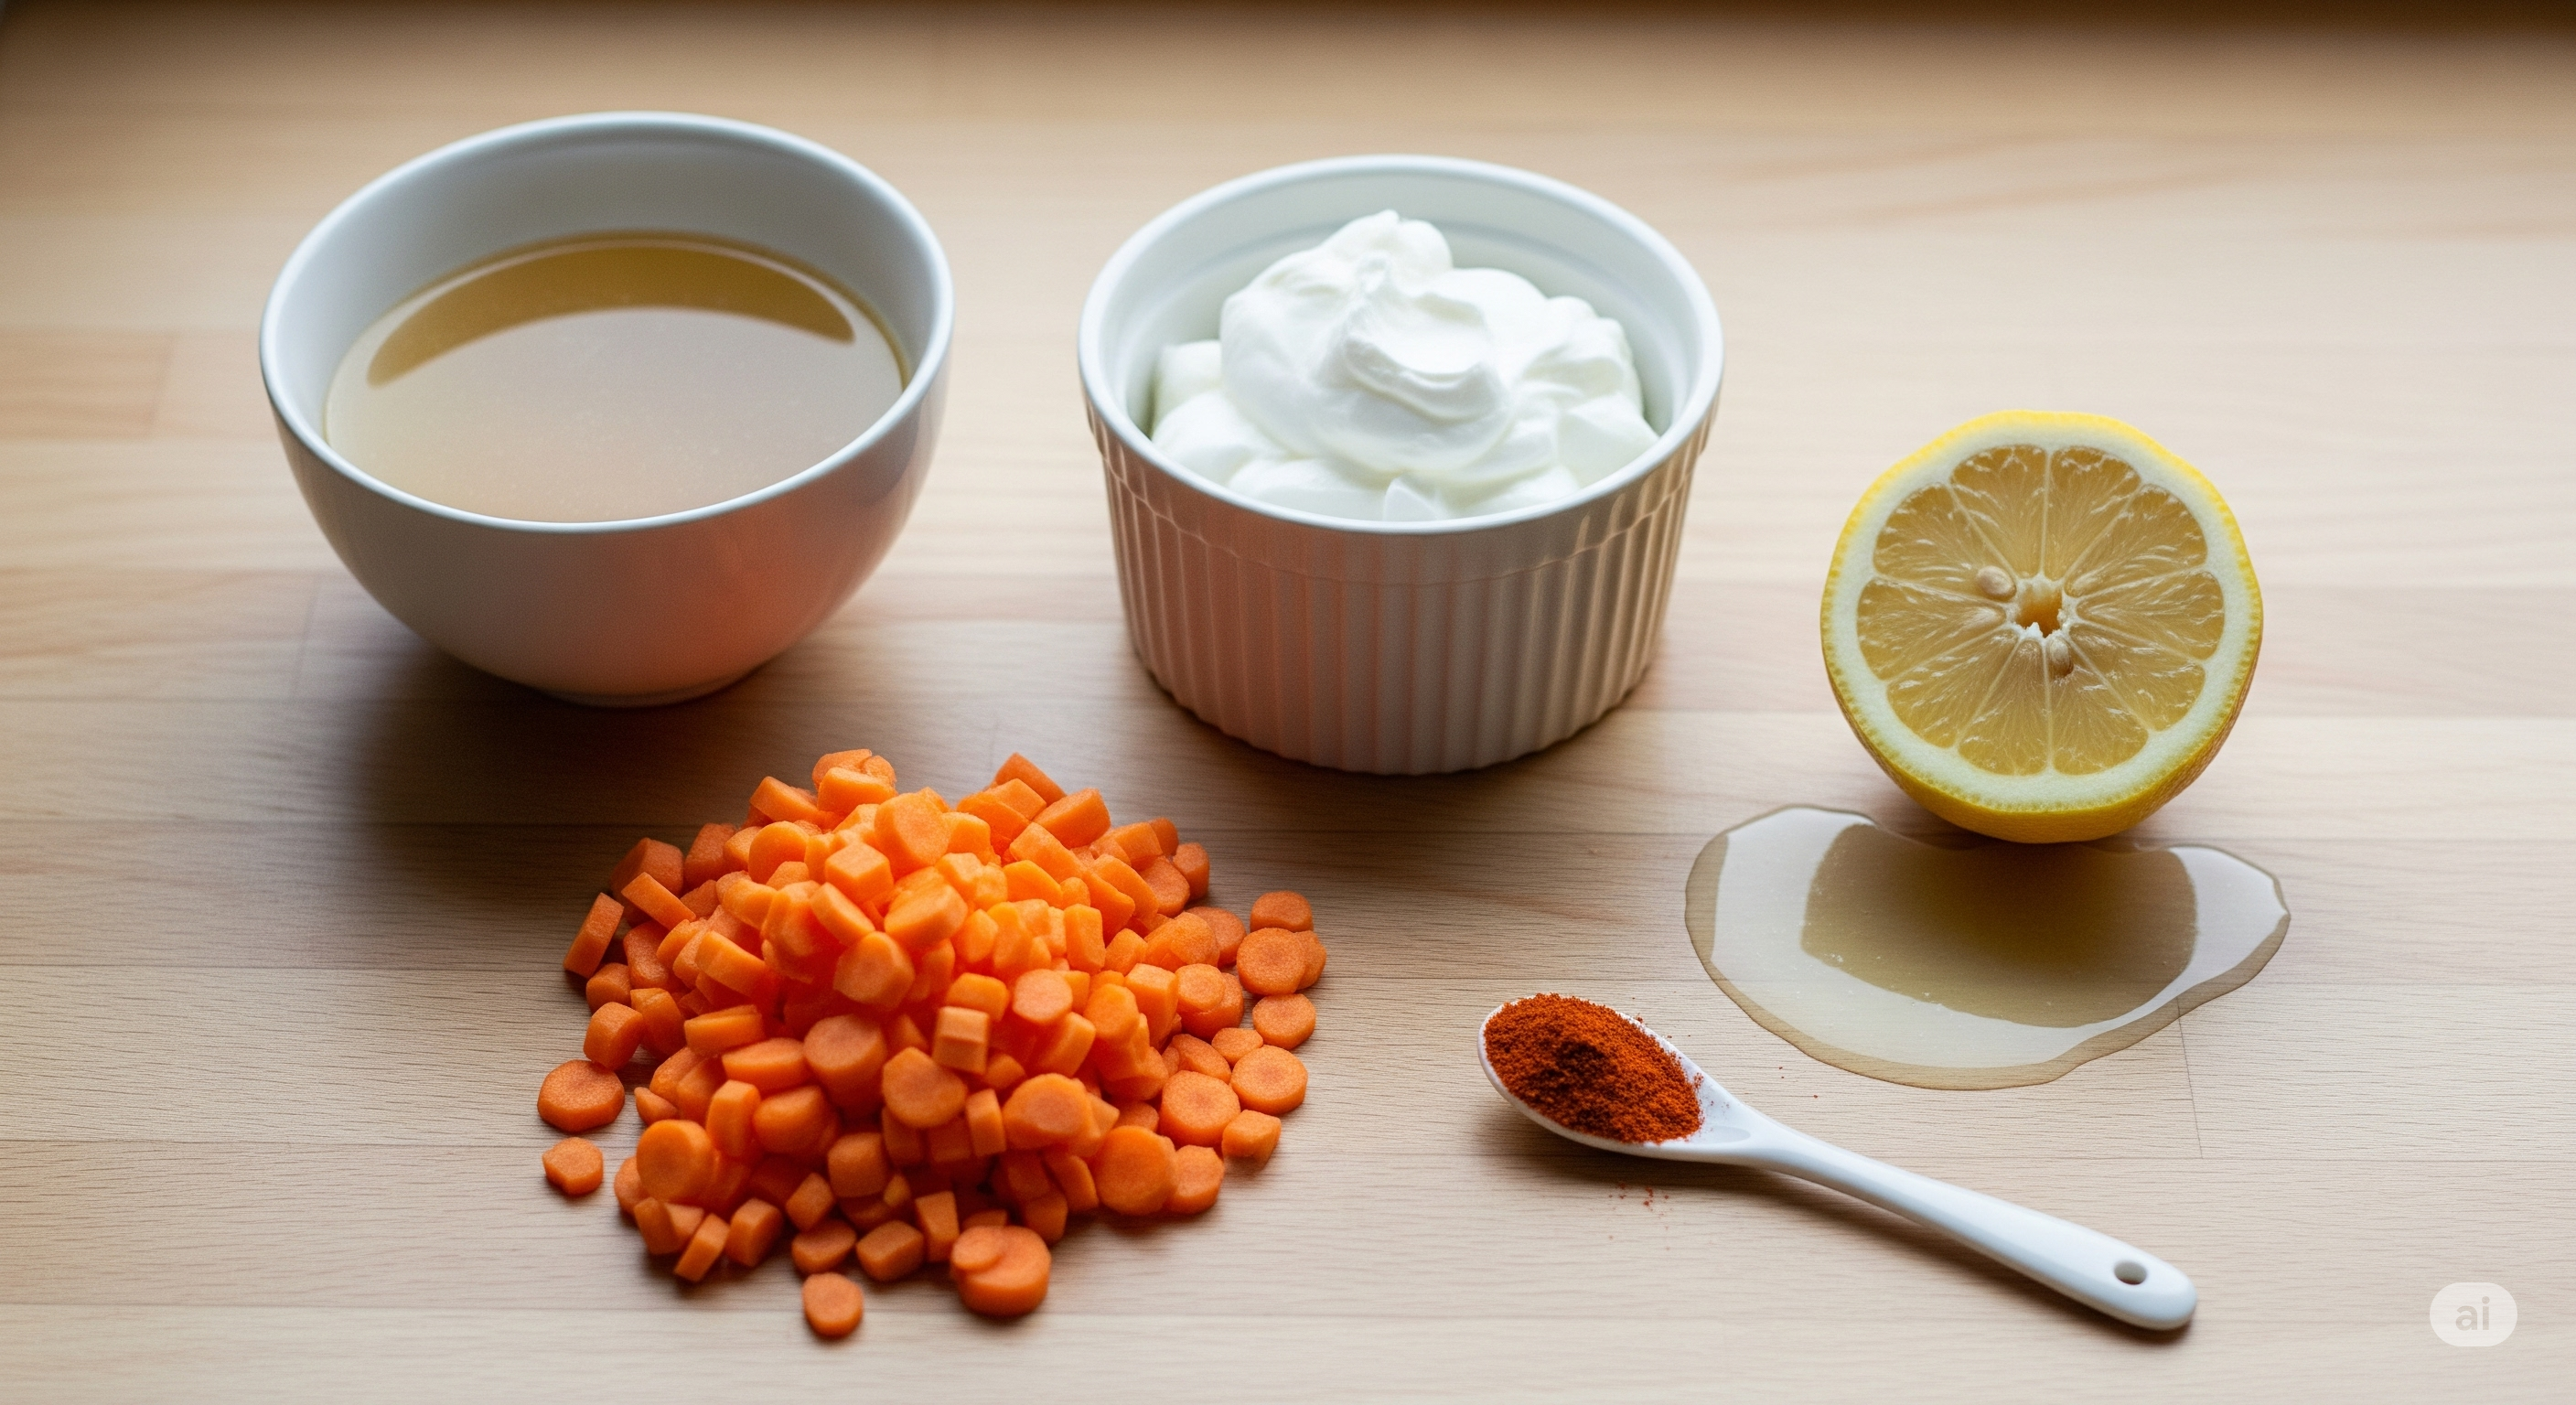
Ingredients

For the Pasta Salad

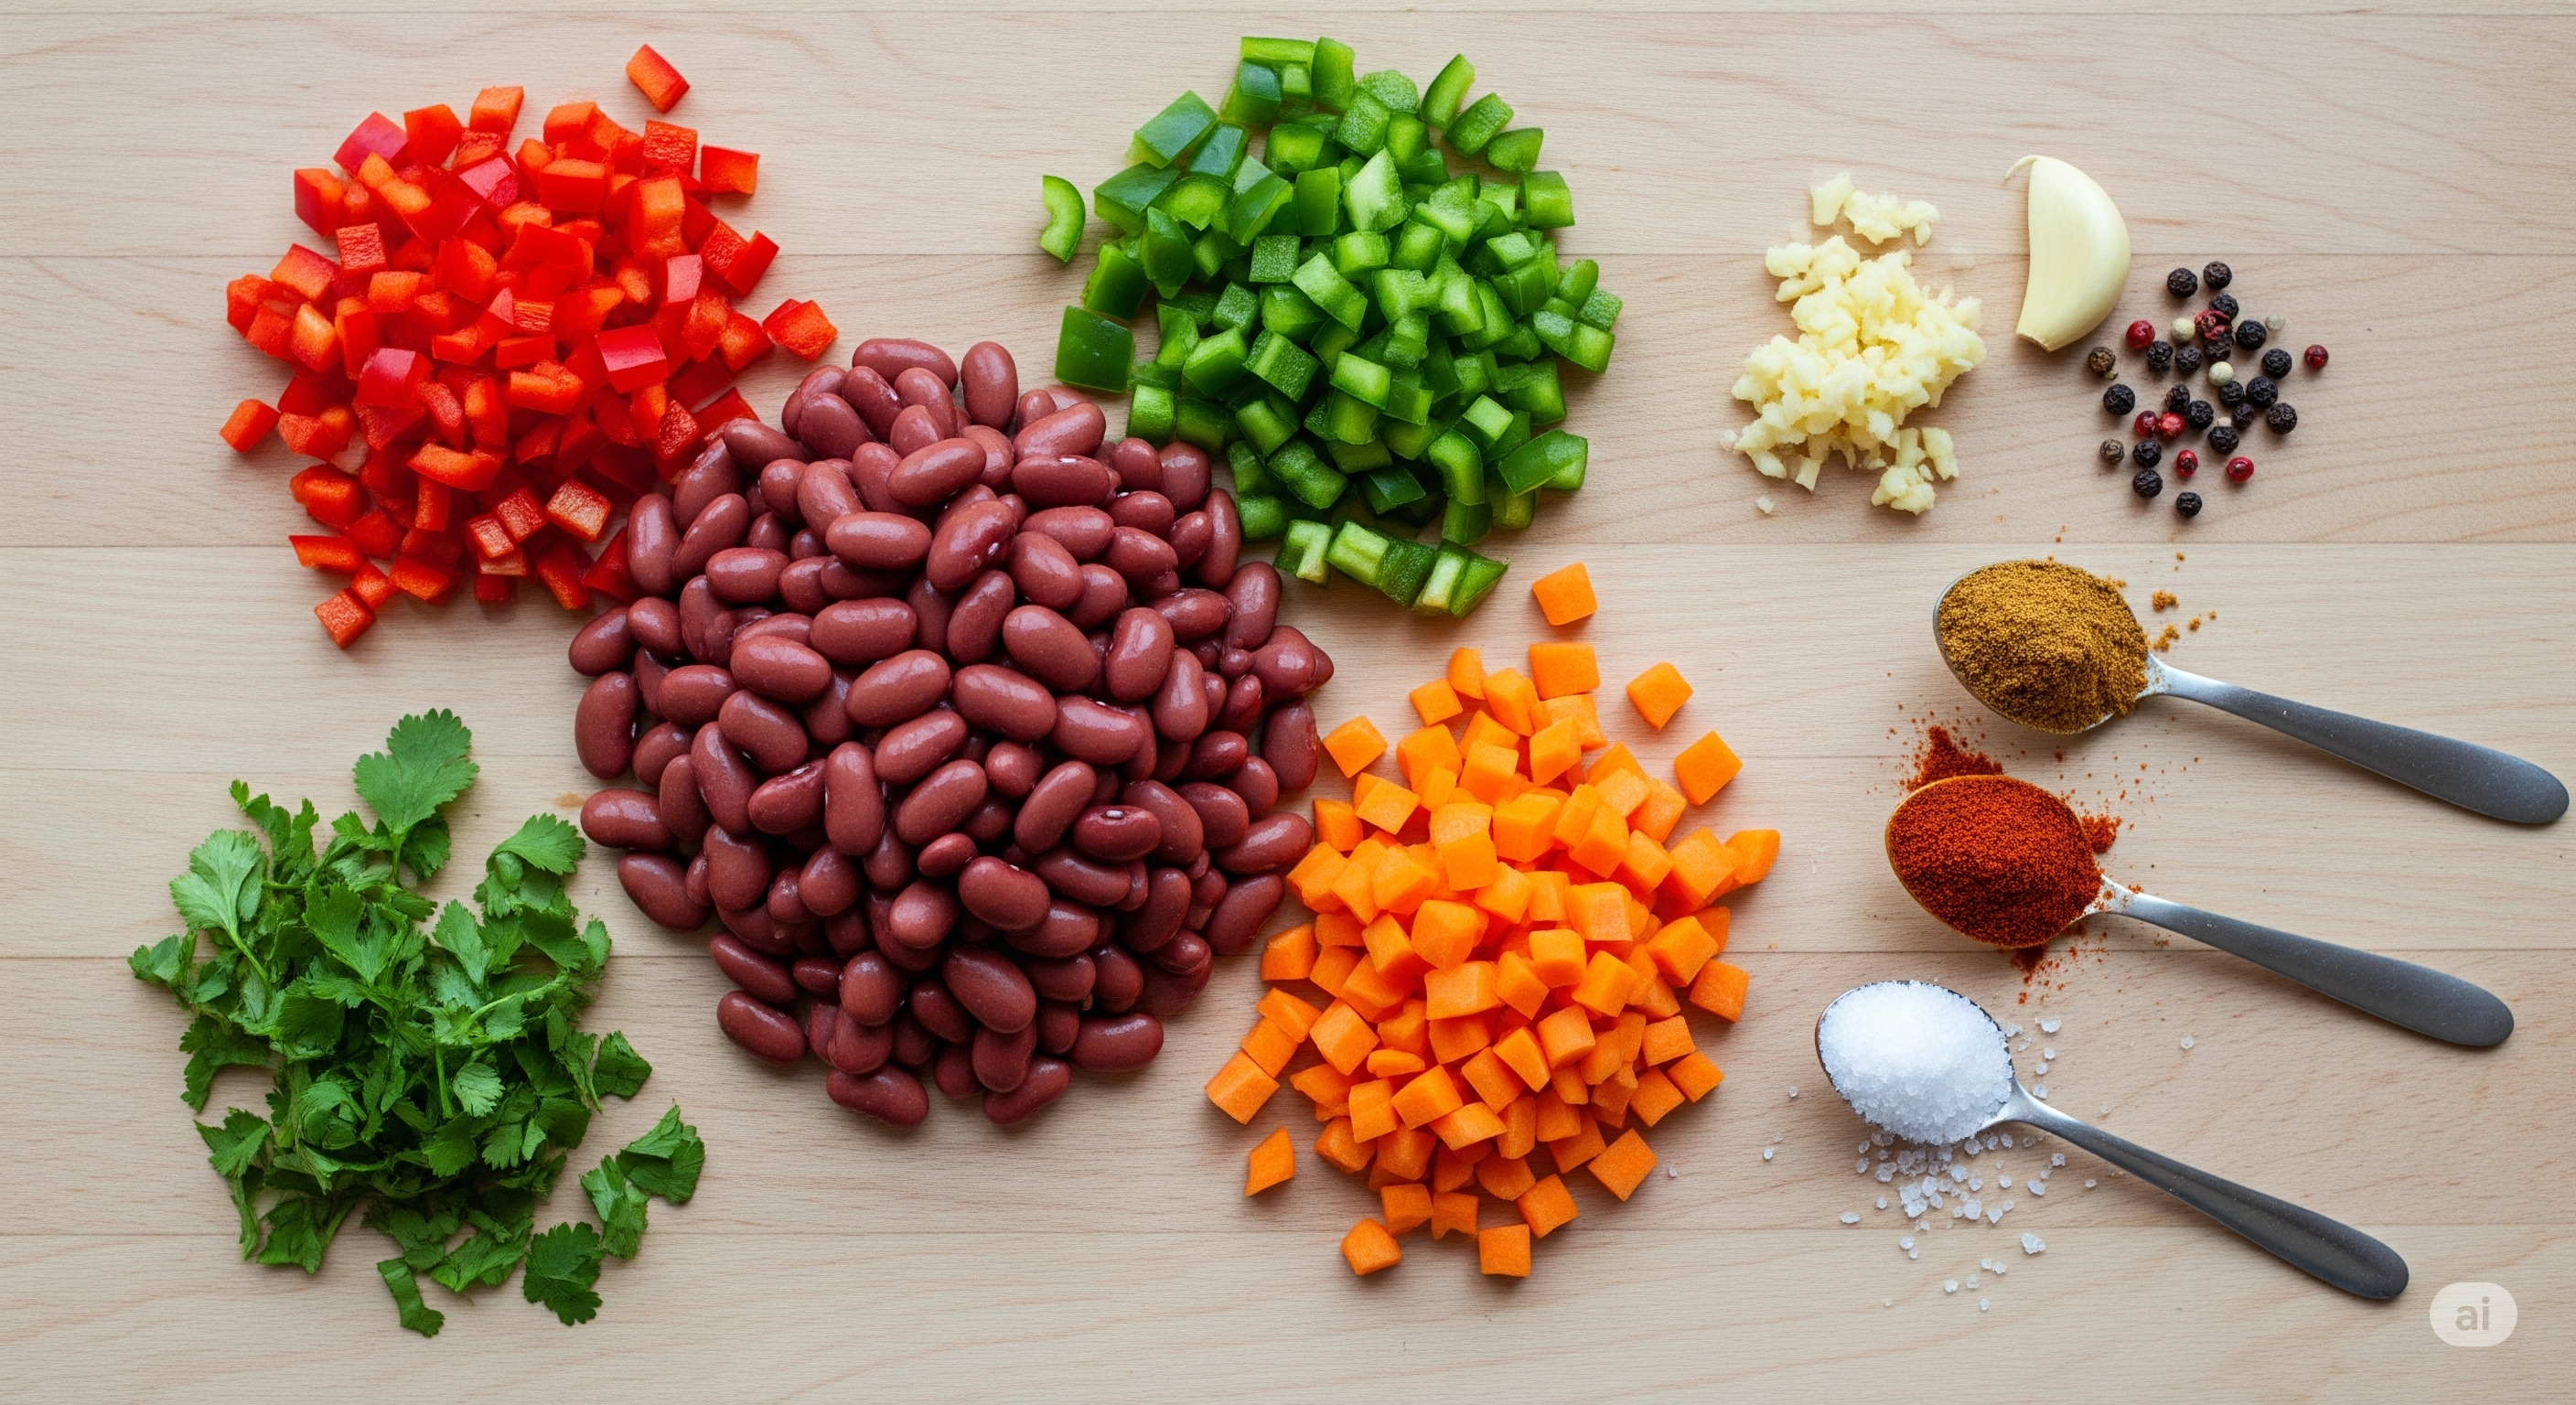
  • 1 pound (16 ounces) spiral pasta (rotini or fusilli)
  • 1 large chicken breast (about 8 ounces), grilled and cubed
  • 1 cup cherry tomatoes, halved
  • 1 large green bell pepper, finely diced
  • 1 (11-ounce) can mandarin orange segments, drained
  • 1/2 cup walnuts or pecans, chopped
  • 2 tablespoons chia seeds

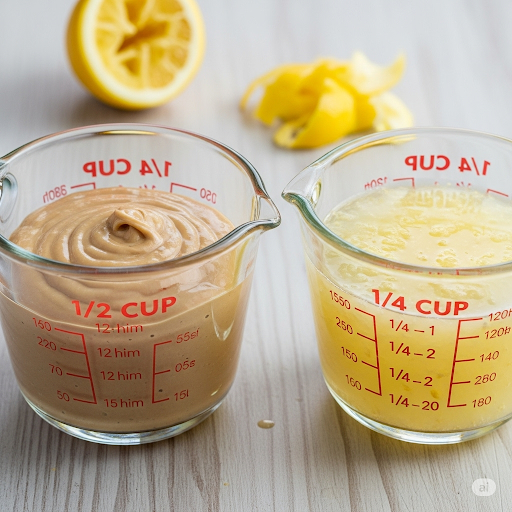
For the Creamy Yogurt Dressing

  • 1 cup plain Greek yogurt
  • 1/2 cup mayonnaise (or a lighter alternative)
  • 2 tablespoons lemon juice
  • 1 tablespoon white wine vinegar
  • 1 tablespoon fresh dill, finely chopped
  • 1 teaspoon onion powder
  • 1 teaspoon garlic powder
  • Salt and black pepper to taste

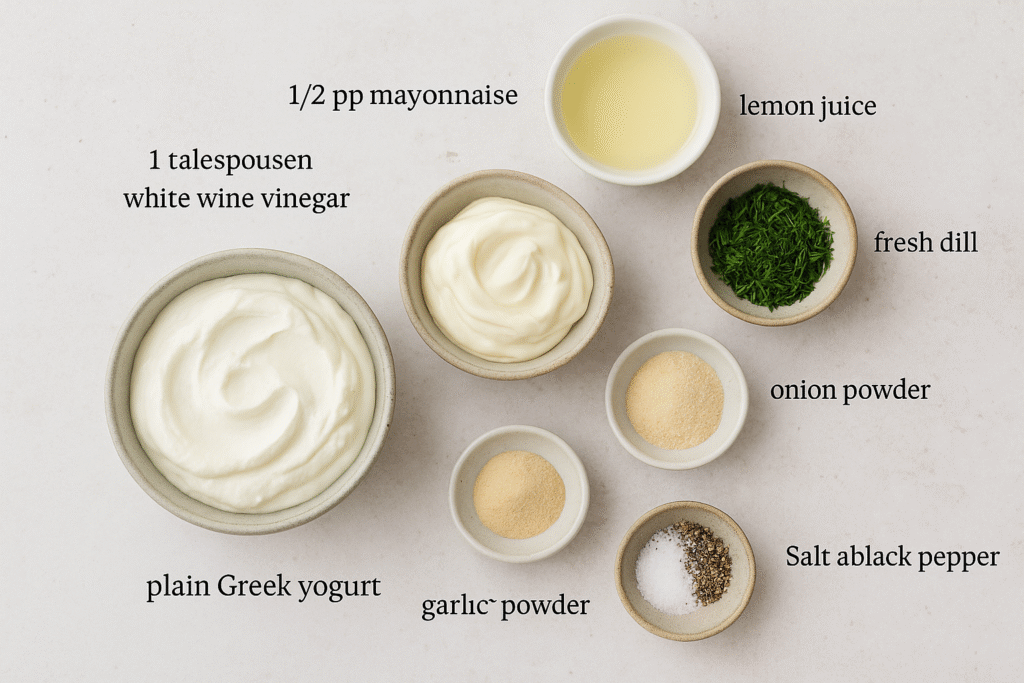
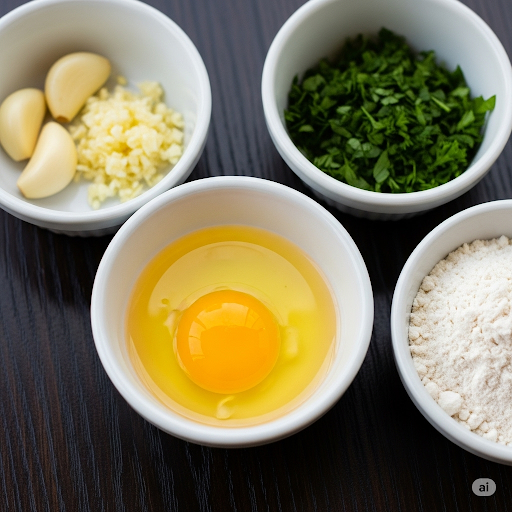
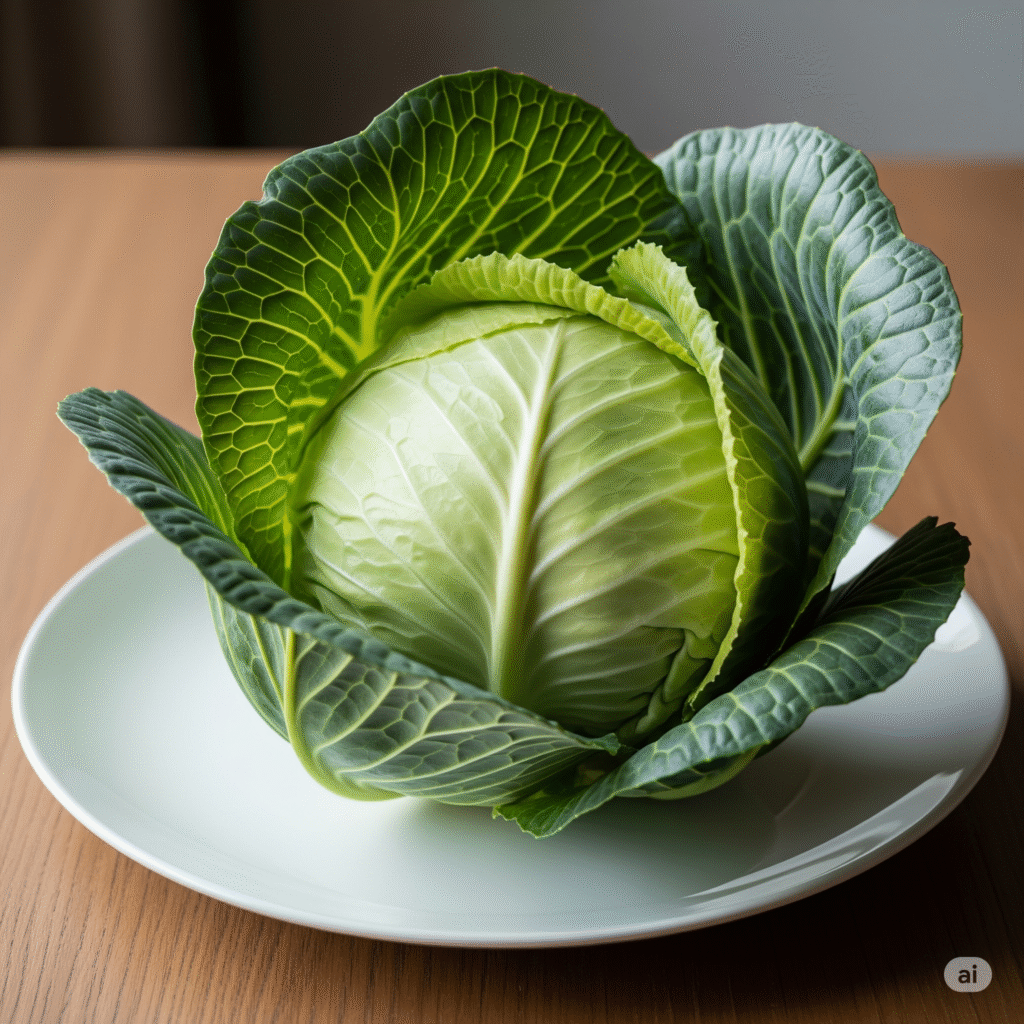
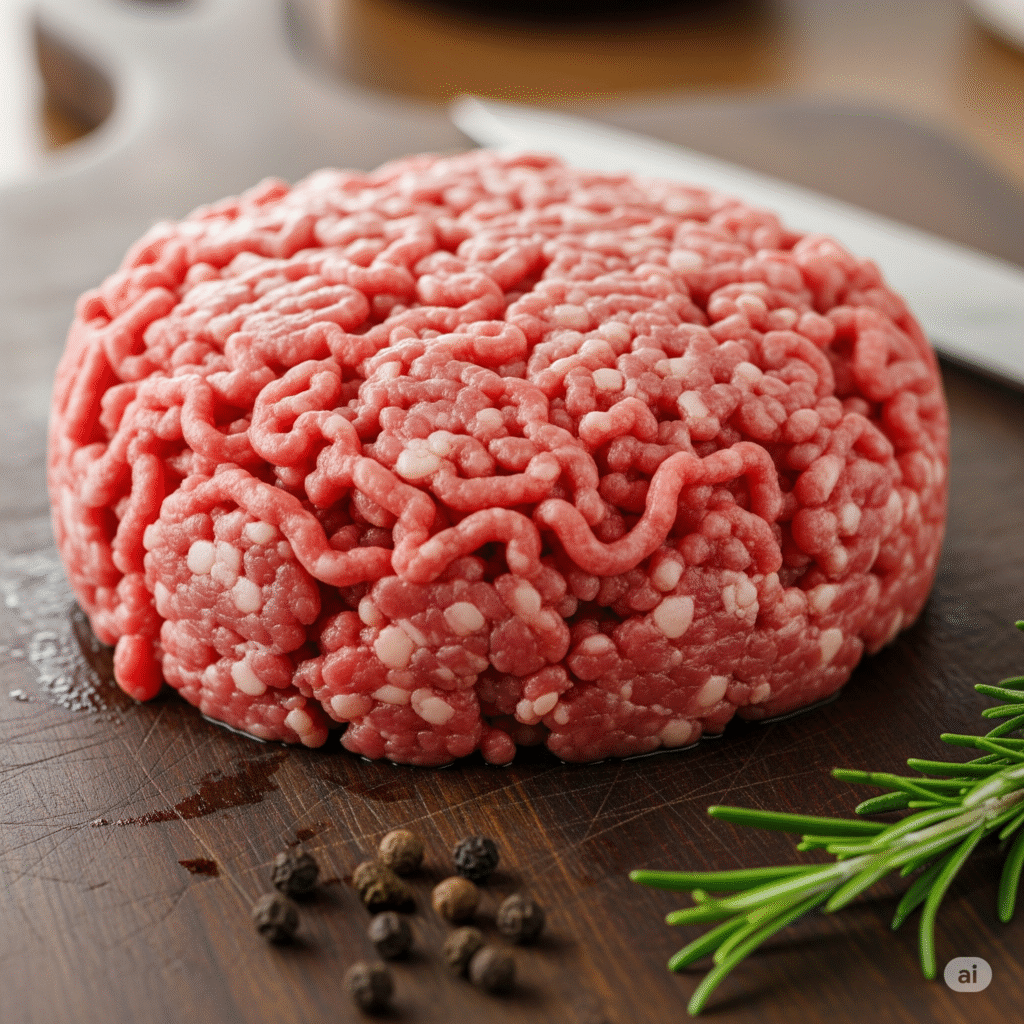
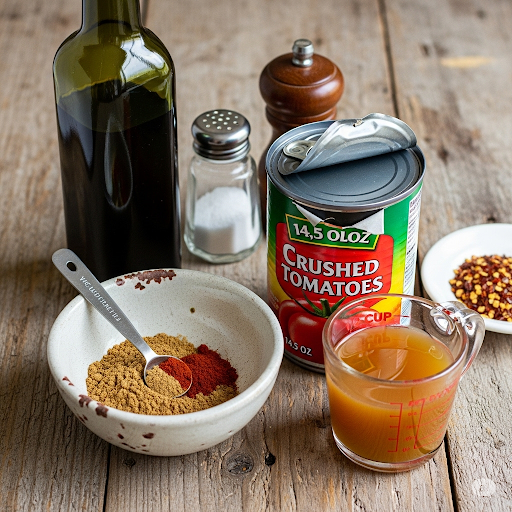
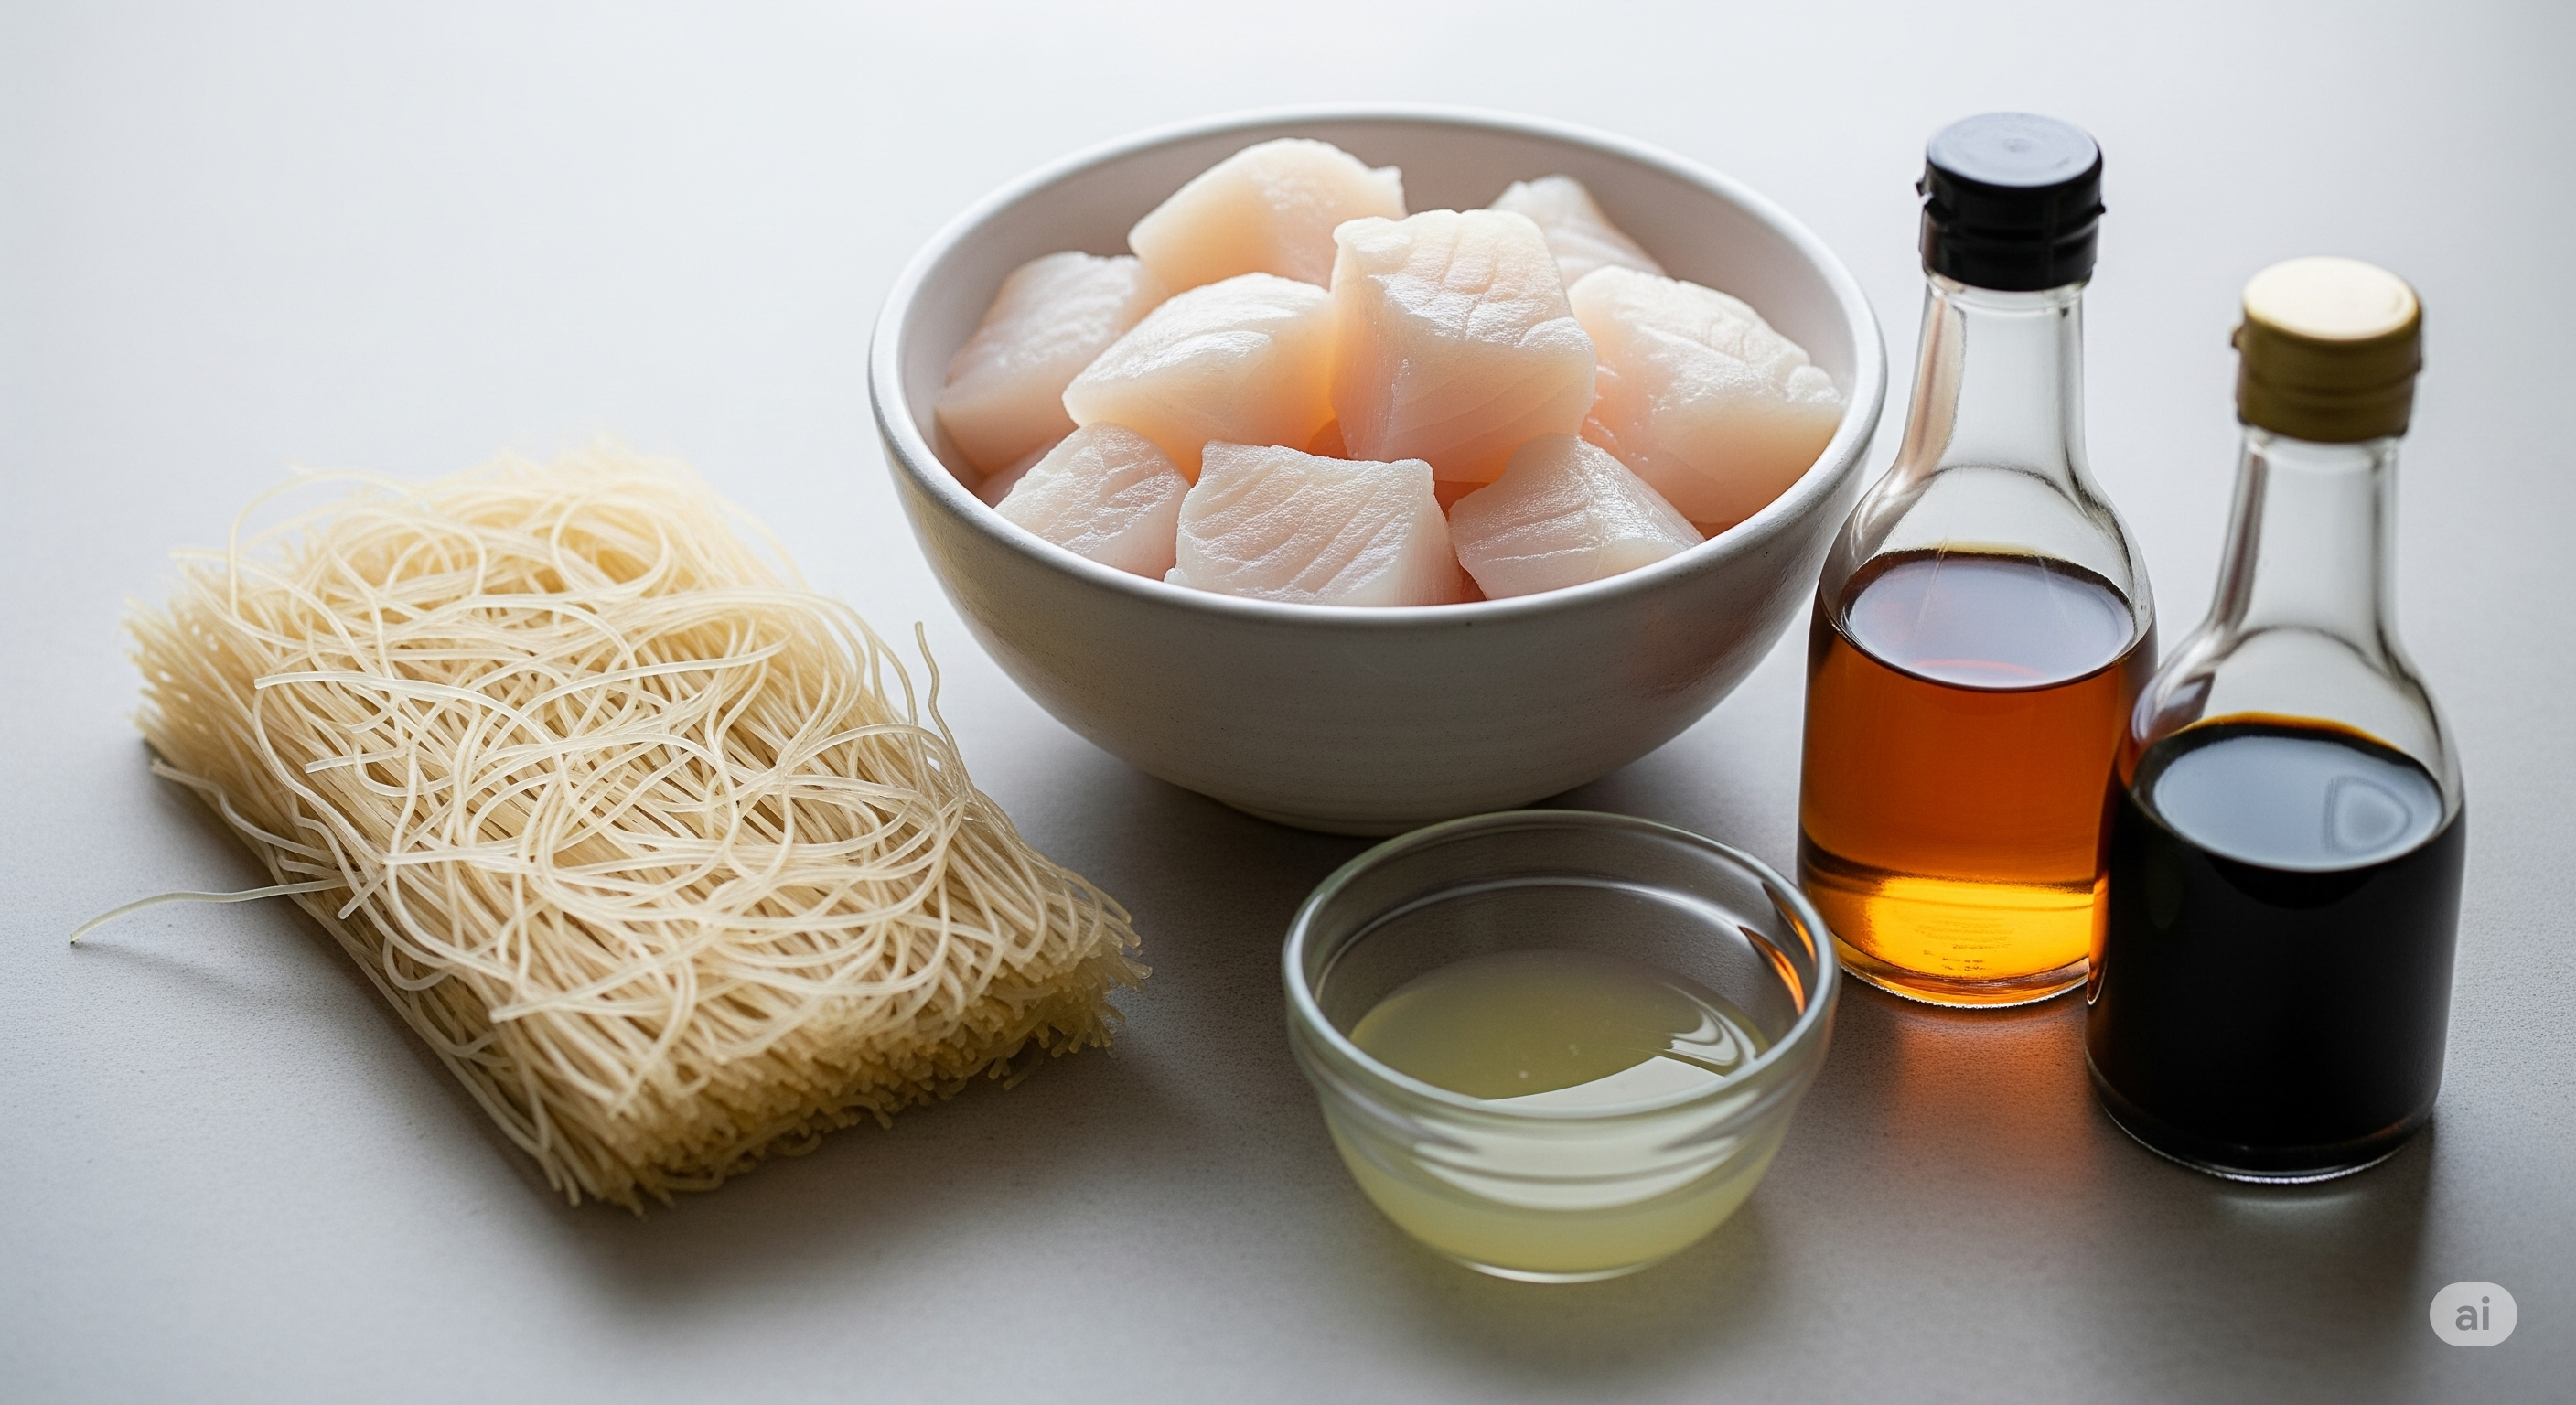
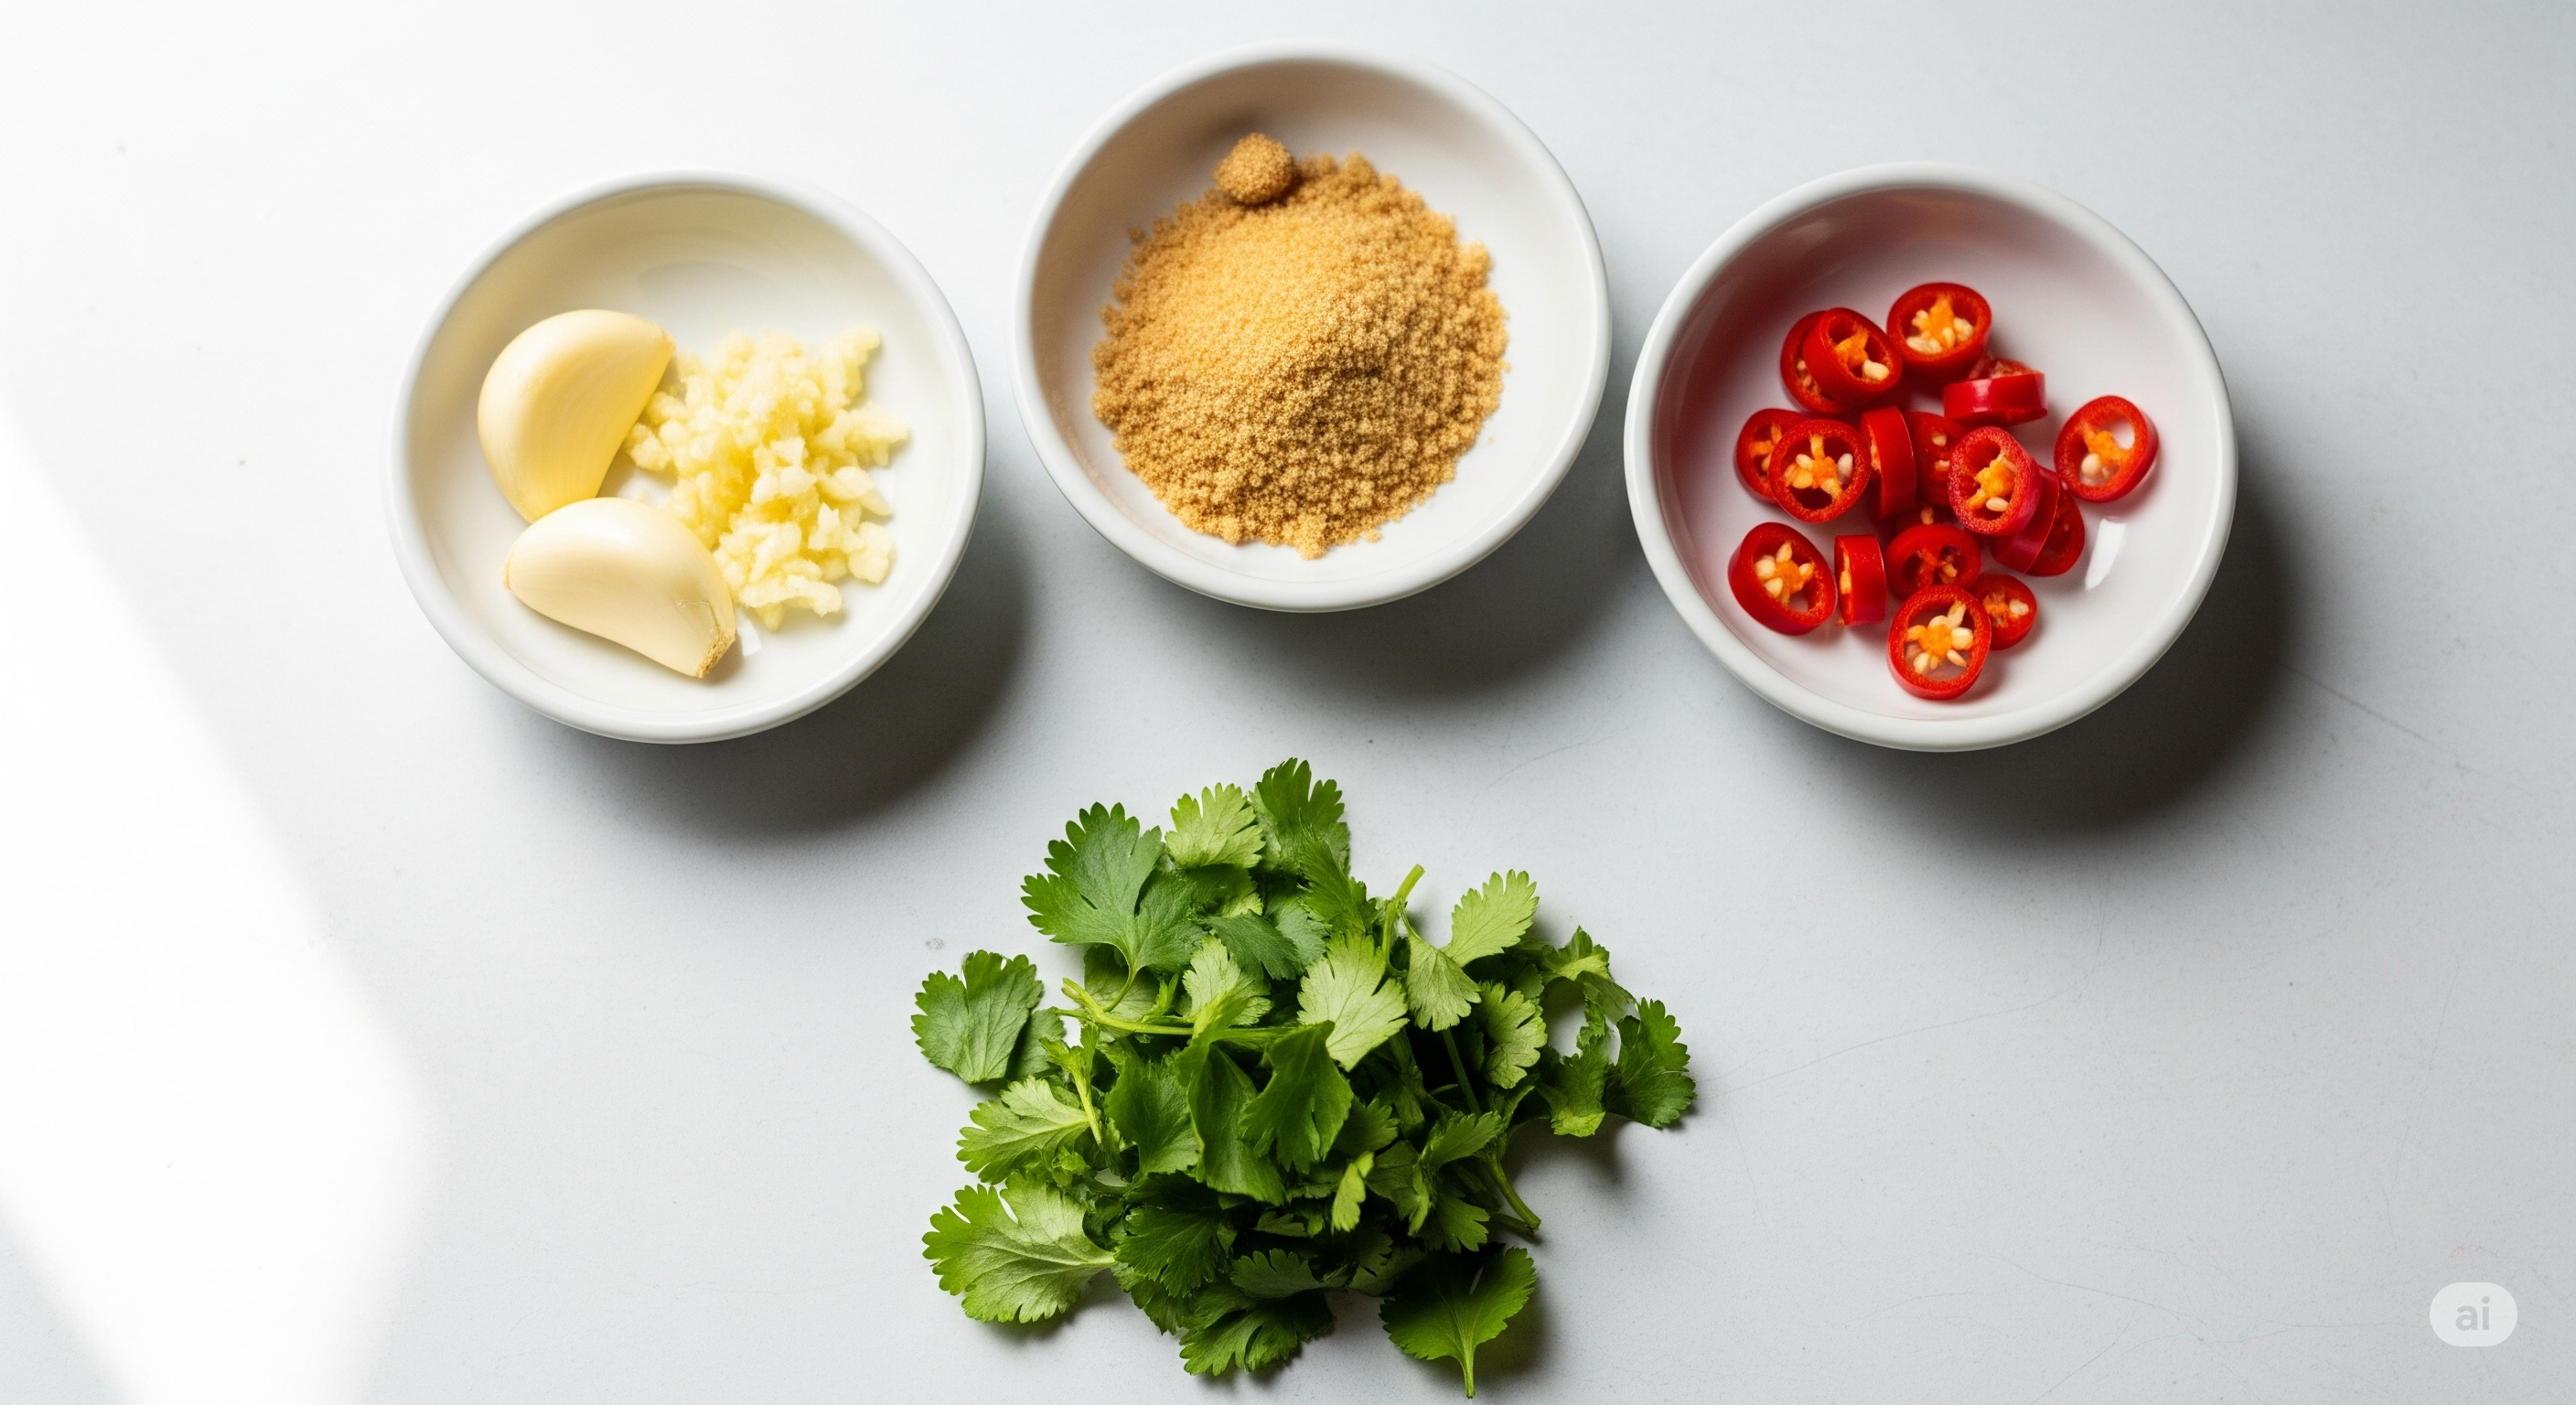
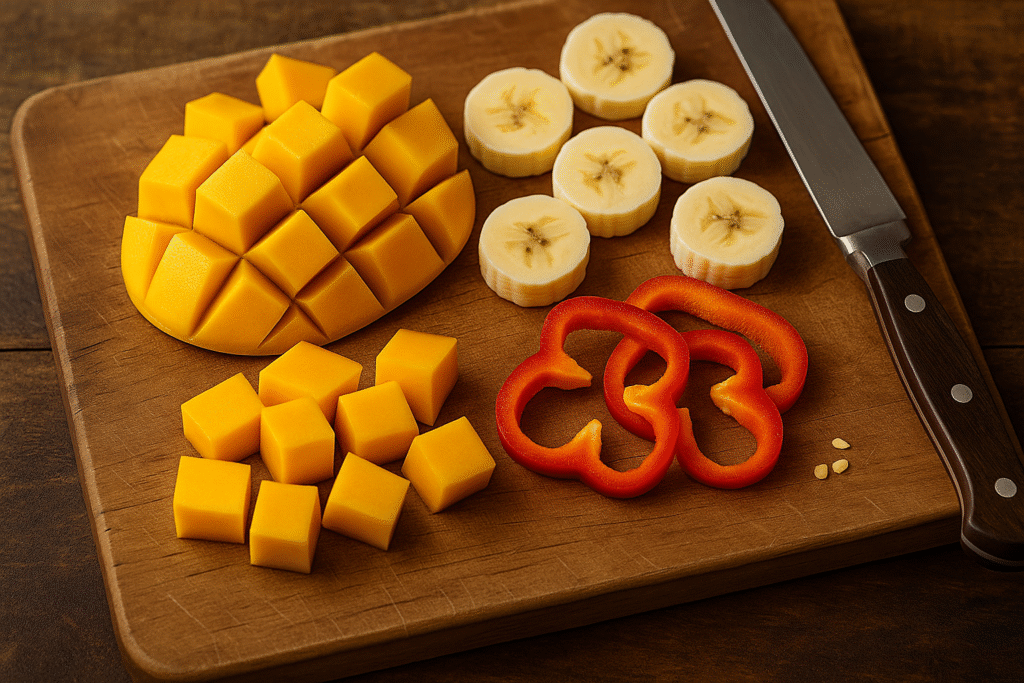
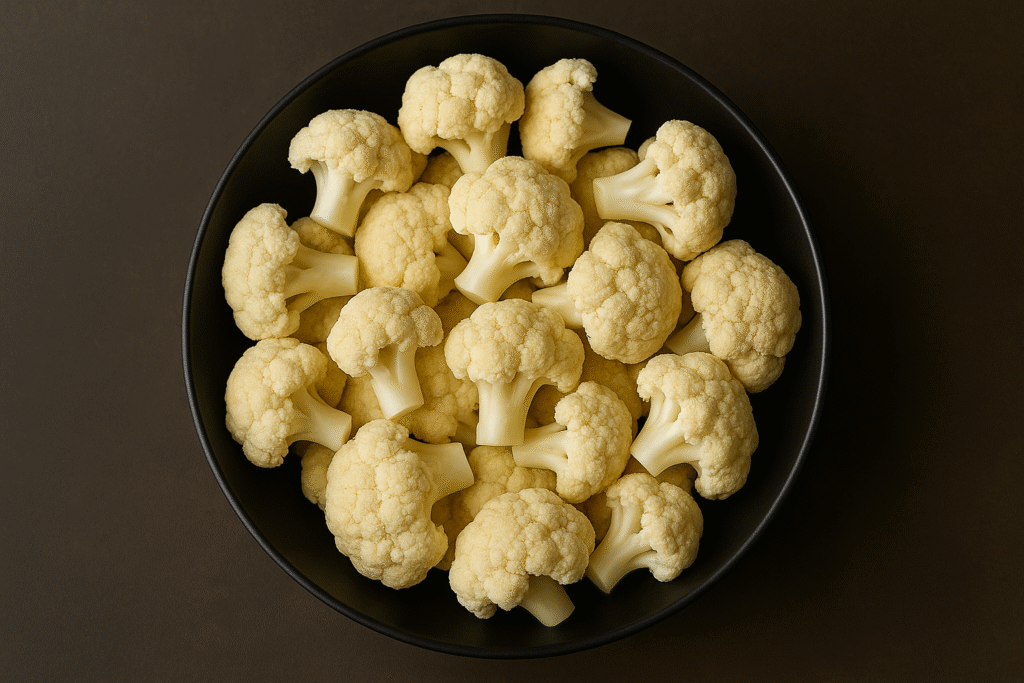
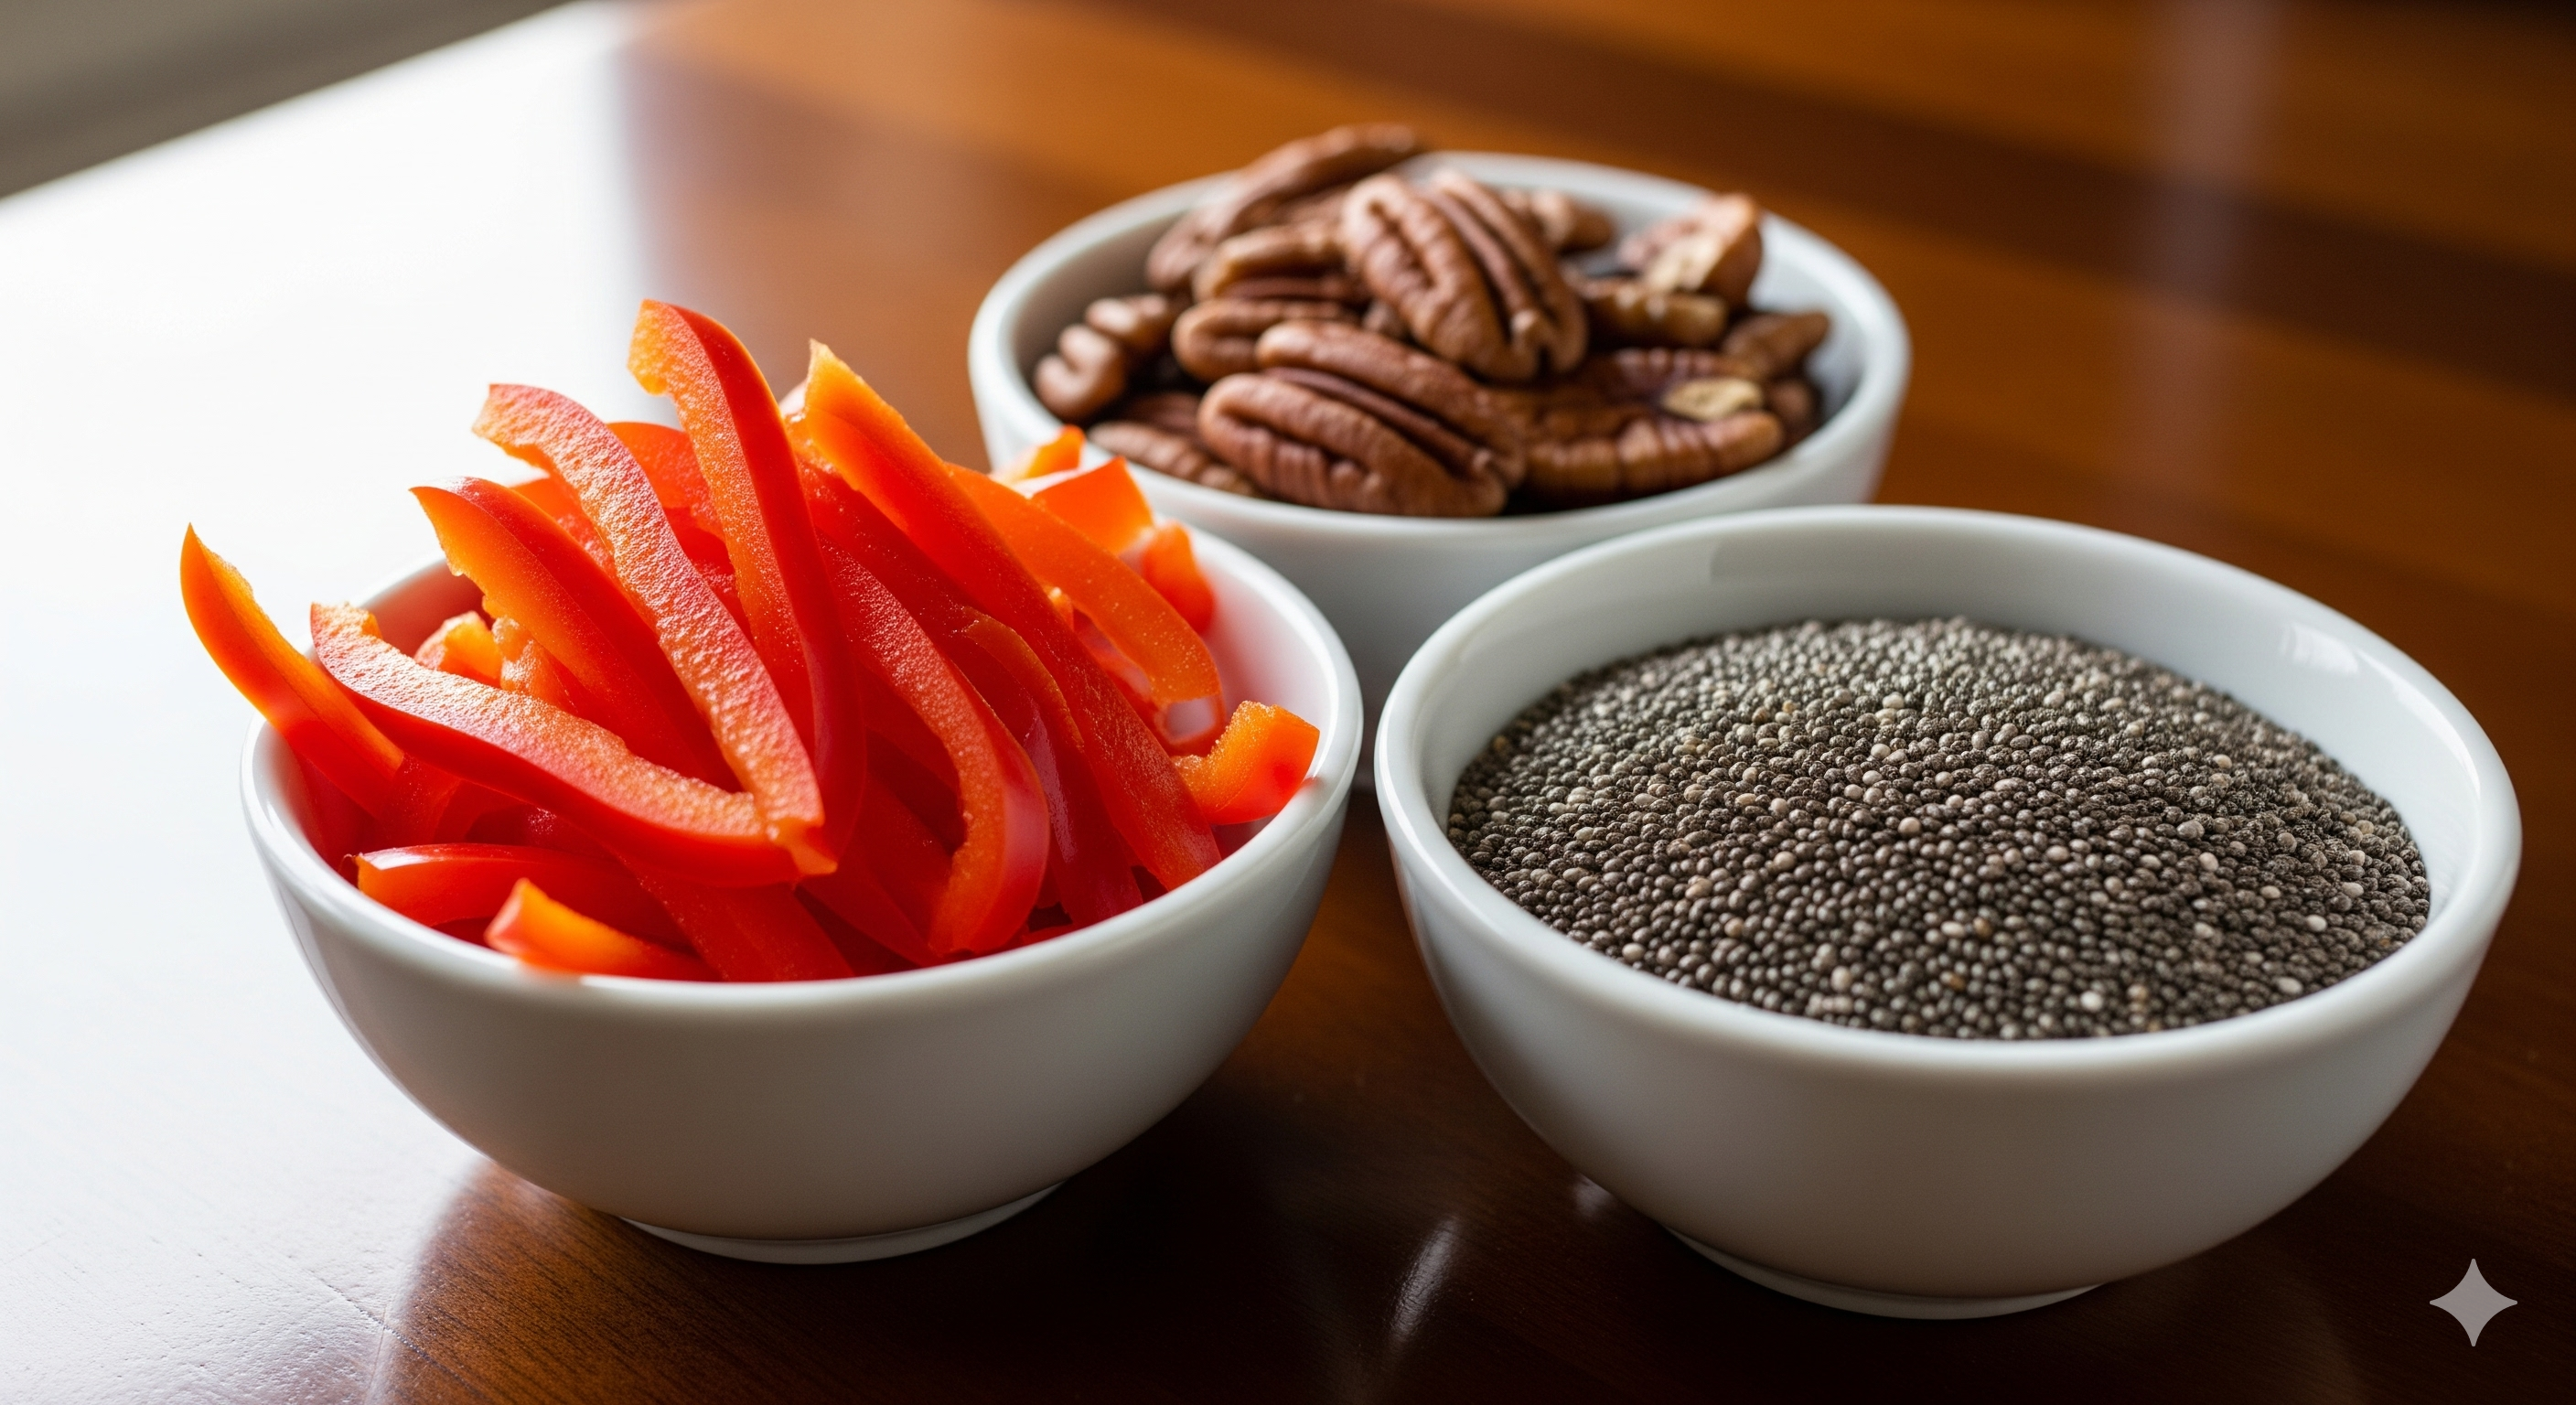
The images show the raw ingredients used in this recipe


Step-by-Step Instructions for the Perfect Pasta Salad

Cook the Pasta

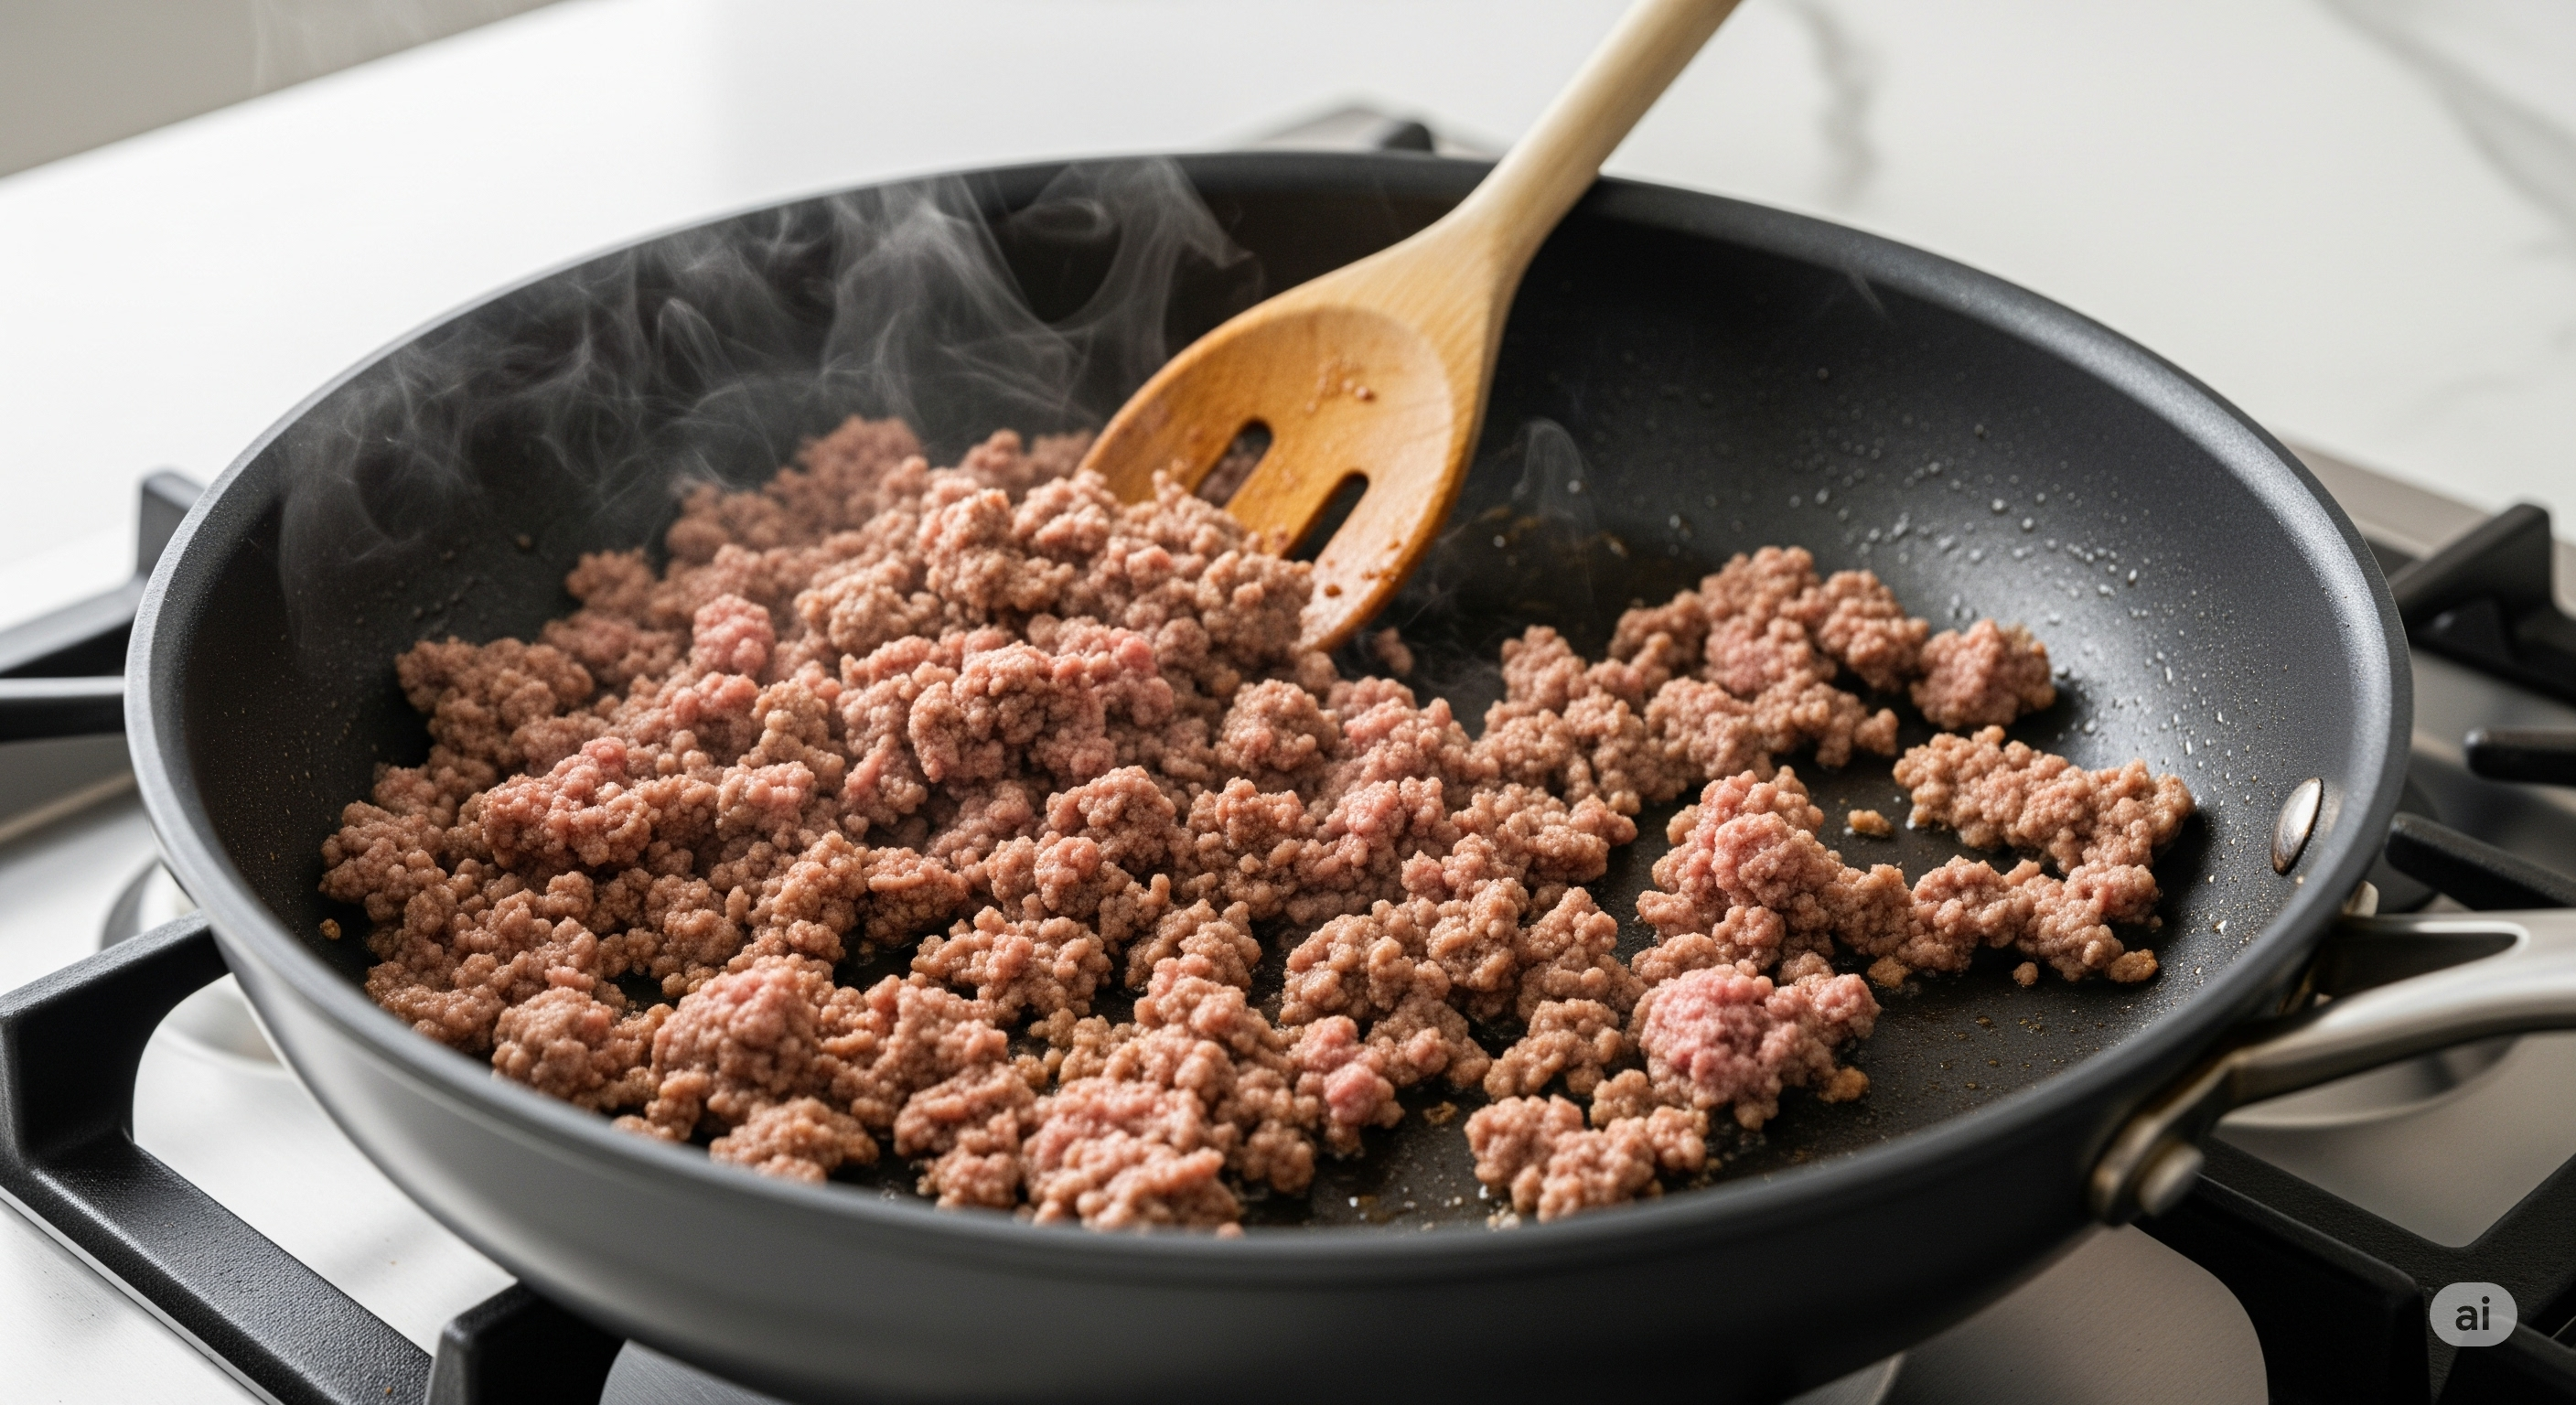
Bring a large pot of salted water to a rolling boil over high heat. Add the pasta and stir occasionally to prevent it from sticking together. Cook the pasta according to the package directions, or until it’s al dente (tender but still firm to the bite). Once cooked, drain the pasta thoroughly using a colander. Rinse the pasta under cold water for about 30 seconds to stop the cooking process and cool it down. This is an important step to prevent the salad from becoming gummy. Once rinsed, set it aside to drain completely.

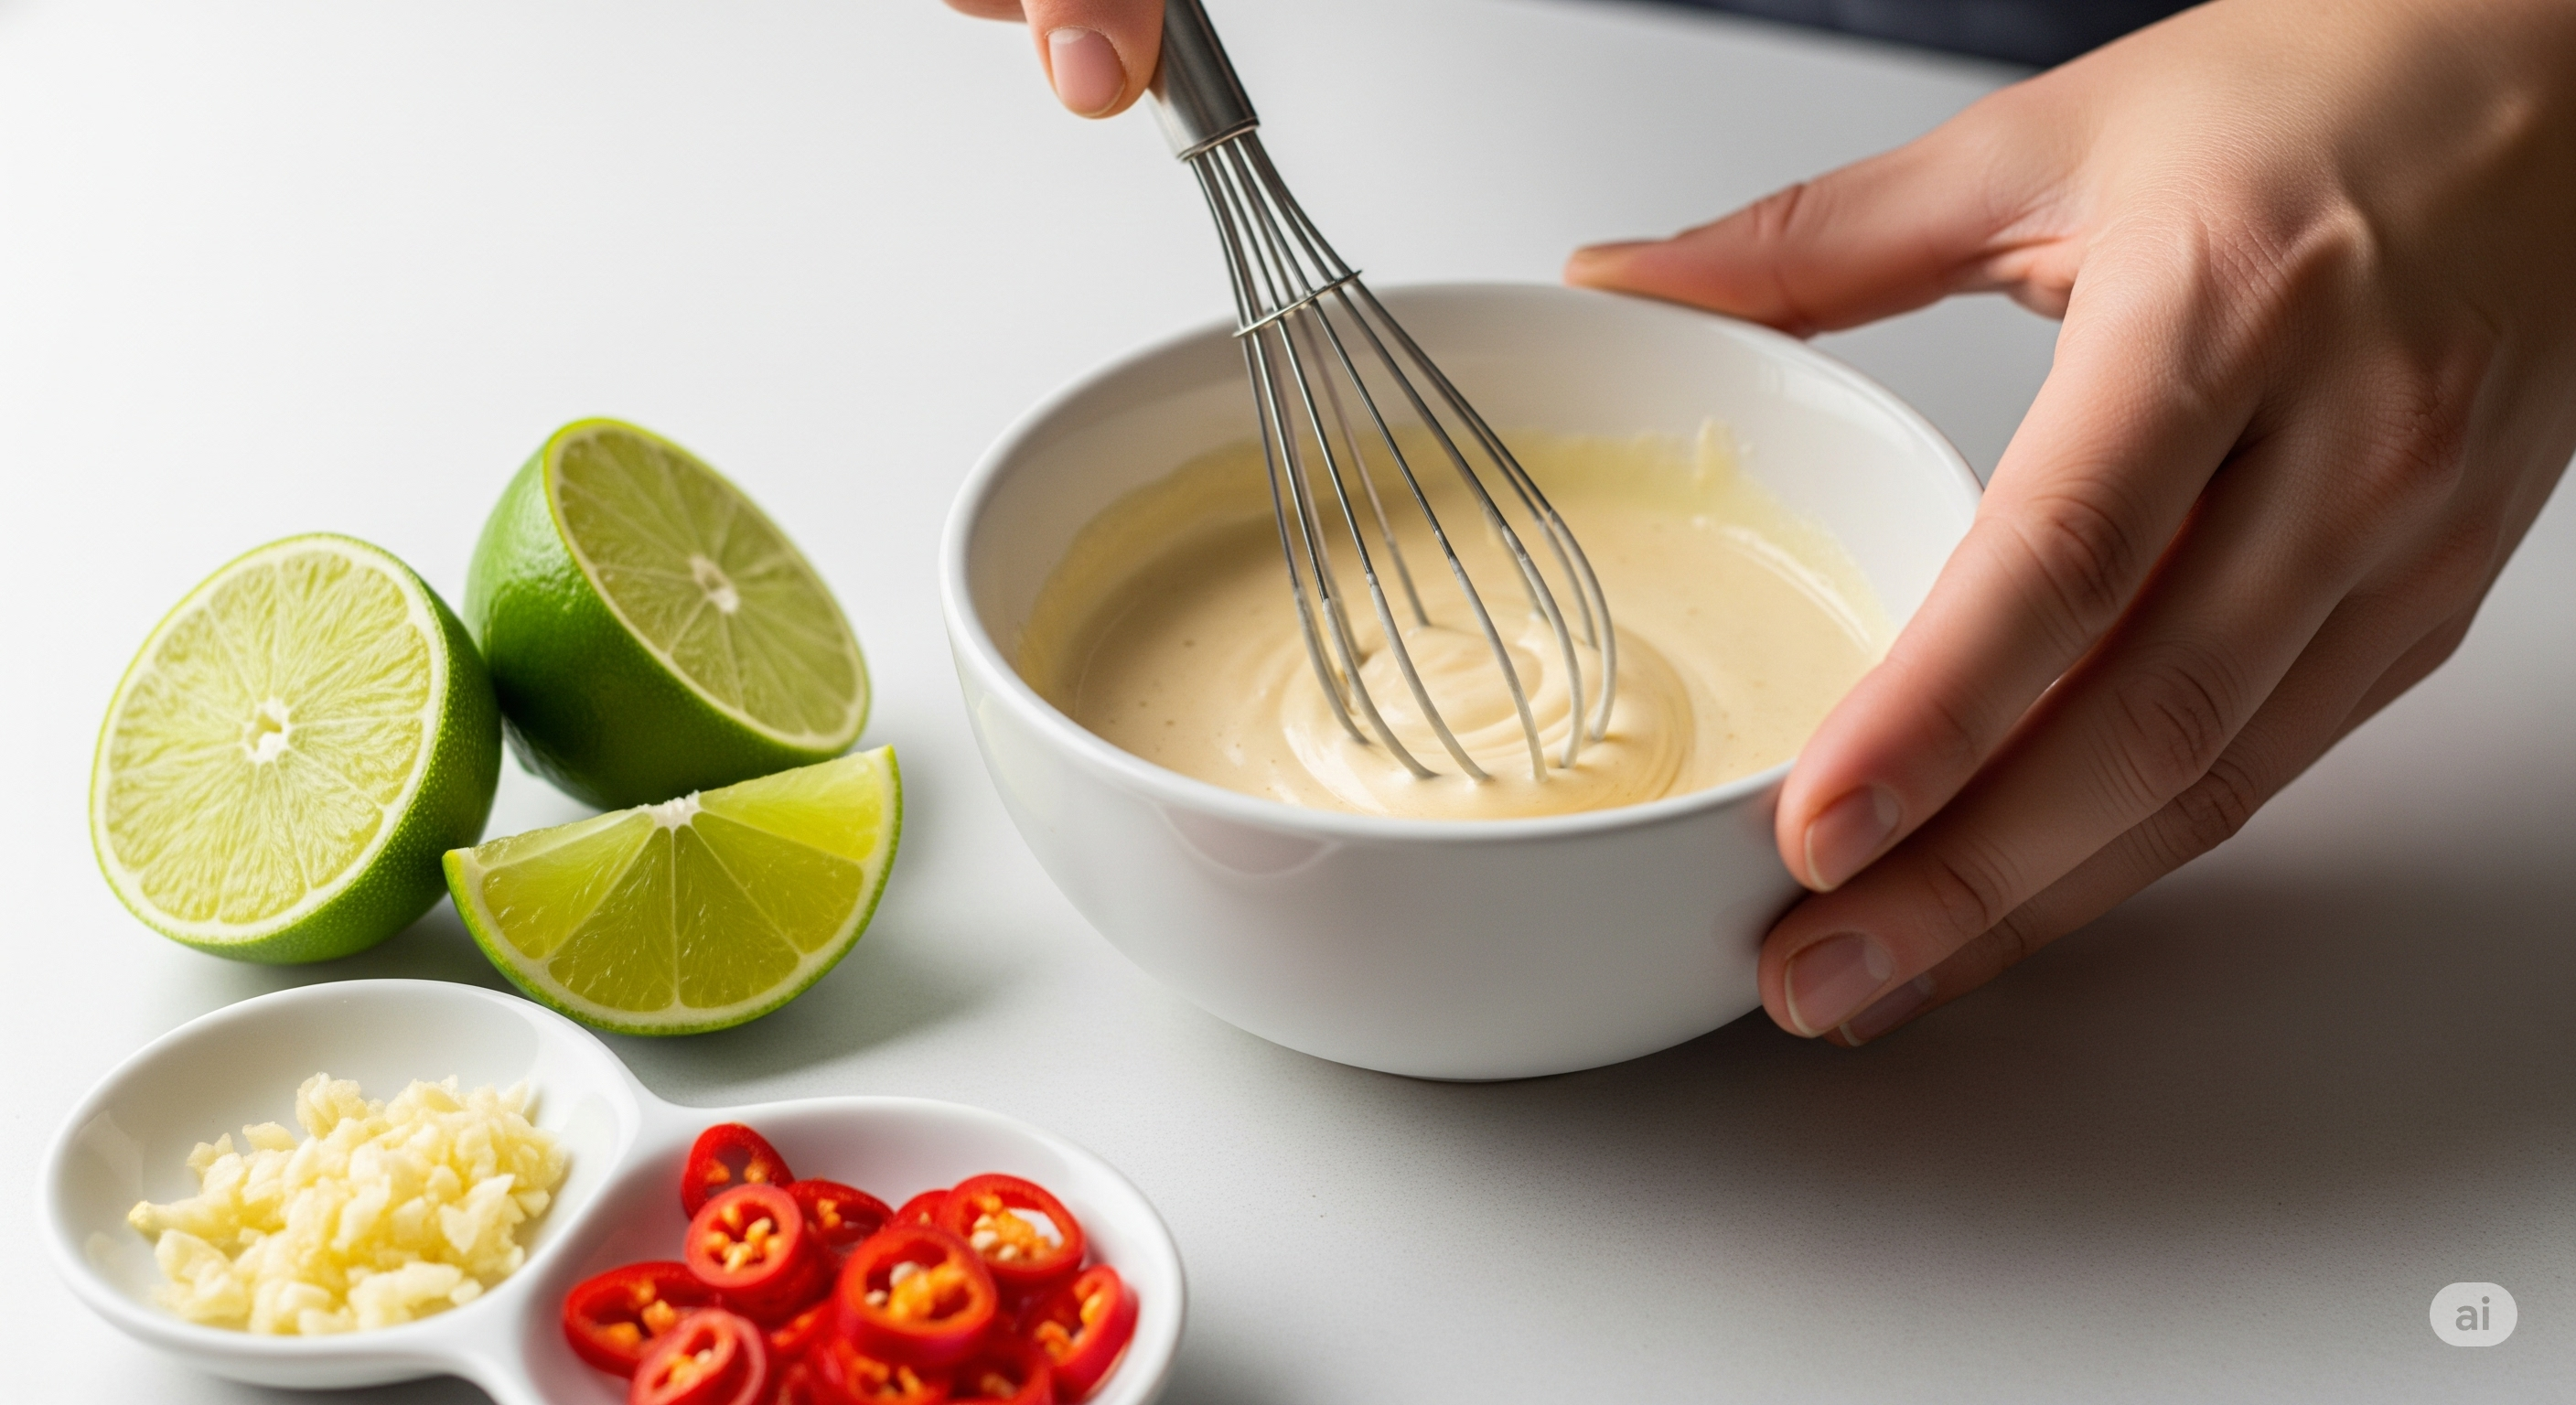
Prepare the Dressing

While the pasta is cooking, you can make the delicious creamy dressing. In a medium-sized bowl, whisk together the plain Greek yogurt, mayonnaise, lemon juice, and white wine vinegar until the mixture is smooth and well-combined. Next, stir in the fresh dill, onion powder, and garlic powder. Season generously with salt and black pepper. Whisk everything together one last time to ensure all the spices are fully incorporated. Taste the dressing and adjust the seasonings if needed. Set the dressing aside.

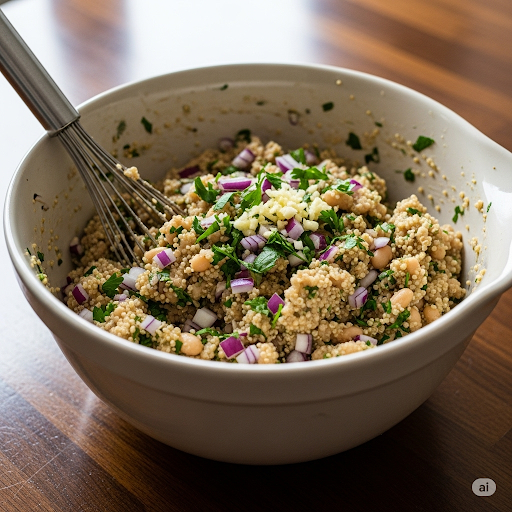
Combine the Salad Ingredients

Once the pasta has cooled and drained, transfer it to a large mixing bowl. Add the cubed grilled chicken, halved cherry tomatoes, and finely diced green bell pepper to the bowl with the pasta. Carefully fold the ingredients together using a spoon or tongs to ensure an even mix.


Add the Dressing and Finishes

Pour the prepared creamy yogurt dressing over the pasta and vegetable mixture. Gently toss everything together until all the ingredients are evenly coated in the dressing. Next, gently fold in the drained mandarin orange segments, chopped walnuts or pecans, and the two tablespoons of chia seeds. These delicate ingredients should be added last to prevent them from breaking apart.

Chill and Serve

For the best flavor, cover the bowl and place it in the refrigerator to chill for at least 30 minutes. This chilling time allows the flavors to meld together and the dressing to absorb into the pasta, making it even more delicious. Give the salad one last toss before serving to redistribute the dressing and ingredients.


    The Benefits of This Pasta Salad

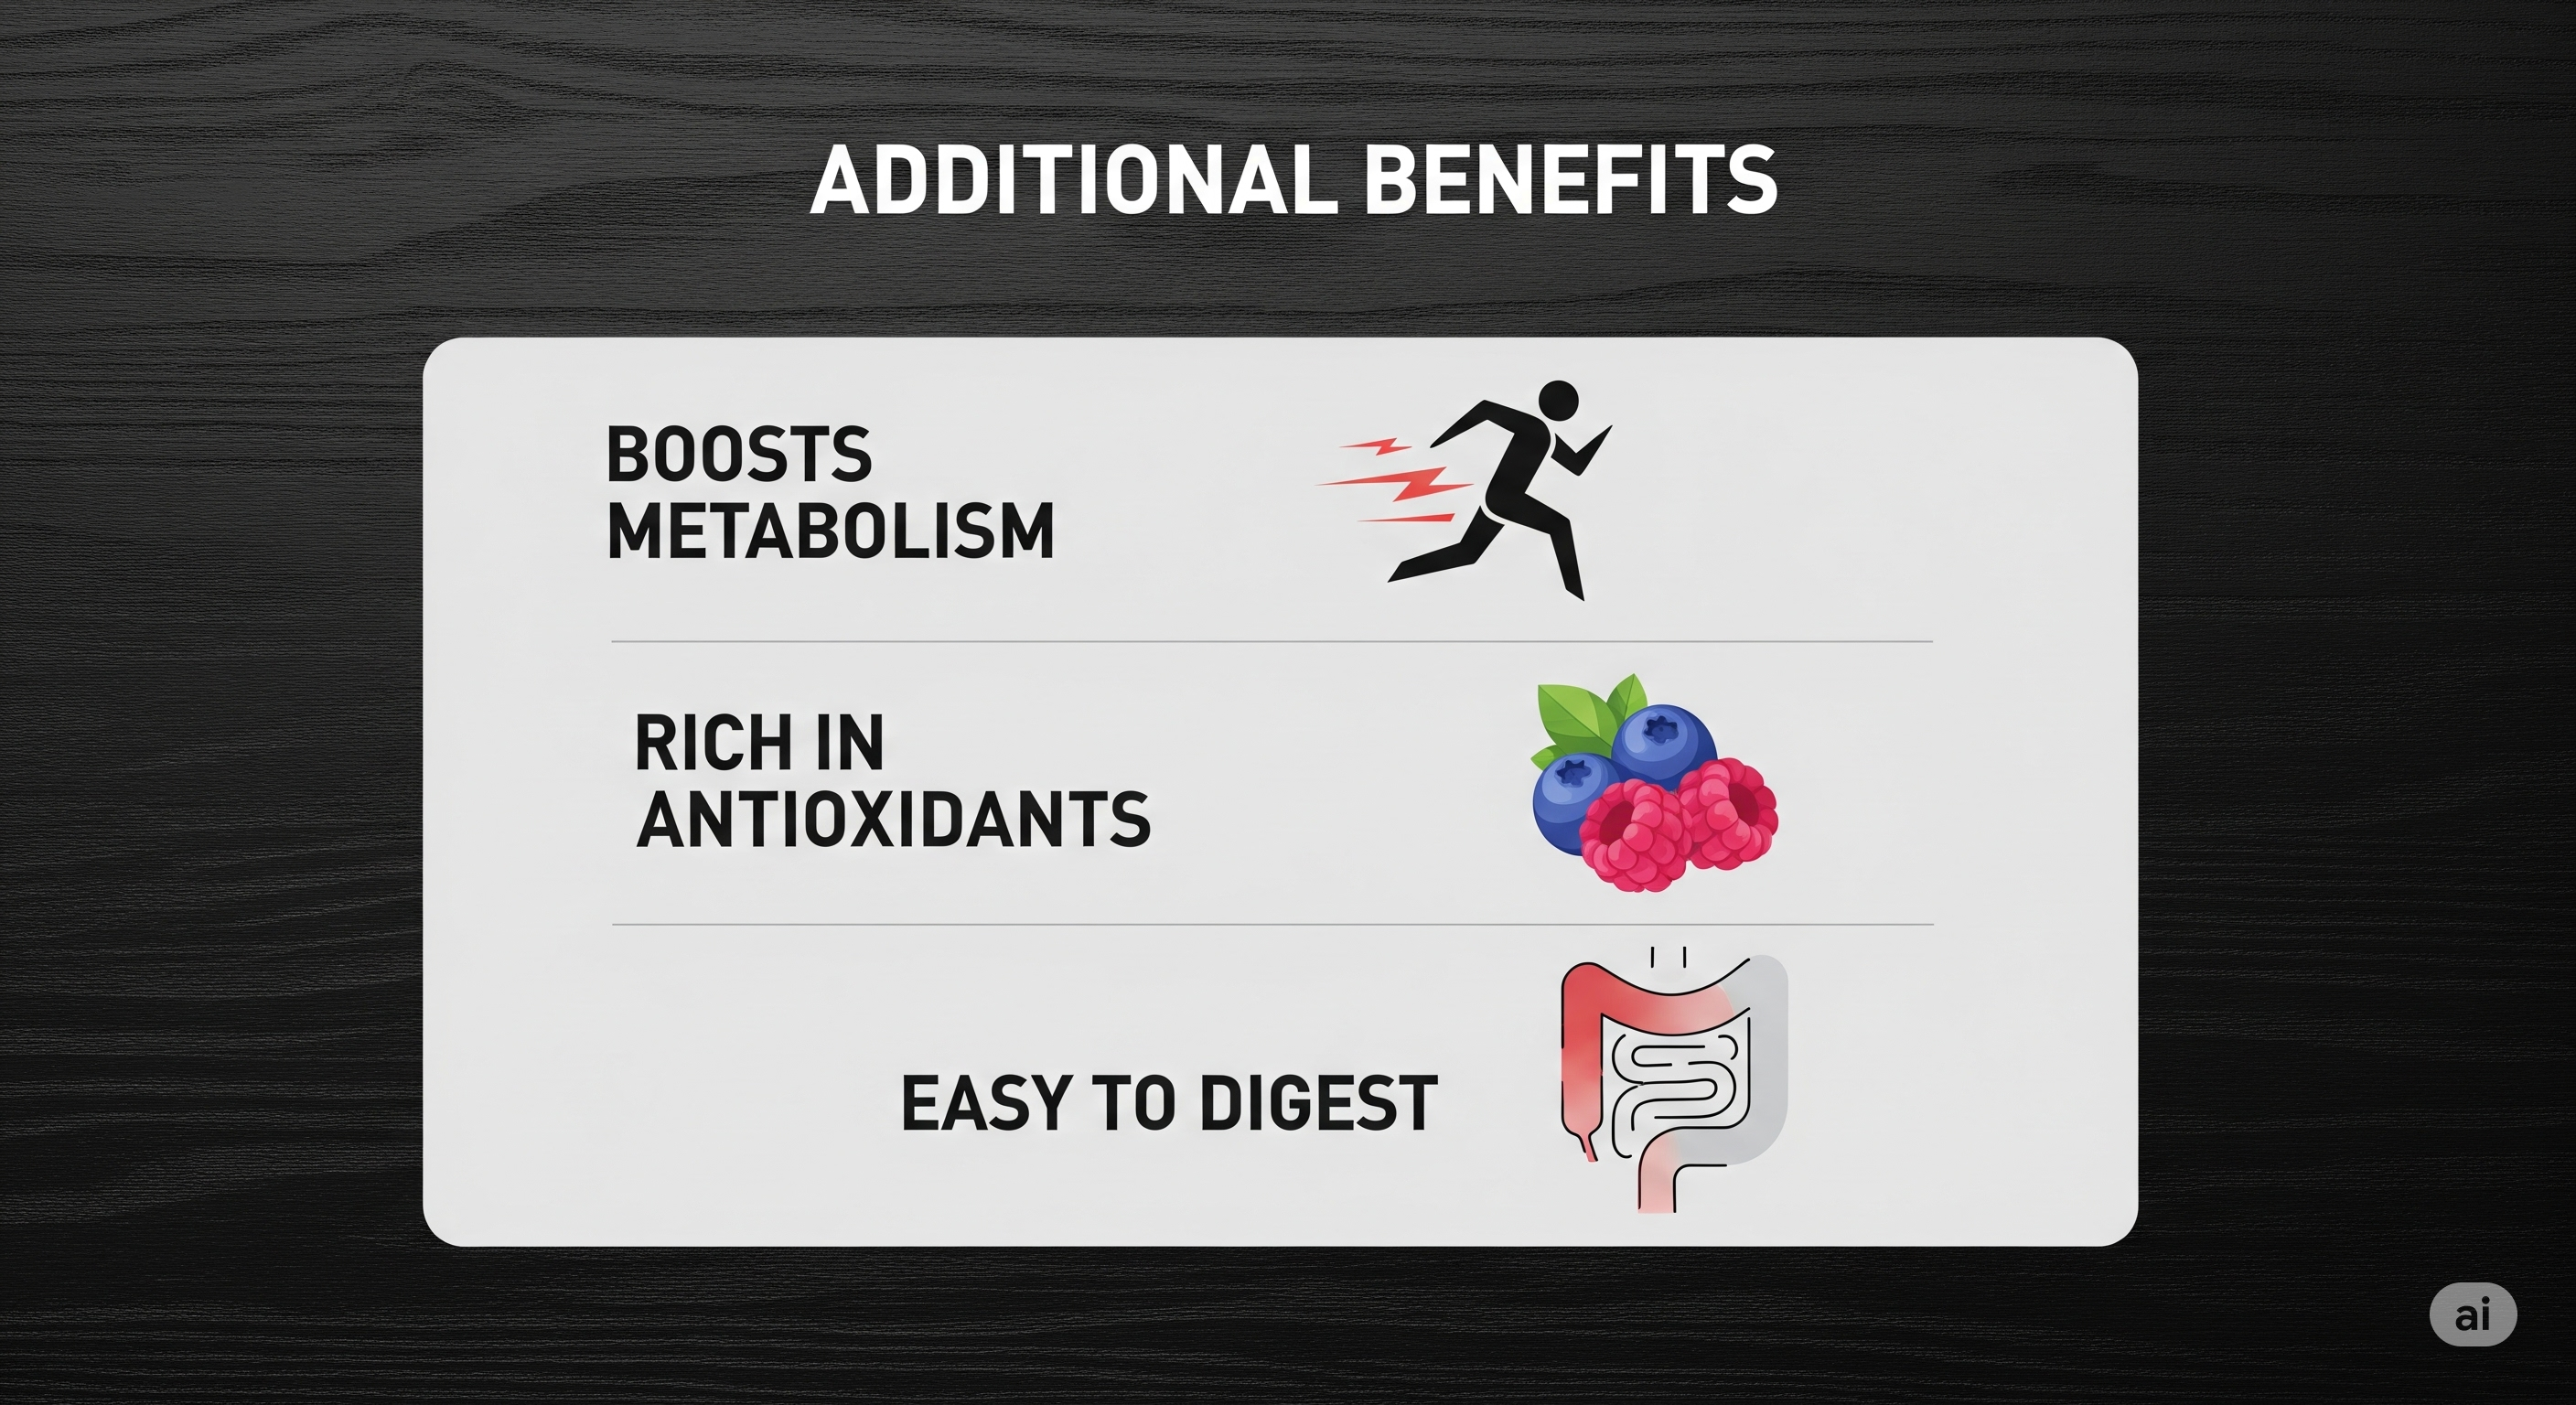
    This Pasta Salad is not just a tasty treat; it’s a foundational dish for a balanced diet. Its strength lies in its perfectly calibrated mix of macronutrients. The complex carbohydrates from the pasta provide a steady release of energy, preventing the sharp peaks and subsequent crashes that come from simple sugars. This is beautifully complemented by the lean protein from the grilled chicken and the healthy fats from the nuts and seeds.

    Together, this trio keeps you feeling full and satisfied for longer, which is a key factor in managing appetite and supporting long-term weight management goals. It’s a satisfying meal that won’t leave you searching for snacks an hour later.

    The health-conscious choices in this recipe elevate it far beyond a typical side dish. The addition of nuts and seeds, like the walnuts, pecans, and chia seeds, provides a significant boost of heart-healthy monounsaturated fats and essential omega-3 fatty acids.

    These healthy fats are crucial for brain function, helping to improve memory and cognitive health. The same ingredients are also packed with fiber, which is a powerful ally for your digestive system. It aids in promoting regular bowel movements and can even help lower LDL (“bad”) cholesterol, actively contributing to your cardiovascular health.

    A Treasure Trove of Vitamins and Antioxidants

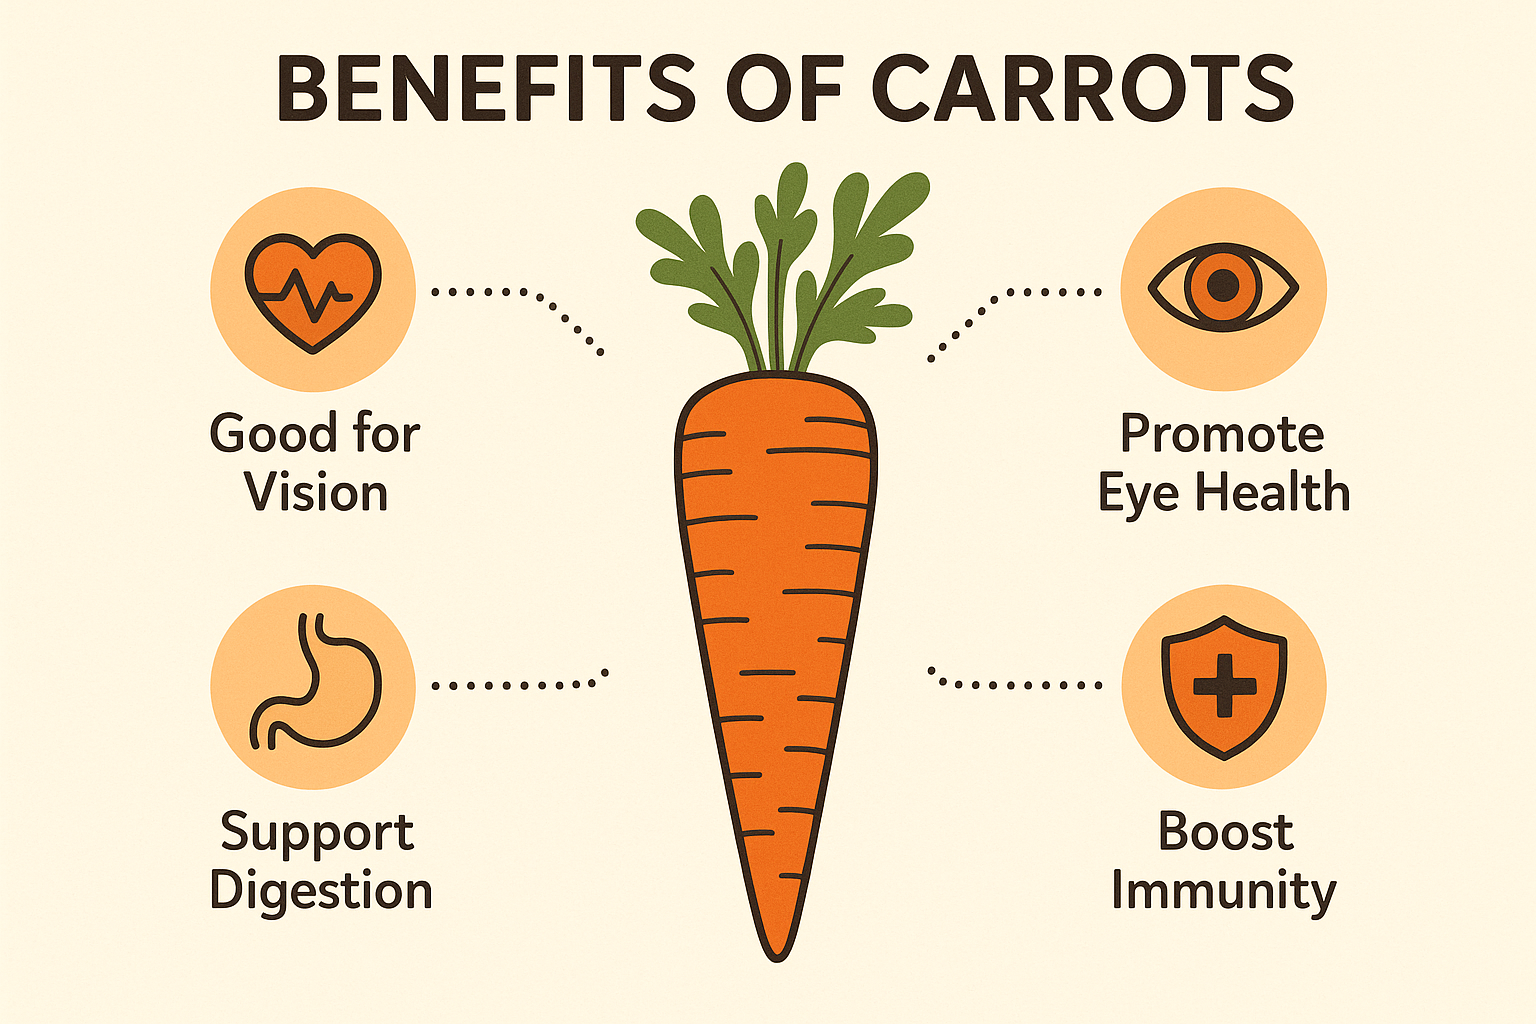
    The colorful array of vegetables and citrus is more than just a feast for the eyes; it’s a treasure trove of micronutrients. The bright red cherry tomatoes are a fantastic source of lycopene, a potent antioxidant known for its ability to fight free radicals and support a healthy heart.

    Meanwhile, the green peppers and juicy mandarin oranges are loaded with Vitamin C, a powerhouse nutrient that is vital for a strong immune system and the production of collagen, which keeps your skin looking radiant and youthful. These ingredients work in harmony to reduce inflammation throughout the body and protect your cells from damage.

    Finally, this salad is an excellent food for your gut microbiome. The Greek yogurt used as the base for the dressing contains live and active cultures, which are beneficial probiotics. These good bacteria are essential for maintaining a balanced and healthy gut.

    The fiber from the vegetables, nuts, and seeds acts as a prebiotic, feeding these beneficial bacteria and helping them thrive. A healthy gut is linked to a cascade of positive effects, from improved digestion and immunity to better mood regulation. Eating this Pasta Salad is a simple yet effective way to nourish your body from the inside out, making it a true investment in your holistic well-being.


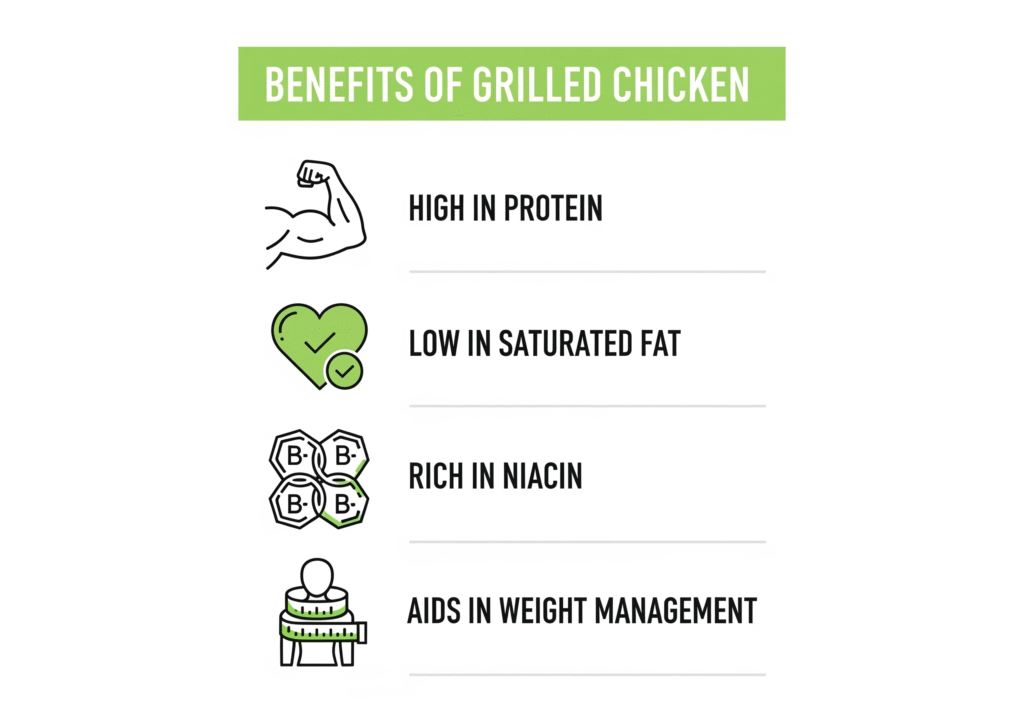
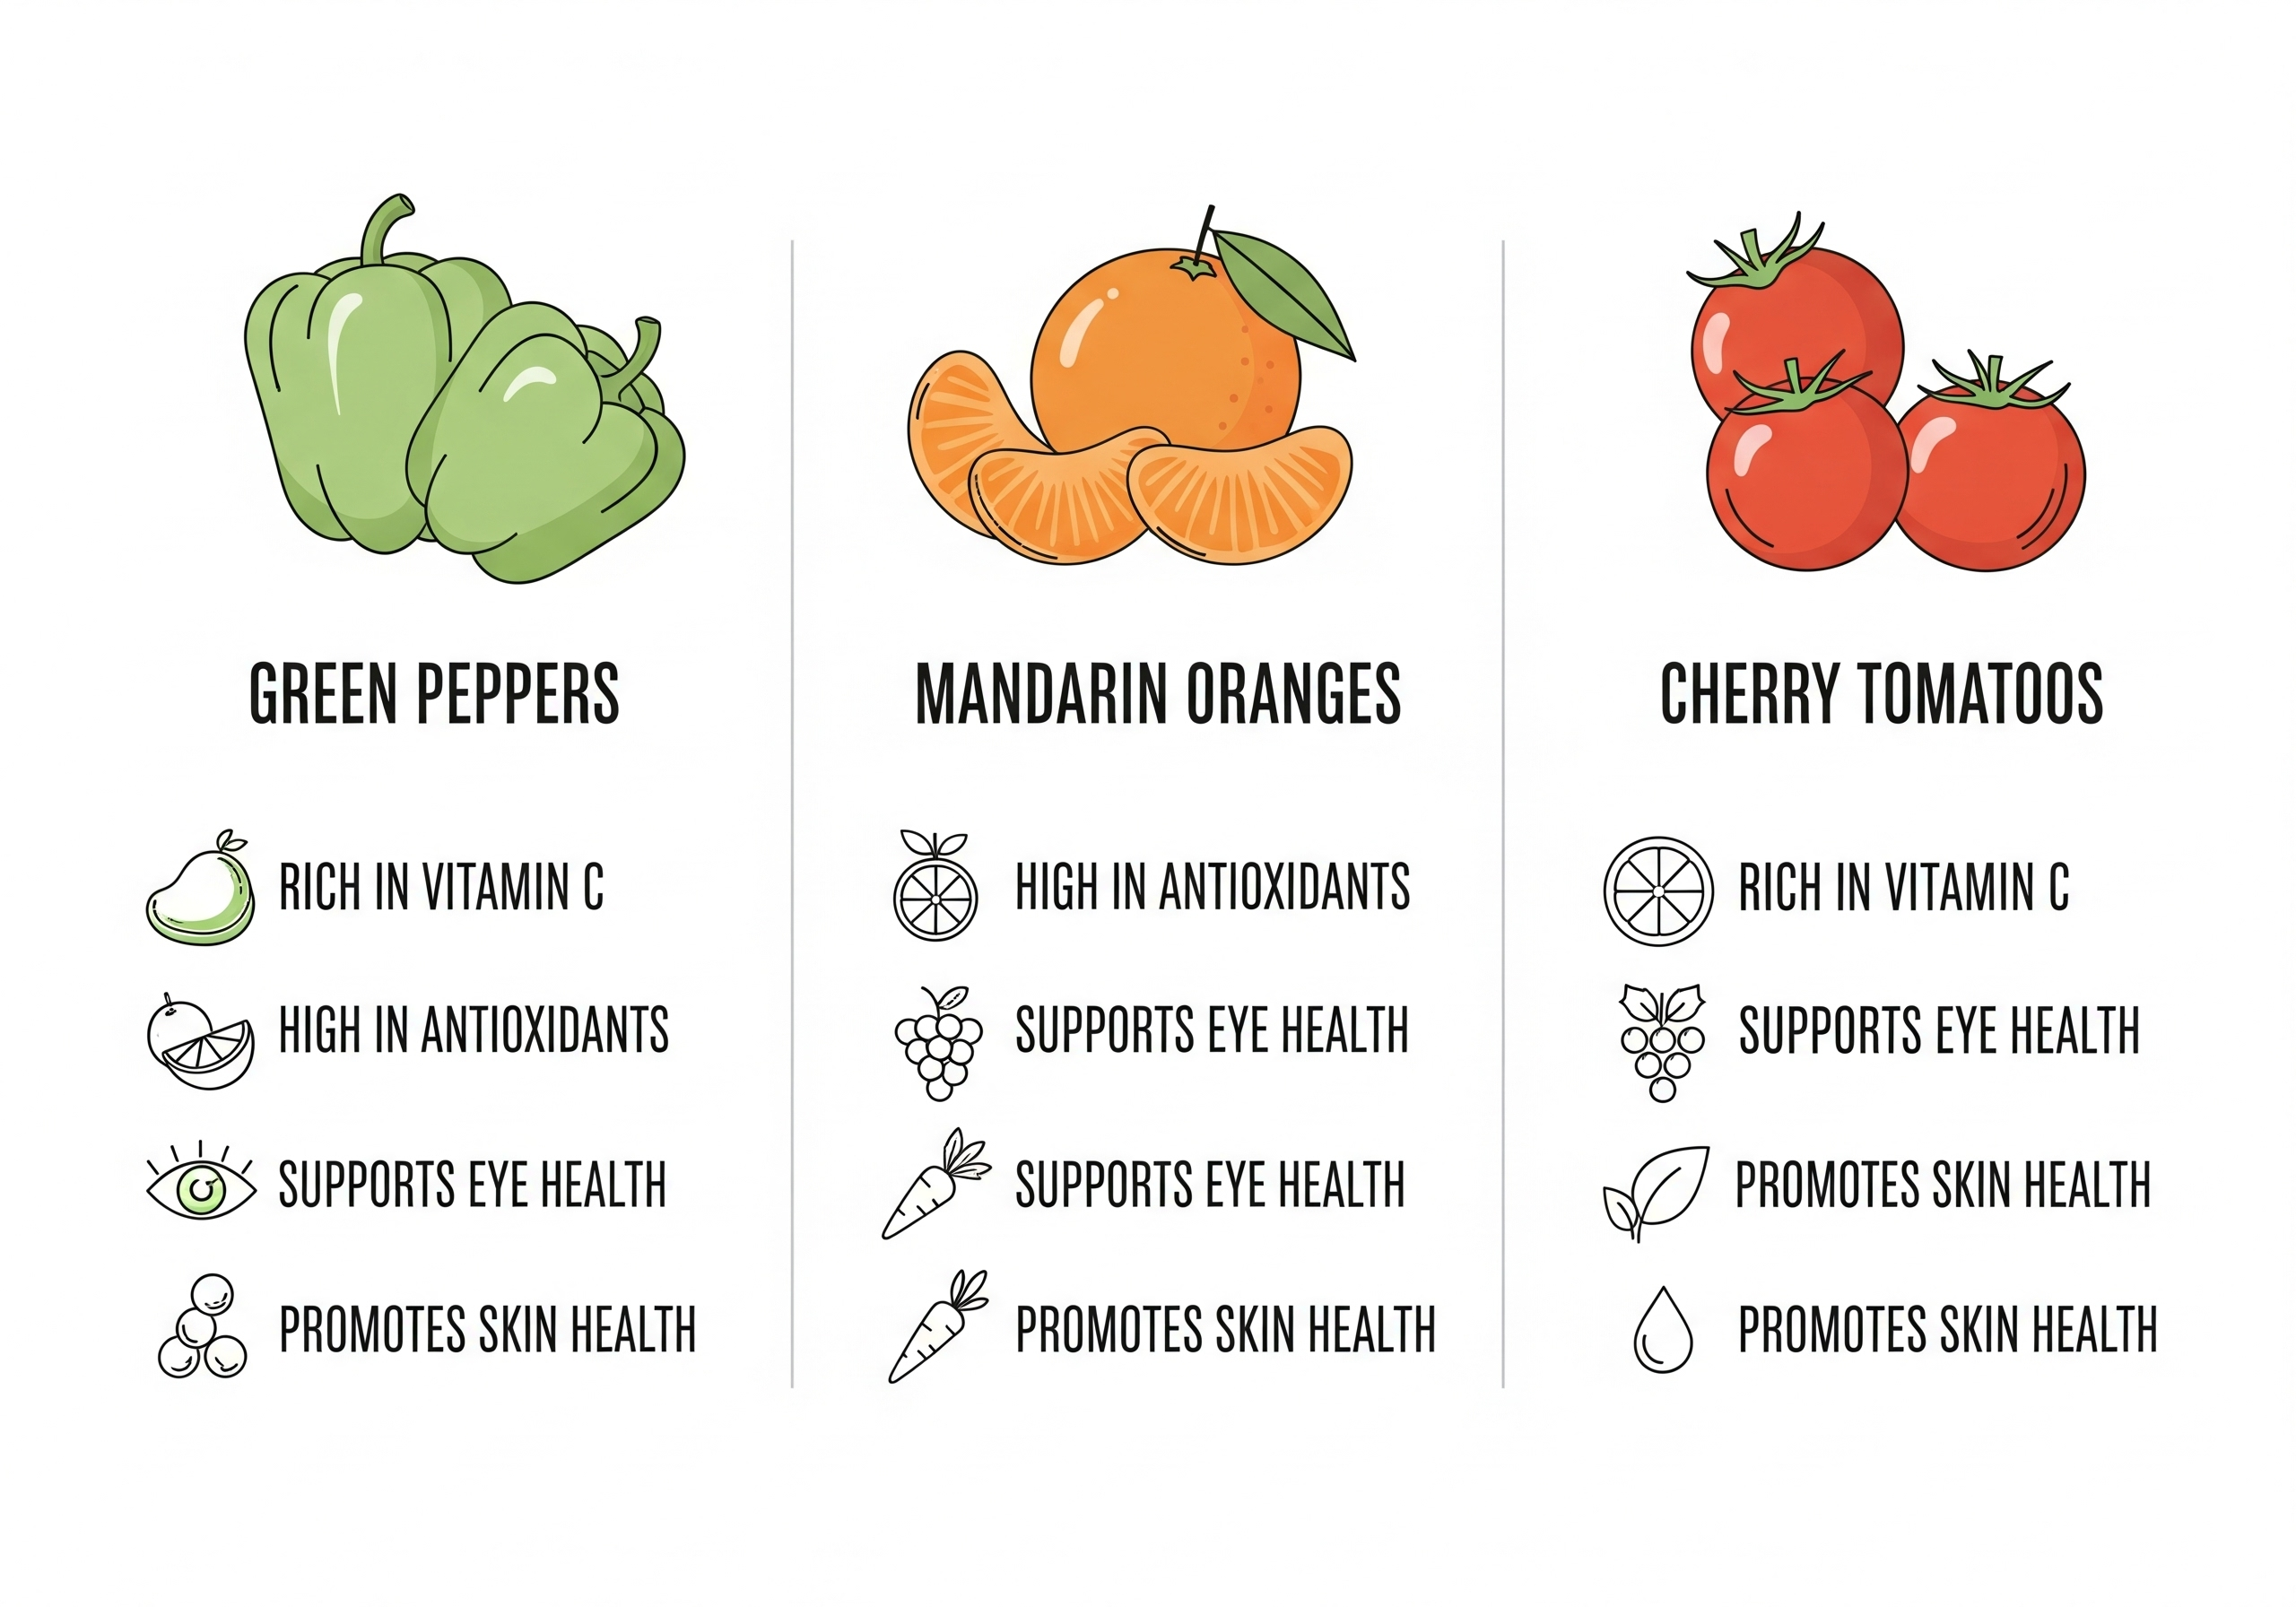
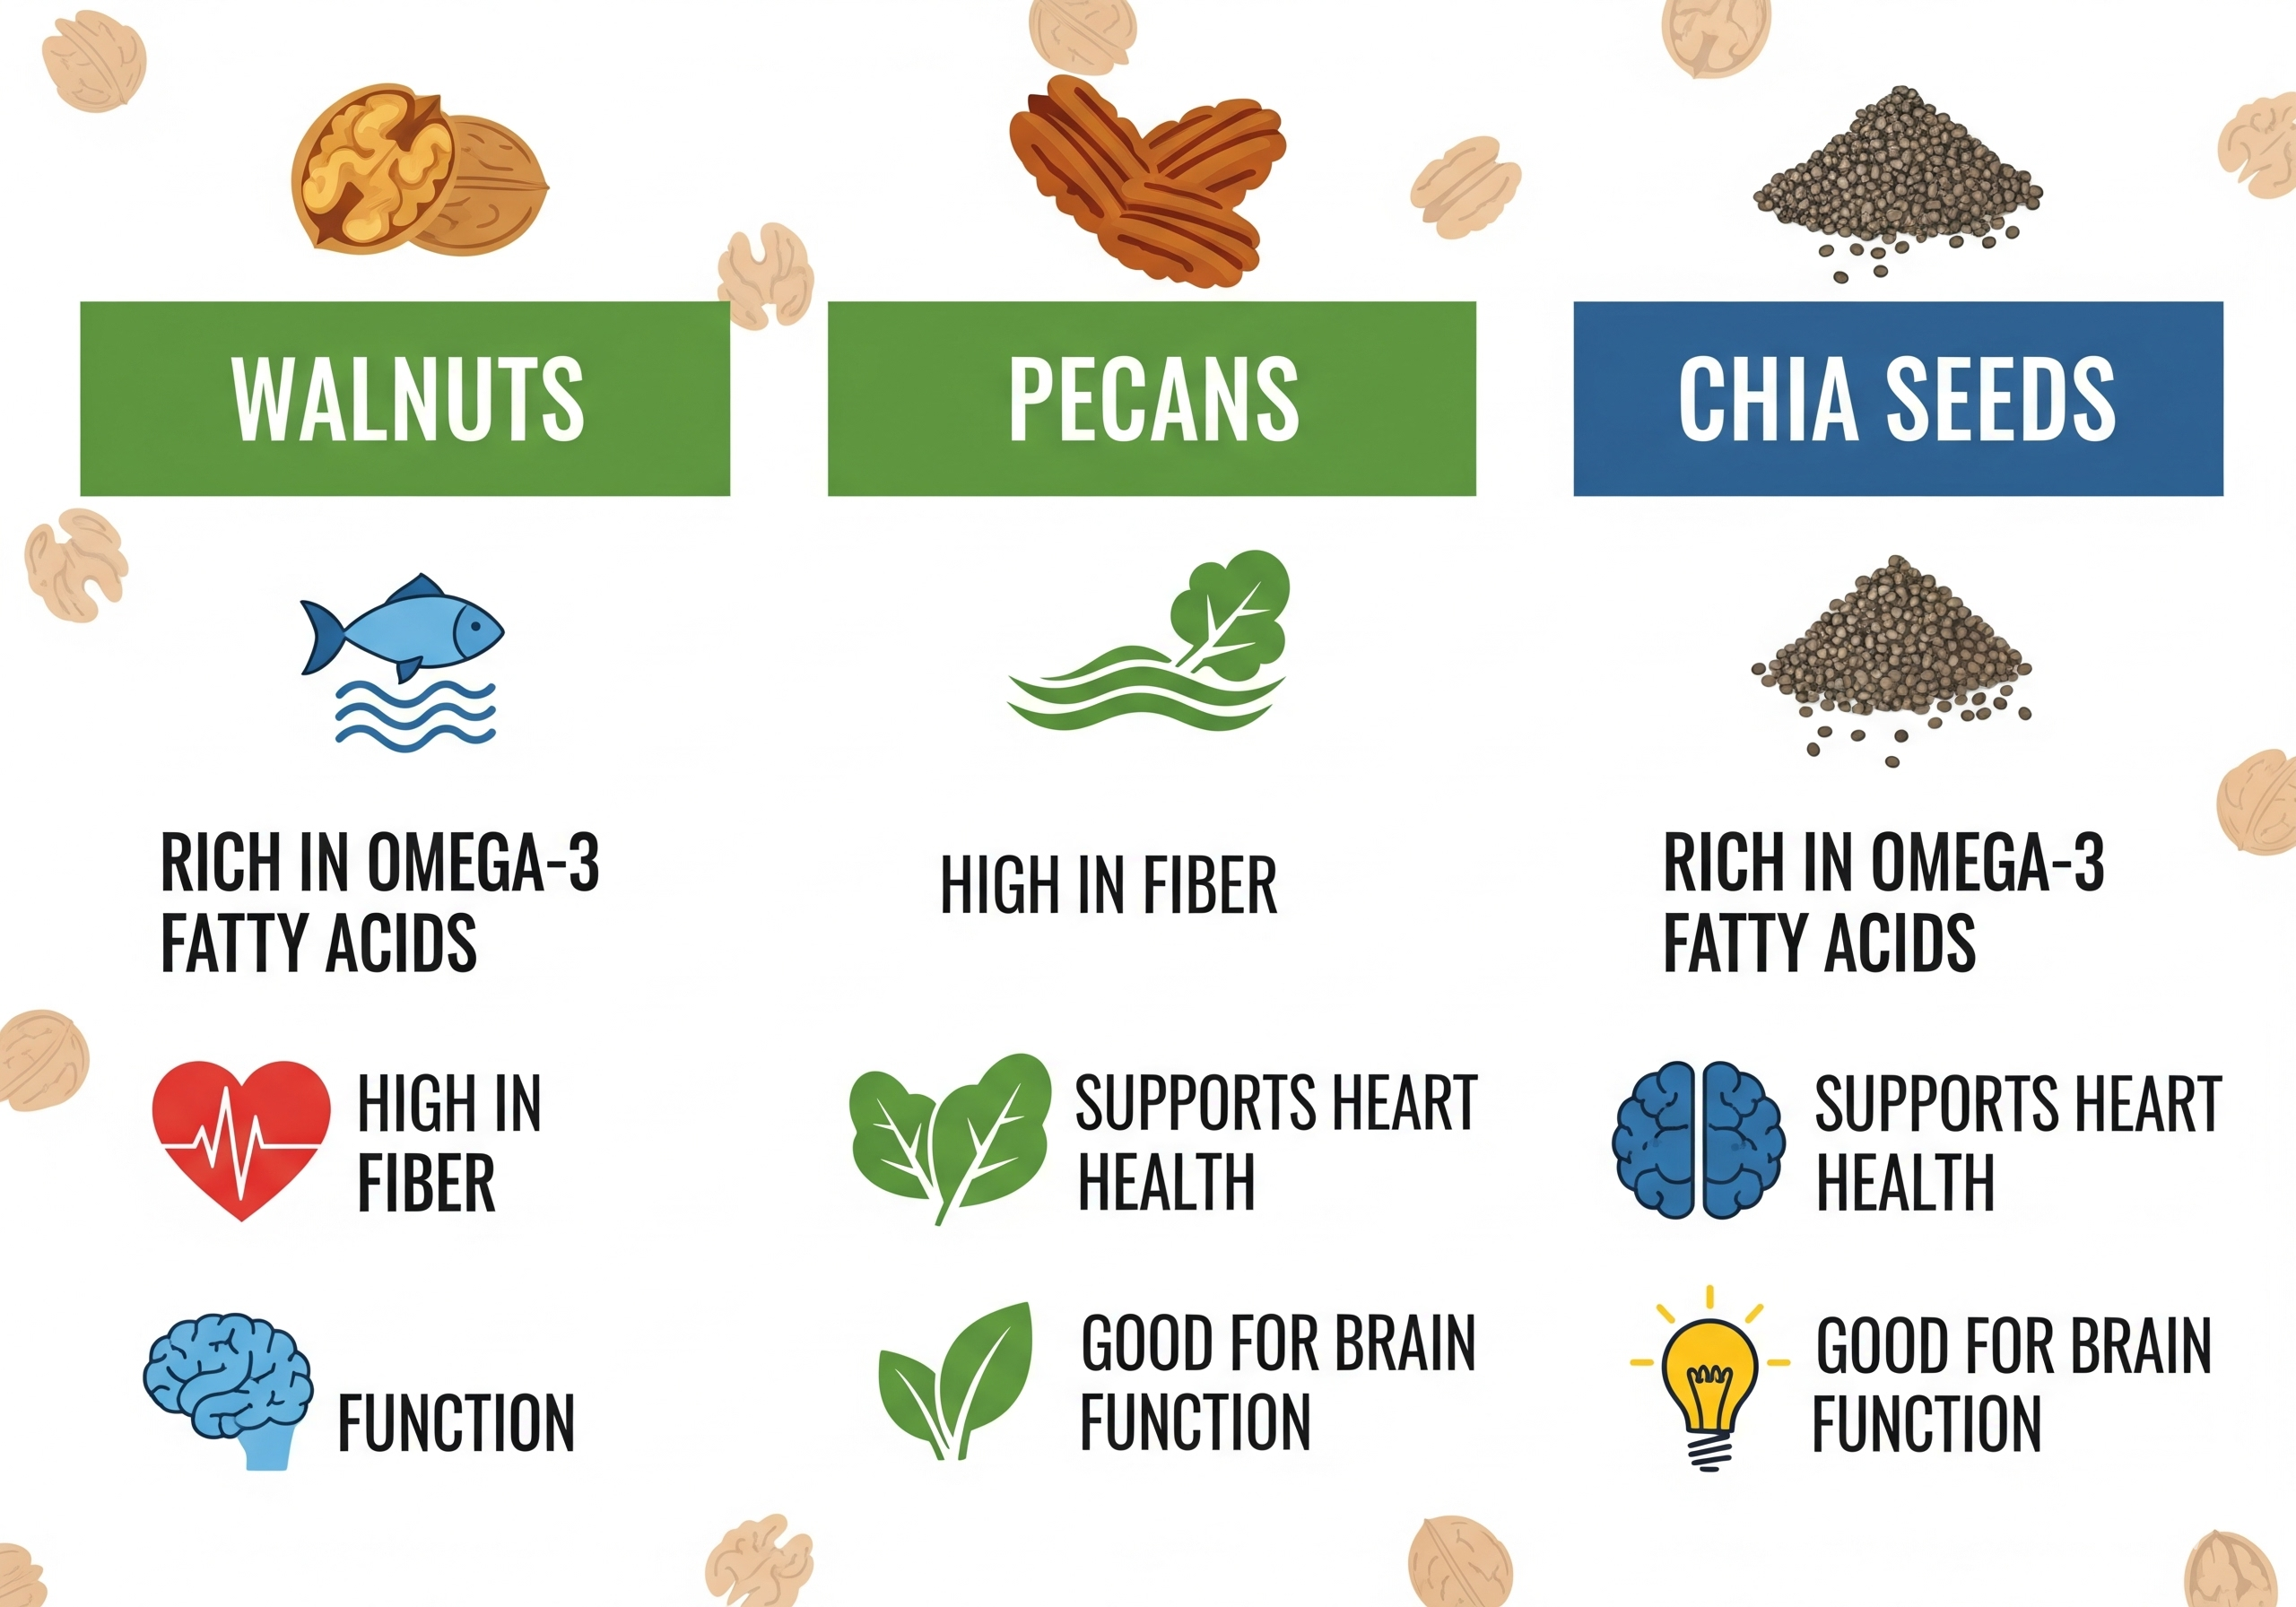
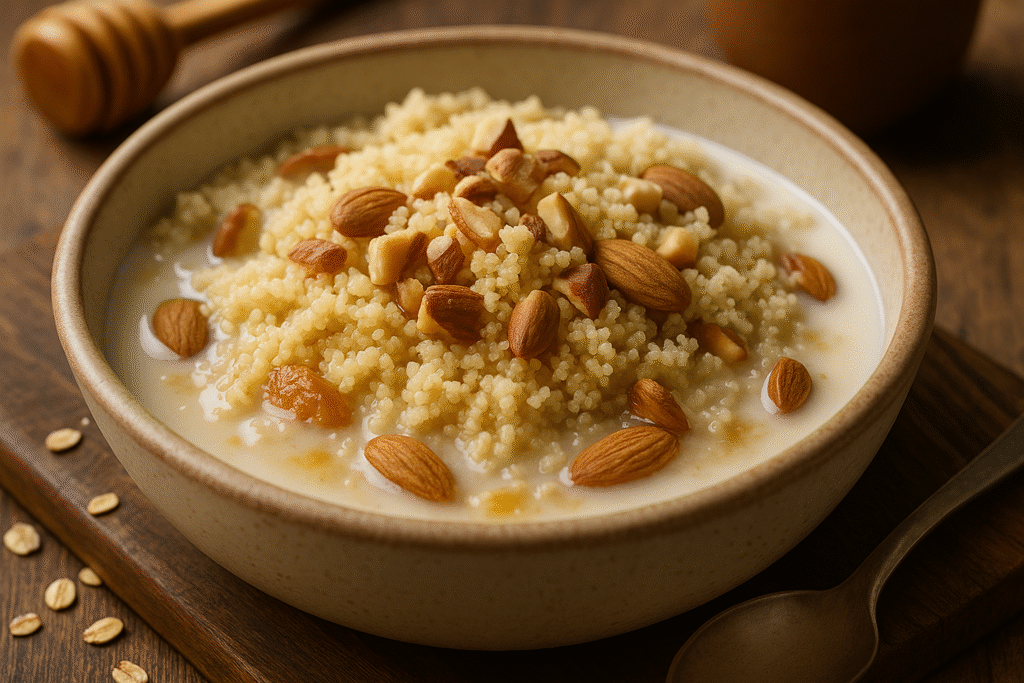
    The gallery shows the nutritional benefits of chicken, the vegetables and nuts used in this recipe


    Pasta Salad Variations

    VariationDescription
    Spicy KickAdd a pinch of red pepper flakes or a finely diced jalapeño to the dressing for a touch of heat.
    Mediterranean TwistReplace the grilled chicken with chickpeas, add crumbled feta cheese, and use cucumber and red onion instead of bell peppers.
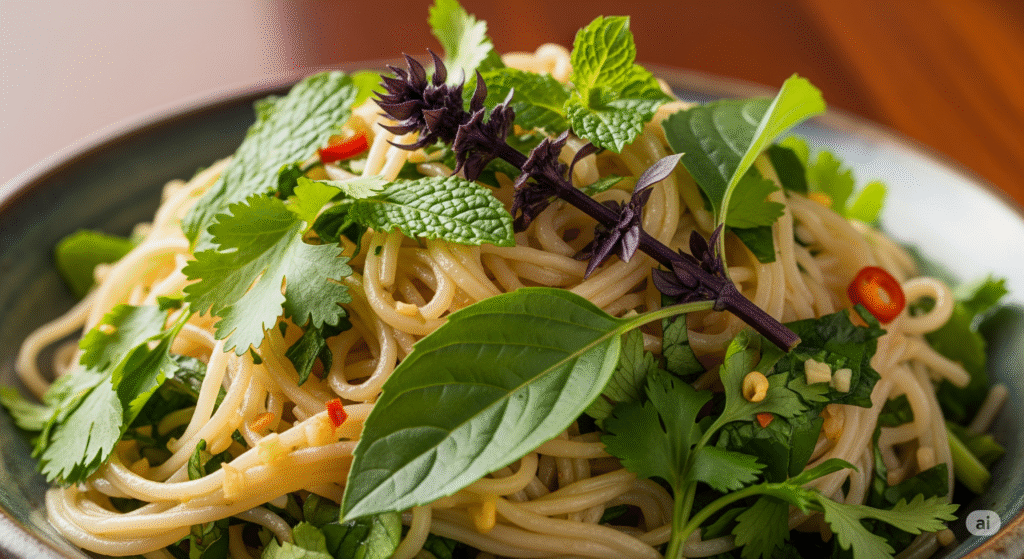
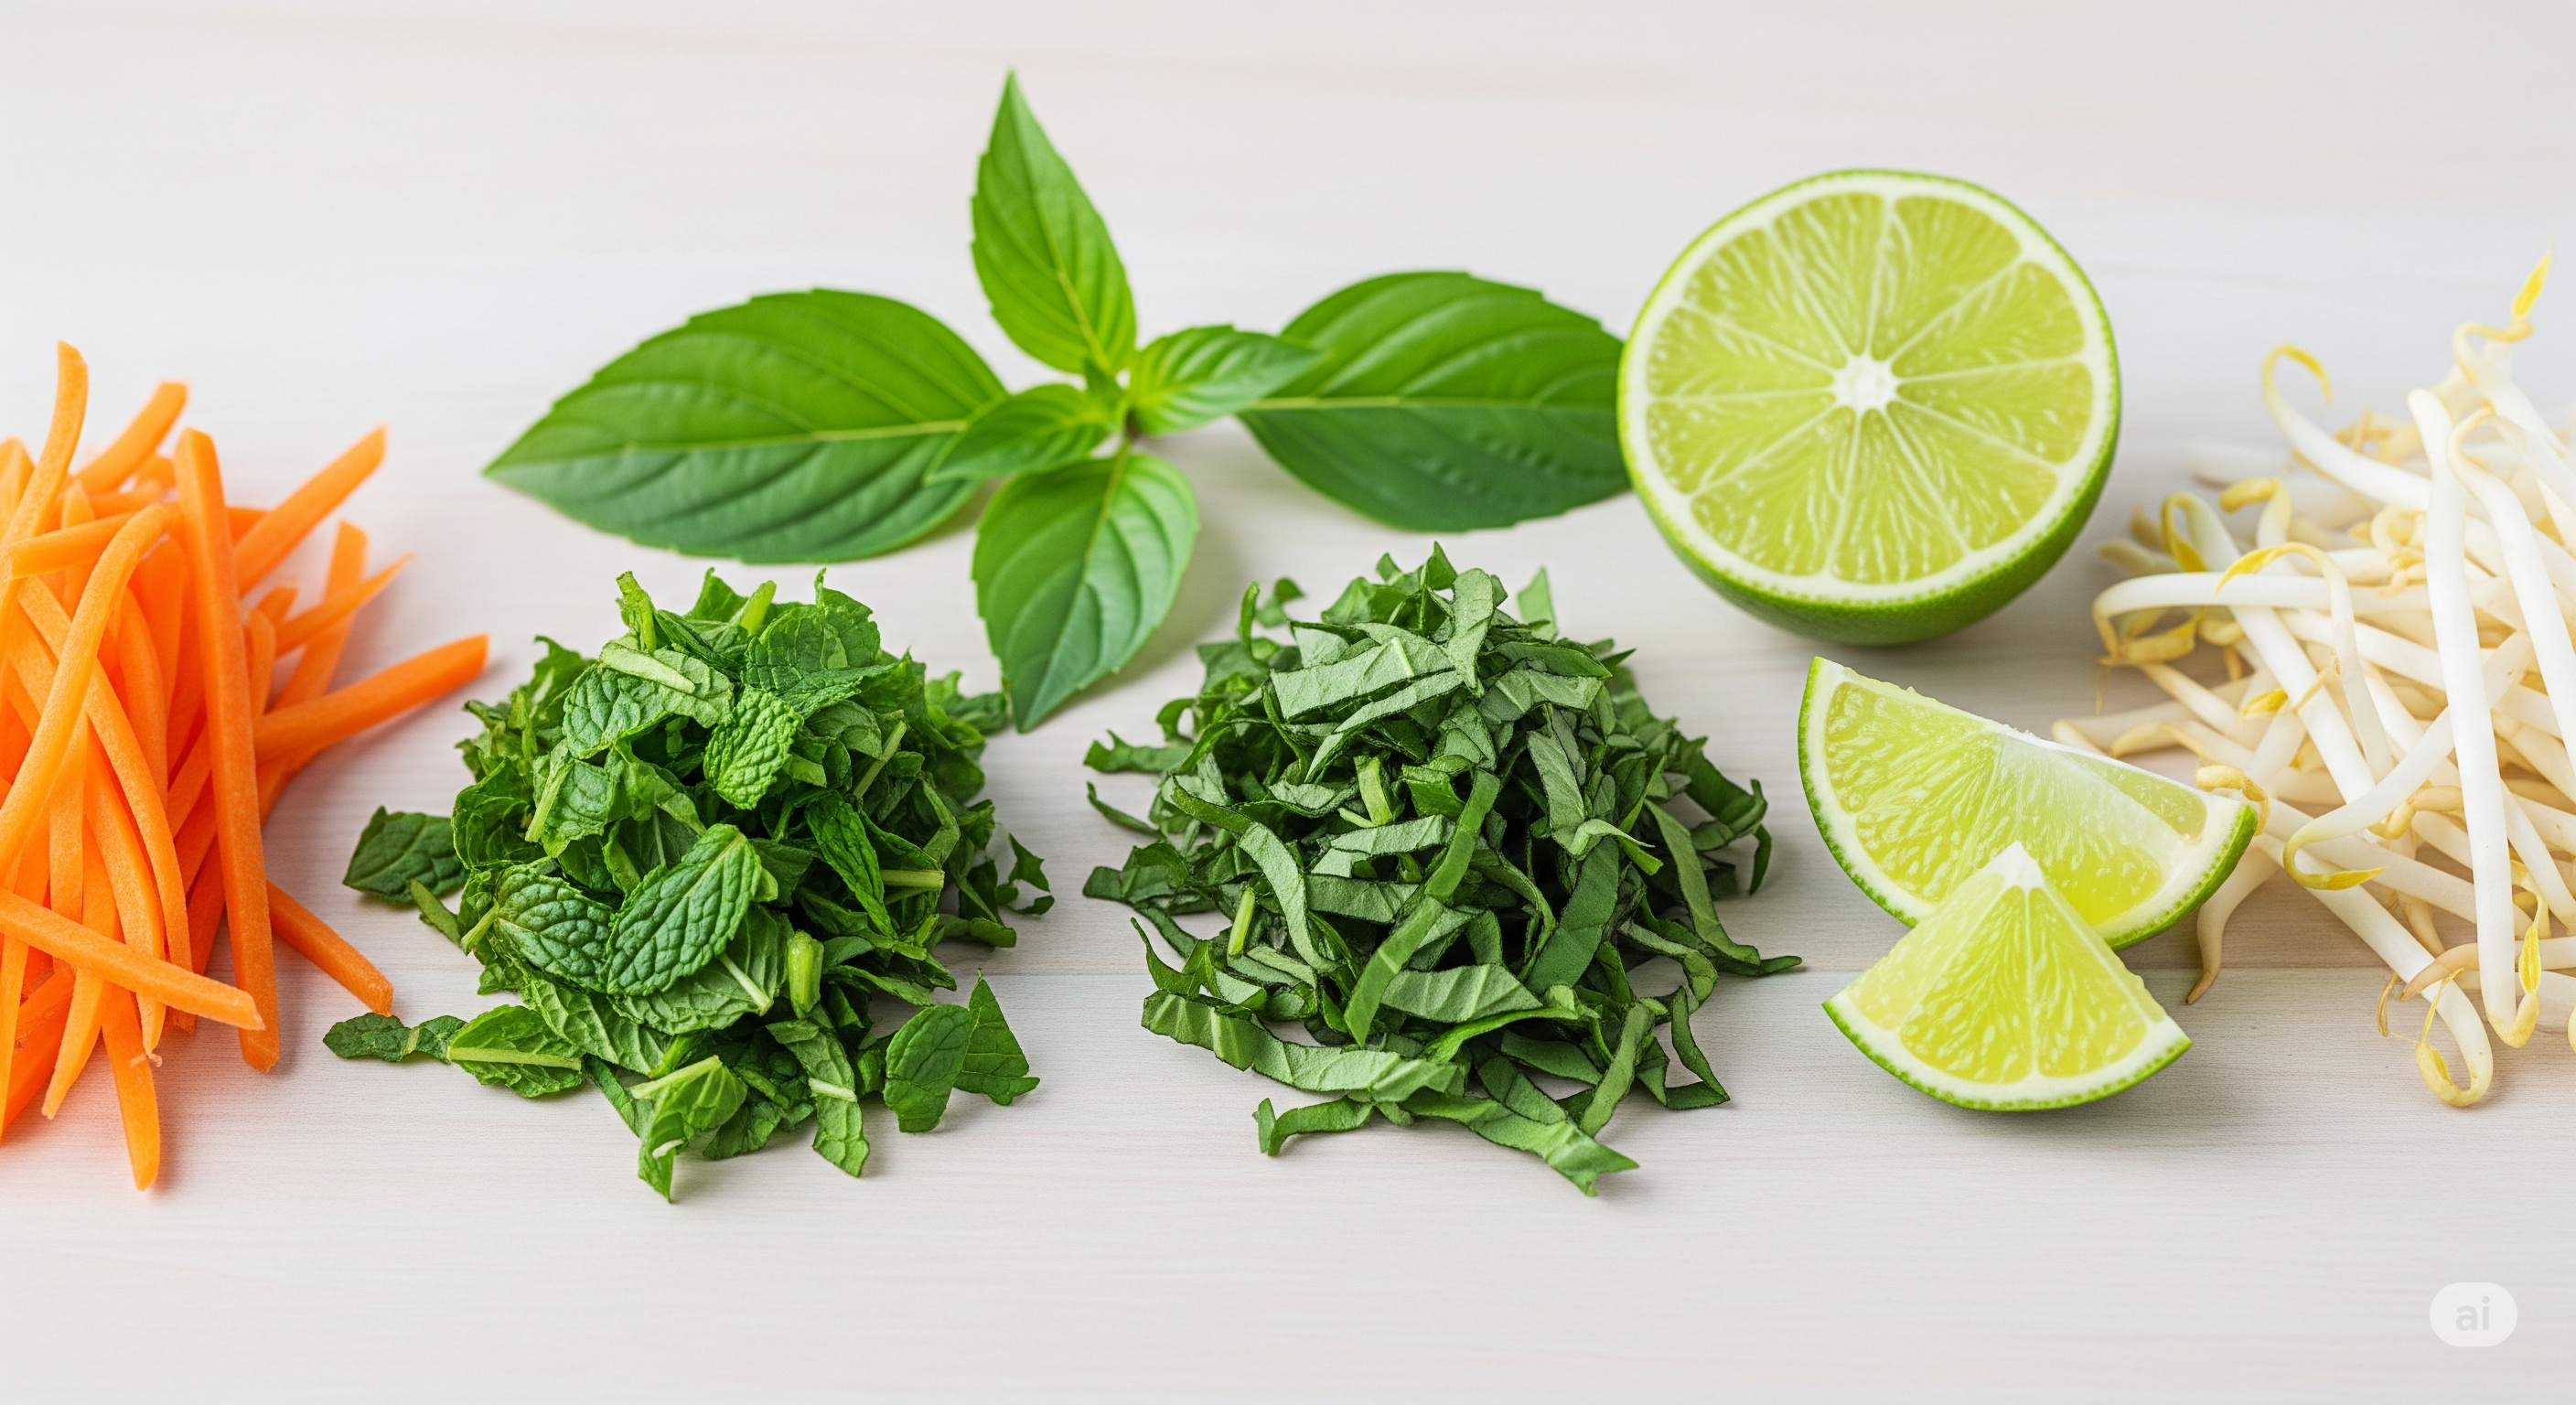
    Herb GardenExperiment with different fresh herbs. Try adding chopped fresh basil, mint, or cilantro for a new flavor profile.
    Seafood SwapSubstitute the chicken with cooked shrimp or flaked canned tuna for a seafood-inspired version.
    Vegetable MedleyUse a different mix of vegetables like steamed broccoli florets, corn, shredded carrots, or black olives to suit your taste.

    Final Thoughts: A Simple Recipe, Endless Possibilities

    This recipe for the best Pasta Salad ever proves that healthy eating can be both easy and incredibly flavorful. It’s a versatile dish that encourages creativity in the kitchen and provides a well-balanced meal in a single bowl. Don’t be afraid to make it your own by experimenting with different vegetables, proteins, or dressings. You can take this basic recipe as a guide and adapt it to your preferences and whatever ingredients you have on hand. It’s a fantastic solution for meal prepping, ensuring you have a delicious and nourishing meal ready to go throughout the week.


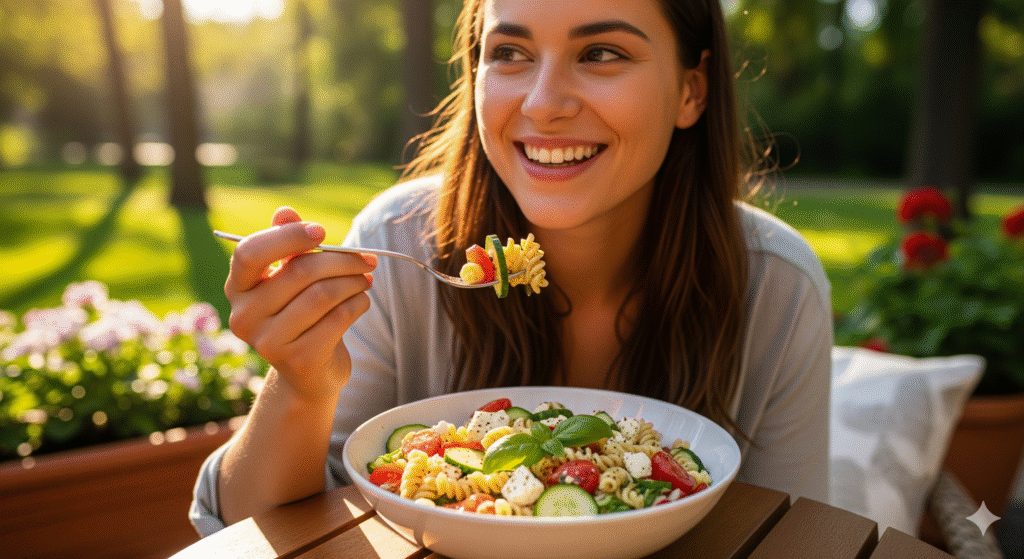
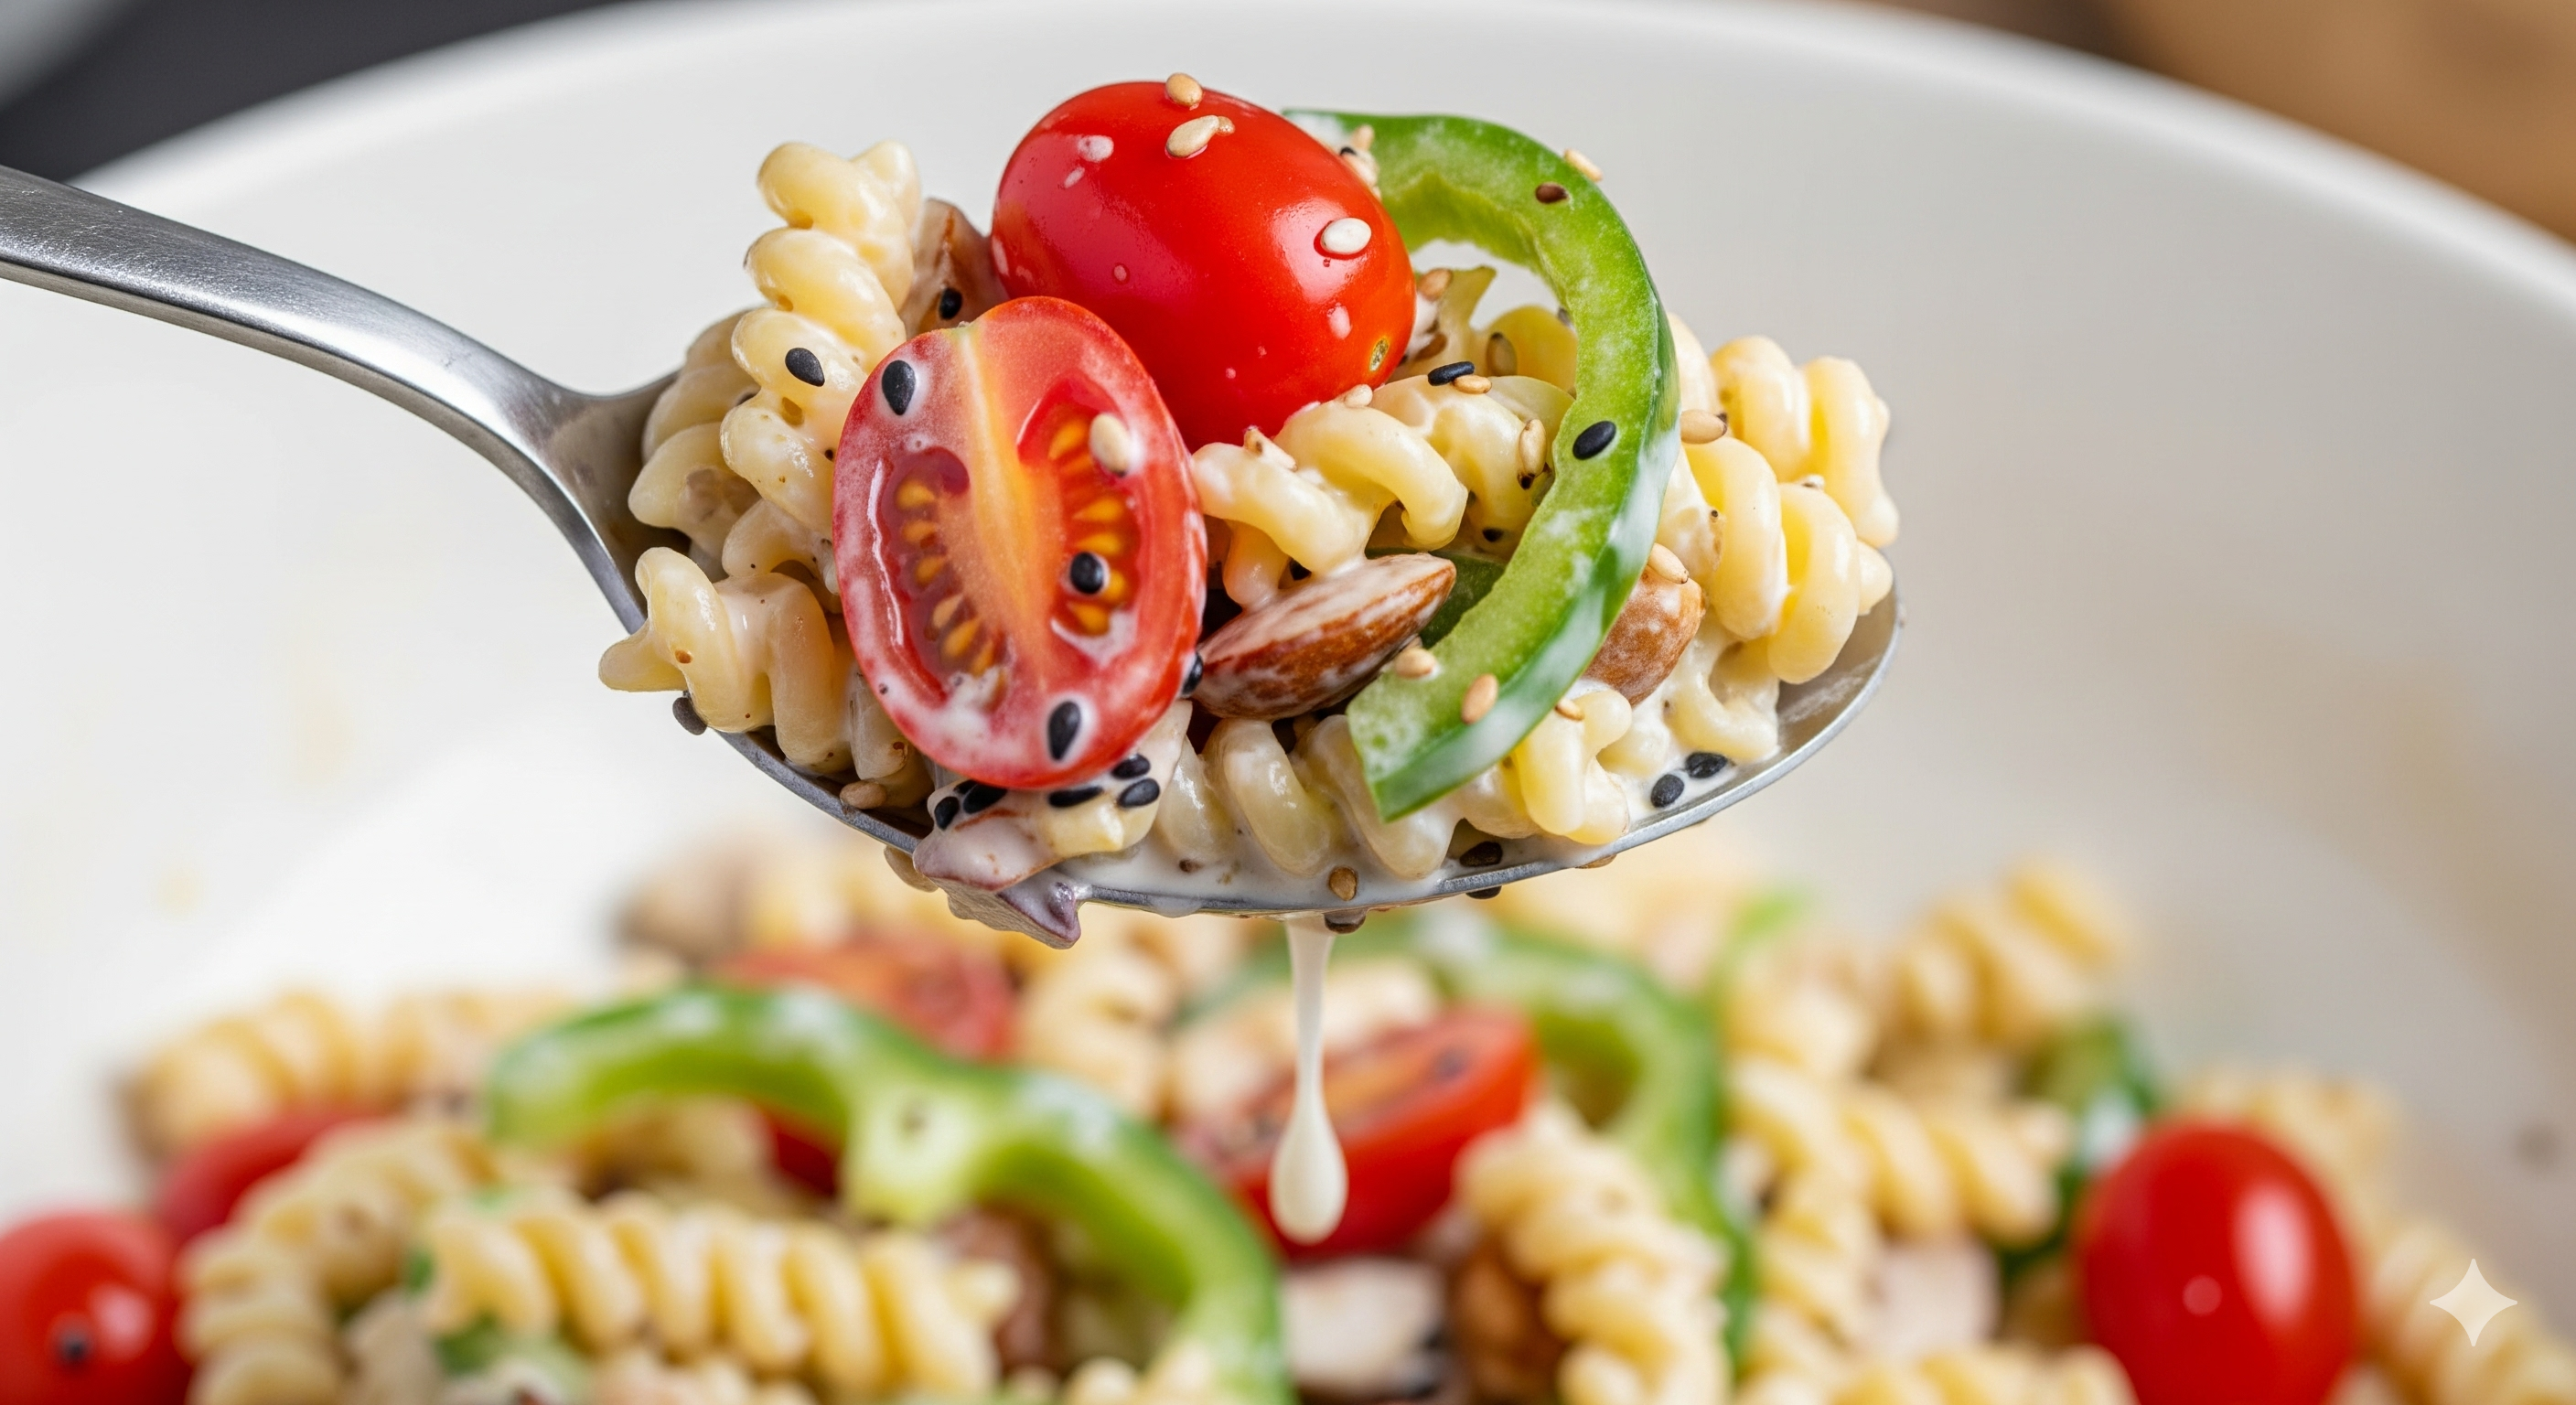
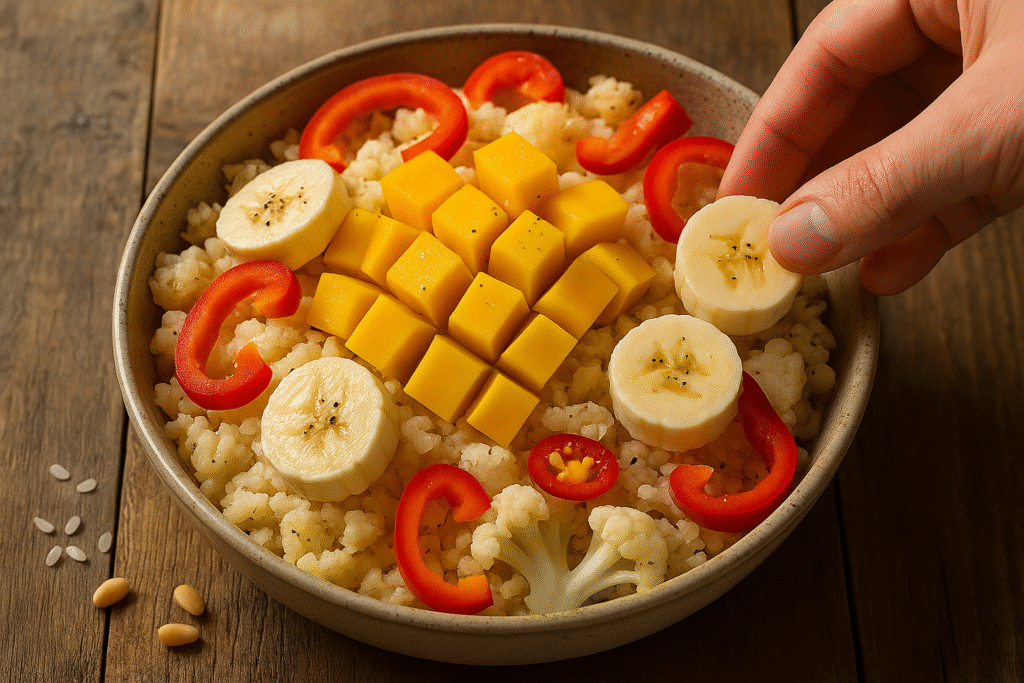
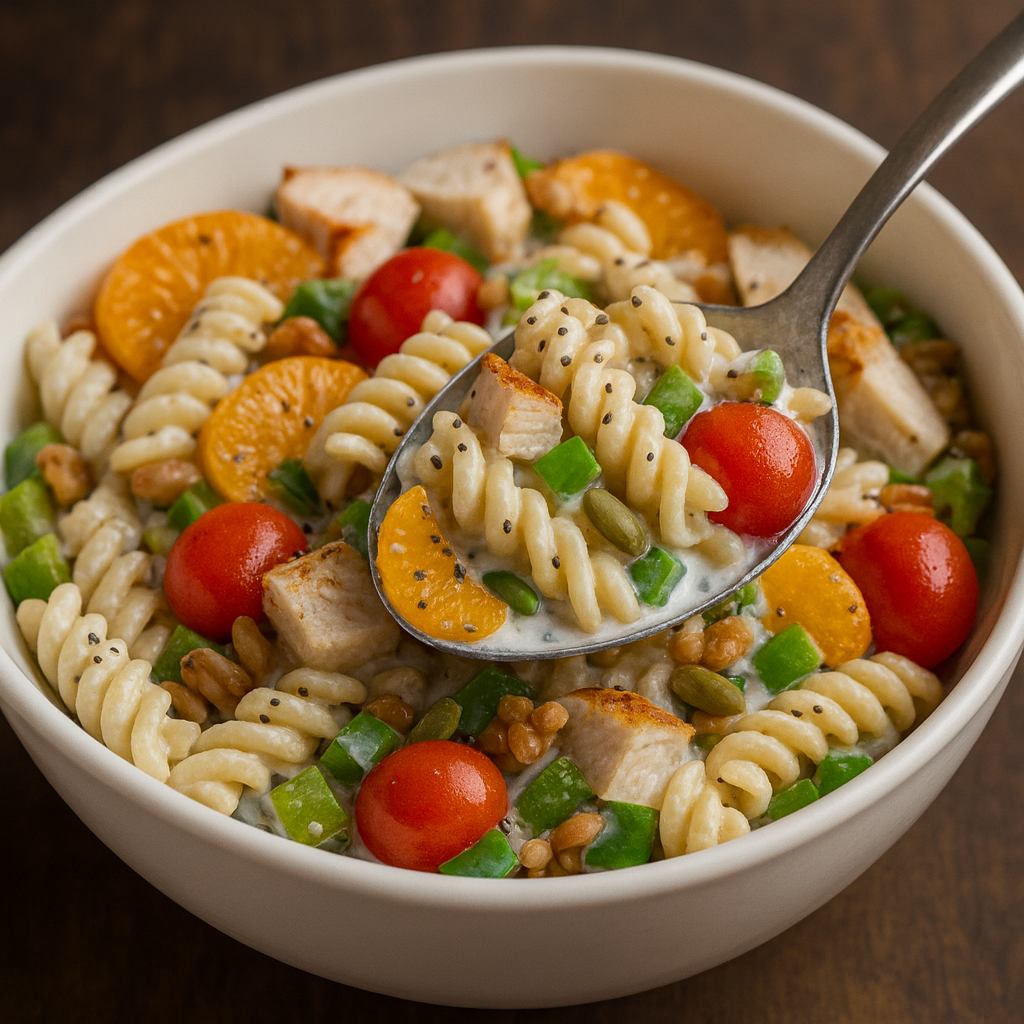
    The images shows someone enjoying the cooked pasta salad outside and a close up look at the pasta salad.


    Frequently Asked Questions

    Q: Can I use a different type of pasta?

    A: Yes, absolutely! Short pasta shapes work best for salads as they hold the dressing and other ingredients well. Penne, farfalle (bow tie), or orecchiette are all great substitutes for the rotini pasta.

    Q: How long can I store this pasta salad?

    A: This salad can be stored in an airtight container in the refrigerator for up to 3-4 days. The pasta will absorb some of the dressing over time, so you might want to add a little extra yogurt or lemon juice before serving on subsequent days to freshen it up.


    References

    1. Harvard T.H. Chan – Protein
    2. Mayo Clinic – Healthy Diet
    3. American Heart Association –Diet and Lifestyle

    Recent Posts


    Make This Easy Cabbage Omelette Rolls with Veg


    This article explores the simplicity and health benefits of making delicious Cabbage Omelette Rolls at home. Whether you’re a seasoned cook or a beginner, you’ll discover how easy and rewarding it is to create this nutritious meal for your family. The versatility of these Cabbage Omelette Rolls with a vibrant carrot sauce makes a wholesome meal and perfect addition to any healthy eating plan.


    The image shows Cabbage Omelette Rolls on a plate With a bowl of carrot sauce on the side.
    Cabbage Omelette Rolls

    Easy and Delicious Cabbage Omelette Rolls: A New Twist on Healthy Eating

    Discover a simple, healthy recipe that’s as delicious as it is easy to make. These savory Cabbage Omelette Rolls are a game-changer for anyone looking for a quick and nutritious meal. They’re perfect for breakfast, lunch, or a light dinner.

    Tired of the same old boring meals? This recipe offers a refreshing and innovative way to incorporate more vegetables into your diet. The gentle crunch of the cabbage paired with the soft, fluffy egg creates a delightful texture, while the vibrant filling of kidney beans, bell peppers, and carrots bursts with flavor. It’s a satisfying dish that won’t weigh you down.


    The images show some of the equipment used and the cooking of the Omelette.


    A Nutritional Powerhouse

    One of the best things about these Cabbage Omelette Rolls is their incredible versatility. You can easily adapt the recipe to use whatever vegetables you have on hand, making it a great way to reduce food waste. Whether you’re a seasoned chef or a complete beginner, the clear, step-by-step instructions will guide you to a perfect result every time.

    This dish isn’t just a treat for your taste buds; it’s a feast for your body. Cabbage, a cruciferous vegetable, is packed with vitamins and minerals, while eggs provide high-quality protein. The combination of these ingredients makes for a balanced meal that supports your overall well-being. Plus, it’s a fantastic option for meal prep, so you can have healthy meals ready to go throughout the week.

    Get ready to transform your approach to healthy eating. These Cabbage Omelette Rolls are about to become a new favorite in your kitchen. They’re simple, quick, and incredibly tasty. So grab your ingredients, and let’s get cooking!


    The images show omelette being eaten and meal prepping the omelette.


    Cabbage Omelette Rolls: A Healthy and Quick Meal


    Time to Prepare: 15 minutes

    Time to Cook/Blend: 20 minutes

    Servings: 3 rolls


    Nutritional Information for Cabbage Omelette Rolls

    Each serving of these delicious rolls is a powerhouse of nutrients. A single Cabbage Omelette Roll typically contains about 250-300 calories, depending on the exact ingredients and portion sizes. They are an excellent source of protein from the eggs and kidney beans, which helps with muscle repair and keeps you feeling full. You’ll also get a significant amount of dietary fiber from the cabbage and other vegetables, which aids in digestion. The colorful mix of bell peppers and carrots provides essential vitamins A and C, crucial for immune function and skin health. This recipe is also naturally low in unhealthy fats and is a great way to boost your daily vegetable intake.


    The gallery shows images of the ingredients for the omelette, sauce and the filling.


    Ingredients

    For the Cabbage Omelette Rolls

    • 2 cups finely shredded green cabbage
    • 6 large eggs
    • 1/2 teaspoon salt
    • 1/4 teaspoon black pepper
    • 1 tablespoon olive oil or avocado oil

    For the Filling

    • 1 can (15 ounces) kidney beans, rinsed and drained
    • 1/2 red bell pepper, finely diced
    • 1/2 green bell pepper, finely diced
    • 1 small carrot, finely diced
    • 1/4 cup chopped fresh cilantro or parsley
    • 1 clove garlic, minced
    • 1/2 teaspoon cumin powder
    • 1/4 teaspoon chili powder (optional)
    • Salt and pepper to taste

    For the Carrot Dipping Sauce

    • 1 cup chopped carrots
    • 1/2 cup vegetable broth
    • 1/4 cup plain Greek yogurt (or a non-dairy alternative)
    • 1 tablespoon lemon juice
    • 1/2 teaspoon smoked paprika
    • Pinch of salt

    The images shows some of the equipment used in this recipe including an Air fryer (optional)


    Equipment

    • Large non-stick skillet
    • Medium-sized mixing bowl
    • Small saucepan (for the sauce)
    • Blender or food processor (for the sauce)
    • Cutting board and sharp knife
    • Spatula

    Step-by-Step Cabbage Omelette Roll Instructions

    Prepare the Filling

    Start by preparing the vibrant filling. In a medium bowl, combine the rinsed and drained kidney beans, finely diced red and green bell peppers, and the finely diced carrot. Add the minced garlic, cumin powder, chili powder (if using), and chopped cilantro or parsley. Gently stir everything together until well combined. Season with salt and pepper to your liking. Set this mixture aside while you prepare the omelettes.

    Make the Cabbage Omelette Batter

    In a separate medium bowl, crack the six large eggs. Whisk them vigorously until the yolks and whites are fully combined and the mixture is light and frothy. Stir in the finely shredded cabbage, salt, and black pepper. The cabbage may look like a lot at first, but it will cook down and integrate perfectly with the egg.

    Cook the Omelettes

    Heat the tablespoon of olive oil in a large non-stick skillet over medium-low heat. Once the pan is warm, pour about one-third of the cabbage and egg mixture into the pan. Use the back of a spatula to spread the mixture out evenly into a thin, round layer. Cook for 2-3 minutes, or until the edges begin to set and the top is no longer runny. You can gently lift an edge with your spatula to check for doneness.

    Add the Filling

    Once the omelette is mostly cooked but still slightly soft on top, carefully spoon one-third of the prepared bean and vegetable filling across the center of the omelette, creating a line from one side to the other. Be careful not to overfill it.


    Roll the Omelette

    Using your spatula, carefully lift one edge of the omelette and begin to roll it tightly over the filling. Continue to roll it until you have a neat, tight roll. Gently press down on the roll to seal it. Cook for another minute to ensure it’s cooked through and the roll holds its shape. Transfer the finished roll to a plate. Repeat this process with the remaining batter and filling to create the other two omelette rolls.

    Alternative Cooking Methods

    If you prefer a firmer texture or a crispier finish, you can also bake or air fry the rolls. After preparing the rolls in the skillet as described above, you can finish them in an air fryer at 350°F (175°C) for 3-5 minutes, or on a baking sheet in a preheated oven at 400°F (200°C) for 5-7 minutes. This is a great way to add a nice golden-brown exterior.


    How to Make the Carrot Dipping Sauce

    1. Cook the Carrots: In a small saucepan, combine the chopped carrots and vegetable broth. Bring the mixture to a boil, then reduce the heat and let it simmer for about 10-15 minutes, or until the carrots are very tender when pierced with a fork.
    2. Blend the Sauce: Carefully transfer the cooked carrots and any remaining broth into a blender or food processor. Add the plain Greek yogurt, lemon juice, and smoked paprika. Blend on high until the sauce is completely smooth and creamy. If the sauce is too thick, you can add a little more broth or water, a tablespoon at a time, until it reaches your desired consistency.
    3. Serve: Season the sauce with a pinch of salt to enhance the flavors. Serve the warm Cabbage Omelette Rolls alongside the creamy carrot dipping sauce. The sweet and tangy sauce perfectly complements the savory rolls.

    The Benefits of Cabbage Omelette Rolls

    These Cabbage Omelette Rolls are more than just a tasty meal—they’re a health-conscious choice that offers numerous benefits, making them a fantastic addition to your diet. The star of this dish, cabbage, is a cruciferous powerhouse. It’s an excellent source of Vitamin C, a powerful antioxidant that helps protect your cells from damage, supports a strong immune system, and is crucial for healthy skin. Cabbage also provides a significant amount of Vitamin K, which is essential for proper blood clotting and bone health.

    Beyond its vitamin content, cabbage is rich in dietary fiber. This is a major plus for digestive health, as fiber helps promote regularity and can prevent constipation. A high-fiber diet is also linked to a reduced risk of chronic diseases such as heart disease and type 2 diabetes. The vegetables in the filling, like bell peppers and carrots, contribute a vibrant array of nutrients. Red and green bell peppers are loaded with Vitamin A and C, while carrots are well-known for their high beta-carotene content, which the body converts to Vitamin A. These nutrients are vital for maintaining good vision, supporting immune function, and fighting inflammation.


    The gallery shows the Nutritional benefits of Cabbage, Carotts and Eggs.


    Sustained Energy and Satiety With Cabbage Omelette Rolls

    The eggs in this recipe provide a complete and high-quality source of protein. Protein is a fundamental macronutrient necessary for building and repairing tissues, making enzymes and hormones, and providing sustained energy. The Cabbage Omelette Rolls will keep you feeling full and satisfied for longer, helping to prevent those mid-day hunger pangs and supporting weight management goals. The kidney beans in the filling further boost the protein and fiber content, making this a well-rounded and satiating meal.

    Furthermore, this dish is naturally low in carbohydrates and gluten-free, making it a great option for those following specific dietary plans. The balance of protein, fiber, and healthy fats from the olive oil contributes to stable blood sugar levels, preventing energy crashes. By choosing a wholesome, homemade meal like these Cabbage Omelette Rolls, you can be confident that you are fueling your body with the nutrients it needs to thrive. It’s a simple, delicious, and effective way to prioritize your health without sacrificing flavor.


    Cabbage Omelette Roll Variations

    VariationDescription
    Protein Power-UpAdd cooked, shredded chicken, turkey, or tofu to the filling for an extra boost of protein.
    Spicy KickMix in some chopped jalapeños or a dash of hot sauce to the filling for those who love a bit of heat.
    Cheesy GoodnessSprinkle some shredded cheese (cheddar, mozzarella, or feta) over the filling before rolling the omelette.
    Herb GardenExperiment with different herbs like fresh dill, mint, or basil to create a new flavor profile.
    Vegan AlternativeSubstitute the eggs with a chickpea flour or plant-based egg substitute batter, and use a vegan yogurt for the sauce.
    Morning GloryUse breakfast sausage, crispy bacon bits, or a mix of sautéed mushrooms and spinach for a breakfast-themed roll.

    The images show the different variations of this recipe. The first is made with chicken and the second is breakfast sausage.


    Final Thoughts: A Simple Recipe for Cabbage Omelette Rolls

    Making these Cabbage Omelette Rolls is a simple yet effective way to introduce a nutritious and delicious meal into your routine. They are perfect for a busy weeknight or a lazy Sunday brunch. The combination of easy preparation and fantastic flavor makes this recipe a true winner. Don’t be afraid to experiment with the filling ingredients to make it your own. Start with this recipe and let your creativity take over. You’ll be amazed at how a few simple ingredients can create such a satisfying and healthy dish.


    Frequently Asked Questions

    Q: Can I make these ahead of time for meal prep?

    A: Yes, these rolls are perfect for meal prep! You can cook the rolls ahead of time and store them in an airtight container in the refrigerator for up to 3 days. When you’re ready to eat, you can reheat them in a microwave, a pan, or an air fryer for a few minutes.

    Q: How can I prevent the omelettes from sticking to the pan?

    A: Using a good quality non-stick skillet is key. Make sure the pan is properly preheated and lightly oiled before pouring in the egg mixture. Cooking over a medium-low heat also helps prevent sticking and ensures the omelette cooks evenly without burning.


    References

    1. Harvard T.H. Chan – Cabbage
    2. Mayo Clinic – Dietary Fiber
    3. American Heart Association Protein

    Recent Posts


    Make This Simple Quinoa And White Bean Fritters


    Welcome to a recipe that redefines simple and delicious eating. These quinoa and white bean fritters are not only easy to make but also packed with flavor and nutrition. Whether you’re a seasoned chef or a kitchen novice, this recipe is designed to be a delightful experience from start to finish.


    The image shows Quinoa and White bean fritters with a black bean and date sauce plus a tahini sauce.
    Quinao And White Bean Fritters

    The Secret to Simple, Wholesome Cooking

    Cooking delicious and healthy meals from scratch doesn’t have to be a complicated affair. In today’s fast-paced world, many of us are searching for recipes that are both nourishing and easy to prepare, allowing us to enjoy homemade goodness without spending hours in the kitchen. The key lies in using simple, accessible ingredients and smart cooking techniques that maximize flavor and nutrition with minimal effort.

    This recipe for Simple Quinoa and White Bean Fritters is a perfect example of this philosophy in action. It transforms humble pantry staples—quinoa and white beans—into a truly spectacular and satisfying dish. Quinoa, a complete protein, and white beans, rich in fiber and plant-based protein, form the foundation of these fritters. They are bound together with a few simple seasonings and then pan-fried to a golden-brown crisp, creating a delightful texture that’s crunchy on the outside and tender on the inside.


    The image shows cooked quinoa on a plate and cooked white beans


    Unlocking Flavor with Pantry Staples

    What truly elevates this dish, however, is the accompanying Black Bean and Date Sauce. This sweet and savory sauce is not just a tasty complement; it’s a flavor revelation. The rich, earthy notes of the black beans are perfectly balanced by the natural sweetness of dates, creating a unique condiment that pairs beautifully with the mild flavor of the fritters. This sauce is a testament to the fact that a few simple ingredients can create a profound impact on a dish, turning something simple into something extraordinary.

    This recipe is also incredibly versatile and adaptable to your personal taste and dietary needs. Whether you’re looking for a quick weeknight dinner, a healthy lunch option, or a crowd-pleasing appetizer, these fritters fit the bill. The recipe can be customized with different herbs, spices, or vegetables to suit your palate. It’s a testament to how creative and flexible plant-based cooking can be, proving that wholesome food is anything but boring.

    So, get ready to roll up your sleeves and discover the joy of making these Simple Quinoa and White Bean Fritters. This is more than just a recipe; it’s an invitation to embrace simple, wholesome cooking that nourishes both your body and your soul. Let’s dive in and create something truly delicious together.


    The images show dates with stones and black beans on a plate


    The Quick Quinoa and White Bean Fritters Recipe

    Servings: 4

    Time to Prepare: 15 minutes

    Time to Cook/Blend: 20 minutes


    Nutritional Information

    (Please note: Nutritional values are approximate and may vary based on exact ingredients and portion sizes.)

    • Calories: 350-400 kcal
    • Protein: 15g
    • Carbohydrates: 50g
    • Fiber: 10g
    • Fat: 10g
    • Sodium: 400mg

    The gallery shows some of the equipment used for this recipe: Blender, colander, measuring spoons, large bowl and air fryer.


    Essential Equipment

    • A large mixing bowl
    • A sturdy fork or potato masher
    • A large non-stick skillet or frying pan
    • Measuring cups and spoons
    • A blender or food processor (for the sauce)
    • A large metal colander for rinsing
    • A large slotted spoon or spatula for flipping
    • A large plate lined with paper towels
    • Air fryer

    Ingredients for the Fritters

    • 1 cup cooked quinoa (cooked and cooled)
    • 1 can (15 oz or 425g) cannellini or great northern white beans, rinsed and drained
    • 1/2 small onion, finely diced
    • 2 cloves garlic, minced
    • 1/4 cup finely chopped fresh parsley
    • 1 large egg (or 1 flax egg for a vegan option)
    • 1/4 cup all-purpose flour (or a gluten-free flour blend)
    • 1/2 teaspoon smoked paprika
    • 1/2 teaspoon ground cumin
    • Salt and black pepper to taste
    • 2 tablespoons olive oil for frying

    The gallery shows the dry ingredients used for this recipe.


    Ingredients for the Black Bean and Date Sauce

    • 1 cup cooked black beans (or 1/2 can, 7.5 oz or 215g), rinsed and drained
    • 1/2 cup pitted dates (Medjool or regular)
    • 1/4 cup water
    • 1 tablespoon fresh lemon juice
    • 1 teaspoon olive oil
    • Salt to taste

    Step-by-Step Instructions for Quinoa And White Bean Fritters

    Prepare Your Base

    In a large mixing bowl, start by mashing the rinsed and drained white beans with a fork or a potato masher. Don’t worry about getting them perfectly smooth; a little texture is great for the fritters. You want a chunky, mashed consistency. Once mashed, add the cooled, cooked quinoa to the bowl. Stir them together until they are well combined.

    Add Flavor

    Next, add the finely diced onion, minced garlic, and chopped fresh parsley to the bowl. Mix everything thoroughly. The parsley will add a fresh, vibrant green color and a clean taste to the fritters.

    Bind the Fritters

    In a separate small bowl, lightly whisk the egg. Pour the whisked egg over the quinoa and bean mixture. Sprinkle in the flour, smoked paprika, ground cumin, a good pinch of salt, and a generous crack of black pepper. Gently fold all the ingredients together with a spatula or your hands until everything is evenly combined. The mixture should hold together well when you form it into a patty. If it feels too wet, add another tablespoon of flour.

    Form and Fry

    Heat the olive oil in a large non-stick skillet over medium heat. While the oil is heating, scoop up a portion of the mixture (about 1/4 cup) and use your hands to form it into a patty, about 1/2 inch thick. Carefully place the fritters into the hot skillet, being careful not to overcrowd the pan. Work in batches if necessary.

    Cook to Perfection

    Cook the fritters for 3–5 minutes on the first side, or until they are a deep, golden-brown color and a crispy crust has formed. Flip them gently using a spatula and cook for another 3–4 minutes on the other side, until they are also golden and cooked through. The inside will be tender and soft.

    Make the Sauce

    While the fritters are cooking, prepare the Black Bean and Date Sauce. In a blender or food processor, combine the cooked black beans, pitted dates, water, lemon juice, and olive oil. Blend on high speed until the sauce is completely smooth and creamy. Season with a pinch of salt to taste. If the sauce is too thick, add water one tablespoon at a time until you reach your desired consistency.

    Serve

    Once cooked, transfer the fritters to a plate lined with a paper towel to absorb any excess oil. Serve the hot fritters immediately, topped with a generous dollop of the rich Black Bean and Date Sauce.


    Air Fryer Method (Alternative Cooking Instructions) for White Bean Fritters

    If you prefer a healthier, oil-free cooking method for your white bean fritters, an air fryer is a fantastic option.

    1. Prepare Your Air Fryer: Begin by preheating your air fryer to 375°F (190°C).
    2. Lightly Coat the Fritters: Once you have formed the patties, lightly spray both sides of each fritter with olive oil or a non-stick cooking spray. This will help them crisp up and achieve that perfect golden color.
    3. Arrange and Cook: Carefully place the prepared fritters in the air fryer basket in a single layer. Make sure there is space between each one to allow the hot air to circulate. Do not overcrowd the basket. Cook the fritters for 10-12 minutes, flipping them gently halfway through the cooking time.
    4. Check for Doneness: The fritters are done when they are a deep golden-brown color and feel firm to the touch. They will have a satisfyingly crispy exterior. Serve immediately with the Black Bean and Date Sauce.

    The image shows the quinoa miixture and the fritters frying on a stove.


    Benefits of These White Bean Fritters

    These simple white bean fritters are not just a treat for your taste buds; they are also a powerhouse of nutrition.

    • High in Plant-Based Protein: Quinoa is a complete protein, meaning it contains all nine essential amino acids. Combined with the protein from the white beans, these fritters provide a substantial, meat-free protein source that is crucial for muscle repair, feeling full, and supporting a healthy metabolism.
    • Rich in Fiber: Both quinoa and white beans are excellent sources of dietary fiber. Fiber is vital for digestive health, helping to regulate bowel movements and supporting a healthy gut microbiome. A diet rich in fiber also helps stabilize blood sugar levels and can contribute to a lower risk of chronic diseases.
    • Packed with Micronutrients: The ingredients in this recipe are loaded with essential vitamins and minerals. The onions and garlic provide allicin, a compound known for its anti-inflammatory properties, while the parsley is a great source of Vitamin K and Vitamin C. The spices, cumin and paprika, are rich in antioxidants, which help protect your cells from damage.

    The gallery shows the benefits from plant based foods and the fiber and protein gained from the other ingredients.


    Recipe Variations for White Bean Fritters

    Here’s how you can customize this recipe to suit your preferences or what you have on hand.

    Variation CategorySubstitution or AdditionNotes
    ProteinUse chickpeas, lentils, or other beans.These can be used in place of white beans. Adjust consistency with flour as needed.
    CarbohydratesUse cooked brown rice, bulgur, or mashed sweet potato.These alternatives provide a similar texture and nutritional profile to quinoa.
    Herbs & SpicesAdd fresh cilantro, dill, or basil. Use a pinch of red pepper flakes.These substitutions will give the fritters a different flavor profile. The red pepper flakes will add a kick of heat.
    VegetablesGrate carrots or zucchini, or add corn kernels.These additions will add extra texture and nutrients. Be sure to squeeze out excess moisture from the grated vegetables.
    BindingUse a flax egg (1 tbsp ground flax + 3 tbsp water) for a vegan option.This is an excellent plant-based alternative to a chicken egg.
    SauceServe with a dollop of Greek yogurt mixed with dill, or a simple avocado cream sauce.These offer a creamy alternative to the black bean and date sauce.

    Final Thoughts for Quinoa And White Bean Fritters

    These Simple Quinoa and White Bean Fritters are more than just a recipe; they are a culinary experience that proves healthy eating can be both easy and incredibly delicious. They offer a simple yet profound way to nourish your body with wholesome, plant-based ingredients. With their crispy exterior, tender interior, and the perfect sweet-and-savory balance from the Black Bean and Date Sauce, they are sure to become a staple in your kitchen. So go ahead, give this recipe a try, and discover the joy of creating a truly satisfying and nutritious meal from scratch.


    Frequently Asked Questions (FAQs)

    Can I make the fritters ahead of time?

    Yes, you can! To prepare them in advance, you can form the patties and store them in an airtight container in the refrigerator for up to 24 hours. When you’re ready to cook, simply follow the frying instructions. You can also cook them completely, let them cool, and store them in the fridge for up to 3 days. To reheat, just pop them in a toaster oven or a non-stick pan until heated through and crispy.

    Can I bake the fritters instead of frying them?

    Absolutely! While pan-frying gives them a great crispy crust, baking is a healthier option. To bake, preheat your oven to 400°F (200°C). Place the formed fritters on a baking sheet lined with parchment paper. Lightly brush or spray the tops with olive oil. Bake for 15-20 minutes, flipping once halfway through, until they are golden-brown and firm to the touch.


    References

    1. FoodData Central – White Beans
    2. Harvard T.H. Chan – Fiber
    3. Healthline – 14 Healthy Foods High in Antioxidants

    Recent Posts


    Easy Steamed Cabbage Rolls with A Kebab Filling


    Our team is dedicated to crafting simple, delicious recipes that make healthy eating an achievable and enjoyable part of your daily life. We are passionate about creating vibrant, nourishing dishes like this Steamed Cabbage Rolls recipe to show that wholesome food can be both easy and incredibly satisfying. We are committed to empowering you with the knowledge and inspiration to cook with confidence and joy.


    Image shows Steamed cabbage rolls with a tahini sauce
    Steamed Cabbage Rolls

    A Delicious Twist on Classic Steamed Cabbage Rolls

    Welcome to a culinary adventure that proves comfort food can be both incredibly satisfying and exceptionally healthy. Today, we are taking a classic dish—cabbage rolls—and giving it a modern, healthful twist by using a gentle steaming method and a vibrant, flavorful kebab-inspired filling. Steaming is a fantastic way to prepare vegetables and meats, as it locks in nutrients and moisture without the need for added oils or heavy sauces. This recipe transforms a humble head of cabbage into a tender, delicate wrapper for a rich and aromatic filling, creating a meal that is light yet deeply satisfying. It’s a testament to the power of simple ingredients and clean cooking techniques.

    Our journey begins with the star of the show: a large, beautiful head of cabbage. Often overlooked, cabbage is a true nutritional powerhouse. When steamed, its leaves become soft, pliable, and almost translucent, making them the perfect vessel for a hearty filling. This recipe elevates the traditional cabbage roll by replacing the typical ground meat filling with a savory kebab-style mixture. We’ll combine lean ground meat with a medley of fresh herbs and warm spices like cumin and paprika, creating a flavor profile that is both familiar and excitingly new. The result is a roll that is packed with taste and goodness, offering a fresh take on a beloved classic.

    Simple and Wholesome Steamed Cabbage Rolls

    The beauty of these Steamed Cabbage Rolls lies not only in their taste but also in their simplicity. We’ve streamlined the process to make it approachable for even the most inexperienced home cook. From preparing the cabbage leaves to rolling the final product, our step-by-step instructions will guide you through each stage with clarity and confidence. The end result is a meal that looks impressive but is surprisingly easy to execute. It’s a perfect dish for a cozy family dinner or a special meal with friends, offering a unique and memorable culinary experience.

    What makes this recipe truly stand out is its commitment to health without sacrificing flavor. The steaming process ensures that the nutrients in both the cabbage and the filling are preserved, providing your body with essential vitamins and minerals. The lean filling provides a high-quality protein source, keeping you full and energized, while the spices add depth and complexity without any additional calories. This dish is a perfect example of how you can create wholesome, nourishing meals that don’t taste like “diet” food. It’s a meal that celebrates clean, fresh flavors and feels good to eat.

    So, get ready to roll up your sleeves and discover a new favorite. This article will provide you with a comprehensive guide to crafting these delicious and healthy Steamed Cabbage Rolls. We’ll cover everything from the ingredients and equipment you’ll need to the key benefits of this fantastic dish. By the end, you’ll have a new go-to recipe that you can confidently prepare, share, and enjoy. Let’s get started and bring this healthy, savory sensation to your kitchen!


    The gallery shows images of a head of cabbage, ground beef and a bag of rice


    The Health-Conscious Way to Enjoy Cabbage Rolls

    Time to Prepare: 25 minutes

    Time to Cook/Blend: 30-35 minutes

    Servings: 4


    Nutritional Breakdown (Approximate per serving):

    • Calories: 350-400 kcal
    • Protein: 25-30g
    • Fat: 15-20g
    • Carbohydrates: 25-30g
    • Fiber: 8-10g

    Note: Nutritional values are estimates and can vary based on portion size and specific ingredients.


    The gallery shows a basket steamer in a pot, measuring spoons and a large bowl


    Essential Equipment for Steamed Cabbage Rolls

    • Large pot with a lid
    • Steamer basket or a large metal colander that fits inside the pot
    • Large mixing bowl
    • Cutting board and sharp knife
    • Measuring cups and spoons
    • Tongs or a large slotted spoon

    Steamed Cabbage Rolls Ingredients

    • 1 large head of green cabbage
    • 1 lb (450g) lean ground beef or lamb
    • 1/2 cup long-grain rice, uncooked
    • 1 small onion, finely diced
    • 2 cloves garlic, minced
    • 1/4 cup fresh parsley, finely chopped
    • 1/4 cup fresh mint, finely chopped
    • 1 teaspoon ground cumin
    • 1/2 teaspoon paprika
    • Salt and black pepper to taste
    • 1 (14.5 oz) can crushed tomatoes (for the sauce)
    • 1/2 cup beef or vegetable broth
    • 1 tablespoon olive oil (for the sauce)
    • Optional: a pinch of red pepper flakes for heat

    A Simple Tahini Sauce to Complement Your Steamed Cabbage Rolls

    This light and creamy tahini sauce provides a nutty, savory contrast to the kebab filling. It’s an excellent, healthy alternative to heavier sauces and comes together in just minutes.

    Sauce Ingredients

    • 1/2 cup tahini
    • 1/4 cup fresh lemon juice
    • 1-2 cloves garlic, minced
    • 1/4 teaspoon salt
    • 1/4 to 1/2 cup warm water (or more for desired consistency)

    The gallery shows Tahini sauce and the dry ingredients for the sauce


    Detailed Step-by-Step Instructions

    Prepare the Cabbage Leaves

    Begin by carefully coring the cabbage. Use a sharp knife to cut around the core at the base of the cabbage head. Place the whole cored cabbage into a large pot of boiling water. This will help the leaves soften and detach easily. As the outer leaves become pliable (after about 3-5 minutes), use tongs to gently peel them off, one by one. Place the softened leaves on a platter to cool. Once they are cool enough to handle, use a paring knife to carefully trim the thick, hard part of the central vein from each leaf. This makes them easier to roll without tearing.

    Make the Kebab-Style Filling

    While the cabbage leaves are cooling, prepare your flavorful filling. In a large mixing bowl, combine the uncooked rice, lean ground meat (beef or lamb), finely diced onion, minced garlic, chopped parsley, and chopped mint. Add the ground cumin, paprika, a generous pinch of salt, and black pepper. Use your hands to mix everything together thoroughly until all ingredients are well combined. The mixture should be a uniform consistency.

    Create the Steaming Setup and Sauce

    In the same large pot used for the cabbage, add the crushed tomatoes, beef or vegetable broth, and olive oil. Stir to combine and season with a little salt and pepper. Bring this mixture to a gentle simmer over low heat. This will serve as the steaming liquid and a light sauce for your finished rolls. If you are not using a sauce, simply add enough water for steaming.

    Assemble and Roll the Cabbage Rolls

    Lay one prepared cabbage leaf on your cutting board. Place a generous spoonful of the filling mixture near the base of the leaf. Fold the sides of the leaf inward, over the filling, and then roll it up tightly from the bottom. The goal is to create a compact, secure roll that will hold its shape during cooking. Repeat this process with the remaining leaves and filling until all are used.

    Steam the Cabbage Rolls

    Gently place the finished rolls seam-side down in the steamer basket. Arrange them in a single layer, or stack them if necessary, but try not to crowd them too much. Place the steamer basket over the simmering tomato sauce in the pot, making sure the bottom of the basket doesn’t touch the liquid. Cover the pot with a tight-fitting lid.

    Cook to Perfection

    Steam the cabbage rolls for 30-35 minutes. This steaming process allows the rice to cook fully and the meat to become tender. You’ll know they are ready when the rice is soft and the meat is cooked through. The rolls will be tender to the touch, and the cabbage will be very soft. Once cooked, use tongs to carefully lift the rolls out of the steamer basket and arrange them on a serving platter. Drizzle with the sauce from the bottom of the pot if desired, or serve them plain for a lighter option. Serve immediately while warm.


    Instructions for the Sauce

    1. Combine Ingredients: In a small mixing bowl, whisk together the tahini, fresh lemon juice, minced garlic, and salt. The mixture will initially thicken and seize up—this is normal.
    2. Add Water to Thin: Gradually whisk in the warm water, one tablespoon at a time. Continue to whisk vigorously until the sauce becomes smooth and creamy, with a pourable consistency. You can add more water to achieve your desired thickness.
    3. Taste and Adjust: Taste the sauce and adjust seasoning as needed. You may want more salt for flavor or more lemon juice for a tangier finish.
    4. Serve: Drizzle the sauce generously over the finished Steamed Cabbage Rolls just before serving.


    The Health and Wellness Benefits

    These Steamed Cabbage Rolls are more than just a delicious meal; they are a nutritional powerhouse. Steaming is one of the healthiest cooking methods, as it helps to retain the vitamins and minerals that can often be lost in other cooking processes. Cabbage itself is incredibly rich in Vitamin K and Vitamin C, which are essential for bone health and immune function. It’s also a fantastic source of fiber, which aids in digestion and helps you feel full and satisfied.

    The kebab-style filling provides a lean protein source that is crucial for muscle repair and a strong metabolism. The use of aromatic spices like cumin and paprika not only adds incredible flavor but also offers a range of anti-inflammatory and antioxidant properties. This recipe is a perfect example of how to make a complete, balanced meal with protein, complex carbohydrates from the rice, and a generous amount of vegetables, all while keeping it low in added fats and calories.


    The images show the benefits of steamed cabbage and the health benefits of the kebab filling.


    Delicious Steamed Cabbage Rolls Variations

    VariationDescription
    Vegetarian DelightSubstitute the ground meat with cooked lentils, quinoa, or a combination of mushrooms and walnuts for a savory, plant-based filling.
    Spice It UpAdd a pinch of cayenne pepper or finely chopped fresh chili to the filling mixture for a fiery kick.
    Cheese PleaseFor a richer flavor, add a tablespoon of grated feta cheese or Parmesan to the filling mixture before rolling.
    Sauce on the SideCreate a separate, creamy yogurt-garlic sauce to serve on the side for dipping.
    Different GreensIf cabbage is not available, you can use large Swiss chard or kale leaves after blanching them to make them pliable.

    The images show alternative ingredients for this recipe. The first Swiss chard and Kale leaves.


    Final Thoughts on Steamed Cabbage Rolls

    This recipe for Steamed Cabbage Rolls with a kebab filling is a testament to the idea that wholesome, healthy food can be both easy to make and full of incredible flavor. By embracing the simple power of steaming, we’ve created a dish that is light, nourishing, and deeply satisfying. It’s a wonderful way to enjoy the versatility of cabbage and to incorporate more vegetables into your diet in a delicious way. We encourage you to try this recipe and make it your own by experimenting with different fillings and spices. Get ready to roll up a new favorite!


    Frequently Asked Questions (FAQs)

    Q: Can I prepare these cabbage rolls ahead of time?

    A: Yes, you can. You can assemble the rolls and store them uncooked in an airtight container in the refrigerator for up to 24 hours. When you’re ready to cook, simply follow the steaming instructions as written.

    Q: Why do I need to remove the thick vein from the cabbage leaf?

    A: The thick central vein is tough and doesn’t become soft during the steaming process, which can make the roll difficult to eat. Trimming it off makes the leaf more pliable and ensures the final product is tender and easy to chew.

    Q: How do I know if the rice is cooked inside the roll?

    A: The best way to check is to carefully open one of the rolls. The rice should be soft and tender, not hard or crunchy. If it’s not fully cooked, continue steaming the remaining rolls for a few more minutes and check again.


    References


    Recent Posts


    Make This Simple Steamed Fish On Herbed Rice Noodles


    Are you a lover of seafood, but find yourself running out of ideas? This steamed fish recipe is a game-changer! It’s a healthy, simple, and incredibly flavorful meal that you’ll want to make again and again.


    The image shows Steamed fish skewers on herbed rice noodles on a plate
    Steamed fish on skewers

    A Culinary Journey of Flavor and Steamed Fish

    Embarking on a journey to eat healthier doesn’t have to mean sacrificing flavor. In fact, it often opens up a world of simple, vibrant dishes that nourish both the body and the soul. This recipe for simple steamed fish on a bed of herbed rice noodles is a perfect example. It proves that some of the most delicious meals are those with minimal preparation, allowing the natural goodness of the ingredients to shine through. This dish is a culinary tradition in many Asian cultures, celebrated for its delicate flavors and incredible health benefits. It’s a testament to the idea that cooking with fresh, whole ingredients is the best way to achieve a truly satisfying result.

    The beauty of this dish lies in its simplicity. We’re not using heavy oils or complicated cooking techniques. Instead, we are relying on the gentle process of steaming, which locks in moisture and preserves the fish’s natural nutrients and tender texture. Steaming is a fantastic method for preparing fish because it allows the delicate flesh to cook through evenly without drying out. This results in a fish that is incredibly moist, tender, and flaky, a texture that is simply unmatched by other cooking methods.


    The gallery of images show: Savoury sauce in a bowl, herbed rice noodles and steamed fish on a plate


    The Perfect Balance of Flavors

    At the heart of this dish is a vibrant array of fresh herbs. Herbs like cilantro, mint, and basil are not just for garnish; they are an essential part of the flavor profile. When tossed with the delicate rice noodles, they create a fragrant, refreshing foundation for the fish. The contrast of the warm, delicate fish with the cool, fresh noodles and herbs is a delightful experience for the palate. This recipe is also highly versatile, allowing you to easily adapt it to your preferences and what you have available in your kitchen.

    This dish is a celebration of clean, fresh flavors. The herbed rice noodles provide a light and refreshing base, while a simple, savory sauce brings everything together. The fish, gently steamed to perfection, soaks up the flavors from the sauce, creating a harmonious and balanced dish. The result is a meal that feels both comforting and incredibly healthy, leaving you feeling light and energized.

    Whether you’re a seasoned chef or just starting your culinary journey, this recipe is designed to be approachable and rewarding. The steps are straightforward, the ingredients are easy to find, and the result is a dish that is sure to impress. It’s perfect for a weeknight dinner when you want something healthy and quick, but also elegant enough to serve to guests. So, get ready to discover the simple joy of cooking with fresh ingredients and create a meal that is as good for you as it is delicious.


    The gallery of images show: Noodles being prepared, the dressing being made and skewered fish on a plate.


    Time to Prepare

    15 minutes

    Time to Cook

    10 minutes


    Nutritional Breakdown of Steamed Fish

    This recipe is a powerhouse of nutrition. The fish provides a lean source of protein and essential omega-3 fatty acids, which are crucial for brain and heart health. The rice noodles are a good source of carbohydrates for energy, while the fresh herbs add a boost of vitamins and antioxidants. This is a low-fat, high-protein meal that is excellent for anyone focused on a balanced diet.


    Equipment

    • Medium-sized pot
    • Large bowl
    • Steamer basket or insert
    • Skewers (bamboo or metal)
    • Serving platter or individual bowls

    Servings: 4

    Steamed Fish on Herbed Rice Noodles: Ingredients List

    • 1 lb firm white fish fillets (such as cod, halibut, or snapper), cut into 1-inch cubes
    • 12 ounces dried vermicelli rice noodles
    • 2 tablespoons fresh lime juice
    • 1 tablespoon fish sauce
    • 1 tablespoon soy sauce or tamari
    • 1 teaspoon brown sugar
    • 2 cloves garlic, minced
    • 1 small red chili, finely sliced (optional, for a bit of heat)
    • 1 cup fresh cilantro, chopped
    • ½ cup fresh mint leaves, chopped
    • ½ cup fresh Thai basil leaves, chopped
    • 1 medium carrot, julienned (cut into thin strips)
    • ½ cup bean sprouts
    • Lime wedges and extra fresh herbs for garnish

    The gallery shows the full range of the raw ingredients that has been included in this recipe.


    Step-by-Step Instructions

    Prepare the Noodles and Skewers

    Begin by cooking the rice noodles according to the package directions. Typically, this involves soaking them in hot water for a few minutes until they become tender. Once they are cooked, drain the noodles and rinse them under cold water. This stops the cooking process and prevents them from sticking together. Set them aside in a large bowl. If you are using bamboo skewers, soak them in water for at least 15 minutes before you begin cooking to prevent them from burning during the steaming process.

    Make the Dressing

    In a small bowl, whisk together the lime juice, fish sauce, soy sauce (or tamari), brown sugar, minced garlic, and sliced red chili (if using). Stir until the sugar has completely dissolved. This simple dressing will be tossed with the noodles and also drizzled over the fish.

    Assemble the Noodles

    Add the chopped fresh cilantro, mint, and Thai basil, along with the julienned carrots and bean sprouts, to the bowl with the rice noodles. Pour half of the prepared dressing over the noodle mixture. Gently toss everything together until the noodles are evenly coated and the herbs are well distributed.

    Skewer and Prepare the Fish

    Gently thread the 1-inch fish cubes onto the prepared skewers. Arrange the pieces so they are not too tightly packed, allowing the steam to circulate and cook the fish evenly. You should have 2-3 pieces of fish per skewer, depending on their size.

    Steam the Fish

    Place the fish skewers in a single layer on a steamer basket. Place the steamer basket in a pot with about 1-2 inches of simmering water. The water should not touch the bottom of the steamer basket. Cover the pot with a tight-fitting lid and steam for 5-7 minutes, or until the fish is flaky and cooked through. Be careful not to overcook the fish, as it can become tough.


    This image shows the fish being steamed on skewers and the cooked skewered fish on a plate.


    Serve and Garnish

    To serve, create a bed of the herbed rice noodles on a large serving platter or in individual bowls. Carefully arrange the steamed fish skewers on top of the noodles. Drizzle the remaining dressing over the fish and noodles. Garnish with fresh lime wedges and extra herbs for a pop of color and freshness.

    The first image shows rice noodles with herbs and the second image shows steamed fish on skewers.


    The Health Benefits of Steamed Fish

    Opting for steaming as a cooking method is one of the healthiest ways to prepare food. Unlike frying or grilling, steaming does not require added oils or fats, significantly reducing the calorie content of your meal. This gentle cooking process also helps to preserve the natural nutrients, vitamins, and minerals in the fish, as they are not lost to the cooking liquid or high heat. This ensures you are getting the maximum nutritional benefit from every bite.


    The images shows a comparison of the benefits of steaming fish over frying and roasting.


    Beyond the cooking method, the ingredients themselves are packed with goodness. Fish, especially fatty fish like salmon, are rich in omega-3 fatty acids, which are vital for reducing inflammation and supporting brain function. Even lean white fish, as used in this recipe, is an excellent source of high-quality protein, which is essential for muscle repair and a feeling of fullness. The fresh herbs provide a wealth of antioxidants and anti-inflammatory compounds, contributing to overall well-being. This dish is not just delicious; it’s a smart choice for a healthy lifestyle.


    The 2 images show the benefits that you get from fish.


    Flavor Variations and Serving Suggestions

    This recipe is a wonderful canvas for creativity. Here are some simple variations to suit your taste:

    VariationDescription
    Spicy KickAdd more sliced red chili or a teaspoon of sriracha to the dressing for a fiery punch.
    Peanut CrunchSprinkle a handful of roasted, chopped peanuts over the finished dish for added texture and a nutty flavor.
    Ginger InfusionAdd a teaspoon of finely grated ginger to the dressing for a warm, spicy note.
    Vegetable BoostAdd blanched snap peas, thinly sliced bell peppers, or thinly sliced mushrooms to the noodle mixture.
    Citrus ZestUse a mix of lime and orange juice in the dressing to create a more complex, citrusy flavor.

    Final Thoughts on Steamed Fish

    This simple steamed fish recipe is more than just a meal—it’s an invitation to savor fresh flavors and embrace a healthier way of cooking. It’s a testament to the idea that the best food is often the simplest. By using gentle techniques and high-quality ingredients, you can create a dish that is not only good for you but also incredibly satisfying. The next time you are looking for a light, delicious, and easy-to-make meal, give this recipe a try. You’ll be amazed at how quickly you can create something so flavorful and elegant.


    Frequently Asked Questions

    Q: Can I use frozen fish for this recipe?

    A: Yes, you can. Just be sure to thaw the fish completely before cutting it into cubes and threading it onto the skewers. Pat the fish dry with a paper towel to remove any excess moisture.

    Q: Can I make the dressing in advance?

    A: Absolutely. You can prepare the dressing a day or two ahead of time and store it in an airtight container in the refrigerator. This can help save time on a busy weeknight.


    References


    Recent Posts


    Make These Easy Moroccan Sausage Pinwheels


    Get ready to impress your friends and family with these delectable Moroccan Sausage Pinwheels, a simple and savory appetizer that’s packed with flavor. This recipe is a delightful twist on a classic, combining the beloved sausage roll with the warm, aromatic spices of Moroccan cuisine.


    Image is of Moroccan Sausage Pinwheels laid out on a plate.
    Moroccan Sausage Pinwheel

    The Ultimate Crowd-Pleasing Appetizer

    Are you looking for a show-stopping appetizer that’s both simple to make and bursting with unique flavors? Look no further than these Moroccan Sausage Pinwheels. Forget the bland, store-bought versions; this recipe elevates the classic party snack with a sophisticated, aromatic twist. By using a blend of traditional Moroccan spices like cumin, coriander, and cinnamon, we transform ordinary sausage meat into a rich, complex filling that will transport your taste buds to the vibrant markets of Marrakesh. The beautiful pinwheel shape not only makes them visually appealing but also ensures every bite is a perfect balance of flaky pastry and savory filling.

    This recipe is designed to be accessible for cooks of all skill levels, from beginners to seasoned home chefs. We’ll walk you through each step with clear, detailed instructions to ensure your pinwheels turn out perfectly every time. The process is straightforward: create a flavorful sausage filling, spread it on puff pastry, roll it up, and slice it into elegant pinwheels before baking. The result is a golden, crispy, and incredibly delicious treat that’s perfect for any occasion, whether it’s a casual get-together, a holiday party, or a cozy family dinner.


    These Images shows a pinwheel stored in a freezer and a pinwheel cooked in an Air fryer.


    Why You’ll Love These Sausage Pinwheels

    The beauty of this recipe lies in its versatility. While we’ll provide a core set of spices for an authentic Moroccan flavor, you can easily adjust them to your personal preference. Want more heat? Add a touch more cayenne or a spoonful of harissa paste. Prefer a milder flavor profile? Scale back on the spices. These pinwheels are a canvas for your culinary creativity. They can be made ahead of time and frozen, making them an excellent option for meal prepping or for those busy days when you need a quick, no-fuss appetizer.

    Beyond their incredible taste, these sausage pinwheels are a great way to introduce new and exciting flavors to your repertoire. Moroccan cuisine is known for its warm spices and use of fresh herbs, which create a comforting yet exotic profile. This recipe is an ideal introduction to these flavors without being intimidating. You’ll be amazed at how a few simple ingredients can create such a memorable and impressive dish. It’s a testament to the power of spices in transforming everyday ingredients into something truly special.

    So, gather your ingredients, preheat your oven, and get ready to embark on a delicious culinary journey. These Moroccan Sausage Pinwheels are more than just a snack; they’re an experience that will delight your senses and leave your guests asking for the recipe. Let’s get started on creating a batch of these savory, flaky, and utterly irresistible treats that will become a new favorite in your home.


    Time to Prepare: 20 minutes

    Preparation Time: 20 minutes

    Time to Cook:

    • Cooking Time: 25 minutes
    • Total Time: 45 minutes

    Servings: 12 pinwheels


    Nutritional Information (per serving):

    • Calories: 150 kcal
    • Total Fat: 10g
    • Saturated Fat: 4g
    • Cholesterol: 20mg
    • Sodium: 250mg
    • Total Carbohydrates: 10g
    • Dietary Fiber: 1g
    • Protein: 5g
    • Vitamin A: 2% DV
    • Iron: 6% DV

    The images show the equipment used for this recipe. Mixing bowl and frying pan, baking tray and rolling pin, pastry brush and knife.


    Ingredients for Sausage Pinwheels

    • 1 lb ground lamb or beef
    • 1 tablespoon olive oil
    • 1 small onion, finely minced
    • 2 cloves garlic, minced
    • 1 teaspoon ground cumin
    • 1 teaspoon ground coriander
    • ½ teaspoon ground ginger
    • ½ teaspoon paprika
    • ¼ teaspoon ground cinnamon
    • Pinch of cayenne pepper (optional, for heat)
    • ½ cup fresh parsley, chopped
    • ¼ cup fresh cilantro, chopped
    • 1 sheet frozen puff pastry (thawed)
    • 1 egg, beaten (for egg wash)
    • 1 tablespoon sesame seeds

    Equipment:

    • Large mixing bowl
    • Large non-stick skillet
    • Baking sheet
    • Parchment paper
    • Rolling pin
    • Pastry brush
    • Sharp knife
    • Air fryer


    Step-by-Step Instructions for Sausage Pinwheels

    Prepare the Filling

    In a large skillet over medium heat, add the olive oil. Add the finely minced onion and cook for 3-5 minutes, or until it becomes soft and translucent. Add the minced garlic and cook for another minute until fragrant. Add the ground lamb or beef, breaking it up with a spoon as you cook. Brown the meat thoroughly, ensuring no pink remains. Drain any excess fat from the pan.

    Season and Combine

    Return the cooked meat to the skillet. Reduce the heat to low and stir in the ground cumin, coriander, ginger, paprika, cinnamon, and cayenne pepper (if using). Cook for 1-2 minutes, stirring constantly, to toast the spices and release their aromas. Remove the skillet from the heat and stir in the chopped parsley and cilantro until well combined. Allow the mixture to cool completely before proceeding to the next step. A cool filling is essential to prevent the puff pastry from becoming greasy and difficult to work with.

    Roll Out the Pastry

    On a lightly floured surface, carefully unfold the thawed puff pastry sheet. Gently roll it out into a large rectangle, about 10×15 inches, using a rolling pin. The goal is to make a smooth, even surface for the filling.

    Assemble the Pinwheels

    Once the filling is completely cooled, spread it evenly over the entire surface of the puff pastry, leaving a small 1-inch border on one of the long edges. This border will help seal the roll. Make sure the filling is spread in a thin, even layer so the pinwheels will roll up nicely.

    Air Fryer Instructions

    For a quicker cook time and an even crispier pastry, you can use an air fryer.

    1. Preheat the Air Fryer: Preheat your air fryer to 360°F (180°C) for 3-5 minutes. This is a crucial step to ensure the pastry puffs up properly.
    2. Arrange the Pinwheels: Place the sliced pinwheels in the air fryer basket in a single layer. Do not overcrowd the basket, as this will prevent the air from circulating and result in uneven cooking. Work in batches if necessary.
    3. Apply Egg Wash: Brush the tops of the pinwheels with the beaten egg wash and sprinkle with sesame seeds.
    4. Air Fry: Cook for 12-15 minutes, or until the pastry is golden brown and the filling is cooked through. Check on them halfway through to ensure they are browning evenly.
    5. Cool and Serve: Carefully remove the pinwheels from the air fryer and let them cool for a few minutes before serving.

    The images show pastry being prepared and the next image shows the mince getting spread over the prepared pastry.


    Roll and Slice

    Tightly roll the puff pastry from the long edge with the filling towards the clean border. This is the most crucial step to get the classic pinwheel shape. Once rolled, press the seam to seal it. Place the log in the freezer for 10-15 minutes to firm up. This will make it much easier to slice without squishing the shape. Use a very sharp knife to slice the log into ¾-inch thick rounds.

    Bake to Golden Perfection

    Preheat your oven to 400°F (200°C). Line a baking sheet with parchment paper. Arrange the sliced pinwheels on the prepared baking sheet, leaving about an inch of space between each one to allow them to puff up while baking. Whisk the egg in a small bowl and brush the tops and sides of each pinwheel with the egg wash. This will give them a beautiful, golden sheen. Sprinkle with sesame seeds for a final touch of flavor and texture.


    The image shows mince in a frying pan and a plate with cooked Sausage pinwheels.


    Serve and Enjoy

    Bake for 25-30 minutes, or until the pastry is golden brown and the filling is cooked through. The exact time may vary depending on your oven. Once baked, remove from the oven and let them cool for a few minutes on the baking sheet before transferring them to a wire rack. Serve warm.


    The Benefits of This Sausage Pinwheels

    These Moroccan Sausage Pinwheels are more than just a delicious snack. The inclusion of spices like cumin, coriander, and ginger not only adds incredible flavor but also provides a host of health benefits.

    These spices are known for their anti-inflammatory and antioxidant properties, which can contribute to overall well-being. Using lean ground meat, such as lamb or beef, provides a good source of protein, essential for muscle repair and a feeling of fullness.

    The addition of fresh herbs like parsley and cilantro introduces vitamins and minerals into the dish, making it a more wholesome option than many other party foods. This recipe allows you to serve a tasty and satisfying appetizer that you can feel good about.


    The gallery shows the benefits of protein from meat, cumin and ginger

    Variations on the Sausage Pinwheel Theme

    VariationDescription
    Spicy Sausage PinwheelsFor a fiery kick, add a tablespoon of harissa paste to the meat filling. You can also use a spicy sausage instead of ground meat and spices.
    Vegetarian DelightSubstitute the ground meat with a plant-based alternative or a mixture of finely chopped mushrooms and lentils. Increase the spices and add a bit of smoked paprika for a deeper flavor.
    Cheese-Lovers’ PinwheelsSprinkle a layer of crumbled feta or goat cheese over the meat filling before rolling for a tangy, creamy addition.
    Gluten-Free VersionUse a gluten-free puff pastry sheet, which is now widely available in many grocery stores. Follow the same steps as the original recipe.
    Herbacious TwistFor an even fresher flavor, increase the amount of fresh herbs and consider adding a little bit of fresh mint or dill to the filling.

    Final Thoughts for Sausage Pinwheels

    These Moroccan Sausage Pinwheels are more than just a recipe; they are an invitation to explore new and exciting flavors in your own kitchen. With a little effort, you can create a truly impressive appetizer that’s both comforting and exotic. The combination of warm spices, savory meat, and flaky pastry is simply irresistible. This is the kind of dish that will have your guests asking for seconds and requesting the recipe before they’ve even finished the first one. So go ahead, give it a try, and let these delectable sausage pinwheels transport you and your loved ones to a new world of taste.

    Frequently Asked Questions (FAQs)

    Q: Can I make these Moroccan Sausage Pinwheels ahead of time?

    A: Yes, absolutely! This is one of the best things about this recipe. You can assemble the entire log, wrap it tightly in plastic wrap, and store it in the refrigerator for up to 24 hours. When you’re ready to bake, simply slice and proceed with the baking instructions. Alternatively, you can slice the raw pinwheels, place them on a baking sheet, and freeze them until solid. Once frozen, transfer them to a freezer-safe bag for up to 2 months. When you’re ready to cook, just bake them directly from frozen, adding an extra 5-10 minutes to the baking time.

    Q: What is the best way to serve these?

    A: These pinwheels are delicious on their own, but they also pair wonderfully with a dipping sauce. A simple yogurt-based dip with a little lemon and garlic, or a spicy harissa-yogurt sauce, would complement the flavors beautifully. They are best served warm, straight from the oven, for that perfect flaky, melt-in-your-mouth texture.


    References:


    Recent Posts


    Simple Couscous with Apricots and Almonds


    This recipe for couscous with apricots is quick, nutritious, and delicious. With almonds for crunch and natural sweetness from dried apricots, it’s a dish that balances health and flavor beautifully. Couscous with apricots is also versatile, making it a perfect recipe for busy weeknights or elegant dinners.


    Image show bowl of Couscous with Apricots on a table
    Couscous with dried fruit

    A Bright and Flavorful Twist on Couscous with Apricots

    Couscous has long been a beloved staple in North African, Middle Eastern, and Mediterranean cuisines. Its versatility and quick preparation time make it a favorite for busy households and professional chefs alike. At its core, couscous is a blank canvas, ready to absorb flavors, spices, and textures, which means it can be transformed into countless delicious dishes.

    This recipe highlights a sweet and savory balance by combining couscous with apricots and almonds. The dried apricots lend natural sweetness, while toasted almonds add depth and crunch. Together, they turn a humble grain into a satisfying dish that feels indulgent without being heavy.

    One of the best things about couscous is how quickly it comes together. In under 20 minutes, you can have a dish that is not only filling but also packed with nutrients. It’s the perfect recipe for when you want to serve something that looks and tastes impressive without spending hours in the kitchen.

    The recipe also adapts well to different needs. Serve it warm as a comforting side dish, chilled as a refreshing salad, or even as part of a main course with added protein like chickpeas or chicken. No matter the occasion, it’s flexible enough to fit your table.

    Finally, couscous with apricots and almonds isn’t just about convenience—it’s about nourishment. Each ingredient brings something special to the table, from fiber-rich apricots to protein-packed almonds, making it a well-rounded dish that pleases both the palate and the body.


    This gallery shows 2 Variations of Couscous. The first is couscous with cubed feta cheese, tomatoes and olives. The second image shows Couscous with chickpeas


    Time to Prepare for Couscous with Apricots

    10 minutes

    Time to Cook

    10 minutes

    Servings

    4 servings


    Nutritional Information (per serving)

    • Calories: ~280
    • Protein: 7g
    • Carbohydrates: 42g
    • Fiber: 5g
    • Fat: 9g
    • Saturated Fat: 1g
    • Natural Sugars: 10g

    Equipment Needed

    • Medium saucepan with lid
    • Mixing bowl
    • Cutting board
    • Sharp knife
    • Fork (for fluffing couscous)
    • Wooden spoon

    This gallery shows the ingredients used for this meal. The first image shows the raw ingredients. The second image show some dry ingredients in bowls. And the third image shows the cooked meal


    Ingredients for Couscous with Apricots

    • 1 cup couscous (instant or quick-cooking)
    • 1 cup boiling water or vegetable broth
    • ½ teaspoon salt
    • 1 tablespoon olive oil or butter
    • ½ cup dried apricots, chopped
    • ⅓ cup raisins or dried cranberries (optional for extra sweetness)
    • ⅓ cup almonds, lightly toasted (whole or slivered)
    • 1 tablespoon honey (optional for added sweetness)
    • 1 tablespoon fresh parsley, chopped (for garnish)


    Step-by-Step Instructions

    1. Prepare the dried apricots.

    Place the chopped dried apricots in a small bowl and cover with warm water. Let them soak for 5–10 minutes so they soften and plump up. Drain well and set aside.

    2. Toast the almonds.

    Heat a dry skillet over medium-low heat. Add the slivered almonds and toast for 3–5 minutes, stirring often. Remove once they’re fragrant and golden. Set aside.

    3. Heat the liquid.

    In a medium saucepan, bring the vegetable broth (or water) to a gentle boil. Add a pinch of salt and the olive oil or butter.

    4. Add the couscous.

     Turn off the heat and stir in the couscous. Immediately cover with a lid and let sit undisturbed for 5 minutes so the steam cooks it through.

    5. Fluff the couscous.

    After 5 minutes, uncover and gently fluff with a fork. Break apart any clumps so the grains stay separate and light.

    6. Mix in apricots and seasonings.

    Stir in the softened apricots. Add cinnamon and pepper if desired. Taste and adjust seasoning with extra salt or olive oil.

    7. Garnish and serve.

    Transfer couscous to a serving bowl. Top with the toasted almonds and sprinkle with parsley or mint. Serve warm as a side, or pair with grilled chicken, roasted vegetables, or salad.


    This gallery shows 3 images. The first images shows someone fluffing the couscous. The second image shows roasted almonds. And the third image shows the completed meal.


    Benefits of Couscous with Apricots

    A Natural Source of Energy

    Couscous is made from durum wheat semolina, which provides complex carbohydrates. These carbs digest slowly, keeping your blood sugar levels stable and giving you steady energy throughout the day. Combined with the natural sugars in apricots, this dish offers a quick energy boost without relying on processed sweets.

    Rich in Fiber for Digestion

    Both couscous and dried apricots contain dietary fiber. Fiber helps keep your digestive system running smoothly, prevents constipation, and promotes satiety so you feel fuller for longer. A fiber-rich dish like this makes it easier to manage appetite and maintain a healthy gut.

    Supports Heart Health

    Almonds in the recipe are packed with heart-friendly monounsaturated fats, which may help lower LDL (bad) cholesterol. Meanwhile, couscous is naturally low in fat, making this a lighter alternative to heavier grain dishes. Adding herbs like parsley or mint brings in antioxidants that further support cardiovascular health.

    Packed with Vitamins and Minerals

    Dried apricots are high in vitamin A, which supports eye health, immunity, and skin glow. Couscous provides selenium, a powerful antioxidant mineral that plays a role in reducing inflammation and protecting cells. Almonds contribute vitamin E, which is known for protecting cells and improving skin health.

    Plant-Based Protein Source

    Couscous and almonds both contain protein, making this recipe a solid plant-based option. Protein is essential for repairing tissues, supporting metabolism, and keeping you satisfied between meals. Adding Greek yogurt on the side or chickpeas into the dish can further boost protein levels.

    Light Yet Satisfying

    Thanks to its combination of grains, fruit, and nuts, this dish is both light and filling. It won’t leave you sluggish after eating, yet it’s satisfying enough to stand alone as a quick lunch or dinner. The balance of sweet and savory makes it appealing to a wide variety of taste preferences.

    Versatile for Any Diet

    Couscous with apricots can be adapted to vegetarian, vegan, or dairy-free diets with ease. Simply swap out butter for olive oil, or add more plant protein like chickpeas. Its adaptability makes it a go-to recipe for households with different dietary needs.


    This gallery displays 2 images. The first is showing the benefits from Couscous with Apricots. The second image shows the vitamins and minerals contained in Apricots, Couscous and Almonds.


    Variations of Couscous with Apricots

    VariationWhat to AddFlavor Profile
    Spiced Moroccan StyleAdd cinnamon, cumin, and a pinch of turmericWarm, aromatic, earthy
    Protein BoostAdd chickpeas or grilled chickenHearty and filling
    Mediterranean StyleAdd feta, olives, and cherry tomatoesFresh, tangy, savory
    Breakfast StyleAdd warm milk, extra honey, and chopped nutsComforting and sweet
    Vegan VersionUse olive oil instead of butter and skip honeyLight and fully plant-based

    This gallery displays 3 variations of Couscous. The first image shows couscous with Chickpeas. The second, is couscous with feta cheese, black olives and tomatoes. The third image is a breakfast meal of couscous, warm milk, honey and chopped nuts


    Final Thoughts on Couscous with Apricots

    Couscous with apricots and almonds is proof that simple ingredients can create something extraordinary. It’s quick to prepare, bursting with color, and nourishing enough to be enjoyed guilt-free.

    The combination of fluffy couscous, sweet apricots, and crunchy almonds delivers not just flavor but also a balanced nutritional profile. With plenty of variations, you can make it spiced, savory, or even sweet for breakfast.

    If you’re looking for a versatile dish that’s equally at home on a weeknight table or at a holiday gathering, this one delivers every time.

    Give this couscous with apricots recipe a try—you’ll love how it looks, how it tastes, and how easy it is to make.


    Frequently Asked Questions (FAQs)

    Can I make couscous with apricots ahead of time?

    Yes! Couscous with apricots can be prepared up to 2–3 days in advance. Store it in an airtight container in the fridge. Before serving, fluff it with a fork and add a splash of warm water or broth to restore its soft texture.

    Can I use fresh apricots instead of dried apricots?

    Absolutely. Fresh apricots will give the dish a juicier and slightly tangier flavor. Just chop them into small cubes and stir them in at the end to prevent them from breaking down too much. If you want extra sweetness, you can combine fresh and dried apricots for the best of both worlds.

    Is couscous gluten-free?

    Traditional couscous is made from durum wheat semolina, so it’s not gluten-free. However, you can substitute gluten-free grains such as quinoa or millet for a similar fluffy texture. These pair beautifully with apricots and almonds as well.

    How can I make this dish more filling?

    To turn couscous with apricots into a full meal, try adding chickpeas, shredded chicken, or grilled halloumi. Pairing it with a side of Greek yogurt or a simple salad also boosts protein and makes it more satisfying.

    Can I serve couscous with apricots cold?

    Yes! This dish can be enjoyed warm or chilled. If you refrigerate it, serve it as a refreshing couscous salad by adding cucumber, mint, and a drizzle of olive oil.

    What type of almonds should I use?

    You can use either raw or toasted almonds. Toasting them lightly in a dry skillet enhances their flavor and gives the dish extra crunch. Slivered almonds work well, but whole chopped almonds provide more texture.

    Can I freeze couscous with apricots?

    While couscous can be frozen, the texture may change slightly when thawed. If you plan to freeze it, store it in small portions and reheat gently with added broth or water. For best results, add the almonds fresh after thawing to keep them crunchy.


    References

    1. Harvard T.H. Chan – Nutrition Source
    2. USDA FoodData Central – 5 Health Benefits of Couscous
    3. Mayo Clinic – Health Benefits of Nuts

    Recent Posts


    Make This Easy Cauliflower Rice Mixed With Veg And Fruit


    This recipe was created to show how easy and versatile cauliflower rice can be for healthy meals. With just a few fresh ingredients, you can turn it into a colorful dish that’s both nourishing and delicious. Try cauliflower rice today and discover a lighter, more vibrant way to enjoy your meals.


    A bowl of cauliflower rice mixed with fresh mango cubes, banana slices, and red bell peppers, served on a clean background for a healthy meal.
    Cauliflower Rice

    A Fresh Take on Cauliflower Rice

    If you’re looking for a fresh, colorful, and nutritious way to enjoy cauliflower rice, this recipe is a perfect choice. Instead of keeping things plain, we’ll take this versatile base and mix it with a unique combination of vegetables and fruit. The result is a light yet satisfying dish that can be enjoyed for lunch, dinner, or even as a refreshing snack.

    Cauliflower rice has gained popularity as a low-carb alternative to traditional rice, but that doesn’t mean it has to be boring. By adding ingredients like sweet mango, creamy banana, and crunchy red pepper, you can transform it into a vibrant and nourishing meal that’s as beautiful as it is healthy.

    This recipe is also beginner-friendly. Even if you’ve never made cauliflower rice before, you’ll find that it’s easy to prepare with just a few steps. Plus, the mix of flavors makes it appealing for all ages.

    Best of all, you can adjust the recipe to suit your preferences. Whether you want to keep it light and fruity or make it savory with extra vegetables, cauliflower rice is adaptable enough to meet your needs.

    So let’s dive in and create a dish that proves healthy eating can be simple, fun, and full of flavor.


    This gallery walks you through the journey of making cauliflower rice with fruit and vegetables. The first image highlights the raw ingredients—freshly cubed mango, sliced banana, and vibrant red peppers. The second shows cauliflower rice cooking in a skillet, transforming into a light and fluffy base. The final image captures the assembled bowl, beautifully topped with fruit and veggies, ready to serve.


    Time to Prepare

    10 minutes

    Time to Cook

    7 minutes

    Servings

    Serves 4 people


    Nutritional Information (Per Serving)

    • Calories: 160
    • Protein: 4g
    • Fat: 5g
    • Carbohydrates: 27g
    • Fiber: 6g
    • Natural Sugars: 13g

    Equipment Needed

    • Cutting board
    • Sharp knife
    • Food processor or box grater
    • Large skillet or non-stick pan
    • Wooden spoon or spatula
    • Serving bowl

    Ingredients for Cauliflower Rice with Fruit and Veg

    • 1 medium head of cauliflower (about 4 cups riced)
    • 1 ripe mango, cubed
    • 1 banana, sliced
    • 1 red bell pepper, thinly sliced
    • 1 tablespoon olive oil or coconut oil
    • ½ teaspoon salt
    • ¼ teaspoon black pepper
    • 1 teaspoon sesame seeds (optional garnish)

    Step-by-Step Instructions for Cauliflower Rice

    Step 1: Prepare the Base

    Wash the cauliflower thoroughly under cold water and pat dry with a clean kitchen towel. Remove the leaves and stem, then chop into small florets that will fit easily into a food processor.

    Step 2: Rice the Cauliflower

    Add the florets into a food processor and pulse in short bursts until they resemble rice-like grains. Alternatively, grate by hand with a box grater. You should end up with about 4 cups of riced cauliflower

    Step 3: Heat the Pan

    Place a skillet over medium heat and add 1 tablespoon of olive oil or coconut oil. Allow the oil to heat for about 1 minute before adding the cauliflower rice.

    Step 4: Cook the Cauliflower Rice

    Add the riced cauliflower and stir frequently with a wooden spoon. Cook for 5–7 minutes until softened but still slightly firm, seasoning with salt and pepper as it cooks.

    Step 5: Cool the Base

    Remove from heat and let the cauliflower rice sit for 2–3 minutes. This helps prevent the fruit from becoming too soft when mixed in.

    Step 6: Prepare the Mango

    Slice along the mango’s pit to remove the fleshy sides. Score into cubes, scoop out with a spoon, and set aside.

    Step 7: Slice the Banana

    Peel and cut the banana into ½-inch rounds. Keep the slices even so they hold their shape in the dish.

    Step 8: Slice the Red Pepper

    Wash the pepper, remove the seeds, and cut into thin strips or half-rings for extra crunch and visual appeal.

    Step 9: Assemble the Bowl

    In a large serving bowl, place the cauliflower rice as the base. Arrange the mango, banana, and red pepper evenly over the top.

    Step 10: Add the Final Touch

    Sprinkle sesame seeds on top and serve immediately for a warm dish, or refrigerate for 20–30 minutes for a chilled, refreshing version.


    Benefits of Cauliflower Rice with Fruit and Veg

    • Low-Carb Alternative: Cauliflower rice is naturally lower in carbohydrates than regular rice, making it a great choice for those on low-carb or keto diets.
    • Nutrient-Dense: Packed with vitamin C, fiber, and antioxidants, cauliflower supports digestion and boosts immunity.
    • Balanced Flavors: The mix of sweet mango, creamy banana, and crisp red pepper makes this dish flavorful without heavy sauces or added sugars.
    • Light but Filling: The fiber from cauliflower and fruit keeps you full while keeping calories in check.
    • Versatile Dish: Works as a light meal, side dish, or refreshing snack, perfect for any time of day.

    This infographic gallery highlights the top health benefits of cauliflower rice. The first image focuses on it being a low-calorie option, showing how swapping regular rice for cauliflower can help with weight management. The second image emphasizes that cauliflower rice is gut-friendly and low in carbs, making it perfect for digestion support and low-carb lifestyles. The third image rounds up the overall benefits of cauliflower rice, including its high fiber, vitamins, and versatility in everyday meals.


    Variations of Cauliflower Rice

    • Savory Twist: Add sautéed garlic, onions, and spinach for a heartier meal.
    • Spicy Kick: Toss in chopped chili or drizzle with sriracha for heat.
    • Tropical Style: Add pineapple chunks and shredded coconut for a sweeter flavor.
    • Protein Boost: Mix in grilled chicken or tofu to make it a main dish.
    • Herb Freshness: Sprinkle mint, cilantro, or parsley for added freshness.

    This gallery highlights three delicious variations of cauliflower rice. The savory twist pairs the rice with colorful vegetables and herbs for a balanced meal. The tropical style combines cauliflower rice with sweet mango, banana, and peppers for a fresh, vibrant flavor. The protein boost variation is topped with hearty beans and legumes, making it both filling and nutritious.


    Final Thoughts

    Cauliflower rice is more than just a substitute for regular rice—it’s a versatile ingredient that can be transformed into a colorful, satisfying, and nutrient-packed dish. By pairing it with fruit and vegetables, you get a balance of flavors that’s light yet fulfilling, and simple enough for anyone to prepare at home.

    If you’re looking for a fresh meal idea that’s healthy, easy, and adaptable, this cauliflower rice recipe is a fantastic option. Give it a try, experiment with your favorite toppings, and discover how enjoyable healthy eating can be.


    Frequently Asked Questions (FAQs)

    Q1: Can I make cauliflower rice ahead of time?
    Yes. You can rice the cauliflower and store it raw in the fridge for up to 3 days, or freeze it for up to 1 month. Cook when ready to use.

    Q2: Can I use frozen cauliflower rice?
    Absolutely. Frozen cauliflower rice works well, though you may need to cook it for 1–2 minutes longer to remove excess moisture.

    Q3: What other fruits pair well with cauliflower rice?
    Pineapple, grapes, or pomegranate seeds are excellent additions if you’d like extra sweetness and color.

    Q4: How can I make this recipe more filling?
    Add a source of protein like chickpeas, grilled chicken, or scrambled eggs for a complete meal.


    References


    Recent Posts


    Spicy Kebab Buffalo Cauliflower Wings Made Simple


    If you’ve been searching for a healthier take on your favorite wings, these Buffalo Cauliflower Wings are the answer. Crispy, spicy, and full of flavor, they’re a perfect plant-based alternative. With simple steps and wholesome ingredients, you’ll master them in no time.


    Image features Crispy Buffalo Cauliflower Wings Skewers with a sprinkle of herbs
    Buffalo Cauliflower Wings

    A Comforting Kick with Buffalo Cauliflower Wings


    Buffalo Cauliflower Wings have taken the spotlight as one of the best plant-based swaps for classic chicken wings. Crispy on the outside, tender inside, and smothered in spicy sauce, they’re the perfect choice for anyone craving bold flavor without the heaviness of fried meat. These wings prove that comfort food can be both delicious and healthy.

    What makes them even better is their versatility. You can serve them as a party appetizer, game-day snack, or even a weeknight dinner when paired with sides. Whether you’re vegan, vegetarian, or simply looking to cut back on meat, Buffalo Cauliflower Wings deliver satisfaction without compromise.

    Another great feature is how quick and simple they are to prepare. With just a few staple ingredients like cauliflower, flour, spices, and hot sauce, you can whip up a batch in under an hour. The recipe is approachable enough for beginners yet customizable enough for experienced home cooks to make it their own.

    Plus, they’re lighter than traditional wings but still pack that addictive spicy kick. Instead of relying on deep frying, these cauliflower bites bake or air-fry to golden perfection, offering a crispy texture while keeping the recipe wholesome. The end result is a guilt-free indulgence that feels like a treat but supports your health goals.

    Most importantly, this dish shows how plant-based cooking can be exciting and satisfying. By choosing Buffalo Cauliflower Wings, you’re not only enjoying incredible flavor but also nourishing your body with fiber, vitamins, and antioxidants. Once you try them, you’ll see why they’ve become a staple in kitchens everywhere.


    Time to Prepare

    15 minutes

    Time to Cook

    30–35 minutes


    Nutritional Information (per serving, approx. 2 skewers)

    • Calories: 180
    • Protein: 6g
    • Carbohydrates: 24g
    • Fiber: 5g
    • Fat: 6g
    • Saturated Fat: 1g
    • Sodium: 580mg

    Ingredients For Buffalo Cauliflower Wings

    • 1 large head of cauliflower, cut into bite-sized florets
    • 1 cup wholewheat flour (or all-purpose)
    • 1 cup unsweetened plant-based milk (or regular milk)
    • 1 tsp garlic powder
    • 1 tsp smoked paprika
    • ½ tsp onion powder
    • ½ tsp salt
    • ½ tsp black pepper
    • 1 cup Buffalo hot sauce
    • 2 tbsp olive oil or melted butter (to mix with the hot sauce)
    • Fresh parsley, chopped (for garnish)
    • Wooden or bamboo skewers (about 8–10)

    The gallery highlights all the fresh, wholesome ingredients you’ll need to make Buffalo Cauliflower Wings, from cauliflower florets to spices and sauce. Each image gives a close-up view of the essentials, making it easy to see exactly what goes into this tasty and healthier comfort food.


    Equipment

    • Large mixing bowl
    • Whisk
    • Baking tray lined with parchment paper
    • Oven preheated to 425°F (220°C)
    • Tongs for flipping cauliflower
    • Small bowl for Buffalo sauce
    • Wooden or bamboo skewers


    Step-by-Step Instructions

    Step One: Preheat the Oven

    Set your oven to 425°F (220°C) and allow it to fully preheat. This ensures that the cauliflower begins cooking immediately when placed inside, giving it the right texture and crispiness.

    Step Two: Prepare the Cauliflower

    Wash the cauliflower thoroughly under cold water to remove any dirt. Pat it completely dry with a clean kitchen towel. Cut it into evenly sized florets, each about 1½–2 inches, so they cook at the same rate. Place them in a large bowl and set aside

    Step Three: Mix the Dry Ingredients for the Batter

    In a mixing bowl, combine wholewheat flour, cornstarch, garlic powder, paprika, onion powder, salt, and black pepper. Whisk well to evenly distribute the spices. Cornstarch helps the coating crisp up, while the flour gives body to the batter.

    Step Four: Add Liquid to Form the Batter

    Slowly pour in water while whisking the dry ingredients. Continue whisking until the batter is smooth and free of lumps. The consistency should be thick enough to cling to the cauliflower but still pourable — similar to pancake batter. If it’s too thick, add 1 tablespoon of water at a time until the right texture is achieved.

    Step Five: Coat the Cauliflower Florets

    Add the florets into the batter in batches, making sure each piece is thoroughly coated. Lift out each floret with tongs or a fork, letting excess batter drip back into the bowl, and place it onto a baking tray lined with parchment paper. Ensure florets do not touch, which helps them crisp instead of steaming.

    Step Six: Bake the Florets

    Place the tray in the preheated oven. Bake for 20–22 minutes, turning the florets over halfway through cooking. At this stage, they should appear golden in spots but still need a final crisping.

    Step Seven: Prepare the Buffalo Sauce

    While the cauliflower bakes, prepare the sauce. In a small saucepan over low heat, combine hot sauce, olive oil, and a drizzle of maple syrup or honey (optional, to balance the heat). Stir gently until the mixture is warmed and slightly thickened. Do not boil — just heat enough for the flavors to blend

    Step Eight: Coat the Baked Cauliflower with Sauce

    Remove the cauliflower from the oven and let it cool for 2–3 minutes so the batter sets slightly. Use a pastry brush or spoon to coat each piece generously with buffalo sauce. For more even coverage, place the florets in a clean bowl, pour the sauce over, and toss gently until coated.

    Step Nine: Return to the Oven

    Transfer the coated cauliflower back to the lined baking tray. Bake again for 8–10 minutes. This second bake helps the sauce adhere firmly and enhances the crispness.

    Step Ten: Prepare for Serving

    Remove the tray from the oven and allow the cauliflower wings to rest for 2 minutes before handling. This brief cooling period lets the coating firm up further. If making kebab-style skewers, carefully thread 3–4 florets onto each skewer.

    Step Eleven: Garnish and Serve

    Place the skewered cauliflower wings on a serving plate or platter. Garnish with fresh parsley or cilantro for color and freshness. Serve hot with a side of ranch, blue cheese dressing, or a yogurt-based dip for balance.


    This gallery walks you through the full journey of Buffalo Cauliflower Wings — from prepping and coating each floret, to baking them golden, and finally saucing and serving for that irresistible kick.


    Benefits of Buffalo Cauliflower Wings

    Buffalo Cauliflower Wings aren’t just delicious — they’re a powerhouse of nutrition and health benefits:

    • Lower in Calories: Compared to chicken wings, these skewers are much lighter yet just as satisfying, making them great for weight-conscious eaters.
    • High in Fiber: Cauliflower provides a solid dose of fiber, which supports digestion and helps you feel fuller for longer.
    • Rich in Vitamins & Minerals: Cauliflower is packed with vitamin C, vitamin K, folate, and antioxidants that support immunity and reduce inflammation.
    • Plant-Based Protein: While cauliflower itself is low in protein, the flour batter adds a boost — and pairing with a dip like Greek yogurt ranch can make it even more balanced.
    • Heart-Healthy Fats: Using olive oil instead of butter makes this recipe healthier for your heart without sacrificing flavor.
    • Versatility for Diets: This recipe can easily be adapted to gluten-free or vegan diets, making it accessible to almost everyone.

    This gallery visually highlights the key health perks of Buffalo Cauliflower Wings, from antioxidant-rich cauliflower to heart-healthy oils. Each image captures a unique benefit, making it clear why this recipe is both a delicious and nutritious choice.


    Variations

    VariationWhat to ChangeFlavor Profile
    Gluten-FreeUse gluten-free flour blendSame spicy, crispy flavor, fully GF
    VeganSwap butter for olive oil or vegan butter100% plant-based
    Extra SpicyAdd chili flakes or cayenne to sauceBold, fiery heat
    MildUse less hot sauce and more olive oilSofter spice with buttery taste
    BBQ VersionSwap Buffalo sauce for smoky BBQ sauceSweet and tangy with crisp texture

    Final Thoughts On Buffalo Cauliflower Wings

    Buffalo Cauliflower Wings are proof that you don’t have to compromise on flavor when choosing a healthier option. Crispy on the outside, tender on the inside, and packed with that spicy Buffalo kick, these skewers are fun, versatile, and crowd-pleasing. Whether for game night, dinner parties, or a quick weeknight treat, this recipe brings comfort food and health together in the best way.

    So grab your skewers, turn up the oven, and get ready to make these fiery bites part of your regular rotation.


    FAQs

    Q1: Can I make these Buffalo Cauliflower Wings in an air fryer?
    Yes! Cook at 375°F (190°C) for about 15–18 minutes, shaking halfway, then coat in sauce and air-fry for another 5 minutes.

    Q2: Can I prepare them ahead of time?
    Yes, you can bake the cauliflower in advance, store them in the fridge, and then reheat and sauce them before serving.

    Q3: How do I keep them from going soggy?
    Make sure the florets are well-dried before coating, and don’t overcrowd the tray so they crisp instead of steaming.

    Q4: What dips go best with Buffalo Cauliflower Wings?
    Classic ranch, blue cheese dip, or even a cooling yogurt dip pair beautifully with the heat.

    Q5: How many servings does this recipe make?
    It makes about 8–10 skewers, serving 4 people as an appetizer.


    References

    1. Harvard T.H. Chan – Vegetables and Fruits
    2. Cleveland Clinic – 5 Health Benefits of Cauliflower
    3. American Heart Association – Olive oil may lower heart disease risk

    Recent Posts


    Wholesome Polenta Tamale Pie You’ll Love


    This wholesome polenta tamale pie brings comfort and health together in one dish. Packed with fiber, protein, and flavor, it’s a recipe worth adding to your table.


    Square casserole dish of Polenta Tamale Pie
    Polenta Tamale Pie

    Comfort in Every Bite: Homemade Polenta Tamale Pie

    There’s something special about comfort food—the way it fills the house with warmth and invites everyone to the table. For many, tamale pie is one of those treasured dishes. With its layers of vegetables, beans, spices, and a golden topping, it’s hearty, cozy, and perfect for sharing.

    This recipe gives tamale pie a wholesome twist by replacing the typical cornbread crust with creamy yet firm polenta. The topping bakes into a golden, textured crust that’s both rustic and beautiful. Underneath, you’ll find a colorful mixture of black beans, sweet corn, zucchini, and red bell peppers, cooked with warm spices and tomatoes. It’s vibrant, nutrient-packed, and every bite feels nourishing.

    Polenta is often underused in home cooking, but it’s surprisingly versatile. Here, it forms a creamy topping that crisps slightly in the oven, providing a satisfying contrast to the soft filling beneath. Adding a sprinkle of parsley or cilantro not only makes the dish look inviting but also enhances its fresh flavor.

    This is the type of recipe that fits anywhere—whether you’re preparing a family dinner, cooking for a friend, or meal-prepping for the week. The pie holds up beautifully for leftovers, and it’s flexible enough to adapt to different diets or spice preferences.

    If you’ve never tried baking with polenta, this recipe is a gentle introduction. It’s easy to prepare, filled with healthy ingredients, and delivers both comfort and nutrition in one dish.


    Ingredients

    Time to Prepare For Polenta Tamale Pie

    • Preparation Time: 20 minutes
    • Cooking Time: 40 minutes
    • Total Time: 1 hour

    Equipment You’ll Need

    • Large skillet or sauté pan
    • Medium saucepan with whisk
    • 8×8-inch (or similar) square baking dish
    • Wooden spoon or spatula
    • Sharp knife and cutting board
    • Measuring cups and spoons
    • Fork (for creating texture on the polenta topping)

    Nutritional Information (per serving)

    • Servings: 6
    • Calories: 290
    • Protein: 10g
    • Fat: 8g
    • Carbohydrates: 45g
    • Fiber: 9g
    • Sodium: 420mg

    Ingredients

    For the Filling:

    • 1 tablespoon olive oil
    • 1 medium onion, diced
    • 2 garlic cloves, minced
    • 1 red bell pepper, diced
    • 1 medium zucchini, chopped into small cubes
    • 1 cup sweet corn kernels (fresh or frozen)
    • 1 can (15 oz) black beans, drained and rinsed
    • 1 can (14 oz) diced tomatoes
    • 2 teaspoons chili powder
    • 1 teaspoon smoked paprika
    • ½ teaspoon ground cumin
    • ½ teaspoon salt
    • ¼ teaspoon black pepper

    For the Polenta Topping:

    • 1 cup polenta (coarse cornmeal)
    • 4 cups water or low-sodium vegetable broth
    • 1 tablespoon olive oil
    • 2 tablespoons Greek yogurt (adds creaminess)
    • ¼ cup Parmesan cheese (optional, for richer flavor)
    • ½ teaspoon salt
    • Fresh parsley or cilantro, chopped, for garnish

    vegetables being sautéed

    Instructions For Polenta Tamale Pie

    1. Sauté the Base Vegetables
      Heat olive oil in a large skillet over medium heat. Add diced onion and garlic, stirring often for 2–3 minutes until softened and fragrant.
    2. Add Veggies for Flavor and Color
      Stir in the diced red bell pepper, zucchini, and corn. Cook for 5–6 minutes, allowing them to soften slightly while retaining some bite. This creates texture in the final dish.
    3. Season the Mixture
      Sprinkle in chili powder, smoked paprika, cumin, salt, and black pepper. Stir well to coat the vegetables evenly in the spices. The aroma should be warm and smoky.
    4. Add Beans and Tomatoes
      Pour in the diced tomatoes with their juices and stir in the black beans. Lower the heat and simmer uncovered for 10–12 minutes, allowing the mixture to thicken slightly. The filling should look hearty and colorful. Remove from heat and spread into your baking dish.
    5. Cook the Polenta
      In a medium saucepan, bring water or broth to a boil. Slowly whisk in the polenta, stirring constantly to avoid clumps. Lower the heat and simmer, stirring often, for 20 minutes until thick and creamy.
    6. Enrich the Polenta
      Stir in olive oil, Greek yogurt, and Parmesan cheese (if using). Taste and adjust seasoning with salt. The polenta should be creamy but spreadable.
    7. Assemble the Pie
      Spoon the hot polenta over the vegetable filling. Use the back of a spoon or spatula to smooth it evenly. For rustic texture, drag a fork lightly across the top to create ridges or swirls.
    8. Bake to Perfection
      Preheat oven to 375°F (190°C). Bake uncovered for 20–25 minutes, until the polenta is firm on top and lightly golden at the edges.
    9. Garnish and Serve
      Remove from the oven, sprinkle with fresh parsley or cilantro, and let rest for 5 minutes before serving. This helps the filling settle.


    Benefits of Polenta Tamale Pie

    This polenta tamale pie isn’t just a comfort dish—it’s a balanced, nutrient-dense meal with several benefits:

    • Supports Digestion: The fiber in beans, corn, zucchini, and polenta keeps your digestive system healthy and promotes satiety.
    • Plant-Based Protein: Black beans provide an excellent source of plant protein, making this filling enough to stand alone as a main dish.
    • Antioxidant-Rich Vegetables: Bell peppers and tomatoes are packed with vitamin C and carotenoids, supporting immune health and reducing inflammation.
    • Whole-Grain Goodness: Polenta is a naturally gluten-free grain that offers complex carbohydrates for sustained energy.
    • Heart-Healthy Fats: Olive oil provides monounsaturated fats, supporting cardiovascular health.
    • Lower in Saturated Fat: Using Greek yogurt and a small amount of Parmesan keeps this dish creamy without being heavy.
    • Great for Meal Prep: The dish stores well and can be reheated easily, making it a healthy option for busy weeks.


    Variations

    VariationHow to Adjust
    Cheesy Tamale PieAdd a layer of shredded cheese before baking for extra richness.
    Vegan VersionSkip the Parmesan and Greek yogurt; stir in nutritional yeast for creaminess.
    Spicy TwistAdd jalapeños, cayenne pepper, or hot sauce to the filling.
    Protein BoostStir in cooked ground turkey, chicken, or tofu crumbles with the beans.
    Mediterranean StyleReplace black beans with chickpeas and add olives, artichokes, and oregano.

    Final Thoughts On Polenta Tamale Pie

    This polenta tamale pie is proof that wholesome food can be hearty, delicious, and beautiful all at once. The golden polenta topping and vibrant vegetable filling make it a dish worth savoring. It’s a great way to introduce more whole grains and vegetables into your diet without giving up the comforting feel of a classic casserole.

    Whether you’re making it for family dinner, meal prep, or a cozy weekend treat, this dish will quickly become a favorite. Try it once, and you’ll see just how versatile and satisfying polenta can be.


    Frequently Asked Questions (FAQs)

    1. Can I make this polenta tamale pie ahead of time?
    Yes, you can prepare the filling and polenta separately, assemble them, and refrigerate for up to 24 hours before baking.

    2. Can I freeze leftovers?
    Definitely. Bake the pie, let it cool completely, then freeze in portions. Reheat in the oven at 350°F until warmed through.

    3. Can I make this recipe vegan?
    Yes! Simply skip the Greek yogurt and Parmesan. Add nutritional yeast for a cheesy flavor if desired.

    4. What other vegetables work in the filling?
    You can use mushrooms, spinach, sweet potatoes, or eggplant. This recipe is very adaptable.

    5. Can I cook the topping differently?
    If you like extra crispiness, you can broil the pie for 2–3 minutes after baking to brown the polenta.


    References

    1. Harvard T.H. Chan – Whole Grains
    2. Academy of Nutrition and Dietetics – Dietary Fiber
    3. American Heart Association – Healthy Cooking Oils

    Recent Posts