Cookie Consent by Free Privacy Policy Generator Update cookies preferences

Easy And Simple Gingerbread Muffins


Plate of six golden-brown, healthy gingerbread muffins dusted with powdered sugar, sitting on a rustic wooden table next to a steaming mug of  tea, in a warm, inviting kitchen.
Gingerbread Muffins

These healthy gingerbread muffins are a delightful treat, perfect for breakfast or snacks. Made with whole wheat flour and low sugar, they offer a wholesome alternative to traditional muffins without sacrificing flavor.

This recipe is simple and can be easily adapted to include your favorite spices or add-ins, making it versatile for any occasion.

Warm and Inviting Gingerbread Muffins

Picture a cozy kitchen filled with the aroma of freshly baked gingerbread muffins. The golden brown muffins, topped with a light dusting of powdered sugar, create an inviting scene that beckons you to indulge.

Arranged on a rustic wooden table, these whole wheat muffins are not just a treat for the taste buds but also a feast for the eyes. A cozy mug of hot tea sits beside them, enhancing the warmth of the setting.

Healthier Indulgence with Gingerbread Muffins

These gingerbread muffins are a delightful option for those seeking a healthier alternative to traditional baked goods. Made with whole wheat flour, they provide a nutritious base while maintaining the comforting flavors associated with gingerbread.

The low sugar content ensures that you can enjoy these muffins without the guilt, making them perfect for breakfast or a snack. Each bite is a blend of warm spices like ginger, cinnamon, and nutmeg, creating a flavorful experience that feels indulgent yet wholesome.

Simple and Versatile Recipe

Creating these whole wheat muffins is a straightforward process that anyone can master. The recipe is adaptable, allowing you to incorporate your favorite spices or add-ins, such as chopped nuts or dried fruit, to customize the flavor profile.

With just a few simple steps, you can whip up a batch of these low sugar muffins in no time. The preparation is quick, taking only about 10 minutes, followed by a baking time of around 20 minutes, making it easy to fit into a busy schedule.

Perfect for Sharing or Meal Prep

This recipe yields about 12 muffins, making it an excellent choice for sharing with family and friends or for meal prepping for the week ahead. Their moist texture and rich flavor ensure that they will be a hit at any gathering.

Whether you enjoy them fresh out of the oven or as part of your breakfast routine, these muffins are sure to satisfy your cravings while keeping your health goals in check.

Enjoying the Moment

Pairing these muffins with a warm mug of tea creates a perfect moment of relaxation. The cozy kitchen decor adds to the inviting atmosphere, making it an ideal setting to savor each bite.

Take a moment to appreciate the simple pleasures of life, like enjoying a homemade treat in a warm and welcoming space. These whole wheat gingerbread muffins are not just a snack; they represent a comforting ritual that brings joy to everyday moments.


Nutrition and Benefits

These muffins are not only delicious but also provide a nutritious option for those mindful of their dietary choices. With only 120 calories per muffin, they offer a satisfying treat without excessive calories.

Rich in whole grains and lower in sugar, these muffins contribute to a balanced diet while still delivering on flavor. Enjoy them guilt-free, knowing you’re making a healthier choice for yourself and your loved ones.

Low Sugar Whole Wheat Gingerbread Muffins

These gingerbread muffins are moist and flavorful, featuring warm spices like ginger, cinnamon, and nutmeg. The use of whole wheat flour and reduced sugar makes them a nutritious choice, and the recipe yields about 12 muffins, perfect for sharing or meal prep.


Cook and Prep Times

  • Prep Time: 10 minutes
  • Cook Time: 20 minutes
  • Total Time: 30 minutes

Nutrition Information

  • Servings: 12 muffins
  • Calories: 120kcal
  • Fat: 2g
  • Protein: 3g
  • Carbohydrates: 24g

Equipment


  • Measuring Cups and Spoons: Essential for accurately measuring both your dry and wet ingredients.
  • Two Mixing Bowls: One large bowl for the dry ingredients and a separate medium-sized bowl for the wet ingredients.
  • Whisk: To thoroughly combine the dry ingredients and to mix the wet ingredients until smooth.
  • Spatula or Wooden Spoon: For gently folding the wet ingredients into the dry ingredients without overmixing.
  • Muffin Tin: A standard 12-cup muffin tin is perfect for this recipe.
  • Paper Muffin Liners: Recommended for easy cleanup and to prevent sticking.
  • Wire Cooling Rack: To allow the muffins to cool evenly and prevent the bottoms from becoming soggy.
  • Optional: A cookie scoop can be helpful for evenly portioning the batter into the muffin cups.
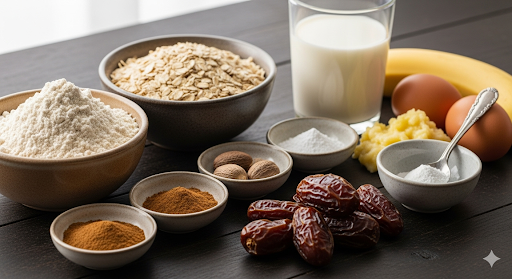
Ingredients


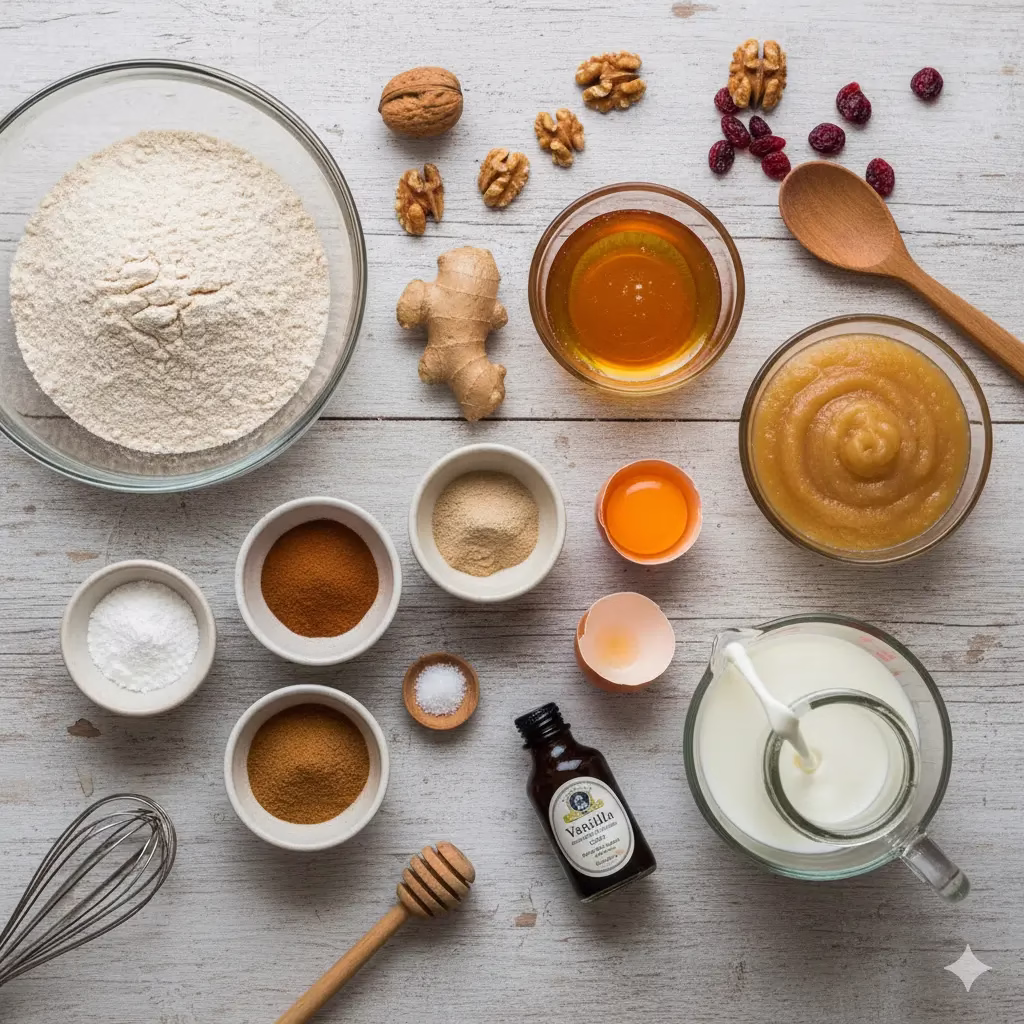
  • 1 ½ cups whole wheat flour
  • A teaspoon baking powder
  • 1 teaspoon baking soda
  • A teaspoon ground ginger
  • 1 teaspoon ground cinnamon
  • ½ teaspoon ground nutmeg
  • ¼ teaspoon salt
  • ½ cup unsweetened applesauce
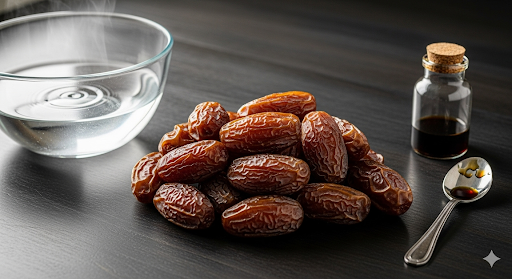
  • ¼ cup honey or maple syrup
  • 1 large egg
  • 1 teaspoon vanilla extract
  • ½ cup milk (dairy or non-dairy)
  • Optional: chopped nuts or dried fruit for added texture

Instructions

  1. Preheat the Oven: Preheat your oven to 350°F (175°C) and line a muffin tin with paper liners or grease it lightly.
  2. Mix Dry Ingredients: In a large bowl, whisk together the whole wheat flour, baking powder, baking soda, ginger, cinnamon, nutmeg, and salt.
  3. Combine Wet Ingredients: In another bowl, mix the applesauce, honey or maple syrup, egg, vanilla extract, and milk until well combined.
  4. Combine Mixtures: Pour the wet ingredients into the dry ingredients and stir until just combined. Do not overmix; it’s okay if there are a few lumps.
  5. Fill Muffin Tin: Divide the batter evenly among the prepared muffin cups, filling each about 2/3 full.
  6. Bake: Bake in the preheated oven for 18-20 minutes, or until a toothpick inserted into the center comes out clean.
  7. Cool: Allow the muffins to cool in the pan for 5 minutes before transferring them to a wire rack to cool completely.

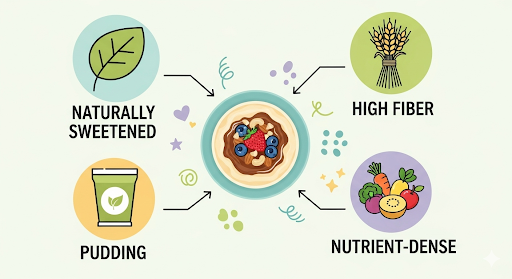
Health Benefits of These Gingerbread Muffins


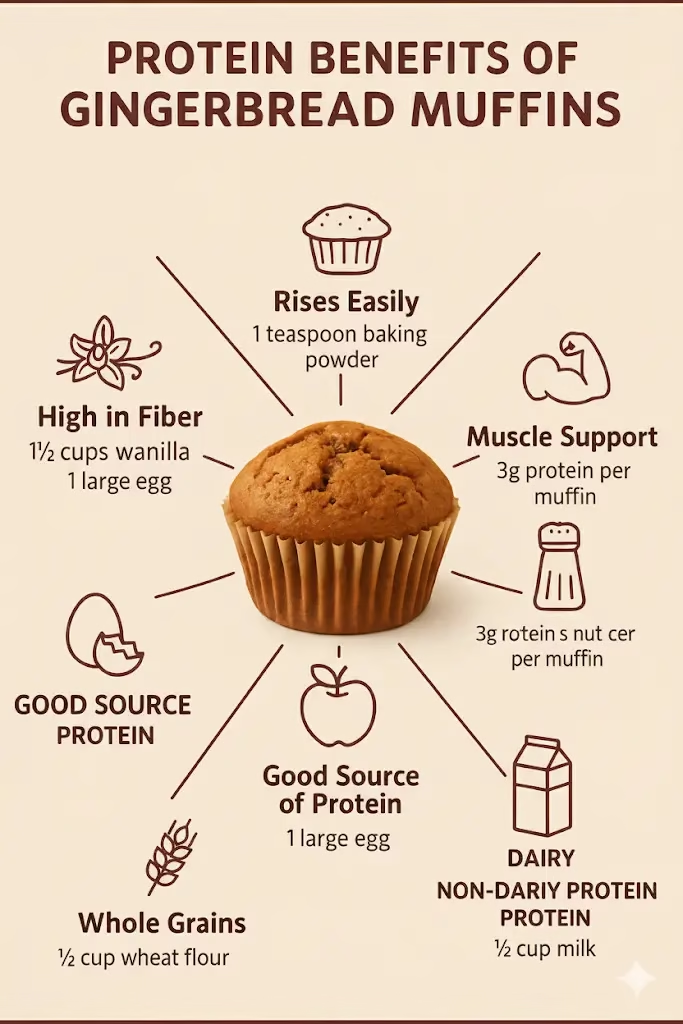
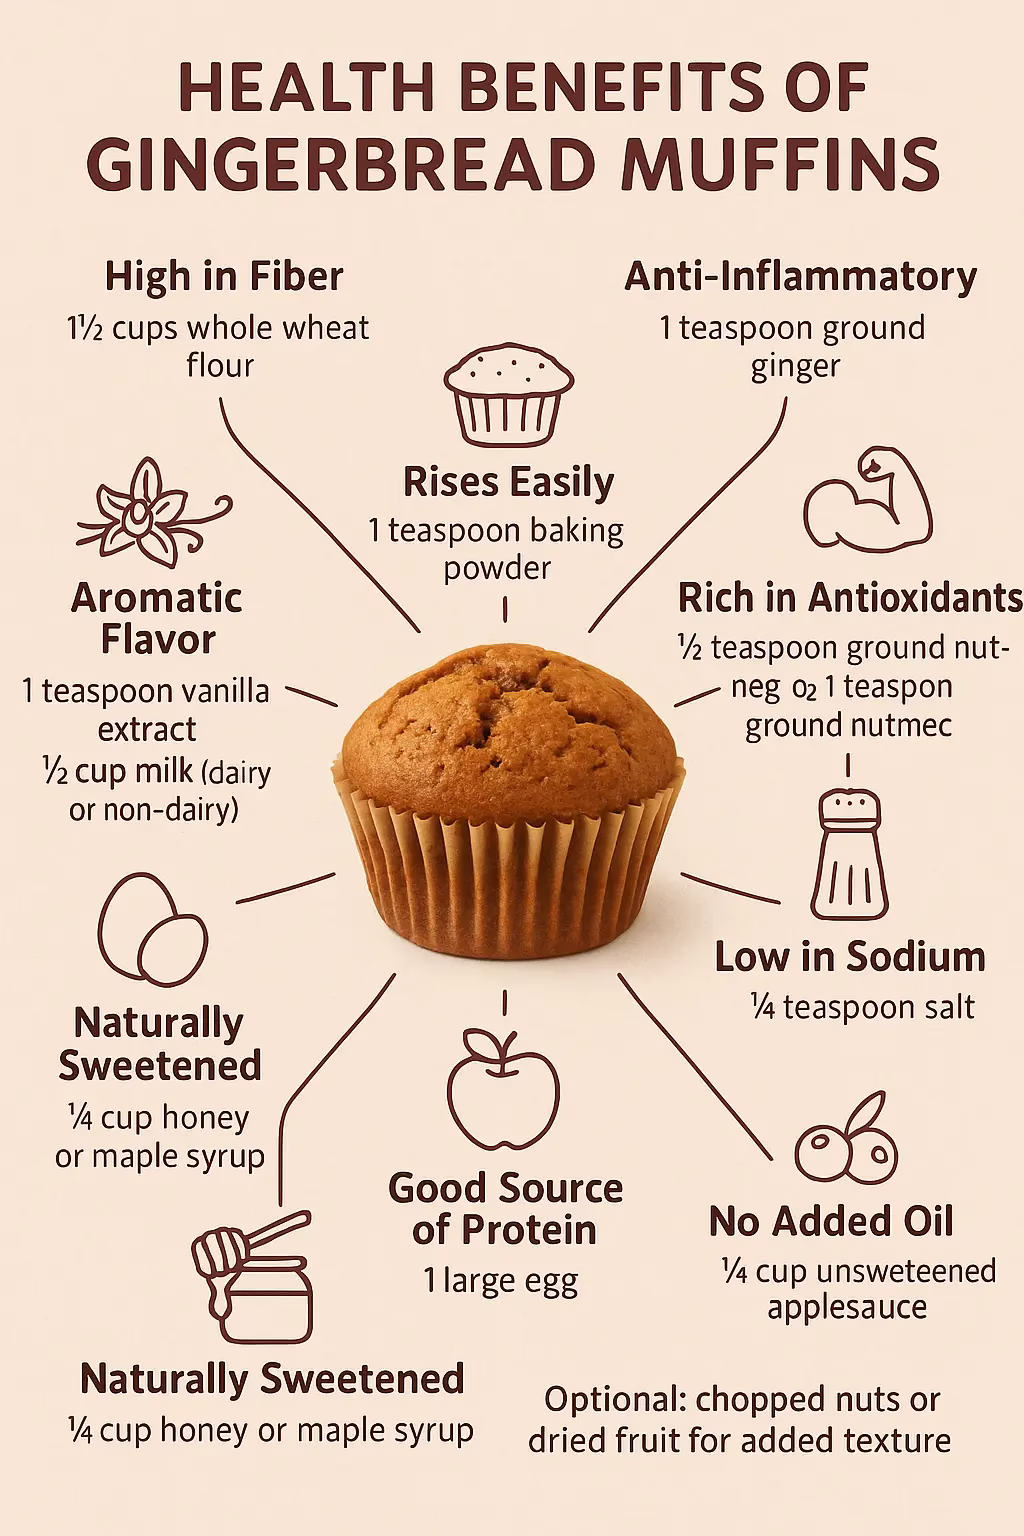
These muffins are not just delicious; they also pack a nutritional punch. By using wholesome ingredients, this recipe offers several health benefits:

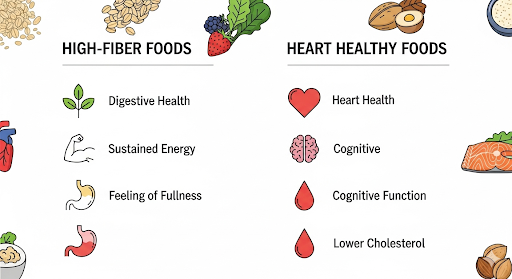
  • Boosts Fiber Intake: The recipe calls for whole wheat flour and applesauce, both of which are excellent sources of dietary fiber. Fiber is essential for a healthy digestive system, helping to regulate bowel movements and keeping you feeling full longer.
  • Provides Antioxidants: Spices like ginger, cinnamon, and nutmeg are more than just flavor enhancers. They are rich in antioxidants and anti-inflammatory compounds. Ginger, in particular, contains gingerol, a powerful substance known for its medicinal properties.
  • Lowers Sugar Content: Using honey or maple syrup and unsweetened applesauce instead of refined sugar significantly reduces the overall sugar content. This helps to prevent blood sugar spikes, making these muffins a better choice for sustained energy.

Variations for Your Gingerbread Muffins


This recipe is a great starting point, but you can easily customize it to fit your taste.

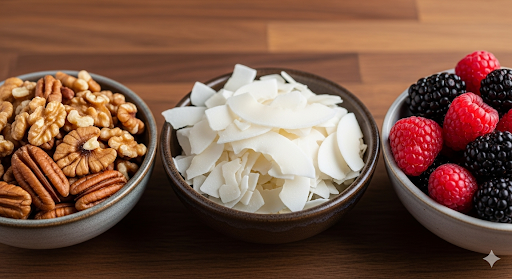
Add-ins: Fold in ½ cup of chopped walnuts or pecans for a nutty crunch. For a boost of antioxidants and a chewy texture, try adding ½ cup of dried cranberries or raisins.

Icing: For an extra touch of sweetness, mix 1 tablespoon of powdered sugar with 1-2 teaspoons of milk to create a simple glaze. Drizzle it over the cooled muffins.

More Spices: If you love a bold spice flavor, increase the ground ginger to 1 ½ teaspoons and add a ¼ teaspoon of ground cloves.

Protein Boost: Replace the Greek yogurt with sour cream, or add a scoop of your favorite vanilla or unflavored protein powder to the dry ingredients for an extra boost.


Final Thoughts on Gingerbread Muffins

These easy and simple gingerbread muffins are a perfect example of how you can make a comforting and classic treat healthier without losing any of the delicious flavor. They’re a staple for chilly mornings, a thoughtful treat to share with a neighbor, or a convenient grab-and-go snack for a busy week. Enjoy every guilt-free bite!


Frequently Asked Questions (FAQ)

Can I use all-purpose flour instead of whole wheat? Yes, you can. The texture will be slightly different—the muffins may be a little lighter—but the flavor will be the same.

How should I store these muffins? Store them in an airtight container at room temperature for up to 3 days, or in the refrigerator for up to a week. For longer storage, you can freeze them for up to 3 months.

Can I make this recipe vegan? Yes! Use a non-dairy milk (like almond or oat milk) and a “flax egg” (1 tablespoon ground flaxseed mixed with 3 tablespoons water, left to sit for 5 minutes) instead of the large egg.


References

  1. Healthline11 Possible Health Benefits of Ginger
  2. Whole Grains Council – Health Benefits of Wheat
  3. Spirehealthcare – Seven health benefits of cutting down on sugar

Recent Posts


Simple Crockpot Steamed Pudding with A Date Syrup


We believe healthy food should be delicious and easy to make, and this simple Crockpot steamed pudding recipe is a perfect example. We’re mindful that it’s still a dessert, and we encourage enjoying it in a proper portion size.


The image shows a Crockpot steamed pudding with Date syrup and dates on the top.
Crockpot steamed pudding

The Ultimate Comfort Food, Crockpot Steamed Pudding

When the weather turns cool and you’re craving a dessert that feels like a warm hug, nothing compares to a rich, moist steamed pudding. It’s a timeless classic, a perfect indulgence. But for many, the idea of making a traditional steamed pudding feels intimidating, requiring special equipment and a lot of hands-on attention. What if we told you there’s a simple, stress-free way to achieve that same incredible result?

Enter the slow cooker, or Crockpot, a kitchen hero that simplifies the process from start to finish. This recipe for Crockpot steamed pudding harnesses the gentle, consistent heat of your slow cooker to create a perfectly moist and tender pudding every single time. There’s no need to fuss with a stovetop steamer or a complex oven setup; just set it and let your slow cooker work its magic.

The Secret to a Healthier Crockpot Steamed Pudding

The secret to this Crockpot Steamed pudding’s incredible flavour and texture lies in its wholesome ingredients. We’ve replaced refined sugars and fats with natural, nutrient-dense alternatives. Instead of heavy butter and white flour, we use the natural sweetness and moisture from mashed banana, and the fiber-rich goodness of whole wheat flour and oats. The result is a pudding that’s not only delicious but also kind to your body.

But the real star of the show is the date syrup. Made from just dates and water, this naturally sweet, glossy sauce elevates the pudding to a new level. It cascades over the warm pudding, seeping into every crevice and adding a deep, caramel-like richness that is completely free of refined sugars. It’s a topping that’s as simple to make as it is delicious.

This recipe is designed for everyone, regardless of your baking experience. The instructions are straightforward and easy to follow, ensuring that even a novice can achieve a show-stopping dessert. So, get ready to transform a few simple ingredients into a warm, comforting masterpiece that will satisfy your sweet tooth and nourish your body.


The images show a slow cooker and a crockpot which are both the same but different names.


Easy Crockpot Steamed Pudding Recipe

Time to Prepare: 15 minutes

Time to Cook: 2 hours 30 minutes to 3 hours

Servings: 6-8


Nutritional Highlights (Per serving, approximate)

  • Calories: 300-350 kcal
  • Protein: 5-7g
  • Fats: 8-10g (mostly from the eggs and whole-wheat flour)
  • Carbohydrates: 50-60g
  • Fiber: 6-8g

This pudding is a good source of fiber, and its sweetness comes from natural sources rather than refined sugar, making it a healthier treat.


Essential Equipment for Steaming Success

  • A Crockpot or Slow Cooker: The star of the show! A 6-quart model works best for this recipe.
  • A Pudding Basin or Oven-Safe Bowl: You’ll need a heat-proof bowl that fits inside your Crockpot. A 1.5 to 2-quart bowl is ideal.
  • Large Mixing Bowl: For combining all your ingredients.
  • Whisk and Spatula: For mixing and scraping the batter.
  • Aluminum Foil and Parchment Paper: To create a tight-fitting lid for the pudding basin.
  • Measuring Cups and Spoons: For accurate measurements.
  • A Blender or Food Processor: For making the date syrup.

Ingredients for a Healthy Pudding

For the Pudding:

  • 1 cup whole wheat flour or spelt flour
  • 1 cup oats or oat flour
  • 1 teaspoon baking soda
  • 1 teaspoon ground cinnamon
  • ½ teaspoon ground ginger
  • ¼ teaspoon ground nutmeg
  • ½ cup mashed ripe banana or unsweetened applesauce
  • 2 large eggs
  • 1 cup non-dairy milk (such as almond or oat milk)
  • 1 cup pitted, finely chopped dates

For the Date Syrup:

  • 1 cup pitted Medjool dates
  • 1 cup hot water
  • 1 teaspoon vanilla extract (optional)

For Topping & Garnish:

  • Chopped nuts (walnuts, pecans)
  • Unsweetened coconut flakes
  • Fresh fruit (berries)

The gallery shows the dry ingredients used in this recipe. They range from prunes, rolled oats, walnuts, coconut flakes and dates.


Step-by-Step Instructions: Mastering the Crockpot Steamed Pudding

Prepare Your Pudding Basin and Crockpot

First, grease your pudding basin or oven-safe bowl thoroughly with a little butter or cooking spray. This will prevent the pudding from sticking. Next, take a piece of parchment paper and a piece of aluminum foil, and cut a small pleat in the center of both. Lay the parchment paper over the top of the bowl, followed by the foil, and secure them tightly around the rim with kitchen twine or a rubber band. This creates a dome-like lid that allows for expansion during steaming.

Make the Date Syrup

This is the easiest part! In a blender or food processor, combine the pitted dates and one cup of hot water. Blend on high speed until the mixture is completely smooth and forms a thick, syrupy sauce. You can add the vanilla extract if you like. Set this aside for later.

Combine the Dry Ingredients

In a large mixing bowl, start by adding your whole wheat flour and oats. Use a whisk to combine them. Now, add the baking soda and all your spices: cinnamon, ginger, and nutmeg. Whisk everything together until it’s well mixed. This ensures the leavening agent and spices are evenly distributed, so your pudding rises and tastes great.

Add the Wet Ingredients

Create a well in the center of your dry ingredients. Add the mashed banana or applesauce, the eggs, and the non-dairy milk. Use a whisk to gently mix from the center outwards, slowly incorporating the dry ingredients. Continue mixing until the batter is smooth. Fold in the chopped dates using a spatula. Be careful not to overmix at this stage; a few lumps are perfectly fine.

Assemble and Steam

Carefully pour the pudding batter into your prepared basin. Pour a layer of about an inch of hot water into the bottom of your Crockpot. Now, gently lower the pudding basin into the Crockpot, making sure the water doesn’t splash into the bowl. The water acts as the steaming agent. Secure the lid on your Crockpot and set it to the “high” setting for 2 hours and 30 minutes to 3 hours.

Check for Doneness

After 2 hours and 30 minutes, carefully open the Crockpot and use a thin skewer or a toothpick to check if the pudding is cooked. Insert it into the center of the pudding. If it comes out clean, the pudding is done. If it has batter on it, close the lid and continue to cook, checking every 15 minutes.

Serve and Enjoy

Once cooked, use a towel or oven mitts to carefully lift the pudding basin out of the Crockpot. Let it sit for 5-10 minutes. Then, run a knife around the edges to loosen the pudding. Place a serving plate on top of the bowl and carefully flip it over. The pudding should slide right out. Drizzle generously with your homemade date syrup and garnish with chopped nuts or fresh fruit.

Follow these detailed steps to create a perfect, moist pudding every time.


The Health Benefits of This Steamed Pudding

This Crockpot steamed pudding is more than just a delicious dessert; it’s a mindful choice that offers a number of health benefits.

  • Naturally Sweetened: By using mashed banana, applesauce, and dates, you avoid refined sugars that can lead to energy crashes and inflammation. Dates are rich in fiber and minerals like potassium and magnesium.
  • Rich in Fiber: The combination of oats, whole wheat flour, and dates provides a significant amount of dietary fiber. Fiber is essential for digestive health, helps you feel fuller for longer, and can help regulate blood sugar levels.
  • Heart-Healthy Fats: The healthy fats from eggs and nuts (if you add them) are important for brain function and overall heart health.
  • Nutrient-Dense: Unlike many empty-calorie desserts, this pudding contains essential vitamins and minerals from the whole food ingredients.
  • Controlled Ingredients: Making your own dessert gives you complete control over what goes in, allowing you to avoid artificial flavours, preservatives, and high-fructose corn syrup.

The infographics shows the nutritional benefits of using naturally sweetened ingredients such as mashed bananas. And the high fiber foods such as whole wheat flour, oats and dates.


Creative Variations for Your Pudding

The beauty of this recipe is how easily you can customize it to your taste or what you have on hand.

Variation NameKey Ingredients & MethodBest For
Gingerbread PuddingAdd 1 tablespoon of ground ginger and a pinch of ground cloves to the dry ingredients. Replace the non-dairy milk with blackstrap molasses for a rich, robust flavour.A festive holiday dessert.
Chocolate PuddingAdd ½ cup of unsweetened cocoa powder to the dry ingredients. Use a few extra drops of vanilla extract in the batter and syrup.A decadent and rich chocolatey treat.
Nutty Caramel PuddingAdd ½ cup of chopped walnuts or pecans directly into the batter before steaming. When serving, sprinkle extra chopped nuts and a pinch of sea salt over the date syrup for a salted caramel flavour.A satisfying crunch and a delightful nutty flavour.
Spiced Apple PuddingReplace the mashed banana with 1 cup of unsweetened applesauce. Add 1 teaspoon of ground cinnamon and a pinch of allspice. You can also mix in some finely diced apple pieces.A light, fruity, and fragrant pudding.

The images show a cooked steamed pudding and the other images is of a slice of the pudding on a saucer.


Final Thoughts

Creating a delicious, warm, and comforting dessert doesn’t have to be complicated or unhealthy. This simple Crockpot steamed pudding recipe is a testament to the fact that with a little creativity and the right ingredients, you can satisfy your cravings while nourishing your body. The slow cooker method takes the stress out of the process, leaving you with a perfect pudding every time. So go ahead, give it a try, and discover your new favourite guilt-free dessert.


Frequently Asked Questions (FAQs)

Q1: Can I make this pudding vegan?

A1: Yes, you can! To make this recipe vegan, simply replace the two large eggs with two flax eggs. A flax egg is made by mixing 2 tablespoons of ground flaxseed with 6 tablespoons of water and letting it sit for about 5 minutes until it forms a gel-like consistency. This will work as a perfect binder for the pudding.

Q2: How should I store leftover pudding?

A2: Leftover pudding can be stored in an airtight container in the refrigerator for up to 3-4 days. To reheat it, you can either warm it in the microwave in 30-second increments or place a slice back in the Crockpot with a little water at the bottom and warm it on the low setting for about 30 minutes. The date syrup can be stored separately in a jar in the fridge.

Q3: Can I substitute the dates?

A3: While dates are key to the flavour and texture, you could substitute them with other dried fruits like figs or prunes for a similar result. Just be aware that the flavour profile will change slightly. For the syrup, you could use pure maple syrup as a substitute for the date syrup, but it will have a different taste and nutritional profile.


References

  1. American Heart Association – Dietary Fats
  2. Healthline – 8 Proven Health Benefits of Dates
  3. Mayo Clinic – Dietary fiber

Recent Posts


The Ultimate Guilt-Free Chocolate Cake Made With Avocado

This guilt-free chocolate cake is more than just a treat — it’s a nutrient-packed dessert designed for those who want indulgence without compromise. Every bite offers a balance of flavor, texture, and goodness, proving that healthy eating can be just as decadent as it is nourishing.


Chocolate cake showing the avocado sections of this cake
Chocolate & Avocado Cake

A Chocolate Cake That Looks Decadent but Loves You Back

Who says indulgence and health can’t live on the same plate? This chocolate cake is here to prove them wrong. With its deep, rich outer layer of raw chocolate and the surprise of vibrant green avocado within, it’s a showstopper in both taste and presentation. Even better, every ingredient is chosen to be as nourishing as it is decadent.

When you first slice into this cake, you’re greeted by the striking contrast of dark chocolate and a bright, velvety green avocado layer. It’s the kind of visual that makes guests pause before they take a bite — and then immediately go back for seconds. But despite its bakery-worthy appearance, this recipe is surprisingly easy to make at home.

The real beauty of this cake lies in its balance. You’ll still enjoy the rich satisfaction that comes with a slice of chocolate cake, but without the heavy, processed fats and refined sugars often found in store-bought versions. Instead, wholesome fats from avocado and the antioxidant power of raw cacao create a dessert you can feel good about eating.

And while it’s healthy, it’s not too healthy — meaning it still tastes like cake, not like something you “should” eat for the sake of your diet. Think of it as the sweet spot where indulgence meets nourishment.

Of course, like all treats, this should be enjoyed in moderation — but when you do indulge, make sure it’s with something as worthwhile as this.


Time to Prepare

15 minutes

Time to Time to Prepare: 20 minutes

Time to Cook: 35–40 minutes

Servings: (Serves 10–12)


Ingredients for Guilt-Free Chocolate Cake

For the Cake:

  • 1 ½ cups wholegrain flour (or almond flour for gluten-free)
  • ½ cup pure cocoa powder
  • 1 tsp baking powder
  • Pinch of salt
  • ½ cup raw honey or maple syrup
  • ½ cup coconut oil, melted
  • 1 cup unsweetened plant-based milk
  • 1 tsp vanilla extract
  • 2 large ripe avocados (flesh scooped just before blending)
  • ¼ tsp baking soda (for avocado layer only)
  • ½ tsp matcha powder (optional, for extra green color stability)

For the Raw Chocolate Coating:

  • ½ cup raw cacao butter
  • ½ cup raw cacao powder
  • 3–4 tbsp maple syrup (to taste)


Instructions for Making the Chocolate Cake

1. Preheat the Oven

  • Set your oven to 160°C / 320°F (fan 150°C / 300°F).
  • Line a loaf tin or square glass oven-proof dish with baking paper.

2. Prepare the Dry Ingredients

  • In a large bowl, sift together flour, cocoa powder, baking powder, and salt.
  • Mix well and set aside.

3. Make the Chocolate Batter

  • In a separate bowl, whisk together half of the dry mixture with honey/maple syrup, melted coconut oil, plant-based milk, and vanilla extract until smooth.
  • This is your chocolate layer batter.

4. Prepare the Avocado Batter (Just Before Baking)

  • In a clean blender, add avocado flesh (scooped at the last moment), baking soda, matcha powder (optional), maple syrup/honey, coconut oil, the remaining half of the dry mixture, and plant-based milk.
  • Blend until fully smooth and a vibrant green. Avoid over-blending to prevent heat from dulling the color.


5. Layer the Batter

  • Pour half of the chocolate batter into your prepared tin.
  • Add the avocado batter on top, spreading gently to avoid mixing.
  • Finish with the remaining chocolate batter and smooth the top.

6. Bake

  • Place in the oven and bake for 35–40 minutes (loaf tin) or 30–35 minutes (square tin).
  • A skewer inserted should come out with only a few moist crumbs. Avoid overbaking.

7. Cool and Coat with Raw Chocolate

  • Cool the cake completely before icing.
  • Melt cacao butter gently, stir in cacao powder and maple syrup until glossy, then pour over the cake. Let it set before slicing

Benefits of This Chocolate Cake

One of the best things about this chocolate cake is that it’s proof you can indulge without sacrificing your health goals. Every ingredient plays a role in making this a more nourishing dessert option.

  • Avocado for Creaminess and Nutrition – Avocados are a source of heart-healthy monounsaturated fats, which can help reduce bad cholesterol levels. They also contain potassium, which supports healthy blood pressure, and fiber, which aids digestion. In baking, avocado creates a moist, rich texture without the need for butter or margarine.
  • Raw Chocolate for Antioxidant Power – Unlike conventional chocolate, raw cacao is minimally processed, which helps preserve its antioxidants — particularly flavonoids. These compounds have been linked to improved brain function, reduced inflammation, and better heart health.
  • Cocoa Powder for Rich Flavor and Minerals – Pure cocoa powder not only delivers a deep chocolate taste but also provides magnesium, iron, and a natural mood boost by promoting serotonin production.
  • Natural Sweeteners for Balanced Energy – Using maple syrup or raw honey instead of refined sugar means you’re getting a slower release of energy, avoiding the rapid spikes and crashes that come with white sugar.
  • Lower Refined Fat Content – Swapping butter for avocado and coconut oil reduces saturated fat while adding beneficial plant-based fats that help keep you satisfied.
  • Nutrient-Dense and Satisfying – Because the cake contains real, whole ingredients, a small slice is often enough to satisfy your sweet craving, making portion control easier.


Variations for Different Tastes and Needs In This Chocolate Cake

Variation TypeAdjustment
Gluten-FreeSwap spelt flour for almond or coconut flour.
VeganReplace eggs with flax eggs (1 tbsp ground flax + 3 tbsp water per egg).
Extra ChocolateyAdd ½ cup dark chocolate chips (70% cocoa) to the batter.
Citrus TwistAdd 1 tbsp orange zest to the cake batter for a bright flavor.
Protein BoostReplace ¼ cup flour with protein powder of choice.

Final Thoughts on This Chocolate Cake

This chocolate cake proves that indulgence doesn’t have to come with guilt. By using avocado for creaminess and raw chocolate for the topping, you create a cake that satisfies your sweet tooth while giving your body nutrients it can actually use.

The green layers inside add a fun surprise for guests, while the rich cocoa flavor makes it a treat everyone will love. Just remember, even the healthiest desserts should be enjoyed in sensible portions.

So the next time you’re craving a rich, decadent cake, skip the processed versions and bake this wholesome masterpiece instead — your taste buds and your body will thank you.


Frequently Asked Questions (FAQs)

Q: Can I taste the avocado in this chocolate cake?
A: Not at all. The cocoa powder and raw chocolate completely mask the avocado flavor, leaving only a rich, moist texture.

Q: How should I store the cake?
A: Keep in an airtight container at room temperature for up to 2 days or refrigerate for up to 5 days. It also freezes well for up to 2 months.


References

  1. Harvard T.H. Chan – Nutrition Source: Avocados
  2. Healthline – Benefits of Raw Cacao Powder
  3. Mayo Clinic – ingredient substitutions

Recent Posts


Better Carrot Cake with Greek Yogurt Frosting

A lighter, naturally sweetened better carrot cake that delivers flavor, moisture, and nourishment—without the sugar overload.


A serving of a better carrot cake with Greek yogurt frosting, topped with crushed nuts, served on a ceramic plate against a soft beige background.
Carrot Cake

A Classic Dessert, Reinvented the Better Way

There’s something nostalgic and comforting about a slice of carrot cake. Maybe it’s the warm spices, the tender crumb, or that rich frosting on top. Whatever the reason, this dessert has stood the test of time. But let’s be honest: the classic version? It’s usually loaded with oil, sugar, and heavy cream cheese frosting—which can leave you feeling more sluggish than satisfied.

This better carrot cake skips the excess without sacrificing what makes the original so lovable. Made with wholesome ingredients like freshly grated carrots, whole wheat or almond flour, maple syrup, and topped with a Greek yogurt frosting, it’s moist, flavorful, and nutrient-packed. It’s the cake you’ll want to bring to every brunch, birthday, or afternoon tea—and feel good about eating too.

At TapedCircle, we believe that desserts should nourish your body and your soul. This better carrot cake strikes that perfect balance: comfort food, made clean.


Why A Better Carrot Cake

“Better” doesn’t just mean healthier—it means more thoughtful, more balanced, and more satisfying.

  • Lower in added sugar – Naturally sweetened with maple syrup
  • Frosting without cream cheese – Greek yogurt keeps it tangy and light
  • Boosted with fiber and nutrients – Thanks to carrots, nuts, and whole ingredients
  • Moist and flavorful – No dryness or bland bites here
  • Perfect for mindful eaters – A treat you can enjoy with zero regret

Time to Prepare For A Better Carrot Cake

  • Prep Time: 15 minutes
  • Cook Time: 35–40 minutes
  • Total Time: ~55 minutes

Ingredients For A Better Carrot Cake

For the Carrot Cake:

  • 1 ½ cups almond flour or whole wheat flour
  • 1 tsp baking soda
  • ½ tsp baking powder
  • 1 ½ tsp cinnamon
  • ½ tsp nutmeg
  • ¼ tsp ground ginger (optional)
  • ¼ tsp salt
  • 2 eggs
  • ⅓ cup maple syrup or honey
  • ¼ cup unsweetened applesauce
  • ¼ cup melted coconut oil or olive oil
  • 1 tsp vanilla extract
  • 1 ½ cups grated carrots (about 2–3 medium carrots)
  • Optional: ½ cup chopped walnuts or raisins

For the Greek Yogurt Frosting:

  • ¾ cup plain Greek yogurt (full-fat or 2%)
  • 2–3 tbsp maple syrup
  • 1 tsp vanilla extract
  • Pinch of sea salt


Instructions For A Better Carrot Cake

1. Preheat & Prep

Preheat your oven to 350°F (175°C). Line an 8-inch round or square cake pan with parchment paper and lightly grease the sides.

2. Mix Dry Ingredients

In a large bowl, whisk together the flour, baking soda, baking powder, cinnamon, nutmeg, ginger, and salt.

3. Mix Wet Ingredients

In another bowl, beat the eggs. Stir in maple syrup, applesauce, oil, and vanilla extract until well combined.

4. Combine & Fold

Add the wet mixture into the dry ingredients and stir until just combined. Fold in the grated carrots and any optional add-ins like walnuts or raisins.

5. Bake

Pour the batter into your prepared pan and smooth the top. Bake for 35–40 minutes, or until a toothpick comes out clean. Let it cool in the pan for 10 minutes before transferring to a rack.

6. Make the Frosting

While the cake cools, whisk together the Greek yogurt, maple syrup, vanilla, and salt until smooth and creamy. Chill until ready to use.

7. Frost & Serve

Once the cake is fully cooled, spread the Greek yogurt frosting over the top. Slice and serve!


Why Greek Yogurt Makes the Best Light Frosting

Greek yogurt isn’t just a healthier swap—it brings:

  • Tangy flavor that mimics cream cheese
  • Creamy texture with fewer calories
  • Protein boost for better satiety
  • Probiotics for gut-friendly benefits
  • Less sugar than most frosting recipes

You can also flavor the frosting with orange zest, a dash of cinnamon, or a spoonful of almond butter for a unique twist.


Health Benefits of A Better Carrot Cake

  • 🥕 Carrots – Rich in beta-carotene, fiber, and antioxidants
  • 🌰 Almond flour or whole grains – Provide protein, healthy fats, and slow-digesting carbs
  • 🍯 Natural sweeteners – Lower glycemic impact than refined sugar
  • 🥄 Greek yogurt – High in protein and gut-friendly probiotics
  • 🧁 Lower in sugar & fat – No butter, no refined frosting, no guilt

🍰 A Thoughtful Indulgence For A Better Carrot Cake

While this carrot cake is made with better-for-you ingredients, it’s still a sweet treat at heart. Think of it as a mindful indulgence—something to enjoy without guilt, but with intention. A small slice can satisfy, especially when you know it’s made with whole, nourishing ingredients.


Storage & Serving Tips For A Better Carrot Cake

  • Store: Keep cake in the fridge for up to 4 days (frosted or unfrosted).
  • Freeze: Freeze unfrosted cake for up to 2 months; thaw before frosting.
  • Make-Ahead: You can bake the cake a day in advance and frost before serving.

This cake is even better chilled overnight—the spices and flavors deepen beautifully.


FAQs

Can I make this cake vegan?

Yes! Replace the eggs with flax eggs (2 tbsp flax + 6 tbsp water) and use a dairy-free yogurt for the frosting.

Can I use regular yogurt?

Yes, but make sure it’s thick or strain it in cheesecloth to avoid runny frosting.

Is this cake gluten-free?

It is if you use almond flour. Whole wheat flour makes it nutrient-dense but not gluten-free.

Can I turn this into muffins?

Absolutely. Pour the batter into a muffin tin and bake for 18–22 minutes.


Reader Reviews

⭐⭐⭐⭐⭐ “This is my new favorite carrot cake recipe. The Greek yogurt frosting is genius!” – Ellie M.

⭐⭐⭐⭐ “So moist and flavorful without the sugar overload. A keeper!” – James L.

⭐⭐⭐⭐⭐ “I made this for Easter brunch and it disappeared in minutes!” – Priya D.


Final Thoughts For A Better Carrot Cake

This better carrot cake hits the sweet spot—literally and nutritionally. It gives you that nostalgic spice and tender crumb, but with whole ingredients that make your body feel as good as your tastebuds do.

Perfect for birthdays, potlucks, or just a weekend treat, it proves that healthy baking doesn’t have to be boring. And with the Greek yogurt frosting, you’ll never miss the cream cheese.


References


    Recent Posts


    The Best Almond Flour Chocolate Cake Ever

    A deliciously wholesome almond flour chocolate cake that proves healthy desserts can still feel indulgent.


    Moist almond flour chocolate cake on a white plate, topped with a glossy chocolate glaze and sliced for serving
    Almond Flour Chocolate Cake

    A Healthier Way to Satisfy Your Almond Flour Chocolate Cake Cravings

    If you’ve ever tried to eat healthier and still found yourself daydreaming about a rich, moist chocolate cake—you’re not alone. Chocolate is more than just a sweet treat. It’s comfort, nostalgia, and celebration all rolled into one. The challenge? Most traditional chocolate cake recipes are loaded with refined sugar, white flour, and unhealthy fats that leave you feeling heavy, bloated, or worse—guilty.

    Enter the almond flour chocolate cake. This isn’t some “diet” version that tastes like cardboard or leaves you wishing you’d eaten the real thing. This cake delivers on all the texture and flavor you crave: it’s soft, deeply chocolatey, and delightfully moist. But here’s the game-changer—it’s made with nutrient-rich almond flour, natural sweeteners, and healthy fats that work with your body, not against it.

    At TapedCircle, we believe you shouldn’t have to choose between enjoying dessert and living well. That’s why we’re excited to share this almond flour chocolate cake recipe: it’s wholesome enough to serve at a family gathering, simple enough to whip up on a weeknight, and healthy enough to become a regular part of your smart indulgence routine. It also aligns beautifully with anti-inflammatory and gluten-free lifestyles, making it a perfect fit for your wellness-focused kitchen.

    Just don’t forget—it’s still cake. Even with cleaner ingredients, this is a treat meant to be savored in moderation. So light a candle, slice a piece, and enjoy every bite.


    Why Choose Almond Flour?

    Almond flour isn’t just a substitute for wheat flour—it’s a nutritional upgrade. Here’s why it shines in this cake:

    • Naturally Gluten-Free – Ideal for gluten-sensitive eaters or those reducing processed grains.
    • Rich in Healthy Fats – Helps keep the cake moist and satisfying.
    • Low in Carbs – Makes it a better option for low-glycemic or keto-style eating.
    • Packed with Vitamin E – Supports skin and heart health.

    Time to Prepare For Almond Flour Chocolate Cake

    • Prep Time: 10 minutes
    • Cook Time: 30–35 minutes
    • Total Time: ~45 minutes

    Ingredients For Almond Flour Chocolate Cake

    All ingredients are easy to find and pantry-friendly.

    • 2 cups fine almond flour
    • ½ cup unsweetened cocoa powder
    • ½ tsp baking soda
    • ¼ tsp salt
    • 3 eggs (room temperature)
    • ½ cup maple syrup (or honey)
    • ¼ cup melted coconut oil (or olive oil)
    • 1 tsp vanilla extract
    • ¼ cup almond milk (or any plant-based milk)
    • Optional: ½ cup dark chocolate chips or chopped nuts


    Instructions For Almond Flour Chocolate Cake

    1. Preheat & Prep

    Preheat your oven to 350°F (175°C). Line an 8-inch round cake pan with parchment paper and lightly grease the sides.

    2. Mix Dry Ingredients

    In a large bowl, whisk together the almond flour, cocoa powder, baking soda, and salt until evenly combined.

    3. Combine Wet Ingredients

    In a separate bowl, beat the eggs. Add the maple syrup, melted coconut oil, vanilla extract, and almond milk. Stir until smooth.

    4. Combine & Mix

    Pour the wet ingredients into the dry mixture. Stir just until combined—don’t overmix. If adding chocolate chips or nuts, fold them in now.

    5. Bake

    Pour the batter into your prepared pan and smooth the top. Bake for 30–35 minutes, or until a toothpick comes out mostly clean with a few moist crumbs.

    6. Cool & Serve

    Let the cake cool in the pan for 10 minutes, then transfer to a wire rack. Serve warm, chilled, or at room temperature.


    Healthy Swaps & Tips For Almond Flour Chocolate Cake

    • For Extra Fudginess: Add 1 tablespoon of brewed coffee to enhance the chocolate flavor.
    • For Vegan Option: Swap eggs for flax eggs (3 tbsp ground flax + 9 tbsp water, rest for 10 min).
    • For Sugar-Free: Use stevia or monk fruit instead of maple syrup, adjusting moisture as needed.
    • Frosting Idea: Try a dollop of Greek yogurt mixed with cocoa powder and honey for a light, tangy frosting.

    Why This Cake Works for Healthy Eating

    This isn’t a “diet cake” that tastes like cardboard. It’s cake—just made smarter.

    • Lower glycemic impact thanks to almond flour and natural sweeteners.
    • Healthy fats from almonds and coconut oil help keep blood sugar stable.
    • No refined sugar or flour, which supports more sustained energy.
    • Gluten-free & grain-free, making it easier on digestion.
    Almond Flour vs. White Flour Infographic

    Infographic: Almond flour offers more protein, fiber, and vitamin E—with fewer carbs—compared to white flour.


    But Let’s Be Real—It’s Still Cake

    While this cake is definitely healthier than your average slice, it’s still dessert. That means:

    • Portion matters—one small slice can satisfy without overdoing it.
    • It’s a treat, not a staple. Even healthy desserts should be enjoyed in balance with other nourishing foods.
    • Listen to your body. If you’re craving something sweet, this is a better way to indulge without feeling deprived.

    Storage & Make-Ahead Tips For Almond Flour Chocolate Cake

    • Store: Keep covered in the fridge for up to 5 days.
    • Freeze: Wrap individual slices and freeze for up to 2 months.
    • Reheat: Microwave for 15–20 seconds for a warm, gooey bite.

    Frequently Asked Questions

    Can I use almond meal instead of almond flour?

    You can, but the texture will be denser and slightly gritty. Blanched almond flour yields a lighter crumb.

    Can I make it nut-free?

    Unfortunately, not this version. But you could try oat flour or sunflower seed flour as an alternative in a separate recipe.

    Is this keto-friendly?

    If you swap the maple syrup for a low-carb sweetener like monk fruit, then yes—it’s keto adaptable.


    Reader Reviews

    ⭐⭐⭐⭐⭐ “I didn’t tell my kids it was healthy, and they LOVED it!” – Megan C.

    ⭐⭐⭐⭐⭐ “So moist and rich! Hard to believe it’s gluten-free.” – Josh P.

    ⭐⭐⭐⭐ “Great flavor. I added some orange zest—amazing!” – Lila D.


    Final Thoughts For Almond Flour Chocolate Cake

    This almond flour chocolate cake proves you don’t have to give up flavor to eat well. It’s rich, decadent, and surprisingly wholesome—all without the sugar crash.

    Whether you’re celebrating, meal-prepping desserts for the week, or just craving something sweet, this recipe delivers the goods. Just slice, savor, and smile—mindfully, of course.


    References


      Recent Posts