Cookie Consent by Free Privacy Policy Generator Update cookies preferences

How To Make Fruit Leather Rolls Ice Cream Smoothies


This article shows you how to transform simple ingredients into a stunning, delicious dessert. Learn the step-by-step process for creating gorgeous Fruit Leather Rolls and a creamy ice cream smoothie that will impress everyone. It’s a fun and healthy way to enjoy a sweet treat.


A vibrant and healthy dessert featuring Fruit Leather Rolls lining a glass dessert bowl, filled with a creamy green ice cream smoothie, and generously topped with chopped nuts.
Fruit leather roll platter

A Sweet Twist on a Healthy Classic: Fruit Leather Rolls

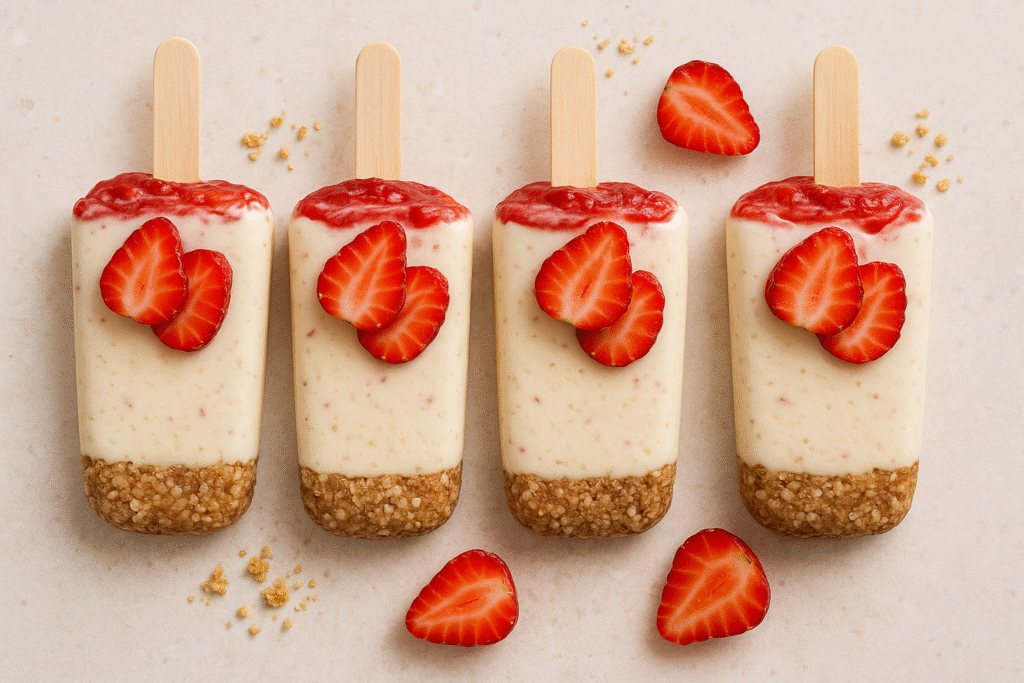
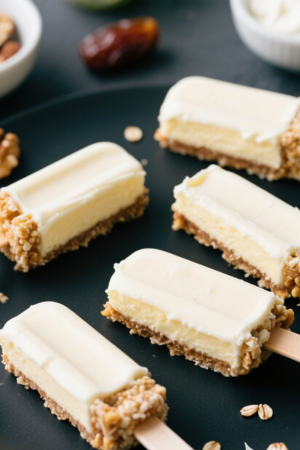
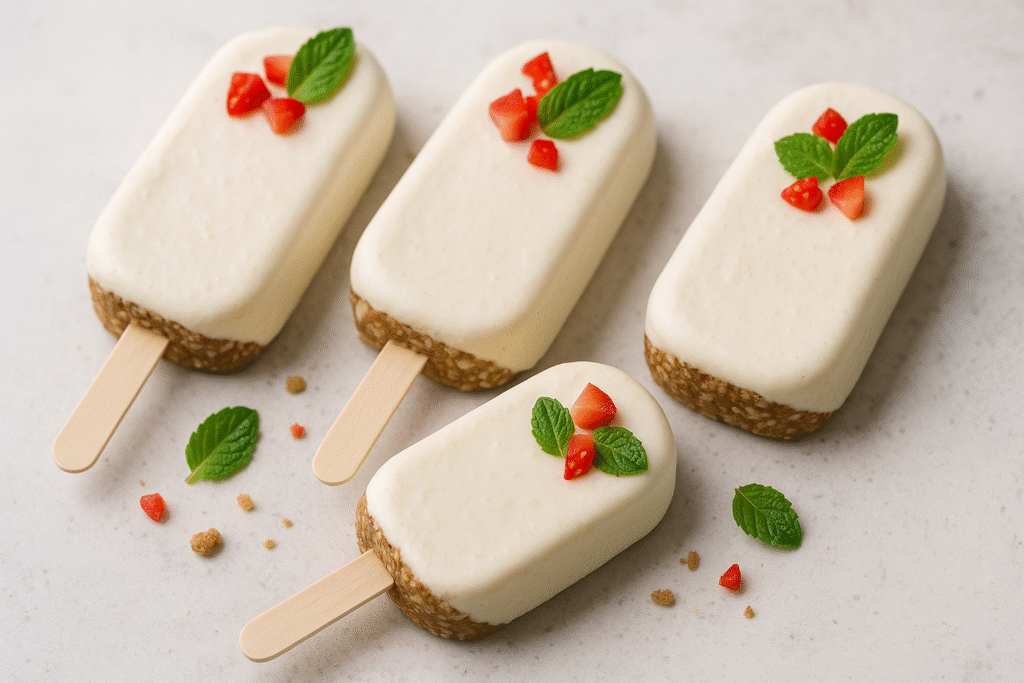
Are you looking for a dessert that’s as beautiful as it is delicious and healthy? Look no further. This recipe for Fruit Leather Rolls Ice Cream Smoothies is a game-changer. It’s a stunning dish that combines the chewy, natural sweetness of homemade fruit leather with the creamy, satisfying texture of an ice cream smoothie. It’s perfect for a special occasion, a summer treat, or simply to satisfy a sweet craving in a wholesome way.

Making fruit leather at home might sound intimidating, but it’s a surprisingly simple process. You’ll be amazed at how easily you can transform fresh or frozen fruit into a chewy, flavorful “candy” that’s packed with nutrients and free of refined sugar. It’s the kind of healthy indulgence you can feel great about serving to your family and friends.


Fruit leather rolls with ice cream smoothie in a glass bowl

Delicious & Healthy Fruit Leather Rolls

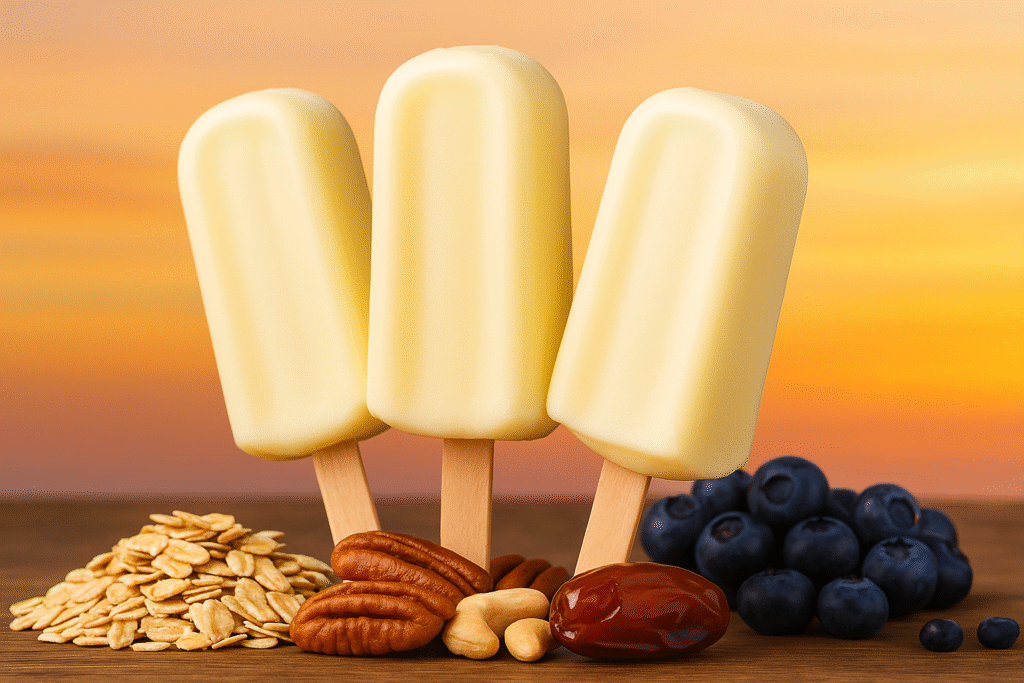
This recipe is designed to be approachable for all skill levels. We’ll guide you through each step, from preparing the fruit to rolling the final product. The result is a vibrant, visually appealing dessert that showcases the natural beauty of the ingredients. The contrasting colors of the fruit leather and the ice cream smoothie create a striking presentation that’s sure to be a showstopper.

The beauty of this recipe lies in its versatility. You can customize the flavors of both the fruit leather and the smoothie to suit your taste. Whether you prefer the deep, rich flavor of berries or the tropical sweetness of mango, the possibilities are endless. Plus, the final touch of chopped nuts adds a satisfying crunch and a boost of healthy fats and protein.

So, get ready to dive into a creative culinary adventure. This recipe is not just about making a dessert; it’s about creating a memorable experience. The process is a rewarding one, and the final dish is a testament to the fact that healthy eating can be incredibly delicious and beautiful.


Mindful Indulgence for Fruit Leather Rolls

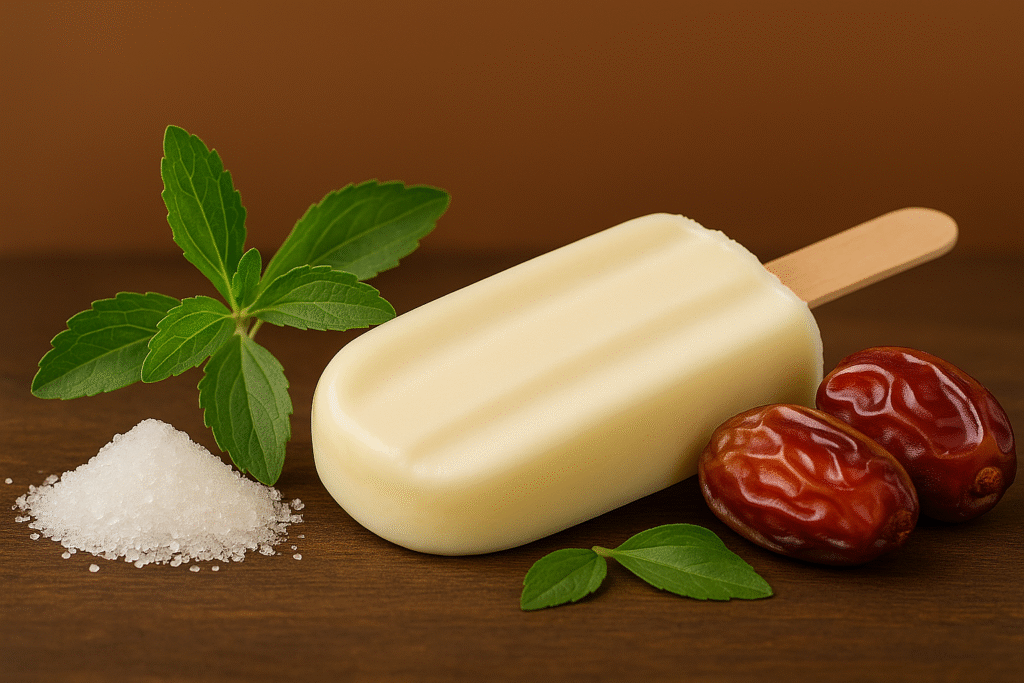
While this dessert is crafted with wholesome, natural ingredients, it’s still a treat! Even natural sugars contribute to your daily intake, and nuts, while healthy, are calorie-dense. We encourage mindful consumption and suggest being aware of portion sizes to keep this delicious creation part of a balanced diet. Enjoy every bite responsibly!


Fruit leather rolls, ice cream smoothie in a bowl

Time to Prepare

Prep time: 20 minutes

Blend time: 5 minutes

Dehydrate time: 6-8 hours


Servings

Yields 4 servings


Nutritional Information

(Approximate values per serving)

Calories: 250-300

Protein: 8-10g

Fiber: 5-7g

Healthy Fats: 10-15g

Note: Nutritional information will vary based on the specific fruits and nuts used.


Equipment

  • Baking sheets
  • Parchment paper or silicone baking mats
  • Blender or food processor
  • Spatula
  • Dehydrator (recommended for best results) or a conventional oven
  • Mixing bowls
  • Measuring cups and spoons
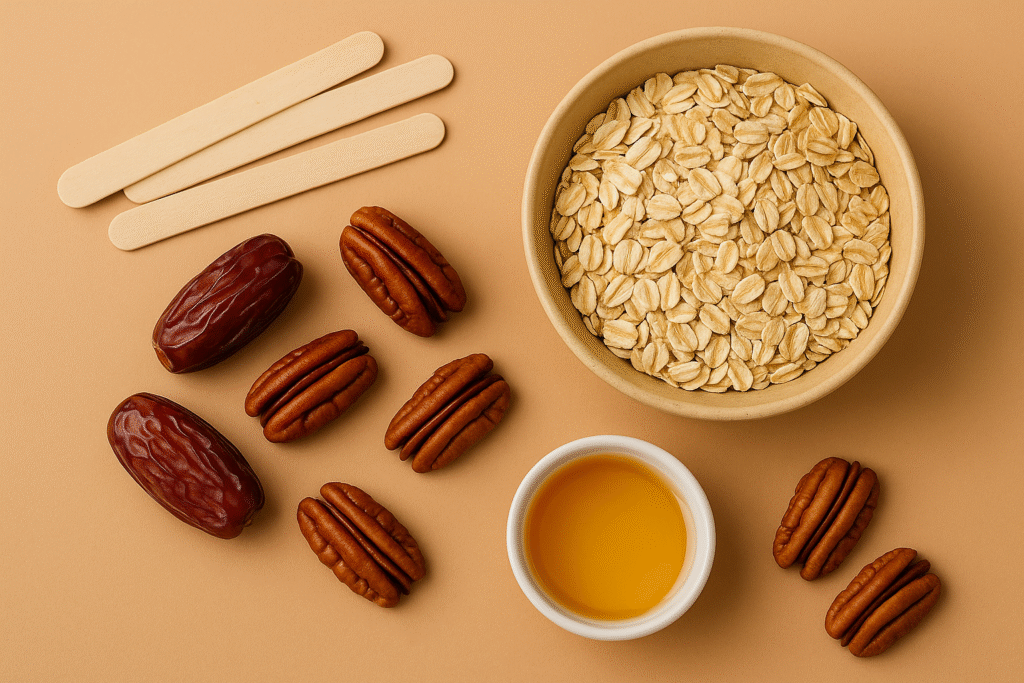
Ingredients

For the Fruit Leather Rolls

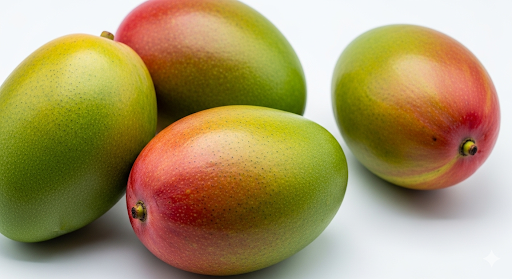
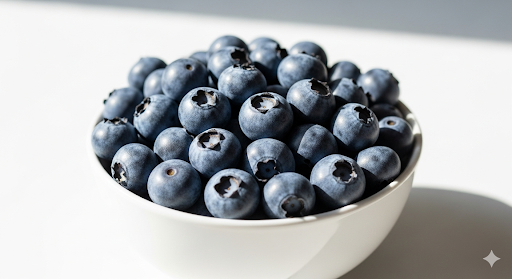
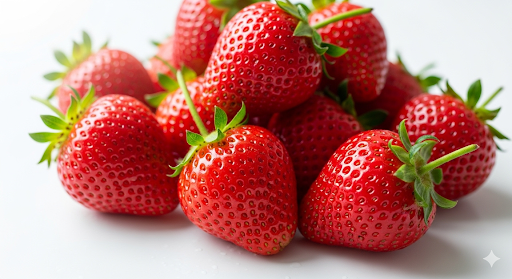
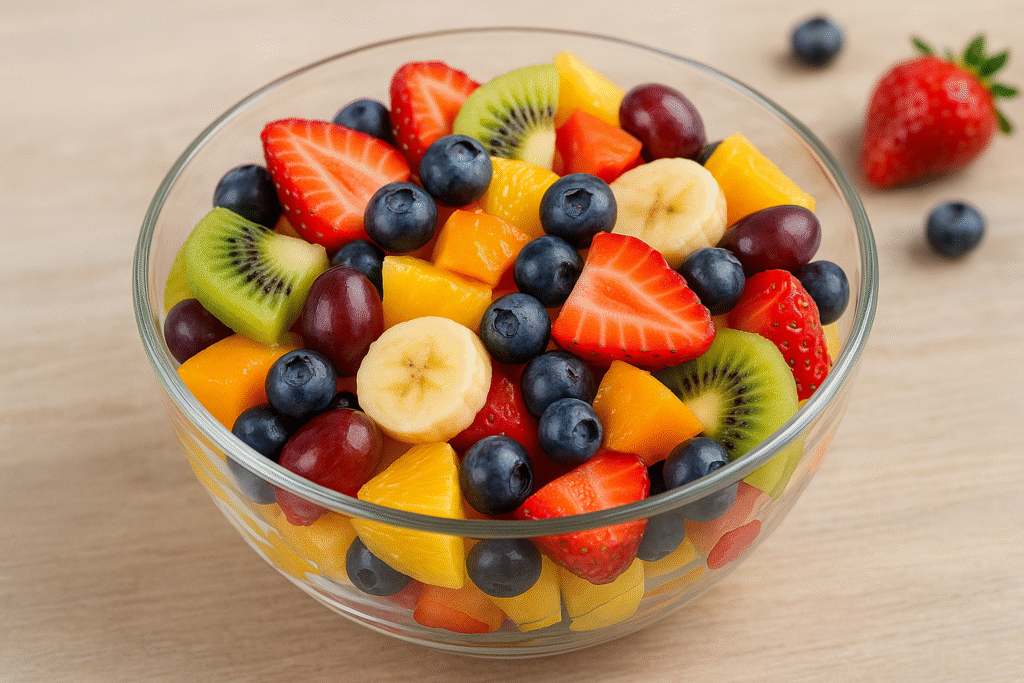
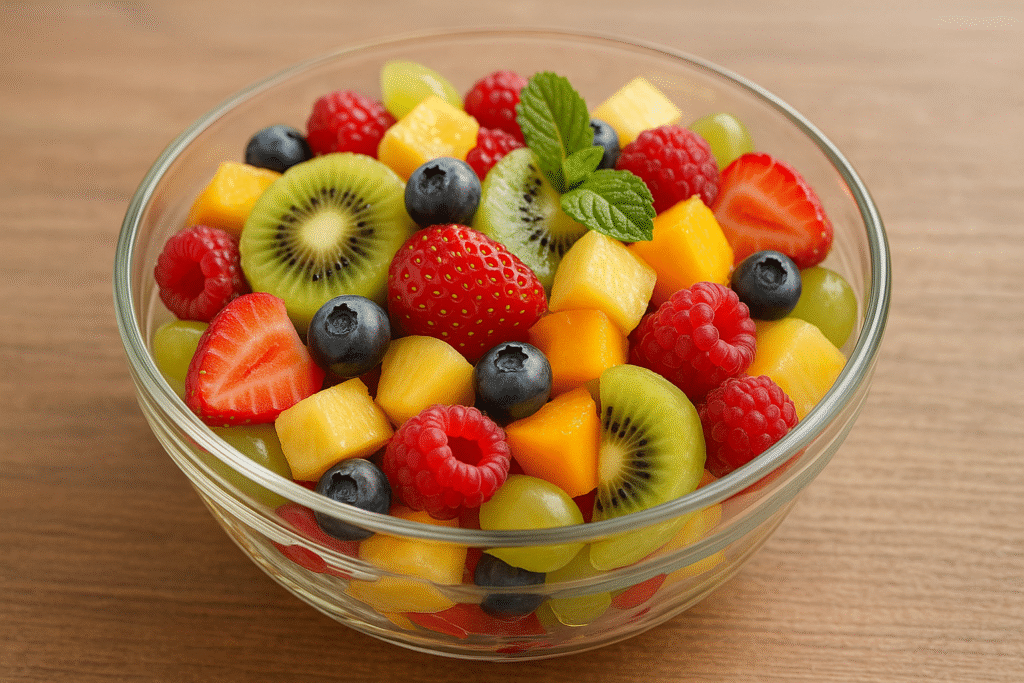
  • 3 cups of fresh or frozen fruit (berries like strawberries, raspberries, or blueberries work well, as do peaches or mangoes)
  • 2 tablespoons of honey or maple syrup (optional, for added sweetness)
  • 1 tablespoon of lemon juice

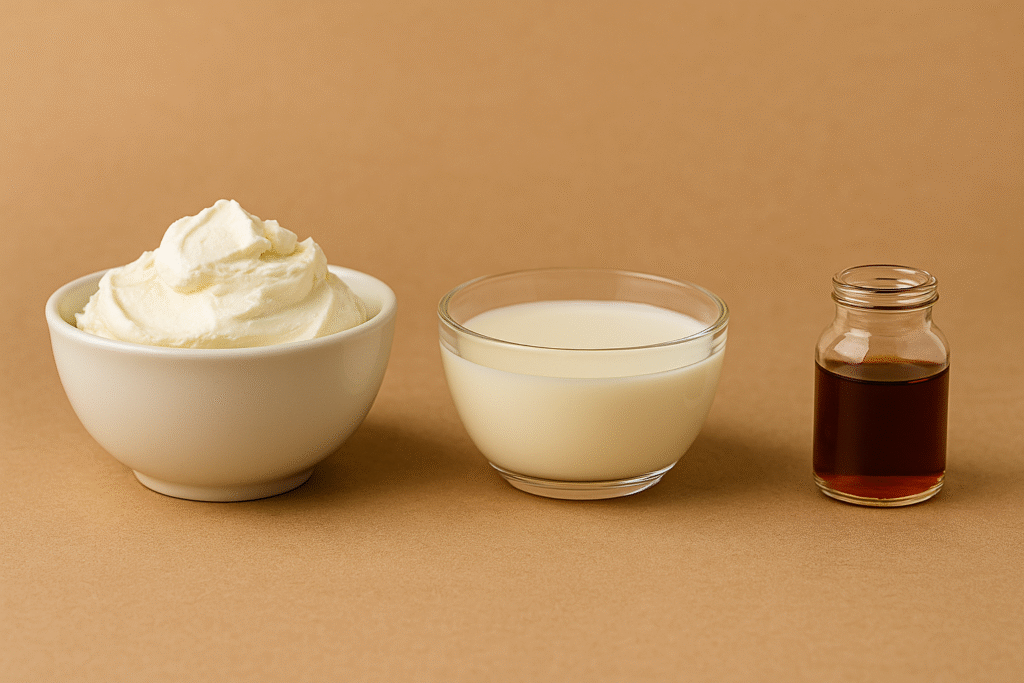
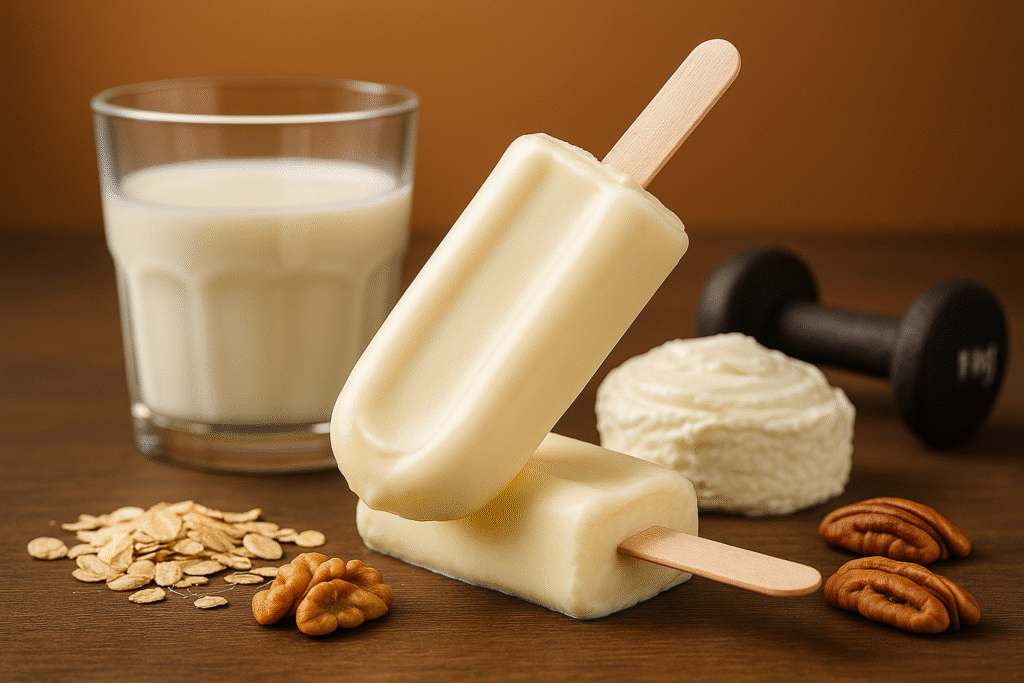
For the Ice Cream Smoothie

  • 2 large frozen bananas, chopped
  • 1 cup of frozen spinach (optional, for color and nutrients)
  • 1/2 cup of unsweetened almond milk or other milk of choice
  • 1 scoop of vanilla or plain protein powder (optional)
  • 1 teaspoon of vanilla extract
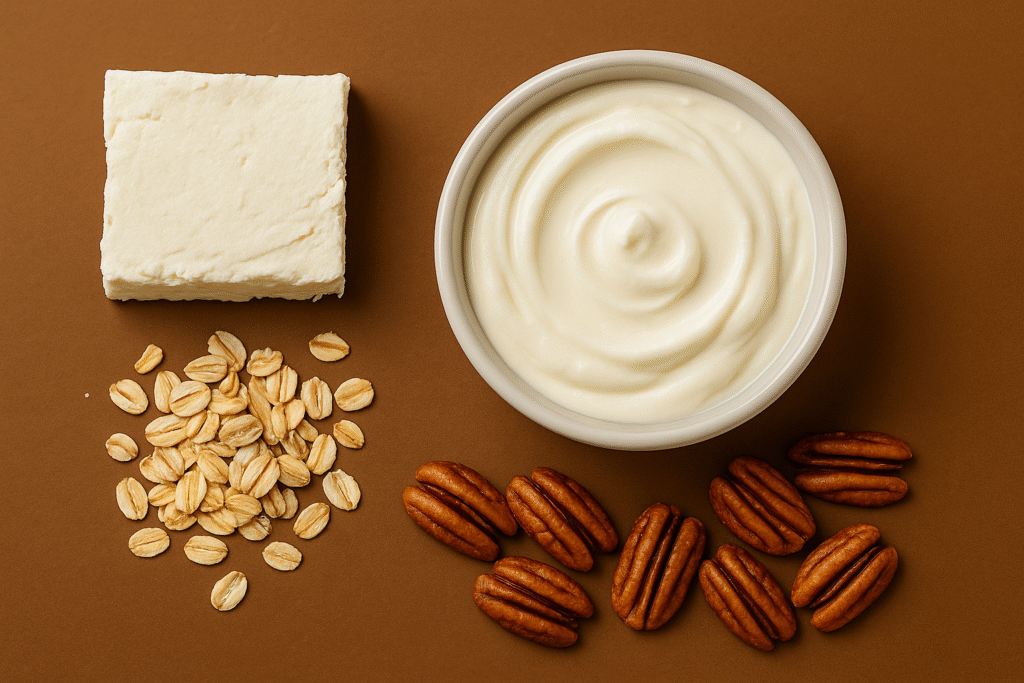
  • 2 tablespoons of nut butter (almond or cashew)

For the Topping

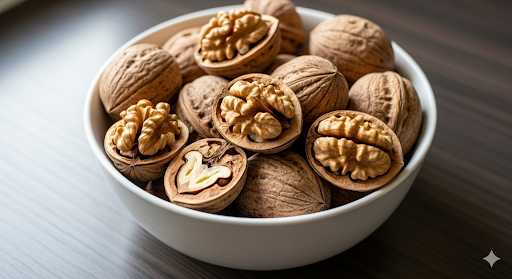
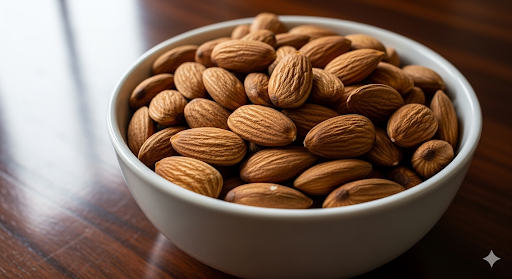
  • 1/2 cup of chopped healthy nuts (walnuts, pecans, almonds, or a mix)
  • 1/4 cup of chopped dried fruit (optional, to complement the fruit leather)

Instructions

Part 1: Making the Fruit Leather Rolls

Prepare the Fruit with Care

Start by carefully washing your fresh fruit under cool running water. If you’re using frozen fruit, take it out of the freezer and let it sit on your counter for about 10-15 minutes until it has softened slightly, but is still very cold. This partial thawing helps it blend more easily. Place all the prepared fruit into your blender or food processor. If you want a bit more sweetness or a tart counterpoint, add the honey or maple syrup and the lemon juice now.

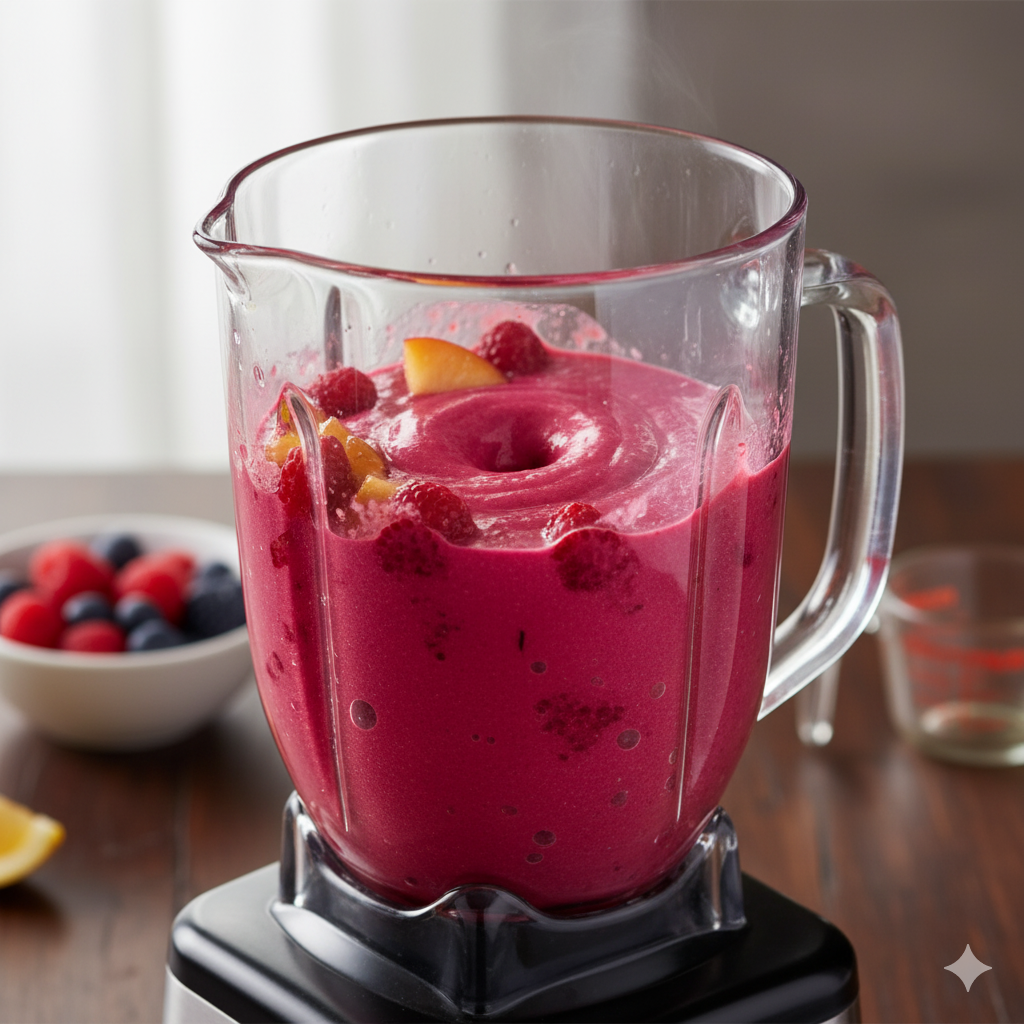
Blend to a Silky Purée

Secure the lid on your blender or food processor. Begin blending on a low speed, gradually increasing to high. Blend until the mixture is completely smooth and you can’t see any chunks of fruit. You might need to pause and scrape down the sides of the blender with a spatula a few times to ensure everything is incorporated. The goal is a very fine, uniform purée, with a consistency similar to a thick, pourable smoothie.


Blending fruit into a puree

Spread Evenly for Best Results

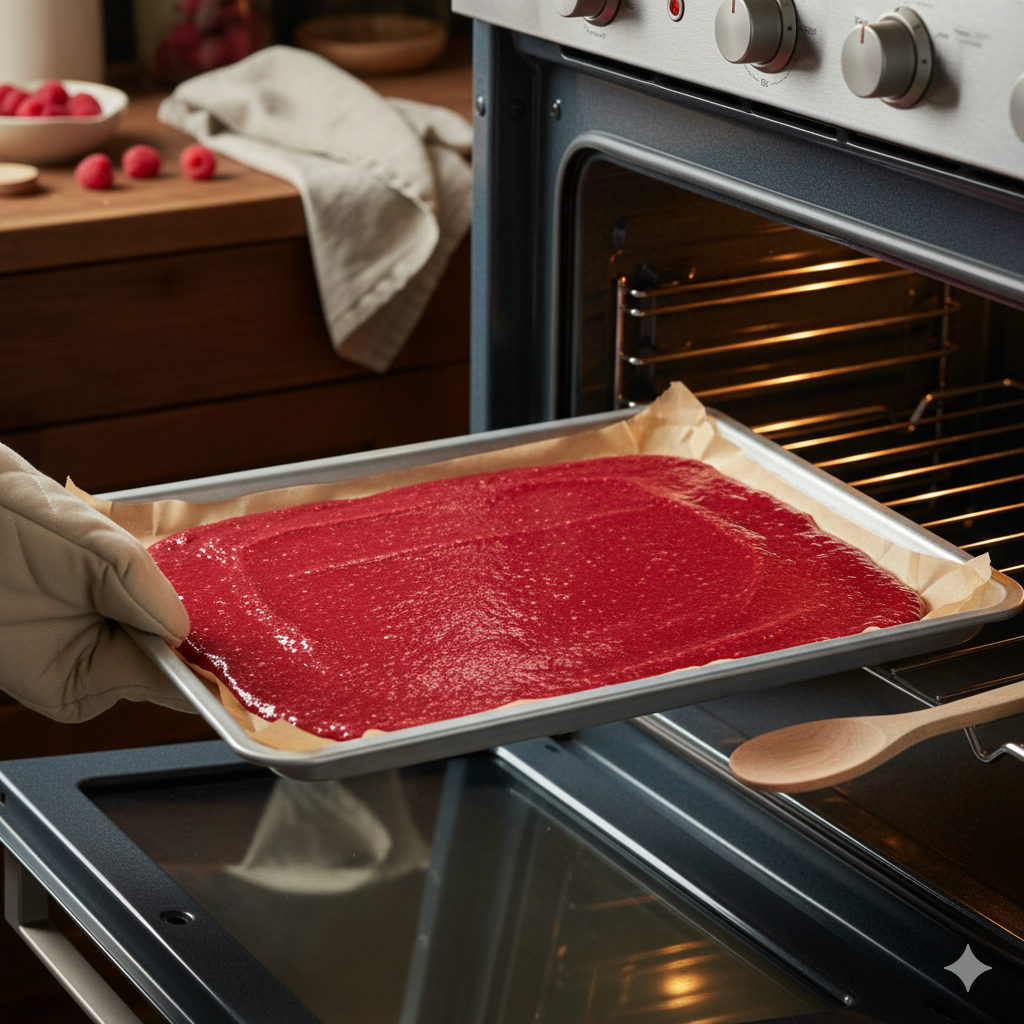
Take a large baking sheet and line it with either a sheet of parchment paper or a silicone baking mat. This step is crucial to prevent the fruit leather from sticking. Carefully pour the fruit purée onto the lined baking sheet. Using a spatula or the back of a spoon, gently spread the purée into a very thin, even layer. Aim for a thickness of about 1/8 to 1/4 inch (about 3-6 millimeters). Consistency is key here; an even thickness will ensure the fruit leather dries uniformly.

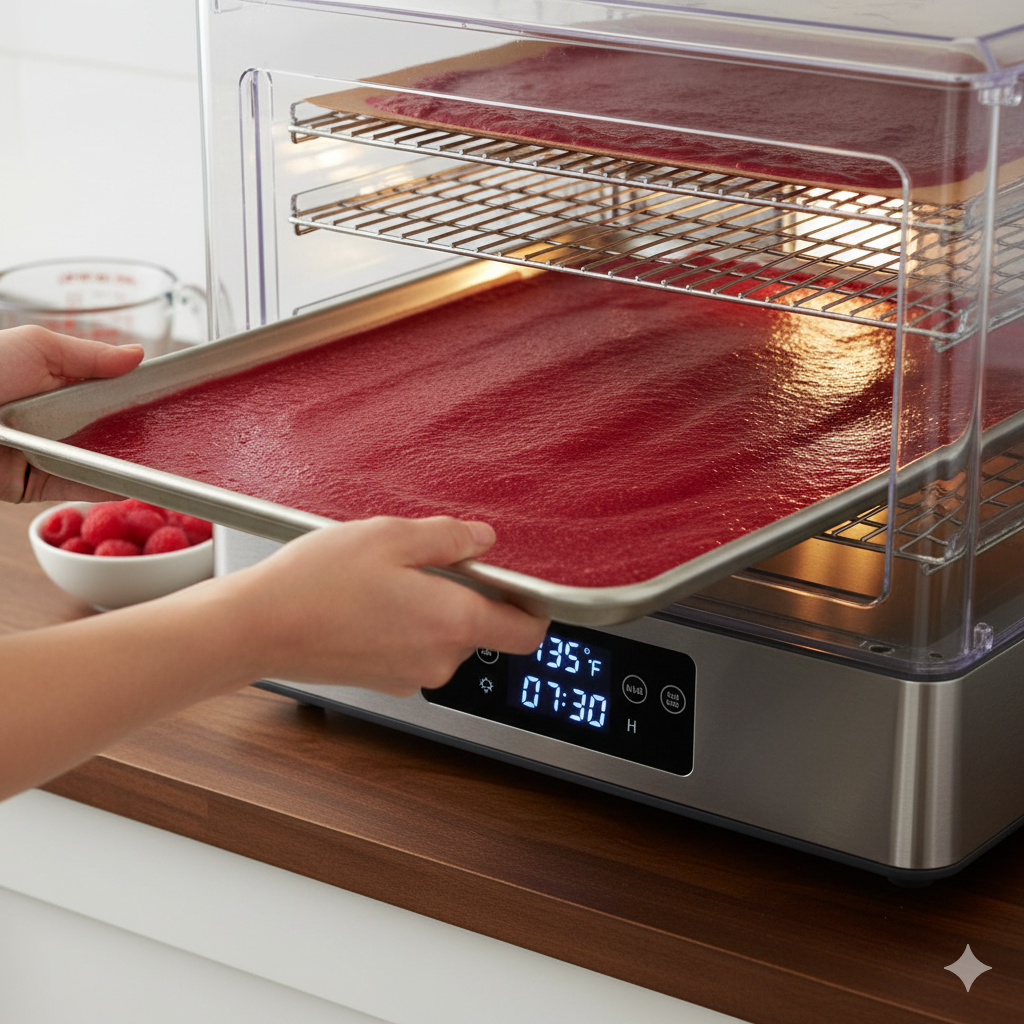
Dehydrate or Bake Until Pliable

Using a Dehydrator (Recommended for Best Texture): If you have a food dehydrator, place the baking sheet with the purée inside. Set the temperature to 135°F (57°C). Allow it to dehydrate for approximately 6-8 hours. The exact time can vary depending on your dehydrator and the fruit’s water content. The fruit leather is ready when it is no longer sticky or tacky to the touch and peels off the parchment paper or silicone mat easily without tearing. It should be pliable, like thin rubber.


Puree fruit going into a dehydrator

Using a Conventional Oven (Alternative Method)

Preheat your oven to its absolute lowest temperature setting, which is usually around 170°F (77°C) or “Warm.” Place the baking sheet in the oven. To allow moisture to escape and prevent the fruit leather from cooking rather than drying, prop the oven door open slightly, perhaps with the handle of a wooden spoon. Bake for 4-6 hours. Check it periodically (every hour or so) until it is no longer sticky and can be peeled cleanly from the paper.


Puree fruit going into an oven

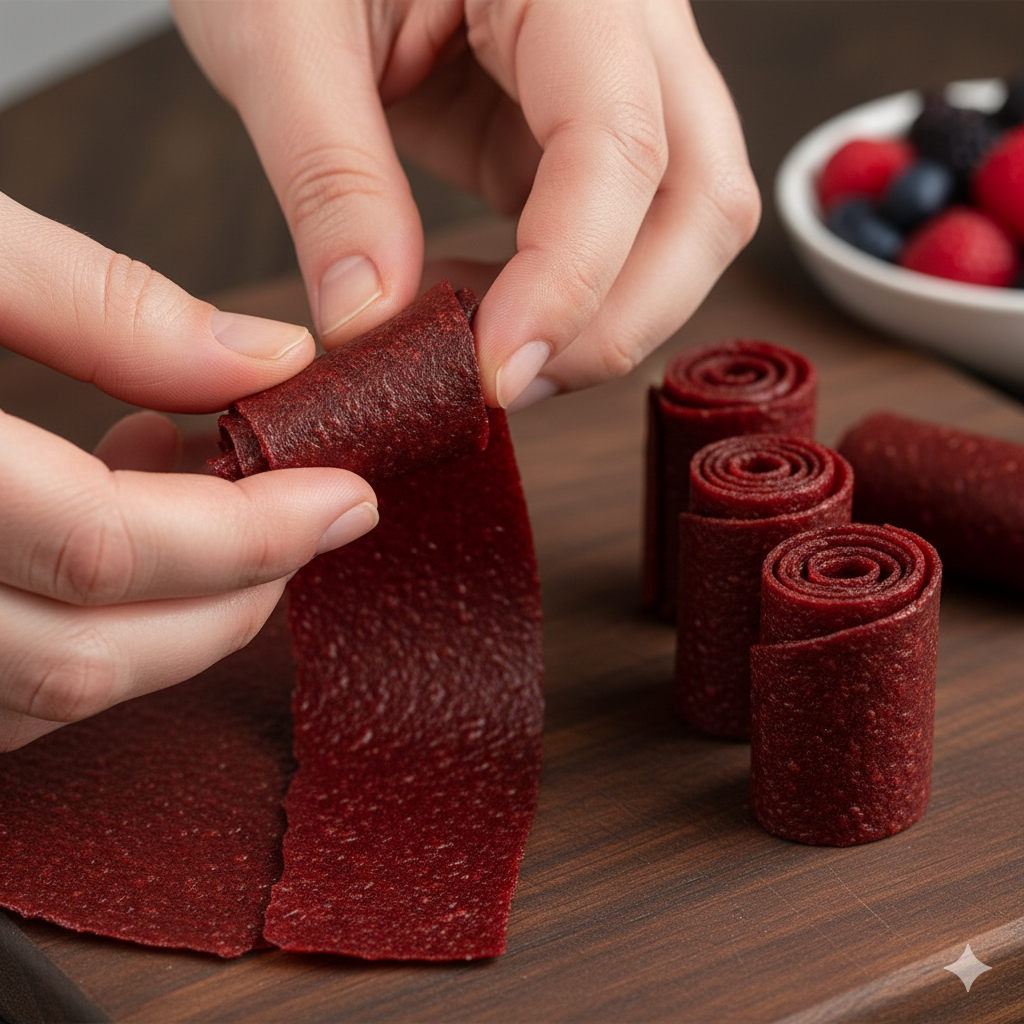
Cool and Cut into Strips

Once the fruit leather is perfectly dry, remove it from the dehydrator or oven and let it cool completely to room temperature. This makes it easier to handle. Gently peel the large sheet of fruit leather off the parchment paper. Place it on a clean cutting board. Using a sharp knife or a pizza cutter, carefully cut the large sheet into long, thin strips, each about 1-2 inches (2.5-5 centimeters) wide. The length will depend on the size of your original sheet.

Form the Fruit Leather Rolls

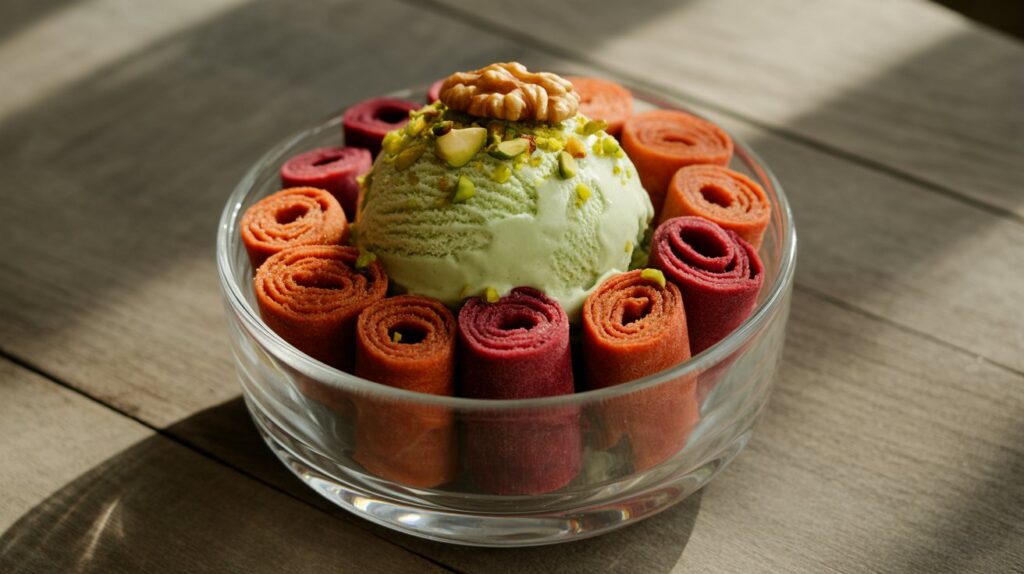
Take each individual strip of fruit leather. Starting from one end, roll it up tightly and neatly into a coil. This will create your beautiful Fruit Leather Rolls. Place these finished rolls in a separate bowl or on a plate and set them aside.


Rolling strips of leather fruit

Part 2: Preparing the Ice Cream Smoothie

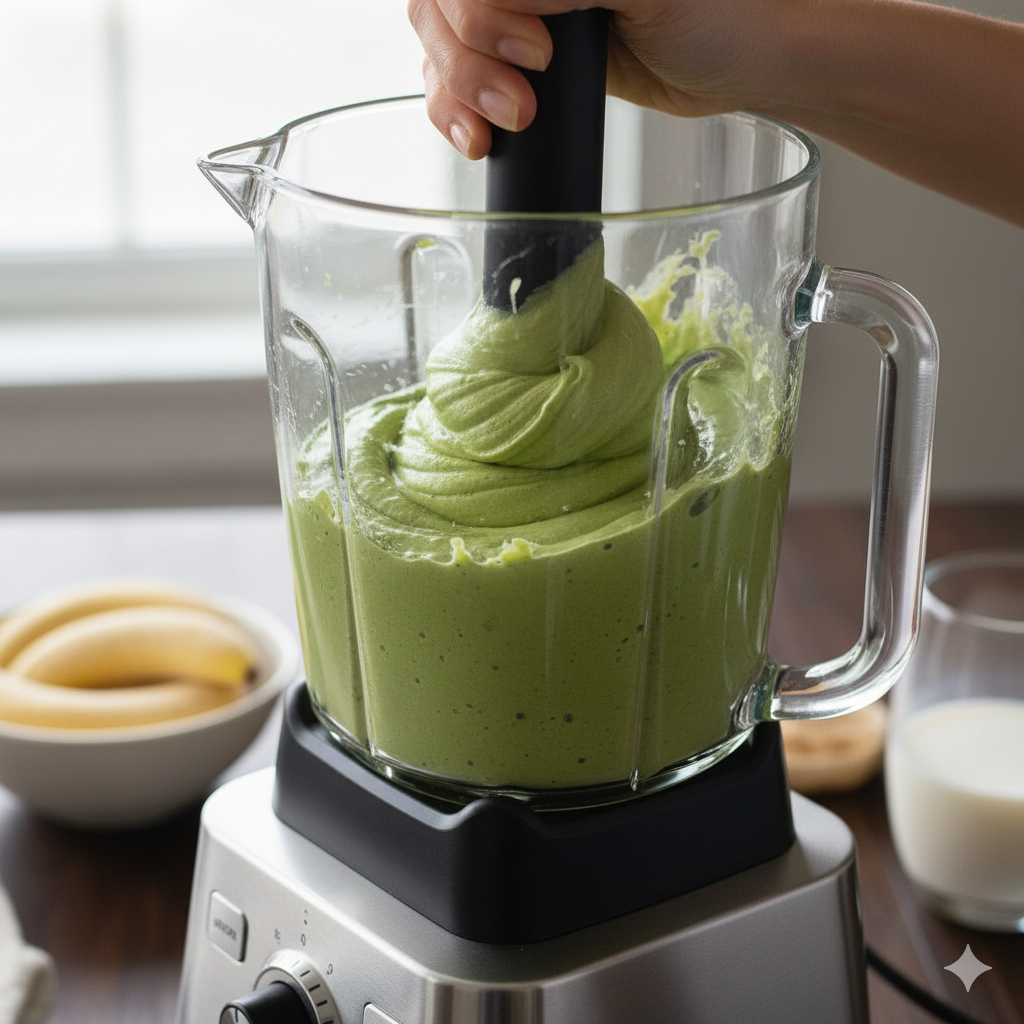
Gather Smoothie Ingredients in Blender: Into your blender, add the chopped frozen bananas (ensure they are truly frozen for the best creamy texture), the frozen spinach (if using – it adds nutrients and a vibrant color without a strong taste), the unsweetened almond milk (or your chosen milk), the protein powder (if you’re including it), the vanilla extract, and the nut butter.

Blend to a Creamy “Ice Cream” Consistency: Secure the blender lid. Begin blending on a low speed, then gradually increase to high. For a very thick, ice cream-like smoothie, you might need to stop the blender, push the ingredients down towards the blades with a tamper (if your blender has one) or a sturdy spoon, and then continue blending. Add just a tiny splash more milk if the mixture is too thick to blend, but be careful not to add too much, or it will become thin. Blend until the mixture is completely smooth, thick, and has the consistency of soft-serve ice cream.


Blending smoothie

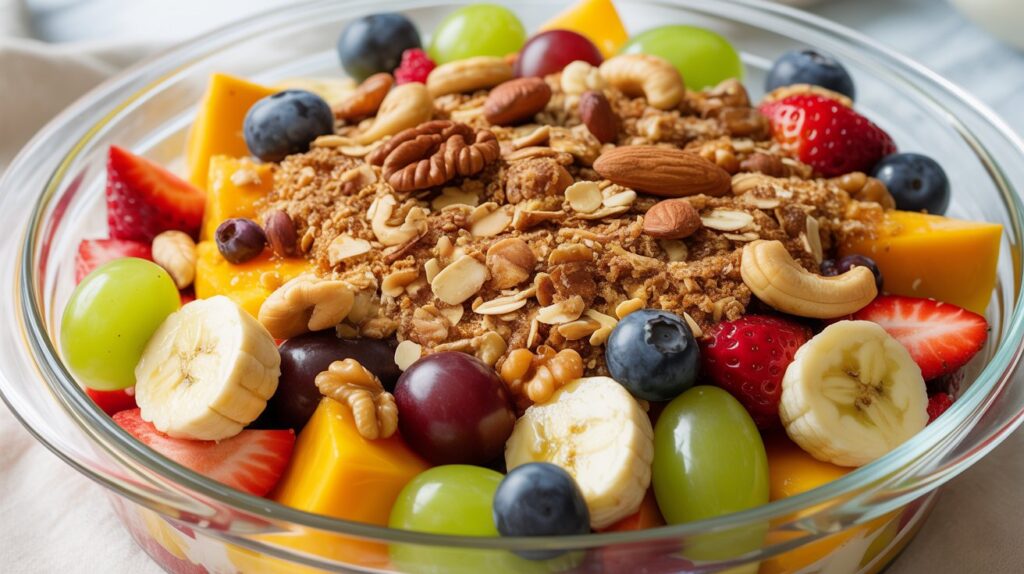
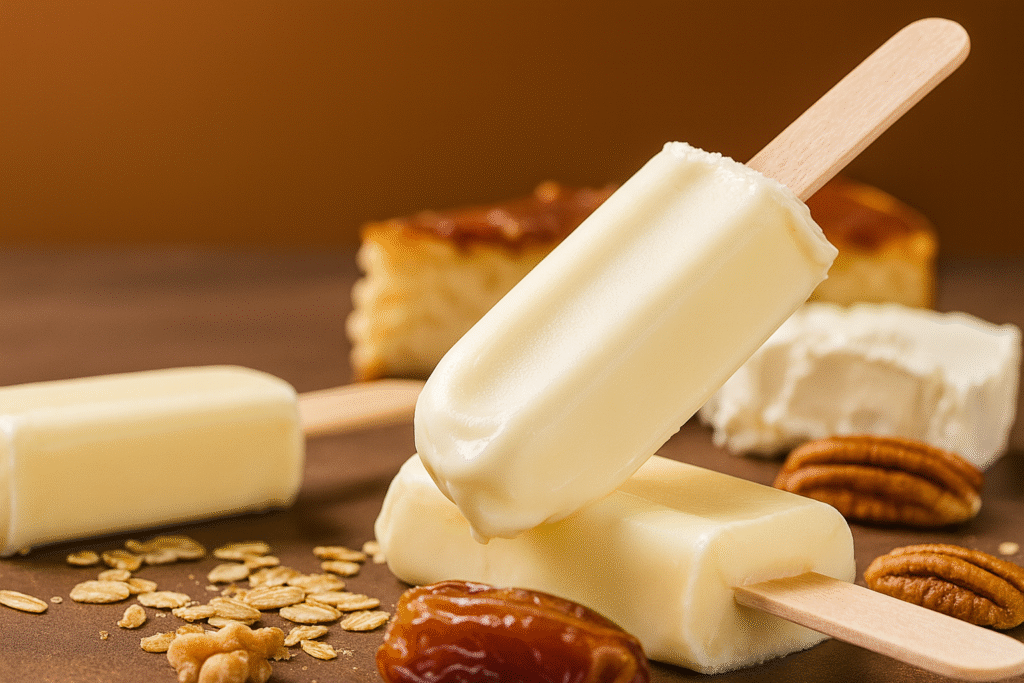
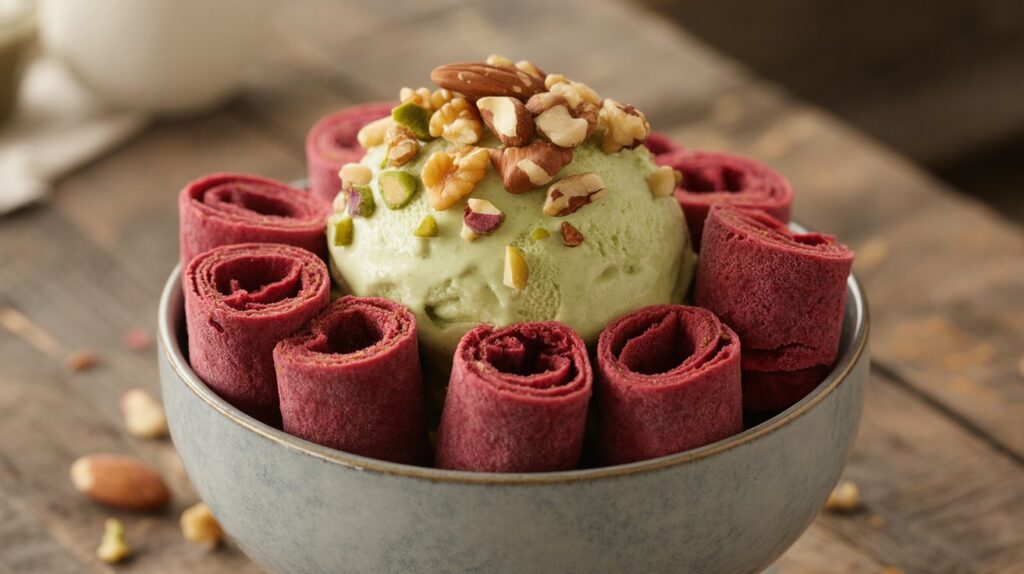
Assembling Your Masterpiece

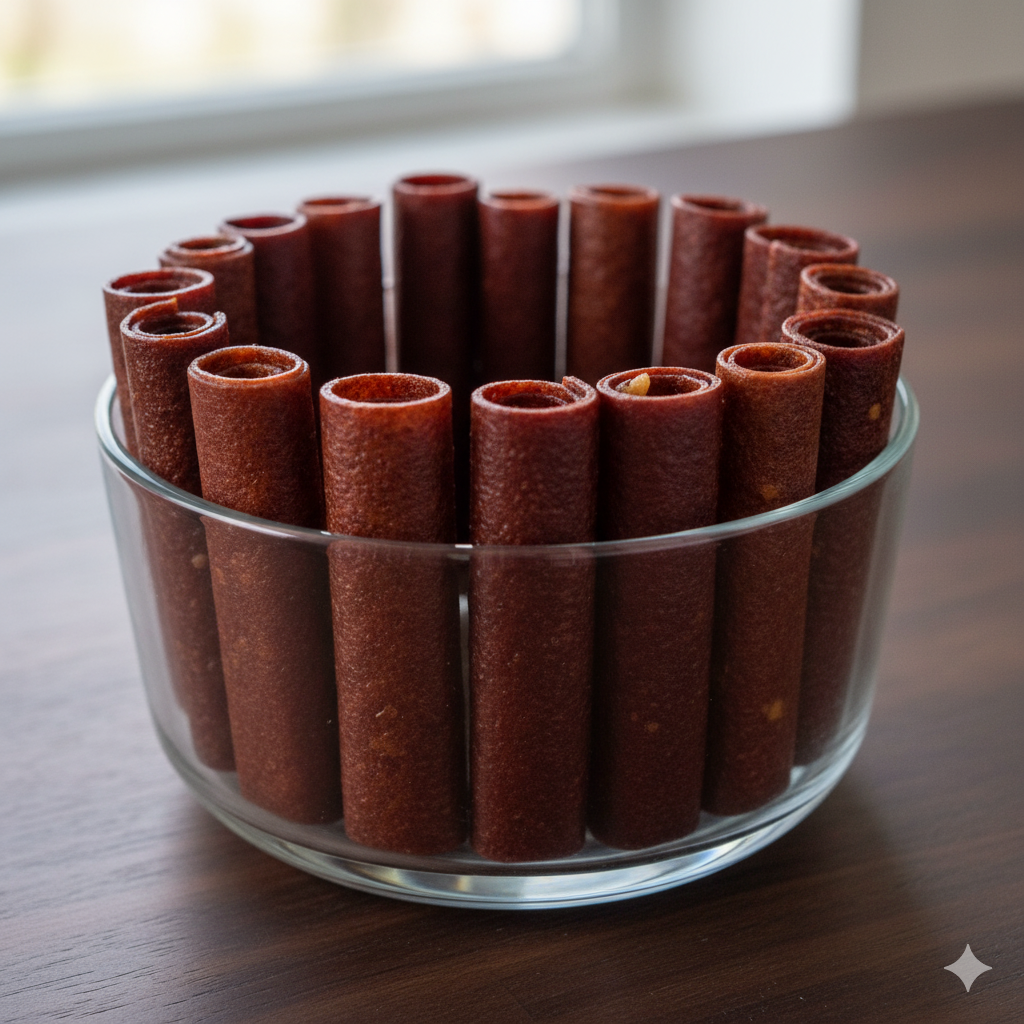
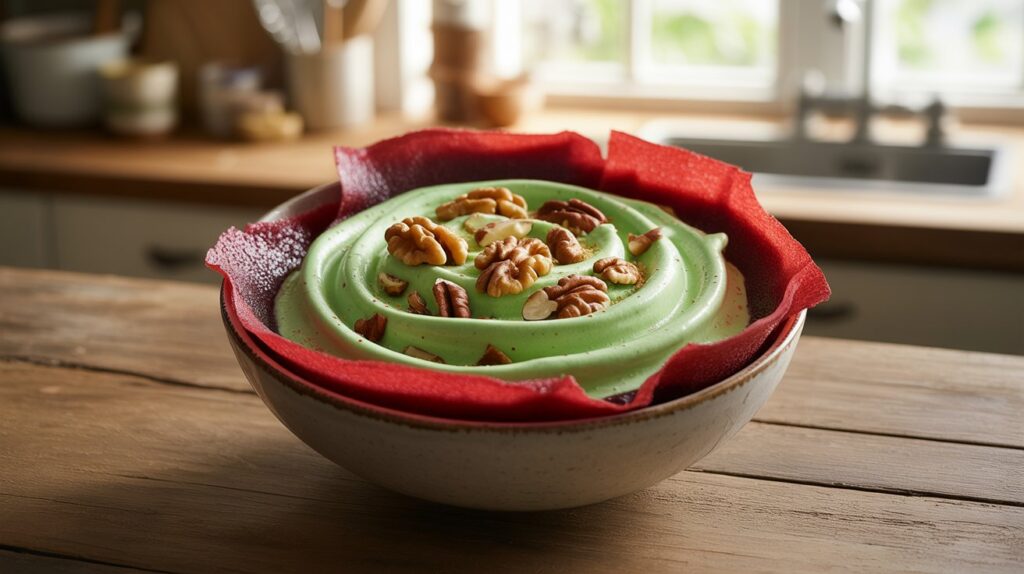
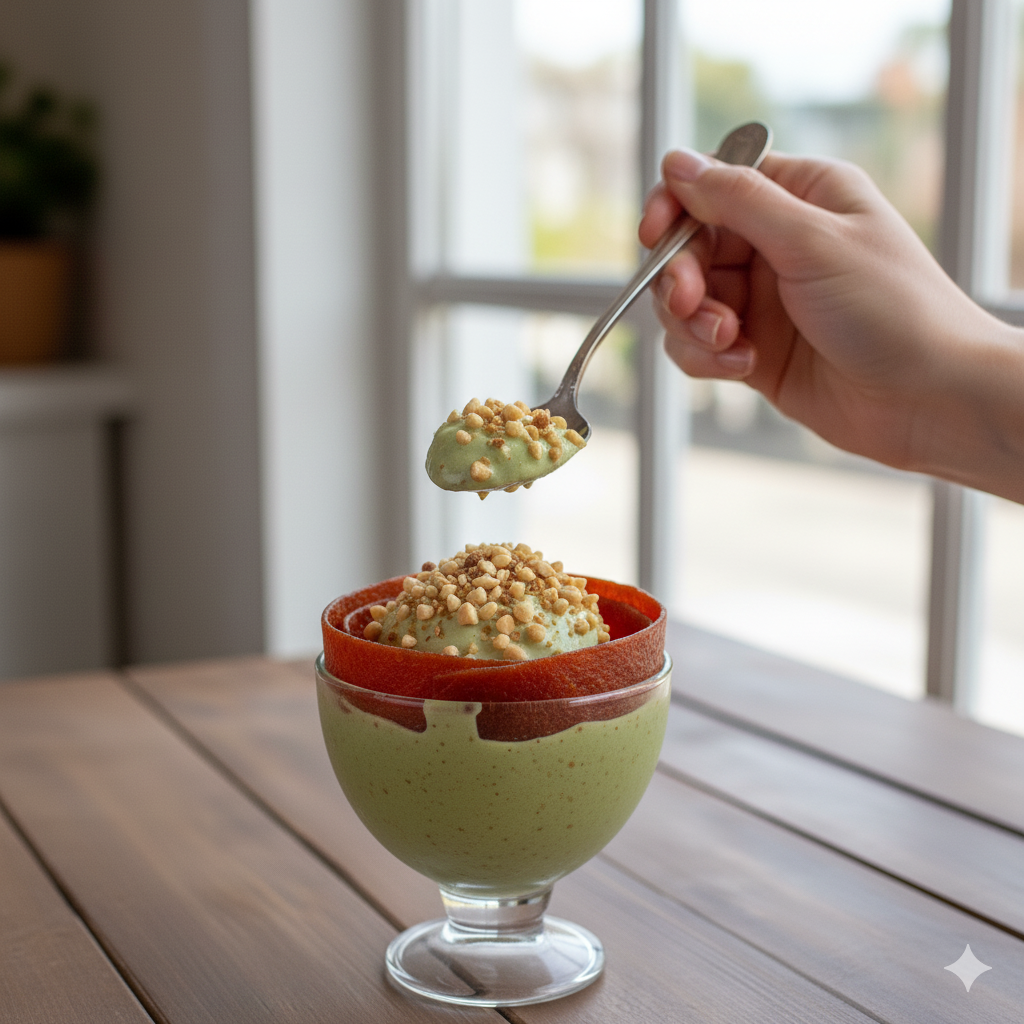
Line the Dessert Bowl: Take your chosen glass dessert bowl. Carefully pick up your prepared Fruit Leather Rolls. One by one, arrange them vertically around the inside edge of the bowl. Stand each roll up, pressing it gently against the glass so that they form a continuous wall or lining around the perimeter of the bowl. They should fit snugly.

Fill the Center with Smoothie: Using a spoon or a small spatula, carefully spoon the thick, creamy ice cream smoothie into the center of the bowl, within the ring of fruit leather rolls. Fill the bowl almost to the top, reaching the level of the fruit leather. Gently smooth the top of the smoothie with the back of your spoon to create a neat, appealing surface.

Add Your Final Touches: Now for the delicious toppings! Generously sprinkle the chopped healthy nuts (like walnuts, pecans, or almonds) over the top of the smoothie. If you’re using chopped dried fruit, sprinkle that on as well.

Serve Immediately for Best Enjoyment: This dessert is at its absolute best when served right away. The ice cream smoothie will be perfectly cold and thick, and the fruit leather rolls will be ready to complement its creamy texture. Enjoy your beautiful and healthy creation!


Bowl lined with fruit leather rolls

Benefits With Fruit Leather Rolls

Wholesome and Nutritious

This recipe is packed with natural goodness. The Fruit Leather Rolls are made from 100% real fruit, providing essential vitamins and fiber without any added sugars or preservatives. The ice cream smoothie base uses frozen bananas for a creamy texture and natural sweetness, while the addition of spinach and protein powder boosts the nutritional content.


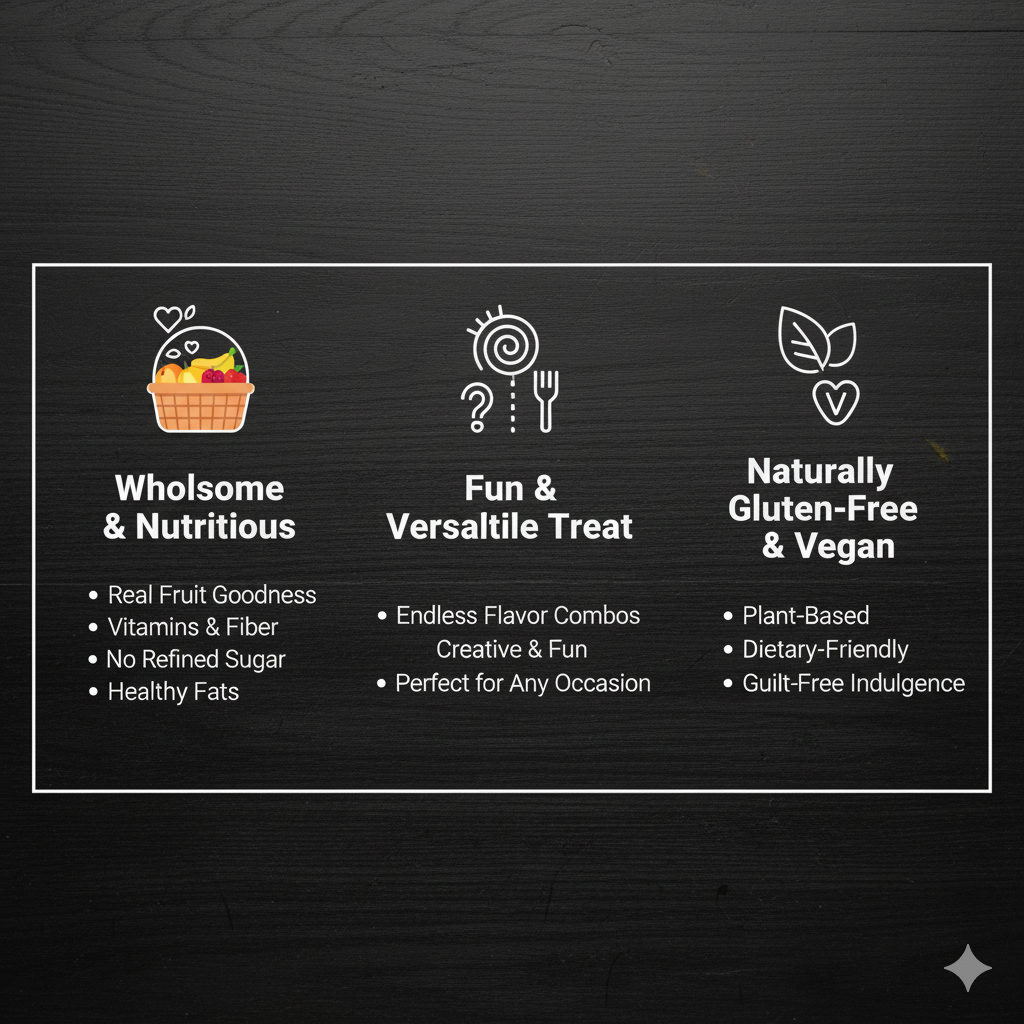
Fruit Leather Rolls are Versatile Treat

One of the best parts about this recipe is how much you can customize it. The flavor combinations are nearly endless, allowing you to create new and exciting versions every time you make it. It’s a great way to use up overripe fruit and get creative in the kitchen.

Naturally Gluten-Free and Vegan

This entire recipe is naturally gluten-free and vegan, making it a perfect dessert option for those with dietary restrictions. It’s a guilt-free pleasure that doesn’t compromise on taste or quality.


Fruit Leather Rolls Ice Cream Smoothie in a bowl

Variations: Make It Your Own

ComponentVariationDescription
Fruit LeatherTropicalUse mango or pineapple for a vibrant, sweet flavor.
Autumn SpiceAdd a pinch of cinnamon or nutmeg to apple or pumpkin purée.
Ice Cream SmoothieChocolate Peanut ButterUse cocoa powder and peanut butter for a rich, indulgent flavor.
Berry BlissBlend frozen berries with the banana for a fruity, pink smoothie.
ToppingsSeed MixSprinkle with chia seeds, flax seeds, or pumpkin seeds for extra crunch and nutrients.
Coconut FlakesAdd toasted coconut flakes for a tropical touch.

Final Thoughts for Fruit Leather Rolls

Creating these Fruit Leather Rolls Ice Cream Smoothies is a fun and rewarding process that results in a truly spectacular dessert. It’s a testament to the fact that healthy eating doesn’t have to be boring or complicated. By using whole, natural ingredients, you can craft a treat that is both visually stunning and incredibly delicious. This recipe is more than just a dessert; it’s an experience that brings a little bit of natural sweetness and beauty to your day. Give it a try, and let your creativity shine!


Fruit Leather Rolls Ice Cream Smoothie being enjoyed at a table

Frequently Asked Questions (FAQs)

Q: Can I use different fruits for the fruit leather?

A: Yes, absolutely! This recipe is incredibly versatile. Any fruit that purées smoothly will work well. Just be aware that fruits with high water content (like watermelon) might take longer to dehydrate. Berries, apples, pears, and stone fruits are all excellent choices.

Q: How do I store leftover fruit leather?

A: If you have any leftover fruit leather, you can store it in an airtight container at room temperature for up to two weeks. For longer storage, you can keep it in the refrigerator for up to a month. It’s a great snack to have on hand!


References

  1. National Library of Medicine – Fruit Leathers
  2. Healthline – How to Dehydrate Food
  3. Medical News Today – What are the benefits of eating healthy?

Recent Posts


No Bake – Simple And Delicious Fruit Salad Crumble


This article will guide you in creating a show-stopping Fruit Salad Crumble that requires absolutely no baking. You’ll learn to layer vibrant mango, juicy strawberries, and plump blueberries with a creamy Greek yogurt sauce, topped with a satisfyingly crunchy crumble. This innovative Fruit Salad Crumble is a guilt-free dessert that is as easy to make as it is delightful to eat.


The image shows a Fruit salad crumble with a yoghurt sauce.
Fruit Salad Crumble

A Healthier Twist on a Classic Crumble

Tired of complicated recipes that require a long list of ingredients and hours in the kitchen? This recipe for a no-bake Fruit Salad Crumble is the perfect solution for busy days when you crave something sweet and wholesome. It’s the ideal dish to satisfy your dessert cravings without any of the fuss of a traditional baked crumble. We’re combining the best of a fresh fruit salad with a crunchy, delicious topping for a texture and flavor combination that will surprise and delight you.

What makes this recipe a game-changer is its simplicity. There is no need to preheat the oven or wait for a long baking time. Every single step is quick and straightforward, allowing you to whip up a beautiful and delicious dessert in minutes. It’s perfect for a quick snack, a refreshing dessert after a meal, or even a wholesome breakfast to start your day off right. The best part is that you can have this amazing dessert ready to eat in the time it takes you to chop some fruit.


The gallery shows fresh mangoes, blueberries in a bowl and strawberries.


Layers of Flavor and Texture in Fruit Salad Crumble

This dish is a testament to how simple, fresh ingredients can come together to create something truly extraordinary. The vibrant colors of the fruit aren’t just beautiful; they also signal a wide array of vitamins and nutrients that are fantastic for your body. The creamy yogurt sauce adds a delightful tang and a smooth texture, while the hand-crushed topping provides a satisfying crunch that makes every bite an adventure. It’s a multi-layered experience that feels indulgent but is secretly a powerhouse of health benefits.

One of the great things about this Fruit Salad Crumble is its versatility. You can easily adapt the recipe to use whatever fruits you have on hand, making it a great way to use up ingredients and reduce food waste. Whether you’re a seasoned chef or a complete beginner in the kitchen, the clear, step-by-step instructions will guide you to a perfect result every time. We will show you how to layer these ingredients beautifully, creating a visually stunning dessert that is as delicious as it looks.

Get ready to transform your approach to dessert. This recipe for a no-bake Fruit Salad Crumble is about to become a new favorite in your kitchen. It’s simple, quick, and incredibly tasty. So grab your ingredients, and let’s start creating this refreshing and healthy treat!


The gallery shows a bowl of walnuts, rolled oats and almonds.


No Bake Fruit Salad Crumble: Your Go-To Dessert


Time to Prepare: 15 minutes

Time to Cook/Blend: 0 minutes (no cooking required)

Servings: 4


Nutritional Information

This Fruit Salad Crumble recipe is more than just a sweet treat; it’s a powerhouse of nutrition. The vibrant fruits are a fantastic source of natural sugars, providing a quick energy boost, and are loaded with essential vitamins, minerals, and antioxidants. The Greek yogurt base offers a significant amount of lean protein and beneficial probiotics, which are vital for a healthy gut and digestive system. The crunchy topping provides a mix of healthy fats from the nuts, along with dietary fiber and complex carbohydrates from the oats, which contributes to long-lasting satiety and helps to stabilize blood sugar levels.


Equipment

  • Large mixing bowl
  • Serving bowls or clear glasses for layering
  • Cutting board and sharp knife
  • Small bowl for the topping
  • Fork or rolling pin for crushing
  • Spoon for mixing and serving

Ingredients

For the Fruit Salad

  • 1 ripe mango, peeled and cubed
  • 1 cup strawberries, hulled and sliced
  • 1 cup green grapes, halved
  • 1 cup black grapes, halved
  • 2 ripe bananas, sliced into chunks
  • 1 cup blueberries
  • 1 kiwi, peeled and sliced (for a sour contrast)
  • 1 (15-ounce) can of peaches, drained and diced (optional, for a sweeter fruit option)

For the Greek Yogurt Sauce

  • 2 cups plain Greek yogurt
  • 2 tablespoons honey or maple syrup
  • 1 teaspoon vanilla extract

For the No-Bake Crumble Topping

  • 1/2 cup rolled oats
  • 1/4 cup walnuts
  • 1/4 cup cashews
  • 1/4 cup ground almond
  • 1/2 teaspoon cinnamon
  • 1 tablespoon of melted coconut oil or honey (to bind the topping)


Step-by-Step No-Bake Instructions for Fruit Salad Crumble

Prepare the Fruit Salad

Begin by washing all your fresh fruits thoroughly. Prepare each fruit as described in the ingredients list (cubing the mango, slicing the strawberries and bananas, halving the grapes, and slicing the kiwi). In a large mixing bowl, gently combine all the prepared fruits. If you are using canned fruit, be sure to drain the syrup completely before adding it to the bowl. A quick tip: for the best texture, avoid using frozen fruits. Once thawed, they can become very watery and make the entire dessert soggy, which is not ideal for this recipe.

Make the Greek Yogurt Sauce

In a separate bowl, combine the plain Greek yogurt, honey or maple syrup, and vanilla extract. Use a whisk or a fork to stir the ingredients together until the sauce is smooth and the sweetener is fully dissolved. Taste the sauce and adjust the sweetness if you like. The sauce should have a pleasant creamy and tangy flavor that complements the sweetness of the fruit.

Create the No-Bake Crumble Topping

This is the most fun and creative part of the recipe! In a small bowl, combine the rolled oats, walnuts, cashews, and ground almonds. Using the back of a large spoon or a rolling pin, gently crush the nuts and oats until you have a coarse, crumble-like texture. It should not be a fine powder; you want to leave some larger pieces for a satisfying crunch. Stir in the cinnamon. Now, add the melted coconut oil or honey and mix thoroughly with a fork. This step is crucial for giving the topping the appearance of a baked crumble, making it stick together in clumps rather than just being a powder.

Assemble and Layer

It’s time to put it all together. You can use a large glass bowl for a beautiful centerpiece or individual glasses for single-serving portions. Start by adding a thick layer of your mixed fruit to the bottom of the dish. Next, generously spoon a layer of the prepared Greek yogurt sauce over the fruit, ensuring it covers everything. Finally, sprinkle the no-bake crumble topping evenly and thickly over the yogurt layer, ensuring you get a good, crunchy coating in every spoonful.


The images show fruit salad without the yoghurt sauce or the topping.


Chill and Serve

For the best results, you can serve this dessert immediately to enjoy the freshness of the fruit and the crunchy topping. However, if you want the flavors to meld together even more, you can place the assembled dessert in the refrigerator for about 30 minutes. Serve it chilled, and get ready to enjoy a delicious, no-fuss dessert!


    The Benefits of This Fruit Salad Crumble

    This Fruit Salad Crumble is a prime example of a dish that is both delicious and incredibly good for you. It’s a complete dessert that provides a wide range of health benefits with every bite. The base of the crumble is a celebration of fruits, each bringing its own nutritional gifts. Blueberries and strawberries are packed with antioxidants, which fight free radicals in the body and help reduce inflammation. The mango and kiwi are bursting with Vitamin C, a powerful nutrient essential for a strong immune system and healthy skin. The grapes and bananas provide natural sugars for quick energy, while also offering fiber and potassium.

    Beyond the fruit, the Greek yogurt sauce adds a layer of beneficial nutrients. It is an excellent source of high-quality protein, which helps with muscle repair and keeps you feeling full. Greek yogurt also contains probiotics, which are the “good bacteria” that are vital for maintaining a healthy and balanced gut microbiome. A healthy gut is linked to a stronger immune system, better digestion, and even improved mental clarity.

    Healthy Fats and Fiber for a Better You in This Fruit Salad Crumble

    The no-bake crumble topping further elevates this dessert’s health profile. Walnuts and cashews are a fantastic source of healthy monounsaturated fats, which are known to support heart health by helping to lower bad cholesterol levels. They also contain omega-3 fatty acids, which are essential for brain health and cognitive function. The rolled oats provide a great source of soluble fiber, which aids in digestion and can help stabilize blood sugar levels.

    This dish is a testament to the fact that you can enjoy a sweet treat without compromising your health. By choosing wholesome, nutrient-dense ingredients, you can create a dessert that not only tastes incredible but also actively contributes to your well-being. It is a fantastic alternative to traditional desserts that are often high in refined sugars and unhealthy fats.


    The gallery shows the nutritional benefits of fruit and greek yoghurt.


    Fruit Salad Crumble Variations

    VariationDescription
    Citrus ZingAdd a few tablespoons of orange or grapefruit juice to the yogurt sauce for a sharper, more tangy flavor.
    Tropical ParadiseReplace some of the fruits with pineapple chunks, passion fruit, and shredded coconut for a tropical twist.
    Nut-Free CrunchIf you have nut allergies, you can replace the nuts in the topping with pumpkin seeds and sunflower seeds.
    Spicy KickAdd a pinch of ground ginger or cardamom to the crumble topping for a warm, spicy flavor that complements the fruits.
    Chocolate IndulgenceStir a tablespoon of unsweetened cocoa powder into the yogurt sauce or add some dark chocolate chips to the crumble topping.

    Final Thoughts: A Simple Recipe, Endless Possibilities

    This recipe for a no-bake Fruit Salad Crumble proves that healthy desserts can be both easy and incredibly delicious. It’s a versatile dish that encourages creativity in the kitchen and provides a well-balanced meal in a single bowl. Don’t be afraid to make it your own by experimenting with different fruits or toppings to suit your taste. It’s a fantastic solution for a quick snack or a beautiful dessert for guests. This recipe will inspire you to have fun in the kitchen and enjoy a simple, sweet treat.


    Frequently Asked Questions

    Q: Can I make this a day ahead of time?

    A: You can prepare the fruit salad and the crumble topping separately and store them in airtight containers in the refrigerator. Wait to combine them until just before you plan to serve to ensure the topping remains crunchy and the fruits stay fresh.

    Q: What if I don’t have fresh fruit available?

    A: This recipe is best with fresh fruit, but you can use high-quality canned fruit, such as peaches or pears, as a healthy alternative. Just be sure to drain the syrup completely to avoid an overly sweet or watery dessert. Avoid using frozen fruit, as it can get soggy and watery after thawing, which will not work for this recipe’s texture.


    References

    1. Harvard T.H. Chan – Vegetables & Fruits
    2. Mayo Clinic – Dietary Fiber
    3. American Heart Association – Healthy Eating

    Recent Posts


    Frozen Cheesecake Lollies Made Simple


    Cheesecake lollies are a fun and refreshing way to enjoy the taste of cheesecake without the fuss of baking. This recipe keeps things light, healthy, and easy for everyone. Whether made with cream cheese or Greek yogurt, cheesecake lollies are a treat you’ll want to make again and again.


    Close-up of creamy cheesecake lollies on wooden sticks, surrounded by oats, dates, pecans, and soft cheese on a clean background.
    Cheesecake Cream Lollies

    Cheesecake Lollies That Spark Sweet Conversations

    “Can you believe these are homemade?” one friend asked as she took a bite of the frozen cheesecake lolly. Another chimed in, “They taste so rich and creamy, but not heavy at all!” That’s the beauty of cheesecake lollies — all the indulgence of cheesecake in a lighter, frozen, and fun-to-eat form.

    If you love cheesecake but find it too heavy, too rich, or just too time-consuming to bake, this recipe is your answer. Cheesecake lollies are not only easy to make but also versatile. They’re perfect for hot summer days, afternoon snacks, or even a playful dessert to serve at dinner parties.

    What makes them even better is that you can make them healthier without sacrificing flavor. By swapping out full-fat cream cheese for low-fat cream cheese or Greek yogurt, using natural sweeteners like stevia or erythritol, and creating a simple base from oats, nuts, and dates, you can enjoy cheesecake lollies that are creamy, refreshing, and guilt-free.

    These little frozen desserts are also completely customizable. You can add fruit, drizzle them with chocolate, or sprinkle them with crushed nuts. The recipe we’ll explore here keeps things simple yet satisfying — but once you’ve mastered the basics, the possibilities are endless.

    So, whether you’re someone who has never baked a cheesecake or someone who just wants a healthier frozen dessert, this step-by-step guide will make your cheesecake lollies a success from the very first batch.


    Time to Prepare For Cheesecake Lollies

    15 minutes (plus 4–6 hours freezing time)

    Time to Cook/Blend

    5 minutes

    Servings

    Makes 8 cheesecake lollies


    Nutritional Information (per lolly, approx.)

    • Calories: 160
    • Protein: 5 g
    • Carbohydrates: 18 g
    • Sugars: 10 g
    • Fat: 7 g
    • Fiber: 3 g

    Equipment You’ll Need

    • Food processor (for base mixture)
    • Blender (for filling)
    • Lolly molds (8 standard-sized)
    • Lolly sticks
    • Mixing bowls
    • Spoon (for pressing and scooping)
    • Optional: parchment paper and baking sheet (if making without molds)

    Ingredients For Cheesecake Lollies

    • 8 oz (225 g) low-fat cream cheese or plain Greek yogurt
    • 1 cup (240 ml) milk of choice (dairy or unsweetened almond milk)
    • ¼ cup honey, maple syrup, or natural sweetener (like stevia/erythritol)
    • 1 tsp vanilla extract
    • ½ cup oats
    • ½ cup pitted dates
    • ½ cup walnuts or almonds
    • Pinch of salt
    • Optional: fresh fruit pieces (berries, mango, banana)
    • Optional: melted dark chocolate for drizzling

    A closer look at the essentials for cheesecake lollies—smooth cream cheese or yogurt, natural sweeteners, and wholesome oats, nuts, and dates for the base.


    Step-by-Step Instructions For Cheesecake Lollies

    Step 1: Prepare the Base

    1. Place the oats, dates, and nuts into a food processor. Blend until the mixture comes together into a slightly sticky, crumb-like texture.

    Step 2: Line the Molds

    1. Spoon a small amount of the base mixture into each lolly mold, pressing it down gently with the back of a spoon.

    Step 3: Blend the Filling

    1. In a blender, combine cream cheese (or Greek yogurt), milk, sweetener, vanilla extract, and a pinch of salt. Blend until smooth and creamy.

    Step 4: Add Fruit (Optional)

    1. Chop small pieces of fruit and place them into the molds over the base layer before adding the filling.

    Step 5: Fill the Molds

    1. Pour the cheesecake filling into the molds, leaving a little space at the top.

    Step 6: Insert Sticks

    1. Place lolly sticks into each mold, ensuring they are upright and centered.

    Step 7: Freeze

    1. Freeze for at least 4–6 hours, or overnight for the best texture.

    Step 8: Remove and Serve

    1. To release, briefly dip molds in warm water (without submerging the lollies) before pulling them out.

    Step 9: Garnish (Optional)

    1. Drizzle with melted chocolate or sprinkle nuts before serving.


    Benefits of Cheesecake Lollies

    Cheesecake lollies aren’t just tasty — they also come with some surprising benefits:

    • Lighter Indulgence: By using Greek yogurt or low-fat cream cheese, you can enjoy a creamy texture without the heaviness of baked cheesecake.
    • Supports Healthy Digestion: The oat and date base provides natural fiber, which aids digestion and helps you feel satisfied longer.
    • Steady Energy Boost: Dates and nuts offer natural sweetness and healthy fats, giving you lasting energy instead of a sugar crash.
    • Protein-Packed Treat: Greek yogurt boosts protein, making this dessert more filling and supportive of muscle repair.
    • Better for the Heart: Walnuts and almonds add omega-3 fatty acids and antioxidants, which contribute to heart health.
    • Portion Control Built-In: Each lolly is pre-portioned, making it easy to enjoy dessert without overindulging.
    • Family-Friendly: Kids and adults alike enjoy these frozen treats, making them a versatile snack or dessert.

    This gallery highlights the key health benefits of cheesecake lollies in a simple, visual way. From being a protein-packed treat that supports muscle recovery, to offering a lower-sugar, guilt-free indulgence, and finally giving an energy and satiety boost with wholesome ingredients like oats, nuts, and fruit — these lollies prove that dessert can be both delicious and nourishing.


    Variations For Cheesecake Lollies

    VariationHow to Make It
    Berry SwirlAdd blended raspberries or blueberries into the cheesecake mix for a fruity twist.
    Chocolate LoversMix cocoa powder into the filling and drizzle melted dark chocolate on top.
    Tropical DelightAdd chopped mango and coconut flakes for a refreshing summer version.
    Nutty CrunchSprinkle chopped almonds or pistachios into the molds before freezing.
    Vegan SwapUse dairy-free yogurt and maple syrup instead of cream cheese and honey.

    Enjoy cheesecake lollies three ways: fresh with strawberries, refreshing with mint and berries, or crunchy with a nut-coated base. A fun treat for every taste!


    Final Thoughts On Cheesecake Lollies

    Cheesecake lollies are proof that dessert doesn’t have to be complicated to be delicious. With simple ingredients, you can create a refreshing frozen treat that’s healthier and lighter than traditional cheesecake.

    Whether you enjoy them plain, fruity, or drizzled with chocolate, these lollies are bound to become a staple in your freezer. They’re versatile, fun to make, and perfect for both adults and children.

    So don’t wait — gather your ingredients and start freezing. Your next favorite dessert is only a few hours away!


    Frequently Asked Questions (FAQs)

    Q1: Can I make these cheesecake lollies without a lolly mold?
    Yes! Use small paper cups and wooden sticks as an easy alternative.

    Q2: How long can I store cheesecake lollies in the freezer?
    They’ll keep well for up to 2–3 weeks in an airtight container.

    Q3: Can I use full-fat cream cheese instead of low-fat?
    Yes, it makes them creamier and richer, but also higher in calories.

    Q4: Can I make these vegan-friendly?
    Absolutely — swap dairy with plant-based yogurt and sweeten with maple syrup.


    References

    1. Harvard T.H. Chan School of Public Health – In search of a milk alternative
    2. Mayo Clinic – Artificial sweeteners
    3. American Heart Association – Go Nuts (But Just a Little!)

    Recent Posts


    Guilt-Free Chocolate Avocado Ice Cream You’ll Love

    This creamy chocolate avocado dessert is everything you want in a guilt-free ice cream: rich, silky, naturally sweetened, and loaded with healthy fats. Serve it with fresh berries, coconut flakes, or chopped almonds for the perfect clean-eating treat!


    The image shows chocolate avocado in a square, white, casserole dish with ice cream on the  spoon, and serving bowls. It is topped with green pistachio nuts. The image also shows this as ice lollies.
    Avocado Chocolate

    A Healthy Indulgence Without the Guilt

    If you’ve ever wished you could dive into a bowl of ice cream and still feel great about it afterward—this is your moment. Say hello to chocolate avocado ice cream, your new go-to treat that satisfies every craving without a drop of dairy, refined sugar, or guilt. It’s smooth, chocolatey, nutrient-packed, and so indulgent you won’t believe it’s actually good for you.

    Made with ripe avocados as the creamy base, this dessert is loaded with heart-healthy fats, antioxidants, and fiber. Avocados blend into a luxuriously smooth texture, while raw cacao or unsweetened cocoa brings that rich, deep chocolate flavor we all love. Natural sweeteners like maple syrup or dates keep it clean without sacrificing taste. It’s a no-churn recipe that comes together in minutes—and disappears just as fast.

    Whether you’re following a dairy-free diet, trying to cut back on sugar, or just looking for a better way to satisfy your sweet tooth, this dessert delivers on all fronts. It’s also an excellent option for anyone with food sensitivities or dietary restrictions, since it’s naturally gluten-free, vegan, and paleo-friendly with just a few swaps. Best of all, no ice cream maker is needed—just a blender, freezer, and a spoon ready to scoop.

    This recipe is perfect for hot summer days, clean dessert cravings, or sharing with guests who won’t believe there’s avocado in it. You can even prep a big batch in advance and store it for when chocolate calls. And if you’ve got kids, they’ll never know they’re eating something healthy. With a rich flavor profile and decadent texture, this is not just an alternative—it’s an upgrade.


    Time to Prepare For Chocolate Avocado

    10 minutes

    Time to Blend & Freeze

    4–6 hours (freezing time)


    Ingredients For Chocolate Avocado

    • 2 ripe avocados
    • 1/2 cup unsweetened cocoa powder or raw cacao
    • 1/2 cup full-fat coconut milk (from a can)
    • 1/3 cup maple syrup (or 4–5 Medjool dates, pitted)
    • 1 teaspoon vanilla extract
    • Pinch of sea salt
    • Optional: 2 tablespoons dark chocolate chips or cacao nibs

    Instructions For Chocolate Avocado

    1. Cut the avocados in half, remove the pits, and scoop the flesh into a blender.
    2. Add cocoa powder, coconut milk, maple syrup (or honey), vanilla extract, and sea salt.
    3. Blend on high until the mixture is smooth and creamy. Scrape down the sides as needed to ensure everything is well combined.
    4. Taste and adjust sweetness if necessary.
    5. Stir in optional chocolate chips or cacao nibs if using.
    6. Transfer the mixture into a freezer-safe container and smooth the top.
    7. Cover and freeze for at least 2–3 hours, or until firm.
    8. Before serving, let it sit at room temperature for 10–15 minutes to soften slightly.
    9. Scoop into bowls or cones and enjoy your guilt-free chocolate avocado ice cream!

    Benefits of Chocolate Avocado Ice Cream

    🥑 Nutrient-Rich Ingredients

    Avocados are packed with monounsaturated fats, fiber, and vitamins like potassium and vitamin E, making this dessert a good-for-you indulgence.

    🍫 Antioxidant Boost

    Cocoa powder is rich in antioxidants, particularly flavonoids, which may help lower inflammation and improve heart health.

    🌿 Naturally Dairy-Free & Refined Sugar-Free

    This recipe is a fantastic option for those avoiding dairy or processed sugar, relying instead on coconut milk and natural sweeteners.

    🍦 No Ice Cream Maker Needed

    You only need a blender and a freezer, making this recipe super accessible for clean-eating beginners and seasoned foodies alike.


    Variations For Chocolate Avocado

    PreferenceVariation Idea
    Nut-FreeUse oat milk instead of almond milk
    Extra RichAdd a tablespoon of almond or peanut butter
    Vegan-FriendlyStick to maple syrup and coconut milk
    Low SugarUse stevia or monk fruit sweetener
    Texture BoostAdd chopped nuts or shredded coconut

    Frequently Asked Questions (FAQs)

    Q: Can I make this ice cream without a blender?

    A: A food processor can also work. Just make sure to blend thoroughly to achieve a smooth texture.

    Q: How long does this ice cream last in the freezer?

    A: It will keep well for up to 1 week in an airtight container. For best texture, allow it to thaw slightly before serving.


    Final Thoughts For Chocolate Avocado

    Chocolate avocado ice cream proves that dessert doesn’t have to be a guilty pleasure. With heart-healthy fats, antioxidants, and clean ingredients, this treat delivers everything you want in a dessert—flavor, texture, satisfaction—while still supporting your wellness goals.

    It’s also a crowd-pleaser. Whether you’re hosting a summer BBQ, celebrating a special occasion, or just craving something cold and chocolaty after dinner, this ice cream has your back. Try it once, and it just might replace your store-bought favorites.


    References


    Recent Posts