Cookie Consent by Free Privacy Policy Generator Update cookies preferences

Artichokes: 10 Health Benefits You Need to Know


Artichokes might not be the first veggie that comes to mind, but they’re packed with a ton of health benefits you won’t want to miss out on. From aiding digestion to supporting liver health, these leafy greens are nutritional powerhouses. Check out these 10 impressive perks of adding these to your plate!

Artichokes Boosts Nutrient Absorption


A plate of fresh artichokes surrounded by various colorful fruits and vegetables.

Artichokes are not just tasty; they play a big role in helping your body absorb nutrients. This unique vegetable is packed with fiber, which aids digestion and helps your body utilize the vitamins and minerals from other foods.

When you enjoy these alongside other nutrient-rich foods, you enhance your body’s ability to absorb those nutrients. This is especially important for vitamins like A, D, E, and K, which are fat-soluble. The healthy fats found in them can help with this absorption process.

Moreover, theys are rich in antioxidants, which can further support your overall health. They may help lower


Enhances Bone Health


A fresh artichoke surrounded by spinach, kale, cheese, and yogurt, highlighting nutritious foods that support bone health.

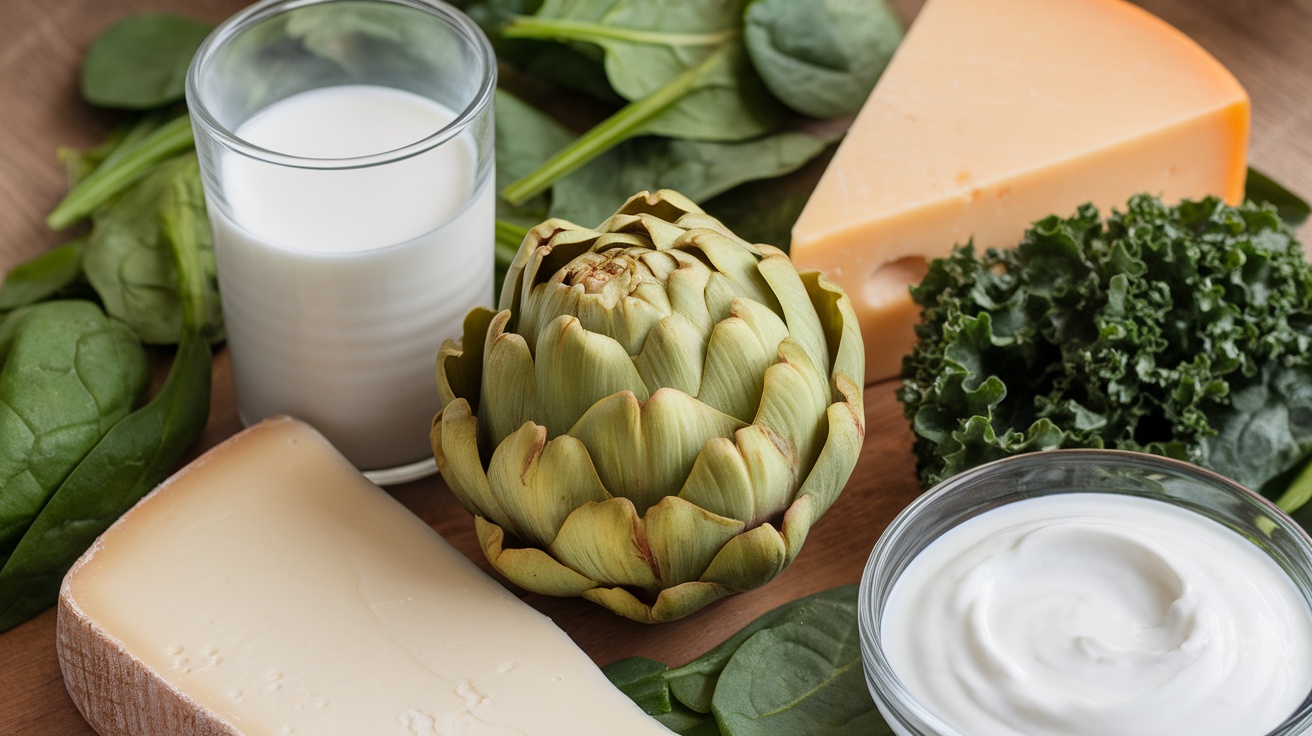
Artichokes are not just delicious; they also bring some serious benefits for your bones. Packed with nutrients, they can play a key role in maintaining bone density and strength.

In the image, you can see a fresh artichoke surrounded by other nutritious foods like spinach, kale, and dairy products. These ingredients work together to support bone health. Artichokes are rich in vitamin K, which is essential for bone metabolism and helps in calcium absorption.

Including these in your meals can be a tasty way to boost your intake of this important vitamin. Pair them with leafy greens or dairy for a well-rounded approach to bone health. Eating a variety of nutrient-rich foods ensures your body gets what it needs to keep your bones strong.


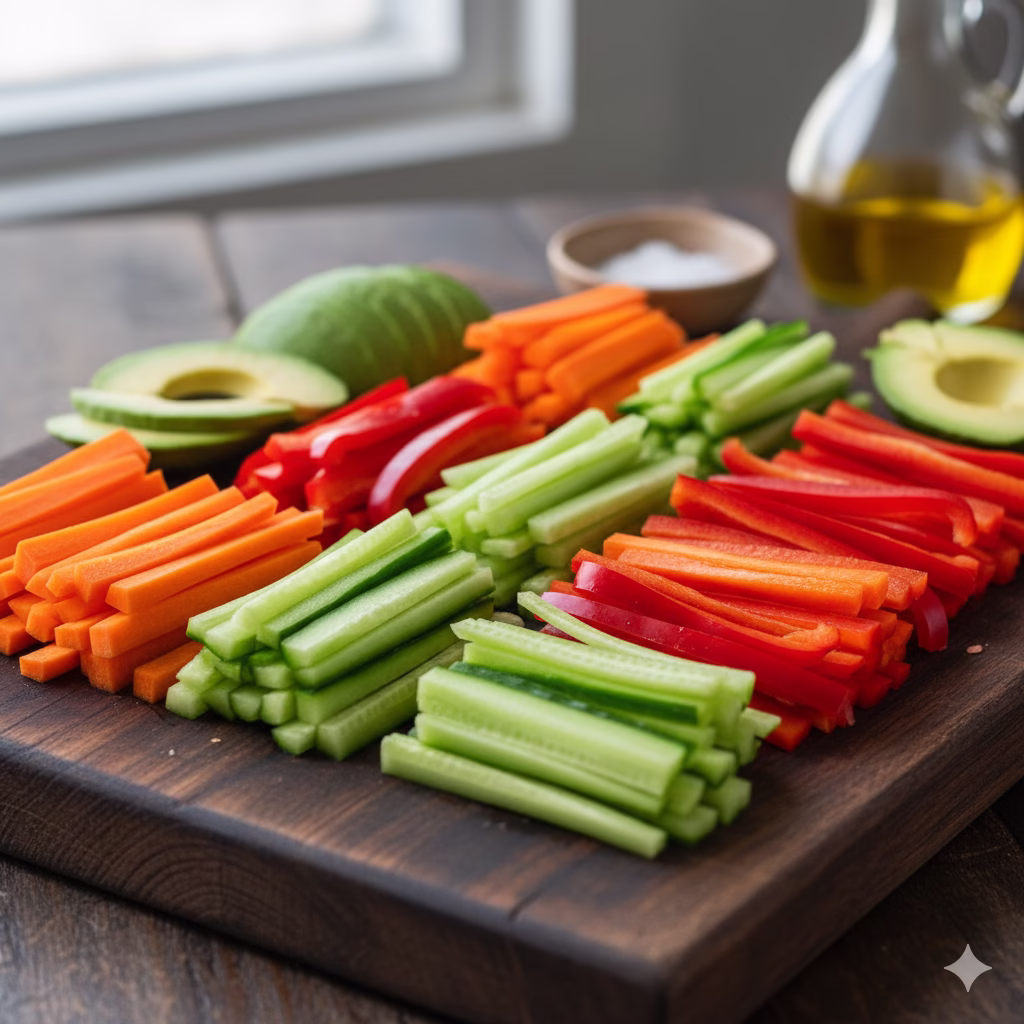
Artichokes Supports Digestive Health


A fresh artichoke on a wooden board with a colorful plate of vegetables in the background.

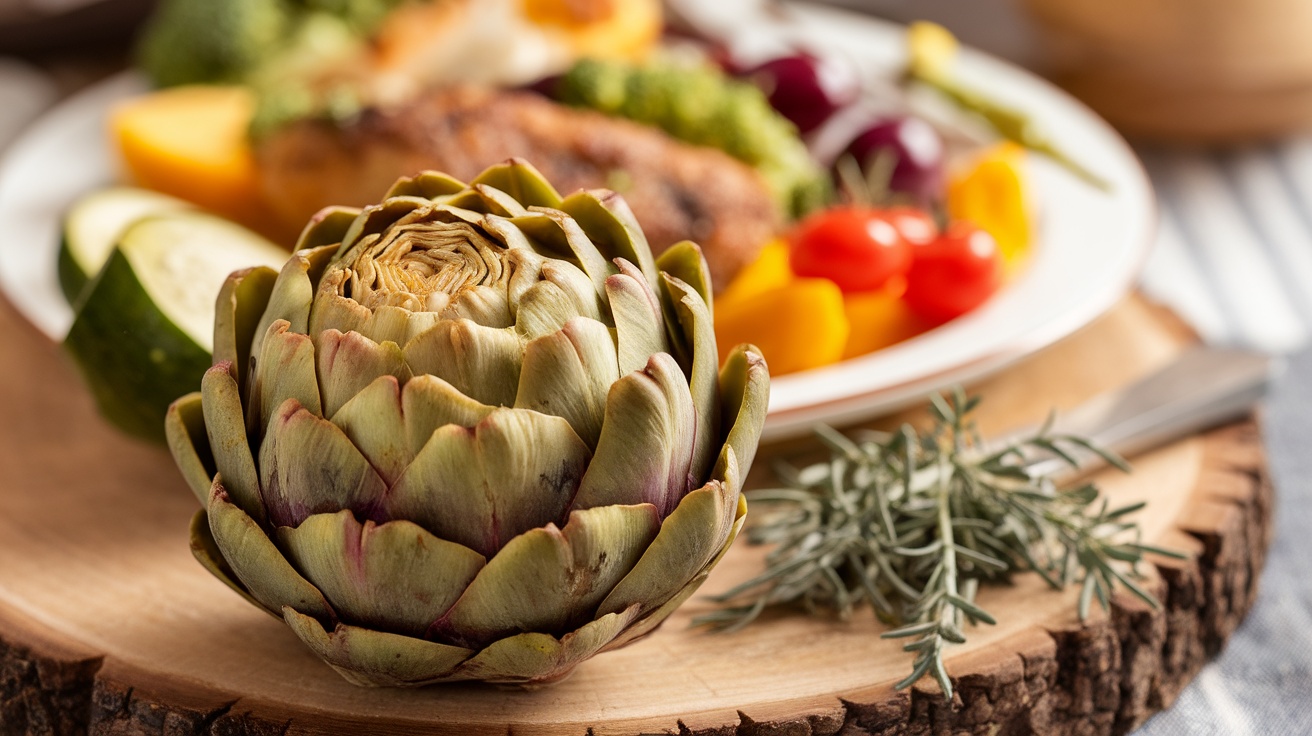
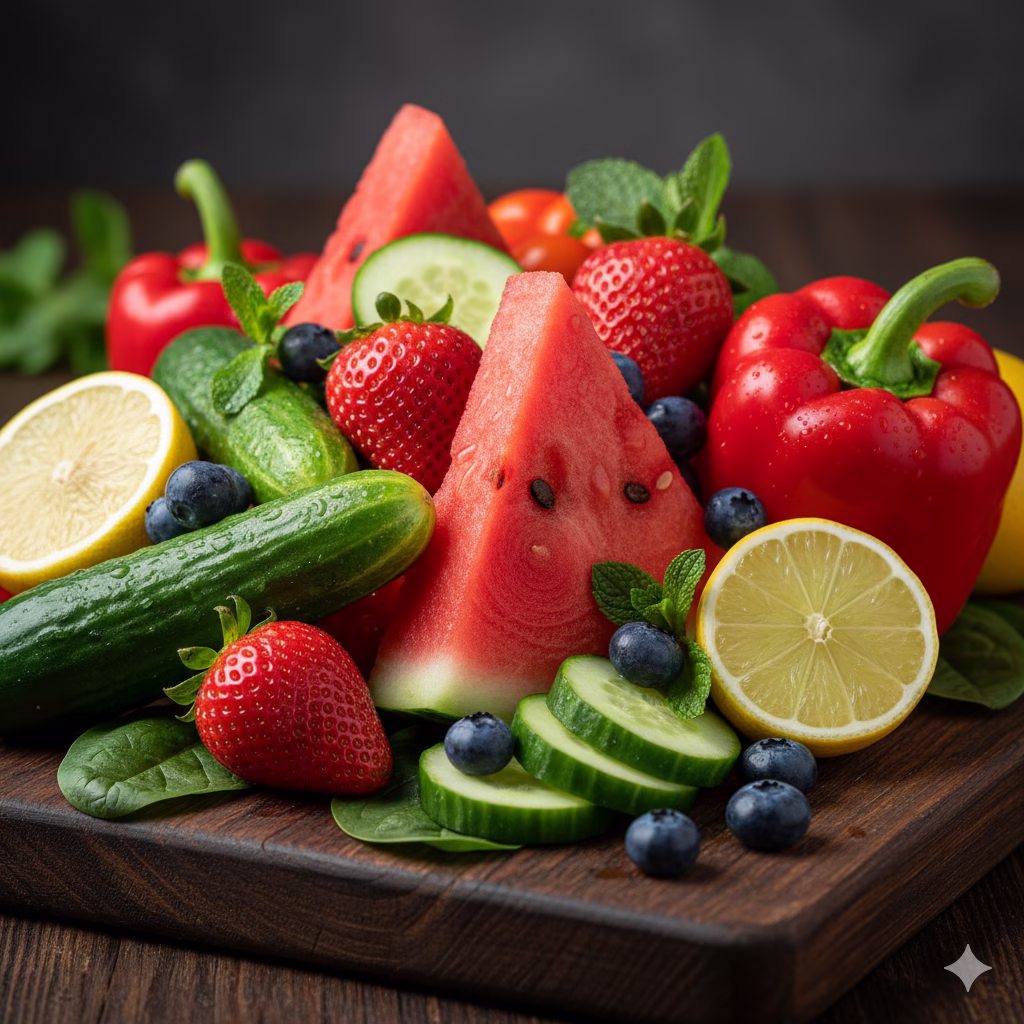
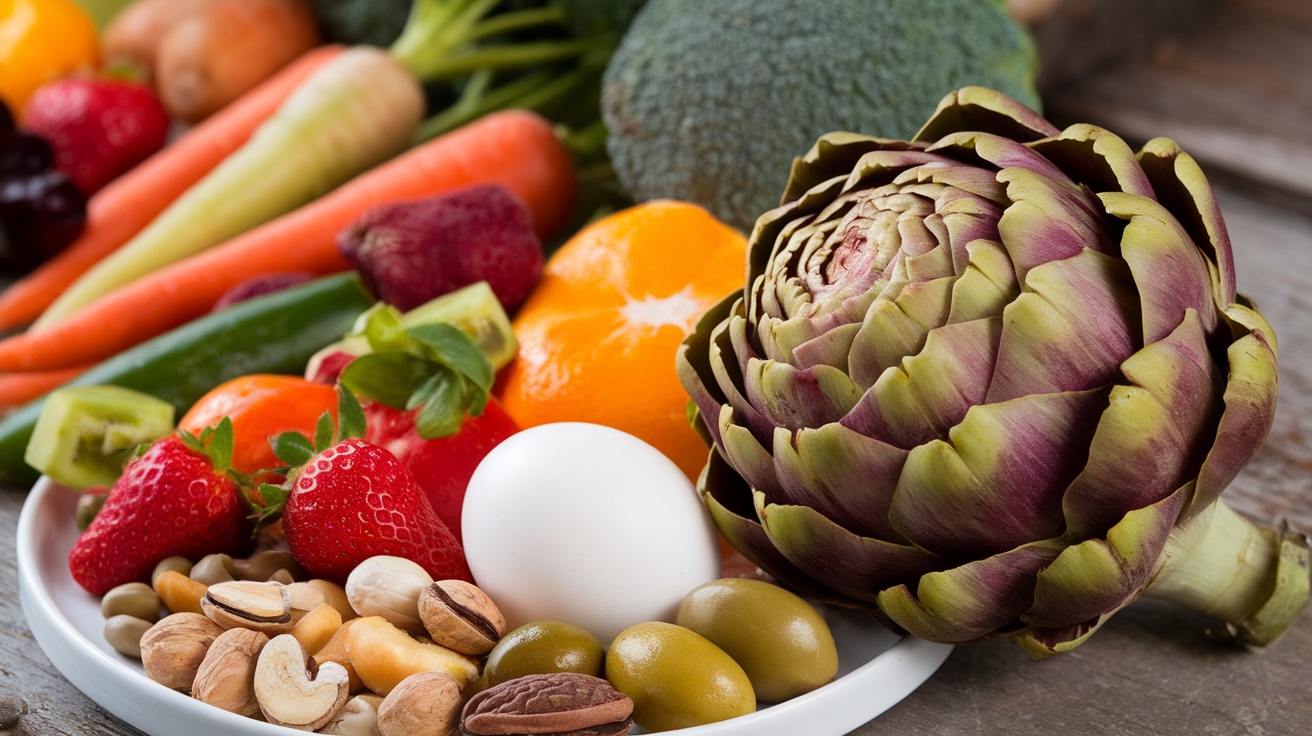
Artichokes are not just a tasty addition to your meals; they are also fantastic for your digestive health. This image shows a fresh artichoke, beautifully displayed alongside a colorful plate of vegetables. The vibrant colors and fresh ingredients highlight the importance of including artichokes in your diet.

This vegetable is rich in fiber, which is essential for a healthy digestive system. Fiber helps keep things moving smoothly in your gut, preventing constipation and promoting regularity. Eating these can aid digestion and help you feel lighter and more comfortable.

Moreover, they contain a unique compound called cynarin. This compound stimulates bile production in the liver, which is crucial for breaking down fats and absorbing nutrients. A healthy liver supports overall digestive health, making artichokes a smart choice for your meals.

For those dealing with digestive issues like Irritable Bowel Syndrome (IBS), artichokes may provide relief. Their high fiber content and natural antioxidants can help soothe the digestive tract and improve symptoms. So, if you’re looking for a delicious way to support your gut health, consider adding artichokes to your plate!


Artichokes Promotes Heart Health


Fresh artichokes with nuts, olive oil, and lemon on a wooden table.

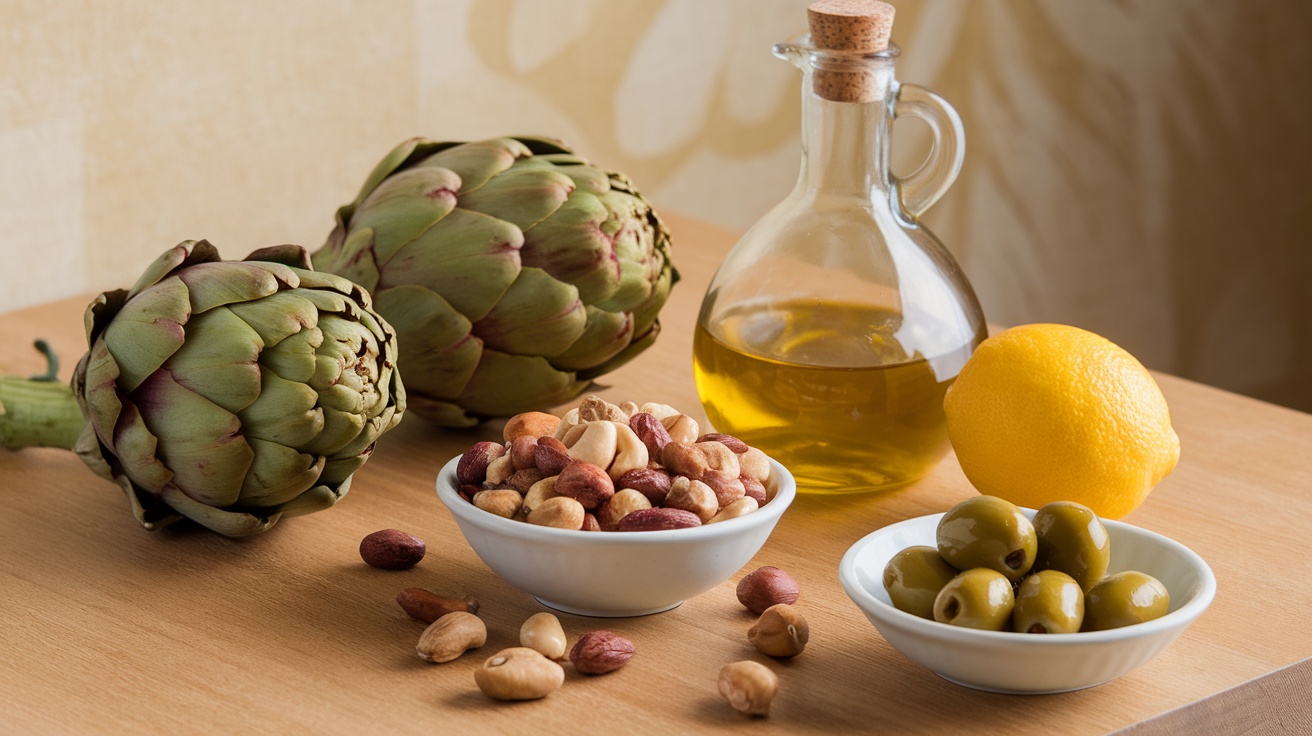
Artichokes are not just tasty; they are also great for your heart. These green vegetables are packed with nutrients that can help keep your heart in top shape. They contain fiber, which is essential for lowering cholesterol levels. Lowering ‘bad’ cholesterol (LDL) is crucial for reducing the risk of heart disease.

The image shows fresh artichokes alongside healthy ingredients like nuts, olive oil, and lemon. These foods complement artichokes well and contribute to heart health. Olive oil, for instance, is rich in healthy fats that can support cardiovascular function.

Artichokes are also high in antioxidants, which help combat oxidative stress in the body. This is important for maintaining overall heart health. Plus, they can help regulate blood pressure, making them a smart choice for anyone looking to improve their heart health.

Incorporating these into your diet can be simple. You can steam them, grill them, or toss them into salads. They not only taste great but also help manage blood sugar levels, making them a fantastic addition to any meal.


Rich in Antioxidants


A fresh artichoke surrounded by various fruits and vegetables, showcasing its vibrant color and health benefits.

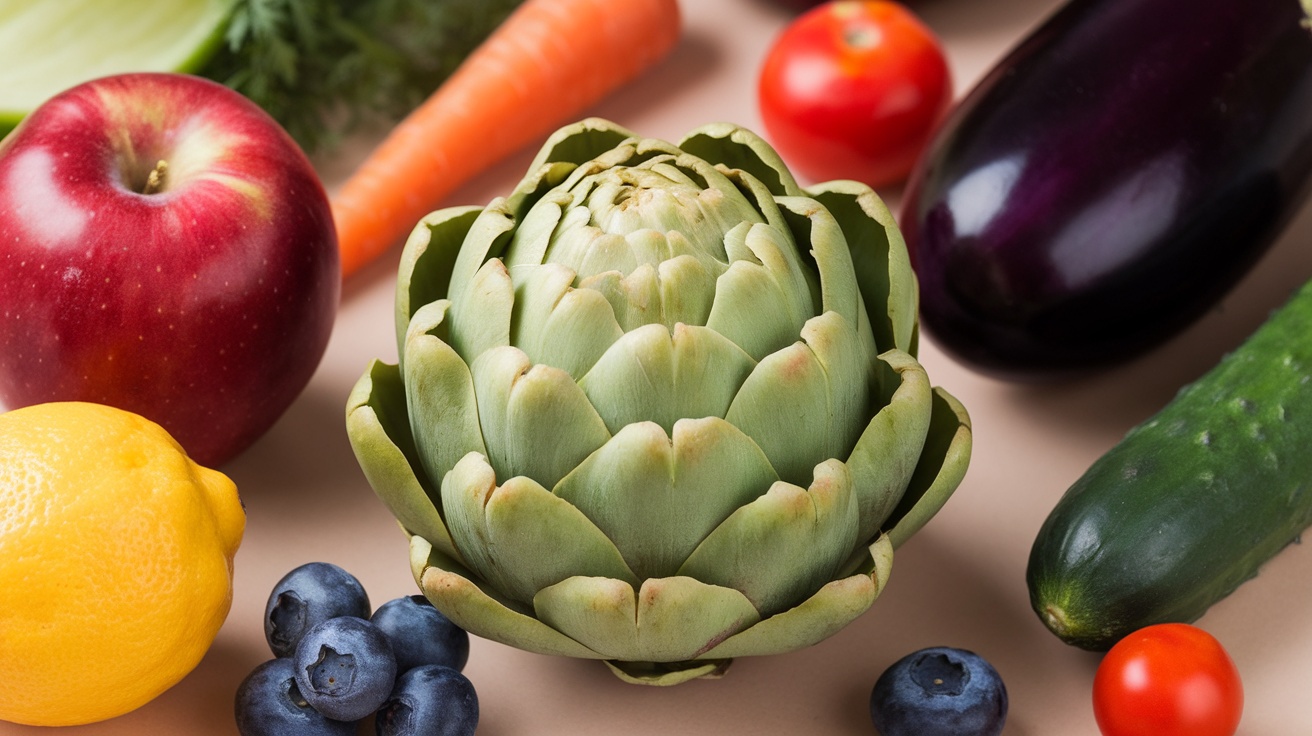
Artichokes are not just tasty; they are packed with antioxidants. These powerful compounds help fight free radicals in our bodies. Free radicals can cause damage to our cells, leading to various health issues. By including artichokes in your diet, you can boost your antioxidant intake and support your overall health.

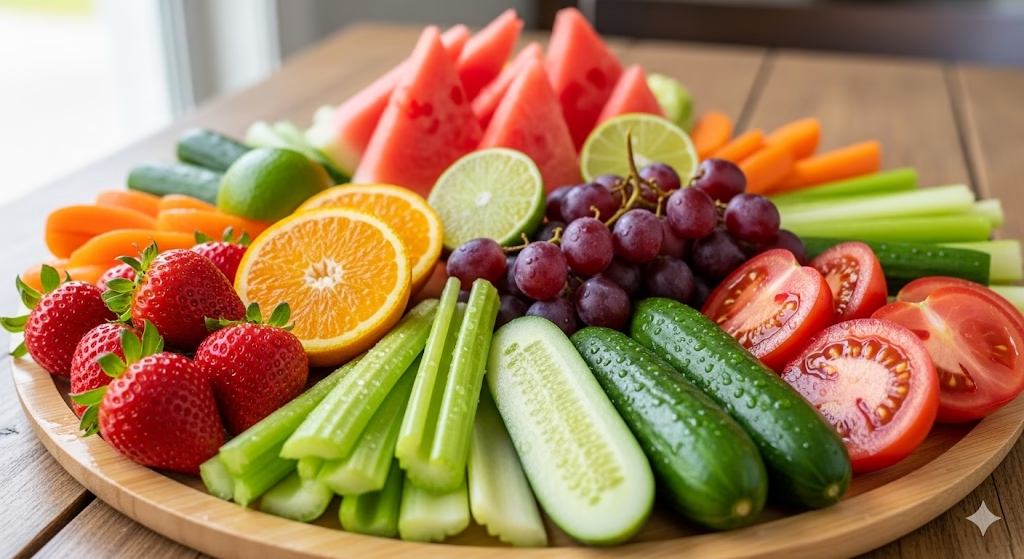
In the image, you can see a vibrant artichoke surrounded by other fresh produce. This colorful display highlights the importance of incorporating a variety of fruits and vegetables into your meals. Each color represents different nutrients and benefits, making your plate not just beautiful but also nutritious.

Artichokes are particularly high in cynarin and silymarin, two antioxidants known for their liver-supporting properties. A healthy liver is essential for detoxification and overall well-being. So, when you enjoy artichokes, you’re not just treating your taste buds; you’re also giving your liver a helping hand.

Moreover, the antioxidants in these may help regulate blood pressure and improve cholesterol levels. This makes them a great addition to a heart-healthy diet. So, the next time you’re at the grocery store, consider picking up some artichokes to enjoy their many health benefits!


Supports Weight Loss


A fresh artichoke on a scale, surrounded by various fruits and vegetables.

Artichokes are a fantastic addition to any weight loss plan. They are low in calories but packed with nutrients, making them a smart choice for those looking to shed some pounds.

This image shows a beautiful artichoke on a scale, surrounded by a variety of colorful fruits. This visual highlights how artichokes can fit into a healthy diet filled with fresh produce.

One of the key benefits of these are their ability to promote satiety. Eating them can help you feel full longer, which can prevent overeating. This is especially helpful when trying to manage your weight.

Artichokes are also high in fiber, which aids digestion and helps regulate blood sugar levels. This means they can keep your energy levels stable and reduce cravings for unhealthy snacks.

Incorporating artichokes into your meals can be easy and delicious. You can steam them, roast them, or even add them to salads. Their unique flavor can enhance many dishes while supporting your weight loss goals.


Aids in Liver Function


Artichoke with herbs and spices promoting liver health

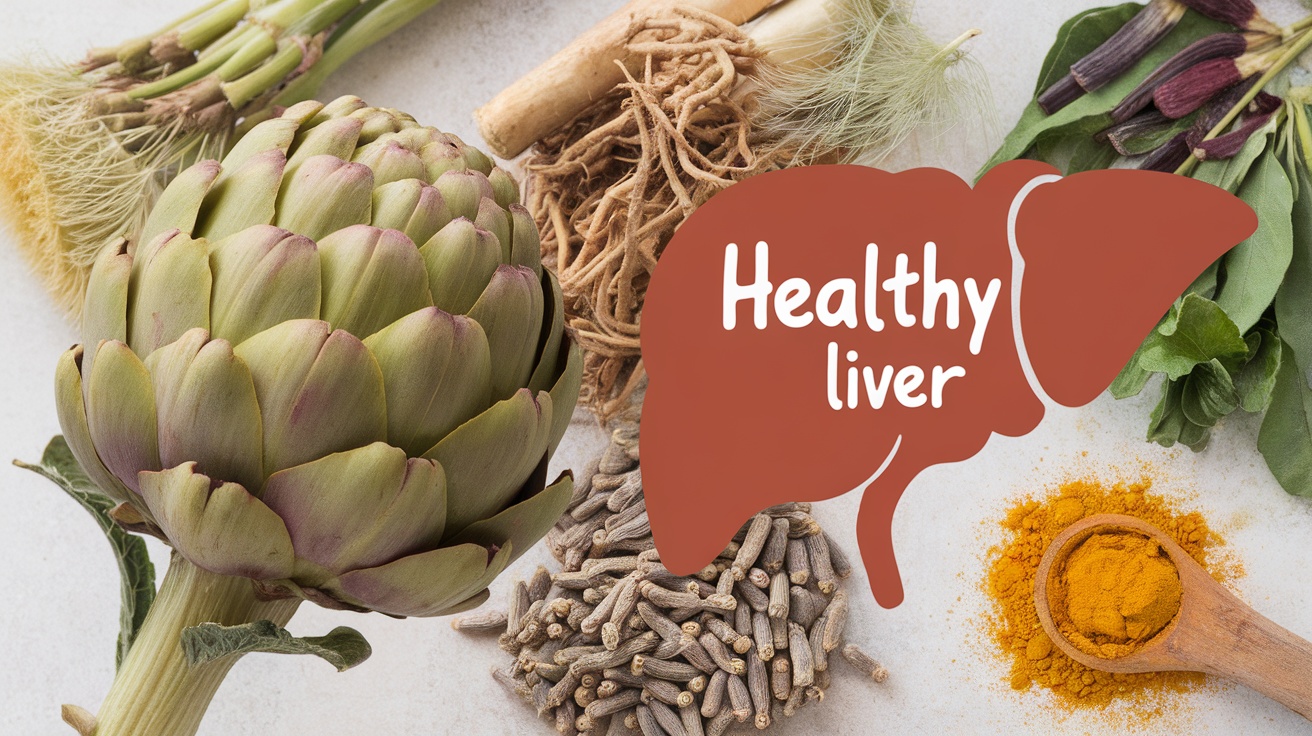
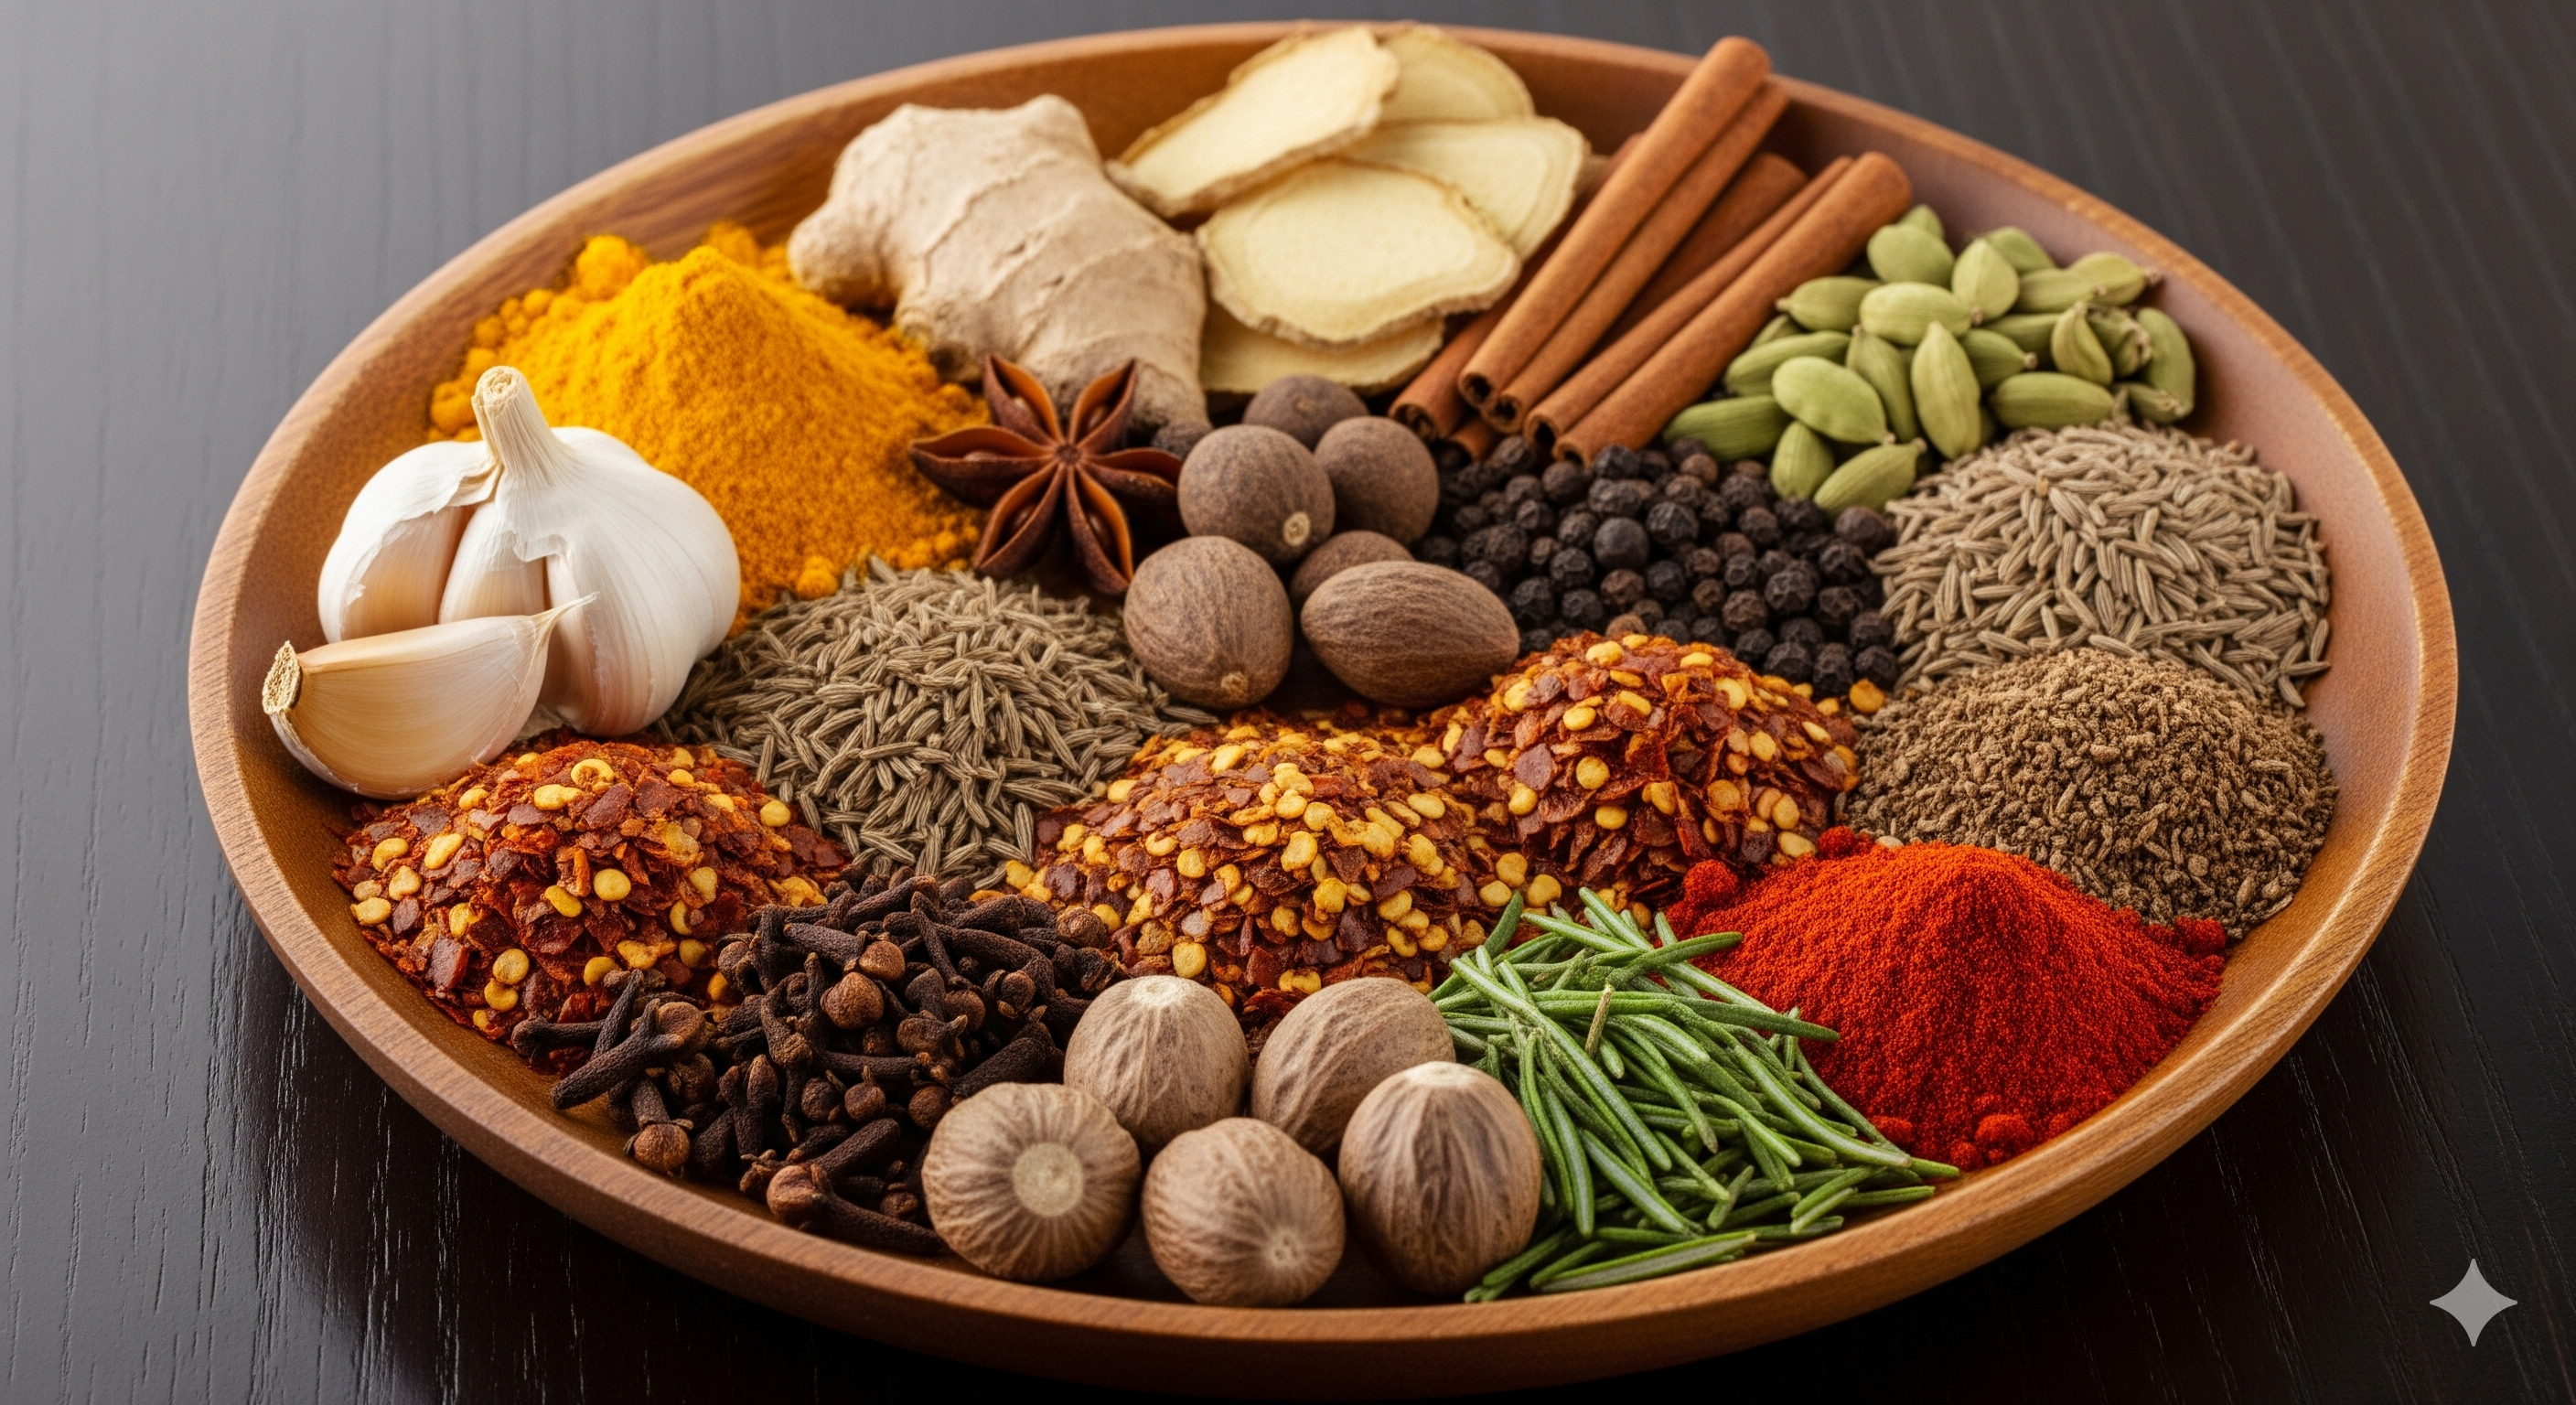
Artichokes are not just tasty; they are also great for your liver. This image showcases a fresh artichoke alongside various herbs and spices known for their health benefits. The vibrant green of the artichoke stands out, hinting at its rich nutrient profile.

Artichokes contain compounds that support liver health. They help detoxify the liver and promote bile production, which is essential for digestion. This can be particularly helpful if you’ve enjoyed a few too many rich meals.

Incorporating these into your diet can also aid digestion. Their high fiber content helps keep things moving smoothly in your digestive system. Plus, they are rich in antioxidants, which protect your liver from damage.

So, if you’re looking to give your liver a little love, consider adding artichokes to your meals. They can be steamed, grilled, or even added to salads for a nutritious boost. Your liver will thank you!


Helps Regulate Blood Sugar


An artichoke, blood sugar monitor, and a bowl of mixed berries and nuts on a wooden table.

Artichokes are not just delicious; they can also play a role in managing blood sugar levels. This image shows a fresh artichoke alongside a blood sugar monitor, emphasizing its importance for those keeping an eye on their glucose levels.

Rich in fiber, they help slow down the absorption of sugar in the bloodstream. This can lead to more stable blood sugar levels, making them a great addition to meals for those with diabetes or anyone looking to maintain healthy levels.

Incorporating artichokes into your diet can be simple. You can steam them, roast them, or even add them to salads. Pairing them with other nutrient-rich foods, like berries and nuts shown in the image, enhances their benefits. These foods are also known for their ability to support overall health.

Besides helping with blood sugar, these are packed with antioxidants, support liver health, and may lower bad cholesterol. They can also aid digestion and promote satiety, making them a fantastic choice for weight management.


Artichokes Boosts Immune System


A fresh artichoke, garlic, and lemon on a wooden surface.

Artichokes are not just tasty; they are also packed with nutrients that can help boost your immune system. This beautiful vegetable, shown alongside garlic and lemon in the image, is rich in antioxidants. Antioxidants fight off free radicals in the body, which can help reduce inflammation and support overall health.

Incorporating artichokes into your meals can be a simple way to enhance your diet. They are high in vitamins C and K, both of which play a role in strengthening your immune response. Vitamin C is known for its ability to help fend off colds and infections, while vitamin K is essential for proper blood clotting and bone health.

Moreover, they aid digestion, which is crucial for a healthy immune system. A well-functioning digestive system helps your body absorb nutrients effectively, ensuring that you get the most out of your food. The fiber in artichokes promotes gut health, which is linked to a stronger immune response.

So, next time you’re looking for a nutritious addition to your plate, consider artichokes. They not only taste great but also provide a variety of health benefits that can keep your immune system in check.


Artichokes Improves Skin Health


Artichokes and skincare products arranged on a wooden surface, showcasing the connection between nutrition and skin health.

Artichokes are not just tasty; they can also work wonders for your skin! Packed with nutrients, these veggies help keep your skin looking fresh and healthy. The image shows a beautiful artichoke surrounded by various skincare products, highlighting the connection between nutrition and skincare.

Rich in antioxidants, they fight off free radicals that can damage your skin. This means they help reduce signs of aging, keeping your skin youthful. Plus, the vitamins and minerals found in artichokes support skin repair and hydration.

Artichokes also aid digestion, which is crucial for skin health. A healthy gut can lead to clearer skin, as it helps flush out toxins. When your body is functioning well internally, it shows on the outside!

Incorporating artichokes into your diet can be a simple way to boost your skin’s health. Whether you enjoy them steamed, grilled, or in a salad, these veggies are a delicious addition to your meals. So, next time you’re looking for a skin-friendly food, remember the artichoke!


References

WebMD – Artichoke – Uses, Side Effects, and More

Healthline – Top 8 Health Benefits of Artichokes and Artichoke

Cleveland Clinic – 10 Health Benefits of Artichokes


Recent Posts


Simple Curried Black Rice And Chickpea Patties With Veg


Curried Black Rice And Chickpea Patties With Veg


Discover the incredible simplicity of Curried Black Rice in this wholesome and flavorful recipe. Perfect for health-conscious foodies, these patties are a delightful way to enjoy nutritious ingredients. Get ready to transform your meals with this vibrant dish!


A Wholesome Journey into Flavor

In a world full of cooking options, sometimes the most satisfying meals are those that feed both your body and your spirit. Today, we’re making a recipe that does just that. It’s a vibrant, tasty, and very healthy dish that will make your taste buds happy. Imagine a meal where old grains meet simple beans. They are mixed with warm spices and fresh, crisp vegetables. It’s a true mix of textures and tastes. This is not just about cooking. It’s about a wholesome trip to discover the power of plant-based foods.

Our cooking adventure is all about black rice. It’s also called “forbidden rice” because long ago, only Chinese emperors could eat it. This dark grain, with its nutty taste, is full of good things. When we mix it with creamy chickpeas and colorful vegetables, it makes the perfect base for patties. These patties are hearty and very tasty. They are not flat like a burger. We are shaping them into sausage-like forms. They are perfect for wraps, salads, or just eating on their own.


The Allure of Curried Black Rice in Your Kitchen

The real magic happens when we add the warm, fragrant curry spices. This mix turns simple ingredients into something special. It adds a deep, warm flavor and a great smell that will fill your kitchen. The earthy taste of Curried Black Rice with sweet vegetables and savory chickpeas creates a perfect balance. It makes every bite a special experience. Whether you cook a lot or are just starting, this recipe is easy and fun.

Get ready to gather your ingredients for a fun cooking time. This recipe is a great choice for meal prep. It’s also a great new meal for your weekly menu. It proves that healthy food can be exciting and full of flavor. We are about to show you how to make something truly special. It’s packed with nutrients and full of taste, all while being simple to do.

So, let’s roll up our sleeves and start making these tasty curried black rice and chickpea patties. You will be surprised at how easy it is to bring such amazing flavors and healthy goodness to your table.


Prep and Cook: Your Timeline

Time to Prepare: 25 minutes

Time to Cook/Blend: 30 minutes


Nutritional Snapshot

Per serving (about 2 patties):

  • Calories: 280-320 kcal
  • Protein: 12-15g
  • Fiber: 8-10g
  • Healthy Fats: 8-12g
  • Carbohydrates: 40-45g (mostly complex carbs)
  • Vitamins & Minerals: Full of B vitamins, iron, magnesium, zinc, and antioxidants.

Note: The nutrition facts are estimates. They can change based on the brand of ingredients and how you cook them.


Essential Equipment


  • Large saucepan with a lid (for cooking rice)
  • Colander
  • Large mixing bowl
  • Food processor
  • Non-stick frying pan or baking sheet
  • Spatula
  • Measuring cups and spoons

Wholesome Ingredients for Curried Black Rice Patties


This recipe makes about 12-14 patties (Servings: 6-7).

  • 1 cup black rice, not cooked
  • 2 cups vegetable broth or water (for cooking rice)
  • 1 (15-ounce) can chickpeas, rinsed and drained
  • 1 small onion, cut into small pieces
  • 2 cloves garlic, minced
  • 1 large carrot, grated
  • 1 cup finely chopped spinach or kale
  • 1/2 cup fresh cilantro, chopped
  • 2 tablespoons olive oil, divided
  • 2 tablespoons curry powder (add more if you like)
  • 1 teaspoon ground cumin
  • 1/2 teaspoon ground turmeric
  • 1/4 teaspoon cayenne pepper (optional, for a little heat)
  • 1/2 cup whole wheat breadcrumbs (or gluten-free oats for a GF option)
  • 2 tablespoons lemon juice
  • Salt and fresh ground black pepper to taste

Step-by-Step Instructions: Crafting Your Curried Black Rice Patties


Let’s bring these delicious patties to life! Follow these steps for a perfect batch every time.

Cook the Black Rice: First, wash the black rice under cold running water in a small strainer. This helps to remove extra starch. Put the washed rice into a large saucepan and add 2 cups of vegetable broth or water. Bring it to a boil over medium-high heat.

Once it is boiling, turn the heat down to low. Cover the pan with a tight lid and let it simmer for about 30-35 minutes. Cook until all the water is gone and the rice is soft but still a little firm. After cooking, take the pan off the heat. Let it sit with the lid on for 5 more minutes. Then, use a fork to fluff the rice. Set it aside to cool a bit.


Cook the Vegetables: While the rice is cooking, heat 1 tablespoon of olive oil in a large non-stick frying pan over medium heat. Add the chopped onion and cook for 5-7 minutes. Stir often, until it becomes soft and clear. Add the minced garlic, grated carrot, and chopped spinach or kale to the pan. Cook for another 3-5 minutes, stirring often, until the vegetables are soft and the spinach/kale has wilted. Take the pan off the heat and set the vegetables aside.

Prepare the Chickpea Mix: In a large mixing bowl, add the washed and drained chickpeas. Use a fork or a masher to mash the chickpeas. You want them to be mostly broken down but still have some lumps. You do not want a smooth paste. Some whole or half chickpeas are good for texture.

Combine All Ingredients: To the bowl with the mashed chickpeas, add the cooled black rice, the cooked vegetables, and the fresh chopped cilantro. Sprinkle in the curry powder, ground cumin, ground turmeric, and cayenne pepper (if you are using it). Add the whole wheat breadcrumbs and lemon juice. Add a lot of salt and fresh ground black pepper to taste.

Mix Thoroughly: Use your hands (or a strong spoon) to mix all the ingredients well. Keep mixing and gently mashing until everything is combined and you can easily form a patty that stays together. The mix should stick together. It should not be too wet or too dry. If it feels too wet, add a little more breadcrumbs. If it’s too dry, add a teaspoon of water or vegetable broth.

Shape the Patties: Take about 2-3 tablespoons of the mixture. Roll it into a sausage-like shape, about 3-4 inches long and 1 inch thick. Put the shaped patties on a baking sheet lined with parchment paper. Do this with the rest of the mixture. You should get about 12-14 patties.


Cooking Methods for Your Curried Black Rice Patties


Pan-Frying (Best for a crispy outside)

Heat Oil: Heat the last 1 tablespoon of olive oil in a large non-stick frying pan over medium heat. You might need to cook the patties in small groups so the pan is not too crowded.

Cook Patties: Carefully put the shaped patties into the hot pan. And cook for 4-6 minutes on each side. Cook until they are golden brown and crispy on the outside and warm all the way through. Flip them gently to cook them evenly.

Baking (For a lighter choice)


  1. Preheat Oven: Heat your oven to 375°F (190°C).
  2. Prepare Baking Sheet: Lightly grease a baking sheet or line it with parchment paper.
  3. Bake Patties: Place the shaped patties on the baking sheet in a single layer. Make sure they do not touch. Bake for 20-25 minutes. Flip them over halfway through. Cook until they are golden brown and firm.

Air Frying (For extra crispiness and less oil)

Preheat Air Fryer: Heat your air fryer to 375°F (190°C).

Arrange Patties: Lightly spray the air fryer basket with cooking spray. Put the shaped patties in the basket in a single layer. Do not crowd them. You will likely need to cook in small groups.

Air Fry: Air fry for 12-15 minutes. Flip them halfway through. Cook until they are golden brown and crispy.


Health Benefits of Curried Black Rice Patties


These delicious patties are not just tasty; they are a powerhouse of nutrition! Each ingredient helps your health in a special way.

Rich in Antioxidants

Black rice is known for having a lot of anthocyanins. These are the same strong antioxidants found in blueberries. They help fight bad molecules in your body. This lowers stress and supports healthy cells.

Great Source of Fiber

Both black rice and chickpeas are full of fiber. Fiber is important for good digestion. It helps keep you regular and supports a healthy gut. It also helps you feel full, which can help with weight management.

Plant-Based Protein Power

Chickpeas are a great source of plant-based protein. Protein is needed for muscle repair and growth. With protein from black rice, these patties make a complete and filling meal. They are great for people who don’t eat meat or want to eat more plants.

Supports Heart Health

The fiber, potassium, and magnesium in these foods help your heart. They can help control cholesterol levels and blood pressure. The healthy fats from olive oil also help keep your heart healthy.

Full of Vitamins and Minerals

These patties are a treasure chest of important nutrients. They have B vitamins from black rice, iron from spinach, and magnesium from chickpeas. These are all needed for energy, a strong immune system, and healthy bones.


Variations: Customize Your Curried Black Rice Patties


VariationDescription
More SpiceAdd a bit more cayenne pepper, a chopped green chili, or a dash of hot sauce to the mix for extra heat.
Gluten-Free OptionUse gluten-free rolled oats (pulsed a little in a food processor) or gluten-free breadcrumbs instead of whole wheat breadcrumbs.
Herby TwistTry adding other fresh herbs like parsley, mint, or basil for a fresh, great smell.
Extra VeggiesAdd other finely grated or chopped vegetables like bell peppers, zucchini, corn, or peas to the mix.
Nutty CrunchAdd 2 tablespoons of finely chopped roasted cashews or peanuts for a fun texture and taste.
Add CheeseFor a non-vegan choice, mix in 1/4 cup of grated Parmesan or nutritional yeast for a cheesy taste.
Smoky FlavorAdd 1/2 teaspoon of smoked paprika to the spices for a nice smoky flavor.

Final Thoughts for Curried Black Rice


There you have it—a truly great recipe for Curried Black Rice and Chickpea Patties with Veg. It is as healthy as it is tasty. We have looked at the great benefits of each ingredient. We have also given you detailed steps to make sure you succeed in the kitchen. These patties are more than just a meal. They are a celebration of healthy, plant-based eating. They show that healthy food can be very exciting and full of flavor.

Whether you need a hearty lunch, a light dinner, or an easy meal prep option, these patties are perfect. They are great in pitas or wraps. They are also good with a fresh green salad or as a side dish. Don’t be afraid to try the variations. Make this recipe your own! We encourage you to get in your kitchen, enjoy the spicy smells, and make a batch of these amazing patties. Share what you make with your friends and family. Inspire others to find the joy of healthy, tasty eating. Happy cooking!


Frequently Asked Questions (FAQs)

Q1: Can I make these patties ahead of time?

A1: Yes, you can! These patties are great for meal prep. You can make the mixture and shape the patties. Then, put them in the fridge for up to 2-3 days before you cook them. Or, you can cook them all the way and store them in a closed container in the fridge for up to 4 days. They reheat well in a pan, oven, or air fryer.

Q2: Can I freeze these Curried Black Rice patties?

A2: Yes, these patties freeze very well! You can freeze them either raw or cooked. To freeze raw patties, place them on a baking sheet and freeze until they are hard. Then, put them in a freezer-safe bag or container for up to 3 months. Cooked patties can be frozen the same way. When you are ready to cook or reheat, you can cook them right from frozen. Just add a few extra minutes to the cooking time. Or, you can let them thaw in the fridge first.


References


Recent Posts


Make This Easy Veg & Nut-Crusted Sushi Monster


A tight close-up of two large, sliced Veg & Nut-Crusted Sushi rolls arranged on a dark, rustic plate. The rolls are generously coated in a crunchy mix of black and white sesame seeds, sunflower seeds, pumpkin seeds, and chopped nuts. The vibrant cross-section reveals bright fillings including white sushi rice, nori, green lettuce, slices of avocado, julienned cucumber, and striking red and orange bell peppers. Pickled ginger and soy sauce bowls are visible in the soft background.
Veg & Nut-Crusted Sushi

Discover the ultimate plant-based delight with our guide to creating the perfect Veg & Nut-Crusted Sushi. This simple article will empower you to craft a visually stunning and incredibly delicious sushi monster, packed with wholesome ingredients and vibrant flavors. Get ready to impress your taste buds and elevate your home cooking with this unique and satisfying recipe!


Welcome to Your Sushi Adventure!

Have you ever wanted to make a sushi roll that looks amazing and tastes even better? Imagine a huge, vibrant roll, packed with healthy food. It turns a simple meal into a fun, new cooking experience. We aren’t talking about small, average sushi here. We’re talking about a sushi monster—a big, filling roll that is fun to make and delicious to eat. Get ready to start a great journey into making creative sushi. Here, fresh vegetables meet a satisfying crunch from nuts and seeds.

Many people are looking for healthier, plant-based meals these days. Sushi is a popular choice. But sometimes, making sushi at home can seem too hard or boring. This recipe changes all that! It gives you a new, easy way to make plant-based sushi that is both simple and exciting. We will show you how to make a big, stunning roll. It is full of fresh flavors and makes a great meal. This recipe works if you love sushi or are just learning to cook. You will soon be ready to impress yourself and your friends!


The Power of the Veg & Nut-Crusted Sushi

The best part of this special Veg & Nut-Crusted Sushi is how healthy and useful it is. By using many colorful vegetables and a thick crust of different nuts and seeds, we make more than just a meal. We create a complete, healthy food experience. This is not a side dish; it’s the main event. It is designed to be a balanced and very satisfying meal. The crunchy outside and the soft, tasty inside create a great mix of textures. This will make you want to eat more and more, one delicious bite after another.

Forget about difficult cooking steps or hard-to-find food items. Our way of making sushi is easy and relaxing. We planned this recipe carefully so that even people who have never rolled sushi before can get great results. From perfectly seasoned rice to pretty fillings and that amazing, crunchy crust, every part is designed for success. You will be surprised at how simple it is to make something so impressive right in your own kitchen. You will turn simple food into a truly spectacular dish.

So, gather your ingredients, clear your cooking area, and let’s get rolling! This article gives you all the tips, tricks, and easy steps you need to make your very own Veg & Nut-Crusted Sushi monster with confidence. It is more than just a recipe. It is an invite to try new tastes, enjoy healthy eating, and feel proud of making something special from scratch. Let’s dive in and create a masterpiece that is healthy and delicious!


Time to Prepare & Cook Your Veg & Nut-Crusted Sushi

Time to Prepare: 45 minutes

Time to Cook/Chill: 30 minutes (rice cooking) + 30 minutes (chilling) = 1 hour


Equipment Needed


  • Large pot with lid (for rice)
  • Fine-mesh sieve
  • Large mixing bowl
  • Small saucepan (for sushi vinegar)
  • Sharp knife
  • Cutting board
  • Sushi rolling mat (makisu)
  • Plastic wrap
  • Measuring cups and spoons
  • Small bowl with water (for wetting hands)

Nutritional Information (per serving, estimated)

MetricAmountBenefit
Calories350-450 kcalGood energy source
Protein10-15gSupports muscles
Fat15-25gHealthy fats for the heart
Carbs40-50gSustained energy
Fiber5-8gAids digestion

Ingredients for Your Veg & Nut-Crusted Sushi Monster


Servings: This recipe makes 2 large sushi rolls, which gives about 12-16 big pieces. It is enough for 2-4 people as a main meal.

For the Sushi Rice:

  • 2 cups sushi rice (short-grain white rice)
  • 221​ cups water
  • 41​ cup rice vinegar
  • 2 tablespoons granulated sugar
  • 1 teaspoon salt

For the Veggie Fillings:

  • 1 large carrot, peeled and cut into thin sticks
  • 21​ cucumber, seeds removed and cut into thin sticks
  • 1 red bell pepper, cored and cut into thin strips
  • 21​ ripe avocado, sliced
  • 4-5 romaine lettuce leaves, washed and dried
  • 4 sheets nori seaweed (for sushi)

For the Nut & Seed Crust:

  • Quarter​ cup sesame seeds (mixed black and white)
  • A Quarter of a cup chopped almonds
  • ​ Quarter cup chopped walnuts
  • 2 tablespoons pumpkin seeds
  • 2 tablespoons sunflower seeds

For Serving (Optional):

  • Soy sauce or tamari
  • Wasabi
  • Pickled ginger

Step-by-Step Instructions: Crafting Your Veg & Nut-Crusted Sushi


1. Get the Sushi Rice Ready:

  • Rinse the sushi rice well in a fine-mesh sieve under cold running water. Do this until the water is clear. This removes extra starch, which helps the rice be fluffy, not sticky.
  • Put the clean rice into a large pot with a lid that fits tightly. Add 221​ cups of cold water.
  • Bring the water to a boil over medium-high heat. Once it boils, turn the heat down to low. Cover the pot tightly and let it simmer for 15-20 minutes. The water should be fully absorbed. Do not lift the lid during this time!
  • When the rice is cooked, take the pot off the heat. Let it steam, still covered, for another 10 minutes. This helps the rice cook completely.
  • While the rice steams, make the sushi vinegar mix. In a small pot, mix the rice vinegar, sugar, and salt. Heat it over low heat, stirring all the time. Stop when the sugar and salt have fully dissolved. Do not let it boil. Let it cool a little.
  • Move the hot rice to a large, shallow mixing bowl. Slowly pour the cooled vinegar mix over the rice. Use a wooden spoon or paddle to gently cut and fold the vinegar into the rice. Do not mash the rice grains. This step gives the rice its classic sushi texture.
  • Cover the rice with a damp cloth or plastic wrap. Let it cool to room temperature. This takes about 20-30 minutes. Do not put warm rice in the fridge; it will get hard.


2. Prepare the Veggie Fillings:

  • While the rice cools, cut your vegetables. Use a sharp knife to slice the carrot, cucumber, and red bell pepper into thin matchsticks. Try to make the pieces the same size for a good roll.
  • Slice the avocado right before you build the roll. This stops it from turning brown.
  • Make sure your romaine lettuce leaves are washed and fully dry.
  • Place all your cut vegetables neatly on a tray or cutting board. Now they are ready for rolling.


3. Make the Nut & Seed Crust:

  • In a shallow dish or on a flat plate, mix the sesame seeds, chopped almonds, chopped walnuts, pumpkin seeds, and sunflower seeds. Stir them well until they are mixed. This will be the tasty, crunchy coating for your sushi monster.

4. Assemble Your Sushi Monster:

  • Lay your sushi rolling mat (makisu) flat on a clean table. Cover the entire mat with plastic wrap. This stops the rice from sticking to the mat and makes cleaning easy.
  • Place one sheet of nori seaweed on the mat, with the shiny side down.
  • Wet your hands a little with water to stop the rice from sticking. Take about 1/2 to 3/4 cup of the cooled sushi rice. Gently spread it evenly over the whole nori sheet. Leave about a 1/2-inch space clear at the top edge of the nori. Press the rice down gently but firmly.


5. Add the Fillings:

  • Along the bottom edge of the rice (the edge closest to you), place a generous line of your cut vegetables. Start with a layer of romaine lettuce. Then add strips of carrots, cucumber, bell pepper, and finally, slices of avocado. Do not overfill, but make sure the filling is big enough for a “monster” roll.


6. The Rolling Technique:

  • Carefully lift the edge of the sushi mat closest to you. Bring it up and over the fillings. Press down lightly to tuck the fillings in. Then, keep rolling forward. Use a gentle, steady press with your hands.
  • As you roll, peel the plastic wrap away from the roll with one hand. Guide the roll with your other hand. This helps make a tight, well-formed roll.
  • When you reach the bare nori edge at the top, wet it a little with a tiny dab of water. This helps to seal the roll shut. Keep rolling until the seam is sealed.
  • Gently use the mat to shape the roll again. Apply light pressure to make a smooth, firm cylinder.


7. Put on the Nut & Seed Crust:

  • Once your roll is firm, carefully take off the plastic wrap.
  • Gently move the roll to the shallow dish that holds your nuts and seeds mix.
  • Roll the sushi monster back and forth. Press lightly until the whole outside is fully covered with the crunchy nuts and seeds. Make sure the crust is thick and even.


8. Slice and Serve:

  • Place the crusted sushi roll back on a clean cutting board. For easier and cleaner cuts, you can wrap the roll tightly in new plastic wrap. Chill it in the fridge for 20-30 minutes. This helps it become firm.
  • Use a very sharp knife. Wet the blade a little with water between cuts to stop sticking. Slice the roll into thick, separate pieces. Aim for pieces about 1 to 1.5 inches wide. Start by cutting the roll in half. Then cut each half in half, and so on. This gives you even pieces.
  • Arrange your beautiful Veg & Nut-Crusted Sushi monster pieces on a serving plate. Serve right away with soy sauce, wasabi, and pickled ginger, if you like.

Benefits of This Veg & Nut-Crusted Sushi


This meal is more than just tasty; it is very healthy! Our Veg & Nut-Crusted Sushi offers many good things for your health:

  • Plenty of Fiber: The many fresh vegetables, whole nuts, and seeds greatly boost your fiber intake. Fiber is key for good digestion, feeling full, and keeping blood sugar steady.
  • Good for the Heart: The nuts and seeds give you great healthy fats. These include Omega-3 fats, which are known to help your heart and reduce swelling in the body.
  • Full of Vitamins and Minerals: Every bite gives you many vitamins (like Vitamin A, C, and K) and minerals (magnesium, zinc, iron). These are vital for your whole body, helping your immune system and giving you energy.
  • Plant-Based Protein: Nuts and seeds add a good amount of plant protein. This makes the dish satisfying and filling for everyone, especially those who don’t eat meat.
  • Antioxidant Power: The bright colors of the vegetables and the goodness in the nuts and seeds give you many antioxidants. These help keep your body’s cells healthy and safe from harm.
  • Long-Lasting Energy: The slow-burning energy from the sushi rice, along with the healthy fats and protein, gives you steady energy. This helps you avoid feeling tired later.

Variations: Change Your Veg & Nut-Crusted Sushi


Quinoa & Sweet Potato (in pink) and Low carb Cauliflower Rice & Poppy Seeds (in white)

Part of the RecipeHow You Can Change It
RiceUse brown sushi rice (more fiber), quinoa, or cauliflower rice (less carb)
VegetablesAdd cooked asparagus, sautéed spinach, roasted sweet potato, colorful peppers, sprouts, or pickled radish
Nut & Seed CrustUse crushed pistachios, poppy seeds, hemp seeds, or panko breadcrumbs for extra crunch
Flavor BoostersAdd thin mango slices, sun-dried tomatoes, a spread of hummus, or thinly sliced marinated tofu
Spice LevelMix chili flakes into the nut crust or add a small amount of sriracha inside the roll
Sun Dried Tomato & Hummus (on the left). Spicy Kimchi & Sprouts (on the right)

Alternative Methods for Cooking the Rice

While cooking the rice on the stove is the usual way, here are other easy methods:

  • Rice Cooker: A rice cooker makes this step very easy. Add the clean sushi rice and water to your cooker. Follow its guide (usually a 1:1 ratio of rice to water). Once cooked, let it rest for 10-15 minutes. Then, move it to a bowl and mix in the sushi vinegar.
  • Instant Pot/Pressure Cooker: Clean the sushi rice as usual. For every 1 cup of rice, use 3/4 cup of water. Cook on high pressure for 5 minutes. Then, let the pressure go out on its own for 10 minutes. After that, let out any extra pressure quickly. Move the rice to a bowl and add the seasoning.

Final Thoughts: Embrace Your Inner Sushi Artist!


Making your own Veg & Nut-Crusted Sushi monster is a creative and rewarding act. It is a chance to try bright flavors, enjoy the calming process of building the roll, and finally, eat a dish that is both good for you and truly delicious. This recipe shows that healthy eating does not have to be boring. It can be a fun, colorful, and very satisfying thing to do. We hope you get creative with your vegetables, mix up your nuts and seeds, and make this recipe truly yours. Share your sushi monster with friends and family. Inspire others to try healthy, plant-based cooking. Happy rolling!


Frequently Asked Questions (FAQs)

Q1: Can I make this sushi ahead of time?

A1: Sushi tastes best when it’s fresh. You can cut the vegetables and cook the rice a few hours before you need them. Keep the cool rice covered with a damp cloth at room temp. Store the vegetables in the fridge in closed containers. Roll and slice the sushi right before serving for the best taste. If you must make it fully ahead, wrap the finished, uncut rolls tightly and keep them in the fridge for up to 4-6 hours. Slice them just before serving.

Q2: How do I stop the nori from being too hard to chew?

A2: The secret to soft nori is properly cooked and cool rice. Make sure your rice is at room temperature when you spread it. Also, do not use too much rice or press it down too hard. This can make the roll too firm. Finally, serving the sushi soon after you make it helps the nori stay soft before it gets too wet from the fillings.


References


Recent Posts


The Best Breadcrumbs for Cauliflower


A warm, inviting close-up shot of a round, blue-rimmed serving plate filled with the Best Breadcrumbs for cauliflower and a medley of fresh, colorful vegetables. Golden-brown, breaded cauliflower florets are arranged on a bed of vibrant, cooked vegetables, including red bell pepper strips, green broccoli florets, and thinly sliced red onion. A light wisp of steam rises from the food, suggesting it is hot and fresh. A small bowl of creamy white dipping sauce, garnished with fresh herbs, sits to the left of the plate. A fork rests on the right side of the plate. The background features a simple, dark wood table and a window with soft, natural light filtering in.
Best Breadcrumbs

Have you ever wanted to make a healthy snack that’s also super tasty? Few things beat the delightful crunch of perfectly breaded vegetables. Cauliflower is a great choice for the Best Breadcrumbs recipe. It has a mild flavor and is easy to work with. The right breadcrumbs can make all the difference. Whether you want a light, low-carb snack or a warm, crispy side dish, this guide is for you. We will show you how to get your baked cauliflower perfectly crisp.


This guide will show you many different breading options. We will look at their unique qualities. You will see how they change the final taste and feel of your dish. We have everything from the savory crunch of pork rinds to the light crispness of almond flour. You will find a whole new world of options to make your cauliflower special. Get ready to turn simple cauliflower florets into a truly amazing meal. It will be great for your taste buds and your health.

Unveiling the Best Breadcrumbs: A Cooking Adventure

Choosing the best breadcrumbs for your cauliflower is about more than just a good crunch. It’s about flavor, feel, and diet needs. Our guide will help you pick the perfect coating. You can choose a breading that fits your diet. You can also just pick one to try something new in the kitchen. We will give you a tasty, simple recipe. It shows you how to use these different breading choices. We will also share tips for getting that perfect golden-brown crispness.


This article is your full guide to making great breaded cauliflower. Lets explore how to add more flavor with spices. We will cover the best ways to cook it to get it crispy. We will even teach you a double-breading trick for extra crunch. This guide is your go-to source for making breaded cauliflower. Every bite will be full of flavor and texture.

Get ready to start a cooking journey. It will change how you think about baked cauliflower. With the right breadcrumbs and a few simple tips, you will be making amazing dishes. They will be delicious and fit your diet. Let’s start making the best crispy cauliflower you have ever had!


Best Breadcrumbs for Cauliflower with Mixed Vegetable Medley

Time to Prepare

15 minutes

Time to Cook/Blend

30-35 minutes (baking)

20-25 minutes (air frying)


Nutritional Information (per serving, approximate values)

  • Calories: 250-300 kcal
  • Protein: 15-20g
  • Carbohydrates: 10-15g (net carbs will vary based on breading choice)
  • Fat: 15-20g
  • Fiber: 5-8g

Equipment


  • Large mixing bowl
  • Baking sheet
  • Parchment paper (for easier cleanup)
  • Whisk or fork
  • Shallow dishes (for breading)
  • Food processor (optional, for crushing breadcrumbs or nuts)
  • Air fryer (optional, for air frying)

Servings

4 servings

Ingredients


  • 1 medium head of cauliflower, cut into bite-sized florets
  • A bell pepper (any color), chopped
  • 1 cup broccoli florets
  • 1/2 red onion, thinly sliced
  • 2 large eggs, whisked
  • 1/4 cup almond milk (or another milk)
  • 1 teaspoon garlic powder
  • 1/2 teaspoon onion powder
  • 1/2 teaspoon smoked paprika
  • Salt and black pepper to taste
  • 1/4 cup grated Parmesan cheese (optional, for extra flavor)
  • 1/4 cup olive oil or avocado oil, divided

Choose Your Best Breadcrumbs:

  • Low-Carb & Keto Options:
    • 1 cup crushed pork rinds (pork panko)
    • A cup almond flour
    • 1 cup grated Parmesan cheese
    • 1/2 cup coconut flour
    • 1/2 cup golden flaxseed meal
  • Gluten-Free & Classic Options:
    • 1 cup Panko breadcrumbs
    • A cup gluten-free breadcrumbs
    • 1 cup crushed mixed nuts or seeds (pecans, almonds, sunflower seeds)

Instructions for the Best Breadcrumbs


Prep the Vegetables: First, preheat your oven to 400°F (200°C). If you are using an air fryer, preheat it to 375°F (190°C). Wash the cauliflower well. Dry it with a paper towel. Cut the cauliflower into small florets. Make them all about the same size so they cook evenly. Chop the bell pepper and broccoli. Slice the red onion.

Make the Breading Station: You will need two shallow dishes. In the first dish, whisk the two large eggs and almond milk together. This is your “wet” mix. It helps the breading stick. In the second dish, mix your chosen breadcrumbs. Add the garlic powder, onion powder, smoked paprika, salt, and pepper. If you are using it, add the grated Parmesan cheese. Stir the dry mix well. Make sure the spices are mixed with your best breadcrumbs.

Bread the Vegetables: Take one cauliflower floret. Dip it into the egg mix. Make sure it is fully coated. Let the extra egg drip off. Then, move it to the dry breading mix. Roll the floret around. Press down gently to make sure the breading sticks. For a very crispy result, you can dip the floret back into the egg mix. Then roll it in the breading a second time. Repeat this for all the vegetables.

Place for Cooking:

Oven Baking: Get a large baking sheet ready. You can lightly oil it or use parchment paper. Arrange the breaded vegetables in a single layer. Make sure they are not touching. Drizzle or spray about half of the olive oil over the vegetables. This helps them get golden and crispy.

Air Frying: If you are using an air fryer, you will need to cook in batches. Put a single layer of breaded vegetables in the basket. Drizzle or spray with the rest of the olive oil.


Cook to Perfection:

Oven Baking: Bake for 30-35 minutes. Flip the vegetables over at the halfway point. They should be golden brown and crispy. Watch them closely. Cooking time can change based on your oven.

Air Frying: Air fry for 20-25 minutes. Shake the basket at the halfway point. They should be golden and crispy. Air fryers cook fast, so check on them.

Serve: Once they are done, take the crispy cauliflower and vegetables out. Serve them right away. They are great as a side, a snack, or even a light meal. You can eat them plain or with your favorite dip.


Benefits of Choosing the Best Breadcrumbs


Using the right breadcrumbs for your cauliflower has many benefits. It’s about more than just taste. If you are on a low-carb or keto diet, pork rinds or almond flour are great. They give you a satisfying crunch without the carbs. These options often have good protein and healthy fats. This helps you feel full. If you can’t eat gluten, you can use special gluten-free breadcrumbs. You can also use things like crushed nuts. Many of these choices are also full of fiber, vitamins, and minerals. This makes your crispy cauliflower a healthy part of your meal. The many options also let you get creative in the kitchen. They make healthy eating exciting.


Variations for Crispy Cauliflower


Breading OptionDietFlavor and FeelGood For
Crushed Pork RindsLow-carb, Keto, Gluten-freeSalty, savory, very crunchyGetting a fried-like texture, like on fried chicken.
Almond FlourLow-carb, Keto, Gluten-freeMild, slightly nutty, light crispBaking or air frying. Great with spices or Parmesan cheese.
Grated Parmesan CheeseLow-carb, Keto, Gluten-freeSharp, salty, rich flavor, very crispyThin coatings. Good for air frying to add a savory punch.
Coconut FlourLow-carb, Keto, Gluten-freeA little sweet, light texture, falls apart easilyBalancing savory food. Adds a unique flavor.
Golden Flaxseed MealLow-carb, Keto, Gluten-freeMild, nutty, great binder, light crunchUsing as a binder in other recipes. Makes a light, crispy coat.
Panko BreadcrumbsClassic, VegetarianNeutral taste, airy, very crispyGetting a classic fried or baked “crunch” that feels light.
Gluten-Free BreadcrumbsGluten-free, VegetarianNeutral taste, feels like regular breadcrumbsMaking traditional breaded dishes for people who can’t eat gluten.
Crushed Nuts/SeedsGluten-free, Paleo (some nuts)Earthy, nutty taste, unique feelGiving dishes a special flavor. Adds healthy fats and fiber.

Final Thoughts: Make Your Cauliflower Better with the Best Breadcrumbs


Choosing the best breadcrumbs for your baked cauliflower is a small thing. But it can make your food much better. This guide gave you many options. We looked at healthy keto choices and classic crispy ones. There is a perfect match for every diet and every taste. Don’t be afraid to try new spices and mixes. Find your own special crispy cauliflower recipe. Remember, cooking is an art. Every part of the recipe is important. Your choice of breadcrumbs is key to making a great dish. So, go make your cauliflower into something that is healthy and delicious. What will you create next?


Frequently Asked Questions (FAQs)

Q1: Can I make my own breadcrumbs from stale bread?

A1: Yes, you can! Making your own breadcrumbs from stale bread is a good way to save food. It also lets you control what goes in them. Just break the stale bread into pieces. Put them in a food processor. Process until you have fine crumbs. Then, toast them in the oven until they are golden and dry. This method lets you change how the crumbs feel. It is also cheaper. If you need gluten-free crumbs, use gluten-free bread.

Q2: How do I store leftover breaded cauliflower?

A2: You can store leftovers in a container with a lid. Keep them in the fridge for up to 3 or 4 days. To heat them again, it is best to use an oven or air fryer. This helps make them crispy again. A microwave can make them soggy. Reheat at 350°F (175°C) for 10-15 minutes in the oven. In the air fryer, it takes 5-8 minutes. Heat until they are warm all the way through and crispy again.


References

  1. Harvard T.H. Chan – Healthy Eating Plate
  2. Harvard Health – Ditch the gluten, improve your health
  3. Mayo Clini – How to make the keto diet healthy

Recent Posts


Make These Simple Savoury Steamed Pumpkin Dumplings


A close-up, horizontal image of a stack of healthy, savory Pumpkin Dumplings on a wooden board. The dumplings have a vibrant, deep orange color and are gathered at the top, showing a visible seal. They are garnished with a sprig of fresh cilantro. The background is a clean, modern kitchen with a stovetop and soft natural light.
Pumpkin dumplings

Discover the joy of creating wholesome and delicious Pumpkin Dumplings from scratch. This recipe guides you through making a nutritious and flavourful meal that’s perfect for any occasion. Elevate your culinary skills and impress your taste buds with these incredible Pumpkin Dumplings.


A Journey into Comforting Flavours

There’s something uniquely comforting about dumplings – those small, tender parcels of goodness that can transport you to a world of flavour and warmth. While often associated with sweet fillings or rich, heavy doughs, we’re here to redefine the dumpling experience. Get ready to embark on a culinary adventure that combines the earthy sweetness of pumpkin with wholesome ingredients, creating a savoury steamed dumpling that’s not just delicious but incredibly good for you. This recipe focuses on simplicity, ensuring even novice cooks can achieve fantastic results.

In a world increasingly focused on healthy eating without sacrificing taste, these pumpkin dumplings stand out. We’ve taken traditional dumpling concepts and infused them with nutritious choices, swapping refined flours for whole grains and packing them with vibrant vegetables. The steaming method itself is a testament to healthy cooking, preserving nutrients and keeping the dumplings light and tender. Forget about deep-frying or excessive oils; our focus is on natural flavours and textures that shine through with every bite.

The Allure of Savoury Pumpkin Dumplings

When you hear “pumpkin,” your mind might immediately jump to pies and lattes. However, pumpkin is a versatile ingredient that truly excels in savoury dishes. Its inherent sweetness perfectly balances robust spices and earthy vegetables, creating a complex flavour profile that is both surprising and satisfying. These Pumpkin Dumplings are a testament to this versatility, offering a delightful twist on what you might expect. The natural creaminess of pumpkin also contributes to a wonderfully tender filling, making each dumpling a delightful explosion of taste and texture.

Moreover, integrating whole grains like spelt flour elevates these dumplings beyond a simple treat into a truly wholesome meal. Spelt, an ancient grain, brings a subtly nutty flavour and a wealth of fibre, enhancing digestive health and providing sustained energy. This thoughtful ingredient swap ensures that while you’re indulging in a comforting dish, you’re also nourishing your body with essential nutrients, making these pumpkin dumplings a guilt-free pleasure you can enjoy regularly.

So, if you’re seeking a dish that marries comfort with health, flavour with nourishment, and tradition with innovation, look no further. These simple savoury steamed pumpkin dumplings are designed to delight your senses and leave you feeling satisfied and energised. Let’s gather our ingredients and begin crafting these wonderful little parcels of joy!


Time to Prepare and Cook

Preparation Time for Your Pumpkin Dumplings

Time to Prepare: 45 minutes (including vegetable chopping and dough resting)

Cooking Time for Your Pumpkin Dumplings

Time to Cook/Steam: 15-20 minutes

Time to Blend (for filling): 5 minutes

Servings

Makes approximately 25-30 dumplings


Nutritional Information (per serving, estimated)

  • Calories: 180-200 kcal
  • Protein: 7-9g
  • Fibre: 5-7g
  • Healthy Fats: 4-6g
  • Carbohydrates: 30-35g

Equipment You’ll Need


  • Large mixing bowl
  • Rolling pin
  • Sharp knife
  • Chopping board
  • Steamer basket or bamboo steamer
  • Large pot or wok (for steaming)
  • Food processor or blender (optional, for finer filling)
  • Small bowls for sauces (optional)
  • Parchment paper

Ingredients for Your Wholesome Pumpkin Dumplings


For the Dough:

  • 2 cups whole spelt flour (or whole wheat pastry flour)
  • ½ teaspoon sea salt
  • ¾ – 1 cup warm water (adjust as needed)
  • 1 tablespoon olive oil

For the Filling:

  • 1 ½ cups roasted or steamed pumpkin purée (from Hokkaido or butternut squash)
  • 1 cup finely diced mushrooms (cremini or shiitake)
  • ½ cup grated carrots
  • ½ cup finely chopped spinach
  • 2 cloves garlic, minced
  • 1-inch piece fresh ginger, grated
  • 2 tablespoons low-sodium soy sauce or tamari
  • 1 tablespoon sesame oil
  • 1 teaspoon rice vinegar
  • ¼ teaspoon white pepper
  • Pinch of red pepper flakes (optional, for a kick)
  • 2 tablespoons fresh coriander, chopped
  • 1 tablespoon chives, chopped (optional, for garnish)

For the Dipping Sauce (Optional, but Recommended):

  • ¼ cup low-sodium soy sauce or tamari
  • 1 tablespoon rice vinegar
  • 1 teaspoon sesame oil
  • Pinch of red pepper flakes
  • 1 teaspoon grated fresh ginger

Step-by-Step Instructions for Your Steamed Pumpkin Dumplings


Creating the Perfect Whole-Grain Dough

Combine Dry Ingredients: In a large mixing bowl, combine the whole spelt flour and sea salt. Give it a good whisk to ensure everything is evenly distributed.

Add Wet Ingredients: Make a well in the centre of the flour mixture. Pour in ¾ cup of warm water and the olive oil. Start mixing with a spoon or your hands, gradually incorporating the flour from the sides into the liquid.

Knead the Dough: Once the mixture comes together into a shaggy mass, transfer it to a lightly floured clean surface. Knead the dough for about 5-7 minutes. If the dough feels too dry and isn’t coming together, add the remaining warm water, one tablespoon at a time, until it forms a smooth, elastic dough. It should be firm but pliable.

Rest the Dough: Form the dough into a ball, lightly grease the bowl with a little olive oil, and place the dough back in. Cover the bowl with a clean kitchen towel or plastic wrap and let it rest at room temperature for at least 30 minutes. This resting period is crucial as it allows the gluten to relax, making the dough easier to roll and more tender when cooked.


Preparing the Flavourful Pumpkin Filling

Prepare Pumpkin Purée: Ensure your pumpkin is already cooked and mashed into a smooth purée. You can roast pumpkin chunks with a little olive oil until tender, then mash, or steam them until soft.

Sauté Aromatics: In a large pan, heat a tablespoon of olive oil over medium heat. Add the minced garlic and grated ginger and sauté for about 1 minute until fragrant, being careful not to burn them.

Cook Vegetables: Add the finely diced mushrooms and grated carrots to the pan. Cook for 5-7 minutes, stirring occasionally, until the vegetables soften and any liquid from the mushrooms has evaporated.

Combine Filling Ingredients: Remove the pan from the heat. In a large bowl, combine the cooked mushroom and carrot mixture with the pumpkin purée, chopped spinach, low-sodium soy sauce (or tamari), sesame oil, rice vinegar, white pepper, and red pepper flakes (if using).

Mix Thoroughly: Stir all the filling ingredients together until well combined. The spinach will wilt into the warm mixture. Taste and adjust seasonings as needed. If you prefer a very smooth filling, you can carefully pulse it a few times in a food processor, but a slightly chunky texture is also delightful. Stir in the fresh coriander.


Assembling Your Delicious Pumpkin Dumplings

Divide the Dough: Once the dough has rested, turn it out onto a lightly floured surface. Knead it lightly for a minute, then roll it into a long cylinder. Divide the cylinder into 25-30 equal pieces.

Shape Dough Rounds: Take each piece and roll it into a small ball. Using a rolling pin, roll each ball into a thin, round wrapper, about 3-4 inches in diameter. Try to make the edges slightly thinner than the centre. Keep the remaining dough covered to prevent it from drying out.

Fill the Wrappers: Place about 1-1 ½ teaspoons of the pumpkin filling in the centre of each wrapper. Do not overfill.


Fold and Seal: Moisten the edges of the wrapper with a little water using your fingertip. Fold the wrapper in half to create a half-moon shape. Press the edges firmly to seal. You can leave it as a simple half-moon, or create pleats along the sealed edge for a more decorative finish. Ensure the seal is tight to prevent the filling from escaping during steaming.


Steaming Your Pumpkin Dumplings to Perfection

Method 1: Traditional Steaming

Prepare Steamer: Line your steamer basket (or bamboo steamer) with parchment paper, making sure to cut small holes in the paper to allow steam to circulate. This prevents the dumplings from sticking.

Arrange Dumplings: Arrange the assembled dumplings in a single layer in the steamer basket, leaving a little space between each one to prevent sticking. Do not overcrowd the steamer. You may need to steam in batches.

Steam: Bring water to a boil in a large pot or wok fitted with a steamer. Once boiling, place the steamer basket over the boiling water, ensuring the water does not touch the bottom of the basket. Cover tightly and steam for 10-15 minutes, or until the dough is translucent and cooked through, and the filling is hot.


Method 2: Pan-Frying and Steaming (Potsticker Style)

Sear: Heat 1 tablespoon of olive oil in a large non-stick skillet over medium-high heat. Place the dumplings in a single layer, making sure they don’t touch. Cook for 2-3 minutes until the bottoms are golden brown and crispy.

Steam: Carefully pour about ½ cup of hot water into the skillet (be cautious of splattering). Immediately cover the skillet with a tight-fitting lid. Reduce heat to medium-low and steam for 8-10 minutes, or until the water has evaporated and the dumplings are cooked through. Remove the lid and let any remaining liquid evaporate, crisping the bottoms slightly more if desired.

Method 3: Baking (Oil-Free Option)

Preheat and Prep: Preheat your oven to 190°C (375°F). Line a baking sheet with parchment paper.

Arrange and Bake: Place the assembled dumplings on the prepared baking sheet, ensuring they are not touching. Lightly mist with water (optional, to prevent drying). Bake for 18-22 minutes, or until the wrappers are lightly golden and the filling is hot. While this method doesn’t offer the same tender chewiness as steaming, it’s a great oil-free alternative.


Preparing the Simple Dipping Sauce

  1. Combine Ingredients: In a small bowl, whisk together all the dipping sauce ingredients: low-sodium soy sauce (or tamari), rice vinegar, sesame oil, red pepper flakes, and grated fresh ginger.
  2. Serve: Serve the dipping sauce alongside the hot steamed dumplings.

Benefits of These Wholesome Pumpkin Dumplings


These savoury steamed pumpkin dumplings aren’t just a treat for your taste buds; they’re packed with nutritional benefits that support your overall health.

Rich in Fibre: By swapping all-purpose flour for whole spelt flour, we significantly boost the fibre content. Fibre is essential for digestive health, helps regulate blood sugar levels, and contributes to a feeling of fullness, aiding in weight management.

Nutrient-Dense Pumpkin: Pumpkin is a powerhouse of vitamins and minerals. It’s an excellent source of Vitamin A (in the form of beta-carotene), crucial for vision and immune function, and also provides Vitamin C, Vitamin E, potassium, and antioxidants.

Veggies Galore: The addition of mushrooms, carrots, and spinach dramatically increases the vegetable intake. These ingredients contribute a spectrum of vitamins, minerals, and antioxidants, supporting everything from heart health to cellular protection.

Lean and Light: Steaming is one of the healthiest cooking methods. It preserves nutrients better than boiling and requires no added fats, resulting in a lighter, healthier dish compared to pan-fried or deep-fried alternatives.

Satisfying and Sustaining: The combination of complex carbohydrates from whole grains, protein from the vegetables, and healthy fats from sesame and olive oil makes these dumplings incredibly satisfying, providing sustained energy without the energy crash often associated with refined carbohydrates.


Variations to Customize Your Dumplings


Variation FeatureIdea/Ingredient SwapBenefit/Why
Protein BoostAdd finely crumbled firm tofu, tempeh, or cooked lentils to the filling.Increases protein content, making them more satiating and suitable as a main.
Spice LevelIncrease red pepper flakes; add a pinch of cayenne or finely chopped chilli.For those who love a bit of heat and a metabolism boost.
Different GrainsExperiment with whole wheat pastry flour, barley flour, or a gluten-free blend.Offers options for different dietary needs or flavour preferences.
Vegetable MixInclude finely shredded cabbage, bok choy, corn, or peas in the filling.Adds more nutrients, texture, and allows for seasonal adjustments.
Flavour ProfileAdd a touch of smoked paprika, curry powder, or nutritional yeast for cheesy notes.Creates different culinary experiences and flavour depths.
Herb PowerSwap coriander for fresh dill, parsley, or Thai basil in the filling.Introduces varied aromatic notes to complement the pumpkin.

Final Thoughts: Embrace the Joy of Wholesome Cooking


Making these simple savoury steamed pumpkin dumplings is more than just following a recipe; it’s an invitation to engage with your food in a nourishing and creative way. From the hands-on process of kneading the wholesome dough to the careful crafting of each delicate parcel, you’ll discover the immense satisfaction that comes from creating something truly delicious and healthy from scratch. These dumplings are a testament to the fact that healthy eating doesn’t have to be bland or complicated; it can be vibrant, comforting, and deeply satisfying.

We encourage you to experiment with the variations, making this recipe truly your own. Share them with family and friends, or simply savour them as a comforting meal for yourself. Let these pumpkin dumplings be a reminder that wholesome ingredients, combined with a little care and creativity, can result in culinary magic. So, roll up your sleeves, gather your ingredients, and enjoy the delicious journey of making these incredible dumplings!


Frequently Asked Questions (FAQs)

Q1: Can I make these pumpkin dumplings ahead of time?

A1: Yes, absolutely! You can prepare the filling a day in advance and store it in an airtight container in the refrigerator. You can also assemble the dumplings and freeze them on a parchment-lined baking sheet until solid, then transfer them to a freezer-safe bag. When ready to cook, steam them directly from frozen, adding a few extra minutes to the cooking time (about 18-22 minutes).

Q2: What are some good serving suggestions for these pumpkin dumplings?

A2: Beyond the simple dipping sauce, these dumplings are wonderfully versatile. They make a fantastic appetizer or a light main course. Consider serving them with a side of steamed green vegetables like bok choy or broccoli, a clear vegetable broth, or a simple fresh salad with a light vinaigrette. For an extra flavour boost, a sprinkle of toasted sesame seeds or finely chopped spring onions over the finished dumplings would be delicious.


References

  1. Harvard Health – The facts on fiber
  2. Mayo Clinic – Whole grains – hearty options for healthy eating
  3. USDA – Flour, Spelt, Whole grain

Recent Posts


Make This Easy Homemade Tomato & Pepper Sauce


A close-up horizontal shot of three small glass jars filled with different variations of homemade tomato & pepper sauce. The jar on the left contains a vibrant, chunky red sauce with visible chili flakes and slices. The middle jar holds a thicker, herb-infused tomato & pepper sauce in a white bowl, garnished with fresh basil, rosemary, and thyme. The jar on the right contains a smooth, creamy, and light orange tomato & pepper sauce variation. All jars are placed on a dark wood surface with soft, natural lighting from a window.
Tomato & pepper sauce

This article was crafted to guide you in creating the perfect Tomato & Pepper Sauce, a versatile addition to countless meals. You’ll learn how to transform ripe tomatoes, smoky bell peppers, and a hint of chilli into a delicious sauce that elevates everything from classic pasta and pizza to simple grilled dishes. This simple recipe will not only become a kitchen staple but will also reveal the true power of fresh, wholesome ingredients.


Your Homemade Tomato & Pepper Sauce: A Culinary Revolution

Crafting your own Tomato & Pepper Sauce at home is a culinary revelation. Forget bland, store-bought jars filled with preservatives and hidden sugars. This recipe isn’t just about making a sauce; it’s about unlocking a world of fresh flavors, vibrant colors, and wholesome goodness that will elevate your meals from ordinary to extraordinary. Imagine a rich, aromatic blend simmering gently on your stovetop, filling your kitchen with an irresistible scent – that’s the magic we’re about to create.

This simple yet sophisticated Tomato & Pepper Sauce is incredibly versatile. It can be the star of a classic pasta dish, a robust base for pizzas, a flavorful addition to scrambled eggs, or even a sophisticated dip for crusty bread. Learning to make your own sauces empowers you in the kitchen, giving you control over ingredients and allowing you to tailor flavors to your exact preferences. It’s a foundational recipe that every home cook should have in their repertoire.

The Heart of Homemade: Why Your Tomato & Pepper Sauce Will Shine

What makes this particular Tomato & Pepper Sauce recipe so special is its reliance on fresh, high-quality produce and a straightforward cooking process that highlights the natural sweetness of ripe tomatoes and the smoky depth of roasted peppers. We’ll be using a medley of colorful bell peppers, sweet cherry tomatoes, and a hint of chilli for that perfect gentle kick. The combination creates a balanced flavor profile that is both comforting and exciting, making it a perfect partner for countless dishes.

Beyond the incredible taste, making your own sauce ensures you’re feeding yourself and your loved ones a meal free from artificial additives. You control the amount of salt, sugar, and fat, making it a truly healthy choice. Plus, there’s an immense satisfaction that comes from transforming fresh ingredients into something so delicious and nourishing. It’s a small act of self-care that reaps huge flavorful rewards.

So, get ready to embark on a delightful culinary journey. Gather your ingredients, clear your counter space, and prepare to fill your home with the inviting aroma of a truly exceptional homemade Tomato & Pepper Sauce. This easy-to-follow guide will walk you through every step, ensuring a perfect result every time.


Time to Prepare and Cook

Time to Prepare

  • Active Prep Time: 20 minutes
  • Inactive Prep Time (Roasting): 30-40 minutes

Time to Cook/Blend

  • Simmering Time: 30-45 minutes
  • Blending Time: 5-10 minutes

Servings

This recipe yields approximately 4-6 servings, depending on usage.


Nutritional Information (per serving)

  • Calories: 120-150 kcal
  • Protein: 4-6g
  • Fat: 5-7g (mostly healthy unsaturated fats from olive oil)
  • Carbohydrates: 18-22g
  • Fiber: 6-8g
  • Vitamin A: Excellent source
  • Vitamin C: Excellent source
  • Potassium: Good source

Note: Nutritional values are estimates and may vary based on specific ingredients and portion sizes.


Equipment You’ll Need


  • Large baking sheet
  • Parchment paper
  • Large pot or Dutch oven
  • Blender (immersion blender or standard blender)
  • Cutting board
  • Sharp knife
  • Measuring cups and spoons
  • Wooden spoon or spatula

Ingredients for Your Homemade Tomato & Pepper Sauce


  • 2 lbs ripe tomatoes (a mix of Roma and cherry tomatoes works wonderfully for depth of flavor)
  • 2 large bell peppers (one red, one yellow, or orange for color and sweetness)
  • 1 medium red onion, roughly chopped
  • 4-5 cloves garlic, peeled
  • 1-2 fresh red chillies (remove seeds for less heat, leave for more), or ½ tsp dried chilli flakes
  • 2 tablespoons olive oil
  • 1 teaspoon dried oregano
  • ½ teaspoon dried basil
  • Salt and freshly ground black pepper to taste
  • Optional: 1 tablespoon balsamic vinegar (for extra depth)
  • Optional: A handful of fresh basil leaves for garnish

Step-by-Step Instructions: Crafting Your Delicious Tomato & Pepper Sauce


Follow these detailed steps to create a rich and flavorful Tomato & Pepper Sauce that will impress everyone at your table. Don’t rush, enjoy the process!

Prepare the Vegetables for Roasting: Preheat your oven to 400°F (200°C). Line a large baking sheet with parchment paper for easy cleanup. Wash the tomatoes, bell peppers, and chillies thoroughly. Halve the bell peppers and remove the seeds and white membranes. If using fresh chillies, halve them and decide whether to remove the seeds for less heat, or leave them in for a spicier kick. Roughly chop the red onion. Peel the garlic cloves. You can leave the smaller tomatoes, like cherry tomatoes, whole. Cut larger tomatoes (like Roma) into halves or quarters.


Roast the Vegetables: On the prepared baking sheet, spread out the chopped tomatoes, bell peppers, red onion, garlic cloves, and fresh chillies (if using). Drizzle generously with 2 tablespoons of olive oil. Season with a good pinch of salt and freshly ground black pepper. Toss everything gently with your hands to ensure the vegetables are evenly coated. Place the baking sheet in the preheated oven and roast for 30-40 minutes, or until the vegetables are tender and slightly charred around the edges. This roasting process intensifies their natural sweetness and creates a wonderful smoky flavor.


Cool and Peel (Optional): Once roasted, carefully remove the baking sheet from the oven. Allow the vegetables to cool for about 10-15 minutes. If you prefer a smoother sauce without any skin, you can now easily peel the skin off the bell peppers. The roasting process makes the skin loosen and it should come off easily. You can also remove the skins from the larger tomatoes if you wish, though it’s not strictly necessary for flavor and adds fiber.

Transfer to a Pot: Carefully transfer all the roasted vegetables, including any juices accumulated on the baking sheet, into a large pot or Dutch oven.

Simmer and Season: Add the dried oregano and dried basil to the pot. If you’re using dried chilli flakes instead of fresh chillies, add them now. Give everything a good stir. Bring the mixture to a gentle simmer over medium heat. Reduce the heat to low, cover, and let it simmer for 30-45 minutes. This slow simmering allows the flavors to meld beautifully and for the vegetables to become incredibly tender. Stir occasionally to prevent sticking. If the sauce seems too thick, you can add a splash of water or vegetable broth.


Blend the Sauce: Once the sauce has simmered and the flavors have developed, remove the pot from the heat. Carefully blend the sauce. You can use an immersion blender directly in the pot, blending until you reach your desired consistency – chunky for a rustic feel, or smooth for a more refined sauce. Alternatively, carefully transfer the hot mixture in batches to a standard blender. If using a standard blender, ensure the lid has a vent and cover it with a kitchen towel to prevent pressure buildup. Blend until smooth.


Final Adjustments: Taste the Tomato & Pepper Sauce and adjust the seasoning as needed. You might want to add more salt, pepper, or a pinch of sugar if your tomatoes weren’t very sweet. This is also the time to stir in 1 tablespoon of balsamic vinegar, if using, for an extra layer of complexity and a slight tangy note.

Serve and Enjoy: Your homemade Tomato & Pepper Sauce is now ready! Serve it hot with your favorite pasta, as a base for pizza, or alongside grilled vegetables or meats. Garnish with fresh basil leaves if desired.


Alternative Cooking Methods for Your Tomato & Pepper Sauce

While roasting is fantastic for depth of flavor, here are other healthy methods for preparing your Tomato & Pepper Sauce:

Stovetop Method (Non-Roasted)

  • Prep: Chop all vegetables (tomatoes, bell peppers, onion, garlic, chilli) into smaller, even pieces.
  • Sauté: Heat olive oil in a large pot or Dutch oven over medium heat. Add chopped onion and sauté until softened, about 5-7 minutes. Add garlic and chilli (fresh or flakes) and cook for another minute until fragrant.
  • Simmer: Add chopped bell peppers and cook for 5-8 minutes until slightly softened. Then add chopped tomatoes, dried oregano, dried basil, salt, and pepper. Bring to a simmer, then reduce heat, cover, and cook for 45-60 minutes, stirring occasionally, until vegetables are very tender and the sauce has thickened.
  • Blend: Blend to your desired consistency using an immersion or standard blender. Adjust seasoning. This method results in a slightly brighter, fresher-tasting sauce.


Slow Cooker Method

  • Prep: Roughly chop all vegetables (tomatoes, bell peppers, onion, garlic, chilli).
  • Combine: Place all chopped vegetables, olive oil, dried oregano, dried basil, salt, and pepper into your slow cooker. Stir to combine.
  • Cook: Cook on low for 6-8 hours or on high for 3-4 hours, until vegetables are very tender and flavors have melded.
  • Blend: Carefully transfer the mixture to a standard blender (or use an immersion blender in the slow cooker if suitable) and blend until smooth or desired consistency. Adjust seasoning. This method is great for hands-off cooking and deeply developed flavors.

Benefits of This Homemade Tomato & Pepper Sauce


Making your own Tomato & Pepper Sauce isn’t just about taste; it’s a powerhouse of nutritional benefits.

Rich in Antioxidants: Tomatoes are famously high in lycopene, a powerful antioxidant known for its potential to reduce the risk of certain cancers and promote heart health. Bell peppers are also packed with antioxidants like Vitamin C and carotenoids, which help protect your cells from damage.

Boosts Immunity: The high Vitamin C content from both tomatoes and bell peppers supports a robust immune system, helping your body fight off illness.

Heart Health: Olive oil, a staple in this recipe, is a healthy monounsaturated fat that can help lower bad cholesterol levels. The potassium in tomatoes and peppers also supports healthy blood pressure.

Digestive Health: Both tomatoes and bell peppers are good sources of dietary fiber, which aids in digestion, promotes gut health, and helps maintain stable blood sugar levels.

Customization and Control: By making your own sauce, you control exactly what goes into it. No hidden sugars, excessive sodium, or artificial preservatives often found in store-bought versions. This makes it an ideal choice for those managing specific dietary needs or seeking cleaner eating options.

Versatility: This sauce is a fantastic way to incorporate more vegetables into your diet in a delicious and appealing way.


Variations to Customize Your Tomato & Pepper Sauce


This Tomato & Pepper Sauce recipe is a fantastic starting point. Feel free to experiment and make it your own!

VariationDescriptionHow to Achieve
Smoky & RichDeeper, more intense smoky flavor, perfect for BBQ-style dishes or hearty pasta.Add ½ – 1 teaspoon smoked paprika to the vegetables before roasting. A dash of liquid smoke during simmering can also enhance this.
Herbaceous DelightA fresher, more aromatic profile with a variety of herbs.Incorporate fresh rosemary, thyme, or marjoram sprigs into the pot during simmering. Remove before blending. Garnish with plenty of fresh herbs.
Mediterranean TwistAdds a tangy, briny note, ideal for pairing with olives or feta.Stir in 1-2 tablespoons of capers or finely chopped Kalamata olives after blending. A squeeze of fresh lemon juice can also brighten it.
Spicier KickFor those who love heat!Increase the amount of fresh chillies or chilli flakes. Add a pinch of cayenne pepper during simmering.
Vegetable BoostSneak in more nutrients and bulk up the sauce.Roast additional vegetables like zucchini, carrots (finely diced), or eggplant alongside the peppers and tomatoes. They’ll blend in seamlessly.
Creamy IndulgenceA richer, more decadent sauce, while still healthier than store-bought cream sauces.Stir in 2-3 tablespoons of unsweetened cashew cream or a splash of unsweetened almond milk after blending and heat gently.
Sweeter ProfileIf your tomatoes are less ripe, or you prefer a sweeter sauce for kids.A pinch of sugar (¼-½ teaspoon) or a teaspoon of maple syrup can balance the acidity. Roasted carrots also add natural sweetness.

Final Thoughts: Embrace the Flavor of Homemade Tomato & Pepper Sauce


There’s an undeniable satisfaction that comes from creating something delicious and wholesome from scratch. This easy homemade Tomato & Pepper Sauce recipe is more than just a culinary guide; it’s an invitation to rediscover the joy of cooking with fresh ingredients and to savor the vibrant flavors that only homemade can offer. From its rich nutritional profile to its incredible versatility, this sauce is destined to become a staple in your kitchen.

Don’t be intimidated; the process is straightforward, and the rewards are immense. Imagine the aroma filling your home as it simmers, and the delight on your family’s faces as they taste the difference. So, gather your ingredients, set aside a little time, and embark on this delicious journey. Your taste buds, and your health, will thank you. Get cooking and enjoy your exquisite Tomato & Pepper Sauce!


Frequently Asked Questions (FAQs) About Tomato & Pepper Sauce

Q1: How long can I store this homemade Tomato & Pepper Sauce?

A1: Your homemade Tomato & Pepper Sauce can be stored in an airtight container in the refrigerator for up to 5-7 days. For longer storage, it freezes beautifully! Portion it into freezer-safe containers or bags, and it will keep in the freezer for up to 3-4 months. Thaw in the refrigerator overnight before use or gently reheat from frozen on the stovetop.

Q2: Can I use canned tomatoes instead of fresh?

A2: While fresh, ripe tomatoes are highly recommended for the best flavor in this Tomato & Pepper Sauce, you can certainly use good quality canned tomatoes as a substitute, especially when fresh tomatoes are out of season. Opt for whole peeled San Marzano tomatoes or crushed tomatoes, and adjust the simmering time as canned tomatoes are already cooked down. You might also want to reduce the salt initially as canned tomatoes can sometimes be saltier.

Q3: What are some other vegetables I can add to this sauce?

A3: Absolutely! This Tomato & Pepper Sauce is highly adaptable. You can roast and blend in other healthy vegetables like zucchini, carrots (which add natural sweetness), eggplant, or even spinach (stirred in at the very end to wilt). Ensure they are cut into similar sizes for even roasting, or add them during the simmering stage if not roasting. This is a fantastic way to boost the nutritional content and flavor complexity.


References


Recent Posts


Make These Easy Baked Crab Croquettes


 A close-up, horizontal image of three beautifully golden-brown baked crab croquettes on a dark wooden platter. They are garnished with fresh parsley and a bright yellow lemon wedge sits next to them.
Baked crab croquets

Craving a delicious, guilt-free appetizer that impresses without the fuss? These easy baked crab croquettes are the answer! Perfectly golden, delightfully crispy on the outside, and wonderfully tender within, they offer a taste of luxury without the deep-fried indulgence. They are coated in a special homemade breadcrumb. Get ready to elevate your snack game with this healthy and simple recipe.


Our Favorite Healthy Baked Crab Croquettes

Forget about oil splatters and heavy frying; our baked method ensures a lighter, healthier bite while still delivering all the flavor you expect from a classic croquette. Whether you’re hosting a gathering, looking for a sophisticated snack, or simply want to treat yourself to something special, these crab croquettes fit the bill. They’re designed for health-conscious individuals who don’t want to compromise on taste or quality.

Imagine biting into a perfectly seasoned morsel, packed with succulent crab meat, a hint of fresh herbs, and a creamy texture that melts in your mouth. That’s precisely what awaits you with these baked crab croquettes. We’ve meticulously crafted this recipe to be straightforward enough for even novice cooks, ensuring a successful and delicious outcome every time. We’ll walk you through each step, from selecting the best ingredients to achieving that irresistible golden crust.

The Delight of Baked Crab Croquettes

This recipe goes beyond just taste; it’s about making smart choices for your well-being. By opting for baking, we drastically reduce the fat content, making these croquettes a much lighter alternative to their fried counterparts. Plus, we’ll be incorporating fresh, wholesome ingredients that contribute to a balanced and nutritious diet. You’ll be surprised at how much flavor and satisfaction you can achieve with simple, healthy methods.

Get ready to transform your kitchen into a haven of delectable aromas and create an appetizer that will undoubtedly become a staple in your recipe repertoire. Let’s dive into the world of light, crispy, and utterly delicious baked crab croquettes!


Time to Prepare & Cook

  • Time to Prepare: 25 minutes
  • Cooks: 20-25 minutes (Baked)
  • Time to Cook: 15-20 minutes (Air Fryer)

Servings

This recipe yields approximately 12-15 croquettes, perfect for sharing as an appetizer or enjoying as a light meal.


Nutritional Information (per serving, approximate)

  • Calories: 120-150 kcal
  • Protein: 10-12g
  • Fat: 5-7g (primarily from healthy sources like olive oil and egg)
  • Carbohydrates: 8-10g
  • Fiber: 1-2g
  • Sodium: 250-300mg (can be adjusted by controlling added salt)

Please note that these values are estimates and can vary based on specific ingredients and portion sizes.


Equipment You’ll Need


  • Large mixing bowl
  • Small mixing bowls (for breading station)
  • Baking sheet
  • Parchment paper
  • Measuring cups and spoons
  • Whisk
  • Spatula or spoon
  • Fork
  • (Optional for air fryer method): Air fryer

Ingredients for Healthy Baked Crab Croquettes


Gather your fresh ingredients for the best results!

  • 1 pound lump crab meat, drained well and picked over for shells
  • 1/2 cup finely diced celery
  • 1/4 cup finely diced red bell pepper
  • 2 tablespoons fresh chives, minced
  • 2 tablespoons fresh parsley, minced
  • 1/4 cup whole wheat breadcrumbs, plus 1 cup for coating
  • 1/4 cup plain Greek yogurt (full-fat or 2% for creaminess)
  • A large egg, lightly beaten
  • 1 tablespoon Dijon mustard
  • 1 teaspoon Worcestershire sauce
  • 1/2 teaspoon smoked paprika
  • 1/4 teaspoon garlic powder
  • Salt and freshly ground black pepper to taste
  • 1 tablespoon olive oil (for drizzling)
  • Lemon wedges, for serving

Step-by-Step Instructions for Perfect Baked Crab Croquettes


Follow these detailed steps to create your delightful crab croquettes.

Step 1: Prepare Your Crab Mixture

In a large mixing bowl, gently flake the drained and picked crab meat. Take care not to break up the lumps too much, as larger pieces of crab add to the texture and appeal of the croquettes. Add the finely diced celery, red bell pepper, minced fresh chives, and minced fresh parsley to the bowl with the crab. These fresh vegetables and herbs will provide a wonderful aromatic base and a pleasant crunch.

Step 2: Create the Binding Agent

In a separate small bowl, whisk together the Greek yogurt, lightly beaten egg, Dijon mustard, Worcestershire sauce, smoked paprika, and garlic powder. Whisk until all the ingredients are well combined and smooth. This creamy mixture will act as the binder that holds your croquettes together and infuses them with rich flavor. Season this mixture with a pinch of salt and freshly ground black pepper.

Step 3: Combine and Season

Pour the yogurt and egg mixture over the crab and vegetable mixture in the large bowl. Add 1/4 cup of whole wheat breadcrumbs. Gently fold everything together using a spatula or your hands. Be careful not to overmix, as this can break down the crab too much and make the croquettes tough. The mixture should be moist enough to hold together but not wet or sticky. Taste a small amount of the mixture (if safe to do so, or adjust seasoning based on your preference) and add more salt or pepper if needed.


Step 4: Form the Croquettes

Set up your breading station. Place the remaining 1 cup of whole wheat breadcrumbs in a shallow dish. Take approximately 1-2 tablespoons of the crab mixture and gently form it into a small, oval, or disc-shaped croquette. Aim for a uniform size so they cook evenly. Roll each formed croquette in the breadcrumbs, ensuring it’s fully coated. Gently press the breadcrumbs onto the surface so they adhere well. Place the breaded croquettes on a plate or baking sheet lined with parchment paper.

Step 5: Chill for Firmness

Once all the croquettes are formed and breaded, place the baking sheet or plate with the croquettes in the refrigerator for at least 20-30 minutes. This chilling step is crucial as it helps the croquettes firm up, making them less likely to fall apart during cooking and ensuring a crispier exterior.

Step 6: Prepare for Cooking

While the croquettes are chilling, preheat your oven to 400°F (200°C) for baking, or your air fryer to 375°F (190°C) if using that method. Line a baking sheet with parchment paper for the oven method. Lightly drizzle the prepared baking sheet or the croquettes themselves with a small amount of olive oil. This will help them achieve that beautiful golden-brown color and crispy texture.

Step 7: Cook Your Baked Crab Croquettes

Method 1: Oven Baking

Arrange the chilled, breaded croquettes on the prepared baking sheet, ensuring there’s a little space between each one for even cooking. Drizzle lightly with olive oil. Bake for 20-25 minutes, or until golden brown and heated through. Halfway through the cooking time, carefully flip the croquettes to ensure even browning on all sides.


Method 2: Air Frying

If using an air fryer, arrange the chilled, breaded croquettes in a single layer in the air fryer basket. You may need to cook them in batches. Lightly spray the croquettes with olive oil cooking spray. Air fry at 375°F (190°C) for 15-20 minutes, flipping halfway through, until they are golden brown and crispy. Keep an eye on them, as air fryer cooking times can vary.

Step 8: Serve and Enjoy!

Remove the baked (or air-fried) crab croquettes from the oven or air fryer. Let them cool for a few minutes before serving. Garnish with extra fresh parsley or chives, and serve immediately with fresh lemon wedges for a bright, zesty finish. A light dipping sauce, like a Greek yogurt dill sauce, would also be a lovely accompaniment!


Benefits of Making These Baked Crab Croquettes


Opting for these baked crab croquettes isn’t just a treat for your taste buds; it’s also a smart choice for your health. Here are some key advantages:

  • Lower in Fat: By baking instead of deep-frying, you significantly reduce the amount of unhealthy fats and calories, making these croquettes a much lighter option.
  • Rich in Protein: Crab meat is an excellent source of lean protein, essential for muscle repair, satiety, and overall body function.
  • Nutrient-Dense: Crab provides important vitamins and minerals such as Vitamin B12, selenium, and zinc, which support immune function, thyroid health, and energy production.
  • Fresh Vegetable Boost: The addition of celery and bell pepper not only enhances flavor and texture but also adds a dose of vitamins, antioxidants, and dietary fiber.
  • Whole Grains: Using whole wheat breadcrumbs instead of refined white breadcrumbs adds more fiber, which aids digestion and helps stabilize blood sugar levels.
  • Heart-Healthy: With reduced saturated fat and the presence of healthy fats from olive oil and possibly omega-3s from crab, this recipe supports cardiovascular health.
  • Digestive Health: The fiber from whole wheat breadcrumbs and vegetables contributes to a healthy digestive system.

Variations to Customize Your Baked Crab Croquettes


These croquettes are wonderfully versatile! Here are some ideas to tailor them to your taste or dietary needs:

Variation TypeDescription
Spice LevelAdd a pinch of cayenne pepper, a dash of hot sauce to the mixture, or serve with a spicy aioli for an extra kick.
Herb InfusionExperiment with other fresh herbs like dill, tarragon, or cilantro for different flavor profiles.
Cheese DelightIncorporate a tablespoon or two of finely grated Parmesan cheese into the crab mixture for a savory, umami boost.
Gluten-FreeUse gluten-free breadcrumbs and ensure all other ingredients are certified gluten-free.
Dairy-FreeSubstitute the Greek yogurt with a plant-based unsweetened plain yogurt (almond or cashew-based) and ensure it’s thick.
Veggie BoostFinely grate a small amount of zucchini or carrot and add it to the mixture for extra nutrients and moisture. Squeeze out excess water.
Citrus ZestAdd a teaspoon of lemon or lime zest to the crab mixture for an even brighter, more aromatic flavor.


Final Thoughts: Embrace Healthy Indulgence


You’ve just created a batch of absolutely irresistible, healthy baked crab croquettes that are sure to become a cherished recipe in your kitchen. This dish proves that eating well doesn’t mean sacrificing flavor or elegance. With fresh ingredients, a simple baking method, and a touch of culinary creativity, you can enjoy gourmet appetizers that nourish your body and delight your palate.

These croquettes are perfect for entertaining, a delightful light lunch, or a sophisticated snack. Don’t hesitate to experiment with the variations to make them truly your own. So, go ahead, gather your ingredients, and let the aroma of these golden-baked treasures fill your home. Your taste buds—and your health—will thank you! Share your creations with friends and family, and inspire them to discover the joy of healthy indulgence.


Frequently Asked Questions (FAQs)

Q1: Can I make these crab croquettes ahead of time?

A1: Yes, you absolutely can! You can prepare the crab mixture and form the croquettes up to 24 hours in advance. Store them, unbaked, on a parchment-lined tray covered loosely with plastic wrap in the refrigerator. When you’re ready to cook, proceed with the baking or air frying instructions. This makes them a fantastic option for entertaining!

Q2: What’s the best way to store and reheat leftover baked crab croquettes?

A2: Store any leftover baked crab croquettes in an airtight container in the refrigerator for up to 2-3 days. To reheat, place them on a baking sheet in a preheated oven at 350°F (175°C) for about 10-15 minutes, or in an air fryer at 325°F (160°C) for 5-8 minutes, until heated through and crispy again. Avoid the microwave, as it can make them soggy.


References


Recent Posts


Discover The Fantastic Proven Benefits You Get From Water


An infographic showing five clear glasses of different types of water, including tap, mineral, spring, sparkling, and flavored water with lemon, raspberries, and mint.

Hydration is key to a healthy life. This article explores the amazing benefits of water, a vital element often overlooked. Learn how it supports every function in your body and discover easy ways to stay hydrated.


The Elixir of Life: Understanding Water’s Crucial Role

Water, often taken for granted, is far more than just a thirst quencher; it’s the fundamental cornerstone of life itself. Comprising roughly 60% of an adult’s body weight, this simple compound is intricately involved in virtually every physiological process, from the most basic cellular functions to complex metabolic activities.

Without adequate water, our bodies simply cannot perform at their peak, making understanding and prioritizing hydration essential for optimal health and well-being.

Every single cell, tissue, and organ in your body relies on it to function correctly. It acts as a universal solvent, dissolving vital nutrients, minerals, and other chemicals, making them accessible to the body.

This incredible ability allows water to transport these essential substances to where they are needed, ensuring that every part of your system receives the fuel it requires to thrive. Think of it as the body’s internal delivery service, constantly moving resources to maintain balance and efficiency.


Why Your Body Can’t Function Without Water

Beyond transportation, this plays a critical role in maintaining body temperature through processes like sweating, which cools us down when we’re overheated. It lubricates our joints, protecting them from wear and tear and allowing for smooth movement. It also acts as a shock absorber for our brain and spinal cord, providing a protective cushion against impact. These vital functions underscore why consistent and sufficient water intake isn’t just beneficial—it’s absolutely non-negotiable for survival and long-term health.

The impact of water extends beyond mere physical functions; it profoundly affects our mental clarity, mood, and overall energy levels. Even mild dehydration can lead to fatigue, headaches, and difficulty concentrating, impairing cognitive performance and making everyday tasks feel more challenging. Conversely, proper hydration can boost alertness, improve mood, and enhance focus, allowing us to perform better in all aspects of our lives.

In essence, it is not just a beverage; it is a life-sustaining nutrient that supports every facet of our existence. From regulating internal systems to enhancing physical and mental performance, its benefits are vast and far-reaching. This article will delve deeper into the fantastic proven benefits you get from water, exploring how this simple substance can profoundly transform your health and vitality.


Time to Hydrate: Quick Preparation

Preparation: 2 minutes

Time to Cook/Blend: Not applicable (unless infusing)

Servings: 1 glass


Equipment for Optimal Hydration

  • Glass or bottle
  • Optional: Infuser pitcher or fruit infuser bottle

Nutritional Benefits of Pure Water


While plain water doesn’t contain macronutrients like carbohydrates, proteins, or fats, its nutritional benefits are profound and unique. It is calorie-free, sugar-free, and an excellent source of essential minerals like calcium, magnesium, and potassium, depending on its source. This facilitates the absorption of vitamins and minerals from the foods we eat, making all other nutritional intake more effective. It also aids in detoxifying the body by flushing out waste products, ensuring our internal systems remain clean and efficient. This is the purest form of hydration, supporting metabolic processes without adding unnecessary calories or artificial ingredients.


Instructions for Enjoying Your Water


Choose Your Vessel: Start by selecting a clean glass, a reusable bottle, or an infuser pitcher. The type of container you choose might depend on whether you plan to drink it immediately, carry it with you, or infuse it with flavors.

Fill with Quality Water: Turn on your tap and fill your chosen vessel with fresh, clean water. If you prefer filtered, use your home filtration system or bottled. Ensure this is at your desired temperature – some prefer it chilled, while others enjoy room temperature.

Optional: Enhance with Natural Flavors (Infused Water): If you wish to add a natural twist, consider infusing.

Slice Your Ingredients: Wash and thinly slice fruits like lemon, lime, orange, cucumber, or berries. For herbs, gently muddle a few sprigs of mint or basil to release their aromatic oils.

Combine and Infuse: Place the sliced fruits and/or herbs into your water. For a subtle flavor, let it sit for 15-30 minutes. For a stronger taste, allow it to infuse in the refrigerator for 2-4 hours, or even overnight. The longer it infuses, the more pronounced the flavor will be.

Sip and Enjoy: Take regular sips throughout the day. Don’t wait until you feel thirsty, as thirst is often a sign that your body is already beginning to dehydrate. Make it a habit to keep water within easy reach.

Refill as Needed: Once you’ve finished your glass or bottle, make sure to refill it promptly. Consistent hydration is key, so aim to drink several glasses or bottles throughout your day to meet your body’s needs.


The Profound Health Benefits of Adequate Water Intake

Supporting Cellular Function and Nutrient Transport

This is the primary component of all cells in the body, and it’s essential for maintaining their structure and function. It acts as a medium for transporting vital nutrients, oxygen, and hormones to cells throughout the body. Without it, cells cannot effectively receive the nourishment they need, impairing their ability to perform their specific roles, from muscle contraction to nerve transmission.

Boosting Energy Levels and Cognitive Function

Even mild dehydration can significantly impact energy levels and cognitive function. When you’re dehydrated, your blood volume decreases, requiring your heart to work harder to pump oxygenated blood to your organs, including your brain. This can lead to feelings of fatigue, sluggishness, and reduced concentration. Proper hydration ensures efficient blood flow, providing your brain with the oxygen it needs to stay alert, focused, and mentally sharp. Studies have shown that staying hydrated can improve memory, mood, and overall cognitive performance.


Regulating Body Temperature

Water plays a crucial role in regulating your body’s internal temperature. When your body heats up, whether from exercise or environmental factors, your sweat glands release water from your skin. As this sweat evaporates, it cools your body down, preventing overheating. Without enough, your body’s ability to regulate temperature is compromised, which can lead to heat exhaustion or even heatstroke in severe cases.

Lubricating Joints and Protecting Tissues

Your joints, spinal cord, and tissues rely on water for lubrication and protection. Cartilage, which cushions the ends of bones in your joints, contains a significant amount of water. Proper hydration helps maintain the elasticity and smoothness of cartilage, reducing friction and allowing for fluid movement. It also acts as a shock absorber for the brain and spinal cord, protecting them from physical impact.


Aiding Digestion and Preventing Constipation

This is essential for a healthy digestive system. It helps break down food and dissolve nutrients, making them easier for your body to absorb. More importantly, it keeps stool soft and allows it to pass more easily through the digestive tract, preventing constipation. When you don’t drink enough, your colon pulls water from your stool, making it hard and difficult to pass.

Detoxing the Body and Flushing Out Waste

Your kidneys need sufficient water to effectively filter waste products and toxins from your blood. This helps transport these waste products out of the body through urine. When you are adequately hydrated, your kidneys can work more efficiently, supporting your body’s natural detoxification processes and preventing the buildup of harmful substances.


Enhancing Skin Health and Appearance

Water is vital for maintaining skin health, elasticity, and a youthful appearance. Hydrated skin cells appear plumper and less prone to wrinkles. It helps maintain the skin’s natural moisture barrier, protecting it from environmental damage and keeping it supple. While drinking water won’t miraculously erase wrinkles, consistent hydration contributes to a healthier, more radiant complexion.


Supporting Weight Management

Drinking water can be a simple yet effective tool for weight management. Often, the body confuses thirst with hunger, leading to unnecessary snacking. Drinking a glass before meals can help you feel fuller, potentially reducing your overall calorie intake. It can also boosts metabolism, helping your body burn more calories throughout the day. Moreover, choosing water instead of sugary drinks eliminates empty calories, significantly contributing to weight loss efforts.


Preventing Headaches and Migraines

Dehydration is a common trigger for headaches and migraines. When your body lacks water, tissues can shrink, pulling away from the skull and causing pain. Drinking enough can often prevent or alleviate these types of headaches. For many, simply rehydrating is an effective remedy for mild dehydration headaches.


Hydration Beyond the Glass: Alternative Water Sources

While plain water is paramount, there are other ways to ensure you’re getting enough fluids and essential nutrients. These alternatives can add variety and additional benefits to your daily hydration routine.

Infused Waters

Infused are plain water with natural flavorings from fruits, vegetables, and herbs. These not only make drinking more enjoyable but also provide additional vitamins and antioxidants.

  • Cucumber Mint: Refreshing and calming.
  • Lemon Ginger : Boosts digestion and provides a subtle kick.
  • Berry Basil : Rich in antioxidants and naturally sweet.

Herbal Teas (Caffeine-Free)

Herbal teas are a wonderful way to hydrate while enjoying warm, soothing flavors. Opt for caffeine-free varieties to avoid any diuretic effects that might counter hydration.

  • Chamomile Tea: Known for its calming properties.
  • Peppermint Tea: Aids digestion and can relieve headaches.
  • Rooibos Tea: Naturally caffeine-free and rich in antioxidants.

Broths

Bone broth or vegetable broths are excellent sources of electrolytes and minerals, especially beneficial during illness or after intense exercise. They are savory alternatives to sweet beverages and provide a comforting warmth.

Water-Rich Foods

Incorporating foods with high water content significantly contributes to your daily fluid intake.

  • Fruits: Watermelon (92% ), strawberries (91%), cantaloupe (90%), oranges (87%).
  • Vegetables: Cucumber (95%), lettuce (96%), celery (95%), bell peppers (92%).


Variations to Customize Your Water Intake

VariationDescriptionBenefitsIdeal For
Fruity InfusionAdding sliced fruits (berries, citrus, melon).Natural sweetness, vitamins, antioxidants, encourages more drinking.Those who dislike plain water, looking for a healthy flavor boost.
Herbal InfusionInfusing with herbs like mint, basil, rosemary, or ginger.Refreshing taste, potential digestive aid, calming properties.Individuals seeking subtle, sophisticated flavors and digestive support.
Electrolyte BoostAdding a pinch of sea salt, a squeeze of lemon, or electrolyte drops.Replenishes essential minerals lost through sweat, prevents cramps.Athletes, those in hot climates, or experiencing illness.
Sparkling WaterUsing plain sparkling water instead of still .Adds effervescence and a different mouthfeel, can be more appealing.People who enjoy carbonated drinks but want to avoid sugar and artificial ingredients.
Temperature PlayEnjoying it at various temperatures: ice-cold, room temperature, warm.Can be more soothing or refreshing depending on personal preference/climate.Anyone, depending on mood or weather.

Final Thoughts on Hydration


The importance of water cannot be overstated. It is the silent workhorse behind every beat of your heart, every thought you have, and every step you take. Prioritizing consistent and adequate hydration is one of the simplest yet most profoundly impactful actions you can take for your health. By understanding the vast benefits and finding enjoyable ways to incorporate more water into your daily routine, you unlock a fundamental pillar of well-being.

Don’t wait for thirst to strike; make hydration a conscious and continuous effort. Your body will thank you for it, with improved energy, clearer skin, better digestion, and an overall enhanced quality of life. Start today – embrace the incredible power of water!


Frequently Asked Questions (FAQs)

Q1: How much water should I drink daily?

A1: The general recommendation is about eight 8-ounce glasses (around 2 liters or half a gallon) per day, but individual needs vary based on factors like activity level, climate, and overall health. Listen to your body, and aim for light yellow urine, which typically indicates good hydration. If you are very active or live in a hot climate, you may need more.

Q2: Can I get enough water from other beverages like coffee or soda?

A2: While beverages like coffee and soda contain water, they are not ideal for hydration. Caffeinated drinks can have a diuretic effect, meaning they can cause your body to excrete more fluid. Sugary sodas also add unnecessary calories and can have negative health impacts. For optimal hydration, plain is always the best choice, supplemented by water-rich foods and caffeine-free herbal teas.


References

  1. NIH – Water, hydration, and health
  2. Nature – Water as an essential nutrient
  3. Harvard Health – How much water should you drink?

Recent Posts


Quick Brussels Sprouts With Paprika and Sesame seeds


A side-view, close-up shot of a white plate with a main meal. A perfectly seared salmon fillet is in the foreground, next to a generous serving of roasted Brussels sprouts with paprika and sesame seeds. The image is horizontally oriented.

This article explores a vibrant and nutritious recipe for Brussels sprouts, perfect for anyone looking to add more healthy greens to their diet. We’ll show you how to transform these humble vegetables into a star side dish, proving that Brussels sprouts can be both quick and incredibly tasty. Get ready to elevate your culinary game with this simple yet sophisticated recipe.


Elevate Your Everyday Greens

Brussels sprouts often get a bad rap, but with the right preparation, they can be transformed into a surprisingly delicious and versatile vegetable. Gone are the days of bland, overcooked sprouts; this recipe for Quick Brussels Sprouts with Paprika and Sesame Seeds is designed to change perceptions and delight your taste buds. It’s a simple, speedy, and incredibly flavorful way to enjoy a nutritional powerhouse.

We understand that in our fast-paced lives, finding time for healthy cooking can be a challenge. That’s why this recipe focuses on efficiency without compromising on taste or nutritional value. You’ll be amazed at how quickly you can create a side dish that’s not only good for you but also bursting with a smoky, nutty flavor profile that will complement almost any meal.


Brussels Sprouts: A Flavorful and Versatile Vegetable

This dish isn’t just about speed; it’s about introducing a new level of enjoyment to your vegetable repertoire. The combination of sweet paprika, which adds a beautiful color and smoky depth, and the satisfying crunch and earthy notes of sesame seeds, elevates the humble Brussels sprout to something truly special. It’s a harmonious blend that creates an irresistible aroma and a fantastic texture.

Whether you’re a seasoned home cook or just starting your culinary journey, these Quick Brussels Sprouts are incredibly forgiving and easy to master. We’ve laid out the steps clearly, ensuring that even less experienced cooks can follow along with confidence and achieve perfect results every time. Get ready to impress yourself and your family with this delightful creation.

So, if you’re ready to bid farewell to boring vegetables and embrace a dish that’s both healthy and incredibly satisfying, you’ve come to the right place. Let’s dive into the world of perfectly cooked Brussels sprouts, seasoned with an irresistible blend that will make them a regular feature on your dining table.


Time to Prepare

  • Prep Time: 10 minutes

Time to Cook/Blend

  • Cook Time (Stovetop): 15-20 minutes
  • Cook Time (Oven Roast): 20-25 minutes
  • Cook Time (Air Fryer): 12-15 minutes

Servings

  • Serves: 4

Nutritional Information (per serving)

  • Calories: 120 kcal
  • Protein: 5g
  • Fat: 7g
  • Carbohydrates: 10g
  • Fiber: 4g
  • Vitamin C: 120% DV
  • Vitamin K: 150% DV

Essential Equipment for Perfect Brussels Sprouts


Before you begin, gather these simple tools to ensure a smooth cooking process:

  • Large mixing bowl
  • Sharp knife
  • Cutting board
  • Large skillet or baking sheet (depending on cooking method)
  • Spatula or tongs
  • Measuring spoons

Ingredients for Flavorful Brussels Sprouts


Here’s what you’ll need to create this delicious side dish:

  • 1.5 lbs fresh Brussels sprouts, trimmed and halved
  • 2 tablespoons olive oil
  • 1 teaspoon sweet paprika
  • 1/2 teaspoon smoked paprika (optional, for extra depth)
  • 1 tablespoon sesame seeds (toasted or untoasted)
  • 1/2 teaspoon garlic powder
  • Salt and freshly ground black pepper to taste
  • A pinch of red pepper flakes (optional, for a hint of heat)

Step-by-Step Instructions for Quick Brussels Sprouts

Follow these detailed steps to achieve perfectly cooked, flavorful Brussels sprouts.

Method 1: Stovetop Sauté (Quickest Method)


Prepare the Brussels Sprouts: Start by thoroughly washing your Brussels sprouts under cold running water. Pat them dry with a clean kitchen towel or paper towels. This step is crucial for achieving a nice sear. Carefully trim off the very end of the stem from each sprout. Remove any loose or discolored outer leaves. Then, using a sharp knife, cut each Brussels sprout in half lengthwise. If some sprouts are particularly large, you might want to quarter them to ensure even cooking.

Season the Sprouts: Place the trimmed and halved Brussels sprouts into a large mixing bowl. Drizzle them with 2 tablespoons of olive oil, ensuring each sprout is lightly coated. Next, sprinkle in the sweet paprika, smoked paprika (if using), garlic powder, salt, and black pepper. Add a pinch of red pepper flakes now if you enjoy a little heat. Use your hands to gently toss the sprouts, making sure all the seasonings are evenly distributed and cling to the sprouts.

Heat the Skillet: Place a large, heavy-bottomed skillet (cast iron works wonderfully here) over medium-high heat. Allow the skillet to heat up for about 2-3 minutes until it’s hot but not smoking. A hot skillet is key to getting a good sear on the sprouts.

Sauté the Sprouts: Carefully add the seasoned Brussels sprouts to the hot skillet in a single layer. Try not to overcrowd the pan, as this can steam the sprouts instead of searing them. If necessary, cook them in two batches. Let the sprouts cook undisturbed for 5-7 minutes. This allows them to develop a beautiful golden-brown sear on one side.

Toss and Continue Cooking: After the initial searing, use a spatula or tongs to flip the sprouts. Stir and toss them occasionally, allowing them to cook for another 8-10 minutes, or until they are tender-crisp and nicely browned all over. You want them to be tender on the inside with a slight char on the outside.

Add Sesame Seeds: During the last 2-3 minutes of cooking, sprinkle the sesame seeds over the Brussels sprouts. Continue to toss gently, allowing the sesame seeds to lightly toast and release their nutty aroma.

Serve: Taste and adjust seasoning if needed. Transfer the Quick Brussels Sprouts with Paprika and Sesame Seeds to a serving dish and serve immediately. Enjoy!

Method 2: Oven Roasting


For a hands-off approach that still yields fantastic results, oven roasting is a great alternative.

Prepare and Season: Follow steps 1 and 2 from the Stovetop Sauté method to trim, halve, and season your Brussels sprouts.

Preheat Oven: Preheat your oven to 400°F (200°C).

Arrange on Baking Sheet: Spread the seasoned Brussels sprouts in a single layer on a large baking sheet. Ensure they have enough space and are not overcrowded; use two baking sheets if necessary.

Roast: Roast for 20-25 minutes, stirring halfway through, until the sprouts are tender and caramelized with crispy edges.

Add Sesame Seeds: Sprinkle the sesame seeds over the sprouts during the last 5 minutes of roasting and toss gently.

Serve: Remove from the oven, taste, adjust seasoning, and serve hot.

Method 3: Air Fryer


The air fryer offers a super-crispy texture in even less time.

Prepare and Season: Follow steps 1 and 2 from the Stovetop Sauté method to trim, halve, and season your Brussels sprouts.

Preheat Air Fryer: Preheat your air fryer to 375°F (190°C) for 5 minutes (if your model requires preheating).

Air Fry: Place the seasoned Brussels sprouts in the air fryer basket in a single layer. You will likely need to cook them in batches. Air fry for 12-15 minutes, shaking the basket vigorously every 4-5 minutes, until they are tender and beautifully crispy.

Add Sesame Seeds: Add the sesame seeds during the last 3-4 minutes of air frying, shaking again to distribute.

Serve: Remove, taste, adjust seasoning, and serve immediately.


The Health Benefits of Brussels Sprouts


Beyond their delicious taste and ease of preparation, Brussels sprouts are a nutritional powerhouse. Incorporating them into your diet offers a multitude of health perks.

Rich in Vitamins and Minerals

These mini cabbages are excellent sources of Vitamin K, essential for blood clotting and bone health, and Vitamin C, a powerful antioxidant that supports your immune system and skin health. They also provide a good amount of Vitamin A, folate, and manganese.

High in Fiber

Brussels sprouts are packed with dietary fiber, which is crucial for digestive health. Fiber helps to regulate bowel movements, prevent constipation, and can contribute to a feeling of fullness, aiding in weight management.

Antioxidant Powerhouse

Like other cruciferous vegetables, Brussels sprouts are loaded with antioxidants. These compounds help to combat oxidative stress in the body, which can reduce inflammation and lower the risk of chronic diseases.

Heart Health Support

The fiber and antioxidants in Brussels sprouts contribute to cardiovascular health. They can help lower cholesterol levels and support healthy blood pressure, promoting a healthier heart.


Variations to Customize Your Brussels Sprouts


Variations to Customize Your Brussels Sprouts

This recipe is incredibly versatile! Feel free to experiment with these variations to suit your taste or dietary needs.

Cheesy Goodness: For a decadent finish, toss the cooked sprouts with a tablespoon of grated Parmesan cheese or nutritional yeast for a dairy-free alternative. The heat from the sprouts will melt the cheese, creating a delicious coating.

Sweet and Tangy: Drizzle the cooked Brussels sprouts with a tablespoon of balsamic glaze or a squeeze of fresh lemon juice at the end. This adds a bright, acidic note that beautifully cuts through the richness.


Spicy Kick: For those who love heat, increase the red pepper flakes or add a pinch of cayenne pepper with the paprika. You could also finish the dish with a hot honey drizzle.

Add Nuts and Dried Fruit: For extra texture and a touch of sweetness, toss in some toasted pecans, walnuts, or almonds along with the sesame seeds. A handful of dried cranberries or chopped apricots added at the end of cooking can also provide a wonderful contrast.

Umami Boost: Give your Brussels sprouts a savory depth by adding a teaspoon of tamari or a dash of liquid aminos during the last few minutes of cooking. This works especially well with a sprinkle of toasted nori flakes or nutritional yeast.


Final Thoughts: Embrace the Brussels Sprout Revolution


Hopefully, this article has convinced you that Brussels sprouts are far from the dreary, bitter vegetables of childhood memory. With a quick and simple preparation featuring the smoky sweetness of paprika and the satisfying crunch of sesame seeds, they transform into a vibrant, flavorful, and incredibly healthy side dish. This recipe is more than just a meal; it’s an invitation to rediscover a humble vegetable and integrate more nutritious greens into your daily diet with ease and enjoyment.

We encourage you to make these Quick Brussels Sprouts with Paprika and Sesame Seeds a regular part of your cooking routine. Experiment with the variations, adjust the seasonings to your liking, and make this recipe your own. You’ll not only be treating your taste buds to a delightful experience but also nourishing your body with essential vitamins, minerals, and fiber. So, go ahead, grab some fresh Brussels sprouts, and embark on a culinary journey that promises both health and flavor!


Frequently Asked Questions (FAQs)

Q: Can I use frozen Brussels sprouts for this recipe?

A: While fresh Brussels sprouts are highly recommended for the best texture and flavor, you can use frozen ones in a pinch. However, they may release more water during cooking, making it harder to get them crispy. If using frozen, allow them to thaw completely and pat them very dry before proceeding with the recipe. You might need to extend the cooking time slightly, especially for stovetop or oven methods, to allow the excess moisture to evaporate.

Q: What main dishes pair well with these Brussels sprouts?

A: These versatile Brussels sprouts pair wonderfully with a variety of main courses. Their savory, slightly sweet, and nutty flavor profile complements roasted chicken, grilled fish (like salmon or cod), pork tenderloin, or even a simple steak. For a vegetarian meal, they are excellent alongside quinoa, rice pilaf, or a hearty lentil dish. They also make a fantastic addition to a holiday spread!

Q: How can I store leftover Brussels sprouts?

A: Leftover Quick Brussels Sprouts with Paprika and Sesame Seeds can be stored in an airtight container in the refrigerator for up to 3-4 days. To reheat, you can warm them in a skillet over medium heat, in the oven at 350°F (175°C) for about 5-10 minutes, or in an air fryer for a few minutes until heated through and slightly crispy again. Avoid microwaving if you want to retain their crispy texture.


References


Recent Posts