The Wrinkle Reduction Visualizer is a web-based tool designed to give you a glimpse into the potential effects of facial yoga on your skin. It’s a fun and interactive way to see a simulated “before and after” scenario. Please note that this tool provides a visualization, and individual results from facial yoga may vary.
How to Use the Visualizer
Upload Your Photo:
Click on the “Upload Photo” button.
Select an image from your computer or mobile device. For the best results, use a clear photo of your face.
The name of your uploaded file will be displayed below the button.
If you upload a file that is not an image, an error message will be displayed.
View Your Photo:
Once your image is uploaded, it will appear in the preview area.
A loading indicator may appear briefly while your image is being processed.
Interact with the Buttons:
Before: Click this button to see your original uploaded photo. This allows you to return to the starting point at any time. When you click this, the cropper is reset.
After (Simulated): Click this button to apply a simulated wrinkle reduction effect to your photo. The tool will apply a subtle blur and adjust the color slightly to represent the potential smoothing effects of facial yoga. The Cropper is destroyed after this effect is applied.
Reset: Click this button to remove the uploaded image and reset the tool to its initial state. This clears the uploaded image, any applied effects, and disables the buttons.
Upload a photo to see the simulated effects of face yoga.
Disclaimer: Simulated visualization. Results may vary.
Important Considerations:
Image Quality: The quality of your uploaded photo can affect the visualization. A clear, well-lit photo will generally provide the best results.
Cropping: The tool crops the image to a square.
Simulation Only: The “After” view provides a simulation of potential wrinkle reduction. It is not a guarantee of actual results. The effects are subtle and designed to give a general idea.
Browser Compatibility: The tool is designed to work in modern web browsers.
Further Details and Benefits
Privacy: Your uploaded photo is processed locally within your browser. The image data is not sent to a server.
Experimentation: Use the tool to experiment with different photos and see how the simulated effects vary.
Motivation: The visualizer can be a fun way to explore the potential benefits of facial yoga and may provide some motivation to incorporate it into your routine.
Free and Easy to Use: The Wrinkle Reduction Visualizer is a free tool that is simple and straightforward to use. There is no software to download or install.
No Registration Required: You can use the tool without creating an account or providing any personal information.
Click Here for more ways to reduce your visual wrinkles.
Disclosure: Please note that I may earn a small commission if you make a purchase through links on this website. This helps support the development and maintenance of this tool.
The Skin Age Calculator below is an interactive tool designed to provide users with an estimate of their skin’s age compared to their actual chronological age. It works by gathering information about various factors that influence skin health, including personal habits, skincare routines, and lifestyle choices.
Users input data through a series of questions about their age, gender, sunscreen usage, smoking habits, sleep quality, water intake, skincare practices, stress levels, exercise frequency, and diet. Based on these inputs, the calculator applies a scoring system, increasing or decreasing the “skin age” relative to the chronological age. This scoring system is based on general knowledge of factors that contribute to skin aging. Finally, the tool provides personalized recommendations for face yoga exercises, skincare practices, and lifestyle adjustments, aiming to help users improve or maintain their skin health.
Skin Age Calculator
Skin Age Calculator
Your Results
Recommendations:
Face Yoga
Regular face yoga can help improve skin elasticity and reduce the appearance of wrinkles. Check out these exercises:
A healthy lifestyle is crucial for maintaining youthful skin:
Get enough sleep (7-9 hours per night).
Drink plenty of water (8 glasses per day).
Manage stress through relaxation techniques.
Eat a balanced diet rich in fruits, vegetables, and antioxidants.
Exercise regularly to improve circulation and overall health.
Ready to Fight wrinkles and fine lines. Find the perfect anti-aging solution for your skin. Click Here for more suggestions about your skincare routines.
Disclaimer:
The results provided by this calculator are estimates for general knowledge and informational purposes only, and do not constitute medical advice. This calculator is not intended to diagnose, treat, cure, or prevent any disease. Individual results may vary. Consult with a qualified healthcare professional for personalized advice regarding your health.
Disclosure:
This website may contain affiliate links to products. We may receive a commission for purchases made through these links.
Ever wonder why you might not feel as spry as you used to? Or perhaps you’ve noticed a few more aches and pains creeping in? It’s all part of the incredible journey of aging, and your musculoskeletal system – that amazing network of muscles, bones, and joints – is right at the heart of it.
But don’t worry, this isn’t a story of inevitable decline! Think of this as your guide to understanding these changes and, more importantly, what you can do to stay strong, mobile, and feeling fantastic for years to come.
The Sneaky Ways Aging Affects Your Muscles: It’s Not Just About Size!
You might have heard that we lose muscle mass as we age, and that’s true – it’s called sarcopenia . You might notice feeling more tired or finding it harder to lift things . But it’s not just about the size of your muscles shrinking. The actual fibers within your muscles can also get smaller, and your body’s ability to repair and rebuild muscle slows down . Sometimes, that lost muscle even gets replaced by tougher, less flexible tissue and even some fatty deposits ! Interestingly, these changes can start happening earlier than you think, sometimes even in your 20s for men and 40s for women . Plus, your nervous system, which tells your muscles what to do, can also become less efficient . All of this can impact everything from your ability to move to your metabolism and even your resistance to illness . And here’s a key point: building new muscle gets a bit tougher as we age . This means being proactive with your muscle health is more important than ever!
Bone Changes You Might Not See (But Definitely Feel!): From Strong to More Fragile
Interactive Aging Charts
Relative Muscle Strength vs. Age
This interactive chart below allows you to explore how muscle strength and bone density change with age. Use the controls to see how these metrics vary for men and women, and the potential impact of exercise. We hope this tool provides valuable insights into the aging process.
Our bones are constantly being remodeled, like tiny construction sites in our bodies. But as we get older, this process can become a bit unbalanced, leading to a gradual loss of bone density, especially for women after menopause due to lower estrogen levels . This can make your bones more brittle and increase the risk of fractures . You might even notice yourself getting a little shorter over time . This happens because the discs in your spine lose fluid and become thinner, and the vertebrae themselves can lose some of their mineral content. Building strong bones when you’re younger is super important, as your peak bone mass is usually around age 30 . But it’s never too late to take care of your bone health! Interestingly, at a cellular level, the cells that build new bones can become less efficient as we age, sometimes even turning into fat cells instead .
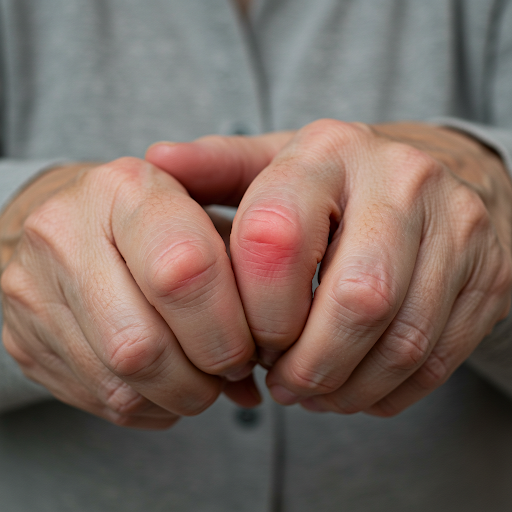
Remember when you could bend and stretch without a second thought? As we age, our joints can become a bit stiffer and less flexible. The lubricating fluid in our joints can decrease, and the cartilage that cushions the ends of our bones can start to wear away. This can lead to osteoarthritis, causing pain, stiffness, and inflammation. Even the ligaments that hold our bones together can shorten and become less flexible . Sometimes, minerals can even deposit around the joints, causing more stiffness . While these changes are common, affecting almost everyone to some degree, lack of movement can actually make things worse! Moving your joints helps keep them lubricated and the cartilage healthy.
What’s Causing These Changes? Let’s Break It Down
So, what’s behind these musculoskeletal changes? It’s usually a combination of factors:
Not Moving Enough (Disuse): This is a big one! Lack of physical activity can be responsible for at least half of the age-related changes in your muscles, bones, and joints. When you’re inactive, your muscles lose strength, your bones can become weaker, and your joints can get stiff.
Hormone Shifts: Hormones play a vital role, especially for bone health. Women experience a significant drop in estrogen during menopause, which can lead to faster bone loss . Men also see a gradual decline in hormones like testosterone, which can contribute to bone loss later in life.
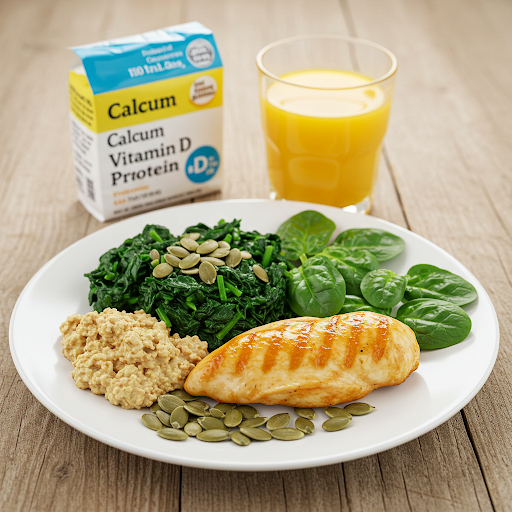
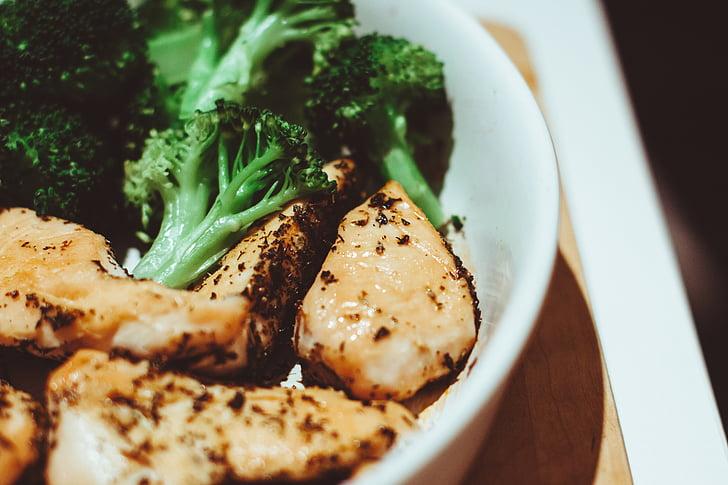
Missing Key Nutrients: What you eat (or don’t eat) matters! Not getting enough calcium, vitamin D, and protein can really impact your muscles and bones. Calcium is essential for strong bones, vitamin D helps your body absorb calcium, and protein is crucial for building and repairing muscles.
The Good News: You Can Take Control! Powerful Strategies to Slow Down and Even Reverse These Changes
Here’s the empowering part: you have the power to significantly influence how your musculoskeletal system ages! By taking proactive steps, you can stay stronger, more mobile, and enjoy a higher quality of life.
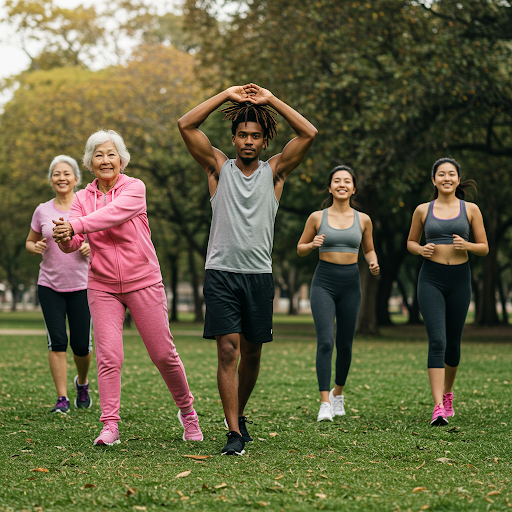
1. Get Moving! Exercise is Your Secret Weapon
Regular physical activity is one of the best things you can do for your muscles, bones, and joints. Aim for a mix of different types of exercise:
Weight-Bearing Exercises: Think activities that make your bones work against gravity, like walking, jogging, dancing, and even gardening. Short bursts and variety are great for bone health.
Resistance Training (Strength Training): This helps build muscle mass and strength, improves balance, and protects your joints. Use weights, resistance bands, or even your own body weight. Aim for at least two sessions a week.
Flexibility Exercises: Stretching, yoga, and Tai Chi can help maintain joint mobility and muscle flexibility, reducing stiffness.
Balance Exercises: Activities like Tai Chi and even just standing on one leg can improve stability and reduce your risk of falls. Strengthening your core muscles also helps.
Low-Impact Cardio: Biking and swimming are great for your heart without putting too much stress on your joints.
Remember to talk to your doctor before starting any new exercise program, especially if you have any health conditions. Even small amounts of activity throughout the day can make a big difference.
2. Fuel Your Body Right: Nutrition for Strong Bones and Muscles
What you eat is just as important as how you move! Make sure you’re getting enough of these key nutrients:
Calcium: Aim for around 1000-1200 mg per day from sources like dairy, broccoli, kale, salmon, and tofu. Talk to your doctor about supplements if needed.
Vitamin D: Get about 600-800 IU daily from fatty fish, eggs, fortified milk, and sunlight. Supplementation might be necessary, especially in winter.
Protein: Aim for 1.0 to 1.2 grams of protein per kilogram of body weight daily to support muscle health . Good sources include meat, poultry, fish, eggs, dairy, beans, and lentils.
3. Watch Your Weight: Less Stress on Your Joints
Excess weight puts extra pressure on your weight-bearing joints like your knees, hips, and feet. Even a small amount of weight loss can make a big difference in reducing joint pain and slowing down wear and tear. Focus on a balanced diet and regular exercise to maintain a healthy weight. While BMI is a guide, for older adults, focusing on overall well-being and how weight impacts quality of life is key.
4. Stand Tall and Lift Smart: Protect Your Body’s Frame
Good posture and safe lifting techniques are crucial for preventing musculoskeletal problems.
Good Posture: Keep your shoulders back, head level, and engage your core muscles when sitting and standing.
Safe Lifting: Bend your knees, keep your back straight, and lift with your legs, keeping the object close to your body. Avoid twisting.
5. Consider Hormone Replacement Therapy (for Women): Talk to Your Doctor
For women experiencing menopause, hormone replacement therapy (HRT) can help prevent bone loss and reduce the risk of osteoporosis and fractures. Some research also suggests it might help maintain muscle mass and strength. However, it’s important to discuss the potential risks and benefits with your doctor, as HRT isn’t for everyone . It’s often recommended to start before age 60.
6. The Benefits of Physical Therapy: Your Personalized Path to Strength
Physical therapy can be incredibly beneficial for addressing age-related musculoskeletal issues. A physical therapist can create a tailored plan to improve your strength, balance, mobility, and function, especially if you’re dealing with conditions like arthritis or osteoporosis.
7. What About Supplements Like Glucosamine and Chondroitin?
These supplements are often used for joint health, particularly osteoarthritis. However, the scientific evidence on how well they work for pain and stiffness is mixed. While generally safe, it’s always best to talk to your doctor before starting any new supplements.
Your Ageless Body Journey Starts Now!
Aging is inevitable, but feeling frail and limited doesn’t have to be. By understanding how your musculoskeletal system changes and taking proactive steps like regular exercise, a healthy diet, and maintaining a healthy lifestyle, you can significantly slow down these changes and enjoy an active, independent, and fulfilling life for many years to come. It’s never too late to start investing in your ageless body!
This website may contain affiliate links to products. We may receive a commission for purchases made through these links.
Disclaimer:
The information provided in this article is for general knowledge and informational purposes only, and does not constitute medical advice. It is essential to consult with a qualified healthcare professional for any health concerns or before making any decisions related to your health or treatment. The data and trends presented in the chart are based on general population studies and may not reflect individual experiences.
In a world increasingly obsessed with aesthetics, the quest for a well-defined jawline has surged in popularity.
Once a subtle feature, the jawline now holds a prominent place in our perception of attractiveness, strength, and even youthfulness.
Whether you’re aiming for a sharper profile, seeking to reduce the appearance of a double chin, or simply looking to enhance your facial symmetry, the desire for a sculpted jawline is a common thread.
But achieving this coveted look doesn’t necessarily require invasive procedures or expensive treatments. The answer, surprisingly, might lie in a series of targeted exercises that can strengthen and tone the muscles surrounding your jaw.
Many of us unknowingly neglect the muscles in our face and neck, leading to a loss of definition and a softening of the jawline over time.
Just like any other muscle group, these areas respond positively to regular exercise, offering a natural and accessible way to enhance your facial features.
Think of it as a workout for your face – a way to chisel and refine your jawline from the inside out.
This article delves into the world of facial exercises, presenting you with 19 of the most effective techniques to help you achieve a more defined and sculpted jawline.
We’ll explore exercises that target various muscles, from the masseter and temporalis to the platysma and orbicularis oris, providing a comprehensive approach to facial fitness.
You’ll learn how to properly execute each exercise, understand the underlying muscle engagement, and discover how to incorporate them seamlessly into your daily routine.
Beyond the aesthetic benefits, these exercises can also contribute to improved oral health, reduced jaw tension, and even a more youthful appearance.
By strengthening the muscles responsible for jaw movement and support, you can enhance your overall facial structure and create a more balanced and harmonious look.
Whether you’re a seasoned face yoga enthusiast or just beginning your journey to a more defined jawline, this guide provides the tools and knowledge you need to achieve your goals.
Let’s dive into the 19 best exercises that can help you sculpt and define your jawline.
1. Jaw Release
How to do it: Sit or stand comfortably and move your jaw as if you’re chewing.
Open your mouth wide, then close it while making a chewing motion.
Repeat this for about 30 seconds to a minute.
Why it helps:This exercise helps to strengthen the jaw
Muscles.
2. Chin Lifts
How to do it: Stand or sit up straight and tilt your head back to look at the ceiling.
Pucker your lips and stretch them towards the ceiling.
Hold for 5 seconds and relax. Repeat this 10-15 times.
Why it helps: This will target the muscles in the jaw and
Neck.
3. Neck Stretch
How to do it: Sit or stand with your back straight.
Slowly tilt your head to one side, bringing your ear toward your shoulder.
Hold for 10-15 seconds, then switch sides.
Why it helps:This stretch helps to elongate the neck and
define the Jawline.
4. Tongue Press
How to do it: Sit or stand upright and press your tongue against the roof of your mouth.
Hold this position for 5 seconds, then relax.
Repeat 10-15 times.
Why it helps:This exercise engages the muscles in the jaw and neck, helping to
sculpt the jawline.
5. Jaw Jut (Forward & Upward)
How to do it: Sit or stand with your head level. Push your lower jaw forward so that your bottom teeth protrude slightly in front of your top teeth. Hold this position for 5-10 seconds. Then, from this jutted position, try to lift your lower jaw upwards as if you’re trying to scoop something with your chin, holding for another 5-10 seconds.
Why it helps: This exercise works the muscles around your jaw joint and under your chin, helping to define the lower jawline and reduce the appearance of a double chin.
6. Tongue Press (Roof of Mouth)
How to do it: Close your mouth and press your entire tongue against the roof of your mouth. Ensure your tongue is flat against the palate, applying firm pressure. Hold this position for 15-20 seconds. You should feel tension in your jaw muscles and under your chin.
Why it helps: This exercise engages the muscles under your chin and in your neck, which contribute to a more defined jawline and can help reduce submental fat (fat under the chin).
7.Neck Tilts (Lateral & Front/Back):
How to do it (Lateral): Sit or stand with a straight back. Gently tilt your head to the right, trying to bring your ear towards your shoulder (without lifting your shoulder). Hold for 5-10 seconds and repeat on the left side.
How to do it (Front/Back): Gently tilt your head forward, bringing your chin towards your chest. Hold for 5-10 seconds. Then, gently tilt your head back, looking upwards. Hold for 5-10 seconds. Be careful not to strain your neck.
Why it helps: Neck exercises help to strengthen and stretch the neck muscles, which can improve posture and reduce tension in the neck and jaw area, indirectly contributing to a more defined jawline.
8.Collarbone Backup (Chin Tuck with Resistance):
How to do it: Stand with your back against a wall and your feet slightly away from the wall. Tuck your chin towards your chest, as if you are making a double chin. While holding this chin tuck, try to push the back of your head against the wall. You should feel a stretch in the back of your neck and engagement in the front of your neck. Hold for 10-15 seconds.
Why it helps: This exercise focuses on the muscles in the front of your neck, which support the jawline and can help improve posture and reduce the appearance of a soft jawline.
9.Air Kiss Pout (Exaggerated Pout):
How to do it: Pucker your lips as if you are going to give a big kiss, extending them forward as far as you comfortably can. Hold this exaggerated pout for 10-15 seconds. You should feel the muscles around your mouth and jaw working.
Why it helps: This exercise works the muscles around your mouth and cheeks, which are connected to the jawline. It can help to tone these facial muscles and contribute to a more sculpted appearance.
10.Vowel Sounds (Exaggerated Articulation of O and E):
How to do it: Open your mouth wide and exaggerate saying the vowel sound “O,” holding the shape for a few seconds. Then, transition to exaggerating the vowel sound “E,” stretching your mouth into a wide smile shape, holding for a few seconds. Repeat this O-E sequence for 10-15 repetitions.
Why it helps: Exaggerated vowel sounds engage a range of facial muscles, including those around your mouth, cheeks, and jawline. This dynamic exercise can help improve muscle tone and definition in the lower face.
11. Chin-Up (Looking Up and Jutting Jaw):
How to do it: Stand or sit with your head level. Tilt your head back, looking up towards the ceiling. From this position, jut your lower jaw forward and upwards, as if trying to scoop the ceiling with your chin. Hold this position for 5-10 seconds. You should feel a stretch in your neck and under your chin.
Why it helps: Similar to the Jaw Jut, this exercise adds the element of neck extension, further stretching and working the muscles under the chin and along the jawline, potentially reducing a double chin and improving jaw definition.
How to do it: Make a fist and place it directly under your chin. Now, try to open your mouth, but push against your fist to provide resistance. You should feel the muscles in your jaw working hard to open against the resistance. Hold this resistance for 5-10 seconds and repeat.
Why it helps: This isometric exercise strengthens the muscles responsible for opening and closing your jaw, contributing to stronger jaw muscles and potentially a more defined jawline over time.
13. Jaw Slides (Side-to-Side and Forward-Back):
How to do it (Side-to-Side): With your mouth slightly open, slide your lower jaw to the right as far as you comfortably can. Hold for a few seconds, then slide it to the left. Repeat 10-15 times on each side.
How to do it (Forward-Back): With your mouth slightly open, slide your lower jaw forward so your bottom teeth are slightly ahead of your top teeth. Then, slide your jaw back to its normal position. Repeat 10-15 times.
Why it helps: Jaw slides improve the flexibility and strength of the jaw muscles and joint, contributing to better muscle tone around the jawline and potentially improving the overall shape and definition.
14. The Lion’s Yawn (Full Jaw Stretch):
How to do it: Open your mouth as wide as you possibly can, sticking your tongue out as far as you can and stretching your jaw muscles as if you are yawning like a lion. Hold this maximum stretch for 5-10 seconds. Repeat several times.
Why it helps: This exercise provides a full stretch for all the muscles around your jaw and mouth, improving flexibility and potentially toning the muscles for a more defined jawline
15. Chewing Gum (Resistance Chewing):
How to do it: Chew sugar-free gum vigorously for a set period, starting with perhaps 10-15 minutes a day and gradually increasing the duration if desired. Focus on chewing with your entire jaw, engaging all the muscles.
Why it helps: Chewing gum provides resistance to the jaw muscles (masseter and temporalis primarily, but also others). Just like weightlifting for your body, this resistance training can help strengthen and potentially hypertrophy (increase size) the jaw muscles, leading to a more defined and prominent jawline. Important Note: Do not overdo it. Excessive gum chewing could potentially lead to TMJ issues for some individuals. Listen to your body and stop if you experience any jaw pain or discomfort. Start slowly and gradually increase duration.
16. Open-Mouth Hold (Isometric Jaw Strength):
How to do it: Open your mouth as wide as you comfortably can and hold that position. Focus on keeping your jaw muscles engaged and preventing your mouth from closing. Hold this wide-open position for 10-15 seconds, then relax. Repeat several times.
Why it helps: This is an isometric exercise that works the muscles responsible for opening and holding your jaw open, contributing to overall jaw muscle strength and endurance. It can also stretch the muscles involved in jaw closing, potentially contributing to balance in jaw muscle strength.
How to do it: Place the palm of your hand on your forehead. Now, try to open your mouth against the resistance of your hand on your forehead. You are trying to push your forehead upwards with your jaw opening motion, while your hand resists this movement from your forehead. Hold the resistance for 5-10 seconds and repeat.
Why it helps: This exercise provides a different form of external resistance compared to the fist-under-chin press. By pushing against your forehead, you engage the jaw muscles in a slightly different way and also involve neck muscles in stabilizing the head, potentially providing a more comprehensive workout for the jaw and surrounding areas.
18. Corner of Mouth Lift (Targeting Lower Facial Muscles):
How to do it: Keep your lips closed and relaxed. Now, try to lift just the corners of your mouth upwards, as if you are trying to subtly smile but without showing your teeth or opening your lips. You should feel the muscles on the sides of your mouth and slightly down towards your jaw engage. Hold this subtle lift for 5-10 seconds and repeat.
Why it helps: This exercise targets the muscles around the corners of your mouth, including the depressor anguli oris and risorius, which play a role in facial expression and can indirectly influence the appearance of the lower face and jawline. Strengthening these muscles can contribute to a more toned look in this area.
19. Platysma Stretch (Neck Muscle Focus for Jawline Appearance):
How to do it: Sit or stand with good posture. Tilt your head back slightly, looking up towards the ceiling. Now, jut your lower jaw forward and upwards, as if you are trying to touch your upper lip to your nose. You should feel a strong stretch in the front of your neck, specifically in the platysma muscle (the sheet-like muscle that runs down the front of your neck). Hold this stretch for 15-20 seconds.
Why it helps: The platysma muscle is a large, superficial muscle in the neck that can affect the appearance of the jawline and neck area. Stretching and toning the platysma can help reduce the appearance of neck sagging and potentially improve the definition along the jawline and upper neck area.
Important Reminders (Still Apply to These Additional Exercises):
Consistency is Key: These exercises, like the previous ones, require regular practice to potentially see results.
Listen to Your Body: Pain is a signal. Stop if you feel any discomfort and don’t push beyond your comfortable range of motion.
Holistic Approach: Jawline definition is not solely about exercises. Diet, body fat percentage, hydration, sleep, and overall health all play significant roles. Combine these exercises with a healthy lifestyle for the best potential outcome.
Realistic Expectations: Genetics heavily influence facial structure. Exercises can help tone muscles, but they can’t fundamentally change your bone structure. Manage your expectations and focus on consistent effort and overall well-being.
Consult Professionals if Needed: If you have concerns about TMJ or neck pain, or if you’re looking for more personalized advice, consult with a physical therapist, doctor, or qualified facial exercise specialist.
Disclosure:
This page may contain affiliate links. This means that if you click on a link and make a purchase, I may receive a commission at no additional cost to you. I only recommend
Our eyes, are often seen as the windows to the soul, are central to our expressions, communication, and overall facial aesthetics.
They are the first feature others notice, conveying emotion, vitality, and even age. Yet, the delicate skin and intricate network of muscles surrounding our eyes are often among the first to show signs of time, stress, and fatigue.
Fine lines, wrinkles, puffiness, and drooping eyelids can subtly creep in, diminishing the bright, alert, and youthful appearance we desire.
While skincare products and cosmetic treatments offer external solutions, there’s a natural, often overlooked approach to revitalizing the eye area: targeted facial exercises.
Just as we exercise our bodies to strengthen and tone muscles, we can similarly engage the muscles around our eyes to promote a more lifted, toned, and rejuvenated look.
These specialized exercises work to stimulate circulation, encourage lymphatic drainage, and strengthen the intricate network of muscles that support the delicate skin around the eyes.
By gently and consistently engaging these muscles, we can potentially diminish the appearance of common concerns such as crow’s feet, under-eye bags, and sagging upper eyelids.
Imagine naturally smoothing away those tell-tale lines, reducing puffiness that can make us look tired, and even subtly lifting the brow and upper eyelid for a more open and refreshed gaze.
The beauty of eye exercises (or Face Yoga) lies in their accessibility and natural approach. They require no special equipment, can be incorporated into your daily routine, and empower you to take an active role in enhancing your natural beauty.
However, it’s crucial to approach eye exercises with the right mindset and technique. The key to success lies in gentle, consistent practice and listening attentively to your body’s signals.
Overdoing these exercises or employing overly forceful movements can be counterproductive, potentially leading to muscle strain or even exacerbating the very concerns you wish to address.
Think of these exercises as a delicate dance with your facial muscles, a mindful engagement rather than a strenuous workout.
With patience, consistency, and a gentle touch, incorporating these targeted eye exercises into your routine can be a powerful step towards unveiling a more radiant, youthful, and captivating gaze.
Prepare to embark on a journey of natural rejuvenation with the following exercises, specifically designed to strengthen and revitalize the muscles around your precious eyes and help with natural anti aging techniques.
Exercises for Strengthening and Toning:
The Eyebrow Raise
How to do it: Place your index fingers just below your eyebrows to provide slight resistance. Try to raise your eyebrows up as high as you can, working against the gentle resistance of your fingers. Focus on feeling the muscles above your eyes and in your forehead engage. Hold for 5-10 seconds, then relax. Repeat 10-15 times.
Why it helps: Strengthens the frontalis muscle (forehead) which lifts eyebrows and indirectly supports the upper eyelid area. Also engages the upper part of the orbicularis oculi.
The Eyebrow Furrow
How to do it: Focus on furrowing your eyebrows, bringing them together and down as if you are frowning or concentrating. You should feel the muscles between your eyebrows engage. Hold for 5-10 seconds, then relax. Repeat 10-15 times.
Why it helps: Strengthens the muscles that draw the eyebrows together (corrugator supercilii and procerus). While focusing on strengthening, consciously relax these muscles afterward to prevent deep frown lines from setting in over time.
The Eye Squeeze
How to do it: Close your eyes tightly, squeezing your eyelids shut as firmly as you comfortably can. Hold this squeeze for 5-10 seconds, then relax. Repeat 10-15 times.
Why it helps: This is a powerful exercise for the entire orbicularis oculi muscle, strengthening it all around the eye socket. It can help improve muscle tone and definition around the eyes.
Gentle Eye Flutter (Orbicularis Oculi – Lower Lid Focus):
How to do it: Keep your upper eyelids still and gently flutter your lower eyelids rapidly. This is a subtle movement. Focus on engaging only the lower part of the orbicularis oculi. Do this for 15-20 seconds, then relax. Repeat 2-3 times.
Why it helps: Specifically targets the lower portion of the orbicularis oculi which can sag with age, contributing to under-eye bags. Toning this area can improve lower eyelid firmness.
Diagonal Eye Gazes (Eye Muscles & Coordination):
How to do it: Keep your head still and look diagonally up and to the right with your eyes only. Hold for 2-3 seconds. Then, look diagonally down and to the left. Repeat this diagonal gaze sequence 10-15 times on each diagonal.
Why it helps: Works the eye muscles that control eye movement in diagonal directions, improving coordination and strength. Also encourages circulation around the eye area.
How to do it: Keep your head still and look as far to the right as you comfortably can with your eyes only. Hold for 2-3 seconds. Then, look as far to the left. Repeat side-to-side gazes 10-15 times.
Why it helps: Improves the strength and flexibility of the muscles that move the eyes horizontally, again promoting circulation and eye muscle coordination.
Circular Eye Rolls (Full Eye Muscle Range of Motion):
How to do it: Gently roll your eyes in a clockwise direction, completing a full circle. Repeat 5-10 times. Then, roll your eyes counter-clockwise for another 5-10 repetitions. Do this slowly and smoothly, avoiding strain.
Why it helps: Works all the muscles that control eye movement through their full range of motion, enhancing muscle balance and flexibility.
Resistance Eye Closure (Fingertip Resistance):
How to do it: Place your index fingers just below your eyebrows and middle fingers just below your eyes (on the cheekbone). Gently try to close your eyes while using your fingers to provide slight resistance to the upper eyelids opening and lower eyelids closing. Hold the resistance for 5-10 seconds, then relax. Repeat 10-15 times.
Why it helps: Provides isometric resistance to the orbicularis oculi muscle as it closes the eyes, further strengthening it.
Exercises for Rejuvenation and Reducing Wrinkles/Puffiness:
The “V” Lift (Crows Feet & Under-Eye Area):
How to do it: Make a “V” shape with your index and middle fingers of each hand. Place your index fingers at the outer corners of your eyes (crows feet area) and your middle fingers at the inner corners of your eyes. Look upwards and gently squint your lower eyelids upwards. You should feel the muscles around your outer eyes working. Relax and repeat 10-15 times.
Why it helps: Targets the orbicularis oculi at the outer corners of the eyes, helping to reduce the appearance of crow’s feet. Also engages the lower eyelid area for under-eye firmness.
The “C” Press (Upper Eyelid Lift & Brow Lift):
How to do it: Make a “C” shape with your thumb and index finger of each hand. Place your thumbs under your eyebrows (along the brow bone) and your index fingers above your eyebrows (on the forehead). Gently press and lift upwards with your thumbs to lift your eyebrows, while simultaneously trying to push your eyebrows down against the resistance of your thumbs. Hold for 5-10 seconds, then relax. Repeat 10-15 times.
Why it helps: Helps to lift and tone the muscles that support the upper eyelids and eyebrows, potentially reducing hooded eyelids and improving brow definition.
Under-Eye Tap & Drain (Lymphatic Drainage & Puffiness Reduction):
How to do it: Using your ring fingers (gentlest pressure), gently tap along the orbital bone under your eyes, starting from the inner corner and moving outwards towards the temples. Continue tapping gently for 1-2 minutes.
Why it helps: Stimulates lymphatic drainage in the under-eye area, helping to reduce puffiness and fluid retention that can contribute to under-eye bags.
Around-Eye Massage (Circulation & Relaxation):
How to do it: Using your ring fingers, gently massage in small circular motions around your eyes. Start at the inner corner, move up over the eyebrow, around the outer corner, and then gently under the eye back to the inner corner. Repeat this circular massage 5-10 times in each direction.
Why it helps: Improves blood circulation and relaxes the muscles around the eyes, potentially reducing tension lines and promoting a more refreshed look.
How to do it: Use your fingertips to massage your temples in small circular motions. Apply gentle to medium pressure. Continue for 1-2 minutes.
Why it helps: Tension in the temples can contribute to tension around the eyes and forehead. Temple massage releases this tension, indirectly helping to smooth the eye area and reduce forehead tension lines that can extend near the eyes.
Forehead Smoothing (Preventative for Forehead Lines Near Eyes):
How to do it: Place your palms flat on your forehead and gently slide them upwards towards your hairline, smoothing out the forehead skin. Repeat 10-15 times.
Why it helps: While targeting the forehead, smoothing this area helps to reduce tension that can radiate down towards the brow and eye area, preventing forehead lines that can sometimes extend close to the eyes.
Exercises for Eye Muscle Control & Awareness:
Isolated Upper Eyelid Lift (Subtle Control):
How to do it: Try to lift only your upper eyelids without raising your eyebrows. This is a subtle and challenging exercise that requires focus and muscle control. You might only feel a slight movement. Practice holding this subtle lift for a few seconds. Repeat several times.
Why it helps: Develops finer control over the upper eyelid muscles, which can be helpful for improving eyelid posture and reducing drooping over time.
Isolated Lower Eyelid Lift (Subtle Control):
How to do it: Try to lift only your lower eyelids without squinting your upper eyelids or raising your cheeks excessively. This is also a subtle exercise. Focus on engaging only the lower orbicularis oculi to lift the lower lids slightly. Hold for a few seconds and repeat.
Why it helps: Develops finer control over the lower eyelid muscles, important for toning the under-eye area and reducing lower eyelid drooping.
Blink Awareness (Conscious Blinking for Muscle Engagement):
How to do it: Throughout the day, become more conscious of your blinking. Practice slow, deliberate blinks, consciously feeling your eyelids close and open. Avoid rapid, tense blinking.
Why it helps: Increases awareness of eyelid muscle function and encourages controlled, rather than tense, blinking, which can help prevent fine lines caused by excessive squinting.
Relaxation and Posture Focused Exercises (Supporting Eye Area):
Neck Stretch for Eye Relaxation (Releasing Neck Tension):
How to do it: Gently tilt your head to the right, bringing your ear towards your shoulder. Hold for 10-15 seconds. Repeat on the left side. Then gently tilt your head forward and backward. While doing these neck stretches, consciously relax your eye area.
Why it helps: Neck tension can contribute to facial tension, including around the eyes. Releasing neck tension can indirectly relax the eye area.
Deep Breathing for Eye Relaxation (Stress Reduction):
How to do it: Sit or lie down comfortably. Close your eyes and focus on your breath. Inhale deeply and exhale slowly. As you exhale, consciously relax your eyes and surrounding muscles. Repeat for 5-10 breaths.
Why it helps: Stress contributes to muscle tension. Deep breathing is a general relaxation technique that helps reduce overall body tension, including tension in the face and eye area.
Good Posture Practice (Overall Facial Muscle Support):
How to do it: Be mindful of your posture throughout the day. Sit and stand tall with your shoulders relaxed and your head balanced. Avoid slouching forward.
Why it helps: Good posture supports overall muscle balance in the face and neck. Poor posture can contribute to muscle imbalances and tension, which can indirectly affect the eye area.
In essence, embracing these 20 eye exercises is an investment in the long-term vitality and radiance of your gaze.
By dedicating just a few moments each day to this gentle yet powerful practice, you can proactively support the delicate muscles around your eyes, potentially softening the signs of time and revealing a more refreshed and youthful appearance.
Remember, consistency and gentleness are your allies on this journey to brighter, more expressive eyes. Embrace these exercises as a natural ritual of self-care, and witness the subtle yet significant rejuvenation they can bring to the windows of your soul.
Disclaimer: The information provided on Taped Circle is for educational purposes only and should not be considered medical advice. Please consult with a healthcare professional before starting any new exercise program, especially if you have any underlying health conditions.
Exercises to Lift and Sculpt for a Youthful, Ageless Look
We all look in the mirror from time to time and wish we could recapture that youthful bounce and vitality, especially in our face.
As we age, one of the most noticeable changes can be the gradual softening and descent of our cheeks. The plump, lifted cheeks of youth can slowly give way to a flatter, less defined appearance, often contributing to a more tired or aged look.
If you’ve ever found yourself longing for a more sculpted, youthful cheek contour, you might be surprised to learn that the answer isn’t always found in expensive creams or invasive procedures.
Instead, nature itself provides a powerful tool: your own facial muscles. This article unveils 20 effective exercises specifically designed to target, lift, and firm your cheek muscles, naturally restoring volume and definition.
Get ready to discover a simple yet potent way to look younger, feel more confident, and embrace a more naturally rejuvenated you.
Cheek Exercises: 20 Moves to Lift and Tone
1. The Cheekbone Lift (Zygomaticus Major & Minor)
How to do it:
Place your index and middle fingers on the apples of your cheeks (the fleshy part that rounds out when you smile).
Smile strongly, engaging your cheek muscles to push your fingers upwards. You should feel your cheek muscles lift and push against your fingers.
Hold for 5-10 seconds, then relax.
Repeat 10-15 times.
Why it helps: Directly targets and strengthens the zygomaticus major and minor muscles, the primary muscles responsible for lifting the cheeks and creating a smile.
2. The Apple Cheek Sculpt (Focus on Upper Cheeks)
How to do it:
Purse your lips slightly as if you are about to say “Ooh.”
Now, try to smile upwards with your cheek muscles, lifting the apples of your cheeks high towards your eyes. You should feel the muscles in the upper part of your cheeks engaging.
Hold for 5-10 seconds, then relax.
Repeat 10-15 times.
Why it helps: This exercise focuses on lifting the upper portion of the cheeks, creating a more pronounced “apple” shape and enhancing cheekbone definition.
3. Air Puff Cheek Press (Resistance Training)
How to do it:
Puff up your cheeks with air.
Place your palms on your puffed cheeks, providing gentle resistance.
Now, try to push the air out of your cheeks against the resistance of your hands, engaging your cheek muscles to prevent the air from escaping.
Hold the resistance for 5-10 seconds, then relax and release the air.
Repeat 10-15 times.
Why it helps: Provides resistance training for the cheek muscles (buccinator and others), strengthening them and potentially improving cheek firmness.
Now, move the air from one cheek to the other, alternating sides.
Keep moving the air from cheek to cheek for 15-20 seconds.
Repeat 2-3 sets.
Why it helps: Works the buccinator muscles dynamically, improving their strength and tone, which can contribute to cheek structure and prevent a hollowed look.
5. Fish Face (Buccinator & Cheek Contouring)
How to do it:
Suck in your cheeks and lips, creating a “fish face” expression.
Hold this position, engaging your cheek muscles. You should feel your cheek muscles pulling inwards.
Hold for 10-15 seconds, then relax.
Repeat 10-15 times.
Why it helps: Engages the buccinator muscles and the surrounding cheek muscles, helping to tone and define the cheek contours. Be mindful not to overdo this, as excessive repetition could potentially thin the face in some individuals.
6. Tongue Push-Up (Inner Cheek Resistance)
How to do it:
Close your mouth and press your tongue firmly against the inside of your cheek, pushing outwards as hard as you can. You should feel resistance from your cheek muscles.
Hold this push for 5-10 seconds, then relax.
Repeat on the other cheek.
Do 10-15 repetitions on each side.
Why it helps: Provides internal resistance to the cheek muscles, strengthening them from the inside out and contributing to cheek firmness.
7. Jaw Drop Smile (Full Cheek Engagement)
How to do it:
Relax your jaw and let it drop slightly open.
Now, try to smile broadly, lifting your cheeks up towards your eyes while keeping your jaw slightly dropped. You should feel a strong engagement of your cheek muscles.
Hold for 5-10 seconds, then relax.
Repeat 10-15 times.
Why it helps: Engages a broader range of cheek muscles by combining jaw relaxation with a strong cheek lift, promoting overall cheek muscle strength and lift.
8. Closed Lip Smile Lift (Emphasis on Cheek Muscle Isolation)
How to do it:
Keep your lips closed.
Try to smile broadly, lifting your cheeks up as high as you can without opening your lips. Focus on feeling only your cheek muscles working to create the smile.
Hold for 5-10 seconds, then relax.
Repeat 10-15 times.
Why it helps: Isolates the cheek muscles and forces them to work harder to create the lift without relying on lip movement, maximizing cheek muscle strengthening.
9. Corner of Mouth Lift (Zygomaticus Focus – Refined Lift)
How to do it:
Keep your lips closed and relaxed.
Now, try to lift just the corners of your mouth upwards, as if you are trying to subtly smile, without showing your teeth or opening your lips. Focus on feeling the muscles on the sides of your mouth and cheeks lift upwards.
Hold for 5-10 seconds, then relax.
Repeat 10-15 times.
Why it helps: Precisely targets the zygomaticus muscles to create a subtle but defined lift at the corners of the mouth and cheeks, contributing to a more youthful appearance.
10. Cheek Scoops (Upward Lifting Motion)
How to do it:
Open your mouth slightly.
Now, imagine you are scooping your cheeks upwards towards your eyes using your cheek muscles.
Engage your cheek muscles in an upward and inward motion, as if trying to lift the flesh of your cheeks upwards.
Hold for 5-10 seconds, then relax.
Repeat 10-15 times.
Why it helps: Focuses on the upward and lifting motion necessary for cheek elevation, training the muscles to lift the cheeks against gravity.
11. Cheek Pinch and Release (Stimulating Circulation)
How to do it:
Gently pinch small sections of your cheeks between your thumb and index finger.
Start at the apples of your cheeks and work your way outwards and upwards towards your cheekbones.
Pinch and release each section quickly and lightly.
Continue for 1-2 minutes per cheek.
Why it helps: Stimulates blood circulation and may help to break down tension in the cheek muscles and tissues, potentially contributing to a more refreshed and toned appearance.
Using your fingertips, gently tap across your cheeks, starting at the center of your face and moving outwards towards your temples and up towards your cheekbones.
Use light, rhythmic taps.
Continue for 1-2 minutes.
Why it helps: Tapping encourages lymphatic drainage and improves blood flow to the cheek area, which can help reduce puffiness and improve skin tone.
Using your knuckles (especially the middle and index finger knuckles), gently massage in upward and outward strokes along your cheekbones, starting from the sides of your nose and moving up towards your temples.
Apply gentle to medium pressure.
Continue for 1-2 minutes per cheek.
Why it helps: Provides a deeper massage to the cheek muscles and tissues, potentially releasing deeper tension and promoting circulation and muscle relaxation.
14. Circular Cheek Massage (Relaxation and Circulation)
How to do it:
Using your fingertips, make small, gentle circular motions across your cheeks, covering the entire cheek area from the apples of your cheeks to your cheekbones and temples.
Continue for 1-2 minutes per cheek.
Why it helps: Promotes overall muscle relaxation, improves circulation, and can help to release tension in the cheek area.
Stand with good posture and perform a chin tuck (tucking your chin towards your chest).
While holding the chin tuck, try to smile broadly and lift your cheeks upwards. You should feel a connection between your neck and facial muscles.
Hold for 5-10 seconds, then relax.
Repeat 10-15 times.
Why it helps: Connects neck posture with facial muscle engagement. Proper neck posture can support facial muscle tone, including cheek muscles.
16. Jaw Release
How to do it:
Simulate chewing by moving your jaw up and down while keeping your lips closed.
Do this for about 30 seconds, then relax.
Why it helps: This exercise helps to tone the muscles around the cheeks and jawline.
17. Cheek Awareness Meditation/Scan
How to do it:
Sit or lie down comfortably.
Close your eyes and bring your attention to your cheeks.
Notice any sensations, tension, or relaxation in your cheek muscles. Simply observe without judgment.
Continue for 5-10 minutes, bringing your awareness back to your cheeks whenever your mind wanders.
Why it helps: Mindfulness helps you become more aware of tension patterns in your cheeks and learn to consciously relax them.
18. Smile Habit Check (Conscious Smiling for Muscle Tone)
How to do it:
Throughout the day, consciously practice smiling with your cheek muscles engaged.
Pay attention to lifting your cheeks when you smile.
Make smiling a conscious exercise for your cheek muscles.
Why it helps: Reinforces the habit of using your cheek muscles when smiling, helping to tone them through regular, conscious engagement in everyday expressions.
19. Hydration and Diet (Overall Skin and Muscle Health)
How to do it:
Drink plenty of water daily and maintain a healthy, balanced diet rich in nutrients.
Why it helps: Proper hydration and nutrition are essential for overall skin and muscle health. Well-hydrated, nourished skin looks plumper and more toned, and healthy muscles function better.
20. Smile and Pout
How to do it:
Start by smiling widely with your lips closed.
Transition into a pout by pushing your lips forward and down.
Alternate between the smile and pout positions, holding each for 5 seconds.
Repeat this sequence 10-15 times.
Why it helps: This exercise helps to lift and tone the cheeks by dynamically engaging and relaxing the cheek muscles through alternating smile and pout movements.
Important Considerations for Cheek Lifting and Toning Exercises:
Consistency is Key: Regular practice (ideally daily or several times a week) is essential to see potential results.
Gentle Approach: Perform exercises gently and avoid over-stretching or straining your facial muscles.
Listen to Your Body: Stop if you feel any pain or discomfort.
Combine with Lifestyle Factors: These exercises are most effective when combined with a healthy lifestyle, including proper hydration, nutrition, sleep, sun protection, and stress management.
Manage Expectations: Genetics, bone structure, and fat distribution significantly influence cheek shape. Exercises can help tone muscles and improve the appearance of lift, but they cannot fundamentally alter your underlying facial structure. Results will be gradual and may vary from person to person.
Patience is Necessary: It takes time and consistent effort to see changes in muscle tone. Be patient and persistent with your exercise routine.
Disclosure: This post contains affiliate links. I may receive a commission if you make a purchase through these links, but this does not affect the price you pay.
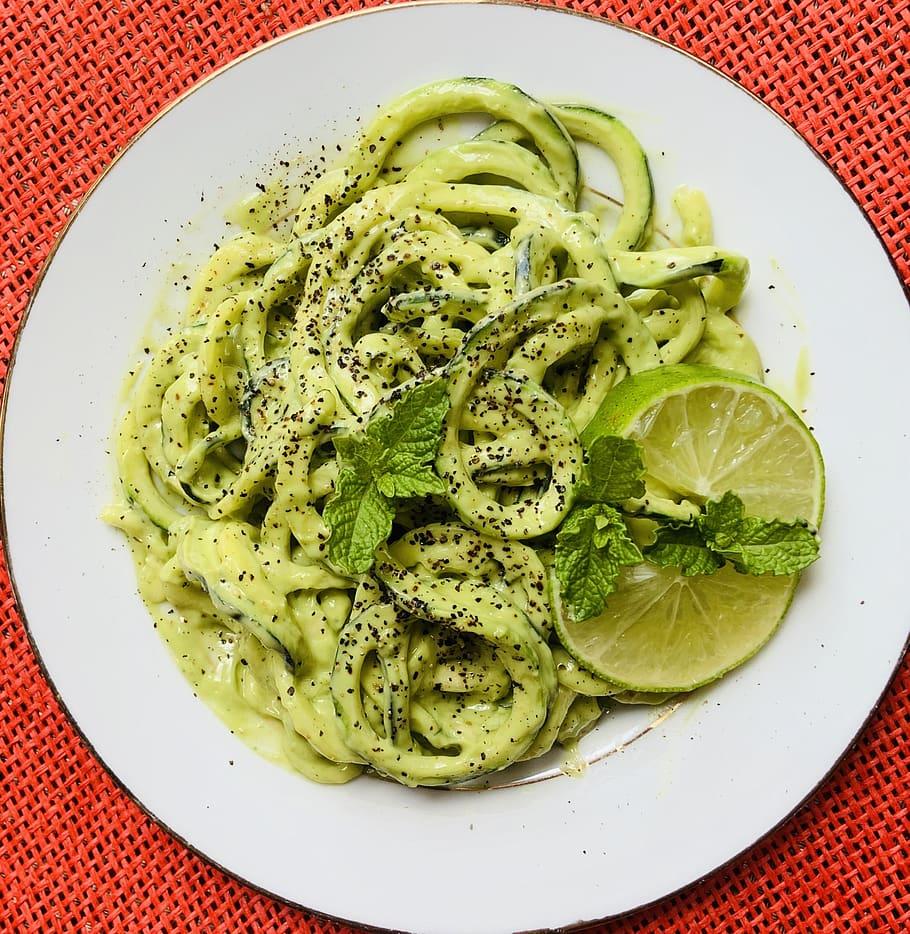
The quest for a youthful, radiant complexion often leads us to explore an array of skincare products and treatments. Yet, one of the most powerful tools for combating facial aging lies not in a jar or clinic, but on our plates.
As the largest organ of the body, the skin reflects our internal health, making nutrition a cornerstone of maintaining its elasticity, firmness, and vibrancy. Over time, factors like oxidative stress, inflammation, and collagen breakdown contribute to wrinkles, sagging, and dullness.
However, strategic dietary choices can counteract these effects by nourishing the skin with antioxidants, healthy fats, vitamins, and hydration.
This guide curates 30 healthy diets and nutrient-rich eating patterns designed to slow the visible signs of facial aging.
From antioxidant-packed Mediterranean-inspired meals to collagen-boosting superfoods and hydration-focused approaches, each recommendation targets cellular repair, inflammation reduction, and skin structure support.
Whether through whole-food emphasis, mindful hydration, or scientifically backed nutrients like vitamins C and E, these diets offer practical, sustainable ways to promote a smoother, more youthful appearance.
Remember, glowing skin starts from within—let’s explore how your next bite can be a step toward timeless radiance.
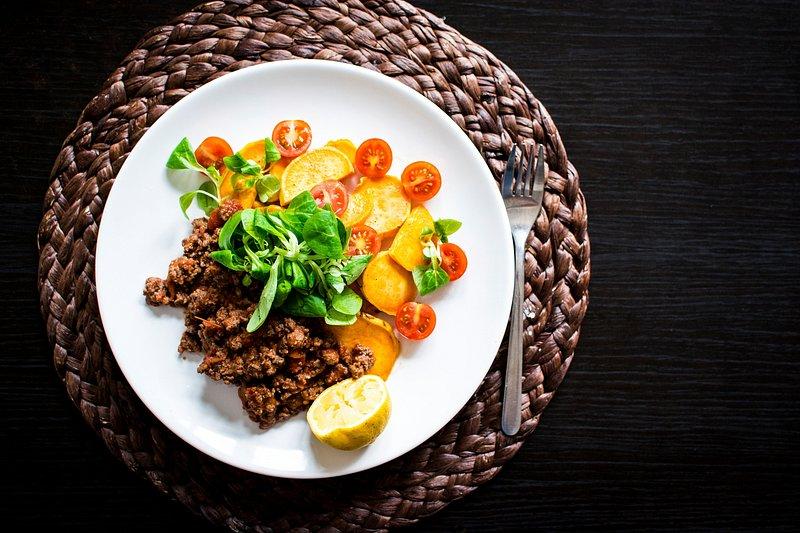
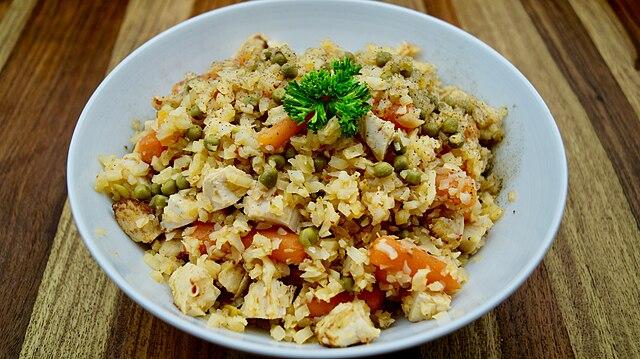
Here are 30 healthy diets that can help reduce face aging
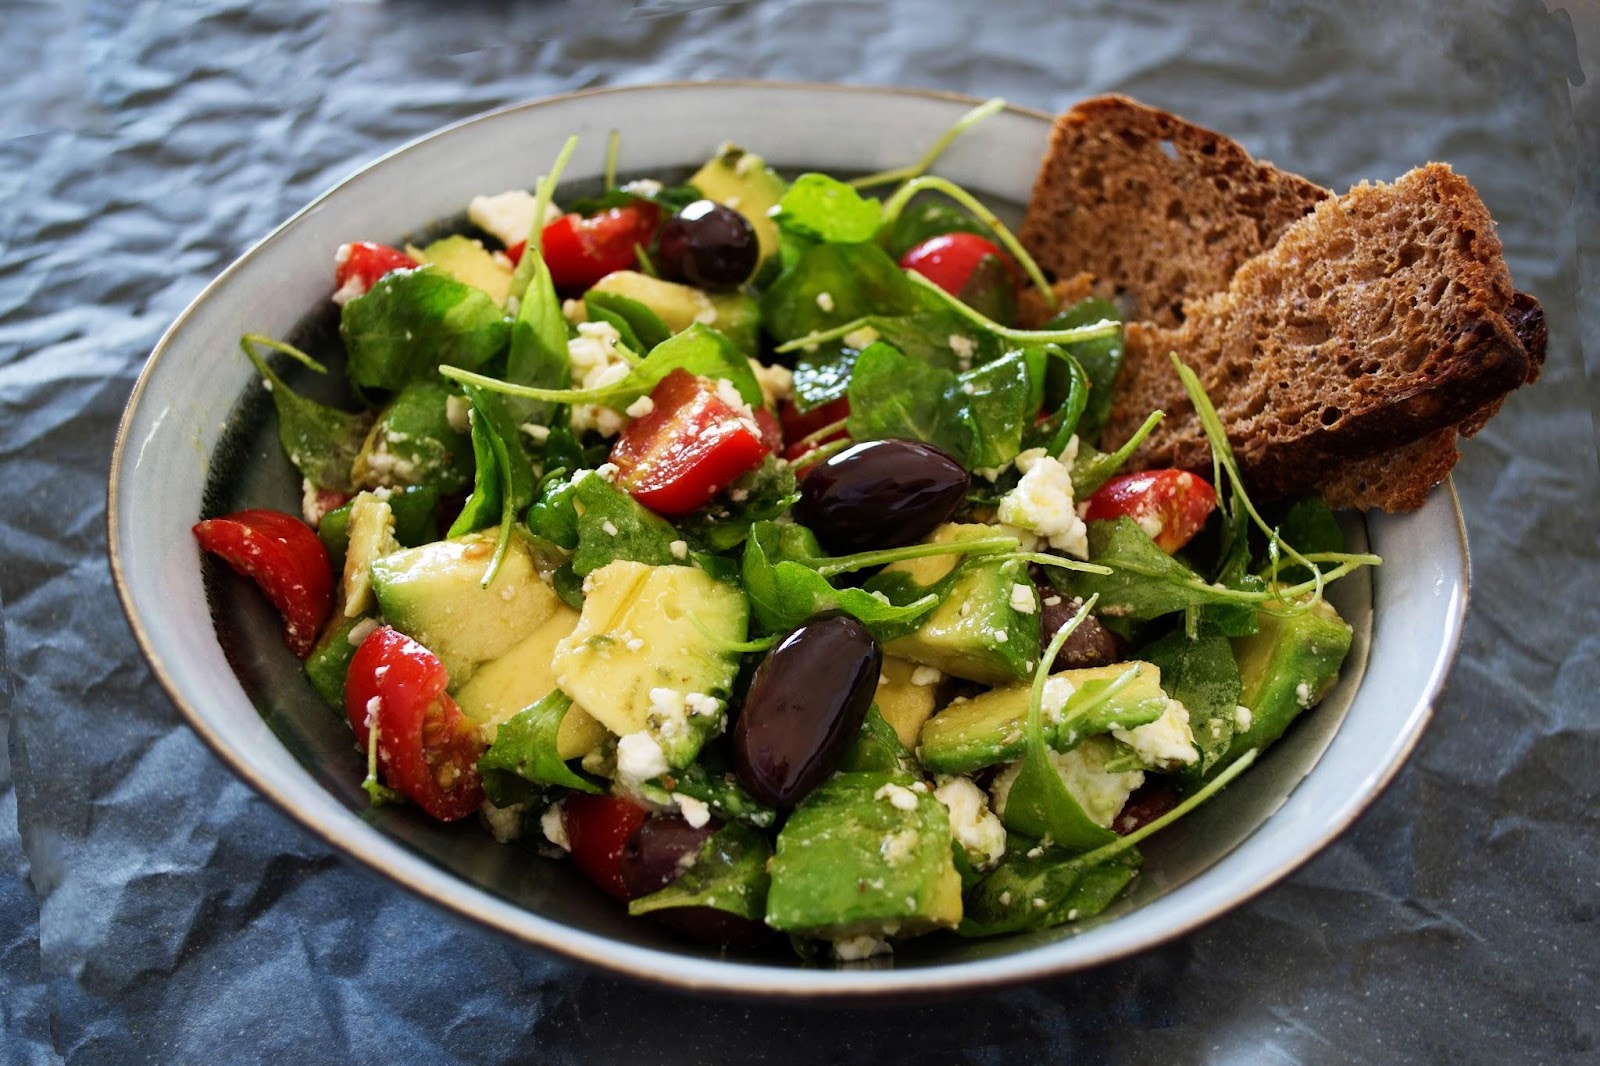
The Mediterranean Diet: This diet is rich in fruits, vegetables, whole grains, and healthy fats, such as olive oil. It has been shown to reduce inflammation and protect against age-related diseases.
The DASH Diet: This diet is designed to lower blood pressure, but it is also a healthy eating pattern that can help reduce face aging. It emphasizes fruits, vegetables, whole grains, and lean protein.
The MIND Diet: This diet is designed to protect brain health, but it may also help reduce face aging. It emphasizes leafy greens, berries, nuts, and fish.
The Flexitarian Diet: This diet is a plant-based diet that allows for some meat consumption. It is a good option for people who want to eat less meat but are not ready to go fully vegetarian or vegan.
The Nordic Diet: This diet is similar to the Mediterranean diet, but it emphasizes local and seasonal foods. It is rich in fruits, vegetables, whole grains, and fish.
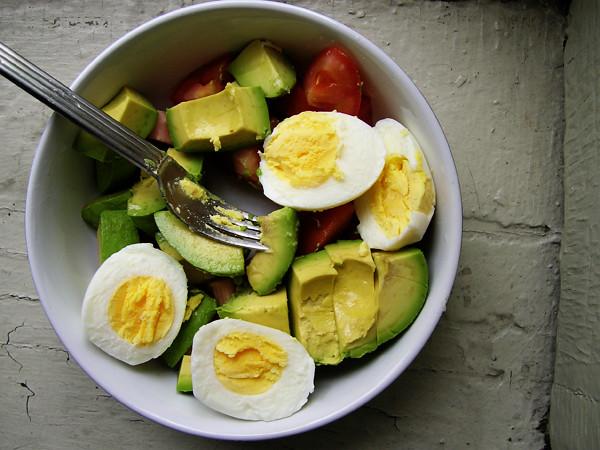
The Vegetarian Diet: This diet excludes meat, poultry, and fish. It is a healthy option for people who want to focus on plant-based foods.
The Vegan Diet: This diet excludes all animal products, including meat, poultry, fish, dairy, and eggs. It is a healthy option for people who want to focus on plant-based foods and avoid all animal products.
The Paleo Diet: This diet is based on the foods that humans ate during the Paleolithic era. It emphasizes whole, unprocessed foods, such as fruits, vegetables, meat, and fish.
The Ketogenic Diet: This diet is a very low-carbohydrate diet that can help you lose weight. It may also help reduce face aging by reducing inflammation.
The Whole30 Diet: This diet is a 30-day program that eliminates all processed foods, sugar, and alcohol. It can help you reset your eating habits and improve your overall health.
The Anti-Inflammatory Diet: This diet is designed to reduce inflammation in the body. It emphasizes whole, unprocessed foods, such as fruits, vegetables, whole grains, and healthy fats.
The Antioxidant-Rich Diet: This diet is rich in foods that contain antioxidants, such as fruits, vegetables, and dark chocolate. Antioxidants can help protect your cells from damage, which can help reduce face aging.
The Fiber-Rich Diet: This diet is rich in fiber, which can help you feel full and satisfied. It may also help reduce face aging by promoting healthy digestion.
The Healthy Fats Diet: This diet emphasizes healthy fats, such as monounsaturated and polyunsaturated fats. These fats can help keep your skin looking young and healthy.
The Low-Glycemic Diet: This diet focuses on foods that have a low glycemic index, which means they do not cause a rapid spike in blood sugar. This can help reduce inflammation and promote healthy aging.
The Clean Eating Diet: This diet emphasizes whole, unprocessed foods. It can help you avoid harmful toxins and chemicals that can contribute to face aging.
The Raw Food Diet: This diet consists of uncooked, unprocessed foods. It may help you get more nutrients from your food and reduce face aging.
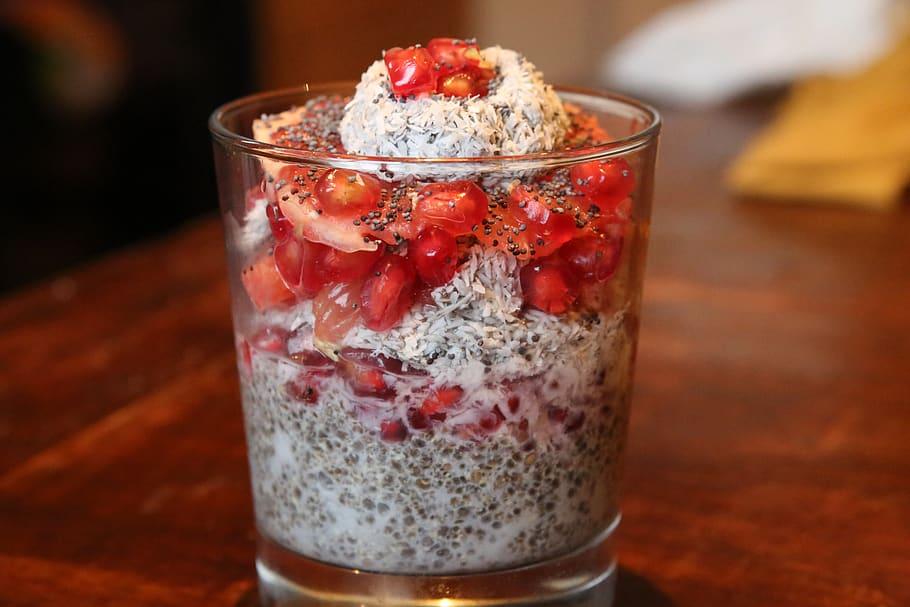
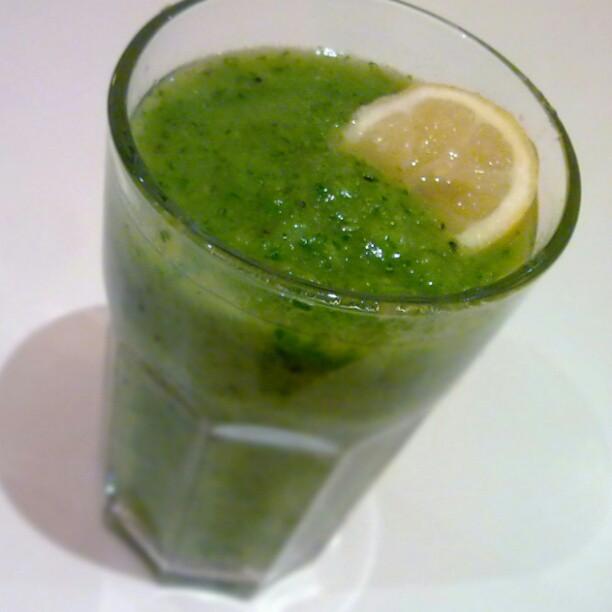
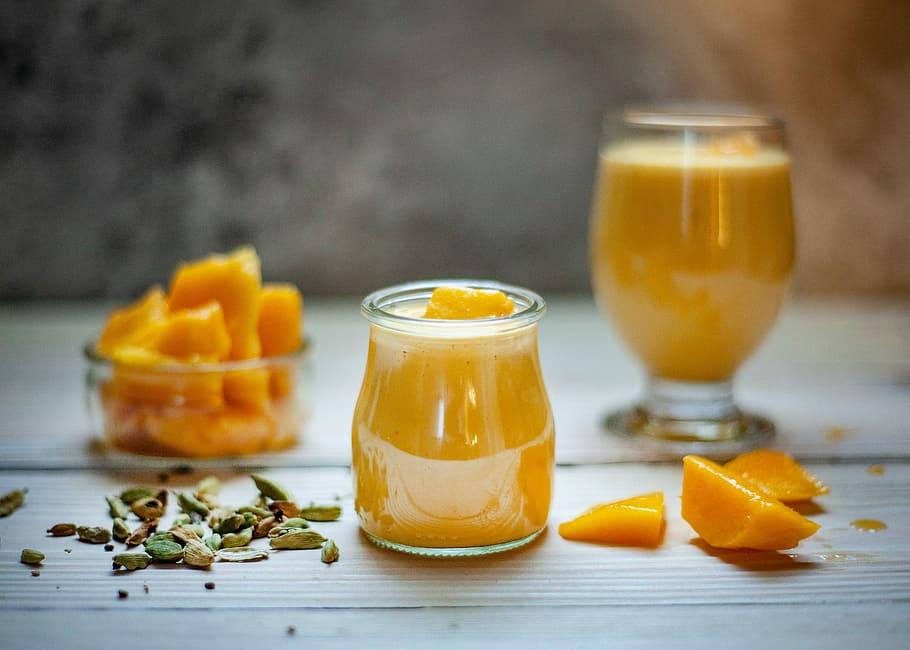
The Juicing Diet: This diet involves consuming only fruits and vegetables in juice form. It can help you get more nutrients and antioxidants, which can help reduce face aging.
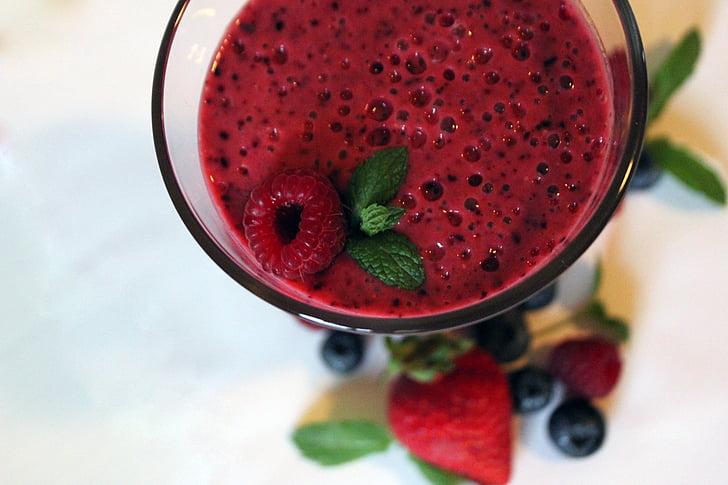
The Smoothie Diet: This diet involves consuming only smoothies made from fruits, vegetables, and other healthy ingredients. It can help you get more nutrients and antioxidants, which can help reduce face aging.
The Soup Diet: This diet involves consuming only soup. It can help you lose weight and get more nutrients, which can help reduce face aging.
The Intermittent Fasting Diet: This diet involves cycling between periods of eating and fasting. It may help you lose weight and reduce inflammation, which can help reduce face aging.
The Calorie Restriction Diet: This diet involves reducing your calorie intake. It may help you live longer and healthier, and it may also help reduce face aging.
The Sirtfood Diet: This diet is based on the idea that certain foods can activate sirtuins, which are proteins that may help protect against aging.
The Fasting Mimicking Diet: This diet is a five-day program that mimics the effects of fasting. It may help you lose weight and improve your overall health.
The Longevity Diet: This diet is designed to help you live a longer and healthier life. It emphasizes plant-based foods, healthy fats, and lean protein.
The Blue Zones Diet: This diet is based on the eating habits of people who live in the Blue Zones, which are areas of the world where people live exceptionally long and healthy lives.
The Mayo Clinic Diet: This diet is designed to help you lose weight and improve your overall health. It is a healthy eating pattern that can help reduce face aging.
The Mediterranean-DASH Intervention for Neurodegenerative Delay (MIND) Diet: This diet is a combination of the Mediterranean and DASH diets. It is designed to protect brain health, but it may also help reduce face aging.
The Ornish Diet: This diet is a low-fat, plant-based diet that is designed to reverse heart disease. It may also help reduce face aging.
The Pritikin Diet: This diet is a very low-fat, plant-based diet that is designed to help you lose weight and improve your overall health. It may also help reduce face aging.
This is for informational purposes only. For medical advice or diagnosis, consult a professional. Remember, it is important to consult with a healthcare professional before making any major changes to your diet.
Disclosure: This post contains affiliate links. I may receive a commission if you make a purchase through these links, but this does not affect the price you pay.
30 healthy diets that can help reduce face aging
Below is a table featuring recipes tailored to each of the diets listed. These recipes are designed to align with the principles of each diet while offering variety and flavor.
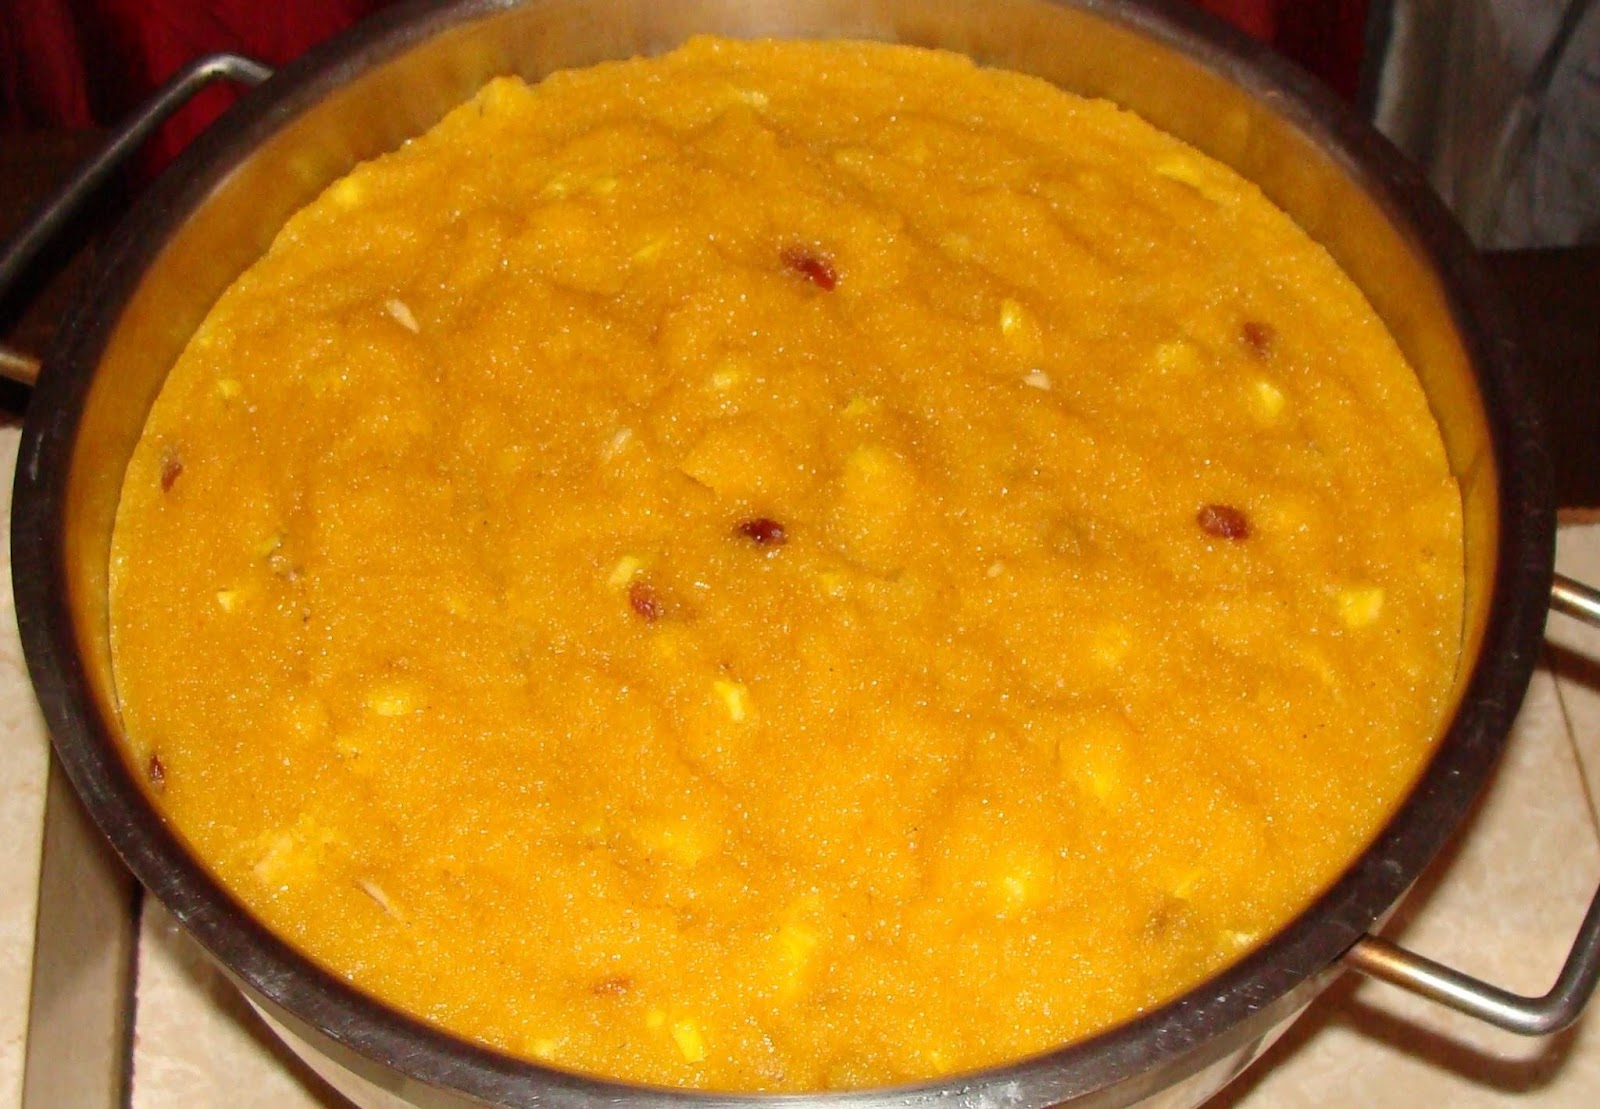
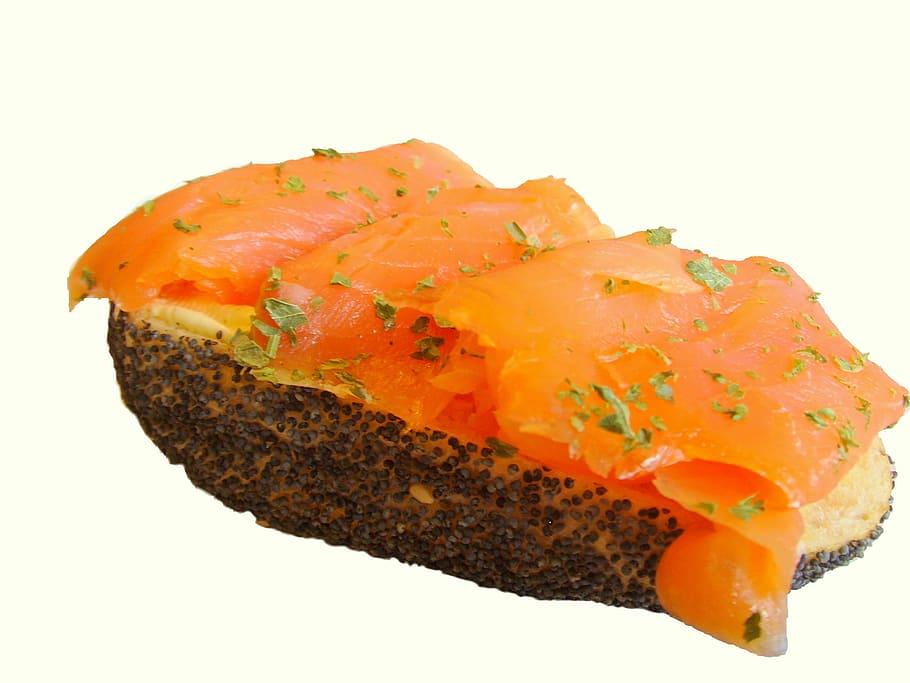
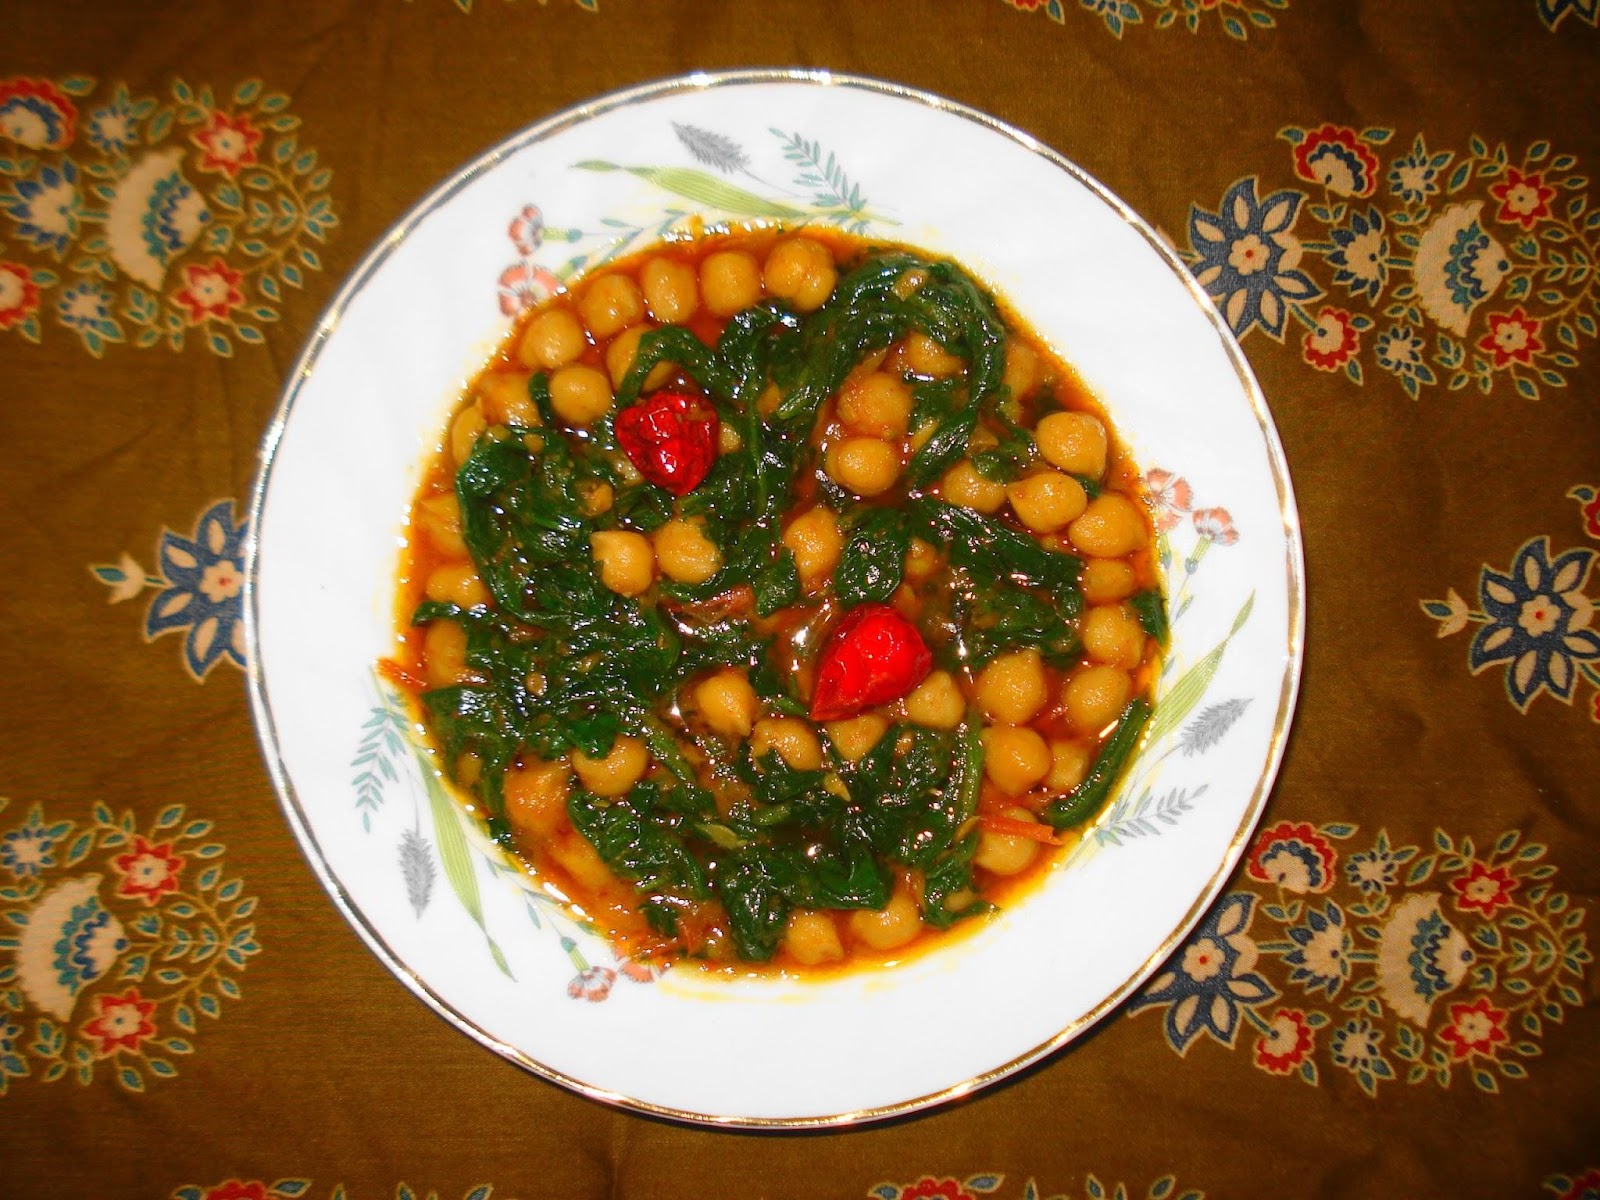
1. Grill salmon seasoned with olive oil, lemon juice, salt, and pepper. 2. Cook quinoa and mix with chopped veggies. 3. Toss salad with olive oil and lemon dressing. Serve with salmon.