Cookie Consent by Free Privacy Policy Generator Update cookies preferences

Minimalist Magic: 10 Subtle Dividers for a Harmonious Home

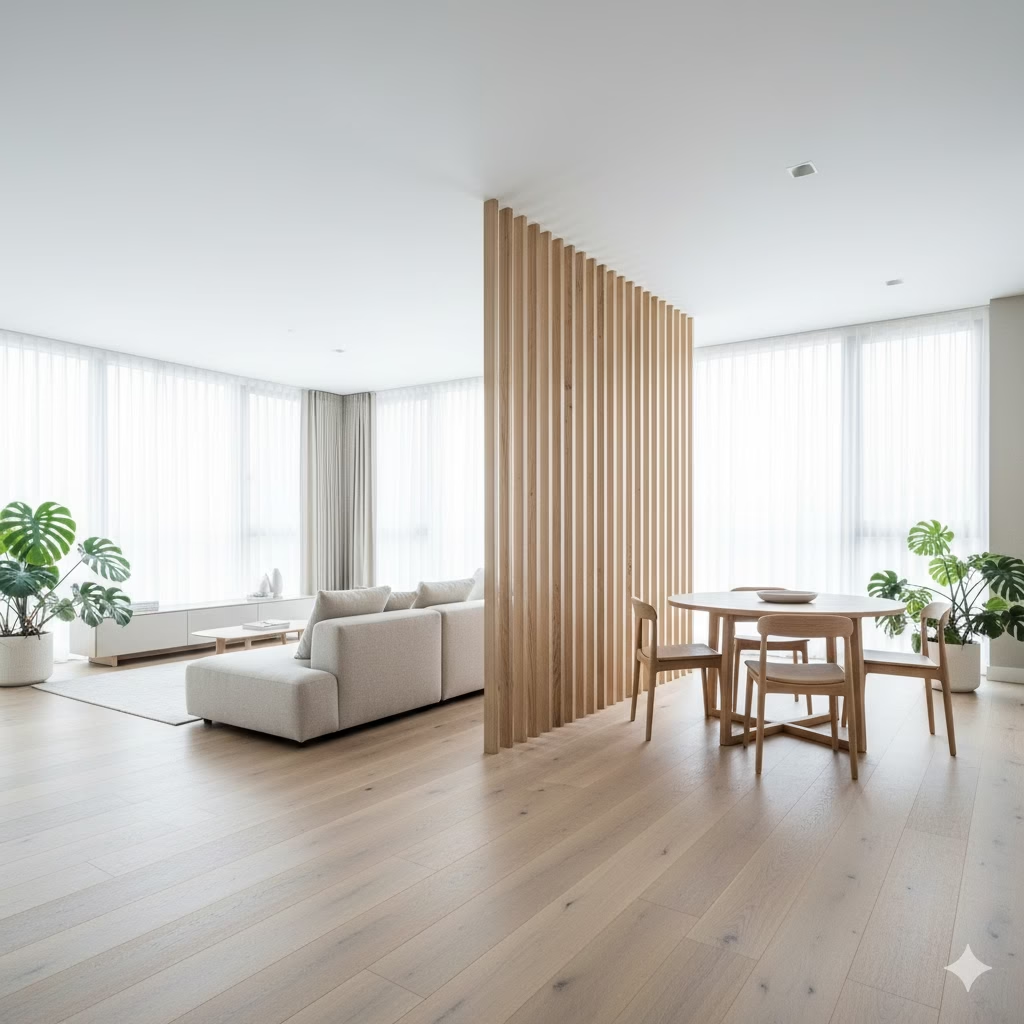
A bright, open-plan living and dining area separated by a vertical slatted wooden screen, showcasing a Minimalist and airy design.

I firmly believe that your home should be your sanctuary—a place of calm, not clutter. My personal journey into Minimalist design wasn’t about getting rid of everything; it was about honoring the space I have and making every object count. I learned that clever division is the secret to both harmony and function in an open layout. If you want a home that feels both open and organized, these solutions are for you!


The Power of Subtle Separation in Minimalist Design

The modern home often celebrates the Minimalist idea of open-plan living. We love how airy it feels, the way light moves, and the wide sense of space. However, this open design can quickly bring disorder and mental fatigue. How do you work, relax, and dine in the same large space without the mess and stress crossing over from one area to the next?

The best solution is not to build heavy, soundproof walls. The answer is to learn the art of the subtle room divider. For a truly Minimalist and calm home, the best divider does not grab attention. It guides your eye, softens the view, and gently suggests that the room’s function has changed. It keeps the space bright and open while setting up necessary areas for specific tasks—a quiet spot to read, a focused workspace, or a cozy place to eat.

A subtle divider is more than just a piece of furniture. It is a design element that creates visual and mental order. It helps you rest your eyes by setting clear borders without demanding total separation. In this guide, we look closely at ten easy and stylish solutions. They use texture, light, and shape to bring structure and peace to your home.


1. The Slatted Wood Screen

Slatted wood partitions are the perfect Minimalist divider. Their straight lines and gaps define an area while letting most of the light and visual connection pass through. They are ideal for separating an entryway from a living room.

How to Do It:

  1. Material Selection: Pick light-colored woods like natural oak or bamboo for a true Zen feeling. The width of the slats should match your room’s size. Use thinner ones for small spaces and thicker ones for bigger areas.
  2. Installation: You can buy slat screens as ready-made panels or build them at home. The key is to secure them only to the floor and ceiling track. This gives them a smooth, floating look. For an easier job, use floor-to-ceiling posts and attach thin slats to the side of the posts.
  3. Finish: Use a matte, natural oil finish instead of a shiny one. This keeps the look simple and matches the Minimalist style.

2. The Tall, Open Shelving Unit

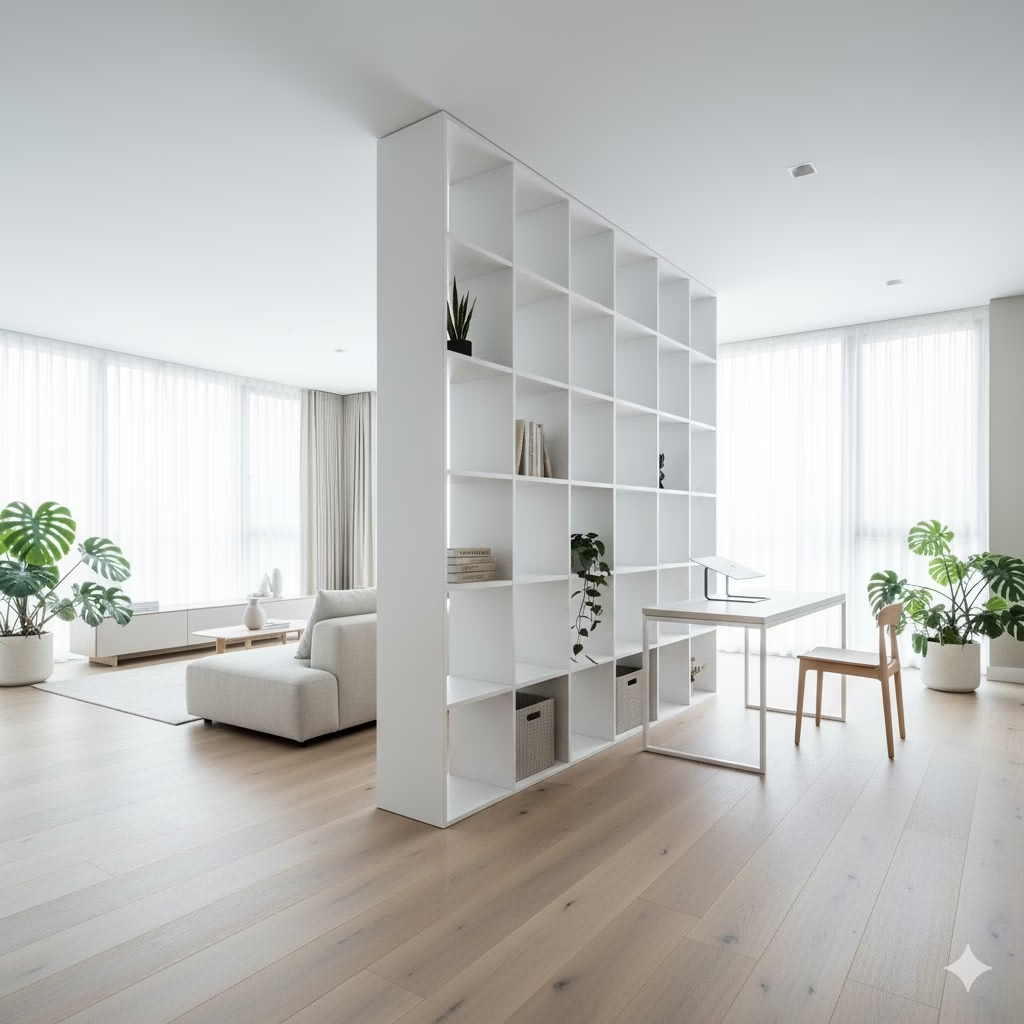
This is the most useful divider because it offers both separation and storage. An open shelf unit creates division without blocking the light. This is especially true if you carefully choose what you place on the shelves.

How to Do It:

  1. Placement: Choose a unit without a solid back that is almost as tall as the ceiling. Place it straight out from a wall. This immediately creates two clear zones.
  2. Styling (The 80/20 Rule): To keep the Minimalist light flowing, try to leave about eighty percent of the shelves empty. You can also fill them with things that let light through, like art or plants. Only twenty percent should hold things you need to hide, such as simple storage boxes.
  3. Anchoring: Always fasten tall, free-standing shelves to the floor or a wall. This is a must for safety, especially if you have children or pets.

3. The Hanging Textile Panel

For areas that need a divider you can hide easily, sheer or linen fabrics offer a soft, beautiful solution. These work well to block off a dressing area in a bedroom or a small spot for reading.

How to Do It:

  1. Fabric Choice: Choose a fabric that is slightly see-through, like muslin, thin linen, or a light cotton. The goal is to soften the light, not to block it. Neutral colors like white, cream, or soft gray are best for a Minimalist design.
  2. Hardware: Install a simple, thin track on the ceiling. The fabric should hang from top to bottom. Let it gather slightly on the floor for a rich, relaxed feel that contrasts with the clean lines of the divider.
  3. Functionality: Use a simple cord or pulley system. This lets you quickly pull the fabric aside. The space then instantly becomes open again.

4. Low-Profile Furniture Placement

The simplest division does not need any building work at all. Simply using how your largest pieces of furniture face can define a zone.

How to Do It:

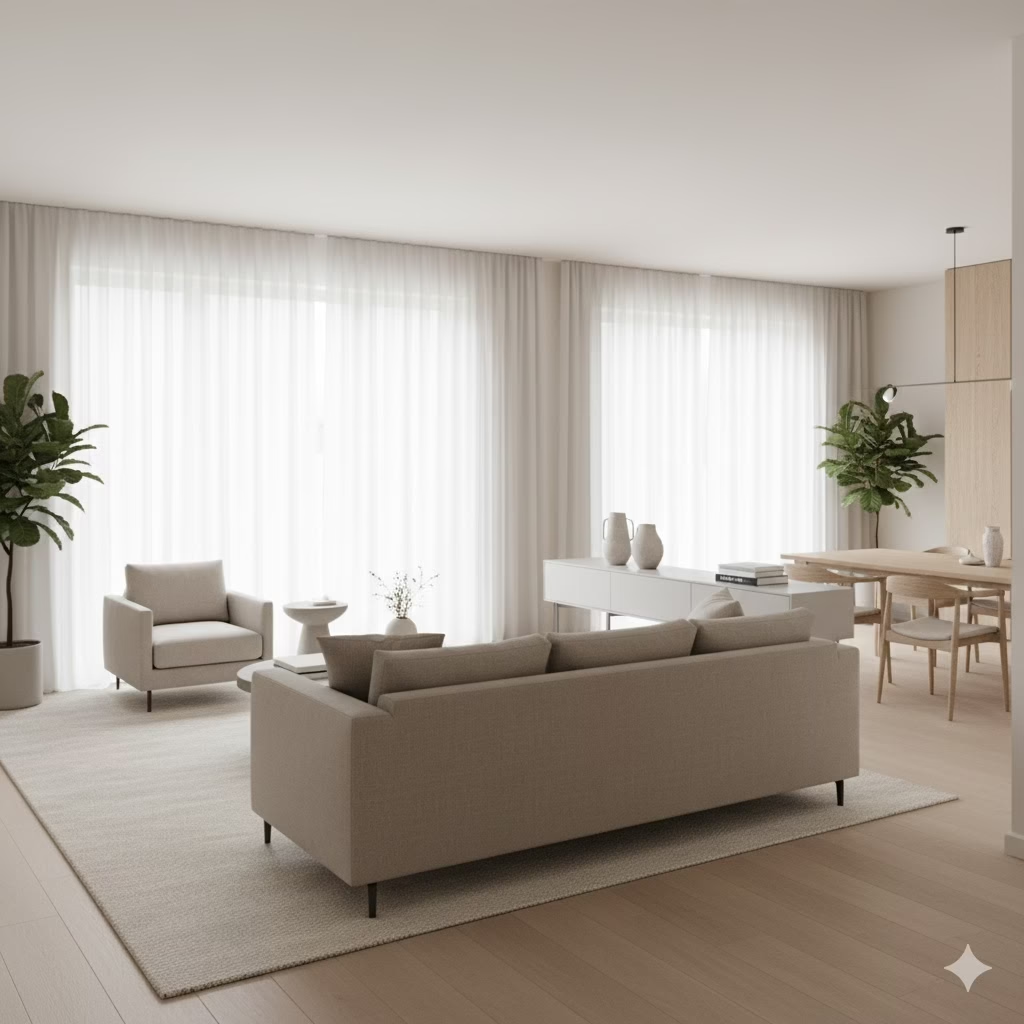
  1. Anchor Piece: Use the back of a large, low sofa to separate the living area from a dining or kitchen zone. Place a large, simple console table right behind the sofa. This gives you useful surface space while acting as a gentle wall.
  2. Area Rugs: Use different-sized Minimalist rugs to mark the boundaries even more. A large wool rug under the couch clearly shows the living area. A runner or a smaller, simpler rug can mark the kitchen prep area.

5. Vertical Indoor Garden Screens

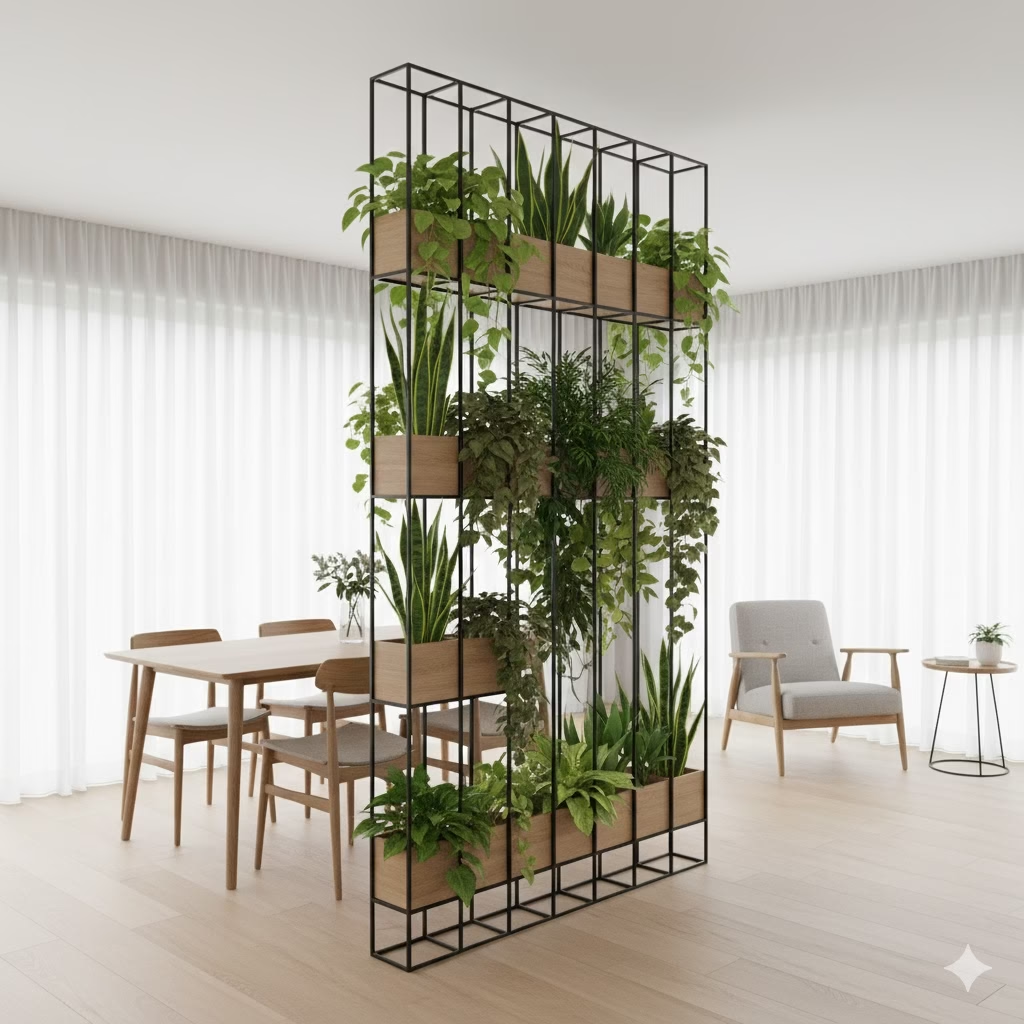
Bringing nature indoors is a key part of the Zen and Minimalist look. A tall, stacked stand of plants can create a visually interesting, lively, and natural screen.

How to Do It:

  1. Structure: Choose a light, tiered metal or wood plant stand that is at least six feet tall.
  2. Plant Selection: Mix tall plants (like snake plants or bamboo) with vines. The thickness of the leaves controls how much privacy you get. To let more light through, put the pots further apart.
  3. Maintenance: Make sure the divider is where the plants get enough light and water. An extra benefit is cleaner air, which adds to the room’s harmony.

6. Translucent Glass or Acrylic Panels

For a modern, polished separation that lets the most light through, a full-height glass or acrylic panel is ideal. It gives privacy while still maximizing the light.

How to Do It:

  1. Material: Choose frosted, ribbed, or tinted glass for subtle visual privacy. The frosting spreads the light beautifully and stops hard shadows.
  2. Mounting: These panels need to be installed by a professional. They should have a very thin frame (black or white steel is common in Minimalist design). This keeps the focus on the glass itself.
  3. Sliding Option: If you need the ability to open the space fully, a sliding track system for the glass panels makes the divider a flexible part of the room.

7. Subtle Color Blocking and Paint Transition

This is the easiest and cheapest way to create a Minimalist divider. Simply changing the color or texture of the paint on the walls and ceiling can create a hidden room division.

How to Do It:

  1. The Change: In an open living and kitchen area, keep the main walls white. Then, paint the walls and ceiling of the kitchen area in a slightly darker, calm neutral shade (like a soft gray or beige).
  2. The Floor: Add to the division by changing the floor material. For example, switch from light wood in the living area to a matte concrete or large, neutral tile in the kitchen. The different surfaces quietly signal that the room’s use has changed.

8. Architectural Screening with Curtains of Rope or Beads

While beads may sound old-fashioned, a modern take using simple wooden beads, natural ropes, or thin metal chains can create a shimmering, moving divider that is mostly transparent.

How to Do It:

  1. The Material: Choose thin, natural-fiber ropes or simple, unpainted wood rods of the same length.
  2. The Installation: Hang the ropes from a thin track fixed to the ceiling. Make sure the ropes are far enough apart to walk through easily but close enough to define the zone. The gentle movement of the ropes adds a calming, pleasing element to the space.

9. Built-in Benches or Low Walls

For a permanent yet simple division, building a low wall or a fixed, built-in bench gives you function, seating, and structure without blocking the view across the room.

How to Do It:

  1. Height is Key: The divider should be no taller than your waist (about thirty-six inches). This keeps the space visually connected.
  2. Dual Function: A low wall can be the backrest for a dining bench on one side. It can be a display area or bookshelf on the living room side. This double use is a key part of Minimalist design.
  3. Clean Finish: Plaster and paint the low wall the same Minimalist color as the main walls. This makes it look like a smooth, natural part of the room.

10. Sliding Shoji-Style Panels

Inspired by old Japanese design, the Shoji panel is the perfect example of Zen-like, Minimalist separation. The see-through paper or fabric panels spread the light evenly while creating total privacy when closed.

How to Do It:

  1. Material: Use light wood frames (like pine or bamboo). Insert rice paper or a strong, frosted plastic/fabric.
  2. Track System: Install a smooth track system on the floor and ceiling. When open, the panels should stack neatly against the wall. This makes them almost disappear to highlight the room’s open feel.
  3. Function: This is a great choice for separating a bedroom from a walk-in closet. It also works for a workspace that you need to hide completely during downtime.

Frequently Asked Questions (FAQ)

Q: Will these subtle dividers help with soundproofing?

A: No, not really. Subtle dividers are built to separate areas visually and to let light flow. They are not made to block noise. Things like slatted screens, plants, or low walls will do very little to stop sound. If noise is a big problem, look at the full-height glass panels or heavy, thick fabrics. These offer the most sound reduction among the options listed.

Q: Which divider is best if I rent my home?

A: The best choices for renters are those that don’t need any permanent installation. This includes using low-profile furniture placement, area rugs, hanging fabrics (using removable ceiling hooks), and movable, free-standing open shelving units.

Q: How do I choose the right height for my divider?

A: The height depends entirely on what you want to achieve. If you want the most light and to see across the room easily, keep the divider low (about waist-height). If you want more privacy and a clear break, choose a divider that goes all the way up (like a sliding panel or tall slatted screen). For a middle ground, choose a divider that is about five to six feet tall. This separates the space without blocking the view overhead.

Q: Do these ideas work in very small apartments?

A: Yes, definitely! Minimalist design and subtle division are perfect for small spaces. Changing the floor surface, using different paint colors, or adding tall, thin shelves are great ways to mark off zones in a studio apartment without losing important floor space.


References


Recent Posts


Your New 10 Sound Calm Routine (You Need This!)

A woman relaxing peacefully in a cozy armchair by a window on a rainy day, wearing headphones. Visual cues of sound waves and brain activity surround her, illustrating the concept of Sound Calm for deep relaxation and mental well-being.

Feeling overwhelmed by the constant noise of life? You are not alone. I used to chase calm, only to find my mind racing faster. Then I discovered the power of intentional sound and the concept of Sound Calm, which completely shifted my world. Join me as I share the simple routine that helped me find my quiet oasis, even on busy days.


Unlock Inner Peace and Silence the Noise with the Power of Sound

Are you tired of feeling constantly wired? Do you battle a restless mind? Do you struggle to find a moment of true peace? In our super-busy, always-on world, real relaxation can feel out of reach. We scroll, we hustle, we worry. Before we know it, another day ends with us feeling more drained than refreshed.

What if the key to deep calm was simpler than you ever thought? And is not in complex meditation or expensive retreats? What if it was in the subtle, yet powerful, world of sound?

Welcome to Your New 10 Sound Calm Routine. A practical guide that helps you use the incredible power of sounds for deep relaxation, stress reduction, and better health. And it is not just about listening to background noise. It is about creating a sound world that calms your nervous system. And quiets your thoughts. It guides you back to a state of peace.

Ready to find out how a simple Sound Calm routine can change your life? Let’s dive in.


The Science of Sound Calm: Why Your Ears are Your Gateway to Zen

For centuries, many cultures have known the power of sound for healing and meditation. From the chanting of monks to the rhythmic drumming of old rituals, sound has led to deep relaxation. Modern science now offers great insight into why certain sounds affect us so deeply.

Our brains process sounds all the time, even when we sleep. This means sounds go straight to our limbic system. This part of the brain manages emotions, memory, and drive. When we hear sudden, loud noises, our “fight or flight” response starts. This releases stress hormones like cortisol. Nice, steady, or musical sounds do the opposite. They activate the parasympathetic nervous system. This promotes a state of “rest and digest.”

Here is how sound works its magic:

  • Brainwave Sync: Steady sounds, like binaural beats or simple rain, help your brainwaves match the external rhythm. This moves us from alert beta waves toward relaxed alpha and meditative theta states. It can even lead to restorative delta waves for deep sleep.
  • Masking Bad Noise: A pleasant, steady sound can hide distracting noises. These may include traffic, neighbors, or a ticking clock. This creates a sound buffer that lets your mind settle.
  • Emotional Link: Some sounds bring strong memories or feelings. The soft sound of waves might remind you of a calm vacation. This instantly starts a sense of peace.
  • Focus & Presence: Focusing on the small details of a soothing sound anchors your attention. It pulls you away from stressful thoughts and into the present moment. This is much like how deep breathing works in meditation.

Knowing this science helps us be more careful about the sounds we use. It changes our sound environment into a haven of calm.


Building Your 10 Sound Calm Routine: The Basics

Before we look at the specific sounds, let’s set up the rules for your routine. This is not a strict plan. It is a flexible guide you can fit into your life.

1. Know Your Goal:

What do you want to achieve? Better sleep? Less worry? Focus? More peace? Knowing your goal helps you choose the best sounds and times for your routine.

2. Choose Your Tools:

You do not need fancy gear!

* Headphones: These are vital for deep listening, like for binaural beats or to block outside noise. Noise-cancelling, over-ear headphones work best.

* Speakers: Good speakers can create a calming sound setting for a whole room.

* Apps/Sites: Many free and paid apps (like Calm, Headspace, Insight Timer) offer large sound libraries. YouTube is also a helpful source.

3. Try and Make It Yours:

What one person finds soothing, another may find annoying. Be sure to try different sounds. See what works best for you. Your “10” sounds might change over time!

4. Do It Often:

Even just 5 to 10 minutes daily can help a lot. Add your Sound Calm routine to your normal habits. Try it with your morning coffee, a midday break, or as you get ready for bed.


Your 10 Sound Calm Arsenal: A Trip Through Auditory Bliss

Here are 10 kinds of very soothing sounds. This includes ideas and tips on how to use them in your daily life.

1. Gentle Rain & Thunderstorms Why it works: The rhythmic, steady fall of rain is a type of ‘white noise.’ It covers other sounds well. Light thunder adds a deep, pleasing tone. This sound makes us feel cozy, safe, and clean.

How to do it: Use rain sounds to focus while you work. Use them to relax after a long day. Or use them as a sleep aid. Look for sounds that are not too heavy. A light shower is calmer than a huge storm. Try different levels of intensity.

Example: Search for “gentle rain sounds for sleep” or “distant thunderstorm ambiance.”


2. Ocean Waves Why it works: The back-and-forth motion of ocean waves feels like natural breathing. Their regular, yet slightly varied pattern is very calming. The sound of a wave breaking and then retreating can be deeply hypnotic.

How to do it: This sound is perfect for meditation. Use it for visualizing exercises. Or just use it to create a peaceful feel. Adjust the volume so you feel surrounded, but not overwhelmed.

Example: “Calming ocean waves,” “beach ambience with distant gulls.”


3. Forest & Nature Ambiance Why it works: Connect with nature, even if you are inside. Sounds of rustling leaves, birdsong, distant animals, and soft wind bring us to peaceful natural places. They help lower feelings of stress and loneliness.

How to do it: Great for relaxing during the day, for study, or for reading. Choose forest sounds that do not have any sudden or loud animal calls, if you are sensitive to noise.

Example: “Deep forest sounds,” “woodland birdsong and breeze.”


4. Chimes & Singing Bowls Why it works: The pure, deep sounds and musical tones of chimes and singing bowls bring clarity and space. They can clear your mind of worries. They help you reach a state of deep thought.

How to do it: Use these sounds for short, mindful breaks. Use them before or after meditation. Or use them to simply reset your focus. Let yourself follow the sound as it slowly fades.

Example: “Tibetan singing bowls meditation,” “wind chimes relaxing.”


5. Binaural Beats Why it works: This is scientific! You listen to two slightly different tones in each ear (with headphones). Your brain then creates a “third” tone, the binaural beat. This helps your brainwaves sync up. Different beat speeds (like alpha, theta, delta) relate to various states of rest, creativity, or sleep.

How to do it: You MUST use headphones. Choose a beat speed that matches your goal. (Theta for deep thought, delta for sleeping.) Start with short sessions. See how you feel.

Example: “Theta waves for deep meditation,” “delta waves for sleep.”


6. White, Pink, or Brown Noise Why it works: These “color noises” are steady background sounds. They cover a wide range of sound speeds. They easily mask other noise without being distracting.
* **White Noise:** Has all sound speeds at the same power (like TV static).
* **Pink Noise:** Focuses on lower sound speeds (like steady rain or soft leaves). It is often considered smoother and more natural than white noise.
* **Brown Noise:** Much deeper, with more emphasis on very low sound speeds (like a strong waterfall or thunder). It sounds like a low rumble.

How to do it: Perfect for helping focus, blocking noise, and aiding sleep. Try them all to see which “color” is most comfortable for you. Pink noise is often a top choice for sleep.

Example: Search for “pink noise for sleep,” “brown noise for focus.”


7. Crackling Fireplace Why it works: A basic sound that makes us feel safe, warm, and together. The gentle crackling and popping, plus the occasional sizzle, is very comforting. It is perfect for relaxing and mesmerizing.

How to do it: Ideal for creating a cozy feel in the evening. Use it while relaxing or reading. Add soft lamps for the best effect.

Example: “Cozy fireplace sounds,” “crackling fire ambience.”


8. Gentle Running Water (Stream/Waterfall) Why it works: The smooth, flowing sound of water is naturally calming and cleansing. It brings to mind renewal. It can wash away mental stress. A steady stream sounds soft. A small waterfall adds a fresh, lively element.

How to do it: Use this during mindful practice. Use it for background sound during work. Or use it to wind down before bed. Make sure the sound is not too loud or intense.

Example: “Gentle stream sounds,” “small waterfall ambience.”


9. Soft Instrumental Music (Ambient, Classical, Lo-Fi) Why it works: Music without words lets your mind rest. You do not have to think about what the words mean. Ambient music creates a calming texture. Some classical pieces (especially slow ones) or Lo-Fi beats are very soothing. They can even boost creativity.

How to do it: Pick music that is meant to be relaxing. Explore different types of music to find what you like. This is perfect for creative work, unwinding, or as a change from silence.

Example: “Relaxing ambient music,” “classical music for relaxation,” “lo-fi study beats.”


10. Your Own “Happy Place” Sound Why it works: This is your own special sound. Maybe it is distant church bells. Maybe it is a cat purring. It could be the soft hum of an old fridge. It might even be the quiet breathing of a loved one. These sounds link directly to good memories and feelings.

How to do it: Take time to think about sounds that truly make you feel safe, loved, or peaceful. Can you find a recording of this sound? Or can you just remember it clearly? This sound is your unique anchor to calm.


How to Do It: Using Your Sound Calm Routine Daily

You now have your set of soothing sounds. Let’s talk about how to use them. The best part of a Sound Calm routine is how easy it is to fit into your life.

Morning Refresh (5-10 minutes):

Start your day with a plan. Before you check your phone, put on some Forest Ambience or Gentle Running Water. Drink your coffee. Stretch a bit. Or just sit quietly. Let the sounds ground you before the day starts.

Midday Reset (10-15 minutes):

Feeling tired in the afternoon? Are you stressed by your tasks? Take a real break. Use headphones and play Binaural Beats (Alpha or Theta). Close your eyes. Just listen. This can re-energize your mind better than checking social media. If you can, play Pink Noise softly while you work. This helps focus and blocks noise.

Evening Unwind (20-30 minutes before bed):

This is where your routine can work wonders. Make a “sleep sanctuary.”

  1. Lower the lights.
  2. Play Gentle Rain, Ocean Waves, or a Crackling Fireplace.
  3. Do not use screens. Read a book, write in a journal, or just lie down and listen.
  4. If using Delta Wave Binaural Beats, put on your headphones once in bed. Let the sound gently put you to sleep.

Focused Calm/Meditation (Anytime):

Need to truly de-stress or enter a quiet state? Pick a sound that fits your goal. Chimes & Singing Bowls work well for mindfulness. Soft Instrumental Music is a great backdrop for gentle yoga or stretching.

Pro-Tip: Make a “Calm Playlist”

On your favorite music app, make a playlist with your 10 (or more!) sounds. Name sections like “Morning Focus,” “Midday Chill,” and “Sleep Prep.” This makes it easy to find your peace whenever you want.


Dealing with Issues in Your Sound Calm Journey

  • “The sounds distract me!” This can happen at first. Try different sound types or volumes. Sometimes, focusing on the sound itself (like counting the waves) is a good form of deep thought.
  • “I can’t find the perfect sound.” Keep trying! The world of sound is vast. Do not stop at just a few. Try sound generators where you can mix different parts.
  • “It feels like another chore.” Think of it as caring for yourself, not a task. Start small, just 5 minutes. When you feel the good effects, it will become something you enjoy.
  • “What if I have ringing in my ears (tinnitus)?” Many people with tinnitus find consistent, low-level white, pink, or brown noise is helpful. It can mask the ringing and bring relief. Always talk to your doctor or a hearing expert for advice just for you.

FAQ Section

Q: Can I use more than 10 sounds in my routine?

A: Yes, you can! The “10” is a simple guide to help you build a core set. Feel free to explore and grow your sound library as much as you like. The main goal is your personal calm.

Q: Are certain sounds better for specific tasks?

A: Yes! Smooth, steady sounds like pink noise or soft rain are great for focus or sleep. More varied sounds like ocean waves work well for active relaxation or deep thought. Binaural beats are specifically made to guide your brainwaves toward certain states.

Q: Do I need expensive headphones for binaural beats?

A: Good headphones will improve the experience. But any stereo headphones that clearly send different sounds to each ear will work for binaural beats. The main point is that each ear gets a slightly different tone.

Q: How often should I use my Sound Calm routine?

A: Doing it regularly is more key than doing it for a long time. Even 5 to 10 minutes every day can help. Aim for at least once a day. Do it in the morning or before bed. Add more sessions whenever you feel stressed or need to focus.

Q: Can children benefit from soothing sounds?

A: Many children find white noise or gentle nature sounds very helpful for sleeping and quiet time. Always watch them. Keep the volume very low, especially for babies.

Q: What if I prefer complete silence?

A: That is fine! Silence is a great source of calm for many. However, if outside noise stops you from finding silence, or if your mind is still racing in the quiet, then using intentional sound might be a strong tool to help you reach a deeper inner quiet.


References


Recent Posts


Zen Approved: The Best Plants to Detox Your Space and Mind

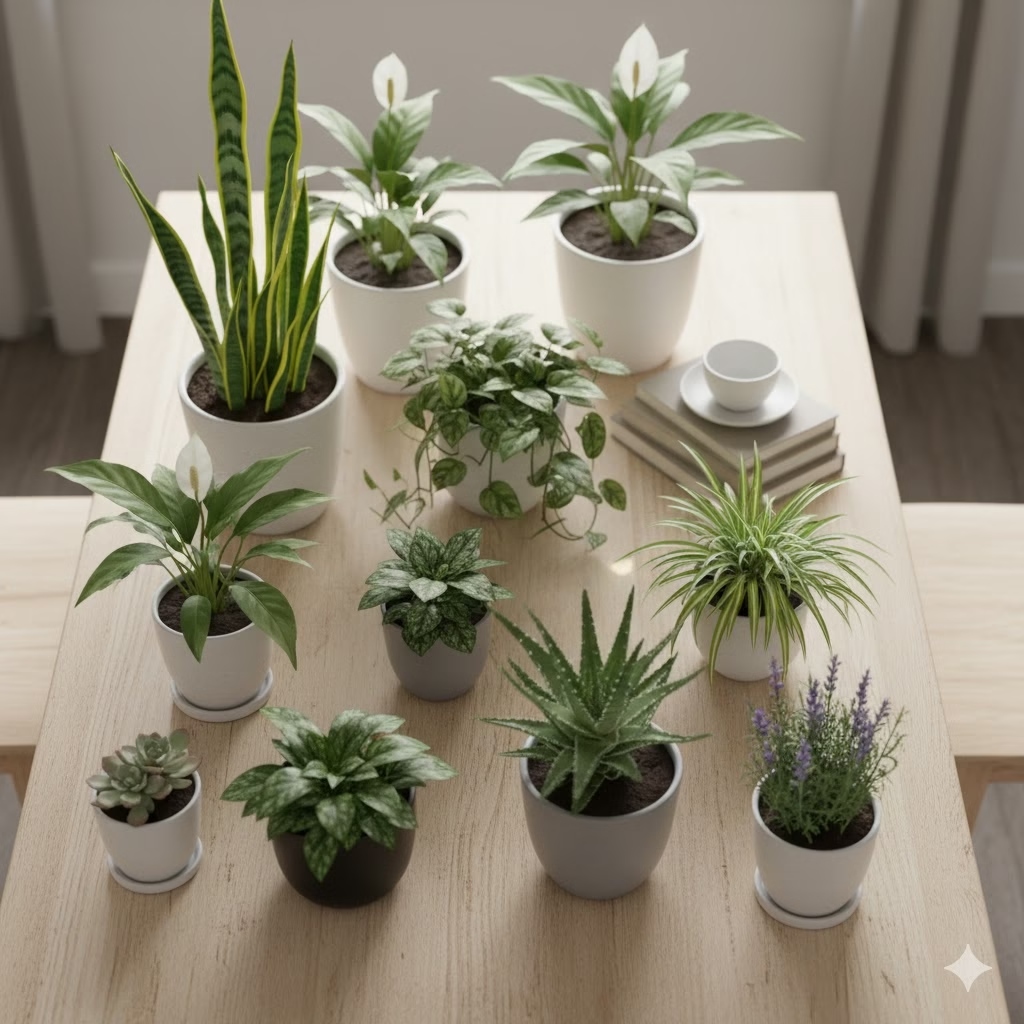
A serene, minimalist living room with abundant natural light, featuring several of the Best Plants in white and natural pots, a soft beige pouf on a round rug, and wooden furniture, creating a calm and detoxifying Zen space.

A belief shared by many in design is that our living spaces deeply affect how we feel. Through study and experience, we learn how much power a simple, calm home has, especially after navigating the chaos of modern life. The pursuit of creating quiet, green spaces filled with the Best Plants leads to a collection of insights on how small changes can bring deep peace. This exploration shows how nature can clean your air and calm your spirit.


In our fast, busy world, finding quiet and calm spots inside our homes is more important than ever. A “Zen space” is not just about looks; it is about creating an area that helps you feel peaceful, lowers stress, and makes your thoughts clearer. While organizing and simple design are key, one item adds unmatched life, peace, and cleaning power: plants.

The right indoor plants do more than just look nice. They actively clean the air, boost your mood, and link us to nature. And are a soft cure for modern stress. They become living, breathing parts of our own safe place. They quietly work to clean our physical surroundings and our inner peace. If you are ready to make your home a truly calm spot, keep reading. We will show you the 10 best plants to clean your space and mind.


The Power of Green: Why Plants Belong in Your Zen Space

Before we look at our top choices, let’s quickly see why plants work so well to create a Zen feeling:

  1. Air Cleaning: Many house plants are known for filtering out bad chemicals like formaldehyde and benzene from the air. This natural cleaning gives you cleaner, fresher air to breathe.
  2. Less Stress: Studies show that seeing or caring for plants can lower blood pressure, reduce feelings of worry, and help you relax. The simple act of caring for a plant can be like a quiet meditation.
  3. Better Mood and Focus: Green areas are known to help you concentrate and be more creative. The bright green colors are easy on the eyes. They can help reduce mental tiredness.
  4. Nature Link: We live in more cities now. Plants offer a vital tie to the natural world. They bring the calming feel of the outdoors inside. This connection is key to the Zen idea.
  5. Look Great: Besides their cleaning uses, plants add beauty, feel, and life to a room. They soften hard edges and make the space feel more welcoming.

Now, let’s look at the best plants that do these jobs well. They will help you make a truly Zen space.


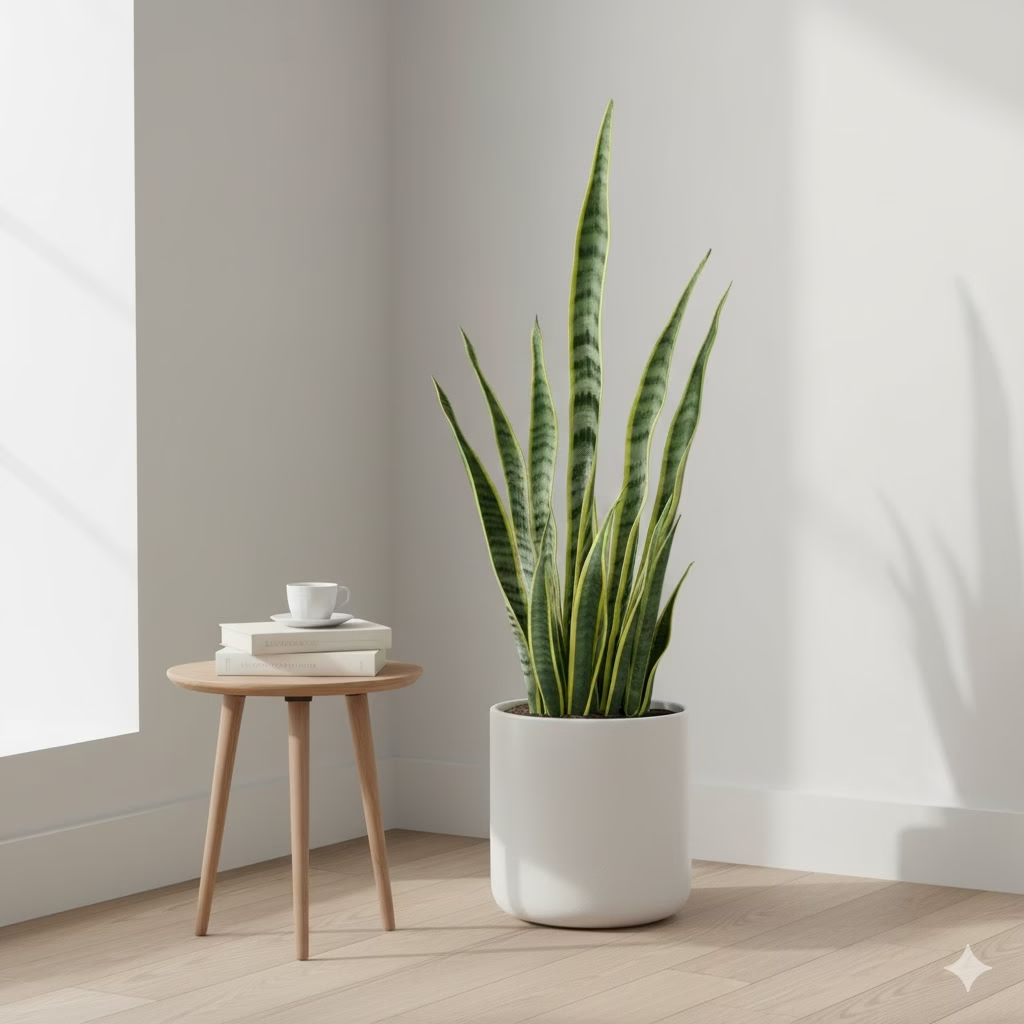
1. Snake Plant (Sansevieria trifasciata)

Why it’s Zen Approved: The Snake Plant is the best example of simple elegance that needs little care. Its tall, straight leaves look modern and simple, which fits Zen design perfectly. But its uses are much more than just looks. It is one of the best air cleaners, known for taking out formaldehyde and other toxins. What is special is that it also turns carbon dioxide into oxygen at night. This makes it an ideal plant for your bedroom to help you sleep better.

How to Do It:

  • Light: Can handle many light levels, from low to bright, indirect light. Great for new plant owners.
  • Water: Water rarely. Let the soil dry out fully between times. Giving it too much water is the only real threat.
  • Placement: Perfect for room corners, next to the bed, or as a tall plant on the floor.

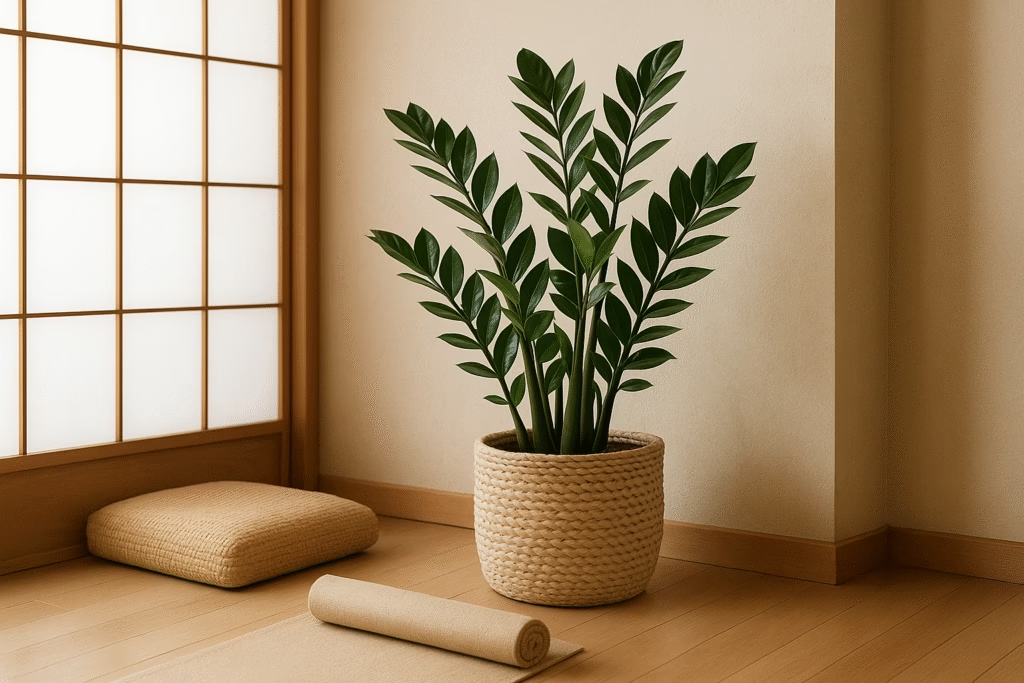
2. ZZ Plant (Zamioculcas zamiifolia)

Why it’s Zen Approved: If you want a plant that looks strong and calm, the ZZ Plant is your choice. Its waxy, dark green leaves look naturally shiny. Its ability to grow even if you forget about it shows its Zen-like self-reliance. It also helps clean up common air pollutants. It makes your air cleaner with very little work from you.

How to Do It:

  • Light: Grows well in low to medium indirect light. Keep out of direct sun.
  • Water: Water very little. It stores water in its roots, so it is better to water less than too much.
  • Placement: Great for offices, living rooms, or any spot that needs green without needing constant care.

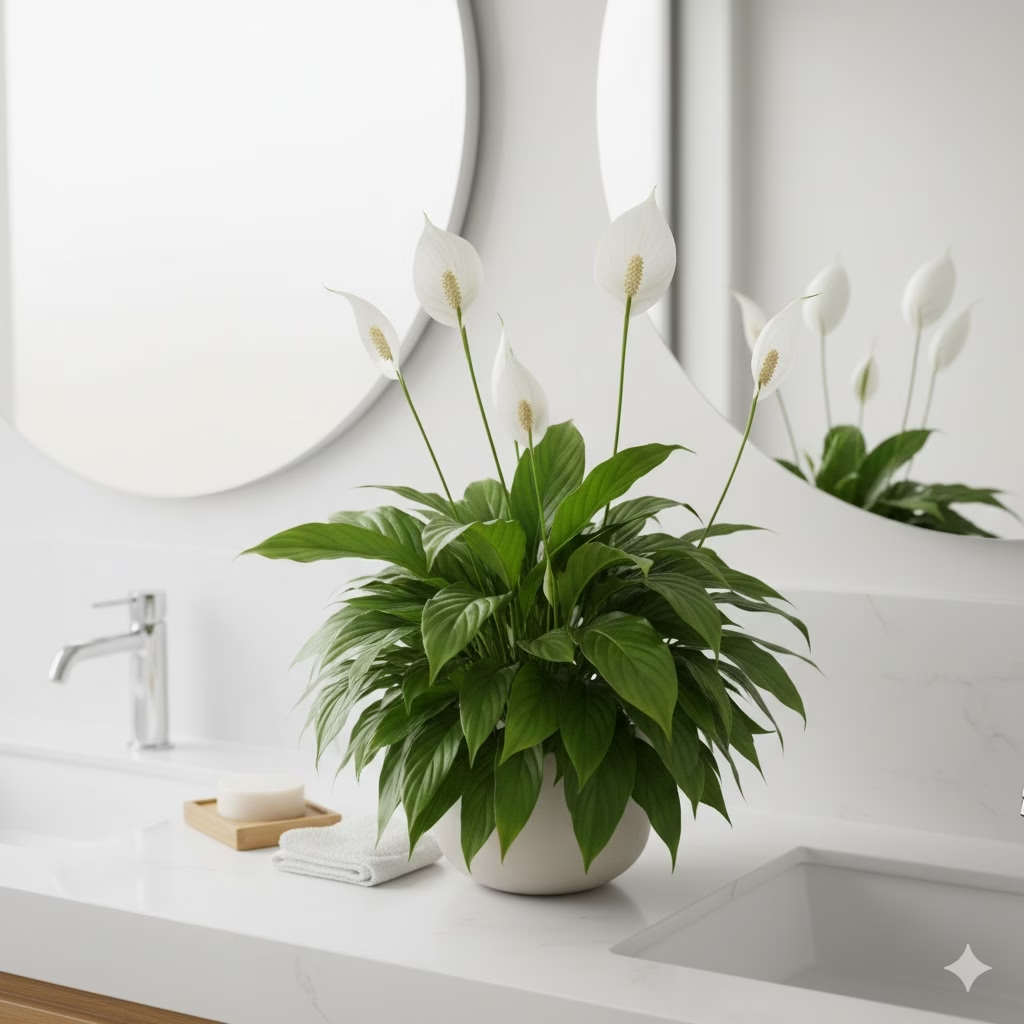
3. Peace Lily (Spathiphyllum)

Why it’s Zen Approved: Its name tells you everything. The Peace Lily means calm. Its lovely white parts look like flowers rising above rich green leaves. This brings a sense of pure peace. Besides being beautiful, it is a strong air cleaner. It fights chemicals like ammonia and formaldehyde. It even shows you when it is thirsty by drooping a little. This makes it easy to care for.

How to Do It:

  • Light: Likes medium to low indirect light. Too much direct sun can burn its leaves.
  • Water: Keep soil wet, but not soggy. Water when the top soil feels dry, or when leaves start to droop slightly.
  • Placement: Works well in bathrooms (it loves the steam), bedrooms, or living areas where you can see its gentle shape.

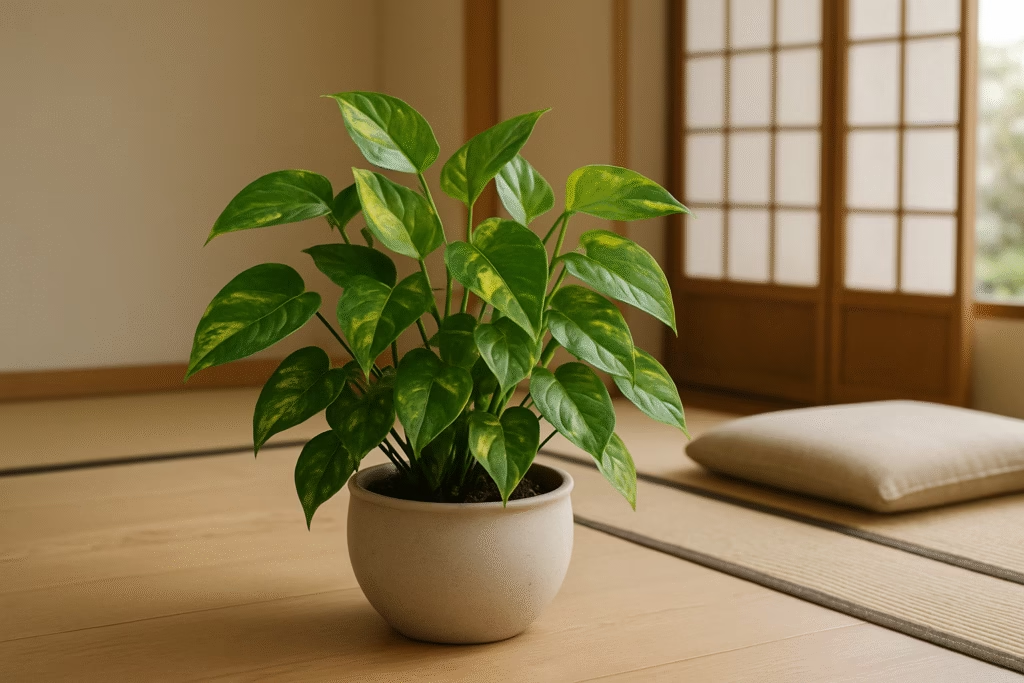
4. Pothos (Epipremnum aureum)

Why it’s Zen Approved: The Pothos, or Devil’s Ivy, is easy to forgive and very flexible. Its vines hang down, creating a flow of green that softens any spot. This adds a natural, moving element that helps you relax. It is great at removing poisons from the indoor air, such as formaldehyde and benzene. This makes it a strong yet quiet air cleaner for your home.

How to Do It:

  • Light: Can handle low to bright indirect light. Avoid direct sun, which can burn leaves.
  • Water: Let the top few inches of soil dry out before watering again. It is quite fine if you miss a watering.
  • Placement: Ideal for hanging baskets, high shelves where its vines can hang, or on top of tall furniture.

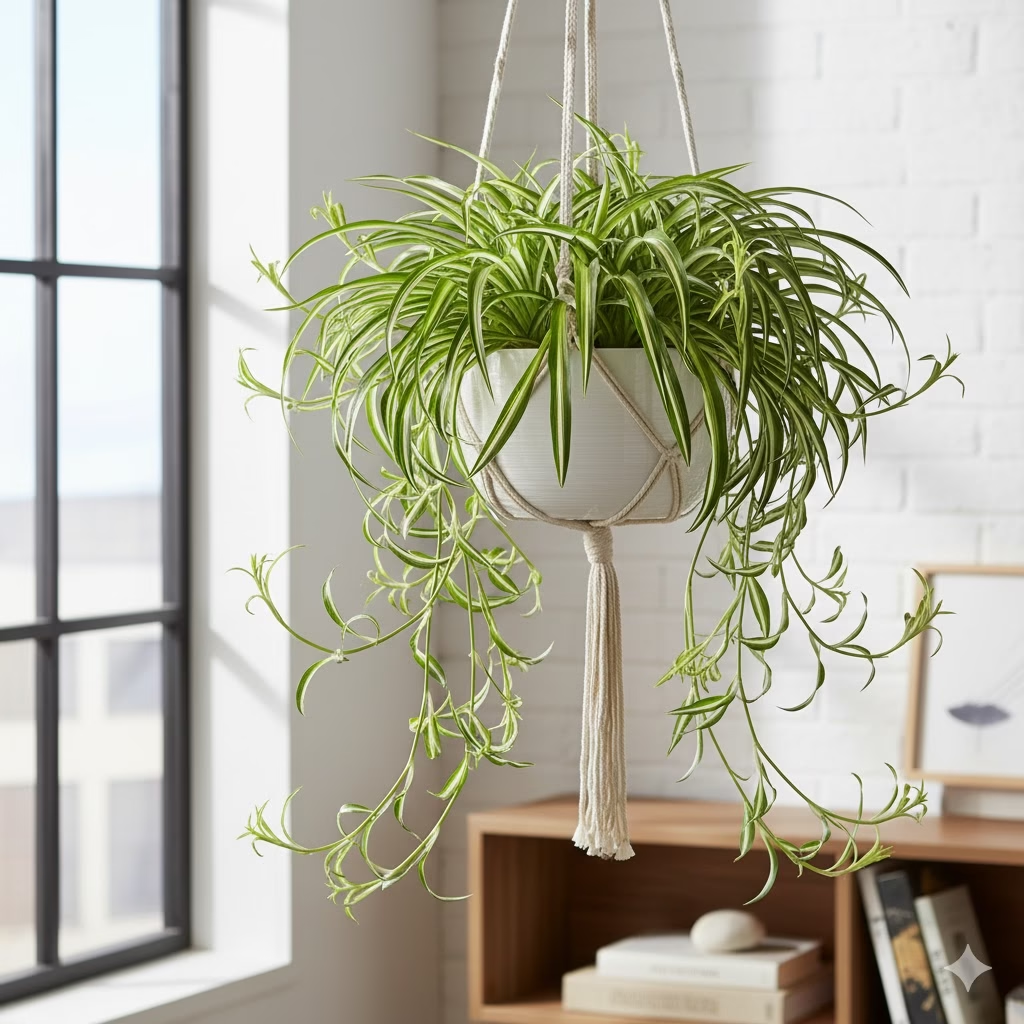
5. Spider Plant (Chlorophytum comosum)

Why it’s Zen Approved: The Spider Plant is a favorite for good reasons. Its curved, striped leaves and small “babies” create a light, open feeling that adds to a peaceful atmosphere. It is a top air cleaner, very good against formaldehyde. Its ease of making new baby plants also gives the plant owner a pleasing feeling of growth and connection.

How to Do It:

  • Light: Likes bright, indirect light. Can handle less light but may grow fewer babies.
  • Water: Keep soil wet but not soaking. Try to avoid using tap water with lots of fluoride, as this can make leaf tips turn brown.
  • Placement: Great in hanging planters, on tall shelves, or as a desk plant.

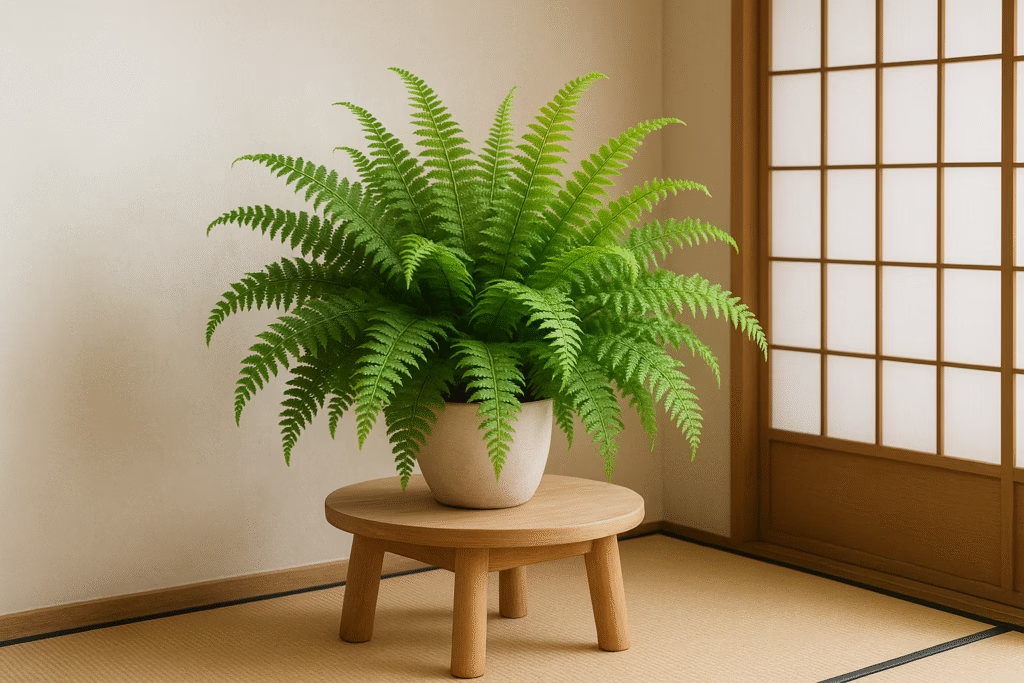
6. Boston Fern (Nephrolepis exaltata)

Why it’s Zen Approved: If you want a plant that is full and brightly green, the Boston Fern is the best. Its soft, airy fronds add a smooth, natural feel to a room, like a quiet forest floor. This fern is very good at taking out formaldehyde. It also acts like a natural humidifier, putting moisture into the air. This is especially good in dry places, making the air more comfortable and soothing.

How to Do It:

  • Light: Bright, indirect light is best. Do not put in direct sun.
  • Water: Needs to stay wet. Do not let the soil dry out. It likes high humidity, so spray it with water often or place it near a humidifier.
  • Placement: Best for bathrooms, or on a stand where its hanging fronds can be seen.

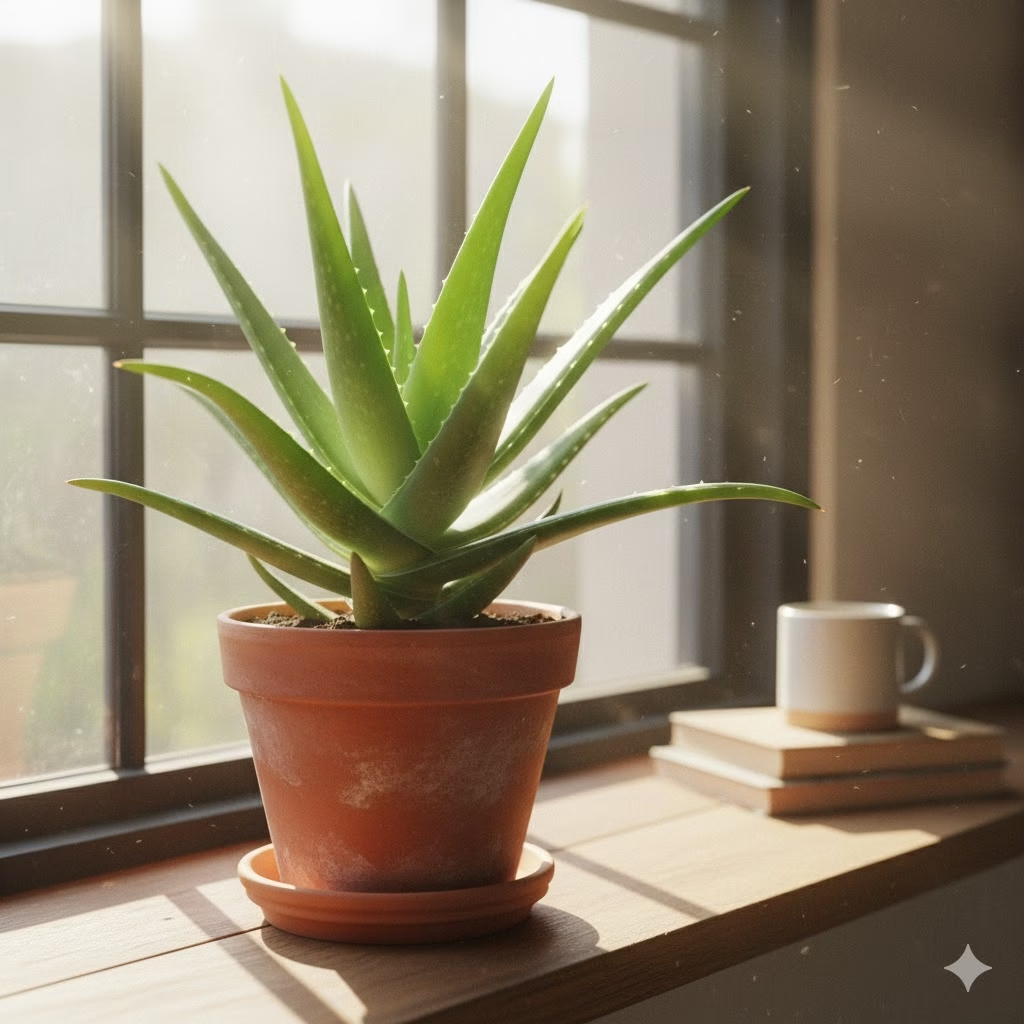
7. Aloe Vera (Aloe barbadensis miller)

Why it’s Zen Approved: We know Aloe Vera for its healing uses (the gel inside its leaves can help burns). It also helps create a Zen space in simple ways. Its ability to live on its own makes it stand for strength and natural healing. It is also good at cleaning the air of formaldehyde and benzene, which are often found in cleaning products. Its shape is simple yet beautiful.

How to Do It:

  • Light: Needs bright, direct sunlight for several hours each day. South-facing windows are perfect.
  • Water: Water rarely. Let the soil dry out fully between waterings. Too much water will cause its roots to rot.
  • Placement: Sunny windowsills, kitchen counters, or a bright spot on a desk.

8. English Ivy (Hedera helix)

Why it’s Zen Approved: English Ivy is a classic, trailing plant. It brings an old-world beauty and a feeling of lasting growth, showing strength. It is especially good at cleaning the air, targeting germs and also taking out formaldehyde and benzene. This makes it a great choice for bathrooms. Its thick leaves add a lovely look and feel.

How to Do It:

  • Light: Prefers bright, indirect light but can handle less light.
  • Water: Keep soil wet, but let the top part of the soil dry out a little before watering again.
  • Placement: Perfect in hanging baskets, draped over shelves, or even trained to climb small supports.

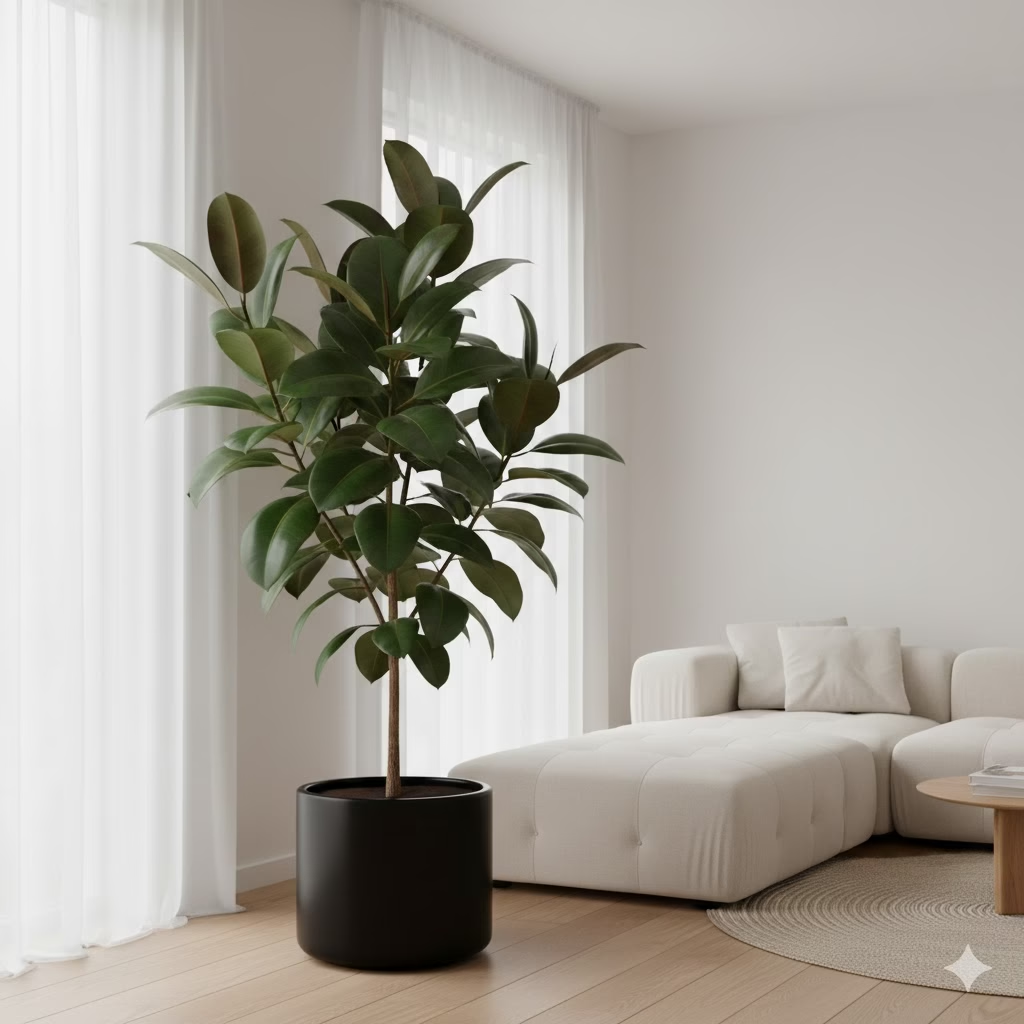
9. Rubber Plant (Ficus elastica)

Why it’s Zen Approved: With its wide, shiny leaves, the Rubber Plant makes a striking point. Its strong, upright presence can ground a space, bringing a sense of steadiness and calm. It is an excellent air cleaner, removing toxins like formaldehyde. Its large leaves are great at turning carbon dioxide into oxygen. Its grand, yet easy-care nature makes it a perfect Zen partner.

How to Do It:

  • Light: Bright, indirect light is best. Can handle medium light, but it may grow slower.
  • Water: Let the top few inches of soil dry out between waterings. Wipe leaves now and then to keep them clean and help them take in light better.
  • Placement: As a tall plant on the floor in a living room, hallway, or a large bedroom corner.

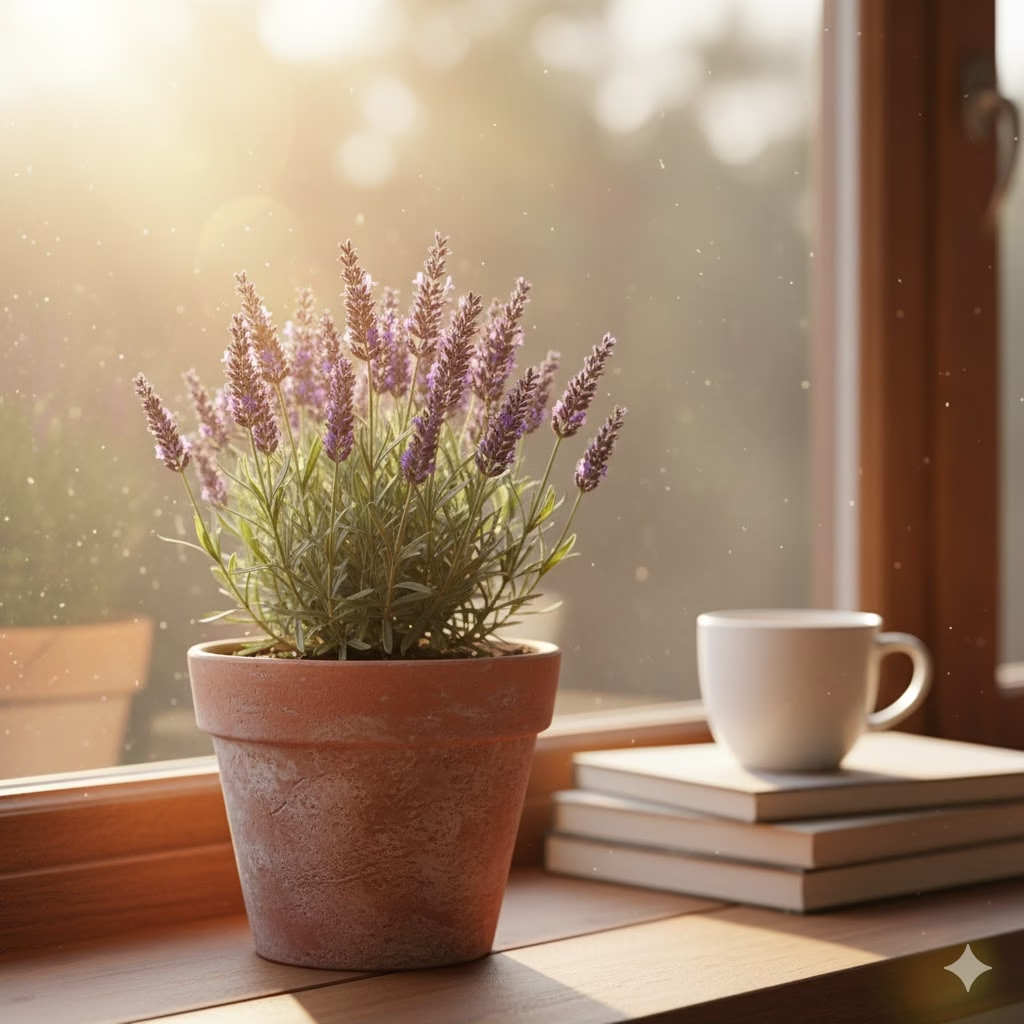
10. Lavender (Lavandula angustifolia)

Why it’s Zen Approved: Lavender is mostly an outdoor plant. Small types can grow well indoors with enough care, especially near a sunny window. Its soft purple flowers and rich smell are known to be calming and help you sleep. The smell alone can lower anxiety and bring a deep feeling of rest. This makes it a special and strong addition to your Zen plant group.

How to Do It:

  • Light: Needs lots of direct sunlight (6 or more hours daily). A south-facing window is a must.
  • Water: Let soil dry out between waterings. It needs soil that drains well.
  • Placement: Sunny windowsills, especially in bedrooms or quiet spots where its smell can be most enjoyed.

How to Do It: Integrating Plants into Your Zen Space

Adding these best plants to your home is more than just buying them. It is about placing them in a smart, thoughtful way.

  1. Start Easy: Do not feel worried. Start with one or two plants that you like and that fit your light. As you feel more sure, slowly add more to your group.
  2. Pick the Right Pot: Choose pots that match your Zen style. Natural materials like simple ceramic, clay, or simple concrete in soft colors (grey, white, black, natural wood) are best. Do not use pots that are too busy or too brightly colored.
  3. Think About Light: This is the most important thing for plants to live. Look at your home all day. Which windows get direct sun? Which areas are always shady? Match your plants to these spots.
  4. Group Plants: Putting plants together in small groups can look better. It also helps raise the moisture in the air nearby, which many plants like. Mix up heights and textures to make it interesting to look at.
  5. Place for a Reason:
    • Bedroom: Snake Plant, Peace Lily, Lavender for better air and sleep.
    • Living Room: Rubber Plant, Pothos, ZZ Plant for general air cleaning and to look nice.
    • Bathroom: Boston Fern, English Ivy, Peace Lily thrive in the steam and clean the air.
    • Workspace: Spider Plant, Pothos for focus and calm.
  6. Care is a Ritual: Think of watering, spraying, and trimming not as chores, but as quiet times to connect with nature. This simple act of care can become like meditation. It helps increase the Zen feel of your space.
  7. Listen to Your Plants: Yellow leaves, drooping, or slow growth all mean your plant is trying to tell you something. A quick search for ” [plant name] yellow leaves” can usually tell you what is wrong. Learning to meet their needs makes your bond stronger.

Cultivating Your Inner Garden

Adding the best plants to your home is an investment in feeling good. These natural cleaners not only clean the air we breathe but also calm our spirits, lower stress, and build a stronger connection to nature. Each plant chosen with care adds to the feeling of peace you are creating in your home.

Start your journey now. Pick one or two green friends from this Zen-approved list. Watch as they change not only your space but also your mind. They will bring a deep sense of calm, clarity, and peace to your daily life.


Frequently Asked Questions (FAQ)

Q1: How can I tell which plants are truly “easy to care for”?

A1: Easy-care plants are usually ones that can handle different amounts of light. They forgive you if you forget to water them. They also do not often get bothered by bugs. Plants like the Snake Plant, ZZ Plant, and Pothos are great examples of easy choices. Always look up what a plant needs before you buy it.

Q2: Can plants really clean the air, or is that just an old story?

A2: Yes, plants truly do clean the air! NASA’s famous Clean Air Study showed that many common house plants can remove large amounts of bad chemicals like formaldehyde from the air. While one plant will not clean a huge room, a group of plants can make a clear difference in the air quality inside.

Q3: How many plants do I need to see a difference in air quality or mood?

A3: There is no strict rule. A common guide from some studies suggests one plant for every 100 square feet of space for better air cleaning. For a better mood, even one or two plants placed well can help a lot. Focus on making groups that feel right to you, instead of trying to hit a certain number.

Q4: My home does not get much sun. Are there any Zen plants for dark rooms?

A4: Of course! The Snake Plant, ZZ Plant, and Pothos handle low light very well. This makes them perfect for less sunny spots. Peace Lilies also do well in medium to low indirect light. Just remember that “low light” does not mean “no light.” All plants need some light to live.

Q5: What are the most common mistakes people new to plants make?

A5: The two biggest mistakes are watering too much (which causes the roots to rot) and not enough light. Always check how wet the soil is before watering. Make sure your plant is in a spot that meets its light needs. Forgetting to learn what your plant needs is also a frequent mistake.

Q6: Are there any plants I should not use in a Zen space?

A6: In general, avoid plants that need constant attention or that have very strong smells that might take away from the calm feeling (unless you choose a calming scent like lavender). Also, if you have pets or small children, look up if a plant is safe before bringing it home.

Q7: What is the best way to keep my plants healthy and bright?

A7: Taking care of them on a regular basis is key. Give them the right amount of light, water when they need it (not on a set schedule), make sure the water drains well, and think about feeding them during the growing months (spring/summer). Check for bugs often and wipe their leaves to keep them clean. This helps them take in light better. Most importantly, learn to ‘read’ your plant and change how you care for it as needed.


References


Recent Posts


How to Cultivate Gratitude and Shift Your Perspective

Open journal on a wooden table with steam rising from a mug, glasses, and a pen. The journal page has headings like Gratitude and "A Shift in Perspective," symbolizing the start of a daily practice.

Life often throws curveballs, leaving us feeling overwhelmed or uninspired. I’ve been there, searching for ways to find more joy and meaning in the everyday chaos. This journey led me to the profound practice of gratitude, a simple yet powerful tool that completely reshaped my view of the world. Join me as I share how embracing thankfulness can truly change everything.


The Profound Power of Daily Gratitude

In a world that often focuses on what we lack, what’s next, or what’s wrong, it’s easy to get caught in a cycle of unhappiness. We look at highlight reels, compare our private lives with others’ perfect images, and constantly try to get more. But what if the key to deep happiness, strength, and a better life wasn’t found in getting more things? What if it was found in appreciating what we already have? This is the core of gratitude. Learning to use it is one of the most powerful changes you can make.

Gratitude is more than just saying “thank you.” It’s a deep appreciation for things that are valuable and important to you, and a general feeling of thankfulness. It is a conscious choice you make and a way to look at the world, even when things are hard. This doesn’t mean ignoring pain or pretending everything is fine; rather, you see the good things that exist along with the bad. You find light even in dark times, and you understand that every event, good or bad, adds to the rich story of your life.

The benefits of practicing gratitude are huge and well-known. Studies show that people who are grateful feel more happy emotions. They are more awake, more eager, and more focused. And are more likely to support others emotionally. They are less bothered by minor aches and sleep better. Gratitude does more than just make you feel good. It changes your brain. It makes the parts of your brain linked to reward and fairness work better. It’s a great skill everyone can have, and it costs nothing to learn.

So, how do we move past simple thank-yous and truly make gratitude a part of our daily lives? It starts with regular, focused practice.

Understanding the Main Ideas of Gratitude

Before we look at the methods, it helps to know why gratitude is so strong.

  1. Focus: You cannot be grateful for something you don’t see. Focus is the base of gratitude. It lets us be present and notice the good things in our lives, no matter how small. It means slowing down and truly looking.
  2. Appreciation: This is the central feeling of gratitude. It’s the emotional reaction to seeing the value or benefit of something. This can be for a major event or just a small comfort.
  3. Seeing the Source: Gratitude often means seeing where the good comes from. This could be another person, a higher power, nature, or just luck. It helps you feel more connected to others and the world.
  4. Change in View: This is where the magic really happens. Gratitude helps us look at situations from a new angle. Instead of focusing on problems, it asks us to see what went right, what we learned, or what new chances came up.

Simple Ways to Cultivate Gratitude

Building gratitude is a long-term path, not a quick stop. It needs steady work, but the rewards are priceless. Here are some clear, actionable ideas to make gratitude a part of your daily life.

1. Start a Gratitude Journal

Keeping a gratitude journal is one of the best and most popular methods. This routine helps you think about things you are thankful for every day. It makes those good feelings stronger and helps you see more good things in your day-to-day life.

How to Do It:

  • Be Regular: Choose a time each day to write. Morning or evening works best for most people.
  • Be Clear: Don’t just write “I’m grateful for my family.” Instead, try “I’m grateful for my sister’s fun laugh on our call today. It made my morning better.”
  • Choose a Number: Start by listing 3 to 5 things each day. They don’t need to be big things. Often, the smallest things matter the most.
  • Don’t Stress: If you have trouble thinking of items, think about your five senses. What did you see, hear, smell, taste, or feel today that you liked?
  • Vary Your List: Try not to list the same things too often. This trains your brain to look for new reasons to be thankful.

Example:

  • Day 1: “Thankful for the warm coffee this morning, my comfy chair, and the sound of birds outside my window.”
  • Day 2: “Thankful for how well my coworker handled that hard client, the sunlight, and the chance to learn a new skill today.”

2. The Gratitude Walk

This is a wonderful way to mix focus and gratitude with being active.

How to Do It:

  • Go Outside: Walk in your area, a park, or even just your yard.
  • Notice Your World: As you walk, truly look at your surroundings. What do you see? Bright colors of flowers, a spiderweb’s pattern, a friendly face? What do you hear? Singing birds, kids playing, the wind? What do you smell? Freshly cut grass, flowers, rain?
  • Say Thanks Inside: For each thing you notice, mentally say a thank you. “I’m grateful for the fresh air.” “I like the beauty of that old tree.” “Thankful for the sound of laughter.”
  • Be Natural: Don’t force the feeling. Just observe the world and let feelings of thanks come naturally.

Example: Walking past a park, you might see bright red roses and think, “How lovely! I’m grateful for the time someone spent growing these, and for the simple pleasure they give me.”

3. Gratitude Jar

This is a great long-term project. It lets you actually see your blessings grow over time.

How to Do It:

  • Get a Jar: Pick a jar, box, or container you like and can easily reach.
  • Write Things Down: When something good happens or you feel thankful, write it on a small slip of paper.
  • Fill the Jar: Fold the paper and drop it into the jar.
  • Look Back and Reflect: On New Year’s Eve, your birthday, or whenever you need a lift, open the jar and read all your notes. It’s a very powerful reminder of the good things in your life.

Example: After a hard day, you might come home to a hot meal made by your partner. Write, “Grateful for my partner’s care and the tasty dinner tonight.”

4. Expressing Gratitude to Others

This goes past just thinking to yourself. It actively makes your relationships and sense of connection stronger.

How to Do It:

  • Say Thanks Out Loud: Make a point to really thank people during your day. Thank your coffee maker, a bus driver, a coworker who helped you, or a family member.
  • Write Notes/Messages: When someone does something especially kind or helpful, write them a note, email, or text message. Make sure to say exactly what you appreciate.
  • Gratitude Visits: For someone who has greatly helped your life, plan a time to visit them. Express your gratitude in person. This can be very meaningful for both of you.

Example: Instead of a quick “thanks” to your friend who helped you move, try, “I want to say how much I appreciate you taking the time to help me move last week. I could not have done it alone, and knowing you were there meant a lot to me.”

5. Gratitude Meditation or Affirmations

If you like quiet, thoughtful routines, adding gratitude to meditation can be very rewarding.

How to Do It:

  • Guided Meditations: Search for “gratitude meditation” online or on apps. These often guide you to think about different sources of thanks.
  • Do It Yourself: Sit calmly, close your eyes, and think about things you are grateful for. Focus on the warm, appreciative feeling in your chest.
  • Positive Statements: Repeat positive statements of gratitude all day, such as, “I am grateful for all the good things in my life,” or, “Every day I find new reasons to be thankful.”

Example: During a meditation, you might picture a loved one, a calm place, or a recent success. Let the feeling of gratitude for each one wash over you.

6. The “Three Good Things” Exercise

This is a simple but strong technique, often used in mental wellness.

How to Do It:

  • Before Bed: Each night, think of three specific good things that happened that day.
  • Say Why: For each item, briefly explain why it happened or why you are thankful for it. This helps you truly feel the positive event.

Example:

  1. “My presentation at work went well because I spent extra time getting ready.”
  2. “I had a good talk with my neighbor because we have not talked in a while, and it felt good to catch up.”
  3. “The weather was perfect for my evening walk. I appreciated the cool air after a warm day.”

7. Balancing Negative Thoughts

Gratitude is not about ignoring problems. It’s about finding balance. When a bad thought comes up, try to actively find a counter-thought of thanks.

How to Do It:

  • See the Negative: Do not push away bad feelings. See them first.
  • Find the Good Side: Then, consciously look for something to be thankful for in that moment or in a different part of your life.
  • Focus on Growth: Even in hard times, try to find the lesson, the growth, or the strength you gained.

Example:

  • Bad thought: “Ugh, I’m stuck in traffic again; this is so annoying.”
  • Gratitude counter: “I’m grateful to have a reliable car. This gives me a chance to listen to my favorite music.”
  • Bad thought: “I didn’t get that job promotion I wanted.”
  • Gratitude counter: “I’m grateful for the skills I gained during the interview process, and for the helpful coworkers I already have.”

Shifting Your Perspective: How Gratitude Changes Your Life

Building gratitude is not just about feeling good right now. It is about deeply changing the way you see the world. This new way of seeing things has huge, long-term benefits.

1. More Strength and Resilience

Life will bring tough times, upsets, and hurt. Gratitude doesn’t stop these things from happening, but it gives you a strong tool to handle them. When you regularly focus on what is good, you build a store of positive feelings inside. You can use this during hard times. You learn to see problems not just as stops, but as chances to grow, learn, and become stronger.

For example, if you lose your job, feeling afraid and angry is normal at first. But a grateful view might also let you feel thankful for the skills you learned in that role. It might let you feel thankful for the time you now have. It might show you a new chance to try a different career you have always wanted.

2. Better Relationships

When you show gratitude to others, you make your connections stronger. People feel valued, noticed, and liked, which naturally brings them closer to you. This creates a good cycle: you feel good when you say thanks, they feel good when they get it, and your relationship improves. A grateful person is also more likely to forgive, feel less anger, and show more care, which are all key parts of healthy relationships.

When you take time to see a friend’s steady help or a partner’s daily kind acts, it strengthens those good things. It makes both of you feel more loved and safe.

3. Higher Self-Esteem and Less Comparison

Gratitude helps you focus on your own good things, instead of looking at what others have. When you value your own path, your own strengths, and your own life, you are less likely to fall into the trap of comparing yourself to others. This leads to feeling better about yourself. It brings a greater sense of being happy with who you are and what you have.

The gratitude jar or journal example is a great way to do this. By always listing your own unique blessings, you reinforce your self-worth.

4. More Optimism and Happiness

Focusing on good things trains your brain to notice more of the good in the world. This doesn’t mean you stop seeing problems. It means your normal way of thinking moves toward being hopeful. You start expecting good things to happen. This, in turn, can lead to more good things actually happening.

This simple shift changes your daily experience. You see challenges as temporary and less important than the overall good in your life.

5. Better Sleep and Health

Studies show a clear link between gratitude and physical health. Grateful people report fewer health issues and have stronger immune systems. They often feel more motivated to take care of their bodies, like exercising and eating well. Also, practicing gratitude just before bed can calm the mind. It clears away the worries of the day. This leads to faster, more restful sleep.

Try writing in your gratitude journal right before you turn out the light. Focusing on positive things is a great way to set the stage for a calm night.

Moving Forward: Making Gratitude Last

The hardest part of any practice is staying with it. Here are final tips to ensure gratitude becomes a long-term part of who you are.

Set Reminders: Use your phone, sticky notes, or a daily event (like brushing your teeth) as a cue to stop and think of one thing you are thankful for.

  • Mix It Up: If journaling feels dull, switch to the gratitude jar or the walk for a week. Use different methods to keep the practice feeling fresh.
  • Be Patient with Yourself: Some days will be easier than others. If you skip a day or a week, do not worry. Just start again. The goal is progress, not perfection.
  • Share the Practice: Talk to family or friends about what you are learning. Start a dinner table tradition where everyone shares one thing they are grateful for.

Gratitude is a truly powerful tool. It is always there, waiting for you to pick it up. By making it a regular part of your life, you are choosing to focus on the abundance that already exists. This choice will not only change your perspective but also improve your relationships, your resilience, and your entire experience of the world. Start today, and watch your world get brighter.


Your Free Daily Gratitude Routine Template

You’ve learned the steps to cultivate gratitude and shift your perspective. Now, it’s time to put those concepts into action!

We’ve created a simple, beautifully designed downloadable PDF template to help you establish a consistent practice morning and night. This tool is designed to make gratitude a simple, 5-minute routine, helping you start your day with intention and end it with peace.

What’s Included in Your Free Template:

  • Morning Routine: A dedicated section to quickly list the good things in your life before the stress of the day begins. This sets a positive tone and primes your mind for optimism.
  • Evening Routine: A section for reflection to help you acknowledge the specific blessings, lessons, or moments of kindness you experienced that day. This clears your mind for better sleep.
  • Consistency Tracking: Dated entries to help you track your progress as you build this new, positive habit.

Click the image or the button below to download your “My Daily Morning & Evening Gratitude Routine” template now!


Frequently Asked Questions (FAQ)

Q: Is practicing gratitude just ignoring my real problems?

A: No, not at all. Gratitude is not about pretending problems don’t exist. It’s about seeing the whole picture. When you focus only on problems, you see only darkness. Gratitude helps you see the light that coexists with the darkness. It makes you stronger and better able to solve those problems.

Q: How long does it take before I feel the benefits of gratitude?

A: Many people report feeling a mood lift right away. You may feel calmer just by writing in your journal for the first time. Research suggests that the deep, long-term changes—like increased optimism and better sleep—can appear after just a few weeks of consistent, daily practice.

Q: What if I have a really bad day and can’t think of anything to be grateful for?

A: On the hardest days, aim small. You don’t have to be grateful for the bad situation itself. Try being thankful for small comforts:

  • The fact that you have water to drink.
  • A bed to sleep in.
  • The fact that the difficult day is now over.
  • The strength to have made it through the day.

Q: Can I practice gratitude for big things, like winning the lottery?

A: You can, but it is often better to focus on small, everyday things. Why? Big, rare events give a quick burst of joy, but the small things are available every day. Being grateful for little things (like a good cup of tea or a short wait in line) teaches your brain to find happiness in the day-to-day. This makes the practice much more powerful.

Q: Do I have to write things down, or can I just think about them?

A: Thinking about what you’re thankful for is good, but writing it down is much more effective. Writing helps to slow down your thoughts and process the feelings more deeply. It gives the feeling a physical anchor and makes it real. It also creates a record you can look back at later.


Reference Section


Recent Posts


Laughter Is The Best Sound

A candid photo of five young adults (three women and two men) sitting around a cafe table by a sunny window, all sharing a moment of genuine, unrestrained Laughter over coffee. The image captures the joy of shared social connection.

A firm believer in the power of a good laugh, the author found solace and strength in humor after navigating life’s ups and downs. This journey inspired the author to share the profound benefits of Laughter with a wider audience. When not writing, the author enjoys sharing jokes and spreading smiles wherever they go.


Introducing Laughter: The Universal Sound of Joy

Laughter is a sound all people understand. It crosses all language barriers, breaks down walls, and always means joy. Quick, catching, and really good for us, it is key to the human story, from a baby’s first little giggle to the loud laughs of old friends. It is more than just a sound we make when we are happy; this powerful tool benefits our physical and mental health. Laughter helps us connect socially, making it a core part of being human.

The world often feels full of stress, worry, and big problems. In this world, the simple act of laughing can feel like an amazing way to take care of yourself. But it is truly the “best sound”? Science, psychology, and countless personal stories say a clear yes. This article will look at the many great things laughter does for us. We will explore how it affects our bodies and minds. We will share easy ways to add more laughter to your daily routine. Finally, we will show why ‘It Is The Best Sound’ is not just a nice saying, but a deep truth.

The Science Behind the Smile: How Laughter Works Its Magic

Laughter is not just a quick feeling; it starts a complex chain reaction in your body. When you laugh, many good changes happen inside you, switching your state from bad to good.

The Body’s Quick Workout:

Think of it like a short, fun workout. It uses many different muscles. Your diaphragm muscle tightens, your chest muscles work, and even your stomach muscles get a light squeeze. This physical activity is the main reason you might feel nicely tired after a long, big laugh.

Beyond muscles, it greatly helps your heart and blood system. Your heart rate and blood pressure first go up, but then drop lower than normal, helping you relax. It brings in more oxygen, waking up your heart, lungs, and muscles. It also causes your body to release endorphins. These are natural “feel-good” chemicals that make you feel well and can even stop pain for a while.

Less Stress and a Stronger Immune System:

One of the most important benefits of laughter is its power to fight stress. Stress hormones like cortisol can harm your body over time. They weaken your immune system, cause swelling, and lead to many health issues. So this is a strong cure. It lowers these stress hormones. At the same time, it increases the number of immune cells and disease-fighting antibodies. This makes your body better at fighting off sickness. Laughter is a vital, often forgotten, part of a strong immune system.

Relief from Pain:

The release of endorphins that comes with laughter is not just about feeling happy; it is also about feeling less pain. These natural painkillers made by your body can work well to ease pain, raising your pain limit. It cannot cure long-term pain, but it can give short-term relief and make the pain easier to handle. It offers a needed break and a sense of hope.

The Mind’s Best Medicine: Mental and Emotional Benefits

The physical benefits are great, but the effects of laughter on our minds and feelings are just as deep. It helps us cope, improves our mood, and builds emotional strength.

Better Mood and Fighting Sadness:

It is nearly impossible to feel truly sad or angry while you are having a real laugh. As it instantly brightens your mood. It offers a mental break from bad thoughts and feelings. It helps you see things in a new way, making problems feel less scary and challenges seem easier to beat. For people dealing with sadness or worry, bringing more laughter into their lives can be a helpful plan. It gives moments of peace and a natural lift to their state of mind. Just the act of smiling, even if forced, can trick your brain into releasing good chemicals. Laughter makes this effect much stronger.

Increased Strength and Recovery:

Life will always have tough times. How we handle these hard moments often decides how happy we are overall. Laughter builds strength by helping us keep a hopeful view, even when things are bad. It lets us deal with negative feelings, gain a clearer view, and bounce back more quickly from bad events. When we can find humor in a hard spot, we feel more in control. We stop ourselves from being crushed by tough times.

Better Thinking and Problem Solving:

When you are relaxed and happy, your brain works much better. This helps clear out mental clutter. It reduces rigid thinking. It encourages a more open and flexible mindset. This can lead to greater creativity and improved skills for solving problems. When you face challenges with a lighter heart and a clearer head, new and smart solutions are more likely to appear.

The Social Glue: Laughter and Relationships

Aside from its personal benefits, laughter is key to our social lives. It is a powerful glue that makes relationships stronger, builds connection, and calms tension.

Building Bonds and Breaking Down Walls:

Laughter spreads easily. When you laugh with someone, a special connection forms. It signals shared understanding, care, and good feelings. This shared moment can build bridges between people from different places. It breaks down social walls. It creates a sense of belonging. Think about how fast strangers can connect over one truly funny event.

Better Talking and Solving Fights:

In any relationship, it can be a secret tool. It eases tension during arguments and offers a common ground when ideas are different. Crucially, it opens up communication. A good joke at the right time or a moment of shared humor can stop fights from escalating. This shift allows partners, friends, or coworkers to face issues with a mindset of working together. Ultimately, it reminds us not to take ourselves too seriously, even when things matter a lot.

Increased Appeal and Likeliness:

People naturally like those who are happy and can make others laugh. A sense of humor is often named as a highly wanted trait in friends and romantic partners. Laughter makes you seem more open. It creates a good feeling around you. It fosters a space where others feel safe and valued. Sharing laughter is a close act that shows trust and joy.

How To Do It: Finding More Laughter in Your Life

With all these benefits, the question is not if we should laugh more, but how. Our busy, often serious lives can make laughter feel like a luxury, not a need. But with real effort, we can create a life rich in humor and joy.

1. Go Out and Seek Humor:

Do not just wait for laughter to find you; go find it.

  • Watch Comedies: Set aside time to watch stand-up comedy, funny movies, or TV shows. Make this a regular part of your free time.
  • Read Funny Things: Look for funny writers or amusing stories online.
  • Listen to Comedy Podcasts: There are many podcasts just for humor that you can listen to while traveling or doing chores.

2. Spend Time with People Who Make You Laugh:

Humor is catching. Be around friends, family, or coworkers who have a good sense of humor and who make you laugh. Their happy energy will rub off on you. Try to connect with those who lift you up and bring joy into your life.

3. Try Laughter Yoga:

Laughter yoga is a unique idea where people laugh without needing jokes or comedy. They start the laughter as a simple physical exercise in a group. They often use playful actions and eye contact. The idea is that your body does not know the difference between real and fake laughter. Both offer the same good benefits for your body and mind. It is a great way to let go of self-doubt and feel pure, honest joy. Look for classes or groups near you.

4. Find Humor in Daily Life:

Develop a playful view of the world. Look for the silly, the odd, or the slightly crazy things in your day. A small mistake can be a source of stress, or it can be a funny story to share. Choosing the second choice can quickly change your mood.

  • Example: Spilling coffee on your shirt before a big meeting could feel terrible. Or, it could be a moment to laugh at your own clumsiness and share a relatable, funny story with a colleague.

5. Be Able to Laugh at Yourself:

Self-deprecating humor (when kind and respectful) is a strong tool. It shows humility, strength, and an ability to not be too serious about yourself. When you can laugh at your own mistakes or odd habits, you lessen the stress of needing to be perfect. You also become more relatable to others. It is a sign of emotional health and self-acceptance.

6. Start a “Laughter Journal”:

Keep a small notebook. Write down funny things that happen each day. Include jokes you hear or funny things you see. Re-reading this journal can be a fast, simple way to make yourself smile or chuckle whenever you need a lift.

7. Create a “Humor First Aid Kit”:

Gather a collection of things that always make you laugh. These could be funny videos, online jokes (memes), quotes, or even a silly hat. When you feel down, grab your kit for an instant mood boost.

8. Share Your Laughter:

This is meant to be shared. Tell funny stories, share jokes, and engage in light, fun conversation with others. When you give laughter, you often get it back many times over. This shared exchange makes the benefits stronger for everyone.

9. Practice Smiling:

While not true laughter, smiling is its close cousin. Even a forced smile can send signals to your brain that lift your mood. Practicing smiling can make it easier for real laughter to follow. Smile at strangers. Smile at yourself in the mirror. Watch the good change in how you feel.

10. Make Time for Play:

Do not let your adult life steal your sense of play. Do things that bring out your inner child. Play board games. Build something fun. Jump in puddles. Play with pets. Playfulness often leads to sudden bursts of joy and laughter.

The Great Power of Laughter in Action: Real-World Examples

To truly see how great laughter is, let’s look at some real examples of its power to change things:

  • Hospital Clowns: Groups show how laughter can greatly help sick children and adults. By bringing joy and distraction, these clowns help patients deal with pain, fear, and the cold hospital setting. This often speeds up recovery and improves emotional strength. The laughter they cause acts as a powerful, helpful treatment.
  • Laughter Clubs for Older People: Many groups have started laughter clubs, especially for older people. These clubs offer a social space and a dedicated time for shared laughter. This fights loneliness and improves overall mental and physical health. People who join often report more energy, better sleep, and a happier view of life.
  • Workplace Wellness Plans: Smart companies are adding humor to their work wellness plans. Putting in “laughter breaks,” comedy classes, or just encouraging a lighter mood can lower employee stress. And boosts team spirit. It improves teamwork. It also increases creativity. All of this leads to higher output and more job happiness.
  • Personal Stories of Strength: Countless people facing huge personal sadness or long-term sickness have found comfort and strength in humor. Using this to cope does not make their situation less serious. Instead, it gives them the power to go through it with more grace and a lighter heart. It is about finding light even when things are dark.

The Spreading Effect of Laughter

When you laugh, you are doing more than just something good for yourself. You are sending out good feelings into the world. Your laughter spreads. It can brighten the mood in a room. And bring a smile to a stranger’s face. It can inspire others to embrace joy. It creates a cycle where one person’s happiness sparks another’s. This leads to a happier and more connected community.

To sum up, ‘Laughter Is The Best Sound’ is more than just a nice thought; it is proof of a basic human experience that holds deep power. This natural cure costs nothing and has no bad side effects.

Furthermore, laughter gives many benefits for our physical health, mental well-being, and social connections. The world often asks us to be serious, but in this world, embracing laughter is an act of hope and a nod to life—a conscious choice to make joy happen. So, go ahead and let out a chuckle, a giggle, or a roaring guffaw! Your body, mind, and the people around you will thank you for it. Make this a top priority, and watch as your life becomes richer, healthier, and clearly happier.


FAQ

Q1: How much should I laugh to get the benefits?

A1: There is no set “dose” of laughter. But studies show that even just a few minutes of real laughter each day can help. The more, the better! Try to look for chances to laugh throughout your day.

Q2: Can fake laughter help as much as real laughter?

A2: Yes, it can! Research on laughter yoga suggests your body often does not know the difference between real and fake laughter. The simple physical action of laughing, even if you start by forcing it, can cause the release of endorphins. This leads to good body responses. Often, forced laughter can turn into real laughter.

Q3: Is laughter always right to use?

A3: Laughter is mostly positive. However, you must be careful of the situation and other people’s feelings. Laughter should never be at someone else’s expense. It should not be used to tease or hurt others. Its power is in its ability to connect and uplift, not to isolate or harm.

Q4: Can laughter help with pain that lasts a long time?

A4: Laughter can make your pain limit higher for a while. It does this by releasing endorphins. These are your body’s natural painkillers. It also takes your mind off the pain. While it is not a cure, it can be a valuable tool to help manage pain. It also improves your quality of life.

Q5: What if I do not feel like laughing?

A5: It is perfectly fine not to feel like laughing all the time. On bad days, just trying to smile, watching something mildly funny, or engaging in a gentle, playful activity can start to change your mood. Remember, even a little bit of humor can help. Sometimes, simply being around people who are laughing can start the good feeling in you.


References


Recent Posts

Breathing Space: How to Live More Mindfully Outdoors

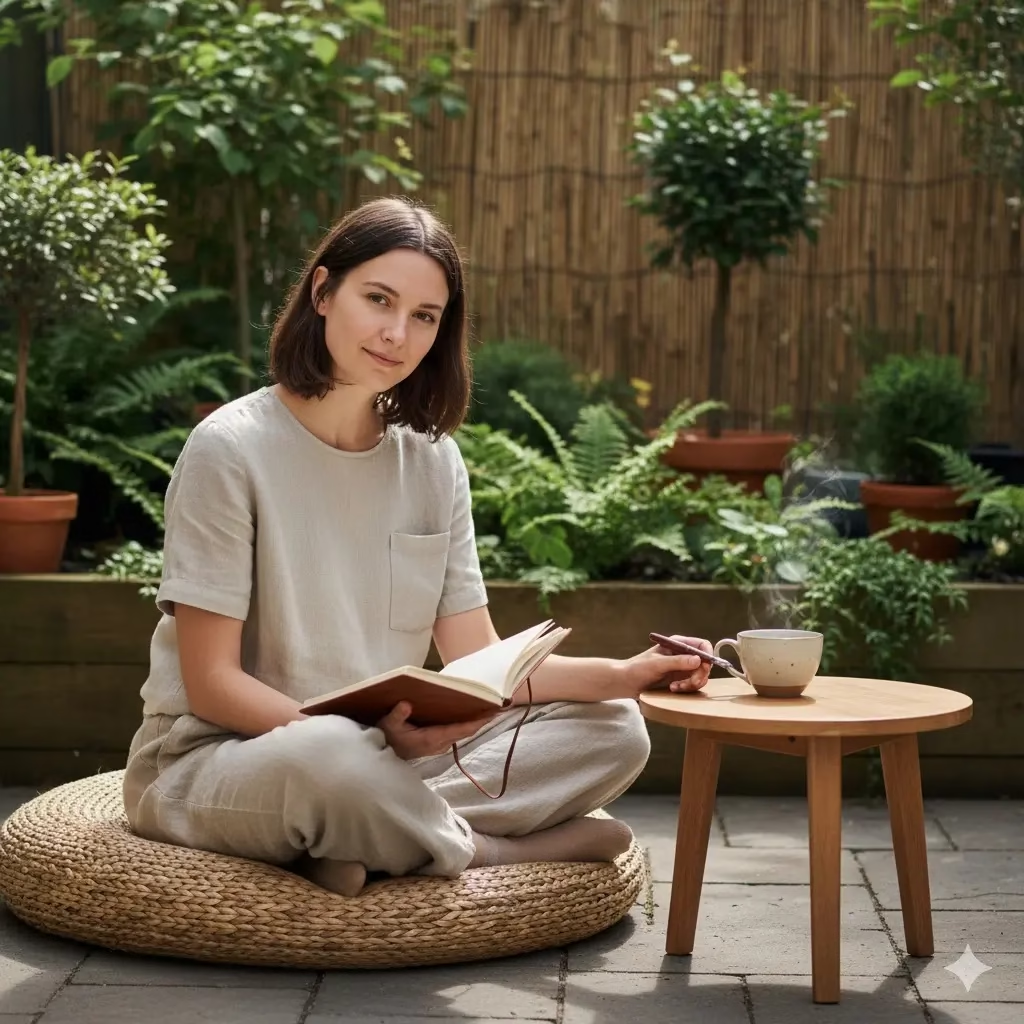
A person sits cross-legged on a woven cushion in a lush garden, peacefully journaling with a pen and notebook. A steaming cup is on a small wooden table beside them, creating a serene Breathing Space outdoors.

It’s easy to feel the struggle of a busy life, constantly juggling deadlines, family commitments, and the relentless ping of notifications. Like many, you may feel disconnected from nature, even while yearning for its calm embrace. Through hard work and a deep look into mindful living, many people have successfully transformed their own small urban spaces into peaceful havens. This article shares that journey and practical wisdom, offering guidance to help you find your own Breathing Space outdoors.


The Gift of Breathing Space: Cultivating Calm in Your Corner of Nature

In our fast-moving world, constant demands pull at our attention. Screens glow, alerts sound, and the to-do list seems to grow every hour. It is no surprise that many of us feel cut off from the natural rhythms that once guided human life. We desperately need a moment to stop, to breathe deeply, and just be. This desire for comfort is not just a brief wish. It is a basic human need. We can meet this need by planning and creating “Breathing Space”—a mindful connection with the outdoors.

This article is more than just about attractive landscaping. It is about changing your outdoor area, big or small, into a place that cares for your well-being. It is about building a personal spot where you can slow down. You can listen to your senses and practice mindfulness. This will ultimately improve your daily life and bring a deeper feeling of peace.

The Power of Outdoor Mindfulness: Why Breathing Space Matters

Before we talk about how to do it, let us look at the big reasons why. Mindfulness, which comes from old meditation practices, means paying attention to the present moment without judging it. When we apply this to the outdoors, it greatly increases the benefits of nature.

Many studies show that time in nature helps both the mind and body. Being in green spaces can lower stress, reduce blood pressure, lift your mood, and even improve how well you think. Nature has a strong healing power. When we mix this power with the focused practice of mindfulness, we create a strong cure for the stress of modern life.

Imagine stepping outside. Instead of quickly grabbing your phone, you purposely notice the warm sun on your skin. You hear the soft sound of leaves rustling. And smell the wet earth after a rain. You see the complex pattern of a spiderweb shining with dew. This is mindful action outdoors. It is a simple but deep change that can calm your nerves and bring you back to yourself.


Creating Your Breathing Space: A Step-by-Step Guide

Before And After (on the right)

You do not need a huge estate or a lot of money to create your Breathing Space. It starts with a clear purpose. You must be willing to see your outdoor area as a canvas for calm. This is true whether your space is a tiny balcony, a small backyard, or just a windowsill.

Step 1: Define Your Purpose – What Do You Want to Feel?

Before you plant anything or move any stones, ask yourself this: What do I want to feel in this space? Do you want a quiet place for morning meditation? A bright area for careful gardening? A place to enjoy a cup of tea in calm solitude? Your purpose will guide every choice you make next.

  • Example: A busy person might focus on a small, neat corner with a comfortable chair for quiet thought. A parent might focus on a safe, sensory-rich area where children can play mindfully with nature.
  • How to do it: Get a notebook and brainstorm. Write down words that describe your ideal feeling (e.g., peaceful, lively, calm, energized). Make quick sketches of your ideas. Write down everything that comes to mind.

Step 2: Clear Out and Keep it Simple – Less is Better

Clutter inside your home can create mental noise. Likewise, an untidy outdoor space can be distracting. A mindful outdoor space should be simple. This allows the natural elements to truly shine.

  • How to do it:
    • Remove distractions: Put away tools, toys, and anything that does not help you feel calm.
    • Prune and trim: Tidy up plants that have grown too much. Remove dead leaves and branches.
    • Create clear paths: Make sure you can walk through the space easily and safely.
    • Think about storage: Buy nice, weather-resistant storage for things you need to keep outside.

Step 3: Engage Your Senses – The Core of Mindfulness

Mindfulness is noticing what your senses tell you. Your Breathing Space should encourage you to truly see, hear, smell, touch, and even taste the natural world around you.

  • Sight:
    • Natural focal points: A beautiful plant, a small water feature, or a group of interesting stones can catch your eye.
    • Color choices: Use calming greens, blues, and whites. Use small splashes of color that are not overwhelming.
    • Texture: Add different textures with plants, paving, and decorations (e.g., smooth pebbles, rough bark, soft grasses).
    • Example: A Japanese maple tree offers amazing seasonal color. Ornamental grasses move gently in the breeze.
  • Sound:
    • Water features: A small, gently trickling fountain creates soothing background noise. This can cover up city sounds.
    • Wind chimes: Choose chimes with soft, deep tones. Chimes made of bamboo or natural materials often sound best.
    • Bird feeders/baths: Bring in birds, whose songs are naturally joyful.
    • How to do it: Test different sizes and styles of water features. Listen to various wind chimes before buying.
  • Smell:
    • Fragrant plants: Plant lavender, jasmine, honeysuckle, scented roses, and herbs like rosemary and mint.
    • Woody aromas: Think about cedar mulch or natural wood features.
    • How to do it: Plant fragrant types near where you sit or along paths so you will smell them often.
  • Touch:
    • Plants with texture: Lamb’s ear feels soft and fuzzy. Some grasses feel like feathers.
    • Natural materials: Use smooth river stones, rough-cut wood, or cool concrete pavers.
    • Comfortable seating: Choose materials that feel good (e.g., weather-resistant cushions, smooth wood benches).
    • How to do it: If you have room, make a small “sensory path” with different textures under your feet.
  • Taste (If you like):
    • Edible plants: A small herb garden (mint for tea, basil for cooking), berry bushes, or a small fruit tree.
    • How to do it: Use a small pot or raised bed for herbs and fruits that are easy to grow.

Step 4: Create a Seating Nook – Your Place to Stop

A person sits cross-legged on a woven cushion in a lush garden, peacefully journaling with a pen and notebook. A steaming cup is on a small wooden table beside them, creating a serene Breathing Space outdoors.

A special place to sit is very important. It helps you remember to stop and just be. This is where you will sit, think, and practice mindfulness.

  • Be comfortable: Choose a chair, bench, or cushion that is truly comfy for a long sit.
  • Location: Put it in a spot that has a nice view, privacy, or is near a focal point or sound element.
  • Protection: Think about an umbrella, overhead covering, or a natural plant canopy for shade and shelter.
  • Example: A simple wooden bench under a shady tree. Or, a single comfy armchair on a small balcony looking at potted plants.
  • How to do it: Try out different seating. Think about where the sun hits at different times of the day.

Step 5: Add Natural Elements and Thoughtful Art

These pieces further connect your space to nature. They also allow you to express yourself.

  • Stones and Rocks: These stand for strength and lasting quality. Arrange them carefully. Follow ideas of balance and unevenness (like the Japanese idea of ishigumi).
  • Wood: Driftwood, simple benches, or wooden screens add warmth and a natural feel.
  • Lighting: Use soft, gentle lighting for peaceful evenings. Solar lanterns, string lights, or subtle lighting can let you enjoy your space longer.
  • Art: A simple, nature-inspired sculpture, a clay pot, or a patterned stepping stone. Choose pieces that bring calm, not excitement.
  • How to do it: Start small. Just a few well-placed stones or one beautiful lantern can make a big difference.

Step 6: Welcome Imperfection and Natural Change (Wabi-Sabi)

A truly mindful outdoor space is not about being perfectly neat. It is about enjoying the beauty of nature’s cycles. This includes a leaf that is wilting, a stone that is aging, and the changing seasons. The Japanese idea of Wabi-Sabi celebrates flaws, short life, and the beauty of things getting old naturally.

  • How to do it:
    • Let nature happen (mostly): Do not worry about a few fallen leaves or a corner that is slightly messy.
    • Watch things change: Take time to see the small differences day by day and season by season. This deepens your connection.
    • Accept what is: Realize that your outdoor space is living and changing, just like you are.

Living Mindfully in Your Breathing Space: Daily Practices

Building the space is only one part. The other part is using it to practice mindfulness on purpose.

  • Mindful Observation: Just sit and watch. What do you see? And what do you hear? What do you smell? Notice these things without judging them or talking to yourself about them.
  • Sensory Walks (Even Short Ones): Walk slowly through your space. Pay close attention to each step. Feel the ground. Notice the air touching your skin.
  • Mindful Gardening: Use all your senses when you water, pull weeds, or trim plants. Feel the soil, smell the plants, listen to the sounds. This turns the work into a kind of moving meditation.
  • Outdoor Journaling: Use your space to inspire your writing. Write your thoughts, things you are thankful for, or just describe what you see.
  • Mindful Eating/Drinking: Enjoy a meal or a cup of tea. Be fully present to the tastes, smells, and the outdoor setting.
  • Simple Breathwork: Practice slow, deep, conscious breathing. Breathe in the fresh air, breathe out any tension. Let your breathing match the rhythm of nature.

Small Spaces, Big Impact: Zen on a Balcony or Patio

Do not worry if you have little room. Even the smallest outdoor area can become a powerful Breathing Space.

  • Vertical Gardening: Use wall planters, hanging baskets, and shelves to fit in the most greenery.
  • Container Plants: Choose plants that grow well in pots. Vary their height and textures.
  • Portable Pieces: A small fountain, solar lights, or a comfortable floor cushion can quickly change a space.
  • Miniature Zen Gardens: A tray with sand, small rocks, and a tiny rake can be a focus point for meditation.
  • Privacy Screens: Bamboo screens or climbing plants on a trellis can create a sense of privacy.

Conclusion: Your Continual Journey of Connection

“Breathing Space” is much more than just a location. It is a practice, a way of thinking, and a constant invitation. It asks you to reconnect with yourself and the natural world. By designing your outdoor areas carefully and using them on purpose, you create quiet moments that feed your soul, reduce stress, and improve your total well-being.

Start today, no matter how small. Step outside, take a deep breath, and let your outdoor sanctuary gently bring you back to the present moment. Your personal journey to living more mindfully outdoors starts right now.


FAQ Section

Q1: Do I need a large garden to create a “Breathing Space”?

A1: No, not at all! The ideas behind “Breathing Space” work for any outdoor area, even a small one. A balcony, a patio, a tiny courtyard, or even a window box can become a mindful place with clear purpose and design.

Q2: What are the most important things for a mindful outdoor space?

A2: While many things help, the most important are a comfortable place to sit, sensory items (like scented plants or a small water feature), and keeping the area mostly free of clutter. Your main purpose for the space is also key.

Q3: How often should I use my Breathing Space to feel the good effects?

A3: Even short, regular times can help a lot. Aim for 10 to 15 minutes every day. You could sit there with your morning coffee or for a quick meditation. The secret is to be present and consistent, not to spend long, infrequent hours there.

Q4: I live in a city with a lot of noise. How can I make a peaceful space?

A4: Water features are great for drowning out city noise with calming sounds. Planting dense bushes or putting up a privacy screen can also help soak up sound. Focus on making one private zone where you can escape.

Q5: What are some low-maintenance plants for a mindful garden?

A5: Try succulents, decorative grasses, hostas (for shade), lavender, rosemary, and many plants native to your area. Once they are established, these plants often need less water and care. This lets you relax and enjoy the space more.

Q6: Can children help create and use a Breathing Space?

A6: Yes! Having children help plant, water, and practice mindful observation is a great way to teach them about nature and focus. You could make a small sensory patch for them or ask them to identify different smells and sounds.


References


Recent Posts


ASMR: Is It Actually Good For You, or Just Weird?

An older man with a gentle smile is carefully mixing bright oil paints on a wooden palette while wearing a denim apron. A large, vintage-style microphone stands next to his work, positioned to capture the meticulous, soothing sounds of his brush movements and scraping, which is characteristic of ASMR content.

Ever felt a strange tingle down your spine from a whisper, or found yourself mesmerized by the crinkle of a chip bag? You’re not alone! I’m , and like many, I stumbled into the world of ASMR with a mix of curiosity and doubt. This article is my journey to find out if those “tingles” really help us relax or if they are just another internet fad. Let’s explore this odd but loved thing together.


ASMR: The Whispering Digital Trend

Do you recall that feeling when someone spoke softly near your ear? Maybe the gentle sound of a page turning gave you a shiver down your neck? For some people, these everyday happenings, when done on purpose and over and over, start a unique feeling called Autonomous Sensory Meridian Response, or ASMR. People often say it feels like static or a tingling on the skin. It usually starts on the scalp and moves down the back of the neck and upper spine. This feeling brings on deep relaxation and happiness.

For years, people who felt ASMR didn’t have a name for it. They knew they felt it, but they could not talk about it or describe it. Then, the internet changed things. YouTube, especially, became the birthplace for this new group. Users began sharing videos made to cause these special feelings. This small, odd part of the web, with amateur creators whispering into cheap mics, has now become a worldwide hit. It has millions of fans, professional video makers, and even scientists studying it.

But even though it is very popular, ASMR still seems strange. Many people doubt it. Is it a real way to calm stress and worry? Is it a special kind of rest? Or is it just a strange internet trend that appeals to a small group? This article will look closely at ASMR. We will check its roots, its supposed benefits, the science (or lack of it), and decide if it is truly good for you, or just… weird.


What Exactly is ASMR? What is That Tingle?

To really grasp ASMR, we must look beyond just the simple “tingles.” While that’s the main sign, the experience is much more complex. It’s how we sense things. It’s a mix of sounds and sights that leads to a physical reaction and a calming feeling.

Think of it this way: some triggers—sounds, things you see, or even soft touch—can easily cause this tingly feeling in people who are sensitive to it. These triggers are very different, but here are some common ones:

  • Whispering or soft speaking: The close, quiet tones are often the strongest trigger.
  • Tapping sounds: Fingers gently hitting surfaces like wood, plastic, or glass.
  • Scratching sounds: Fingers softly scratching cloth, paper, or even microphone covers.
  • Crinkling sounds: The sound of paper, plastic, or foil being gently moved.
  • Page turning: The soft sound of turning pages in a book.
  • Brushing sounds: The gentle sweep of a makeup brush or hairbrush.
  • Personal attention: Videos where the creator pretends to be a doctor, hairdresser, or makeup artist. They give the watcher all their gentle attention.
  • Slow, careful movements: Hand motions, focusing on a job very precisely.
  • Visual triggers: Watching someone do a detailed task, like painting or delicate crafting, even without sound.

The reaction to these triggers is very personal. What makes one person feel calm and happy might do nothing for another. It might even be annoying. This difference is why ASMR can cause strong feelings both for and against it.


ASMR: From Secret Feelings to a Digital Group

Before the internet, people who felt ASMR simply did not have a name for it. They might have called it “brain tingles” or “head pleasure” (a confusing name that led to early errors). The start of the ASMR group really began on online forums. There, people started sharing their unique feelings carefully.

A key moment was a discussion thread on a health forum called “Steady Health” in 2007. A user named ‘okaywhatever5’ posted about having “that good feeling/weird sensation/shiver.” This thread quickly brought together others who knew the feeling. It was clear many people shared this unnamed experience.

Jennifer Allen created the name “Autonomous Sensory Meridian Response” in 2010. She felt a name that sounded more scientific would help make the experience seem real. She wanted to move it away from words that were too suggestive or wrong. The name was meant to be neutral and academic, and it worked.

At the same time, YouTube channels started showing up. Early leaders like ‘WhisperingLife’ and ‘GentleWhispering’ began making videos just to cause ASMR. At first, they didn’t even know the feeling had a name. Their success proved that there was a huge audience waiting for these special sensory experiences.

Over the last ten years, ASMR has grown very fast. What started as an effort by regular people has turned into a refined content industry. Creators spend money on high-quality microphones (like mics that make 3D sound), detailed sets, and complex role-play stories. This shows how powerful sharing human experiences can be in the modern digital world.


Is It Good For You? Looking at the Reported Benefits

The main reason people watch ASMR videos is because they say it helps ease many mental worries. Thousands of personal reports, and more scientific studies over time, suggest that ASMR can be truly helpful.

1. Less Stress and Worry

This is likely the benefit people talk about most. Many people use ASMR as a natural way to reduce stress. The slow speed, soft sounds, and focused attention in most ASMR videos can be a strong counter to the busy pace of life. It offers a gentle break, slowly guiding the mind away from worried thoughts toward the present moment. The tingling feeling itself is often described as deeply relaxing, almost like a mental rub-down.

2. A Good Night’s Sleep

For people who can’t sleep and struggle with bedtime, ASMR has become a popular habit. The dull, repeated, and gentle nature of many ASMR triggers helps quiet a mind that is racing. This makes it easier to fall asleep. Instead of just looking at the ceiling, people can focus on a soft whisper or tapping sound. This gives their mind a calming place to rest. Research has shown that ASMR can truly slow the heart rate, which helps a person sleep.

3. Better Mood

Besides just relaxing, many users say their mood is much better after an ASMR session. When feel-good brain chemicals are released (like dopamine and oxytocin, which we will discuss later) during an ASMR experience, it can lead to feelings of happiness and mild joy. For people fighting sadness, ASMR can offer a short rest, a soft escape from bad thoughts.

4. Helping with Pain

Though scientists have studied this less, some people who have long-term pain say ASMR helps them manage their symptoms. The idea is that focusing deeply on the sounds and feelings of ASMR takes attention away from pain signals. This is like how meditation can help manage pain. The deep relaxation from ASMR could also help lower muscle tension that makes some types of pain worse.

5. Feeling Less Lonely

The personal attention videos, where creators pretend to have close, one-on-one talks, can give viewers a feeling of connection. For people who feel lonely, especially when they are isolated, these videos can offer a feeling of companionship and care, even if it is only pretend. The soft voices and gentle actions can create a sense of being looked after and understood.


The Science of ASMR (or Lack Thereof): Is It Just Weird, or Real?

This is where the “weird” factor often comes in for people who doubt ASMR. If it is so powerful, why don’t doctors use it as a standard treatment? The truth is, while many people tell similar stories of success, real scientific research is still very new.

Early scientific studies on ASMR have started to show how it works:

Brain Activity: Studies with Scans

Some of the strongest evidence comes from studies that scan the brain. Functional magnetic resonance imaging (fMRI) has shown that people who feel ASMR have different ways their brains light up. One study, printed in PLOS ONE in 2018, found that people who felt ASMR had more activity in brain areas linked to reward and strong feelings (like the medial prefrontal cortex) when they watched ASMR videos. This was compared to people who didn’t feel it. This proves there is a unique brain reaction.

Other studies have used EEG (which measures brain waves). These studies sometimes show changes in brain waves that match relaxed states, such as more alpha waves. This is similar to what happens during meditation.

Physical Body Reactions

Beyond brain activity, scientists have seen changes in the body. A 2018 study found that people who experience ASMR had a much slower heart rate while watching the videos. This is similar to what happens with other ways to relax. They also showed more skin conductance responses. This shows they were emotionally interested and engaged.

Ideas About Brain Chemicals

While it’s hard to measure directly, researchers think ASMR might cause the release of several brain chemicals:

  • Dopamine: Linked to feeling rewarded and happy.
  • Oxytocin: Linked to closeness, trust, and feelings of well-being. This matches the “personal attention” videos.
  • Serotonin: A chemical that balances mood. This could explain why people feel better.
  • Endorphins: Natural pain relievers. This might explain some of the reports about helping with pain.

The “Default Mode Network” Idea

One interesting theory suggests that ASMR works because it changes the brain’s “Default Mode Network” (DMN). The DMN is active when our minds wander, when we think about ourselves, or when we worry about the past or future. This is often where anxiety comes from. ASMR, with its highly focused sensory input, might stop or quiet the DMN. This moves the brain into a more present, relaxed state, much like when people do mindfulness meditation.

So, the science is still catching up. But early findings strongly suggest that ASMR is not “just weird.” It is a real reaction in the brain and body that needs more study. It is a genuine physical event for people who can feel it.


How to “Do” ASMR: Finding Your Tingle

You don’t “do” ASMR like you do an action. You “experience” it. But if you want to find out if you are someone who responds to ASMR, here is how to try it:

1. Start with the Source: YouTube

The easiest place to begin is YouTube. Search for “ASMR” and prepare to see a massive amount of content.

2. Try Different Triggers

Don’t give up if the first video doesn’t work. Remember, triggers are very personal. Try different kinds:

  • Whispering: Search “ASMR whispering”
  • Tapping: Search “ASMR tapping”
  • Crinkling: Search “ASMR crinkling”
  • Role-plays: Search “ASMR doctor,” “ASMR hair salon,” “ASMR ear cleaning” (these are common and popular)
  • Accidental ASMR: Sometimes the best ASMR is not made on purpose. Watch videos of people doing precise jobs, like Bob Ross painting or detailed cooking videos.

3. Use Headphones for ASMR

This is very important. Many ASMR videos are recorded with special binaural microphones. These mics record sound in a way that feels like it’s coming from all around you, just like real life. Headphones (especially large, over-ear ones) will greatly improve the experience and how well the triggers work.

4. Set the Scene

Get rid of distractions. Find a quiet, cozy place where no one will interrupt you. Turn the lights down if you can. The goal is to fully focus on the sounds and sights.

5. Be Patient and Open

ASMR is not a guarantee for everyone. Some people just don’t get the tingles. Others might need to try many different creators and trigger types before they find what works. If you approach it with an open mind, instead of expecting a certain feeling, it might help.


The Dark Side? Controversies and Criticisms

Even with its growing acceptance, ASMR has its share of arguments and people who criticize it.

1. Wrong Ideas and Sexualization

One of the first and longest-lasting problems was mixing up ASMR with sexual feelings. Words like “brain orgasms” (though mostly stopped by the community) added to this confusion. The feeling can be nice and joyful, but for most ASMR people, it is clearly not sexual. Sadly, a few creators have made videos that blur this line on purpose or by accident. This can scare away new users and keep the wrong ideas alive.

2. “ASMR Fatigue” and Less Effect

Some people who have enjoyed ASMR for a long time say they get “ASMR fatigue.” The triggers that used to give them strong tingles now work less well. They have to search for new creators or different triggers. This happens with many sensory experiences and brain rewards, but it is hard for those who rely on ASMR to relax.

3. The “Weird” Factor and Social Stigma

For people who don’t feel ASMR, the idea of watching someone whisper into a mic or tap on objects can seem very strange, even creepy. This often leads to people being ashamed to admit they enjoy ASMR. This is slowly changing as ASMR becomes more common, but the idea that it’s “weird” still exists.

4. The Misophonia Conflict

While ASMR relaxes many people, for others, the very sounds that cause tingles—whispering, chewing, tapping—can cause strong negative feelings and physical reactions. This problem is called Misophonia, or “hatred of sound.” For someone with Misophonia, the content is not calming. It can be very annoying or even cause anger. This split shows how differently people’s brains process certain sounds.

5. Selling Out and Being Fake

As ASMR has become popular, it is now heavily commercial. Companies now pay creators for videos that are ads. This makes people worry if the content is truly authentic. When a video is an ad pretending to be a real relaxation tool, it can break the crucial feeling of immersion needed for the tingle. This can lead to “tingle immunity” or tiredness among long-time fans. The need for more views can also push creators toward triggers that are stranger or more shocking, moving the focus away from real health benefits.


The Creator’s Perspective: Behind the Mic

What does it take to make a relaxing experience for millions? Creating ASMR content is much harder than it looks. It demands special skills and often, big life changes.

The Gear: Investing in the Feeling

The most important tool for an ASMR artist is the microphone. Most professional creators use binaural microphones. These have two separate inputs spaced like human ears (often looking like a fake head). This lets them record sound that travels to your headphones with a realistic sense of space. When an artist whispers from the “left,” you really hear it in your left ear. This creates the close feeling that they are right next to you. This gear is costly and needs a quiet setup to get rid of any noise.

The Art of Control and Care

A successful ASMR artist must be able to control their voice and body well. They must whisper softly but clearly for a long time. They must do repetitive actions with a steady, gentle rhythm. This perfect execution is what starts the relaxation response.

More importantly, the best creators are very empathetic. The “personal attention” videos work because the creator acts like a friend, caregiver, or service provider, focusing only on the viewer. This copies the safe, soothing feeling often linked to early childhood care. Researchers think this is a main reason for it’s stress-relieving powers.

The Things They Give Up

Being an ASMR artist means giving up certain things. Many creators report:

  • Voice Strain: Whispering or speaking softly for hours can cause long-term voice cord problems.
  • Social Isolation: The need for a totally quiet recording space means videos are often made late at night or alone.
  • Dealing with Hate: Even though the videos are about peace, being public on YouTube exposes creators to doubts, bullying, and the “weird” label.
  • Tingle Immunity: Oddly, many creators become immune to their own triggers. This happens because they are exposed to them all the time while testing and editing their content.

Conclusion: Good, Weird, or Both?

So, after looking at all the stories, the new science, and the arguments, where is the truth about ASMR?

Is it weird? Without a doubt, yes. To someone outside the community, watching a person brush a tiny microphone or pretend to do a brain check seems very unusual. The “weirdness” is simply because it’s new and different from regular media or therapy.

But is it good for you? For the millions who use this to fight sleeplessness, calm severe worry, and find a quiet moment in a busy world, the answer is a strong yes. The scientific data, though new, proves the physical reality: ASMR slows the heart rate and activates brain areas linked to reward and happiness. It is a real mental and physical event.

This is perhaps best seen as a kind of digital self-help—an easy, free tool that uses the brain’s special power to find comfort in certain sensory patterns. It won’t take the place of professional mental health care, but it is a strong, proven tool for self-soothing.

In the end, whether you think the idea is strange or wonderful, the power of ASMR to cause a real, measurable physical reaction in the human body confirms that it is much more than just a quick internet trend. It is a real, deeply personal path to finding calm.


    Frequently Asked Questions (FAQ)

    1. Does everyone feel ASMR?

    No. Studies suggest that only a small part of the population (maybe around 10-20% of people tested) feels the classic, strong tingling feeling. Many others just find the videos relaxing without the intense physical response.

    2. Can ASMR cure worry or sadness?

    This is a good way to cope with the feelings of stress, worry, and trouble sleeping. However, it is not a cure for medical conditions like serious anxiety or depression. If you are struggling with serious mental health issues, you must seek help from a doctor or professional.

    3. Why do I sometimes get annoyed by ASMR sounds?

    This could be due to Misophonia. This is a condition where certain sounds (often repeated or mouth-related) cause an immediate, strong negative feeling (anger, distress). If you feel annoyed, you should simply stop watching and try a different kind of sound or visual trigger.

    4. What is “Tingle Immunity”?

    Tingle immunity, or ASMR fatigue, happens when a person who once felt strong tingles finds that their usual triggers no longer work, or the feeling is much weaker. This occurs because the brain gets used to things that happen over and over. The best fix is often to take a break from it for a few weeks or to try completely new kinds of triggers and creators.

    5. Is there ASMR with only visuals?

    Yes. Some people only get tingles from seeing things. This could be watching someone tracing shapes, putting on makeup, or doing silent, slow hand movements. These are often called “No Talking” ASMR videos that focus on what you see.


    References

    1. NIH – The Default Mode Network in Healthy Individuals
    2. Psychology What Is ASMR and Why Are People Watching These Videos?
    3. Healthline – ASMR: Benefits and Emerging Research

    Recent Posts


    10 Speakers for Your Ultimate Calm Sanctuary

    Transform your space into a calming retreat with our list of 10 speakers designed for your ultimate calm sanctuary. Each of these picks not only plays soothing sounds but also blends seamlessly into your home, helping you unwind and recharge. From nature sounds to gentle melodies, you’ll find the perfect match to enhance your relaxation routine.

    Low-Distortion Audio Fidelity

    A stylish speaker designed for low-distortion audio fidelity, placed on a minimalist table surrounded by plants.

    When creating your calm sanctuary, the quality of sound is key. The image shows a sleek speaker designed for low-distortion audio fidelity. This means you get clear, crisp sound without the annoying muddiness that can ruin your listening experience.

    Imagine relaxing with your favorite tunes or nature sounds filling the room. A speaker like this ensures that every note is delivered just as it should be. It’s perfect for meditation, yoga, or simply unwinding after a long day.

    Low-distortion audio fidelity is all about preserving the integrity of the sound. This speaker is crafted to minimize any unwanted noise, allowing you to fully immerse yourself in the soothing sounds of your choice. It’s a great addition to any calm space.


    Room-Filling, 360-Degree Sound Dispersion

    A serene room with two speakers on either side of a small table, surrounded by plants and soft lighting.

    Imagine stepping into a serene space where sound wraps around you like a warm blanket. The speakers in this setup are designed to deliver room-filling, 360-degree sound dispersion. This means that no matter where you are in the room, you’ll experience rich audio that feels immersive and complete.

    These speakers blend seamlessly into the calming decor, enhancing the overall vibe of your sanctuary. With their sleek design and natural wood accents, they not only sound great but also look fantastic. The plants and soft lighting in the background create a peaceful atmosphere, making it the perfect spot to unwind.

    Whether you’re playing soothing music, nature sounds, or your favorite podcasts, these speakers ensure that every note is clear and every word is heard. They transform your space into a personal retreat, allowing you to escape the noise of everyday life.


    Dedicated Sub-Bass Response

    A modern setup of speakers designed for dedicated sub-bass response, featuring sleek black designs in a calm, minimalist environment.

    When creating your calm sanctuary, the right speakers can make a big difference. The image shows a sleek setup of speakers designed to deliver deep, rich sound. These speakers are not just stylish; they are built to provide dedicated sub-bass response.

    Sub-bass is the low-frequency sound that you can feel as much as you hear. It adds depth to music and creates an immersive experience. In a calm environment, this type of sound can enhance relaxation and help you unwind.

    Choosing speakers with dedicated sub-bass capabilities means you’ll enjoy a fuller sound. This is especially important for genres like ambient music or nature sounds, which are perfect for setting a tranquil mood. With the right speakers, you can transform any space into a peaceful retreat.


    Acoustic Calibration Or Room-Sensing Technology

    A stylish speaker on a wooden stand in a cozy room filled with plants and comfortable furniture.

    When creating your calm sanctuary, the right speakers can make a huge difference. The image showcases a beautifully designed speaker that blends seamlessly into a cozy room filled with plants and comfortable seating. This setup not only looks inviting but also hints at the importance of sound quality in your space.

    Acoustic calibration and room-sensing technology play a key role in optimizing your listening experience. These features allow speakers to adjust to the unique characteristics of your room. They analyze the space and modify sound output to ensure that every note and beat is crystal clear.

    Imagine sinking into your favorite chair, surrounded by greenery, while your speakers deliver perfectly balanced sound. This technology helps eliminate any unwanted echoes or distortions, making your music or meditation sessions more enjoyable. With the right speakers, you can truly transform your space into a haven of relaxation.


    Multi-Room Or Multi-Speaker Synchronization

    A collection of stylish speakers glowing softly in a serene setting.

    Creating a calm sanctuary at home is all about the right speakers. Imagine having multiple speakers throughout your space, all playing your favorite soothing tunes in perfect harmony. This setup can transform your environment into a serene escape.

    The image shows a collection of stylish speakers, each glowing softly. These speakers not only look great but also offer the ability to sync music across different rooms. You can enjoy a seamless listening experience, whether you’re in the living room, kitchen, or even outside.

    With the right technology, you can control the volume and track from one central device. This means you can easily switch from a relaxing playlist to nature sounds without missing a beat. Multi-room synchronization makes it easy to fill your space with sound that calms your mind.

    So, if you’re looking to enhance your calm sanctuary, consider investing in speakers that can connect and sync. It’s a simple way to create a peaceful atmosphere throughout your home.


    “Smart” Integration With Ambient Sound Libraries

    A modern speaker on a wooden table surrounded by plants, creating a calming atmosphere.

    Imagine a cozy corner of your home, filled with plants and soft lighting. In this serene space, a sleek speaker sits on a wooden table, ready to fill the air with calming sounds. This is where smart integration shines, especially with ambient sound libraries.

    These speakers can connect to various sound libraries, offering a range of soothing sounds like rain, ocean waves, or gentle forest noises. You can easily set the mood for relaxation or focus, just by selecting your favorite sound. It’s like having a personal sound therapist at your fingertips!

    With smart features, these speakers can adapt to your preferences. They can learn what you enjoy and suggest new sounds to explore. This makes it simple to create the perfect atmosphere for unwinding after a long day or enhancing your meditation practice.

    So, if you’re looking to transform your space into a calm sanctuary, consider investing in speakers that offer smart integration with ambient sound libraries. It’s a small addition that can make a big difference in your daily routine.


    Minimalist Or Architectural Design

    A minimalist interior featuring a speaker, plants, and pottery in a calm sanctuary.

    In a calm sanctuary, the design plays a big role in creating a peaceful vibe. The image showcases a minimalist space that feels open and airy. Soft curves and natural materials invite relaxation.

    The speakers in this setting blend seamlessly into the environment. Their sleek design complements the overall aesthetic without being intrusive. This is key for a calm atmosphere where sound can enhance your experience.

    Notice how the plants and pottery add a touch of nature. They work well with the speakers, making the space feel alive. This balance between technology and nature is essential for a serene retreat.


    Physical Control For Volume & Mute

    A sleek speaker placed on a table with soft cushions and plants in the background.

    When creating your calm sanctuary, having the right speakers is key. The image shows a sleek speaker that fits perfectly into a serene environment. Its modern design blends well with natural elements, like the greenery in the background.

    Physical control for volume and mute is essential for a peaceful experience. You want to adjust the sound without interrupting your relaxation. This speaker likely features easy-to-use knobs or buttons, allowing you to find the perfect sound level with just a touch.

    Imagine being able to turn up your favorite calming playlist or mute it instantly when you need silence. This control makes it simple to customize your space. Whether you’re meditating or enjoying a quiet evening, having that flexibility is a game changer.


    Silent Background/Low System Noise

    A cozy sanctuary featuring a sleek speaker surrounded by soft pillows and plants, emphasizing a calm atmosphere.

    Creating a calm sanctuary at home is all about the details. The right speakers can make a huge difference in your space. Imagine a sleek speaker sitting quietly in a cozy corner, blending perfectly with your decor. This image captures that essence beautifully.

    The speaker is designed to produce sound without overwhelming your senses. It sits among soft pillows and gentle lighting, inviting you to relax. The low system noise ensures that the focus remains on the soothing sounds, whether it’s nature sounds, soft music, or guided meditations.

    In a calm sanctuary, silence is golden. You want a space where you can unwind without distractions. A speaker that operates quietly in the background allows you to enjoy your peaceful environment. It enhances your experience without drawing attention to itself.


    Pre-Programmed Tonal Therapy (Optional Feature)

    A modern speaker with a sleek design and a glowing interface, set against a serene background with plants.

    Imagine a speaker that not only plays your favorite tunes but also offers a unique feature: pre-programmed tonal therapy. This option is perfect for creating a calm sanctuary in your home. The image shows a sleek speaker with a modern design, ready to enhance your relaxation experience.

    With this feature, you can choose from various soundscapes designed to promote relaxation and mindfulness. Whether you’re looking to unwind after a long day or set the mood for meditation, these speakers can help you achieve that peaceful atmosphere.

    Each tonal therapy program is crafted to resonate with your mind and body. You can easily select your preferred sound from the intuitive interface displayed on the speaker. This makes it simple to switch between different modes based on your mood or needs.

    Having such a speaker in your space not only boosts the aesthetic but also transforms your environment into a soothing retreat. So, if you’re aiming to create your ultimate calm sanctuary, consider adding speakers with this amazing tonal therapy feature.


    References


    Recent Posts
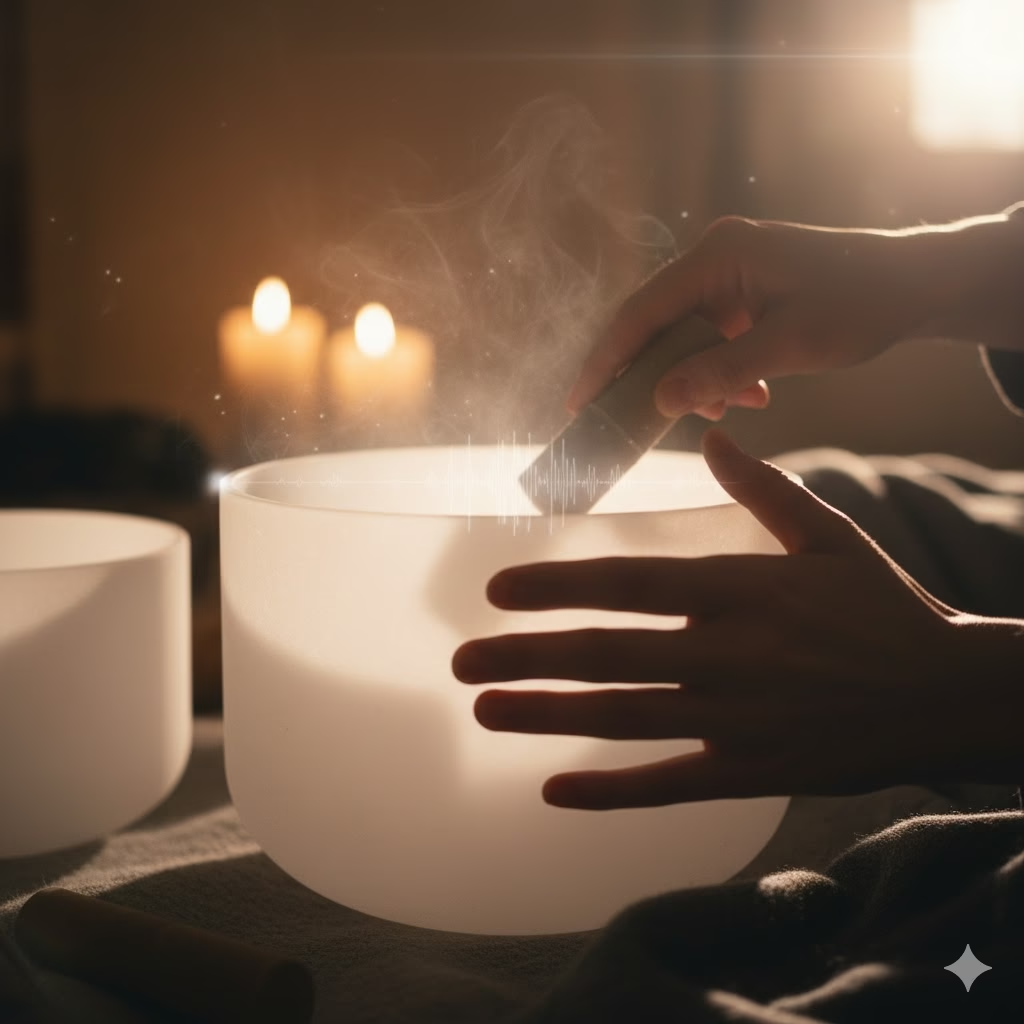


    The 5-Minute Pantry Potion for the BEST Bath EVER

    Three homemade Pantry Potion bath soak varieties labeled "Sleep & Serenity," "Warming & Winter Relief," and "Detox & Refresh" in elegant glass jars tied with twine on a wooden shelf.

    Do you find yourself scrolling through expensive self-care sites, wishing you had the time and money for a truly luxurious soak? As a fellow busy human, I get it—sometimes all you need is a moment of peace without a major shopping trip. That’s why I became obsessed with finding the easiest, most accessible way to create a spa experience right at home, leading me to create the Pantry Potion. I’m here to prove that the secret to the BEST bath ever isn’t in a fancy boutique; it’s already in your kitchen cabinet.


    Introduction: Pantry Potion

    Picture this: It’s the end of a long, draining day. Your muscles ache, your mind is racing, and the thought of tackling one more task is just too much. What do you need? A complete reset. And what do you have? Probably not a personal masseuse or a trip to a five-star spa booked.

    But what if I told you the ultimate, stress-melting, muscle-soothing bath soak is just five minutes and a few cupboard staples away?

    Forget the overpriced, chemical-laden bath bombs and pre-made mixes. We are about to create a powerful, all-natural relaxation remedy using the simplest of ingredients—the hidden gems already nestled in your kitchen. This is the Pantry Potion, and it is your new holy grail for instant self-care. It’s effective, accessible, zero-waste friendly, and honestly, life-changing. Get ready to transform your tired bathroom into a therapeutic sanctuary.


    Why the Pantry Potion Beats the Boutique

    The appeal of the Pantry Potion is threefold: Accessibility, Affordability, and Efficacy.

    1. The Accessibility Factor (The 5-Minute Promise)

    When you need a bath soak, you usually need it now. You don’t want to drive to a specialty store or wait for a package to arrive. The beauty of this recipe is that it relies on common pantry staples. We’re talking basic salts, sugars, and common dried herbs or spices. If you have a kitchen, you likely have the foundational ingredients. The “5-Minute” part of the title isn’t a joke—the mixing process is truly that fast.

    2. The Affordability Advantage

    High-quality bath products often come with a high price tag, which mostly covers fancy packaging and marketing. By making your own, you save a significant amount of money. The bulk cost of ingredients like Epsom salt or baking soda is minuscule compared to a single, pre-packaged bath bomb. You get more soaks for your dollar, making luxury a sustainable daily habit rather than a rare treat.

    3. The Efficacy of Natural Ingredients

    Your kitchen is a treasure trove of healing. Herbs like chamomile and mint are known for their calming properties. Salts are celebrated for their muscle-relaxing mineral content. Instead of confusing labels full of synthetics, you are using pure, simple ingredients that your body recognizes and loves. It’s clean beauty at its most fundamental.

    The Core Foundations of Your Pantry Potion

    Every great bath soak starts with a base. You need something to dissolve, something to detoxify, and something to soften the water.

    1. The Muscle Relaxer: Epsom Salt

    This is non-negotiable for a truly restorative soak. Epsom salt isn’t actually salt; it’s a mineral compound of magnesium and sulfate. When you soak in it, the magnesium is absorbed through the skin, which plays a critical role in muscle and nerve function. It’s widely recommended for soothing sore muscles, reducing stiffness, and promoting relaxation.

    • Role in the Potion: Soothes aches, reduces inflammation, and aids in detoxification.
    • Alternative: Plain sea salt or coarse kosher salt (for mineral content, though without the magnesium benefits).

    2. The Skin Softener: Baking Soda (Bicarbonate of Soda)

    Often overlooked, baking soda is an incredible addition. It helps neutralize acids on the skin, leaving it feeling silky-smooth and soft. It can also help wash away oils and residue from your skin, leaving you feeling cleaner.

    • Role in the Potion: Water softener, skin soother, and a mild detoxifier.
    • Alternative: Borax (use sparingly and with caution, or omit completely).

    3. The Scent and Soothe: Dried Herbs & Spices

    This is where your kitchen truly shines and where the “Pantry Potion” gets its magic. You don’t need essential oils; you just need the vibrant aromas and soothing properties of common dried kitchen ingredients.

    • Role in the Potion: Aromatherapy, visual appeal, and therapeutic herbal benefits.
    • Alternatives: See the ingredient section below!

    The Master Formula: How to Mix Your Pantry Potion

    This foundational recipe is your starting point. Feel free to scale it up to make a large batch for storage or scale it down for a single-use soak.

    The Pantry Potion Master Recipe (Single Soak)

    IngredientMeasurementPurpose
    Epsom Salt1 to 2 cupsMuscle relaxer and detox
    Baking Soda1/2 cupSkin softener and water neutralizer
    Herbal Element1/4 cupScent, aromatherapy, and soothing properties

    Total Estimated Time: 3-5 minutes


    How to Do It: The Simple Steps

    1. Prep Your Herbs: If your dried herbs or spices are very coarse (e.g., whole bay leaves or large cinnamon sticks), give them a quick pulse in a food processor or coffee grinder. You want a mix that releases aroma but isn’t so fine it clogs your drain (a coarse grind or whole, smaller petals work best).
    2. Combine the Dry: In a large mixing bowl, scoop out the Epsom salt and baking soda. Use a wooden spoon or whisk to thoroughly combine the ingredients. It should look like a uniform, sparkling white base.
    3. Add the Magic: Pour your prepared herbal element into the salt mixture. Gently stir until the color is evenly distributed. Do not overmix, or you can lose some of the aroma.
    4. Jar It Up: Transfer your fresh Pantry Potion to an airtight container (a Mason jar or recycled pasta sauce jar works perfectly). Label it and store it in a cool, dry place until you’re ready for the BEST bath EVER!

    Potion Customization: 3 Magical Pantry Potion Recipes

    This is where we get specific. Depending on your mood, you can choose a different “flavor” for your soak. All of these use the Master Formula ratio, simply substituting the Herbal Element.

    Potion 1: The Sleep & Serenity Soak (Best for Bedtime)

    Pantry Potion ElementIngredient
    Herbs/SpicesDried Chamomile flowers and/or Dried Mint leaves
    Aroma BoostA few pinches of dried orange or lemon peel (optional)
    Bonus1 tbsp of White Sugar (for extra skin exfoliation)
    • Therapeutic Focus: Calming the nervous system and preparing the body for sleep. Chamomile is a gentle sedative, and mint is a known muscle relaxant.

    Potion 2: The Warming & Winter Relief Soak (Best for Cold/Aches)

    Pantry Potion ElementIngredient
    Herbs/SpicesGround Ginger and/or Ground Cinnamon (use a small amount!)
    Aroma BoostA few cloves, whole or lightly crushed (optional)
    Bonus1/4 cup of whole milk powder (if you have it, for creamy skin)
    • Therapeutic Focus: Increasing circulation and providing a warming, comforting sensation. Ginger is an ancient remedy for aches and joint stiffness. Caution: Cinnamon can be a mild irritant; start with just 1-2 teaspoons.

    Potion 3: The Detox & Refresh Soak (Best for Resetting)

    Pantry Potion ElementIngredient
    Herbs/SpicesDried Lemon slices or Zest and/or dried Rosemary leaves
    Aroma BoostA small handful of Green Tea leaves (from a broken-open tea bag)
    Bonus1 tbsp of Apple Cider Vinegar (added directly to the running water)
    • Therapeutic Focus: Invigorating the senses, gently detoxifying the skin, and clearing the mind. The bright scents of citrus and rosemary are instantly uplifting.
    Three homemade Pantry Potion bath soak varieties labeled "Sleep & Serenity," "Warming & Winter Relief," and "Detox & Refresh" in elegant glass jars tied with twine on a wooden shelf.

    The Ultimate Bath Ritual: Activating Your Pantry Potion

    Mixing the soak is only half the battle. To truly get the BEST bath EVER, you need to elevate the entire experience.

    1. Preparation is Key (1 Minute)

    • Clean the Tub: No one relaxes in a dirty tub. Give it a quick rinse.
    • Set the Mood: Turn off the harsh overhead lights. Light a candle (use one from your kitchen if you don’t have a fancy one!) or use a dim lamp.
    • Silence the World: Put your phone on airplane mode. Yes, seriously.

    2. The Pantry Potion Deployment (2 Minutes)

    • The Sachet Hack (Recommended): To avoid herbal residue in your tub (and save your plumbing), place your entire single-soak portion into a sachet. You can use:
      • A small muslin bag (if you own one for tea)
      • A clean, thin sock or nylon stocking
      • A square of cheesecloth tied with string
    • The Direct Dump (If you don’t mind the clean-up): Pour the mixture directly into the running water. Swirl the water to help dissolve the salts.

    3. Temperature and Time (2+ Minutes)

    • Temperature: Aim for warm, not scalding. Water that is too hot can be dehydrating. A pleasant, steamy warmth is ideal for muscle relaxation and steam-based aromatherapy.
    • Immersion: Get in! Submerge yourself up to your chest. If you used a sachet, drop it in next to you or hang it over the faucet so the water runs through it.
    • Duration: Aim for a minimum of 20 minutes. This gives your body time to absorb the magnesium from the Epsom salt and your mind time to truly switch off.

    Troubleshooting & Storage for Your Pantry Potion

    Storage

    • Keep it Dry: Always store your bath soak in an airtight container (glass is best) away from humidity. Moisture will cause the salt and baking soda to clump together.
    • Label and Date: Label your jar, especially if you create multiple varieties. While the salts don’t “go bad,” the scent potency of the dried herbs will fade over time. Use within 6 months for the best aroma.

    Troubleshooting Clogs (The Herbal Residue)

    The biggest drawback of using raw herbs is the potential for drain residue. This is why the Sachet Hack is so important.

    • If you dump directly: After draining the tub, use the shower head to blast away any remaining residue toward the drain to prevent buildup.
    • Avoid the Fine Powders: If you use too much finely ground spice (like turmeric or fine cinnamon), it can stain your tub. Stick to larger, whole or coarsely chopped herbs/leaves.

    The Science Behind the Pantry Potion Soak

    This isn’t just fluffy wellness talk; there’s real science backing this Pantry Potion.

    • Magnesium Absorption: Studies suggest that soaking in magnesium sulfate (Epsom salt) can raise magnesium levels in the body, which is vital for reducing stress hormones and aiding muscle recovery.
    • The Power of Aroma: The olfactory system (your sense of smell) is directly linked to the limbic system, the part of the brain that controls emotion.5 Inhaling the steam-activated scents of chamomile, mint, or rosemary immediately communicates “relax” to your brain.
    • Hydration Barrier: The addition of baking soda helps balance the water’s pH, which prevents stripping your skin’s natural moisture barrier, leaving your skin soft and nourished instead of tight and dry.

    Beyond the Bath: Other Pantry Potion Uses

    The principles of the Pantry Potion can extend beyond the tub!

    • Foot Soak: Use 1/4 cup of the mix in a basin of warm water for an instant, soothing foot soak. Perfect after a long day in uncomfortable shoes.
    • Shower Scrub: Mix 1/4 cup of the salt mix with 2 tablespoons of coconut or olive oil (also likely in your pantry!) to create a quick, exfoliating body scrub. Use caution, as this can make the shower floor slippery.
    • Room Refresher: Place a small, open dish of the dry mix in your linen closet or bathroom for a gentle, all-natural air freshener.

    Conclusion: Making Luxury a Habit

    The Pantry Potion is more than just a bath recipe; it’s a mindset shift. It’s the realization that you don’t need expensive, complicated solutions to find peace and luxury in your everyday life.

    In just five minutes, using ingredients you already own, you can create a powerful, therapeutic experience that nurtures your body and quiets your mind. This is truly the BEST bath EVER because it’s a commitment to your own well-being that is both sustainable and accessible.

    Go on, check your cupboard. Mix up your potion. You deserve this.


    Frequently Asked Questions (FAQ)

    1. Can I use fresh herbs instead of dried?

    It is generally not recommended. Fresh herbs contain water and are much more likely to mold if stored in the salt mixture. They also tend to float and create more residue. Stick to dried herbs from your pantry for the best results and storage life.

    2. Is this safe for people with sensitive skin?

    The base ingredients—Epsom salt and baking soda—are generally very safe and often recommended for sensitive skin. However, strong spices like cinnamon or ginger in the warming potions can be mildly irritating to highly sensitive skin. Always perform a small patch test or start with the simple Sleep & Serenity Potion first.

    3. How much of the Potion do I use per bath?

    For a standard-sized bathtub, 1 to 2 cups of the total mix is ideal for a therapeutic soak. Use less for children or smaller tubs, and up to 3 cups for extra-large soaking tubs.

    4. How long does the Potion last in storage?

    When stored in a cool, dry, airtight container, the salt and baking soda will last indefinitely. The key is the potency of the herbs and spices. For the strongest aroma, use your batch within 6 months of mixing.

    5. What if I don’t have Epsom salt?

    While Epsom salt provides the most significant muscle relief (magnesium), you can substitute it with plain coarse sea salt or Himalayan pink salt. You will still get the skin softening and mineral benefits, but the muscle-soothing effect may be less pronounced.


    References

    1. Healthline – What Are the Health Benefits of a Hot Bath?
    2. Clevelandclinic – Taking the Plunge: 5 Reasons Baths Are Good for You
    3. Harvard Heath – Take a soak for your health – Harvard Health

    Recent Posts


    Why You Need to Vibrate Your Way to Wellness

    A serene woman meditating in a lotus position on a rock in the middle of a calm, misty lake at sunrise, reflecting a peaceful state of being where mind and body vibrate in harmony.

    We’ve all hit that wall where stress feels like a heavy weight we can’t shake off. Sometimes, traditional relaxation just doesn’t seem to reach the deep tension we carry. This guide explores the simple, yet profound, idea that the right sound can physically move stuck energy and tension in the body. If you’re looking for a new way to find deep calm, it’s time to explore how you can truly vibrate your way to wellness.


    Vibrate: The Ancient Power of Sound Medicine

    For centuries, sound has been more than just something we hear—it has been used as powerful medicine. Cultures worldwide, from Tibetan monks to ancient tribes, have used specific sounds for healing. Today, science supports this idea. It shows us that our bodies are not just physical; they are vibrational. We are, quite simply, sound chambers.

    When we feel stress, anxiety, or deep tension, our body’s natural frequencies get unbalanced. Think about it: a specific sound or pitch can shatter a glass. Now, think about what precise, calming frequencies can do for your tight muscles and racing thoughts!

    This is the core idea of vibrational healing. It suggests that we can help the body return to its natural, balanced state by using precise, gentle sounds. We’ll explore sound methods that go beyond the usual singing bowls. We’ll teach you exactly how to vibrate your way to deeper calm, better focus, and lasting wellness.

    Abstract digital illustration of a glowing, translucent human body outline with horizontal gold and blue vibrating sound waves passing directly through the center, symbolizing energy and wellness.

    Concept: An abstract shot showing gentle sound waves (subtle ripples or lines) moving across an outline of a human body, symbolizing the physical effect of vibration.


    The Simple Science: How Sound Heals

    The key to vibrational healing is resonance. Every cell, bone, and organ in your body has its own natural, healthy frequency.

    Imagine two guitars side-by-side. If you pluck the A-string on one, the A-string on the other guitar will start to gently move or vibrate. It’s resonating with the first string, even though you didn’t touch it.

    Sound healing works the same way:

    1. Imbalance: A tight neck or a busy mind is vibrating at a stressed, “stuck” frequency.
    2. Entrainment: You introduce a strong, pure, healthy frequency (from a fork or bowl).
    3. Healing: The stressed part of your body starts to match, or “entrain,” with the healthy frequency. The tension lets go, and balance returns.

    When we use calming, low-frequency sounds, we instantly tell the nervous system to drop its high-frequency stress response.


    Modality Spotlight: Tools to Vibrate Your Body

    Singing bowls are wonderful, but the sound world is vast. These three methods offer unique ways to harness vibration for wellness.

    1. Tuning Forks: Precision Healing

    Tuning forks are like specialized tools in sound therapy. They don’t fill the room with sound like a bowl; they deliver a clean, sustained tone and precise vibration right where you need it.

    How They Work:

    Tuning forks are set to specific frequencies (measured in Hertz, or Hz). These frequencies are linked to different physical or emotional states. For instance, the common 128 Hz fork is often used to help bone and tissue repair.

    How to Do It:

    1. Activate: Gently tap the fork on a rubber pad or your knee. It will start to hum.
    2. Listen: Hold the vibrating prongs next to your ear. Let the pure tone calm your thoughts.
    3. Vibrate: Place the stem of the vibrating fork directly onto a tight spot, like a stiff joint or muscle knot. The vibration travels deep into the tissue. This helps physically unstick the tension.

    Concept: A close-up of a hand activating a metal tuning fork against a surface, showing the subtle blur of vibration.

    2. Therapeutic Drums: Deep, Rhythmic Grounding

    Drums, especially large frame drums used in ancient healing traditions, are pure rhythm. They use deep, low frequencies and strong, consistent beats to shake you out of stress.

    How They Work:

    The steady, rhythmic sound (around 4 to 7 beats per second) is tied to Theta brainwaves. This is the state linked to deep meditation, trance, and dreaming. The powerful, consistent rhythm bypasses the thinking mind. It forces your body into a state of deep, primitive rest and release.

    How to Do It:

    1. Find the Rhythm: Look for tracks called “Shamanic Drumming” or “Rhythmic Sound Journey.”
    2. Lie Down: Get comfortable on the floor with headphones or good speakers.
    3. Surrender: Focus on letting the deep beat enter your body. The consistent, low-frequency sound acts like a physical massage for your nervous system. It pulls you into a deep, internal focus.

    Concept: A simple, natural image of a hand holding a mallet over a large, round frame drum (like a shamanic drum), with soft, deep lighting.

    3. Didgeridoos and Drones: Total Immersion

    The didgeridoo, an ancient Australian wind instrument, makes a continuous, circular drone sound. Because of its very low, sustained frequency, it’s one of the best tools for full-body vibrational healing.

    How They Work:

    The sound of a drone vibrates the air in a sustained way. This causes almost your entire body to resonate with the sound. Its low Hz tones are often used to massage internal organs and help energy flow smoothly throughout the body.

    How to Do It:

    1. Immersive Listening: Find tracks with sustained, deep drone notes (like didgeridoo or low-frequency ambient music).
    2. Feel the Sound: Sit or lie down and note where you feel the sound in your body. Is it in your chest? Your sinuses? Your stomach? Breathe deeply into those areas, letting the sound gently move the air inside you.

    Concept: A close-up shot of the mouth of a didgeridoo, maybe with a person subtly visible playing it in the background, emphasizing the sustained air movement.


    Expanding the Spectrum: Frequencies for Specific Needs

    You can pick certain frequencies to aim for different goals. This moves your practice from simple relaxation to active healing.

    4. Solfeggio Frequencies: Spiritual Alignment

    These are specific tones (like 528 Hz or 432 Hz) based on old music theory. Many people believe each frequency has a unique benefit, from better spiritual connection to healing transformation.

    How They Work:

    The theory suggests that these pure, specific frequencies help balance the body’s energy centers, or chakras. This restores spiritual and emotional harmony.

    How to Do It:

    1. Select Your Tone: Choose a frequency based on your goal (e.g., 528 Hz is often used for “transformation” and love).
    2. Meditate: Play the tone quietly in the background during your meditation or yoga. Focus on the intention linked to that specific frequency.

    Concept: A vibrant, colorful, abstract visualization of sound waves or a spectrum of color, perhaps with the number 528 faintly visible, symbolizing energy and alignment.

    5. Rhythmic Music to Vibrate with: Yoga and Flow

    For physical practice like yoga, the best sound helps your body vibrate at a constant, steady tempo.

    How They Work:

    Instrumental music with a stable tempo (around 60 to 80 beats per minute, or BPM) helps your heart rate slow down. It also helps your breathing match the music’s beat. This creates a state of relaxed alertness. This state is perfect for holding poses and flowing smoothly.

    How to Do It:

    1. Check the BPM: Use playlists labeled “Yoga Flow” or “Ambient BPM.”
    2. Move with the Sound: As you breathe and move through your poses, let the beat guide the smoothness of your transitions. Focus on how the music helps you flow.

    Concept: A silhouette of a person holding a yoga pose (like Warrior II) in a warm, dimly lit room, with sound subtly implied.


    Practical Application: How to Vibrate Safely and Effectively

    To get the best results from vibrational healing, remember these simple rules.

    1. Volume is Vital

    Your goal is resonance, not loud noise. The sound must be clear enough to be heard and felt, but never loud enough to cause stress or discomfort. High volume triggers defense tension. This is the opposite of the healing you want.

    2. Lie Down Flat

    Whenever you can, lie flat on your back during sound sessions (especially with bowls or rhythmic drums). This lets the sound waves and vibrations pass evenly through your body, which is mostly water, for maximum effect.

    3. Breathe with the Sound

    Your breath naturally amplifies sound. As you listen, try to make your exhales long, slow, and deep. Imagine the sound you are hearing being carried deep into your body by your breath.

    4. Headphones vs. Speakers

    • For Tonal/Vibrational Work (Forks, Solfeggio): Use high-quality headphones. This delivers the pure frequency directly to your inner ear without outside noise getting in the way.
    • For Immersion (Drums, Drones): Use a high-quality speaker placed on the floor near you. This allows the low frequencies to physically vibrate your space and massage your body.

    Concept: A person lying down comfortably under a soft blanket with a speaker placed on the floor nearby, emphasizing the immersive, restful setup.


    The Next Step: Building Your Sonic Sanctuary

    Your home can easily become a place of intentional healing. Start by adding these sounds to your daily routine:

    • Before Sleep: Use deep, low Hz drone sounds to calm your nervous system before bed.
    • During a Slump: Use a sharp 128 Hz tuning fork on your desk. Use it to hit a tension point and quickly reset your focus.
    • For Grounding: Listen to rhythmic drum tracks whenever you feel scattered or overwhelmed.

    By understanding that sound can literally vibrate away stress and tension, you open the door to a powerful, holistic form of wellness. Your body is ready to resonate; you just need to give it the right tone.

    Concept: A beautifully arranged side table showing a small speaker, a set of tuning forks, and a meditation journal, symbolizing the personalized wellness toolkit.


    Frequently Asked Questions (FAQ)

    Q: Is sound healing safe for everyone?

    A: Yes, sound healing is generally very safe and gentle. However, if you have a pacemaker, are pregnant, or have conditions like epilepsy, you should talk to your doctor first. This is especially important before intense vibrational sessions (like placing loud gongs very close to the body). Simply listening to calming sounds through speakers is almost always safe.

    Q: Do I need expensive crystal bowls to get the benefit?

    A: No, absolutely not. Crystal bowls are great, but you can get powerful vibrational healing from high-quality recordings of Tibetan bowls, rhythmic drumming tracks, or even inexpensive metal tuning forks. The true healing comes from the frequency and your intention, not the price of the tool.

    Q: Can I use sound healing for chronic pain?

    A: Many people find that specific low frequencies (like those from a 128 Hz tuning fork or deep drone) help manage chronic pain. They do this by helping reduce inflammation and promoting relaxation. Sound therapy is a great extra tool, but it must not replace prescribed medical treatment.

    Q: How long should a sound session last?

    A: Even 5 to 10 minutes of intentional listening can make a difference. For deep relaxation or meditation, 20 to 45 minutes is ideal. The most important thing is consistency: short daily sessions are more effective than long, infrequent ones.


    References

    1. NIH – Effects of Singing Bowl Sound Meditation on Mood
    2. LondonDrumInstitute – Let It All Out
    3. GroundedKiwi – Benefits of Tuning Forks for Natural Healing

    Recent Posts