Cookie Consent by Free Privacy Policy Generator Update cookies preferences

6 Of The Best Types Of Beds For Tiny House Living Now!

Bright, modern tiny house interior with a cleverly designed loft bed, showcasing innovative Beds For maximizing space and comfort in compact living.

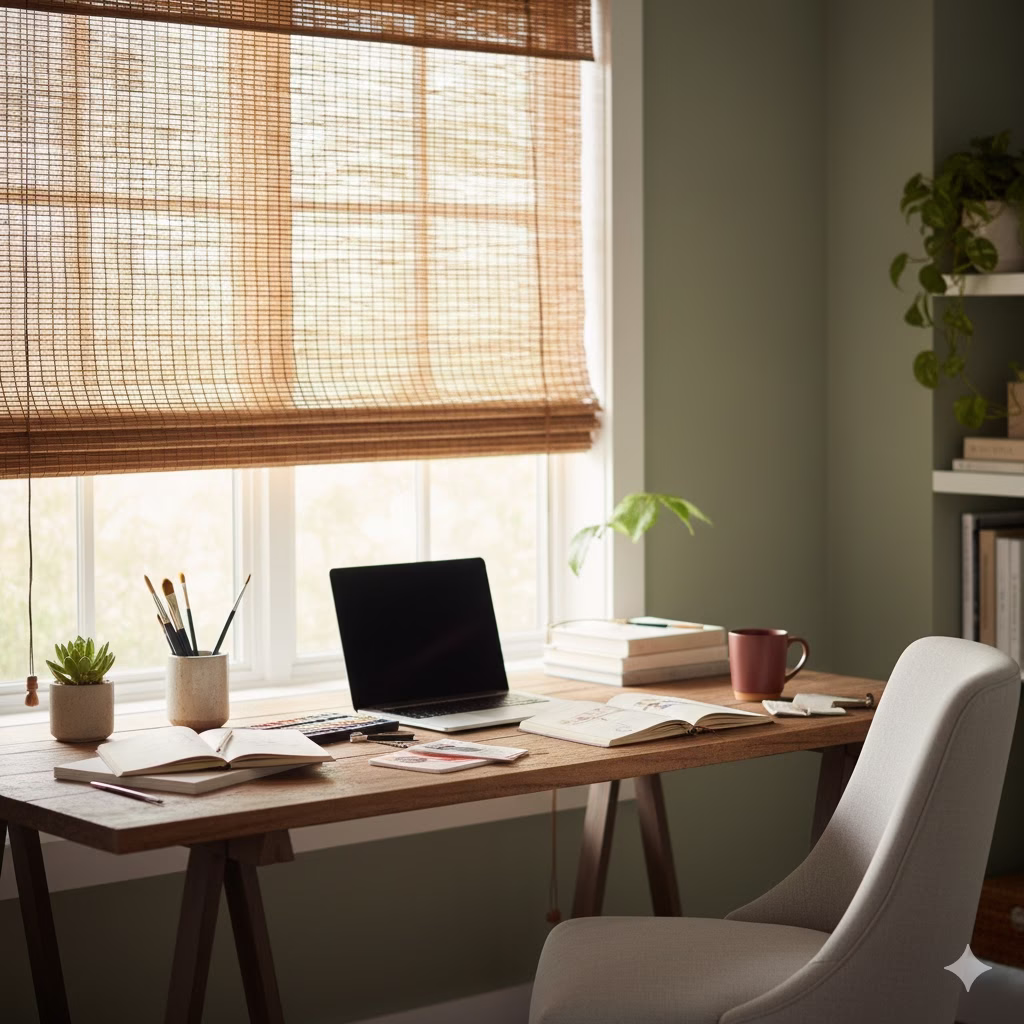
When space is tight, every piece of furniture must earn its place. The bed is no different. As someone who has lived the tiny house life, I know design is about smart choices, not sacrifices. I have spent hours researching and testing solutions to help you find the best Beds For a sleeping spot that saves space without giving up a good night’s rest. It’s time to unlock the full potential of your tiny home interior!


The Tiny Revolution: Redefining Sleep in Tiny Homes

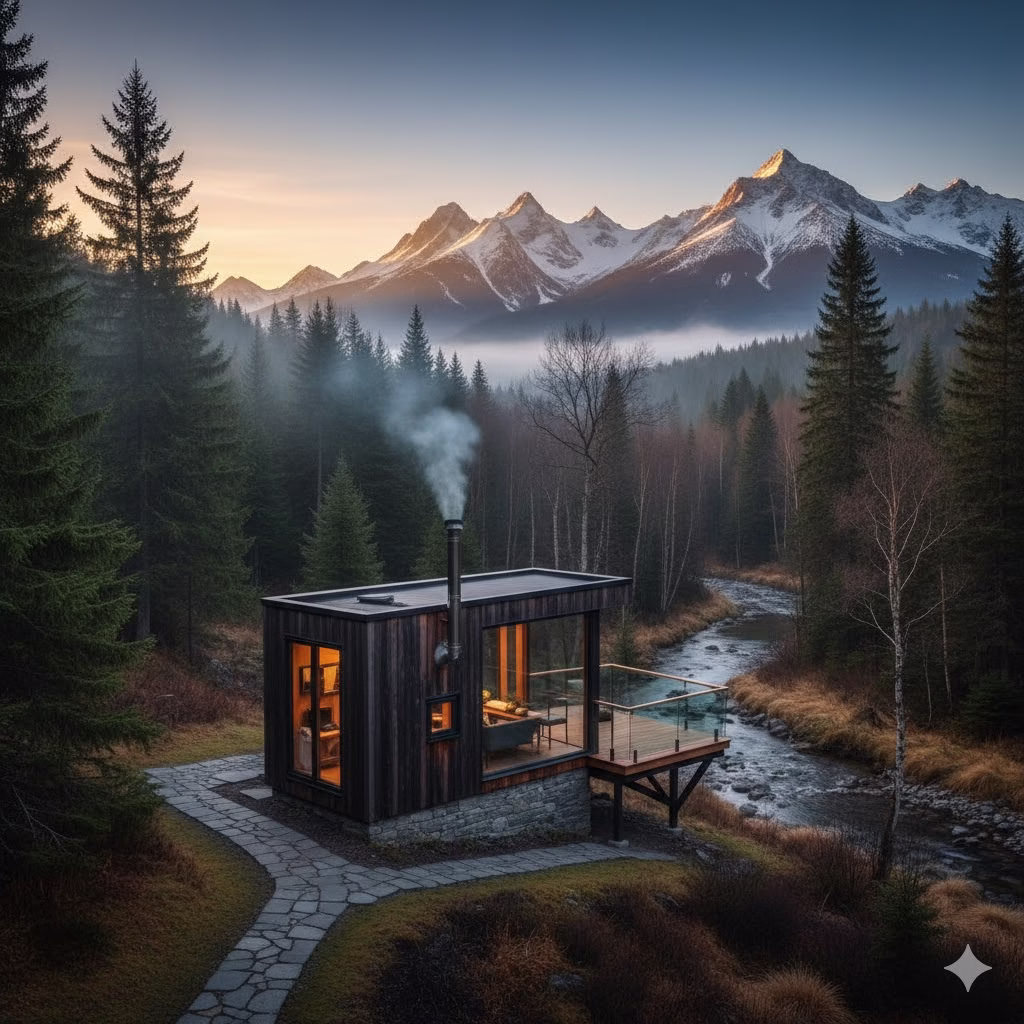
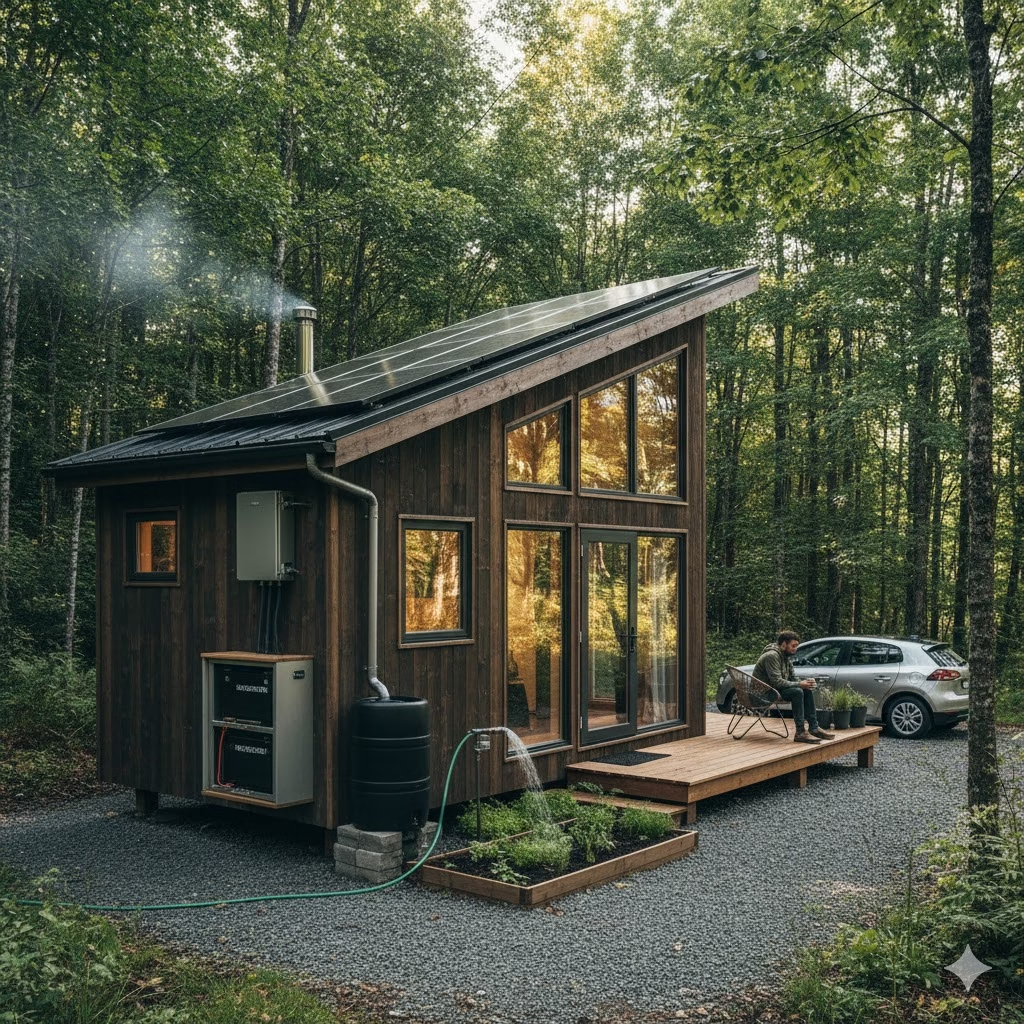
Tiny house living is a big idea. It is more than just a passing trend. It is a real shift toward owning less, spending less money, and living in a way that helps the planet. Tiny homes are wonderful, but they bring a unique problem: how do you fit a comfortable life—including a full-sized sleep experience—into a space smaller than many people’s garages?

The bed is usually the biggest piece of furniture in any home. In a tiny house, it becomes the most important design choice. For a normal house, a bed is just for sleeping. In a tiny house, it must do many jobs. It needs to save space and change its form. It should be a quiet place for sleeping. But then it must disappear or change to give you valuable living space during the day.

Choosing the right type of Beds For your structure is probably the most important decision for your inside design. This choice decides how well your small space works. This guide will look closely at the six best types of beds. They are perfect for using every inch of your treasured tiny house. We will show you what these beds are. We will also give practical tips on how to do it to bring these tiny house ideas to life.


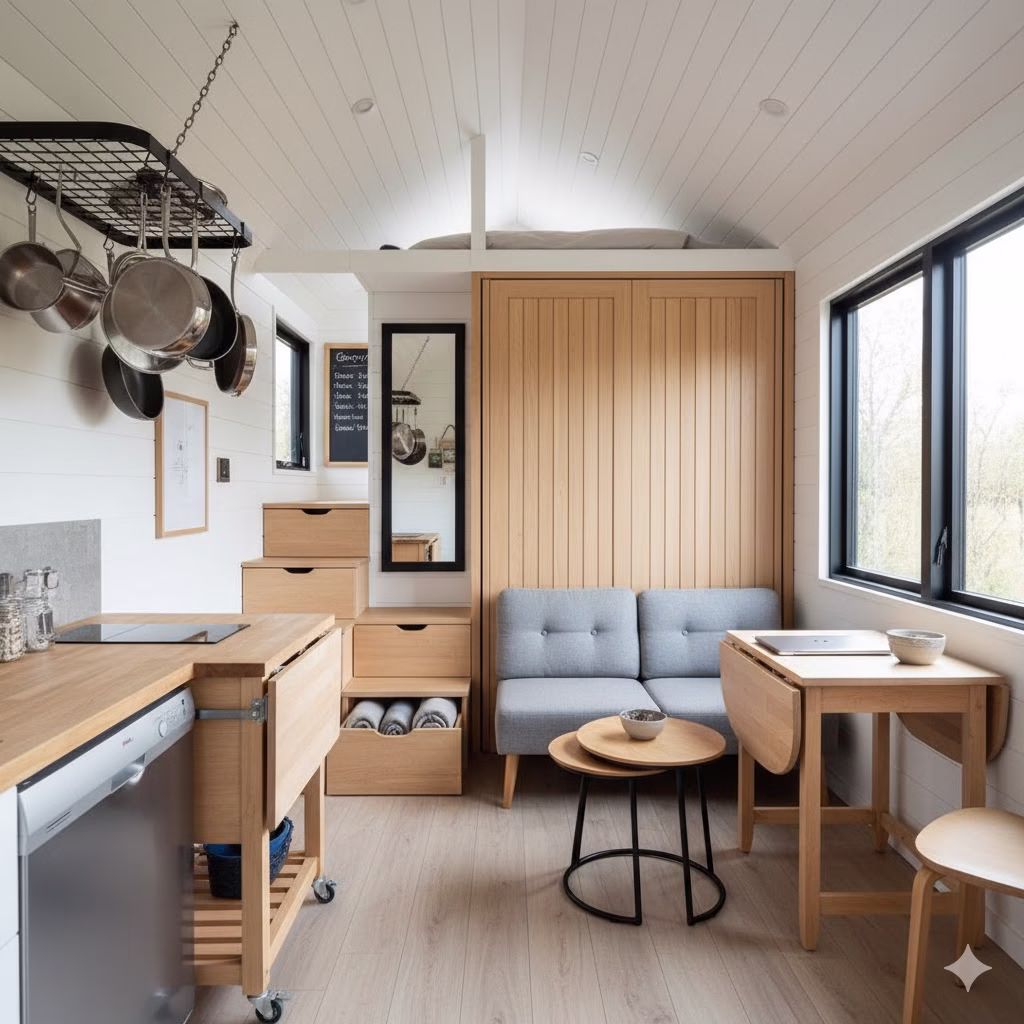
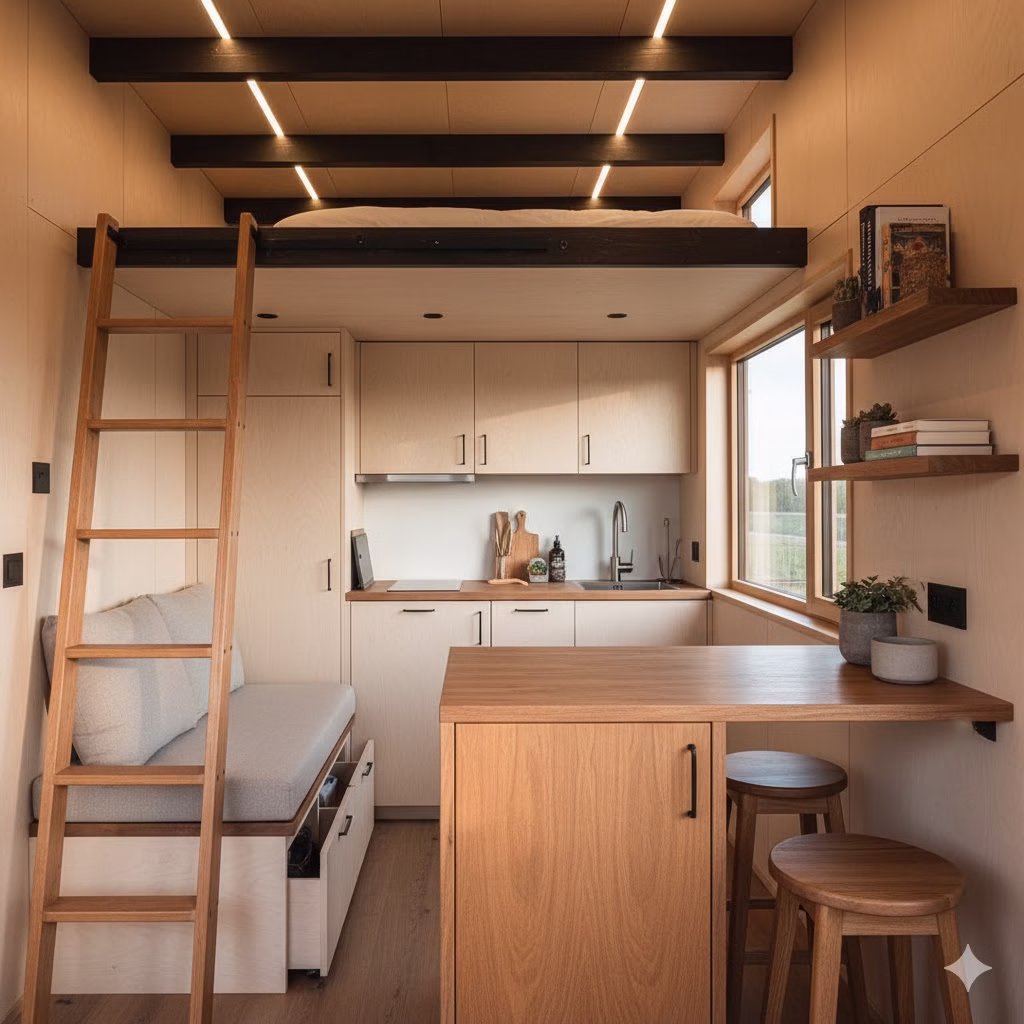
1. Loft Beds: Elevating Tiny House Inspiration

The Loft Bed is the classic answer for tiny house inspiration. It is the most popular way to use the tall, vertical space that tiny homes offer. By moving the sleeping area high up and out of the way, you clear the entire area underneath it. That open space can then be used for other things.

Why It Works for Tiny House Living

Loft beds fix the space problem by creating two useful areas where there was only one. The space below the bed can become an office, a relaxing area, a place to eat, or even a storage room. This change makes your tiny home feel much larger than its actual size. It greatly increases the usable space inside your tiny home interior.

How To Do It: Maximizing the Under-Loft Space

  1. Create a Dedicated Living Area: The most common setup is making a small living room under the loft bed. You can place a small couch or two chairs there. Add a coffee table and maybe a slim set of shelves. Proper lighting is key here. Make sure the area under the loft is bright. Use ceiling lights or special lamps to keep it from feeling too dark.
  2. Set up a Home Office: If you work from home, the space beneath a loft bed is a great place for a built-in desk and shelves. This gives you a clear line between where you work and where you sleep. This is a very helpful thing to have in a small home.
  3. Use Storage Walls and Closets: Do not just use a simple ladder. Build custom stairs that have drawers inside them. Then, use the whole wall under the loft for storage from floor to ceiling. You are then creating a walk-in closet or a deep pantry.

Example: A tiny home with a 10-foot ceiling can easily hold a loft bed. It leaves about 4.5 feet of space above the mattress for headroom. That leaves 5.5 feet of usable space below. This lower space is perfect for a small kitchen shaped like a “U” or a comfortable sitting area with books.


2. Murphy Beds (Wall Beds): The Disappearing Act

Murphy Beds, also called Wall Beds, are experts at vanishing. When you are not using the bed, the entire frame and mattress fold straight up. They go right into a wall cabinet. This instantly turns your bedroom into a room that can be used for many things. These are prime examples of smart tiny house ideas.

Why It Works for Tiny House Living

Some people do not want their bedroom to look like a bedroom during the day. The Murphy bed is the best choice for them. It lets one room be a living room, a place to eat, and an office during the day. At night, it becomes a comfortable, full-sized bedroom. This ability to change is necessary for tiny homes that have open floor plans.

How To Do It: Integrating a Wall Bed

  1. Select a High-Quality Mechanism: A Murphy bed works well only if it has a smooth and strong folding system. Spend money on a piston or spring system. This allows you to open and close the bed easily and safely with just one hand.
  2. Hide It and Blend It In: Do not just install a plain box. Build custom cabinets around the bed system. When the unit is closed, it can have shelves. It can also have a desk that folds down (attached to the bottom of the bed frame). You can even hide a television behind sliding doors.
  3. Placement is Key: Put the Murphy bed on the largest wall that has no breaks. Make sure there is enough empty floor space in front of it. This space is needed to safely lower the bed. You also need room to walk around it once it is down.

Example: Put a horizontal (folds sideways) Murphy bed in a narrow tiny home. When it is closed, the cabinet is only a few feet deep. When you open it, it leaves a long, open path along the end of the bed. This makes the home feel open, even when you are asleep.


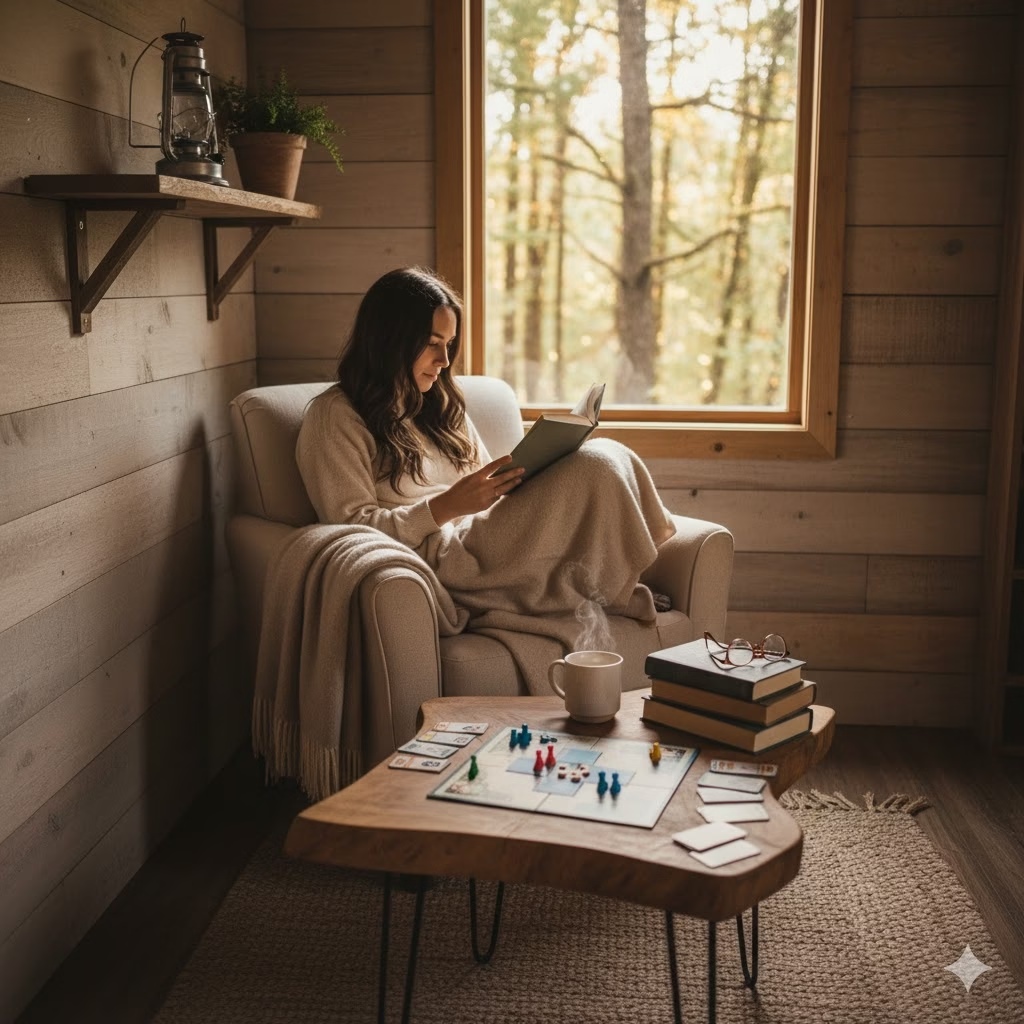
3. Sofa Beds/Daybeds: The Dual-Purpose Lounge

Sofa Beds and Daybeds are the classic pieces of furniture that do two jobs. They are a comfortable place to sit during the day. And turn into a sleeping surface at night. They are a common feature of tiny homes interior design because they are simple and useful right away.

Why It Works for Tiny House Living

These are the perfect choice for tiny homes that need a main lounge area. But they also need a place for sleeping, either every night or just for guests. Daybeds can work as a large single bed at night. During the day, they become a cozy corner for reading or simple bench seating, often next to windows.

How To Do It: Selecting and Utilizing Your Bed

  1. Focus on Comfort: If this is your main bed, do not buy a cheap folding futon. Look for beds that have a thick foam mattress or one with inner springs. The system for pulling the bed out must be simple to use and put away every day.
  2. Include Storage: The best sofa beds for tiny homes have storage built right into the piece. Look for models with hidden space under the seats. This is a good spot for sheets, pillows, and extra blankets.
  3. Daybed as Bench Seating: A daybed can easily become part of your eating area. Put a big dining table in front of it. Use the daybed as long bench seating on one side. This makes one piece of furniture serve many purposes.

Example: A full-sized sofa bed is set against the longest wall of the tiny house. When it is open, it takes up the width of the home, giving you a big place to sleep. When it is closed, it becomes the center of the entire living area.


4. Ottoman Beds: Discreet and Highly Functional

Ottoman Beds are special because they are designed for maximum storage. They look like a normal bed frame. But they have a system that lifts the mattress base up. It lifts either straight up or on a hinge near the headboard. This reveals the entire area under the bed as usable storage space.

Why It Works for Tiny House Living

In tiny homes, a common problem is finding a place for things you need but do not use daily. This includes out-of-season clothes, extra sheets, bulk food items, or emergency gear. The Ottoman Bed solves this. It turns the largest empty space in the home (under the mattress) into the largest storage unit. It is a great example of tiny house ideas that focus on hidden usefulness.

How To Do It: Making the Most of the Under-Bed Space

  1. Choose the Right Lift Mechanism: A side-lift system is easier to get into in a narrow space. You do not need room to stand at the end of the bed. A lift that goes straight up is easier for daily use. But it needs more space to open at the foot of the bed.
  2. Organize Everything Well: The storage area is deep and open. Use large, matching storage bins. Or use vacuum-sealed bags for clothing you are not wearing that season. This keeps the space neat and stops it from becoming a messy catch-all drawer.
  3. Dual-Purpose Top: If you use a small ottoman that folds out into a bed, the ottoman itself can work as a coffee table during the day. This makes it a three-in-one item: storage, table, and bed.

Example: Use a large ottoman bed in a tiny home. The huge storage space underneath can hold all out-of-season clothing. It can hold all spare towels. It can also hold most of the kitchen’s dry goods. This means you do not need a separate closet or a large pantry.


5. Divan Beds with Drawers: Accessible Daily Storage

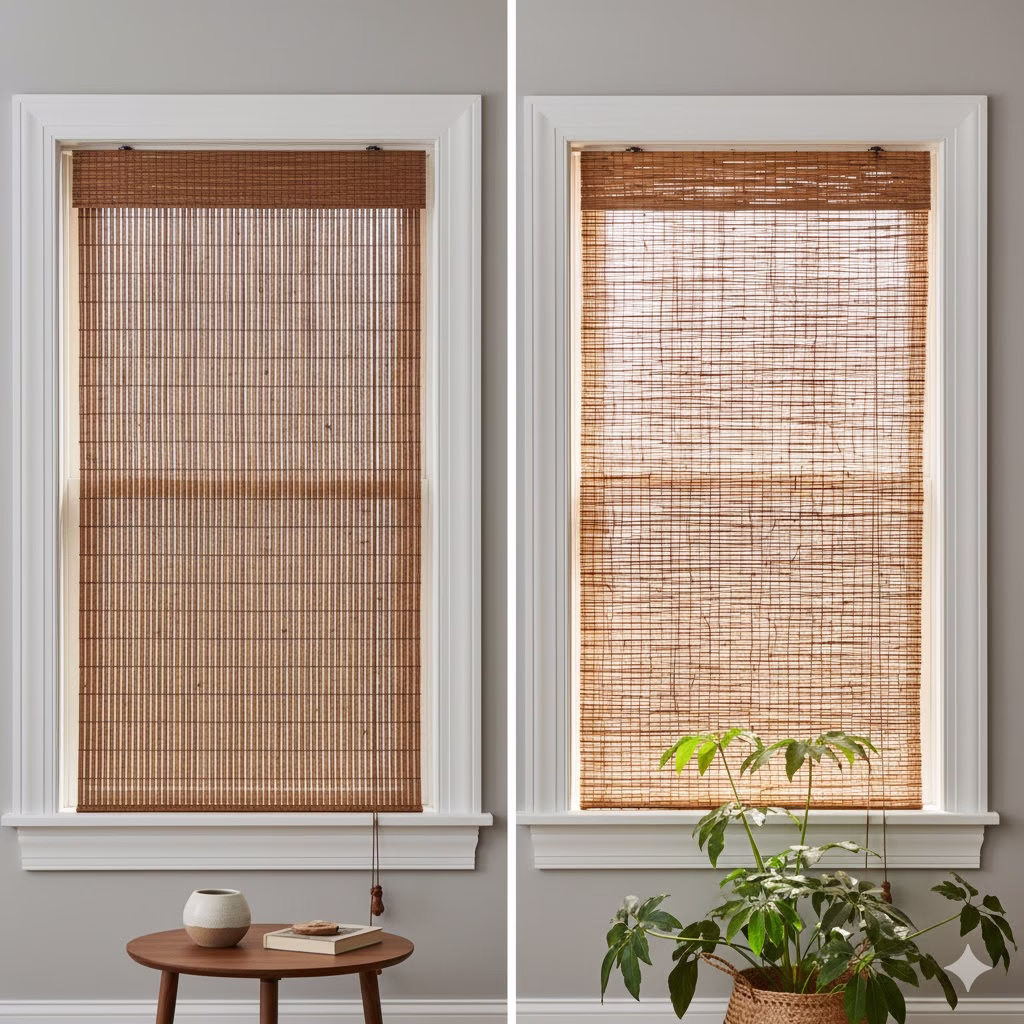
A Divan Bed is a bed base made from a strong wooden box. It is usually covered with fabric. It is built to sit right on the floor. Most importantly, they are made to have drawers or sliding storage units built into the sides of the base. This makes them an excellent choice for Beds For things you use every day.

Why It Works for Tiny House Living

An Ottoman bed gives you one huge storage spot. A Divan Bed gives you organized, easy-to-reach storage sections. This is great for tiny house living. You can get your clothes, socks, or a book without lifting a heavy mattress. It takes the place of a separate dresser or chest of drawers.

How To Do It: Optimizing the Drawer System

  1. Select a Layout: Divan bases usually have two drawers (one on each side) or four drawers (two on each side). In a tiny house, think about a ‘Continental’ style. In this style, the drawers are only at the end of the bed. This lets you put the head of the bed close against a wall or built-in furniture. You can still reach the drawers easily.
  2. Maximize Drawer Depth: Look for models that have deep drawers that pull all the way out. Even a little extra depth adds a lot of storage space. This is helpful for bulky items like thick sweaters or towels.
  3. Add Headboard Storage: You can add to the drawer storage with a custom headboard. This headboard can have thin shelves or small cubbies. They are useful for charging phones, holding glasses, or displaying small items. The whole bed unit becomes a complete sleeping and storage area.

Example: A tiny home has a Divan bed placed in a small, recessed area. Two large drawers on the side facing the room hold all the clothes used daily. This means there is no need for a traditional chest of drawers. It makes getting ready in the morning simpler.


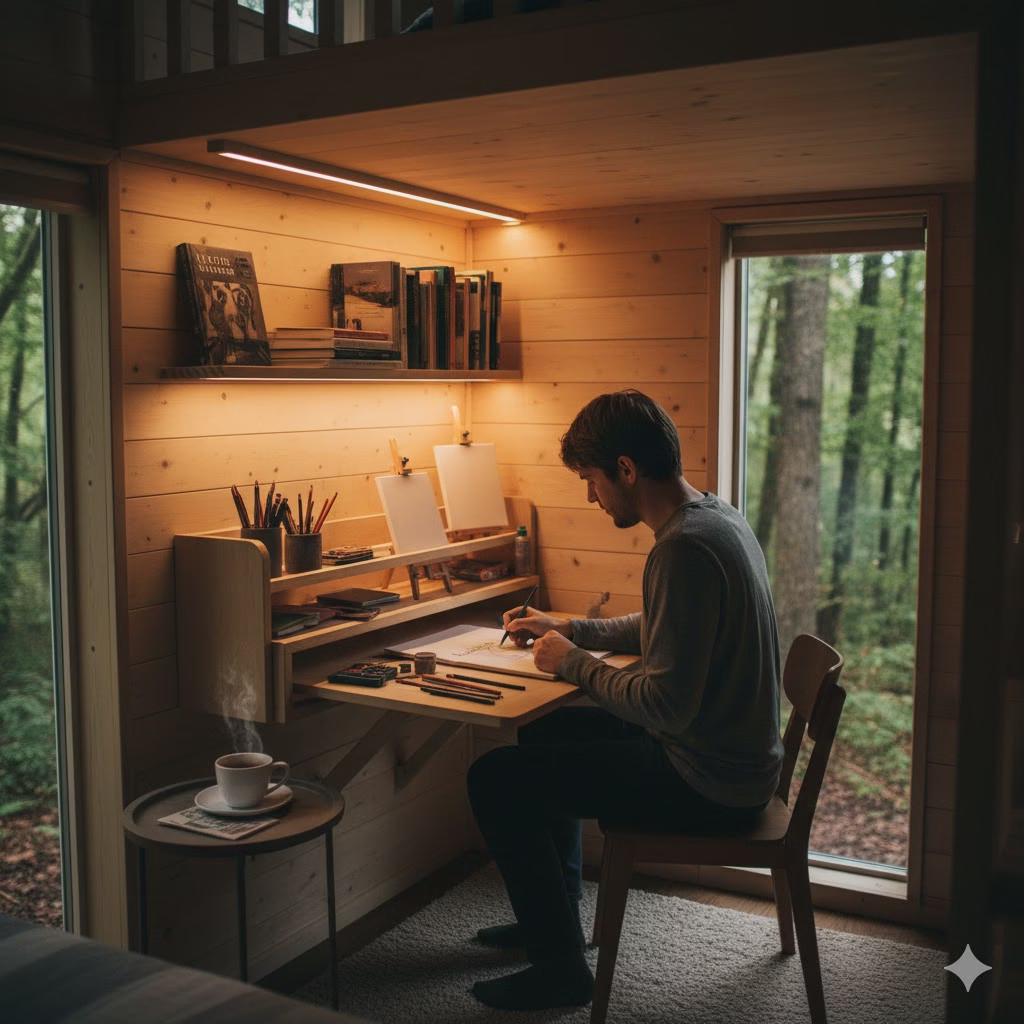
6. Cabin Beds/Mid-Sleeper Beds: The All-in-One Station

Cabin Beds, also called Mid-Sleeper Beds, are like Loft Beds but they sit lower. They are usually about halfway between the floor and the ceiling. The key is that they are designed as a full station. They have features built right underneath, like a desk, shelves, or a chest of drawers.

Why It Works for Tiny House Living

This type of bed is the best ready-made idea for tiny house inspiration. It is one piece of furniture that handles three important needs: sleeping, working/studying, and storage. Because the bed is lower than a full loft, it is often seen as a safer and easier choice for adults. Some adults find a high loft too hard to climb every day.

How To Do It: Integrating the Mid-Sleeper

  1. Check Headroom: The bed is lower, but still check your headroom. Make sure you can sit up comfortably on the mattress. Also, check that you have enough room to sit at the desk beneath it. People often forget to check this in small spaces.
  2. Use Components that Move: Many Cabin Beds have desks that pull out on wheels. This lets you hide the desk completely when you are not using it. You can roll it out into the middle of the room for work. This gives you more leg and elbow room than a fixed, built-in desk.
  3. Focus on Function: Use the storage space under the bed for things related to the area next to it. If the bed is near the kitchen, the shelves can hold cookbooks and small appliances. If it is near the living area, it can hold games and media.

Example: A single person living in a tiny home uses a Mid-Sleeper. The desk slides out for work each day. The shelving unit holds all their books and office supplies. This creates a dedicated home office. The office completely vanishes when the desk is pushed back under the bed for the night. This is a smart piece of tiny house interior design. It uses the floor space well for daytime activities.


Conclusion: Tailoring Your Sleep Solution

Choosing the perfect bed is not about forcing a fit. It is about finding a solution that matches your daily habits. It must also match the unique space limits of your tiny home. You might choose the high space of a Loft Bed. You might prefer the invisible nature of a Murphy Bed. Or maybe the easy storage of a Divan Bed. Each option helps you live in a bigger, more organized space.

Remember that great tiny homes use furniture that does many things well. Your bed can, and should, be one of the hardest-working items in your home. By adding these clever Beds For compact living, you are doing more than just saving space. You are creating a tiny house interior that is better, more comfortable, and full of tiny house inspiration. Embrace these tiny house ideas and turn your bedroom from a space thief into a space hero.


Frequently Asked Questions

Q: Are Loft Beds safe for tiny homes, and how do I access them?

A: Yes, Loft Beds are very safe when they are built right and secured tightly to the structure of the tiny house. You usually get to them using a fixed ladder. The best ladders have wide, comfortable steps. For the most safety and storage, many builders create stairs that have drawers built inside. This is the preferred way for daily use over a long time. Make sure the side rails are fixed tightly and meet safety rules.

Q: Do Murphy Beds use special mattresses?

A: Murphy Beds usually use a standard mattress. However, it cannot be thicker or heavier than the lifting system allows. This is usually about 10 to 12 inches thick. Standard mattresses with springs or foam work best. Do not use very heavy mattresses or ones with stiff edges. They might harm the lifting system or not fold into the cabinet correctly.

Q: How do I ensure a Sofa Bed is comfortable enough for daily sleep?

A: If you plan to sleep on a Sofa Bed every night, look for models called “everyday sleepers.” Or look for ones with a high-quality foam mattress or a pocket-sprung mattress. These are often sold separately. The thickness and quality of the mattress are much more important than the sofa’s look. Test the bed mechanism. Make sure the support bars do not press through the mattress and feel uncomfortable when you lie down.

Q: Which bed type is best for a tiny home with low ceilings?

A: For low ceilings, the best choices are the Murphy Bed or a Divan Bed with Drawers. Both sit low to the ground. This keeps the maximum space above the mattress. Loft and Cabin Beds will cut the headroom a lot. This will make the space feel cramped. The Murphy Bed lets the entire sleeping area disappear. This leaves the whole room feeling open and large.

Q: Can I build any of these beds myself?

A: Yes, many tiny house fans build their own space-saving beds successfully. Loft Beds and Cabin Beds are the easiest to build yourself. They often use standard wood beams and plywood. For Murphy Beds, you can buy the metal lifting system. This is the most important part. Then you build the wood cabinet around it yourself. Always follow clear, planned instructions for safety, especially for beds attached to the wall or placed up high.


References


Recent Posts


Stop Tossing the Peels! Your New Favourite Sustainable Drink Mixer

Close-up shot of hands peeling a ripe mango over a wooden table, revealing the vibrant orange peel. In the foreground are a small bottle labeled "Mango Peel Syrup," two finished cocktails (a light mojito-style drink and a dark old fashioned), and a bowl full of discarded peels and pits, showcasing the entire Sustainable Drink Mixer process.

As someone who loves a good drink but hates seeing good food go to waste, I’ve always been on the lookout for clever kitchen hacks. Like many of you, I used to toss mango peels without a second thought, missing out on their hidden potential for a truly Sustainable Drink Mixer. Join me as we explore how to turn those overlooked scraps into something truly spectacular for your home bar. You’ll never look at a mango the same way again!


Every day in kitchens around the world, the same thing happens. The sweet, bright flesh of a mango is carefully cut away. Then, the fragrant peel and the pit are thrown into the trash.

But wait. What if I told you that those parts you throw away hold a huge amount of flavour? They are waiting to make your homemade drinks much better. What if those discarded parts could be the key to your new favorite Sustainable Drink Mixer?

Today, living sustainably is not just a trend. It is something we must do. Finding clever ways to stop wasting food is a goal for every good cook. And today, we are starting a very exciting kitchen project. We are going to turn simple mango skins and pits into amazing syrups and sauces (called coulis). You will not only find a new, deep mango flavour, but you will also help the planet. You can do this with every delicious sip you take. Get ready to stop wasting food and start using the great potential of the whole fruit.

The Hidden Potential of Mango Skins

When we think of a mango, we only think of its juicy, yellow flesh. But the skin and even the pit hold surprising flavour and good ingredients. Mango skins are packed with antioxidants, fiber, and some vitamins. They taste stronger, often more tangy, and a little bitter compared to the sweet fruit. This makes them perfect for creating interesting and complex syrups.

When we boil the skins and pits, we pull out these incredible essences. We create a deeply scented liquid. This liquid captures the true spirit of the mango. It often has a hidden layer of flavour you will never find in plain mango juice. This is not just about saving money. It is about being creative in the kitchen. It is about using every last bit of potential from our ingredients.

The slight bitter taste in the skin is actually good for mixing drinks. It helps balance the sweetness of the sugar. It also balances the richness of the fruit. This makes the syrup taste much more mature and interesting than a simple syrup made only from the fruit pulp. This deep flavour helps the syrup pair very well with strong alcohol and sour ingredients.

Safety First: Preparing Your Mango Skins

Before we get to the delicious part, a quick and very important note on safety. Mango skins can sometimes have leftover chemicals from farming. More importantly, they have small amounts of urushiol. This is the same chemical found in poison ivy. It can cause a rash in people who are sensitive to it. Cooking usually makes many irritants harmless. But taking steps to be safe is always best.

  • Always Wash Well: You must wash your mangoes very carefully before peeling. Scrub them under running water using a vegetable brush. Do not just rinse them quickly. You must clean the surface completely.
  • Choose Organic: If you can, buy organic mangoes. This keeps any chemical exposure as low as possible. This makes using the skins much safer and better.
  • Be Careful When Handling: If your skin is easily irritated, think about wearing thin kitchen gloves while you handle the peels. This is especially true if you are making a large batch.
  • Know Your Fruit: The fresher and better the quality of the mango, the better your syrup will taste. Do not use any skins that look bruised or have signs of mould.

How to Make Mango Skin Syrup: Your New Sustainable Drink Mixer

This process is very easy. It gives you a highly flavoured syrup. This syrup will quickly become a key part of your sustainable drinks. We want a rich, flavourful liquid. It should hold the strong essence of the mango skins.

What You’ll Need:

  • Skins and pits from 3 to 4 ripe mangoes (must be washed well)
  • 4 cups (about 1 litre) of water
  • 1 cup (200g) of white sugar (you can use more or less, depending on how sweet you want it)
  • Extra options: A few slices of ginger, one cinnamon stick, a few star anise pods, or a pinch of red pepper flakes for some heat. These spices taste great with the complex notes of the skin.

Instructions:

  1. Get the Mango Scraps Ready: Enjoy the fruit pulp first. Then, collect your well-washed mango skins and pits. If a little fruit pulp is still stuck to the pit or skin, that is fine. It will only make the syrup taste richer and better.
  2. Mix Ingredients: Put the mango skins and pits into a medium-sized pot. Add the water and any extra spices you picked. Heat the mixture until it boils over medium-high heat.
  3. Cook and Flavour: Once it boils, turn the heat down to low. Cover the pot and let it cook slowly for at least 30 to 45 minutes. The longer it cooks, the more flavour you will get out of the skins. The color will also get deeper. The oils and flavour from the skin will go into the water. You will see the liquid turn a beautiful golden-orange colour. A rich smell will fill your kitchen.
  4. Add Sugar: Stir in the sugar until it is completely gone. Keep cooking slowly for another 5 to 10 minutes. This lets the sugar mix in fully and allows the syrup to get a little thicker. For a very thick syrup, cook it longer to reduce the liquid. For a lighter syrup, stop sooner.
  5. Strain: Take the pot off the heat. Carefully pour the mixture through a fine strainer into a clean bowl. Use the back of a spoon to press down hard on the solid parts (the skins and pits). You want to squeeze out every bit of liquid. Throw away the cooked skins and pits (or put them in your compost!). The liquid left behind is your strong Sustainable Drink Mixer.
  6. Cool and Store: Let the mango skin syrup cool down fully at room temperature. Once cool, pour it into a clean bottle with a tight lid. Keep it in the refrigerator. It will stay good for up to 2 to 3 weeks.

How to Make Mango Skin Coulis: A Thicker, Fruitier Option

Coulis is a thicker sauce, almost like fruit puree. It is perfect for coating the inside of a glass or mixing into drinks for a richer feel. It also works great for drizzling over desserts. This makes it a very useful item for cooks and bartenders who aim for zero waste. The coulis keeps more of the fiber from the mango skins. This gives you an extra layer of texture and a health boost.

What You’ll Need:

  • Skins and pits from 3 to 4 ripe mangoes (must be washed well, with a little fruit pulp left on)
  • 2 cups (about 500ml) of water
  • ½ cup (100g) of sugar (change this to your taste)
  • Optional: a small amount of lime juice for a bright taste and to help keep it fresh.

Instructions:

  1. Mix and Cook: Put the mango skins and pits in a pot with the water. Bring it to a boil. Then, lower the heat and cook slowly, covered, for 20 to 30 minutes. Cook until the skins are very soft and easy to poke with a fork. You are trying to make them tender, not just pull out the flavour.
  2. Blend: Carefully move the cooked skins, pits (you can remove the largest, hard pits if you want), and liquid to a powerful blender. Blend until it is very smooth. You may need to blend for a few minutes to break down all the tough pieces.
  3. Strain (Recommended): For a very smooth coulis, push the blended mixture through a fine strainer. Use a spatula to help the liquid pass through. This removes any leftover tough or gritty pieces. You get a soft texture that looks great on plates and in drinks.
  4. Sweeten and Thicken: Put the strained liquid back into the pot. Stir in the sugar. Cook slowly for another 5 to 10 minutes. Stir it often. Cook until it reaches the thickness you want for a coulis. It should cover the back of a spoon lightly. Add the lime juice if you like.
  5. Cool and Store: Let it cool down completely. Keep the coulis in a sealed container in the refrigerator for up to 1 week.

Mix It Up: Cocktails with Mango Skin Syrup

The slightly sour taste and subtle spice in the mango skin syrup make it an excellent match for aged spirits. It gives your cocktails a deeper flavour that simple mango juice cannot match. Here are two ways to use your new sustainable syrup:

The Sustainable Spicy Mango Old Fashioned

This recipe uses the complex flavour of the syrup to create a special version of a classic drink. It is perfect for showing off your Sustainable Drink Mixer.

Ingredients:

  • 2 ounces of Aged Rum or Bourbon
  • ½ ounce of Mango Skin Syrup (try the one you made with cinnamon or ginger)
  • 2 Dashes of Angostura Bitters
  • An orange peel twist, for decoration

Method:

In a rocks glass (Old Fashioned glass), mix the syrup and bitters. Add the rum or bourbon. Fill the glass with one large ice cube. Stir gently for about 30 seconds. This chills the drink well and adds the right amount of water. Squeeze the oil from the orange twist over the drink. Then drop it in to decorate. The concentrated, spicy mango flavour is wonderful with the woody and vanilla tastes of the alcohol.

The Tangy Mango & Gin Sour

The slight bitterness of the skin syrup balances the plant flavours of gin. It also balances the sourness of the lime or lemon.

Ingredients:

  • 2 ounces of Dry Gin
  • ¾ ounce of Fresh Lemon Juice
  • ¾ ounce of Mango Skin Syrup
  • 1 Egg white (this is optional, for a foamy top and texture)
  • A dash of Cardamom Bitters (also optional)

Method:

Put the gin, lemon juice, syrup, and egg white (if you use it) into a shaker. Shake it hard without ice for 15 seconds. This is called a “dry shake.” It makes the egg white foamy. Add ice to the shaker and shake again until it is very cold. Pour the drink through two strainers into a chilled coupe or rocks glass. Decorate it with a thin slice of dried mango or a small drizzle of the mango skin coulis.

Mocktails with Mango Skin Syrup & Coulis

This sustainable drink mixer works just as well in mocktails non alcoholic. It offers a complex flavour without any alcohol. The coulis is great for making beautiful, flavourful decorations.

Sparkling Mango Ginger Refresher

This easy, fizzy drink is perfect for hot days. It gives you a tropical taste without any alcohol.

Ingredients:

  • 1.5 ounces of Mango Skin Syrup (use the ginger version if you have it)
  • 1 ounce of Fresh Lime Juice
  • 4 ounces of Sparkling Water or Club Soda
  • A small branch of mint and extra lime slices for decoration

Method:

Fill a tall glass with ice. Add the mango skin syrup and lime juice. Pour in the sparkling water and stir gently. Decorate the glass with lots of mint and lime slices. The complex, tangy flavour of the Sustainable Drink Mixer makes this much better than a regular soda.

Mango Lassi Swirl (Using Coulis)

The coulis is thicker and richer. This makes it perfect for drinks that need texture, like a non-alcoholic lassi.

Ingredients:

  • 4 ounces of Plain or Vanilla Yogurt
  • 3 ounces of Mango Juice (or water/milk)
  • 1 tablespoon of Mango Skin Syrup (to make it sweeter)
  • 2 teaspoons of Mango Skin Coulis
  • A pinch of cardamom powder

Method:

Blend the yogurt, mango juice, and syrup until smooth. Pour this mix into a glass. Use a spoon to drizzle the coulis around the inside of the glass before you pour in the lassi. This creates a bright, swirling pattern. Or, swirl it gently on top before you serve it. Add a sprinkle of cardamom. This gives you deep mango flavour while making sure nothing goes to waste.

The Impact of Zero-Waste Mixology

The journey from wasted mango skins to a delicious, useful syrup is more than just a kitchen trick. It is a strong statement about how we see and use our food. Every time you make a cocktail or a mocktails non alcoholic with this Sustainable Drink Mixer, you are actively cutting down on food waste. You are saving resources. You are encouraging a more careful way of cooking and drinking.

The best part of this syrup is not just its delicious, complex flavour. It is also the good feeling you get from knowing you turned waste into a great product. This is a small change that brings big rewards. It is good for your taste buds and good for the planet. So, the next time you peel a mango, remember this: you are not just throwing away the skin. You might be throwing away a perfectly good cocktail. You are throwing away a chance to make a fantastic Sustainable Drink Mixer.


Frequently Asked Questions (FAQ)

Q: Can I use the skins from any type of mango?

A: Yes, you can use the skins from any kind of mango you have. The final flavour will change a little based on the type of mango and how ripe it is. But the basic steps for making the syrup stay the same. Very ripe mangoes usually give a sweeter syrup with less bitter taste.

Q: Why do I need to be careful about washing the mango skins?

A: Washing well is very important for two main reasons. First, it removes any possible leftover farm chemicals. Second, it reduces the urushiol in mango skins. This is the chemical that can cause a rash or allergy in some people. Cooking does help, but a clean skin is always the safest start.

Q: How long will the mango skin syrup last?

A: If you keep it in a clean, closed bottle in the refrigerator, the mango skin syrup should stay good for about two to three weeks. For a longer time, you can freeze the syrup. Pour it into ice cube trays. Once frozen, put the cubes in a freezer bag. They will last for many months this way.

Q: Can I use the mango skin syrup in baking or cooking?

A: Absolutely. This syrup is great as a shiny glaze for meat like grilled chicken or pork. You can also mix it into dressings for tropical salads. Or, use it to moisten cake layers. It adds a unique, deep mango flavour to many different foods.

Q: I don’t want to use sugar. Can I use a substitute like honey or agave?

A: Yes, you can use other sweeteners. But remember, the sugar is important for making a real syrup that works well as a Sustainable Drink Mixer. Sugar helps it stay fresh and gives it the right thickness. If you use honey or agave, you might need to use a different amount, and the syrup may not last as long. If you use a zero-calorie sweetener, the final liquid will be more of a flavoured water than a thick syrup.


References


Recent Posts


The Walk-In Pantry Secrets That Makes Sustainable Living Effortless

A brightly lit, wide Walk-In Pantry featuring light wooden shelving organized with uniform glass jars of bulk dry goods (grains, beans, pasta) and natural woven baskets for produce, illustrating an aesthetic and sustainable storage design

We’ve all been there: staring into a dark cabinet, hoping that last bag of flour hasn’t expired. We often find a chaotic mess of half-used items instead of what we need. For years, I struggled to make the most of my small kitchen storage. This stress caused unnecessary waste. But turning my cluttered closet into a functional, well-designed Walk-In Pantry changed how I shop and cook. Learning to master pantry design can simplify your life. It makes sustainable living feel easy and natural.


1. The Foundation of Effortless Sustainability: Why Design Matters

[Image Placement 1.1: A detailed close-up showing well-organized uniform containers on a shelf labeled “Bulk Goods.”]

Most people think that achieving Sustainable pantry ideas is only about what you buy. They focus on choosing local, organic, or bulk foods. That is certainly important. But poor physical design often ruins these good efforts. If you cannot clearly see what you have, you will always buy too much. This leads to food waste, which defeats the purpose of sustainability.

A walk-in pantry gives you the best chance to build sustainability right into the structure. It is different from a small kitchen pantry cabinet or a simple closet. A walk-in space lets you create dedicated areas, ensure good air movement, and see everything easily. It is more than just a storage spot. It becomes an organized, efficient place that supports a low-impact lifestyle.

How to Do It: Defining Zones

Your first step is to turn your walk-in pantry into a sustainable powerhouse. To do this, you must set up specific working zones. This is about more than just organizing things. It is about creating logical and easy habits.

  • The Bulk Zone: Place this area near the entrance or on strong, lower shelves. This is where you keep heavy, large containers. This zone is for dry goods you buy in large amounts, like grains, beans, and flour. Buying in bulk greatly cuts down on packaging waste.
  • The Decant and Display Zone: Use the middle shelves, which are at eye level. This is for your matching glass or ceramic containers. Decanting all food items, from pasta to snacks, immediately removes visual mess. You can easily check your stock. Expiration dates become less important because you are only refilling, not replacing old items.
  • The Root and Produce Zone: Create a cool space low down. Use breathable wire baskets or open wooden crates here. Store onions, potatoes, garlic, and winter squash here. Proper airflow in this area is often forgotten in standard designs. Air circulation keeps produce fresh longer. This means fewer store trips and less spoilage.
  • The Re-Use/Recycling Station: This small zone is very important. Here, you store things like cloth napkins, reusable shopping bags, and glass jars you plan to use for preserving later. Also, keep a separate, clearly labeled bin for soft plastics or items that cannot be recycled easily. This station serves as a strong reminder to grab your reusable items before you leave the kitchen.

2. Maximizing Space: Smart Layouts for Different Pantry Types

Walk-in pantries come in many shapes and sizes. The design must fit the space to truly promote Sustainable pantry ideas. You might have a large room or a compact small pantry room. In either case, the main goal is maximum visibility and easy access.

The Narrow Walk-In Pantry

Many homes have a narrow walk in pantry. This is common in older houses or in closets that were changed into pantries. The design here must focus on shelves that are not deep.

  • Shelving Depth: Do not use deep shelves. The ideal depth is between 10 and 12 inches. This forces you to store items in just one or two rows. This way, you never lose an item in the back or forget about it. This directly stops food waste.
  • Vertical Space: Use the height of the room. Build shelves that go almost to the ceiling. Keep a small, stylish step stool nearby that you can easily tuck away. The highest shelves are perfect for appliances you use less often or for seasonal goods. Store these in light, clearly labeled boxes.

The Small Pantry Room

If your space is a small pantry room that is somewhat square, you can use corner shelving and the back of the door cleverly.

  • Corner Shelves: Corners can be dead space. Instead, put in shallow, spinning corner shelves or lazy Susans. This removes hidden spots where things get lost. This is vital for keeping track of smaller items like spices, oils, or sauces.
  • Door Storage: The back of the pantry door is very valuable space. Put up thin, layered wire racks or clear pocket holders there. This is the perfect place for small jars, spices, and lightweight clips for bulk bags. These are the items that usually make deep shelves look messy.

How to Do It: Material Selection

The materials you choose decide how long your pantry will last and what its environmental impact will be.

MaterialSustainability BenefitDesign Application
Plywood/Bamboo ShelvingLong-lasting, grows quickly, and is often sourced responsibly. Look for FSC certification.Use for the main shelf structure and any counter surfaces.
Glass ContainersCan be reused forever, is non-absorbent, and allows you to see everything. This means you need fewer labels for contents.Use to store and display dry goods, especially in the main viewing zone.
Ceramic CrocksVery durable, non-toxic. They help keep temperatures steady for fermenting or keeping salt or cultures active.Store sourdough starters, homemade fermented foods, or bulk salt.
Natural Fiber BasketsMade from renewable materials like jute, cotton, or seagrass. They allow air to move through.Use them to store root vegetables, reusable shopping bags, or bread.
Milk Paint/Low-VOC PaintBetter for the environment, low in toxic fumes, and provides a clean look.Use on the pantry’s interior walls and ceiling. (This is where your keyword Paint Plates can be subtly integrated for visual aesthetic)

Using low-VOC or milk-based Paint Plates for your walls and trim keeps the air inside your pantry clean. This is a small but important part of creating a truly sustainable storage area.


3. Illumination and Circulation: Essential Sustainable Elements

A sustainably designed walk-in pantry is more than just a dark closet with shelves. It should be a well-lit, breathing system for your food.

The Power of Light

If you cannot see an item, you will not use it. This means it will expire. This simple fact makes lighting a key part of Sustainable pantry ideas.

  • LED Integration: Install long-lasting, low-energy LED strip lights. Put them under the shelves or vertically along the door frame. These lights use very little power and last for a very long time. This reduces replacement waste.
  • Motion Sensors: The best light is one you never forget to switch off. Install motion-sensor switches for your pantry lights. This ensures the light is only on when you open the door and are inside. This saves energy and makes the right habit easy.
  • Natural Light: If you can, put in a small, high window or a sun tube to let in natural light. Natural light is great for seeing things. It also helps stop mold and mildew from growing in the closed space.

The Necessity of Airflow

Good air circulation is vital. This is especially true in a small pantry room where moisture can get trapped easily. Air that does not move causes produce to spoil faster. It can also harm the quality of dry goods.

  • Venting: If your pantry is inside the house, make sure you install a small vent or fan. It could be near the floor. It should connect to your home’s air system or circulate cool air. Air movement is a very effective way to preserve food.
  • Open Shelving: Avoid using closed cabinets inside the walk-in pantry itself. Open shelving allows air to move freely around your stored items. This is much better for keeping food fresh than sealing it in a box with no air flow.

How to Do It: Simple Steps

  1. Switch to Motion: Replace your old light switch with a motion sensor switch.
  2. Add Gaps: Make sure there is one inch of space between the back of your shelves and the wall. This small gap allows air to move naturally up and behind your storage. This prevents cold spots and moisture issues. It improves your Sustainable pantry ideas for preservation.
  3. Use Breathable Baskets: Any containers you use for produce, like potatoes or apples, should let air through. Use woven baskets or open wire bins. Do not use solid plastic containers.

4. Integration with the Kitchen Workflow

The most effective kitchen pantry design saves movement and improves efficiency. A sustainable pantry should be so linked to the kitchen that using it is almost automatic.

The Prep Zone

Within the walk-in pantry, set aside a small counter area or a shelf that pulls out. This will be your “Prep Zone.”

  • Decanting and Weighing: This spot is perfect for bringing in bulk purchases. You can immediately pour them into your permanent containers here. This removes the plastic bags before they ever enter the main kitchen area. It is also the ideal place to keep a small kitchen scale. This allows you to measure and portion mindfully without having to carry large containers to the main countertop.
  • Refill Station: Keep empty jars and cleaning tools here. This includes a small brush for dusting shelves or cleaner for jar lids. Creating a dedicated area for maintenance makes the sustainable practice of cleaning and reusing containers an easy, natural part of your routine.

Linking the Layout to Sustainable Goals

  • Crockery and Cutlery Storage: If you have the room, consider storing sustainable crockery here. This could be your serving platters or special dishes that you do not use often. Moving these heavy items out of your main kitchen cabinets frees up space for your daily items. It also reduces visual clutter. This supports the minimalist side of Sustainable pantry ideas.
  • Recycling Proximity: Put the recycling bin for glass, cardboard, and metal right near the pantry door. This makes disposing of items a simple one-step process when you are unpacking or decanting. It keeps the main kitchen area tidy. This makes the sustainable act of recycling very convenient.

Frequently Asked Questions (FAQ)

Q: How do I incorporate the “Buy Bulk” strategy into a small pantry room?

A: Even a small pantry room can work with bulk buying. Focus on using height. Do not use large, round buckets. Instead, use tall, slim, square or rectangular containers. These fit closely against the wall. Only buy the amount of an ingredient you can completely empty into a permanent container. This ensures you do not have messy half-bags cluttering your shelves.

Q: Is it more sustainable to use plastic or glass containers?

A: Glass requires more energy to make at first. However, it can be reused forever. It is also non-absorbent. This makes it the better choice long-term for Sustainable pantry ideas. Glass lets you see everything perfectly. This prevents waste. It also does not release chemicals into food, unlike some plastics. If you must use plastic, choose containers that are made from recycled materials.

Q: What is the ideal shelf depth for a narrow walk in pantry?

A: For a narrow walk in pantry, the shelves on both sides should be no deeper than 12 inches. A depth of 10 inches is even better. This ensures that standard quart or gallon jars can be placed in a single line. This is the most crucial design point for ensuring you see and use items before they spoil.

Q: Where should I put my reusable bags in a kitchen pantry?

A: Put them on hooks or in a tall, skinny basket on the back of the pantry door. Place them near the exit. The goal is to make them easy to see and easy to grab. They should be the last thing you notice when you leave the pantry. This serves as a strong reminder before you go shopping.


References


Recent Posts


The Ultimate Eco-Friendly Decor Hack

A cozy living room with natural light streaming through an eco-friendly bamboo shade on a large window. A light-colored sofa, throw blanket, and potted plants create a relaxed, sustainable living space. Keywords: bamboo shades, eco-friendly, living room, natural light, window coverings, sustainable decor.

For anyone striving for a beautiful, custom-feeling home without breaking the bank or contributing to fast décor culture, the struggle is real. For years, making significant changes felt daunting, as if sustainable living meant sacrificing style. But after discovering the simple, transformative power of bamboo shades (the ultimate Eco-Friendly window coverings), it becomes clear that high impact and Zero waste principles can go hand-in-hand. This is the simple change using bamboo that can make any space feel like a mindful home.


Introduction: More Than Just a Quick Fix

In the world of home décor, we see many passing trends. We are often pushed to buy the newest colors, the latest materials, and constantly upgrade our homes. But what if the best “hack” was not about following a trend? What if it was about making a simple, thoughtful choice that offers timeless style and a measurable positive impact?

Let us talk about bamboo shades. These natural woven window coverings are more than just a style choice. They are an important piece of the sustainable living movement. And offer an Eco-Friendly update that is both beautiful and responsible. They perfectly mix texture, light, and ethical sourcing. They can change a room’s entire feeling with little effort and maximum benefit.

This article will show why bamboo shades are the ultimate Zero waste décor hack. We will cover everything from their sustainable origins to a detailed, simple guide on how to measure, install, and style them in your home.


The Bamboo Advantage: Why It Is the Best Sustainable Material

To understand why bamboo shades are a great Eco-Friendly hack, you must first know about the amazing qualities of the material itself.

Rapid Growth and Earth Benefits

Bamboo is not a tree; it is actually a type of grass. It is one of the fastest-growing plants on earth. Some kinds can grow up to three feet in a single day. This fast growth means it can be cut often without the need for replanting, making it a highly renewable resource. Hardwood can take many decades to grow fully. In contrast, bamboo reaches full growth in only three to seven years.

This fast growth also makes bamboo excellent at storing carbon. Bamboo forests take in much more carbon dioxide and produce more oxygen than similar stands of trees. This makes it a key tool in fighting climate change. Choosing bamboo helps reduce the carbon in the air.

Low Environmental Impact

Growing bamboo is very low-impact. It grows well naturally and usually does not need large amounts of pesticides, weed killers, or too much water. These things are often used when growing cotton, timber, and many man-made materials. Also, cutting bamboo does not usually need heavy machines. This helps to prevent soil erosion and minimizes harm to animal habitats. The roots of bamboo also help to hold the soil in place. This is especially true on sloped land. This further stops erosion and runoff.

Zero Waste and Breaking Down Naturally

At the end of their long life, the natural fibers of bamboo shades can break down fully. This is a very important part of the Zero waste idea. This is very different from man-made window coverings like vinyl or plastic blinds. These often sit in landfills for hundreds of years. Even making bamboo products usually creates less waste. This is because almost all parts of the plant can be used.


The Aesthetic Impact: Making Your Home Stylish with Natural Texture

Being sustainable does not mean you have to give up style. In fact, bamboo shades are a favorite of designers precisely because they are beautiful and fit many looks.

The Beautiful Light Filter

One of the best things about woven bamboo shades is how they soften the sunlight. They do not block light entirely, like a blackout curtain, or reflect it harshly, like aluminum blinds. Instead, bamboo spreads the light out. This fills the room with a warm, golden, and very soft light. This effect immediately improves the mood of the room. It makes the space feel cozy, airy, and inviting. This also increases the perceived value of your home.

Texture Is Key to Modern Style

In homes with minimalist, modern, or simple Nordic design, texture is often more important than color. Bamboo adds a rich, natural layer of texture. This grounds the space and adds depth without the need for busy patterns. The natural colors of the woven fibers change (from light honey to deep caramel). This makes the shades visually interesting. They match almost any décor style, whether you like coastal, boho, or mid-century modern looks.

Bringing the Outside In

Bamboo is a material that links the inside of your home with the natural world outside. This link is key to biophilic design. This is the idea that people have a natural need to connect with nature. By using bamboo shades as your window coverings, you are easily applying a key rule of healthy, relaxing design.


The “How-To”: Making the Simple Switch to Bamboo Shades

This section explains the “decor hack” part. Replacing old, possibly unsafe, or non-recyclable window coverings with bamboo is a simple job that gives big rewards. Here is the easy, step-by-step guide.

Step 1: Measure Carefully for the Best Fit

Getting your measurements correct is the most important part of putting up the shades. Bamboo shades look best when they fit perfectly. You have two main choices for mounting them: inside mount and outside mount.

A. Inside Mount: The shade goes inside the window frame. This gives a clean look, like it was built in. This is best if your window trim is decorative.

  • Measure the width at the top, middle, and bottom of the window opening. Use the smallest number.
  • Measure the height from the top of the opening to the window sill.
  • Note: Most companies will take off a small amount of space (usually 1/4 inch to 1/2 inch) from your width measurement. This is to make sure the shade fits without rubbing. Always check what the seller suggests.

B. Outside Mount: The shade is put on the wall or window trim outside the opening. This is a good choice for windows that are slightly crooked, or if you want to make a window look bigger.

  • Decide how wide and tall you want the shade to be. A good tip is to add 3 to 6 inches to the width on each side. That means 6 to 12 inches in total. Also, add 3 to 6 inches above and below the window opening.
  • Tip: Adding extra width stops gaps where light can peek through. It also makes the window look more substantial and custom-made.

Step 2: Pick Your Style of Weave and Lining

  • Weave Tightness: Tighter weaves offer more privacy and block more light. Looser, thin weaves offer the most texture and light filtering. Choose based on what the room is used for. For example, bedrooms often need tighter weaves or linings.
  • Lining: For bedrooms or bathrooms that need full privacy, choose shades that come with a privacy or blackout lining. Look for cotton or recycled materials for an extra Eco-Friendly touch. The lining is put on the back. It completely hides the view through the bamboo fibers.

Step 3: Installation Is Quick and Simple

Bamboo shades are usually easy to put up. This makes them a true do-it-yourself decor hack.

  1. Mark the Brackets: Hold the top piece of the shade up to where you will mount it. This can be inside the window frame or on the wall. Use a pencil to mark where the mounting brackets will go. Make sure your marks are level.
  2. Drill Starter Holes: Use a drill bit that is slightly smaller than your screws to drill starter holes. Helpful Hint: If drilling into drywall, use wall anchors for extra support. If drilling into wood trim, just drill into the wood.
  3. Attach the Brackets: Screw the mounting brackets into place firmly.
  4. Hang the Shade: The top bar of the shade usually snaps right into the brackets you installed. Gently push the top bar into the brackets until you hear a solid click.

Sustainable Living: How Shades Lead to a Better Lifestyle

Switching to bamboo shades is a great starting point. The real benefit of this Eco-Friendly hack is the mindset it helps create. It is a way into a larger philosophy of sustainable living.

The Zero Waste Idea

The main goal of Zero waste is to send as few items as possible to a landfill. By choosing a natural, renewable, and biodegradable material like bamboo, you are supporting a circular system. This simple choice sets an example for what you buy in the future:

  • Seek Natural Fibers: Use this idea when buying bedding, towels, and blankets. Look for things like organic cotton, linen, or hemp.
  • Focus on Long-Term Use: Buy items that are made to last. This reduces the need to replace things often. Bamboo shades are strong and can easily last for ten years or more if cared for well.
  • Support Good Supply Chains: When buying bamboo shades, look for companies that clearly share their ethical sourcing and manufacturing steps.

Insulation and Energy Saving

Bamboo shades help create a more sustainable home by saving energy. The woven material creates a layer that helps stop heat from moving through the glass. In the summer, they lower the heat coming in from the sun. This means your air conditioning does not have to work as hard. In the winter, they can help stop heat from going out.

This reduction in energy use does two good things. It lowers your utility bills and also cuts down your home’s total carbon emissions. This is a great win for both your money and the planet.


Practical Examples and Ideas for Styling

Bamboo shades are very versatile. They fit easily into almost any room in your home.

The Living Room: Privacy and Warmth

  • The Look: Put a medium-dark bamboo shade with sheer white linen drapes on each side. The drapes frame the window and add a soft feel. The bamboo shades add texture and allow you to control privacy.
  • How-To: Hang the sheer drapes on a separate, wider curtain rod. Put this rod a few inches above the window frame. The bamboo shade is installed inside the frame. This creates layers for controlling the light.

The Bedroom: Better Rest and Texture

  • The Look: Choose a tightly woven bamboo shade that has a full blackout lining. This ensures the room is completely dark for sleeping. It still keeps the natural look during the day.
  • How-To: Use the blackout bamboo shade mounted inside the frame. Combine this with blackout curtains hung on an outside-mounted rod. This double layer is the best way to block light.

The Bathroom: Water Resistance and Durability

  • The Look: Use a lighter-colored, tightly woven shade. This allows for maximum light while still giving full privacy. Bamboo naturally resists water. This makes it a better choice than some fabrics in areas with high moisture.
  • How-To: Make sure your bathroom has good airflow. Think about treating the shades with a mild, non-toxic wood sealer if they are right next to the shower or sink.

Maintenance and Long Life: Keeping Your Shades Perfect

Another Eco-Friendly benefit of bamboo shades is that they last a long time and are easy to care for. This is part of their Zero waste status.

  1. Dust Regularly: The best way to care for them is with regular, gentle dusting. Use a feather duster, a clean, soft cloth, or the brush attachment of your vacuum cleaner on a low setting. This stops dust from building up and making them look dull.
  2. Clean Small Spots: For small spots or spills, use a cloth that is only slightly damp. Do not soak the bamboo. Use a very mild, non-toxic soap. Dab the spot gently. Immediately wipe it dry with a clean, dry cloth.
  3. Cord Care: Keep the operating cords from tangling. Check the moving parts now and then. Most shade parts are simple. They can often be fixed or replaced by parts from the company. This helps the whole product last longer.
  4. Avoid Water Spray: Never spray water directly onto the bamboo. It resists water, but too much water can make the fibers and operating strings weak.

By taking care of them in this simple, easy way, your Eco-Friendly bamboo window coverings can last for many years. This proves that the sustainable choice is often the strongest and most money-saving choice over time.


Conclusion

The path to a more thoughtful and Eco-Friendly home does not have to begin with a huge, expensive remodel. Often, the best results come from the easiest, most intentional choices. Bamboo shades are the ultimate Zero waste decor hack. They give an immediate, noticeable upgrade to your space. At the same time, they fit perfectly with the ideas of sustainable living.

When you choose this natural material for your window coverings, you are doing more than just dressing a window. You are making an investment in the health of your home, your planet, and your personal style.


References


Recent Posts


10 Reasons To Go On Vacation In A Tiny House

A modern, dark-wood tiny house with large windows sits nestled on a stone path next to a flowing river, backed by a dense pine forest and snow-capped mountains at sunrise, perfectly capturing a serene and isolated mountain Vacation spot.

In a world that often demands more—more space, more things, more complexity—finding a moment to just be can feel like a luxury. We’ve all felt the familiar drag of life’s endless to-do list, which is why a Vacation is essential. The next time you need to reset, consider shrinking your world, just for a little while. This is the simple secret behind the growing joy of a tiny house getaway.


Introduction

The tiny house movement has caught the attention of many people. It is not just a new way to live full-time, but also a fresh and very meaningful way to take a Vacation. Escaping the routine of our big, traditional lives does not need a huge resort or an expensive, high-maintenance villa. Instead, it often requires the opposite: a smart, perfectly sized space. This space helps you focus on the world outside and the people you are with.

A tiny house Vacation is your chance to try out a simpler, minimalist life. It is a time to step away from constantly buying things. It lets you lower your impact on the environment. You trade your large home’s cleaning tasks for extra time to watch the sunrise. Far from feeling cramped, a well-designed tiny home offers a deep sense of freedom. You are not just renting a space; you are choosing a way of thinking. This mindset focuses on important experiences instead of too many things.

The benefits of choosing a tiny house for your next trip are huge, from saving money to feeling closer to nature. What follows are 10 strong reasons why this small dwelling leads to a truly big adventure.


1. Reconnect with Nature and Yourself

One of the best and most immediate benefits of a tiny house Vacation is that you will be very close to nature. Hotels are often built in busy city areas. Tiny house rentals, however, are usually set in beautiful, quiet spots. These include forests, mountain hideaways, lakeside areas, or gentle meadows.

The careful design of most tiny homes makes this connection even stronger. They often have huge windows, folding doors, and big decks. These features make the line between the cozy inside and the great outdoors less clear. This means your living room view is always changing. The sound of birds is your morning alarm. And watching the stars is your evening entertainment.

This forced closeness to nature is a great cure for modern-day stress. It helps you take a real break from your screens. It encourages you to put down your phone and instead read a book, use a hiking map, or talk with your travel partner. This is more than just a change of view; it is a vital reset for your mind and feelings.

Example: Picture yourself waking up in a tiny house in the Scottish Highlands. A tall window next to your bed perfectly frames the misty mountains. You walk out onto a small wooden deck, and the only sound is the gentle wind. This feeling of being truly immersed in nature is a healing experience you cannot get in a standard hotel.


2. Save Money Right Away

For many people, the first reason they like the tiny house idea is the money they save. This benefit works perfectly for a Vacation. Renting a tiny house is almost always cheaper than booking a traditional hotel room or a big holiday rental of the same quality and unique style.

The lower cost of your stay frees up a lot of your budget. Instead of spending too much on expensive nightly rates, you can use that money for great activities. This might include a local cooking lesson, a guided fishing trip, great meals at local places, or just making your trip a few days longer. The tiny house makes high-quality travel affordable. It changes what ‘luxury’ means—it is not about the size; it is about great design and location for a much lower price.

How to do it: Budgeting Brilliance

  • Compare Prices: When you plan your trip, compare the cost of a nice tiny home in a good area (like near a National Park) with a regular-sized rental. You will often find the tiny house offers a more special, custom-built experience for less cash.
  • Use the Kitchen: Tiny houses almost always come with a small but full kitchen. Cooking just a few meals a day in your tiny home greatly cuts down on eating-out costs. This adds up to big savings throughout your Vacation.

3. Enjoy the Happiness of Simple Living

A tiny house shows you the best of smart design. It makes you live with only what you truly need. This limit is surprisingly freeing. When you only have space for a few outfits, a couple of books, and the basic items, the stress of clutter and endless choices disappears.

This simple living rule of “less is more” directly helps your mind during your Vacation. Less space means less time spent cleaning, organizing, or looking for lost things. It is a chance to live mindfully. You become very aware of every item you bring and use. This simplicity allows you to step off the continuous cycle of buying things. You can focus purely on relaxing, connecting with others, and exploring. The simple home leads to a simpler, calmer mind.


4. See Clever, High-Quality Design

Tiny houses are not just simple sheds; they are often amazing pieces of architecture. Since the space is small, every part is planned with great care. This leads to truly smart, high-quality, and often custom-made design details.

When you choose a tiny house for your Vacation, you often stay in a space with luxury finishes. These would be too costly to use in a regular-sized home. Think about custom-built cupboards, high-end taps and fittings, beautiful wooden parts, and clever ways to save space, like beds that fold into the wall or sliding walls. The experience is often special, unique, and deeply personal. It gives you a level of charm and skilled work that large hotel chains cannot match.

Example: Some tiny houses are converted shipping containers with cool, modern interiors. Others are handmade wooden cabins with a sleeping loft that has a skylight for perfect night-time viewing. This wide range of unique design makes choosing your rental an adventure on its own.


5. Take a Real Break from Screens

While many tiny house rentals offer Wi-Fi, more and more hosts are offering cabins made just for a break from screens. These often sit far from strong phone service, which encourages you to turn off your devices on purpose.

The tiny house setting perfectly supports this goal. Without the large rooms and endless TV channels of a hotel, your attention naturally moves to activities that do not involve screens. You might find yourself reading more, playing board games (often provided by the host), writing, drawing, or just having a talk without any interruptions. This intentional break from the digital world is likely the most helpful part of the Vacation for many tired, modern travelers.

How to do it: The Digital Detox Lockbox

  • Many tiny house retreats made for digital breaks offer a simple lockbox. The process is clear: when you arrive, put all your non-essential electronics (phones, laptops, tablets) into the box. Agree not to open it until you leave. This small step creates an immediate, strong barrier between you and your digital life. It makes sure you get the full benefits of the experience.

6. Keep Your Environmental Impact Small

If you care about the planet, a tiny house Vacation is a choice you can feel good about. Because they are so small, tiny homes naturally need much less material to build. They also use much less energy to heat and cool.

Many rental tiny houses go even further. They often have sustainable technology that gives you a true off-grid experience. These may include:

  • Solar Panels: These provide clean energy from the sun.
  • Composting Toilets: These greatly reduce the amount of water used.
  • Rainwater Systems: These collect water for uses like washing (not drinking).

Staying in such a space connects you clearly to sustainable living. You can enjoy a relaxing Vacation with a much smaller carbon footprint. This feeling of being a responsible traveler is a growing and important part of the modern getaway.


7. Enjoy Complete Privacy and Quiet

In a hotel, you share walls, hallways, and public areas with many other guests. A tiny house, however, gives you total and complete privacy. These units are usually placed on private land. They are often far apart from others in a small group, or completely alone in a remote spot.

This quiet and separation is ideal for a trip for two, a private place for serious creative work, or simply a calm space for people who need to recharge alone. You control your surroundings. You are free from the noise of neighbours or the need to talk with staff. The tiny house becomes your own private safe place in nature.

Example: Think about a tiny house set on a vineyard or a busy farm. Though the farm might welcome visitors, your tiny home is hidden away on a far corner of the land, looking out over the fields. You can watch the local work from a distance or go out to join in. All the while, you have a personal, private base to return to.


8. Try Out the Tiny House Lifestyle

Perhaps you have thought about moving to a smaller house, building your own tiny home, or making your life simpler. A tiny house Vacation offers the perfect, easy way to try this lifestyle for yourself. It is a practice run—a weekend test drive of a big life change.

This direct experience helps you answer practical questions before you commit long-term:

  • How does it feel to cook in a very small kitchen?
  • Are you okay climbing a ladder to get to a high bed?
  • Do you truly like the simple way of dealing with storage and living space?

By trying the tiny house life on your Vacation, you gain helpful knowledge. This makes sure that if you do decide to go tiny forever, you do so with confidence and clear thinking.


9. Get Closer to Local Communities

Tiny houses are generally located outside of the main tourist areas. This places you closer to real local communities and unique cultural experiences. This is very different from the common, less personal feeling of staying in a large corporate hotel.

Staying in a tiny house often means buying your food from a local farm stand. You can visit a small bakery or eat a meal at a local, favourite restaurant that is not a chain. Hosts often give personal suggestions. They share their inside knowledge of the best trails, hidden spots, and community events. This deeper look into the local culture makes your Vacation much richer than a regular tourist trip.

How to do it: Maximise Local Engagement

  • Ask Your Host: Before you arrive, email your host. Ask for their top three favourite local spots, such as cafes, hiking paths, or shops. These ideas are extremely helpful.
  • Visit a Farmer’s Market: Plan one of your tiny house meals around fresh food from a local market. This supports the people in the area and makes sure you are eating very fresh, seasonal food.

10. Start Creative Ideas and Focus Better

The small, focused environment of a tiny house is surprisingly good for creative thinking and deep work (if you need to work). Experts have noted that a few limits on your environment can actually improve focus and creativity. When everything has its place, and you are free from the distractions of a large, messy home, your mind has room to wander and create in a useful way.

Many tiny house rentals are sought out by writers, artists, and people who work remotely. They look for a calm, focused retreat. The peace of nature combined with the simple function of the home creates the perfect state of ‘flow’ for starting a creative project or enjoying a meaningful time of personal thought.


How to Book Your Tiny House Vacation

Booking a tiny house is easy now, thanks to specialized rental websites and booking platforms.

1. Finding the Perfect Tiny House

  • Special Platforms: Companies (both big and small) that only focus on tiny houses or off-grid experiences are great places to look first, as they offer carefully chosen options.
  • General Booking Sites: Major holiday rental websites now have sections for ‘Tiny House’ or ‘Cabin’. Use the search filter for ‘Unique Stays’ or ‘Tiny Homes’ to find what you need.

2. Key Things to Look For

  • Location: Decide what kind of nature you want: beach, forest, desert, or mountains. Search by the region or by the nearest National Park.
  • Things You Need: Be clear about your must-haves. Do you need Wi-Fi to work, a hot tub for luxury, or are you aiming for a fully off-grid trip (which means no electric plug-ins)?
  • Beds: Check the sleeping arrangements carefully. Tiny houses often have raised bedrooms reached by a ladder. Make sure this works for everyone in your group.

3. Getting Ready for Your Stay

  • Pack Light (Very Important): Space is tight. Pack only a few key outfits, items that have many uses (like travel soap), and only essential devices. You will be glad your bags are not blocking the floor.
  • Bring Fun Activities: Assume the Wi-Fi will be weak or non-existent. Pack physical books, a deck of cards, or a small board game.
  • Plan Simple Meals: Since storage and fridge space are small, plan simple meals. Buy groceries often and locally, instead of trying to buy a whole week’s worth of food at once.

FAQ

Q: Are tiny houses comfortable enough for a long Vacation?

A: Yes, they are. Modern tiny houses are designed to be comfortable and fully useful. They are small, but they have full bathrooms, comfy beds (often in a loft), temperature control, and kitchens with good equipment. The smart design means every space is used well, so you do not have to give up comfort.

Q: Can a family stay in a tiny house?

A: Many tiny houses are built for two people. However, more and more are being built to hold families. They often have two separate loft areas or one bed on the main floor and one loft. Always check the listing for the exact number of beds and how many people can stay. Look for tiny houses on wheels (THOWs) or custom-built tiny cabins, as they can have different layouts.

Q: What is the main difference between a tiny house and a cabin Vacation?

A: A tiny house is defined by its small size (usually under 400 square feet). It is also based on the idea of simple, efficient, and often sustainable living. A cabin might also be small, but it might not have the same level of smart architecture or focus on efficient, multi-use space and green technology that defines the tiny house movement. Tiny houses offer a focused, intentional experience of living small.

Q: Is it possible to go completely off-grid?

A: It is absolutely possible. Many tiny house rentals are made specifically for an off-grid experience. They use solar power, gas, and water collection systems. If you want a complete break from the electricity grid, look for words like “off-grid,” “digital detox,” or “solar powered” in the rental description. Be ready to use less power for items like hair dryers.


Reference Section


Recent Posts


Dream Backyard Landscaping Ideas That Will Blow Your Mind

A breathtaking, multi-level backyard landscape featuring a pool, a fire pit area with built-in seating, and a dining pergola covered in flowering vines, all bathed in warm, soft sunlight. This is a stunning example of luxury Backyard Landscaping design.

Hey there, fellow dreamers and garden lovers! Like many, I’ve spent lots of time looking at pictures, wishing for a backyard that feels like a peaceful spot just for me. My journey to change outdoor spaces started with a small, boring patch of grass and a big dream. Through trying, learning a lot about Backyard Landscaping, and loving the process of making beautiful, useful spaces, I’ve found the ways to turn those amazing ideas into real places. Join me as we explore how to plan the backyard of your dreams, one inspiring idea at a time!


Do you feel tired of looking at a plain green area? Do you wish for a backyard that is fun and relaxing, instead of feeling like work? Many people feel this way. Our backyards are part of our homes. They are a space ready to be changed into a peaceful outdoor haven. This is where you can make memories, find peace, and enjoy nature. Do not worry. Making a dream backyard landscaping plan does not need a huge budget. It also does not need a team of experts. With a few good ideas, smart planning, and some hard work, you can build a wonderful and real outdoor paradise. This space will truly amaze you.

This full guide will show you fresh backyard landscaping ideas. It will give you easy “how-to” advice. It will also tell you about being sustainable. This makes sure your outdoor space is kind to the planet and also very beautiful. Get ready to use all the potential of your yard!

Defining Your Dream: What Does “Amazing” Mean to You?

Before we look at specific designs, take a minute to think about your perfect outdoor space. Is it a lively spot for parties? And is it a quiet garden for thinking? Is it a play area for children and pets? Or is it a garden that grows food? Knowing what you care about most and how you live is the first key step. It is key for any successful backyard landscaping project.

Think about these things:

  • Purpose: Do you want to host, relax, garden, play, or eat?
  • Style: Do you like modern, rustic, simple, or tropical looks?
  • Time for Upkeep: How much time will you spend taking care of it?
  • Budget: Be real about how much money you can spend.
  • Weather and Land: What plants grow well where you live? What natural features does your yard have?

Once you know what you want, the fun part starts.

Section 1: Making Zones for Great Use and Easy Flow

A very effective backyard landscaping trick is to make separate “zones” in your yard. This makes the space seem bigger and much more useful. Think of it like making different rooms in your house, but outside.

Idea 1: The Outdoor Living Room – Comfort Outside

Bring your indoor comfort to the outdoors. An outdoor living room is a set area for sitting, reading, and casual get-togethers.

How to Do It:

  1. Mark the Space: Use paving stones, a wood deck, or a large outdoor rug to show the edges of this area. A cover like a pergola or a big umbrella can give shade. It also helps define the “ceiling.”
  2. Soft Seating: Buy tough, weather-proof sofas, chairs, and footrests with soft cushions. Outdoor throw pillows and blankets make it feel extra cozy.
  3. Feeling and Light: Use string lights, lamps, and maybe an outdoor fireplace or fire pit. This adds warmth and light at night. A small, easy-to-move outdoor speaker can play music for the right mood.
  4. Mixing in Plants: Use large plants in pots, hanging baskets, or raised garden beds around the edges. This makes the space softer. It connects the spot with the natural yard.

Idea 2: The Outdoor Dining Spot – Eating Outside

Why eat inside? You can eat under the stars or in the warm afternoon sun. A special place for dining makes every meal better.

How to Do It:

  1. Where to Put It: Pick a spot that is easy to reach from the kitchen. Keep it away from paths where people walk a lot. Think about morning sun for breakfast or evening shade for dinner.
  2. Strong Base: A patio made of natural stone, concrete, or a strong wood deck gives a firm spot for your dining set.
  3. Dining Set: Choose strong, weather-safe furniture. Make sure it fits your overall backyard style. Tables that can be made longer are great for guests.
  4. Shade and Light: A big patio umbrella, a roll-out cover, or a pergola with climbing plants (like wisteria) gives needed shade. Put in outdoor lights like wall lamps, hanging lights, or focused spotlights for eating at night.

Section 2: Adding Water Features for Calm and Sound

Not many things add as much calm and beauty to backyard landscaping as water features. The gentle sound of water running can hide city noise. It makes a very peaceful feeling.

Idea 3: Still Ponds and Fountains – Quiet Look and Sound

Whether it is a still pond that shows the sky or a bubbly fountain, water is lovely to watch.

How to Do It:

  1. Pond Spot: Choose a spot that is fairly flat. It should get some sun. Do not put it under trees that lose their leaves (to keep the leaves out). Dig the shape of the pond. Line it with a special pond liner. Add the right filter system.
  2. Water Plants: Use water plants like lilies, irises, and tall grasses. These make it look nice and help clean the water naturally.
  3. Fountain Setup: Many fountains that stand alone are simple to put in. Just place them, fill them, and plug them in. For bigger, custom fountains, make sure the water pipes and electricity are set up right.
  4. Lighting: Lights under the water in ponds or bright lights aimed at fountains can look magical when it is dark.

Idea 4: Winding Stream or Waterfall – Nature’s Music

For a more real feel, a small stream or waterfall that cycles the water can look like a natural scene.

How to Do It:

  1. Plan the Path: Use a garden hose to mark the way your stream or waterfall will go. Think about height changes to make natural drops.
  2. Lining and Rocks: Dig out the path. Line it with pond liner. Place different sizes of rocks and pebbles carefully. This makes it look like real small rapids and pools.
  3. Pump System: A pump placed in the lowest part of the stream pushes water back up to the highest point. This makes the water flow all the time.
  4. Planting: Plant plants that love water, like ferns and hostas, along the sides. This helps connect the water feature to the rest of the yard landscaping.

Section 3: Sustainable Backyard Landscaping and Green Choices

A truly amazing backyard is not just pretty. It is also good for the earth. Making sustainability part of your yard landscaping makes your space healthier. It helps the planet, too. This means using less water, helping local plants and animals, and making less waste.

Idea 5: Dry Landscaping and Low-Water Gardens – Beauty with Less Water

Dry landscaping, or xeriscaping, uses plants that need very little water. This is great for simple backyard ideas and saving this precious resource.

How to Do It:

  1. Smart Plan: Put plants that need the same amount of water together. Make low spots or rain gardens to catch and soak up rainwater.
  2. Better Soil: Mix in natural materials to the soil. This helps the soil hold water better.
  3. Right Plants: Pick native plants that are used to your local weather. Find plants that need little water. These include types of cacti, lavender, and many tall grasses.
  4. Use Mulch, Always Use Mulch: Put a thick layer of natural mulch (wood chips, leaves) around plants. This stops weeds. It keeps the soil wet. It also keeps the soil temperature steady.

Idea 6: Bee Gardens and Native Plants – Helping Local Nature

Invite useful insects, birds, and butterflies to your yard. Plant native species. Make a friendly place for these tiny helpers.

How to Do It:

  1. Find Native Plants: Ask local plant shops for a list of plants that grow naturally in your area. These plants work best with your weather and soil. They give food and shelter for local animals.
  2. Have Many Kinds: Plant a wide mix of flowers. Make sure they bloom at different times of the year. This gives food all year long.
  3. No Bug Killers: Use natural ways to control pests. This keeps the helpful insects safe.
  4. Water Source: A shallow bird bath or a small water area gives a place for wildlife to drink.

Section 4: Making the Most of Small Areas and Simple Backyard Ideas

Even the smallest yard can become a great haven. Simple backyard ideas focus on smart plans, items that do more than one thing, and growing plants vertically. This uses the small space in the best way.

Idea 7: Vertical Gardens and Living Walls – Grow Up, Not Out

When you do not have much room on the ground, grow up! Walls of plants look amazing. They can even grow food for you.

How to Do It:

  1. Pick Your System: You have choices. These range from simple stacked planters and hanging pockets to fancy wall systems with built-in watering.
  2. Check Sunlight: Pick plants that can handle the light on your vertical wall. Small cacti, ferns, herbs, and small yearly flowers are popular choices.
  3. Install It: Attach your vertical garden safely to a strong fence, wall, or stand-alone frame. Make sure water can drain out properly.

Idea 8: Small Fire Pits and Seating – Cozy Spots

A fire pit is a great spot to gather. Even small yards can fit one.

How to Do It:

  1. Be Safe First: Make sure your fire pit is far away from buildings, low branches, and anything that can burn. Check the rules in your area.
  2. Size and Type: For simple backyard ideas, think about a metal fire bowl you can move. Or try a small, ready-made stone fire pit kit.
  3. Built-in Seats: Do not use big chairs. Think about making seats that are part of the structure around the fire pit. This saves room. It can also act as a low wall if you plan it well.

Section 5: The “How-To” Basics for Your Dream Backyard Landscaping

To make these ideas happen, you need some basic skills and knowledge.

Planning and Design (The Map for Success)

  1. Study Your Land: Know the special details of your yard. Note the sunlight during the day, existing trees or structures, soil type, water drainage problems, and the common wind direction.
  2. Draw a Plan: Draw a map of your yard to scale. Try out different ways to place your zones, paths, and main features. This is where your backyard landscaping vision becomes clear.
  3. Choose Plants: Look up plants that work well in your weather (hardiness zone). Consider their need for sun, soil type, and how big they will get. Think about how they look all year long. Also, remember sustainability. Choose native types when you can.
  4. Pick Materials: Think about paving stones, gravel, wood, stone, and other decorations. These items add a lot to the look and feel of the space.

Execution and Setup (Getting Your Hands Dirty)

  1. Clear the Area: Take out unwanted weeds, trash, and old structures.
  2. Leveling and Drainage: Make sure the ground slopes correctly, away from your house. Fix any standing water issues with special drains or by changing the slope of the ground.
  3. Do Hardscaping First: Put in patios, paths, walls, and large water features before you plant. This protects the newly planted areas from damage.
  4. Get the Soil Ready: Mix in compost and other natural matter to your soil. This gives your plants a healthy base.
  5. Planting: Dig holes that are twice as wide as the plant’s root ball. Water them well after planting. Remember how big plants will grow so they do not get too crowded.
  6. Watering System: Think about putting in drip lines or soaker hoses. These are efficient for watering and good for sustainability efforts.
  7. Mulch: Put a layer of natural mulch, 2 to 4 inches thick, around all your plants. This keeps water in, stops weeds, and makes the soil better over time. This is a very important step for healthy yard landscaping.
  8. Lighting: Put in outdoor lights for safety. Use them to show off your beautiful features after the sun goes down.

Section 6: Adding the Final Touches – Making Your Yard Landscaping Great

The small details are what truly make a backyard “mind-blowing.”

Idea 9: Smart Lighting Plans – Setting the Mood

Lighting does more than just help you see. It completely changes the look and feel of the space.

How to Do It:

  1. Use Different Lights: Mix work lights (for cooking), accent lights (to show off features), and ambient lights (for a general glow).
  2. LED Lights: Use LED lights. They save energy and last a long time, which is great for sustainability.
  3. Timers and Sensors: Put in timers or motion sensors. This makes it easy to use and saves energy.
  4. Path Lights: Help guests walk safely with soft lights along your walkways.

Idea 10: Art and Decor – Showing Your Style

Just like inside your home, outdoor art and decorations add your own touch.

How to Do It:

  1. Garden Art: Choose art that can handle the weather and matches your style.
  2. Outdoor Rugs and Pillows: Add color and texture to your sitting areas.
  3. Wind Chimes: Bring gentle sounds into your space.
  4. Bird Feeders and Houses: Welcome birds and add a bit of living nature to your yard.

Conclusion: Your Dream Yard Is Ready

Changing your backyard into a truly amazing place is a mix of being creative, planning well, and working with your hands. Use these great but real backyard landscaping ideas. Make useful zones. Add calm water features. Focus on sustainability. Make the most of even the smallest areas. By doing this, you can create an outdoor place that shows your style. It will make your life better. Always remember, your yard is your own special canvas. Be bold with your dreams, get inspired, and enjoy the great journey of making your vision come to life. Happy yard landscaping!


Frequently Asked Questions (FAQ)

Q1: What is the price to landscape a backyard completely?

A1: The price changes a lot. It depends on the size, how complex the plan is, the materials you use, and if you do the work yourself or hire experts. Simple backyard ideas, mostly done by you with basic plants, might cost a few hundred dollars. More detailed plans with a lot of hardscaping, special features, and professional work can easily cost many thousands of dollars. Start with a budget and pick the most important things first.

Q2: What are some good, easy-to-care-for plants for backyard landscaping?

A2: There are many choices! Look at native plants. They need less help once they are growing well. Also consider ornamental grasses, small cacti, lavender, coneflowers, and certain bushes. A thick layer of mulch also means less work for you.

Q3: Can I really do large backyard landscaping projects myself, or do I need a professional?

A3: Yes, you can! Many parts of yard landscaping are easy to do yourself, as long as you plan well and are patient. Hardscaping like laying stones or building a deck can be harder. But skilled people can do it. For very complex tasks, like a lot of ground leveling, big water features, or tricky electric work, it is helpful to ask a professional for advice.

Q4: How important is sustainability in backyard landscaping?

A4: Sustainability is very important. It reduces your impact on the environment. And saves resources, especially water. It helps local wildlife. It can even make your bills lower. Using dry-landscaping methods, native plants, composting, and smart watering makes your backyard healthier and stronger.

Q5: What are some simple backyard ideas for someone with a small yard?

A5: For small yards, focus on vertical growth (walls of plants, stacked planters). Use furniture that has more than one purpose (benches with storage). Create cozy spots with small fire pits. Use light colors to make the area seem bigger. Choose plants carefully (small types of trees or bushes). Every little bit of space is important!


References


Recent Posts


Maximize Your Mini-Space: The Ultimate Small Backyard Landscaping Reveal

A beautifully designed small backyard with a living wall, fire pit, and defined seating areas, showcasing effective Small Backyard Landscaping.

Like many homeowners, I’ve faced the dilemma of looking at a tiny outdoor space and wondering if it’s even worth the effort to landscape. For years, my own small yard felt more like an afterthought than a functional extension of my home. But necessity truly is the mother of invention, and I eventually learned that limited space simply demands more creative, focused Small backyard landscaping design. Now, I’m excited to share the strategies that turned my cramped corner into an inspiring, multi-functional oasis, proving that any small backyard can be a magnificent retreat.


The modern home often comes with a modern challenge. This challenge is a decidedly un-modern-sized backyard. Your outdoor area may feel more like a small patio than a lush yard. If so, you are not alone. The dream of a large garden, an expansive lawn, or an outdoor kitchen often seems impossible. This is true when you face limited square footage.

However, the size of your yard does not control the scope of your vision. Small Backyard Landscaping is not about reducing your ideas. Instead, it is about making them bigger and better. It is a precise design focus. It aims to maximize every vertical inch and horizontal foot. This turns limits into chances for creativity. By using smart design rules, you can change a neglected patch into a useful, beautiful, and highly personalized outdoor room.

This full guide will walk you through the core concepts. It includes practical examples and step-by-step instructions. These steps will help you achieve the ultimate small backyard reveal. We will focus on new, sustainable design and powerful yard landscaping techniques.

I. Change Your Mindset: Design for Scale, Not Size

The first step for any successful Small Backyard Landscaping project is to change how you look at the space. Think of your small space not as a tiny yard. Think of it as an outdoor room. Every room—indoor or out—needs a clear purpose.

How to Do It: Define Your Zones

Before you buy any plants or paving stones, decide what your yard needs to do.

  1. Prioritize: You likely cannot fit a full dining set, a fire pit, and a large vegetable garden. Choose one or two main functions. Do you need a private reading corner? Do you need an outdoor dining space for two? Or maybe you need a play area for a small pet?
  2. Sketch it Out: Create a simple top-down sketch of your yard. Use a ruler to help you imagine the size of things. Mark off the areas you want. For example, mark “Dining Area,” “Relaxation Nook,” and “Vertical Garden.” Even a small yard can hold two separate zones if you separate them smartly.
  3. Use Psychological Tricks: Larger pavers or decking planks can trick your eyes. They make you think the space is bigger. Laying them in a diagonal pattern is one of the oldest simple backyard ideas. This method creates the illusion of depth.

II. Maximize Vertical Space: Use the Power of the Wall

In small yards, the ground area is precious. The key to great yard landscaping here is to look up. Vertical gardening is one of the most effective and sustainable ways to add plants and function. It does this without sacrificing any floor space.

How to Do It: Vertical Solutions

  • Living Walls and Trellises: Put up a simple trellis against a fence or wall. Use it for climbing plants like clematis, jasmine, or edible grapes. This adds visual appeal. It also hides ugly boundaries. For a more modern look, build a system of small planters. Bolt them right onto the wall to create a living green wall.
  • Tiered Shelving: You can reuse old wooden pallets. Or you can buy slim, tiered plant stands. These stands can hold a variety of herbs, succulents, or flowers. This creates a focused spot that makes the eye move up.
  • Tool Storage and Function: Vertical space is not just for plants. Use wall-mounted hooks and shelving to store your gardening tools. You can also store lighting or even a fold-down table. This makes your design functional.

Example: The Culinary Wall

A great example of vertical Small Backyard Landscaping is making a “culinary wall.” Use hanging baskets or pocket planters to grow herbs like mint, basil, and rosemary. You can also grow small vegetables like strawberries and cherry tomatoes. This turns a plain wall into a fragrant, useful, and good-looking centerpiece. It perfectly shows off simple backyard ideas.

III. Hardscaping for Flow and Function

Hardscaping is the non-living part of your yard. This includes things like paving, walls, and decking. It is the structure that holds up your plants (softscaping). In a small space, the right hardscaping can mark paths. It can also create the look of a larger area.

How to Do It: Strategic Hardscaping

  • Minimal Materials: Stick to just one or two main materials for your hardscaping. Too many textures and colors can make the space feel busy and small. A single, continuous surface makes the space feel larger and better put together. Use either decking or stone pavers.
  • Curved Lines: Straight lines are neat, but gentle curves can make the space look longer. Even a short winding path suggests a journey. It makes the yard feel deeper than it really is.
  • Multi-Purpose Furniture: Buy furniture that can do more than one thing. A built-in bench, for example, gives you a place to sit. It can also be used for storing cushions or garden supplies. This is a smart move for efficient Small Backyard Landscaping.

Example: The Floating Deck

Do not pour a large concrete slab. Instead, think about building a small, raised “floating” deck in one corner. This small change in height quietly separates the yard into a lounge area. Install low-voltage LED strip lighting under the deck. This creates a soft light. It makes the deck seem to float. This adds a modern, roomy feel to your yard landscaping.

IV. Smart Softscaping: Picking Plants for Limited Space

When choosing plants for your small yard, focus on quality over quantity. Every plant must be worth the space it takes. Choose plants that look good across multiple seasons. They should have good shape and stay a manageable size. This focus on careful choice is a key part of sustainability. Planning well reduces waste. It also reduces the need to replace plants often.

How to Do It: Plant Selection

  • Use Texture and Shape: Put plants with large leaves next to plants with fine textures. Examples are hostas next to ferns or grasses. The difference in texture adds visual depth and richness. This is a classic simple backyard idea used by all designers.
  • Container Gardening is Essential: Use nice, well-chosen planters instead of digging big garden beds. Containers allow you to move plants easily. You can adapt them for different seasons or needs. Use large containers. They should be at least 15 to 20 inches wide. Use them as focal points. Small pots create clutter. A few large ones create a strong impact.
  • Vertical Focus Trees: Choose thin, column-shaped trees. Look for small types of juniper or ornamental pears. Use these instead of wide, spreading varieties. They give you the height and shade of a tree. They do this without using up your important ground area.

Example: The Rule of Three

Use a design rule called the “Thriller, Filler, Spiller” when planting in a container or small bed.

  • Thriller: This is a tall, impressive plant for the center. Think of a fountain grass or a canna lily.
  • Filler: These are medium-sized plants. They fill out the middle. Examples are impatiens or petunias.
  • Spiller: These are trailing plants. They hang over the edge. Examples are creeping jenny or sweet potato vine.This creates a deep, layered look. It adds a lot of interest to your yard landscaping.

V. Lighting, Water, and Mirrors: Making Things Look Bigger

These elements are the secret tools for Small Backyard Landscaping. They do not take up much room. But they have a huge effect on the feel of the space, especially at night.

How to Do It: Creating Atmosphere

  • Strategic Lighting: Do not use harsh, bright lights. Use soft lights that point in a certain direction. Use them to show off your best features. You can highlight a favorite plant, a textured wall, or a water feature. Draped string lights define the “ceiling” of your outdoor room. This makes the space feel closed-in and cozy.
  • The Power of Reflection: Putting an outdoor mirror on a fence or wall is an amazing trick. It reflects light, views, and greenery. This instantly doubles the size you think your yard is. Frame the mirror nicely. Make it look like a window onto another part of the garden.
  • Sound and Movement: A small, self-contained water feature adds a calming sound. It could be a bubble fountain or a simple tiered bowl. This masks city noise. It brings a feeling of calm and movement into the space. These features are often great examples of simple backyard ideas that add big value.

VI. Embrace Sustainability in Small Spaces

A small yard gives you a great chance to focus on sustainability. Less space means less to care for. It also means less use of resources. However, it needs choices made with thought.

How to Do It: Sustainable Practices

  • Native and Drought-Tolerant Plants: Pick plants that naturally grow in your area. They need less water, fertilizer, and bug control. This makes them a low-effort, sustainable choice for your Small Backyard Landscaping.
  • Rain Collection: Include a thin rain barrel in your design. This gives you free, sustainable water for your containers. It lessens how much you need to use city water. This is an important step in eco-friendly yard landscaping.
  • Composting: Maybe you cannot fit a big compost bin. If so, look into compact systems. These include worm farms or small tumbling composters. They turn kitchen and garden waste into rich soil for your containers.

Example: Permeable Paving

For your hardscaping, think about materials that water can pass through. Use gravel, permeable pavers, or decomposed granite. These materials are better than solid concrete. They let rain soak straight into the ground. This reduces water runoff. It also improves the local water supply. This strongly supports overall sustainability.

VII. A Step-by-Step Guide to Your Small Backyard Transformation

Are you ready to begin? Use this easy process to set up your ultimate Small Backyard Landscaping project.

  1. Vision and Audit (The Planning Phase):
    • Measure your space exactly.
    • Note where the sun hits during the day. Check morning, noon, and evening.
    • Decide on your two main useful areas. For example, Dining and Relaxation.
  2. Hardscape First (The Foundation):
    • Install your main floor. This could be decking, pavers, or gravel.
    • Build any lasting structures. This means raised beds, built-in benches, or vertical supports.
  3. Vertical Integration (The Ascent):
    • Put up trellises, mirrors, or shelves on any border walls or fences.
    • Now is the best time to run any wires needed for permanent lighting.
  4. Softscape Placement (The Greenery):
    • Place your large, main containers and fill them with plants.
    • Plant any permanent beds or borders. Use the Thriller, Filler, Spiller method where it works best.
    • Install your sustainable items, like a small rain collector.
  5. Furnishing and Lighting (The Polish):
    • Bring in your furniture that has more than one use.
    • Set up your final decorative lighting. This means string lights and spot lights. Set up any water features.
    • Step back and enjoy your maximized mini-space!

Frequently Asked Questions

Q: How can I make my small yard look wider?

A: The best trick is to make the eye look across the space, not toward the back. Use horizontal lines in your decking or paving. Put one main horizontal item across the view from the house. This could be a long, low planter or bench. This makes people look sideways. It makes the space feel broader.

Q: What is the best color for small backyard landscaping?

A: Lighter colors for hard surfaces are best. Think of light gray pavers or light-colored wood stain. These colors reflect light. They make the space feel bright and larger. For plants, use cool colors like blues, purples, and whites in the back corners. These colors seem to fade into the distance. This helps the illusion of depth in your yard landscaping.

Q: Should I use a fence or a hedge for privacy in my small backyard?

A: Fences often use space better. They are flat. A hedge is lovely and sustainable, but it can use up valuable ground space. If you pick a fence, think about painting it a dark color, like black or charcoal. This makes the boundary seem to disappear. It highlights the plants in front of it.

Q: How can I add a water feature when I have very little space?

A: Look for fountains that hang on the wall. Or use small tabletop fountains. They give you the nice sound of water. They do this without needing any floor space. You can also turn a nice ceramic pot into a simple “bubble fountain” with a small pump. This is one of the most effective simple backyard ideas for luxury without the size.

Q: Are raised garden beds a good choice for a small yard?

A: Yes, they are, but only if they are built-in and also work as seating. Typical, separate raised beds can feel bulky. They take up too much floor space. A better choice for Small Backyard Landscaping is often a vertical garden. Or you can use a thin, border-style raised bed along a wall. This keeps the middle of the area open and clear.


References


Recent Posts


The Only Landscaping Guide You’ll Ever Need: Stunning Results Guaranteed

A vibrant, sustainable front yard featuring native plants, permeable pathways, and lush garden beds under a warm, golden hour sun, showcasing beautiful and eco-friendly home landscaping.

Ever stared at your yard and felt completely overwhelmed? We’ve all been there—dreaming of a beautiful, functional outdoor space but having no idea where to even start with your Landscaping. This simple guide is written just for you: the homeowner and garden enthusiast who wants a gorgeous landscape without harming the planet. Join me as we break down the basics and make your outdoor living better than ever.


Section 1: Landscaping with a Purpose: Why Sustainability Matters

Landscaping has traditionally been all about making your home look good. But today, a truly stunning landscape does so much more. It needs to be healthy, easy to care for, and kind to the environment. This is what we call sustainability in your yard.

Sustainable landscaping means we stop fighting nature and start working with it. It focuses on using less water, avoiding harsh chemicals, helping local wildlife, and using resources wisely. The ultimate goal is to create a beautiful, low-maintenance, and tough garden that lasts.

How to Start: Your Yard’s Report Card

Before you buy anything, you must study your site. This crucial first step is the secret to successful Garden Design and long-term sustainability. It saves you time and money later on.

How to Do It:

  1. Watch the Sun and Shade: Spend a day tracking how the sun moves across your property. Note which areas get sun all day (full sun), some sun (partial sun), and almost no sun (shade). Matching plants to these spots means they will naturally thrive, and you won’t need to baby them later.
  2. Get to Know Your Soil: Do a simple soil test. You can buy kits at any garden center. Find out your soil’s pH (how acidic or alkaline it is) and what it is made of (sand, silt, or clay). Plants have very specific soil needs. Match the plant to your existing soil, and you cut down on buying expensive soil amendments.
  3. Spot Water Problems: Look for wet spots, dry hills, or areas sheltered from the wind. Pay attention to where water collects during a big rainstorm. Areas that hold water are perfect for creating rain garden features. This helps the water sink into the ground and stops dirty runoff from leaving your property.

Section 2: Simple Steps for Amazing Garden Design

Great Garden Design uses simple rules to make a space that works well, looks beautiful, and fits with your home. It’s about creating smooth pathways, giving different areas their own purpose, and picking materials that will last forever.

The Three Main Pieces of Design

  1. Hardscape (The Structure): This means all the non-living parts: patios, walking paths, walls, and fences. For sustainability, always choose materials that water can pass through. Use things like gravel, loose stone, or special permeable pavers for your paths. This allows rainwater to soak into the soil, feeding your plants instead of rushing down the street.
    • Example: Take out an old solid concrete driveway. Replace it with a beautiful path made of spaced flagstones that have sand and fine gravel between them. Water can now sink right into the earth.
  2. Softscape (The Plants): This is your entire planting plan: all the trees, bushes, flowers, and groundcover. The main rule here is simple: The Right Plant in the Right Place. Focus on plants that are native to your local area. Native species already know how to live in your climate and soil. This means they need much less water, less fertilizer, and almost no help fighting pests compared to foreign plants.
  3. Define Your Zones: Divide your landscaping into areas that each have a clear job. This is extremely important if you are tackling Small Backyard Landscaping.
    • The Fun Zone: Your patio, deck, or a cozy fire pit area.
    • The Work Zone: Your compost pile, tool storage, or a simple clothesline.
    • The Food Zone: Your vegetable garden, herbs, or fruit trees.
    • The Nature Zone: Areas filled with native plants to attract local birds and insects.

Section 3: Making the Most of Small Backyard Landscaping

If your yard is small, that is actually a good thing! Small Backyard Landscaping gives you unique chances to be creative and focus your efforts. The main goal is to make the area feel bigger than it really is and make sure every inch has a purpose.

How to Do It: Tricks for Tiny Spaces

  1. Go Up, Not Out: Use vertical space by putting planters, trellises, and shelves on walls and fences. Vertical gardens make your eye travel up, making the space seem taller. They also let you grow way more plants without using up precious ground area.
    • Example: Put up a simple metal grid on your garage wall. Train climbing beans, beautiful roses, or morning glories to grow up it. This adds stunning visual interest and saves space.
  2. Use Angles: When building paths or laying out your patio, run the lines diagonally instead of parallel to your house. This simple design trick fools your brain into seeing a much longer, more interesting space.
  3. Plant in Layers: Create depth by using plants of different heights and textures. Put the tallest plants, like thin evergreens or tall grasses, at the very back. Then, plant shorter and shorter things toward the front. This layering creates depth and makes your small space feel deep and full.

Section 4: Save Water: The Smart Landscaping Approach

Saving water is the most powerful thing you can do for sustainability in your landscaping. The practice of xeriscaping means reducing or even removing the need for extra watering.


How to Do It: Easy Water Management

  1. Stop Wasting Water: Traditional sprinklers lose a lot of water to wind and heat. Switch to drip irrigation or simple soaker hoses. These systems slowly drip water right onto the roots of your plants. This smart method can save you up to half of the water you use now.
  2. The Magic of Mulch: Put a thick layer (about three inches is perfect) of organic mulch—like wood chips, shredded leaves, or straw—around all your plants. Mulch is like a blanket for your soil. It keeps the moisture in the ground and stops the sun from drying it out. It also keeps weeds down. Plus, as it breaks down, it naturally feeds your soil.
  3. Catch the Rain: Install a simple rain barrel connected to one of your roof’s downspouts. You can use this free, natural rainwater to water your flowerpots and beds. This is an ideal solution for Small Backyard Landscaping where you want to maximize every natural resource.

Section 5: Healthy Gardens: No Chemicals Allowed

A sustainable landscape is a buzzing, healthy place. For true sustainability, you must stop using harsh chemical fertilizers and pesticides. These things pollute our water and kill the helpful insects and tiny life forms that keep your soil healthy.


How to Do It: Building a Natural Ecosystem

  1. Invite Good Guests: Plant many different types of native flowers that bloom all year long, from early spring to late fall. This provides a steady supply of food for local bees, butterflies, and hummingbirds. This practice is key to having a vibrant, healthy garden.
    • Example: Include native milkweed (which Monarch butterflies love), bright coneflower, and purple aster in your flower beds.
  2. Love Your Soil: Start a simple composting system in your yard. Composting your kitchen scraps and yard waste creates a super-rich soil food called humus. Humus makes your soil hold more water and stay healthier. Healthy soil is the base of any successful, low-effort landscaping project.

  1. Let Nature Handle Pests: Instead of spraying chemicals, bring in helpful insects. You can buy and release ladybugs to eat annoying aphids. Or, plant herbs like dill, fennel, and coriander. These herbs attract tiny, beneficial wasps that naturally prey on many common garden pests.

Section 6: Keep it Easy: Maintenance for the Long Run

A sustainable landscaping plan is designed to be easy to maintain, but “easy” does not mean you do nothing. You still need to do a few important tasks to keep your beautiful garden looking stunning year after year.

Key Tasks for the Year

  • Weeding: Keep your mulch layers thick to help prevent weeds. Pull out any weeds that manage to sprout by hand before they drop seeds.
  • Trimming: Cut back trees and shrubs at the correct time of the year to keep them healthy and looking good. Avoid cutting them too aggressively, as this can weaken them over time.
  • Water Check: Once a year, check your drip system for any clogs or leaks. This makes sure your water is delivered to your plants as efficiently as possible.

Section 7: The Final Details That Make an Impact


The small finishing touches are what turn good landscaping into stunning Garden Design.

  1. Smart Lighting: Use low-energy LED or solar-powered lights to highlight beautiful features, light up your paths, and create a cozy evening mood. This uses very little electricity and lets you enjoy your outdoor space longer.
  2. Repurpose Materials: Bring natural things like large, interesting rocks or driftwood into your landscaping. You can also use repurposed items, like old wooden barrels or thick pieces of reclaimed wood. This gives your yard character and fits perfectly with sustainability by using materials you already have.

Frequently Asked Questions (FAQ)

Q: What is the single best thing I can do for sustainable landscaping?

A: The most impactful change is to shrink your traditional lawn or replace it with native, tough plants that do not need much water. Regular grass needs huge amounts of water and chemicals, making it the least sustainable part of most home landscaping.

Q: Do I really need to hire a professional for Garden Design?

A: Not if you do not want to. For projects like Small Backyard Landscaping, a simple plan based on your yard’s needs is often enough. Use the sun analysis and zoning tips from this article to create a rough sketch before you start digging.

Q: What is the most important element of sustainable hardscape?

A: The most important word is “permeability.” This means choosing materials for your paths and driveways that let rainwater soak into the earth, like gravel or pavers with open joints. This stops runoff and filters water, which is a key part of long-term sustainability.

Q: Are raised garden beds better for a vegetable garden?

A: Yes, in most cases. Raised beds offer much better drainage, warm up faster in the spring, and let you completely control the quality of your soil. They are an excellent choice for intensive Small Backyard Landscaping and growing your own food.

Q: What are the best plants for a low-maintenance garden that saves water?

A: This depends on your region, so always check local guides. Generally, look for local native plants, succulents, ornamental grasses, and tough perennial flowers like lavender and sedum. These are naturally adapted to need very little help in your garden.


Reference Section


Recent Posts


Reclaimed Wood is the New Luxury

Close-up of a prominent, thick reclaimed wood kitchen island worktop in a bright, modern farmhouse kitchen with dark blue cabinets, showcasing the unique grain and natural distressed texture of the wood.

Hey there, fellow home enthusiasts! Like many of you, we are always searching for ways to make a home both beautiful and sustainable. After countless hours scrolling through design feeds and dreaming up kitchen makeovers, we found a secret that’s too good not to share: the enduring appeal of Reclaimed Wood. Join us as we explore how to bring character, history, and a touch of eco-chic into your most beloved space with this stunning material.


Embracing Reclaimed Wood: The New Luxury Begins Here

A beautifully styled kitchen featuring a prominent reclaimed wood island or worktop, perhaps with natural light streaming in, showcasing its unique grain and texture.

It used to be that luxury meant pristine, untouched, and brand new. We aspired to gleaming granite, flawless marble, or factory-perfect laminates. However, times, and tastes, are changing fast. A quiet revolution is happening in kitchen design. It’s led by a material that carries stories, whispers of history, and boasts a unique character no new product can ever replicate: reclaimed wood.

Forget what you thought about opulence. True luxury today is about authenticity, sustainability, and owning something unique. That is precisely what a reclaimed wood worktop delivers.

Why Reclaimed Wood? Beyond the Hype

The allure of reclaimed wood is more than just a trend. It’s a move toward conscious and meaningful design. When you choose a worktop made from reclaimed wood, you aren’t just buying a surface. You are investing in a piece of history, an heirloom for your home that tells a real tale.

1. Unmatched Character and Aesthetic Appeal

Imagine wood that has weathered decades, or even centuries, as part of an old barn, a forgotten factory, or a dismantled warehouse. This wood has seen seasons change and felt the hands of countless people. It has developed a unique finish that you cannot make artificially. Knots, nail holes, saw marks, grain variations, and natural distressing—these are not flaws. They are badges of honour.

Examples of Character-Rich Reclaimed Wood:

  • Barnwood Oak: Often has a deep hue and incredible texture. It shows circular saw marks and natural blemishes.
  • Factory Maple: Known for its hardiness and lighter tones. It often bears subtle marks from industrial use.
  • Old Growth Douglas Fir: Can display stunning, tight grain patterns and a beautiful reddish-brown colour. It often comes from large timbers.

These elements create warmth and depth. They instantly elevate a kitchen and add a focal point that is both rustic and refined. This is the kind of feature that makes people pause, look closer, and ask, “Where did you get that?”

2. A Champion for Sustainability

Environmental impact is a critical concern today. Choosing reclaimed wood is one of the most eco-friendly decisions you can make for your kitchen.

Reclaimed wood helps the planet by:

  • Reducing Landfill Waste: These beautiful, aged timbers are given a second life instead of ending up in a dump.
  • Conserving New Resources: Using reclaimed wood reduces the need for newly harvested timber. This helps preserve forests and their vital ecosystems.
  • Lowering the Carbon Footprint: The energy needed to process reclaimed wood is far less than the energy required for harvesting, milling, and transporting new lumber.

It’s a simple win-win for your home and for the planet.

3. Inherent Durability and Stability

Do not let the “old” in reclaimed make you think it is weak. Wood that is reclaimed has often endured tough conditions for many decades. This long exposure to various climates causes the wood to fully season. This means it has stabilized, shrunk, and expanded as much as it ever will. Because of this, reclaimed wood is often more stable. It is less likely to warp and crack than newly cut timber.

How to Do It: Bringing Reclaimed Wood Luxury into Your Kitchen

Ready to embrace the character of reclaimed wood? Here is your simple guide to making it happen.

Step 1: Sourcing Your Reclaimed Wood

This is perhaps the most exciting part! Finding the right supplier is very important.

Places to Find Quality Reclaimed Wood:

  • Dedicated Reclaimed Wood Dealers: These specialists have networks for salvaging wood from old buildings. They offer a wide variety of wood species and historical backgrounds. They know how to properly de-nail, clean, and mill the wood to your exact needs.
  • Architectural Salvage Yards: These are like treasure troves! You might find individual slabs or beams you can turn into a stunning worktop.
  • Local Craftsmen/Woodworkers: Many independent artisans work mainly with reclaimed materials. They can source, prepare, and custom-build your worktop for you.

Key things to look for:

  • Species: Think about the look and the wood hardness. Oak, maple, chestnut, and longleaf pine are popular choices.
  • Condition: Imperfections are good, but avoid wood with serious rot, extensive bug damage, or structural weakness.
  • Provenance: Always ask about the wood’s history! This is part of its story and adds to its appeal. Did it come from a Civil War-era barn? A turn-of-the-century factory?
  • Moisture Content: Make sure the wood has been properly dried to stop warping after installation. Reputable suppliers use professional kilns for this.

Step 2: Design and Fabrication

Once you have your wood, it is time to make your vision real.

  • Measure Precisely: Accuracy is key for worktops. Get professional measurements if you are unsure.
  • Consider Thickness: Reclaimed wood worktops often look best with a thicker profile (1.5 to 2.5 inches). This shows off their solidity.
  • Edge Profiles: Decide on the edge style. A simple square edge, a soft chamfer, or a rounded bullnose can all work. A clean, natural edge often showcases the material best.
  • Cut-outs: Plan for sink, faucet, and hob cut-outs. These need precise work. They are often best handled by experienced fabricators.
  • Working with a Professional: Unless you have high-level woodworking skills and tools, let a professional woodworker or a specialized company fabricate your worktop. They have the knowledge to safely de-nail, mill, join planks (if required), and prepare the surface correctly.

Example:

I once saw a kitchen where the fabricator carefully kept an interesting knot in the reclaimed wood. They filled it with a clear resin. This created a subtle, stunning design feature. It proves how individual pieces can inspire unique touches.

Step 3: Finishing for Durability and Beauty

The finish protects the wood from moisture, stains, and daily wear. This is the stage where your reclaimed wood worktop changes from rough timber to a functional, stunning surface.

The finish you choose affects the look, feel, and maintenance of your worktop.

A. Oil Finishes (e.g., Tung Oil, Hardwax Oil):

  • Pros: Penetrates the wood, boosting its natural grain and warmth. It is easy to repair scratches or damage by spot-treating the area. Offers a more natural, matte, or satin look.
  • Cons: Needs more frequent reapplication (at least once or twice a year). It is less resistant to standing water if not maintained.
  • How to Do It: Apply thin coats with a clean cloth. Rub the oil into the wood. Let it dry fully between coats. Buff off any extra oil. Use multiple coats for the best protection.

B. Polyurethane or Varnish Finishes:

  • Pros: Forms a tough, protective film on the surface. It offers great resistance to water and stains. And is available in various sheens, from matte to high gloss. It needs less reapplication than oils.
  • Cons: Can look less natural because it sits on top of the wood. It is hard to repair small areas. It often means sanding and refinishing the whole section.
  • How to Do It: Apply evenly with a brush or roller in a dust-free area. Lightly sand between coats for better adhesion. Apply several coats for the best result.

C. Epoxy Resin Finishes:

  • Pros: Creates a very tough, waterproof, and heat-resistant glass-like finish. Great for showing off unique wood features.
  • Cons: Can look very modern, which may not suit all traditional reclaimed wood styles. Mixing and applying it must be precise. Repairs are difficult.
  • How to Do It: Follow all manufacturer instructions for mixing. Pour carefully and spread evenly. Use a heat gun or torch to remove any bubbles. This is often a job for a professional.

Recommendation: For an authentic, luxurious feel with reclaimed wood, a high-quality hardwax oil is often best. It lets the wood breathe and is simple to refresh.

Step 4: Installation

While some adventurous people might install this themselves, professional installation is usually recommended. This is especially true for large or heavy worktops.

Key Installation Steps:

  • Level Cabinets: Ensure your base cabinets are perfectly level. This prevents stress on the worktop and ensures a flat surface.
  • Secure Fastening: Use the right fasteners to secure the worktop to the cabinets. This should allow for the slight seasonal movement of the wood.
  • Sealing Edges (for sinks): If you have a sink cut-out, seal all raw edges thoroughly with a waterproof silicone sealant. Do this before the sink is dropped in. This prevents moisture damage.

Living with and Loving Your Reclaimed Wood Worktop: Maintenance

Good maintenance of your reclaimed wood worktop is vital. It preserves its beauty and durability for decades to come.

Daily Care Tips:

  • Wipe Spills Immediately: Water is wood’s enemy. Do not let spills sit, especially acidic liquids like lemon juice or wine, which can damage the finish.
  • Use Mild Cleaners: A damp cloth with a little dish soap works well. Avoid harsh cleaners, abrasive scrubbers, or steam cleaners. These can strip the finish.
  • Use Cutting Boards and Trivets: Always use a cutting board for chopping. Always use trivets for hot pans. While wood is tough, you must protect your surface from direct cuts or scorch marks.
  • Avoid Standing Water: Especially near sinks and taps. Wipe these areas dry after every use.

Periodic Maintenance:

  • Re-oiling (for oil finishes): Depending on how much you use it, re-oil your worktop every 6 to 12 months. Do this when the wood looks dry or easily absorbs water. This is a simple process: clean the surface, sand lightly if needed, and apply a thin coat of the oil.
  • Inspecting for Damage: Check often for any deep scratches or areas where the finish looks weak. Fix these immediately to prevent worse damage.
  • Addressing Scratches (Oil Finishes): Light scratches on oiled surfaces can be gently sanded out. Then, re-oil the area to blend it in. Deeper scratches will need more work.

Long-Term Considerations:

  • Humidity Control: Wood reacts to changes in humidity. Keep a consistent indoor humidity level (ideally 40–50%). This helps to minimize wood movement.
  • Embrace Patina: Your reclaimed wood worktop will naturally develop its own patina over time. This adds to its charm and should be seen as a sign of life, not a flaw.

Styling Your Reclaimed Wood Worktop

The great thing about reclaimed wood is its flexibility. It can fit with almost any kitchen style.

  • Modern Farmhouse: Pair it with Shaker-style cabinets, subway tiles, and open shelving. The wood adds warmth to crisp white colours.
  • Industrial Chic: Mix the raw texture of reclaimed wood with black metal accents, exposed brick, and stainless steel appliances. The contrast is powerful.
  • Minimalist Nordic: Let the wood be the main feature. Keep other items simple and clean. Light colours and natural textures let the wood’s character shine.
  • Eclectic Bohemian: Mix different textures, patterns, and colours. Reclaimed wood keeps the space grounded. It brings an authentic, earthy feel to a vibrant room.

Final Thoughts: The Enduring Appeal of Reclaimed Wood

Choosing a reclaimed wood worktop is more than a design choice. It is a powerful statement. That shows your commitment to sustainability, your appreciation for history, and your love for real beauty. It is a focal point that will start conversations, collect memories, and age gracefully with your family.

If you want to fill your kitchen with soul, character, and a touch of eco-conscious grandeur, embrace the allure of reclaimed wood. It is truly the new luxury. Your kitchen deserves a surface with a story to tell.


Frequently Asked Questions (FAQ)

Q: Is reclaimed wood more expensive than new wood?

A: Not always. The cost depends a lot on the wood species, its rarity, and the process of preparing it. It may cost more due to the work involved in salvaging and preparing it. However, it offers unique style and sustainability benefits that new wood cannot match.

Q: Can reclaimed wood be used in bathrooms or other wet areas?

A: Yes, with the right sealing and maintenance, just like any wood. However, you must be extra careful to wipe away standing water right away. A very waterproof finish, like marine-grade varnish or epoxy, might be a good choice for very wet spots.

Q: Will reclaimed wood warp or crack?

A: Good suppliers make sure the wood has been properly dried (kiln-dried) to control its moisture level. This makes it less likely to warp and crack than newly milled wood. However, all wood can react to big changes in humidity. Keep consistent indoor conditions to minimize movement.

Q: How do I clean a reclaimed wood worktop?

A: Use a damp cloth with a mild dish soap solution for daily cleaning. Do not use harsh chemical cleaners, abrasive pads, or steam cleaners. These can damage the finish or the wood itself.

Q: Can I cut directly on a reclaimed wood worktop?

A: Wood is resilient, but you should always use a cutting board. This protects your worktop from knife marks. It also helps keep its finish and lengthens its life.


References


Recent Posts


Wooden Crate Magic: Fifteen Projects That Will Surprise You

A workbench filled with miniature wooden crate projects, including small shelves, beds, and tables, with larger stacked wooden crates in the background featuring the text 'Wooden Crate Magic,' suggesting creative DIY upcycling.

Remember that feeling of finding a forgotten treasure in your grandma’s attic? That’s me, Sarah, with a lifelong love for turning overlooked items into something beautiful and functional. My weekends are often spent covered in sawdust or paint, experimenting with ways to give new life to old things. I believe that creativity shouldn’t break the bank, and that’s why I’m thrilled to share how simple wooden crates can unlock a world of DIY magic for your home.


15 Brilliant Wooden Crate Projects to Instantly Upgrade Your Home

There’s something great about an old wooden crate. Maybe it’s the rustic feel, the scent of old wood, or the silent story it tells of goods once shipped and journeys taken. These simple wooden boxes should not be stored in a dusty garage. They hold an amazing, hidden potential. With a little creativity, some basic tools, and a dash of effort, you can turn these overlooked items into stunning, useful, and unique pieces for every room in your home.

Prepare to be surprised as we explore the “wooden crate magic,” looking at fifteen smart projects. These projects will not only improve your home decor but will also offer simple solutions. You will enjoy the rewarding spirit of upcycling.


The Appeal of the Wooden Crate: Why Repurpose It?

Before we look at the projects, let’s quickly understand why wooden crates are such a perfect material for DIY.

  • Low Cost: You can often find wooden crates for free or very cheap. Check local markets, antique shops, or even behind grocery stores (always ask for permission!).
  • Eco-Friendly: Reusing old materials reduces trash. It lowers the demand for new production, which is a great choice for the environment.
  • Flexibility: Crates come in many sizes and shapes. This offers endless options for change.
  • Rustic Look: The natural wood grain and aged look add warmth to any area. They fit well with farmhouse, industrial, bohemian, and even modern styles.
  • Strength: These crates were built to handle the demands of shipping. They are often surprisingly strong and can hold a lot of weight once properly braced.

Now, let’s get inspired!


The Fifteen Projects That Will Surprise You

1. Chic Coffee Table with Hidden Storage

Are you tired of clutter on your coffee table? This project gives you a sleek answer.

How to do it:

  • Materials: Four matching wooden crates, wood glue, screws, caster wheels (optional), sandpaper, stain or paint, polyurethane sealer.
  • Assembly: Set the four crates in a square. Face their open sides outwards. This creates a space in the center. Glue and screw the crates together safely from the inside. For more strength, add a piece of plywood to the bottom. You can add one to the top as well, if you want a solid surface.
  • Finishing: Smooth any rough spots with sandpaper. Stain or paint the whole piece to match your decor. Apply a few coats of polyurethane. This makes it last longer and protects it from spills. Put caster wheels on the bottom for easy movement.
  • Surprise Element: The open sides allow easy shelving for books, remotes, or decor. The central space (if you add a lift-off top) offers hidden storage for blankets or magazines.

2. Elegant Bookshelf or Display Unit

Turn several crates into a custom shelf system that fits any wall.

How to do it:

  • Materials: Several wooden crates (different sizes look good), wood glue, screws, wall anchors, sandpaper, paint or stain.
  • Assembly: Decide how you want to set them up. You can stack them flat, upright, or in a random pattern. Make sure the crates are level. Glue and screw each crate tightly to the ones next to it. For bigger units, attach the finished piece to wall studs using L-brackets or strong wall anchors for safety.
  • Finishing: Sand and finish it as you like. One color can create a clean look. Or, use different colors to highlight each space.
  • Surprise Element: This is more than a bookshelf; it’s art you can change. You can move it around, add more crates later, or use it to show off plants, photos, or small art items.

3. Rolling Storage Bin for Toys or Laundry

Keep messes held in one mobile spot!

How to do it:

  • Materials: One strong wooden crate, four caster wheels, screws, sandpaper, paint or stain, optional rope handles.
  • Assembly: Be sure the bottom of the crate is solid. If it isn’t, brace it with a piece of plywood cut to size. Sand the crate until it is smooth. Attach one caster wheel to each bottom corner using screws.
  • Finishing: Paint or stain it your preferred color. Drill holes and put strong rope handles on the short sides for easy pulling.
  • Surprise Element: No more dragging heavy bins! This rolling bin makes clean-up easy for kids’ rooms, laundry areas, or even as a mobile planter for larger indoor plants.

4. Rustic Pet Bed

Give your pet a cozy and stylish place to sleep.

How to do it:

  • Materials: One correct size wooden crate, sandpaper, non-toxic paint or stain, soft cushion or blanket.
  • Assembly: Sand all surfaces well. Pay extra attention to any splinters. If the crate is deep, you can remove one of the long sides. This creates an easy way for your pet to get in.
  • Finishing: Paint or stain the crate. Think about using a clear, pet-safe sealer. Once it is dry, put in a soft, washable cushion or blanket.
  • Surprise Element: It is charming, and it raises your pet off the cold floor. You can even write your pet’s name on it!

5. Stylish Bathroom Storage Tower

Make the most of the vertical space in a small bathroom.

How to do it:

  • Materials: Two or three matching wooden crates, wood glue, screws, sandpaper, paint (often a light, moisture-proof paint for bathrooms).
  • Assembly: Stack the crates one on top of the other. Line them up perfectly. Glue and screw them together from the inside for a neat look. You can have all the open sides facing forward, or you can switch them for a unique design.
  • Finishing: Sand and paint. You can paint the inside a bright color for a fun contrast.
  • Surprise Element: This tower gives you open shelves for towels, soaps, and decor. It turns an unused corner into a useful and attractive space.

6. Unique Wall Sconces or Floating Shelves

Add character and useful surfaces to your walls.

How to do it:

  • Materials: One or more shallow wooden crates or crate fronts, sandpaper, paint or stain, strong picture hangers or L-brackets, small LED lights (optional).
  • Assembly: If you use a full crate, stand it on its side, open end facing out. Sand and finish. Tightly attach heavy-duty picture hangers or L-brackets to the back. Mount it to the wall studs.
  • Finishing: For a wall light look, attach a small LED light to the inside top. This gives a soft, gentle glow.
  • Surprise Element: These are more than just shelves; they are display boxes. They can show off small treasures, plants, or even act as a source of mood lighting.

7. DIY Planter Box or Herb Garden

Bring nature inside or improve your outdoor area.

How to do it:

  • Materials: One wooden crate, plastic liner or garden cloth, potting soil, plants/herbs, sandpaper, outside-grade paint or sealer.
  • Assembly: Line the inside of the crate with strong plastic sheeting or garden cloth. Staple it along the top edges. Poke small drain holes in the bottom of the liner to stop roots from rotting. Fill it with soil and plant your chosen herbs, flowers, or small vegetables.
  • Finishing: Sand and apply an outside-grade paint or wood sealer. This protects the wood from water if you use it outdoors.
  • Surprise Element: A beautiful, rustic planter box. You can put it on a patio, porch, or a sunny window. For an herb garden, it keeps all your cooking plants together in one nice spot.

8. Entryway Shoe Rack and Bench Combo

A helpful and welcoming piece for your home’s front area.

How to do it:

  • Materials: Two strong wooden crates (or three for more seating), a solid piece of plywood for the top, wood glue, screws, sandpaper, paint or stain, optional cushion fabric and foam.
  • Assembly: Put two crates next to each other. Face the open ends outwards to create shoe slots. Fasten them together with glue and screws. Cut a piece of plywood to fit across the top. It should stick out slightly over the edges. Screw the plywood top on from underneath.
  • Finishing: Sand and finish the entire piece. For added comfort, make a simple cushion. Cover a piece of foam with fabric and put it on top of the plywood.
  • Surprise Element: This gives you both useful shoe storage and a handy place to sit down to put on or take off shoes. The rustic look immediately makes your entryway feel friendly.

9. Vintage-Inspired Nightstand

A charming bedside piece with lots of personality.

How to do it:

  • Materials: One strong wooden crate, sandpaper, paint or stain, optional small wooden legs or caster wheels.
  • Assembly: Decide if you want the crate standing tall or on its side. If it’s tall, the open side faces forward, making a shelf. If it’s on its side, the top surface is wider. Sand all surfaces.
  • Finishing: Paint or stain the crate. You can attach small wooden legs to raise it up or caster wheels for easy moving.
  • Surprise Element: It has an open shelf for books and things you need. The flat top surface is good for a lamp and alarm clock. The rustic feel brings warmth to your bedroom.

10. Portable Art Supply Caddy

Keep your creative tools neat and ready to use.

How to do it:

  • Materials: One medium-sized wooden crate, sandpaper, paint or sealer, optional wooden dividers (thin plywood strips), wood glue, handle (e.g., a stick or thick rope).
  • Assembly: Sand the crate. If you want, cut thin wood strips to create sections inside the crate for different supplies (brushes, paints, pencils). Glue these dividers into place. Drill holes in the top edges of the crate on the short sides. Thread a stick or rope through to make a handle.
  • Finishing: Paint or seal the caddy.
  • Surprise Element: Artists and crafters will love this! It keeps everything tidy and can be easily moved from room to room. You can even take it outside for painting outdoors.

11. Stackable Pantry or Produce Bins

Organize your kitchen with style and function.

How to do it:

  • Materials: Several strong wooden crates, sandpaper, food-safe sealer or paint (optional).
  • Assembly: Simply sand the crates, making sure there are no splinters.
  • Finishing: You can leave them natural for a rustic look. Or, you can put on a food-safe sealer so they are easy to clean.
  • Surprise Element: Stack them in your pantry for tidy storage of canned goods, dry food, or vegetables. The open design lets air move around. This is perfect for things like onions and potatoes.

12. Kids’ Play Kitchen or Lemonade Stand

Start fun, pretend play with a custom project.

How to do it:

  • Materials: Two or three wooden crates, plywood scraps, wood glue, screws, sandpaper, non-toxic paint, small wooden knobs, fabric for curtains (optional).
  • Assembly: Use one crate as the bottom (for the oven). Put another on top for the counter or sink area. You may need to add a back panel made from plywood. Cut a circle in the top crate for a “sink.” Add a wooden knob for a “faucet.”
  • Finishing: Sand and paint in bright, cheerful colors. Add small wooden knobs for oven controls. You can even add a small curtain to the “oven” opening.
  • Surprise Element: This project is very rewarding. It creates a special play area that encourages many hours of creative fun.

13. Outdoor Side Table or Stool

Great for a patio or garden, it is both strong and attractive.

How to do it:

  • Materials: One strong wooden crate, sandpaper, outside-grade stain or paint, polyurethane sealer.
  • Assembly: Just sand the crate very well.
  • Finishing: Apply an outside-grade stain or paint. Follow this with several coats of an outdoor-rated polyurethane sealer. This will guard the wood from the weather and make it last longer outside.
  • Surprise Element: A simple, yet effective item for any outdoor seating. It provides a handy surface for drinks, books, or small plants.

14. Wall-Mounted Wine Rack

Show off your wine collection with a rustic, cool look.

How to do it:

  • Materials: One strong wooden crate, sandpaper, stain or paint, L-brackets or French cleat system, wine bottle holders (e.g., small wooden dowels or metal rings).
  • Assembly: Sand the crate. You may need to add inner dividers or dowels, depending on how you want to display the bottles. For a flat display, attach small dowels across the width of the crate to hold bottles securely. Firmly mount the crate to wall studs using L-brackets or a French cleat system.
  • Finishing: Stain or paint the crate to make it look nicer.
  • Surprise Element: A beautiful, small way to display a few bottles of wine. It adds an unexpected, rustic feel to your dining room or kitchen.

15. Charming End Table with Magazine Holder

A multi-purpose item for your living room.

How to do it:

  • Materials: One wooden crate, wood glue, screws, sandpaper, paint or stain, optional small wooden legs or caster wheels.
  • Assembly: Stand the crate on its side. If the crate has slatted sides, you can use one of the open sections to hold magazines. Sand the entire surface.
  • Finishing: Paint or stain the crate. Add small wooden legs or caster wheels if you prefer.
  • Surprise Element: This simple setup gives you a surface for a lamp or drink. The open slats or inner space can smartly hold magazines, remotes, or even a small throw blanket, keeping your living room neat.

Essential Tips for Working with Wooden Crates

No matter which project you pick, a few basic steps will help you succeed and stay safe:

  1. Find Crates Safely: When you get crates, always check for stamps showing they were heat-treated (HT). Avoid those that were chemically treated (MB for Methyl Bromide). HT crates are safe for use inside. Do not use any crates that have strong chemical smells or signs of mold. If you get them from a store, always ask for permission!
  2. Cleaning is a Must: Wash your crates well with soapy water, especially if they are old or have been outside. A mix of water and a little bleach can help clean them. Let them dry completely.
  3. Sanding for Smoothness: This step is vital for both looks and safety. Use medium-grit sandpaper (about 120-150 grit) to smooth rough edges and take off splinters. Finish with fine-grit (220 grit) for a truly smooth surface, especially for items you will touch often.
  4. Brace the Crates: Old crates can sometimes be shaky. Use wood glue in the joints. Brace them with small nails or screws if needed, especially for furniture pieces.
  5. Final Touches:
    • Stain: This improves the natural wood grain and adds warmth.
    • Paint: This offers endless color choices to match your decor. Think about chalk paint for a worn, farmhouse look.
    • Sealer/Polyurethane: This is key for long life. It protects against water, scratches, and wear. Use an outside-grade sealer for projects that will be outdoors.

Conclusion: Unleash Your Inner Crate Creator

Who knew that a simple wooden crate held so much promise? From useful storage answers to stunning home decor items, these fifteen projects are just the start of what you can do. Each change shows the power of ideas and the joy of giving a tossed-away item a second, even better, life.

So, the next time you see an old wooden crate, don’t just see a box. See the chance for a chic coffee table, a charming pet bed, a neat pantry, or a fun play kitchen. Embrace the “wooden crate magic,” roll up your sleeves, and surprise yourself with what you can create! Happy crafting!


FAQ (Frequently Asked Questions)

Q: Where can I find old wooden crates?

A: You can often find them at antique shops, flea markets, local wineries (they sometimes give them away), small grocery stores (ask first!), Facebook Marketplace, or online DIY groups. Look for crates stamped “HT” for heat-treated. These are safer than “MB” (methyl bromide) treated crates.

Q: How do I get an old wooden crate ready for a project?

A: First, wash it well with soapy water and a brush, then let it dry fully. Next, sand all surfaces and edges with medium-grit sandpaper (120-150). This removes splinters and makes the wood smooth. Follow this with fine-grit (220) for a smoother final surface. Check for loose nails and either take them out or secure them.

Q: What kind of paint or stain should I use?

A: That depends on the look you want. For a natural look, use a wood stain. For color, use acrylic or latex paint. Chalk paint is great for a rustic, worn finish. Always add a sealer like polyurethane. This is especially true for items that will be used a lot or get wet.

Q: Are wooden crates strong enough for furniture?

A: Yes, many wooden crates are quite strong, especially vintage ones made for shipping. However, for furniture like coffee tables or benches, always brace the joints with wood glue and screws to ensure safety and stability. If the bottom is weak, add a piece of plywood.

Q: Can I use crates for outdoor projects?

A: You certainly can! Just be sure to properly clean, sand, and then seal the wooden crate with an exterior-grade paint or sealer. This protects the wood from water, sun, and weather changes. It will make it last much longer outdoors.

Q: What tools do I need for these projects?

A: Most projects require simple tools: sandpaper (or an electric sander), wood glue, screws, a drill, a screwdriver, and paint brushes or rollers. For more complex projects, you may need a saw (hand saw or jigsaw) for cutting plywood or making custom dividers.


References


Recent Posts