Cookie Consent by Free Privacy Policy Generator Update cookies preferences

The Top 7 Botanical Prints Trending Right Now

A gallery wall featuring an assortment of framed pressed flower art, showcasing various Botanical Prints in different frame sizes and colors, including brown wood and black. The collection displays multiple pressed flower types, such as blue, yellow, and red blossoms, arranged as herbarium-style specimens.

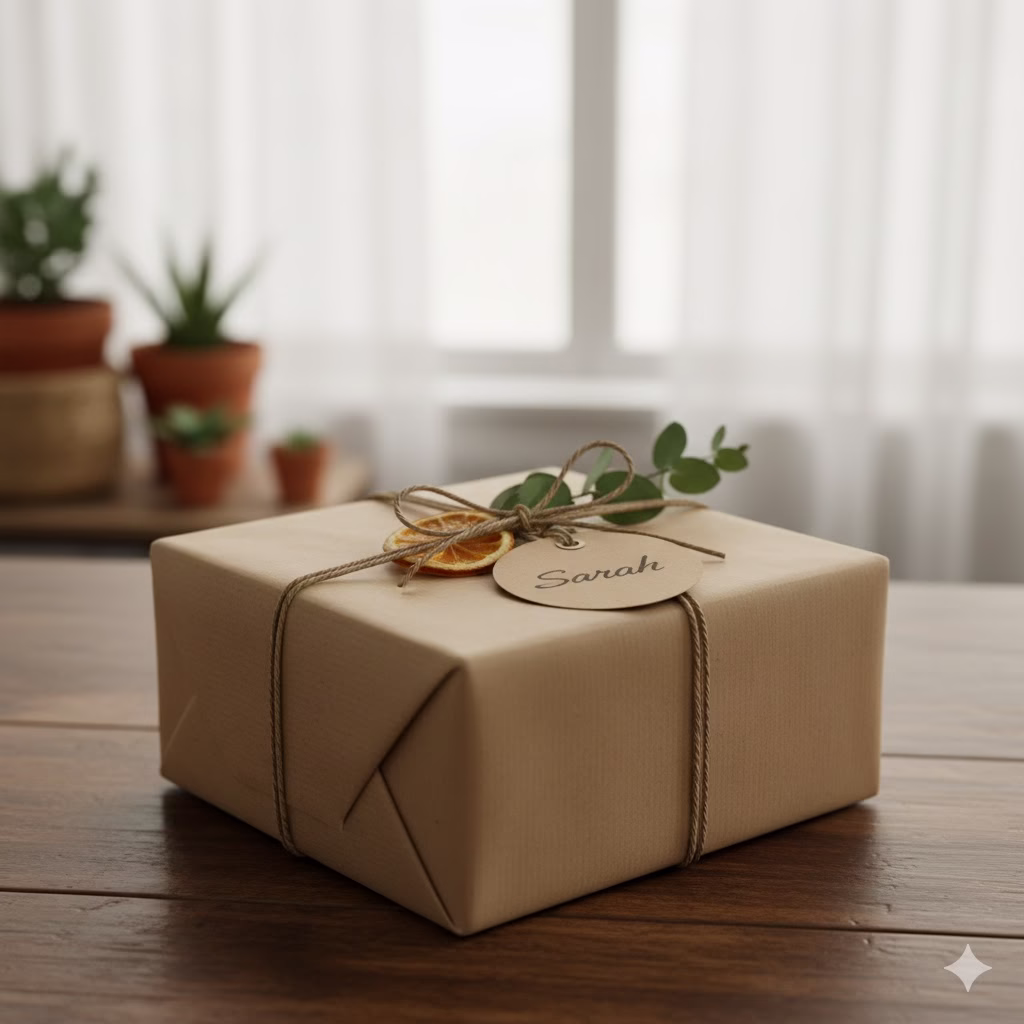
Hi there, fellow nature lover and home decor enthusiast! I’m Sarah, and like many of you, I’ve always loved the simple beauty of nature. My journey into botanical art started in my grandmother’s garden. I learned to turn fleeting blossoms into lasting treasures and create stunning Botanical Prints. Join me as we explore how to bring that same magic into your home with stunning pressed flower art.


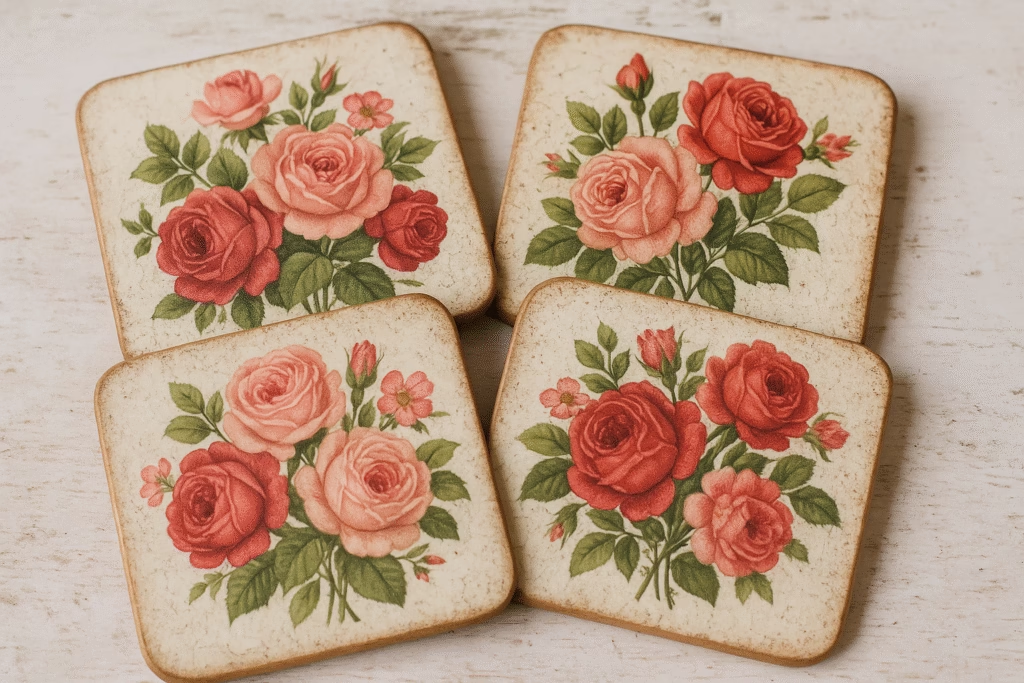
Botanical prints are popular right now. They bring a calming, natural feel to any space, from a tiny apartment to a large country home. This trend is not new, but it is strong. People want to connect with nature inside their homes. Old botanical prints were often like science diagrams. Today’s prints are fresh, bright, and very adaptable. They range from delicate pressed flowers to bold digital art. The world of botanical prints has something for everyone.

But which styles are truly trending now? Which ones are captivating home decorators? This guide will show you the top seven trends in botanical design. We include clear examples. We also give you a detailed “how-to” guide. You can create your own beautiful wall art. Get ready to update your home with the lasting beauty of nature!


Why We Love Botanical Prints

First, let’s talk about the appeal. Why do these prints feel so good to look at? In a modern world full of screens, botanical art keeps us grounded. It reminds us of growth, life, and the wonder of the natural world. These prints create a feeling of peace. They can boost your mood. They lead to a more mindful living space. Whether you see a tiny pressed fern or a bright floral picture, these prints connect you to something essential and beautiful.

The Top 7 Botanical Prints Trending Right Now

Here are the styles of botanical prints that designers and homeowners favor today:

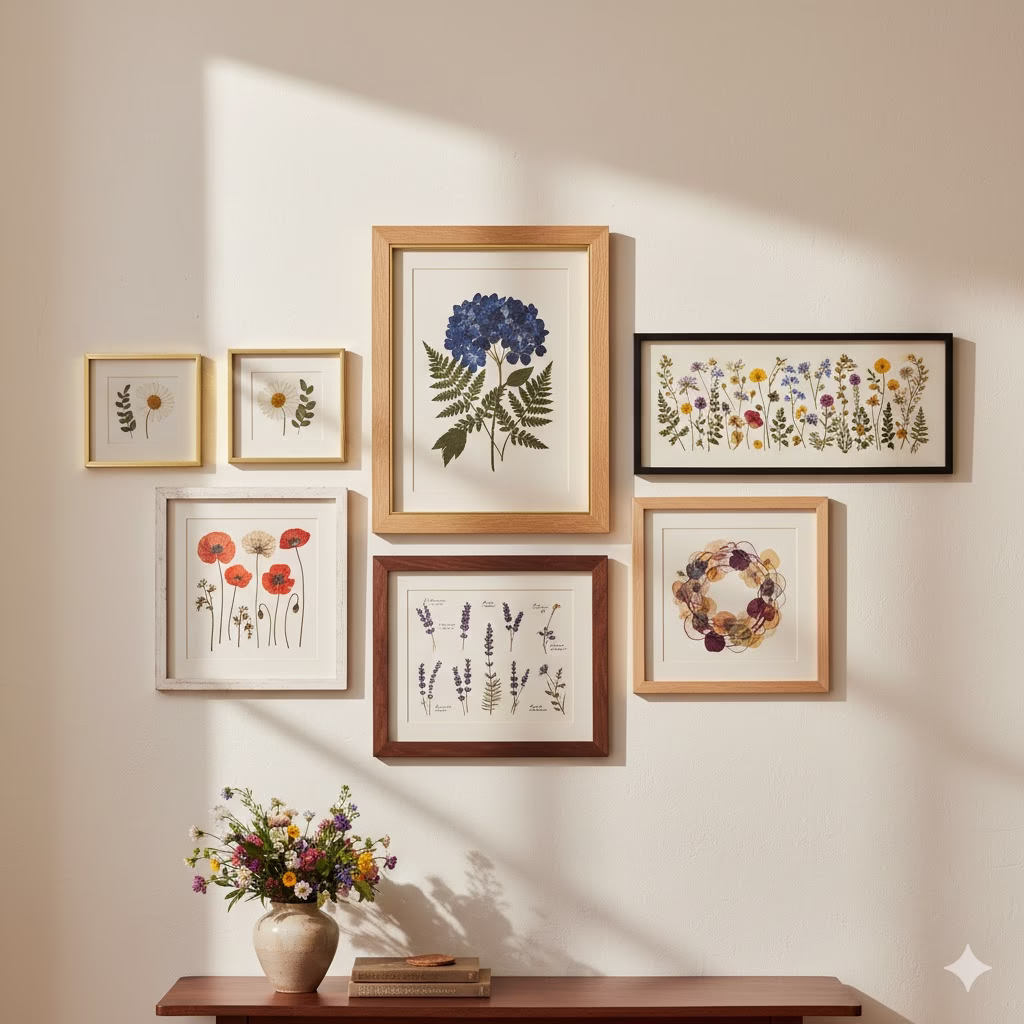
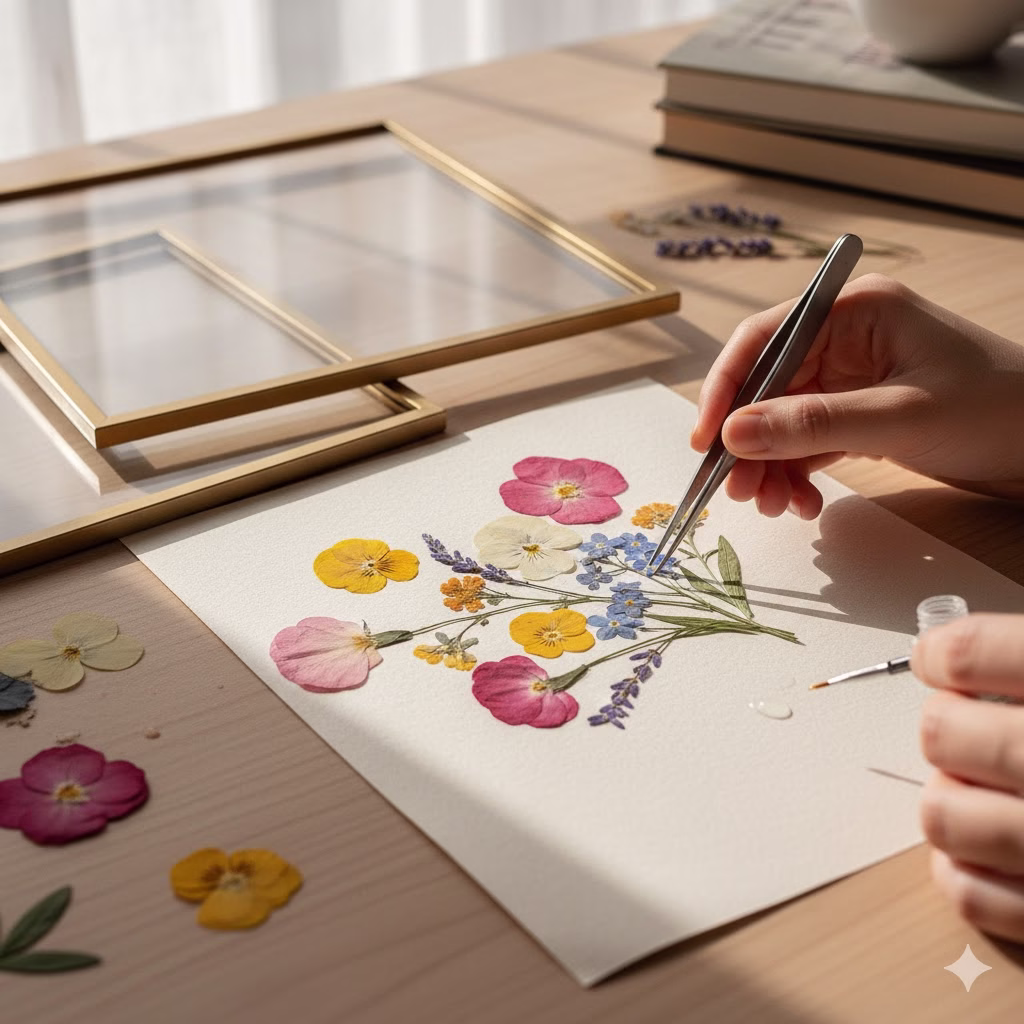
1. The Classic Pressed Wildflower Medley

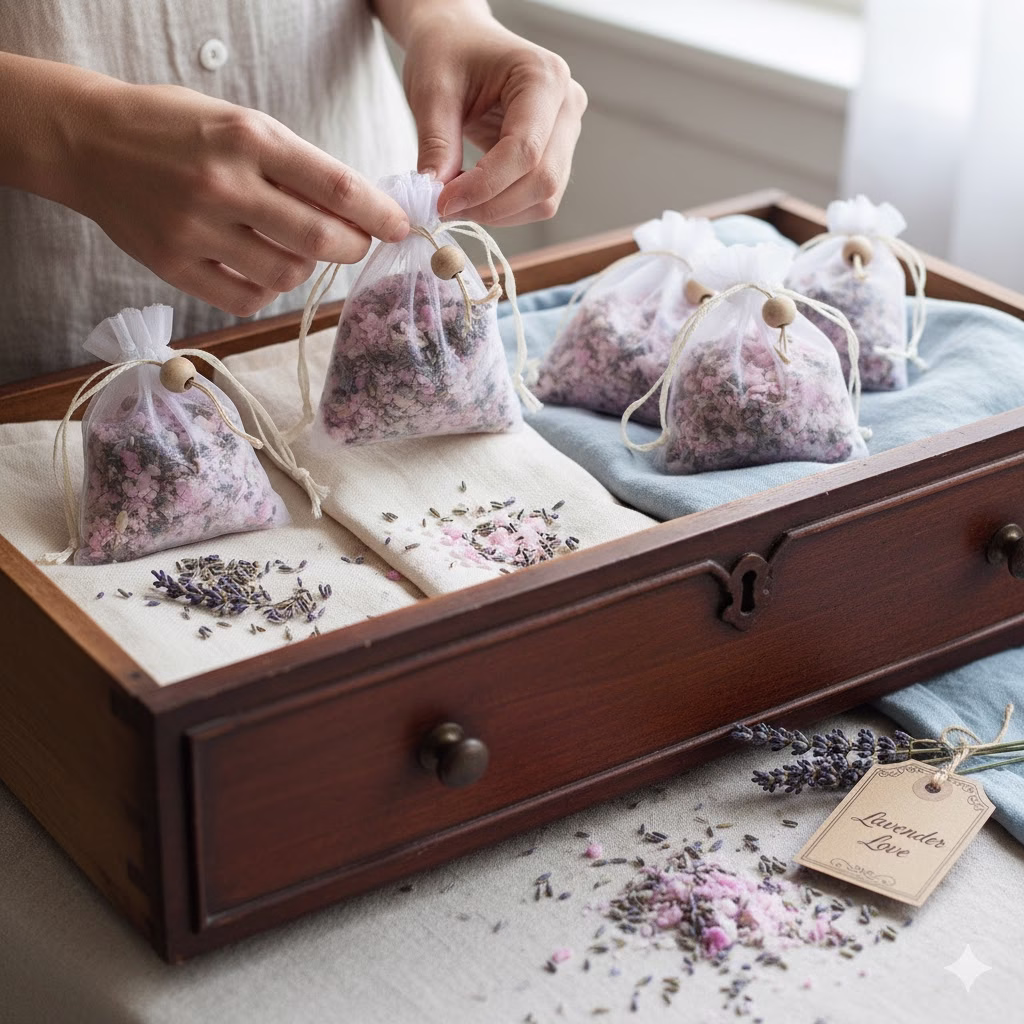
Everyone loves the simple beauty of a wildflower collection. It’s like a captured memory. These flowers are carefully pressed and arranged. They hold a moment in time. This trend uses the organic, rustic look of nature. Often, you see many types of wildflowers in one frame. Think of tiny blue forget-me-nots. Picture delicate Queen Anne’s Lace. See the red of crimson clover. All are composed into art. Their beauty comes from their natural, unique shapes. The pressing process adds subtle color changes.

Why it’s trending: It feels nostalgic. It connects us to the outdoors. It celebrates quiet, simple beauty. It’s perfect for creating a gallery wall that looks truly handmade.

How to do it yourself:

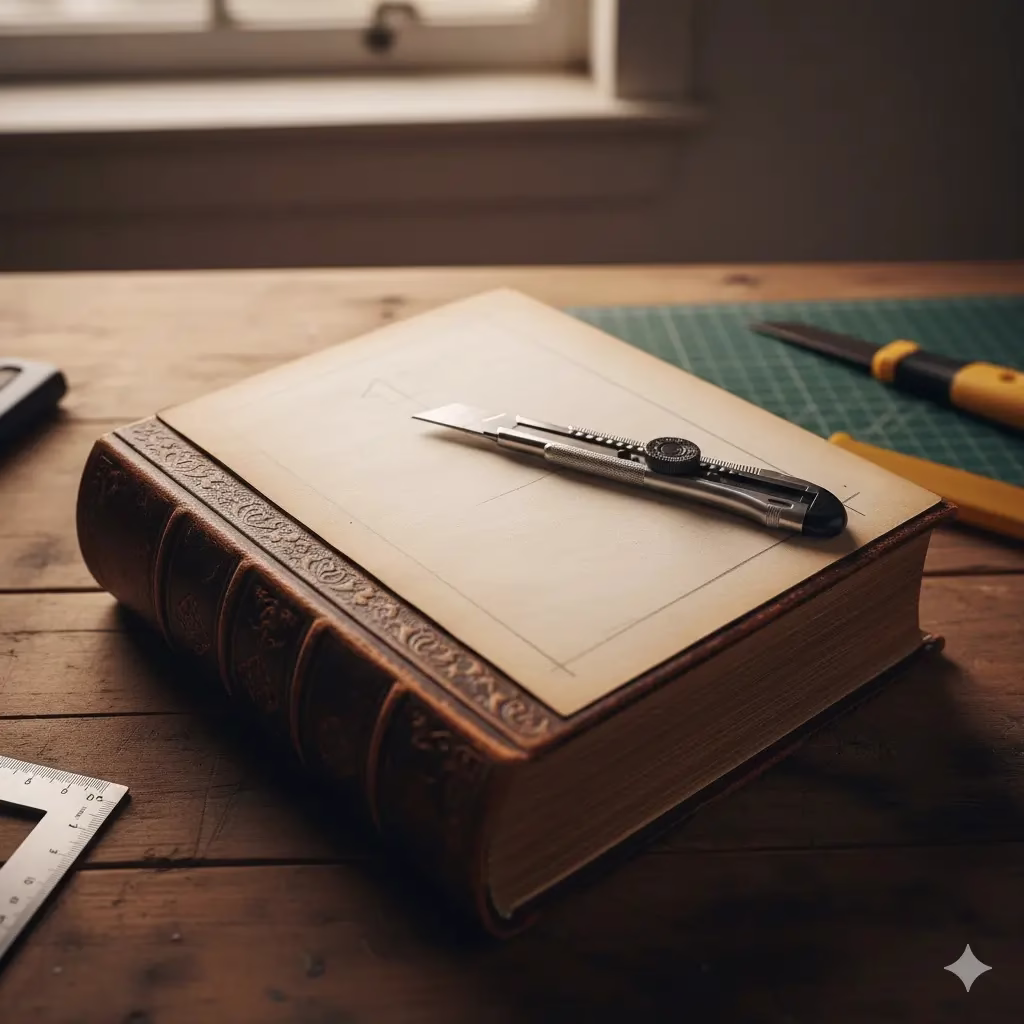
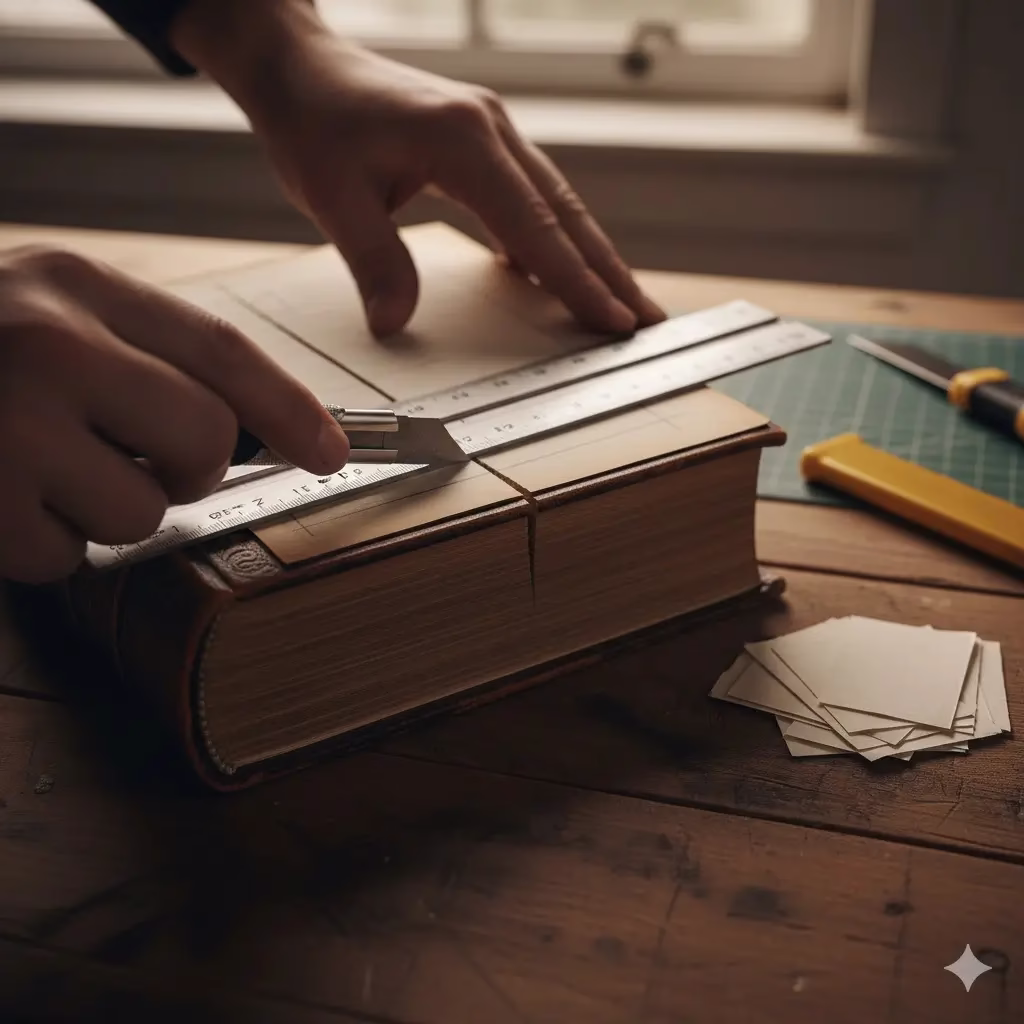
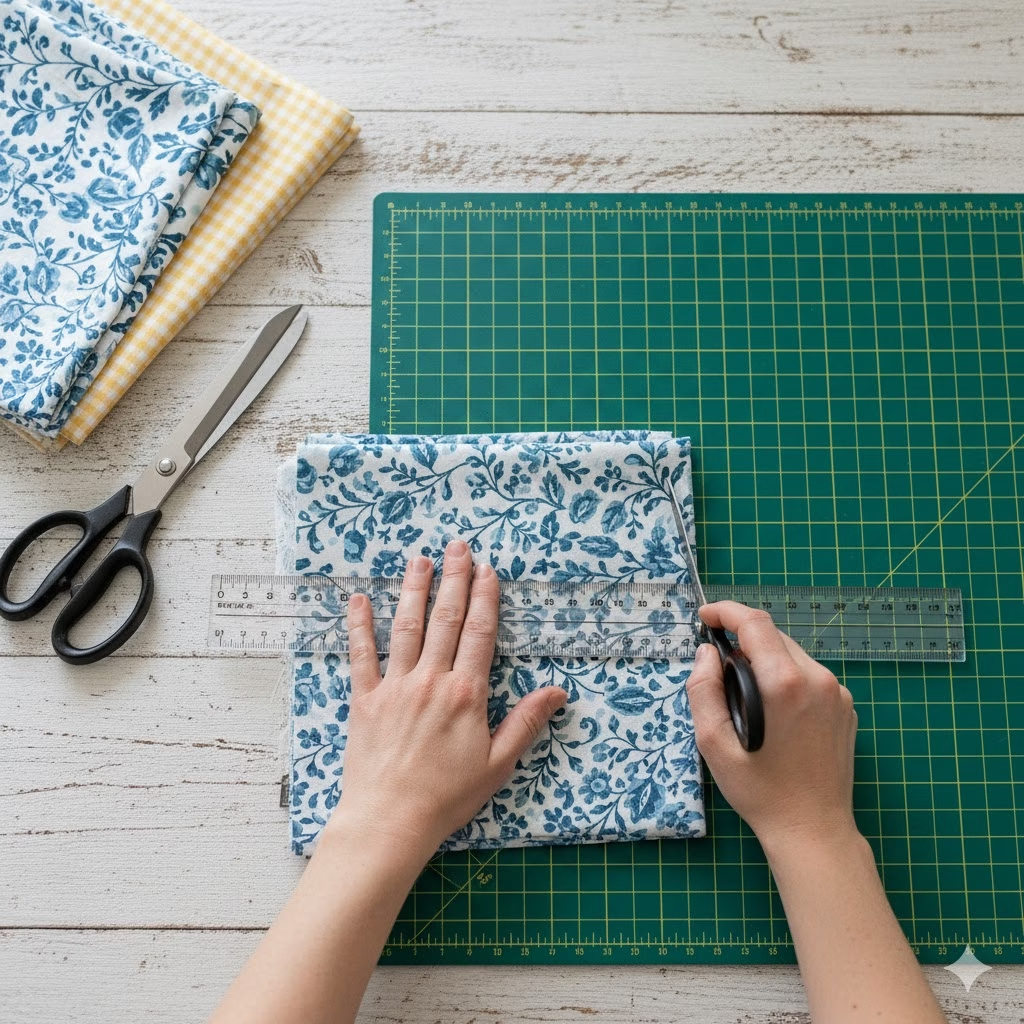
  • Collection: Pick small, flat wildflowers. Find them in your garden. Forage responsibly. Don’t pick thick, wet flowers. They may grow mold easily.
  • Pressing: Use a flower press if you have one. You can also use heavy books. Place the flowers between blotting paper, newspaper, or coffee filters. Press them firmly. Wait for two to four weeks. Change the paper every few days if it feels wet.
  • Arrangement: Make sure the flowers are totally dry. Arrange them on archival paper. Try different looks. You can cluster them. And scatter them. You can line them up.
  • Framing: Use a tiny amount of clear glue to stick them down. Use clear adhesive dots if you prefer. Frame the art under glass. UV protection is best to stop colors from fading.

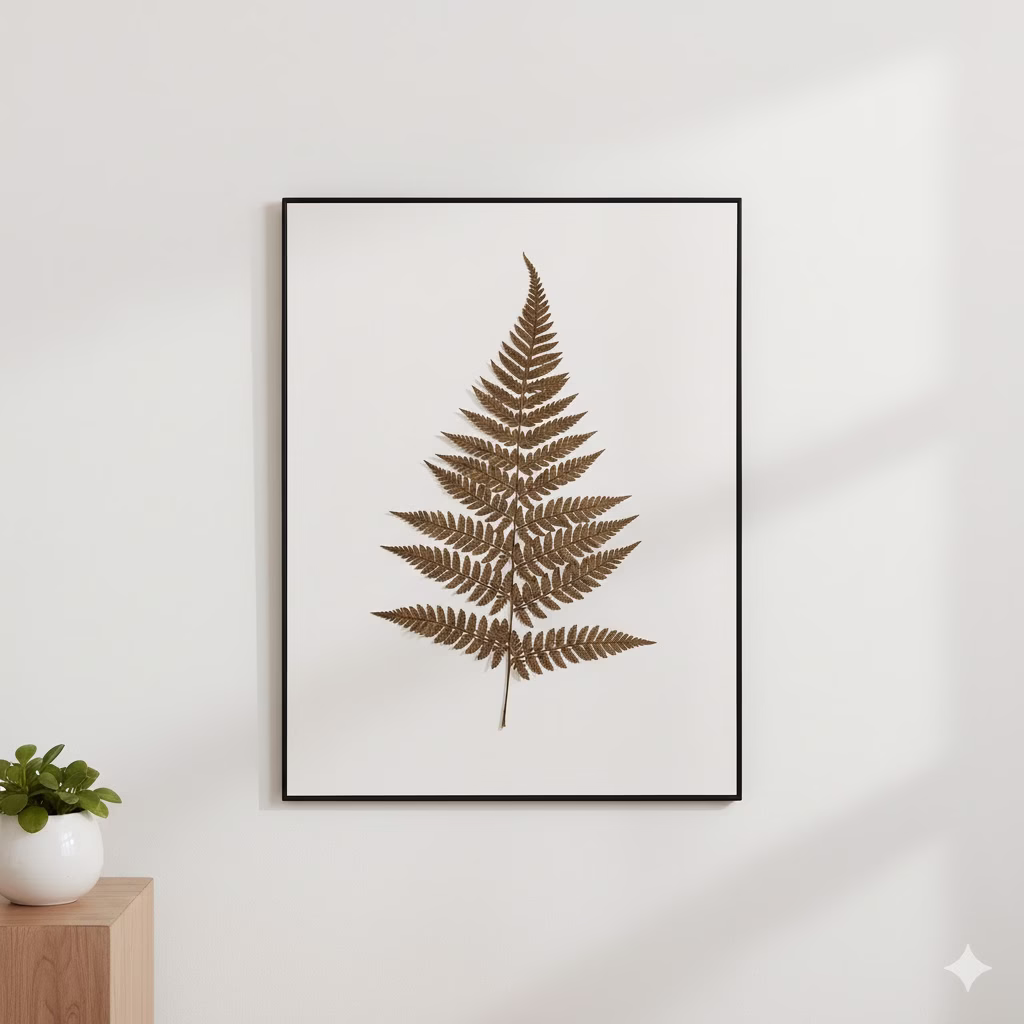
2. Bold, Single-Stem Statement Pieces

This trend is the opposite of the medley. It focuses on just one stunning plant. It makes a big impact. Imagine a large, perfectly pressed fern. Picture a vibrant, flat tropical leaf. Think of one beautiful rose bloom. Put it in a large frame. This style highlights the plant’s shape, texture, and color.

Why it’s trending: It gives a modern, clean look. The small details of the plant stand out. It becomes a strong focal point. It won’t make the room feel too busy.

How to do it yourself:

  • Selection: Pick a flat, strong specimen. Good choices are big fern fronds (like Maidenhair). A single, young, flat Monstera leaf works too. You could also use a pressed Dahlia petal design.
  • Pressing: Use a big press or large books for bigger items. Flatten thick stems or leaves gently before you press them. Be patient; big specimens need more time.
  • Presentation: Place the dried plant exactly in the center of a plain white or cream background. The empty space around the plant is important. It adds to the drama.
  • Framing: Choose a simple, elegant frame. Thin black metal, natural wood, or a clear acrylic frame all look great.

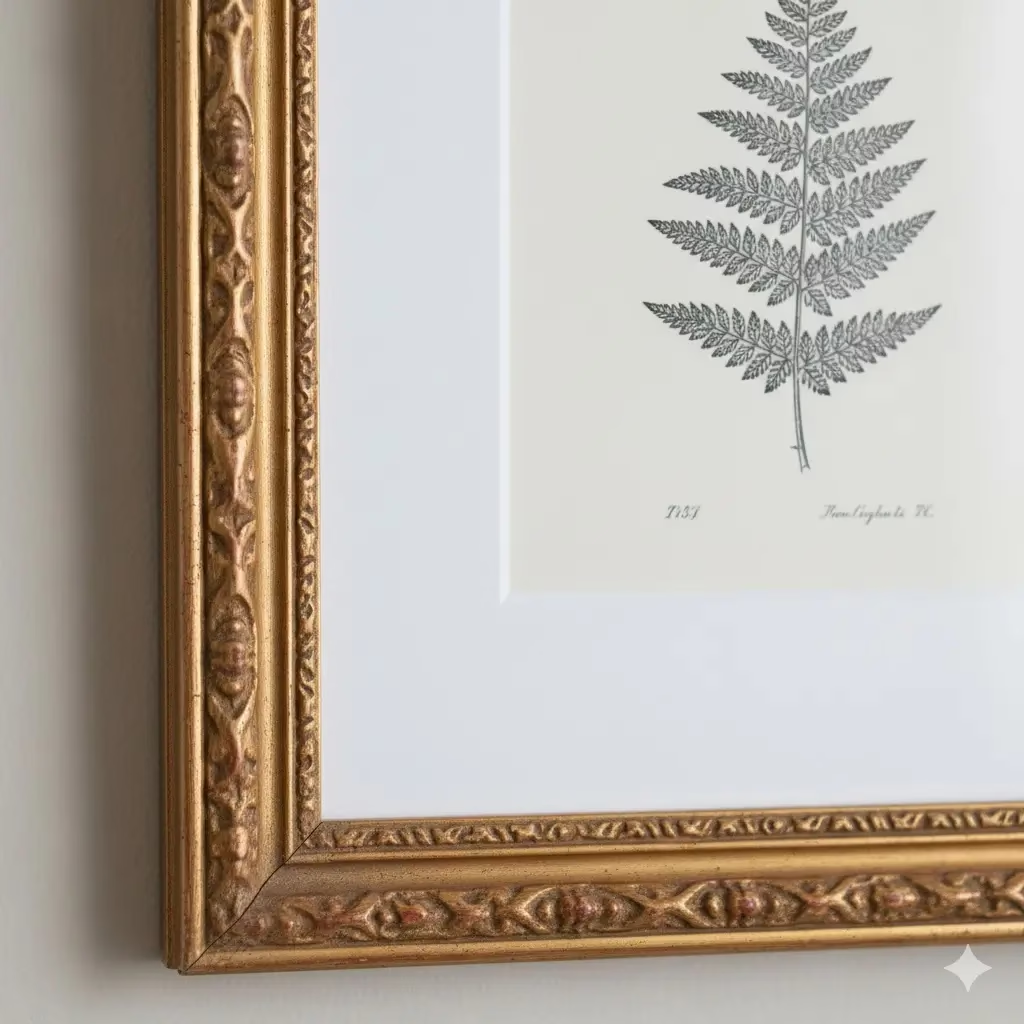
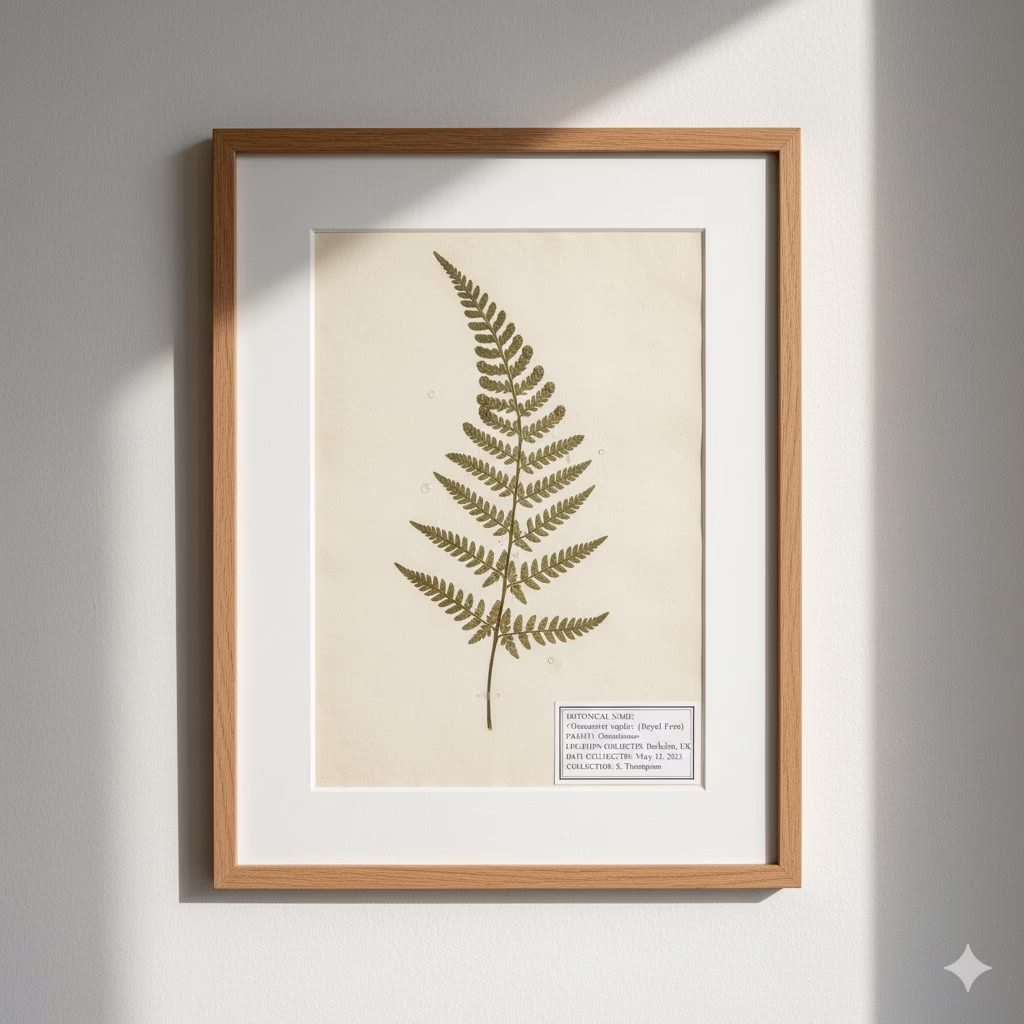
3. Herbarium Style: Scientific & Elegant

This trend is based on old plant collections. The herbarium style uses pressed plants. Each one is carefully labeled. The label shows the scientific name. It shows the common name. It gives the date and place it was collected. This style mixes science with art. It often uses stylish fonts. The paper sometimes looks old. It is organized beauty. It tells the plant’s story.

Why it’s trending: People who love history and science like this style. It adds a smart, refined feel to any room.

How to do it yourself:

  • Preparation: Press a whole plant specimen. Include the stem, leaves, and flowers. If the roots are small and clean, include those too. Keep the plant as complete as possible.
  • Mounting: Carefully glue the entire specimen onto a strong, archival paper.
  • Labeling: Create a label. You can write it by hand with a fine pen. You can print it. Include the Botanical Name (in italics). Add the Common Name. List the Date Collected and Location. Put the collector’s name too. Place the label neatly in one corner.
  • Framing: A classic wood frame looks best. Choose dark or natural wood. Add a mat for extra elegance.

4. Minimalist Geometry with Botanical Accents

This trend is a mix of natural shapes and clean lines. It takes the soft look of botanicals and puts them with sharp, geometric designs. You might see pressed leaves inside a clean circle. Maybe delicate flowers are placed near an abstract line drawing. The print might use modern frames with geometric patterns. The soft, living elements contrast beautifully with the straight, hard lines.

Why it’s trending: It works well for both natural and modern design. It’s perfect for homes that like neat lines but still want a touch of nature.

How to do it yourself:

  • Design: Draw your shape first. This helps plan the layout. You could make a circle. The flowers could fan out from the center. Or, pressed stems could form simple, abstract lines.
  • Elements: Pick small, thin pressed flowers or leaves. They should be easy to bend into shapes. Good choices are small fern pieces, lavender stems, or single petals.
  • Mounting: Glue your pressed pieces onto the background paper. The paper should highlight your geometric shape. You can draw the shape lightly first as a guide.
  • Framing: Use a thin, modern frame. Black metal or clear acrylic sandwich frames work well. They make the modern look stronger.

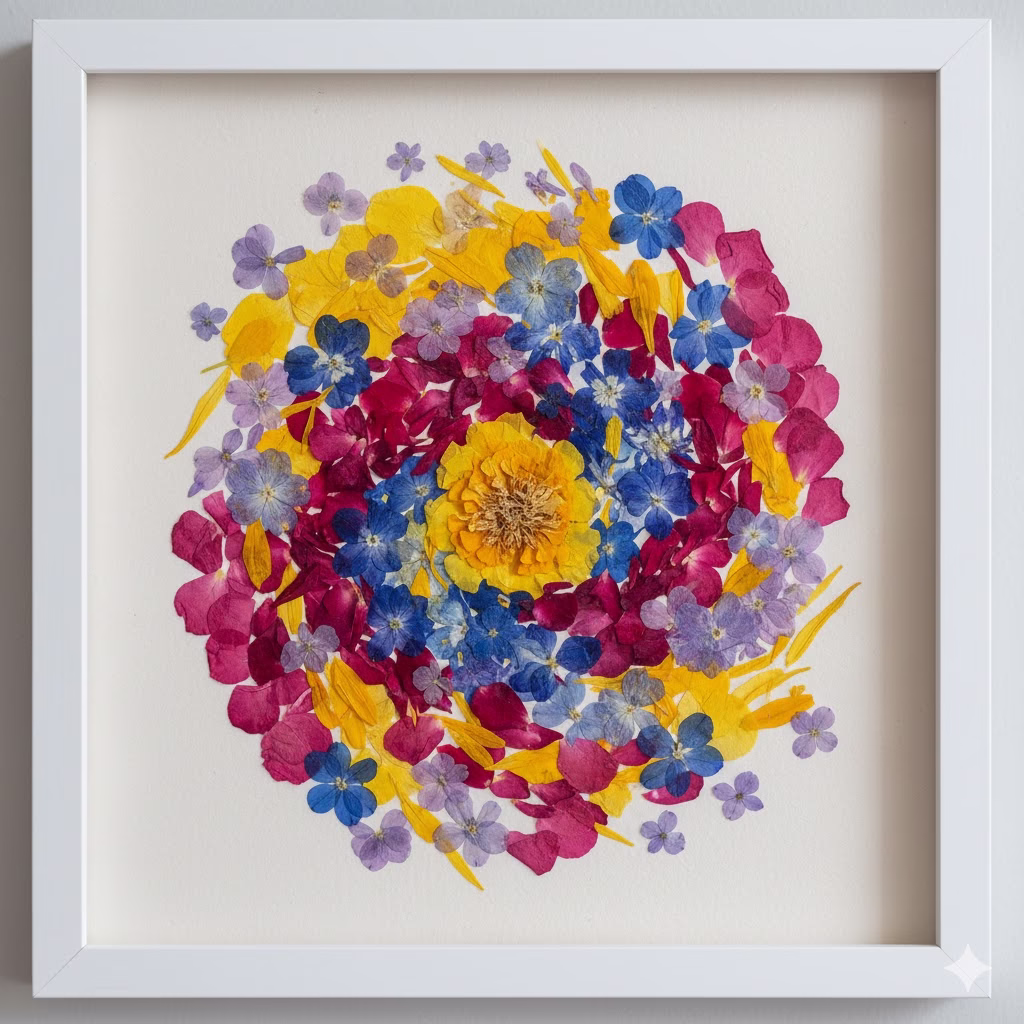
5. Vibrant & Abstract Petal Art

Many pressed flower pieces look very real. This trend is different. It uses petals for abstract designs. It means arranging petals into bright, non-realistic pictures. Think of patterns that look like mosaics. Imagine swirling colors or smooth color changes. All the colors come from natural flowers. Roses, hydrangeas, and delphiniums are good for this. They have rich colors and unique petal shapes.

Why it’s trending: It is a fresh, artistic style. It brings a lot of color and texture. And it is a great match for modern or bohemian homes. It lets you be very creative.

How to do it yourself:

  • Preparation: Press a lot of petals from different, colorful flowers. Sort the petals by color and size.
  • Composition: Play with the arrangement on paper first. Make swirls, color fades, or abstract shapes. You can even try to make tiny landscapes of color. Overlapping petals adds depth.
  • Adhesion: Use just a tiny bit of clear-drying glue. Take your time. You will build up the shapes and layers slowly.
  • Framing: A simple frame with a wide mat helps the art pop. It keeps the focus on the vibrant colors.

6. Pressed Foliage and Greenery Studies

This trend puts the spotlight on greenery and leaves. It skips the flowers altogether. It celebrates the different shades of green, the texture, and the unique structure of leaves. You see ferns, moss, eucalyptus, and small sprigs of pine. The prints often have a monochromatic, calming effect. They give a subtle hint of the forest. The arrangements are simple and often large-scale.

Why it’s trending: It is gender-neutral and versatile. It works with any interior style, from industrial to ultra-modern. It’s the perfect way to add quiet color and texture.

How to do it yourself:

  • Selection: Pick a variety of leaves. Find different shapes and colors of green. Thin leaves press best. Try ferns, eucalyptus, or small ivy leaves.
  • Pressing: Press them flat, just like flowers. They may take longer to dry than petals. Make sure they are totally dry before framing. Wet leaves will mold easily.
  • Arrangement: Create a layered look. Place the larger leaves down first. Then, add smaller ferns and sprigs on top. This adds depth and shadow.
  • Framing: A light-colored wood or a white frame looks fresh. A dark background paper, like navy or black, will make the green stand out strongly.

7. The Layered Transparency Look

This trend uses clear glass or acrylic frames. There is no paper background. The pressed flower is visible on both sides. This creates a floating effect. The wall color becomes the background. When light hits the frame, the pressed flower casts a beautiful, soft shadow. It’s a delicate, ethereal, and very modern way to display plants.

Why it’s trending: It is modern and airy. It creates visual lightness. The flower seems to float. It adds an interactive element because the shadows change with the light.

How to do it yourself:

  • Materials: You need a special frame. Look for a floating frame. It uses two pieces of glass or acrylic.
  • Preparation: This method demands perfect flowers. Any smudge or excess glue will be very visible. Use only very thin, flat pieces.
  • Mounting: Clean the glass well. Place the flower on the bottom piece of glass. Use a tiny amount of clear epoxy or clear-drying glue on the back of the flower. Use tweezers for careful placement. Gently put the top glass over the flower and secure the frame.
  • Placement: Hang this art in a place where it can catch natural light. This is how you get those beautiful shadows.

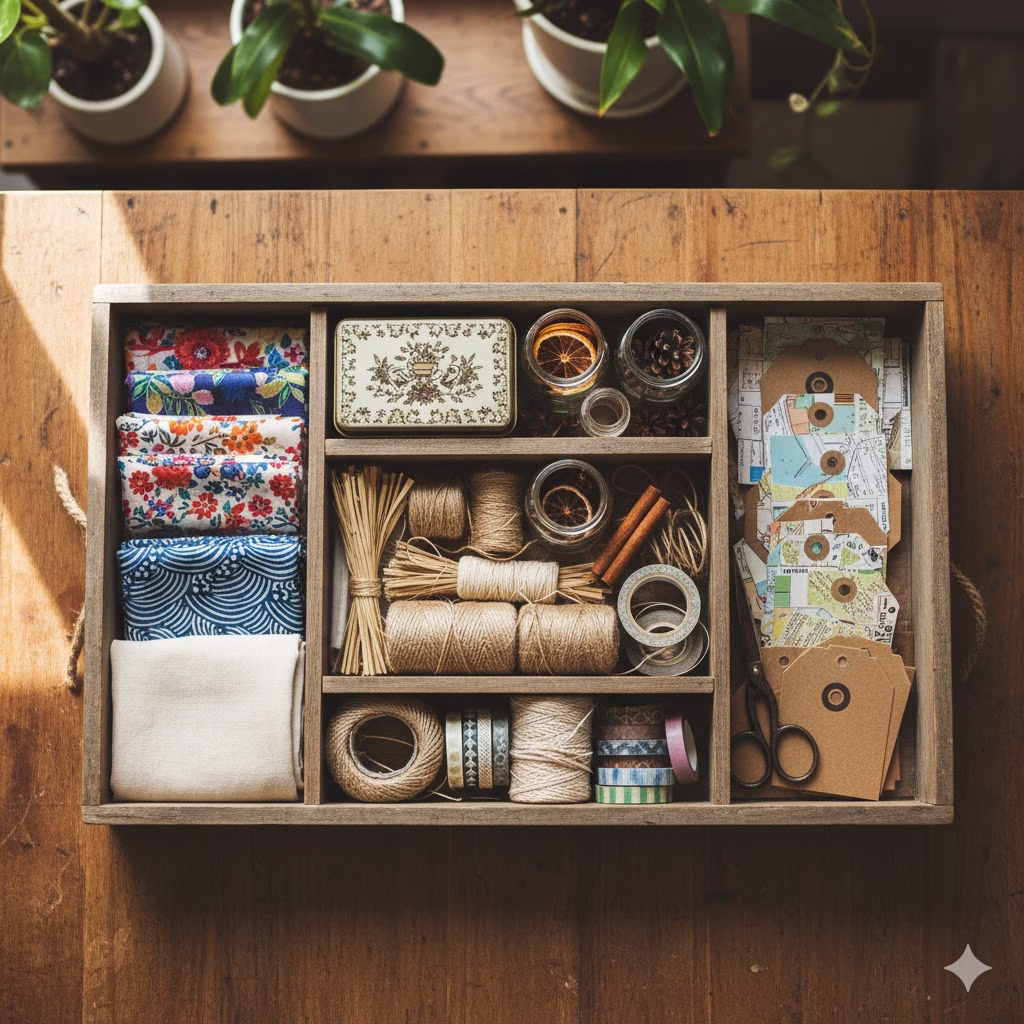
Mastering the Art of Pressing: Your Detailed How-To

Creating your own botanical prints is simple. It only needs patience. The process is easy. The payoff is huge. Here is a simple, easy-to-follow guide to pressing and framing your flowers.

Step 1: Gathering and Selection

  • When to Pick: Pick flowers in the middle of the day. They should be dry. Wait for the dew to dry. Flowers with less moisture press better. They will not mold.
  • Which Flowers are Best: Choose flowers with flat petals and thin centers. Pansies, violas, single-petal roses, cosmos, and ferns are great. Avoid thick flowers like tulips or dense buds. They are too bulky.
  • Pre-Press Prep: Remove any leaves that you don’t want. Trim stems to the length you need. Gently flatten the flower with your fingers.

Step 2: The Pressing Method

  • Use a Book: This is the easiest, cheapest way. Open a heavy book. Place the flower between two sheets of absorbent paper. Blotting paper is best. You can also use plain newsprint or coffee filters. The absorbent paper draws out moisture.
  • Positioning: Place the flowers face down. Keep space between them. If they touch, they can stick together. Spread out the petals and leaves as you want them to look. Be careful.
  • Pressure: Close the book. Place more heavy books on top. Use bricks or other heavy items for more weight. The pressure must be even.
  • Waiting: This is the hard part. Wait for two to four weeks. Do not check too soon. The flowers must be totally dry. They will feel like paper. If they bend, they need more time.

Step 3: Arranging and Gluing

  • Materials: Get tweezers, archival paper, and clear-drying craft glue. A small brush or a glue pen helps control the glue.
  • Arrangement: Use tweezers to move the delicate, dried flowers. Arrange them on your paper. Try different positions. Once you are happy, take a picture with your phone. This helps you remember the layout.
  • Gluing: Put a very tiny amount of glue on the back of the flower. Use the brush or glue pen. Place the flower on the paper. Press it gently for a moment. Work slowly. If a petal breaks, just glue it back together.
  • Drying: Let the entire piece dry completely. Give it at least 30 minutes.

Step 4: Framing Your Botanical Prints

  • Protect Your Art: Pressed flowers can fade in direct sunlight. Use a frame with UV-protective glass. This keeps the colors brighter for longer.
  • Choosing a Mat: A mat is the cardboard border around the art. It adds a professional look. It also keeps the flower from touching the glass. This protects the delicate petals.
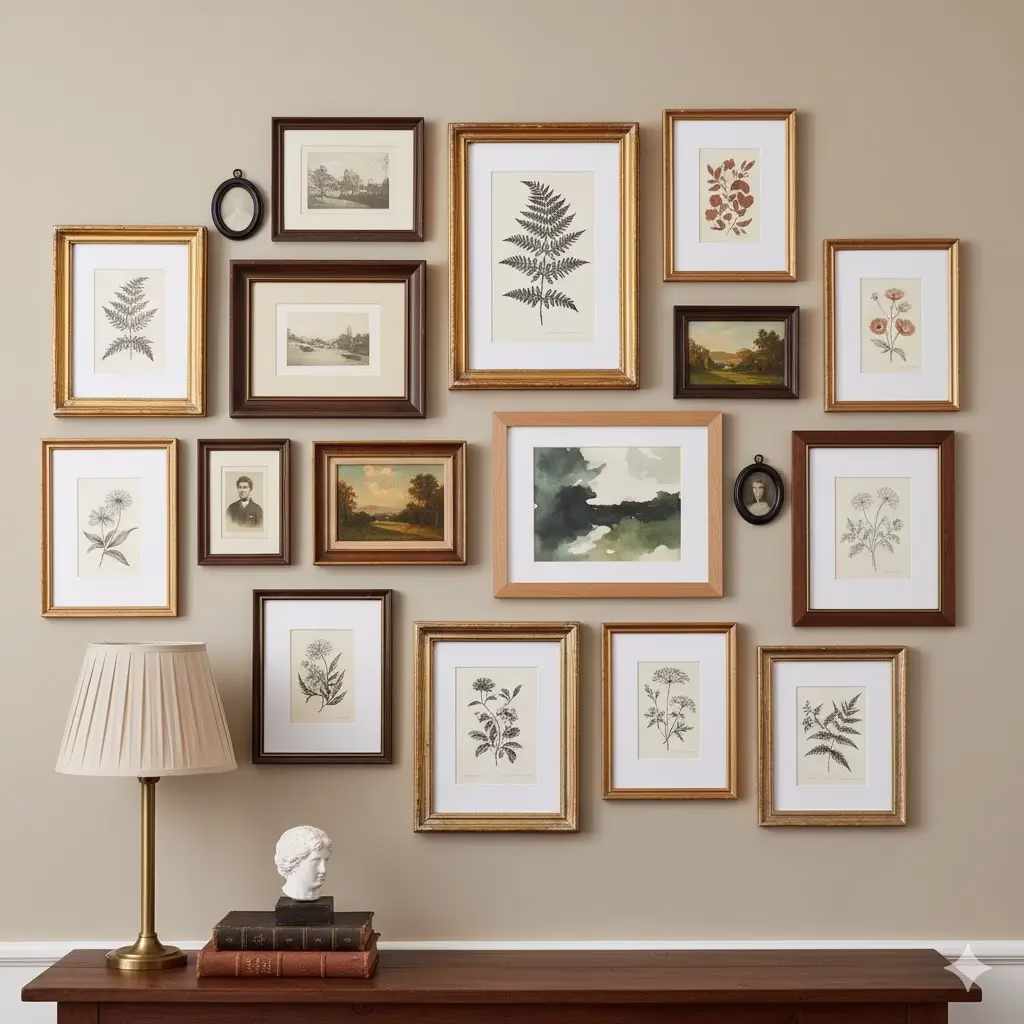
  • Display: Hang your botanical prints where you can see them often. Group a few together for a gallery wall. This makes a great design statement.


Frequently Asked Questions (FAQ)

Q: What is the formal name for pressed flower art?

A: The art of pressing and arranging dried flowers is often called Oshibana. This is a Japanese art form. It has been practiced for many centuries.

Q: How long will my pressed flower art last?

A: If you prepare and frame them well, pressed flowers can last for many years. The key is to keep them out of direct sunlight. This slows color fading. You must also make sure they are completely dry before you frame them. This prevents mold.

Q: Which flowers are the absolute easiest to press for beginners?

A: For beginners, choose flowers that are already flat and thin. Pansies and Violas are perfect. Ferns, Queen Anne’s Lace, and small single-petal Daisies are also very easy to work with.

Q: Can I use a microwave to press flowers faster?

A: Yes, you can use a microwave press. This method is much faster than the book method. It can dry flowers in minutes. You must be very careful with it. You need a special microwave press or thick paper and ceramic tiles. This prevents burning. The traditional, slow method often gives the best color retention.

Q: What is the best type of paper for the background?

A: Use archival-quality paper or cardstock. This paper is acid-free. It will not yellow over time. You can choose white or cream. Darker colors, like navy, can make bright flowers pop strongly.

Q: Where should I display my finished botanical prints?

A: Display your prints indoors. Avoid spots with high humidity, like a very steamy bathroom. The biggest rule is to avoid direct, strong sunlight. Sunlight will cause the natural colors to fade over time.


Reference Section


Recent Posts


How to Use Potato Skins: 10 Easy Ideas

A close-up of a bowl filled with golden-brown, crispy and seasoned homemade Potato Skins, garnished with fresh chives and coarse sea salt.

We all have those kitchen reflexes—like tossing a perfectly usable food item. This zero-waste journey began by recognizing that even something as humble as Potato Skins has incredible potential. Turning kitchen scraps into fantastic meals is not just rewarding; it’s fun! If you can transform a simple potato skin, you can transform your entire cooking mindset.


The Unexpected Hero: Unlocking the Power of Potato Skins

We’ve all been there: peeling potatoes for mash, salad, or a spectacular roast, and tossing those beautiful, earthy skins right into the compost or trash. It’s a kitchen reflex. But what if I told you that you are habitually discarding one of the most flavorful, versatile, and nutrient-dense parts of the potato? It’s true! The potato skin isn’t just a byproduct; it’s a hidden gem ripe for culinary transformation.

In our quest for efficiency and a commitment to reducing food waste—a goal that is both environmentally responsible and great for our wallets—repurposing kitchen scraps has become an essential skill. And few scraps offer the instant culinary payoff that potato skins do. Think about it: they’re pre-portioned, full of fiber, rich in vitamins, and, perhaps most importantly, incredibly textural. That thin layer of potato flesh still clinging to the skin, once roasted or fried, becomes pure, irresistible crunch.

This article isn’t just about reducing waste; it’s about instant gratification. We’re talking about ten incredibly easy and fast ways to turn those peelings into gourmet snacks, satisfying sides, and even innovative ingredients for other dishes. Forget complicated, time-consuming recipes. These are hacks you can implement right now, using ingredients you already have. Get ready to rethink your routine, maximize your potato prep, and elevate your cooking with these simple, powerful ideas for your leftover potato skins.


1. The Classic Crisps: Ultimate Homemade Potato Skin Chips

This is the cornerstone of potato skin utilization and often the first thing people think of, but the how-to makes all the difference between a sad, soggy peel and a shatteringly crisp chip. These are perfect for snacking or serving alongside a sandwich.

How to Do It:

  1. Prep: Wash the skins thoroughly before peeling. After peeling, pat them absolutely bone-dry with a clean kitchen towel or paper towels. Moisture is the enemy of crispiness.
  2. Season: Toss the skins in a bowl with a generous drizzle of olive oil, fine sea salt, and a pinch of your favorite seasoning (garlic powder and smoked paprika are excellent choices).
  3. Bake: Spread the skins in a single layer on a baking sheet. Overcrowding creates steam, leading to limp chips. Bake at 400∘F (200∘C) for 10 to 20 minutes, flipping halfway through.
  4. Finish: They are done when they are dark golden brown and audibly crisp. Serve immediately with a French onion dip or a simple vinegar drizzle.

2. Flavor-Packed Potato Skin Stock Base

Instead of using plain water or store-bought vegetable stock for your next soup or stew, use potato skins to create an inexpensive and deeply flavorful stock. The starches and residual flavor from the potato enrich the liquid beautifully.

How to Do It:

  1. Combine: Place a generous amount of potato skins into a large pot. Add rough-cut vegetable scraps you might also have, such as onion ends, carrot peels, and celery leaves.
  2. Simmer: Cover the ingredients with water, add a bay leaf and a few peppercorns. Bring to a boil, then reduce the heat and simmer gently for about an hour.
  3. Strain: Pour the liquid through a fine-mesh sieve or cheesecloth, pressing on the solids to extract all the liquid. Discard the spent skins and scraps.
  4. Use: The resulting golden liquid is a rich, slightly earthy stock, perfect for making gravy, adding depth to risotto, or serving as a base for a hearty vegetable soup.

3. Savory Baked “Bacon” Bits Substitute

For a vegetarian or vegan option, or simply when you want a quick, crispy topping for salads, baked potatoes, or mac and cheese, potato skins can mimic the crunch and savory notes of bacon bits.

How to Do It:

  1. Mix the Marinade: In a bowl, combine a teaspoon of olive oil with a drop of liquid smoke (optional, but adds a great smoky depth), a pinch of salt, a dash of garlic powder, and a small amount of nutritional yeast for a cheesy note.
  2. Coat: Toss the dried potato skins thoroughly in this mixture.
  3. Roast: Roast them at 375∘F (190∘C) until they are very dark and extremely crunchy, which usually takes around 20 minutes.
  4. Chop: Once cooled, chop them roughly into small pieces. Store them in an airtight container for a week of easy salad topping.

4. Garnish for Creamy Soups and Chili

A spoonful of richly seasoned, crispy potato skins can elevate a humble bowl of soup from ordinary to extraordinary. This works particularly well on creamy soups, like leek and potato, or hearty chilis where the crunchy texture contrasts nicely with the smooth base.

How to Do It:

  1. Follow the preparation steps for the Homemade Potato Skin Chips (Idea 1), ensuring they are extra crispy.
  2. Crush them lightly with your hands—you want small, irregular pieces, not dust.
  3. Sprinkle them over your finished chili or soup just before serving. The warmth will enhance their aroma.

5. Fried Potato Skin “Puffs” for Appetizers

When skins are peeled a bit thicker, they hold their shape better during a shallow fry, turning into delicious, airy puffs. This is a perfect, rustic appetizer for a casual dinner party.

How to Do It:

  1. Oil: Heat about a half-inch of neutral oil (like canola or vegetable oil) in a heavy-bottomed pan to medium-high heat.
  2. Fry: Carefully drop the dried, unseasoned skins into the hot oil. Do this in small batches to maintain oil temperature.
  3. Drain: Fry them for 2 to 3 minutes until golden and puffy. Remove with a slotted spoon and drain on paper towels.
  4. Season Immediately: While still hot, sprinkle them generously with a vibrant seasoning mix—try chili powder, lime zest, and cumin, or simply salt and pepper.

6. Homemade Potato Skin Salt Rub

Don’t just use salt on the skins; infuse your salt with the skins! Drying and blending the skins creates an earthy, umami-rich seasoning rub that enhances everything from roast chicken to scrambled eggs.

How to Do It:

  1. Dehydrate: Bake or dehydrate the skins (without oil or seasoning) until they are completely brittle. This may take up to an hour in a low-temp oven (200∘F or 95∘C).
  2. Blend: Place the brittle skins and a generous amount of coarse salt (like kosher or sea salt) into a food processor or a strong blender.
  3. Grind: Process until you have a fine, uniform seasoning blend.
  4. Store: Store this bespoke, earthy salt in a shaker to use as a finishing salt.

7. Potato Skin “Flour” for Thickening and Texture

The dehydrated skins can be pulverized even further than the salt rub to create a fine, earthy flour. This isn’t meant to replace wheat flour, but to act as a stealthy, flavorful thickener.

How to Do It:

  1. Pulverize: Follow the dehydration step from Idea 6, then grind the skins in a spice grinder until they are a very fine powder, avoiding any chunky pieces.
  2. Use: Stir a spoonful into stews, gravies, or sauces just before serving to add body, a rustic texture, and a subtle potato flavor boost. It’s a fantastic, low-carb alternative to traditional thickeners in certain dishes.

8. The Loaded Snack: Mini Potato Skin Bites

While traditional potato skins use the scooped-out potato itself, you can create a bite-sized, minimalist version using the skins alone, focusing on the topping. This is a speedy, crowd-pleasing snack.

How to Do It:

  1. Pre-Bake: Bake the skins (as in Idea 1) until they are about halfway cooked—still soft, but slightly firm.
  2. Top: Sprinkle the skins with shredded sharp cheddar cheese and small bacon pieces (or the vegetarian ‘bacon’ bits from Idea 3).
  3. Finish: Return them to the oven and bake until the cheese is melted, bubbly, and slightly browned.
  4. Garnish: Remove, let cool slightly, and top with a dollop of sour cream or Greek yogurt and a sprinkle of chopped chives. These disappear fast!

9. Rustic Bread Crumb Replacement in Meatloaf or Burgers

When making meatloaf, meatballs, or burgers, breadcrumbs are typically used as a binder and to keep the finished product moist.1 Finely chopped or ground potato skins can step in to serve this same purpose while adding an unbeatable rustic, savory depth.

How to Do It:

  1. Prep: Use a sharp knife to very finely mince the raw or slightly softened potato skins. Alternatively, pulse them a few times in a food processor—you don’t want a puree, just small pieces.
  2. Mix: Substitute the potato skin pieces for about a quarter of the breadcrumbs called for in your favorite recipe.
  3. Cook: Proceed with your usual recipe. The skins will essentially melt into the mixture as it cooks, lending moisture and flavor without changing the structural integrity of your meat dish.

10. Crispy, Savory Bowl Filler (Instead of Noodles)

Looking for a satisfying crunch in your next Asian-inspired rice or noodle bowl? Tossed with spices and baked until crisp, potato skins provide an exciting textural element that’s far more flavorful than plain croutons or fried noodles.

How to Do It:

  1. Season: Toss the dried potato skins with a teaspoon of sesame oil, a pinch of chili flakes, and a dash of soy sauce or tamari.
  2. Bake: Bake at 375∘F (190∘C) until very crispy.
  3. Garnish: Just before serving your ramen, pho, rice bowl, or stir-fry, sprinkle a handful of these savory skins over the top for a guaranteed textural pop.

Tips for Maximizing Your Potato Skin Yield

To ensure success with any of these methods, a little prep goes a long way.

  • Wash Thoroughly: Potatoes grow in the soil, so a meticulous wash with a vegetable brush is critical before peeling. This is non-negotiable for cleanliness and flavor.
  • The Thicker the Better: If you intend to make loaded bites or puffs, use a vegetable peeler that allows for a thicker peel, grabbing a little extra of the inner potato flesh. For chips and salts, a thin peel is just fine.
  • Keep it Dry: When making crispy items (chips, garnishes), patting the skins completely dry before adding oil is the single most important step for achieving that signature crunch.
  • Storage: Raw skins can be stored in the refrigerator in a sealed container for a few days, but they are best used immediately. Once baked, store them like potato chips—in an airtight container at room temperature.

By embracing these ten easy ideas, you’re not just saving scraps; you’re unlocking new possibilities in your kitchen. That feeling of turning what was once waste into a delicious, gourmet-style food is truly instant gratification.


Frequently Asked Questions (FAQ)

Q: Are potato skins actually nutritious?

A: Yes, they are! The skin holds a significant amount of the potato’s fiber, B vitamins, Vitamin C, and essential minerals like potassium and iron. When you eat the skin, you are getting more concentrated nutrition than if you only consumed the white, starchy interior.

Q: Do I need to use organic potatoes if I’m eating the skins?

A: While it is always recommended to choose organic when possible, the most important step is always to wash the potatoes thoroughly with a brush under running water to remove any dirt or surface residue. If you are concerned about pesticides, organic is the best choice.

Q: Can I use the skins from any type of potato?

A: Absolutely! Russet potato skins tend to be the thickest and most rugged, making them ideal for the loaded bites and classic chips. Yukon Gold and Red potato skins are thinner and more delicate, perfect for stock, salt rubs, or the savory bowl fillers where a light crisp is desired.

Q: How long can I store leftover baked potato skins?

A: Once they are fully baked and crispy, treat them like homemade potato chips. Store them in an airtight container at room temperature for up to four or five days. They can lose some crunch over time, so you might need a quick re-bake at 350∘F (175∘C) to refresh them.


References


Recent Posts


How To Cut Your Water Bill in Half With Greywater

A bright, modern kitchen counter featuring a sleek, stainless steel instant boiling water tap. The countertop is clean and clutter-free, emphasizing that this efficient system can help Cut Your Water Bill by replacing the less efficient traditional electric kettle.

As a homeowner, you’re always looking for smart ways to save money and live more sustainably. I’ve been there, watching the water meter spin, wondering if there was a better way to Cut Your Water Bill. This guide shares the practical, real-world solutions I’ve discovered to harness household water, transforming a common drain into a valuable resource. Join me as we explore how a little ingenuity can lead to big savings and a greener lifestyle.


Introduction: The Water Hidden in Your Home

Think about the water you use every day to shower or wash your clothes. Where does it all go? Most of it goes straight down the drain and is lost forever. But what if that water could be used again? This idea is called greywater recycling. It’s a simple, smart way to save a lot of money on your water bill and help the planet at the same time.

Many people worry about high water costs or live in areas where water is scarce. We try to take quick showers and only run full dishwashers. These are good steps, but they miss the biggest opportunity: greywater.

Greywater is wastewater from your home that hasn’t touched human waste. This water comes from your bath, shower, washing machine, and bathroom sinks. It is usually quite clean. It does not include water from the toilet (which is called blackwater). By catching and reusing this water for things like watering your yard, you cut down how much fresh water you buy from the city. This leads to real savings on your monthly bill.

This guide will show you everything about recycling greywater. We will cover why it matters, the different systems you can set up for any budget, and how to install them step-by-step. Prepare to make your home a water-saving champion and see your meter slow down!


Why Greywater Matters: Saving Money and Water

The reasons to start using greywater are strong. They help both your wallet and the environment.

1. Slash Your Water Bill: This is the biggest reason for most people. A huge part of your home’s water—sometimes up to 80%—goes to watering your lawn or garden. When you use greywater instead, you stop buying that fresh water. This means you save money every month, especially if your city charges more as you use more water.

2. Protect Fresh Water: We only have so much clean, fresh water. Climate change and more people put stress on our rivers and lakes. When you reuse greywater, you lower the demand on these vital sources. This keeps water available for nature and for future use.

3. Tougher During Dry Times: If you have a garden, greywater is gold during a dry spell. When water use is restricted, your plants can still get the water they need. If you use safe soaps, the water even gives your plants a little bit of extra food.

4. Less Work for Treatment Plants: Every gallon you reuse on-site is one less gallon the city has to clean up. Cleaning wastewater takes a lot of energy and money. By reusing at home, you reduce the stress on public systems.

5. Being Water Wise: Using greywater is a clear sign that you are committed to living sustainably. It’s an easy, real way to lower your impact on the earth.


What is Greywater? Knowing the Difference

You must know what greywater is and what it isn’t to use it safely.

Greywater Comes From:

  • Showers and baths.
  • Washing machines.
  • Bathroom sinks.

Do NOT Use (This is Blackwater):

  • Toilets.
  • Kitchen sinks (too much food grease and soap).
  • Water used when someone is sick.

Key Safety Points

  • Soaps Matter: Only use soaps that break down easily and have low amounts of salt and phosphorus. Harsh cleaners, bleach, and high boron levels hurt plants and soil. Always look for plant-safe labels.
  • Use It Fast: Greywater should be used right away, within a day. If you store it longer, bad bacteria can grow, and it will start to smell.
  • Keep It Separate: Never drink greywater. Don’t use it to wash food. Try not to spray it directly onto the leaves or edible parts of your vegetables.

Greywater System Types: Pick the Right Fit

Systems range from very easy and cheap to complex and automated. Your choice depends on your skill level, budget, and how much water you want to save.

1. Simple, Manual Methods (Easy Entry)

These need you to do some work but cost almost nothing.

A. The Bucket Method:

  • How it works: Keep a bucket in your shower. Catch the cold water while you wait for it to warm up. Use this water right away on your house plants or pour it down the toilet to flush it.
  • Pros: Free. No tools needed. Instant savings.
  • Cons: You must do the heavy lifting. You only catch a small amount.

2. Laundry-to-Landscape (L2L) Systems (Best Value)

This is a favorite choice. It often costs less and is easy to install. Always check your local rules first!

  • How it works: A special valve is put on your washing machine’s drain hose. With a simple switch, you send the used wash water either to the sewer or out to your yard through pipes buried just under the ground.
  • Pros: Cheap to set up. Little impact on your home’s main pipes. Saves a lot of water if you do laundry often.
  • Cons: Only captures wash water. Needs careful planning for where the water goes in your yard. You must use safe soaps.
  • Best for: Most homeowners with a garden who are ready to change their laundry soap.

Installing an L2L System: Simple Steps

  1. Check Rules: See what your town allows. Some places need a permit or a licensed plumber.
  2. Change Soap: Switch to low-salt, eco-friendly liquid detergent. This is vital for plant health.
  3. Design the Spot: You need an area where the water can soak in slowly. It must not pool on the surface. Dig shallow trenches or build small mounds called mulch basins around sturdy shrubs or trees. Keep these areas away from your house walls.
  4. Set Up Valves: Install the greywater diverter valve right on your washing machine drain pipe. Make sure the switch is easy to see so you know where the water is going.
  5. Lay the Pipes: Connect the valve to plastic tubing. Let gravity do the work to move the water to your basins.
  6. Cover It Up: Place 4 to 6 inches of wood chips (mulch) over the pipes in the basins. The mulch filters the water, stops smells, and keeps the water from evaporating in the sun.[invalid URL removed]
  7. Test It: Run a short, rinse-only wash cycle. Watch the basins to make sure the water spreads out evenly. Track your meter to see how much you save.

3. Advanced Systems (Big Projects)

These are for bigger needs or whole-house reuse. They cost more and need more work.

  • Branched Systems: These tap into the main pipes after the water leaves fixtures like showers and sinks but before it hits the main sewer line. They use filters (like sand) and pumps to move the water to a holding tank or directly to the yard.
  • Pump and Filter Systems: These systems collect water, use multi-stage filters (screens, biological filters), and sometimes UV light to clean it very well. The clean water is stored and can be used for irrigation or sometimes even refilled into toilet tanks indoors, based on local laws.

How to Really Cut Your Water Bill in Half

To see major savings, you need to replace most of your outdoor water use.

A Simple Look at Savings Potential:

A family of four uses roughly 100 to 125 gallons of greywater daily from showers and laundry.

If your water costs about $0.003 per gallon (this price changes often):

Annual Savings≈$0.33×365 days=$120.45

This seems small, but remember: Water rates always go up. More importantly, this water replaces the most expensive water use—irrigation. If your normal outdoor watering costs you $\$200$ a summer month, replacing that entirely with free greywater easily lets you cut your water bill by a third or more. To hit 50% savings, you need to divert nearly all your shower, bath, and laundry water and use it well.


Essential Tips for Long-Term Success

Setting up the system is step one. Keeping it running well is step two.

Tip 1: Know Your Soil

Water soaks into sand fast but can run off clay too quickly. If you have heavy clay soil, you must use shallow trenches or raised mulch basins so the water spreads out and evaporates slowly instead of drowning your plants’ roots.

Tip 2: Mulch is Mandatory

A thick layer (4+ inches) of wood chips over the distribution area is key. Mulch acts as a natural filter. It stops bad smells by allowing air in. It also stops the soil surface from hardening up, which keeps the water sinking in where it should be.

Tip 3: Rotate the Water Zones

Don’t water the same spot with greywater all year long. Too much water, even clean water, can damage the soil. If your yard is large enough, set up two separate sections. Water Section A for a month, then switch to Section B for a month. This lets the soil in Section A rest and recover.

Tip 4: Filter Out the Lint

Your washing machine throws off lint, hair, and soap residue. This stuff clogs up pipes and emitters fast. Always clean the lint screen on your machine. If you have a pipe going underground, put a simple sock filter or a removable screen filter right before the water goes outside. Clean this filter every week or two.

Tip 5: Choose Plants Wisely

Some plants love the light nutrients in greywater. Others hate it.

  • Good Bets: Hardy shrubs, many flowers, and deep-rooted trees (like fruit trees) do well.
  • Bad Bets: Grass lawns (they need very even, constant watering that greywater struggles to provide) and shallow vegetable roots.

Maintenance Checklist

A small amount of regular care keeps your system saving you money.

Check Monthly:

  1. Soap Check: Make sure everyone in the house is using approved, low-salt soaps. One bottle of bleach can undo weeks of work.
  2. Leak Search: Walk the path of the pipes. Look for drips or wet spots in unexpected places.
  3. Filter Cleaning: Clean any simple mesh or sock filters you installed.

Check Seasonally:

  1. Loosen Soil: Use a rake or pitchfork to gently loosen the mulch layer above your dispersal pipes. This keeps the soil from getting too compacted.
  2. Winterizing (If Needed): If you live where it freezes hard, you must drain all water from the outdoor pipes before winter hits to prevent bursting.

By staying on top of these tasks, you ensure your system keeps working hard to help you cut your water bill for years to come.


Conclusion: Water Wisdom Pays Off

Recycling greywater is a fundamental shift in how we view our household resources. You save money right away. You also become part of the solution for saving water locally. Start small with a bucket or move up to an easy L2L system. Every gallon you divert helps your budget and helps secure our local water supply. Take the first step—check the rules, change your soap, and let your used water start working for you!


Frequently Asked Questions (FAQ) About Greywater Recycling

Q: Does greywater make my yard smell bad?

A: No, if it’s done right. The water needs to move quickly and be applied under the ground or mulch. Smells only happen when the water sits still and rots. Using safe soaps also prevents odors.

Q: Will using greywater kill my plants or ruin my soil?

A: The water itself is fine. Harsh chemicals are the danger. If you switch to low-sodium, biodegradable soaps, your soil stays healthy, and your plants will likely thrive with the extra watering.

Q: Can I use kitchen sink water in my system?

A: For simple systems like L2L, the answer is generally no. Kitchen water has grease and food bits that clog simple filters quickly. Only advanced, multi-stage filtration systems should handle kitchen water.

Q: How much water does a typical family make each day?

A: A family of four can easily produce over 100 gallons of usable greywater daily from showers and laundry alone.

Q: Do I need a permit for a greywater setup?

A: This changes a lot depending on where you live. Simple bucket or L2L systems might be okay without one, but complex systems almost always need permission and inspection from your local plumbing office. Always check your local city or county rules first.


References


Recent Posts


The Gift of a Waste Free Wrap: Beautiful & Sustainable Ideas

A neutral-colored linen or burlap drawstring fabric pouch, tied securely at the top with natural twine and embellished with a sprig of fresh rosemary. This reusable bag is a beautiful example of Waste Free Wrap for small gifts.

Feeling the pang of guilt as wrapping paper piles up after celebrations? You’re not alone. We all want to show love through thoughtful gifts, but the environmental cost of traditional wrapping can be a heavy burden. This article is for anyone ready to embrace creativity, reduce waste, and add an extra layer of meaning to their presents using Waste Free Wrap ideas. Join us as we explore the beautiful world of sustainable gift giving!


Why Embrace the Waste Free Wrap Philosophy?

The magic of giving and receiving gifts is a cherished tradition, but what happens once the last present is opened and the confetti settles? Often, it’s a mountain of discarded wrapping paper, plastic ribbons, and sticky tape destined for landfill. Annually, in the UK alone, around 227,000 miles of wrapping paper are used, much of which isn’t recyclable due to glitter, plastic coatings, or foil. In the US, the amount of waste increases by 25% between Thanksgiving and New Year’s, with much of that being holiday-related packaging.

But what if there was a way to make your gifts even more special, while simultaneously showing love for our planet? Enter the world of waste free wrap. It’s about more than just sustainability; it’s about adding a unique, personal touch that often becomes part of the gift itself, creating a deeper connection and lasting memory. This comprehensive guide will equip you with beautiful, sustainable, and surprisingly simple ways to transform your gift-giving experience.

Why Choose Waste-Free Wrap? The Environmental and Emotional Benefits

Before we dive into the “how-to,” let’s briefly touch on the compelling reasons to make the switch:

  1. Environmental Impact: Reduces landfill waste, conserves natural resources (trees, water, energy), and lessens pollution associated with manufacturing and transporting traditional wrapping materials.
  2. Cost Savings: While there might be an initial investment in a few reusable items, over time, you’ll save money by not constantly buying single-use wrapping paper and accessories.
  3. Unique Aesthetic: Waste-free wrapping often boasts a charming, rustic, or elegant appeal that stands out from mass-produced options. It communicates thoughtfulness.
  4. Adds Value to the Gift: When your wrap is a beautiful scarf, a useful tote bag, or a lovely tin, it becomes an extension of the gift itself, offering a dual purpose.1
  5. Inspires Others: Your efforts can inspire friends and family to consider their own impact, spreading a ripple effect of conscious consumption.

It’s clear that moving towards a waste free wrap philosophy isn’t just a trend; it’s a mindful choice with far-reaching benefits.

The Pillars of Waste-Free Wrapping: Reusable, Recyclable, Compostable, and Upcycled

When considering your options, think about these categories:

  • Reusable: Materials that can be used again and again, ideally for wrapping or as part of the gift itself. (e.g., fabric, baskets, tins)
  • Recyclable: Materials that can be processed and turned into new products after use. (e.g., plain paper, cardboard)
  • Compostable: Organic materials that will break down naturally into nutrient-rich soil. (e.g., natural twine, real leaves)
  • Upcycled: Giving a second life to an item that would otherwise be discarded. (e.g., old maps, newspaper, cereal boxes)

Most effective waste free wrap strategies combine elements from all these pillars.

Section 1: Fabric Fantastic – The Art of Furoshiki and Beyond

Fabric is arguably the most elegant and truly zero-waste option for gift wrapping. It’s infinitely reusable and adds a luxurious touch.

1.1 Furoshiki: The Japanese Art of Fabric Wrapping

Furoshiki is a traditional Japanese wrapping cloth that has been used for centuries to transport goods, bundle clothes, and, of course, wrap gifts.2 It’s an incredibly versatile and beautiful method that requires no tape, scissors, or ribbon.

How to Do It:

  • Choose Your Fabric: A square piece of fabric is ideal. Common sizes are 45cm x 45cm (17×17 inches) for small items, or 70-90cm x 70-90cm (27-35 inches) for larger or multiple items.
    • Ideas for Fabric:
      • Scarves: A new scarf can be part of the gift!
      • Bandanas/Handkerchiefs: Great for smaller items.
      • Tea Towels/Cloth Napkins: Practical and charming.
      • Fabric Scraps: Got an old pillowcase, sheet, or unloved shirt? Cut it into a square, hem the edges (or leave them raw for a rustic look), and you’ve got instant Furoshiki.
      • Pre-made Furoshiki: You can purchase these from sustainable retailers.
  • Basic Wrap Method (for square/rectangular items):
    1. Lay your fabric flat, diamond-style (corner pointing up).Place the gift in the center.Bring the bottom corner up over the gift and tuck it under.Bring the top corner down over the gift.Gather the remaining two side corners and tie them securely in a knot on top of the gift. You can do a simple square knot or a more decorative bow.
  • Bottle Wrap Method:
    1. Lay the bottle across the center of the fabric, diagonally.Fold two opposite corners over the bottle and roll it up.Gather the ends and tie them securely above the bottle neck.
  • Image Placement: Furoshiki bottle wrap example.

1.2 Beyond Furoshiki: Other Fabric Ideas

  • Reusable Bags as Gifts: Place your present inside a beautiful tote bag, a drawstring produce bag, or even a small backpack. The bag itself is part of the gift!
    • How to Do It: Simply place the gift inside the bag. You can add a tag tied to the handle.
  • Fabric Pouches/Sachets: For small gifts like jewelry or toiletries, sew simple fabric pouches from scraps.3 These can be tied with a ribbon or drawstring.
    • How to Do It: Cut two rectangles of fabric, sew three sides, hem the top, and add a drawstring or ribbon channel.

Section 2: Upcycled & Repurposed Wonders – Giving Materials a Second Life

This category is all about creativity and resourcefulness. Look around your home – you likely have plenty of potential waste free wrap materials!

2.1 Paper with a Past

Traditional wrapping paper is often not recyclable due to plastic coatings, glitter, or foil.4 But many other paper products are perfect for upcycling.

  • Newspaper: The ultimate classic.
    • How to Do It: Use the comic sections for a burst of color and fun, or the black and white pages for a sophisticated, minimalist look. Use natural twine and a sprig of greenery for decoration.
  • Brown Paper Bags: Sturdy and versatile.
  • How to Do It: Cut open paper grocery bags, turn them inside out (if there’s branding you don’t want), and use the plain brown paper. Decorate with stamps, drawings, or hand-written messages.
  • Old Maps, Sheet Music, Calendars, or Posters: These offer incredible visual interest.
    • How to Do It: Simply wrap your gift as you would with any paper. These are often strong enough to not require excessive tape.
    • Examples: Wrap a travel-themed gift in an old map, or a musical instrument in sheet music.
  • Kids’ Artwork: The most personal touch!
    • How to Do It: Use a child’s drawings or paintings (perhaps not their masterpieces, but older ones!) as wrapping paper for family members.
  • Seed Paper: A truly unique option.
    • How to Do It: Purchase seed paper (paper embedded with plant seeds) and use it to wrap small gifts. The recipient can then plant the “paper” to grow flowers or herbs. Ensure the paper is truly compostable/biodegradable.

2.2 Boxes, Baskets & Jars: Containers as Gifts

Why wrap a gift when the container can be the gift itself, or at least beautifully reusable?

  • Decorative Tins: Keep those attractive cookie or tea tins. They are perfect for small gifts, baked goods, or crafting supplies.
    • How to Do It: Simply place your gift inside. Add a bow or tag if desired.
  • Wooden Boxes or Crates: For larger or multiple items, a wooden box can be a beautiful presentation and then repurposed for storage.
  • Baskets: Fill a basket with several smaller gifts to create a “hamper.” The basket can then be used for storage, picnics, or décor.
  • Mason Jars/Glass Bottles: Ideal for homemade treats, bath salts, spice mixes, or small trinkets.5
    • How to Do It: Fill the jar, tie a ribbon or fabric scrap around the lid, and attach a tag.

Section 3: The Finishing Touches – Sustainable Fasteners and Embellishments

This is where your waste free wrap truly shines. Ditch the plastic ribbon, glitter, and synthetic bows for natural, reusable, or compostable alternatives.

3.1 Eco-Friendly Fasteners

  • Natural Twine & String: Hemp, jute, cotton, or raffia twine are excellent choices. They are biodegradable and add a rustic charm.
    • How to Do It: Simply tie around your wrapped gift or container.
  • Fabric Scraps as Ribbons: Cut strips from old t-shirts, sheets, or leftover fabric to create unique, soft ribbons.6
    • How to Do It: Tear or cut fabric into strips of desired width and tie around the gift. No need to finish the edges if you like a frayed look.
  • Washi Tape or Paper Tape: While not entirely free of waste, these are far superior to plastic-based sticky tape. Washi tape is often made from natural fibers like bamboo or hemp and is biodegradable.7 Water-activated paper tape is also a good option.
    • How to Do It: Use instead of regular sellotape for paper wraps.
  • Safety Pins/Buttons: For fabric wraps, you can sometimes secure folds with a decorative safety pin or a vintage button.

3.2 Beautiful & Biodegradable Embellishments

This is where nature and your craft supplies come together.

  • Natural Elements (Compostable):
    • Greenery: A sprig of pine, rosemary, eucalyptus, or holly.
    • Dried Flowers/Herbs: Lavender, dried orange slices, cinnamon sticks.
    • Seed Pods/Pinecones: Collect these on a nature walk.
    • How to Do It: Tuck these under twine or ribbon, or hot glue them to a tag.
  • Reusable Ornaments/Charms:
    • Small Christmas Ornaments: Attach a small, new ornament that becomes part of the gift.
    • Thrifted Brooches/Charms: Find unique pieces at charity shops to add a vintage touch.
    • How to Do It: Tie onto ribbon or twine.
  • Homemade Gift Tags:
    • Upcycled Cardboard: Cut tags from old cereal boxes, greeting cards, or shipping boxes.
    • Plantable Seed Paper Tags: As mentioned before, a truly regenerative option.
    • Hand-Stamped Tags: Use natural kraft paper or upcycled cardboard and rubber stamps.
    • How to Do It: Punch a hole, write your message, and attach with twine.

Section 4: Practical Tips for a Seamless Transition

Making the switch to waste free wrap doesn’t have to be overwhelming. Here are some practical tips:

  1. Start Small: Don’t feel pressured to completely overhaul your wrapping habits overnight. Pick one or two ideas to try first.
  2. Build a Stash: Over time, collect fabric scraps, interesting tins, baskets, and natural elements. Keep a “waste-free wrap kit” box handy.
  3. Communicate: If you’re using fabric that you’d like back, let the recipient know with a gentle note or by saying, “This scarf is part of your gift, but if you don’t need it, I’d love to reuse it for another gift!”
  4. Embrace Imperfection: Hand-wrapped gifts with natural elements will never look as “perfect” as machine-produced paper. This is their charm! Embrace the rustic beauty.
  5. Think Outside the Box: What unconventional items could you use? An old sweater sleeve for a wine bottle? A piece of burlap? A vintage tablecloth? The possibilities are endless.

References


Recent Posts


The Ultimate List: 8 Homemade Gifts for Instant Joy

A rustic wooden box filled with a stack of sealed, labeled "Open When..." envelopes, tied with twine, symbolizing heartfelt Homemade Gifts for emotional support.

I’m just like you—someone who struggles to find the perfect gift that truly says, “I see you.” I’ve spent too many hours wandering store aisles, only to grab something generic. That’s why I finally embraced the power of Homemade Gifts, realizing that the real present is the time and love poured into the creation. My philosophy is simple: if I can make it, anyone can, and the look on a loved one’s face when they realize you made them something with your own two hands? That’s instant joy.


The Timeless Joy of Homemade Gifts

In a world saturated with mass-produced goods, the simple act of giving a homemade gift stands out as an act of profound care. It transcends monetary value, offering a piece of your time, your creativity, and your heart. Whether you’re celebrating a birthday, a major holiday, a housewarming, or simply want to say “thank you,” a thoughtful DIY project is always the perfect choice. These homemade gifts are not only practical and beautiful, but they are also designed to be approachable for crafters of all skill levels, ensuring that you can create instant joy for your friends and family no matter the occasion.

We’ve curated a list of eight universally loved projects that are sure to delight anyone on your list, complete with step-by-step instructions and ideas for personalization.


1. Infused Oils or Vinegars

Infused oils and vinegars are a sophisticated yet simple gift that elevates any home cook’s pantry. They can be used to dress salads, marinate meats, or simply serve as a delicious bread dip. The beautiful presentation of the herbs and spices suspended in the liquid makes this gift as visually appealing as it is functional.

What You’ll Need:

  • A carrier liquid: High-quality extra virgin olive oil (for oils) or white wine or apple cider vinegar (for vinegars).
  • Infusion ingredients: Fresh rosemary sprigs, thyme, whole garlic cloves, dried chili flakes, lemon or orange zest (pesticide-free), peppercorns.
  • Containers: Clean, sterilized glass bottles with airtight stoppers or corks.
  • Optional: Decorative labels and ribbon.

How to Do It:

The Hot Infusion Method (Best for Oils with Dried Herbs/Spices):

  1. Prepare the ingredients: If using garlic, slightly crush the cloves to release their flavor. Ensure all fresh herbs are completely dry to prevent mold growth.
  2. Gently warm the oil: In a saucepan over very low heat, gently warm the olive oil to about 130∘F (55∘C). Do not let it smoke or boil. Warming helps the oil absorb the flavors.
  3. Combine and steep: Pour the warm oil into the sterilized bottle. Add your chosen infusion ingredients—for example, three sprigs of rosemary and five peeled garlic cloves.
  4. Cool and store: Seal the bottle and allow it to cool completely before gifting. Store in a cool, dark place. The oil should be used within 2-3 weeks, or the recipient can strain the solids out after a week of infusing to extend the shelf life.

The Cold Infusion Method (Best for Vinegars and Fresh Herbs):

  1. Prepare the ingredients: Wash and gently bruise the fresh herbs (e.g., basil, oregano) or fruits (e.g., raspberries) to release their aromatics.
  2. Combine: Place the ingredients inside the sterilized bottle. For every cup of vinegar, use about 1/4 cup of fresh herbs or fruit.
  3. Pour and seal: Pour the vinegar over the ingredients, filling the bottle completely. Seal tightly.
  4. Infuse: Let the vinegar sit for 1-2 weeks in a cool, dark place, shaking gently every few days. Taste periodically. Once the flavor is to your liking, strain the solids out before bottling it for the final gift.

2. Homemade Vanilla Extract

This gift is the epitome of simple elegance. Homemade vanilla extract requires only two ingredients, but it takes time to reach perfection, making the eventual gift a rich, concentrated labor of love. It’s perfect for bakers and cooks, as the quality far surpasses store-bought varieties.

What You’ll Need:

  • Vanilla Beans: Grade B vanilla beans are best for extracting (they are less visually appealing but have a lower moisture content, concentrating the flavor). Plan on 5 to 6 beans per 8 ounces (240ml) of alcohol.
  • Alcohol: 80-proof (or 40\%) vodka, rum, or bourbon. Vodka is the most neutral and allows the vanilla to shine.
  • Containers: Small, airtight glass bottles (dark glass is preferable to protect the extract from light).

How to Do It:

  1. Prepare the beans: Slice each vanilla bean lengthwise with a sharp knife, leaving about 1/2 inch (1cm) uncut at the ends. This exposes the vanilla caviar inside, maximizing flavor release.
  2. Combine: Place the sliced beans inside the glass bottle.
  3. Fill and seal: Pour the alcohol over the beans until they are completely submerged. Seal the bottle tightly.
  4. Infuse (The Waiting Game): Attach a label with the date. The extract needs to infuse for a minimum of 8 weeks, but the flavor will deepen significantly over 6-12 months. When gifting, attach a note explaining that the extract gets better with age and that they can “top up” the bottle with more alcohol as they use it.

3. Layered DIY Spice Blends in a Jar

A gorgeous, multi-layered jar of a homemade spice blend is an incredibly thoughtful and visually striking gift. It tells the recipient, “I want you to eat delicious food,” and encourages them to get creative in the kitchen. This works well for BBQ rubs, taco seasoning, or a beautiful Italian herb blend.

What You’ll Need:

  • Spices: Choose high-quality, fresh spices. Examples: Smoked paprika, oregano, cumin, chili powder, onion powder, garlic powder, salt, pepper.
  • Container: A clean, clear glass jar with a tight-fitting lid (e.g., a small mason jar).
  • Tools: Small funnel, measuring spoons.

How to Do It:

  1. Choose a recipe: Select a blend that the recipient will love. For a classic BBQ Rub, the layers might be:
    • 1 tablespoon coarse salt (bottom layer)
    • 2 tablespoons brown sugar (layer 2)
    • 1 tablespoon smoked paprika (layer 3)
    • 1 teaspoon garlic powder (layer 4)
    • A teaspoon onion powder (layer 5)
    • 1 teaspoon black pepper (layer 6)
    • 1/2 teaspoon cayenne pepper (top layer)
  2. Layer carefully: Using a small funnel, add one spice at a time, being careful not to jostle the jar too much. The trick is to create distinct, colorful horizontal stripes. Use a chopstick or the back of a spoon to gently press the spices down between layers.
  3. Seal and decorate: Seal the jar tightly. Create a decorative tag that includes the name of the blend (e.g., “The Ultimate Grill Master Rub”) and, crucially, a printed recipe card detailing how they should use the blend and how to mix the spices before use.

4. Scented Bath Salts

A spa-like experience in a jar, scented bath salts are a luxurious and easily scalable homemade gift. They promote relaxation and self-care, making them perfect for anyone who deserves a moment of peace—which is pretty much everyone.

What You’ll Need:

  • Salts: Epsom salts are necessary for muscle relaxation, and sea salt or pink Himalayan salt can be added for texture and minerals.
  • Essential Oils: High-quality, therapeutic-grade oils (e.g., lavender for relaxation, peppermint for invigoration, or citrus for a mood boost).
  • Optional: Dried flowers (chamomile, rose petals, lavender buds) for visual appeal.
  • Container: Airtight glass jar.

How to Do It:

  1. Measure the salts: For a standard-sized gift jar (about 16 ounces or 450g), measure out the salts. A 3:1 ratio of Epsom to sea salt works well.
  2. Add fragrance: For every cup of salts, add 10−20 drops of essential oil. Start conservatively—you can always add more, but you can’t take it away.
  3. Mix thoroughly: Place the salts and oils in a large bowl. Using a spoon or whisk, mix vigorously to ensure the essential oils are evenly distributed.
  4. Add botanicals (optional): Gently fold in the dried flowers.
  5. Package: Transfer the mixture to the airtight jar. Seal it, and attach a tag with a use suggestion: “Add 1/2 cup to a warm bath and soak for 20 minutes.”

5. “Open When…” Letters

A rustic wooden box filled with a stack of sealed, labeled "Open When..." envelopes, tied with twine, symbolizing heartfelt Homemade Gifts for emotional support.

This is a deeply personal and heartfelt homemade gift that provides comfort or a laugh when the recipient needs it most. It is an investment of time, but the emotional return is priceless.

What You’ll Need:

  • A stack of paper (colored or decorative if desired).
  • A series of envelopes (at least eight, but the more the better).
  • A nice pen.
  • A decorative box or container to hold the finished letters.

How to Make It:

  1. Brainstorm Titles: Create a series of letter titles for different moods or occasions. The key is to make the titles specific and relevant to the recipient’s life. Examples include:
    • “Open when you’re feeling lonely.”
    • “Open when you need a laugh.”
    • “Open when you’ve had a bad day.”
    • “Open when you need to remember how far you’ve come.”
    • “Open on a random Tuesday.”
    • “Open when you’re celebrating a big win.”
    • “Open when you miss me.”
    • “Open when you need to know a secret.”
  2. Write the Letters: In each envelope, write a sincere, personalized letter.
    • For the “lonely” letter, share a happy memory of the two of you and a list of things you love about them.
    • For the “laugh” letter, write down a shared inside joke, a funny story, or simply draw a ridiculous doodle.
    • For the “bad day” letter, include words of encouragement and a reminder of their strength.
  3. Add Small Items: You can add small, relevant items to the envelopes to enhance the experience:
    • A teabag, hot chocolate packet, or a small piece of chocolate for the “Feeling blue” letter.
    • A funny photo of you two for the “Need a laugh” letter.
    • A piece of confetti or a cutout star for the “Celebrating a big win” letter.
  4. Finalize: Seal the letters and clearly write the “Open When…” title on the outside of each envelope. Place them all in a decorative box and present the gift with an explanation of how and when to use them.

6. A “Jar of Awesome”

This simple, thoughtful homemade gift encourages gratitude and reflection by providing a collection of happy memories. It’s an instant mood-lifter and a powerful reminder of a relationship’s depth.

What You’ll Need:

  • A clean, medium to large glass jar (a mason jar or a repurposed decorative jar works well).
  • Small slips of colored paper or card stock.
  • A fine-tipped pen.
  • Optional: Ribbons, paint, or stickers for decoration.

How to Make It:

  1. Decorate the Jar: Clean the jar thoroughly. Decorate it with ribbons, paint, or a beautifully printed or handwritten label that says, “Jar of Awesome,” “Happy Moments,” or “Reasons to Smile.”
  2. Seed the Jar: The key to this gift is to get it started. On small slips of paper, write down your favorite memories, silly inside jokes, personal compliments, or moments of pride you’ve shared with the recipient. For example:
    • “That time we got lost driving and found the best hidden diner.”
    • “I love your laugh!”
    • “Remember when you aced that presentation?”
  3. Include Blank Slips: Crucially, include a generous stack of blank slips of paper and a pen tied to the jar. This is so the recipient can add their own “awesome” moments—things they are proud of, funny things that happened, or moments of gratitude—throughout the year.
  4. Instructions: Provide instructions that the recipient should only open the jar on a bad day, or perhaps at the end of the year (New Year’s Eve) to reflect on all the good things that happened.

7. DIY Stovetop Potpourri Mix

Store-bought air fresheners can be overwhelming and artificial. A DIY stovetop potpourri mix, however, fills a home with a natural, gentle, and welcoming aroma that is instantly comforting. It is a fantastic homemade gift for a host, a neighbor, or a housewarming.

What You’ll Need:

  • Container: Small, clear cellophane or glassine bags, or a decorative mason jar.
  • Ingredients: Choose a theme:
    • Winter/Holiday: Dried orange slices, cinnamon sticks, whole cloves, fresh rosemary.
    • Autumn: Apple slices, vanilla bean, star anise, allspice berries.
    • Spring/Summer: Lemon slices, vanilla extract, mint leaves.

How to Do It:

  1. Dry the fruit: Slice citrus fruits (oranges, lemons) thinly. Bake them on a low temperature (around 175∘F or 80∘C) for several hours until they are dry and firm, but not burnt. Alternatively, you can buy pre-dried slices.
  2. Measure and combine: Measure out the ingredients. A good starting point is 1/4 cup of cinnamon sticks/star anise, 1/2 cup of dried fruit slices, and 1 tablespoon of whole cloves or peppercorns.
  3. Package beautifully: Layer the ingredients in the cellophane bag or jar so the recipient can see the beautiful components.
  4. Add Instructions: Attach a tag with simple instructions: “Pour the contents into a small saucepan. Cover with 3 cups of water. Bring to a simmer, and let the gentle scent fill your home, adding more water as needed.”

8. Recycled Book Knife Block

For the handy and design-conscious recipient, this is a unique, stylish, and incredibly clever gift. It takes an old, unwanted hardcover book and repurposes it into a functional and beautiful kitchen object, celebrating both cooking and literature. This is the most challenging of the eight projects, but the result is a truly impressive, one-of-a-kind piece.

What You’ll Need:

  • A book: A large, thick hardcover book that is no longer wanted. A decorative, vintage cover is a bonus.
  • Tools: A ruler, a pencil, a rotary cutter or sharp utility knife, and a cutting mat.
  • Hardware: A small rubber-band clamp or c-clamp, and two bolts, washers, and wing nuts to bind the book (optional, but recommended).
  • Filling: Wooden skewers or bamboo chopsticks, about the length of the book’s spine.

How to Do It:

  1. Hollow the book (The “Block”):
    • Open the book to the title page. Using a ruler, measure a 1-inch (2.5cm) border from the outer edge of the page.
    • Use the pencil to mark the cutting lines. This border will hold the structure together.
    • Carefully use the rotary cutter or utility knife to cut through the pages along your lines. This requires patience and many passes—cut about 20−30 pages at a time to keep the cut clean. You are hollowing out a rectangular space in the center of the book’s pages, leaving the cover and the small border intact.
  2. Bind the pages: Once the center is hollowed, apply a strong craft glue to the inside edges of the border you left. Clamp the book shut and let it dry overnight. This fuses the pages together, turning them into a solid block.
  3. Add the skewers: The bamboo skewers or chopsticks are what hold the knives upright. Cut them to size so they fit neatly inside the hollowed-out area, standing upright. Pack them in tightly.
  4. Final Polish: Optionally, you can drill two small holes near the spine (top and bottom) and thread a bolt through, securing it with a washer and wing nut. This adds a nice industrial look and provides extra structural integrity. Present the knife block with a clean, sharp knife inside to demonstrate its use.

The Joy of the Homemade Gift

The true power of homemade gifts lies in the story they tell. They say, “I spent time, not just money.” By choosing one of these eight projects—from the culinary delight of vanilla extract to the deep emotional connection of the “Open When…” letters—you are giving something infinitely more valuable than a store-bought item. You are gifting an experience, a memory, and a piece of yourself, ensuring that the instant joy you feel creating the gift is multiplied when your loved one receives it. So grab your supplies, put on some music, and start crafting a little happiness today.


Frequently Asked Questions (FAQ)

Q: How far in advance do I need to start making these homemade gifts?

A: Most of the gifts are quick, requiring only an hour or two of active time (e.g., bath salts, spice blends). However, some require significant lead time:

  • Homemade Vanilla Extract: Needs at least 8 weeks to infuse, but 6-12 months is ideal. Start this one a year in advance!
  • Infused Oils/Vinegars: Needs 1-2 weeks to infuse fully.
  • “Open When…” Letters: The writing process is time-consuming and can take several hours, depending on how many letters you choose to write.

Q: Are homemade gifts suitable for professional colleagues or bosses?

A: Yes, absolutely, provided you choose an appropriate item. Culinary gifts like Infused oils or vinegars and the DIY stovetop potpourri mix are excellent, universally appreciated, and professional choices. Avoid highly personal gifts like the “Open When…” letters or the “Jar of Awesome,” which are better suited for close friends and family.

Q: What is the shelf life of the infused oils and vinegars?

A: Infused vinegars have a very long shelf life, often many months, as the acid acts as a preservative. Infused oils are slightly trickier. To avoid the risk of botulism, it is crucial that the fresh ingredients (like garlic or herbs) are completely strained out after 5-7 days of infusion. If fresh ingredients remain, the oil should be stored in the refrigerator and consumed within 2-3 weeks. For extended shelf life without refrigeration, use only dried herbs, spices, and dried citrus zest.

Q: How can I make a homemade gift look more professional?

A: Presentation is key for any homemade gift. Invest in high-quality, matching containers (clear glass jars for visibility), use printed or professionally designed labels instead of hasty handwritten tags, and use ribbon, twine, or wax seals to add a finishing touch. The extra effort in presentation elevates the gift from a craft project to a treasured item.

Q: I’m not a great cook. Can I still make the spice blend or vanilla extract?

A: Definitely! The spice blend simply requires measuring and layering—no actual cooking skills are needed. Homemade vanilla extract only requires pouring and waiting. The process is almost entirely hands-off. Don’t let a lack of cooking confidence deter you from these simple, high-impact culinary homemade gifts.


Reference Section


Recent Posts


The Ultimate Dozen: 12 Homemade Christmas Trees To Make

A beautiful, rustic Homemade Christmas Trees crafted from stained wooden planks, featuring a star topper and adorned with delicate garlands of wooden hearts and stars, set in a cozy, neutral-toned room.

My holiday motto is simple: if I can make it, I will. This year, tired of the same old tinsel and pine, I challenged myself to reimagine the Christmas tree as a piece of sophisticated home decor. The result is this curated collection of twelve modern, boutique-hotel-worthy Homemade Christmas Trees. I hope these projects inspire you to ditch the generic store-bought look and infuse your space with handmade elegance this season.


12 Homemade Christmas Trees

The scent of pine needles is classic, but sometimes, the same old evergreen just doesn’t fit the aesthetic. If your style leans more toward minimalist luxury, gallery-wall chic, or refined modernity, it’s time to rethink the traditional centerpiece. This year, transform your holiday decor with a collection of Homemade Christmas Trees that look less like a seasonal craft project and more like they belong in a high-end boutique or a five-star hotel lobby.

We’ve curated twelve truly unique, sophisticated, and surprisingly simple DIY projects. These are not your grandmother’s felt crafts; they are elegant, architectural, and completely customizable to your modern home.


1. The Gilded Geometric Wire Tree

Concept: A three-dimensional, architectural sculpture that captures light and creates stunning shadows. This piece is all about negative space and clean lines.

Materials:

  • Thin gauge wire (craft wire or floral wire)
  • Needle-nose pliers
  • Gold or copper metallic spray paint
  • Small wooden base (optional)
  • Micro LED string lights (battery operated)

How to Do It:

  1. Form the Base: Begin by bending the wire into a large triangle for the base. This will define the size of your tree. Twist the ends to secure them.
  2. Build the Sides: Cut three more lengths of wire. From each corner of your base triangle, bend one length upwards and meet them at a single point, forming a pyramid shape. Secure the peak by twisting the wires tightly.
  3. Add Structure: For a more complex geometric look, add horizontal or diagonal wire bracing inside the pyramid. Think of it like building a basic tetrahedron structure. The cleaner the angles, the more modern the result.
  4. Finish: Once the shape is secure, spray the entire structure with the metallic paint. When dry, wrap it sparingly with micro LED lights for a delicate sparkle. This tree works perfectly on a console table or mantelpiece.

2. The Floating Driftwood Cone Tree

Concept: A coastal-meets-Scandinavian look. This tree uses natural, weathered elements arranged in a classic conical shape, lending an organic, textured feel.

Materials:

  • A sturdy cardboard or foam cone base
  • Small, uniform pieces of thin driftwood or smooth, light-colored twigs
  • Hot glue gun and ample glue sticks
  • White or pale gray craft paint (optional)
  • Small starfish or shell ornaments

How to Do It:

  1. Prep the Wood: Ensure your driftwood pieces are clean and dry. For a unified, boutique look, lightly dry-brush them with white or very pale gray paint, allowing the natural wood grain to still show through.
  2. Start at the Base: Working in small sections, apply hot glue near the wide base of the cone. Start adhering the driftwood pieces horizontally, staggering the lengths so they overlap slightly but keep the overall circular shape.
  3. Layer Up: Continue gluing the pieces, working your way up the cone. Let the wood dictate the spacing; a slight overlap adds texture. Ensure the cone is completely covered.
  4. Display: Place on a simple pedestal or in a sleek ceramic vase. The finished look is textural, airy, and effortlessly chic.

3. The Minimalist Ladder Tree

Concept: A highly versatile, space-saving, and industrial-chic piece. This is less about decoration and more about structural display.

Materials:

  • Four equally long wooden dowels (about 4–6 feet tall)
  • Smaller dowels or branches for “rungs”
  • Wood glue and clamps
  • Drill and small screws (optional, for extra stability)
  • White, black, or dark charcoal paint/stain

How to Do It:

  1. Cut and Sand: Decide on the height and angle. Cut the small dowels to gradually decreasing lengths—these will be the “branches.” Sand all pieces smooth.
  2. Assemble: Create two identical ladder frames by gluing and securing the short dowels between two long ones. Use clamps to hold the pieces until the glue is fully set.
  3. Paint: Apply your modern finish (white for Scandinavian, black for industrial, or natural stain for a rustic look).
  4. Stand: Once dry, stand the two ladder frames up, opening them slightly at the bottom (like an A-frame tent) and securing them at the top with a single screw or thick twine. Hang lightweight, geometric ornaments directly from the rungs.

4. The Stacked Marble Book Tree

Concept: An intellectual, elegant centerpiece perfect for a library, office, or sophisticated living area. This tree uses the color and structure of books and blocks.

Materials:

  • 10–15 hardback books of varying sizes (use old books and cover them)
  • Contact paper or wrapping paper in a chic, neutral design (e.g., solid gray, black, or white marble print)
  • Small, upscale ornaments (e.g., glass globes, brass stars)

How to Do It:

  1. Cover the Books: For a unified, modern look, cover all the books in the same marble-patterned contact paper. This is the key to achieving the “boutique” aesthetic.
  2. Create the Base: Start with the largest book on a flat surface.
  3. Stack: Continue stacking the books in gradually decreasing size, turning them slightly on each layer to create a spiral or offset effect that mimics a tree shape.
  4. Decorate: The spine of each book serves as a perfect ledge for small, curated ornaments or a delicate garland of pearls. The “tree” instantly looks refined and tailored.

5. The Corkscrew Paper Garland Tree

Concept: A textural, monochrome fantasy that provides incredible depth and movement. It’s surprisingly simple and budget-friendly.

Materials:

  • Large foam or cardboard cone (at least 3 feet tall)
  • Dozens of circles cut from thick cardstock or metallic paper (all the same size, about 1-inch diameter)
  • Hot glue gun

How to Do It:

  1. Prepare the Circles: The trick is to give them texture. Gently fold or crimp the paper circles to create a soft, dome-like shape.
  2. Attach: Starting from the base of the cone, apply a small dot of hot glue to the top edge of a circle and press it onto the cone.
  3. Layering: Overlap the circles slightly and stagger the placement as you work your way around and up the cone. The crimped edges should stick out, giving the tree a feathered, corkscrew-like appearance.
  4. The Reveal: When finished, the tree should look like it’s made of layered scales or petals. Use matte white paper for a snow-drift look or metallic silver for high glamour.

6. The Minimalist PVC Pipe Grid Tree

Concept: A true modernist’s dream—industrial materials used to create a clean, gridded display unit that happens to be triangular.

Materials:

  • PVC pipes of a moderate diameter (about 1.5–2 inches)
  • PVC pipe T-connectors and 90-degree elbows
  • PVC cement
  • Matte black or dark bronze spray paint

How to Do It:

  1. Measure and Cut: Determine your desired height and width. Cut the PVC pipes into various short lengths that, when connected, will form small, uniform squares or rectangles.
  2. Build the Grid: Use the T-connectors and elbows to create a large triangular grid structure, securing all joints with PVC cement. Take time to ensure the lines are perfectly straight.
  3. Finish: Once cured, spray the entire structure with a matte black or deep metallic paint to remove the cheap plastic appearance.
  4. Style: The open cubbies become perfect niches to display single, standout ornaments—a tiny succulent, a glass cloche, or a single statement bulb.

7. The Painted Canvas Mural Tree

Concept: For walls where space is at a premium, this is a two-dimensional, graphic, and highly impactful solution.

Materials:

  • Large, square or rectangular blank canvas (at least 3×4 feet)
  • Painter’s tape
  • Acrylic paints in a sophisticated palette (e.g., deep charcoal, gold, blush pink, or navy)

How to Do It:

  1. Tape the Shape: Use painter’s tape to mark out the shape of your tree directly on the canvas. Instead of a traditional triangle, consider a modern geometric design—three overlapping triangles, or a single thick, stylized geometric cone.
  2. Paint: Paint the taped-off area with your main color. Once dry, remove the tape for crisp, clean lines.
  3. Detailing: For a truly boutique look, add abstract brushstrokes of a metallic paint (gold or silver) over the main color. Alternatively, use a contrasting color to paint a second, smaller shape inside the main tree outline.
  4. Hang: The canvas becomes a statement piece of holiday art.

8. The Stacked Log Base Tree

Concept: A sophisticated, rustic-meets-contemporary look. This piece uses the beautiful, raw texture of wood slices arranged on a central pole.

Materials:

  • Wooden slices of varying diameters (pre-cut from a craft store or sawed from a log)
  • A central wooden dowel or metal rod for support
  • A sturdy, heavy base (a piece of thick wood or a metal plate)
  • Drill with a bit slightly larger than the dowel
  • Wood glue

How to Do It:

  1. Drill the Slices: Drill a centered hole in all the wooden slices.
  2. Secure the Base: Drill a hole in the sturdy base and glue the central dowel into it. Let it dry completely.
  3. Stack: Start with the largest log slice and thread it onto the dowel. Continue stacking the slices in decreasing size. You can place a small bead of glue or a thin washer between each slice to keep them slightly separated for an airy look.
  4. Final Touches: Top with a small, brass star. This tree is naturally beautiful and only needs a few subtle micro-lights.

9. The Golden Hoop and Garland Tree

Concept: An utterly modern, mobile-inspired take on the traditional chandelier tree. It’s light, airy, and glamorous.

Materials:

  • Three to four brass or gold metal hoops (different sizes, from small to large)
  • Invisible fishing line
  • Pre-made or DIY simple, minimalist garland (e.g., white pom-poms, wooden beads, or simple green sprigs)
  • Ceiling hook

How to Do It:

  1. Arrange the Hoops: Tie fishing line to the largest hoop. Then, suspend the next size up from the first, and so on, creating a stack of concentric circles that form a cone shape.
  2. Hang: Hang the stacked hoops from the ceiling hook.
  3. Drape: Drape the garland or string of beads around the edges of the hoops. Keep the garlands sparse for an upscale, not cluttered, effect. The circular shape is a chic break from the classic triangle.

10. The Cone of Curled Magazine Paper

Concept: Recycling meets sophistication. This tree uses the color and gloss of magazine paper to create a vibrant, yet structured, textural piece.

Materials:

  • Large cone (foam or cardboard)
  • Glossy magazine pages or art paper (curate the pages to a specific color palette—e.g., only black, white, and silver)
  • Wood skewers or pencil
  • Hot glue

How to Do It:

  1. Cut the Strips: Cut the paper into uniform strips (e.g., 6 inches long and 1 inch wide).
  2. Curl: Tightly wrap each strip around a wooden skewer or pencil to create a paper curl. Slide the curl off the skewer.
  3. Attach: Starting from the bottom of the cone, apply a dot of hot glue to the inside of the curl and press it onto the cone.
  4. Layer: Overlap the curls slightly and work your way up. By carefully choosing the colors from the magazines (avoiding harsh reds or greens), you can achieve a muted, gallery-quality look.

11. The Acrylic Pyramid Display

Concept: A highly sleek, almost invisible tree that focuses entirely on the ornaments. This is ideal for showcasing a curated collection of beautiful ornaments.

Materials:

  • Clear acrylic sheets (thin and easy to cut)
  • Acrylic glue or strong, clear epoxy
  • Metal clips or small plastic clamps
  • Small, elegant hooks for ornaments

How to Do It:

  1. Cut: Carefully cut four large triangles from the acrylic sheets (three sides and a base, if desired). Ensure the sides meet at a clean, sharp point.
  2. Glue: Use the acrylic glue to join the three sides into a pyramid shape. You may need to clamp the edges while the glue cures.
  3. Place Hooks: Before the glue is completely dry, you can embed small metal hooks into the seams or use a drill to carefully thread fishing line through the edges once dry.
  4. Style: The tree itself is nearly invisible, letting your precious ornaments float in mid-air.

12. The Woven Yarn Tassel Tree

Concept: A soft, tactile, and highly unique bohemian-meets-modern look. It uses texture and a single, muted color for a cozy, upscale vibe.

Materials:

  • Large cardboard cone
  • Thick, high-quality yarn in a luxurious, muted color (e.g., cream, deep forest green, terracotta, or navy)
  • Hot glue gun

How to Do It:

  1. Make the Tassels: Create dozens of small, uniform tassels. The key is using thick, quality yarn.
  2. Make the Loops: Before securing the tassels, make simple loops of yarn about 2 inches long. These will act as the “needles” or texture on the cone.
  3. Attach the Loops: Start at the base and cover the entire cone with the yarn loops, gluing them tightly together to completely hide the cardboard underneath. This gives the tree its plush texture.
  4. Add the Tassels: Glue the finished tassels to the exterior, staggering them slightly. Use a different textured yarn for the tassels than the loops for added visual interest.

Tips for Achieving a Boutique Look

  • Edit Your Palette: For a boutique feel, limit your tree palette to just two to three colors. Think monochrome (white and silver), deep jewel tones (navy and brass), or earthy neutrals (cream, terracotta, and natural wood).
  • Embrace Negative Space: Modern design loves negative space. Don’t over-decorate your Homemade Christmas Trees. Let the structure and the materials speak for themselves. A single strand of lights is often more impactful than a dozen.
  • Choose High-Quality Materials: Swap cheap plastic for real wood, metal, glass, or thick cardstock. A coat of matte spray paint can instantly upgrade plastic or cardboard.
  • Lighting is Key: Use delicate, warm-white micro LED wire lights. Avoid large, multicolored bulbs, which can instantly cheapen the look.

Scaling Your Design: From Tabletop to Tree-Sized Centerpiece

While many of the chic Homemade Christmas Trees featured here are perfect as sophisticated tabletop accents, most of these modern designs are easily scaled up to replace a traditional 6- or 7-foot floor tree. The key is to simply increase the size of the core materials and ensure the base is stable.

For projects where the instructions might seem small, remember these scaling tips to achieve a full-sized, boutique-worthy centerpiece:

Project Name for Homemade Christmas TreesScaling Requirement to Reach 5–7 Feet
The Minimalist Ladder TreeUse 4–6 foot dowels for the main vertical supports and increase the diameter of the wood for stability.
The Minimalist PVC Pipe Grid TreeUse wider diameter PVC pipe (2–3 inches) and buy pipes in 10-foot lengths to build a full, tall pyramid structure.
The Golden Hoop and Garland TreeSource large metal hoops, with the bottom hoop measuring at least 30–36 inches in diameter, and hang from the ceiling using strong, secure hooks.
The Stacked Log Base TreePurchase a central threaded metal rod (not just a dowel) 6 feet long and use large, heavy wood slices for the base to ensure stability.
The Corkscrew Paper Garland TreeSource a large conical form that is 3–4 feet high, then place it on an elevated stand or pedestal to achieve the full height.
The Painted Canvas Mural TreeIncrease the size of the canvas to at least 4×6 feet to make it an impactful visual replacement for a tree in a main living area.

By committing to larger materials, you ensure your DIY project is not only elegant but also fulfills the role of a proper holiday centerpiece.


Frequently Asked Questions (FAQ)

Q: Are these trees durable enough to last multiple seasons?

A: Yes, absolutely. Projects utilizing materials like wood, metal, PVC, and thick acrylic (Trees 1, 3, 6, 8, 9, and 11) are built to last. For the paper and yarn-based trees (Trees 5, 10, and 12), use a sealant spray or store them carefully in a box to maintain their shape.

Q: I have very little crafting experience. Which tree is the easiest to start with?

A: The Floating Driftwood Cone Tree (Tree 2) and the Stacked Marble Book Tree (Tree 4) are excellent beginner projects. They primarily rely on simple gluing and stacking techniques, with minimal cutting or complex construction needed.

Q: How can I safely light the wooden or paper-based trees?

A: Always use battery-operated, cool-to-the-touch LED micro-lights for any tree built from paper, yarn, or wood. These lights do not generate significant heat, making them a safe choice for all your Homemade Christmas Trees.

Q: Where is the best place to find unique, modern ornaments for these trees?

A: Look for geometric shapes, matte finishes, and natural materials like unfinished wood, brass, or colored glass. Many craft stores sell basic ornaments that can be spray-painted in your chosen modern color palette (e.g., matte black or metallic gold) to achieve a coordinated, upscale look.

Q: I don’t have enough space for a full-sized tree. Which of these can be made small?

A: Nearly all of them can be scaled down. The Geometric Wire Tree (Tree 1), the Stacked Log Base Tree (Tree 8), and the Corkscrew Paper Garland Tree (Tree 5) all make exceptional, sophisticated tabletop displays when made in miniature.


Reference Section


Recent Posts


Easy Ways to Upcycle Plastic Jugs into Stylish Storage

Modern white plastic jug Upcycled into Plastic Jugs storage container with a clean, geometric cut-out design, holding a neatly folded knit blanket.

Is your recycling bin overflowing with plastic? Before you toss those everyday containers, pause and see their potential. This article explores innovative and beautiful ways to Upcycle plastic jugs into functional, aesthetically pleasing storage solutions. Join us on a journey to reduce waste, save money, and add a touch of eco-chic style to your home with simple DIY upcycling projects.


Introduction: Unlock the Design Potenetial When You Upcycle Plastic Jugs

The everyday plastic jug often ends up in the bin after a single use. That’s a huge waste! These common containers, from milk jugs to detergent bottles, are everywhere. But imagine if your recycling bin was a treasure chest of design ideas. What if those plain, empty jugs could become stylish, functional, and totally chic storage pieces that upgrade your home decor?

This is your complete guide to upcycling. We will focus on plastic jugs and show you how simple it is to create beautiful, useful items for any room. Forget plain, boring plastic. Think elegant organizers, cool planters, and smart holders. They will not only work well but also bring modern style to your space. Get ready to be creative. Reduce your waste. And find the real joy of giving old items a second, better life.


Why Upcycle Plastic Jugs?

The good things about upcycling go beyond just saving a few dollars. When you choose to upcycle plastic jugs, you are making a deliberate, positive choice for your home and the planet.

  1. Good for the Planet: Every plastic jug you keep from the landfill or skip the energy-intensive recycling process for is a win. Upcycling cuts the need for new products. It saves resources and lowers pollution.
  2. Save Money: Why buy expensive new storage bins? You can easily create unique, custom pieces using materials you already own. Upcycling is a very smart, low-cost way to get organized and decorate.
  3. Unique Style: Items bought in stores often lack character. Upcycling lets you put your own style and personality into every piece. This creates items that are truly unique to you.
  4. A Fun Hobby: DIY projects are very rewarding. It is a chance to relax and be creative. You get a great feeling of success when you turn something ordinary into something amazing.
  5. Long-Lasting: Many plastic jugs are made to be strong and tough. This makes them perfect for creating durable storage that will last for years.

Your goal is not just to reuse the plastic. It is to reimagine it. Turn that simple plastic into pieces that look high-quality, modern, and beautiful.


Getting Started: Tools and Safety

Before starting your projects, make sure you have the correct tools and take simple safety steps.

Essential Tools Checklist:

  • Sharp Craft Knife or Box Cutter: Use this for precise cuts on thick plastic. Always be careful.
  • Strong Scissors: Good for simpler cuts and trimming edges.
  • Cutting Mat: This protects your table or work surface.
  • Ruler and Marker: You need these for accurate measuring and drawing straight lines.
  • Fine Sandpaper: Use this to smooth down any rough or sharp plastic edges.
  • Adhesives: A hot glue gun, strong craft glue, or spray adhesive, depending on the job.
  • Safety Gear: We suggest wearing safety glasses and gloves when you are cutting plastic.

Key Safety Reminders:

  • Adult Supervision: Always watch children closely if they help with cutting.
  • Cut Safely: When using a craft knife, always cut in a direction that moves away from your body.
  • Keep it Stable: Make sure your cutting surface is flat and does not move.
  • Smooth Edges: Plastic edges can be very sharp. Always use sandpaper to smooth them down and prevent cuts.
  • Good Airflow: If you use spray paint or strong glues, work in an area with lots of fresh air.
  • Clean Everything: Always wash and dry all plastic jugs completely before you start. This is especially important for containers that held food or harsh cleaners.

Project 1: The Modern Kitchen Utensil Holder

Purpose: This smart utensil holder reuses a common plastic jug as a stylish piece for your kitchen. It keeps essential cooking tools neat and easy to grab. The speckled paint and small handle give it a very clean, modern feel.

How to Do It:

  1. Pick Your Jug: Choose a sturdy jug with a square or rectangle shape. Think about a container that held laundry detergent or bleach. Wash it really well and let it air dry completely.
  2. Mark the Cut: Get your ruler and marker. Draw a diagonal line across the top of the jug. This creates a sloped opening. This modern angle is a key part of the design. You can also measure the same height on three sides. Then connect these points for a perfect slope.
  3. Cut the Jug: Cut along your marked line slowly and carefully. Use a sharp craft knife or strong scissors. Go slow to get a clean, smooth edge. Use fine sandpaper to smooth any rough spots right away.
  4. Add Texture: To get the speckled, stone-like look, you have a few options:
    • Textured Spray Paint: Look for paint that is made to look like stone or granite. You might need to use a primer coat first.
    • DIY Texture Paste: Mix simple acrylic paint with baking soda or fine sand. This makes a thick, textured paste. Apply this using a brush or a sponge.
  5. Paint and Finish: Apply the textured paint in thin, even coats. Follow the product directions. Allow plenty of time for drying between coats. If you use the DIY paste, let it dry completely. You can add a clear sealant coat if you want extra protection.
  6. Add a Handle (Optional): For a finished, sophisticated look, add a small leather or fake leather loop. Punch two small holes near the top edge. Secure the handle with strong glue or small rivets. This small detail adds a nice contrast.

Placement: This holder looks best next to your sink or stovetop. It adds a touch of simple elegance to any kitchen counter.


Project 2: The Modern Basket Weave Storage Caddy

Purpose: This project changes a basic plastic jug into a charming and practical caddy. It is perfect for storing remote controls, art supplies, or small household items. The rope wrapping adds a great texture and warmth.

How to Do It:

  1. Pick Your Jug: Use a medium-to-large plastic jug. It should have a sturdy base and a smooth, straight body. Clean and dry it very well.
  2. Prep the Jug: Decide how tall you want your caddy. You can leave the top handle area on the jug. This is great for a grab-and-go handle, as shown. Or, you can cut the top off completely for a fully open container. If you cut it, mark your line first. Use strong scissors and then sand the edges smooth.
  3. Select Rope: Natural ropes like jute, sisal, or thick cotton cord work best for this style. A thicker rope will give you a better texture and cover the jug faster.
  4. Start Wrapping: Put a line of hot glue near the bottom edge of the jug. Press the end of your rope firmly onto the glue line.
  5. Wrap the Rope: The simplest way to get this basket-weave look is to glue rows of rope very close together. Apply the hot glue in small sections as you wrap. This keeps the rope snug and tight against the jug. Work your way up the side until the rope reaches your desired height. Be sure to press the rows together to hide the plastic underneath.
    • Note: For the exact cross-hatch pattern shown, you can glue thin, vertical strips of rope first. Then, weave your horizontal rope through them. However, simple coiled wrapping is much easier and still looks fantastic.
  6. Finish It: When the rope reaches the right height, trim the end. Use a final dot of hot glue to secure the end of the rope. Tuck the end neatly into the coil next to it.

Placement: This caddy looks perfect on a coffee table, a bedroom nightstand, or even a home office desk for small supplies.


Project 3: The Minimalist Modern Lantern

Purpose: This project transforms a translucent plastic container into a stylish, soft lantern. It is great for creating a cozy, warm mood indoors or outside on a deck. The simple shape and clean black lines make it a chic home accessory.

How to Do It:

  1. Pick Your Jug: Look for a translucent or frosted plastic jug. A large water jug or a rounded cleaning container works well. Wash and dry it completely.
  2. Prep the Jug: Cut off the very top, narrow part of the jug. You want to be left with an open cylinder shape. The bottom of the jug should stay solid. Use sandpaper to smooth all the cut edges.
  3. Create the Rings: To give it a clean, finished look, you need a base and a top ring. Use thick craft foam, thin wood circles, or even lids from other containers for this.
    • Measure the size of the jug’s base and top opening.
    • Cut two circles from your chosen material. One should fit well around the bottom. The other should fit right on the top edge.
    • Paint both of these rings a contrasting color, like a matte black, for that modern touch.
  4. Attach the Handle:
    • The example uses a curved wooden or faux leather handle. Cut a strip of thin, flexible material (wood or thick faux leather) into a curved shape.
    • Attach the ends of the handle to the top painted ring. Use a very strong glue or small rivets. Make sure the handle is solid.
  5. Assemble the Lantern:
    • Glue the painted base ring around the bottom edge of your jug.
    • Glue the top ring (with the handle) to the top cut edge of the jug.
    • Wait for all the glue to dry completely and securely.
  6. Add the Light: Place battery-operated LED fairy lights or a small LED candle inside the jug. This gives off a safe, beautiful, glowing light.

Placement: Use this lantern as a centerpiece on a table, on a bookshelf, or to add ambiance to any seating area.


Project 4: The Wavy Handle Caddy

Purpose: This eye-catching caddy has a wavy, decorative top edge and a strong, practical handle. It’s perfect for organizing art supplies, holding small cleaning bottles, or working as a decorative plant holder. The speckled body and black contrast look refined and artistic.

How to Do It:

  1. Pick Your Jug: Select a jug that is tall and has a square or rectangular base. Make sure its surface is smooth. Clean and dry it very well.
  2. Mark the Wavy Edge: Decide on the caddy’s final height. Use your marker to draw a freehand wavy or scalloped line around the top edge. Draw it slowly and make sure the curves look planned and smooth.
  3. Cut the Wavy Edge: Cut along your wavy line with a sharp craft knife or strong scissors. Be very precise and careful with the curves. Sand down all the cut edges to make them smooth.
  4. Create the Handle Accent: You need to make the striking black handle and top trim.
    • The Best Method: Cut the wavy top and a matching handle shape from a piece of sturdy material. Think thick EVA foam or hard plastic.
    • Paint this piece a solid matte black.
    • Attaching: Once the black piece is dry, glue it securely to the wavy cut edge of your jug. Use a very strong adhesive. It should sit perfectly on the jug’s edge.
  5. Paint the Jug (Optional): To get that speckled texture, paint the main body of the jug. Use a light spray paint for plastic. Then, add a speckled topcoat or apply your DIY texture as described in Project 1.
  6. Add a Base (Optional): For extra stability, you can glue a simple black ring to the very bottom, similar to the method in Project 3.

Placement: This caddy looks amazing in a home office, a craft area, or a stylish bathroom.


Project 5: The Stylish Laundry Hamper / Blanket Storage

Modern white plastic jug Upcycled into Plastic Jugs storage container with a clean, geometric cut-out design, holding a neatly folded knit blanket.

Purpose: This smart project turns a large plastic container into a striking storage solution. It is ideal for throw blankets, extra towels, or even a small, decorative laundry hamper. The cut-out pattern adds a modern, architectural feel.

How to Do It:

  1. Pick Your Jug: Choose a very large, strong plastic jug. The kind that holds a gallon or more of laundry detergent is perfect. It should have a strong handle and a square or rectangular base. Wash and dry it completely.
  2. Design the Cut-Out: This is the most creative step. Use a marker and ruler to plan your pattern. The example shows interlocking “X” shapes within a large window.
    • First, mark a large rectangle on two opposite sides of the jug. Leave a solid border at the top, bottom, and sides for strength.
    • Next, draw your geometric pattern inside this window. Keep the strips of plastic wide enough so the jug stays structurally sound.
    • Tip: Measure carefully. Draw the pattern on one side, then trace it onto the opposite side for a matching look.
  3. Cut the Design: Use a sharp craft knife or a precision cutting tool. Very carefully cut out the marked sections. This step needs a steady hand and patience. Be sure to smooth all the cut edges with fine sandpaper.
  4. Paint (Optional): If the jug isn’t already a good neutral color (like white or cream), spray paint it. A matte finish often looks the most expensive and modern.
  5. Final Touches: Make sure all edges are smooth and clean. The jug’s shape, combined with the open cuts, creates a nice look. The blankets or towels you store inside become part of the decor.

Placement: This piece fits perfectly in a living room next to a sofa or in a bedroom as smart storage for extra linens.


More Upcycled Plastic Jug Ideas

The chances to upcycle plastic jugs are endless! Here are a few more concepts to keep your creative momentum going. These ideas keep that high-end, modern look.

  • Stylish Desk Organizers: Cut off the top handle part of a jug. Paint it a solid color (matte grey or black). Then, wrap the bottom third with a leather strap or thin cork sheeting. This creates a smart holder for pens, scissors, or charging cables.

Hanging Planters: Cut jugs in half. Drill drainage holes in the bottom. Paint them with a textured paint (like Project 1). Add faux leather or rope straps and hang them on a wall. They are perfect for small indoor plants or succulents.

The Patterned Light Diffuser: For a different take on Project 3, paint the entire jug matte black (or another dark color). Carefully drill or cut small, random holes across the surface. Place LED lights inside. This creates a dramatic, starry-night effect when the light shines through.

Cleaning Supply Caddy: Use a large, open-top jug (like a milk jug). Cut the top off neatly. Apply a glossy, solid-color paint (like deep emerald or cobalt blue). Add a simple wooden dowel handle secured by small bolts. This makes a great-looking caddy for moving cleaning supplies around the house.

Kids’ Toy Bins: Use very large jugs (like commercial detergent containers). Cut the tops off to create wide, open bins. Paint them in two-tone patterns (like white and tan). These make durable, chic bins for tidying away toys in a stylish living space.


FAQ – Upcycle Plastic Jugs

Q: What kind of plastic jugs are best for upcycling projects?

A: The best containers are usually made from HDPE plastic (often marked with a #2 recycling symbol). These are commonly found as milk jugs, laundry detergent bottles, and some cleaning solution containers. They are thicker, sturdier, and hold their shape well, making them ideal for cutting and converting into strong storage.

Q: Is it safe to cut the plastic? What is the best way to get a smooth edge?

A: Safety is always first. Use a sharp craft knife for heavy cuts and strong scissors for trimming. Always cut away from your body. The most important step for safety and a professional look is to smooth the edges. Use fine-grit sandpaper (around 120-220 grit) and gently rub the cut line until it is completely smooth and no longer sharp to the touch.

Q: What is the best paint to use on plastic jugs for a long-lasting finish?

A: You need to use paint specifically made for plastic, which usually contains an additive that helps it adhere to the slick surface. Spray paint is often the easiest option for a smooth, even finish. Look for products labeled “Paint for Plastic” or “All Surface” spray paint. For the best result, apply a thin coat of plastic primer first, then apply several light coats of your color.

Q: How can I hide the texture or logos already on the plastic jug?

A: You have a few options:

  1. Textured Paint: As shown in Project 1 and 4, thick or textured spray paint (stone, granite, or stucco effect) does a great job of covering small details.
  2. Wrapping: Projects 2 and 4 use materials like rope or cork/leather to fully or partially wrap the body of the jug, covering the original markings completely.
  3. Sanding: For raised letters, you can often sand them down with a coarse sandpaper before applying primer and paint.

Q: Are upcycled containers safe to use for food storage?

A: It is strongly recommended that you do not use upcycled plastic for direct food storage or serving. Unless you are absolutely certain of the plastic type and its original use, it’s safest to reserve these containers for non-food items like blankets, cleaning supplies, art materials, or planters.


References


Recent Posts


My BEST Thrifting Secrets for Aesthetic Home Decor

A chic, cream-colored barrel-style swivel chair upholstered in boucle or shearling fabric, sitting on a concrete floor in a well-stocked second-hand or vintage furniture store. This is an example of a high-quality find achieved by mastering Thrifting Secrets.

We all scroll Instagram and love those beautiful, collected homes. They look effortlessly chic. Then we see the high price tags on new furniture. I used to spend money trying to get that look. I ended up with a high credit card bill and a house that felt too plain. Everything changed when I discovered the powerful Thrifting Secrets of hunting for vintage treasures. I found that the best decor has a real story. Now, I will share my journey with you. I’ll show you how to find beautiful pieces on a small budget.


Unlocking the Aesthetic: Your First Dive into Thrifting Secrets

We live in a world with too much fast furniture. Most homes have mass-produced items. The most popular homes today feel unique and personal. They look curated. This “collected” style means your home has grown over time. It is the sign of great taste. The real secret? It always involves old, pre-loved, or thrifted items.

Thrifting is no longer just for saving money. It is a smart design choice. But walking into a huge thrift store can feel overwhelming. How can you find the good stuff among all the clutter? How can you make sure your finds look expensive, not messy?

This guide reveals my personal thrifting secrets. It gives you simple advice and easy ‘how-to’ methods. You can transform your home with stylish, unique items. Best of all, you will keep your budget low.


Part 1: Plan Your Hunt (Success Starts Before You Leave Home)

Many new thrifters make one big mistake. They go without a plan. Finding aesthetic items is not about luck. It is about being prepared.

Secret 1: Know Your Style and Your Sizes

Applying the best Thrifting Secrets starts with forming a clear vision before visiting any store: define the style you want, and identify the specific items you need.

How to Do It: Make a “Thrift List”

  1. Look Around Your Home: Walk through your rooms with a notepad. Write down what you need. Do you need art for an empty wall? A tray for the coffee table? A better light for a dark corner?
  2. Pick Your Style Words: What is your style? Mid-Century Modern, Coastal Grandma, Dark Academia, or Boho-Eclectic? Knowing these words helps you focus your search. For example, a Mid-Century modern buyer looks for solid teak wood. They want simple shapes. A Coastal Grandma buyer looks for brass frames and blue and white plates.
  3. Measure Everything: You must do this. If you need a dresser, measure the space exactly. Save those measurements (up, across, deep) on your phone. If you want a dining table, know the smallest and largest size that will fit in your space.

Secret 2: Map Out Your Treasure Route

Mastering Thrifting Secrets means knowing that not all second-hand stores are the same, as different shops hold unique finds.

  • Charity Shops (Goodwill, Salvation Army): These are best for small decor items, kitchen gear, and surprise accessories. They get many new donations every day.
  • Local Thrift/Consignment Shops: Prices here are often a little higher. But they have better quality, curated furniture. They offer truly unique vintage items.
  • Estate Sales: This is the best place for original art, high-end furniture, and special collections. You must research these sales. You usually need to arrive early.
  • Flea Markets/Swap Meets: These are great for finding fabrics, raw materials, and for negotiating prices.

How to Do It: Plan Your Day

Use a map app to plan a trip. Try to visit 3 to 5 stores in one area. Start at the nicer, more curated shops first. Then, go to the busy charity stores. Finish with a quick look at an antique mall if you have time. This plan helps you see the best items before they sell.


Part 2: Searching Smart (Mastering the Art of the Search)

The search is often where people get lost, but one of the key Thrifting Secrets is understanding that a thrift store needs a different kind of focus than a department store.

Secret 3: Use the 4 Cs Inspection Rule

When buying decor for your aesthetic, quality is important. A bad find, even a cheap one, just becomes clutter. Use the 4 C’s to check any item quickly.

  1. Condition: Does the structure feel strong? For wood, check for rot or cracks. Check for weak legs. For ceramics, look for chips or thin cracks. For fabric, check for moth holes or stains.
  2. Character (The “Vibe”): Does it look unique? Does it have a cool shape or a history? A wooden box with a few scratches often has more character than a new, perfect one. Do not buy items that look generic or like modern, cheap copies.
  3. Cost: Always ask: “If this item were new at a regular store, what would it cost?” This helps you decide. If a chipped mug is $10, skip it. If a solid brass lamp is $35, buy it.
  4. Conversion Potential: This is key for aesthetic finds. If the color is bad or the fabric is old, can you easily convert it? Can you make it beautiful? For example, an ugly wooden chest with a great shape is perfect for a coat of paint. An item that needs major fixing should probably be left behind.

Secret 4: Look Past the Mess (Visual Filtering)

Thrift stores are often very messy. The “ugly” items hide the “gold.”

How to Do It: The Aesthetic Scan

  • Focus on Material, Not Color: Forget the bright, ugly paint or the dust. Look only for the material: Is the base solid marble? Is the bowl real brass? Is the vase hand-blown glass? Good materials always look high-end. The bad color can be fixed.
  • Hunt in Weird Aisles: Skip the main furniture floor—everyone goes there. Go to the craft section for old buttons or unique frames. Check the kitchen gear for cast iron, nice cutting boards, or unusual containers.
  • Look for Great Shapes: Train your eye to see beautiful shapes. A big, unique vase instantly looks chic with a coat of matte white paint. A simple wooden cabinet with thin, nice legs has huge potential.

Part 3: The Aesthetic “Thrift Flip”

One of the best Thrifting Secrets is recognizing that most finds need work; the magic is in the simple, big changes that transform “old stuff” into aesthetic decor.

Secret 5: Master the Paint Overhaul

Paint is your most powerful tool. It quickly moves a piece from cheap to chic.

How to Do It: The Stylish Paint Job

  • The Matte Rule (Black or White): Use matte black or matte white spray paint on almost any small item (vases, ceramic animals, old statues, candleholders). This gets rid of bad colors. It makes people look at the item’s shape instead. This gives instant sophistication.
  • Furniture Makeover: Chalk paint is the easiest way to update wood. Choose soft, muted colors (like sage green, dusty blue, or light brown). Always sand the piece lightly. Clean it well. Use a good wax or sealer to make it look professional.
  • Change the Handles: Even if you keep the original wood finish, changing the knobs helps. Take off the old plastic or brass handles. Add modern leather pulls or cool glass knobs. You can find these at hardware stores or online. This simple change takes ten minutes and updates the whole piece.

Secret 6: Build a ‘Collected’ Gallery Wall

Art at the thrift store is often ignored. Yet, it offers the most personality for your walls.

How to Do It: Make Thrifted Art Look Expensive

  1. Ignore the Picture: Unless it is a special painting, ignore the actual print or image. Focus on the frame. Look for real wood, unique gold paint, or deep carvings.
  2. Use a New Mat: You can keep the old art. But change the stained, yellowing paper border (the mat) with a new, thick, white one. This instantly makes the piece look modern. It puts the focus back on the art.
  3. The Simple Abstract: Did you find an old canvas with good texture but a bad image? Flip it over. Paint the back white. Create your own simple abstract art using only one or two colors. Now you have custom, original art in a vintage frame.

Part 4: Style and Placement (Making Thrifted Look High-End)

This is the final step. Here, your thrifting secrets truly pay off. You make the items look planned, not random.

Secret 7: The Rule of Three and Stacks

High-end stylists use these rules. They make any group of objects look planned.

  • The Rule of Three: When you style a shelf, coffee table, or fireplace mantle, put objects in odd numbers (3, 5, or 7). The uneven numbers look better to the eye.
  • Stacks and Layers: Use stacks of books to make different heights. You can turn the book spines inward, or use books that are all one color. Place a thrifted item on top of the stack. This raises it up. For example, a small brass bowl on a stack of two old books looks great.

Secret 8: Mix Textures and Eras

One of the most powerful Thrifting Secrets is recognizing that a truly aesthetic home never uses only one style or era; the compelling difference between old and new is what makes a space interesting.

How to Do It: Smart Contrasts

  • Mix Rough with Smooth: Put a rough, hand-made ceramic vase next to a new, smooth, modern mirror.
  • Mix Time Periods: Put a worn, old mahogany desk in a room with a sleek, new, simple lamp. The new piece makes the old piece’s character stand out. The old piece makes the new piece look special.
  • The High-Low Accessory: Use your thrifted brass items, woven baskets, or old linens. They soften modern, simple pieces. This is the biggest thrifting secret for getting that expensive, layered look.

Part 5: Thrifting Secrets for a Better World

Thrifting is about more than style and budget. It is also good for the world. Every thrifted item means one less item in a landfill. It is a vote against constant, quick buying. When you use these thrifting secrets, you choose beautiful, lasting items. You are building a home that is both lovely and responsible. This careful way of decorating is the most valuable secret of all.


Frequently Asked Questions (FAQ)

Q: Where should I look first in a big thrift store?

A: Focus on sections with the best quality materials. Look at the art and frames section. Look at the glass and ceramic aisle. Check for heavy items and unique colors. Look at the lamp section. Often, only the lamp shade is ugly. The lamp base might be solid brass or marble.

Q: How do I clean a thrifted item safely?

A: For fabrics, use a cleaner that removes odors. Wash them in hot water if possible. Or, take them to a professional cleaner. For wood, use a mild wood soap to remove dirt. Then, use a wood polish. For glass and ceramics, just wash them with soap and water. Use a soft toothbrush and baking soda paste for tough spots.

Q: Can I ask for a lower price at a thrift store?

A: Large store chains usually have fixed prices. Do not try to negotiate there. But, you can ask for lower prices at local, independent shops, consignment stores, and estate sales. This is often expected. Always be kind. Never offer a price that is too low. Try saying, “Will you take $X for this item?” Or, “I like these three items; can I get a small discount for buying them together?”

Q: What is the single best item to always look for?

A: Mirrors. An old mirror with a detailed or unique frame is the easiest way to add light, depth, and charm to a room. Even if the frame is damaged, a coat of matte spray paint can make it look high-end.


Reference Section

This article shares common ideas and methods used in interior design, furniture fixing, and sustainable home decor. It focuses on the following concepts:


Recent Posts


The BEST Beginner Sewing Project for a Sustainable Life

A frustrated shopper stands at a grocery checkout line with a clear plastic bag of produce, looking guilty, while in the foreground, a sewing machine suggests a solution for a Beginner Sewing Project to reduce plastic waste.

Ever felt that tug of eco-guilt at the checkout, adding yet another plastic bag to your overflowing bin? You’re not alone! I used to dread grocery shopping, knowing I was contributing to a problem I desperately wanted to solve. But what if I told you there’s a super simple, incredibly rewarding way to make a real difference, even if your sewing machine mostly collects dust? This Beginner Sewing Project changed my shopping habits and my outlook, and it’s about to change yours too.


Stitching Towards a Greener Future with this Beginner Sewing Project

In a world increasingly aware of its environmental footprint, many of us are searching for tangible ways to reduce our impact. One of the most pervasive sources of waste in our daily lives comes from single-use plastics, particularly in the realm of grocery shopping. From flimsy produce bags that tear before you get home to the endless stream of plastic bread bags, it can feel overwhelming to navigate the supermarket aisle without accumulating a mountain of non-recyclable waste.

But what if the solution was not only simple but also incredibly satisfying? Enter the humble, yet mighty, DIY zero-waste bag. This isn’t just a craft project; it’s a statement, a step towards a more sustainable lifestyle, and arguably the BEST beginner sewing project for a sustainable life. If you’ve ever wanted to learn to sew, or even if your sewing machine has been gathering dust in a closet, this guide is your invitation to create something truly meaningful.

We’re going to walk through how to make two types of essential zero-waste bags: a simple cotton produce bag and a versatile mesh bag. Both are perfect for carrying everything from apples and leafy greens to bulk grains and nuts, eliminating the need for countless plastic alternatives. Not only will you save money in the long run, but you’ll also gain a sense of accomplishment and contribute directly to a healthier planet. So, dust off that sewing machine, grab your fabric scraps, and let’s stitch our way to a greener future!


Why Zero Waste Bags Are Your New Best Friend

Before we dive into the nitty-gritty of sewing, let’s talk about why these bags are such a game-changer:

  • Environmental Impact: This is the big one. Every reusable bag you make and use means one less plastic bag ending up in landfills, polluting our oceans, or harming wildlife. Plastic takes hundreds of years to decompose, if at all, breaking down into microplastics that infiltrate our food and water systems.
  • Cost Savings: While there’s an initial investment in fabric (often you can use scraps!), you’ll save money in the long run by not having to purchase reusable bags repeatedly or paying for plastic bags in some areas.
  • Durability & Longevity: Handmade bags, especially those made from sturdy cotton or repurposed materials, are often far more durable than their store-bought counterparts. They can withstand countless washes and heavy loads, serving you for years.
  • Customization & Style: Express yourself! Choose fabrics that match your personal style, create bags in different sizes for different purposes, and even add fun embellishments. Who said sustainability couldn’t be chic?
  • Empowerment: There’s immense satisfaction in making something with your own hands. This beginner sewing project gives you a tangible way to take control of your consumption and contribute positively to your community and the planet.
  • Healthier Produce: Mesh bags allow your produce to breathe, extending its freshness compared to being suffocated in plastic bags.

What You’ll Need for This Beginner Sewing Project (The Essentials)

Don’t be intimidated! You likely have many of these items already.

  • Sewing Machine: Any basic functional machine will do.
  • Fabric:
    • For Cotton Produce Bags: Lightweight, tightly woven cotton fabric. Old cotton sheets, pillowcases, duvet covers, or even men’s button-down shirts are perfect for upcycling! Muslin, calico, or quilting cotton also work beautifully. You’ll need about 1/2 to 3/4 yard per bag, depending on desired size.
    • For Mesh Produce Bags: Lightweight mesh fabric. This can be tricky to find in small quantities, but look for old sheer curtains, laundry bags, or specialty “eco-mesh” fabrics online. Alternatively, you can repurpose old tulle or netting. A standard size might need about 1/2 yard.
  • Matching Thread: Polyester all-purpose thread is generally suitable for both cotton and mesh.
  • Fabric Scissors: Sharp scissors are crucial for clean cuts.
  • Ruler or Measuring Tape: For accurate measurements.
  • Pins or Fabric Clips: To hold fabric pieces together.
  • Iron and Ironing Board: For pressing seams (makes a huge difference!).
  • Safety Pin: For threading drawstrings.
  • Drawstring Material:
    • Cotton cord, ribbon, or even a strip of fabric you make yourself (about 1/2 inch wide).
    • For mesh bags, you can use a thinner cord or even elastic if you prefer.
    • You’ll need about 25-30 inches per bag.

A flat lay photo of a white sewing machine surrounded by essential tools for a beginner sewing project, including blue and yellow patterned cotton fabric, sharp scissors, white and green thread spools, an iron, a measuring ruler, and safety pins.

Part 1: How to Make a Simple Cotton Drawstring Produce Bag (The Ultimate Beginner Sewing Project!)

This is truly a fantastic beginner sewing project because it involves mostly straight seams and introduces basic techniques like hemming and creating a casing.

Step 1: Prepare Your Fabric

Decide on your desired bag size. A good starting point for a medium produce bag is a rectangle of fabric approximately 15 inches wide by 30 inches long. This will give you a bag roughly 14×14 inches when finished (allowing for seam allowances and the drawstring casing).

  • Wash and press your fabric. This pre-shrinks it and makes it easier to cut and sew.
  • Cut your fabric to the desired dimensions. Remember, your length will be folded in half.

Step 2: Hem the Top Edge

This will be the top opening of your bag.

  • Along one of the 15-inch edges (the top of your future bag), fold the raw edge over by 1/4 inch towards the wrong side of the fabric and press.
  • Fold it over again by 1/2 inch and press firmly. This creates a neat double-fold hem.
  • Stitch this hem in place, close to the inner folded edge. Backstitch at the beginning and end. Repeat for the other 15-inch edge if you’re making a bag that opens at both ends, but for a simple produce bag, you only need to hem one of the short edges that will become the bag’s opening.

Step 3: Fold and Sew the Side Seams

  • Lay your fabric piece flat, right side up.
  • Fold the fabric in half width-wise, bringing the two 15-inch (hemmed) edges together. The right sides of the fabric should be facing each other. The raw edges of the long sides should align perfectly. Pin along the two raw side edges and the bottom raw edge.
  • Starting from one top corner of the bag, sew down the side seam, across the bottom, and up the other side seam, using a 1/2-inch seam allowance. Remember to backstitch at the beginning and end of each seam to secure it. If your fabric is prone to fraying, you can do a second line of stitching or finish the raw edges with a zigzag stitch or serger.

Step 4: Create the Drawstring Casing

  • Turn your bag right side out.
  • At the top opening of your bag, fold the hemmed edge down towards the inside of the bag by about 1 inch (or enough to accommodate your drawstring material, plus a little extra for the seam). Press firmly.
  • Stitch this casing down, about 1/8 inch from the bottom folded edge. Make sure not to stitch the casing closed at the top where the drawstring will exit! You want a channel for the drawstring to go through. Leave a small opening (about 1/2 inch) in the side seam of the casing for the drawstring to enter and exit. This is usually created by backstitching, leaving a gap, and then starting to stitch again.

Step 5: Thread the Drawstring

  • Cut a piece of drawstring material about 25-30 inches long (this allows for a bow).
  • Attach a safety pin to one end of your drawstring.
  • Thread the safety pin, with the drawstring following, through the opening you left in your casing. Work it all the way around the top opening of the bag until it emerges from the same opening.
  • Tie the two ends of the drawstring together in a knot. Now you have a functional drawstring!

Congratulations! You’ve made your first zero-waste produce bag!


Part 2: How to Make a Simple Mesh Produce Bag (For Breathability!)

Mesh bags are fantastic for fruits and vegetables that need to breathe. The process is very similar to the cotton bag, with a few key differences due to the nature of the fabric.

Step 1: Prepare Your Mesh Fabric

  • Cut a rectangle of mesh fabric, again around 15 inches wide by 30 inches long for a medium bag.
  • Mesh can be slippery! Take your time and use lots of pins or fabric clips.

Step 2: Fold and Sew the Side Seams

  • Fold the fabric in half width-wise, right sides together.
  • Pin along the two raw side edges and the bottom raw edge.
  • Sew down the side, across the bottom, and up the other side, using a 1/2-inch seam allowance.
  • Important for Mesh: Mesh often doesn’t fray, but if your mesh is delicate, consider using a French seam for cleaner, stronger edges. A French seam involves sewing the seam twice: first with wrong sides together (1/4 inch seam), then trimming, turning right sides together, and sewing again (1/4 inch seam) to encase the raw edges. For a beginner sewing project, a simple straight stitch with a small zigzag over the raw edge after the main seam is usually sufficient to prevent unraveling.

Step 3: Create the Drawstring Casing

  • At the top opening of your bag, fold the raw edge down towards the inside of the bag by about 1/4 inch and press (mesh might not hold a press well, so pin well).
  • Fold it down again by about 3/4 inch to create the casing. Pin liberally.
  • Stitch this casing down, about 1/8 inch from the bottom folded edge. Leave an opening for your drawstring.
  • Since mesh can be tricky, a zigzag stitch might work better than a straight stitch for the casing to allow for stretch and reduce puckering.

Step 4: Thread the Drawstring

  • As with the cotton bag, cut your drawstring (cotton cord or ribbon works well here) about 25-30 inches long.
  • Use a safety pin to thread it through the casing, emerging from the same opening.
  • Tie the ends together.

Tips for Success (Especially for Beginners!)

  • Practice Makes Perfect: Don’t expect your first bag to be flawless. Each one you make will get better.
  • Press Your Seams: This is a golden rule in sewing. Pressing seams open or to one side creates a much neater and more professional-looking finish.
  • Use the Right Needle: A universal needle is fine for most cottons. For mesh, a finer needle (like a sharp or microtex) might glide through better without snagging.
  • Don’t Rush: Take your time with measuring, cutting, and pinning. Precision here saves headaches later.
  • Backstitch! Always backstitch at the beginning and end of each seam to lock your stitches in place.
  • Don’t Be Afraid of Imperfection: Handmade items have character. Embrace it!

Beyond Produce Bags: Other Zero Waste Bag Ideas

Once you master this beginner sewing project, a world of zero-waste possibilities opens up!

  • Bread Bags: Larger, sturdier cotton bags for loaves of bread.
  • Bulk Bin Bags: Larger, perhaps with a flat bottom, for heavier items like rice, flour, or pasta. You can even add a small patch to write the tare weight (weight of the empty bag) on.
  • Sandwich Wraps/Snack Bags: Lined with food-safe material (like PUL or beeswax-coated fabric) for reusable alternatives to plastic baggies.
  • Gift Bags: Fabric gift bags are beautiful, reusable, and eliminate wrapping paper waste.
  • Everyday Tote Bags: Use heavier canvas or denim for a sturdy reusable shopping bag.

Conclusion: Your Sustainable Journey Starts Now

Congratulations, eco-warrior! You’ve not only learned a new skill but you’ve also taken a significant step towards a more sustainable lifestyle. Making your own zero-waste bags is incredibly rewarding, practical, and a fantastic beginner sewing project that builds confidence and creativity.

Every time you pull out one of your handmade bags at the grocery store, you’re doing more than just carrying groceries. You’re making a statement, inspiring others, and actively reducing your environmental footprint. So, keep sewing, keep creating, and keep making a positive impact, one stitch at a time. The planet thanks you, and so do future generations!


FAQ Section

Q1: What kind of fabric is best for beginner sewing projects like these?

A1: For cotton produce bags, quilting cotton, muslin, old cotton sheets, or even repurposed cotton shirts are ideal. They are easy to cut, don’t stretch, and hold a press well. For mesh bags, look for lightweight, soft mesh, old sheer curtains, or even laundry bags.

Q2: I don’t have a sewing machine. Can I hand sew these bags?

A2: Absolutely! It will take longer, but a simple backstitch (which mimics a machine stitch) is strong enough. Just ensure your stitches are even and relatively small for durability.

Q3: How do I wash my zero-waste bags?

A3: Most cotton and mesh bags can be machine washed in cold water with similar colors and then air-dried or tumble-dried on low. For items that held very dirty produce, a pre-soak might be helpful. Avoid fabric softeners as they can reduce absorbency and breathability over time.

Q4: Can I make these bags in different sizes?

A4: Yes, definitely! The beauty of DIY is customization. Simply adjust your initial fabric rectangle dimensions. For small bags, try 10×20 inches; for large, 20×40 inches. Remember the length is twice the height you want your finished bag to be.

Q5: What if my fabric frays a lot?

A5: If your fabric is prone to fraying, you have a few options:

  • French Seams: This is a very neat finish that encases all raw edges.
  • Zigzag Stitch: After sewing your main straight seam, trim the seam allowance and then zigzag over the raw edge.
  • Pinking Shears: These scissors create a zigzag edge that helps reduce fraying.
  • Serger/Overlocker: If you have one, this is the most professional finish.

Q6: What else can I use for the drawstring?

A6: Besides cotton cord, you can use thin ribbon, bias tape, old shoelaces, or even create a narrow fabric tube from the same fabric as your bag. Elastic can also be used, but you’ll want to stitch it into a loop before threading.


References


Recent Posts


10 Creative New Lives for Glass Jars

A collection of clean, empty Glass Jars of various sizes, along with twine, scissors, craft paper, and paint brushes, laid out on a rustic wooden table, ready for upcycling projects.

We all have them. Empty glass jars. They collect in the recycling bin. They once held pasta sauce, jam, pickles, or candles. For a long time, I just threw them away without a second thought. But then, I started to see their hidden potential. Each jar was a blank canvas. Now, I see chances for creativity and organization. They add a touch of charm to my home. I no longer just see waste.

If you’ve ever felt bad throwing away a good jar, or just wanted a greener way to organize, you’re in the right place. Come with me. We will explore ten fantastic ways to give those simple glass jars a creative new life. We will turn them into useful and beautiful items for your home.


Why Upcycle Glass Jars?

Before we start our projects, let’s quickly look at why upcycling glass jars is such a smart idea:

  1. Good for the Earth: It means less trash. It saves energy (making new glass uses a lot of power). It also means we need fewer new raw materials.
  2. Saves Money: Most of these projects need very few new items, if any. You are using what you already have!
  3. Make it Your Own: You can change each project to fit your personal style. Match it to your home decor.
  4. Boosts Creativity: It is a great way to use your hands and mind. You turn something plain into something special.

Are you ready to begin? Gather your clean, label-free glass jars. Let’s get creative!


1. Smart Pantry & Spice Storage

Using glass jars to organize your pantry is one of the best and most useful ideas. Jars that all look the same make things appear very tidy. You can easily see what you have. This helps reduce food waste. It also makes cooking faster.

How to do it:

  1. Wash and Dry: Make sure your glass jars are very clean and completely dry. Take off all labels. Soaking in warm, soapy water often helps. For sticky bits, scrub with baking soda.
  2. Fill Them Up: Put dry foods into jars of different sizes. Think pasta, rice, lentils, oats, flour, sugar, coffee beans, nuts, and spices.
  3. Add Labels: Labels are super important for good order. You can use:
    • Chalkboard Labels: Stick on chalkboard labels or paint a spot with chalkboard paint. Write on it with chalk markers.
    • Printed Labels: Design and print your own labels. Then stick them on.
    • Handwritten Tags: Tie small paper tags with string for a rustic look.
  4. Arrange Them: Put your organized jars on shelves, in drawers, or on a counter. This will make your pantry look good and work better.

Example: Imagine a row of clear glass jars. They are filled with bright spices like paprika, turmeric, and cumin. All are neatly labeled. Or bigger jars holding different kinds of pasta, sealed tight and easy to reach.


2. Lovely Vases & Planters

Glass jars, especially ones with unique shapes or colors, make wonderful vases. Small jars are perfect for a single flower or a small bunch. Bigger ones can hold larger flower displays. You can also turn them into cute small planters for succulents or herbs.

How to do it:

  1. Clean Very Well: Remove any dirt that might harm plants or make the water cloudy.
  2. For Vases: Just fill with water and put your flowers in. For a special touch, you can:
    • Paint: Spray paint the outside (or inside for a shiny look) with opaque or frosted glass paint.
    • Wrap: Wind string, ribbon, or lace around the top or middle of the jar.
    • Decorate: Glue on beads, buttons, or small shells to add texture.
  3. For Planters:
    • Drainage is Key: Glass jars do not have holes for water to drain. This is very important. Put a layer of small stones or charcoal at the bottom first. This stops roots from rotting. Then add potting soil.
    • Plants: Small plants like succulents, herbs (like basil or mint), or plant cuttings grow well in jar planters.
    • Water Gently: Since there are no drainage holes, be careful not to water too much.

Example: A group of small baby food jars, painted white. Each holds a single green leaf on a windowsill. Or a big pickle jar filled with a green fern. It adds a touch of nature to your living room.


3. Homemade Candle Holders & Lanterns

Turning glass jars into pretty candle holders or lanterns makes any room feel warm and cozy. They are great for quiet evenings, outdoor parties, or even as backup lights.

How to do it:

  1. Be Safe: Make sure your jar is stable. It should not tip over easily. Keep anything that can burn far from the flame.
  2. Simple Holders: Just put a small tea light or votive candle inside a clean jar.
  3. Decorated Holders:
    • Frosted Look: Use frosted glass spray paint for a soft light.
    • Lace & Burlap: Wrap jars with lace, burlap, or patterned cloth. Stick it down with glue. The light will shine through beautifully.
    • Glitter: Put Mod Podge glue on the outside of the jar. Then roll it in glitter for a festive feel.
    • Painted Designs: Use glass paint to draw patterns or simple shapes.
  4. Hanging Lanterns:
    • Wire Handle: Securely attach a wire handle around the top of the jar. You can use craft wire or even old coat hangers. Make sure it is strong enough to hold the jar’s weight.
    • Fairy Lights: For a safer, battery-powered choice, fill jars with LED fairy lights instead of candles.

Example: A line of decorated Mason jars. Tea lights flicker inside them along a garden path. This creates a magical feel for an evening get-together. Or a beautifully frosted jar filled with fairy lights. It sits on a bedside table.


4. Bathroom & Craft Room Organization

Mess makes us feel stressed. Glass jars are great helpers in making things tidy, especially in bathrooms and craft rooms. These rooms often have many small items.

How to do it:

  1. See What You Have: Decide what you need to put in order. Cotton swabs, cotton balls, hair ties, makeup brushes, bath salts, paintbrushes, beads, buttons, paper clips, rubber bands – there are so many things!
  2. Match Sizes: Pick the right size glass jars for different items. Tall jars for brushes, wider jars for cotton balls.
  3. Label (Good Idea): Clear glass lets you see inside. But a label makes it look even better.
  4. Put Like Things Together: Keep similar items in their own jars.
  5. Place Them: Arrange them on shelves, on your counter, or inside drawers.

Example: Three nice glass jars sit on a bathroom counter. They hold cotton pads, Q-tips, and small soaps. In a craft room, a wooden shelf holds many jars. These jars neatly contain embroidery thread, beads, and sewing tools.


5. Unique Drinking Glasses & Mugs

Glass jars, especially Mason jars, make excellent drinking glasses. They have a simple, rustic charm. They are strong, easy to hold, and give a fun, casual vibe to your drinks.

How to do it:

  1. Clean and Sterilize: Make sure jars are very clean. They should have no chemical traces. Washing them in a hot dishwasher is a good idea.
  2. Straw Holes: For some canning jars, you can make a hole in the lid with a drill for a straw. Make sure the edges are smooth.
  3. Add Handles: You can buy wire handles that fit Mason jars. These turn them into mugs.
  4. Decorate (If You Want): Clear is classic. But you can etch designs onto the glass. Or paint safe designs on the outside. Don’t paint near the rim where you drink.

Example: Iced tea served in charming Mason jars. They have lemon slices and mint. Perfect for a summer barbecue. Or a tasty smoothie enjoyed from a reused jam jar. It has a colorful straw.


6. Glass Jars for Creative Gift Packaging

Forget the usual gift bag! Putting small gifts in decorated glass jars adds a personal, handmade touch. This makes the present feel even more special.

How to do it:

  1. Think About Contents: What could fit inside a jar?
    • DIY Baking Mixes: Layer dry ingredients for cookies, brownies, or soups.
    • Spa-in-a-Jar: Fill with bath bombs, small soaps, a face mask, and a loofah.
    • Emergency Kit: Put in small basics like pain relievers, bandages, lip balm, and hand sanitizer.
    • Craft Kit: Small sewing items, buttons, beads, or tiny art supplies.
  2. Decorate the Jar:
    • Lid: Cover the lid with fabric, ribbon, or fancy paper.
    • Label: Attach a special gift tag or label.
    • Fillers: Use crinkled paper, tissue paper, or shredded newspaper. This adds cushioning and looks nice.
    • Outside Decorations: Tie string, lace, or add small ornaments to the jar.

Example: A pint-sized glass jar. It is filled with layers of brownie mix ingredients. Chocolate chips top it off. A recipe tag is tied with a festive ribbon. It’s an instant homemade gift. Or a set of small garden tools and seed packets nestled in a larger jar. A perfect gift for a friend who loves plants.


7. Terrariums & Fairy Gardens

Glass jars are like tiny worlds waiting to be made! Making a terrarium or a small fairy garden inside a jar is a lovely way to bring nature inside. It’s also surprisingly easy.

How to do it:

  1. Pick Your Jar: Jars with wide openings are easier to work with.
  2. Layering:
    • Drainage: Start with a thin layer of small stones or gravel at the bottom.
    • Charcoal: Add a thin layer of activated charcoal. This helps stop bad smells and filters water.
    • Mesh (Optional): A thin layer of mesh or cloth can go over the charcoal. This stops soil from mixing.
    • Soil: Add a layer of the right potting mix. Use succulent mix for dry plants. Use general potting mix for humid terrariums.
  3. Plants: Choose small, slow-growing plants. They should thrive in small spaces. Succulents and air plants are good for open jars. Mosses and ferns are good for closed terrariums.
  4. Decorate: Add small stones, twigs, tiny figures (for fairy gardens), or shells.
  5. Care: Water very little. Closed terrariums make their own moisture. They need very little watering.

Example: A large cookie jar turned into a green, self-sustaining terrarium. It has tiny ferns and moss. A small world under glass. Or a small jam jar. It holds a charming fairy garden with a tiny gnome and colorful stones.


8. Desk Organizers

Get rid of desk clutter with the simple beauty of glass jars. They are perfect for keeping office supplies visible and neat.

How to do it:

  1. Collect Your Supplies: Pens, pencils, markers, paper clips, binder clips, staples, pushpins, rubber bands, scissors, rulers – almost any small item.
  2. Sort Them: Give different glass jars to different kinds of items.
  3. Place Them: Arrange the jars neatly on your desk, inside a drawer, or on a shelf.
  4. Make it Personal (Optional): You can paint the jars. Wrap them in pretty paper. Or add nice labels to match your office look.

Example: Three glass jars of different sizes, neatly on a desk. The tallest holds pens and pencils. A middle-sized one contains scissors and markers. A short, wide jar keeps paper clips and binder clips organized.


9. Piggy Banks & Coin Glass Jars

Start saving spare coins or even small bills. Turn a simple glass jar into a clear piggy bank. It’s nice to watch your savings grow!

How to do it:

  1. Choose a Strong Jar: A wider opening makes it easier to get money out when you need it.
  2. Change the Lid:
    • Slotted Lid: Carefully cut a slot in the middle of a metal lid. Use tin snips or a Dremel. Smooth any sharp edges with sandpaper or a file.
    • No Lid: Just use the open jar to drop money in quickly.
  3. Decorate:
    • Savings Goal: Write your savings goal on the jar. For example, “Vacation Fund,” or “New Gadget.”
    • Paint/Decoupage: Decorate the outside to make it more attractive.
  4. Start Saving!

Example: A medium-sized Mason jar. It has a brightly painted lid and a slot. It is clearly marked “Adventure Fund.” It slowly fills with coins and small bills. A constant visual reminder of a future trip.


10. Memory Glass Jars & Time Capsules

This is a very special and meaningful way to use glass jars. Make a memory jar to collect good moments all year. Or create a time capsule to capture a picture of today.

How to do it:

  1. Memory Jar (Ongoing):
    • Decorate: Label the jar “Memory Jar” or “Gratitude Jar.”
    • Collect: All year, when something good happens, or you have a memorable time, write it on a small piece of paper. Drop it into the jar.
    • Look Back: On New Year’s Eve, open the jar. Read all the wonderful moments you collected. It gives a beautiful summary of your year.
  2. Time Capsule (Sealed):
    • Pick a Date: Decide when you will open it. For example, in 5 years, or 10 years.
    • Gather Items: Put in things that show the current time. Photos, newspaper clippings, a list of popular trends, movie tickets, a handwritten letter to your future self, small toys, notes from family members.
    • Seal It: Close the lid very tightly. You can even use wax to seal it completely.
    • Hide/Bury It: Keep it in a safe, dry place. Or bury it. Make sure the jar is well-sealed and safe from water.

Example: A beautiful, simply decorated glass jar on a living room shelf. It slowly fills with folded notes. These notes tell about family events, funny sayings, and small wins through the year. Or a sealed, strong jar buried in the garden. It holds letters and small items from childhood. It waits to be dug up years later.


Conclusion for Glass Jars

From simple storage to touching time capsules, glass jars are truly amazing. By trying these upcycling ideas, you do more than just add unique touches to your home. You also actively help reduce waste and live greener. So, next time you finish that jar of pickles or jam, don’t just throw it away. See what it can become. Clean it up. Give it one of these 10 creative new lives. Your home, your wallet, and the planet will all thank you. Happy upcycling!


FAQ about Recycling Glass Jars

Q1: How do I get rid of stuck labels and glue from glass jars?

A: Soak jars in hot, soapy water for 30 minutes to an hour. Many labels will then peel off easily. For very sticky glue, mix baking soda with a little oil. Make a paste. Put it on the glue. Let it sit for 15-30 minutes. Then scrub with a pad. Rubbing alcohol or nail polish remover can also work. Always test them in a hidden spot first.

Q2: Can I paint glass jars? What paint should I use?

A: Yes, you can! For decoration, use acrylic paint made for glass. Spray paint (especially frosted or matte colors) or enamel paints work well. For jars you will wash, look for paints that say “dishwasher safe.” Some need baking to set the paint for a long-lasting finish. Always follow the paint maker’s directions.

Q3: Are all glass jars safe for storing food or drinking?

A: Yes, generally, if they are very clean. But be careful with jars that held things like candles or chemicals. Only use them for food if you are sure they can be cleaned to be completely food-safe. For long-term canning, always use special canning jars (like Mason jars). These are made to handle high heat and pressure.

Q4: How can I make a handle for a glass jar to hang it up as a lantern?

A: You can use thick craft wire, flexible aluminum wire, or even an old metal coat hanger. Wrap the wire tightly around the neck of the jar. Twist the ends together. Then, make a loop at the top for hanging. Make sure the handle is strong enough to hold the jar’s full weight, especially if it has candles or other heavy things inside.

Q5: What are some tips for making terrariums in glass jars?

A: Pick plants that grow slowly. They should like humidity (for closed terrariums) or dry weather (for open ones). The right layers of drainage stones, charcoal, and soil are very important. Water very little, especially in closed terrariums. They create their own moisture. If your jar has a narrow opening, use long tweezers or chopsticks to arrange items.


References


Recent Posts