Cookie Consent by Free Privacy Policy Generator Update cookies preferences

Sustainably Slaying: Reusable Outfits You Need to See

Four stylish people walk down a cobblestone street in bright sunlight, wearing creative, reusable outfits. The clothing features extensive upcycling, including a denim bustier top with patchwork shorts and boots, a man in a vest and trousers made from mixed-fabric patchwork, a woman in a long denim skirt with fringed details, and a man in a repurposed green military-style jacket.

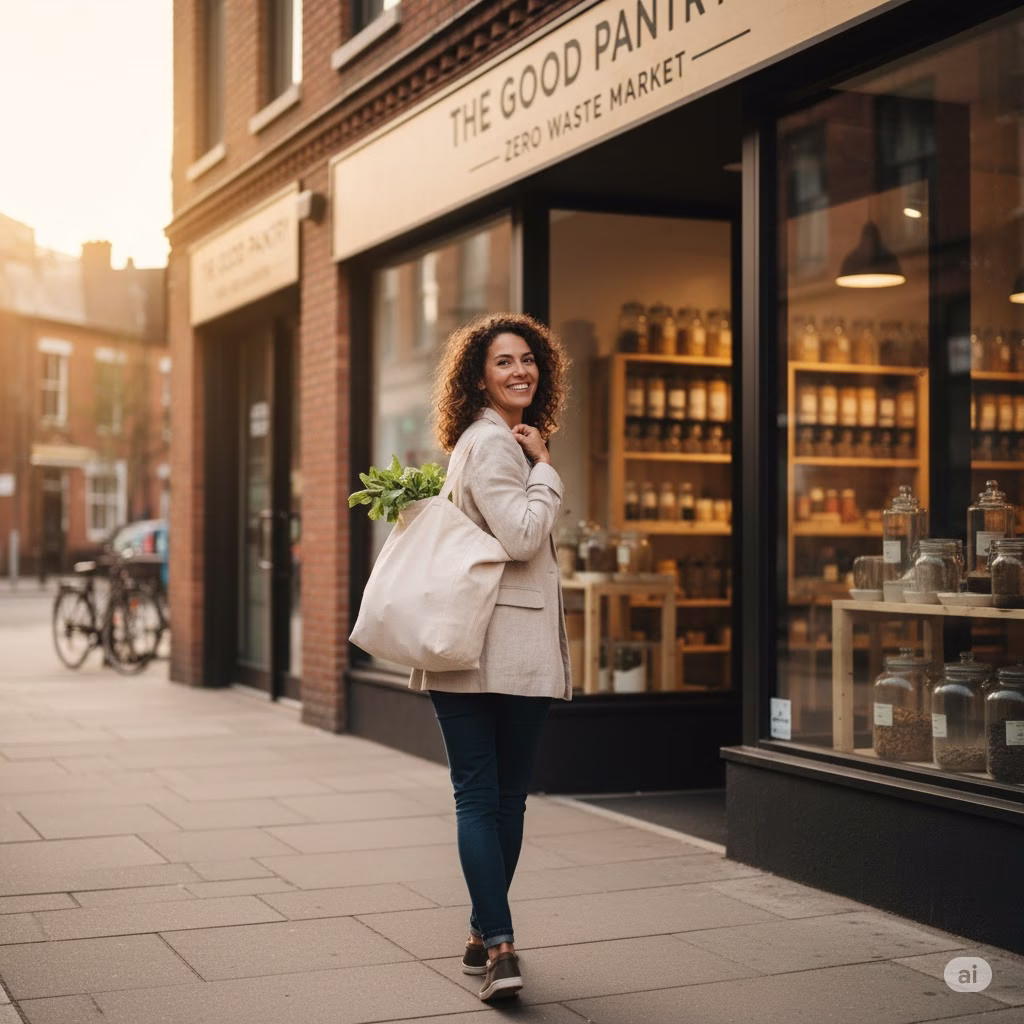
As fashion lovers, we all know the feeling of having a full closet yet believing there’s “nothing to wear.” This constant cycle of buying too much only leads to waste and a drained bank account. Luckily, the amazing world of sustainable style and Reusable Outfits offers a better way to look great. Join us as we explore how this movement helps your personal style, your wallet, and the well-being of the planet.


Fast Fashion and Reusable Outfits

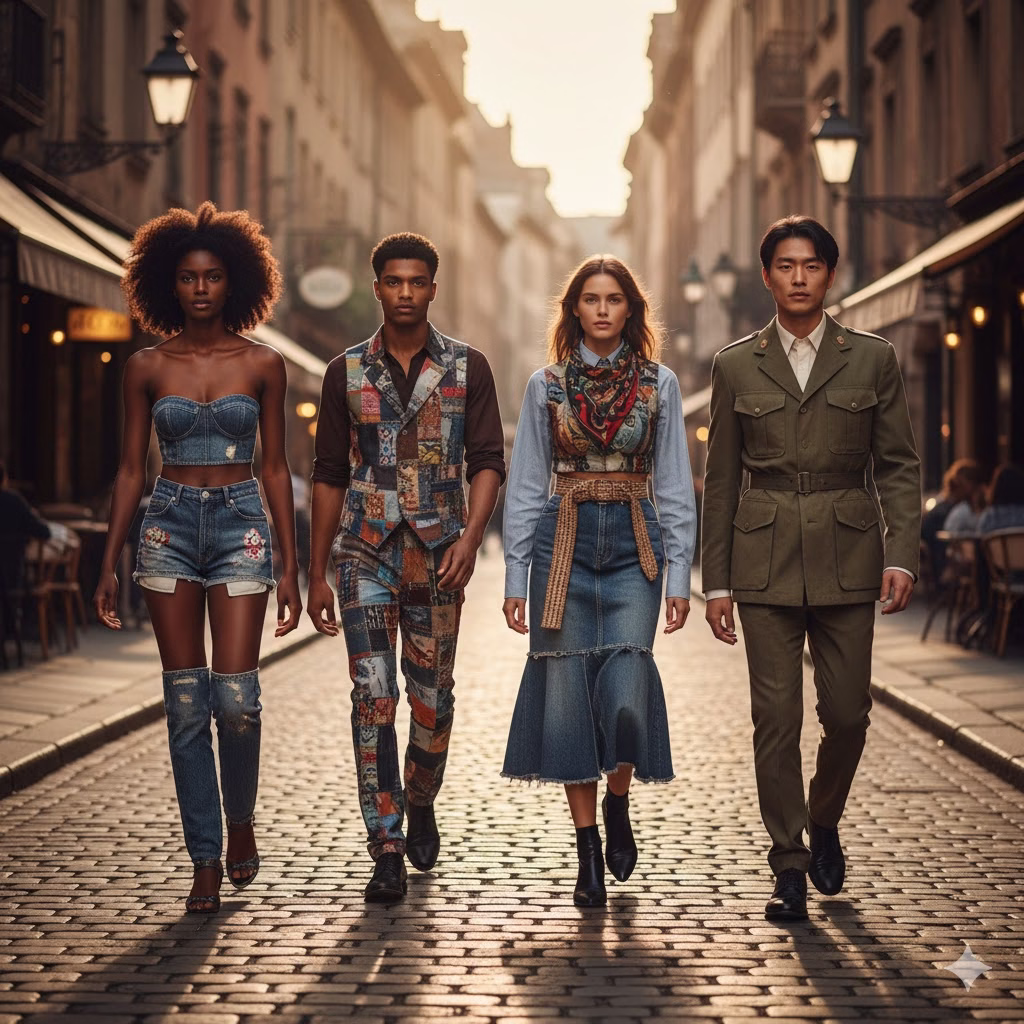
We live in a world that always wants what is new. It is easy to get pulled into the quick flow of fast fashion. New trends come and go faster than we can buy them. This leaves us with clothes we never wear and harms the environment more and more. But what if there was a better way? A way to dress that is thoughtful, fun, and looks great? Welcome to the world of reusable outfits. Here, style gets better, not lost, by making smart choices and loving what you already have.

This is not just about saving cash (though you certainly will!). It is about finding a style that is truly yours. And about causing less harm to the planet. It is also about the great feeling of turning old items into fresh, exciting looks. Forget the idea that earth-friendly fashion is boring; today, we will look deeply at how to dress great with reusable outfits you must see—and how you can make them yourself.

The Problem with “New”: Why Reusable Fashion Matters

Let’s first talk about the big issue in shopping: fast fashion hurts our world. The constant wish for cheap, trendy clothes has caused huge costs for the environment and for people. Think about the facts: Cotton farming uses lots of water and chemicals. Harmful dyes pollute rivers. Huge piles of old clothes sit in dumps. The impact is massive. Add to this the concerns about workers in many clothing factories, and it is clear that what we buy has big effects.

Reusable fashion is a strong answer. When we make clothes last longer, we lower the need for new things to be made. We save resources. And cut down on waste. We even reduce the air pollution that comes from making and moving clothes. It is a win for the Earth, a win for kind shopping, and a big win for your own style.

What Exactly are Reusable Outfits?

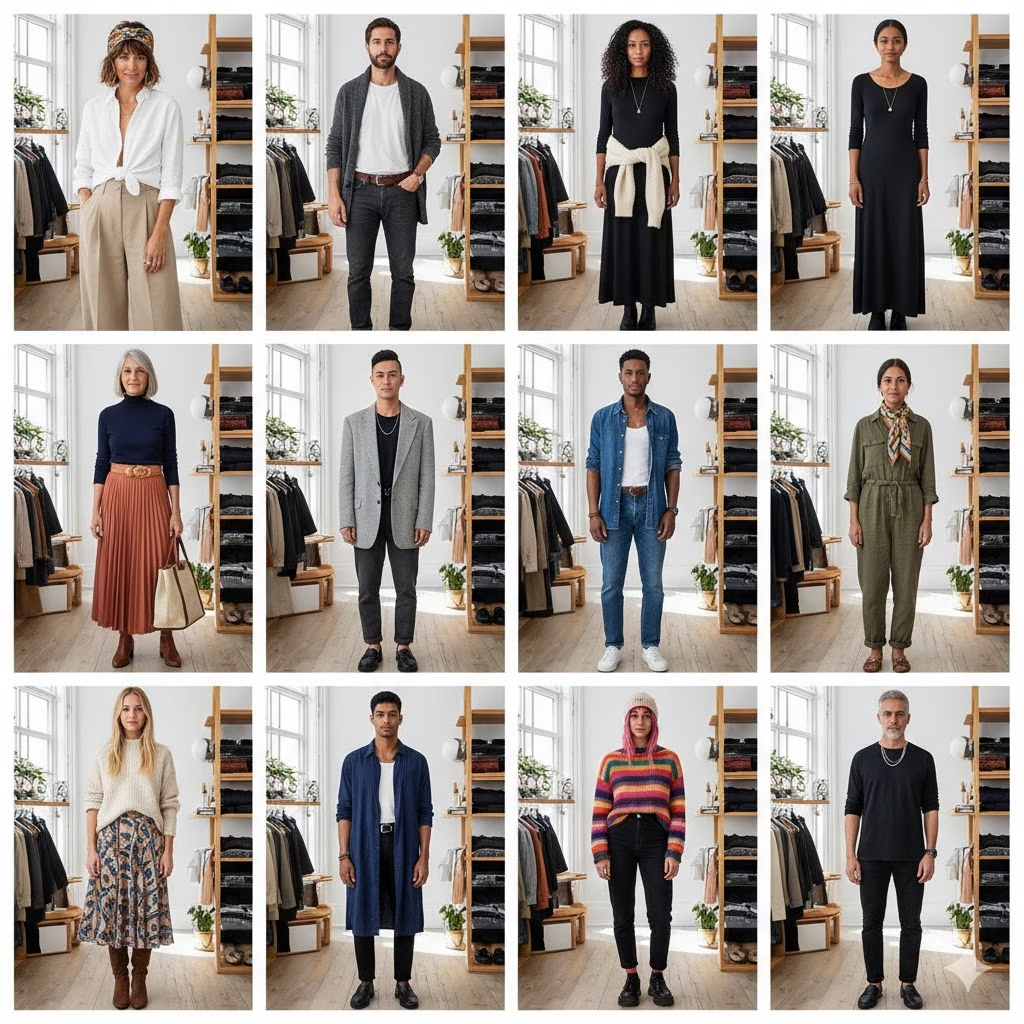
At its heart, reusable fashion means clothes that last and can be used in many ways. It means seeing your clothes not as things you will soon throw away, but as smart buys and core pieces. A reusable outfit is not always something you bought second-hand (though thrift store finds are amazing!). It is any look made from clothes you own, clothes you have fixed or changed, or items you bought with the goal of wearing them often and in many styles.

Think about it: that simple white shirt, those perfect trousers, that denim jacket—these are the heroes of reusable fashion. The magic happens when you see them not as fixed items, but as parts that can be mixed, styled, and changed up forever.


The Pillars of Sustainably Slaying: How to Build Your Reusable Wardrobe

Making a closet centered on reusable outfits takes time, but the reward is huge. Here are the main steps:

1. Master the Art of the Wardrobe Audit: Reusable Outfits

You must know what you have before you can build. The first step to embracing reusable outfits is to truly know what you own now.

How to Do It:

  • Take Everything Out: Do it. Take every piece of clothing, every belt, every shoe out of your closet and drawers.
  • Make Groups: Put similar items together (all shirts, all jeans, all dresses).
  • The “Keep, Fix, Give Away” Rule:
    • Keep It: You love these items. They fit well, feel good, and are useful.
    • Fix It: These items need a small repair (a missing button, a small rip). Do not throw them out! They can become core reusable items.
    • Give It Away: These are items that do not fit, are too stained to fix, do not match your style, or have not been worn in a year. Put them in piles to sell, give away, or turn into cleaning cloths.
  • Find Missing Items: Once you see all your clothes, you can find things you truly need (e.g., a good basic black top). This stops you from buying things you do not need.

2. Embrace Quality Over Quantity

This is the most important change in how you think. Fast fashion needs cheap, disposable items. Reusable fashion needs well-made items that will last a long time.

How to Do It:

  • Spend Wisely: When you do buy new (after finding a real need), choose items with better materials (cotton, linen, wool), strong sewing, and simple designs that will not look old next season. Think about how much it costs each time you wear it, not just the price tag. A high-quality item worn 100 times costs much less per wear than a cheap item worn twice.
  • Shop Second-Hand: Thrift shops, old clothing stores, and online sites (like Depop, ThredUp) are great places to find high-quality, pre-loved clothes. This is the best way to do reusable fashion! You find special items, often cheaper, and give them a new life.

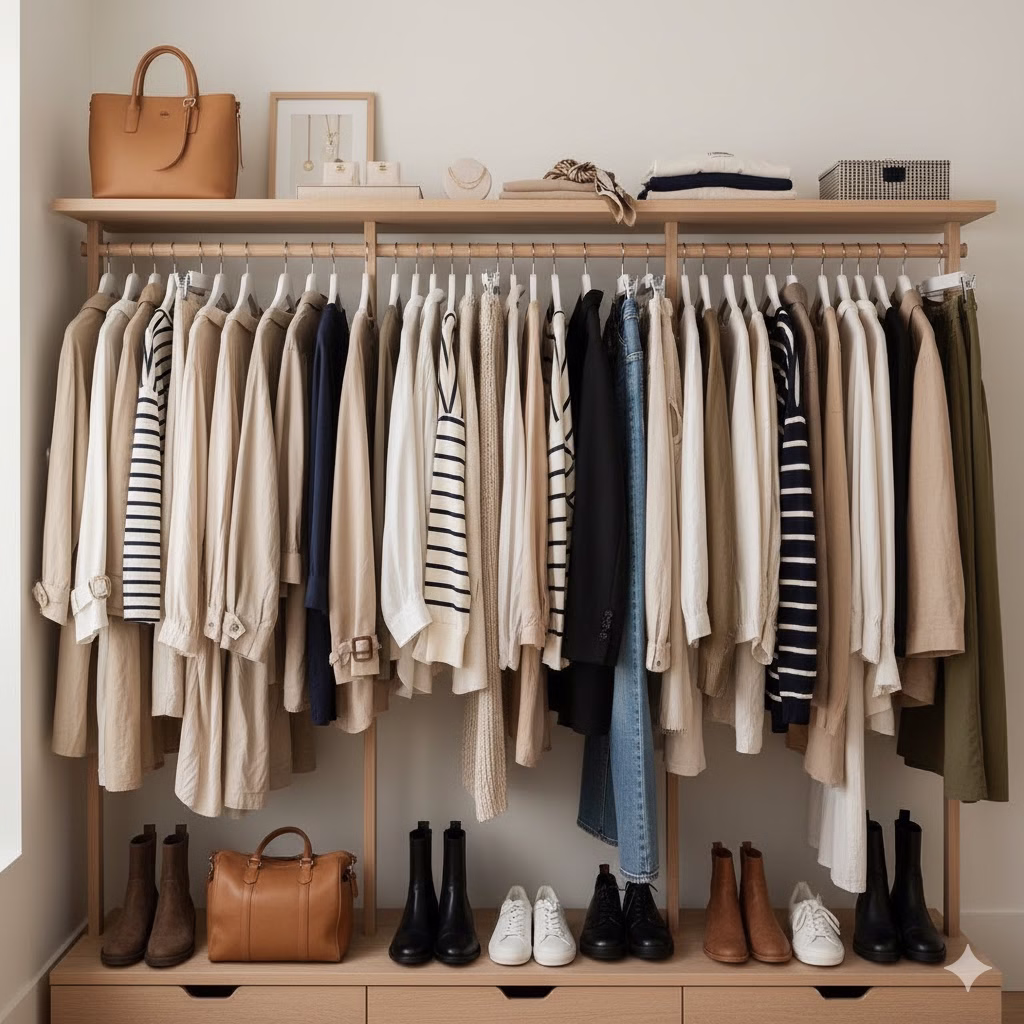
3. Cultivate Versatility: The Capsule Wardrobe Approach

A capsule wardrobe is a small set of clothes that all work together. This helps you make the most number of outfits possible. It is the best plan for reusable outfits.

How to Do It:

  • Pick Colors: Choose one main color (like black, blue, or gray) and a few bright colors. This helps make sure everything matches.
  • Focus on Key Pieces: Pick useful basics like good jeans, classic pants, a simple skirt, basic tops, a jacket, and an easy dress.
  • Layering is Key: Think about how items can be worn over or under each other to make new looks and suit the weather. A simple dress can be worn alone, over a shirt, or under a thick sweater.
  • Mix and Match: Push yourself to try new pairings with the clothes you already have. Take pictures of good outfits to use as ideas later.

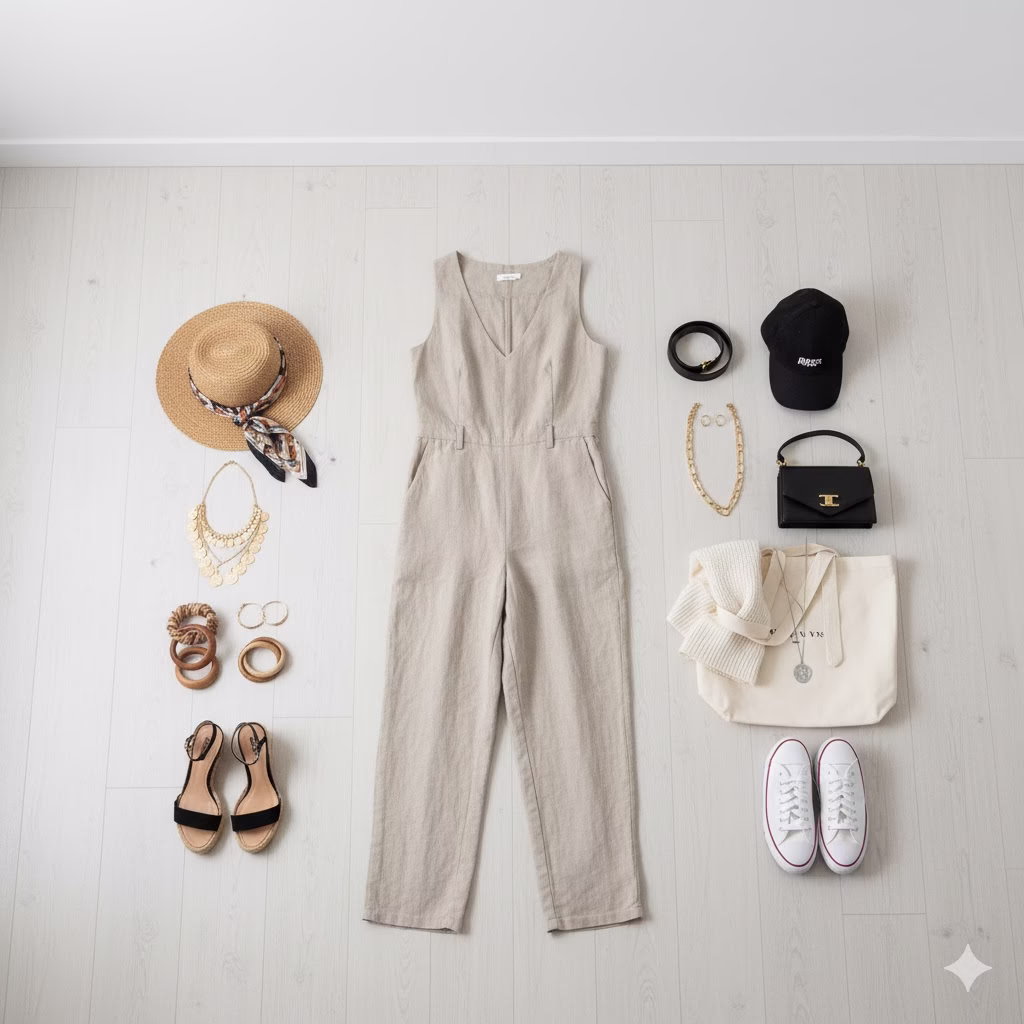
4. The Power of Accessories and Styling

Small items like jewelry and bags are the secret weapon of reusable outfits. They can totally change how a simple piece of clothing looks.

How to Do It:

  • Scarves: A scarf can be used in your hair, as a belt, a top, a bag decoration, or simply around your neck.
  • Belts: Use a belt to make a loose dress fit better, add shape to a thick sweater, or dress up simple jeans.
  • Jewelry: Big necklaces, small chains, hoop earrings, or bracelets can quickly change if an outfit is formal or casual.
  • Shoes & Bags: Changing sneakers for heels, or a big tote for a small clutch, instantly changes the outfit’s purpose.

5.Reusable Outfits: Repair, Repurpose, Reimagine

Do not throw away clothes just because of small issues. This is where true sustainable slaying happens!

How to Do It:

  • Learn Basic Mending: A simple sewing kit can fix missing buttons, loose seams, and small tears. Videos online are very helpful here!
  • Use a Tailor: A garment that fits perfectly looks much better. Take items to a tailor for small changes (making pants shorter, taking in the waist). This is an investment that makes the item last.
  • Upcycling/DIY:
    • Turn old jeans into shorts or a skirt.
    • Make an oversized shirt or sweater shorter.
    • Add patches or designs to hide stains or tears, making them a cool feature.
    • Change the color of faded clothes with fabric dye.

Reusable Outfits in Action: Examples to Inspire You

Let’s see how these ideas work in real reusable outfits. Imagine having these few core pieces and seeing all the possibilities:

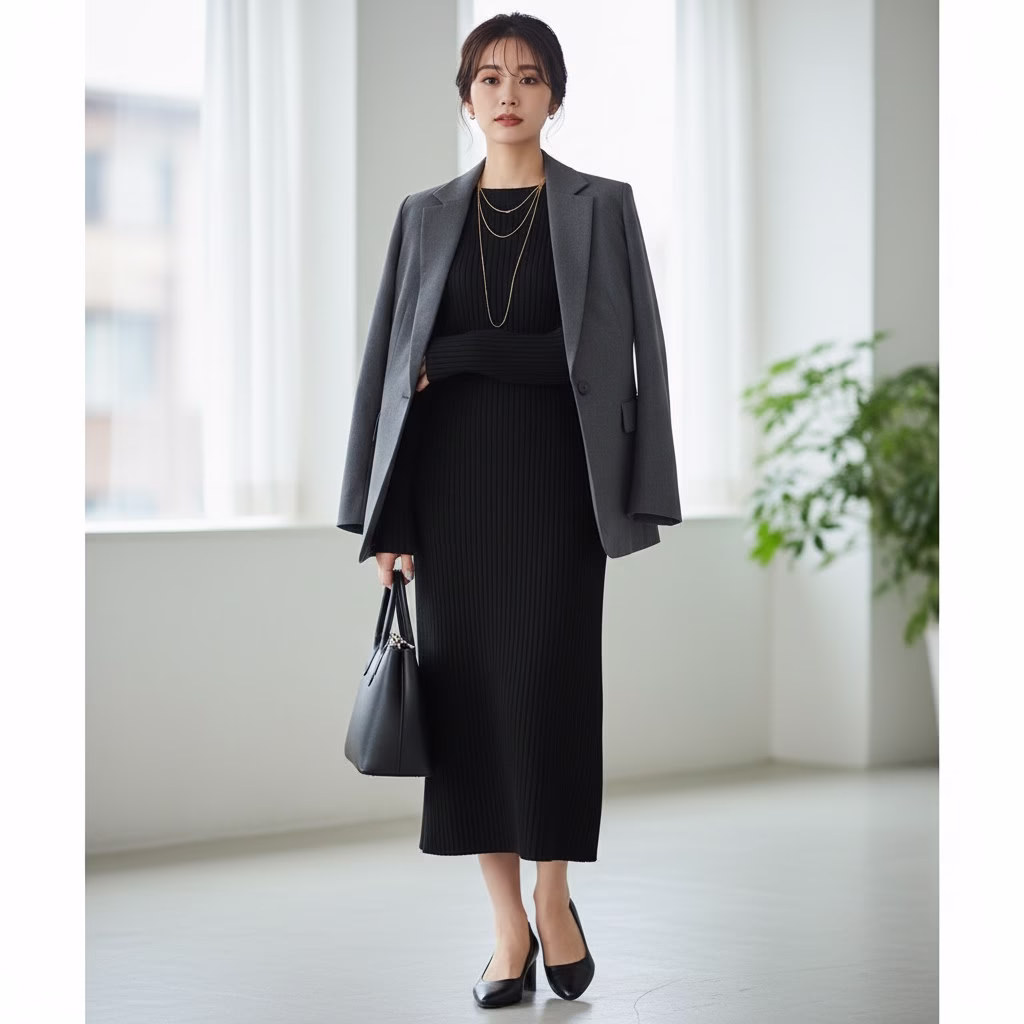
Example 1: The Versatile Black Midi Dress

Your Core Piece: A simple, well-fitting black midi dress.

  • Casual Day Out: Black dress + white shoes + denim jacket tied around your waist + a baseball cap.
  • Office Chic: Black dress + smart jacket + high heels + a nice necklace.
  • Evening Glam: Black dress + thin-strapped heels + simple gold jewelry + a small, elegant bag.
  • Cozy Weekend: Black dress + thick knit sweater worn over the top (making the dress look like a skirt) + ankle boots.
  • Bohemian Vibe: Black dress + wide-brimmed hat + many layered necklaces + rope sandals.

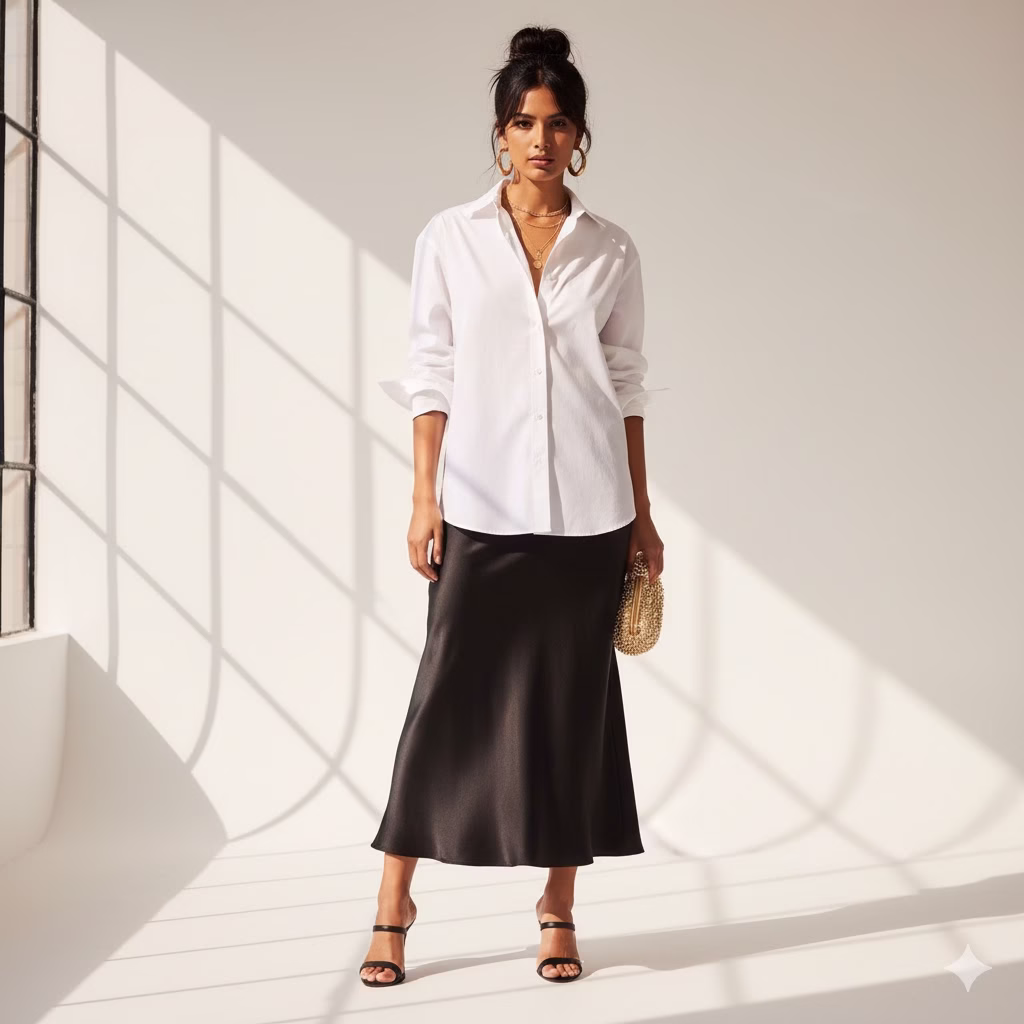
Example 2: The Classic White Button-Down Shirt

Your Core Piece: A crisp white large button-down shirt.

  • Effortlessly Cool: White shirt open over a tight top + high-waisted jeans + sneakers.
  • Polished Professional: White shirt tucked into smart pants + a thin belt + simple, flat shoes.
  • Beach Ready: White shirt worn open over a bathing suit + denim shorts + sandals.
  • Unexpected Glam: White shirt partly tucked into a silk skirt + heels + large earrings.
  • Layered Look: White shirt under a round-neck sweater, with the collar and cuffs showing + cotton pants.

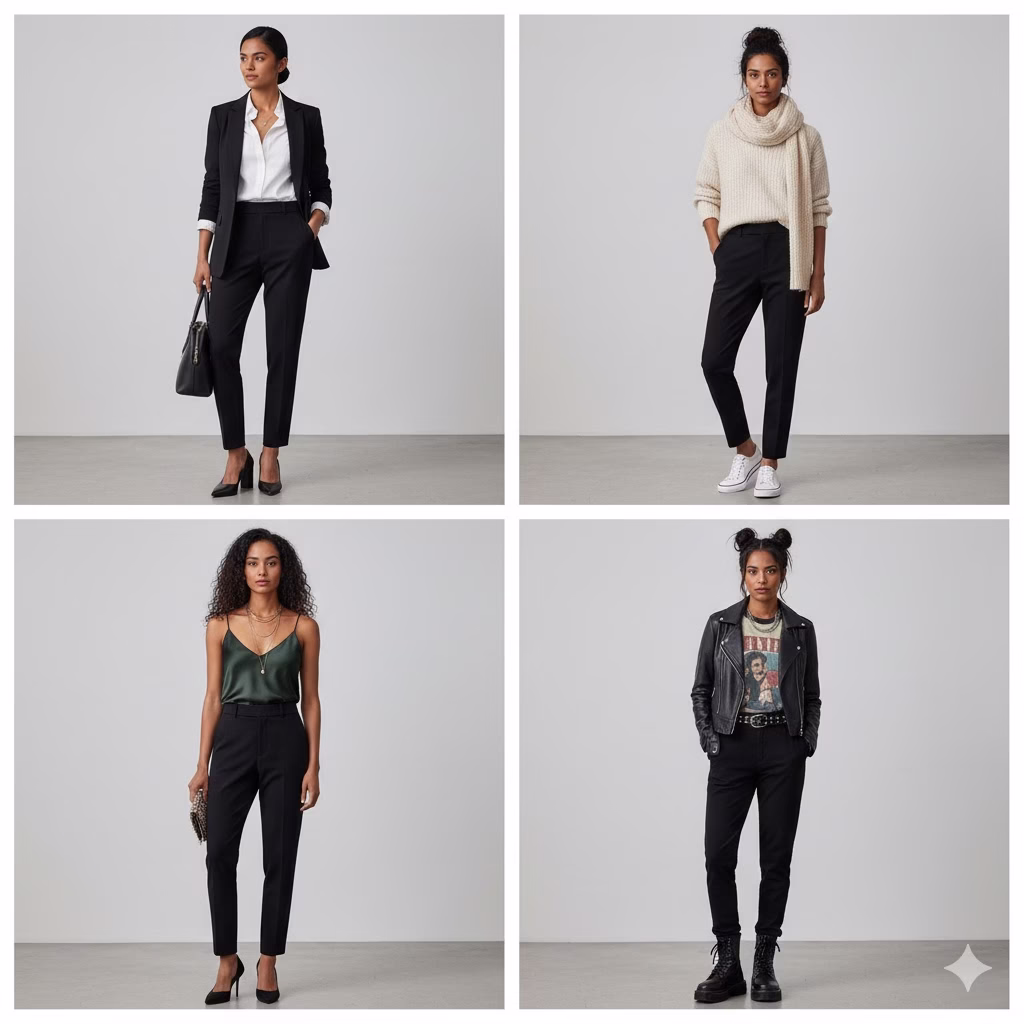
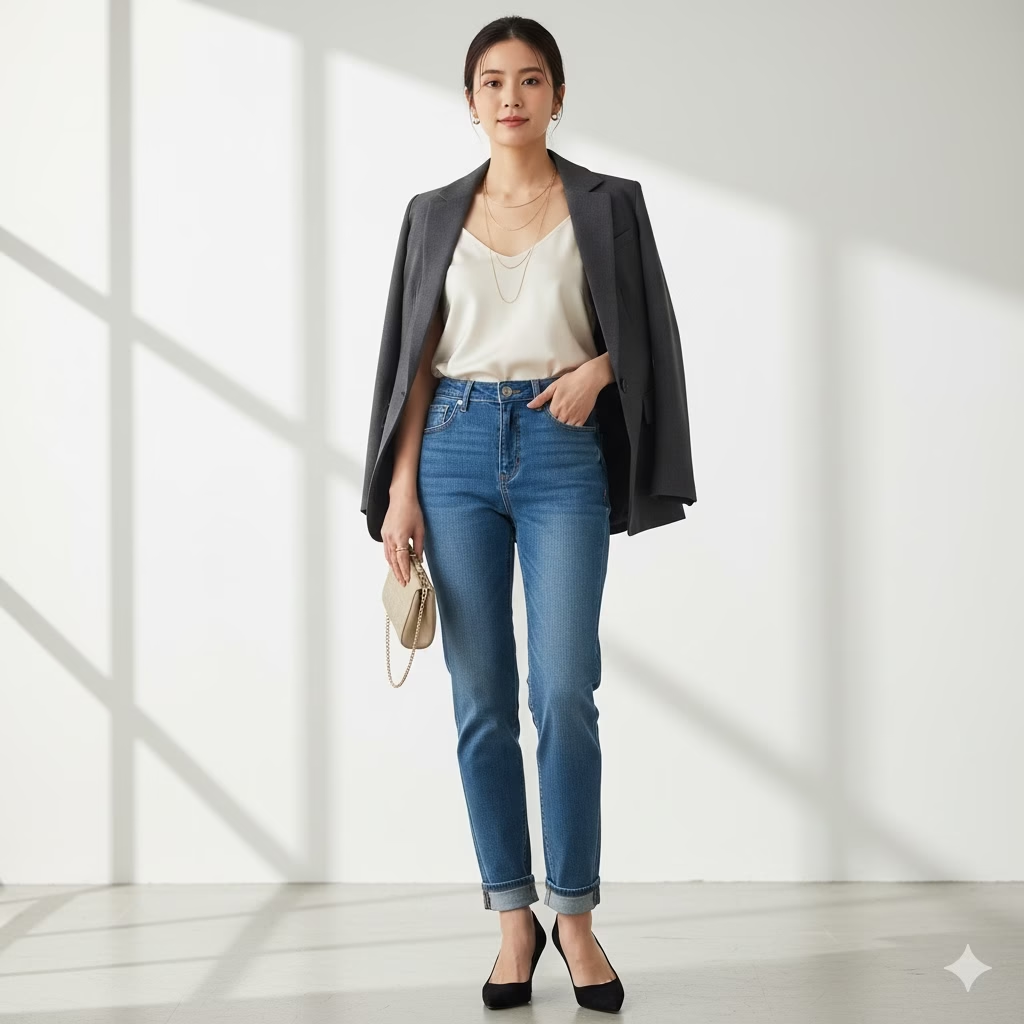
Example 3: The Beloved Pair of Jeans

Your Core Piece: A comfortable, great-fitting pair of blue jeans.

  • Classic Casual: Jeans + fun graphic tee + sneakers + an open cardigan.
  • Smart Casual: Jeans + a silky top + a blazer + heels.
  • Cozy Comfort: Jeans + a large, soft sweatshirt + thick socks for resting at home.
  • Boho Edge: Jeans + an embroidered shirt + ankle boots + a bag with fringe.
  • Date Night: Jeans + an off-the-shoulder top + simple jewelry + heeled slip-on shoes.

The Joy of the Sustainable Slay: Reusable Outfits

Choosing reusable outfits is more than just a trend; it is a way of life that feels deeply satisfying. And also makes you use your clothes in more fun ways. It makes you value the quality of good clothing. It helps you find a unique style that is not just based on passing fads.

Imagine the feeling of confidently walking into a room, knowing your outfit is not only stylish but also a sign of smart choices. This is more than just wearing clothes; it’s making a profound point. You instantly become part of a growing group that believes in long life, creativity, and caring for the world—you are, simply put, sustainably slaying.

It might feel hard at first to stop the need to buy new things all the time. But with every good outfit you make from your own closet, every repair you do, and every smart second-hand buy, your style will become clearer and stronger. Your closet will turn into a small, cherished collection, not a mess of forgotten items.

So, are you ready to change your closet and your view on fashion? The world of reusable outfits is here, showing a future where great style and care for the Earth go hand-in-hand. Start with one item, one outfit, one small change, and watch your style—and your impact—change for the better.


FAQ: Your Reusable Outfit Questions Answered

Q1: Is reusable fashion only for people who are good at sewing?

A1: Not at all! It helps to know how to sew, but you do not have to be an expert. Many tailors and dry cleaners can fix clothes for a small fee. Just learning how to reattach a button or sew a small tear can make a piece of clothing last much longer. Also, you can change clothes without sewing, like cutting jeans into shorts or tying a shirt in a new way.

Q2: How do I find good quality second-hand items?

A2: Look for natural materials (cotton, linen, wool, silk) because they usually wear well and feel better. Look at the seams for loose threads. Check zippers and buttons. Look for stains or holes that cannot be fixed. Shopping in richer areas or on certain websites can often lead to better brands. Do not be afraid to try things on and see how you can wear them with the clothes you already have.

Q3: What if I get tired of my reusable outfits?

A3: This is where you get creative!

* Accessories: As we said, scarves, belts, jewelry, and different shoes can totally change the look of an outfit.

* Layering: Add a jacket, vest, or cardigan. Wear a top open over a dress or t-shirt.

* Hair and Makeup: These can greatly change your whole look without changing any clothes.

* Seasonal Swaps: Put away some clothes for a season and bring them back later. They will feel new again.

* DIY/Fixing: Change the color of a faded item, add patches, or have a tailor change the shape of the clothing.

Q4: How many clothes do I need for a good reusable wardrobe?

A4: There is no perfect number. The goal is to have a set of clothes where most items can be mixed and matched. Some people aim for a “capsule wardrobe” of about 30 to 50 items (including shoes and jackets) for each season. This is a guide, not a rule. Focus on having enough choice to make different looks without having too much stuff.

Q5: Is sustainable fashion more expensive?

A5: Buying new, high-quality items can cost more at first than cheap fast fashion. But you will save money over time because those clothes last longer. You do not have to replace them as often, and you will shop less. Buying second-hand is often much cheaper than buying new, making sustainable fashion very easy on your wallet. It is all about choosing quality and long life over a lot of cheap stuff.


References


Recent Posts


How to Choose a Truly Eco-Friendly Vacation

A quiet, Eco-Friendly forest path surrounded by green trees and sunlight, suggesting a beautiful, less-crowded hiking destination during the shoulder season.

If you have always wanted to explore amazing places without causing harm. For years, I found it hard to tell the difference between real Eco-Friendly sustainable trips and just clever ads. This made choosing an Eco-Friendly vacation a guessing game. This guide comes from my own travel research and personal trips. It should help you travel with confidence and joy.


The Eco-Friendly Imperative: Why Your Next Trip Needs to Be Responsible

The urge to get away is powerful. We crave the promise of new sights, sounds, and experiences. However, we also know more now about the planet’s needs. This makes us want to travel in a better, more responsible way. Today, the phrase “eco-friendly vacation” is everywhere. You see it on every website and travel brochure.

But what does it really mean to travel sustainably? More important, how can you spot a true commitment from a simple marketing trick?

This complete guide will give you the knowledge you need. You’ll learn how to plan a trip that not only lifts your spirits but also respects the earth and its people. We’ll look at the core ideas of eco-friendly travel. We will give you easy “how-to” steps and clear examples. This will make sure your next trip leaves a positive mark.


The Four Main Parts of an Eco-Friendly Trip

To choose well, you must first know what makes a vacation truly eco-friendly. It is much more than just putting bottles in the recycling bin. It is a full approach that cuts down on bad effects and boosts good ones.

  1. Protecting Nature: This is the clearest goal. It means reducing your carbon footprint. And also saving resources like water and energy. It means guarding wildlife and keeping garbage to a minimum. You must choose companies that actively work to protect the local ecosystems.
  2. Helping Local People: Real eco-tourism must benefit the local people you visit. This includes paying fair wages and providing good jobs. It means supporting local shops and businesses. It also involves respecting their culture. Locals should be part of the travel decisions. Tourism should help the community, not exploit it.
  3. Saving Culture: Sustainable travel means you must respect local ways, traditions, and sacred places. It encourages real, positive connections. You should avoid any activities that treat local customs like products to be sold.
  4. Local Economy: For eco-tourism to last, it must also be good for local people’s wallets. This means creating jobs. It means the money you spend stays in the area. It gives locals a clear reason to protect their natural resources.

The Greenwashing Trap: How to Spot Fakes

Greenwashing is when companies pretend to be green. They trick people into thinking their services are good for the environment. This happens a lot in the travel business. A hotel might show a sign asking you to reuse towels. At the same time, it may use huge amounts of power with no plan to use clean energy.

How to Spot Greenwashing:

  • Vague Statements: Be wary of simple claims like “eco-conscious.” They need to provide specific details or proof.
  • Lack of Clear Facts: If a business won’t show clear facts about their green or social work, be suspicious.
  • Focus on Only One Tiny Thing: A hotel may only talk about its recycling plan. But it may ignore its high water use or poor treatment of workers.
  • No Official Proof: A trusted certificate or third-party check helps. Without one, the claims are hard to verify.
  • Misleading Pictures: Photos of beautiful nature do not prove the business is sustainable.

Step-by-Step: How to Plan a Truly Eco-Friendly Vacation

We know the basics and the traps. Now, let’s go through the simple steps for planning your next responsible adventure.

Step 1: Research Where You Go Carefully

Your choice of destination is the most important step. Some places are more sensitive. Others have better systems for sustainable tourism.

  • Try Off-Season Travel: Traveling when it’s less crowded is smarter. This takes the pressure off local services and wildlife. It often gives you a more real experience.
  • Choose Places That Care: Look for countries or parks with clear sustainability plans. Choose places known for their conservation efforts. Costa Rica is a famous example.
  • Skip Over-Crowded Spots: Too many tourists often damage nature and local culture. Look for places that are actively managing visitor numbers.

Step 2: Choose Greener Ways to Travel

The way you travel often creates the biggest part of your trip’s carbon footprint.

  • Fly Less: If a long flight is a must, think about paying to offset your carbon. This isn’t a perfect fix, but it does help. Choose direct flights. Take-offs and landings use the most fuel.
  • Use Better Alternatives: For shorter distances, trains, buses, bikes, and walking are far more eco-friendly.
  • Pick Eco-Friendly Local Transport: Once you arrive, walk, bike, or use public transport. If you must rent a car, get an electric or hybrid vehicle.
  • Example: Don’t fly from Seattle to Vancouver. Take the Amtrak train. It’s scenic and much better for the earth. In a city, use the metro instead of ride-shares.

Step 3: Pick Certified Sustainable Places to Stay

Trusted third-party proof is very helpful here. Look for this proof when booking.

  • Look for Real Proof/Certificates: Search for hotels and guesthouses that have been checked by known organizations. Examples include:
    • Green Globe: A worldwide standard for sustainable tourism.
    • EarthCheck: A major science group that rates travel businesses.
    • Travelife: This group focuses on accommodations and tour companies.
  • Ask More Questions: Even without a certificate, you can ask about their habits:
    • Do they use clean energy?
    • How do they save water and handle trash?
    • Do they get food from local farmers?
    • Can they hire and train local people fairly?
    • Do they give money to local conservation?
  • Example: A hotel shows commitment by using solar power. It also uses recycled water for gardening. Plus, it only buys meat and produce from nearby farms, helping the local economy.

Step 4: Choose Responsible Tours and Activities

What you do on your trip has a direct effect.

  • Find Companies with Clear Green Rules: Look for tour companies that state they protect nature and help the local community.
  • Prefer Small Group Tours: Smaller groups are less likely to damage sensitive environments. They also give you better cultural contact.
  • Say No to Animal Exploitation: Never pay for things like elephant rides or swimming with captive sea life. Always research animal encounters. Make sure it is ethical (e.g., watching wild animals from a respectful distance).
  • Hire Local Guides: Local guides offer better insights. This also puts money directly into their hands.
  • Example: Instead of a huge, loud jeep tour, pick a small, locally-led bike tour. Your guide can teach you about the area’s history and plants.

Step 5: Pack Smart and Light

What you take (or don’t take) matters to the environment.

  • Bring Reusables: Always pack a reusable water bottle, coffee cup, and shopping bag. This cuts down on plastic trash.
  • Use Eco-Friendly Toiletries: Use sunscreen that won’t harm coral reefs. Use soaps that break down easily to protect rivers and oceans.
  • Pack Less: Lighter luggage means less fuel is burned during travel.
  • Example: Use a portable water filter bottle. This means you don’t have to buy plastic bottles, which is vital in places with poor tap water.

Step 6: Be a Responsible Tourist While You’re There

Your actions on the ground are key to a successful eco-friendly trip.

  • Respect Local Culture: Learn a few words in the local language. Dress respectfully. Always ask before taking pictures of people. Respect all local traditions.
  • Save Resources: Turn off the lights and AC when you leave your room. Take quick showers. Be mindful of your consumption.
  • Create Less Trash: Say no to plastic bags. Throw away your trash properly. Recycle when you can.
  • Support Local People: Eat at local cafes and restaurants. Buy gifts directly from local artists. Your money stays in the community.
  • Leave No Trace: If you are in nature, stay on the paths. Pack out all your trash. Never disturb animals or plants.
  • Example: Eat street food from a trusted local vendor instead of eating at a global fast-food chain.

Step 7: Offset Your Carbon Footprint (Last Resort)

Your main goal is to reduce your pollution. But some emissions from travel are hard to avoid.

  • Pick Verified Offset Programs: Look for programs that invest in real projects like clean energy or planting trees. Choose groups like Gold Standard or Verified Carbon Standard (VCS).
  • Know Its Limits: Offsetting only makes up for pollution. It is not a free pass. You should only use it after trying hard to cut down first.
  • Example: Use a reputable website to calculate your flight’s carbon. Then, invest in a certified project to offset that amount.

The Future of Travel is Sustainable

Choosing a truly eco-friendly vacation needs effort and careful planning. You must look past the flashy “green” marketing. You need to look for real sustainability at every stage.

It takes a little more work, but the payoff is big. You will have a richer travel experience. You will have a clearer conscience. And you’ll know that your trip is helping the earth and making communities stronger.

Go ahead and plan that perfect trip. Just make sure it’s one that gives back as much as it takes.


Frequently Asked Questions (FAQ)

Q1: Is eco-friendly travel always more expensive?

A1: Not always. Certified places might cost a little more. But many sustainable choices can actually save you money. Using public transport and staying in local guesthouses is often cheaper than high-end resorts.

Q2: How do I know if a carbon offsetting program is real?

A2: Check if they are certified by known standards. These groups—like the Gold Standard—make sure the projects are real, measurable, and checked by others.

Q3: What’s the difference between eco-tourism and sustainable tourism?

A3: Eco-tourism is a small part of sustainable tourism. Eco-tourism focuses on nature travel. Its goal is to protect the environment and help local people. Sustainable tourism is a wider term. It applies to all travel and aims to reduce harm across the board.

Q4: Should I bring a water filter if tap water is unsafe?

A4: Yes, absolutely! This is the best way to avoid buying tons of plastic water bottles. Always pack a portable water filter or purification tablets.

Q5: How can I be sure my visit helps the local community?

A5: Spend your money at places owned by locals. This means using local guides, eating at small restaurants, and buying souvenirs directly from artists. This makes sure your money stays in their community.


References


Recent Posts


MY ULTIMATE GUIDE to Zero Waste Shopping

A Zero Waste butcher or deli counter where a customer, wearing a black coat and carrying a cloth tote bag, hands a clean, empty glass container with a wooden lid to a smiling male staff member wearing an apron. The counter displays various cuts of meat, cheeses, and bulk olives in large glass jars, with small signs that read, "BYO Containers Welcome!"

For years, I struggled with the guilt of overflowing bins and the endless cycle of disposable products. But then I discovered the transformative power of Zero Waste living, especially when it comes to shopping, and it completely changed my perspective and my pantry! Join me as I share everything I’ve learned to help you navigate the wonderful world of shopping smarter, not harder.


Zero Waste Shopping Guide

Have you ever looked at your trash can and felt bad? That big pile of plastic, cardboard, and food scraps is a clear sign of how much we buy and use. For many, the idea of “Zero Waste” living can seem too hard. It feels like something only very dedicated environmentalists do. But what if I told you that using Zero Waste ideas, especially when you shop, isn’t just possible? What if it actually makes your life easier, saves you money, and greatly helps the planet?

This journey isn’t about being perfect; it’s about making progress. It’s about making simple choices that match your values and help create a healthier world. In this ultimate guide, we will make Zero Waste shopping easy to understand. We’ll break it down into steps anyone can use in their daily routine. Get ready to change your shopping list, your kitchen, and the effect you have on the world.


The “Why” Behind Zero Waste Shopping: It’s More Than Just a Fad

Before we talk about how to shop this way, let’s quickly look at why Zero Waste shopping matters. It’s more than a short-lived trend—it’s a move toward a better future.

Every year, people create billions of tons of trash. Much of this waste ends up in landfills. There, it can take hundreds of years to break down. During this time, it leaks bad chemicals into our soil and water. Plastic is the worst offender. It pollutes our oceans, hurts animals, and even gets into our food as tiny pieces called microplastics.

Zero Waste shopping fixes these issues. It focuses on the “5 R’s”:

  • Refuse: Say “no” to things you don’t need (like free samples or one-time-use plastics).
  • Reduce: Buy less, use less, and live with fewer things.
  • Reuse: Choose items you can use again instead of throwing them away (like bags, bottles, and jars).
  • Recycle: Properly sort and recycle things you cannot refuse, reduce, or reuse.
  • Rot (Compost): Turn food scraps and yard waste into good soil.

By picking products with little or no packaging, choosing reusable items, and supporting green businesses, you are doing more than just buying food. You are choosing the kind of world you want to live in.


Step 1: Clean Out Your Old Habits (and Your Kitchen!) for Zero Waste

The first step to Zero Waste shopping isn’t buying new stuff. It’s about seeing what you already own and what you truly need.

How to Do It:

  1. Check Your Trash: For one week, pay attention to what you throw away. What kind of packaging do you see the most? This shows you the biggest source of your waste.
  2. Clean Your Pantry: Look through your pantry, fridge, and bathroom drawers. What has expired? What do you use rarely? Give away unopened food that hasn’t expired, and plan to use up what you have. This stops food waste and shows you where you buy too much.
  3. Find Single-Use Items: Make a list of things you use once and throw away. Is it plastic wrap, paper towels, coffee pods, or plastic toothbrushes? These are the first things you will replace with Zero Waste options.

Step 2: Get Your Zero Waste Shopping Kit Ready

You wouldn’t go on a hike without the right gear, and Zero Waste shopping is the same. A few key items will make your store trips easy and cut down on trash.

How to Do It:

  1. Reusable Shopping Bags: This is the simplest, but most important item. Keep some strong bags in your car, by the front door, or folded in your purse.
    • Example: Cotton canvas bags last a long time and you can wash them.
  2. Produce Bags: Stop using the thin plastic bags for fruits and veggies.
    • Example: Mesh or light cotton bags let air flow and let the clerks see the food inside.
  3. Bulk Bins and Containers: For dry items like grains, nuts, pasta, and even cleaning liquids, you need containers to fill at bulk stores.
    • Example: Glass jars (Mason jars work best), light plastic containers you already own, or cloth bulk bags.
  4. Reusable Water Bottle & Coffee Cup: Stop buying bottled water or takeaway coffee cups.
    • Example: Steel bottles and travel coffee mugs that keep drinks hot or cold.
  5. Cutlery Set & Napkin (Optional): For eating food when you are out.
    • Example: A small pouch with a fork, spoon, knife, and a cloth napkin.

Step 3: Learn How to Buy in Bulk

Bulk stores and sections are the main place for Zero Waste shopping. They let you buy only the amount you need, without any extra packaging.

How to Do It:

  1. Find Your Local Bulk Store: Many normal grocery stores now have bulk bins. Special Zero Waste shops are also opening. Search online for “bulk food stores near me.”
  2. Weigh Your Containers (Tare): Before filling them, you must weigh your empty containers. This “tare weight” is removed at the checkout so you only pay for the product. Most bulk stores have a scale for this.
    • Pro Tip: Write the tare weight right on the container with a marker you can wipe off.
  3. Fill Them Up: Bring your weighed containers and fill them with what you want.
    • Example: Fill a large jar with oats, a small bag with lentils, and a different container with dish soap.
  4. Label Everything: Write down the product code (PLU) or the name of the item on your container. This makes paying much faster.
  5. Start Small: Don’t try to buy everything at once. Begin with foods you use all the time, like oats, rice, pasta, nuts, and spices.

Step 4: Choose Produce Without Packaging

Fruits and vegetables are naturally Zero Waste! Yet, we often see them wrapped in plastic or placed on foam trays.

How to Do It:

  1. Pick Loose Produce: Always choose fruits and vegetables that are not wrapped.
  2. Use Produce Bags (or Nothing): Instead of plastic bags, put loose produce into your reusable produce bags. For foods with a strong peel, like bananas or oranges, you don’t need any bag at all!
  3. Shop at Farmers’ Markets: These markets are great for Zero Waste shopping. You can often buy straight from the person who grew the food. Bring your own bags and sometimes even containers for berries or herbs.
  4. Grow Your Own: To get the best Zero Waste produce, think about growing a small herb garden or a few vegetables at home.

Step 5: Use Reusable Items for Everything

Zero Waste shopping is not just about food. It includes all the products you bring into your house.

How to Do It (Beyond the Food Store):

  1. Personal Care:
    • Solid Bars: Use shampoo bars, conditioner bars, and soap bars instead of liquid products in bottles.
    • Bamboo Toothbrushes: These can be composted instead of thrown away like plastic ones.
    • Reusable Razors: Razors with replaceable metal blades make much less trash.
    • DIY Products: Make your own toothpaste, deodorant, or lotions if you want to try something new.
    • Example: Refill an empty bottle with bulk lotion or shampoo at a Zero Waste shop.
  2. Cleaning Supplies:
    • Bulk Refills: Refill your empty cleaner bottles (all-purpose, laundry soap, dish soap) at bulk stores.
    • DIY Cleaners: Simple things like vinegar, baking soda, and oils can clean almost anything.
    • Reusable Cloths: Use cloth towels or old t-shirts instead of paper towels.
    • Example: Buy a strong cleaner tablet that you drop into your own spray bottle with water.
  3. Items for When You Are Out:
    • Always carry your reusable water bottle, coffee cup, and perhaps a small fork and spoon.
    • Example: When you order food to go, ask if they can put it in your own clean container (always ask first!).

Image Placement 7: Zero-waste cleaning supplies (refillable bottles, cloths, baking soda, vinegar).

Step 6: Smart Shopping for Meat, Dairy, and Deli Items

While this can be tricky due to rules about food safety, there are ways to cut waste in these areas.

How to Do It:

  1. Bring Your Own Containers: At the deli or butcher counter, ask nicely if they can put your meat, cheese, or sliced cold cuts right into your clean reusable containers. Some stores will be happy to help. Others may have store rules that say no. Don’t worry if the first place says no; try another!
    • Pro Tip: If possible, have your containers weighed empty first (tared), or ask the staff to weigh the empty container before they fill it.
  2. Buy More at Once: If you have to buy pre-packaged food, choose bigger sizes. This means less plastic for the amount of food you get.
  3. Choose Other Options: Look for plant-based options for milk (oat milk, almond milk often come in cartons that are easier to recycle than plastic jugs) and meat. Many Zero Waste shops also sell vegan cheese and other items in bulk.
  4. Milk in Glass Jars: Some companies sell milk in glass bottles that you can return to the store for a small refund.
A Zero Waste butcher or deli counter where a customer, wearing a black coat and carrying a cloth tote bag, hands a clean, empty glass container with a wooden lid to a smiling male staff member wearing an apron. The counter displays various cuts of meat, cheeses, and bulk olives in large glass jars, with small signs that read, "BYO Containers Welcome!"

Step 7: Food Waste: The Quiet Part of Zero Waste

Even when we try our best, some food waste happens. The “Rot” part of the 5 R’s is very important here.

How to Do It:

  1. Compost Your Scraps:
    • At Home: Start a compost pile in your yard or a worm bin for fruit and veggie scraps, coffee grounds, and plants.
    • Community: Check if your city picks up compost or if there are local drop-off spots.
    • Example: Many coffee shops collect old coffee grounds to use for composting.
  2. Plan Your Meals: Plan what you will cook so you use up ingredients and prevent food from going bad. This also saves you money!
  3. Store Food Well: Learn how to store food to make it last longer (like putting herbs in water or wrapping leafy greens in a damp cloth).
  4. Use Leftovers: Get creative! Turn old roasted vegetables into an egg dish or mix small amounts of leftovers into a soup.

Step 8: Beyond the Store – Expanding Your Zero Waste Mindset

Zero Waste shopping is a great place to start, but this way of thinking can be used in all parts of your life.

How to Do It:

  1. Fix It, Don’t Replace It: Before buying something new, see if the old one can be fixed. Learn simple repair skills or find a local repair shop.
  2. Borrow or Rent: For tools or things you use only once in a while, ask a friend to borrow theirs or rent from a local “library of things.”
  3. Buy Used Items: Thrift stores, consignment shops, and online sites have many great clothes, furniture, and books. This gives items a second life and means less need to make new things.
  4. Think Simply: Look at your belongings often. Do you really need it? Does it make you happy? Less clutter usually means less waste later.

Your Zero Waste Journey Starts Now

Starting your Zero Waste journey, especially with how you shop, is a very strong step. It’s a chance to feel closer to your food, help good businesses, and greatly lower the amount of trash you create. Remember, don’t try to be perfect. Just try to make better choices all the time. Every bag you don’t take, every jar you refill, and every food scrap you compost makes a real difference.

Start small, feel proud of your successes, and try new things. This ultimate guide to Zero Waste shopping is not a strict rulebook. It is a flexible map to a better, more helpful, and less wasteful life. Happy shopping!


Frequently Asked Questions (FAQ) About Zero Waste Shopping

Q1: Is Zero Waste shopping more expensive?

A: Not really! You need to buy reusable items (jars, bags) first, which costs money. But buying in bulk often saves you a lot of money later because you do not pay for all the packaging. Also, you buy only what you need, so you throw away less food, which also saves cash.

Q2: What if I don’t have a Zero Waste shop near me?

A: That’s fine! Many regular stores now have bulk sections for grains, nuts, and spices. You can also focus on getting food without packaging, choosing items in glass or cardboard, and asking your local deli if they will take your containers. Farmers’ markets are also great for low-waste buying.

Q3: How do I keep food fresh after buying it in bulk?

A: Containers that seal tightly are your best friend! Glass jars (like Mason jars) are perfect because they are strong, clear, and easy to clean. You can also reuse plastic containers you already own. Keep food in a cool, dry place to make it last.

Q4: Is it safe to bring my own containers to stores?

A: Yes, as long as your containers are very clean! Most stores that allow you to bring your own containers have clear rules for safety. Always make sure your containers are spotless. The store usually has a system (like weighing them empty) to make sure only the product is weighed and handled properly.

Q5: What are the easiest things to start with for Zero Waste shopping?

A: Start with the simple things!

  1. Always bring reusable shopping bags.
  2. Carry a reusable water bottle and coffee cup.
  3. Choose loose produce instead of pre-packaged items.
  4. Try buying one or two bulk foods like oats or rice.The key is to keep doing it, so start with what you can handle easily!

References


Recent Posts


The Essential Pantry Checklist: 20 Staples You Need Now

A clean, organized pantry shelf filled with various sizes of airtight glass jars containing dry goods like grains, beans, and flour, illustrating an essential Pantry Checklist for a zero-waste kitchen.

Like many of you, I started my zero-waste journey feeling completely overwhelmed. My kitchen cabinets were a chaotic mess of single-use plastic, half-used ingredients, and a nagging feeling that I was constantly contributing to landfill. I quickly learned that the secret to a sustainable, less wasteful home wasn’t buying fancy new eco-products, but simplifying my life down to a core list of truly versatile ingredients. This article is the guide I wish I had back then—a roadmap to a streamlined pantry that saves you money, cuts down on packaging, and makes sustainable living genuinely achievable. It all starts with having the right Pantry Checklist.


A Revolution in Your Cupboard: The Zero-Waste Pantry Checklist

For those stepping into the world of zero-waste living, the kitchen often feels like the final frontier. It is here that disposable packaging, food waste, and single-use products seem to multiply on their own. The good news? The solution is not in a complicated series of expensive swaps, but in a profound simplification. A well-stocked, zero-waste pantry is the bedrock of a sustainable home, moving beyond just food to become a source for powerful, non-toxic cleaning agents, personal care ingredients, and a host of other uses.

This comprehensive guide focuses on the ultimate Pantry Checklist: 20 fundamental, multi-purpose staples. These are the workhorses of the zero-waste movement—ingredients that not only form the basis of countless delicious meals but can also transform into effective, plastic-free household cleaners and more. By buying these items in bulk using your own reusable containers, you can dramatically reduce your household’s plastic footprint, save money in the long run, and streamline your entire cooking and cleaning routine.


The Zero-Waste Philosophy: Progress Over Perfection

Before diving into the pantry checklist, remember the golden rule of zero-waste: progress, not perfection. You don’t need to ditch everything overnight. Start by using up what you already have, and only replace it with a bulk, plastic-free alternative when it runs out. Your goal is a pantry that is organised, visible, and stocked with items that serve multiple functions, thereby reducing clutter, minimizing food spoilage, and eliminating packaging waste.


The Essential Pantry Checklist: 20 Multi-Purpose Staples

Our list of 20 staples is divided into categories for easy stocking and use. Each item is chosen for its versatility in both the kitchen and the wider home.

Section 1: Grains, Legumes & Bulk Powerhouses

These form the foundation of your meals and are the easiest items to purchase in bulk.

1. Dried Beans & Legumes (Chickpeas, Lentils, Black Beans)

  • Why they’re essential: Excellent source of protein, incredibly filling, and versatile for a variety of global cuisines. Buying dry means zero waste and maximum value.
  • How to do it: Soak overnight (for most beans) and cook in large batches.
  • Example Use (Cooking): Use chickpeas for hummus, lentil for soups/curries, or black beans for burritos/burgers.
  • Example Use (Zero-Waste Hack): The water from cooking chickpeas (aquafaba) can be whipped into a foam to replace egg whites in vegan baking (meringues, mousses).

2. Oats (Rolled/Jumbo)

  • Why they’re essential: A breakfast staple, great for baking, and surprisingly useful for non-food applications.
  • How to do it: Store in an airtight container to prevent pests.
  • Example Use (Cooking): Oatmeal, overnight oats, or ground into a flour substitute.
  • Example Use (Zero-Waste Hack): Use oats as a soothing, natural addition to a bath soak for irritated skin (place in a muslin bag to avoid clogging the drain).

3. Rice (Brown or White)

  • Why they’re essential: The ultimate neutral side dish, binder, and bulk filler for meals.
  • How to do it: Buy a large sack if possible and decant into multiple airtight containers.
  • Example Use (Cooking): Base for stir-fries, rice bowls, or pilafs.
  • Example Use (Zero-Waste Hack): Uncooked rice can be placed in a sock or cloth bag to create a reusable, microwaveable heating pad.

4. All-Purpose Flour (Wheat or GF Alternative)

  • Why they’re essential: Necessary for baking, thickening sauces, and making DIY doughs.
  • How to do it: Keep in a sealed container in a cool, dark place to maintain freshness.
  • Example Use (Cooking): Bread, pasta, tortillas, or a thickening roux for gravy.
  • Example Use (Zero-Waste Hack): Combine with salt and water to make a simple, non-toxic homemade playdough.

5. Pasta (Various Shapes)

  • Why they’re essential: A quick, universally loved meal base that stores indefinitely.
  • How to do it: Purchase from a bulk shop or in paper packaging.
  • Example Use (Cooking): Quick weeknight dinners, cold pasta salads.

Section 2: Fats, Oils & Vinegars (The Flavour Trio)

These are crucial for adding depth of flavour and providing natural, non-toxic cleaning power, add them to your Pantry Checklist.

6. White Distilled Vinegar

  • Why they’re essential: An acid for cooking and an unparalleled, cheap, natural, and non-toxic cleaner.
  • How to do it: Purchase in the largest glass bottle available or refill a bottle at a bulk liquid station.
  • Example Use (Cooking): Brightens up sauces, acts as a mild preservative for pickling.
  • Example Use (Zero-Waste Hack): The ultimate all-purpose cleaner. Mix 1:1 with water in a spray bottle for streak-free windows, kitchen surfaces, and bathroom disinfection. Add citrus peels to the bottle for a week to infuse a fresh scent (see How to Do It below).

7. Olive Oil (or other preferred cooking oil)

  • Why they’re essential: The base for most cooking, salad dressings, and seasoning and an important part in your Pantry Checklist.
  • How to do it: Look for refill stations that allow you to bring your own bottle.
  • Example Use (Cooking): Sautéing, roasting, dipping, and dressing.
  • Example Use (Zero-Waste Hack): Mixed with vinegar and a few drops of essential oil (like lemon), it makes an excellent, natural wood furniture polish.

8. Salt (Sea Salt or Himalayan)

  • Why they’re essential: The most basic and necessary seasoning, plus a fantastic scrubber and deodorizer.
  • How to do it: Buy in bulk bags and store in a durable container or salt pig.
  • Example Use (Cooking): Seasoning all meals.
  • Example Use (Zero-Waste Hack): Use a paste of salt and lemon to scrub and naturally disinfect wooden cutting boards, or use it to scour pots and pans.

9. Baking Soda (Bicarbonate of Soda)

  • Why they’re essential: A leavening agent for baking and a powerhouse for cleaning, deodorizing, and mild scrubbing.
  • How to do it: Buy the largest box or bag possible and store it in an airtight jar to prevent it from absorbing odours.
  • Example Use (Cooking): Used in baking recipes to create rise.
  • Example Use (Zero-Waste Hack): Place an open container in your fridge to absorb odours. Use as a gentle abrasive scrub for sinks and tubs. Mix with vinegar for a powerful, non-toxic drain cleaner.

Section 3: Flavour Enhancers & Spices

Spices are vital for delicious food and often contain natural properties useful in the Pantry Checklist.

10. Black Peppercorns

  • Why they’re essential: Universal seasoning.
  • How to do it: Buy whole peppercorns in bulk and grind fresh.

11. Herbs & Spices (Choose 3-5 key ones, e.g., Oregano, Cumin, Chilli Powder)

  • Why they’re essential: Adds complexity and variety to simple base meals.
  • How to do it: Buy small amounts in bulk (just what you’ll use in 6 months) to ensure freshness. Store in small, labelled, airtight jars away from heat and light.

12. Garlic Powder & Onion Powder

  • Why they’re essential: Quick flavour for when fresh is unavailable or you need a deeper, more mellow flavour.
  • How to do it: Same bulk rules as other spices.

13. Nutritional Yeast

  • Why they’re essential: A key vegan staple that adds a cheesy, umami depth to dishes.
  • How to do it: Buy in bulk.
  • Example Use (Cooking): Vegan ‘cheese’ sauces, dusting on popcorn.

Section 4: Sweeteners & Liquids

Essential for flavour balance and can be used to make homemade wellness products, add these to your Pantry Checklist.

14. Sugar (Granulated or Coconut Sugar)

  • Why they’re essential: Sweetener for baking and beverages.
  • How to do it: Buy in bulk and ensure a completely dry, airtight seal to prevent clumping.
  • Example Use (Zero-Waste Hack): Mix with a small amount of oil to create a simple, invigorating body scrub.

15. Pure Maple Syrup or Honey

  • Why they’re essential: Natural sweetener. Choose honey for its medicinal properties.
  • How to do it: Buy in glass jars. Look for local honey/syrup to reduce transit impact.

16. Dried Fruit (Raisins, Apricots)

  • Why they’re essential: Healthy snack, natural sweetener for baking, and great for adding texture to oats or trail mix.
  • How to do it: Bulk buy.

17. Dried Nuts & Seeds (Almonds, Sunflower Seeds)

  • Why they’re essential: Snack, baking ingredient, and base for homemade nut butter or plant milk.
  • How to do it: Bulk buy and store in the fridge or freezer to prevent them from going rancid (which is a common issue with nuts).
  • Example Use (Zero-Waste Hack): The leftover pulp from making nut milk can be dehydrated and ground into flour.

Section 5: Multi-Use Kitchen & Home Staples

These final three on the Pantry Checklist are the ultimate multi-taskers for the kitchen and cleaning arsenal.

18. Lemon/Lime (Fresh or Dried Citrus Peels)

  • Why they’re essential: Flavour enhancer, source of Vitamin C, and a natural disinfectant.
  • How to do it: Always keep a few fresh, or collect and dry the peels.
  • Example Use (Cooking): Juice for dressings, zest for flavouring.
  • Example Use (Zero-Waste Hack): Rubbing a cut lemon over a chopping board helps sanitise and deodorise it. Citrus peels are essential for infusing cleaning vinegar (see How to Do It below).

19. Castile Soap (Liquid or Bar)

  • Why they’re essential: While technically a specialty item, it’s a necessary, highly concentrated, vegetable-based, biodegradable soap that replaces nearly every cleaning and body product.
  • How to do it: Buy the largest size bottle or a large bar.
  • Example Use (Zero-Waste Hack): Diluted for hand soap, dish soap, laundry detergent, body wash, and even a mild pest repellent for plants.

20. Coffee Grounds/Used Tea Bags

  • Why they’re essential: The ultimate “waste” that still has plenty of life left.
  • How to do it: Collect in a designated jar or compost caddy.
  • Example Use (Zero-Waste Hack): Used coffee grounds are fantastic for composting, deodorizing the fridge (if dry), or mixing with oil as a DIY cellulite scrub. Used tea bags can be used to deodorize smelly shoes.

How to Do It: Zero-Waste Pantry Storage & Application

Transitioning your pantry requires a system. Here is a step-by-step guide on how to implement the zero-waste mindset for a Pantry Checklist.

Step 1: The Container Overhaul (Image Placement 7)

You don’t need to buy new containers! Reuse, Repurpose, and Thrift.

  • How to do it: Save all your old glass jars (pasta sauce, pickles, jam). Wash them thoroughly, remove labels (soak in hot, soapy water, then scrub off residue with a paste of baking soda and oil). These are your new bulk storage containers.
  • Pro Tip: Uniformity is nice, but function is better. Make sure the lid creates an airtight seal to keep pests out and freshness in.

Step 2: The Shopping Protocol

  • How to do it: Before you shop, take an inventory of what you need from your Pantry Checklist. Pack your reusable containers and produce bags.
  • The Tare Weight: When shopping in a bulk store, you must get the tare weight (the weight of your empty container) recorded before filling it. This weight is subtracted at the till so you only pay for the product you’ve added.
  • Pro Tip: Start small. Only buy a few weeks’ worth of a new bulk item to ensure you like it and will use it up before it goes stale.

Step 3: Mastering the Multi-Use Staples

Here are two essential recipes that use your Pantry Checklist items for zero-waste cleaning:

A. All-Purpose Citrus-Infused Vinegar Cleaner

  • What you need (from the list): White Distilled Vinegar (No. 6), Lemon/Lime Peels (No. 18).
  • How to do it:
    1. Fill a jar about half to three-quarters full with fresh citrus peels (lemon, orange, grapefruit—any you have saved).
    2. Pour White Distilled Vinegar (No. 6) over the peels until the jar is full. Seal it.
    3. Store in a cool, dark place for 2-4 weeks. The vinegar will absorb the citrus oils and scent.
    4. Strain the liquid and discard the peels (compost them).
    5. To use, mix the infused vinegar with water in a 1:1 ratio in a spray bottle.

B. Non-Toxic Drain Declogger

  • What you need (from the list): Baking Soda (No. 9), White Distilled Vinegar (No. 6), Boiling Water.
  • How to do it:
    1. Pour $1/2$ cup of Baking Soda (No. 9) down the clogged drain.
    2. Follow immediately with $1/2$ cup of White Distilled Vinegar (No. 6).
    3. Cover the drain and let the fizzing reaction work for about 30 minutes (this is the key to dissolving the gunk).
    4. Flush the drain with a pot of boiling water.

The Zero-Waste Pantry and Food Waste Reduction

A well-stocked pantry is your best weapon against food waste. When you can clearly see what you have, you are far less likely to overbuy or let perishable food spoil, this Pantry Checklist will help you get organized.

Example: The Scrap Revolution

  • How to do it: Keep a large glass jar or silicone bag in your freezer and toss in vegetable scraps (carrot ends, onion peels, celery leaves, mushroom stems) and herb stems.
  • The Payoff: Once the container is full, simmer the scraps in a large pot of water for a few hours with a pinch of Salt (No. 8) and Black Peppercorns (No. 10) to create a deeply flavourful, zero-cost vegetable stock. You can then use this stock as a base for almost any soup, rice dish, or sauce, maximizing the use of every single food item.

Frequently Asked Questions (FAQ)

Q1: How do I deal with pests like pantry moths and weevils in my bulk items?

A: Prevention is key! Always store dry goods (grains, flours, nuts) in completely airtight glass or metal containers (not plastic or fabric bags). Before storing, some people freeze new bulk grains and flours for 48-72 hours to kill any potential eggs. If you get an infestation, immediately discard the contaminated food in a sealed compost bag outside, clean the area thoroughly with White Distilled Vinegar (No. 6), and store new items with a bay leaf tucked inside the container—pests hate the smell.

Q2: I don’t have access to a bulk store. Can I still do a zero-waste pantry?

A: Absolutely. While bulk is ideal, you can focus on reducing plastic waste. Look for items packaged in paper bags (Flour, Oats, Salt), cardboard (Pasta), or glass/metal (Oils, Honey). Prioritize items you use most often for the highest-impact swaps. Consider coordinating with neighbours for a large online order of staple items packaged in paper or biodegradable materials to reduce packaging per unit.

Q3: Is it safe to use vinegar-based cleaners on all surfaces?

A: No, be cautious. While highly effective, the acidity of White Distilled Vinegar (No. 6) can etch or dull natural stone surfaces like granite, marble, and soapstone over time. For these surfaces, a solution made with diluted Castile Soap (No. 19) and water is a safer, non-acidic alternative. Always test a small, inconspicuous area first.

Q4: How do I store fresh produce zero-waste without plastic?

A: Use cotton mesh bags for non-leafy produce. Leafy greens stay fresh longer when wrapped in a damp cotton tea towel (or “unpaper towel”) and stored in the crisper drawer of your fridge. Root vegetables should be stored in a cool, dark place with good air circulation (like a paper bag or basket) outside the fridge.

Q5: How do I make the switch to a zero-waste pantry affordable?

A: Focus on the staple ingredients that replace high-waste, pre-packaged foods and cleaners. Buying dried Beans & Legumes (No. 1), Oats (No. 2), and Rice (No. 3) in bulk is significantly cheaper than buying canned or pre-made versions. Making your own cleaner with Baking Soda (No. 9) and Vinegar (No. 6) costs pennies compared to brand-name solutions. The initial investment in a few good containers will be recouped quickly through these savings.


References


Recent Posts


Ditch the Chemicals: How to Make Natural DIY Fragrances

A four-panel composite image illustrating the benefits of natural perfume. Panels show: 1) A table with essential oils, carrier oil, and a notebook for blending; 2) A woman applying homemade essential oil perfume to her wrist; 3) A clean, clear stream next to a reusable waste bin; and 4) A close-up of small bottles being refilled. This visual promotes avoiding synthetic Chemicals by making natural, non-toxic, and sustainable DIY fragrances.

As someone who’s always sought out natural alternatives, I understand the frustration of finding products that are both effective and kind to your body. My journey into homemade beauty began when I decided to eliminate unnecessary Chemicals from my routine. Discovering the joy and benefits of DIY fragrances showed me a better way. Join me as we explore how easy it is to create beautiful, chemical-free scents that not only smell amazing but also nourish your well-being and the environment.


We all care about what we put into our bodies. It’s smart to also think about what we put on them. Perfume is a daily luxury for many people. It’s a finishing touch that makes you feel great. But most designer scents hide a secret. They contain a mix of synthetic chemicals. This cocktail can cause problems for your health and the environment.

There is a better choice. You can smell wonderful without risking your health or creating pollution. The solution is simple: make your own natural DIY fragrances. Making perfume at home is more than just a passing trend. It’s a thoughtful decision. It gives you total control over every ingredient. You avoid harmful synthetic chemicals. You choose a healthier, cleaner way to smell great.


The Natural Chemicals Free Choice: Health Benefits You Will Love

People switch from store-bought to homemade perfume because they want better health. When you decide to ditch the chemicals, you get many benefits. Synthetic fragrances simply cannot give you these advantages.

Avoid the Chemical Trap

Many commercial perfumes have a complex mix of synthetic compounds. These often come from petrochemicals. The word “fragrance” on a label can hide hundreds of secret chemicals. This is a loophole that lets companies protect their secret recipes. Some of these hidden ingredients are phthalates and parabens. They can cause many health issues. These range from skin irritation and allergies to serious hormonal problems.

You become the perfume creator when you make your own. So you ensure your scent is free from these harsh chemicals. You pick pure ingredients. This gives you peace of mind with every spray.

Better for Sensitive Skin

Synthetic chemicals that cause health worries are often the reason for skin problems. Do you have dry, sensitive, or allergy-prone skin? Store-bought perfumes can easily cause redness, dryness, or itchy rashes. Natural perfume ingredients are much gentler. This is especially true for pure, plant-based essential oils. Mix them properly with a good carrier oil like jojoba or fractionated coconut oil. Your DIY fragrance will be safer and non-irritating.

The Power of Aromatherapy

When you choose pure essential oils over lab-made scents, your perfume does more. It becomes a beautiful fragrance and a tool for wellness. This is one of the best health benefits. Commercial fragrances only cover up bad smells. Essential oils offer real aromatherapy benefits. They can directly improve your mood and well-being.

  • Lavender is well-known for being very calming. Use it for a relaxing evening blend.
  • Citrus oils (like sweet orange or grapefruit) are bright and energizing. They are great for a morning lift.
  • Peppermint can help you focus and think clearly.

You intentionally choose your oils. This turns your daily spritz into a small moment of self-care.

Customize Your Subtle Scent

Have you ever been near someone wearing too much perfume? Store-bought perfumes often create a big “sillage,” or scent cloud. They use fixatives and synthetic boosters to do this. DIY perfumes are different. They use natural, heavier carrier oils. This keeps the scent more subtle and personal. The smell stays closer to your body. This is better for others who are sensitive to strong fragrances.


Chemicals Free for A Better Planet: Environmental Benefits

Choosing to ditch the chemicals in your perfume helps create a healthier planet. Homemade fragrance greatly cuts down on the environmental problems caused by the large beauty industry.

Less Pollution and a Smaller Footprint

Making perfume commercially uses a lot of energy and resources. This includes harvesting ingredients, chemical creation, processing, bottling, and shipping around the world. When you make perfume at home, you skip most of these steps that use up resources.

Many synthetic fragrances come from petrochemicals. These create fossil fuel emissions. These compounds can also stick around in our air, water, and soil as pollutants. Natural essential oils come from plants. If you source them responsibly, they are biodegradable. They don’t have these harmful effects on the environment.

Less Waste

One easy way to be sustainable is to create less trash. You can make and store homemade perfume in reusable or refillable glass bottles. This simple change cuts out the need for plastic packaging, wrapping, and fancy boxes. These items come with most store-bought beauty products. You significantly reduce the waste you create.


Important Warnings: Ethics & Safety

Keep in mind that “natural” is better than synthetic chemicals. But “natural” does not automatically mean zero risk. You must be careful and informed when you make your own products.

Safety: Essential Oils Are Strong

Essential oils are highly concentrated plant extracts. They are very strong. You must follow safety rules carefully. Ignoring them can cause irritation or injury.

  1. Allergies Are Possible: Even natural things can cause allergies. Oils like tea tree, lavender, and certain citrus oils can cause skin irritation or allergic contact dermatitis. You must always perform a patch test first. Put a tiny drop on a small spot of skin (like your inner arm). Only use the oil blend widely if there is no reaction.
  2. Sunlight Risk (Phototoxicity): Be very careful with cold-pressed citrus oils. This includes bergamot, lemon, lime, and sometimes grapefruit. If you put them on your skin and then go into direct sunlight or a tanning bed, they can cause bad reactions. This includes burns or blisters. Only apply these oils to areas of skin that will be covered. Or, use them only in blends you wear at night.
  3. Never Use Oils Undiluted: Do not ever put pure, undiluted essential oils right on your skin. This can cause severe irritation and damage. Always properly dilute essential oils in a carrier oil. A 2 to 3% dilution ratio is common for perfume.

Source Your Ingredients Ethically

The effect your perfume has on the environment depends on the ingredients you pick and where they come from.

  • Unsustainable Farming: Many people want certain natural ingredients. This high demand can sadly lead to over-harvesting, cutting down forests, and soil damage. This is a known problem for valuable ingredients like sandalwood and agarwood (oud). Look for ingredients that are certified as ethically farmed or sustainably harvested.
  • Fair Labor: Even common ingredients can have supply chain issues. For example, vanilla from Madagascar has had problems with fair pay for farmers. Research your suppliers. Choose those who are honest about their sourcing and their commitment to fair trade practices.

How to Make Your Natural DIY Fragrance

The best part of homemade perfume is the creativity. All perfumes use a structure called the “scent pyramid.” It has three kinds of notes: Top, Middle (Heart), and Base.

Step 1: Get Everything Ready

Ingredient/ToolWhat It DoesTips
Essential OilsThe scent parts (Top, Middle, Base notes).Make sure they are high-quality and pure.
Carrier OilUsed to make the essential oils less strong.Jojoba oil is best. It has no smell and lasts a long time. Coconut oil or almond oil also work well.
VesselA small glass roller bottle (10mL) or spray bottle (30mL).Always use glass, because plastic can react with the essential oils.
Diluent (Optional)Strong, clear alcohol (like 190 proof vodka) for a spray perfume.You don’t need this if you are making a standard oil-based roll-on.

Step 2: Learn the Scent Pyramid

A good perfume needs oils from all three groups. Try for a ratio of 20% Top, 50% Middle, and 30% Base notes.

Note CategoryHow it Smells and LastsExamples
Top Notes (20% )Lightest smell, disappears fastest. This is the first thing you notice.Citrus (Orange, Lemon, Bergamot), Peppermint, Eucalyptus.
Middle/Heart Notes (50% )The main body of the scent; lasts longer than the top note.Floral (Lavender, Rose, Geranium), Spice (Nutmeg, Black Pepper), Herbaceous (Rosemary).
Base Notes (30% )Heaviest oils, last the longest. They hold the lighter scents in place.Wood (Sandalwood, Cedarwood), Resins (Frankincense, Myrrh), Earthy (Patchouli, Vetiver), Vanilla.

Step 3: Mix the Ingredients: Dilution

For a 10mL oil-based roll-on perfume, a safe amount of oil is typically 2 to 3% concentration.

  • A 2% oil mix in a 10mL bottle: Use about 6 to 7 total drops of essential oil.
  • For a 3% oil mix in a 10mL bottle: Use about 9 to 10 total drops of essential oil.

Step 4: The Mixing Process (Simple Recipe)

Recipe: Calming Lavender-Cedarwood Roll-On (10mL)

Target Total Drops: 10 Drops (3% Oil Mix)

  1. Add Base Notes: Start with 3 drops of Cedarwood (Earthy/Woody Base).
  2. Middle Notes: Add 5 drops of Lavender (Floral Middle/Heart).
  3. Add Top Notes: Finish with 2 drops of Sweet Orange (Uplifting Citrus Top).
  4. Fill the Bottle: Carefully fill the rest of the 10mL roller bottle with your Jojoba Carrier Oil.
  5. Mix and Let Sit: Close the cap tightly. Gently roll the bottle in your hands to mix the oils.
  6. Be Patient: The smell will get better over time. Let the perfume sit in a cool, dark spot for at least 1 week (or 2 to 4 weeks is best). This is called maceration. It lets the different scents blend together.

How to Make a Spray Perfume (Alcohol-Based):

For a spray, you need more oil (10 to 20%) and high-proof alcohol. The alcohol helps the oils dissolve and makes the scent travel in the air.

  1. Mix your essential oil blend (e.g., 60 drops for a 10% mix in a 30mL bottle) with about 25mL of high-proof alcohol.
  2. Shake it well. It might look cloudy at first.
  3. Let it sit for 1 week.
  4. Add 5mL of distilled water (or scented water called hydrosol) and shake gently.
  5. Allow the perfume to sit for a few weeks, shaking it now and then. The longer you wait, the better the scent will be.

Storage, How Long it Lasts, and Labels

Homemade perfumes don’t have harsh chemical preservatives. You must store them correctly to keep them fresh.

  • Storage: Always store your perfume in a cool, dark place. Keep it away from heat and direct sunlight, which can ruin the essential oils. Dark glass bottles offer the best protection.
  • Longevity: A natural, oil-based perfume usually lasts 6 to 12 months. This depends on the carrier oil you use (jojoba lasts the longest). Alcohol-based perfumes may last longer because alcohol preserves the oils.
  • Labeling: This is very important. Always label your bottle with the date you made it and the ingredients you used. This helps you know the shelf life. It also lets you know which oils caused a reaction if you have one.

Conclusion

Choosing to ditch the chemicals and make your own natural fragrances is a great decision. It’s a healthy step for you and the environment. You turn a store-bought product into a personalized, non-toxic, and healing part of your day. Treat essential oils with care. Follow the safety and ethical rules. When you do this, you are not just making a perfume. You are taking back control of your health and helping create a cleaner world, one beautiful scent at a time.


Frequently Asked Questions (FAQ)

Q: Why do my DIY fragrances fade faster than commercial perfumes?

A: Store-bought perfumes use synthetic chemicals called fixatives. These are designed to make the scent last for hours. Natural perfumes, especially oil-based ones, fade faster. To make yours last longer, make sure your mix has a strong amount of Base Notes. Heavy oils like Sandalwood, Vetiver, or Frankincense hold the lighter scents on your skin.

Q: Can I use olive oil or vegetable oil as a carrier oil?

A: You could use some cooking oils, but it’s not a good idea. Oils like olive oil have a strong natural smell that will mess up your perfume. Also, most vegetable oils (like grapeseed or sunflower) spoil quickly. They will go rancid, which ruins your perfume. Jojoba oil is the best choice because it is odorless and does not spoil easily.

Q: Are there any oils I should never use in a DIY perfume?

A: Yes. Don’t use oils meant only for internal use. For skin use, strictly avoid oils that can be dermally toxic or very irritating. Examples are Cinnamon Bark or Clove Bud. Use them only in tiny amounts, and never on your face. Also, be careful with the phototoxic citrus oils if you plan to go out in the sun. Always check an oil’s safety information before you mix it.

Q: How do I know if my essential oils are high quality?

A: Look for oils labeled as 100% pure therapeutic grade. Good companies will share Gas Chromatography/Mass Spectrometry (GC/MS) reports for their oil batches. These reports prove the oil’s purity and its chemical makeup. Avoid oils that say “fragrance oil” or “perfume oil.” These often contain the synthetic chemicals you are trying to avoid.


Reference Section

Resources for Further Reading and Safety

  1. EWGDiscover EWG VERIFIED
  2. NAHAFactors that influence the safety of essential oils include

Recent Posts


10 House Fixtures That You Need to Live More Sustainably

A cleverly designed tiny home interior showcasing essential multi-functional House Fixtures, including a wall-mounted Murphy bed cabinet, integrated storage drawers beneath loft access stairs, a rolling kitchen island, a ceiling-mounted pot rack, and a folding drop-leaf table used for dining.

Ever dreamed of a life with less clutter and a smaller impact on the planet? This article is written by a former urban resident who found her passion in conscious, compact living. The key to her successful transition was realizing that thoughtful design in House Fixtures can make a huge difference, proving you don’t need a huge space to live well. Join her in exploring how smart choices can revolutionize your home and your environmental footprint.


Lots of people now see the tiny house movement as more than just a way to save money on a home. For many, it’s a deep goal to live in an eco-friendly way. It is a choice to use fewer resources and live better with the Earth. But how do you fit all of your daily needs into a small space and still keep things green? The answer is simple. Look at the clever design of house fixtures. These key items are not just for looks. They are the core of the house, often doing many jobs to save space and cut waste.

This article shows you 10 smart house fixtures. That are great space-savers. As they are also vital for a truly sustainable tiny home. We will look at how these useful items help you live green. And give you simple examples. We will also share tips on how to add them to your home.

The Idea: Do More with Less

The main rule of tiny house design is to do more with less. Every choice of material, every design plan, and house fixtures must be checked. It must work well. Or must save on resources. It must last a long time. This is not about feeling a lack of things. It is about smart use of materials. When one fixture can do two, three, or even four jobs, you do not need to buy so many things. This saves raw materials, factory energy, shipping costs, and precious space. This choice not only shrinks your physical space but also greatly cuts your impact on the planet.

1. The Great Murphy Bed: Sleep Space, Living Room, and Office

You cannot talk about useful house fixtures without naming the Murphy bed. This famous design changes your bed area into a bright living space during the day. It is the best example of tiny home magic: now you see it, now you don’t.

How it Helps the Planet: This bed takes away the need for a fixed bedroom. It opens up a lot of floor space. This means your whole home can be smaller. A smaller home means fewer materials are used to build it. As it cuts down on heating and cooling costs. It also makes your home feel clean and neat. It pushes you to put things away, which helps your mind stay clear.

Example & How to Do It:

Picture a cozy living room with a nice couch and a coffee table. With an easy pull, the couch moves away. A queen-sized bed comes down from the wall. It often has shelves built right into the sides.

  • How to do it: Buy a ready-made Murphy bed set. Some include desks or sofas. Or, build a custom frame that fits into a wall space. Make sure the bed is heavy enough. Use a safe lock to keep it up. Add storage around the frame for bedding.

2. Flexible Sofa Beds: Seat by Day, Sleep by Night

The convertible sofa bed is like the Murphy bed. It is a key item for living with flexible space. These are better than old, bumpy pull-out beds. Modern sofas are comfy for sitting and for sleeping.

How it Helps the Planet: It cuts the need for a spare guest room. In some small homes, it is the main bed. This makes the whole structure smaller. Many new sofa beds use strong, eco-friendly cloth and wood. This makes them greener. Choosing a well-made one means it lasts longer and makes less waste.

Example & How to Do It:

A simple, modern sofa that you can move around for movie night. You can also pull it out into a comfy bed for guests. Some designs have storage hidden inside the long cushion.

  • How to do it: Look for brands known for good folding parts and eco-friendly stuff. Choose a design with covers you can wash easily so it lasts. Think about models that let you change the layout.

3. Folding Tables: For Eating, Working, and Cooking

You need a table. But a big, table wastes space. Folding tables are clever house fixtures that do many jobs.

How it Helps the Planet: They fold up to save floor space when you don’t use them. This makes your home feel big and work better without needing more actual space. One table can be used for eating, working, crafting, or extra cooking space. This means you do not need lots of separate tables. Less furniture means fewer materials are used.

Example & How to Do It:

A table fixed to the wall that folds down flat when you do not need it. Then, you lift it up to make a strong surface for two or four people to eat. Another option is a small kitchen cart with a folding side.

  • How to do it: Wall-mounted tables are great for tiny spaces. Make sure the hinges and locks are very strong. For carts, look for safe parts that lock when they are open.

4. Storage Stairs: Up and Full of Space

Tiny homes with a loft must have stairs or a ladder. Smart design makes these vertical parts into storage. They become more than just a way to walk up and down.

How it Helps the Planet: This is a top example of smart vertical use. Every stair face can be a drawer, a small cupboard, or a hidden shelf for books. This saves the space and materials you would need for other storage. It is a very good use of a necessary part of the house.

Example & How to Do It:

A strong set of stairs going to a loft bed. Each step is a deep drawer. The side of the stairs opens up to show a full closet for hanging clothes.

  • How to do it: It is often best to have these custom-built. Plan out the size of your drawers and cabinets. Make sure the slides and hinges are strong. Safety comes first. The steps must be solid and secure.

5. Window Ledges for Shelves or Seats: A View with a Job

People often forget the window ledge. It can be a very useful, multi-job house fixture.

How it Helps the Planet: Making window ledges wider and stronger lets them become shelves, small desks, or built-in seats. This adds work space without adding new furniture. It uses a part of the house you already have in a smarter way. It also helps you use more sunlight, so you use less electric light in the day.

Example & How to Do It:

A wide, strong window ledge in the kitchen is extra counter space. It is perfect for herbs or a small cutting board. In the living room, a deep ledge can become a comfy seat with a soft pad.

  • How to do it: Check that the wall and window frame can hold the extra weight. Use solid, water-safe materials for kitchen ledges. Add a cushion to ledges you plan to use as seats.

6. Mobile Kitchen Carts: Moving Food Prep and Dining Centers

A big kitchen island is too much for a tiny home. But kitchen carts on wheels aree useful house fixtures. It gives you lots of options.

How it Helps the Planet: You can move these carts to make room, or use them to make your counter bigger. They can be a small dining table or a mobile drink cart. This flexibility means one item does many jobs. This cuts the total number of furniture pieces. Many are built from old wood or eco-friendly sources.

Example & How to Do It:

A small, rolling cart with a wood top, shelves below for pots, and a folding side for eating. You can roll it away to make room for exercise or move it to the main room for a party.

  • How to do it: Find carts with strong, lockable wheels. Think about one with drawers or shelves for best storage. A solid top (like butcher block) makes it more useful.

7. Built-in Appliances: Clean and Tidy Work

Built-in appliances are types of house fixtures that are key for tiny home sustainability. These are small, often multi-job machines put right into the cabinets.

How it Helps the Planet: Small items, like a washer/dryer combo hidden behind a door, or a cooktop that is flat with the counter, save a lot of room. They also often use less energy. By being built-in, they look neat and tidy. Their smaller size means less material is used to make and run them.

Example & How to Do It:

A small oven that also works as a microwave, sitting flush with the other cabinets. Or a drawer dishwasher that looks just like a normal kitchen drawer.

  • How to do it: Plan your kitchen well to fit small appliances. Look for models with a good energy rating. Make sure there is good airflow for any hot items.

8. Pot Racks and Hanging Hooks: Vertical Order

When you can’t build out, build up! Pot racks and hook systems fixed to the wall or ceiling are vital house fixtures for a sustainable kitchen.

How it Helps the Planet: They use wall or ceiling space. This frees up needed room in cabinets and drawers. This means you do not need more cabinets, which saves materials. They keep your tools easy to find, so you waste less time and energy looking for things.

Example & How to Do It:

A rack hanging from the ceiling above the main counter. It holds all your cooking pots, leaving the lower cabinets for food. Or, a wall with pegs and hooks for spoons, knives, and small machines.

  • How to do it: Get strong racks. Make sure they are fixed well to the beams. Plan the layout so that things are easy to reach and do not get in the way.

9. Multi-Job Doors: More Than Just an Opening

A door opens and closes. But in a tiny home, its flat face can do more as a house fixture.

How it Helps the Planet: You can use a door’s surface for another job. You can add a mirror, a whiteboard, or a board with hooks. This means you need one less item in the home. This simple change saves materials and space. For example, a mirrored door means you do not need a separate mirror.

Example & How to Do It:

The bathroom door has a full mirror on the inside. Or, the food pantry door is painted with chalkboard paint. You can use it to write your grocery list or a meal plan.

  • How to do it: For mirrors or hook boards, make sure they are fixed well. For chalkboard paint, clean the door well first. Think about the added weight on the door. Adjust the hinges if you need to.

10. Flexible and Nesting Items: Moveable and Growing

A group of smaller, flexible, or nesting items shows the best of green design. This means tables that fit inside each other, chairs that stack, or shelf parts that you can move around.

How it Promotes Sustainability: These house fixtures are made to be easily moved, stacked, or put away. They change to fit your needs. This means you do not need many single-job items. This flexibility cuts down on the stuff you buy. It helps keep the home neat, which is key for a small, eco-friendly house. They last longer because you can change how you use them over time.

Example & How to Do It:

A set of three tables that fit under each other. You can pull them apart for guests or stack them for space. Or, shelf units that you can put in many ways to suit your storage needs.

  • How to do it: Buy good items that are easy to move and change. Think about light but strong materials.
  • Image Placement 10: Nesting tables or modular shelving.

The Big Picture: Your Home, Your Effect

Choosing these multi-job house fixtures is a life choice. It shows you value smart design, lower buying habits, and less waste. Each smart choice helps lower your carbon footprint. It builds a more sustainable life. Your tiny home shows that good design can fix big problems. It proves you do not need a huge space to live a rich and mindful life. By looking closely at multi-purpose house fixtures, you are not just building a home; you are building a better future.


FAQ

Q1: Are these multi-job house fixtures more costly than normal ones?

A1: At the start, some house fixtures may cost more. This is because they need complex parts or custom design. But, they often do the work of two or three items. This saves you money in the end. Also, they last a long time and save space. This makes them a great deal for tiny homes where space is everything.

Q2: How can I know these house fixtures are really green?

A2: Look for items made from green sources. This means wood that is certified or recycled metals. Choose items that are strong and easy to fix. This helps them last longer. Find companies that make things the right way. Also, avoid paints or finishes that have many bad chemicals. You can also build your own items using old or reclaimed materials. This is very green.

Q3: Can I use these multi-job designs in a normal-sized house?

A3: Yes, of course! While they are vital for tiny homes, these smart design ideas can help any home size. Adding these house fixtures can help keep larger homes tidy. They create rooms that you can use for many things. They still help you live a more green life by using less stuff.

Q4: What is the best way to plan for these house fixtures in a new home?

A4: First, draw a detailed plan of your space. Think about your daily needs. See how you will use each area at different times. Sketch how the furniture will change. Plan how storage will be built into the walls. Work with a designer who knows about tiny homes. This makes sure everything is strong and fits together well.

Q5: Are there any problems with multi-job house fixtures?

A5: The main problems are the first cost and the effort needed to change them each day. For example, you have to make the bed every morning. They can also take a bit more time to set up. But, for most tiny home people, the good things they bring—saving space and helping the planet—are much better than these small issues.


References


Recent Posts


Think Big, Build Tiny: Exterior Designs That Defy Expectation

Earth-friendly tiny home with curved, organic walls and a lush green roof in a sunlit forest. The home features passive solar windows, a wooden deck, a small wind turbine, and solar panels, showcasing how to Build Tiny with maximum sustainability and unique style.

Ever feel like life’s just getting too big, too fast? I know the feeling. I used to dream of a simpler existence, one that was kinder to my wallet and the planet, without sacrificing an ounce of personal style and build tiny. That’s when I stumbled upon the captivating world of tiny homes, and it completely reshaped my perspective on what “home” truly means. Join me as we delve into the art of creating extraordinary tiny living spaces, starting right from the outside in.

Think Big, Build Tiny: Exterior Designs That Defy Expectation

Tiny homes are now much more than a fleeting trend. They show a big change in how we view where we live. For many people, though, a “tiny home” still looks like a basic, boxy structure. It seems practical, but not inspiring. This article will smash that idea. We’ll look at incredible exterior designs that turn simple homes into works of art. Living small doesn’t have to mean thinking small. We will see how good design, green practices, and bold creativity lead to beautiful tiny homes. These homes look great and treat our planet kindly.


Build Tiny: It’s More Than Just Walls

The true magic of tiny home exterior design comes from one basic idea: every inch matters, both inside and out. It’s not about stuffing things into a small place. It’s about making sure every part does three jobs: look good, work well, and help the environment.

When you Think Big, Build Tiny, you question what a home should look like. You embrace new ideas to create a place that is both a private retreat and a strong statement.

This mindset works in several key ways:

  1. Using Space Wisely: The outside design is just as important as the inside. It controls how much natural light enters. It creates usable outdoor “rooms.” It also makes the house feel bigger.
  2. Fitting In With Nature: Tiny homes often try to feel like part of the landscape. Exterior design is vital for helping a home blend in or stand out in a smart way.
  3. Green Design is Style: Earth-friendly choices are not just about materials. They are about complete systems that work together. These features—like rain collectors, solar power, and living walls—are often visible. They are a core part of the look.

Build Tiny: Cool Shapes and Forms

The classic tiny home built on a trailer is useful, but today’s designers are using new, exciting shapes. These designs grab your attention. They often offer practical benefits, too. These can include better aerodynamics, less energy use, or unique room layouts.

Examples:

  • Geodesic Domes & A-Frames: These shapes are naturally strong. They are great at keeping heat in or out. Their unique, fun look makes them distinct. A steep A-frame roof easily sheds snow and rain. A dome shape minimizes the outside surface area while giving maximum space inside.
  • Curved Walls & Natural Shapes: Some tiny homes use rounded walls. Builders often make these walls with methods like straw bale or cob. This creates a softer, more natural look that feels linked to the earth. These forms can also cut down on wind resistance.
  • Homes That Grow: Some tiny homes are built in parts. Exterior parts can be added or moved. This offers great flexibility and a changing visual look.

How to Do It:

Don’t be afraid of an unusual shape. Look into the structural needs of unique forms. For curves, you can use flexible building supplies like bendable plywood. You can also try natural building methods like cob. If you plan to build far outside a standard rectangle, hire a designer who knows how to work with unique structures.


Materials That Matter: Eco-Friendly and Beautiful

The outside siding is a tiny home’s skin. It shields the home from the weather and defines its style. Choosing materials that are green, tough, and nice to look at is key for a long life and for protecting the planet.

Examples:

  • Reclaimed Wood & Old Barnwood: This material gives a cozy, rustic feel. It has unique character. Using it keeps waste out of dumps. The weathered look of reclaimed wood tells its own story.
  • Metal Siding (Corten Steel, Standing Seam): This material lasts a long time. It needs little care and can be recycled. Corten steel gets a protective layer of rust, giving it a modern, industrial style. Standing seam metal roofs are perfect for collecting rainwater.
  • Cedar Siding & Shingles: Cedar resists rot naturally and looks beautiful. It turns a lovely silver-gray color as it ages. If you get it from managed forests, it is a sustainable choice.
  • Fiber Cement Siding: This is tough, resists fire, and requires little maintenance. It can look like wood, stone, or stucco. Many brands now use recycled content in their products.
  • Living Walls & Green Roofs: These are not just nice to look at. They add insulation, clean the air, manage rainwater, and help local wildlife. A green roof helps control the inside temperature. This means you use less energy.

How to Do It:

Focus on materials that need little energy to make and move. This is called low embodied energy. Buy materials locally to lower your carbon footprint. Study how well the material insulates (R-value) and how long it will last. Mix different materials for a varied look and feel. For living walls, plan for watering and choose plants that suit your area.


Windows: Eyes to the World and Smart Design

Windows do more than bring in light. They are vital to a tiny home’s curb appeal and energy use. Placing and sizing them well can completely change how a home looks and feels inside.

Examples:

  • Large Picture Windows: They give you great views, bringing the outside in. This makes the inside feel much larger. They are great for natural solar heat in cold places if they face south.
  • High (Clerestory) Windows: Placed high up on a wall, these let in natural light while keeping your privacy. They also help with airflow. They can highlight unique roof shapes.
  • Opening Windows & Folding Doors: These choices maximize fresh air flow. They connect the inside and outside perfectly. This actually makes your living space bigger when the weather is nice.
  • Skylights: These flood lofts with light. They are also fun for looking at stars. Make sure they are energy-efficient and properly sealed to stop leaks.

How to Do It:

Think about your local climate. For natural solar heating, place bigger windows toward the sun (south in the Northern Hemisphere). For cooling, you need opposing windows to get cross-ventilation. Always choose top-quality, double or triple-paned windows. Look for low-emissivity (Low-E) coatings. These reduce heat transfer. Think about the views the windows frame and how to maintain privacy.


Maximizing Outdoor Living: Decks, Porches & Awnings

A tiny home’s outdoor space often becomes another room. Smartly designed outdoor features expand the living space. These parts not only make the home more useful but also boost its looks and make it seem bigger.

Examples:

  • Fold-Down Decks & Porches: These are clever solutions for tiny homes on wheels. They add a living area without increasing the size for travel. When set up, they create a welcoming entrance and sitting area.
  • Retractable Awnings & Pergolas: These provide shade and shelter. They let you use your outdoor spaces more often. Awnings can be pulled back to let in solar heat during winter.
  • Built-In Storage & Seating: If built into the outside, these items can serve two roles. They create useful outdoor zones.
  • Outdoor Showers & Cooking Nooks: If you love the outdoors, these features further blur the line between inside and out.

How to Do It:

Design based on your local weather. If it’s hot, focus on shade. If it’s mild, focus on open-air comfort. Use tough, weather-proof materials like treated wood or recycled plastic decking. For fold-down features, ensure strong hinges and secure locks. Think about how these parts will look when they are both open and put away.


Build Tiny: Yard and Site Work

The area right around a tiny home is a continuation of its design. Careful landscaping and blending with the site are key for both beauty and sustainability.

Examples:

  • Local Plant Landscaping: Use plants that are already suited to your climate. They need less water and care. They also support local wildlife. This helps the home fit naturally into its surroundings.
  • Rain Gardens & Porous Paving: These features manage water runoff from storms. They prevent soil loss and refill groundwater. They are beautiful, useful landscape parts.
  • Food Gardens & Herb Spirals: You can grow food right next to your home. This helps you be more self-sufficient.
  • Smart Walkways & Lighting: These guide people and highlight important parts. They make the tiny home feel like a purposeful part of its location.

How to Do It:

Check your site’s weather, sunlight, and soil. Work with the land’s natural shape, don’t try to change it completely. Plan for water management right from the start. Think about how the plants will change with the seasons and over the years. For tiny homes on wheels, use potted plants or raised beds that can travel with the house.


The Power of Color & Texture: Visual Impact

Color and texture are great design tools. They change how a tiny home looks and how it works with its setting. They can make a small building feel important, cozy, or perfectly matched to its site.

Examples:

  • Contrasting Colors: A dark house with bright trim creates strong lines and highlights design details. A bold color on the front door adds character.
  • Single-Color Schemes: Using one color family can make a tiny home feel bigger and more refined. This works well when you use varied textures, like smooth metal and rough wood.
  • Natural Tones: Earthy colors like green, brown, and gray help a tiny home disappear into a natural area.
  • Varied Textures: Combining smooth metal, rough wood, and maybe a stone feature adds depth and visual appeal. This stops a small house from looking too plain.

How to Do It:

Look at your setting. Is your home in a forest, by the sea, or in a city? Pick colors that either match or offer an interesting contrast to the area. Test paint samples under different light. Use texture to add warmth or a modern feel. Remember, lighter colors reflect light. This can keep the home cooler.


Integrated Sustainability: More Than Just Good Looks

Many green features add to the home’s look. However, some are purely functional and cleverly built-in. They truly show the spirit of “Think Big, Build Tiny.”

Examples:

  • Solar Panels & Wind Turbines: These green energy sources are often visible. They are built onto roofs or stand alone near the house. Their presence clearly shows the home’s dedication to energy freedom.
  • Rainwater Harvesting Systems: Gutters feed water into visible barrels or tanks. This becomes a design element. It shows the home’s efforts to save water.
  • Composting Toilets & Greywater Outlets: These systems manage waste responsibly. They keep the environmental impact low.

How to Do It:

Plan for these systems early in the design process. Think about the weight and position of solar panels for the best sun. Check local rules for collecting rainwater and using greywater. Weave the collection spots and storage tanks into the exterior design. Maybe hide them with plants or pick tanks that look good on their own.


Case Study: The “Eco-Pod” Tiny Home

Picture a tiny home that belongs in a forest clearing. Its outside is covered in reclaimed cedar and a dark, metal roof. Part of the roof has a lively green roof full of flowers. This roof provides natural insulation and manages water. On the sunny side, large, efficient windows let in lots of passive solar heat in winter. A small, pull-out awning shades these windows in summer.

One wall has a built-in vertical living wall. It gets water from a hidden greywater system. A large rain barrel visibly catches water from the roof. It is linked to a small outdoor faucet for the garden. The entry is marked by a fold-down deck made of local composite material. It includes a built-in bench. This deck makes the usable space much bigger. It makes the tiny home feel much larger than its small base. The style is modern but rustic. It honors natural materials while using smart, green technology. It perfectly shows how to Think Big, Build Tiny: Exterior Designs That Defy Expectation.


Frequently Asked Questions (FAQ)

Q: Are tiny homes with unique exterior designs more difficult to insure?

A: Yes, sometimes. Standard insurers might hesitate. They prefer normal construction. You may need a specialty tiny home or RV insurance provider. Custom features like green roofs or unique shapes must be fully documented for a correct appraisal.

Q: Do unique shapes (like domes) cost more to build than a standard box?

A: Often, yes, the labor can be higher. While materials for a dome might be efficient, the specialized framing and custom-cut siding take more time and skill. A simple box is usually the cheapest to frame and clad.

Q: How do you make a vertical garden wall if you build tiny homes on wheels?

A: You need a lightweight, modular system. Use felt pockets or plastic trays attached to a light, durable frame. It must be strong enough to handle highway speeds. Use a separate, enclosed water tank for the greywater feed, if applicable, to prevent sloshing or leaks during transport.

Q: How can I ensure my reclaimed wood siding is durable and sustainable?

A: Buy from a certified local source to ensure quality and less transport. Check the wood’s moisture content. It should be treated with a non-toxic, eco-friendly sealant or oil. This protects it from bugs and weather.

Q: Does a metal roof really help with sustainability?

A: Yes, a lot. Metal is 100% recyclable at the end of its long life. Its light color can reflect sunlight (reducing heat gain). This cuts down on the need for air conditioning. It is also an ideal surface for collecting clean rainwater.


References


Recent Posts


The New Green Revolution: How Living Small Unlocks Maximum Sustainability

A cozy wooden tiny home with vertical gardens built into its side sits by a calm lake at sunset. A person reads inside by warm fairy lights. Outside, a backpacker stands on a cliff overlooking the water, a vibrant scarf trailing behind them in the breeze, emphasizing Sustainability through mindful living and travel. Two people paddle a canoe and another meditates by the shore, reflecting a connection with nature and eco-conscious lifestyle.

I used to believe that having a big house and lots of things was the key to happiness—but all that stuff felt like a heavy weight. I realized my large, half-used house was taking up too much of my time and money, and its size felt wrong for the planet, especially when it came to sustainability. This journey is about finding true freedom and protecting the Earth. It proves that you don’t need a huge place to be happy; a simple life is often the richest one.


Why Less Space Means More for the Planet

The world is worried about climate change and running out of resources. We desperately need a new way to live. We’ve chased the dream of huge houses and overflowing closets, but it has only brought debt and a giant carbon footprint. The old idea of “more is better” is failing all of us. But there’s a strong, quiet movement with a simple, smart solution: living small.

This is more than just a trend for tiny houses. It’s the New Green Revolution. It’s a clear choice to make our lives better and more eco-friendly by shrinking our living space and owning fewer things. When we redesign where we live, it starts a positive domino effect: it slashes energy use, saves resources, improves our mental health, and boosts our savings. Living small isn’t a sacrifice; it’s the smartest way to ensure a sustainable future.

The Facts: Downsizing is Key to Sustainability

The numbers are clear. A large amount of global pollution comes from the energy we use in our homes, and the main reason is how big they are. The average new house in the U.S. is twice as large as it was in the 1970s, even though families are smaller now. This extra size means a massive jump in the materials needed, the energy used, and the overall damage to the environment.

A key study by Dr. Maria Saxton on the tiny house movement found that people who live in tiny homes (usually between 100 and 400 square feet) have an ecological footprint that is about 45 percent lower than the average American. This huge difference isn’t just about the structure’s size; it comes from the simpler lifestyle that tiny living demands.

1. Less Waste from Building and Materials

Building a large house uses a huge amount of materials—wood, concrete, steel, and insulation. All these materials have a high embodied energy cost, which is the energy spent to dig up, create, ship, and put together the materials.

The Small-Living Advantage:

  • Fewer Resources: A small house needs much less raw material. This seriously reduces the environmental damage caused by mining and manufacturing.
  • Affordable Eco-Choices: Because the project is small, it’s easier to afford and use premium, sustainable materials. You can choose reclaimed wood, recycled metal, or new, low-carbon options like hempcrete or Structural Insulated Panels (SIPs). Here’s a practical how-to: If you save $1,500 on normal lumber for a large house, you can use that money to buy highly efficient SIPs for a small one. The result is a better, greener home.

2. Saving Massive Amounts of Energy

The biggest costs and environmental problems for any home come from keeping it warm or cool. The rule is simple: less space to heat and cool means you use a lot less energy.

How Small Living Saves Energy: Benefits of Sustainability

  • Better Shape for Saving Heat: Small buildings lose less heat because the outside surface area is smaller compared to the inside space. This means less heat escapes in winter and less heat sneaks in during summer.
  • Smart Design Power: In a small space, excellent insulation and smart design become vital. Placing windows to catch the sun’s heat, using natural breezes for cooling, and maximizing daylight can drastically reduce the need for active heating, air conditioning, and electric lights.
  • Going Solar is Easier: Since the energy needs are low, going off-grid with solar power is much more practical. A small set of solar panels on the roof can often power 100% of a small home’s energy needs. This lets the home reach true net-zero status (using as much energy as it makes) or even be net-positive (making more energy than it uses).

How to Do It:

When you buy appliances, look for the Energy Star label. Also, choose smaller sizes. A compact, energy-efficient fridge or an induction stove can use 30 to 50 percent less energy than standard big models.

The Big Shift: Less Stuff, More Intentional Living

The large sustainability benefits of living small go far beyond the building itself. Downsizing forces us to look hard at our buying habits. When every item must earn its place in a small space, we stop buying things we don’t truly need. This focus on minimalism is the real heart of the New Green Revolution: it’s a direct way to be a great steward of the environment.

3. Less Waste and Longer-Lasting Products

The average person throws away about 4.9 pounds of garbage daily. A large home acts like a “junk drawer” for our endless purchases, hiding the huge amount of things we buy and throw away.

How Small Living Cuts Waste:

  • Thoughtful Shopping: With limited storage, you have to be very thoughtful about every purchase. People start buying high-quality, durable items that can be repaired, instead of cheap, disposable goods. This choice directly cuts down on manufacturing waste and reduces landfill trash.
  • Repair and Reuse: Small-space living creates a mindset of using everything to its maximum potential. A single item might serve multiple uses. This approach naturally encourages longevity and fixing things instead of throwing them out and replacing them.

Example:

Instead of owning a separate vacuum, floor steamer, and mop, someone in a small home would buy one high-quality, multi-functional cleaning machine. This reduces the energy cost of three products down to one, saves space, and significantly cuts down on electronic waste over time.


Sustainability Living: Life Beyond Your Walls

The mindset of living small often leads to other major sustainable habits.

4. Growing Food in Small Spaces

Not having a lot of land doesn’t mean you can’t grow your own food. You just need to be clever and use vertical space or shared community gardens.

How to Grow Food with Little Space:

  • Vertical Gardens: Use wall space on a balcony, patio, or even inside by a sunny window to grow herbs, leafy greens, and strawberries in planters that stack up.
  • Container Gardening: Choose small, “patio” types of vegetables like tomatoes, peppers, and beans that grow well in pots.
  • Composting is Easy: Even apartment dwellers can compost. Worm farms (vermicomposting) or small, sealed kitchen bins turn food scraps into rich fertilizer for your plants. This greatly reduces the methane pollution that comes from landfills.

(Image Placement 3: A small balcony with vertical planters growing herbs and small vegetables.)

5. Better Transportation and Stronger Communities

Small homes, especially permanent ones, are often built in or near towns where you can walk to things, or close to city centers. This location naturally encourages people to walk, bike, or use public transport. This is a direct attack on the high pollution caused by relying on private cars.

The Power of Sharing:

In tiny house communities or shared housing setups, people often share resources: a community garden, a shared laundry room, a workshop, or central power systems. This shared system is the ultimate in efficiencyand Sustainability. It reduces the need for every household to own its own set of expensive, rarely-used items.


Sustainability: Your Practical Steps

You don’t have to move into a tiny house tomorrow to join this revolution. Living small is a personal journey, and the biggest changes start with your own choices.

Step 1: Declutter for Clarity (The 80/20 Rule)

Most people only use 20% of their belongings 80% of the time. The first step is to be honest about everything you own.

  • The ‘One Year Test’: If you haven’t used it in a year, it probably isn’t needed. Recycle, donate, or sell it.
  • Be a Curator: Every new item that enters your life should replace an old one, or at least have a specific, useful place.

Step 2: Maximize Space with Smart Design

A smaller footprint demands brilliant planning.

  • Look Up High: Install shelves all the way to the ceiling. Use vertical storage racks inside cabinets and drawers.
  • Invest in Transformer Furniture: Get furniture that changes shape, like a desk that folds into the wall, a sofa that becomes a dining table, or a bed with built-in storage. These smart products are key to efficient living.
  • Use Every Nook: The space under your stairs, the backs of doors, and even small drawers in the base of kitchen cabinets can all be used for storage.

Step 3: Check Your Habits (The Big 3 Impact Areas)

Focus your efforts where they will help the environment the most:

  1. Energy: Switch to electricity from renewable sources. Use smart power strips to stop electronics from wasting power when on standby. Lower your heating and cooling settings.
  2. Water: Install low-flow showerheads and faucets. Collect rainwater for watering plants. Take faster showers.
  3. Food: Eat more meals that focus on plants. Buy food grown locally to cut down on shipping pollution. Compost all food scraps.

Step 4: Focus on Your Home’s Efficiency

Whether you’re building new or improving an old small space, make efficiency your number one goal.

  • Insulation is Critical: The best money you can spend is on high-quality, air-tight insulation. Focus on high R-value insulation in the attic and walls.
  • Better Windows: Change old windows to high-efficiency double or triple-pane units.
  • Go Electric: Switch from gas appliances (like stoves and water heaters) to electric ones, especially heat-pump technology, to work better with a renewable energy grid.

(Image Placement 8: A diagram illustrating high-efficiency insulation and passive solar design.)


Conclusion: A Better Life, A Healthier Planet

The New Green Revolution is all about taking back control from the huge demands of oversized homes and too-busy schedules. Living small is more than a quick trend; it is a clear path toward real Sustainability. It proves that we can live better, not by owning more, but by needing less. This mindful, minimalist approach lowers our demand on the planet, frees up our cash, and helps us focus on experiences, community, and our true purpose. It is the best way to live a life that is truly meaningful and responsible to the world.


Frequently Asked Questions (FAQ)

Q1: Is living small only for single people or young couples?

A: Definitely not! Many families are choosing to live small. The key is in smart design and intentional living. Multi-purpose furniture, clever storage, and shared community spaces allow families to live comfortably in a smaller footprint. It’s about using space fully, not giving up comfort.

Q2: What is the biggest barrier to widespread small living?

A: The main problems are often local zoning laws and building codes. These rules force houses to be a certain minimum size, which basically makes tiny homes illegal or hard to place. To fix this, communities need to speak up and get local rules changed to allow for diverse, sustainable housing options.

Q3: How can I start applying these ideas if I live in a large rental home?

A: The revolution starts with mindful shopping and saving energy.

  • Shopping: Use the 80/20 rule to declutter and stop buying things you don’t really need. Use the money you save for experiences or savings.
  • Energy: Focus on cheap habits (turn off lights, lower thermostat, etc.) and portable upgrades (LED bulbs, smart power strips).
  • Water: Install low-flow showerheads (these are easy to swap out when you move).

(Image Placement 10: Image of a water-saving showerhead or LED light bulb.)

Q4: Will the eco-benefits of a small home disappear if I drive too much?

A: Yes, the pollution from your car can easily undo the good your small home does. Real Sustainability means looking at your whole life. The most effective small homes are near places you can walk to, bike to, or take the bus or train. This helps cut down on or stop the need for a car.

Q5: What are the best eco-friendly building materials for a small home?

A: Choose materials that don’t take much energy to make and will last a long time.

  • Reclaimed/Recycled: Old lumber, recycled metal for the roof, and repurposed windows.
  • High-Efficiency: Structural Insulated Panels (SIPs) for walls and roofs.
  • Natural/Plant-based: Bamboo, cork, sheep’s wool or cellulose insulation (made from recycled paper), and wood from local sources.

References

  1. Virginia Tech – Chapter 2 Environmental Impacts of Tiny Home Downsizers
  2. Turmerry – Easy Ways To Live a Sustainable Lifestyle

Recent Posts


The 5-Minute Pantry Potion for the BEST Bath EVER

Three homemade Pantry Potion bath soak varieties labeled "Sleep & Serenity," "Warming & Winter Relief," and "Detox & Refresh" in elegant glass jars tied with twine on a wooden shelf.

Do you find yourself scrolling through expensive self-care sites, wishing you had the time and money for a truly luxurious soak? As a fellow busy human, I get it—sometimes all you need is a moment of peace without a major shopping trip. That’s why I became obsessed with finding the easiest, most accessible way to create a spa experience right at home, leading me to create the Pantry Potion. I’m here to prove that the secret to the BEST bath ever isn’t in a fancy boutique; it’s already in your kitchen cabinet.


Introduction: Pantry Potion

Picture this: It’s the end of a long, draining day. Your muscles ache, your mind is racing, and the thought of tackling one more task is just too much. What do you need? A complete reset. And what do you have? Probably not a personal masseuse or a trip to a five-star spa booked.

But what if I told you the ultimate, stress-melting, muscle-soothing bath soak is just five minutes and a few cupboard staples away?

Forget the overpriced, chemical-laden bath bombs and pre-made mixes. We are about to create a powerful, all-natural relaxation remedy using the simplest of ingredients—the hidden gems already nestled in your kitchen. This is the Pantry Potion, and it is your new holy grail for instant self-care. It’s effective, accessible, zero-waste friendly, and honestly, life-changing. Get ready to transform your tired bathroom into a therapeutic sanctuary.


Why the Pantry Potion Beats the Boutique

The appeal of the Pantry Potion is threefold: Accessibility, Affordability, and Efficacy.

1. The Accessibility Factor (The 5-Minute Promise)

When you need a bath soak, you usually need it now. You don’t want to drive to a specialty store or wait for a package to arrive. The beauty of this recipe is that it relies on common pantry staples. We’re talking basic salts, sugars, and common dried herbs or spices. If you have a kitchen, you likely have the foundational ingredients. The “5-Minute” part of the title isn’t a joke—the mixing process is truly that fast.

2. The Affordability Advantage

High-quality bath products often come with a high price tag, which mostly covers fancy packaging and marketing. By making your own, you save a significant amount of money. The bulk cost of ingredients like Epsom salt or baking soda is minuscule compared to a single, pre-packaged bath bomb. You get more soaks for your dollar, making luxury a sustainable daily habit rather than a rare treat.

3. The Efficacy of Natural Ingredients

Your kitchen is a treasure trove of healing. Herbs like chamomile and mint are known for their calming properties. Salts are celebrated for their muscle-relaxing mineral content. Instead of confusing labels full of synthetics, you are using pure, simple ingredients that your body recognizes and loves. It’s clean beauty at its most fundamental.

The Core Foundations of Your Pantry Potion

Every great bath soak starts with a base. You need something to dissolve, something to detoxify, and something to soften the water.

1. The Muscle Relaxer: Epsom Salt

This is non-negotiable for a truly restorative soak. Epsom salt isn’t actually salt; it’s a mineral compound of magnesium and sulfate. When you soak in it, the magnesium is absorbed through the skin, which plays a critical role in muscle and nerve function. It’s widely recommended for soothing sore muscles, reducing stiffness, and promoting relaxation.

  • Role in the Potion: Soothes aches, reduces inflammation, and aids in detoxification.
  • Alternative: Plain sea salt or coarse kosher salt (for mineral content, though without the magnesium benefits).

2. The Skin Softener: Baking Soda (Bicarbonate of Soda)

Often overlooked, baking soda is an incredible addition. It helps neutralize acids on the skin, leaving it feeling silky-smooth and soft. It can also help wash away oils and residue from your skin, leaving you feeling cleaner.

  • Role in the Potion: Water softener, skin soother, and a mild detoxifier.
  • Alternative: Borax (use sparingly and with caution, or omit completely).

3. The Scent and Soothe: Dried Herbs & Spices

This is where your kitchen truly shines and where the “Pantry Potion” gets its magic. You don’t need essential oils; you just need the vibrant aromas and soothing properties of common dried kitchen ingredients.

  • Role in the Potion: Aromatherapy, visual appeal, and therapeutic herbal benefits.
  • Alternatives: See the ingredient section below!

The Master Formula: How to Mix Your Pantry Potion

This foundational recipe is your starting point. Feel free to scale it up to make a large batch for storage or scale it down for a single-use soak.

The Pantry Potion Master Recipe (Single Soak)

IngredientMeasurementPurpose
Epsom Salt1 to 2 cupsMuscle relaxer and detox
Baking Soda1/2 cupSkin softener and water neutralizer
Herbal Element1/4 cupScent, aromatherapy, and soothing properties

Total Estimated Time: 3-5 minutes


How to Do It: The Simple Steps

  1. Prep Your Herbs: If your dried herbs or spices are very coarse (e.g., whole bay leaves or large cinnamon sticks), give them a quick pulse in a food processor or coffee grinder. You want a mix that releases aroma but isn’t so fine it clogs your drain (a coarse grind or whole, smaller petals work best).
  2. Combine the Dry: In a large mixing bowl, scoop out the Epsom salt and baking soda. Use a wooden spoon or whisk to thoroughly combine the ingredients. It should look like a uniform, sparkling white base.
  3. Add the Magic: Pour your prepared herbal element into the salt mixture. Gently stir until the color is evenly distributed. Do not overmix, or you can lose some of the aroma.
  4. Jar It Up: Transfer your fresh Pantry Potion to an airtight container (a Mason jar or recycled pasta sauce jar works perfectly). Label it and store it in a cool, dry place until you’re ready for the BEST bath EVER!

Potion Customization: 3 Magical Pantry Potion Recipes

This is where we get specific. Depending on your mood, you can choose a different “flavor” for your soak. All of these use the Master Formula ratio, simply substituting the Herbal Element.

Potion 1: The Sleep & Serenity Soak (Best for Bedtime)

Pantry Potion ElementIngredient
Herbs/SpicesDried Chamomile flowers and/or Dried Mint leaves
Aroma BoostA few pinches of dried orange or lemon peel (optional)
Bonus1 tbsp of White Sugar (for extra skin exfoliation)
  • Therapeutic Focus: Calming the nervous system and preparing the body for sleep. Chamomile is a gentle sedative, and mint is a known muscle relaxant.

Potion 2: The Warming & Winter Relief Soak (Best for Cold/Aches)

Pantry Potion ElementIngredient
Herbs/SpicesGround Ginger and/or Ground Cinnamon (use a small amount!)
Aroma BoostA few cloves, whole or lightly crushed (optional)
Bonus1/4 cup of whole milk powder (if you have it, for creamy skin)
  • Therapeutic Focus: Increasing circulation and providing a warming, comforting sensation. Ginger is an ancient remedy for aches and joint stiffness. Caution: Cinnamon can be a mild irritant; start with just 1-2 teaspoons.

Potion 3: The Detox & Refresh Soak (Best for Resetting)

Pantry Potion ElementIngredient
Herbs/SpicesDried Lemon slices or Zest and/or dried Rosemary leaves
Aroma BoostA small handful of Green Tea leaves (from a broken-open tea bag)
Bonus1 tbsp of Apple Cider Vinegar (added directly to the running water)
  • Therapeutic Focus: Invigorating the senses, gently detoxifying the skin, and clearing the mind. The bright scents of citrus and rosemary are instantly uplifting.
Three homemade Pantry Potion bath soak varieties labeled "Sleep & Serenity," "Warming & Winter Relief," and "Detox & Refresh" in elegant glass jars tied with twine on a wooden shelf.

The Ultimate Bath Ritual: Activating Your Pantry Potion

Mixing the soak is only half the battle. To truly get the BEST bath EVER, you need to elevate the entire experience.

1. Preparation is Key (1 Minute)

  • Clean the Tub: No one relaxes in a dirty tub. Give it a quick rinse.
  • Set the Mood: Turn off the harsh overhead lights. Light a candle (use one from your kitchen if you don’t have a fancy one!) or use a dim lamp.
  • Silence the World: Put your phone on airplane mode. Yes, seriously.

2. The Pantry Potion Deployment (2 Minutes)

  • The Sachet Hack (Recommended): To avoid herbal residue in your tub (and save your plumbing), place your entire single-soak portion into a sachet. You can use:
    • A small muslin bag (if you own one for tea)
    • A clean, thin sock or nylon stocking
    • A square of cheesecloth tied with string
  • The Direct Dump (If you don’t mind the clean-up): Pour the mixture directly into the running water. Swirl the water to help dissolve the salts.

3. Temperature and Time (2+ Minutes)

  • Temperature: Aim for warm, not scalding. Water that is too hot can be dehydrating. A pleasant, steamy warmth is ideal for muscle relaxation and steam-based aromatherapy.
  • Immersion: Get in! Submerge yourself up to your chest. If you used a sachet, drop it in next to you or hang it over the faucet so the water runs through it.
  • Duration: Aim for a minimum of 20 minutes. This gives your body time to absorb the magnesium from the Epsom salt and your mind time to truly switch off.

Troubleshooting & Storage for Your Pantry Potion

Storage

  • Keep it Dry: Always store your bath soak in an airtight container (glass is best) away from humidity. Moisture will cause the salt and baking soda to clump together.
  • Label and Date: Label your jar, especially if you create multiple varieties. While the salts don’t “go bad,” the scent potency of the dried herbs will fade over time. Use within 6 months for the best aroma.

Troubleshooting Clogs (The Herbal Residue)

The biggest drawback of using raw herbs is the potential for drain residue. This is why the Sachet Hack is so important.

  • If you dump directly: After draining the tub, use the shower head to blast away any remaining residue toward the drain to prevent buildup.
  • Avoid the Fine Powders: If you use too much finely ground spice (like turmeric or fine cinnamon), it can stain your tub. Stick to larger, whole or coarsely chopped herbs/leaves.

The Science Behind the Pantry Potion Soak

This isn’t just fluffy wellness talk; there’s real science backing this Pantry Potion.

  • Magnesium Absorption: Studies suggest that soaking in magnesium sulfate (Epsom salt) can raise magnesium levels in the body, which is vital for reducing stress hormones and aiding muscle recovery.
  • The Power of Aroma: The olfactory system (your sense of smell) is directly linked to the limbic system, the part of the brain that controls emotion.5 Inhaling the steam-activated scents of chamomile, mint, or rosemary immediately communicates “relax” to your brain.
  • Hydration Barrier: The addition of baking soda helps balance the water’s pH, which prevents stripping your skin’s natural moisture barrier, leaving your skin soft and nourished instead of tight and dry.

Beyond the Bath: Other Pantry Potion Uses

The principles of the Pantry Potion can extend beyond the tub!

  • Foot Soak: Use 1/4 cup of the mix in a basin of warm water for an instant, soothing foot soak. Perfect after a long day in uncomfortable shoes.
  • Shower Scrub: Mix 1/4 cup of the salt mix with 2 tablespoons of coconut or olive oil (also likely in your pantry!) to create a quick, exfoliating body scrub. Use caution, as this can make the shower floor slippery.
  • Room Refresher: Place a small, open dish of the dry mix in your linen closet or bathroom for a gentle, all-natural air freshener.

Conclusion: Making Luxury a Habit

The Pantry Potion is more than just a bath recipe; it’s a mindset shift. It’s the realization that you don’t need expensive, complicated solutions to find peace and luxury in your everyday life.

In just five minutes, using ingredients you already own, you can create a powerful, therapeutic experience that nurtures your body and quiets your mind. This is truly the BEST bath EVER because it’s a commitment to your own well-being that is both sustainable and accessible.

Go on, check your cupboard. Mix up your potion. You deserve this.


Frequently Asked Questions (FAQ)

1. Can I use fresh herbs instead of dried?

It is generally not recommended. Fresh herbs contain water and are much more likely to mold if stored in the salt mixture. They also tend to float and create more residue. Stick to dried herbs from your pantry for the best results and storage life.

2. Is this safe for people with sensitive skin?

The base ingredients—Epsom salt and baking soda—are generally very safe and often recommended for sensitive skin. However, strong spices like cinnamon or ginger in the warming potions can be mildly irritating to highly sensitive skin. Always perform a small patch test or start with the simple Sleep & Serenity Potion first.

3. How much of the Potion do I use per bath?

For a standard-sized bathtub, 1 to 2 cups of the total mix is ideal for a therapeutic soak. Use less for children or smaller tubs, and up to 3 cups for extra-large soaking tubs.

4. How long does the Potion last in storage?

When stored in a cool, dry, airtight container, the salt and baking soda will last indefinitely. The key is the potency of the herbs and spices. For the strongest aroma, use your batch within 6 months of mixing.

5. What if I don’t have Epsom salt?

While Epsom salt provides the most significant muscle relief (magnesium), you can substitute it with plain coarse sea salt or Himalayan pink salt. You will still get the skin softening and mineral benefits, but the muscle-soothing effect may be less pronounced.


References

  1. Healthline – What Are the Health Benefits of a Hot Bath?
  2. Clevelandclinic – Taking the Plunge: 5 Reasons Baths Are Good for You
  3. Harvard Heath – Take a soak for your health – Harvard Health

Recent Posts


How to Repurpose Banana Peels: Tips for a Sustainable Home

A bowl of savory, shredded vegan "pulled pork" made from seasoned Banana peels with a fork scooping some out. A soft bun and coleslaw are blurred in the background, suggesting a complete meal.

Like many people, I’m constantly looking for small, achievable ways to reduce my impact on the planet without completely changing my routine. I used to be fascinated by “zero-waste,” but the truth is, everyone generates some food scraps. Discovering how useful the simple banana peels are—something I always threw away—has been a game-changer. This easy habit has made my kitchen greener and my garden happier, proving that real sustainability starts with the everyday things we often overlook.


The Hidden Power of the Banana Peels

The push for a sustainable lifestyle often starts in the kitchen. We aim to reduce waste and find better uses for what we typically discard. The banana peel, unfortunately, is one of the most common kitchen scraps. Most people toss it without a second thought.

We eat countless bananas every year around the world. The peel makes up about 35% of the fruit’s weight. Yet, this fibrous, nutrient-dense skin is an amazing resource. It is more than just material for the compost heap. The banana peel is packed with key nutrients, fiber, natural oils, and powerful compounds. This makes it a great asset for cooking, gardening, cleaning, and even skin treatments.

Repurposing banana peels is perhaps the easiest, cheapest, and most accessible way to create a more sustainable home. By using these clever tips, you can cut down on waste, save money, and use natural solutions for common household needs.


Part 1: Culinary Creativity – Banana Peels in the Kitchen

First, a vital step: always wash the peels very well. This removes any possible pesticides or dirt. Once clean, the texture of the peel makes it great for several healthy and creative additions to your meals. Eating the peel increases your intake of fiber, magnesium, and potassium.

1. Vegan Meal Magic: Faking Pulled Pork

One of the most surprising and delicious uses for banana peels is as a meat-free substitute. The stringy texture, especially after it’s slow-cooked, can feel very similar to pulled pork or bacon.

How to Do It:

  • Prepare: Scrape away any fruit left on the inside of the peel. Boil the peels until they become soft (around 15 to 20 minutes).
  • Season: Once cool, use a fork to shred the peels into strips. Mix the shredded peel with a savory, smoky marinade (use ingredients like paprika, liquid smoke, vinegar, and a bit of brown sugar).
  • Cook: Fry or bake the marinated peels until they turn slightly crisp.
  • Serve: Put them on a bun with coleslaw for a tasty “pulled peel” sandwich.
A bowl of savory, shredded vegan "pulled pork" made from seasoned Banana Peels, with a fork scooping some out. A soft bun and coleslaw are blurred in the background, suggesting a complete meal.

2. Adding Flavor: Curries and Stir-fries

Many regions, including parts of Southeast Asia, India, and Venezuela, have known the value of banana peels for centuries. They often include them in main dishes.

How to Do It:

  • Cut: Chop or slice the washed peels into small, even pieces.
  • Mix In: Add the pieces to your curries or stir-fries along with other vegetables. The peel absorbs the flavors of the spices and sauce. It adds a chewy element and more fiber.

3. Boosting Health: Smoothies and Baked Goods

Want a secret health boost? Pureed or finely cut peels can easily be mixed into various recipes.

How to Do It:

  • Smoothies: Blend a whole, clean peel into your morning drink. This greatly increases the fiber content without changing the taste much.
  • Baking: Finely chop or puree the peels. Fold the puree into your batter for muffins or banana bread.

4. A Natural Sleep Aid: Banana Peels in Tea

A simple tea made from the peel can help you sleep. This is because it is rich in magnesium and potassium, minerals known for relaxing muscles.

How to Do It:

  • Boil: Put one clean banana peel in a pot with about 4 cups of water.
  • Simmer: Bring the water to a boil, then turn down the heat and let it simmer for 10 to 15 minutes.
  • Drink: Strain the liquid into a cup. Add a little honey or cinnamon for a better taste.

Part 2: Garden Goodness – Boosting Your Plants

The high levels of potassium, phosphorus, and magnesium in banana peels make them a fantastic natural fertilizer. They are a free and easy way to keep your plants healthy.

5. Free Plant Fertilizer and Soil Food with Banana Peels

Potassium is key for plants that flower and produce fruit. Skip expensive chemical fertilizers and use the nutrients already in the peel.

How to Do It:

  • Bury Directly: Chop the peels into small pieces. Dig a hole a few inches deep around the base of plants that need extra food, like tomatoes, roses, or peppers. As the peels break down, they feed the roots.
  • Banana Tea (Liquid Food): Soak several peels in a jar of water for one week. Use the strained, nutrient-rich liquid to water your plants. This gives them a fast, gentle dose of minerals.
  • Compost: Just toss the peels into your compost bin. They rot quickly and add a powerful mix of minerals to your final compost.

6. Keeping Pests Away and Pollinators Happy

Banana peels can serve a double role in the garden. They help chase away unwanted bugs while attracting helpful insects.

How to Do It:

  • Stop Aphids: The natural smell of banana peels can keep aphids away. Bury small, chopped pieces of peel near plants that aphids like to attack, such as roses and tomatoes.
  • Attract Butterflies: Place very ripe, mushy banana peels on a flat stone or tray away from direct sunlight. The sweetness draws in butterflies, bees, and other good pollinators.

Part 3: Eco-Friendly Cleaning Solutions

The inside of a banana peel has natural oils and a soft, slightly waxy texture. This makes it perfect for simple, chemical-free polishing and cleaning jobs at home.

7. Shining Leather Shoes and Furniture

Forget harsh, strong-smelling polishes. Let the natural oils in the peel bring the shine back to your leather items.

How to Do It:

  • Rub: Use the soft, inner part of a fresh banana peel. Gently rub it over leather shoes, bags, or furniture. The peel’s natural oils fill small scuffs and add shine.
  • Buff: Use a clean, soft cloth to rub the surface until it gleams. This removes any extra residue.

8. Removing Tarnish from Silver with Banana Peels

A simple paste made from banana peels can gently clean tarnish from silver and silver-plated items.

How to Do It:

  • Mix: Blend a few banana peels with a tiny bit of water until you have a thick paste.
  • Clean: Rub the paste onto tarnished silver using a soft cloth.
  • Finish: Rinse the silver thoroughly and dry it with a soft towel.

9. Dusting and Brightening Houseplant Leaves

Dust often collects on houseplant leaves, making them look dull and blocking light.

How to Do It:

  • Wipe: Use the inside of the banana peel to carefully wipe the top of large, dusty leaves (like a rubber plant or Monstera). This removes the dust and leaves the leaf with a beautiful, healthy shine.

Part 4: Skin and Health Remedies

Banana peels contain anti-inflammatory and antioxidant agents. This is why they are often used in simple home remedies for skin issues and minor injuries.

10. Soothing Insect Bites and Rashes

The calming properties of the peel may help quiet irritated skin.

How to Do It:

  • Apply: Gently rub the inside of a fresh banana peel over an itchy bug bite, mosquito sting, or an area with a minor rash. Repeat this as needed for fast relief.

11. Taking Out Splinters

For small splinters that are just below the surface of the skin, a banana peel patch may help draw them out.

How to Do It:

  • Cover: Put a small piece of banana peel (inside facing the skin) right over the splinter. Hold it in place with a bandage overnight. The moisture and natural ingredients in the peel can help bring the splinter to the surface, making it easier to pull out with tweezers.

12. Reducing Puffy Eyes

Many people say that placing banana peels under the eyes can help reduce puffiness and calm irritation.

How to Do It:

  • Cool: Place the peels in the refrigerator for about 30 minutes.
  • Place: Cut two small pieces. Place the inside surface directly under your eyes for 10 to 15 minutes. The cold temperature and the natural soothing compounds work together.

13. Gentle Teeth Polish

We should note that no science proves banana peels whiten teeth. However, rubbing the peel on your teeth uses gentle friction, which can help remove plaque from the surface.

How to Do It:

  • Rub: Gently rub the inside of a fresh peel over your teeth for about two minutes.
  • Brush: Follow this by brushing your teeth as you normally would.

Part 5: Bigger Impact: Environment and Industry

The usefulness of banana peels goes beyond the home. Scientists are looking into using them for big-picture industrial and environmental solutions.

14. Cleaning Water

In an exciting discovery, studies show that chopped banana peels can absorb toxins. They can effectively remove heavy metals, like lead and copper, from dirty river water. This offers a cheap, natural method for cleaning water, especially in developing countries.

15. Producing Fuel and Animal Food

Researchers have successfully used banana peels as a source material to produce ethanol. Ethanol is a cleaner-burning fuel. This offers a way to create fuel without relying on food crops. Also, in areas where bananas are grown, the peels are a common, nutritious addition to animal feed for livestock.

Conclusion

The next time you eat a banana, remember the value of the peel before you throw it away. You are holding a powerful, multi-use tool. It can boost your garden, clean your home, add nutrition to your meals, and even soothe your skin. The simple choice to repurpose banana peels is an easy, strong step toward a zero-waste lifestyle. You can make your home much more sustainable, one peel at a time.


Frequently Asked Questions (FAQ)

Q: Are banana peels safe to eat?

A: Yes, after washing them thoroughly, banana peels are safe to eat. They are very fibrous, so they are best when cooked, blended into a smoothie, or made into a puree.

Q: Should I use organic banana peels for cooking and skin treatments?

A: Yes, it is best to use organic banana peels. This is crucial for anything you eat or put directly on your skin. If you use standard peels, make sure you wash them very, very well to remove any residue.

Q: How quickly do banana peels break down in the garden?

A: Banana peels break down quite fast. They usually decompose within a few weeks to a couple of months. The speed depends on how moist the soil is and how small you chop the pieces. Cutting them smaller makes them break down faster.

Q: Will banana peels attract pests to my garden?

A: Very ripe peels can attract good insects like butterflies. However, if you leave exposed peels on the soil surface, they might attract pests like fruit flies or rodents. Always bury the peels a few inches below the soil when you use them as a fertilizer to avoid this.


References

  1. WebMD – Health Benefits of Banana Peel
  2. Healthline – 23 Banana Peel Uses
  3. NIH – Banana Peels: A Waste Treasure for Human Being – PMC

Recent Posts