Like many people, I thought beautiful, statement-making Art at Home belonged only in expensive galleries. My own walls were often bare or covered in prints that felt lifeless. I struggled with decorating on a budget. Then I found simple ways to turn cheap materials into sophisticated DIY Wall Art and elegant Wall Hangings. This completely changed my home and my creative outlook. Now, I want to show you how you can achieve that same high-end look without any art experience.
Introduction: The Key to High-End Art
For centuries, people viewed art as a difficult skill. It needed special training and costly materials. But modern art movements, like Abstract Expressionism, proved something different. Impact comes from concept, texture, and size, not just technical skill.
The most beautiful art you see in design magazines looks complex, but it is often made using simple methods. This guide will make the process easy. We will turn intimidating projects into fun weekend activities. Are you looking for new Wall Hangings? Do you need easy DIY Wall Art ideas? Do you simply want to make sophisticated Art at Home? We will cover three easy techniques that guarantee stunning, museum-quality results.
Project 1: The Minimalist Sculptural Canvas
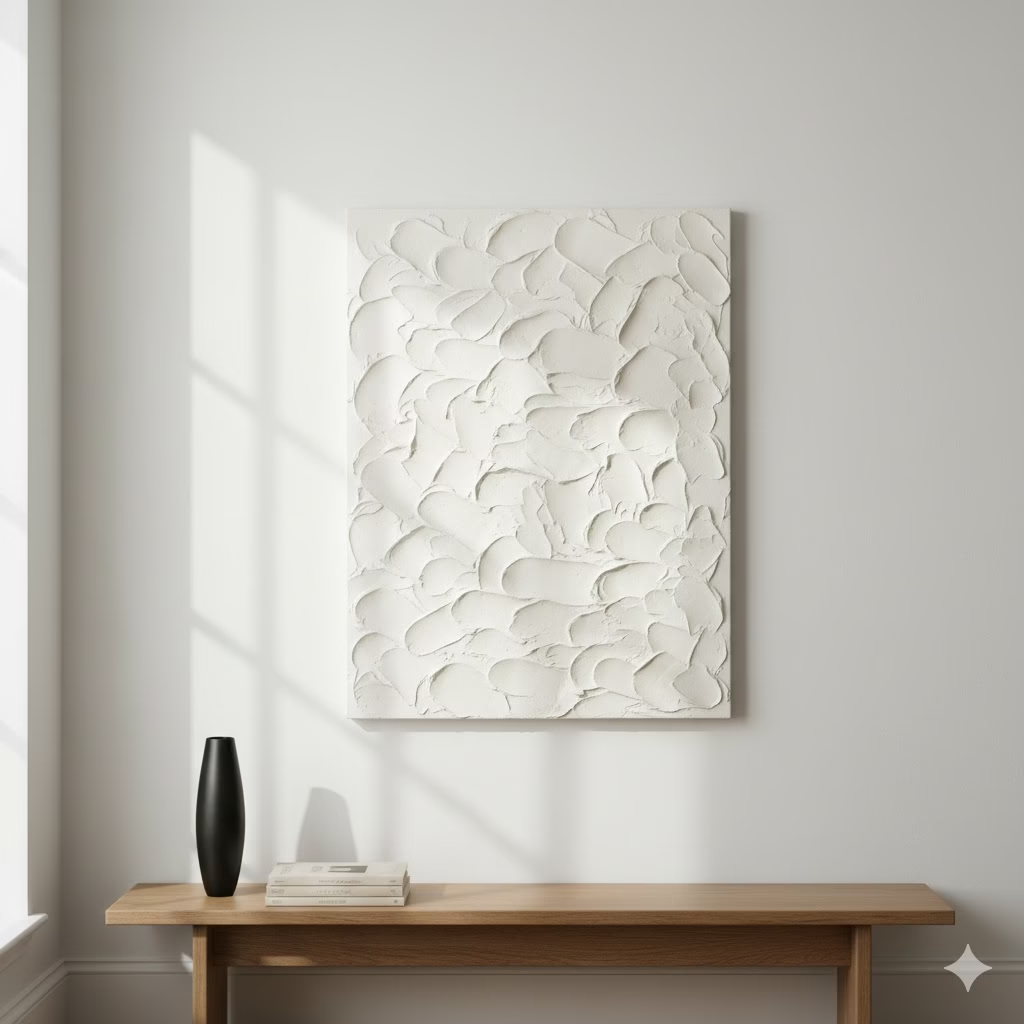
Contemporary high-end art often uses heavy texture, few colors, and a large size. This technique is surprisingly easy. It requires zero drawing or painting ability. The focus is completely on surface and dimension.
What You’ll Need (The Art at Home Toolkit)
- Canvas: Pick a deep-edge canvas for a gallery style. For a big impact, choose a size of at least 24in×36in.
- Joint Compound or Spackling Paste: This is cheap and found at any hardware store. It acts as your sculpting material.
- Trowel, Palette Knife, or Old Credit Card: Use these tools for spreading the material and adding texture.
- Acrylic Paint (Optional): Use matte white, beige, or a deep charcoal for a sleek finish.
- Caulk Gun and Caulk (Optional): Use this for creating raised, controlled lines.
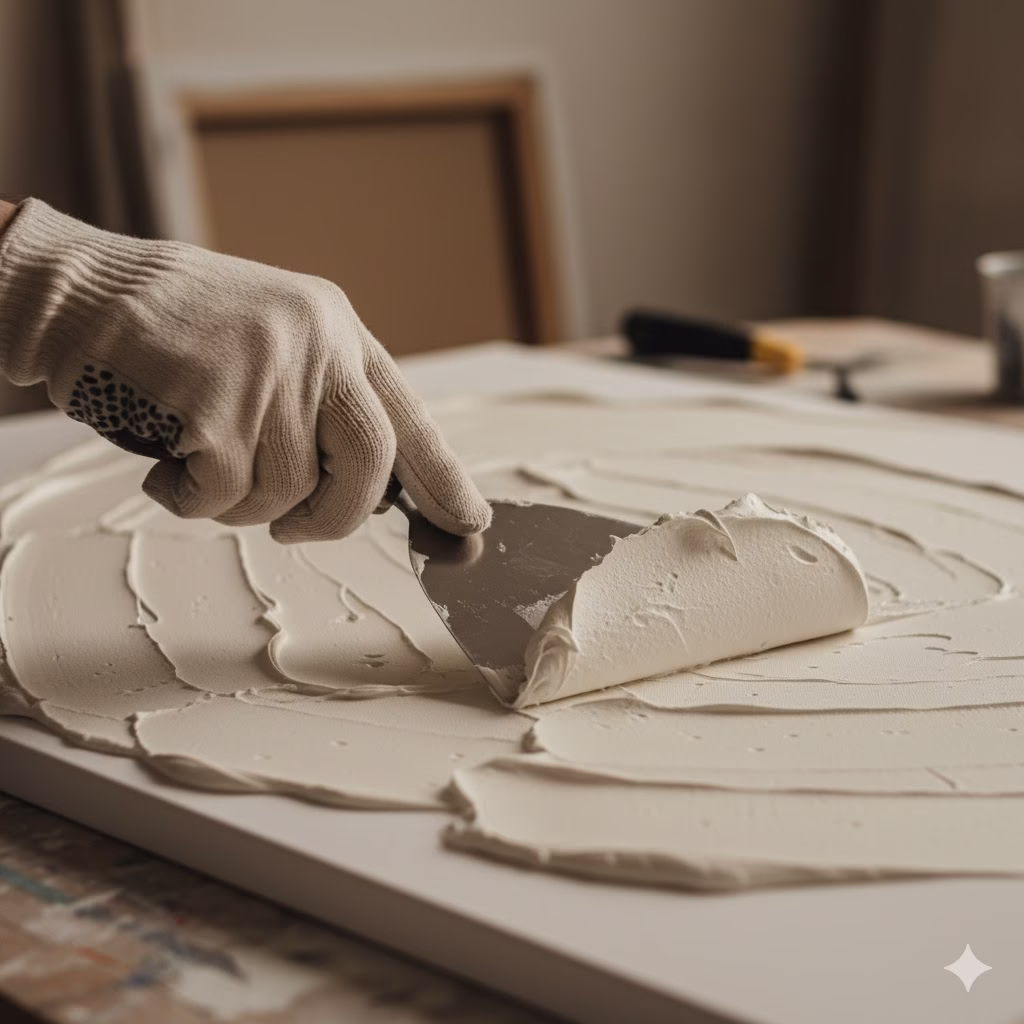
How To Do It: Creating Abstract Texture
Step 1: Prepare Your Space
Place your canvas flat on a surface you can protect. You can apply a layer of primer, but for textured art, you can often start right on the raw canvas.
Step 2: Add the Base Layer of Texture
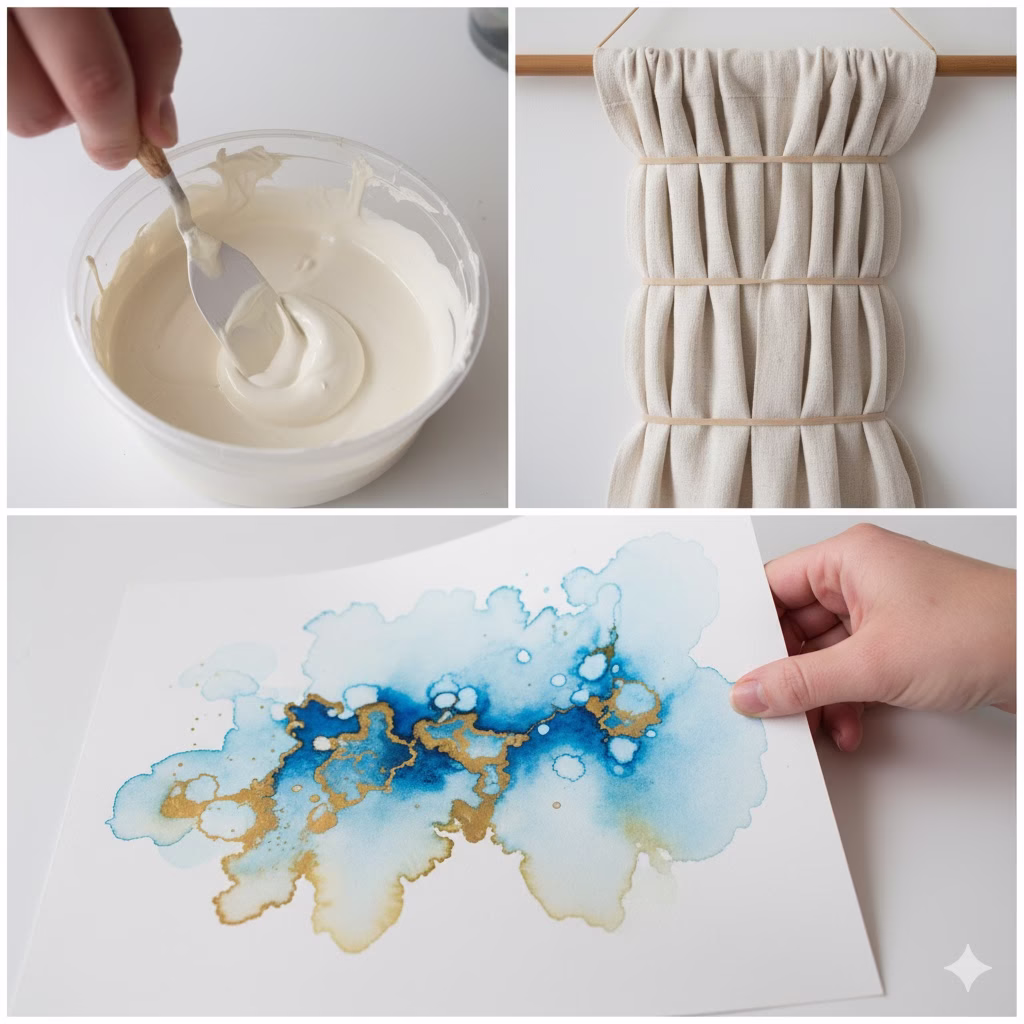
Use a large trowel or palette knife. Scoop up a lot of the joint compound. Start spreading an uneven, thick layer across the canvas. Do not try to make it perfect. Variation and randomness are your goals. Push the compound around. Create high spots and low areas.
Step 3: Adding Controlled Detail (Optional)
You can create a sculptural effect that is popular in modern DIY Wall Art. Load your caulk gun with clear or white caulk. Slowly and carefully, draw straight lines, curves, or simple geometric shapes onto the wet compound. These shapes will look very dramatic once the piece dries.
Image Placement 2: Process Shot
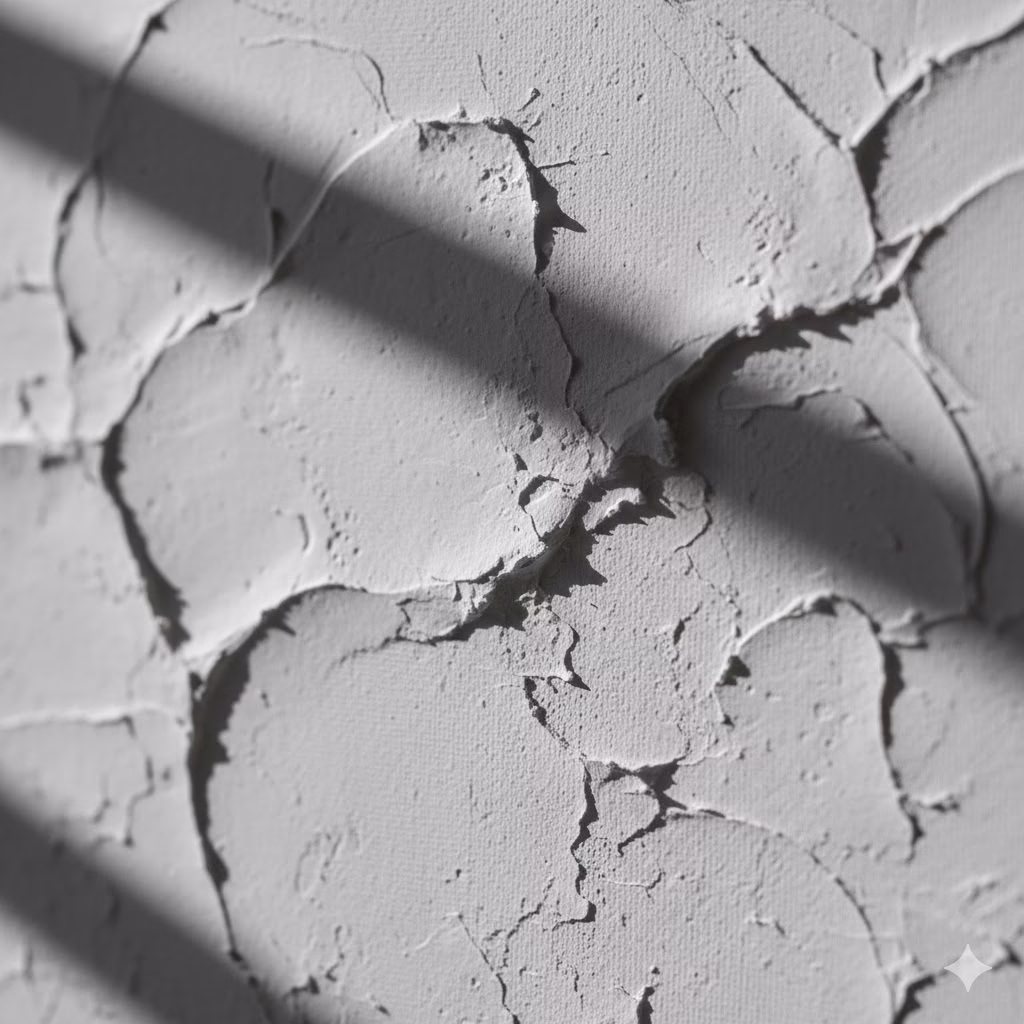
Step 4: The Final Swipe
Take a long, flat object, like a piece of cardboard or a ruler. Drag it lightly over the surface. This will flatten some high spots. It will also leave deep channels and ridges. This mimics a professional method called impasto. The finished surface will catch light beautifully. This gives it that expensive, museum-worthy finish.
Step 5: Drying and Finishing
Let the compound dry completely. This might take 24 to 48 hours, depending on how thick it is. Once it is dry, you have two choices. You can leave it the natural color (usually matte white). This is the truly minimalist look. Or, you can paint it a single, sophisticated color using matte acrylic paint.
Project 2: Abstract Watercolor Bleeding (High-Contrast Art)
Maybe you do not like texture. If so, the drama of high-contrast color bleeding is an easy way to create sophisticated Abstract Expressionist Art at Home. With this method, the material does the hard work. The resulting pieces look complicated but are actually simple to make.
What You’ll Need
- Watercolor Paper or Bristol Board: Choose a heavy kind, 140lb or more. This stops the paper from bending or buckling.
- Liquid Watercolor Ink or Acrylic Ink: Use highly pigmented liquid colors for the best “bleed” effect. Only use 2 to 3 colors that look good together (for example, Prussian Blue, Burnt Sienna, and Gold).
- Spray Bottle: Fill this with plain water.
- Large Flat Brush: Use this to wet the paper.
- Eye Droppers or Small Pipettes: Use these for precise control when adding ink.
How To Do It: Controlled Flow and Contrast
Step 1: Prepare the Paper
Tape your paper down to a stiff backing board with painter’s tape. This stops it from warping. You can also just work on a very flat, protected table. Use the large flat brush. Completely soak the area where you plan to add the color. The paper must be very wet, not just damp. This is essential for letting the colors flow.
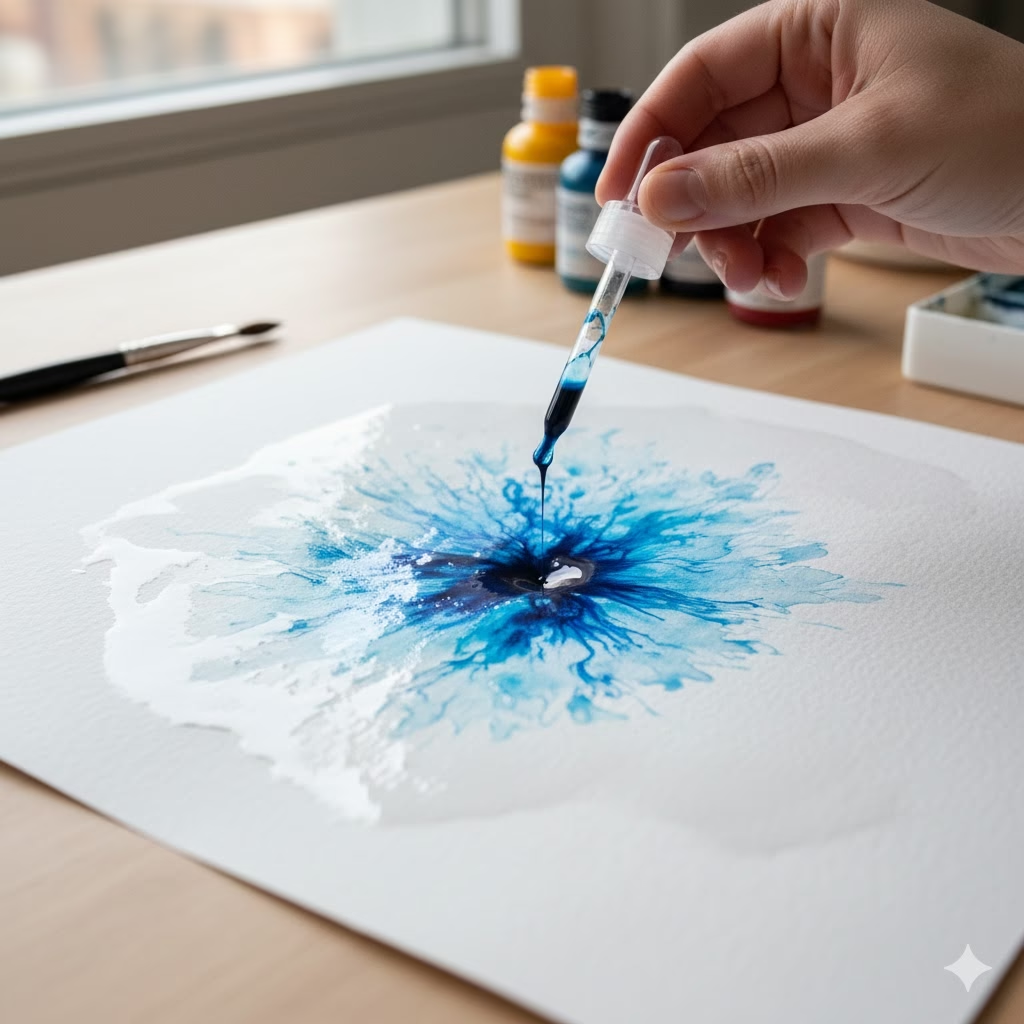
Step 2: Dropping the Color
Fill your pipette or dropper with one color. Hold the dropper close to the paper. Drop small, concentrated spots of ink onto the wet surface. Watch as the water immediately pushes the pigment outward. This creates beautiful, unpredictable bursts of color.
Step 3: Adding the Second Color
Let the first color settle for a moment. Then, add your second color. Drop it near, but not directly on the first color pool. The inks will meet and mix at the edges. This creates a soft transition, like a natural gradient. A brush cannot easily copy this effect.
Step 4: Activating the Flow
Pick up the paper and gently tilt it. Let gravity pull the colors into controlled streaks. Or, use the spray bottle. Lightly mist water right onto the color pools. This will make the colors bleed and blur even more. The less you touch it with a brush, the more natural and professional the result will look.
Step 5: Framing for Impact
Once it is dry, put it in a simple, museum-style frame. A thin profile in black or natural wood, plus a wide, white mat, will improve the look instantly. This turns your abstract study into true museum-quality art at home.
Project 3: The Oversized Textile Wall Hanging
Not all high-end DIY Wall Art needs a frame. Large Wall Hangings made of fabric are a great way to add warmth, texture, and quiet to a room. This is a very good approach for making a centerpiece above a couch or a bed.
What You’ll Need
- Fabric: Choose a heavy, textured fabric. Good options are raw canvas, linen, duck cloth, or a thick cotton drop cloth. Use a natural, plain color for the most sophisticated feel.
- Dye or Fabric Paint (Optional): You can create a soft, dipped color effect with fabric dye.
- Wood Dowel or Branch: You will use this to hang the fabric. The dowel should be a little wider than your fabric.
- Twine or Rope: Use this for hanging the textile.
- Sewing Machine or Fabric Glue: Use this to create a simple sleeve for the dowel.
How To Do It: Simple, Large Textile Art
Step 1: Prepare the Fabric
Cut your fabric to the size you want. A long, narrow piece often looks best for a modern Wall Hanging. For example, 3ft wide by 5ft tall. Finish the raw edges. You can use a sewing machine or strong fabric glue to make a clean hem.
Step 2: The Hanging Sleeve
Fold the top edge of the fabric over by about 2in. Sew or glue it down to make a sleeve, also called a casing. Make sure the dowel can slide through this sleeve easily.
Step 3: Applying Texture (The Shibori Method)
A subtle pattern improves the look. This step is optional. The Japanese shibori method (a type of tie-dye) works very well. Scrunch or fold a section of the fabric. Secure it tightly using rubber bands. Dip only the bottom half of the fabric into a bucket of diluted fabric dye. When the fabric dries and you remove the ties, you will see soft, organic patterns. This makes the Art at Home piece look high-concept.
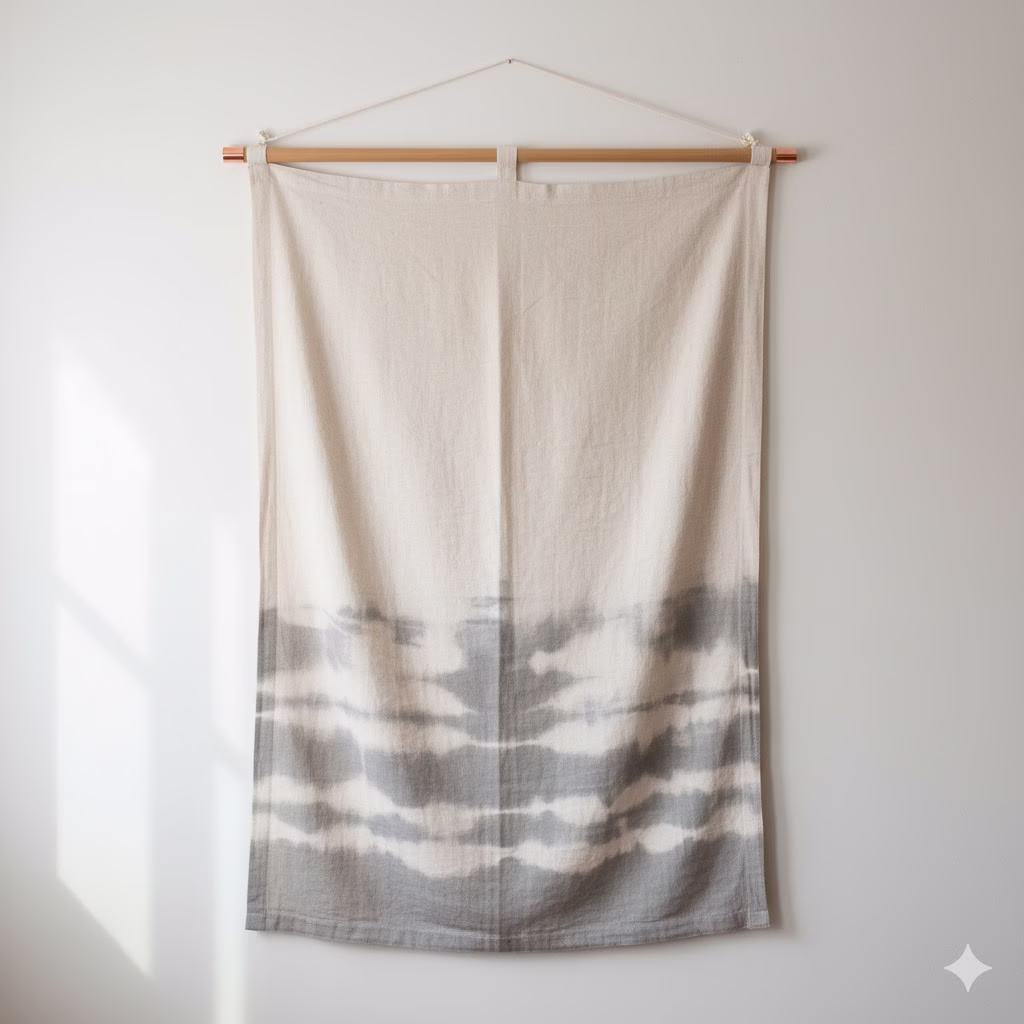
Step 4: Put It Together
Slide your wood dowel or natural branch through the sleeve at the top. Tie a length of strong twine or rope to both ends of the dowel. Your large, museum-worthy Wall Hanging is now ready to mount on the wall.
Key Principles for Museum-Quality DIY Wall Art
The success of your DIY Wall Art is less about skill. It is more about using four main design principles:
1. The Power of Size
A small piece of art on a large wall looks out of place. A large piece of art on any wall makes a statement. To get that gallery look, always choose a size bigger than you think you need. A piece that fills two-thirds of the empty wall space will look more important and more expensive.
2. Focus on Texture
Texture makes everything equal. If you use few colors (like shades of white, black, or grey), the viewer will focus on the three-dimensional surface. This is why joint compound or thick textiles work so well. They add depth that a flat print cannot offer.
3. Use Few Colors
Professional galleries often display art that uses a simple, limited color plan. Stick to one, two, or maybe three colors at most. Choose colors that are muted, like earthy tones, or use strong neutral colors. This keeps the focus on the form and texture. It creates a refined, curated feeling.
4. Professional Display
Do not forget how important the frame and the hanging method are.
- Framing: Choose frames with thin, clean lines. Use black, white, or natural wood. For prints, use a mat that is very wide. This creates “negative space,” a trick used by professional galleries.
- Hanging: Make sure your Wall Hangings or framed art are hung at eye level. The middle of the artwork should be about 57in from the floor.
Expanding Your Collection: More Art at Home Ideas
Idea 1: The Magazine Collage (Clean Minimalism)
How To Do It: Find pages from fashion or architecture magazines. Look for large areas of color, black and white images, or interesting text. Cut these into simple geometric shapes. Carefully arrange them onto a board or a canvas. Seal the whole surface using only matte Mod Podge. The precise layering and clean cuts create a sharp, graphic style. This often looks like early 20th century abstract art.
Idea 2: Line Drawing on Linen
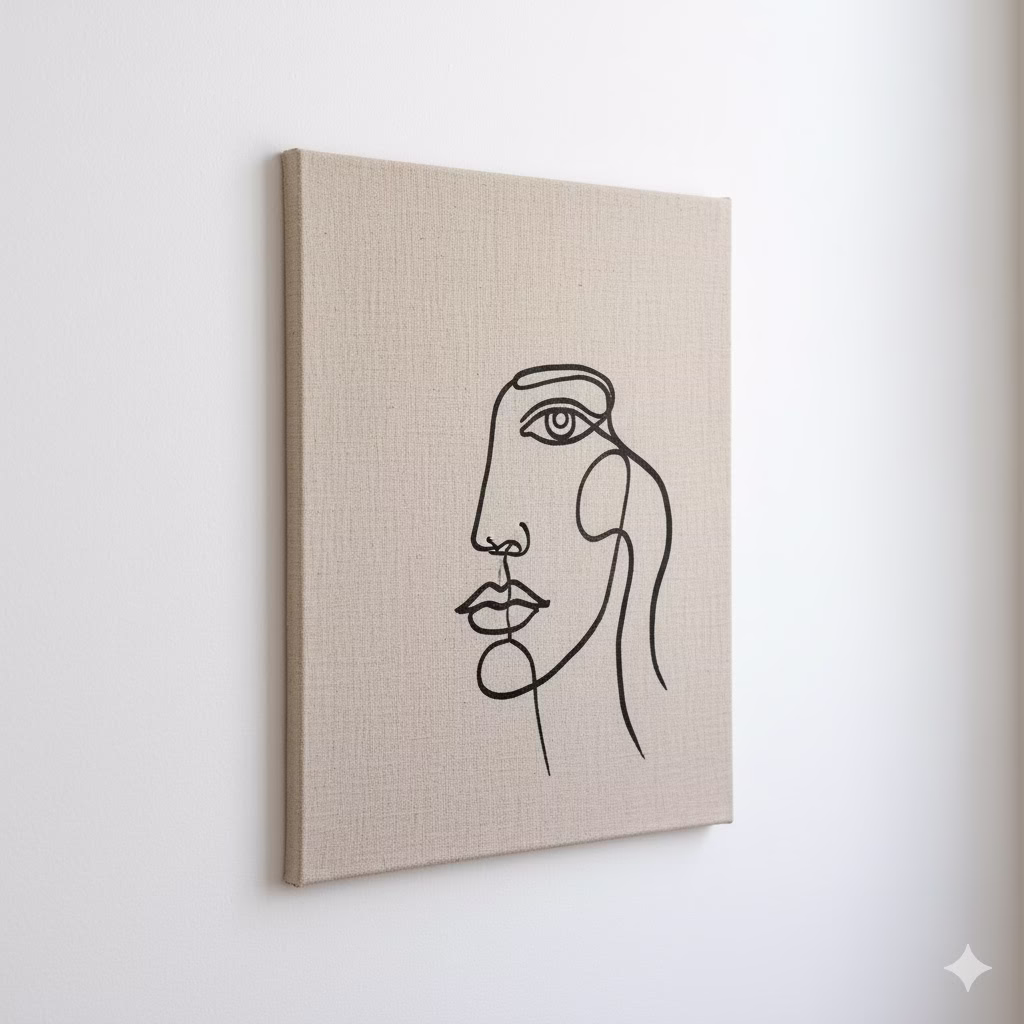
How To Do It: Buy a piece of raw, unbleached linen or drop cloth. Stretch it over a wood frame. Use a thick black paint pen or a permanent marker. Draw a single, continuous, slightly imperfect line. Draw a simple figure, face, or landscape. The natural feel of the linen combined with the single, bold line creates a very modern, gallery-worthy piece of Art at Home.
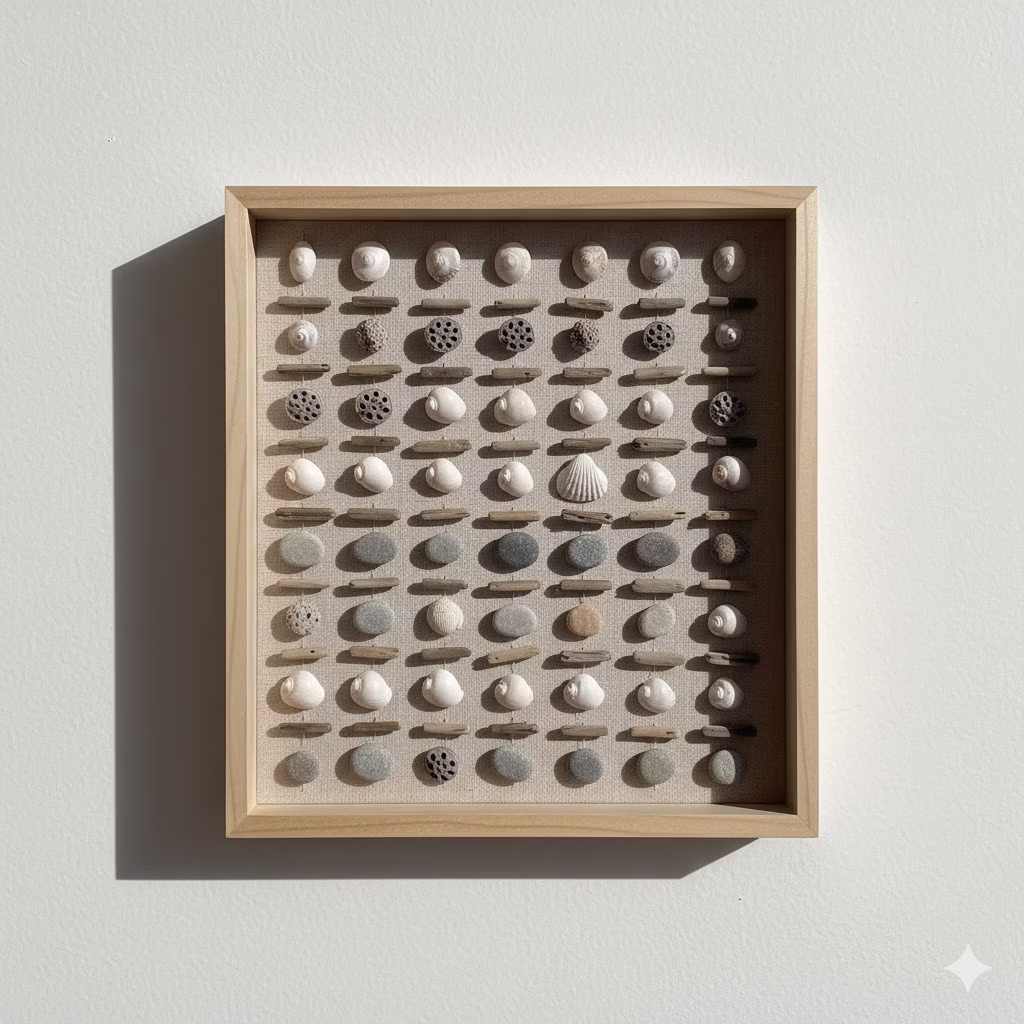
Idea 3: Shadow Box Assemblage (Wall Hangings from Found Objects)
How To Do It: Find an old shadow box or a deep picture frame. Collect small objects that are all the same color (for example, all white, all rusty metal, or all natural wood pieces). Glue them inside the shadow box. Use strong glue. Create a repeating pattern or an abstract scene. This turns simple found items into a 3D Wall Hanging. It adds depth and interest to your space.
Frequently Asked Questions (FAQ)
What is the cheapest material for large-scale DIY Wall Art?
The cheapest and most useful material is a simple cotton painter’s drop cloth. They come in very large sizes. They have a beautiful natural texture. You can use them as a canvas for the sculptural project or as the fabric base for Wall Hangings. You can usually find one big enough for a small wall for less than the cost of one store-bought print.
Do I truly need ‘no skill’ to make the sculptural canvas?
Yes, that is true. The sculptural canvas works because the texture is meant to be uneven and random. There is no correct or incorrect way to spread the joint compound. Your “mistakes” are what give the art its unique look and depth. This mimics the expressive style of professional abstract art. It is the perfect DIY Wall Art project for anyone starting out.
How can I protect the finished surface of my DIY art?
For painted pieces (ink or acrylic), spray a final layer of matte or satin varnish. This will seal the surface. It protects it from dust and keeps the color from fading. For the sculptural joint compound art, spray a clear matte topcoat after it is fully dry. This prevents the surface from getting scuffed.
What is the best way to hang large, heavy DIY Wall Art?
Always use two separate picture hooks or D-rings. Place them about one-third of the way down from the top edge on the back of the piece. This makes sure the weight is spread out evenly. It also stops the piece from tilting. For very large Wall Hangings or canvases, use wall anchors if you cannot find wall studs.
References
- Ahousewebuilt – How to Make Textured Canvas Art (With Drywall Mud)
- Architectural Digest – These 53 Wall Decor Ideas
- EUFY Make – 35 DIY Wood Wall Art Ideas to Elevate Your …