As someone who loves adding a personal touch to every outfit, I’ve found that DIY accessories are the best way to make a statement. I’m always looking for simple, satisfying Pom Pom crafts, and making Pom Poms is surprisingly therapeutic. If you’re ready to dive into the world of fun, fuzzy Pom Pom projects and create your own custom diy Pom Poms, this guide is for you. Get ready to transform a simple headband into a playful, custom Pom Pom Headband creation that perfectly reflects your style!
Introduction
The humble pom pom, a simple sphere of yarn, holds incredible potential for adding whimsy, texture, and personality to almost anything. While often associated with winter hats, the pom pom is experiencing a vibrant renaissance in DIY fashion and home décor. Few projects are as satisfying, approachable, and customisable as the Pom Pom Headband.
A handcrafted Pom Pom Headband is more than just an accessory; it’s a wearable piece of joy. It allows you to play with colour palettes, experiment with different textures, and create a truly unique piece that can’t be found in any high-street shop. Whether you’re crafting a bold, statement piece for a festival, a subtle accent for everyday wear, or a themed accessory for a special event, this guide will walk you through the entire process. We will cover the essential materials, two distinct methods for creating perfect diy Pom Poms, and detailed instructions on securely assembling your charming, one-of-a-kind accessory.
If you’re ready to dive into the wonderful world of Pom Pom crafts, let’s begin this fun, fuzzy adventure!
I. Gathering Your Materials
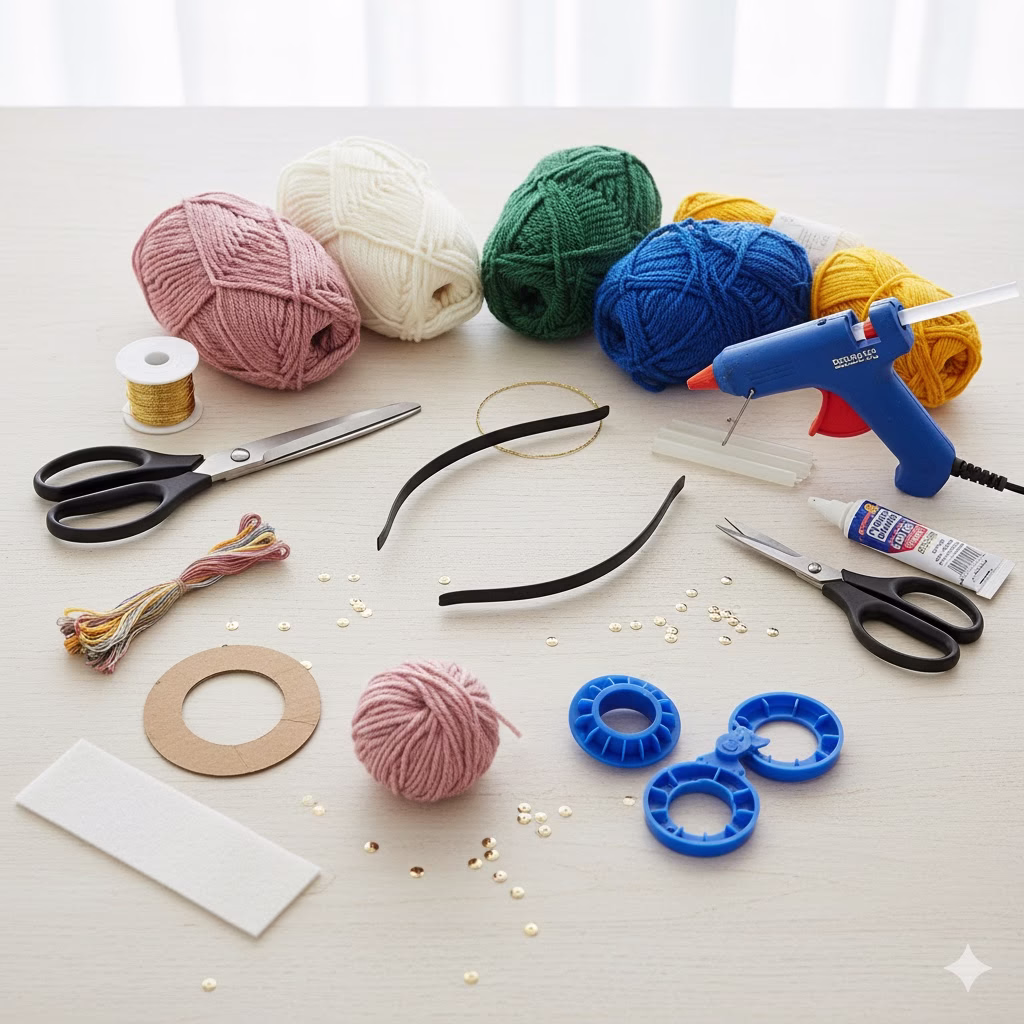
Before you begin creating your beautiful accessory, gathering all your tools and materials is crucial. This helps ensure a smooth and enjoyable crafting experience.
A. Essential Supplies
- Headband: Choose a comfortable, plain headband. Plastic or metal are ideal as they offer a firm base. For a seamless look, pick a colour that matches your main yarn colour, or choose a neutral colour like black or white.
- Yarn: This is the heart of your project. You can use any type of yarn, but medium-weight (worsted/aran) acrylic or wool is often the easiest for beginners.
- Tip: Varying the yarn type (e.g., adding a metallic or textured yarn) can add great depth to your Pom Poms.
- Scissors: You will need two types:
- Sharp Fabric Scissors: For cutting the yarn cleanly after winding.
- Small, Precision Scissors (optional, but helpful): For trimming and shaping the finished pom poms.
- Strong Adhesive: A glue gun (recommended for quick and secure bonding) or a strong craft glue suitable for fabric/plastic.1
- Strong Thread/Thin Wire: For securely tying the centre of your Pom Poms. Embroidery floss or a strong kitchen string works well.
B. Optional Decorative Elements
- Felt or Foam: A strip of thin felt can be glued to the top of the headband first to provide a non-slip, high-grip surface for the pom poms to adhere to.
- Beads, Sequins, or Rhinestones: For adding extra embellishment to the finished piece.
- Pom Pom Maker Tool: While not strictly necessary (as shown in Method 2), this plastic tool makes the process of making uniform pom poms faster and easier.
II. How to Make Your Pom Poms (Pom Pom Crafts Core)
The next step is creating the stars of the show: the Pom Poms. The number you need will depend on the size of the pom poms you create and the coverage you desire on the headband. A full coverage band usually requires between 10 to 20 medium-sized pom poms. We will explore two popular and effective methods.
Method 1: The Cardboard Template (The Classic Method)
This is the traditional, cost-effective way to make perfectly round Pom Poms.
- Create the Template: Cut two identical doughnut shapes from stiff cardboard. The outer diameter determines the final pom pom size, and the inner hole needs to be large enough to easily pass your scissors and yarn through. For a medium pom pom (approx. 2 inches/5 cm), aim for an outer diameter of about 3.5 inches (9 cm) and an inner hole of 1 inch (2.5 cm).
- Wind the Yarn: Hold the two cardboard rings together. Begin winding your yarn around both rings simultaneously, passing it through the centre hole. Keep the tension consistent. The fuller you wind, the denser and more robust your pom pom will be. Wind until the centre hole is almost entirely filled and winding becomes difficult.
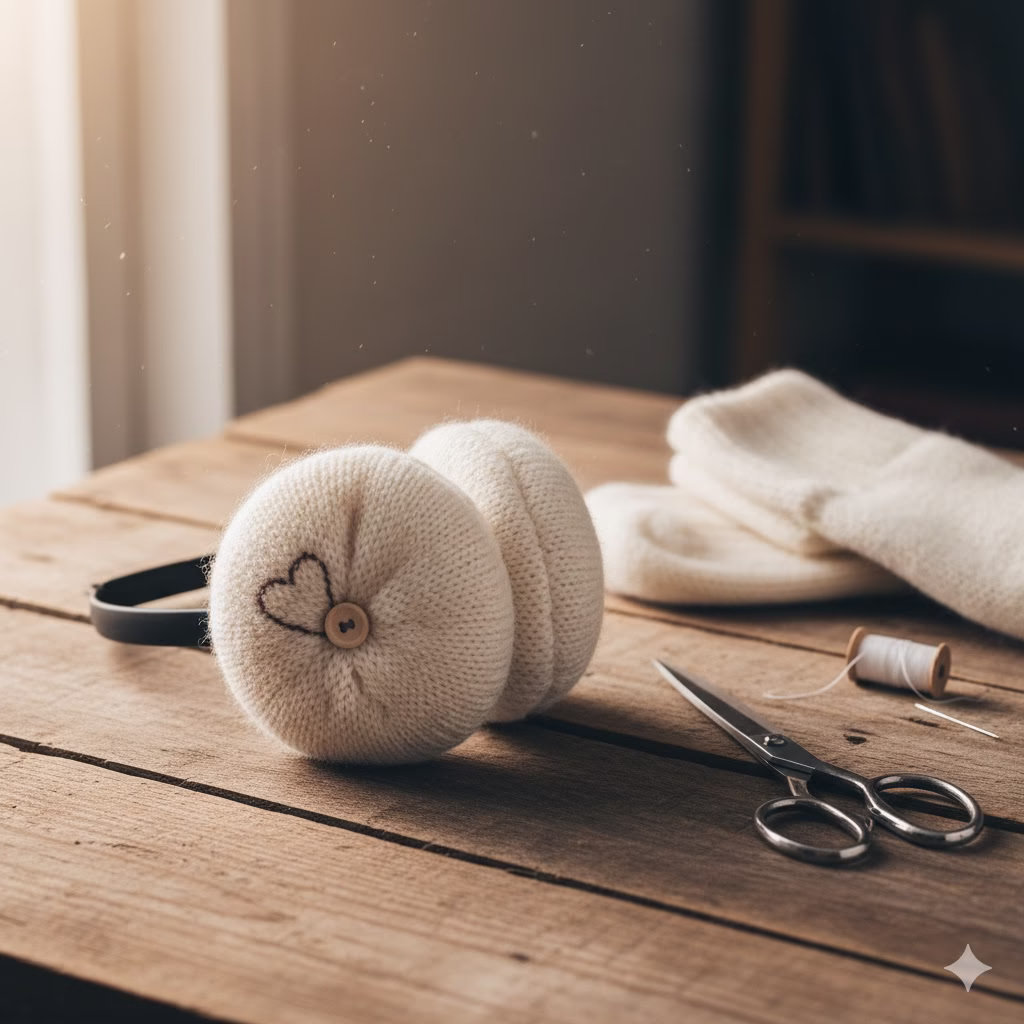
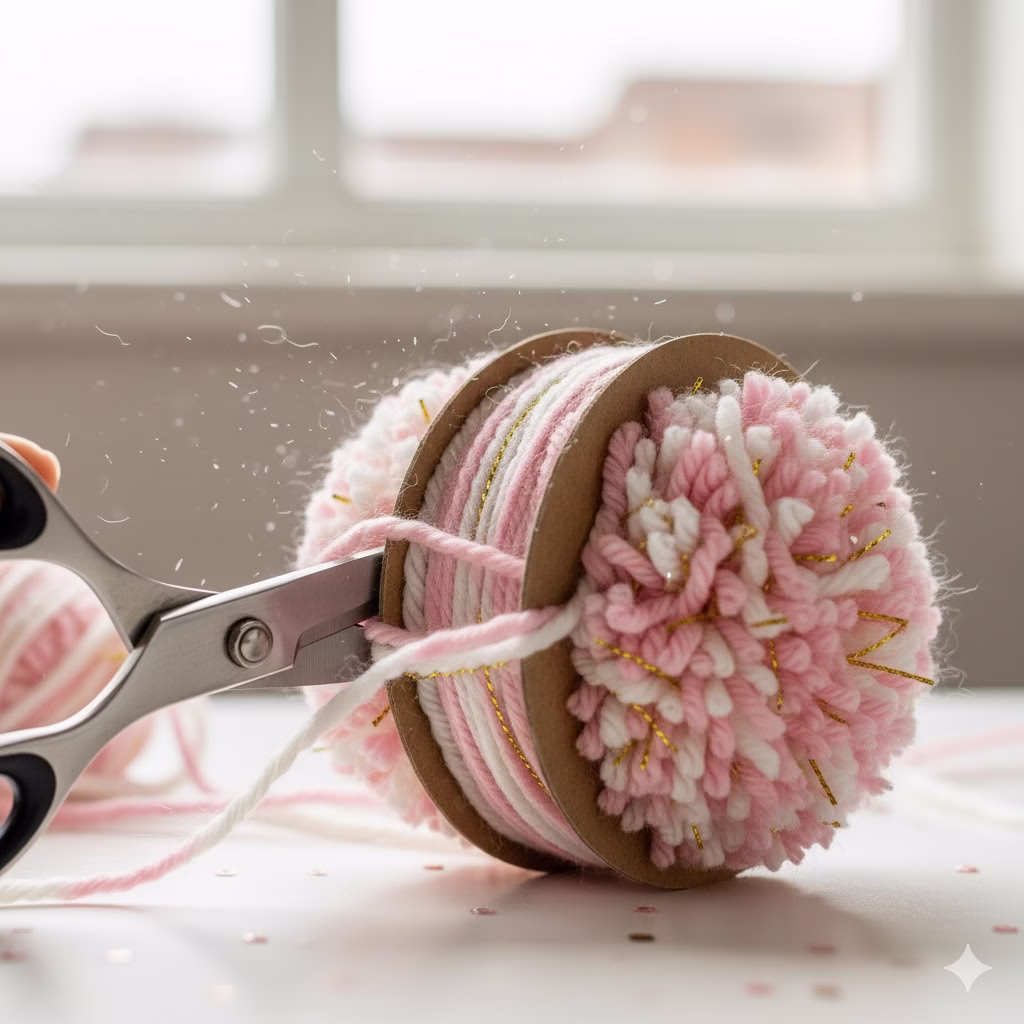
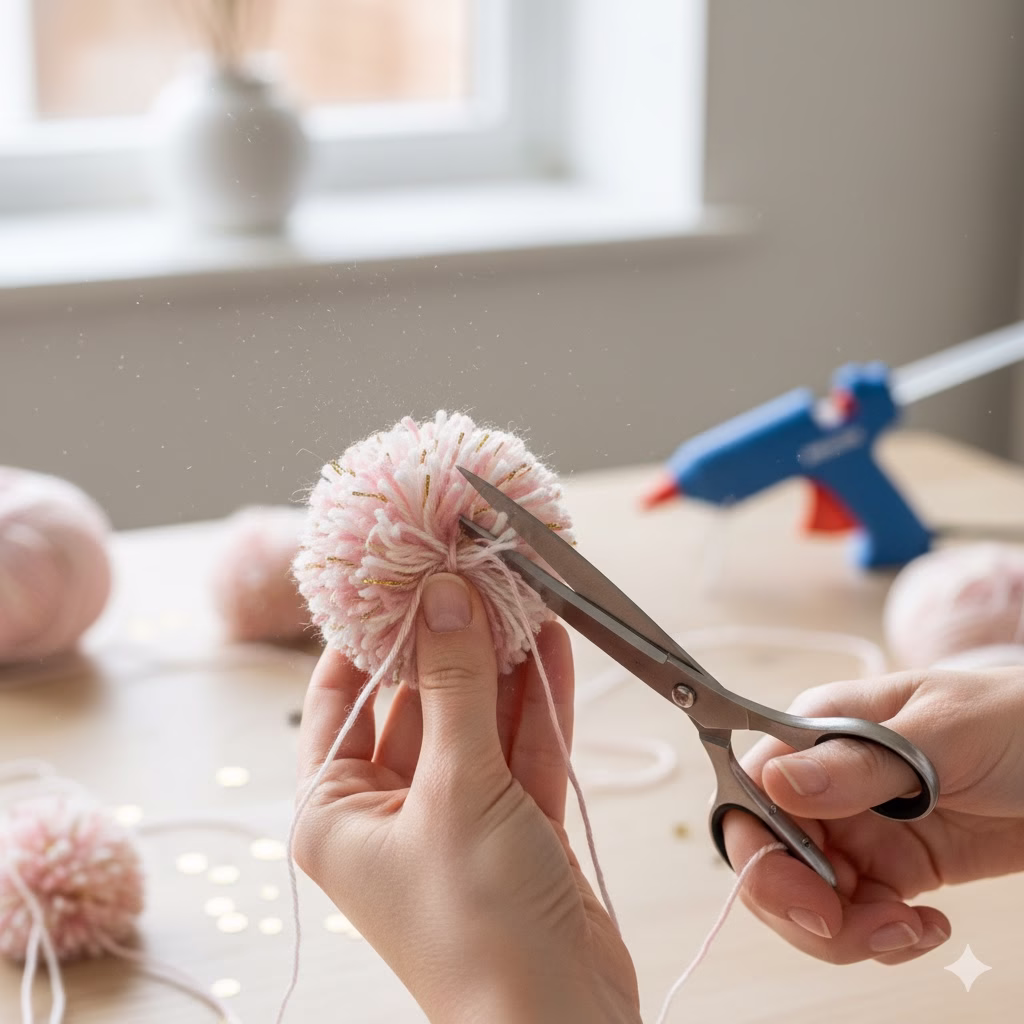
- Cut the Yarn: Carefully insert the blade of your sharp scissors between the two cardboard rings and begin cutting the yarn all the way around the outside edge. Keep the cardboard rings firmly pressed together so the yarn doesn’t shift.
- [Image Placement 1: A close-up shot of the yarn being carefully cut between the two cardboard templates.]
- Tie the Centre: Cut a separate, 12-inch piece of strong thread or yarn. Carefully slide this thread between the two cardboard rings and wrap it tightly around the entire centre bunch of cut yarn. Tie a secure double or triple knot. Pulling this knot extremely tight is the secret to a durable pom pom.
- Remove and Fluff: Gently slide the cardboard rings off (you may need to tear them slightly). Fluff your pom pom and give it a good shake.
Method 2: The Fork or Fingers Method (The Small Pom Pom Method)
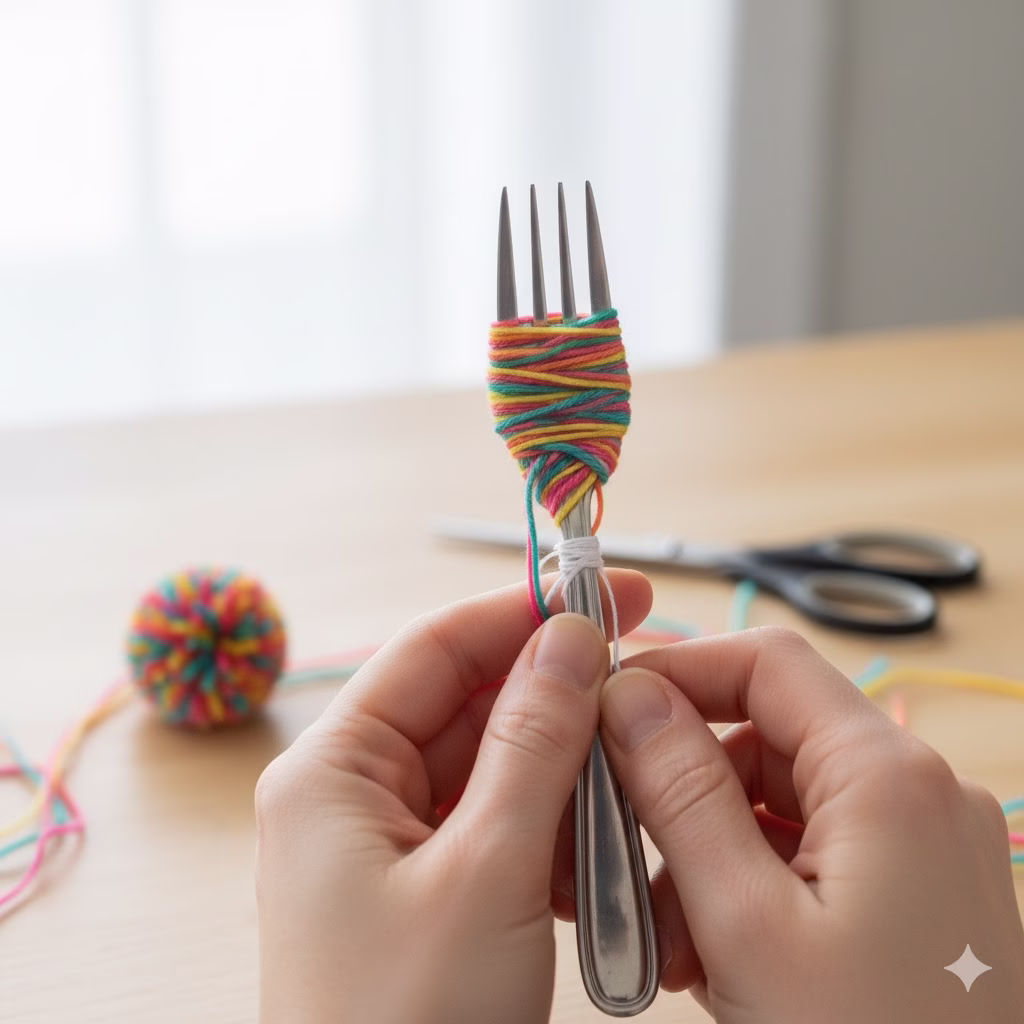
This is great for creating tiny or small pom poms, or if you don’t have cardboard on hand.
- Winding: Hold a fork (for tiny Pom Poms) or your two fingers tightly together (for small pom poms). Wrap the yarn around the prongs of the fork or your fingers. Again, the more you wrap, the denser the pom pom.
- Securing the Centre: Cut a piece of strong thread or yarn and thread it between the centre prongs of the fork (or between your two fingers). Pull this thread tight and tie a very secure knot around the centre of the wrapped yarn.
- Removing and Cutting: Slide the yarn loop off the fork or your fingers. Now, insert your scissors into the loops on both the top and bottom sides and cut them all open.
- Shaping: Proceed to step 5 of Method 1 (Trimming and Shaping).
III. Trimming and Shaping Your Pom Poms
No matter which method you use, this step is crucial for achieving that perfectly round, professional-looking Pom Pom.
- The ‘Haircut’: Hold the pom pom by the tie thread (the one you secured the centre with). Use your sharp scissors to trim any stray, uneven strands. This is like giving your pom pom a haircut. The goal is to create a consistent, spherical shape.
- [Image Placement 2: A shot showing the trimming process, with the crafter holding the pom pom by the centre thread and trimming a section.]
- Roll and Trim: Roll the pom pom between your hands occasionally to expose new long strands, then trim them. Continue this process until you are satisfied with the shape and density. Don’t be afraid to trim generously; a little sacrifice of yarn results in a much better final product.
- Repeat: Make all your pom poms. Try to make them as uniform as possible, but remember that handmade items naturally have character and slight variations.
IV. Designing and Assembling the Headband
Now for the exciting part: turning your beautiful diy Pom Poms into a finished accessory!
A. Design Options and Examples
Before gluing, lay out all your pom poms along the headband to plan your design.
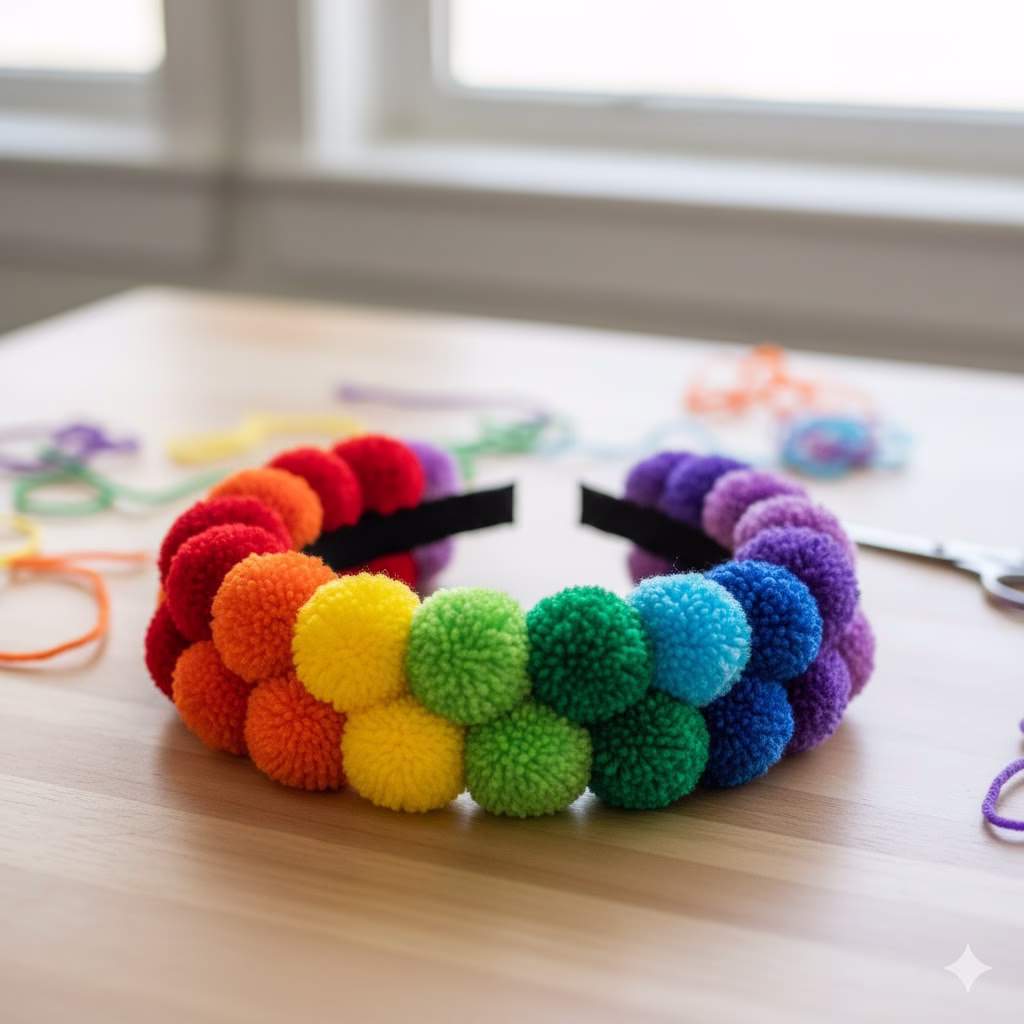
- The Full Rainbow: Use 6-8 different bright colours and arrange them in a colourful spectrum down the band.
- [Image Placement 3: A full Rainbow Pom Pom Headband example.]
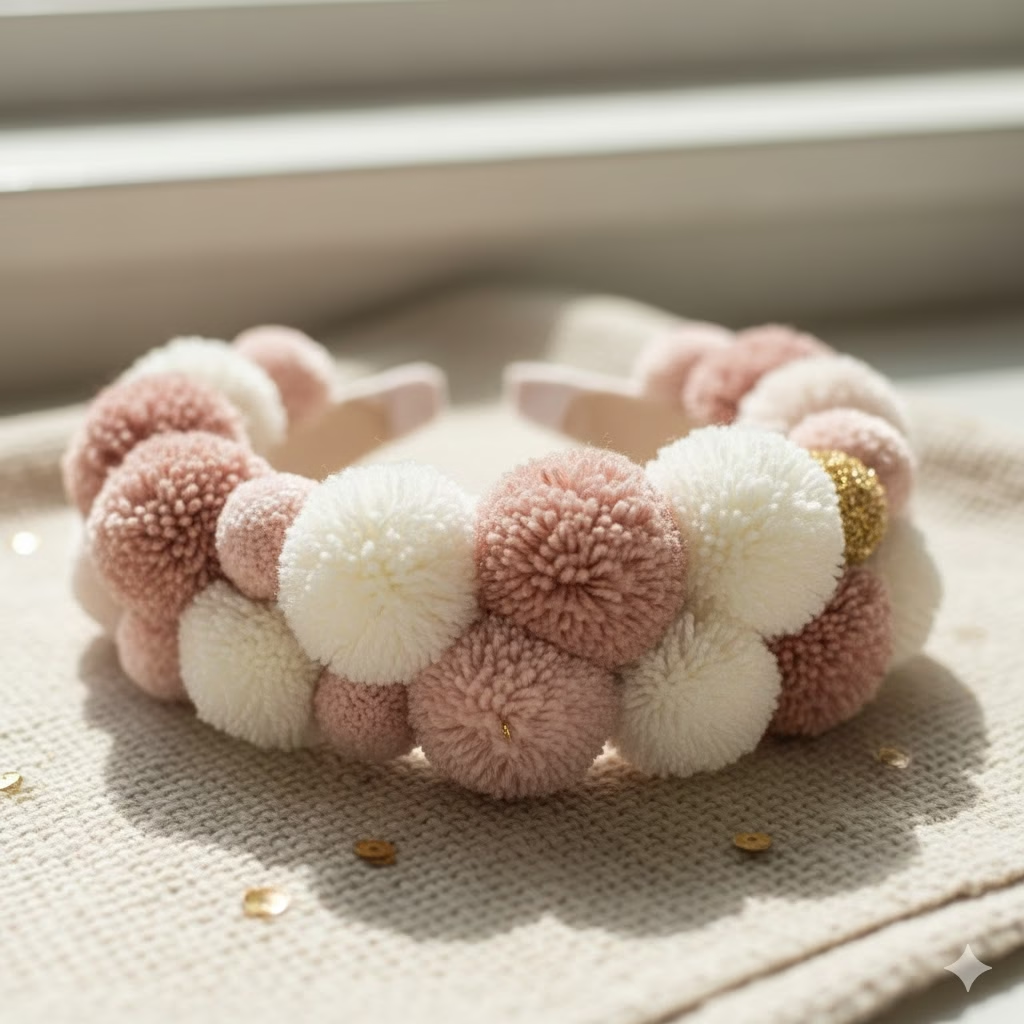
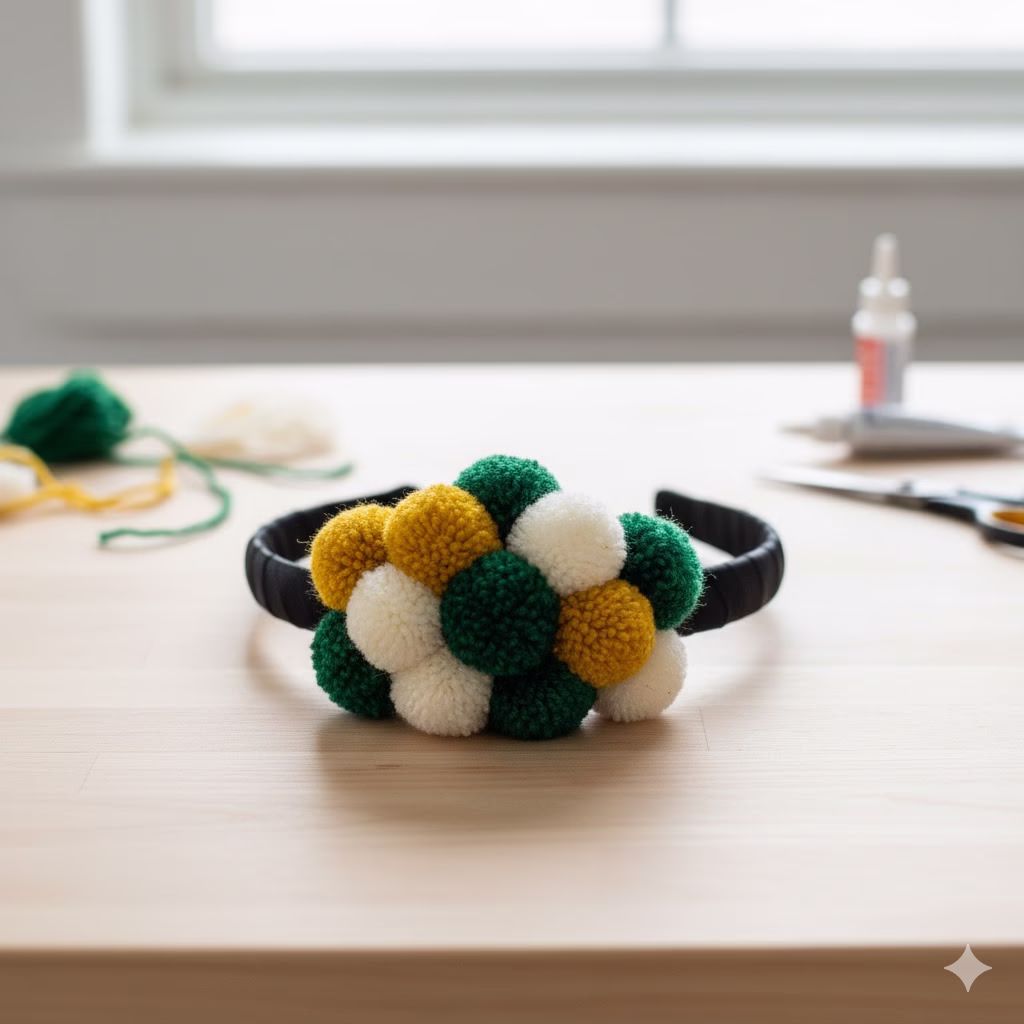
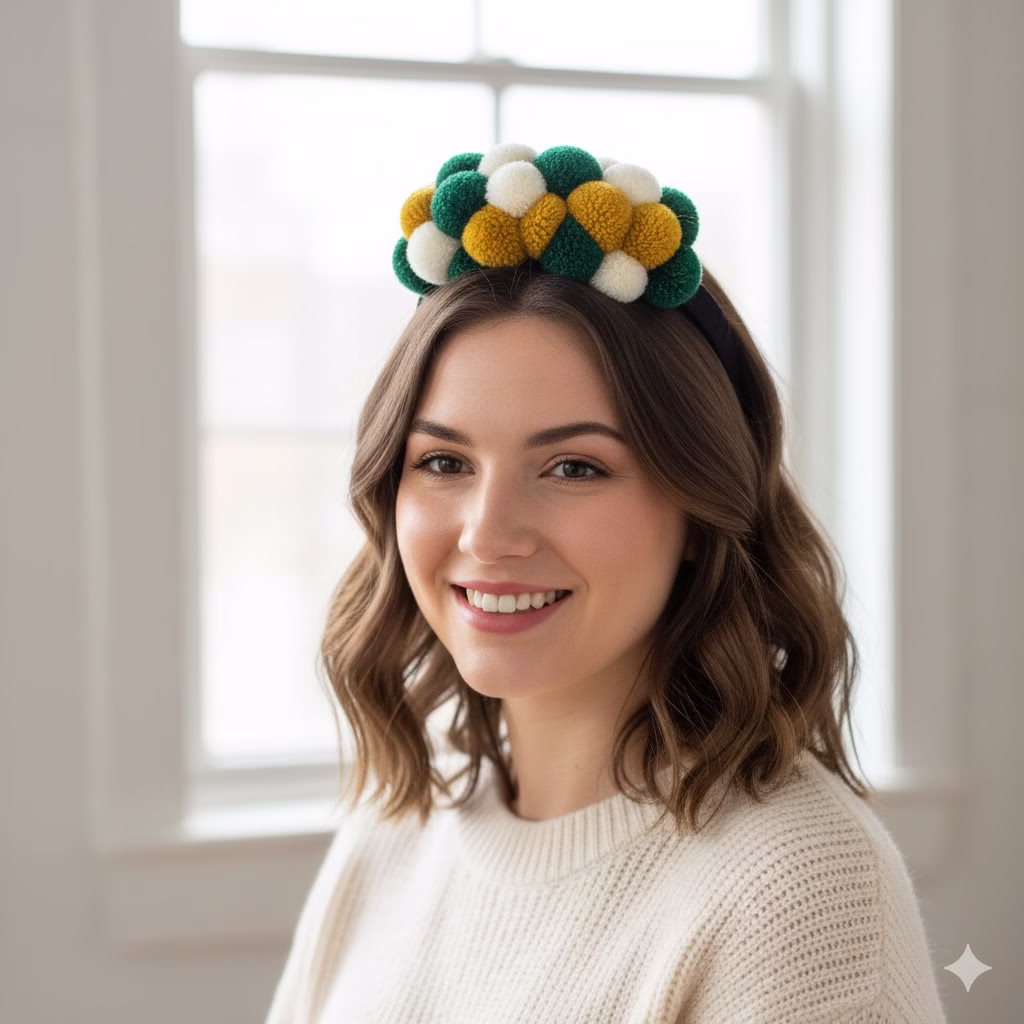
- The Cluster Crown: Concentrate the pom poms only on the top section of the headband (the central 6-8 inches), leaving the sides bare. Use varying sizes of Pom Poms in complementary colours for a playful crown effect.
- [Image Placement 4: A Headband design showing only a central cluster of different-sized pom poms.]
- Monochrome Elegance: Use a single colour of yarn (e.g., pale pink, deep emerald, or black) but mix the texture of the yarn (e.g., plain acrylic and fuzzy velvet yarn) for a sophisticated yet playful look.
- The Side Accent: Place a small cluster of 3-5 pom poms just above one ear for a subtle, asymmetrical accent.
B. The Assembly Process (“How To Do It”)
- Prepare the Headband: Clean the surface of the headband to ensure the glue adheres properly. If you are using a felt strip base (recommended for better grip), glue the felt strip to the top arc of the headband now and let it dry completely.
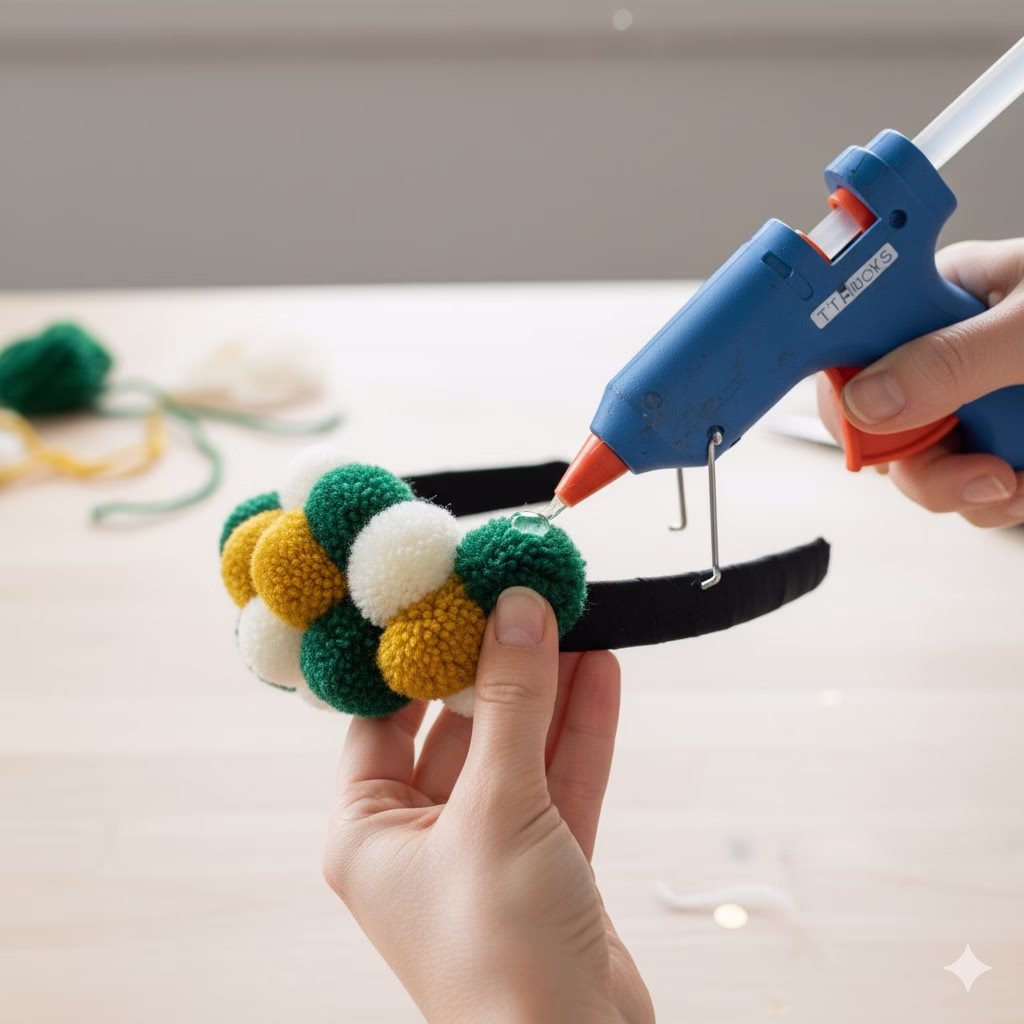
- Apply Glue: If using a hot glue gun, apply a small bead of glue directly onto the headband where you want your first pom pom to sit. Work in small sections.
- Attach the Pom Pom: Immediately press the base of the first Pom Pom firmly onto the glue. Hold it in place for several seconds until the glue cools and sets.
- Crucial Tip: The pom pom’s strongest point is where the centre tie is. Try to orient this flat part of the pom pom against the headband for the best attachment.
- Continue Gluing: Work your way along the headband, placing the pom poms as close together as you like to achieve your desired density. If using multiple sizes, alternate them for visual interest.
- Secure the Gaps: Once the main pom poms are attached, look for any noticeable gaps between them. You can use a small dab of glue and press the fluffy sides of the adjacent pom poms together to eliminate any visible headband space.
- [Image Placement 5: A close-up showing the pom poms being glued tightly next to each other on the headband.]
- Curing Time: Allow the finished Pom Pom Headband to cure for several hours (or according to your glue’s instructions) before wearing to ensure maximum durability.
V. Troubleshooting Common Pom Pom Crafts Issues
Even experienced crafters encounter little snags. Here are solutions to common Pom Pom crafts issues:
| Problem | Cause | Solution |
| Pom Pom is not dense/falls apart. | Not enough yarn was wound; the centre tie was not tight enough. | Ensure the centre hole of your template is almost completely filled with yarn. Use strong string and pull the centre knot extremely tight (it should indent the yarn). |
| Pom Pom is not perfectly round. | The yarn wasn’t cut evenly, or it hasn’t been trimmed enough. | Trim more! Use the ‘roll and trim’ technique described in Section III until the shape is a uniform sphere. |
| Pom Poms are falling off the headband. | The wrong glue was used, or the base wasn’t clean. | Use a high-quality, flexible, and strong craft glue (like hot glue or E-6000). Consider using a felt strip on the headband base for a better grip surface. |
VI. Caring for Your Pom Pom Headband
To keep your bespoke creation looking its best:
- Spot Clean Only: Avoid submerging the headband in water. If it gets dirty, spot clean the affected Pom Pom gently with a damp cloth and a tiny bit of mild soap.
- Reshape: If a pom pom loses its fluff, gently roll it between your palms to restore its shape. If the yarn is looking fuzzy, you can give it a quick, light trim.
- Storage: Store the headband in a way that the pom poms aren’t crushed (e.g., hanging it on a hook or placing it on a mannequin head).
VII. Advanced Pom Pom Ideas
Once you have mastered the basic Pom Pom Headband, consider these advanced applications of your Pom Poms knowledge:
- Multi-Coloured Pom Poms: Wind two or three different colours of yarn onto the template simultaneously for a marbled effect.
- Shaped Pom Poms: Use clever trimming techniques to shape your pom poms into hearts, ovals, or even small animal ears for a novelty headband.
- Tassel Integration: Combine small pom poms with handmade tassels, alternating them along the headband for a bohemian look.
FAQ (Frequently Asked Questions)
Q: Can I use different sizes of pom poms on one headband?
A: Absolutely! Mixing small, medium, and large Pom Poms adds wonderful texture and dimension. A popular design involves placing the largest pom pom in the centre and gradually decreasing the size toward the sides.
Q: How can I make my pom poms extra fluffy?
A: Fluffiness comes from three factors: winding the yarn very densely, using a fluffy yarn type (like wool or an acrylic blend), and trimming the finished pom pom until it’s a tight, even sphere. Some people gently brush the finished pom pom with a wire brush to tease the fibres, but be gentle so it doesn’t fall apart.
Q: My finished pom poms are too heavy. How can I fix this?
A: Heavy pom poms are usually caused by using a very thick or heavy type of yarn. For future projects, use a lighter-weight yarn, such as a double knitting (DK) or worsted weight acrylic. You can also try making fewer or smaller pom poms to distribute the weight across the headband.
Q: Do I have to use a specific type of yarn?
A: No, but acrylic yarn is highly recommended for beginners. It’s affordable, durable, comes in every colour imaginable, and holds its shape well. Natural fibres like cotton tend to be less fluffy, and specialty yarns like chenille can be tricky to cut evenly.
Q: Is it better to use a pom pom maker tool or the cardboard method?
A: The best method is the one you prefer. A dedicated pom pom maker tool provides consistency, especially if you need many identical Pom Poms. The cardboard or fork methods are excellent if you’re on a budget or only making a few, and they allow for great customisation of size.
Reference Section
- The Orry Mill – Yarn Weights Chart & Guide
- Glue Gun – Using a Glue Gun Safely
Recent Posts