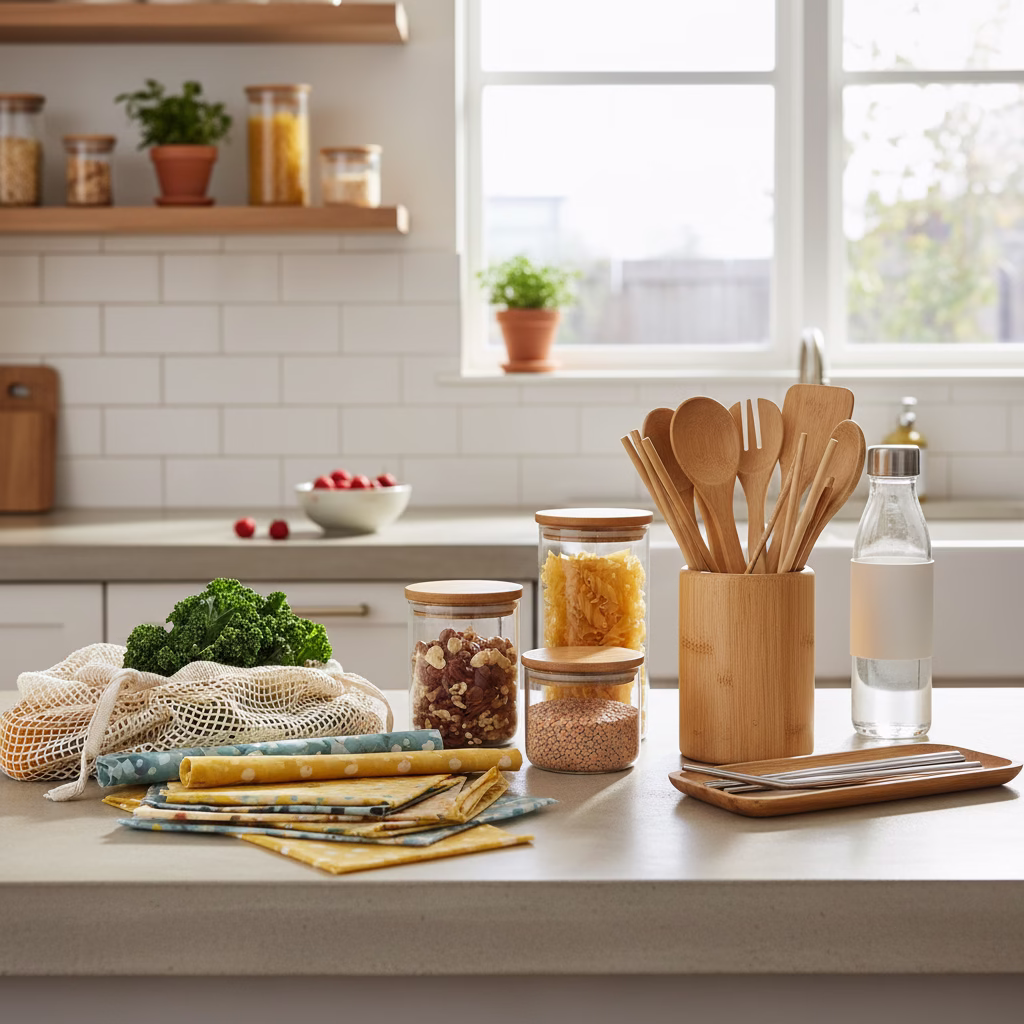
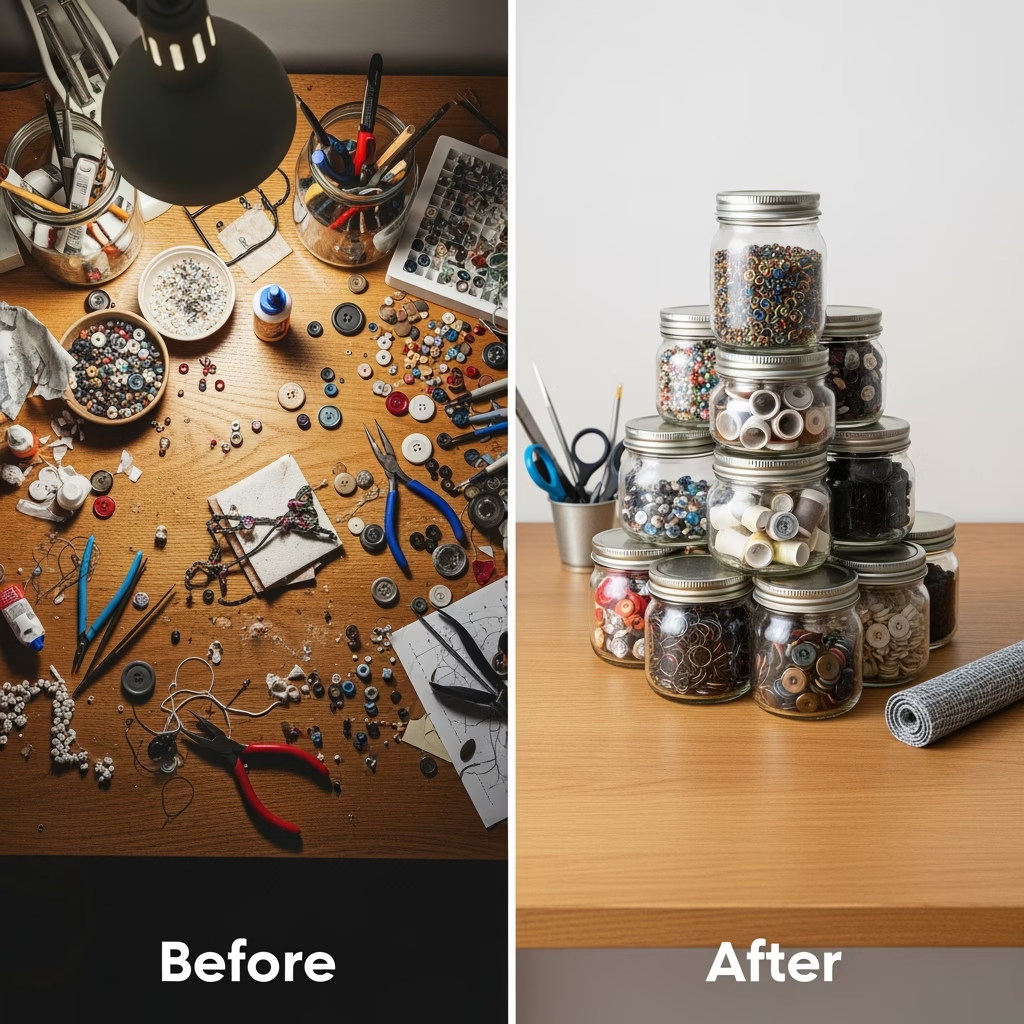
Cluttered desks are a common problem, but the solution doesn’t have to involve buying more plastic containers. This guide explores how simple glass jars can transform any workspace into an organized, eco-friendly haven. By embracing zero waste principles, anyone can create stylish desk storage without contributing to landfill waste. Zero waste jars offer a sustainable alternative that looks great and works even better
Introduction: Why Your Desk Needs a Zero Waste Makeover
Let’s be honest. Most of us have a drawer full of random office supplies and a desk that could use some help. Pens roll around, paper clips scatter, and sticky notes seem to multiply overnight. The easy fix might seem like a quick trip to the store for plastic organizers. But there’s a better way.
Glass jar organization is a simple concept with powerful results. Instead of buying new containers, you can repurpose jars you already have at home. Think about all those pasta sauce jars, jam containers, and mason jars sitting in your recycling bin. They’re perfect for holding everything from pencils to push pins.
This approach fits perfectly with zero waste living. The zero waste movement encourages us to reduce what we throw away. It asks us to find new uses for items before discarding them. And it challenges us to think creatively about everyday problems.
A desk organizer made from glass jars checks all these boxes. It’s free, it’s functional, and it’s good for the planet. Plus, there’s something satisfying about looking at your organized workspace and knowing you made it yourself.
In this guide, we’ll walk through everything you need to know. You’ll learn how to collect the right jars, prepare them properly, and arrange them for maximum usefulness. By the end, you’ll have a custom desk organizer that reflects your style and values.
Gathering Your Materials: What You’ll Need

Before you start creating your zero waste desk organizer, you’ll need to collect some supplies. The good news? Most of these items are probably already in your home.
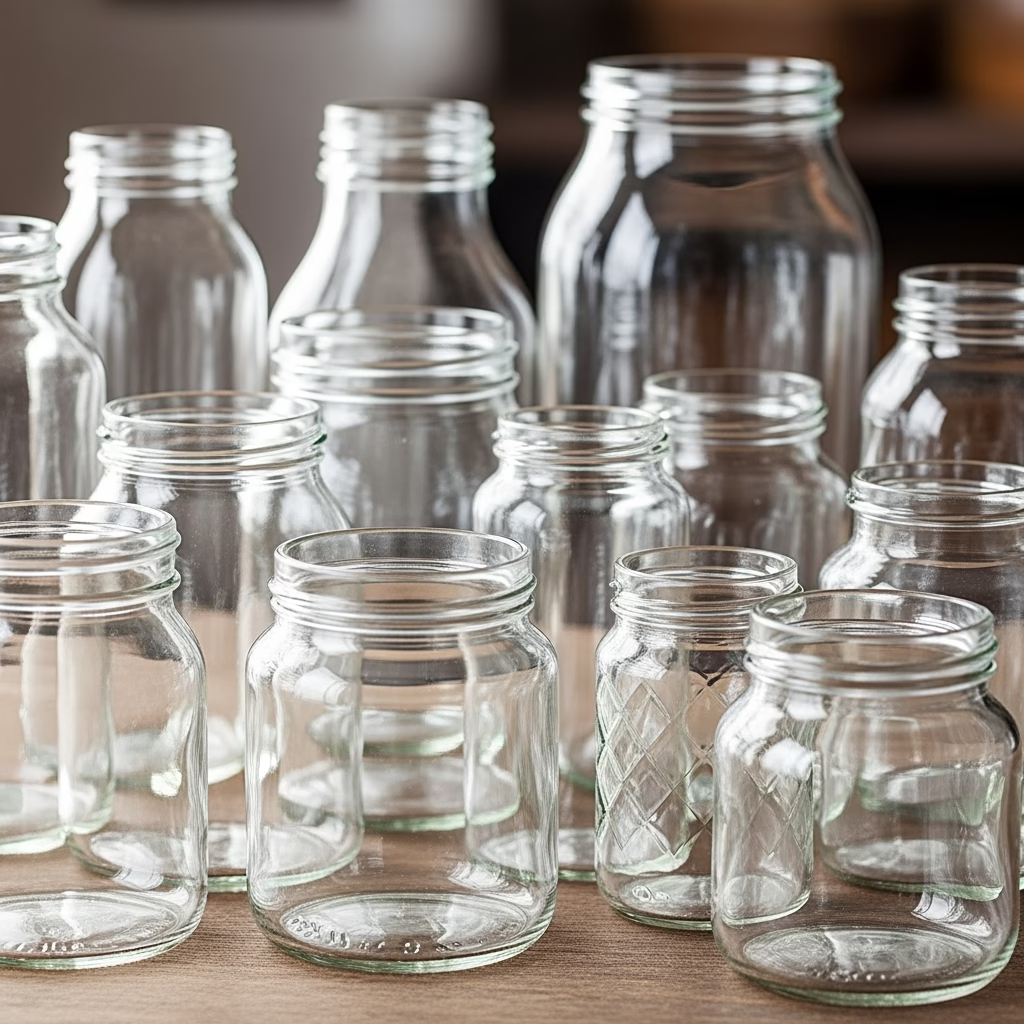
Glass Jars
The foundation of this project is, of course, glass jars. Mason jars are a popular choice because they come in many sizes. But don’t limit yourself. Pickle jars, candle holders, baby food containers, and sauce jars all work wonderfully. Variety is actually your friend here. Different sizes will hold different items.
Start saving jars a few weeks before your project. Ask family and friends to save theirs too. You’ll be surprised how quickly you can build a collection.
Cleaning Supplies
You’ll need dish soap, warm water, and possibly some baking soda. A scrub brush helps remove stubborn labels. White vinegar is useful for cutting through sticky residue.
Optional Decorating Materials
If you want to personalize your zero waste jars, gather some extras. Twine, ribbon, or fabric scraps can add charm. Chalk paint works well if you want a matte finish. Old newspaper or magazine pages can create decoupage effects.
Base or Tray
Consider what will hold your jars together. An old wooden board, a vintage tray, or even a piece of cardboard covered in fabric can work. This base keeps everything unified and easy to move.
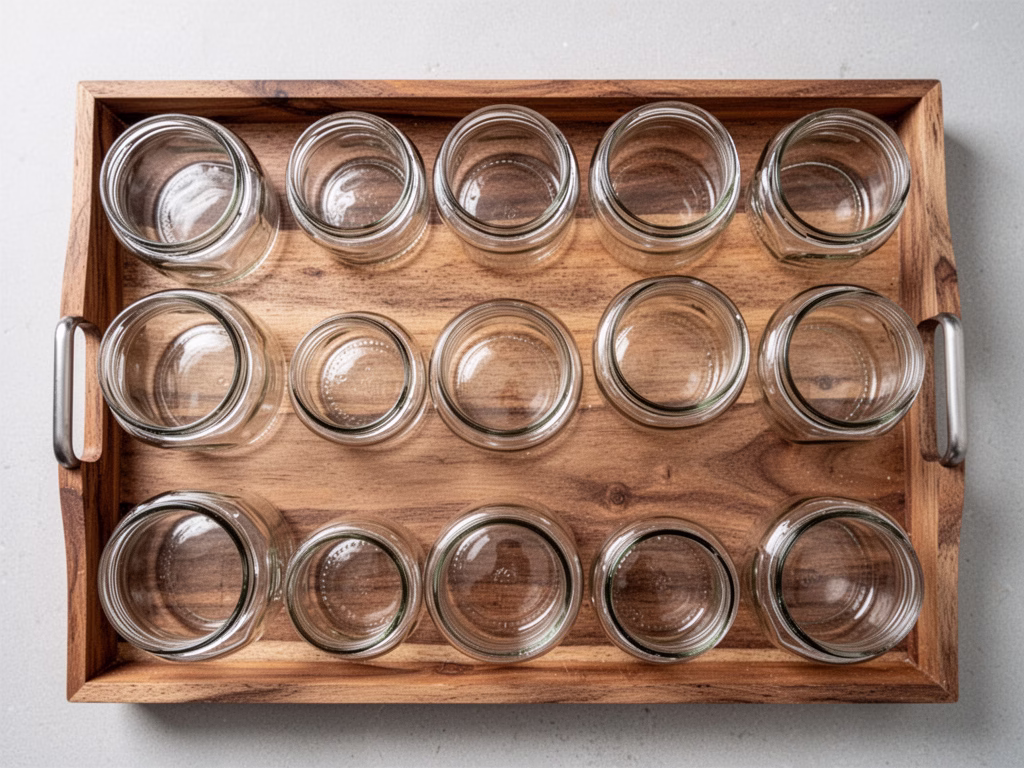
Step One: Cleaning and Preparing Your Jars
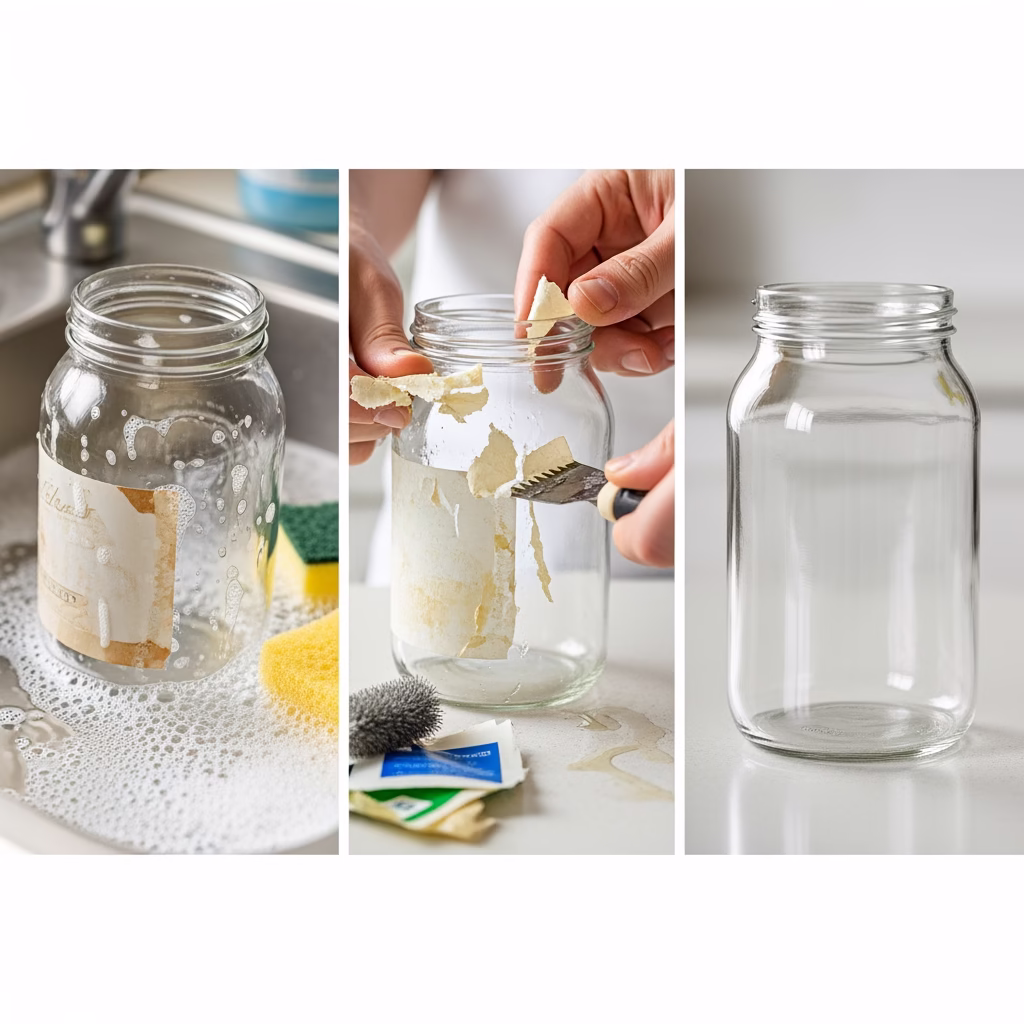
Proper preparation makes all the difference. Nobody wants a desk organizer that smells like pickles or has sticky label residue. Take your time with this step.
Removing Labels
Start by soaking your jars in warm, soapy water. Let them sit for about thirty minutes. Many labels will peel right off after soaking. For stubborn labels, try this trick. Make a paste with baking soda and cooking oil. Apply it to the label and let it sit for ten minutes. Then scrub gently with a rough sponge.
White vinegar also works wonders on adhesive residue. Apply it directly to the sticky spots. Wait a few minutes, then wipe clean. You might need to repeat this process for particularly stubborn glue.
Deep Cleaning
Once labels are removed, wash each jar thoroughly. Use hot water and dish soap. Pay attention to the inside, especially if the jar held something strongly scented. For lingering odors, fill the jar with a mixture of water and baking soda. Let it sit overnight, then rinse well.
Dry your jars completely before moving forward. Water spots can form if you skip this step. A clean dish towel works better than air drying for a streak-free finish.
Step Two: Planning Your Layout
Now comes the fun part. Before you start decorating, think about what you’ll store and how you’ll arrange your jars.
Assess Your Needs
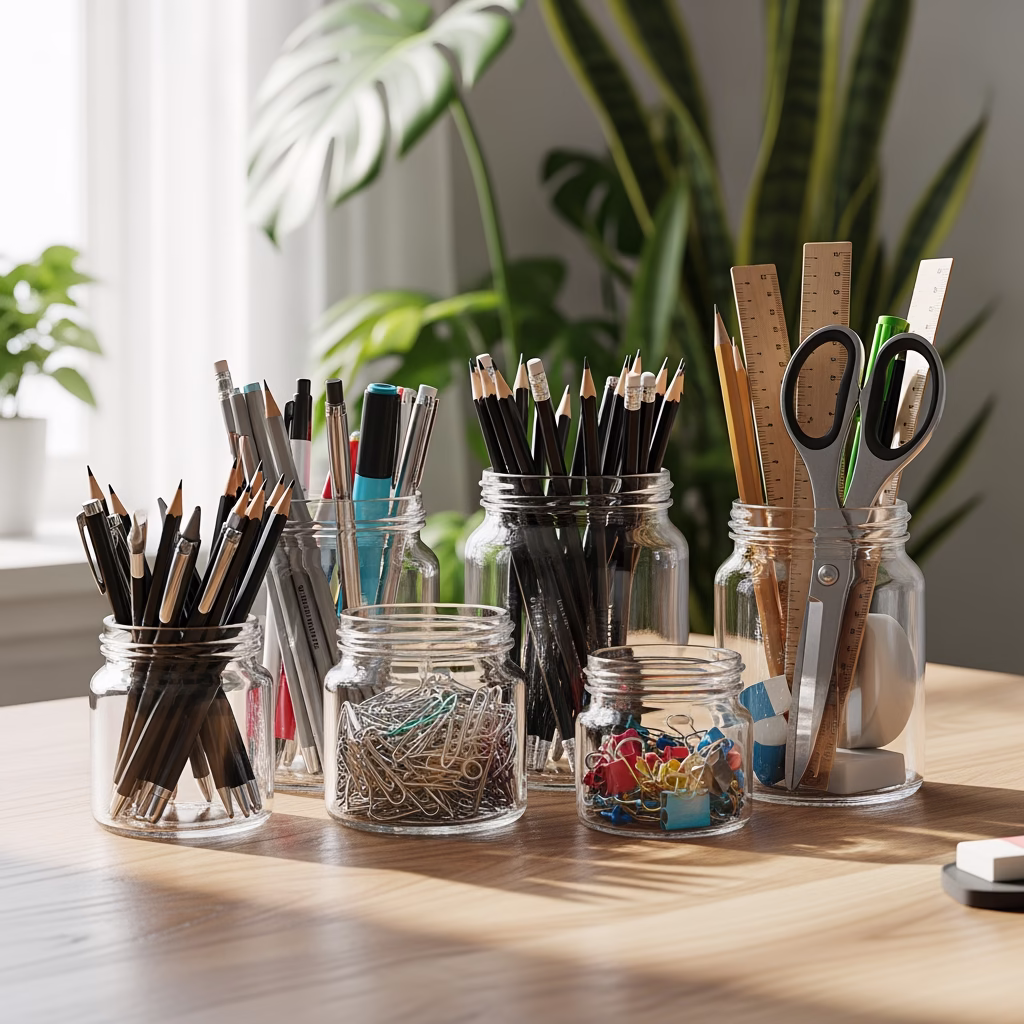
Take a look at what’s currently cluttering your desk. Do you have lots of pens and pencils? Maybe you need several tall jars. Are paper clips and rubber bands taking over? Small jars or baby food containers are perfect for tiny items. Scissors and rulers might need a wide-mouth mason jar.
Make a list of categories. Common ones include writing tools, cutting tools, small supplies like clips and pins, sticky notes, and miscellaneous items. This list will help you determine how many jars you need and what sizes work best.
Consider Your Space
Measure your desk area. How much room do you have for your organizer? A narrow shelf might need jars arranged in a single row. A spacious desk could accommodate a cluster of varying heights.
Think about height too. You don’t want your organizer blocking your computer screen or getting in the way of your work. Sketch out a rough plan before committing to an arrangement.
Play With Arrangements
Before any permanent assembly, experiment with different layouts. Place your jars on your chosen base and move them around. Try grouping by size, by function, or by a mix of both. Often, placing taller jars in the back and shorter ones in front creates visual appeal and easy access.
Step Three: Decorating Your Jars (Optional)
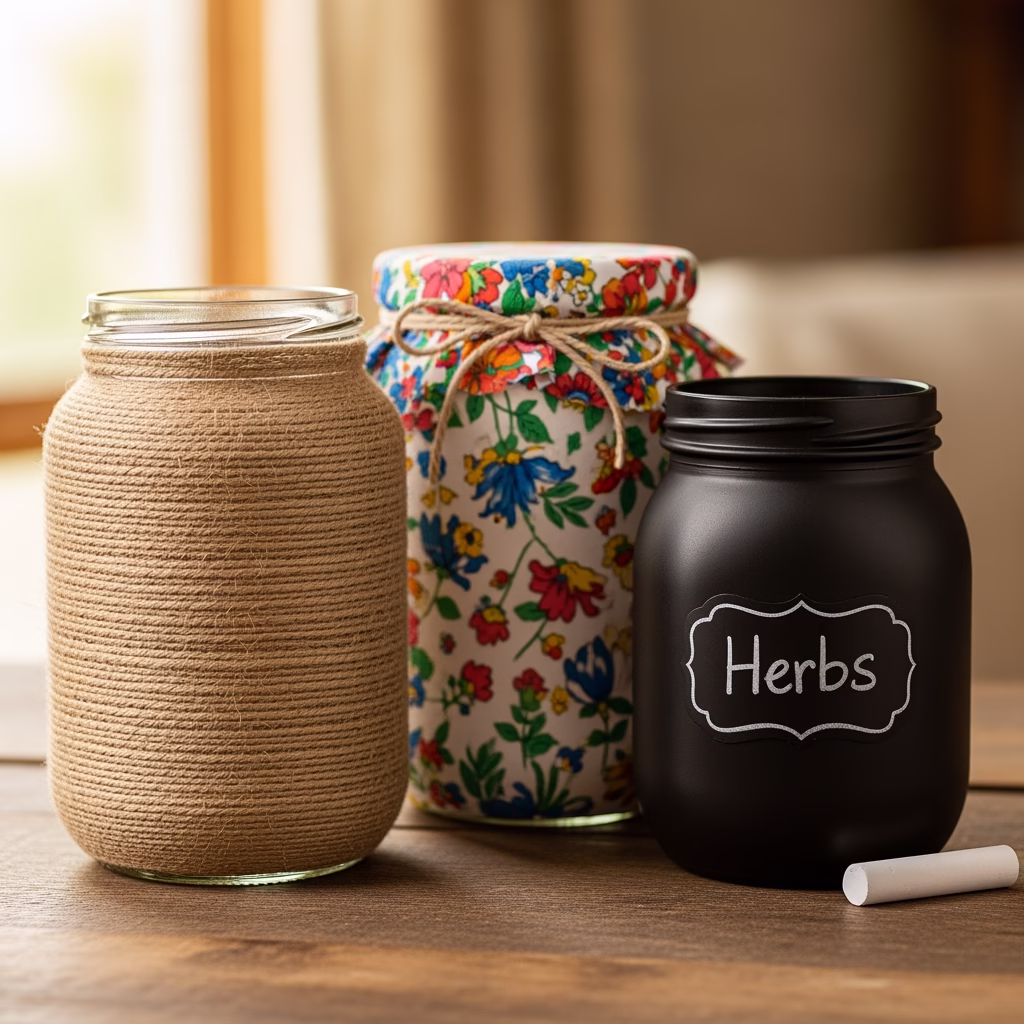
Plain glass jars look sleek and modern on their own. But if you want to add personality, decoration is a wonderful option. The key is using materials you already have. This keeps your project aligned with zero waste principles.
Simple Twine Wrapping
Wrapping twine around the neck of a jar adds rustic charm. Apply a thin line of glue around the rim area. Wrap the twine tightly, pressing it into the glue as you go. You can do just a few rows or cover more of the jar. Cut the twine and secure the end with another dab of glue.
Fabric Covers
Cut fabric scraps to fit around your jars. Old shirts, napkins, or cloth scraps work well. Use a simple glue application or Mod Podge to adhere the fabric. This technique can coordinate your organizer with your room’s color scheme.
Chalkboard Paint
Mason jars look fantastic with a strip of chalkboard paint. This allows you to label each jar and change the labels whenever you want. Apply painter’s tape to create a clean rectangle on the jar. Paint within the taped area. Once dry, remove the tape and write with chalk.
Natural Elements
For an earthy touch, consider gluing small pebbles, shells, or dried flowers to your jars. These elements add texture and bring a bit of nature to your workspace.
Remember, decoration is entirely optional. Many people prefer the clean look of plain glass. It shows off the contents and creates a minimalist aesthetic. Choose whatever feels right for your space.
Step Four: Assembling Your Organizer
With your jars cleaned, planned, and possibly decorated, it’s time to bring everything together.
Preparing Your Base
If you’re using a wooden board or tray, make sure it’s clean and dry. You might want to sand rough edges or paint the base to match your jars. A piece of cork or felt on the bottom prevents scratching your desk.
Some people skip the base entirely. Individual jars placed strategically around a desk can work just as well. The choice depends on your preference and workspace layout.
Securing the Jars
For a moveable organizer, you might not need to secure anything. Simply arrange the jars on your tray and you’re done. However, if you want a more permanent setup, consider these options.
A hot glue gun can attach jars to a wooden base. Apply glue to the bottom of each jar and press firmly onto the base. Hold for thirty seconds until set. This creates a stable unit that won’t tip easily.
Alternatively, use double-sided mounting tape for a less permanent bond. This allows you to rearrange or remove jars later if your needs change.
Final Arrangement
Place your jars according to your earlier plan. Fill each jar with its designated supplies. Step back and admire your work. Make any final adjustments to spacing or position.
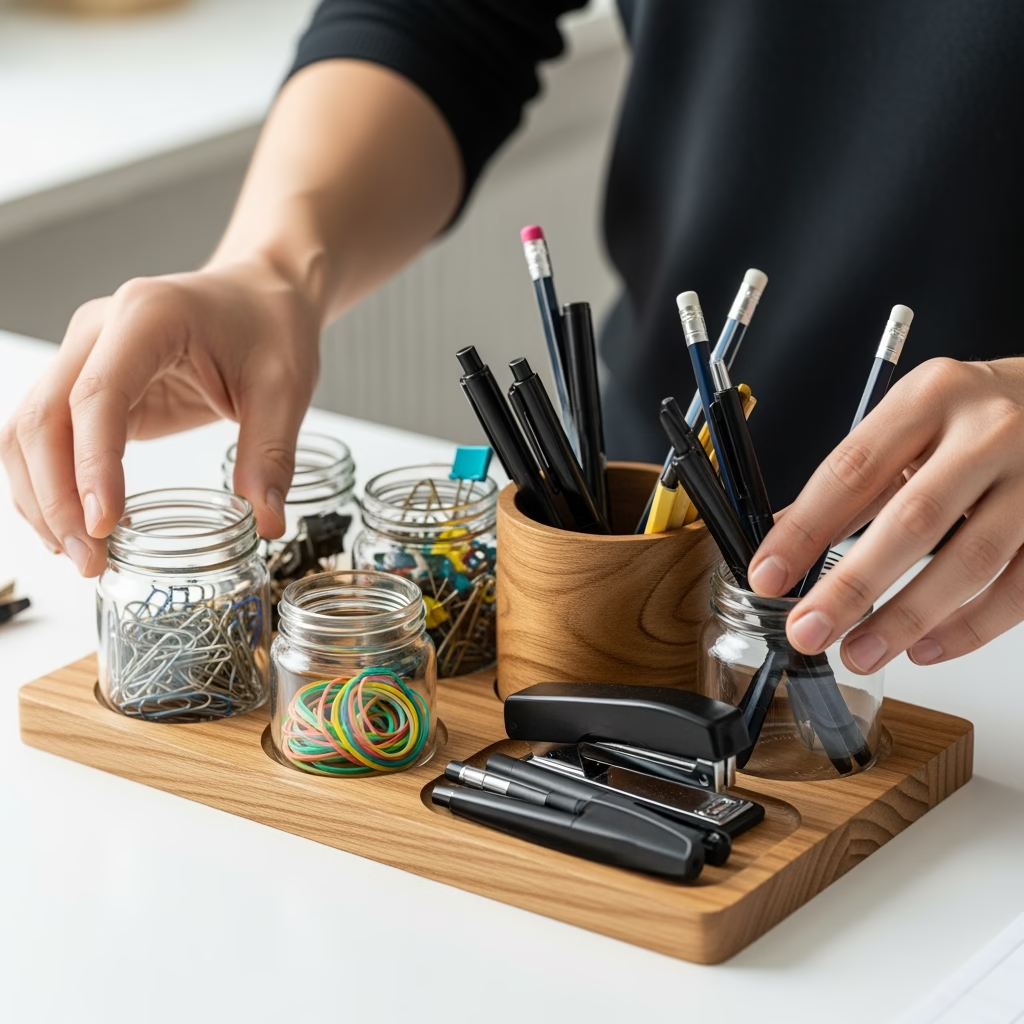
Step Five: Organizing Your Supplies

Your zero waste desk organizer is almost complete. Now it’s time to fill it thoughtfully.
Group Similar Items
Keep like items together. All pens in one jar, all pencils in another. This makes finding what you need quick and easy. Small items like paper clips and push pins deserve their own small containers.
Use Vertical Space
Stand items upright whenever possible. Pens, pencils, scissors, and rulers all benefit from vertical storage. This makes them easy to grab and shows you exactly what you have.
Keep Frequently Used Items Accessible
Place your most-used supplies in the jars closest to your dominant hand. Less frequently used items can go toward the back. This small detail makes a big difference in daily convenience.
Don’t Overfill
It’s tempting to cram everything into your new organizer. Resist this urge. Overfilled jars are hard to use and look cluttered. If you have too many supplies, it might be time to declutter. Donate or recycle what you don’t need.
Tips for Maintaining Your Zero Waste Organizer
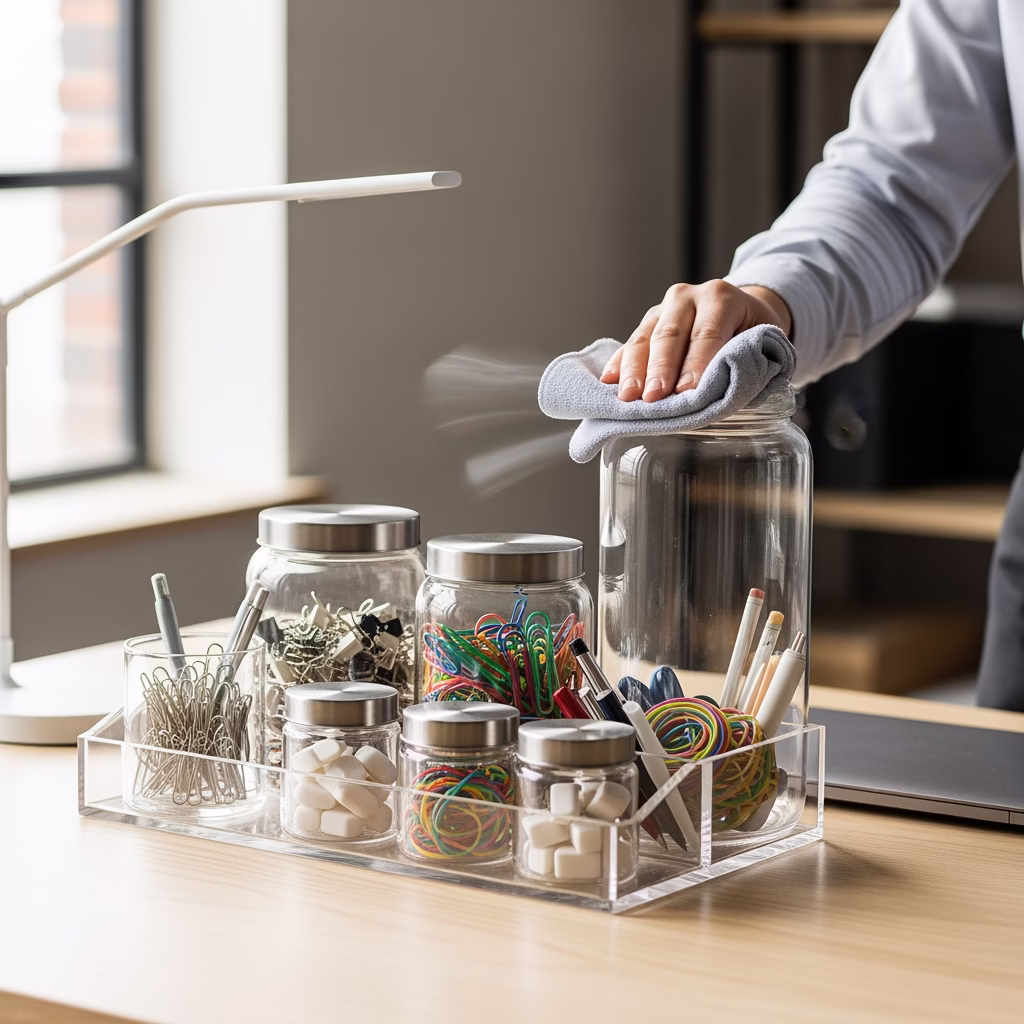
Creating your glass jar organization system is just the beginning. A little maintenance keeps it functional and beautiful.
Take five minutes each week to tidy up. Return items to their proper jars. Throw away dried-up pens. Remove anything that’s wandered into the wrong container.
Every few months, give your jars a quick wipe down. Dust accumulates, and glass shows fingerprints. A damp cloth keeps everything sparkling.
As your needs change, adjust your system. Swap out jars, add new ones, or rearrange. The flexibility of this system is one of its greatest strengths.
The Bigger Picture: Why Zero Waste Matters

This project is about more than just organizing your desk. It’s a small step toward a more sustainable lifestyle.
Every year, millions of tons of plastic end up in landfills and oceans. Much of this plastic comes from single-use items and unnecessary packaging. By choosing to repurpose glass jars instead of buying new plastic organizers, you’re making a difference.
Zero waste living doesn’t require perfection. It’s about making better choices when you can. This desk organizer is proof that sustainable options can be practical, affordable, and attractive.
Small projects like this one build momentum. Once you see how easy glass jar organization can be, you might look for other ways to reduce waste. The zero waste journey is made up of many small steps. Each one matters.
Conclusion: Your Sustainable Workspace Awaits
Creating a zero waste desk organizer using glass jars is one of the simplest and most rewarding DIY projects you can tackle. It costs nothing, reduces waste, and results in a functional, personalized storage solution.
You’ve learned how to collect and clean jars, plan your layout, add optional decorations, and assemble everything into a cohesive organizer. More importantly, you’ve taken a step toward more mindful consumption.
Mason jars and other glass containers deserve a second life before heading to recycling. Your desk is the perfect place to give them one. The beauty of this project lies in its simplicity and flexibility. No two organizers will look exactly alike, and that’s the point.
So gather those jars, clear off your desk, and get started. Your organized, eco-friendly workspace is waiting.
External References and Further Reading
- EPA: Reducing and Reusing Basics
- UN foundation: Protect Our Planet from Plastic Pollution
- National Geographic –Planet or Plastic?
- ZWIA: Zero Waste International Alliance
Recent Posts