There’s nothing quite as satisfying as a gorgeous piece of home decor, especially when you’ve created it yourself. Like many of you, I started my journey with a shaky brush and basic paint plates knowledge. I often had more paint on my hands than on the plate. I’ve spent years experimenting with different materials and techniques, perfecting my plate painting ideas to create truly beautiful painted plates. This guide will fast-track your skills. Your DIY pieces will look like they came straight from a high-end boutique.
The Professional Difference: Why Your Painted Plates Fall Short (and How to Fix It)
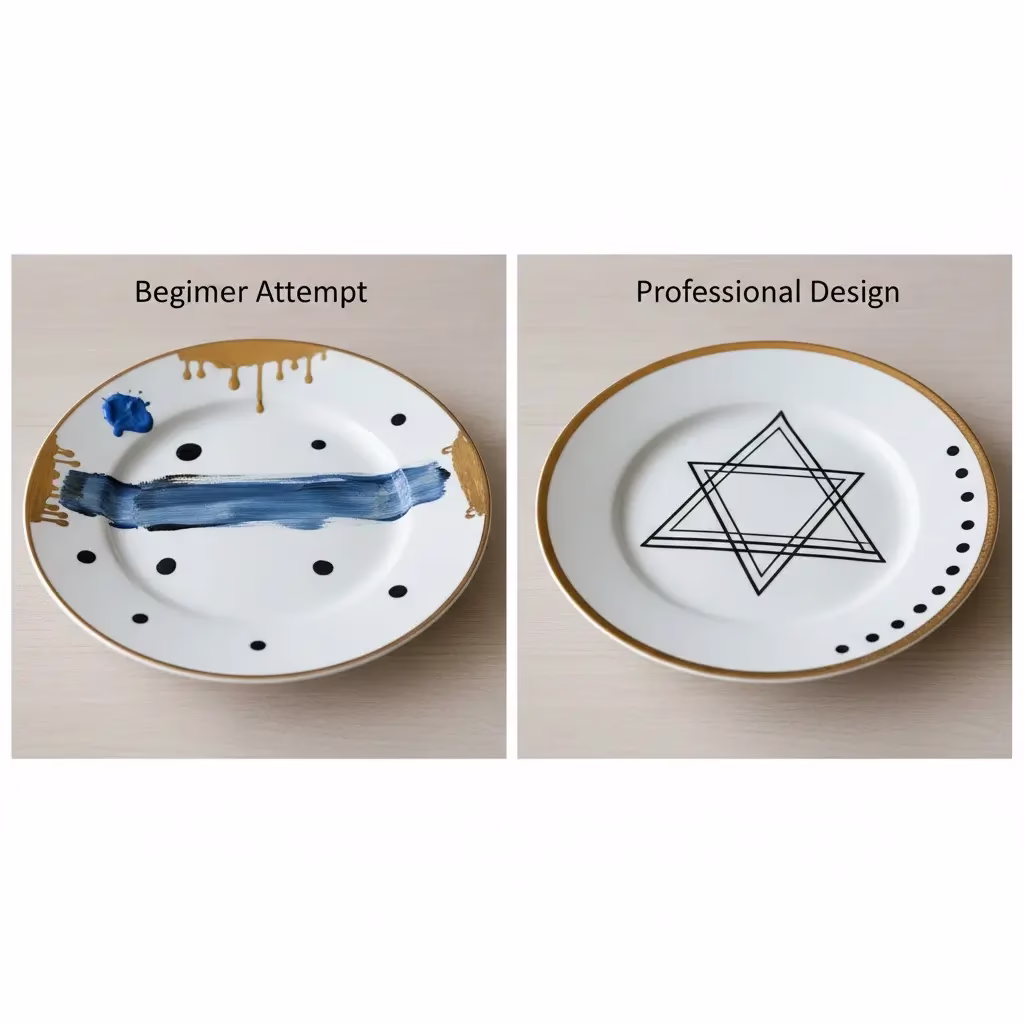
The jump from a “homemade” look to a “handmade professional” look relies on a few key details. Amateurs often overlook these details. It’s not about complex artistry. It is about simple preparation, choosing the right materials, and controlled execution. The secret to professional-looking painted plates is simple. You must treat the plate like a valuable canvas that needs care. Don’t just use it as a surface for doodling. We will explore simple, yet powerful, techniques. These techniques will immediately improve the finished product. Your plate painting ideas will truly stand out.
Material Selection Matters: Using the wrong paint is the most common mistake. For a lasting, food-safe finish, you must use paints specifically for ceramic, porcelain, or glass.
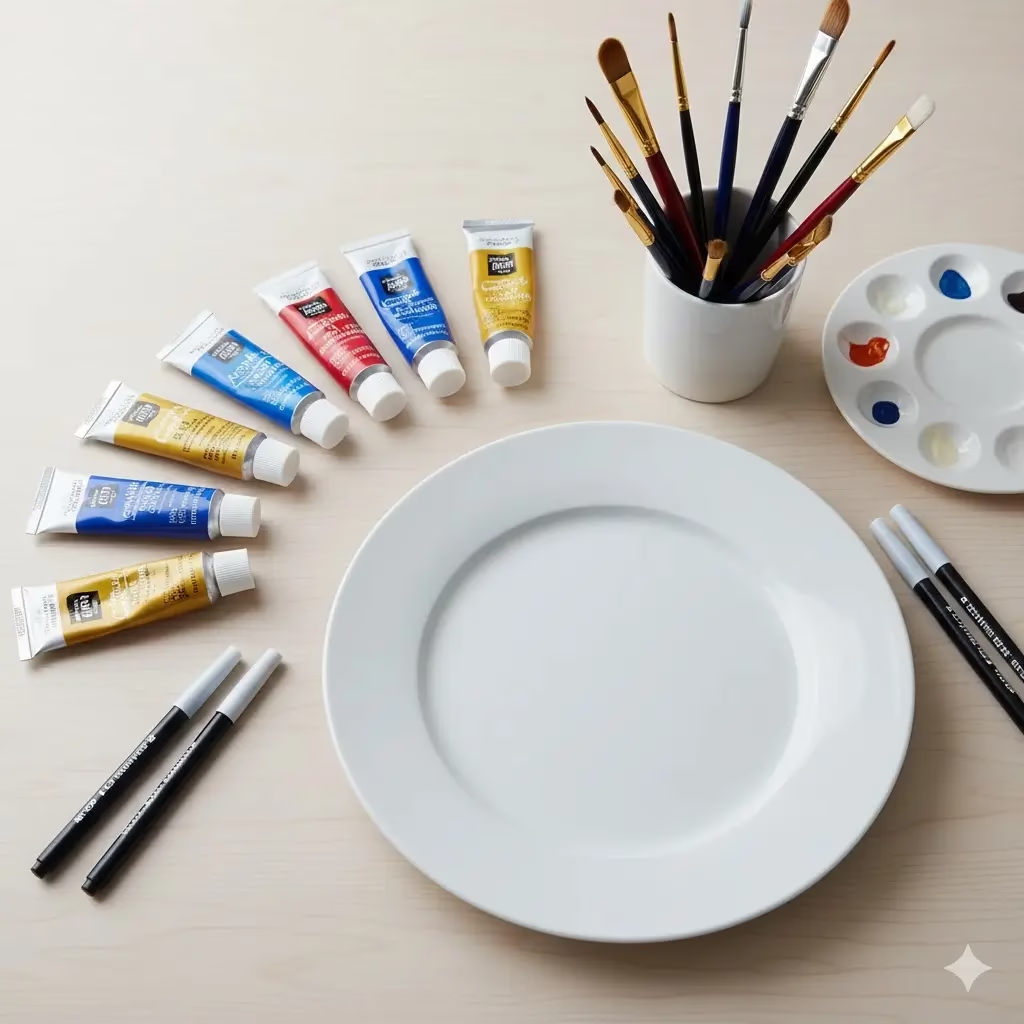
- Acrylic Enamel Paints: These paints dry in the air. They are non-toxic. They often require baking in an oven. This process cures them to a permanent, dishwasher-safe finish. They offer bright colors and cover the surface well.
- Porcelain Markers/Pens: These are perfect for small details, letters, and sharp lines. They give you the highest level of control for detailed work.
- Specialty Glaze Paints: These are more difficult to use. They require high-temperature firing. This usually happens in a kiln. They create a true glazed finish. For home crafters, the first two options are usually best.
Surface Preparation: A professional project always starts clean. Before you apply any paint, wash your plate with soap and water. This removes any dust or residue. Next, wipe the surface with rubbing alcohol. This step gets rid of oils from your hands. Oil can repel the paint and cause streaks. This simple step ensures the paint sticks well. It also guarantees a smooth finish.
Design Principles: The Secrets to Standout Plate Painting Ideas
Intentional design creates beautiful art. Otherwise, your project is just a basic craft. Forget designs that are busy or messy. Professionals use principles of simplicity and contrast. They also use the empty space on the plate, called negative space.
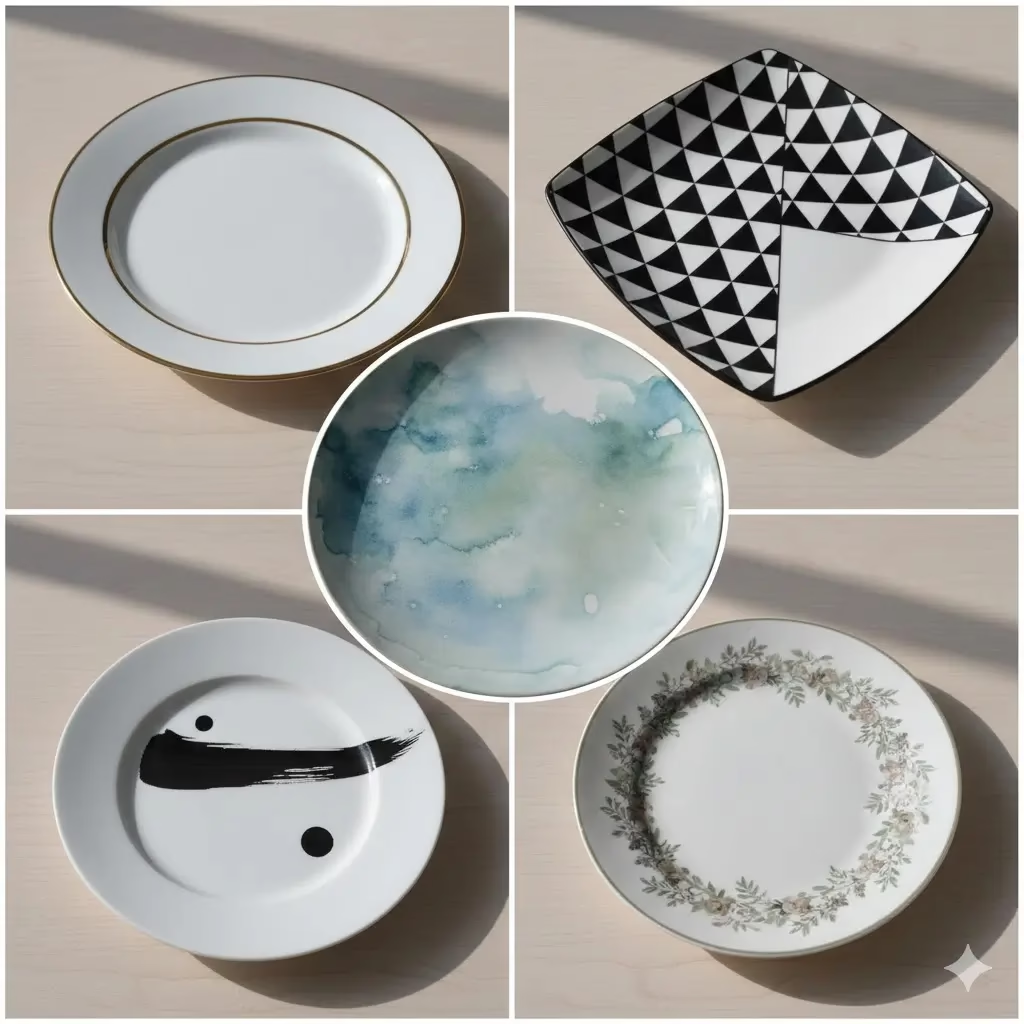
Focus on the Edges: The Gold Rim Technique
Focusing only on the rim is an easy way to achieve a high-end look. Many expensive ceramic pieces feature simple, perfect bands of color.
How to Do It:
- Prep the Edge: Take a strip of low-tack painter’s tape. Place it exactly where the plate goes from flat to curved. You can also use a strip along the outer edge. This creates a defined, thick border. Press the tape down firmly. This prevents paint from bleeding under the tape.
- Apply the Paint: Use metallic paint for the most luxurious look. Gold, silver, or rose gold are good choices. Apply the paint smoothly and evenly. Use a soft, flat-edged brush. Always paint two thin coats. This is much better than one thick coat. Thick coats are more likely to peel. They can also show visible brush strokes.
- The Reveal: Remove the painter’s tape immediately and carefully. The paint must still be wet when you do this. This stops the paint from sticking to the tape. It prevents the paint from pulling away from the plate. The result is a perfectly sharp edge.
Minimalist Geometry: Creating Modern Painted Plates
Clean, geometric patterns look expensive and modern. This is one of the best plate painting ideas for beginners. The design uses only straight lines and simple shapes.
How to Do It:
- Set the Guide: Use a ruler and a graphite pencil. The pencil marks will disappear when you cure the plate. Use it to lightly mark your pattern. Alternatively, use strips of painter’s tape. You can mark out triangles, stripes, or zig-zags.
- Apply the Paint: Use fine-tipped porcelain markers for thin lines. Use a small, flat-edged brush for blocks of color. Work slowly. Keep your hand steady. For stripes, only paint the areas between the tape.
- Wait for the Cure: Let the paint dry to the touch before you remove the tape. This avoids smudging. However, do not let it fully harden. If it hardens completely, it can sometimes chip along the edges when you pull the tape.
The Watercolor Wash: Effortless Elegance
This technique looks like specialty glazes. It gives your plates a unique, organic feel.
How to Do It:
- Thin the Paint: Dip your brush in ceramic paint. Then, lightly dip it into a solvent or water. The right choice depends on your paint type. The paint should be slightly thinner. It should be runny, but not dripping.
- The Application: Lightly brush the thinned paint onto the plate. Use large, sweeping motions. Do not try to cover the plate completely. You want a translucent wash. The goal is a paint layer that shows changes in color and intensity.
- Blotting for Texture: The paint must still be wet. Gently dab it with a crumpled piece of plastic wrap or a dry sea sponge. This creates beautiful, cloud-like textures. This method is very forgiving. It helps create truly unique painted plates.
Techniques for Flawless Execution

You can master paint plates by controlling your materials. You also need the right tools.
Tool Control: Mastering the Brush and Pen
A large or stiff brush is a common mistake. For detailed work, buy good quality synthetic brushes. A fine-point round brush is best for details (size zero or one). A small, flat-edged brush works best for straight lines and filling in shapes.
- The Dotting Tool: Do not use a brush for perfectly uniform polka dots. Polka dots are a classic, professional look. Instead, use a specialized ceramic dotting tool. You can also use the back of a small paintbrush handle. A cotton swab works too. Dip the tool straight into the paint. Place it straight onto the plate. Do not drag or twist it.
Stencils and Transfers: The Secret to Symmetry
You do not need to be an artist to create detailed designs. Professionals often use stencils and transfers. These tools help them achieve precise repetition and perfect symmetry.
- Temporary Adhesive Stencils: You can cut your own designs out of vinyl. You can also buy pre-made stencils. Stick them firmly to the plate. Use a dabbing motion with a sponge brush. Do not use a sweeping motion. Apply your ceramic paint. This stops paint from bleeding under the stencil edge.
- Graphite Transfer Paper: Use this paper to move a printed design onto the plate surface. First, lay the transfer paper down. Put your printed design on top of it. Then, trace over the lines with a pencil. The graphite lines guide your painting. The lines are easily removed. They also burn off in the curing process.
Correcting Mistakes Like a Pro
A professional finish means you fix errors before they dry. Always keep cotton swabs nearby. Also have rubbing alcohol or paint thinner handy. The right solvent depends on your paint type. If you make a mistake, immediately dampen a cotton swab. Gently wipe away the wet paint. A clean plate is a reusable canvas. Do not be afraid to wipe the surface clean if a line is not perfect.
Curing and Finishing: The Final Step to Permanence
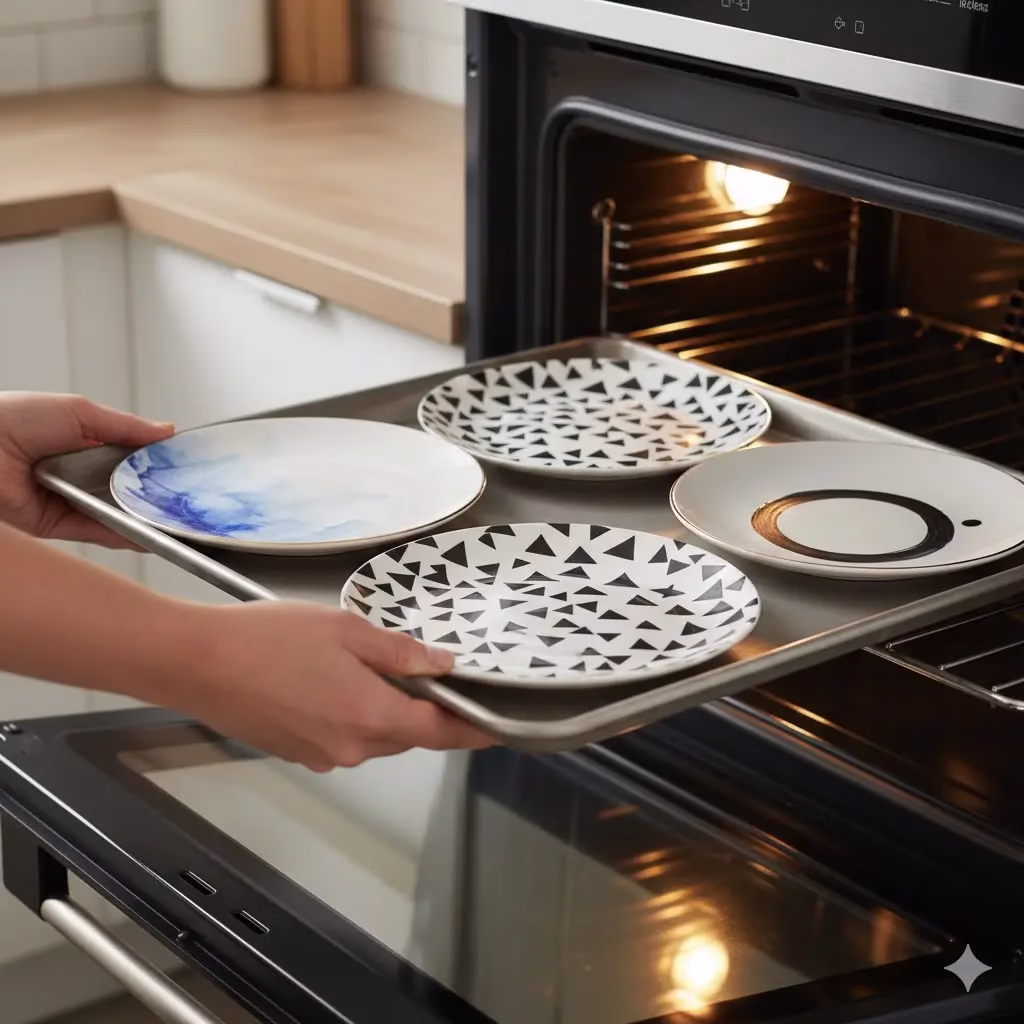
The curing process is the final step for all your beautiful plate painting ideas. This is the stage that makes your painted plates permanent. It makes them dishwasher-safe and food-safe. Always follow the instructions on your ceramic paint packaging. However, the general method is as follows:
The Baking Method (Most Common for Home Use):
- Dry Completely: Let your plates dry in the air for the full recommended time. This is usually twenty-four to forty-eight hours. The paint must be completely dry to the touch before you bake it.
- Cold Start: Place the plates in a cold oven. This prevents thermal shock. Thermal shock can cause the plate to crack.
- Bake: Set the oven temperature based on your paint maker’s instructions. This is typically between $\text{300}$ and $\text{350}$ degrees Fahrenheit. Once the oven reaches the temperature, bake the plates for the specified time. This is usually thirty to forty minutes.
- Cool Down: Turn the oven off. Do not open the door. Let the plates cool down completely inside the oven. This takes several hours or overnight. This slow cooling process is vital for properly setting the paint.
Post-Cure Care: Even after curing, try not to use metal utensils directly on the painted areas. For the longest life, hand-washing your specialty painted plates is always the best choice. However, most baked-on paints can handle the top rack of a dishwasher.
Frequently Asked Questions (FAQ)
Is the ceramic paint food safe after baking?
Yes, most ceramic and porcelain paints that need baking are non-toxic. They are designed to be food safe once fully cured. However, many experts suggest keeping the painted design on the plate’s outer rim. Avoid painting the central eating surface. Knives and forks may scratch the design there. Always check the specific labeling on your paint product.
Can I use regular acrylic paint on plates?
No, regular acrylic paint will chip and wash off easily. This is especially true when it is exposed to water and soap. It is not made to stick to the smooth surface of ceramic or glass. Also, it is not food safe. You must use paints made for ceramic or glass. These paints require heat setting or chemical curing.
What kind of plates should I buy for painting?
The best plates are plain, white, glazed ceramic or porcelain. Glass plates also work well. Make sure they do not have any patterns or textures. Check thrift stores or discount home goods stores. You can find inexpensive, blank canvases there. Do not use plates that are chipped or cracked.
How do I prevent my lines from shaking or wiggling?
You need proper support for a steady hand. Always rest the elbow of your painting hand firmly on the table. Gently rest the heel of your painting hand on the plate itself. You should turn the plate instead of moving your entire arm. This helps you keep a smooth curve or straight line. Using porcelain markers also gives you better control than a traditional brush.
References
- Emerson creek pottery – Non-Toxic Pottery & Sustainable Practices
- Vaessen Creative – DIY: Painting crockery
- Linda Levy – decorating techniques
Recent Posts