We’ve all been there: staring into the fridge, feeling overwhelmed by a list of ingredients that seems endless, and opting for takeout instead. The dream of healthy, home-cooked food often clashes with the reality of a busy life and a complicated pantry. But what if eating well didn’t require a dozen spices or hours of prep? We’re here to prove that you can create nutritious, satisfying meals using just three simple ingredients. This article is your guide to kitchen freedom, showing you how to unlock maximum flavor and health benefits with minimum fuss using these amazing 3 ingredient recipes. Say goodbye to complex recipes and hello to simple, delicious meals that anyone can master.
The Philosophy of Three: Why Less Truly is More
In a world full of culinary complexity, adopting the “rule of three” can revolutionize your approach to food. The beauty of 3 Ingredient Recipes lies in their simplicity and accessibility. They demand less shopping time, less money, and less clean-up.
The Benefits of Kitchen Minimalism
- Reduced Food Waste: When you only buy three main items for a dish, you are far less likely to end up with wilted produce or half-used spice jars going bad. You use what you buy, creating a more sustainable kitchen.
- Increased Confidence: Beginner cooks often feel intimidated by lengthy ingredient lists. These streamlined recipes build confidence by delivering guaranteed success with minimal steps. They are an ideal entry point to making more of your own food.
- Faster Prep and Cooking: A three-ingredient meal often means three steps or less. This dramatically cuts down on the time spent in the kitchen, making it easier to stick to a healthy diet, even on your most hectic days.
- Health Focus: By concentrating on just a few whole, high-quality ingredients, you naturally gravitate towards dishes that are unprocessed and nutrient-dense.
This guide is dedicated to showing you five distinct, healthy dishes—ranging from quick snacks to satisfying main courses—that each require only three core ingredients. Ready to simplify your plate? Let’s dive in.
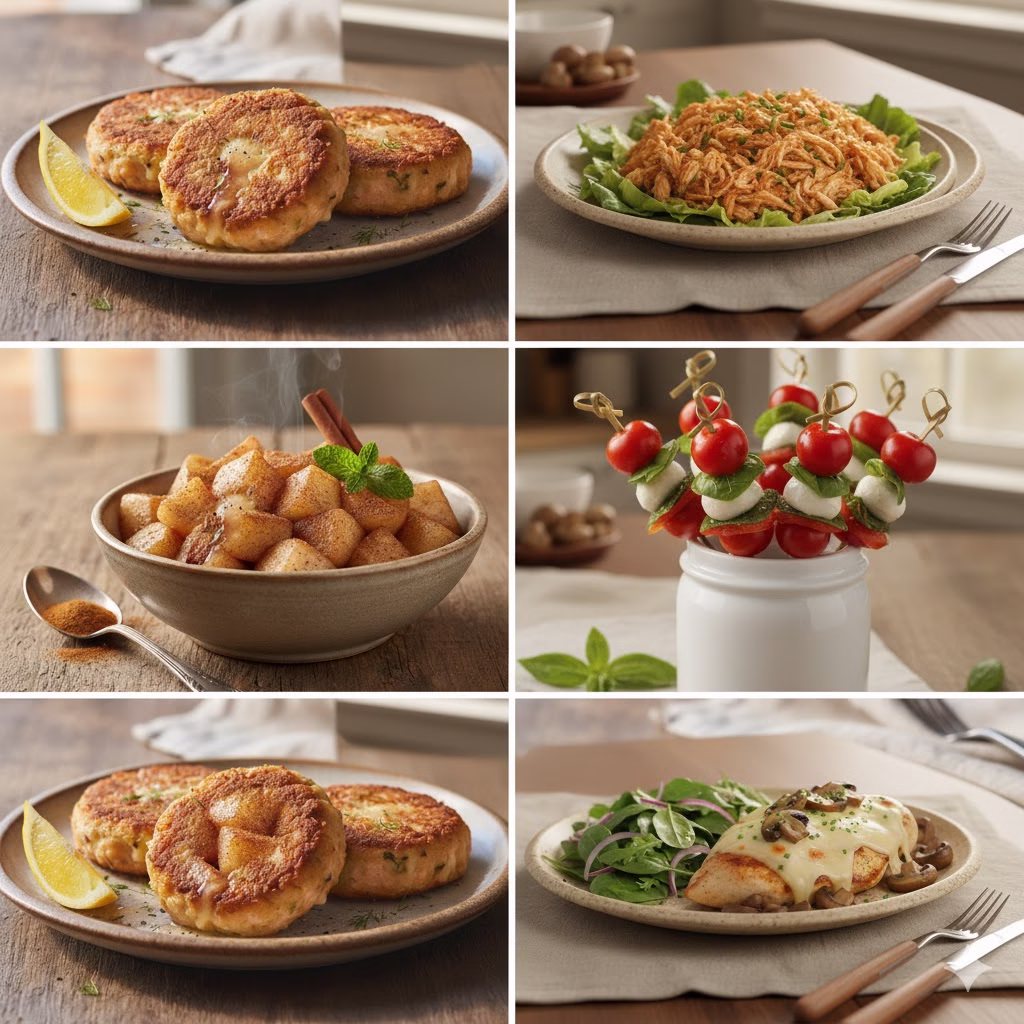
1. Salmon Patties Snack: The Protein Power-Up

This recipe is a champion of convenience. It’s quick, packed with protein and healthy fats, and requires no chopping or complicated steps. These low-carb patties are fantastic for a fast snack, a light lunch, or even served atop a fresh salad for a complete meal.
How to Make It: Detailed Instructions
Ingredients:
- 5 oz canned salmon (drained well)
- 1 egg
- 1 cup of shredded Monterey Jack cheese (or your favorite cheese that melts well)
Preparation Time: 5 minutes
Cook Time: 10–14 minutes
Yields: 3 medium-sized patties
Step-by-Step Guide:
- Prep the Salmon: Open the can of salmon and drain off any excess liquid. You can use a fork to press the salmon against the lid before fully opening, or simply dump the contents into a fine-mesh sieve. Transfer the drained salmon into a medium mixing bowl.
- Combine the Mixture: Crack the egg into the bowl with the salmon. Add the entire cup of shredded Monterey Jack cheese. Use a fork or your hands to thoroughly combine the ingredients. The mixture should hold together well—the cheese and egg act as the primary binding agents. This is a crucial step to ensure the patties don’t fall apart during cooking.
- Form the Patties: Divide the mixture equally and gently form it into three small, round patties. They should be about half an inch thick and firm enough to handle. If the mixture feels a little wet, you can chill them in the fridge for 10 minutes to help them set, though this is usually unnecessary.
- Heat the Skillet: Place a non-stick skillet or frying pan over medium heat. Add approximately 1 teaspoon of olive oil (or your preferred cooking oil) to lightly coat the bottom of the pan. Let the oil heat for a minute until it shimmers slightly.
- Cook to Perfection: Carefully place the three patties into the heated skillet. Cook them for 5–7 minutes on the first side. You are looking for a beautiful, golden-brown crust to form.
- Flip and Finish: Gently flip the patties using a thin spatula. Cook for another 5–7 minutes on the second side until they are golden brown all over and heated through. The cheese inside will be gooey and melted.
- Serve: Remove from the pan and let them rest on a paper towel for a moment to absorb any excess oil. These are delicious served warm on their own, or with a simple dollop of plain yogurt or a squeeze of fresh lemon.
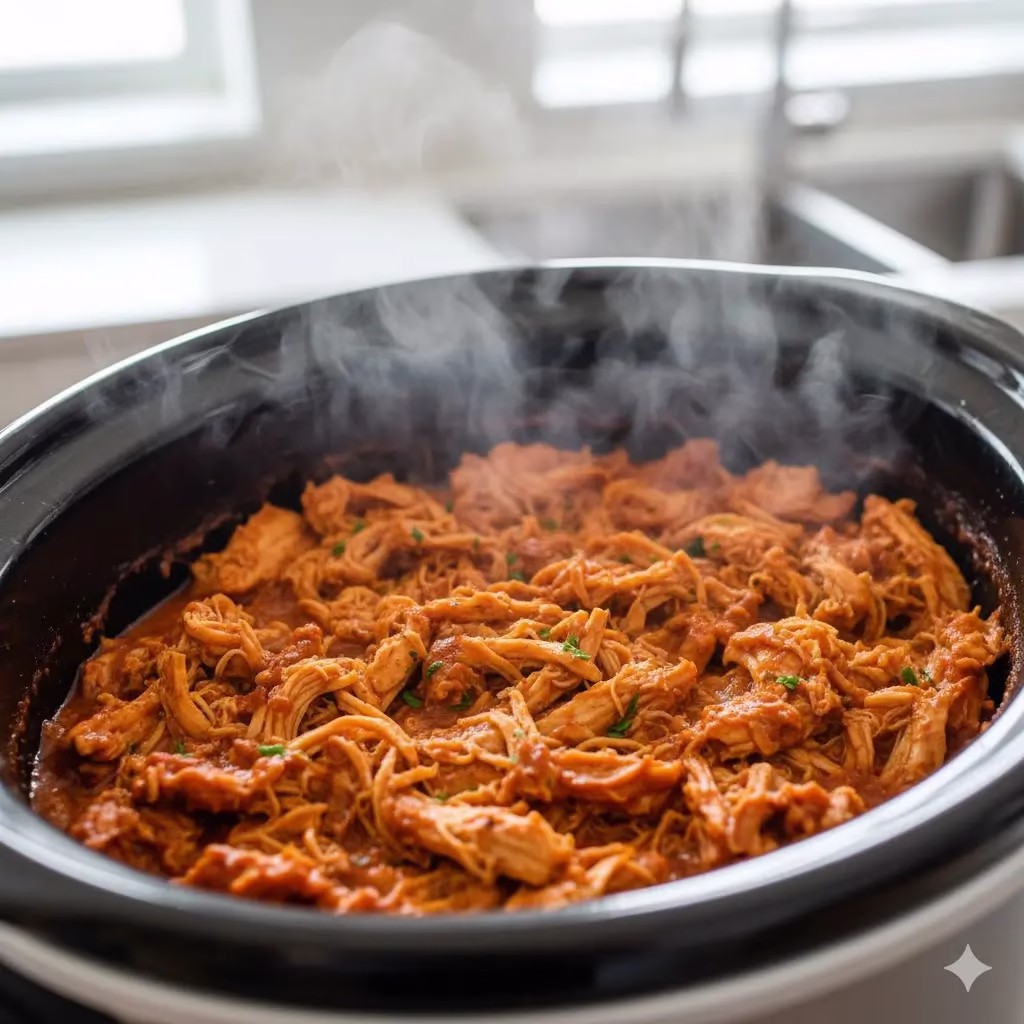
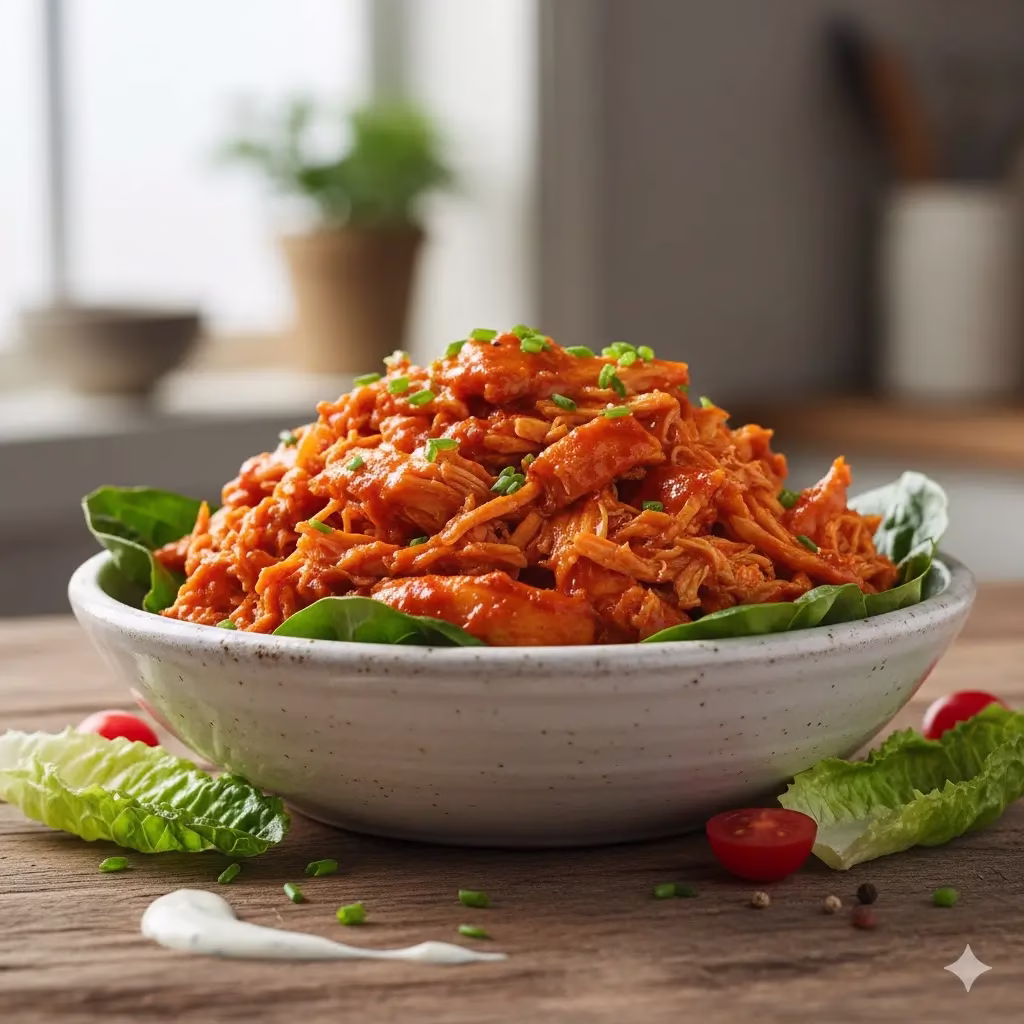
2. Buffalo Chicken: The Low-Carb Slow-Cooker Star
This is the ultimate “dump and go” recipe. It requires virtually no active cooking time and delivers a massive return of flavor. The resulting buffalo chicken is low-carb, high-protein, and incredibly versatile—perfect for topping salads, filling lettuce wraps, stuffing tacos, or simply eating by the forkful.
How to Make It: Detailed Instructions
Ingredients:
- 1.5 lbs boneless, skinless chicken breast (about 3–4 pieces)
- 1 packet of ranch dressing mix (the dry seasoning kind)
- 1 cup of your favorite wing sauce
Preparation Time: 2 minutes
Cook Time: 4–6 hours (low)
Yields: Approximately 4–6 servings
Step-by-Step Guide:
- Gather and Prep: Retrieve your 4-quart (or larger) slow cooker. There is no need to cut or trim the chicken breasts unless you prefer smaller pieces.
- The Dump: Place all 1.5 pounds of chicken breast directly into the bottom of the slow cooker.
- Season and Sauce: Pour the entire cup of wing sauce over the chicken. Then, open the packet of dry ranch dressing mix and sprinkle the contents evenly over the sauced chicken. You do not need to add any additional water or liquid. The chicken will release its own moisture as it cooks.
- Set It and Forget It: Place the lid securely on the slow cooker. Set the cooker to the low setting. Allow the chicken to cook undisturbed for 4 to 6 hours. The chicken is ready when it is falling-apart tender and easily shreds. Avoid lifting the lid during cooking, as this lets out heat and extends the required cooking time.
- Shred and Mix: Once the chicken is fully cooked, turn the slow cooker off or to the “keep warm” setting. Use two forks to shred the chicken directly in the cooker. It should pull apart very easily.
- Coat and Serve: Once shredded, toss the chicken thoroughly with the sauce remaining in the bottom of the pot until every piece is coated in the delicious buffalo-ranch mixture. Serve immediately. This is excellent prepared ahead of time and reheats beautifully for meal prep.
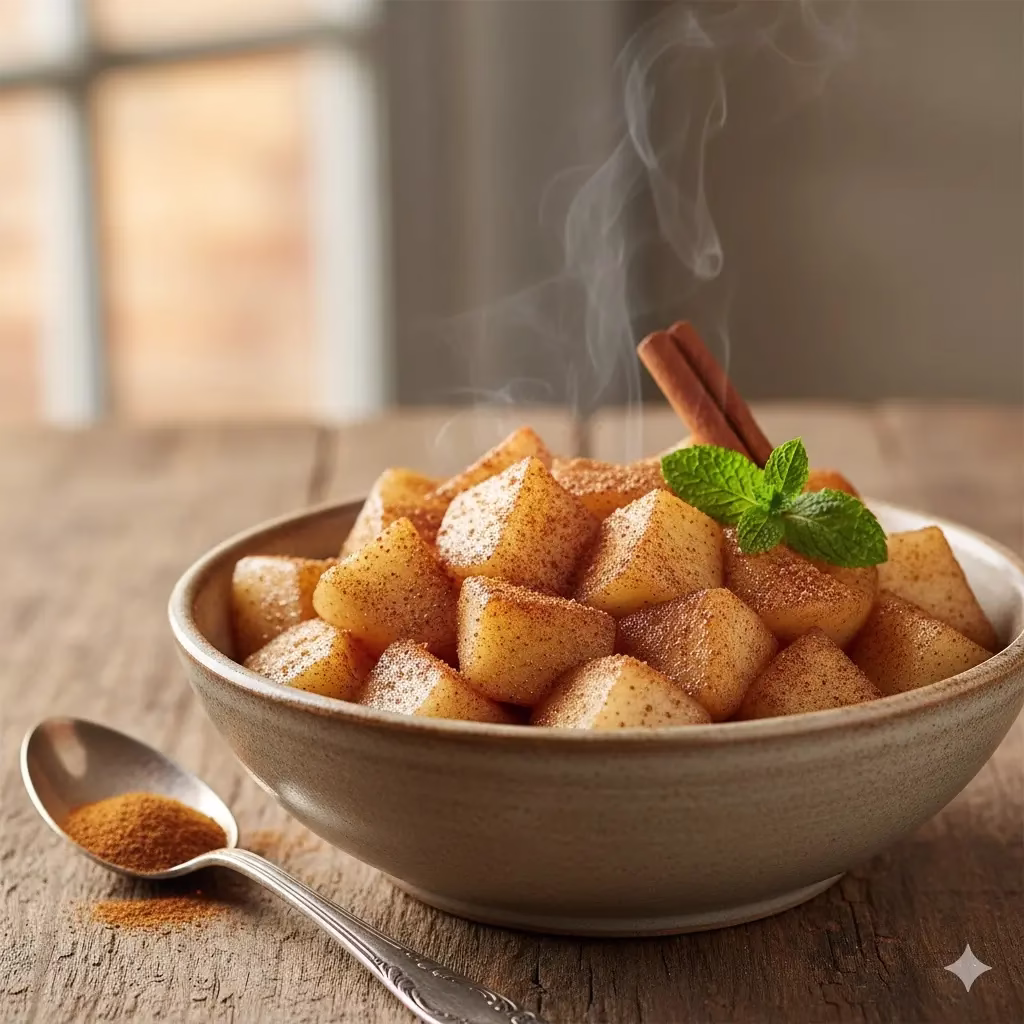
3. Cinnamon Pears: A Warming Fiber Treat

This simple recipe transforms an ordinary piece of fruit into a warm, comforting, and incredibly nutritious side dish or snack. Pears are naturally high in fiber, and cooking them lightly makes their inherent sweetness pop, without the need for any added sugar. This preparation is especially good for those with sensitive digestion.
How to Make It: Detailed Instructions
Ingredients:
- 2 pears (Bartlett or Bosc work well)
- half a teaspoon of ground cinnamon
- 2–3 tablespoons of water
Preparation Time: 5 minutes
Cook Time: 8–10 minutes
Yields: 2 servings
Step-by-Step Guide:
- Prep the Pears: Wash the two pears thoroughly. Using a vegetable peeler, carefully remove the skin from both pears. Once peeled, core the pears to remove the seeds and tough center. Then, dice the fruit into even, bite-sized pieces—about half an inch.
- Set Up the Steamer: Pour 2–3 tablespoons of water into a small or medium saucepan. You need just enough water to create steam without the water level touching the bottom of your steamer basket.
- Cinnamon Toss: Place the diced, peeled pears into a steamer basket. Sprinkle the half teaspoon of ground cinnamon over the pears. Gently toss them in the basket or in a separate bowl until all the pieces are lightly coated with the spice.
- Start Steaming: Place the steamer basket into the saucepan, making sure the pears are elevated above the water. Cover the pot with a tight-fitting lid.
- Cook: Turn the heat on high to quickly bring the water to a boil. Once boiling, reduce the heat immediately to low to maintain a gentle steam.
- Check for Doneness: Steam the pears for 8 to 10 minutes. The cooking time will depend on the ripeness of the pears; firmer pears will take longer. The pears are finished when they are easily pierced with a fork but still hold their shape. They should be tender, not mushy.
- Serve: Carefully remove the steamer basket from the pot. Serve the warm, spiced pears immediately. They can be enjoyed as a side dish to a savory meal or as a light, sweet dessert.
4. Caprese Skewers: The Effortless Appetizer
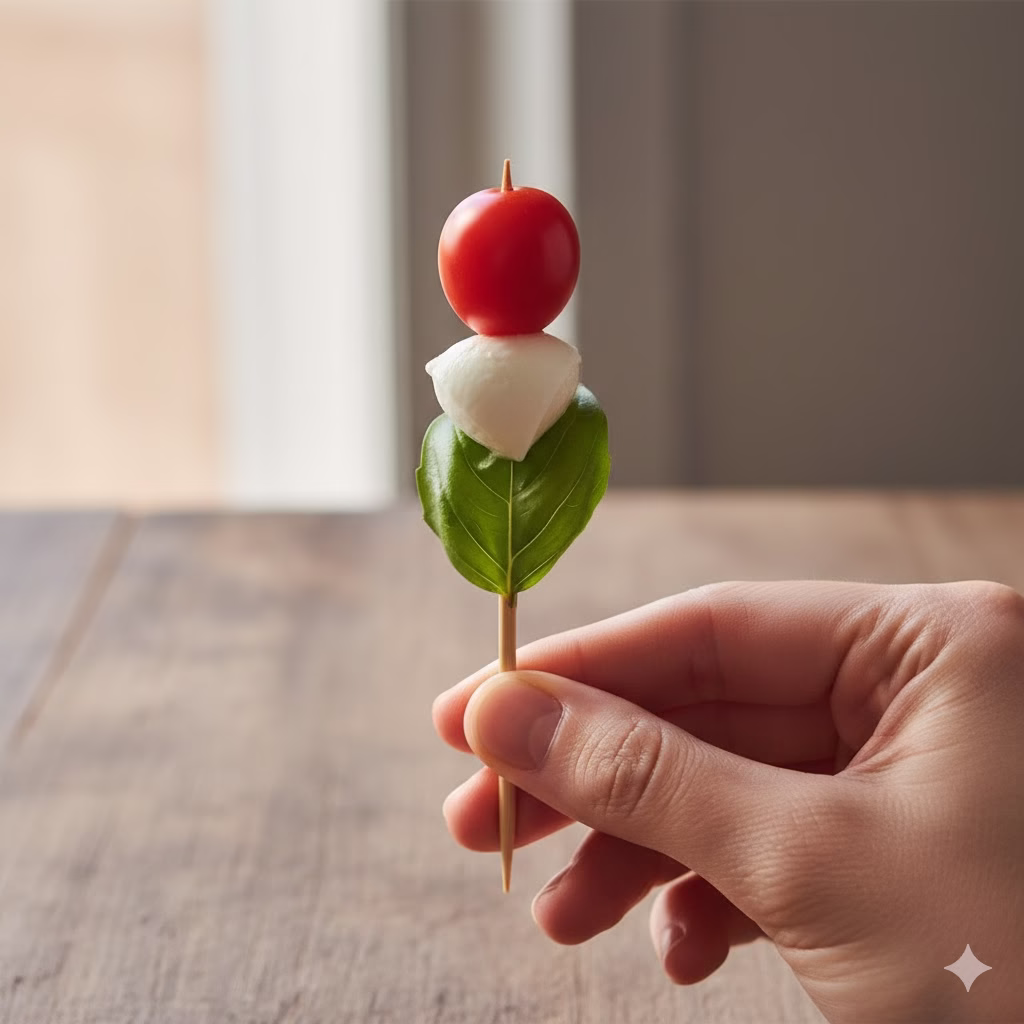
Caprese is the definition of fresh, simple, and elegant. These skewers take the classic Italian salad and transform it into an incredibly easy-to-assemble appetizer or snack. They require absolutely zero cooking and are perfect for a 3 Ingredient Recipes party, a mid-day snack, or a vibrant side dish.
How to Make It: Detailed Instructions
Ingredients:
- Cherry tomatoes (or grape tomatoes)
- Small mozzarella balls (often called bocconcini)
- Fresh basil leaves
Preparation Time: 10 minutes
Cook Time: 0 minutes
Yields: As many skewers as you wish to make
Step-by-Step Guide:
- Prep the Ingredients: First, wash the cherry tomatoes and the basil leaves. Gently pat the basil leaves dry. If your small mozzarella balls are packaged in water or brine, drain them thoroughly. If you can only find larger mozzarella balls, simply cut them into bite-sized cubes roughly the size of your cherry tomatoes.
- Gather Supplies: Get your package of small wooden skewers (about 6 inches long) ready. You can also use toothpicks for a smaller bite.
- Assemble the Skewers: The key to a beautiful Caprese skewer is the order and presentation. For a classic, appealing look, follow this order for each skewer:
- Start by threading one cherry tomato onto the skewer, pushing it about halfway down.
- Next, thread one small mozzarella ball (bocconcini).
- Finish by folding a fresh basil leaf in half (or threading a small one whole) and pushing it onto the end.
- Repeat: Continue this process until you have used all your ingredients or have made the desired number of skewers.
- Serve: Arrange the finished skewers artfully on a serving platter. While not required for the 3 Ingredient Recipes challenge, you can optionally drizzle them with a good quality balsamic glaze or a pinch of salt and pepper just before serving to take the flavor to the next level.
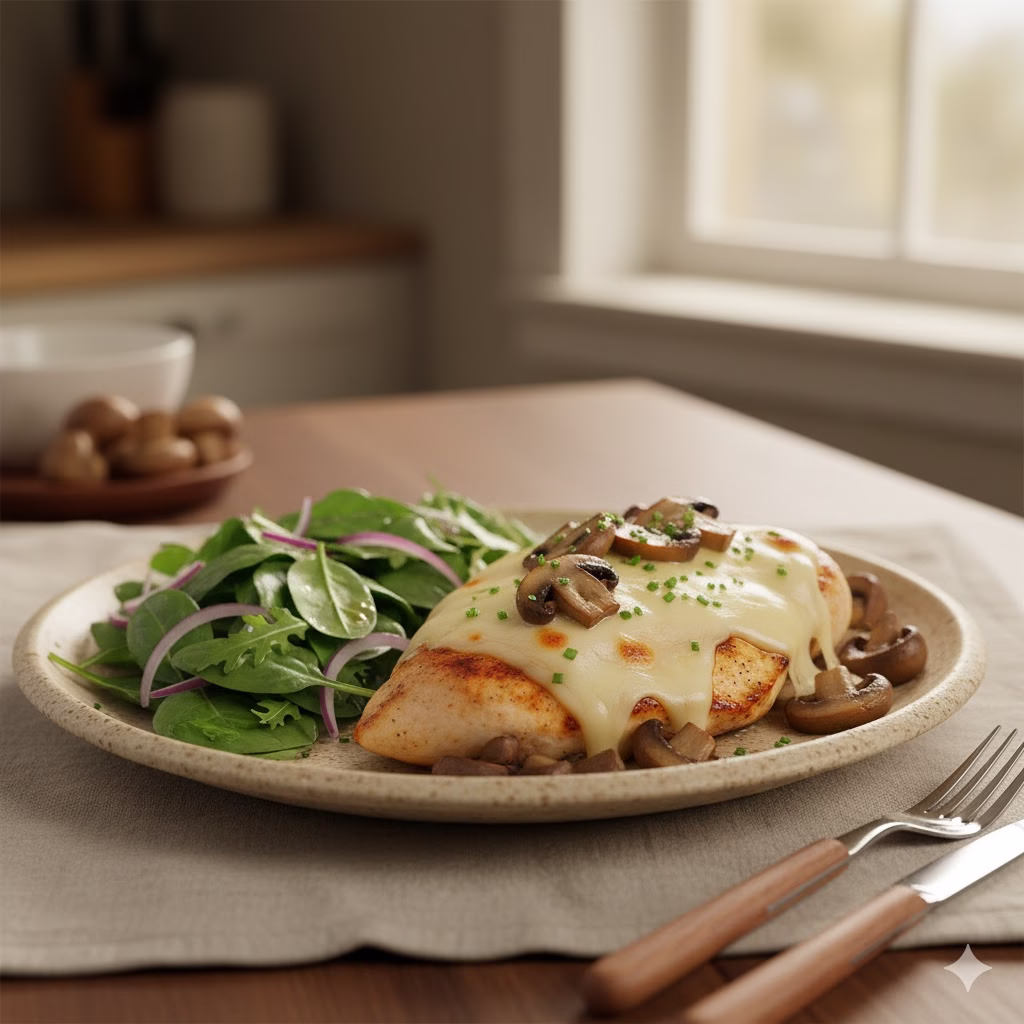
5. Swiss Cheese and Mushroom Chicken: The Quick Dinner
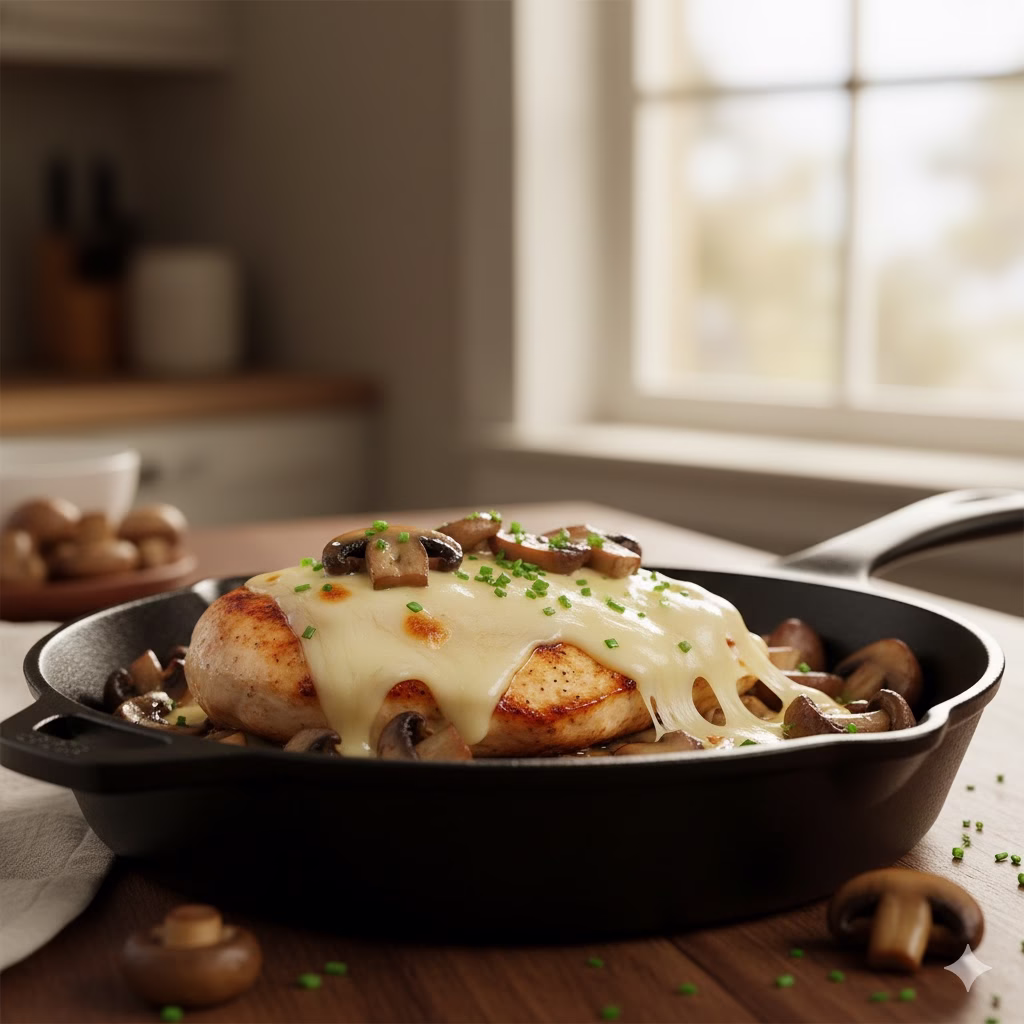
This recipe delivers a satisfying, high-protein, low-carb meal that feels much more complex than the 3 Ingredient Recipes this suggests. The creamy melted Swiss cheese and savory mushrooms transform a plain chicken breast into a hearty weeknight dinner.
How to Make It: Detailed Instructions
Ingredients:
- 4 boneless, skinless chicken breasts
- 1 can (around 10 ounces) of mushrooms, fully drained
- 4 slices of Swiss cheese
Preparation Time: 5 minutes
Cook Time: 20 minutes
Yields: 4 servings
Step-by-Step Guide:
- Prep and Season: Pat the chicken breasts dry with a paper towel. This step is important for achieving a good sear. While not counted in the three ingredients, you may want to add a little salt and black pepper to both sides of the chicken now for best flavor.
- Heat the Pan: Place a large skillet over medium-high heat. Add approximately 1 teaspoon of cooking oil (such as olive oil or canola) to the pan and allow it to heat until a drop of water sizzles immediately.
- Brown the Chicken: Carefully place the four chicken breasts into the hot pan. Brown them for about 5 minutes per side. The goal here is not to cook them through, but to develop a nice, golden-brown crust for flavor and texture.
- Add Mushrooms: Once the chicken is browned on both sides, reduce the heat to medium. Add the fully drained can of mushrooms to the pan, scattering them around the chicken. If you are adding any other optional seasonings (like a dash of garlic powder or onion powder), now is the time to do it.
- Finish Cooking: Continue to cook the chicken and mushrooms for another 15 minutes. The precise time depends on the thickness of your chicken breasts. To ensure safety, the chicken is fully cooked when its internal temperature reaches 165∘F (74∘C) and the juices run clear. The mushrooms will soften and release their moisture.
- Melt the Cheese: Once the chicken is cooked through, place one slice of Swiss cheese on top of each chicken breast.
- Cover and Serve: Cover the skillet with a lid or a sheet of aluminum foil. Allow the cheese to melt for about 1 to 2 minutes until it is perfectly gooey and dripping over the mushrooms. Serve the chicken immediately with the mushrooms on the side or spooned over the top.
FAQs: Questions on 3 Ingredient Recipes
Q: Can I use different types of ingredients?
A: Absolutely! The goal of these 3 Ingredient Recipes is to inspire you to simplify. Feel free to swap out ingredients based on your dietary needs or what you have on hand. For example, in the Salmon Patties, you can swap Monterey Jack for cheddar or Parmesan. For the Swiss Cheese Chicken, you could use provolone or mozzarella. The core concept—the minimalist framework—is what you are keeping.
Q: Do optional seasonings count as an ingredient?
A: No, in the spirit of these 3 Ingredient Recipes, staples like salt, pepper, and common cooking oils (like olive oil or butter used for cooking) do not count toward the three-ingredient limit. They are considered pantry essentials that are always available. The three ingredients are the core components that define the dish’s main flavor and substance.
Q: Are these meals nutritionally complete?
A: These recipes are all designed to be healthy, high in protein, or fiber-rich. For a fully balanced, nutritionally complete meal, you can easily pair these dishes with a simple, staple side. For example, serve the Buffalo Chicken with a simple side salad, or the Swiss Cheese Chicken with a baked sweet potato. The base of the meal is simple, allowing you to easily add a healthy carbohydrate or vegetable without complexity.
Q: Can I make substitutions for the protein sources?
A: Yes, the recipes are quite flexible. The Buffalo Chicken recipe would work equally well with pork tenderloin or turkey breast, though the cooking time may vary slightly. The Salmon Patties could be made with canned tuna or drained mashed chickpeas for a vegetarian option, though you may need to adjust the binding agent slightly.
Reference Section
- Healthline – Salmon Nutrition: Health Benefits Explained
- WebMD –Cinnamon: Health Benefits, Uses, Nutrition
- UCLAhealth – 7 health benefits of mushrooms
Recent Posts


