Struggling to make your rental feel like you, or just want to add a touch of luxury without breaking the bank? I’ve been there! As a fellow budget-conscious design enthusiast, I’m always on the hunt for clever ways to elevate my space. Join me on a journey to transform overlooked items into statement pieces that look far more expensive than they actually are. Let’s make our homes shine, one simple drawer hack at a time!
Introducing the Simple Drawer Hack That Will Change Your Home
Do you ever scroll through Pinterest or Instagram? You see those perfectly styled homes with custom furniture and bespoke decor. Then, you look at your own functional but uninspiring living space. You probably wonder how you can get that coveted “high-end” look. Achieving it without spending a fortune seems impossible.
What if I told you the secret to adding a touch of sophisticated style is hidden in plain sight? It might be tucked away in your garage, attic, or at your local thrift shop. It’s true. Today, we’re diving deep into an amazing transformation. We will take something humble and overlooked—an old drawer—and turn it into a genuine statement piece. Get ready to learn the ultimate simple drawer hack. Your guests will ask, “Where did you buy that?!”
The Unsung Hero: Why Old Drawers Are Your Design Secret Weapon

Drawers are usually just for storage. We use them to tuck things away out of sight. They are often boxy, purely useful, and, frankly, a bit dull. But this is exactly what makes them so great! Their simple, strong structure makes them incredibly easy to repurpose. They come in many sizes, depths, and materials. You can find solid wood or particle board, giving you many options for upcycling.
Think about these benefits:
- Built-in structure: You don’t need complex carpentry. The hard work of creating a sturdy box is already finished.
- Affordability: Old drawers are often free. Ask friends, family, or check local online sites for dressers people are throwing out. They are very cheap at second-hand stores.
- Sustainability: You are giving an item a second life. This keeps it out of the landfill. You are helping create a more circular economy. It’s a great choice!
- Customization potential: You can use paint, wallpaper, legs, or handles. You can easily make it look just how you want.
Before we discuss the “how-to,” let’s spark your imagination. Here are some stunning examples of what a drawer can become.
Beyond Storage: Inspiring Transformations

This simple drawer hack is beautiful because it is so flexible. You aren’t just making a new storage box. You are creating a functional piece of art.
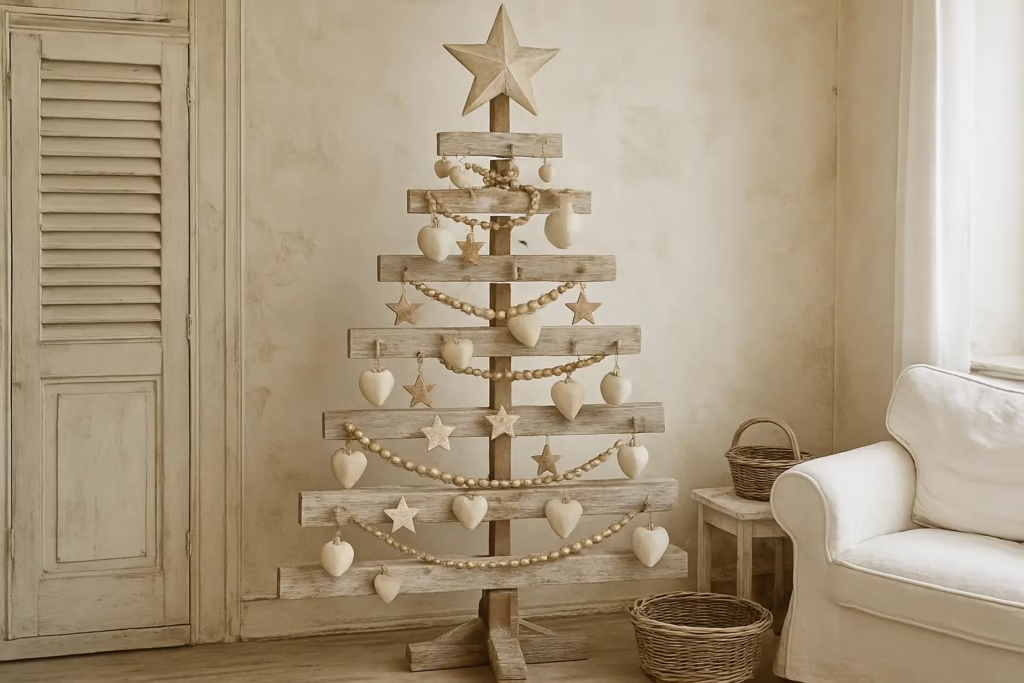
1. Floating Wall Shelves/Cubby Organizers
Imagine a group of drawers. Paint them in different shades of one color, or use vibrant, contrasting colors. Mount them right onto a wall. They become stylish display shelves. You can use them for books, plants, or cherished small items.
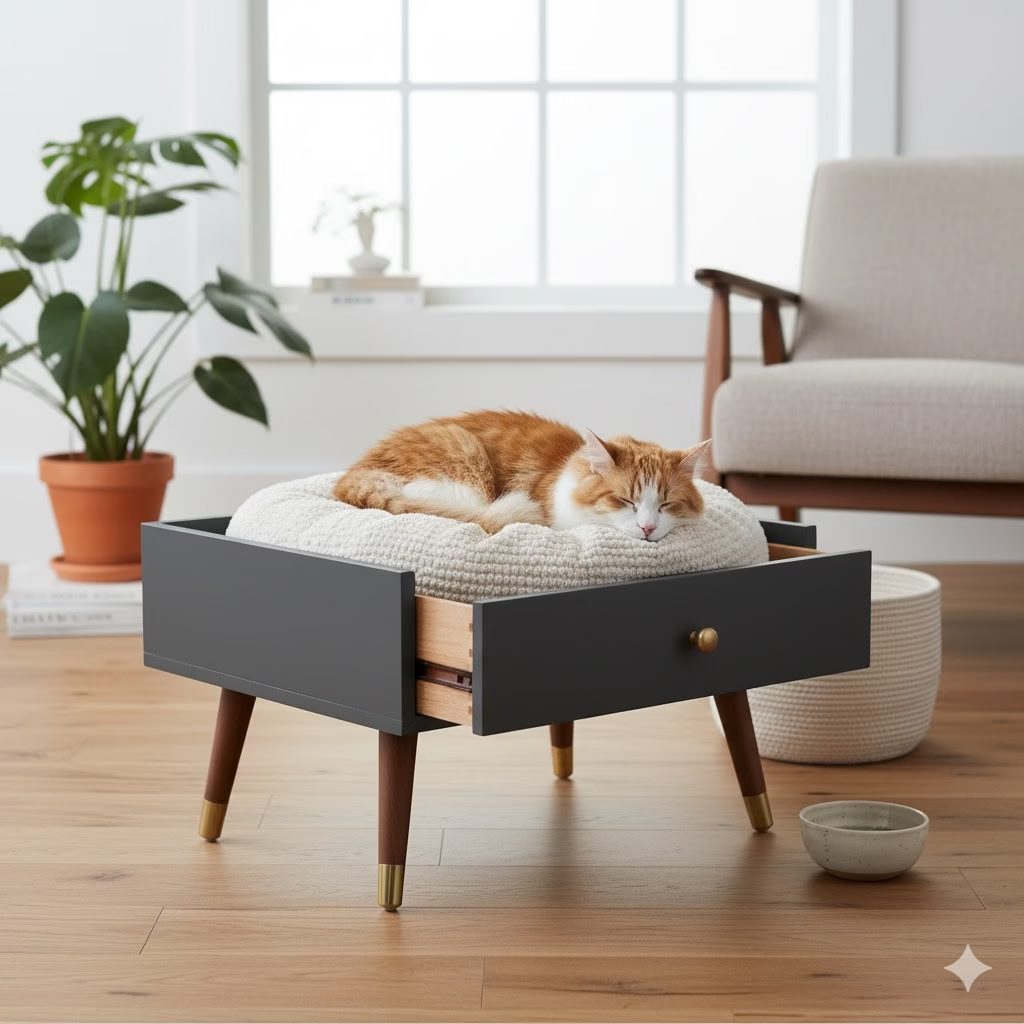
2. Pet Beds (Chic & Cozy)
You can turn larger drawers into adorable, raised pet beds. Add some short, elegant legs, a fresh coat of paint, and a custom cushion. Now you have a pet accessory that looks good with your decor. It won’t clash with your style.
3. Mini Coffee Tables or Side Tables
A sturdy, deeper drawer from an older, well-built dresser can become a small side table. Add four stylish legs. You can choose tapered wooden, hairpin metal, or even decorative round feet. Add a glass top for protection. Now you have a custom piece.
4. Storage Ottomans or Benches
Do you have a long, shallow drawer? You can even join two drawers together. This can create a charming storage ottoman or bench. Add a padded lid that lifts off. Now you have both hidden storage and extra seating.
5. Bathroom Organizers or Vanity Trays
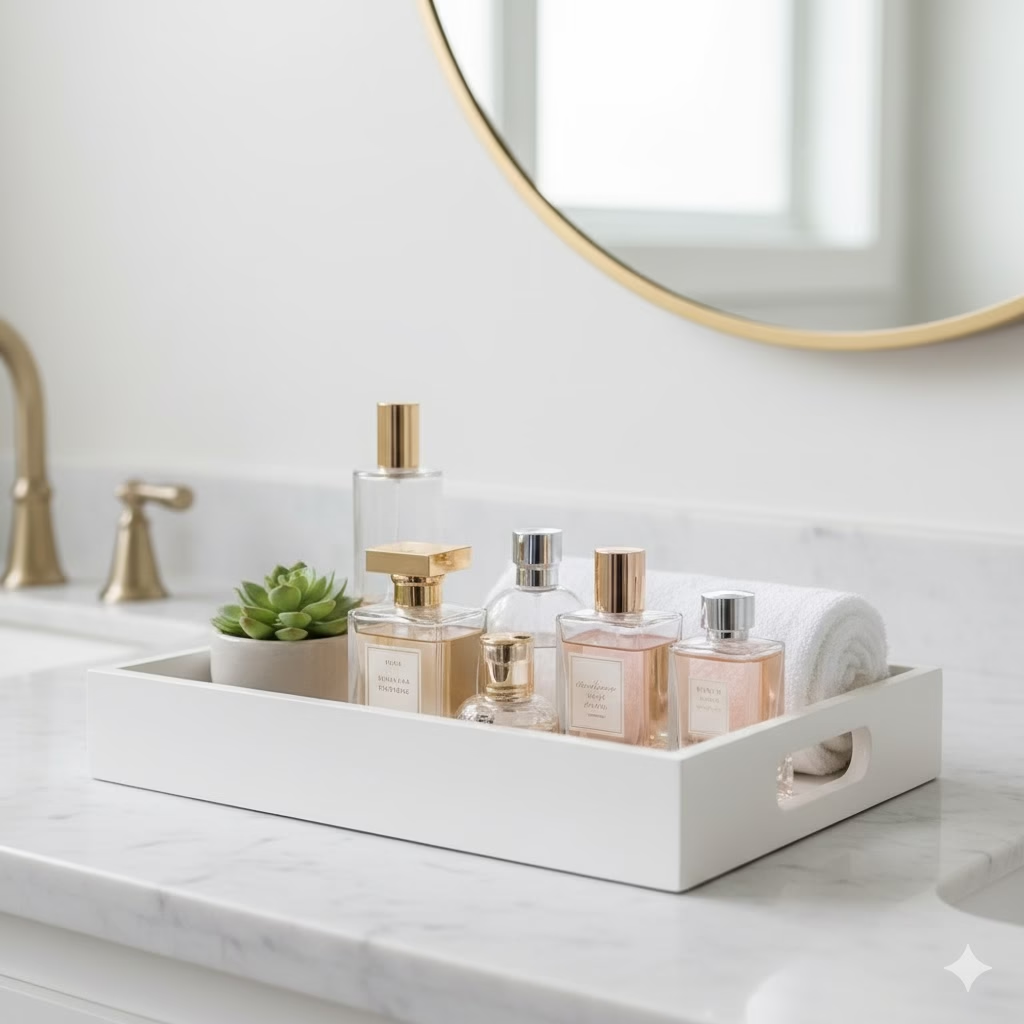
Smaller, shallower drawers work perfectly for bathroom organizing. Mount them straight on a wall for rolled towels or toiletries. You can also just use them as decorative trays on your vanity for perfumes and lotions.
6. Wall-Mounted Planters or Herb Gardens
Line a drawer with plastic sheeting. Add drainage holes. Fill it with soil. Mount it on a wall to create a unique vertical garden. You can grow herbs or small plants.
These examples are just the start. The true magic happens when you add your own style and meet your own home needs with the project.
The Simple Drawer Hack: A Step-by-Step Guide
Are you ready to get your hands a little dirty? (And then beautifully clean and stylish?) Here is how to complete this simple drawer hack. You will get professional-looking results.
Step 1: Finding Your Drawer(s)
This is often the easiest and most enjoyable part!
- Thrift Stores/Charity Shops: These are a great source for old dressers, bedside tables, or even single drawers. Look for solid wood if you can. Particle board can also work.
- Online Marketplaces: Check Facebook Marketplace, Gumtree, and Craigslist. People often give away old furniture for free if you are willing to pick it up.
- Friends & Family: Ask around! Someone always has an old piece collecting dust.
- Curbside Alerts: Look around on collection days in your neighborhood.
What to look for:
- Sturdiness: Make sure the drawer isn’t wobbly or about to fall apart.
- Material: Solid wood is usually easier to work with. It is also more durable.
- Size & Shape: Think about what you plan to make. You need a deeper drawer for a side table. You need a shallower one for a wall shelf.
- No major structural damage: Scratches, dents, and old finishes are fine. But avoid large cracks or missing pieces that make it unstable.
Step 2: Cleaning and Preparation – The Foundation of a Flawless Finish
This step is very important and people often forget it. Good prep makes a huge difference!

- Thorough Cleaning: Wipe down the whole drawer, inside and out. Use a good all-purpose cleaner. For dirt that is stuck, a cleaner like sugar soap works well. Let it dry completely.
- Sanding: Sanding helps your new paint stick well. It gives the surface a “key.”
- Light Sanding: If the current finish looks good, a light sand with 180-220 grit sandpaper is enough.
- Heavier Sanding: If the paint is chipped, there are deep scratches, or a thick varnish, you might start with 80-120 grit. This smooths things out. Then, finish with 180-220 grit for a very smooth surface.
- Pro Tip: Always sand with the wood grain.

- Dust Removal: Vacuum up all the dust from sanding. Then, wipe it down well with a special tack cloth or a damp (not wet) cloth. This removes any leftover dust.
- Priming (Highly Recommended): Primer is essential. It blocks stains and stops color from bleeding through. This is very important with old wood. It also helps your topcoat paint stick beautifully and evenly. Use a good quality all-purpose primer. If your drawer is very dark or has knots, use a special stain-blocking primer. Apply 1-2 coats following the directions. Let it dry completely between coats.Image Placement 7: A drawer being sanded, showing dust and old finish.
Step 3: The Transformation – Making it “Expensive”

This is the step where your idea becomes real!
Option A: Painting for a Modern Finish
- Choose Your Paint:
- Color: Neutral colors look sophisticated. Think matte black, charcoal grey, crisp white, or muted beige. Deep, rich colors like emerald green or sapphire blue can add a luxurious splash of color. Think about using a different color inside for a surprise look.
- Sheen: Matte or eggshell finishes often look more expensive and modern. High gloss can sometimes show flaws more easily.
- Type: Use good quality furniture paint, chalk paint (which needs less prep but needs a protective topcoat), or a strong acrylic latex paint that has primer mixed in.

- Application:
- Brushes & Rollers: Use a high-quality synthetic brush for corners and details. Use a small foam roller for smooth, even coverage on flat areas.
- Thin Coats: Apply several thin coats instead of one thick one. This stops drips and gives a much smoother, professional finish. After each coat dries, lightly sand with 220-320 grit sandpaper for an extra smooth feel.
- Topcoat/Sealer: Does your paint not have a built-in topcoat? Or do you want extra durability? If so, apply a clear, water-based polycrylic or wax. This protects your finish. It also adds a subtle shine.Image Placement 8: A drawer being painted with a roller, showing even coverage.
Option B: Adding Texture with Wallpaper or Fabric
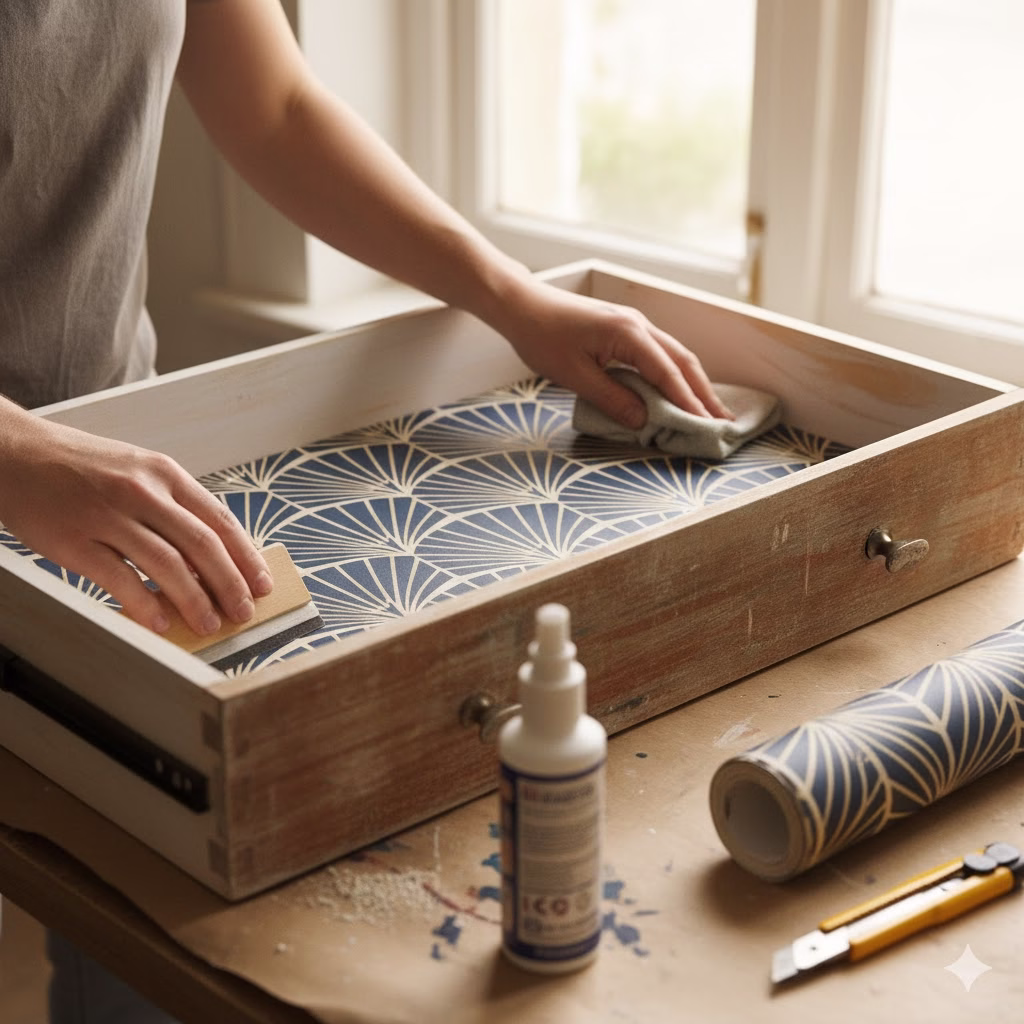
To make it look even more interesting, you can put wallpaper on the inside or outside of the drawer.
- Preparation: Make sure the surface is clean, smooth, and primed, as described above.
- Measure and Cut: Carefully measure the drawer panels you want to cover. Cut your wallpaper or fabric with a little extra around the edges.
- Adhesive:
- Wallpaper: Use normal wallpaper paste.
- Fabric: Spray adhesive or Mod Podge works well.
- Application: Put the adhesive on the drawer surface. Then, carefully lay down the wallpaper or fabric. Smooth out any air bubbles with a wallpaper tool or a clean cloth. When it is dry, trim the extra material with a craft knife.Image Placement 9: A drawer with patterned wallpaper being applied to the inside.
Step 4: Elevated Details – The “Expensive” Finish
This step is where you truly upgrade your simple drawer hack. It will look designer-made, not DIY.
- Legs: Adding legs immediately turns a box into a piece of furniture.
- Hairpin Legs: These are modern, industrial, and look sleek.
- Tapered Wooden Legs: These give a mid-century modern style.
- Bun Feet/Decorative Legs: These are more classic or fancy, depending on your choice.
- Attachment: Use leg attachment plates for easy and safe installation. You can find these metal plates at hardware stores.
- Hardware: Replace any old drawer pulls with something new and noticeable.
- Brass/Gold: This immediately adds a touch of luxury.
- Matte Black: This is chic and contemporary.
- Leather Pulls: These are unique and feel nice to the touch.
- No Hardware: For a minimalist style, you can sometimes cut a finger pull. Or, you can simply use the existing opening.
- Trim/Molding: For an even more custom look, add thin decorative molding strips to the front of the drawer. Create a geometric pattern. Paint them the same color as the drawer. This makes it look neat and high-end.
- Glass or Mirror Tops: For tables or trays, a piece of glass or mirror cut to fit adds protection. It also adds a touch of reflective glamor. Use clear silicone bumpers to keep it in place.Image Placement 10: Close-up of stylish new hardware (e.g., gold pulls) on a painted drawer.
Step 5: Styling Your Masterpiece
Once your piece is finished and dry, it’s time to put it in your home.
- Placement: Think about where it will look best. A floating shelf in a hallway, a side table next to a couch, or a vanity organizer in the bathroom.
- Decor: Style it simply and thoughtfully. A few well-chosen items will make it feel curated, not messy. Use a plant, a stack of books, a decorative object, or a framed photo.
- Lighting: Good lighting can improve how any piece looks. Consider a small lamp on your new side table. Or, use a spotlight above your wall shelves.Image Placement 11: A beautifully styled finished drawer project in a home setting.
Conclusion: Your Home, Elevated

You don’t need a huge budget or a team of interior designers to create a home that feels luxurious, personal, and exactly like you. With a little creativity, some effort, and this simple drawer hack, you can turn old items into elegant statements. You will save money. You will also help the environment. Plus, you will feel great knowing you built these beautiful pieces yourself.
So, the next time you see an old dresser being thrown out, don’t see trash. See potential. See a chance to make your home look expensive. It is easy and affordable. Happy upcycling!
FAQ Section
Q1: What kind of drawers are best for upcycling?
A1: Solid wood drawers are usually the easiest to use. They are strong and hold paint well. However, good quality particle board (MDF) drawers can also be successfully upcycled. Make sure they are strong and stable. Do not use drawers made from very weak particle board.
Q2: Do I really need to sand and prime? Can’t I just paint over it?
A2: You can sometimes paint without sanding and priming. But projects that skip these steps often don’t look professional. They also chip and peel faster. Sanding prepares the surface so the paint sticks well. This prevents chipping. Priming blocks stains and makes the color look even. It also makes the paint last much longer. For a truly “expensive” look, these steps are necessary.
Q3: How do I attach legs securely to a drawer?
A3: The easiest and safest way is to use special leg attachment plates. These metal plates screw onto the bottom of the drawer. They provide a strong place to screw in threaded furniture legs. You can find them at hardware stores or online.
Q4: What if my drawer is a bit wobbly?
A4: If the wobble is small, you can reinforce the joints with wood glue and clamps. For bigger gaps, use wood filler before sanding. If the drawer is very broken or unstable, it is better to find a different one.
Q5: Can I use this hack for outdoor furniture?
A5: Yes, but you must use materials made specifically for outdoor use. This includes exterior-grade paint, primer, and sealants. These products can handle bad weather. Also, ensure the wood itself is suitable for the outdoors or is fully protected.
Q6: Where can I find affordable new hardware for my drawers?
A6: Look at online shops like Amazon, Etsy, or special hardware stores. For unique items, check out antique shops, flea markets, or your local Habitat for Humanity ReStore. Sometimes, simply spray painting old hardware can make it look new and high-end.
References
- FutureLearn – The future of recycling
- Healtheplanet – 27 Upcycling
Recent Posts