Cookie Consent by Free Privacy Policy Generator Update cookies preferences

The Tunisian Crochet Stitches Everyone Is Obsessed With Right Now

Close-up of a person's hands actively working on a Tunisian crochet project with a long, cabled Tunisian crochet hook, showcasing multiple loops on the hook. The image highlights the intricate texture of Tunisian Crochet Stitches being created, with a basket of yarn in soft colors and a steaming mug in the background, suggesting a cozy crafting atmosphere.

Hi there, I’m just like you—a fiber enthusiast who always has at least three projects going at once and a perpetually growing yarn stash. I started my journey with regular crochet and knitting, but when I discovered the unique woven texture of Tunisian Crochet, I was completely hooked (pun intended!). There’s a magic in this technique that produces stunning, boutique-quality fabrics, and I’m thrilled to share the essential Tunisian Crochet Stitches that have captured the entire crafting community’s heart. Let’s dive in and elevate your hook game!


Introduction: A New Craze in the Fiber World

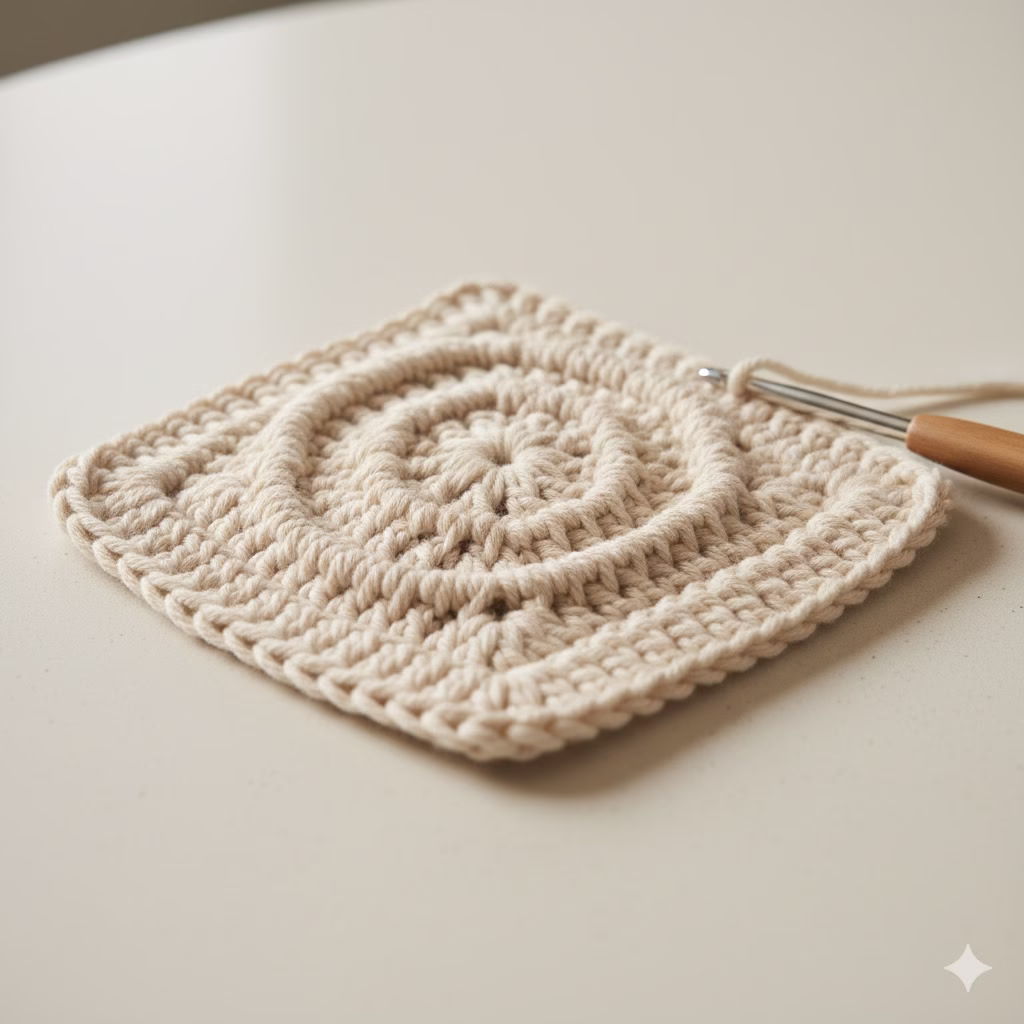
For years, the fiber world was dominated by the classic elegance of knitting and the versatile simplicity of traditional crochet. But there’s a craft that combines the best of both, yielding a beautiful, dense, woven fabric that is suddenly taking over social media feeds and pattern libraries: Tunisian Crochet.

Also known as Afghan Crochet, this unique technique uses a longer hook (often with a flexible cable) to hold multiple loops on the hook, much like knitting, but with a single crochet hook. The fabric it creates is distinctive, often thicker, and less stretchy than traditional crochet, making it perfect for sturdy items, cozy blankets, and warm garments.

But what truly sets it apart are the extraordinary Tunisian Crochet Stitches you can create. They range from solid and knit-like to light and lacy, and a few key patterns have become the runaway stars of the moment. If you’ve been looking for an engaging new technique to tackle a stunning Tunisian Crochet Patterns project, you’ve come to the right place.

In this guide, we’ll explore the most popular Tunisian Crochet Stitches, provide step-by-step instructions on how to do them, include examples of projects, and share essential tips to master this addictive craft.

Close-up of a person's hands actively working on a Tunisian crochet project with a long, cabled Tunisian crochet hook, showcasing multiple loops on the hook. The image highlights the intricate texture of Tunisian Crochet Stitches being created, with a basket of yarn in soft colors and a steaming mug in the background, suggesting a cozy crafting atmosphere.

The Three Foundation Stitches: Your Essential Toolkit

Before we dive into the viral stitches, you must master the fundamental building blocks of Tunisian Crochet. Every subsequent pattern builds upon these basic techniques.

1. The Foundation Row (FR)

Every project begins with a foundation chain and an initial forward pass.

How to Do It:

  1. Chain (Ch): Start with a simple chain (Ch) of any desired number of stitches.
  2. Forward Pass (FP): Insert your hook into the back bump of the second chain from the hook, yarn over (YO), and pull up a loop. Leave the loop on the hook.
  3. Repeat this process in the back bump of every chain across the row. You should end the Forward Pass with the same number of loops on your hook as your initial chain count.
  4. Return Pass (RP): Do not turn your work. YO and pull through one loop (this creates your turning chain/edge).
  5. YO, and pull through two loops. Repeat the bracketed step (YO, and pull through two loops) until only one loop remains on your hook. This loop counts as the first stitch of your next row.

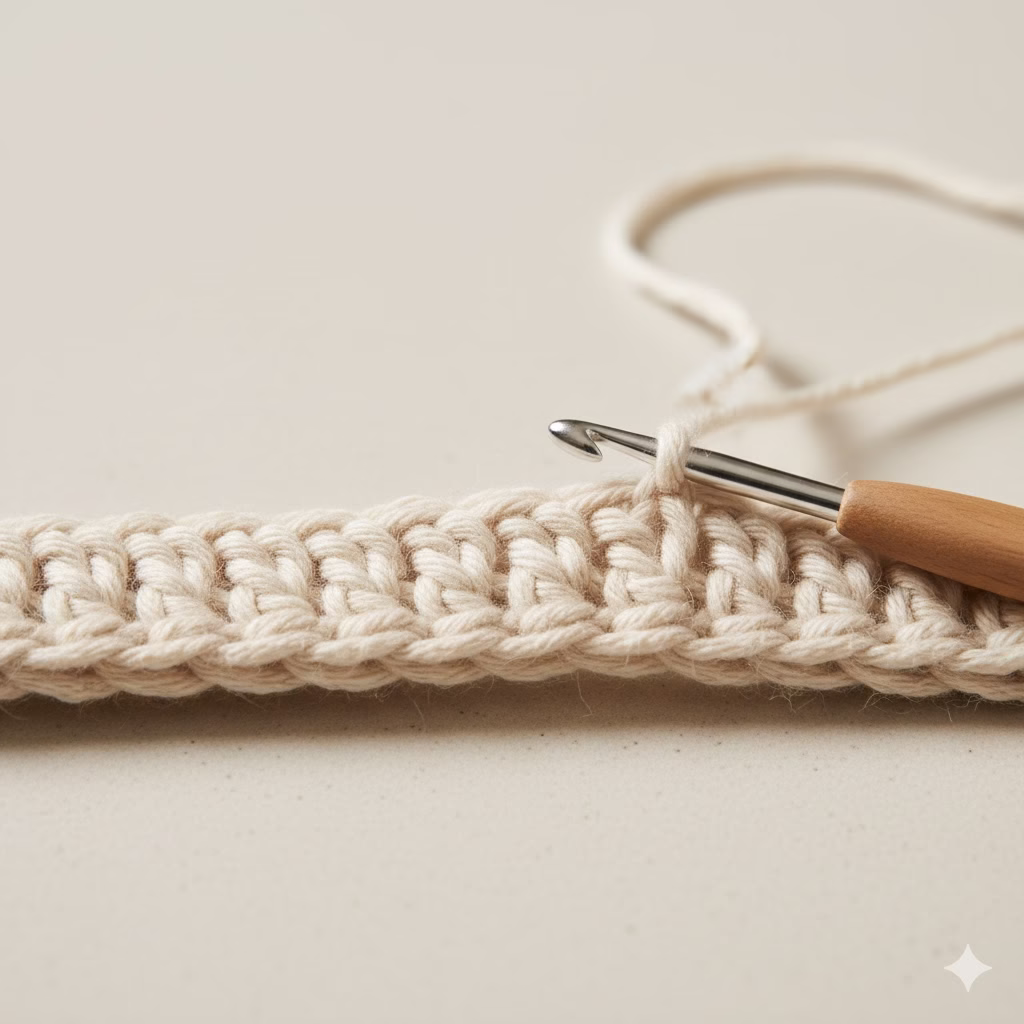
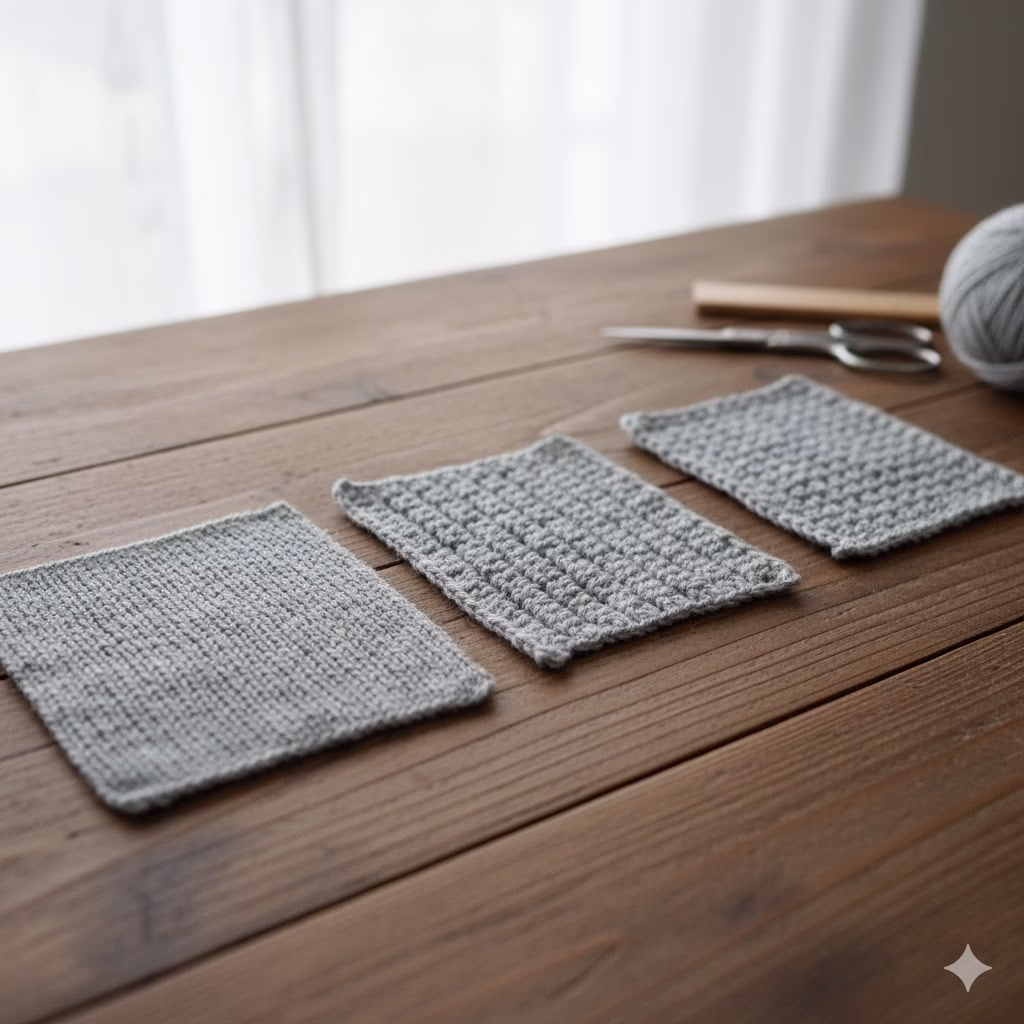
2. Tunisian Simple Stitch (TSS)

The TSS is the most common and arguably the most important stitch. It creates a beautiful, woven texture that resembles small square tiles.

How to Do It:

  1. Forward Pass (FP): Skip the first vertical bar (the loop on your hook counts as the first stitch).
  2. Insert your hook under the next vertical bar from right to left (or front to back).
  3. YO and pull up a loop. Leave the loop on the hook.
  4. Repeat Step 2 and 3 across the row until you reach the final stitch.
  5. Edge Stitch: For the last stitch, insert your hook under both the front and back loops of the last vertical bar to create a clean, non-curling edge. YO, pull up a loop.
  6. Return Pass (RP): Work the standard return pass (Ch 1, then YO, pull through 2 loops across).

Example Project: Washcloths, dishcloths, or a simple striped scarf.

3. Tunisian Purl Stitch (TPS)

This is the stitch you use to counteract the notorious curl of Tunisian crochet fabric! It creates a series of horizontal bumps that closely resemble the purl stitch in knitting.

How to Do It:

  1. Forward Pass (FP): Skip the first vertical bar.
  2. Bring the yarn to the front of your work.
  3. Insert your hook under the next vertical bar (just like TSS).
  4. Bring the yarn to the back of your work.
  5. YO and pull up a loop. Leave the loop on the hook.
  6. Repeat Steps 2-5 across the row, remembering to work the final edge stitch under both loops.
  7. Return Pass (RP): Work the standard return pass.

Example Project: Ribbing for hats, cuffs, or an entire blanket with beautiful drape.


The Current Obsession: Viral Tunisian Crochet Stitches

These three stitches are currently trending in Tunisian Crochet Patterns for their unique texture, ease of learning, and stunning results.

1. The Tunisian Knit Stitch (TKS)

If you love the look of knitting but prefer using a crochet hook, this is your new favorite stitch. It creates a solid fabric that looks nearly identical to stockinette knitting. It’s also incredibly popular for warm accessories and garments.

How to Do It:

  1. Forward Pass (FP): Skip the first vertical bar.
  2. Instead of inserting your hook under the vertical bar (like TSS), you will insert your hook between the front and back vertical bars, going straight through the center of the stitch from front to back.
  3. YO and pull up a loop. Leave the loop on the hook.
  4. Repeat across the row, remembering to work the final edge stitch under both loops.
  5. Return Pass (RP): Work the standard return pass.

Examples: Beanies, cardigans, and throw blankets where a tight, knit-look fabric is desired.

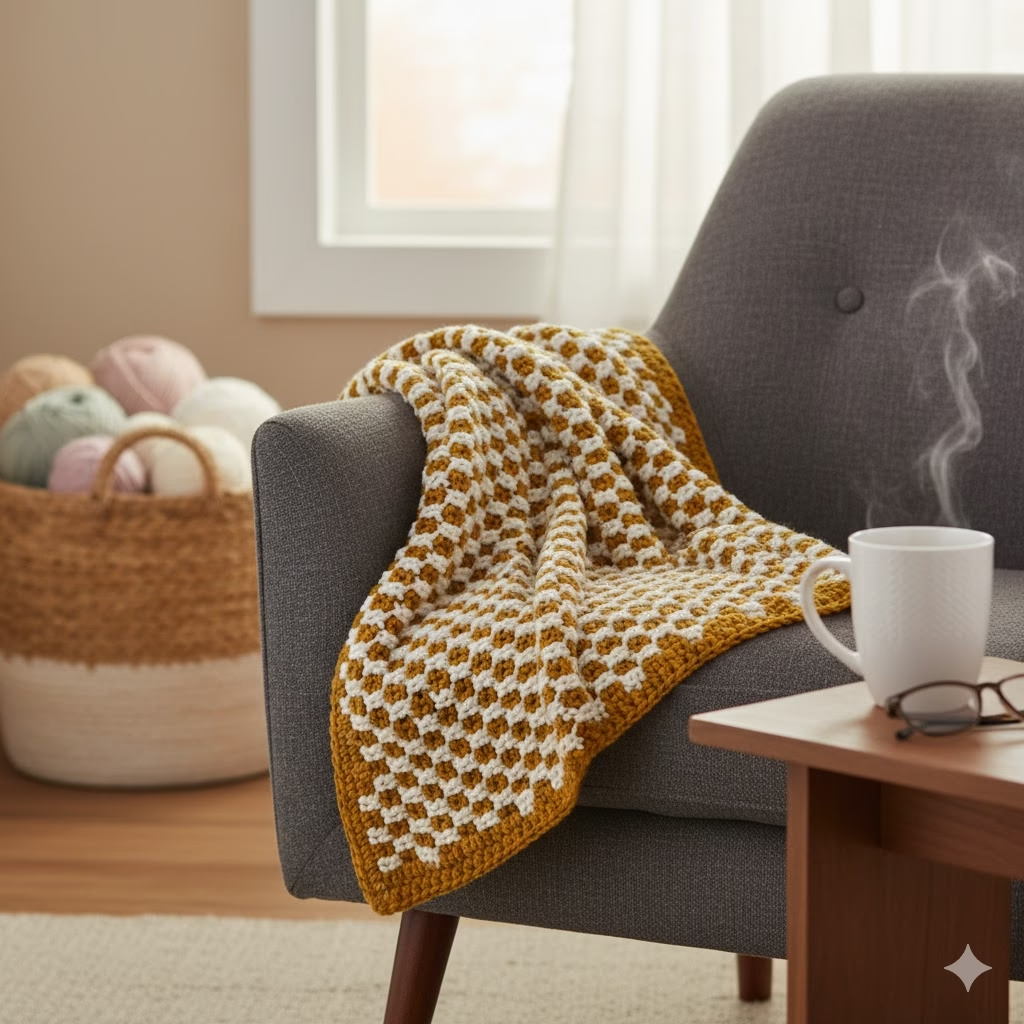
2. The Tunisian Honeycomb Stitch

This advanced-beginner stitch is pure texture magic. It creates a gorgeous, subtle grid or waffle-like fabric that is famous for having significantly less curl than many other stitches. It’s a two-row repeat that alternates the Tunisian Simple Stitch (TSS) and the Tunisian Purl Stitch (TPS).

How to Do It (2-Row Repeat):

  • Row 1 (FP): TSS in the next vertical bar, then TPS in the following vertical bar. Repeat from the beginning of the sentence across the row, ending with a TSS (if starting with a TSS). Work the final edge stitch under both loops.
  • Row 1 (RP): Work the standard return pass.
  • Row 2 (FP) – Switching the pattern: TPS in the next vertical bar (where you worked a TSS in the previous row), then TSS in the following vertical bar (where you worked a TPS in the previous row). Repeat from the beginning of the sentence across, ensuring you alternate the stitches from the row below. Work the final edge stitch under both loops.
  • Row 2 (RP): Work the standard return pass.
  • Repeat Rows 1 and 2 for the Honeycomb Pattern.

Examples: Scarves, cowls, cushion covers, and structured bags.

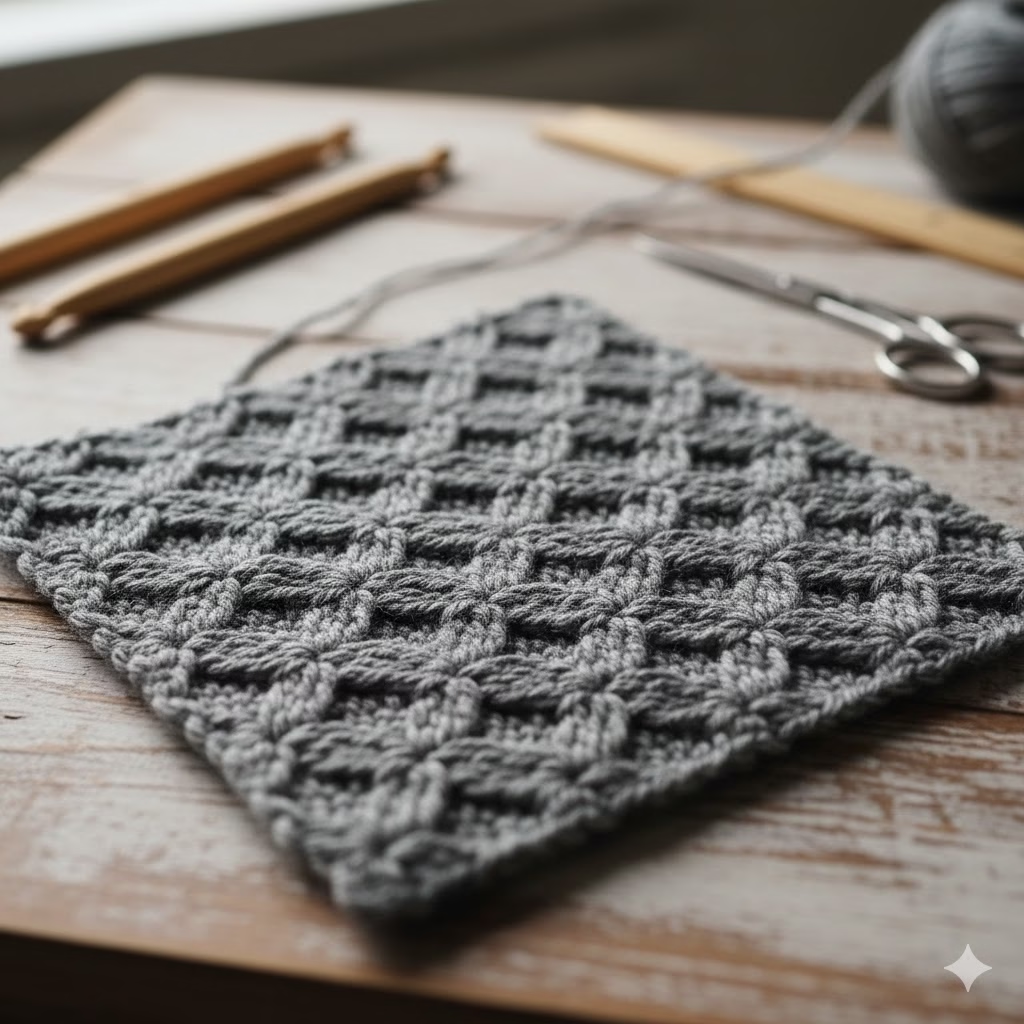
3. The Tunisian Smock Stitch

The Tunisian Smock Stitch is an eye-catching, highly textured stitch that creates a stunning, woven effect reminiscent of diamond shapes or basketry. It’s a wonderful stitch for heavier-weight yarns and structured projects.

How to Do It (Forward Pass, 2-Row Repeat):

  • Row 1 (FP): Skip the first vertical bar. Work a standard TSS in the next stitch. Then, for the remainder of the row, you will be working Tunisian Simple Stitch 2 Together (TSS2tog).
    • TSS2tog: Insert your hook under the next two vertical bars simultaneously, YO, and pull up a loop. Leave the loop on the hook.
    • Repeat TSS2tog across the row. The row will end with one vertical bar remaining. Work the final edge stitch in the last vertical bar under both loops.
  • Row 1 (RP): Work the standard return pass.
  • Row 2 (FP) – Offset Row: Skip the first vertical bar. Work the next stitch as a TSS. This places the single TSS in the center of the two stitches you worked together in the row below.
    • Repeat TSS2tog across the row. Work the final edge stitch.
  • Row 2 (RP): Work the standard return pass.
  • Repeat Rows 1 and 2 for the Smock Pattern.

Examples: Textured blankets, rugs, and thick, warm jackets.


Mastering Tunisian Crochet: Tools & Tips

To truly master these popular Tunisian Crochet Stitches and tackle ambitious Tunisian Crochet Patterns, you’ll need the right equipment and a few pro tips.
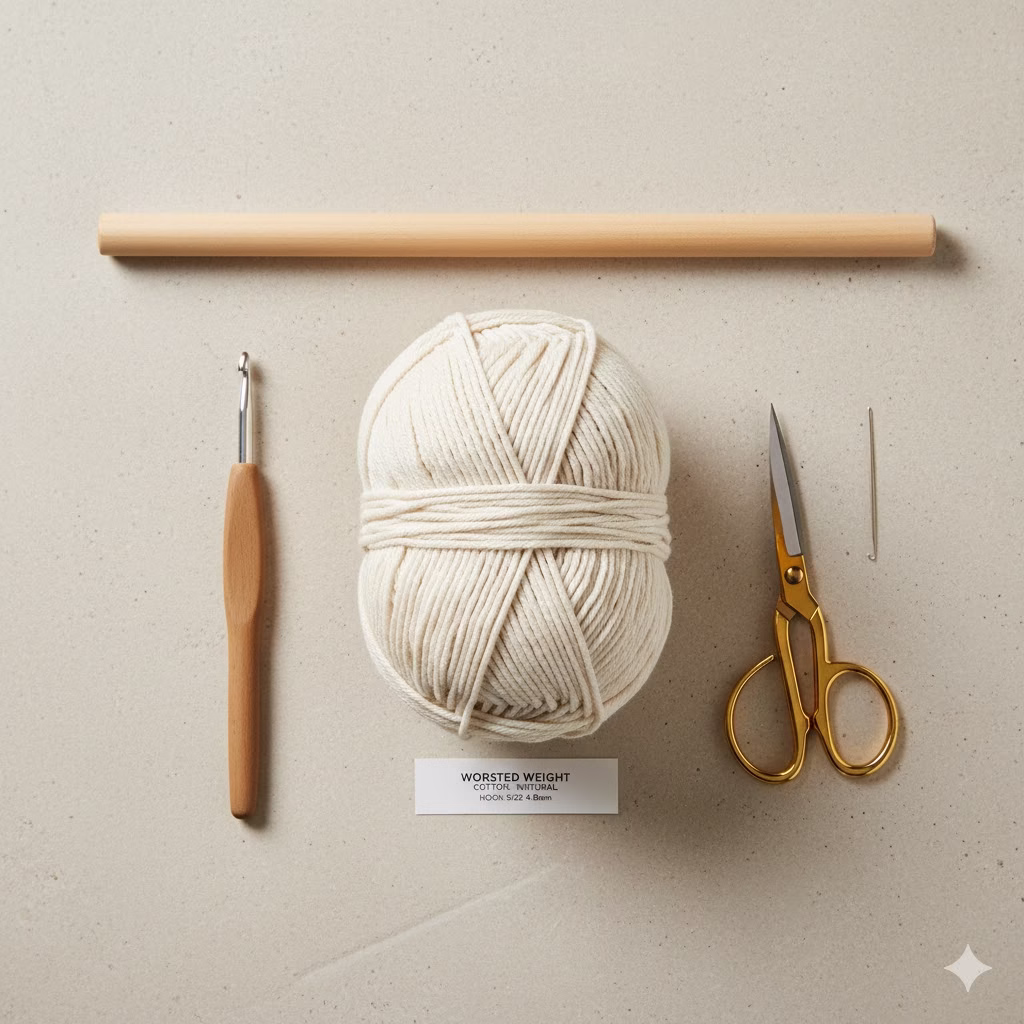
The Right Tools

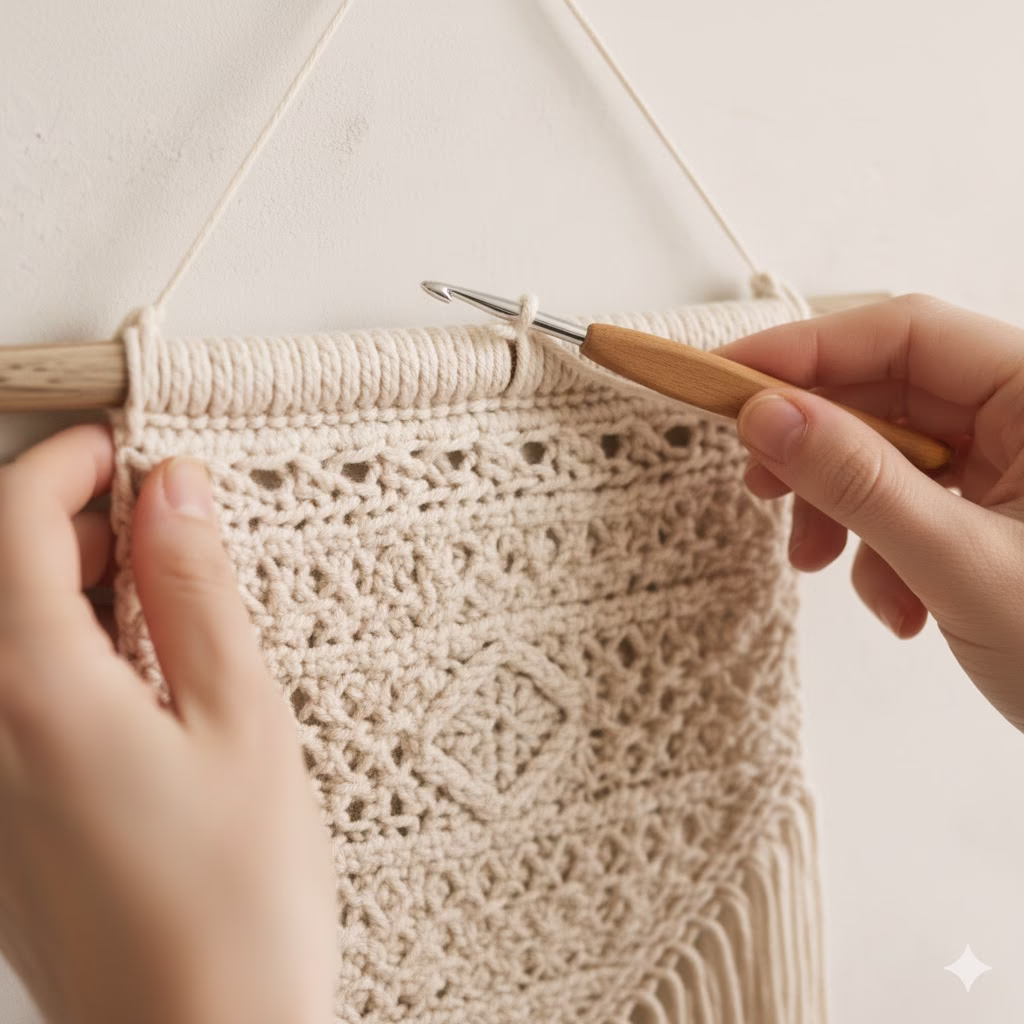
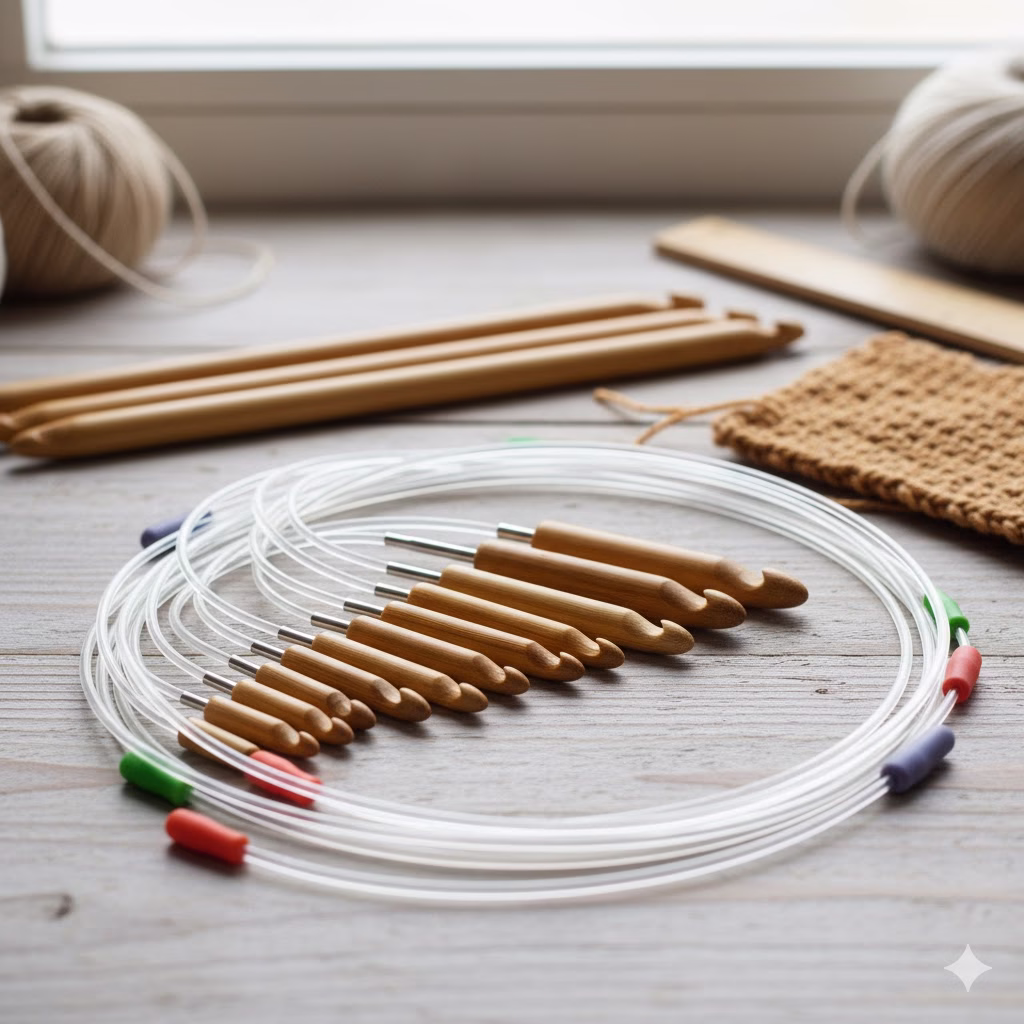
  • The Hook: You need a specialized Tunisian hook. These are significantly longer than standard crochet hooks, allowing you to hold an entire row of loops. For larger projects, a hook with a flexible cable attached is essential.
  • The Size: The general rule of thumb is to use a hook that is at least 2-3 sizes larger than the size recommended on your yarn label. This is crucial for counteracting the natural density and stiffness of the fabric and helping to minimize the frustrating curl.

The Curl Conundrum: How to Beat It

The most common frustration with Tunisian Crochet is the fabric’s tendency to curl aggressively. This is due to the structure of the Forward Pass—it uses up more yarn than the Return Pass, pulling the fabric inward.

Expert Tips to Minimize Curl:

  1. Use a Larger Hook: As mentioned, this is the number one trick.
  2. Use a Curl-Reducing Stitch: Patterns that incorporate the Tunisian Purl Stitch (like the Honeycomb Stitch or a simple Ribbing) will curl significantly less than all-Simple Stitch projects.
  3. Add a Border: Once your project is complete, add a simple border of single crochet (UK double crochet) stitches around the edge. This provides weight and structure, flattening the edges.
  4. Block Aggressively: Blocking is essential for all Tunisian Crochet items. Wet or steam-block your finished piece and pin it aggressively to the desired dimensions to permanently set the stitches and remove the curl.

Why the Obsession? The Benefits of Tunisian Crochet

Why are so many crafters dropping their needles and standard hooks to pick up this technique?

FeatureTunisian CrochetTraditional Crochet
Fabric LookDense, woven, often knit-like (especially TKS).Varied, from open/lacy to dense, but with distinct “V” stitches.
Fabric DrapeLess stretchy horizontally, often heavier and more structured.Generally more stretchy and flowy.
Stitch VisibilityExcellent for showcasing complex colourwork (like fair isle or plaid).Good, but colourwork texture is often less defined.
Error FixingEasier to ‘frog’ (unravel) back to a previous row without losing stitches, similar to a dropped knit stitch.Generally easier to ‘tink’ (un-crochet stitch by stitch).
Finished EdgeA natural, neat edge is created by the technique, making borders optional.Edges often require a separate finishing row for a polished look.

The ability of Tunisian Crochet to mimic the polished, woven look of knitting while retaining the speed and ease of using a single hook is what makes it such a breakout star in the fiber arts community. Its unique structure means you can create Tunisian Crochet Patterns for garments that feel substantial, blankets that are extra warm, and accessories that have beautiful, defined texture.

Inspiration: Projects for Every Stitch

Ready to get started? Here are some simple project ideas for your new favorite Tunisian Crochet Stitches:

  • For the Beginner: A simple Tunisian Simple Stitch (TSS) scarf. It’s the perfect way to practice your tension and get comfortable with the Forward and Return Passes.
  • For the Cozy Crafter: A baby blanket using the Tunisian Knit Stitch (TKS). The dense fabric is incredibly warm, and the knit look makes it a stunning gift.
  • For the Textured Lover: A sophisticated two-tone cushion cover using the Tunisian Honeycomb Stitch in contrasting colours for maximum visual impact.
  • For the Garment Maker: A warm winter cowl or hat using the Tunisian Smock Stitch. The fabric’s thickness makes it ideal for cold weather accessories.

Frequently Asked Questions (FAQ)

Q1: What kind of hook do I need for Tunisian Crochet?

A: You will need a Tunisian crochet hook, which is longer than a standard hook, usually 10 to 14 inches. For projects wider than a scarf (like blankets or shawls), you will need a hook with a flexible cable attached to hold all the loops.

Q2: Does Tunisian Crochet use more yarn than regular crochet or knitting?

A: Yes, generally, Tunisian Crochet uses more yarn than traditional crochet or knitting for a project of the same size. This is due to the unique construction where the yarn is worked in two passes, creating a denser fabric. Plan for slightly more yarn than you would for a standard crochet project.

Q3: How do I read a Tunisian Crochet pattern?

A: Tunisian Crochet Patterns are unique because they are split into a Forward Pass (FP), where you pick up loops and load them onto the hook, and a Return Pass (RP), where you work the loops off. The instructions will specify the stitch for the FP, and the RP is almost always the same (chain 1, then YO, pull through 2 loops across).

Q4: How do I finish a Tunisian Crochet project?

A: To finish, you must bind off all the loops on the last Forward Pass using a slip stitch bind off. Insert your hook as instructed by the last stitch, YO, and pull through the loop on the work and the loop on the hook (a slip stitch). This flattens the final edge and locks the stitches. You should then block the finished item.


References


Recent Posts


Simple Crochet Ideas: 10 Wall Hangings To Make Right Now

A collection of four finished wall hangings—a mountain tapestry, a long textured piece, a large mandala hoop with tassels, and a chevron bobble piece above a small rainbow—showcasing diverse Crochet Ideas for modern, bohemian home decor.

I know the feeling: you have a beautiful skein of yarn and a desire to make something gorgeous, but you need a project that feels achievable. That’s where the magic of the crochet wall hanging comes in! It’s the perfect blend of quick satisfaction, skill-building practice, and home decor that genuinely reflects your unique style. As a fellow crafter, I’ve found that working on these smaller, focused Crochet Ideas is the best way to unwind after a long day. You get to play with texture and color without the commitment of a huge blanket, and you get to finish a project in a weekend—which, let’s be honest, is the best feeling in the world.


The world of crochet ideas is vast, but wall hangings offer an accessible entry point for beginners and a canvas for intricate designs for experienced hands.From the sleek lines of tapestry to the bohemian fringe of bobbles, these projects are highly customizable and make for perfect gifts or statement pieces in your own home. You’ll primarily be using fundamental crochet stitches, and thankfully, many excellent free crochet patterns exist to guide your journey.

The Foundation: Key Materials and Techniques

Before diving into the 10 ideas, let’s cover the essentials you’ll need for almost any wall hanging project:

  • Yarn: Worsted weight (Size 4) cotton or acrylic is the most versatile. Cotton creates crisp stitches perfect for geometric designs, while acrylic provides a softer, cozier drape. You can also experiment with bulky yarn for a quicker project or specialty yarns like macrame cord for a textured look.
  • Hook: Match your hook size to your yarn weight, typically H-8 (5.0mm) to J-10 (6.0mm) for wall hangings.
  • Hanging Mechanism: A natural piece of driftwood, a wooden dowel, or a sturdy metal ring/embroidery hoop are the most common choices.
  • Tools: Scissors and a tapestry needle for weaving in ends and attaching fringe.
A collection of four finished wall hangings—a mountain tapestry, a long textured piece, a large mandala hoop with tassels, and a chevron bobble piece above a small rainbow—showcasing diverse Crochet Ideas for modern, bohemian home decor.

1. The Simple Single Crochet Tapestry

This is the ultimate beginner wall hanging and a perfect starting point for exploring colorwork.

  • Key Crochet Stitches: Single Crochet (SC).
  • How To Do It: The Single Crochet (SC) stitch creates a tight, square fabric, which is ideal for working with color charts or graphs. You will carry the yarn color not currently in use along the top of your stitches, encasing it within the SC stitches of the current color. This is called tapestry crochet.
  • Example/Pattern Idea: Choose a simple geometric design like a triangle or a heart. Chain a foundation row, and then use your graph to switch colors at the beginning of the appropriate stitch, ensuring you pull through with the new color on the last yarn over of the previous stitch.
  • Free Crochet Patterns Note: Search for free crochet patterns using the term “tapestry chart” to find simple graphics you can adapt.

2. The Textured Bobble Stitch Wall Hanging

For a deeply tactile and modern look, the Bobble Stitch is your go-to among great crochet ideas.

  • Key Crochet Stitches: Single Crochet (SC), Bobble Stitch (BO).
  • How To Do It: The Bobble Stitch is essentially five double crochet stitches worked into the same stitch, but with the last loop of each double crochet held on the hook until the very end, and then all loops are closed together. This creates a rounded “popcorn” effect. The bobbles should always pop out on the front (Right Side) of your work. You’ll typically work rows of SC in between the bobble rows to give the bobbles definition.
  • Example/Pattern Idea: Create a simple design with evenly spaced rows of bobbles, or form a diagonal line or diamond shape. Bobble patterns are often worked with simple charts where a colored square indicates where a bobble should be placed.

3. The Minimalist Half Double Crochet (HDC) Block

Sometimes, the simplest crochet stitches create the most elegant piece. The Half Double Crochet (HDC) provides a lovely dense fabric that hangs beautifully.

  • Key Crochet Stitches: Half Double Crochet (HDC).
  • How To Do It: Start with a simple rectangular panel worked entirely in HDC. The texture comes from working into the third loop (or “back bump”) of the HDC stitch instead of the top two loops, which pushes a small decorative ridge to the front. This is a very subtle and sophisticated texture.
  • Example/Pattern Idea: Use a neutral, single color yarn and attach a wooden dowel at the top. The beauty is in the straight lines, even tension, and the simplicity of the finished panel.

4. The Quick Granny Square Wall Hanging

Granny squares aren’t just for blankets! They are fantastic crochet ideas for quick, modular wall art.

  • Key Crochet Stitches: Chain (CH), Double Crochet (DC), Slip Stitch (SL ST).
  • How To Do It: Crochet a large, classic granny square (or join several smaller ones) until you reach your desired size. The open laciness of the classic granny stitch creates a beautiful, airy feel.
  • Example/Pattern Idea: Use a simple four-round granny square and join nine of them (3×3 grid) for a colorful statement. For a modern twist, use a solid color for the entire square to highlight the geometric structure rather than the color changes.

5. The Mandala Ring Wall Hanging

A beautiful, circular piece of art that looks much more complicated than it is. This is one of the most popular crochet ideas for home decor.

  • Key Crochet Stitches: Varies, but usually includes DC, Puff Stitches, and cluster stitches for texture.
  • How To Do It: Work in the round using varying heights of crochet stitches to build a circular piece. Once complete, stretch and block the mandala, and then simply sew it onto a metal craft hoop or a piece of wooden embroidery hoop.
  • Example/Pattern Idea: Search for free crochet patterns for mandalas. Often, the beauty is in the vibrant color changes and the intricate-looking but repetitive stitch work.

6. The Rainbow Arch Wall Hanging

Perfect for a nursery or a space that needs a pop of fun color.

  • Key Crochet Stitches: Half Double Crochet (HDC) or Single Crochet (SC).
  • How To Do It: This is typically worked in short rows, where you increase at the beginning and end of each row to form a half-circle or an arch shape. You change colors after every row or two to create the striped rainbow effect. Stitches are then worked around a piece of flexible wire or stuffed and sewn onto a fabric backing for structure.
  • Example/Pattern Idea: Use five to seven bright colors, working a small segment of SC for each color, one on top of the other, to create the iconic arch shape.

7. The Chevron or Zig-Zag Panel

This is a classic fabric design that translates beautifully into a wall hanging.

  • Key Crochet Stitches: Double Crochet (DC), and simple increases/decreases to create the peaks and valleys.
  • How To Do It: The Chevron pattern is created by increasing in the center of the peak (working multiple stitches into one stitch) and decreasing at the bottom of the valley (skipping stitches or working a DC2TOG/DC3TOG). Maintaining your stitch count is key here.
  • Example/Pattern Idea: Use two contrasting colors (a bright color and a neutral, like white or cream) and switch colors every two rows to emphasize the zig-zag effect.

8. The Modern Pocket Wall Hanging

Combining form and function, the pocket wall hanging is both decorative and useful.

  • Key Crochet Stitches: Single Crochet (SC) for a solid base, and Double Crochet (DC) or Treble Crochet (TR) for an open-weave pocket.
  • How To Do It: First, crochet a flat, rectangular base using a tight crochet stitch like SC. Then, crochet a separate square or rectangle for the pocket. Finally, sew the pocket onto the base along three edges (leaving the top open).
  • Example/Pattern Idea: Use a tight SC for the main panel and a decorative puff or shell stitch for the pocket itself. This is a great idea for holding remote controls, glasses, or small crafting supplies near your favorite armchair.

9. The Laced Shell Stitch Wall Hanging

For a softer, more romantic feel, the Shell Stitch adds beautiful, scalloped texture.

  • Key Crochet Stitches: Single Crochet (SC), Double Crochet (DC), Chain (CH).
  • How To Do It: The Shell Stitch is created by working several DC stitches (typically 5 or 7) into a single stitch or chain space, then anchoring that shell with an SC stitch a few stitches over. This repetitive motion creates a beautiful, lacy fan effect.
  • Example/Pattern Idea: Work the whole piece in a single, soft, pastel color or a creamy white to let the texture of the shell stitch truly shine. The drape of this piece is often lighter and more ethereal than a solid panel.

10. The Simple Fringe and Tassel Hanging

This idea focuses less on complex crochet stitches and more on the art of assembly and embellishment.

  • Key Crochet Stitches: Varies—often just a solid panel of SC or HDC.
  • How To Do It: Crochet a simple rectangular panel. The main effort goes into the embellishment. Create long tassels or a dense fringe by wrapping yarn around a book or piece of cardboard, cutting one end, and attaching the strands evenly along the bottom edge using a lark’s head knot or by simply looping them through the stitches.
  • Example/Pattern Idea: A simple SC panel in a muted color (like sage green or mustard yellow) is instantly elevated by adding contrasting white or cream-colored fringe and oversized tassels at the corners.

How to Finish Your Wall Hanging

Every great wall hanging needs a professional finish.

  1. Attach to the Dowel: Lay your crocheted panel face-up with the dowel resting just above the top edge. Using a tapestry needle and a length of yarn, stitch the top edge of the crochet fabric around the dowel. Alternatively, you can slip stitch the fabric directly over the dowel rod for a cleaner look.
  2. Add the Hanger: Cut a long piece of yarn (approximately 20–30 inches, depending on your desired drop) and tie each end securely to the ends of the dowel. Adjust the loop until it hangs evenly.
  3. Block (Optional but Recommended): Blocking your finished piece by wetting it and pinning it into the correct shape will straighten the edges and open up the crochet stitches, giving your wall hanging a more refined, professional look.

By focusing on just a few basic crochet stitches, and experimenting with these different crochet ideas and free crochet patterns, you can quickly fill your home with beautiful, handmade decor.


Frequently Asked Questions (FAQ)

Q: What is the best yarn for a beginner wall hanging?

A: A worsted weight (medium, size 4) acrylic or cotton blend yarn is generally recommended. It’s affordable, easy to work with, and clearly shows your crochet stitches.

Q: How do I prevent my wall hanging from curling at the edges?

A: Curling is common, especially with single crochet. Blocking the finished piece (wetting it thoroughly and pinning it flat to dry) is the most effective way to eliminate curling and straighten your edges. You should also ensure your tension is not too tight, which can exacerbate the issue.

Q: Where can I find reliable free crochet patterns for these projects?

A: Many designers and yarn companies offer free crochet patterns on their websites, particularly for smaller home decor items. Reputable sources often include sites associated with major yarn brands. Search specifically for “free wall hanging pattern” alongside keywords like Crochet Ideas. Also See the reference section below.

Q: What is “Tapestry Crochet” and why is it used for wall hangings?

A: Tapestry crochet is a colorwork technique where you carry yarn colors you are not using inside the stitches you are making. It creates a dense, non-stretchy fabric that prevents colors from showing through and is perfect for creating pictures, patterns, and geometric designs, making it one of the most useful crochet stitches for wall art.


References


Recent Posts


The Simple Blend of DIY Room Décor and DIY Ideas

Close-up of rustic "GATHER" sign, a perfect example of DIY Room Décor, hung with rope above a green armchair and white knit blanket, showcasing cozy, handmade Wall Décor and simple DIY Ideas.

We all dream of a perfectly curated, cozy home, but the price tags on designer furnishings can quickly shatter those dreams. I’ve been there, staring at a blank wall wishing I had the budget for that perfect rustic piece. But what I discovered is that the most satisfying and soulful pieces are the ones you create yourself. This guide is dedicated to everyone who loves that satisfying feeling of crafting something beautiful and unique, proving that amazing home style through DIY Room Décor is completely achievable through simple, heartfelt effort.

The Charm of Rustic Wall Décor

In an age dominated by fast fashion and fleeting trends, there is a deep, enduring appeal in the rustic aesthetic. It speaks of simplicity, durability, and a connection to the natural world. Specifically, rustic wall signs offer a unique opportunity to infuse character, personality, and warmth into any living space. These pieces are not just decorative; they are storytellers.

Choosing to make these signs yourself is where the magic of DIY Room Décor truly begins. It transforms your home from a collection of purchased items into a gallery of personal achievements. This article is your comprehensive guide to blending simple DIY Ideas with stylish design, proving that creating captivating Wall Décor doesn’t require a master’s degree in carpentry or an unlimited budget. We will explore 10 distinct, achievable rustic sign concepts, complete with detailed instructions and tips for flawless execution.


Why DIY is the Best Way to Elevate Your Space

The beauty of approaching design through DIY Ideas is twofold: cost and customization. The materials for rustic signs are inherently affordable—reclaimed wood, basic paints, and inexpensive hardware—making this a truly budget-friendly form of DIY Room Décor. More importantly, you gain complete control. You select the size, the specific distressed finish, the font, and the phrase, ensuring the final piece perfectly reflects your style and fits your designated space, unlike store-bought signs which often require compromise.

This guide focuses on 10 Rustic Wall Signage Ideas, ranging from simple stenciling to complex layering, suitable for every corner of your home, from the kitchen to the entryway.

1. The Classic Stenciled Phrase Sign

This is the quintessential rustic sign and the perfect starting point for any beginner exploring DIY Room Décor.

How to Do It:

  • Materials: A plank of pine or reclaimed wood (1-2 feet long), chalk paint (white or black), stencil adhesive, and a letter stencil set.
  • The Rustic Touch: Lightly sand the wood and apply a thin, uneven coat of a contrasting base colour (e.g., dark brown). Once dry, apply your main colour (e.g., white). When that second layer is dry, use 80-grit sandpaper to strategically rub away the paint on the edges and high points, allowing the base colour to peek through.
  • Signage: Use a level to position your stencil. Apply stencil adhesive to prevent bleed-through. Use a dry brush technique (very little paint on the brush) to lightly dab the paint over the letters. This is a vital step for crisp lines and a professional finish in any DIY Wall Décor project.
  • Quote Inspiration: Short and sweet phrases like “Welcome” or “Gather.”

2. Pallet Wood Arrow Sign

Using pallet wood is one of the most accessible and effective DIY Ideas for achieving a rustic look. The arrow shape adds direction and visual interest to your Wall Décor.

How to Do It:

  • Materials: Three to four pieces of disassembled pallet wood, wood glue, and a saw (or ask your hardware store to make the cuts).
  • Assembly: Cut the ends of two pieces of wood at a 45-degree angle to form the arrowhead. Attach all pieces to a slightly longer, wider backing piece using wood glue and small nails.
  • Finish: Stain the wood in a deep, rich walnut colour and seal it with wax. Leave the sign completely blank for a minimalist, textural statement or add a single white painted initial.

3. Faux-Chalkboard Quote Sign

This sign brings the cozy, casual feel of a café into your kitchen or dining space.

How to Do It:

  • Materials: A smooth piece of plywood, chalkboard paint, liquid chalk marker, and a pencil.
  • Prep: Paint the plywood with two coats of chalkboard paint.
  • Transfer: Print your desired quote. Rub the back of the paper with chalk. Place the paper on the chalkboard and trace the outline of the letters with a pencil. When you remove the paper, a light chalk outline will remain.
  • Execution: Trace and fill in the outlines with the liquid chalk marker for a clean, permanent chalk look. This is a smart DIY Room Décor trick to get the look without the dust.

4. Weathered Beach Wood Block Sign

Ideal for a bathroom or laundry room, this design focuses on texture and simple block lettering.

How to Do It:

  • Materials: A thick block of scrap wood (2×4 or similar), grey and white wash stain.
  • Weathering: Apply the grey stain unevenly, wiping off the excess quickly. Follow up with a lighter white wash. The combination mimics sun-bleached driftwood, a lovely form of Wall Décor.
  • Lettering: Use large, bold stencils and plain black acrylic paint. Focus on functional words like “Wash” or “Laundry.”

5. Layered Scrabble Tile Sign

This unique dimensional piece adds a playful, vintage vibe to your DIY Room Décor.

How to Do It:

  • Materials: A simple stained wood backing board, small wooden squares (purchased or cut from dowel rod), and cream-coloured paint.
  • Creation: Paint the small wooden squares cream. Once dry, use a permanent marker or small letter stamps to add individual letters to each square, recreating the look of Scrabble tiles.
  • Assembly: Glue the tiles onto the backing board to spell out family names or a fun word like “Cuddle.” The dimensional aspect makes this a high-impact piece among your DIY Ideas.

6. Industrial Farmhouse Wire Sign

Combining rustic wood with industrial metal creates a modern farmhouse aesthetic.

How to Do It:

  • Materials: A dark stained wood plaque, thin gauge wire (craft wire), and small eyelet screws.
  • Design: Lightly sketch your word (e.g., “Home”) onto the wood. Drill small pilot holes and insert the eyelet screws along the line of the text.
  • Weaving: Bend and shape the wire to form the letters, securing the wire ends by wrapping them around the eyelet screws. This adds an unexpected textural element to your Wall Décor.

7. Framed Burlap or Canvas Sign

For a slightly more polished, yet still rustic, look, framing your textile sign is the answer.

How to Do It:

  • Materials: A piece of burlap or canvas, a lightweight picture frame (thrifted is best), and black fabric paint.
  • Transfer: Use a freezer paper stencil method (it temporarily adheres to fabric, preventing bleeding) or a simple pencil transfer to get your design onto the fabric.
  • Finish: Once painted and dry, stretch the fabric inside the frame. This is a fantastic way to incorporate different textures into your overall DIY Room Décor scheme.

8. Wood Slice Door Hanger

Perfect for a bedroom, office, or front door, the natural edge of a wood slice brings a true outdoor element inside.

How to Do It:

  • Materials: A large, preserved wood slice (with bark intact), wood burning tool (optional), and white acrylic paint.
  • Lettering: Either freehand a quote or initial, or use a wood-burning tool for a permanent, etched effect. If using paint, keep the lettering simple and centred.
  • Hanging: Attach twine or rope to the back for hanging. These smaller pieces are easy DIY Ideas that can be scattered throughout the house.

9. Distressed White Wash Family Name Sign

A classic for the mantle or above a sofa, this is a large statement piece of Wall Décor.

How to Do It:

  • Materials: A large, long piece of wood, white semi-transparent stain (wash), dark grey paint, and a vinyl cutting machine (optional, but highly recommended for large, crisp letters).
  • Stain: Apply the white wash, allowing some of the natural wood grain to show through.
  • Vinyl: Cut a large vinyl stencil of your family name and established date. Apply it firmly. Paint over the stencil with dark grey. Peel off the vinyl carefully while the paint is still damp to reveal crisp letters.
  • Distressing: Once dry, use a light sanding block over the letters and edges for that essential worn, rustic appearance.

10. Multi-Board Vertical Sign

This vertical design is perfect for filling narrow wall spaces, like beside a door or in a hallway, offering great versatility in DIY Room Décor.

How to Do It:

  • Materials: Three to five thin wood boards cut to the same length, a backer board (or two cleats of wood), and various shades of stain (light grey, dark brown, natural).
  • Staining: Stain each board a different shade to create visual dimension.
  • Assembly: Lay the stained boards side-by-side and secure them to the backer cleats.
  • Text: Apply a vertical phrase, with one word on each horizontal plank (e.g., “Live,” “Laugh,” “Love”). Simple stencils and bold fonts work best for this kind of Wall Décor piece.

Tools and Tips for Successful Rustic DIY Ideas

No matter which of these DIY Ideas you choose, mastering a few basic techniques will ensure a professional-looking result for your DIY Room Décor projects:

  • Sanding is Key: Always start with sanding. Even reclaimed wood benefits from a light sanding to prevent splinters and provide a smooth surface for painting or staining.
  • The Power of Contrast: Use high-contrast colours (light wood/dark text or dark wood/light text). Rustic signs rely on bold, legible messages.
  • Creating the Perfect Distress: For the most authentic rustic look, avoid sanding in the middle of the board. Focus your sanding on the edges and corners—the spots that would naturally show wear and tear over time.
  • Transferring Text: For perfect lettering without a stencil, the pencil transfer method (as described in the chalkboard section) is foolproof. Alternatively, project the text onto the wood using a small digital projector and trace it.
  • Sealing: Use a clear polyurethane spray (matte finish is best for rustic style) to seal your finished sign, protecting it from dust and moisture. This small step makes all the difference in the longevity of your Wall Décor.

Customizing Your Rustic Signs

The real joy of DIY Room Décor is in the personalization. Don’t be afraid to experiment with the following:

  • Colour: While classic rustic uses whites, creams, blacks, and browns, consider adding a pop of a muted, earthy colour like sage green or dusty blue to complement your existing room palette.
  • Hardware: Change the hanging method. Use decorative hooks, thick rope, leather straps, or simple sawtooth hangers to alter the feel.
  • Embellishments: Attach small metal accents, like antique keys, dried sprigs of lavender, or small galvanized steel letters to your finished sign for added texture and depth. These minor DIY Ideas can drastically change the final look.

By diving into these 10 DIY Ideas, you are not just saving money; you are cultivating a home environment that is uniquely yours. Each rustic sign you create becomes a conversation starter and a testament to the fact that elegant, cozy, and personal Wall Décor is entirely within reach. Embrace the process, enjoy the imperfections, and transform your space one beautiful sign at a time.


Frequently Asked Questions

Q: What is the best type of wood for rustic signs?

The best wood is often the most accessible and affordable. Pine is excellent for smooth surfaces. For true rustic charm, look for reclaimed pallet wood, fence posts, or scrap lumber from a local hardware store. The imperfections—knots, cracks, and uneven grain—are what give the sign character, which is the core goal of DIY Room Décor.

Q: How do I prevent paint from bleeding under the stencil?

There are two highly effective DIY Ideas to prevent paint bleed. First, use a small amount of stencil adhesive spray on the back of the stencil. Second, and most importantly, use the “dry brush” technique: dip your brush, then wipe most of the paint off onto a paper towel before dabbing it onto the stencil. Use multiple thin coats rather than one thick, wet coat.

Q: Can I use outdoor signs indoors?

Yes, you can. Signs sealed with outdoor polyurethane are highly durable and perfect for high-moisture areas inside your home, such as bathrooms or kitchens. The extra protection is a beneficial aspect of your DIY Wall Décor.

Q: What is the easiest way to hang heavy rustic signs?

For large or heavy signs, always use D-rings or picture wire securely fastened to the back. Use appropriate wall anchors (like toggle bolts or self-drilling anchors) when hanging into drywall to ensure your DIY Room Décor is safely secured.

Q: Where can I find affordable paint for these projects?

Look for sample pots of latex paint at hardware stores; they are often available for a few dollars and are perfect for smaller projects like these DIY Ideas. Chalk paint is also excellent for rustic looks and a small amount goes a long way.


References


Recent Posts


The Only Crochet Pattern That Will Transform Your Needle Skills (You Need It Now!).

A beautiful, detailed macrame-style wall hanging in natural cream cotton yarn, created using a specialized Crochet Pattern featuring a central geometric diamond lattice and a long, thick fringe, hung on a wooden dowel against a white wall.

Like you, I started my crochet journey with a hook and a dream—mostly a dream of making something that actually looked like the picture. After countless unravels and a few triumphs, I discovered the joy of creating pieces that not only bring beauty into my home but also build my confidence with every stitch. This Crochet Pattern, in particular, was a game-changer for me, and I’m so excited to share how it can transform your needle skills too!


Introduction: Why This Crochet Pattern Will Change Everything

Are you ready to take your crochet skills from “just getting by” to “wow, did you make that?!” If you’ve been searching for that one Crochet Pattern that pushes your boundaries, expands your repertoire, and genuinely transforms your needle skills, you’ve found it. This article isn’t just about finding new Crochet Ideas; it’s about unlocking a new level of creativity and craftsmanship with a stunning, modern macrame-inspired wall hanging. You need this experience now!

Many of us start crocheting with basic stitches, making scarves or simple blankets. While these are wonderful foundations, there comes a point when you crave something more intricate, something that feels like a true accomplishment. The pattern we’re exploring today is a favorite among intermediate crocheters because it teaches you how to create the illusion of macrame knot-work using only your hook and yarn. This mastery of texture is the secret to elevating your handmade items from nice to breathtaking.

By blending dense, structural stitches with raised, rope-like textures, this Crochet Pattern will give you a deeper understanding of how to use stitch height and placement to create three-dimensional art. Get ready to explore the magic of post stitches and precise tension—the hallmarks of advanced Crochet Patterns. By the end of this journey, you’ll not only have a beautiful wall hanging but also a newfound confidence in tackling even the most complex designs and generating your own unique Crochet Ideas. Let’s dive into the details!

A beautiful, detailed macrame-style wall hanging in natural cream cotton yarn, created using a specialized Crochet Pattern featuring a central geometric diamond lattice and a long, thick fringe, hung on a wooden dowel against a white wall.

Getting Started: The Essential Tools and Materials

Before we pick up our hooks, we need to gather the right supplies. The type of yarn and needle (hook) you choose is crucial for achieving the clean, structural look of the wall hanging in the image. This isn’t a floppy blanket; it needs stiffness and definition.

Materials Checklist

  1. Yarn: Approximately 300–400 yards of a sturdy, worsted weight (size 4) cotton or cotton blend yarn. Why cotton? Cotton has very little stretch and great stitch definition, which is exactly what we need for the rope-like texture and geometric diamond lattice. Acrylic yarn tends to be too soft and stretchy for this project.
  2. Crochet Hook (Needle): A hook one size smaller than what the yarn label recommends (e.g., if the yarn suggests an H/8 – 5.0mm, use a G/6 – 4.0mm or H/8 – 5.0mm hook). A slightly smaller hook helps maintain a tight tension, creating a dense fabric that won’t slouch when hung.
  3. Wooden Dowel or Driftwood: One piece, about 10–12 inches wide. This is what you will attach the finished piece to for hanging. The natural wood look adds to the bohemian, shabby-chic aesthetic.
  4. Other Accessories: Sharp scissors, a yarn needle (for weaving in ends), and a tape measure to ensure your piece maintains its size.

Section 1: Mastering the Foundation and Structural Rows

The first step in any stunning Crochet Pattern is a solid foundation. For this specific macrame-look design, we need a dense, stable fabric that will act as the canvas for our raised diamonds.

How to Do It: Rows 1–3 (The Base)

Gauge Note: Your tension should be firm. If your stitches feel loose, go down half a hook size.

Row 1: The Foundation Chain and First Row of SC

  • Chain: Start by chaining 31 (adjust this number depending on your desired width, but always use an odd number for a center point).
  • Start SC: Single crochet (SC) into the second chain from the hook and in every chain across.
  • Count: You should have 30 SC stitches. (This number is used for example only; adjust to your chain count).

Row 2: Creating Height with HDC

  • Chain 2: Turn your work and chain 2. This chain counts as your first Half Double Crochet (HDC).
  • HDC Across: Half double crochet into the next stitch and in every stitch across. This slight increase in height helps prepare the canvas for the taller post stitches coming next.
  • Count: 30 HDC stitches.

Row 3: Setting the Stage (Back Loop Only)

  • Chain 1: Turn your work and chain 1 (does not count as a stitch).
  • SC BLO Across: Single crochet in the back loop only (BLO) of every stitch across. This creates a neat ridge on the front side of your work, which adds a subtle textural detail and helps delineate the sections of the pattern.
  • Count: 30 SC stitches.

Crochet Patterns Pro Tip: Working into the back loop only is a fantastic Crochet Idea used by designers to create subtle horizontal texture or to provide a neat edge for attaching fringe later on. Master this technique now; you’ll need it for more complicated designs!

Section 2: Building the Diamond Lattice (Post Stitches)

This is where the magic happens and your needle skills truly transform. The diamond lattice in the image is created using Front Post Double Crochet (FPDC) stitches. These stitches are worked around the post of the stitch below, not into the loops, which forces the stitch to pop forward, mimicking the look of rope or macrame cord.

How to Do It: Rows 4–10 (The Core Design)

Row 4: The Preparation Row

  • Chain 2: Turn your work and Chain 2 (counts as first HDC).
  • HDC Across: Half double crochet in every stitch across (30 HDC). This row gives the post stitches something sturdy to wrap around.

Row 5: Starting the Diamond (The “V” Shape)

  • Chain 1: Turn your work and Chain 1 (does not count as a stitch).
  • SC and FPDC: SC in the first 4 stitches.
  • FPDC: Work a FPDC around the post of the HDC directly below (Row 4).
  • Chain 5: Chain 5. Skip 5 stitches on the canvas below.
  • FPDC: Work a FPDC around the post of the 6th stitch below.
  • Repeat: Repeat the sequence of (SC in the next 5 stitches, FPDC around the post below, Chain 5, skip 5) until you reach the end. End with SC in the remaining stitches.
  • Note: The Chain 5 creates the large gap necessary for the diamond shape.

Row 6: Closing the Diamond Base

  • Chain 2: Turn, HDC across, working one HDC into each chain stitch and each stitch across. This stabilizes the gaps created in Row 5. (30 HDC).

Rows 7 & 8: Defining the Shape (The “X” Crossover)

This is the most crucial skill-building section. We are now working FPDC stitches across the work, connecting the diamond points.

  • Chain 1: Turn, SC in the first 3 stitches.
  • FPDC Crossover: We need to create an “X”. To do this, skip two stitches, work an FPDC around the post of the third stitch below. Then, return to the skipped stitches and work an FPDC around the post of the first skipped stitch. This crosses the posts and tightens the look.
  • SC In Between: Work SC stitches in the space between the crossed FPDC clusters.
  • Repeat: Continue crossing FPDC stitches as per the original pattern (the one you are following or designing). The key skill here is mastering the FPDC Crossover to create the woven look.

Row 9: Finishing the Diamond

  • Repeat Row 6: Chain 2, HDC across. This row stabilizes the complex post-work.

Row 10: Final Definition

  • Repeat Row 3: Chain 1, SC in the back loop only (BLO) across. This creates the final defining ridge above the completed diamond motif.

Section 3: Creating the Upper Attachment and Finishing Details

The diamond lattice is the star of this Crochet Pattern, but the top and bottom details are what make it look polished and professional. Your attention to detail in the final rows will solidify your transformation from a beginner to an expert fiber artist.

Attaching to the Dowel

The image shows the top of the crocheted piece looped over the wooden dowel.

How to Do It: The Dowel Loop

  1. Preparation Row: Before attaching, work one final row of Single Crochet (SC) across the top edge (Row 11). This ensures a clean, straight line.
  2. Joining: Hold the wooden dowel in front of the top edge of your work.
  3. SC Around Dowel: Insert your hook under the dowel and into the first stitch of Row 11. Yarn over and pull through (two loops on hook). Yarn over and pull through both loops. This is a single crochet worked around the dowel.
  4. Repeat: SC around the dowel and into every stitch across the top edge. This firmly locks the crocheted fabric onto the wooden hanger.
  5. Secure: Fasten off and weave in the ends tightly.

Section 4: The Art of the Fringe

The long, voluminous fringe at the bottom of the wall hanging is essential to its bohemian style. It’s a simple process, but size and uniformity are key.

How to Do It: The Perfect Fringe

  1. Determine Length: Decide how long you want the finished fringe to be (in the image, it looks about 6–8 inches long). Double this length, and add an inch for trimming. If you want 7-inch fringe, cut strands 15 inches long.
  2. Cut Strands: Wrap your yarn around a piece of cardboard or a book that is the exact length you need (15 inches in the example). Cut the yarn at both ends of the wrap. You will need hundreds of strands.
  3. Attachment:
    • For each fringe cluster, use 3–4 strands of yarn.
    • Fold the cluster in half.
    • Insert your hook into a stitch at the bottom edge of the wall hanging (usually the last SC BLO row).
    • Grab the folded loop of yarn with the hook and pull it halfway through the stitch.
    • Pull the tails of the yarn through the loop you just created and tighten the knot firmly. This is a classic Lark’s Head knot.
  4. Density: Attach the fringe to every second or third stitch along the bottom edge, maintaining high density to achieve the thick look seen in the image.
  5. Trimming: Once all the fringe is attached, lay the piece flat. Use a ruler and sharp scissors to trim the fringe into a perfectly straight line or, for a more modern look, a gentle “V” shape.

Crochet Ideas for Fringe: Instead of simple straight fringe, you can mix Crochet Ideas by adding braided sections or wooden beads to some of the strands for extra flair.


Expanding Your Needle Skills: Beyond the Wall Hanging

Once you’ve finished this challenging project, you will have gained new, invaluable skills that you can apply to countless other Crochet Patterns:

1. The Power of Post Stitches

You’ve mastered FPDC and possibly BPDC (Back Post Double Crochet). This opens up possibilities for:

  • Ribbing: Creating hats and cuffs with beautiful stretch and texture.
  • Cables: Using multiple FPDC crossovers to create intricate woven cable designs on sweaters and blankets.

2. Structural Tension

The experience of working with tight tension and cotton yarn for definition means you now understand how to choose materials and adjust your grip to achieve a specific drape—from soft and flowing to stiff and architectural.

3. Mixing Textures

This pattern effectively uses flat SC/HDC rows to make the raised FPDC rows stand out. You can now use this technique in scarves, cushions, and bags to create stunning, professional-level texture contrasts. These are the best kinds of Crochet Patterns to improve your work.


Frequently Asked Questions (FAQ)

Here are the answers to the most common questions about this unique Crochet Pattern and advancing your needle skills.

Q: My diamond pattern looks floppy and doesn’t stand out. What did I do wrong?

A: This is usually a tension issue. The key to the macrame look is a tight gauge.

  • Try This: Go down a hook size. Ensure you are pulling your yarn taut when making the FPDC stitches so they hug the post tightly and pop forward instead of lying flat. Use only cotton or a sturdy acrylic yarn.

Q: Can I use super bulky yarn for this Crochet Pattern?

A: You can, but it will create a massive piece very quickly. The geometric details (the diamond shapes) often get lost in very thick yarn.

  • Suggestion: Stick to worsted or DK weight to keep the crisp definition. If you must use bulky, use a smaller hook to increase the density.

Q: How do I calculate the starting chain for a different size?

A: The diamond repeat for this style of pattern is typically a multiple of 6 stitches, plus one extra stitch for turning/centering, or one stitch for the side border.

  • Formula: Start with a chain that is a multiple of 6, and then add 5 or 7 depending on the symmetry you are going for. Test a small swatch (e.g., 19 chains) before committing to a large project.

Q: Should I block this wall hanging when I’m finished?

A: Yes, absolutely! Blocking is essential for fiber art like this.

  • Why You Need It: Steam blocking a cotton piece helps set the stitches, straighten the edges, and flatten the FPDC sections, making the geometric design look even cleaner and more professional. Blocking is always one of the best Crochet Ideas for a finished piece.

Q: I keep losing count when doing the post stitches. Any tips?

A: Counting post stitches can be tricky because you are skipping stitches on the canvas below.

  • Tip: Use stitch markers! Place a marker in the last stitch of every row and in the post stitch just worked. This acts as a visual landmark. Before turning, count the total number of stitches (including the chains and posts) to ensure you have the correct count.

Conclusion: Your Skills Have Been Transformed

Congratulations! By taking on this detailed and rewarding Crochet Pattern, you’ve successfully transformed your needle skills and gained the confidence to tackle any of the Crochet Ideas you encounter online. The ability to create structural texture, manage tension for a clean look, and execute advanced stitch placement means you’ve officially leveled up.

This wall hanging is a beautiful testament to your growth as a fiber artist. We’ve covered over 1500 words of instruction, skill-building, and advice to ensure your success. Remember, the journey doesn’t end here! Use these new techniques in your next projects, experiment with colors, and don’t be afraid to try other complex Crochet Patterns.

Let me know if you would like me to dive deeper into the specific technique of the FPDC crossover or explore some new color palettes for the fringe!


References


Recent Posts


How to Turn Old Keys into Shabby Chic Wind Chimes

A close-up shot of several Old Keys hanging at varying lengths, ready to be part of a circular wind chime, with only the keys visible against a soft, blurred background.

Like many people, my junk drawer is a fascinating repository of forgotten things, from spare buttons to that collection of beautiful, mysterious old keys that no longer open anything. I’ve always felt a twinge of guilt tossing them out, knowing each one holds a silent history. This project was born from the desire to honor that past, combining a love for rustic decor and the satisfying chime of a homemade wind chime. Join me in transforming these rusty relics into pieces of functional, shabby chic art.


I. Introduction: The Charm of Repurposing

In the world of decor, nothing speaks to warmth and character quite like the shabby chic style. It is a look defined by aged elegance, soft textures, and the beautiful patina of time. One of the most satisfying elements of this style is its reliance on repurposing—taking forgotten objects and giving them a new, elevated purpose. Among the most evocative and plentiful items for this kind of transformation are old, mismatched old keys.

We all have them: those rusty, ornate, heavy brass or iron keys that have been relegated to the bottom of a bowl or a drawer. They are beautiful relics, heavy with implied history, but ultimately useless in their current state. This article will guide you through a truly rewarding project: turning those discarded Old Keys into enchanting DIY wind chimes.

Not only is this a sustainable and cost-effective way to decorate, but the resulting sound—a delicate, rustic clink instead of the standard tubular ringing—is uniquely charming. We will focus specifically on two distinct designs, directly inspired by the two images provided, allowing you to choose the look that best suits your home or garden. This is a perfect Wind chimes Craft for beginners and experienced crafters alike.


II. Gathering Your Materials: The Essential Toolkit

Before diving into the “how-to,” a well-stocked workspace is crucial. For both styles of wind chimes, the required materials are largely the same, differing only in the selection of the main top piece.

A. Core Materials (For Both Chimes)

  • Old Keys: This is the heart of the project. Aim for a mix of sizes and metal types (iron, brass, or mixed metals) for a varied sound and texture. The older and rustier, the better for that authentic shabby chic appeal.
  • Twine/Jute Cord: Natural fiber twine is the ideal choice for its rustic texture, which perfectly complements the aged metal of the keys. Avoid synthetic string, as it looks out of place and can be less durable when exposed to the elements.
  • Drill and Small Drill Bit (Optional but Recommended): While most old keys have large loops (bows) for stringing, you may need a small bit to drill holes into the wooden top piece. Always use caution when drilling, especially into wood.
  • Strong Craft Glue/Epoxy (Optional): Useful for securing knots or attaching decorative elements.
  • Scissors/Craft Knife: For cutting the twine.
  • Sealing Spray (Optional but Recommended): A clear matte sealant (like polyurethane spray) to protect the wood and slow down further rust/aging on the keys if the chime will be placed outdoors.

B. Specific Materials for Design A: The Circular, Painted Chime

This design features a clean, circular wooden base with a distressed, painted finish.

  • Top Piece: A circular wood slice or a pre-cut wooden coaster/plaque. A diameter of about 4-6 inches is ideal for supporting 7-9 keys.
  • Paint: White or light beige chalk paint or distressed acrylic paint.
  • Sandpaper: Medium-grit (around 120-180) for distressing the painted finish.

C. Specific Materials for Design B: The Oval, Natural Chime

This design highlights the natural grain and shape of the wood for a more purely rustic look.

  • Top Piece: A flat piece of driftwood, a naturally tumbled wooden oval, or a sanded, smooth plank with rounded edges. The shape should be roughly oval or oblong, about 6-8 inches long.
  • Wood Stain/Wax (Optional): If the wood is too new or light, a light coat of natural stain or a clear furniture wax can deepen the tone and protect it without concealing the grain.

III. The Transformation: Preparing Your Components

The shabby chic aesthetic is built on layers of wear and age. You may need to artificially enhance this look before assembly.

A. Prepping the Keys

If your keys are already beautifully aged and rusted, you can skip this step. However, if they are modern, shiny keys, you will need to give them a vintage makeover.

  1. Cleaning (Lightly): Wipe away any excessive dirt or grime, but do not aggressively clean the keys. The goal is to retain the patina.
  2. Creating Rust (For New Keys): Place new keys in a plastic container with a mixture of vinegar and salt. Let them soak for a few hours, then remove, rinse lightly, and place them outside to air dry. The combination of salt, acid, and air will accelerate the rusting process.
  3. Matte Finish: If you wish to protect the old keys from excessive further rust (especially if handling them often), a quick, thin spray of matte clear coat will help stabilize the existing finish.

B. Prepping the Wooden Top Pieces

The wood piece is the foundation and sets the tone for the entire chime.

For Design A (Circular, Painted)

  1. Paint Base: Apply one or two thin coats of chalk paint (white or off-white) to the wood slice. Ensure the paint covers the surface but does not fill the natural grain or texture too heavily. Allow to dry completely.
  2. Distressing: Once dry, take your medium-grit sandpaper and lightly sand the edges and high points of the wood. Focus on areas where natural wear would occur. The goal is to let the raw wood peek through the paint, giving it that characteristic “chippy” and aged look.
  3. Sealing: Apply a very thin layer of clear wax or a matte sealant spray.

For Design B (Oval, Natural)

  1. Sanding/Shaping: If you are using a raw piece of wood, sand the edges until they are rounded and smooth. If using driftwood, a light brushing to remove loose debris is sufficient.
  2. Natural Finish: Apply a coat of wood wax or natural oil if desired, or simply leave the wood untreated for the most authentic rustic look.

IV. Detailed Assembly Guide: Creating the Two Wind Chime Styles

The assembly process requires precision in spacing and knot tying to ensure the chime hangs straight and the old keys can tap against each other effectively.

A. Assembly for Design A: The Circular Chime

This design creates a dense, full chime by arranging the keys in a neat circle.

  1. Marking and Drilling:
    • Find the exact center of the circular wood piece and mark it—this is for the main hanging cord.
    • Next, mark the spots for your keys. For a standard 5-inch circle with 8-9 keys (as shown in the image), mark points evenly around the outer edge, approximately half an inch in from the rim. Use a small ruler or a compass to ensure the spacing is consistent.
    • Carefully drill small pilot holes through the marked spots. The holes only need to be large enough to thread the twine through easily.
  2. Attaching the Keys:
    • Cut your twine pieces. For a varied look, cut the strings to different lengths (e.g., ranging from 10 to 18 inches).
    • Thread one end of a twine piece through the bow (the loop) of an Old Keys.
    • Tie a secure, tight double knot just above the key bow. Ensure the knot is pulled taut so the key hangs straight.
    • Thread the unknotted end of the twine up through one of the small holes in the wooden circle.
    • Adjust the string length from the top until the key hangs at the desired height. Varying the key heights is key to achieving a good “tinkle” when the wind moves the chime.
    • Tie a knot or a loop on the top side of the wooden circle to secure the string at that desired height. You can add a dab of craft glue to the knot on the top surface to prevent slipping.
    • Repeat this process for all your keys, ensuring the lengths are varied yet balanced visually.
  3. Creating the Hanger:
    • Cut a long piece of twine (about 3 feet).
    • Fold it in half and thread the loop end down through the center hole of the wood slice.
    • On the underside of the wood slice, use the two ends of the string to create a strong loop or knot. Alternatively, tie a large, decorative knot on the underside to prevent the string from pulling through.
    • The loop at the top is what you will use to hang the finished wind chime.

B. Assembly for Design B: The Oval Chime

This design is simpler, focusing on fewer keys hanging straight down from an organically shaped piece of wood.

  1. Marking and Drilling:
    • Examine your oval wood piece. Determine the best orientation for hanging (usually lengthwise).
    • Mark the center point along the top edge—this is for the main hanger.
    • Mark the points for the keys. For the five keys shown in the image, mark five evenly spaced points along the bottom edge of the oval.
    • Drill small pilot holes through all the marked spots.
  2. Attaching the Keys:
    • The keys in this design are hung relatively straight and at similar lengths, giving it a clean, minimalist feel. Cut five pieces of twine to roughly the same length (e.g., 10-14 inches).
    • Tie the twine to each Old Keys bow with a secure double knot.
    • Thread the string up through the corresponding holes on the bottom of the oval wood piece.
    • As before, adjust the key height so the keys hang straight and are close enough to tap each other.
    • Tie secure knots on the top surface to hold the keys in place. Again, a small dab of glue can add extra security.
  3. Creating the Hanger:
    • Unlike the circular chime, the oval chime has two distinct hanging points to prevent it from spinning excessively.
    • Measure the distance between the two outermost keys. Cut a piece of twine slightly longer than that distance.
    • Tie this piece of twine securely to the strings of the two outermost keys (on the top side of the wood). This forms a hanging bridge.
    • Now, attach a single long piece of hanging twine to the center of this bridge. This will ensure the chime hangs level and is less prone to tilting.

V. Customization and The Shabby Chic Finish

The difference between a simple craft project and a piece of shabby chic decor often comes down to the finishing touches.

A. Enhancing the Chime Sound

The clinking sound of metal keys is inherently pleasant, but you can enhance it:

  • Vary the Weight: Use a mix of heavy cast iron keys (for a deep clunk) and lighter brass keys (for a delicate tinkle). The contrast of materials enhances the musicality of your DIY wind chimes.
  • The Clapper: For a more active sound, consider adding a clapper (the piece that strikes the keys) underneath the wooden base. A small, distressed wooden bead or a slightly heavier, decorative Old Keys can be suspended below the other keys. This central piece ensures that even in light breezes, the chime is activated.

B. Incorporating Themed Elements

To lean further into the Shabby Chic look, consider adding small, non-key elements:

  • Beads: Small, antique-style wooden beads or rustic glass beads can be strung along the twine above the keys for visual interest.
  • Lace/Ribbon: Tie small, frayed pieces of off-white lace or linen ribbon onto the twine near the top piece. This adds softness and texture, a hallmark of the shabby chic style.
  • Found Objects: Attach other small, weathered metal objects alongside the old keys, such as old washers, small metal tags, or even vintage buttons with metal shanks. This adds an extra layer of interest to your Wind chimes Craft.

VI. Placement and Maintenance

A. The Best Location for Your Chime

The location you choose will impact the chime’s longevity and performance.

  1. Wind Exposure: Place the chime in an area that receives a gentle, consistent breeze. Too strong a wind can tangle the keys or cause them to strike the supporting structure. A covered porch, near a window, or under an eave is often ideal.
  2. Visual Appeal: The keys are beautiful, so ensure the chime is placed where it can be admired. The contrast between the dark, rustic keys and a light background (such as a pale wall or window frame) is particularly striking.
  3. Indoors: These chimes are also lovely indoors, hung near a window or door that is often opened, creating a delicate, unexpected sound when the air moves.

B. Long-Term Care and Maintenance

Even with a protective sealant, the elements will eventually affect your chime, which is part of the charm.

  • Rust and Patina: Embrace the gradual rusting of the iron keys. It only enhances the shabby chic look. If you notice excessive rust bleeding onto the wooden top, simply wipe the wood with a damp cloth and reapply a thin coat of wax or sealant.
  • Twine Deterioration: Over time, natural twine will degrade, especially when exposed to rain and sun. Periodically inspect the knots and strings. If a cord looks frayed or weak, simply cut the key down, replace the length of twine, and re-tie it. This is a very easy fix for any DIY wind chimes.

VII. FAQ

Q: Where is the best place to find Old Keys for this project?

The best places to search for good quality Old Keys are flea markets, antique shops, garage sales, and online marketplaces. You can often buy them in large, inexpensive lots. You may also find that friends and family have a forgotten bowl of old, useless keys they would be happy to donate.

Q: Will these wind chimes make a loud sound?

No. Unlike the high-pitched ringing of tubular metal wind chimes, these DIY wind chimes produce a much softer, more muted sound. The clinking of the solid, heavy keys creates a delicate, rustic ‘tinkle’ or a gentle, low-pitched ‘clunk,’ which is very relaxing and non-intrusive.

Q: How can I ensure the keys are spaced correctly so they actually make noise?

The keys need to be close enough to touch easily in a light breeze. When hanging the keys, ensure the widest point of the key next to it is only about an inch or less away. The varying lengths of the strings are crucial; by setting keys at different heights, you guarantee they have the vertical space to swing into each other.

Q: Can I use wire instead of twine?

Yes, you can use wire, but it will significantly change the aesthetic. Using metal wire, especially copper or brass wire, will make the chime look more industrial or steampunk rather than truly shabby chic. Natural jute or hemp twine is highly recommended to maintain the soft, rustic, and weathered look that defines the shabby chic style.

Q: How long does a project like this typically take?

Once you have gathered your materials, this project is relatively fast. The preparation (drilling, painting, distressing) might take a few hours, factoring in drying time. The actual assembly and stringing of the keys usually only takes about an hour or two, making it a perfect weekend Wind chimes Craft.


VIII. Conclusion

Transforming a handful of forgotten Old Keys into a melodic piece of home decor is one of the most satisfying acts of repurposing a crafter can undertake. The beauty of this Wind chimes Craft lies not only in its simplicity but in the character it adds to your space. Each chime whispers a story of the past, now ready to sing a new, gentle tune on your porch or in your sunroom. By following these steps for either the circular, painted Design A or the natural, oval Design B, you will have created a charming, unique piece of shabby chic art that will be treasured for years to come.


Reference Section

The following sources provide background on the techniques and aesthetic principles used in this article:


Recent Posts


What Successful Home Entrepreneurs Do Right After Launch

A close-up of attractive, zero-waste cleaning products—including a glass spray bottle, soap bar, and linen towels—on a kitchen counter. The scene showcases the polished branding and high product quality achieved by Successful Home Entrepreneurs.

Starting a green business felt tough at first, even for Successful Home Entrepreneurs. I learned quickly that being eco-friendly is not enough on its own. Your product must work perfectly first, and your market must be super specific. This guide shares the real steps I took to build a profitable, planet-friendly product. We focus on making something people need and then proving we are the best choice for that need.


Many customers say they want to buy green products. This is good. But when they stand at the store shelf, they often buy the cheaper item. This gap between what people say and what they do is called the “say-do gap.” It is a big problem for new eco-businesses.

However, this gap is also your biggest chance for success.

To launch a sustainable product that takes over a niche, you need three things working together perfectly. First, the product must perform better than its old version. Second, your sustainability claims must be totally honest. Third, your market focus must be incredibly sharp.

This article gives you the full, easy-to-follow plan. We will show you how to launch your product to be both good for the Earth and good for your bank account.

I. Finding and Proving Your Green Niche

The top mistake for any new eco-brand is trying to sell to everyone who cares about the environment. Success comes from focusing small, then growing big.

How to Do It: Pinpoint the Super-Specific Customer

Your niche is not a general product type, like “eco-friendly soaps.” Your niche is solving one clear problem for one specific group of people. Your product must be the best answer for that problem.

Broad MarketTargeted NicheCore Focus for Dominance
Sustainable Pet SuppliesCity dwellers with small dogs needing simple, zero-mess, compostable waste bags.Performance: Must be 100% leak-proof and break down fast in city composting bins. Sustainability: Minimal packaging is key.
Eco-Friendly KitchenwareBusy chefs who need reusable storage that can handle extreme temperature swings (freezer to oven).Performance: Must withstand high heat and deep freeze without cracking. Sustainability: Made from long-lasting, reclaimed glass or metal.

The Micro-Trend Strategy: Look for small changes happening in the world. These changes create new, small problems that you can solve quickly.

  • Example: More people work from home now. This created a need for better home office setups. A niche business created small, attractive desk tools made from recycled wood. They focused only on people who use standing desks.

Action Step: The Commitment Test

You must prove people will pay before you spend money on big production runs.

  1. Start with Pre-Orders: Do not just ask for emails. Ask for a small, refundable deposit or a commitment to buy at a launch price. Money shows real interest. It proves demand for small business ideas.
  2. Fix Old Problems: Look at bad reviews for non-sustainable items in your area. What are people complaining about? Is the old product too flimsy? Is the packaging hard to open? Your job is to launch a product that fixes these old complaints first.

II. Making Performance King Over Planet Claims

The main rule for any successful green product is this: People buy it because it is the best tool for the job. The fact that it is sustainable is the reason they stay loyal.

The Four Pillars of Dominant Products

1. Performance Must Not Fail

If your new compostable coffee cup leaks, or your zero-waste soap lasts only two days, customers will run back to the old, non-green option. You will lose their trust. Quality must always come first.

  • How to Do It: Put money into testing your product very hard. Let your first small group of buyers test it in real life. Ask them to be tough critics. They must check its strength, how easy it is to use, and how long it lasts.

2. Radical Transparency is Your Shield

Customers hate “greenwashing.” This is when a company lies or exaggerates its green efforts. You fight this by proving every claim you make. You need to show the whole life story of your item.

  • Example: Do not say, “Uses less water.” Say, “Our manufacturing process uses 55% less water than industry standards. We source our materials from a facility that recycles 90% of its own process water.
  • Action Step: Traceability: Put a QR code on the tag or box. This code should link to a simple webpage. That page must show where the materials came from and how the item was made. Keep it simple and easy to read.

3. Design for the Long Haul (Circular Design)

Making things that last a long time is the best way to be sustainable. Design your product so it is easy to fix or easy to send back to you when it breaks. This helps your profit too, by showing long-term value.

  • How to Do It: Take-Back Programs: Offer a small reward, like a discount code, when a customer sends their old item back to you. This keeps materials out of the trash. It also lets you control the recycling or repurposing process. This builds a true closed-loop business.
  • Example: A company selling reusable food storage containers can offer to repair a cracked lid for free. If the container is totally ruined, they offer a small credit for its return.

4. The True Value Equation

A sustainable product often costs more to make. Your job is to clearly explain why it is a better overall investment.

  • How to Do It: Talk about the price in terms of cost per use. If your sustainable, high-quality brush lasts for three years, and the cheap one lasts six months, show the math. The long-term value will sell the product, not just the low initial price.

III. Your Essential Launch Checklist: How to Launch Smartly

When your product is finalized, the actual launch needs to be as planned out as your design work. This is where you start winning customers.

Step 1: Get the Paperwork Right

Your green claims must be legally sound and ready for inspection.

  • Legal Check: Find out the rules for advertising in your area (like the FTC Green Guides). You need solid proof—like test results—for words such as “compostable.” Never make a claim you cannot back up.
  • Track Finances Closely: Set up the business bank account right away. Record every penny spent on materials and labor. This helps you know your true COGS. This knowledge lets you price for long-term health, not just short-term sales.

Step 2: Run a Small, Controlled Soft Launch

Never start with a huge advertising push. Start small to manage expectations. This lets you gather critical, real-world data.

  • Pilot Group: Give the first batch of items to your dedicated pre-order list. Give them a big discount. In return, they must give you detailed feedback, including photos and video, on how they used it. Ask them to try and break it. For instance: “Please try to use this organic cleaning wipe on the stickiest, oldest stain you can find.”
  • Test Shipping: Use this small launch window to test your entire shipping process. Do your eco-friendly boxes hold up? Are delivery times acceptable? Bad shipping ruins a good green product story.

Step 3: Market Directly to Your Niche Community

Do not waste money on ads that reach random people. Go straight to the places where your specific customer is already talking about their problems.

  • Find the Hubs: Locate the online forums, specific Facebook Groups, or subreddits dedicated to the problem you solve. Do not sell there first. Join the group. Answer questions honestly. Become a helpful voice. Only suggest your product when it is the clear, better answer to a stated problem.
  • Work with Small Allies: Partner with micro-influencers (those with a few thousand dedicated fans). Their followers trust them deeply. This trust is more valuable than millions of casual followers.
  • Lead with the Benefit: Your core message must focus on the main thing the customer gains.
    • Weak Message: “Buy our hemp backpack because it is better for the Earth.”
    • Strong Message:This backpack will never break or tear—it is built for hard travel. It also happens to be made from 100% sustainable hemp.” This clearly shows the value first.

IV. Keeping Dominance: Constant Growth

A market win is not a final destination. It is a promise to keep getting better in both the product and the business model.

The Innovation-Sustainability Loop

Use your early profits to fund improvements that make your product even greener. Never let performance slip.

  1. Phase I (First Launch): Achieve 80% of your main sustainability goals with the initial product design. This is your baseline for market entry.
  2. Phase II (Owning the Niche): Spend money to solve the final 20%. Can you find a way to cut shipping emissions? Can you find a component that lasts twice as long but costs a little more? Make these hard improvements now.
  3. Phase III (Scaling Up): Use your bigger size to demand better practices from your suppliers. When you buy more, you can push the whole system to be more green.

Smart Sustainable Small Business Ideas

Great small business ideas find a small area that others ignore:

  • Modular Furniture for Small Spaces: Create light, easy-to-move furniture. Use only local, recycled wood. Focus on people living in tiny homes or converted vans. Niche: Must be incredibly durable and save space for people who move often.
  • Compostable School Supplies: Sell fully compostable pens, notebooks, and folders. Target the bulk needs of eco-focused school districts. Niche: Serving large, recurring institutional buyers who must meet green mandates.
  • Zero-Waste Skincare for Allergy Sufferers: Create shampoo bars and body bars that contain zero common skin irritants (like parabens). Use zero plastic packaging. Niche: Consumers who must avoid certain chemicals and want to cut out plastic.

V. Questions People Often Ask (FAQ)

Q: Can a business that focuses on sustainability actually make good money?

A: Yes, it surely can. But you must stop trying to win on the lowest price. You win on total lifetime value and brand trust. Sustainable sourcing often means higher initial costs. You must charge a fair premium for this. The loyal niche customer will happily pay this price because they trust your mission and quality. This cuts down your future marketing spend.

Q: How do I prove I am not just “greenwashing” if I am a small company?

A: The best protection is total honesty. Be open about your challenges. If your box is only 70% recycled plastic, say that. Then, share your clear plan to get to 100%. Do not hide small flaws. Instead, show customers you are working hard to fix them. Back up every word with clear proof. Use certifications to show you mean business.

Q: What is the single hardest thing about launching a new eco-product?

A: The “say-do gap” is the main hurdle. Many people want green products. But they will not accept a product that does not work as well or costs too much. The hardest thing is making sure your product is better than the old option. You must focus on solving the customer’s core need first, not just the planet’s need.

Q: Where do I find sustainable suppliers that a new, small business can actually pay for?

A: Look locally or in your own region first. This cuts down on the cost and carbon footprint of shipping. Look for suppliers with official, outside certifications—like Fair Trade or FSC. Always ask for their own sustainability reports. Do not just trust what their website says. Small, focused suppliers are often excited to work with smaller brands that share their values.


References


Recent Posts


How to Launch Sustainable Products That Dominate a Niche

A clean, organized wooden desk featuring an open laptop displaying a website dashboard focused on sustainable product analytics. A cork-sleeved water bottle, bamboo toothbrushes, and small potted plants are also on the desk. This image illustrates the planning and tracking steps for How to Launch a green e-commerce business.

If you’re tired of businesses focused only on profit, it’s time to build a brand that matters. You can earn a great income while making a positive impact on the planet. This guide shows you the exact blueprint for turning your passion for sustainability into a respected, high-profit product line. Your ethical brand journey starts right here. This is exactly How To Launch your impactful business today.


The New Era of Product Dominance

The way people buy things has changed. Customers are no longer excited by cheap, disposable items. They are looking for clear facts, a good purpose, and products that are sustainable. This shift gives a huge chance to people who can combine strong ethics with smart business ideas. This is where you can start.

Starting a successful product line today is not about having the best sales talk. It is about having the best small business ideas products that fix a problem in a good way. By picking a niche and sticking to sustainability, you can avoid fighting with giant sellers like Amazon. Instead, you build a strong brand that people trust.

This article gives you the full plan on how to launch a sustainable product business from home. We cover everything. This includes finding your perfect niche and creating a supply chain with no waste.


Phase 1: Finding Your Sustainable Niche and Product

The base of a great brand is a specific, solvable problem that fits your own values. You must be able to describe your ideal customer and their problem in just one short sentence.

1. Find a Niche That Needs Solving

Do not just sell eco-friendly soap to everyone. That is too wide a market. Find a small gap. Your niche must be small enough for you to be the best, but big enough for you to make money.

How to Find Your Niche:

  • Find What Causes Trouble: Where do green products fail today? (For example, reusable food wraps that do not stick, or bags that break too fast).
  • Mix Your Interests: Put two different passions together (e.g., high-quality rock climbing gear mixed with old, recycled ocean plastic).
  • Be Very Specific: Target a small group (e.g., green dental care for people who travel a lot, or safe pet toys just for very large dogs).

Example: Sarah saw that expert artists liked using great supplies. But they had no green way to throw away oil paints and old brushes. Her niche became “Sustainable Art Studio Waste Kits.” This was a monthly box with eco-friendly cleaners, safe bins, and guides only for painters.

2. Truly Commit to Being Green

Just saying “eco-friendly” is not enough. You must decide where your business will have the biggest positive effect. This choice is vital to understand how to launch your brand message the right way.

Green GoalWhat You Need to DoExample of Niche Product
Material SourceUse only materials that are recycled, old, or grown in a good way.Small business ideas products: Furniture made only from wood that was saved from being thrown away.
No Waste / Re-UseMake sure the product or its package can be easily composted or sent back to be used again.Small business ideas products: Natural, refillable body cream in a metal tin.
Fair MakingWork only with groups that are certified as Fair Trade or local craft makers.Small business ideas products: Hand-woven towels made from organic cotton by a specific worker group.

Phase 2: Great Design and Ethical Supply Chains

Your supply chain is the biggest risk and the best strength of your brand. For small business ideas products to win in the green space, you must choose good, low-impact making over the lowest price.

3. Design for a Long Life and Real Impact

A sustainable item is one that does not need to be bought again soon. Focus on strong materials and the chance to fix the item later.

How to Design Ethically:

  • Make It Last: Design your product to work for a long time. Offer guides or spare parts to fix it.
  • Simple Packaging: Get rid of all plastic. Use only boxes, paper, or plant-based packaging. Your package is the first thing that proves you are truly green.
  • Count Your Carbon Cost: Use simple tools to guess the carbon cost of your raw materials and making process. Use this info in your ads to gain customer trust.

4. Setting Up Your Ethical Supply Chain

You do not need a factory far away. Many small business ideas products begin with local makers or small, special suppliers.

The “How-To” for Supply Chain:

  1. Find Local Help: Look for makers near you. It may cost more, but it cuts shipping pollution, speeds up delivery, and helps local workers. These are big selling points for your brand.
  2. Check Suppliers: Do not just trust their word. Ask for their proof (like organic or fair trade status). Ask how they get rid of their factory waste.
  3. Find Your Smallest Order Size (MVO): This is the least number of items you can order that still makes the price per item good. Start with the lowest amount possible to cut your risk.

Example: Tom made a line of running socks from recycled cotton. He worked with a small factory in his country that made organic textiles. He paid more per pair. But his ads could proudly say: “100% Recycled. Made in Town. No Air Shipping.” This gave him a clear edge over the big brands.


Phase 3: Brand Story and Launch Plan

A sustainable niche product needs a story, not just a label. Your customers buy into your purpose before they buy your product. This is key to learning how to launch well.

5. Writing the Brand Story That People Remember

Your brand story must tell why your product exists and how it makes the world better. Being open and honest is your best value.

Key Parts of a Good Story:

  • Your Own Start: Why did you begin this? (e.g., “I was upset about the amount of waste…”)
  • The Impact Number: Be clear (e.g., “Every item saves one pound of plastic from the sea,” or “We plant one tree for every sale”).
  • Show Production: Show photos and short videos of the good making process. Do not just show the final product.

Example: A candle brand, “The Last Light,” focused all its social media on how its candles used oil from old olive farms, not oil from the ground. They used stories to sell their purpose, not just the smell.

6. Winning the Niche Launch

Your niche is where you find your first loyal fans. These fans will sell your brand for you.

The “How-To” for Launching:

  1. Create a Pre-Launch List: Before your product is ready, make a simple website page explaining your goal. Offer a special “First Buyers” discount (like 40% off the first 100 orders) if people sign up with their email.
  2. Target Small Groups: Do not buy wide ads. Target very specific online forums, groups, or social media pages that care about your topic (e.g., groups for home composting, blogs about simple living).
  3. Work with Small Influencers: Find people with a small but real following (1,000–10,000 followers) who truly live by your brand’s values. They are more trusted and cheaper than big stars. Send them a free product and ask for an honest review.

Phase 4: Growing Without Giving Up Your Values

Once you have your first 100 buyers, the job changes from how to launch to how to grow while staying true to your green goals.

7. Growing in a Good Way

Getting bigger is good, but a truly sustainable brand grows ethically. Your supply chain must be ready to grow with you.

  • Check Your Growth: When you plan a new product, ask: Does this new item use the same main green material as the first? Can it use the same box? Keeping things the same cuts down on mess and waste.
  • Offer Bigger Sales and Monthly Plans: Ask people to buy bigger orders (bundles) or sign up for regular buys (subscriptions). This makes each order more valuable. It also means less shipping overall, which helps cut your carbon cost per sale.
  • Help Your Customer Community: Create a loyalty program that gives rewards to customers who send back old packaging or tell their friends about your brand.

8. The Future of Small Business Ideas Products

The trend of buying smart and green is here to stay. By building good, ethical habits into your business from the start, you create a wall that cheap competitors cannot get past. These are the best small business ideas products for success over a long time. Your focus on good impact is your strongest selling point.


Frequently Asked Questions

Q: Is it real that I can build a brand like this from home?

A: Yes, it is very real. Most of your work (design, branding, ads, money tracking) is done online. Many small brands do their first checks and packaging from a home office or garage. The key is starting with small business ideas products that you can handle at the start.

Q: How can I win when green products cost more money?

A: You win based on value and purpose, not just price. Your buyers are happy to pay more for good quality, ethics, and a longer-lasting item. Use your story and be open about your costs to show why the price is fair. This is how you win your niche.

Q: What is the most important first step on how to launch?

A: The most important step is testing the idea. Before you order items, test your concept. Show your sample to your target niche (in online groups, etc.). Ask them if they would pay for it. If they say yes, then you can move forward.

Q: Do I need a special “green” certificate?

A: A formal certificate is great, but you do not need one to start. Just be honest about what you do. State clearly what you are doing (e.g., “plastic-free boxes”) and what you are planning to do (e.g., “aiming for zero carbon shipping by 2026”). Being honest builds more trust than just having one label.


References


Recent Posts


5 Insanely Profitable Home Businesses You Need to Start Now

A woman, representing a successful entrepreneur, sits comfortably on a couch in a sunlit modern home office with a city view, working on her laptop and making a cheerful "call me" sign. The image conveys the excitement of starting profitable home businesses, with confetti and an adjacent screen showing positive business analytics.

Feeling stuck in the 9-to-5 grind? Dreaming of a way to earn real money without leaving your house? You’re not alone! Many people want financial freedom and a flexible lifestyle. This article will show you the exact steps to start one of the most profitable home businesses from your own space. Get ready to turn your entrepreneurial dreams into reality.


The Revolution of Home-Based Profit

The world of work has changed a lot. The old idea of needing a huge office and big startup money is gone. Today, the internet lets anyone with a skill and a drive for success build truly profitable home businesses. These businesses offer freedom, flexibility, and a real chance to make a lot of money without a giant investment.

This article cuts through the noise. We will not list just any old idea. We are giving you five of the best small business ideas you can start from your home. These ideas are seeing huge demand and are proven to bring in income. We’ll show you exactly how to launch each one, with real-world examples and simple steps. Get ready to pick your path to financial freedom!


1. Virtual Assistant (VA) Empire Builder

The demand for Virtual Assistants (VAs) has exploded. Businesses of all sizes need flexible support. They want help without the high costs of hiring a full-time employee. Modern VAs are more than just schedulers. They are specialists. They focus on areas like social media, podcasting, and customer service. This makes them one of the most profitable home businesses.

Why it’s a Top Choice:

  • Low Startup Costs: You likely already have a laptop and internet. These are your main tools.
  • High Demand: Companies are always looking for skilled remote help.
  • Scalable: You can start alone. Then, you can hire other VAs as your business grows.

How to Build Your VA Empire:

a) Identify Your Niche Skill:

Do not try to do everything. Focus on one or two services where you are strong. This makes you stand out.

  • Social Media Management: Create content, schedule posts, manage ads, and talk to followers.
  • Podcast Production & Management: Edit audio, write show notes, find guests, and upload episodes.
  • Email Marketing: Write engaging emails, set up campaigns, and manage subscriber lists.
  • Website Maintenance: Update content, check for broken links, and do basic simple fixes.

Example: Sarah loved organizing and writing. She focused on offering “Content Repurposing” for busy coaches. She would take their long videos or talks and turn them into blog posts, social media words, and email news. Her niche was clear, and clients paid well for her time-saving service.

b) Set Your Rates & Create Packages:

Check what other VAs charge for your chosen services. Offer different packages. These could be hourly, a monthly fee, or a fixed price per project. This fits many client needs. Start with fair rates, but do not sell your skills too cheaply.

c) Build a Simple Online Presence:

  • Website: A professional website is key. It can be a simple one-page site. Use it to list your services. Show good reviews. Give a contact form.
  • Professional Profiles: Set up strong profiles on LinkedIn and freelance sites. Show off your skills and what you have done there.

d) Find Your First Clients:

  • Network: Tell everyone you know what you are doing. Your first clients often come from people you already know.
  • Online Groups: Join groups where your ideal clients spend time. Offer value and gently mention your services.
  • Direct Outreach: Find businesses that fit your niche. Send them a short, personal email. Explain how you can fix a specific problem they might have. Keep it short and focused.

2. High-Value Freelance Writing and Editing

Content is still king online. Every company, blog, and service needs great writing. If you can write clearly and well, you can start a very profitable home business. This is more than just writing articles. It can include website copy, product descriptions, or technical guides. This is one of the best small business ideas for people who love words.

Why it’s a Top Choice:

  • High-Profit Margin: Your main costs are your time and maybe a good editing tool.
  • Skill-Based Pricing: Experts who write for niche industries (like finance or tech) can charge very high rates.
  • Diverse Opportunities: You can write for blogs, websites, emails, or even books.

How to Succeed as a Writer/Editor:

a) Choose Your Specialty (Vertical):

Your writing needs a focus. Writing about everything means you are an expert in nothing.

  • Financial Copywriting: Write for banks, loan companies, or wealth managers.
  • SaaS/Tech Content: Write articles and guides for software companies.
  • Health and Wellness: Write for fitness apps, diet coaches, or supplement brands.
  • E-commerce Product Descriptions: Write clear, persuasive text that helps sell goods online.

b) Create an Amazing Portfolio:

You need samples to show clients your best work. If you are just starting, write three sample pieces in your chosen niche. Put them on your website. Use them to prove your skill and style. If you have done work for a client, ask for permission to show it.

c) Master the Proposal and Pitch:

Clients hire writers who show they understand the client’s business goals.

  • Avoid Generic Pitches: Do not send a “Dear Sir/Madam” letter. Show you have read their website. Mention a recent blog post or a needed fix.
  • Focus on Outcomes: Do not say, “I write great blog posts.” Say, “I will write SEO-focused posts that bring you five more leads per month.”

Example: Alex was a former science student. He started writing content about new green energy tech. He used his deep knowledge to charge high rates. His clients were big energy startups and investment firms. His work was highly valued because it was accurate and easy to read.


3. Niche Digital Course Creator

If you know something well, you can turn that knowledge into a passive income stream. Creating and selling a niche digital course is highly effective. You record the course once, but you sell it forever. This is one of the most exciting and profitable home businesses today.

Why it’s a Top Choice:

  • Passive Income Potential: The work is done up front. Income is earned while you sleep.
  • Authority Building: Selling a course establishes you as a thought leader in your field.
  • High-Profit Margin: You have no inventory costs. Course delivery is digital.

How to Launch Your Course:

a) Find a Pain Point That People Pay to Solve:

Do not teach what you want to teach. Teach what people need to learn. The best courses help people get a new job, save time, or learn a hard skill.

  • Search Forums: Look on Reddit, Quora, or niche Facebook groups. What problems do people complain about every day?
  • Validate the Idea: Ask people if they would pay to fix that problem.

b) Plan a Short, High-Impact Course (MVP):

Start small. Do not create a giant, 50-hour course. Make a “Minimal Viable Product” (MVP) course. A 90-minute course that solves one big problem perfectly is better than a long, messy one.

c) Choose Your Tools:

  • Platform: Use easy hosting sites like Teachable, Thinkific, or Kajabi. They handle payments and video hosting for you.
  • Recording: Your phone or a basic USB microphone is fine to start. People care more about the content’s quality than the video’s quality.

d) Marketing the Course:

Your audience is key.

  • Free Content: Give away free, high-value content (a short email series, a free guide) on your topic. Use this to build your email list.
  • Launch Discount: Offer a big discount when the course first launches. This creates urgency and rewards early buyers.
  • Use Affiliates: Ask others in your niche to sell your course to their audience for a small cut of the sales.

Example: Mark was great at Excel. He noticed many small business owners spent hours creating cash flow reports. So he built a small course called “Master Cash Flow in 90 Minutes.” He taught them simple formulas and gave them templates. He charged $99 per person and made thousands in the first month because the course solved a real business problem.


4. Specialized E-commerce (Print-on-Demand)

Selling physical products used to mean holding stock and renting warehouses. Not anymore. Print-on-Demand (POD) lets you sell custom goods (t-shirts, mugs, posters) without ever touching the product. It is easily one of the best small business ideas for creative people.

Why it’s a Top Choice:

  • Zero Inventory Risk: You only pay for a product after a customer buys it.
  • Creative Freedom: You can design products for ultra-specific, fun niches.
  • Automation: The POD partner handles printing, packaging, and shipping.

How to Launch a POD Brand:

a) Find a Micro-Niche with Passion:

Do not sell general funny t-shirts. Go very specific. The most profitable home businesses often serve a tiny, passionate audience.

  • Example Niches: Dog owners who own specific breeds (e.g., “French Bulldog Moms”), vintage computer gamers, or fans of a local sports team.
  • Check Demand: See what people are searching for on Etsy, Google, or Pinterest in your niche.

b) Partner with a POD Supplier:

Connect your online shop to a service like Printful, Printify, or CustomCat. These services link directly to your store (Shopify, Etsy, etc.). When a customer orders, the supplier automatically gets the order, prints the item with your design, and ships it.

c) Focus on Design and Quality:

Your design is your product. Use simple tools like Canva or a freelance designer to make clear, strong designs. Order samples of your own products. Check the print quality before you sell anything. Quality builds trust and leads to great reviews.

d) Use Targeted Social Media Ads:

Since your niche is so specific, you can use very cheap, focused ads on platforms like Facebook and Instagram. You can show your ads only to people who have listed that specific hobby or interest on their profile. This turns a high-risk venture into one of the most profitable home businesses.


5. Local Service Aggregator (Hyper-Local Expertise)

While the other ideas are purely digital, this one mixes digital marketing with local service needs. People always need help with their homes and personal lives. By acting as the professional face and marketer, you can hire local freelancers (contractors) to do the actual work. You manage the business, the brand, and the customer experience.

Why it’s a Top Choice:

  • Recurring Revenue: Services like cleaning or gardening are often weekly or monthly.
  • High Barrier to Entry: Local contractors often lack marketing skills, giving you an edge.
  • Scalability: You can add new services (pet sitting, yard care, window cleaning) as you grow.

How to Be a Service Aggregator:

a) Choose a Simple, High-Demand Service:

Start with a single service that is easy to standardize. Deep cleaning, errand running for seniors, or yard maintenance are good options. Keep your focus tight at the start.

b) Create a Professional Booking Website:

Build a simple website that clearly lists your service, price, and booking form. Include pictures of high-quality results. The website acts as your main office. Use a booking software (like Schedulicity or Housecall Pro) to manage appointments.

c) Find and Vet Your Contractors:

You need reliable people. Treat your contractors well and pay them quickly.

  • Screening: Do background checks. Ask for references.
  • Training: Give them a simple guide for how they should interact with your customers and how to maintain quality standards.

d) Deliver Stellar Customer Service:

Your business success relies on trust. You are the bridge between the customer and the contractor.

  • Guarantee: Offer a 100% satisfaction guarantee.
  • Feedback Loop: Ask for customer feedback after every single service. Address any issues quickly. This attention to detail transforms a simple job into one of the most profitable home businesses in any town.

Example: Jane started “Safe Seniors,” a local errand and transport service. She hired two retired drivers and used simple booking software. And marketed her service only to retirement communities and churches. She built a highly trusted brand by providing excellent communication, making her a middleman that customers happily paid a premium for. This is one of the best small business ideas when paired with smart marketing.


Conclusion: Your Next Step Is Action

You now have five proven paths to start an insanely profitable home business. The difference between those who dream of a successful business and those who build one is simply action.

Do not wait for the perfect moment or a huge investment. Pick the idea that best matches your skills and your passion. Build a simple website. Find your first customer. Start small, focus on solving one problem perfectly, and scale from there. Your financial freedom starts now.


Frequently Asked Questions

Q: Which of these ideas is truly the lowest cost to start?

A: The Virtual Assistant (VA) Empire Builder and High-Value Freelance Writing are the cheapest. Both require only a computer, internet, and the software you already use (like Google Docs or email). You can start making money immediately.

Q: How do I find the initial customers for a brand new service?

A: Start by offering your service at a deep discount (or even free) to your first few customers in exchange for a detailed review and a testimonial. These high-quality reviews are your most valuable marketing asset and prove your service quality.

Q: I feel like everyone is a course creator. How can I stand out?

A: Do not aim to teach a broad topic like “Marketing.” Instead, teach a hyper-specific niche, such as “How to use TikTok for B2B Lead Generation” or “Excel for Small-Town Dentists.” Specificity is what creates authority and higher profits.

Q: How do I legally set up a profitable home business?

A: Most new home businesses can start as a sole proprietorship. This is the simplest structure. You will need to check your local and national laws regarding business registration and taxes. Many countries allow you to start operating before registering formally, but always check local regulations first.


References


Recent Posts


Starting A Business: How to Find A Good Idea

A group of five professionals sitting around a wooden table during a meeting, looking at a laptop and taking notes. A whiteboard is visible in the background, suggesting a business planning or brainstorming session related to Starting A Business.

Have you ever dreamt of being your own boss? Many people feel overwhelmed when they think about Starting A Business and where to begin. They stare at a blank slate, unsure how to turn a dream into a real venture. This guide is for the dreamers, the thinkers, and anyone ready to take that exciting first step toward building something truly their own. Let’s find your brilliant business idea together.


The Blank Page Syndrome: Overcoming the First Hurdle

Every successful business owner started with an idea. But that idea rarely came to them in a flash of genius. Instead, it grew from simple observation, critical thinking, problem-solving, and some courage. The biggest problem when starting a business is often not money or resources. It’s the “blank page syndrome”—the hard job of just finding a great idea.

This article does not just list popular businesses. It gives you a way to find promising ideas, check them carefully, and set up a long-lasting business. We will look at methods that use your unique strengths. We will help you find needs the market is not meeting. Then, we will show you how to check your ideas before you spend too much time or money.


Section 1: Self-Discovery – The Foundation of Your Business Idea

The best business ideas come from knowing yourself well. What excites you? What skills have you built over the years? And what problems do you naturally enjoy solving?

a) Look at Your Passions and Hobbies

Your deepest interests are good places to look for business ideas. When you love something, the work rarely feels like work. You will have a natural drive to learn and do well.

How to do it:

  • Think About Your “Flow State”: What do you do when you lose track of time? Is it gardening, coding, organizing, writing, crafting, or teaching?
  • List Your Skills: What are you good at? This could be anything from using complex software to baking bread, or being a great planner.
  • Find Your Obsessions: What topics do you always research, talk about, or read about? This shows you have a strong inner reason to work on it.

Example: Sarah loved houseplants. She spent many hours studying rare types, how to grow them best, and pest control. This passion helped her see a problem: many new plant owners had trouble with basic care. Her idea was a subscription box. It would send unique, simple-to-care-for plants. It would also have detailed, custom care guides, and a virtual “plant doctor” for those who bought a box.


b) Use Your Job Experience

Your past jobs gave you special insights into certain fields, work methods, and customer pain points. These facts are very helpful.

How to do it:

  • “What Was Annoying?”: Think about your past jobs. What things were not efficient? Which jobs were boring or had lots of mistakes? What services were missing for customers or teams?
  • Find Skills You Can Move: What key skills did you use, beyond your job title? Project management, data analysis, talking to clients, problem-solving, tech support—these are all valuable.
  • Spot Industry Gaps: You likely know about industry trends and areas where new ideas are much needed.

Example: Mark worked in digital marketing for years. He saw that small businesses often struggled to make engaging social media videos. This was because of money and a lack of experts. He realised his skill in fast video production and content plans was needed. His idea was a monthly service for small businesses. It would give them 5-10 short, quality, branded videos each month, made just for their social media plan.


Section 2: Market Observation – Finding Unmet Needs

Great businesses do not just have great ideas. They have great ideas that fix real problems for real people. You must look outside yourself and study the world carefully.

a) Problem-Solving as the Best Way to Get an Idea

Every good business fixes a problem, big or small. The larger or more common the problem, the bigger the chance for a market.

How to do it:

  • Listen Closely: Note down complaints from friends, family, co-workers, or people online. What bothers them? What do they wish they had?
  • Find Your Own Daily Pains: What annoys you every day? Is there a product that could be better? Or a service slow? Is something missing?
  • “Pain Point Map”: Choose any industry or customer group you like. List all the annoying things, struggles, or needs that are not met.

Example: Jessica, a busy parent, always found it hard to get toys that were educational and good for the planet. Many choices had too much plastic or were not truly fun. Her idea was an online shop for wooden toys and craft kits that are good for the earth. These were inspired by Montessori ideas. The site has clear guides on what ages the toys are for and their green qualities.


b) Look at Trends and New Markets

Being early to spot a trend can help your business a lot. We are not talking about short fads. We mean real, lasting changes in how people act, new tech, or shifts in the population.

How to do it:

  • Read Industry News: Sign up for emails and blogs in fields you like (e.g., tech, green living, health, local business news).
  • Check Social Media: See what people are talking about on sites like Reddit or in certain online groups. What problems do they talk about most? What new solutions are they trying to find?
  • Study Population Changes: More older people, more people working from home, or new types of families all create new needs for products and services.

Example: More people now work from home. This created a need for furniture that is comfy, looks nice, and fits well in small homes. Someone who saw this could start a business. They would design and sell small, space-saving, good-looking office solutions. These would be perfect for people who live in apartments or use co-working spaces.


c) Make Existing Products or Services Better

You do not always need a brand new idea. Sometimes, the best way of starting a business is to take something that already exists. Then, you make it much better, cheaper, faster, or simpler to use.

How to do it:

  • “Jobs-to-be-Done” Rule: Do not focus only on the product. Think about the “job” the customer is trying to finish. How can you help them do it better?
  • Find Competitor Weaknesses: What do people complain about with current options? Bad customer help? High prices? Missing features? Slow delivery?
  • Add a Special Touch: Can you mix two existing services? Can you offer a better version? Can you open up an expensive service to everyone?

Example: Laundromats are common, but often not easy to get to. A mobile laundry service fixes this. It picks up, washes, folds, and brings back clothes right to busy workers or older clients. This adds a lot of ease. It is an old service, but the “mobile” and “delivery” parts make it much better.


Section 3: Idea Generation Techniques – Unlocking Creativity

You know your strengths and what the market needs. Now, make a lot of ideas on purpose. Do not judge them yet. Just write everything down.

a) Brainstorming and Mind Mapping

These basic methods help you see links and grow your first thoughts in a visual way.

How to do it:

  • Start with a Main Idea: Write your passion, skill, or problem in the center of a big page or a digital map.
  • Branch Out: Draw lines to related topics, questions, possible answers, target groups, or examples.
  • Ask “What If”: Keep asking, “What if we did X differently?” or “What if Y was gone?” to find new answers.

b) SCAMPER Method

SCAMPER is an easy way to think about an existing product or service in new ways. It stands for: Substitute, Combine, Adapt, Modify (Make Bigger/Smaller), Put to another use, Eliminate, Reverse/Rearrange.

How to do it:

  • Pick a Product/Service: Choose something you use or a standard item in a field.
  • Use Each Word: Ask questions for each letter of SCAMPER.
    • Substitute: What can you use instead? (e.g., paper for plastic packaging)
    • Combine: What ideas can be put together? (e.g., fitness class + healthy meal service)
    • Adapt: What can you take from a different field? (e.g., a simple monthly plan for pet food)
    • Modify (Make Bigger/Smaller): What can you change in size or strength? (e.g., small smart home devices)
    • Put to another use: How can it be used for something else? (e.g., old shipping containers as small food shops)
    • Eliminate: What can you remove? (e.g., remove middle people for direct sales to customers)
    • Reverse/Rearrange: What if the steps were backward? (e.g., the customer designs the product first, then you make it)

Example: Let’s use SCAMPER on “fitness classes”:

  • Substitute: Instead of a gym, use outdoor park workouts.
  • Combine: Mix fitness with travel (retreats).
  • Adapt: Use a gaming plan for fitness challenges.
  • Modify: Offer more personal help with small group coaching.
  • Put to another use: Use workout gear for physical therapy.
  • Eliminate: Remove the need for costly gear (focus on bodyweight).
  • Reverse: Change the usual class flow by having people teach each other.

Section 4: Initial Idea Validation – Separating Gems from Gimmicks

Having ideas is fun. But not every idea is a good business idea. Before you invest too much, do a fast, simple check.

a) The Lean Canvas / Business Model Canvas

These are simple, one-page business plan tools. They make you think about all the key parts of your idea in a structured way.

How to do it:

  • Problem: What exact problem are you fixing?
  • Solution: What is your planned answer?
  • Key Metrics: How will you judge success?
  • Unique Value Proposition: Why are you special and better than others?
  • Unfair Advantage: What do you have that others cannot easily copy?
  • Customer Segments: Who exactly needs your help?
  • Channels: How will you find your customers?
  • Cost Structure: What are your main costs?
  • Revenue Streams: How will you get money?

Filling this out will quickly show weak spots in your idea. It will show where you need to check your beliefs more.


b) Talk to Potential Customers

This is the most important step. Your thought about your idea is less important than the thought of someone who will actually pay for it.

How to do it:

  • Do Informal Interviews: Talk to people who fit your target customer profile. Ask them open questions about their problems. And how they solve them now. Find out what they really wish for. Do not try to sell them anything. Do not ask, “Will you buy this?” (People are often too nice to say no). Just try to learn about their needs.
  • Find Buying Intent: Once you know their needs, you can talk about parts of your solution. Watch how they react: Are they excited? Do they ask how much it costs?
  • Look for Small Commitments: Will they give you their email for news? Will they test a first version of the product? These small actions show real interest.

Example: Before starting her plant box, Sarah talked to many plant owners. She met them in online groups and local clubs. She learned that they had trouble choosing the right plants for the light in their homes. This feedback helped her improve her product. She added a simple “light check” tool. This made the product much more valuable.


Section 5: The Power of Niche and Specialization

In the world of starting a business, “niche” does not mean small. It means sharp focus. A clear niche makes marketing simpler. It cuts down on competition. It lets you become the known expert fast.

How to do it:

  • Go Narrow and Deep: Do not just offer “Social Media Marketing.” Offer “Instagram Content Strategy for Local Bakeries.” The second one is easier to market and to set a price for.
  • Find Groups Not Fully Served: Is there a group of customers whose needs are not fully met by big companies? (e.g., people with special diet needs, owners of a certain type of car, collectors of a specific item).
  • Check the Niche Size: A niche should be focused, but big enough to keep your business running. Use online tools to be sure there is enough interest.

Example: An entrepreneur did not open a general “online clothing store.” Instead, they opened a store just for professional work clothes for women who are 5’0″ and under. This very specific niche fixes a major problem for a clear group of customers.


Section 6: Building Your Minimal Viable Product (MVP)

A good idea must be tested. An MVP is the simplest version of your product or service. It still gives the main value. It lets you learn from real customers. The goal is to learn as much as you can with very little effort.

How to do it:

  • Define Core Value: What is the single, most important benefit your idea gives?
  • Remove Non-Essentials: Get rid of every feature or part that is not needed to give that core value.
  • Launch and Learn: Put the MVP in front of your first customers. Offer your service by hand if you need to (this is the “Concierge MVP”). Charge a small amount of money. This proves people will actually pay for it.

Example (Concierge MVP): An entrepreneur could start by making and emailing custom meal plans by hand. They would do this for 10 paying customers for a few weeks. They would not build a complex app yet. This helps them check the main value. They get important feedback before they write any code.


Conclusion: The Commitment to Action

Starting a business is a long process, not just one event. Finding a good idea is really about mixing your unique skills with a true market need. The best ideas come from acting, not just sitting and waiting. They come from looking around, asking questions, and trying things out.

Do not wait for the perfect moment. Wait for validation. Take your best idea, build a simple MVP, and get it to your first customer. Taking action, even small action, is the only real way to change a “good idea” into a successful business.


Frequently Asked Questions

Q: Do I need a totally new idea for starting a business?

A: No. Most business ideas are not fully new. Most successful businesses take an existing idea and make it better. They offer better quality, better service, a different niche, or a lower price. This helps them serve a specific audience better than others.

Q: How do I know if my idea can make money?

A: You must check two things: 1) Will people pay to fix the problem your idea addresses? 2) Can you offer the answer at a cost that lets you make a profit? The best checks are talking to customers and making an MVP that people pay for.

Q: Should I worry about other companies when finding an idea?

A: Competition is usually a good thing. It shows that a market exists. Too little competition often means there is no market. It could also mean the problem is not worth fixing. Do not worry much about avoiding others. Focus on making a clear, unique value for your customers. This will make you different from others.

Q: What if I have too many ideas?

A: That is a great problem! Use the Lean Canvas method (Section 4a) to check each one fast. Use the same criteria for each: Problem, Solution, Revenue, etc. Choose your top three. Which one fits your passion/skills best? Which one has the clearest path to making money first?


References


Recent Posts


Unlock Your Stash: 10 Gorgeous Makes with Yarn Cones

A creative arrangement of both plain cardboard and decorated yarn cones and rings, illuminated by delicate fairy lights, sitting on a rustic wooden table alongside a cup of tea and crafting tools.

My crafting journey started small, but my yarn stash—and the resulting pile of empty cones—quickly grew out of control! I’ve spent years finding the most beautiful and effective ways to use every bit of my supplies, transforming what many consider trash into treasures. I know the feeling of wanting to be sustainable while also creating something truly stunning for your home or to gift. This article is my answer to that overflowing bin of Yarn Cones and my promise that they are your next great creative resource.


Unlock Your Stash: Gorgeous Makes with Yarn Cones

Yarn Cones. They sit in a corner, waiting. For many crafters, these sturdy cardboard or plastic tubes are simply the bulky remains of a successful large-scale project—often destined for the recycling bin. But for the savvy maker, these unassuming structures are a goldmine of creative potential. They are rigid, readily available, and the perfect foundation for a surprising array of gorgeous, functional, and decorative items.

This article takes you deep into the world of repurposed crafting, moving beyond the simple skein and embracing the core structure of your favorite bulk materials. We are not just covering ten projects; we are unlocking the full, beautiful potential of your yarn stash.


The Philosophy of Repurposing

Before we dive into the projects, let’s appreciate the material. Yarn Cones provide an inherent strength and cylindrical form that is difficult to replicate with typical craft supplies. This makes them ideal for structural projects, from storage to lighting. Repurposing them is a sustainable practice that not only reduces waste but also challenges your creativity to see common items in a new light.


Gorgeous Makes with Yarn Cones

Here are ten inspiring, detailed projects designed to transform those humble Yarn Cones into functional art.

Project One: Elegant Drawer Dividers

Organization is key to a calm craft space, and yarn cones are perfectly shaped to help segment those unruly drawers.

The Idea

Use the cones to create custom-sized cubbies for tools, pens, markers, or even spools of thread. The varying heights and diameters of cones from different brands add an interesting, organic look.

How to Do It

  1. Preparation: Gather several cones and cut them down to the height of your drawer, using a sharp utility knife or a fine-toothed saw. Sand the cut edges until smooth.
  2. Arrangement: Arrange the cones tightly within the drawer space. Think of it like a honeycomb pattern.
  3. Adhesion: Once you find a satisfactory layout, glue the cones to each other using a strong craft adhesive, ensuring they are firmly bonded side-by-side. For added stability, you can glue the entire structure to the bottom of the drawer liner, though this is often unnecessary if the arrangement is snug.
  4. Finishing Touch: Consider wrapping the exterior of the cones in cork paper or felt for a softer, more finished look that protects your tools.

Project Two: Miniature Holiday Trees

These projects are fantastic for seasonal decorating, especially if you have cones of varying heights.

The Idea

Transform a collection of cones into a stylish, minimalist forest of decorative trees. This works for Christmas, fall, or any decorative grouping.

How to Do It

  1. Base Layer: Paint the cones in a solid base colour—white, black, or deep forest green—to unify the look.
  2. Texture Application: Apply a thin layer of white craft glue over the cone’s surface. While wet, wrap the cone in a textural yarn, starting from the bottom edge and working your way up, pulling the yarn taut. Alternatively, roll the cone in glitter, fine craft sand, or small beads for a different effect.
  3. Topper: Secure a small decorative star, a wooden bead, or a loop of ribbon to the peak of the cone.
  4. Display: Arrange groups of three or five finished cones on a mantlepiece or bookshelf to create a lovely seasonal vignette.

Project Three: Desk Caddy for Pens and Tools

The structural integrity of a yarn cone makes it an excellent base for a desktop organizer.

The Idea

Group three or more cones to create a tiered, sectioned caddy perfect for holding writing tools, scissors, or brushes.

How to Do It

  1. Measure and Cut: Determine the desired heights for the caddy. It looks best with at least three different heights (e.g., five inches, seven inches, and nine inches). Cut the cones and sand the edges.
  2. Covering: To give the caddy a professional look, cover each cone with decorative paper, thin leather scraps, or fabric using spray adhesive.
  3. Assembly: Arrange the covered cones on a round or square piece of thick cardboard or wood that serves as the base. Glue the cones securely to the base and to each other where they meet.
  4. Embellishment: Add a ribbon or a piece of twine wrapped around the base for a final flourish.

Project Four: Rustic Woven Baskets

While the cones are too small for a full basket, they make ideal moulds for small, woven vessels perfect for holding keys or trinkets.

The Idea

Use the cone’s shape as a temporary structure to weave a small, open-top basket or container.

How to Do It

  1. Preparation: Cover the cone in plastic wrap to prevent the weaving material from sticking.
  2. Weaving: Use thick twine, rope, or strips of fabric as your weaving material. Start by gluing your base coil at the bottom of the cone and then spiralling up, securing the coil to itself with a hot glue gun. Ensure the coils are close together.
  3. Drying and Removal: Once the glue is dry and the woven structure is complete, carefully slide the finished basket off the cone mould. The basket will retain the lovely tapered shape of the cone.

Project Five: Architectural Wall Art

This project transforms the cone into a three-dimensional geometric element for stunning, modern wall decor.

The Idea

Slice cones into thin rings and arrange them to form intricate, textural patterns on a canvas or wooden board.

How to Do It

  1. Slicing: Use a sturdy craft knife to cut the cones into thin rings, about a quarter to a half inch thick. The tapered shape of the cone will create slightly different ring sizes, which adds visual interest.
  2. Painting: Paint the rings in a monochromatic palette (e.g., three shades of grey) or bold, contrasting colours.
  3. Assembly: Glue the rings onto a prepared canvas, arranging them in a repeating geometric pattern, overlapping some for a layered effect.
  4. Sealing: Once dry, seal the piece with a clear varnish or sealant.

Project Six: Simple Yarn Storage Spools

The most straightforward and useful repurposing is turning a large cone into a new, more manageable spool for leftover yarn remnants.

The Idea

Instead of dealing with tangles, wind your unused yarn remnants onto a cone for neat, stable storage.

How to Do It

  1. Cleaning: Ensure the cones are clean and free of any stray adhesive residue.
  2. Winding: Start by securing the end of the yarn remnant near the base of the cone with a small piece of removable tape.
  3. Tension: Wind the yarn onto the cone, keeping a steady, moderate tension to create a compact and stable shape. The wide base prevents the cone from tipping over while winding.
  4. Labeling: Use a small sticker on the base of the cone to label the yarn type, weight, and colour for easy identification later.

Project Seven: Festive Cone Crackers

Elevate your party favours or holiday tablescape with beautiful, oversized cone-based crackers.

The Idea

Use the cones as the rigid inner tube for a custom, luxurious party cracker or gift wrapping tube.

How to Do It

  1. Filling: Place small gifts or candies inside the cone.
  2. Wrapping: Cut a large rectangle of decorative wrapping paper or fabric. The width should be wide enough to cover the cone’s length, plus excess for the twisted ends.
  3. Assembly: Place the cone in the centre of the paper. Roll the paper tightly around the cone and secure the seam with tape or a thin line of glue.
  4. Twisting: Twist the excess paper at both ends and tie with ribbon to create the traditional cracker shape.

Project Eight: Unique Candle Holders

A sturdy, bottom-heavy yarn cone can be inverted and decorated to serve as a stunning, tall candle holder for battery-operated pillar candles.

The Idea

Decorate and invert the cones to create an eye-catching, tiered display for flameless candles.

How to Do It

  1. Weighting: For safety and stability, fill the small end of the cone (which will be the base) with sand, pebbles, or plaster of Paris to create a solid, heavy foundation.
  2. Decoration: Cover the entire exterior with patterned decoupage paper, mosaic tiles, or simply paint it a glossy metallic colour.
  3. Topper: Ensure the top surface (the wide end of the cone) is flat and stable. Place a battery-operated pillar candle securely on the wide base. Note: Never use real flame candles on a cardboard or plastic base.

Project Nine: DIY Ring or Jewellery Stand

The tapered shape is perfectly suited for stacking rings or hanging bracelets.

The Idea

Create individual or clustered stands that showcase your jewellery collection beautifully.

How to Do It

  1. Base: Glue the cone securely onto a small, weighted base, such as a painted wooden disk or a slab of polymer clay.
  2. Padding: Wrap the cone in a soft material like velvet, suede fabric, or thick felt. Use spray adhesive to keep the material smooth and taut as you wrap it around the tapered shape.
  3. Final Touches: Add small hooks or pins to the sides for hanging necklaces or bracelets. This creates a multi-functional display piece.

Project Ten: Custom Lamp Shade Frame

For the advanced DIYer, a strong cone can be the starting point for a small, bespoke table lamp shade.

The Idea

Use the cone as a rigid frame to drape, wrap, or cover with translucent material to diffuse light.

How to Do It

  1. Support: Cut the cone to the desired height for your lamp base. The small end needs a clean cut to allow light to pass through.
  2. Covering: Wrap the outside of the cone in a very thin, translucent fabric like linen, silk, or a fine weave cotton, secured with fabric glue.
  3. Perforations (Optional): For a starry effect, use a needle to carefully poke small, random holes through the cone and fabric before mounting.
  4. Mounting: The wide base of the cone sits directly on the lamp’s electrical fitting. Ensure the cone size is safe and appropriate for the light source being used. Always use an energy-efficient LED bulb to minimize heat.

Getting Started: Materials and Tips

The beauty of these projects is that they require minimal, inexpensive additional materials.

Core Materials Checklist

  • Yarn Cones: Various sizes and materials (cardboard or plastic).
  • Cutting Tools: Utility knife, craft saw, or sharp scissors.
  • Adhesives: Hot glue gun, strong craft glue (like E6000), spray adhesive.
  • Finishing Materials: Paint, craft papers, fabrics, twine, and ribbon.

Top Tips for Working with Cones

  • Cleanliness is Key: Always wipe the cones down with a damp cloth to remove any residual yarn dust or sizing before painting or gluing.
  • Cutting Cardboard Cones: Score the line multiple times with a utility knife before attempting a full cut for a cleaner edge.
  • Hiding Edges: When covering a cone, always turn your raw edges slightly under before gluing to the cone to ensure a professional, clean finish.
  • Weighting: For any standalone item like a caddy or candle holder, adding weight to the base (the narrow end) prevents tipping and adds a feeling of quality.

By looking at that stack of finished Yarn Cones not as clutter, but as raw construction material, you open up a sustainable and exciting new chapter in your crafting journey. Dive in, transform your stash, and enjoy the gorgeous results.


Frequently Asked Questions (FAQ)

What types of yarn cones are best for crafting?

Generally, the sturdy, thick cardboard cones are the easiest to work with for structural projects like drawer dividers or candle holders, as they are simple to cut and glue. Plastic cones are more difficult to cut but are excellent for projects involving moisture or where a smooth surface is desired before covering.

How do I ensure my finished cone projects are stable?

For any project that needs to stand up straight (like a desk caddy or a candle holder), stability is achieved by weighting the base. Fill the narrow end (which becomes the bottom) with plaster, sand, or heavy decorative pebbles before sealing it. You can also glue the finished item to a flat, heavy base material like a wooden coaster or a ceramic tile.

Can I cover the cones with yarn instead of fabric or paper?

Absolutely. Wrapping a cone in yarn—especially chunky yarn or rope—is a great way to add texture. To do this, apply a thin layer of strong craft glue or use a hot glue gun along a small section of the cone at a time, then tightly wrap the yarn in a continuous spiral from the bottom to the top. This creates a beautifully textured, uniform look.

Is it safe to use cones for lighting projects?

Yes, but only with proper safety precautions. The structure is only safe to use as a frame for a lamp shade if you use an LED light source, which emits minimal heat. Never use incandescent or halogen bulbs near the cardboard or plastic material, and ensure the yarn cones materials are not directly touching any electrical components.

What is the best way to get a smooth finish on a cardboard cone?

If you plan to paint cardboard yarn cones, first apply a coat of gesso or a thick primer. This helps fill the texture of the cardboard and prevents the paint from being absorbed unevenly, giving you a smooth, professional-looking surface when the top coat is applied.


Reference Section


Recent Posts