Greek yogurt is a versatile ingredient that’s perfect for adding a creamy texture and a protein boost to your meals. Whether you’re cooking breakfast, lunch, dinner, or even dessert, there’s a place for Greek yogurt at your table. This guide shares 10 simple ways to incorporate Greek yogurt into every meal, featuring tasty recipes and tips on how to apply it for maximum flavor and nutrition.
High-Protein Parfait/Bowl with Greek Yogurt
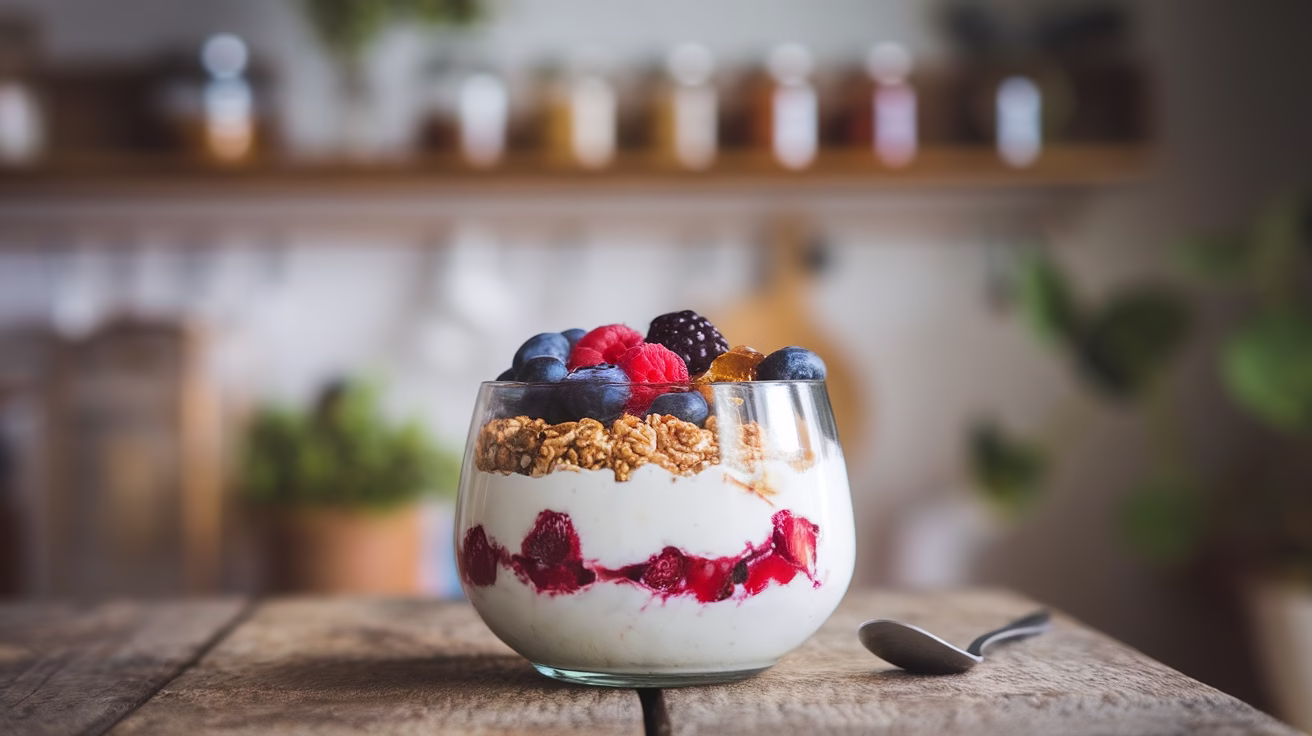
This is a fantastic base for a high-protein parfait or bowl. It’s creamy, thick, and packed with protein, making it a perfect choice for breakfast or a snack. In the image, you can see a delicious parfait layered with fresh berries, granola, and a hint of sweetness. This colorful dish is not just pleasing to the eye; it’s also nutritious and satisfying.
To make your own high-protein parfait, start with a cup of Greek yogurt. Layer it in a glass or bowl with your favorite fruits, like blueberries, raspberries, and strawberries. Add a sprinkle of granola for crunch and texture. You can also drizzle some honey or maple syrup on top for a touch of sweetness.
Mixing Greek yogurt with fruits and granola not only enhances the flavor but also boosts the protein content. This makes it a great option for anyone looking to fuel their day with healthy ingredients. Enjoy it as a quick breakfast or a refreshing afternoon snack!
Fruit Dip/Frosting

Using this as a fruit dip or frosting is a fun and healthy way to enjoy snacks. The creamy texture and tangy flavor make it a perfect match for fresh fruits. Just look at that beautiful spread of strawberries, apples, and grapes surrounding a bowl of Greek yogurt!
To make a simple fruit dip, start with one cup of Greek yogurt. Add a tablespoon of honey for sweetness and a splash of vanilla extract for flavor. Mix it all together until smooth. This dip pairs wonderfully with sliced apples and strawberries, making it a hit at parties or as a quick snack.
If you want to use Greek yogurt as a frosting, blend it with some cream cheese and a bit of powdered sugar. This creates a delicious and healthier frosting option for cakes or cupcakes. Spread it generously over your favorite baked goods for a tasty treat!
Two-Ingredient Pizza Dough with Greek Yogurt
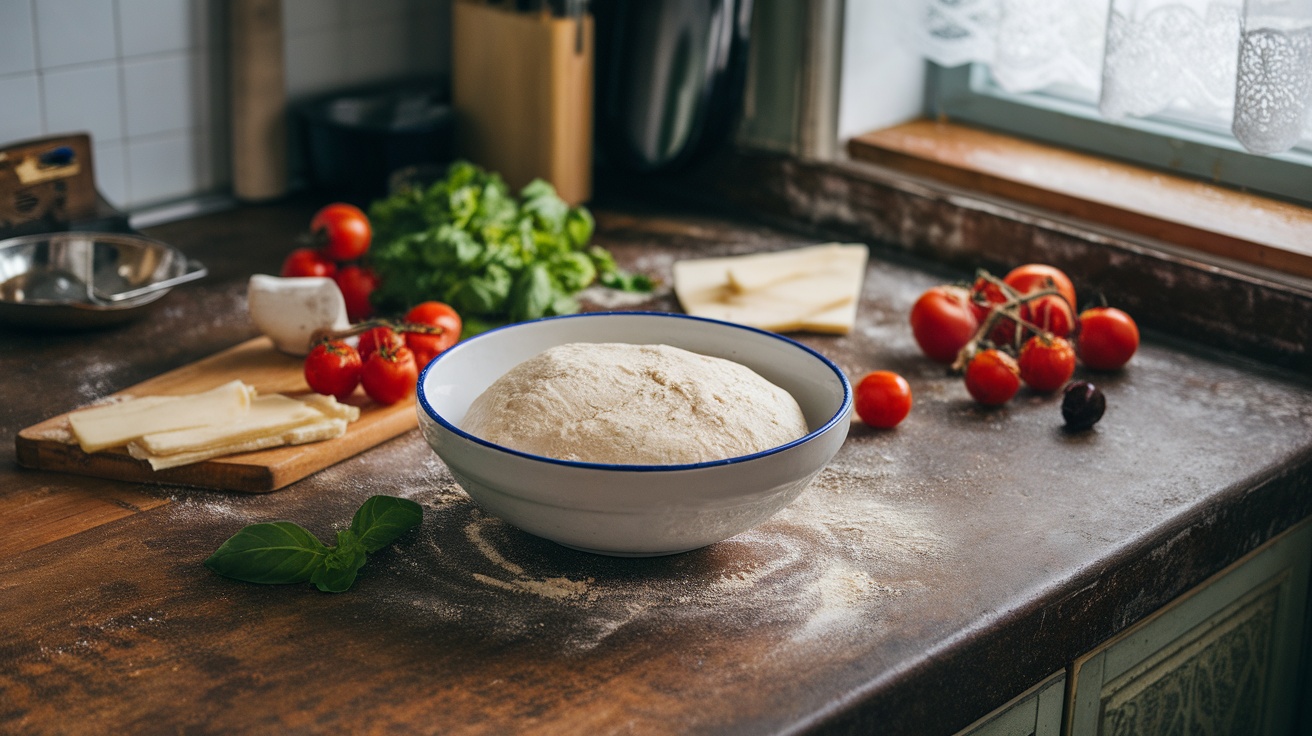
Making pizza at home is easier than you think, especially with this two-ingredient pizza dough. The star of the show is Greek yogurt, which adds a creamy texture and a boost of protein. You only need Greek yogurt and self-rising flour to whip up this simple dough.
To start, combine one cup of Greek yogurt with one cup of self-rising flour in a mixing bowl. Stir until a dough forms. If the dough is too sticky, sprinkle in a bit more flour until it’s manageable. Knead it gently on a floured surface for a minute or two.
Next, roll out the dough to your desired thickness. You can make it thin and crispy or thicker for a chewier crust. Once rolled out, transfer it to a baking sheet or pizza stone. Now, it’s time for toppings! Spread your favorite sauce, sprinkle cheese, and add any toppings you like. Bake at 450°F (230°C) for about 12-15 minutes, or until the crust is golden and the cheese is bubbly.
This two-ingredient pizza dough is not only quick but also a fun way to get creative with your meals. Using Greek yogurt makes it a healthier option, so you can enjoy pizza guilt-free!
Fluffy Protein Pancakes

Fluffy protein pancakes are a delicious way to start your day. They are light, airy, and packed with protein, making them a great breakfast option. The secret ingredient? Greek yogurt! It adds creaminess and a protein boost.
To make these pancakes, you’ll need flour, baking powder, eggs, milk, and, of course, Greek yogurt. Start by mixing the dry ingredients in one bowl and the wet ingredients in another. Then, combine them gently to keep the batter fluffy.
When it’s time to cook, heat a non-stick skillet over medium heat. Pour in the batter, and watch for bubbles to form on the surface. Flip them over when they’re golden brown. Serve with a dollop of Greek yogurt on top, fresh berries, and a drizzle of maple syrup for that perfect finish!
No-Bake Cheesecake Cups
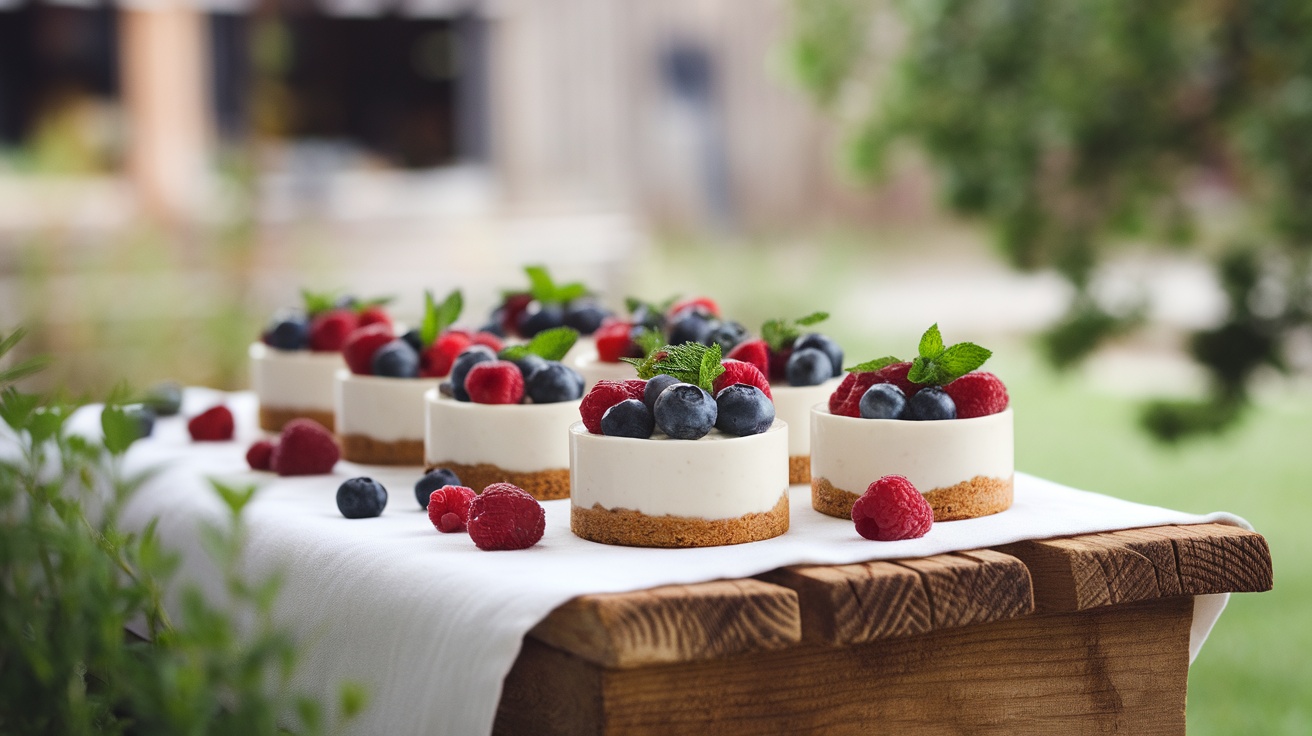
No-bake cheesecake cups are a delightful treat that’s both easy to make and delicious. These little desserts are perfect for any occasion, and they look stunning too! The image shows a beautiful arrangement of cheesecake cups topped with fresh berries and mint, making them an eye-catching addition to your table.
To make these cheesecake cups, you’ll need a few simple ingredients: Greek yogurt, cream cheese, sugar, vanilla extract, and graham cracker crumbs. The Greek yogurt adds a creamy texture and a tangy flavor that balances the sweetness perfectly.
Start by mixing the cream cheese, Greek yogurt, sugar, and vanilla extract until smooth. This mixture forms the base of your cheesecake. Next, prepare the graham cracker crust by crushing the crackers and mixing them with a bit of melted butter. Layer this crust at the bottom of your cups.
Once the crust is ready, spoon the cheesecake mixture on top. Chill the cups in the refrigerator for a couple of hours to let them set. Before serving, top each cup with fresh berries and a sprig of mint for that extra pop of color and flavor.
These no-bake cheesecake cups are not just tasty; they’re also a fun way to enjoy Greek yogurt in dessert form. They’re light, refreshing, and sure to impress your guests!
Frozen Yogurt Bark

Frozen yogurt bark is a simple and fun way to enjoy Greek yogurt. This treat is not only delicious but also packed with nutrients. You can customize it with your favorite toppings, making it a versatile dessert or snack.
To make frozen yogurt bark, start with a base of Greek yogurt. Spread it evenly on a baking sheet lined with parchment paper. You can use plain or flavored Greek yogurt, depending on your taste.
Next, add your favorite toppings. Fresh fruits like strawberries, blueberries, and raspberries work great. Nuts like almonds and pistachios add a nice crunch. Drizzle a little honey or maple syrup on top for extra sweetness.
Once you’ve added your toppings, place the baking sheet in the freezer. Let it freeze for about 2-3 hours or until it’s solid. After that, break it into pieces and enjoy!
This frozen yogurt bark is perfect for a hot day or as a healthy dessert option. Plus, using Greek yogurt gives it a creamy texture and a boost of protein. Give it a try, and you’ll have a refreshing treat that everyone will love!
Tzatziki Sauce with Greek Yogurt

Tzatziki sauce is a refreshing dip that brings a taste of Greece to your table. Made with Greek yogurt, it’s creamy and tangy, perfect for pairing with veggies or pita bread. The image shows a vibrant spread with colorful bell peppers, cucumbers, and warm pita, all ready to be dipped into that delicious tzatziki.
To make tzatziki, you’ll need Greek yogurt, cucumber, garlic, olive oil, lemon juice, and fresh dill. Start by grating the cucumber and squeezing out excess moisture. Then, mix it with Greek yogurt, minced garlic, a splash of olive oil, a squeeze of lemon juice, and chopped dill. Stir until everything is well combined.
This sauce is not just a dip; it can also be used as a dressing for salads or a topping for grilled meats. The creamy texture of Greek yogurt makes it a versatile ingredient that enhances the flavors of any dish.
Lighter Chicken Salad

This lighter chicken salad is a delicious way to enjoy a healthy meal. The image shows a vibrant bowl filled with fresh greens, juicy cherry tomatoes, and tender slices of grilled chicken. The creamy drizzle on top is Greek yogurt, which adds a tangy flavor and a boost of protein.
To make this salad, start with your favorite greens like romaine or mixed lettuce. Add sliced cucumbers and halved cherry tomatoes for a refreshing crunch. Grill or bake some chicken breast, then slice it and place it on top of the salad.
For the dressing, mix Greek yogurt with a splash of lemon juice, a pinch of salt, and some herbs like dill or parsley. This creamy dressing is a healthier alternative to traditional dressings and pairs perfectly with the fresh ingredients.
Drizzle the Greek yogurt dressing over the salad just before serving. This not only enhances the flavor but also makes the salad more filling. Enjoy this lighter chicken salad as a satisfying lunch or a light dinner!
Creamy Chicken Marinade with Greek Yogurt
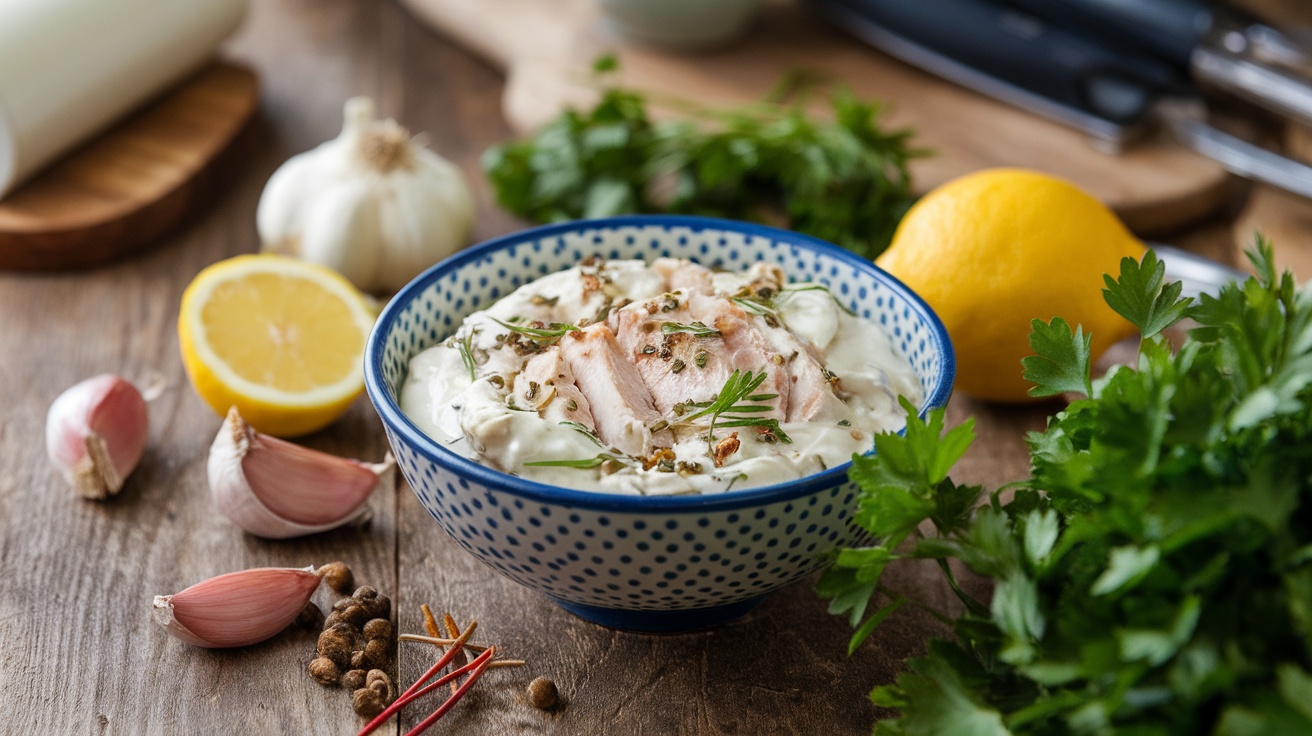
Using Greek yogurt in a chicken marinade is a fantastic way to add flavor and moisture. The creamy texture of Greek yogurt helps tenderize the chicken while infusing it with delicious taste.
To make this marinade, you’ll need Greek yogurt, garlic, lemon juice, and your favorite herbs. Start by mixing one cup of Greek yogurt with three minced garlic cloves, the juice of one lemon, and a handful of chopped herbs like parsley or dill. This combination creates a zesty and aromatic base.
Next, place your chicken in a resealable bag or a bowl and pour the marinade over it. Make sure the chicken is well-coated. Let it marinate in the fridge for at least one hour, or overnight for even more flavor. The longer it sits, the more the flavors will develop.
When you’re ready to cook, simply grill, bake, or pan-sear the chicken. The Greek yogurt will keep the chicken juicy and tender, making every bite a delight. Enjoy your meal with a side of veggies or a fresh salad!
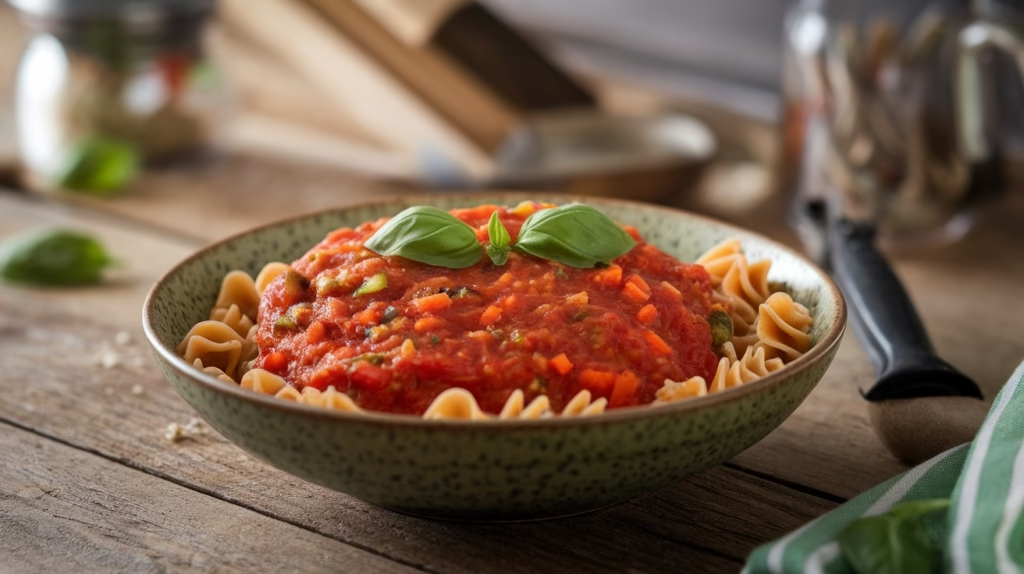
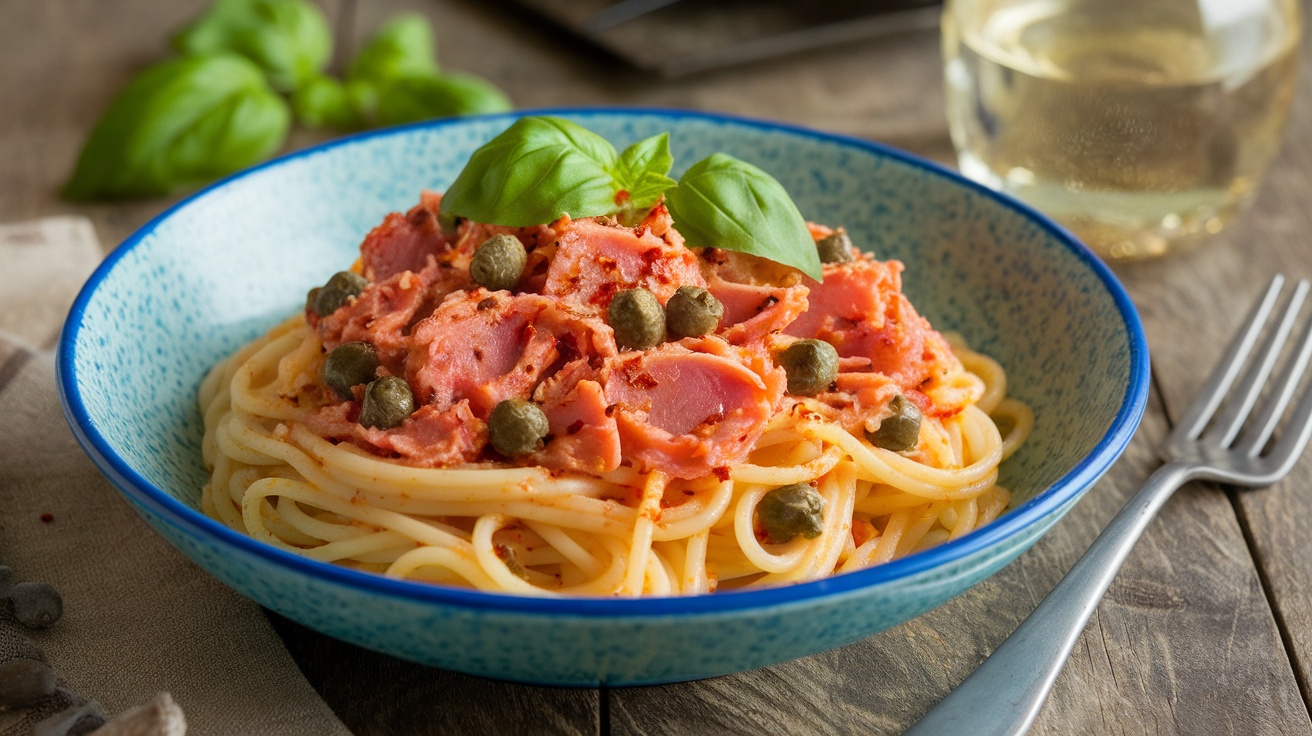
Better-For-You Creamy Pasta Sauce

Using Greek yogurt in your pasta sauce is a fantastic way to make it creamy without all the extra calories. This simple swap adds protein and a tangy flavor that elevates your dish.
To make a delicious creamy pasta sauce, start with your favorite pasta. Cook it according to the package instructions. In a separate pan, sauté garlic and onions in a bit of olive oil until they’re soft. Add in some diced tomatoes and let them simmer. Once the tomatoes are cooked down, stir in a generous scoop of Greek yogurt. This is where the magic happens! The yogurt will create a smooth and creamy texture.
Mix the cooked pasta into the sauce, ensuring every strand is coated. You can also add in some fresh herbs like basil or parsley for extra flavor. For a pop of color and freshness, top your dish with cherry tomatoes and a sprinkle of more Greek yogurt before serving. This not only looks great but also adds a creamy finish that everyone will love.
References
Medicalnewstoday – Is Greek yogurt good for you?
Healthline – 6 Fantastic Health Benefits of Greek Yogurt
WebMD – Health Benefits of Greek Yogurt
Recent Posts