Cookie Consent by Free Privacy Policy Generator Update cookies preferences

How to Brew the Perfect Mate with Zero Trash

A steaming yerba mate gourd on a weathered wooden table with fresh mint leaves and rising vapor swirls, illustrating how to brew a traditional herbal energizer.
The yerba mate gourd

Discover the art of sustainable mate brewing. This guide connects you to old traditions while you protect our planet. Learn how to brew authentic Yerba Mate Tea using zero-waste methods. These steps remove the need for extra packaging and items you only use once. Learn the skills that turn this herbal drink into a green habit. Master the brewing process while you follow green steps that honor South American culture and the earth.


Introduction: The Zero-Waste Mate Revolution

Mate is not just a drink. It is a deep cultural habit that brings people together in a circle. For many hundreds of years, people in South America have enjoyed this drink. They use very simple and green ways to make it. Today, we can follow those same old ways while we use modern zero-waste ideas.

The best thing about mate is that it is very simple. Many people drink coffee or tea that needs paper filters or plastic pods. Those things create a lot of trash. Mate is different. When you learn how to brew mate the right way, you are not just making a cup of tea. You are taking part in a green ritual. This process creates almost no trash at all.

This ancient herbal drink gives you more than just a spark of energy. it gives you a steady feel of being awake. It helps your mind feel clear and brings you closer to your friends. By using zero-waste tea habits, you make these benefits even better. You also help the world by making less garbage.


Understanding Yerba Mate: The Foundation of Perfect Brewing

Before we talk about how to brew, we must look at what makes Yerba Mate Tea special. This plant grows in South American forests. It has caffeine and other natural parts like theobromine. This mix gives you a smooth energy that lasts a long time. It does not make you feel shaky like coffee often does.

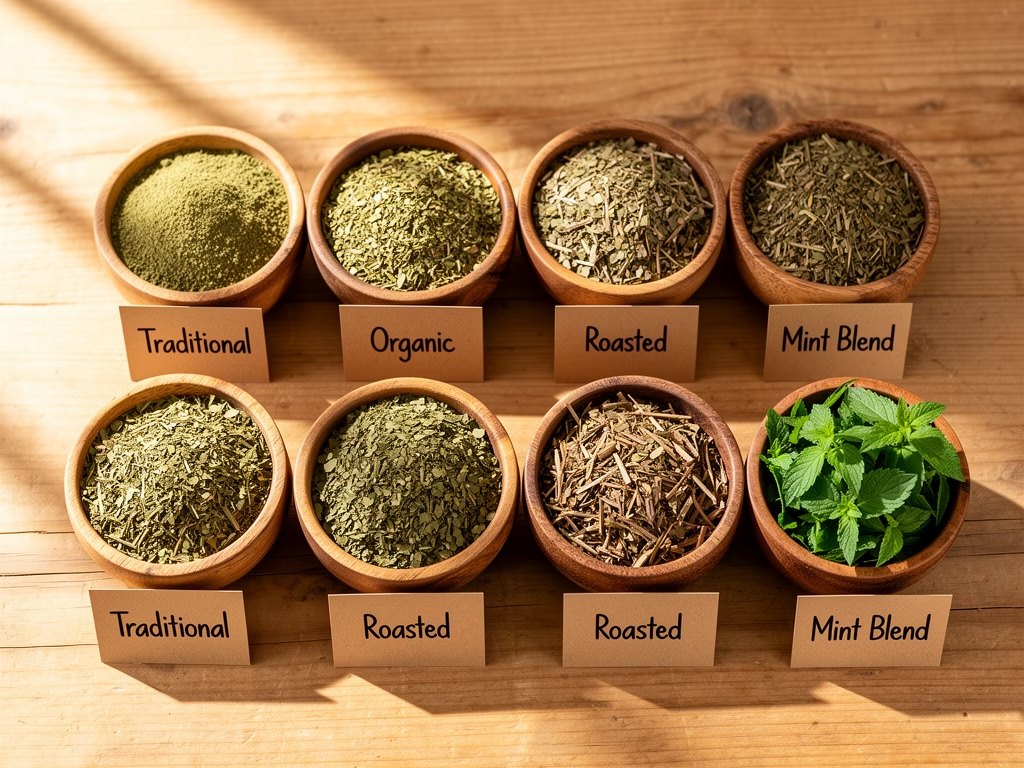
You can find traditional mate in a few different styles. Some bags have small stems and leaf dust inside. Others are made only of pure green leaves. The size of the pieces changes the taste. It also changes how you brew it. Large, coarse pieces work best if you use a traditional cup. Fine pieces are better if you use a French press or other tools.

Good mate should always smell fresh and like green grass. It should never smell like old dust or stale hay. Try to find organic mate that is sold in large bins. This helps you skip the plastic bags. Many health food stores now let you bring your own jars to fill up. This is a great way to keep your kitchen free of waste.


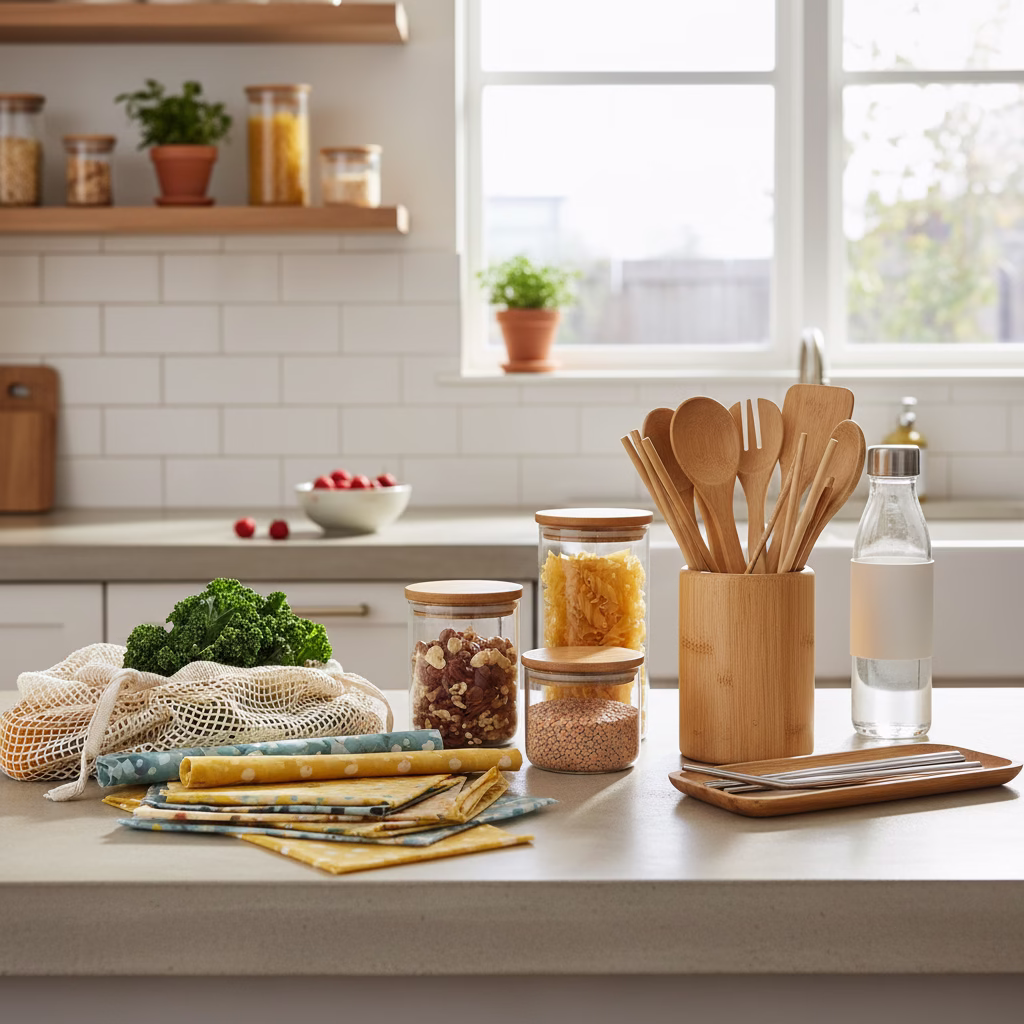
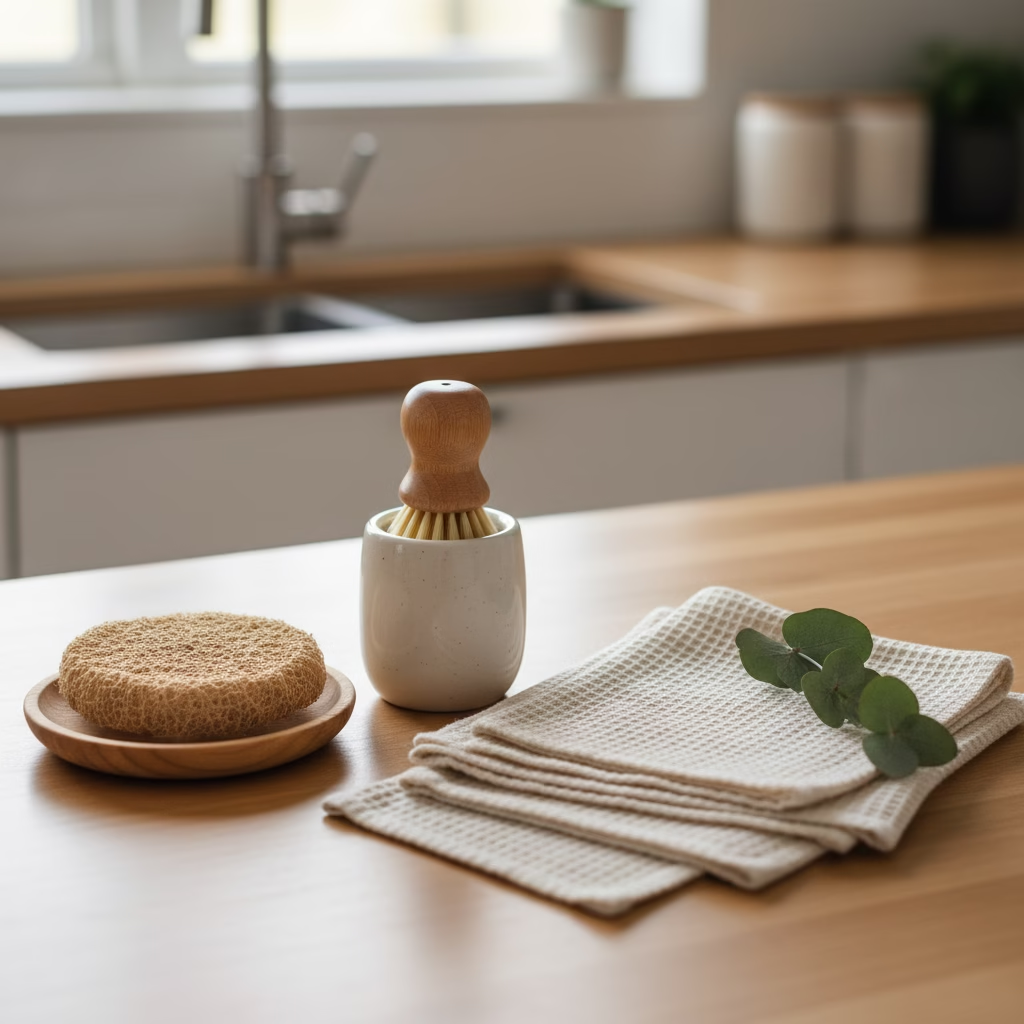
Essential Zero-Waste Equipment for Perfect Mate

A traditional mate gourd and metal bombilla on a wooden table, surrounded by fresh yerba mate leaves and reusable accessories, showing how to brew with zero waste.

Brewing mate in the old way needs very few tools. This makes it a very green choice for your home. Here is a list of the basic things you need for a real zero-waste session:
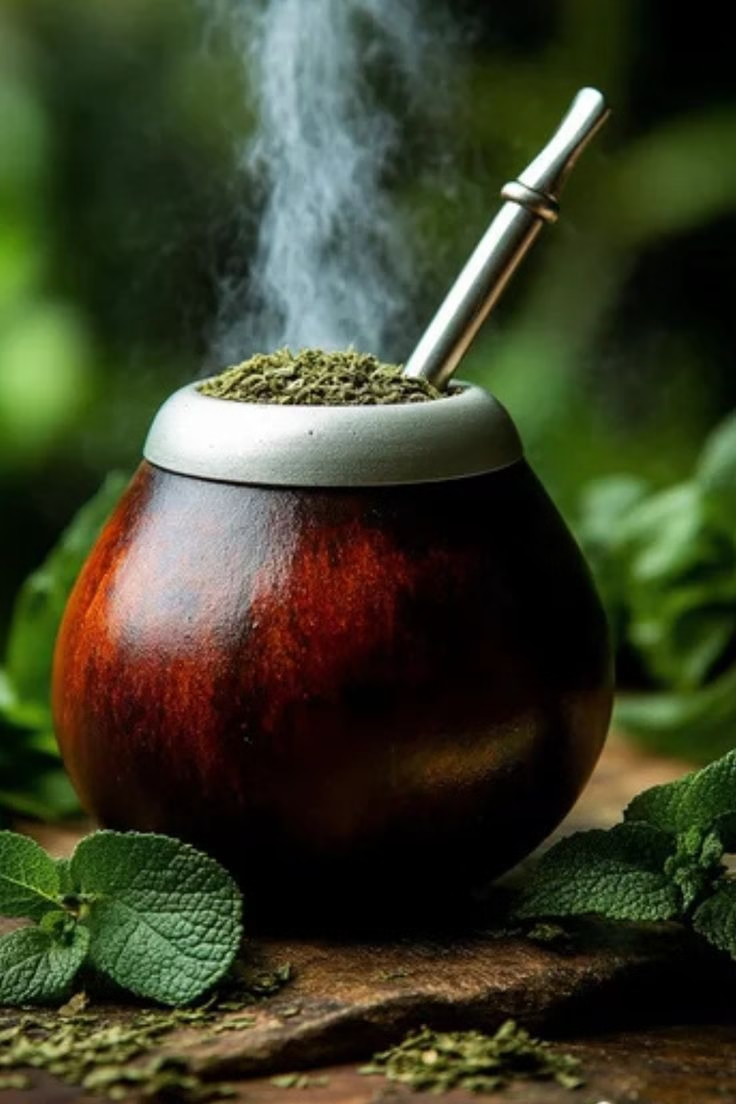
The Gourd

The gourd is the heart of the whole mate world. Most people use a dried squash called a calabash. You can also find cups made of wood, clay, or glass. Each type of cup changes the taste a little bit. A squash gourd adds a woody, earth-like flavor. A glass cup keeps the taste very clean and neutral.

The Bombilla

The bombilla is a special straw made of metal. It has a filter at the bottom end. This tool is great because you do not need paper filters or tea bags. If you buy a high-quality metal straw, it can last for many years. It is best to choose stainless steel. It is very strong and does not change the flavor of your drink.

The Thermal Flask

A good insulated bottle or flask is very helpful. It keeps your water at the right heat for a long time. This is important because you will pour water many times. By using a flask, you do not have to keep turning on the stove. This saves power and time.

Alternative Tools

If you do not want to use a gourd, you have other choices. You can use a French press or a glass jar. You can even use a metal pour-over tool. All of these tools are reusable. They work perfectly with loose leaves and create no trash.


Preparing Your Gourd: A Zero-Waste Ritual

If you buy a new natural gourd, you must “cure” it first. This is a special step that gets the cup ready for use. It removes bitter tastes from the inside of the squash. It also makes the cup last longer. This process only uses mate leaves and water, so it is totally green.

First, fill your new gourd with used mate leaves. Add hot water until it is full. Let it sit on your counter all night. The next day, use a small spoon to scrape the inside. This removes the soft skin from the squash. You should do this a few times. Stop when the inside is clean and the water does not taste bitter.

Between your daily sessions, just rinse the gourd with warm water. You should never use dish soap on a natural gourd. Soap can get into the walls of the gourd and ruin the taste of your mate. Always let it air dry in a spot with good breeze. This stops mold from growing inside.


The Perfect Water: Temperature and Quality Matter

The water you use will change the flavor of your mate in a big way. It is best to use filtered water or fresh spring water. Water from the tap can sometimes smell like chemicals. This can hide the sweet and grassy notes of the mate leaves.

The heat of the water is the most important part. Mate is not like black tea or coffee. You should never use boiling water. Boiling water makes the leaves burn. This creates a very bitter taste that is hard to drink. The best heat is between 160 and 175 degrees.

Heat your water in a pot and let it cool for a minute before you pour. Many people use a thermometer to be sure. This careful step stops waste because every cup will taste great. You won’t have to throw away a bitter batch of tea.


How to Brew Traditional Mate: Step-by-Step Instructions

Brewing mate the old way is a process. It helps you get the most flavor out of the leaves. This method also lets you use the same leaves for many refills. This helps your bag of mate last much longer.

Step One: The Fill

Fill your gourd about two-thirds of the way with dry leaves. Put your hand over the top and shake it. Tilt the gourd so the leaves sit on one side. This creates a slope or a “little mountain.” This helps the water flow well and keeps the straw from getting stuck.

Step Two: The Straw

Put your thumb over the top of the metal straw. Push the filter end into the bottom of the empty space in the cup. Do not move it once it is in place. Keeping your thumb on the top stops leaf dust from getting inside the straw.

Step Three: The Awakening

Pour a tiny bit of cool water into the empty side of the gourd. Let it sit for a minute so the leaves can soak it up. This is called “waking up the mate.” It protects the leaves from the hot water you will add next.

Step Four: The Pour

Slowly add your hot water into the small pool next to the straw. Do not wet all the leaves at the top yet. The first person in the circle drinks the whole cup. Then, they add more water and pass it to the next friend.

Step Five: The Refill

Keep adding water and passing the cup until the flavor is gone. A good scoop of mate can be refilled 10 to 15 times. This makes it a very cheap and green way to drink caffeine.


Alternative Zero-Waste Brewing Methods

You do not have to use a gourd to be green. There are other ways to make mate that are also very sustainable. These methods are great if you are in a rush or want to make a lot at once.

The French Press

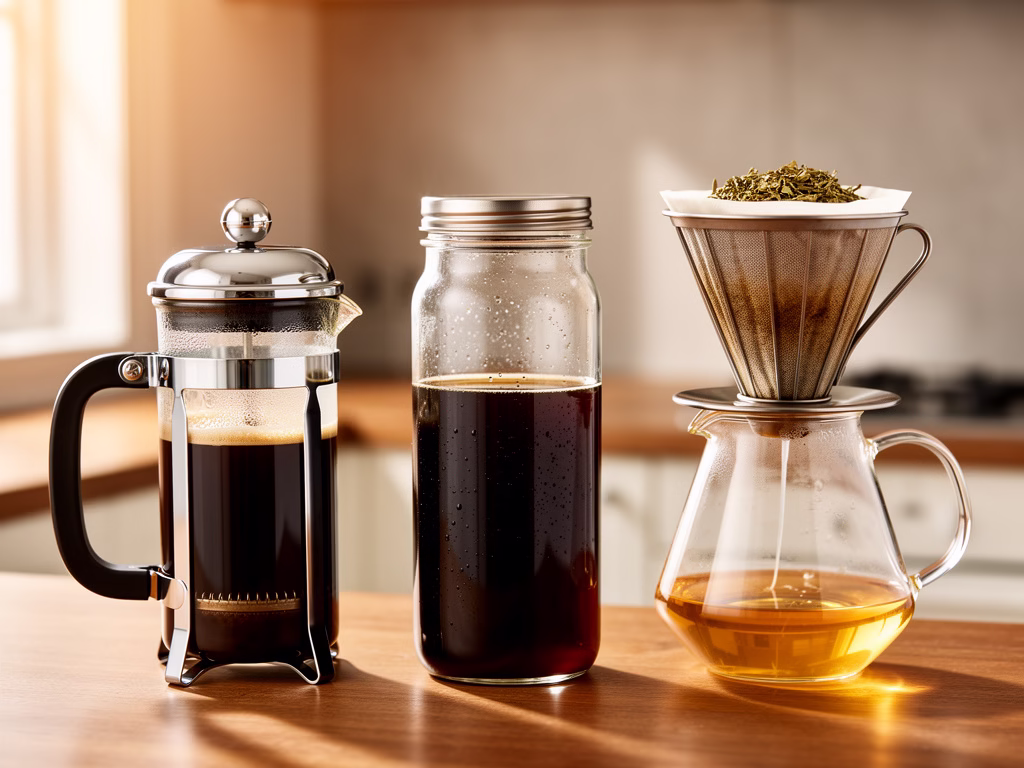
A French press makes a very smooth cup of mate. Use one big spoon of leaves for every cup of water. Add your hot water and let it sit for about three to five minutes. Then, push the metal filter down. This way is very easy to clean and works well for a big breakfast.
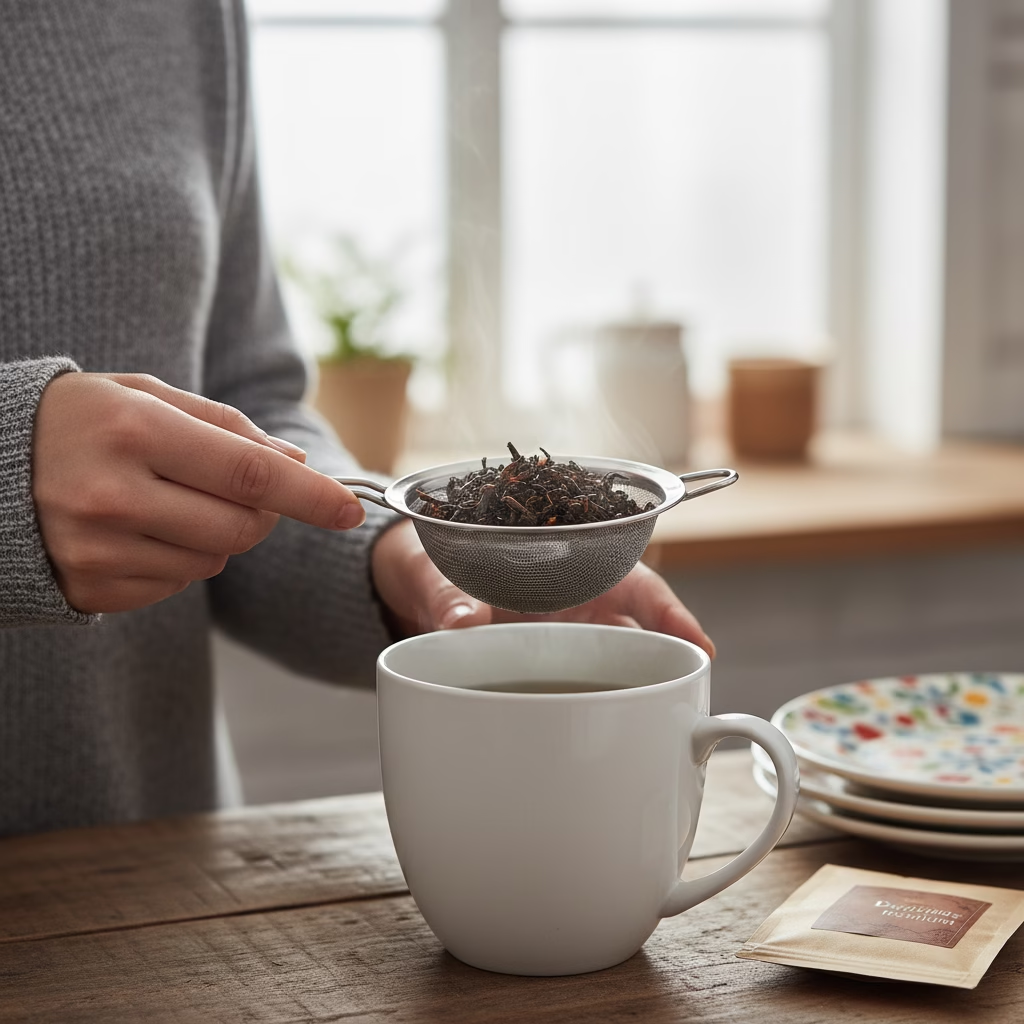
Cold Brew Mate

In the summer, you might want a cold drink. Put mate leaves and cold water in a glass jar. Put the jar in the fridge all night. The next day, pour it through a metal strainer. Cold brew mate is very sweet and not bitter at all. It is a great way to stay cool without using plastic bottles.

Metal Pour-Over

You can use a metal coffee filter to make mate too. This gives you a very clear drink. It allows you to taste the small details in the leaves. These metal filters can be used forever, so they never go into the trash.


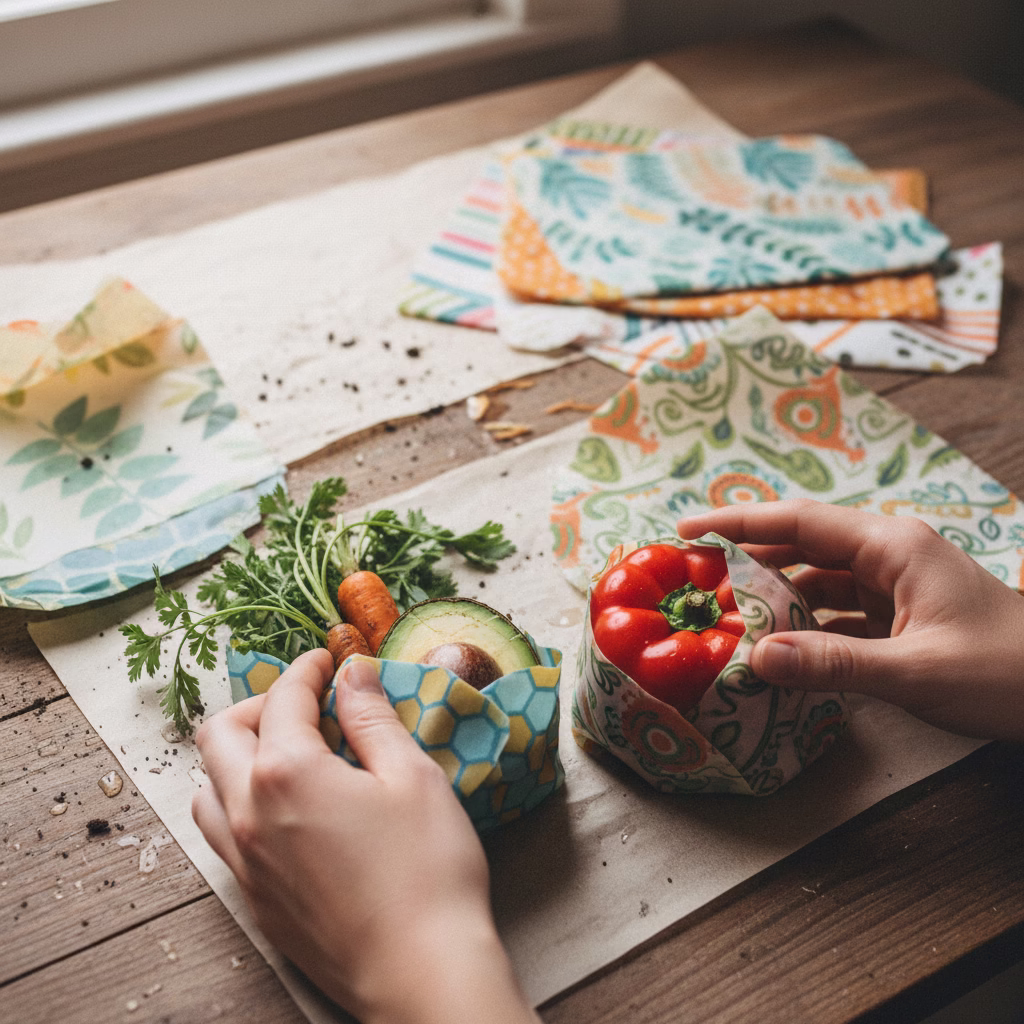
Sustainable Sourcing and Storage

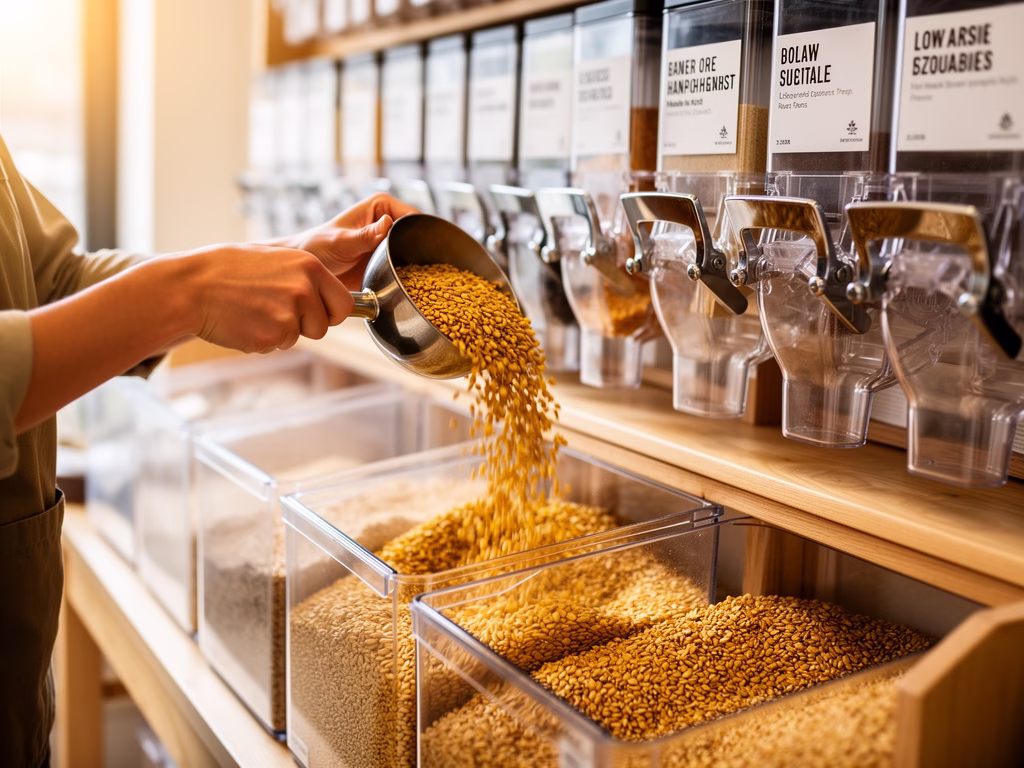
Zero-waste living starts before you even brew your tea. It starts when you are at the store. You should try to buy your mate from people who care about the earth. Look for bags made of simple paper instead of plastic.

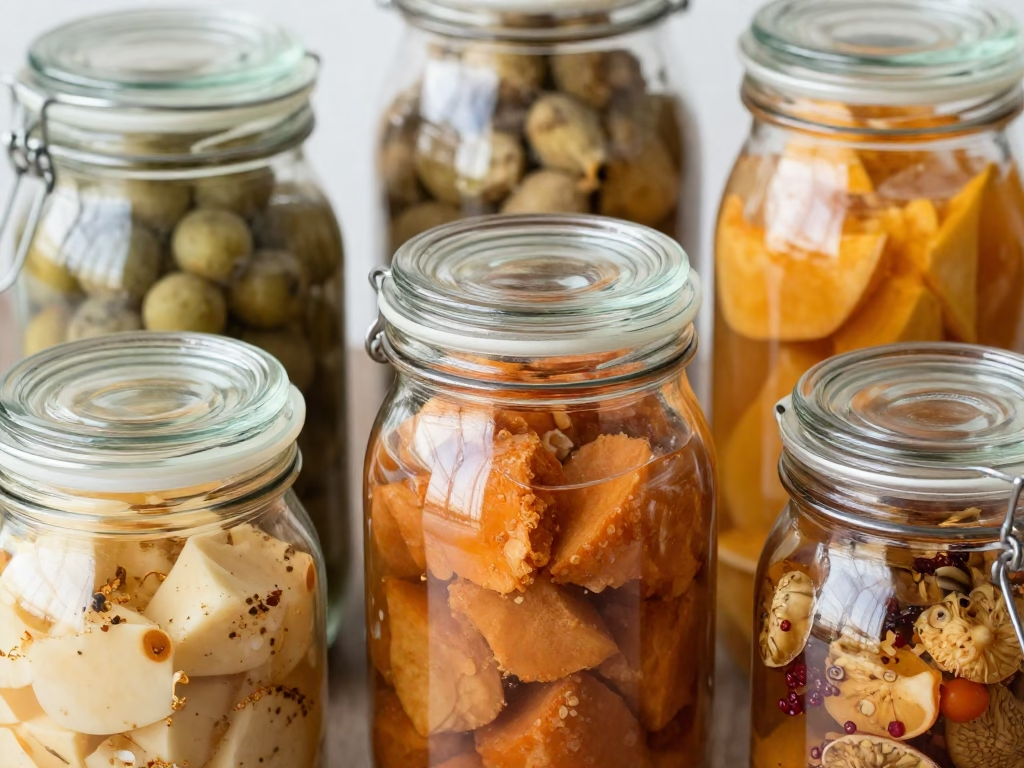
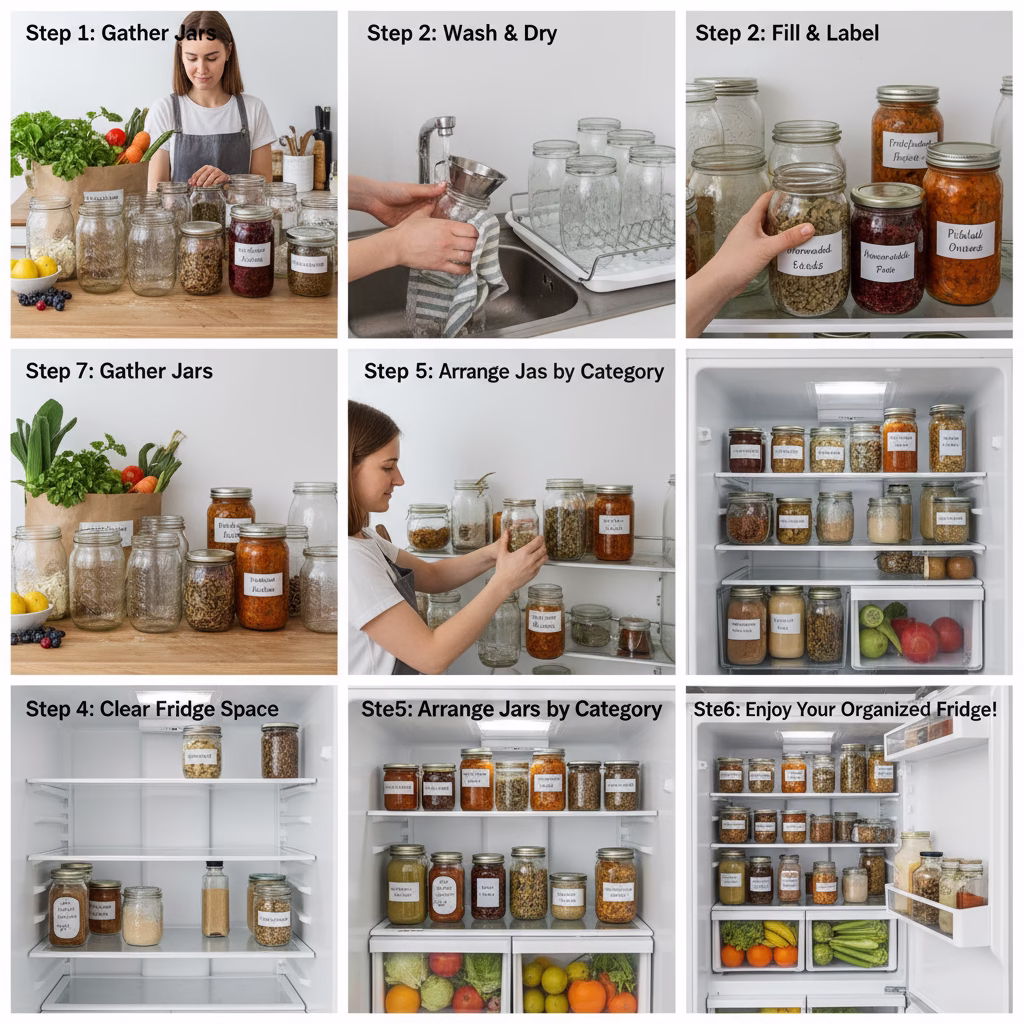
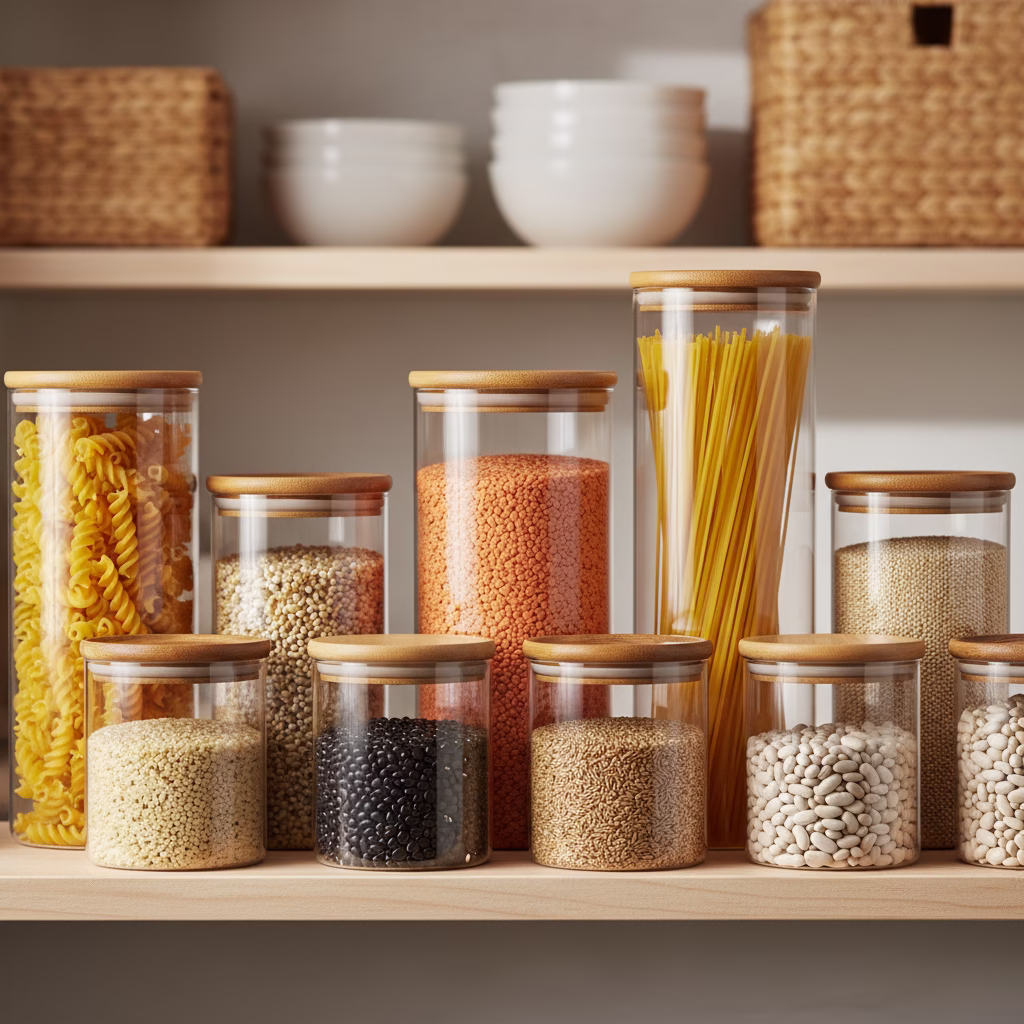
Many shops now have “bulk sections.” You can bring your own glass jars from home and fill them up. This means you do not bring any new trash into your house. It is also a good idea to look for “Fair Trade” mate. This means the farmers who grow the plants are paid a fair wage.

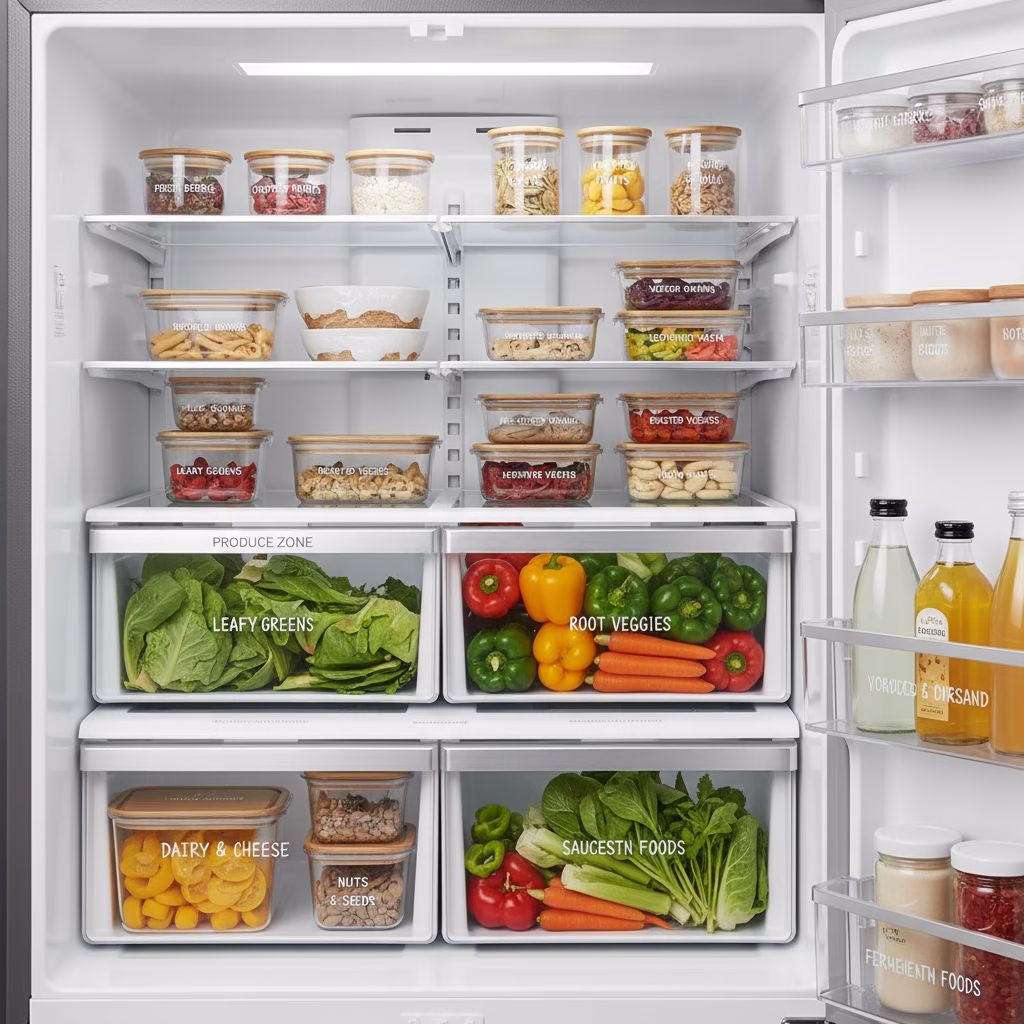
Once you get your mate home, keep it in a cool and dark place. A glass jar with a lid is the best choice. This keeps the leaves fresh for a long time. If you keep your mate fresh, you will not have to throw any away because it got stale. Buying in big amounts is also a good way to save money and reduce the number of trips you take to the store.


Maximizing Your Mate: Getting Every Drop of Value

True zero-waste brewing means you use every part of what you buy. The leaves give you many drinks, but they have a life after the cup too.

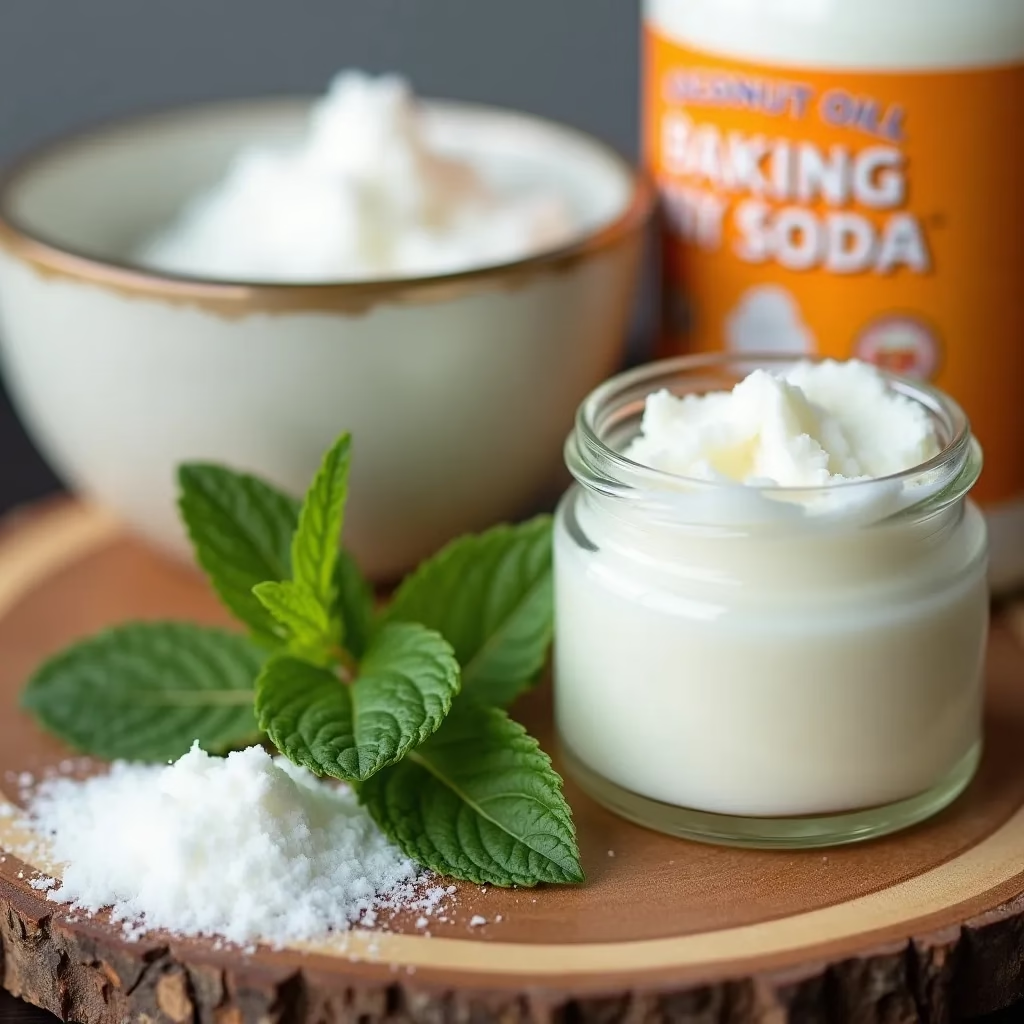
When you are done drinking, do not throw the leaves in the garbage. Mate leaves are great for the dirt in your garden. They have a lot of nitrogen which helps plants grow tall and green. You can put them in a compost bin or right under your flowers.

Some people even use the dry leaves in their food. You can put them in a blender for a green smoothie. You can even use them when you bake bread or cookies. This adds a nice earthy taste and a bit of health to your food.

You can even use the extra tea water for your plants. Just make sure the water is cool first. The light vitamins in the mate act like a mild food for your indoor plants. This is a perfect way to make sure nothing at all is wasted.


Common Mistakes and How to Avoid Them

Even simple things can go wrong. If you want to avoid waste, you should know these common mistakes.

Hot Water Errors

This is the most common problem. If your water is too hot, the tea will taste like burnt grass. If it is too cold, it will taste like nothing at all. Use a thermometer until you learn how the water looks when it is at the right heat.

Packing Too Tight

If you put too many leaves in the cup, the water cannot move. This makes it very hard to sip through the straw. It also means some of the leaves stay dry and are wasted. Leave some room for the water to dance around the leaves.

Stirring the Straw

In many cultures, stirring the straw is seen as a mistake. It moves the leaves and clogs the filter. Once you put the bombilla in, leave it alone. This keeps the drink flowing well until the very end of your session.


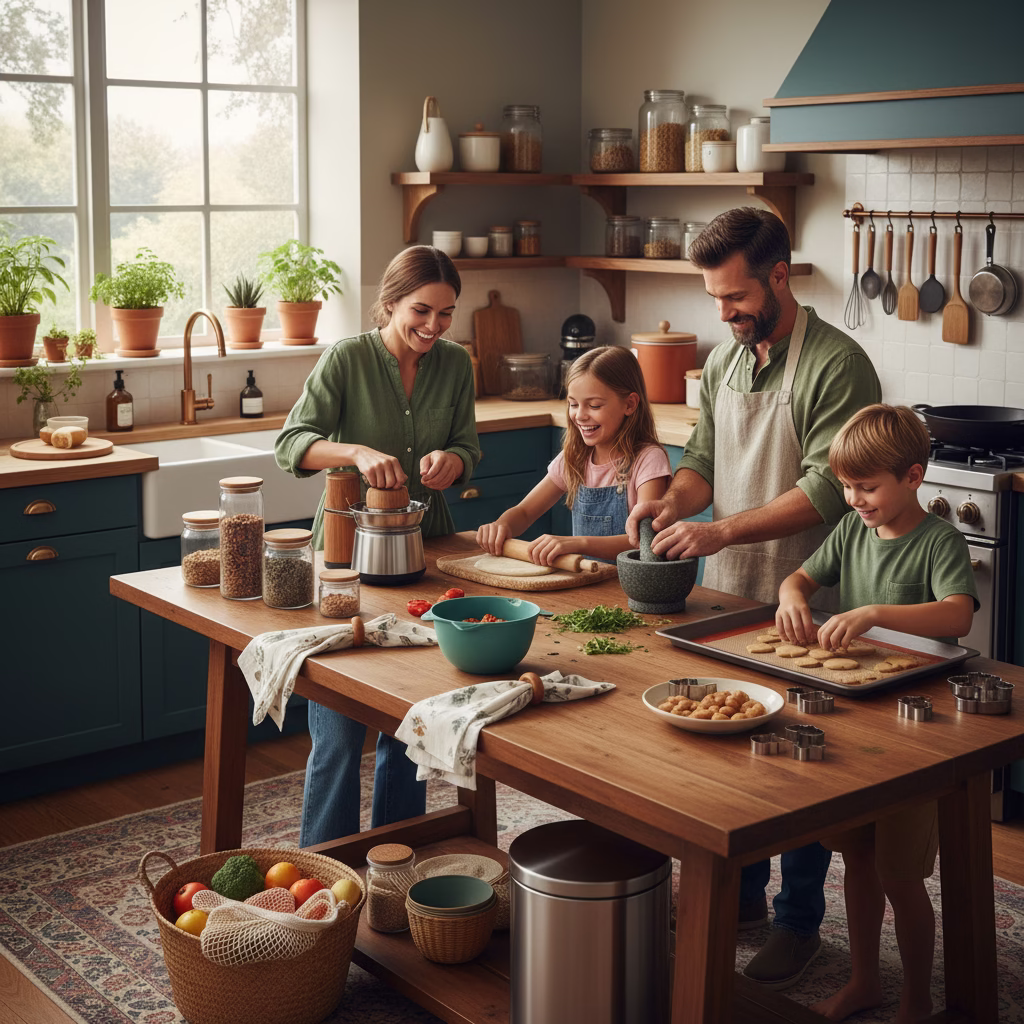
The Social Aspect: Sharing Without Waste

Sharing mate is a great way to live a green life. When a group of friends shares one gourd, they use less of everything. They use one cup, one straw, and one pot of water. This is much better than everyone using their own plastic cup or paper bag.

In a traditional circle, one person is the “server.” This person makes sure every pour is perfect. This means no water or mate is wasted on a bad brew. This system shows that being green can actually make your social life better.

Most people share one metal straw, which is the old way. If you are worried about germs, everyone can bring their own metal straw. This still keeps the trash away while keeping everyone happy and healthy. Mate sessions are a beautiful way to slow down and talk to the people you love.


Troubleshooting Your Zero-Waste Mate Setup

Keeping your tools in good shape is part of being sustainable. If you take care of your things, you will not have to buy new ones.

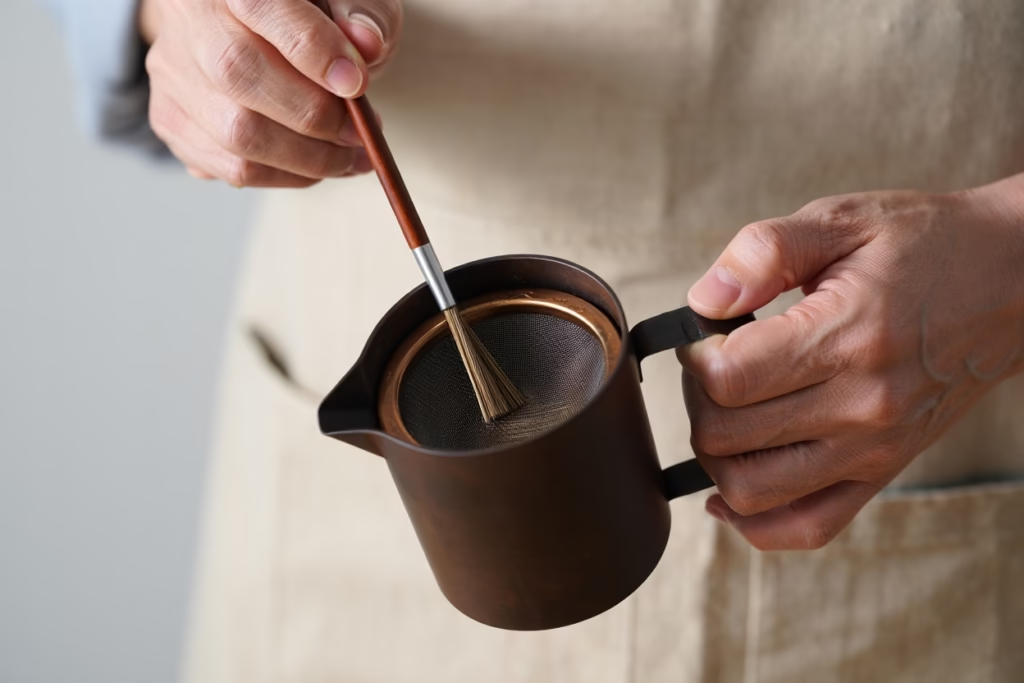
Clean your metal straw after every use. You can buy a very small brush to clean the inside. If you do not clean it, old tea bits will build up. This can make your fresh tea taste bad.

If you see white spots in your natural gourd, it might be mold. Do not throw the cup away! You can fix this by scrubbing it with salt and warm water. Then, let it dry in the sun. The sun is a natural way to kill mold.

If your mate suddenly tastes bad, check your water. Sometimes the pipes in your house can change the taste. Try using a water filter before you think your mate leaves have gone bad. Having a back-up straw is also a smart idea so you never have to use a plastic one if your main straw breaks.


Conclusion: Embracing the Zero-Waste Mate Lifestyle

Learning how to brew the perfect mate is a journey. It connects you to old South American stories. It also helps you protect the future of the earth. This green way of drinking shows us that we do not need trash to have a good life.

The zero-waste tea life is a big idea. It is about thinking before you buy. Every time you use a reusable cup, you are doing something good. Every time you compost your leaves, you are helping the soil. These small steps add up to a big change for the world.

Mate is more than just a source of caffeine. it is a teacher. it teaches us to slow down, to share, and to respect nature. By mastering these simple steps, you join a global family. This family cares about tradition and the health of our planet.

Start your green mate journey today. You only need a few simple tools and a bag of loose leaves. It is a small change that brings a lot of joy. You can enjoy the best brew of your life and know that you are leaving nothing behind but happy memories.


References


Recent Posts


Fridge Hack: Why You Need More Jars

A beautifully organized refrigerator showcasing a functional Fridge Hack using various glass jars to store colorful fresh produce, leftovers, and meal-prepped ingredients.
Fridge Hack

Looking for a simple fridge hack that can revolutionize your kitchen? This guide explores why jars are becoming the go-to solution for home cooks everywhere. From storing fridge leftovers to creating a zero waste fridge system, jars used as organizers offer practical benefits that plastic containers simply can’t match. Discover how this affordable change can save you money, reduce waste, and keep your food fresher for longer.


Introduction

Every week, millions of families open their fridge to find a mystery‑meat casserole that’s been forgotten for days, a bag of wilted greens, or a half‑used jar of sauce that’s now a sticky mess on the shelf. The result? Food waste, higher grocery bills, and a lot of frustration.

What if there were a simple, inexpensive way to solve these problems? Enter the Fridge Hack: using ordinary jars as clever organizers and preservers. By turning everyday glass jars into functional tools, you can dramatically improve the way you store, see, and use your fridge leftovers.

This article walks you through why jars are a game‑changer, how to set them up, and the creative ways you can make the most of every jar in your kitchen. Ready to give your fridge a fresh start? Let’s dive in!


The Problem with Fridge Leftovers

Before and after comparison of a cluttered refrigerator transformed into an organized space using glass jars

Visual Clutter

When leftovers sit in open containers or on random plates, they blend into the background. You’re less likely to eat them before they spoil.

Limited Shelf Life

Air, moisture, and light accelerate spoilage. A bowl of rice left uncovered can become dry and stale in a day, while a sealed jar can keep it fresh for a week.

Food Waste

The U.S. Environmental Protection Agency estimates that 30 % of household food waste comes from improper storage. That adds up to billions of dollars each year and unnecessary environmental impact.

Safety Concerns

Cross‑contamination is a hidden risk. Raw meat juices can drip onto other foods, increasing the chance of bacterial growth.

The Bottom Line

If you want to keep food fresh longer, see what you have, and cut waste, you need a better system.


How Jars Solve the Problem

Jars are a perfect match for the fridge because they combine three key strengths:

  1. Sealed Environment – A tight lid blocks air and moisture, slowing oxidation and bacterial growth.
  2. Transparent View – You can instantly spot contents without digging through a pile of containers.
  3. Versatile Size & Shape – From tiny spice jars to large quart jars, there’s a fit for every leftover type.

When you start using jars as organizers, you turn your fridge from a chaotic storage zone into a well‑ordered pantry that encourages you to eat what you have.


Organizing Your Fridge with Jars

1. Clear the Shelf

Remove everything from the shelf you want to reorganize. Wipe the surface clean and check for expired items.

2. Group by Category

  • Vegetables & Herbs – Store washed greens, chopped carrots, or fresh herbs in smaller jars.
  • Cooked Meals – Transfer soups, stews, or rice into larger jars.
  • Snacks & Condiments – Keep nuts, olives, or sauces in medium‑sized jars.

3. Label for Clarity

Use a permanent marker or printable labels to write the name and date. This simple step ensures you always know what’s inside and how long it’s been stored.

4. Stack & Rotate

Place taller jars behind shorter ones for easy access. Follow the “first‑in, first‑out” rule: move older items to the front so they’re used first.


Extending Freshness with Jars

Airtight Sealing

A jar’s lid creates an airtight seal, limiting oxygen exposure. This is especially useful for leafy greens, which wilt quickly when exposed to air.

Temperature Stability

Glass conducts heat slowly, helping to keep contents at a more consistent temperature. This reduces the risk of hot spots that can spoil food.

Moisture Control

When you add a small piece of paper towel to a jar, it absorbs excess moisture. This trick works well for berries, sliced fruit, and cut vegetables.


Visual Appeal: Jars as a Design Element

A fridge full of neatly labeled jars looks tidy and inviting. The uniform shape and clear glass add a clean aesthetic that makes cooking feel more enjoyable.

  • Color Coding – Use colored lids or labels to denote protein, dairy, or produce.
  • Layering – Stack jars of different heights to create a visual rhythm.
  • Highlighting – Place a jar of fresh herbs on a small plate at eye level to inspire quick garnishes.

Step‑by‑Step: Turning Jars into Fridge Organizers

Below is a simple, repeatable process you can follow for any jar you collect.

Materials

  • Clean glass jars (any size)
  • Dish soap and warm water
  • Baking soda (optional, for stubborn stains)
  • Labels or masking tape
  • Permanent marker
  • Small piece of paper towel (optional)

Instructions

  1. Wash Thoroughly
    • Fill each jar with hot, soapy water. Scrub the interior with a bottle brush.
    • Rinse well and let air‑dry upside down on a rack.
  2. Remove Stains (if needed)
    • For stubborn stains, sprinkle a little baking soda inside, add a splash of water, and scrub gently.
  3. Dry Completely
    • Ensure the jar is completely dry before placing any food inside. Moisture can encourage mold.
  4. Add Paper Towel (optional)
    • Place a thin, damp paper towel at the bottom of the jar to absorb excess moisture.
  5. Fill with Food
    • Transfer leftovers or fresh produce into the jar. Leave a small headspace (≈½ inch) for expansion.
  6. Seal & Label
    • Screw the lid on tightly. Write the contents and date on the label.
  7. Store in the Fridge
    • Place the jar on a shelf, ensuring it fits comfortably.
  8. Rotate Regularly
    • Move older jars to the front of the shelf to use them first.

Quick Tips

  • Don’t Overfill – Leaving space prevents the lid from sealing properly.
  • Avoid Metal Lids with Acidic Foods – Glass lids are safer for tomatoes, citrus, or pickles.
  • Re‑use Jar Rings – If a lid cracks, keep the ring for future jars.

Zero Waste Fridge Leftovers

Reducing Food Waste

By extending the life of leftovers, jars help you eat what you buy, cutting the amount of food that ends up in the trash.

Saving Money

Less waste means lower grocery bills. A single jar can keep a pound of cooked beans fresh for up to two weeks, saving you from buying a new can each time.

Supporting Sustainability

Every pound of food saved reduces greenhouse‑gas emissions associated with production, transport, and landfill decomposition.

Easy Tracking

Labeling each jar with a date makes it simple to follow the “use‑by” rule. You’ll notice patterns—some items stay fresh longer than you thought!


Creative Ideas for Jar Use in the Fridge

IdeaWhat It StoresBenefits
Herb GardenFresh basil, cilantro, parsleyKeeps herbs crisp, adds a splash of green to your meals
Snack StationNuts, dried fruit, trail mixPortion control, easy grab‑and‑go
Meal‑Prep ContainersCooked grains, pre‑cut veggies, proteinsStreamlines weekly cooking, reduces prep time
Condiment JarsHomemade sauces, dressings, picklesKeeps flavors sealed, reduces plastic waste
Freezer‑Friendly JarsSoups, sauces, pureesGlass tolerates freezing better than many plastic containers
DIY SorbetSmall servings of frozen fruit pureeQuick dessert, no need for ice‑cream maker

Feel free to mix and match ideas based on your household’s needs. The key is to keep jars transparent, labeled, and organized.


Maintaining Your Jar System

Regular Cleaning

  • Weekly: Take down jars, wash, and re‑label as needed.
  • Monthly: Deep clean any jars that have held raw meat or strong odors (use a solution of 1 part vinegar to 4 parts water).

Check for Damage

Inspect lids for cracks or rust. Replace damaged lids promptly to keep the airtight seal intact.

Refresh Labels

If a label fades, rewrite it. Consistent labeling prevents confusion and waste.

Inventory Audit

Every month, glance at your fridge and note which jars are empty or still full. This audit helps you plan meals and grocery shopping more efficiently.


Conclusion

The Fridge Hack of using more jars is a simple, low‑cost strategy that delivers three major wins:

  1. Freshness – Airtight jars keep leftovers crisp and safe longer.
  2. Clarity – Transparent jars let you see what you have at a glance.
  3. Zero‑Waste Mindset – By extending the life of food, you cut waste, save money, and lower your environmental footprint.

With just a few jars, some soap, and a label maker, you can turn your refrigerator into a well‑organized, eco‑friendly pantry. Give it a try this week—your taste buds (and the planet) will thank you!


References


Recent Posts


Amazing jar crafts for the non-crafty person

A collage of beautiful Jar Crafts featuring lanterns with glowing candles, pink textured vases with white flowers, and organized containers for art supplies. The crafts are in a shabby chic style, using lace, twine, and soft colors to create zero waste home decor.
Jar Crafts

Jar crafts are a fun way for anyone to start DIY projects. This is true even if you do not feel creative. This guide shows you easy tasks using old jars. We blend staying green with having style. Learn to make zero waste home decor that has a shabby chic look. These ideas are great for beginners. They turn plain mason jars into special items. Enjoy being eco-friendly without any stress.


Unlock Your Inner Maker: Jar Magic for the “Craft-Challenged”

Hello! If glue guns make you nervous and glitter feels like a mess, you are in the right spot. Jar crafts are the best trick for people who are not crafty. Why is that? They are easy, fast, and very cheap. You do not need complex tools or costly gear. Your kitchen shelf has all you need right now. Do you have old pasta sauce jars? Do you have small jam jars? Those are perfect. We are turning them into zero waste home decor. It will look both rustic and very nice. Let us jump into tasks that are so simple you will be surprised. You will stop doubting your skills fast.

Why Jars? Your Zero-Waste Superpower

Jars are the best tools for a green life. Every jar you use again stays out of the trash. It helps cut down on waste. Also, the clear glass and strong shape are great for a shabby chic look. Think about soft colors and cozy styles. Do you lack fancy skills? That is no problem here. These tasks are about putting things together. They are not about being a great artist. Just grab a jar and let us turn trash into a real treasure.


Project: Dreamy Mason Jar Lanterns

Zero waste shabby chic gives you a nice mood fast. These lanterns give off a warm light. You can use things you have at home right now.

Materials

  • One or two clean mason jars of any size
  • Small fairy lights that run on batteries
  • Bits of twine or old lace
  • White paint and an old sponge for a frosty look

Instructions

First, clean the jar. Take off the labels with warm water and soap. Make sure the jar is dry. Next, you can add texture. Use a sponge to dab white paint on the glass. This makes it look like frost. Let it dry. Then, put the lights inside. Coil the fairy lights into the jar. Hide the battery pack under the top lid. Last, add a decoration. Wrap some twine around the neck of the jar two times. Tie a small bow. You are done! Put it by your bed for a magical feel at night.

Project: Rustic Flower Vases in 10 Minutes

Do you have a green thumb? If not, fake flowers work just as well. This task is a great way to make zero waste home decor.

Materials

  • A mix of jars with different heights
  • Some paint and a brush
  • A bit of sandpaper to make it look old
  • Real flowers or silk flowers

Instructions

Start by painting the glass. Brush the jars with soft blue or cream paint. If there are streaks, that is fine. It looks good that way. Once the paint is dry, use the sandpaper. Rub the corners to show the glass underneath. This gives it a worn look. Then, put your flowers in. Trim the stems so they fit the height of the jar. Mix different types of flowers together. For a style tip, put three jars in a group. This makes a great center piece for a table.

Project: Zero-Waste Kitchen Organizers

Fix the mess in your pantry with zero waste mason jars. They are useful and look very pretty.

Materials

  • Large jars from sauce or pickles
  • Chalkboard paint and some chalk
  • A piece of twine
  • A funnel made from an old bottle top

Instructions

First, label your jars. Paint a small box on the front with the chalkboard paint. Let it dry all night. Next, fix the lids. Tie some twine around the lids for a rustic look. Then, fill the jars. Use your funnel to pour in rice, pasta, or beans. Write the name of the food on the paint with chalk. As a bonus, add dried fruit slices to coffee jars for extra color.

Project: Hanging Jar Herb Garden

You can grow herbs even if you do not have a yard. This fits the zero waste shabby chic vibe well.

Materials

  • Four to six mason jars with wide tops
  • Twine or thin leather straps
  • Potting soil and small herb plants
  • A drill or a hammer and a nail

Instructions

Make the hangers first. Put two holes on opposite sides of the jar rim. Pull the twine through and tie knots on the inside. Next, plant your herbs. Fill the jars most of the way with soil. Put in the small plants and press the dirt down. Then, hang them up. Put them near a window with lots of sun. Give them a little water every two days. You can even use jars with small cracks for this task.

Project: Snow Globe Serenity Jars

These are not just for the winter time. You can change them for any season or mood.

Materials

  • Small jars with tight lids
  • Glitter or green sequins
  • Tiny figures like cork or small rocks
  • Strong glue and clear water

Instructions

Glue your figures to the inside of the lid first. Let them dry for one hour. Then, fill the jar with water. Add your glitter and leave a tiny bit of air at the top. Next, seal the jar. Screw the lid on very tight. Turn it over and shake it. For a pro tip, add a tiny drop of soap or oil. This makes the glitter fall much slower.

Project: Sew Simple Jar Organizers

Clean up your craft area with zero waste home decor. This project is very helpful for storage.

Materials

  • Small jars like spice containers
  • Scraps of felt or old fabric
  • A glue gun

Instructions

Line the jars first. Cut the felt to fit the inside of the jar. This stops things from making noise. Next, sort your items. Use different jars for buttons, pins, or beads. Then, make the lids pretty. Glue bits of fabric to the top of the metal lids. Keep these jars near your desk. Now you can find what you need fast.

Why These Work for Non-Crafters

You do not need special skills for these. You just need to wash, glue, or wrap things. And enjoy the flaws. If the paint chips, it just adds more style. These are also very cheap to make. You can use old ribbon or leftover paint. They are quick wins too. Most of these take less than twenty minutes to finish. You get a great result very fast.

Conclusion: Your Jar Journey Starts Now

Jar crafts show that you do not need to be an artist to make beauty. With zero waste mason jars, every task helps the planet. It also helps you feel more sure of yourself. Start with something small. Try making the lanterns tonight. Soon, you will not see jars as trash. You will see them as a blank space for art. Keep in mind that zero waste shabby chic is about being simple. It is not about being perfect. Now, go look through your recycling bin for a jar!


References

Here are some helpful links on how to reuse items and help the Earth:


Recent Posts


Easy Zero Waste Beauty Ideas You Can Make From Home

A bright and inviting flat lay of natural ingredients for Zero Waste Beauty Ideas, featuring a wooden cutting board topped with a pile of oats, a small bowl of raw honey with a wooden dipper, coconut oil in a glass jar, and several amber essential oil bottles.
Zero Waste Beauty Ideas

The path to green living does not have to be hard or costly. Zero waste beauty ideas give you a fresh way to care for yourself. It is kind to your skin and the earth. When you make your own products at home, you stop using plastic jars. You also keep harsh chemicals out of your daily life. This guide looks at easy beauty hacks that anyone can do in their own kitchen.

Why Zero Waste Beauty Matters Now More Than Ever

The beauty world makes over 120 billion packs every year. Most of this ends up in the trash or the sea. Think about your own bathroom shelf. How many plastic bottles and tubes are there right now? The good news is that moving to zero waste beauty is easy. You do not have to give up quality or how well a product works.

Making your own beauty items at home puts you in charge. You know what goes into every jar. There are no hidden toxins or secret ingredients. Plus, you will save a lot of money over time. Many zero waste beauty ideas use basic food items you likely have right now.

Moving toward a green life is about small, good changes. You do not need to change everything in one night. Start with one or two items and go from there. Every plastic bottle you do not buy is a big win for the world.

Getting Started: Essential Ingredients for Your Zero Waste Beauty Cabinet

Before we start the recipes, let’s talk about your natural beauty shelf. These items are the base for most zero waste beauty hacks. Try to buy them in bulk to save even more on waste.

Coconut oil is the best item you can own. It works as a skin cream, a way to remove makeup, or a hair mask. It is a base for many other DIY ideas. Look for the organic kind to get the best results.

Other key items include raw honey. It is great for skin because it fights germs. Oats are perfect for a soft skin scrub. Shea butter and cocoa butter give deep moisture. Apple cider vinegar helps keep hair and skin healthy. Baking soda is a natural cleaner that also stops bad smells.

Essential oils add a nice scent and good vibes. Lavender, tea tree, mint, and lemon are great for beginners. Always mix these oils with a base oil first. Do a small skin test before you use them all over.

Keep your items in glass jars with tight lids. Write the name and date on every jar. Most home products stay good for one to three months. Keep them in a cool, dark spot.

Gentle Facial Cleanser: A Simple Starting Point

This recipe makes a soft face wash for most skin types. It takes away dirt and makeup. It does not strip away the natural oils your skin needs to stay healthy.

Ingredients:

  • 2 tablespoons raw honey
  • A tablespoon coconut oil (melted)
  • 5 drops lavender essential oil (optional)

Instructions:

Start by warming the coconut oil until it turns to liquid. Do not let it get too hot. Add the raw honey and stir it well. If you want a nice smell, add the oil now and mix it in.

Put the mix into a small glass jar. To use it, put a tiny bit on your fingers. Rub it onto dry skin in slow circles. Add a little warm water to help it move, then rinse it off. Finish with your usual toner and cream.

This wash is great for both day and night. The honey keeps moisture in your skin while it cleans. Coconut oil breaks down makeup and oil in a natural way. Your skin will feel soft and wet, never tight or dry.

Nourishing Face Mask for Glowing Skin

Face masks are a fun part of any zero waste beauty plan. This recipe uses easy items to make tired skin look bright and fresh.

Ingredients:

  • 1 tablespoon plain yogurt (full fat is best)
  • A teaspoon raw honey
  • 1 teaspoon ground oats

Instructions:

Mix all the items in a small bowl. Stir until it is smooth and easy to spread. If it is too thick, add a bit more yogurt. If it is too thin, add more oats.

Put the mask on clean, dry skin. Stay away from your eyes. Let it sit for 15 to 20 minutes. You might feel it get a bit tight as it dries. Rinse with warm water and use soft circles. The oats help scrub away old skin as you wash it off.

Use this mask once or twice a week. Yogurt has a mild acid that cleans off dead skin. Honey keeps skin soft and calm. Oats stop redness and buff the skin. Your face will look fresh and feel very soft.

DIY Sugar Scrub for Silky Smooth Skin

Body scrubs are one of the easiest zero waste beauty ideas to try. This simple mix rubs away dead skin and leaves you feeling brand new.

Ingredients:

  • 1 cup sugar (white or brown)
  • 1/2 cup coconut oil or olive oil
  • 10 to 15 drops of your favorite essential oil
  • Zest of one lemon (optional)

Instructions:

If your coconut oil is hard, warm it until it is soft enough to stir. Do not melt it all the way. Mix the sugar and oil in a bowl. Stir well so the oil coats all the sugar.

Add your scent and the lemon zest if you have it. Mix one more time to get it all together. Put it in a glass jar with a good lid. Keep it in a cool, dry place.

To use, take a scoop into your hands while you are in the shower. Rub it onto wet skin in circles. Work on rough spots like elbows, knees, and feet. Rinse well with warm water. Be careful, as the oil can make the floor slick.

This scrub is a great gift in a pretty jar. Make extra to give to friends. It is a nice way to show them how to live a green life.

Natural Deodorant That Actually Works

Many people feel a bit shy about trying natural deodorant. This recipe uses strong items that really do the job. It is a top choice for zero waste beauty fans.

Ingredients:

  • 3 tablespoons coconut oil
  • 2 tablespoons shea butter
  • 3 tablespoons arrowroot powder (or cornstarch)
  • 2 tablespoons baking soda (use 1 if you have sensitive skin)
  • 10 drops essential oil (tea tree or mint work well)

Instructions:

Melt the coconut oil and shea butter together. Use a double boiler or a microwave. Stir it often so it does not burn. Once it is liquid, take it off the heat and let it cool a bit.

Add the powder and baking soda. Stir until it is smooth with no clumps. Add your oils and mix well. Pour the mix into an old tube or a small glass jar.

Let it sit for a few hours or put it in the fridge until it is solid. If it is in a jar, put it on with clean fingers. You only need a little bit for it to work.

Give your body about two weeks to get used to it. You might feel a bit different at first, but that will go away. The soda stops bad smells while the powder keeps you dry.

Luxurious Lip Balm for Soft Lips

Dry lips can hurt and look dull. This home balm gives you moisture that stays. It is a perfect first step for anyone new to zero waste beauty.

Ingredients:

  • 1 tablespoon beeswax (or plant wax for a vegan balm)
  • A tablespoon coconut oil
  • 1 tablespoon shea butter
  • 5 drops vitamin E oil
  • 5 drops peppermint oil (optional)

Instructions:

Put the wax, oil, and shea butter in a heat-safe bowl. Place it in a pot of hot water to melt it. Stir now and then until it is all liquid.

Take it off the heat and add the vitamin E and scent. Stir fast. While it is still hot, pour it into small tins or tubes. This makes about five small balms.

Let the balm cool all the way before you put the caps on. This takes about 30 minutes. Keep them in a cool spot. They will stay good for about one year.

Try different oils to find a scent you love. Orange and vanilla are great together. Rose feels very fancy. Mint gives you that classic cool feel.

Refreshing Hair Rinse for Shiny Locks

People have used vinegar on hair for a long time to make it shine. This zero waste beauty hack cleans away old product and helps your scalp stay healthy.

Ingredients:

  • 2 tablespoons raw apple cider vinegar
  • 1 cup water
  • 5 drops rosemary or lavender oil (optional)

Instructions:

Mix everything in a bottle or jar. Shake it well before you use it. After you wash your hair, pour the mix over your head. Start at the roots and go down to the ends.

Let it sit for one or two minutes. Rinse it out with cool water. Do not worry about the smell of the vinegar. It goes away once your hair is dry.

Use this once or twice a week. You will see more shine and feel more softness fast. It works very well if your water is hard. It takes away the crusty stuff that makes hair look dull.

If you dye your hair, use this only once in a while. It might make the color fade a bit. For most people, it is a safe and cheap way to get healthy hair.

Simple Body Butter for Deep Hydration

Cold air can make skin feel very dry. This thick body butter gives you deep moisture that lasts all day long. It is a very fun zero waste beauty project to make.

Ingredients:

  • 1/2 cup shea butter
  • 1/4 cup coconut oil
  • 1/4 cup almond oil
  • 15 drops of your favorite oil for scent

Instructions:

Put the shea butter and coconut oil in a bowl. Melt them in a double boiler or microwave. Stir often. Once they are liquid, add the almond oil. Let it cool down to room temperature.

Put the bowl in the fridge for about an hour. You want it to get semi-solid but not hard. It should look cloudy and feel firm on the sides.

Use a mixer to whip it on high speed. Do this for three to five minutes until it is light and fluffy. Add your scent oils during the last minute of whipping.

Put it in a glass jar. Use it on dry skin after you bathe. Use it on dry spots like knees and feet. A little goes a long way, so start with just a small dab.

Conclusion: Your Journey Toward Sustainable Living Starts Today

Making your own beauty items is good for many reasons. You will cut down on waste, save your cash, and use pure items on your body. These zero waste beauty ideas show that good skin care does not need to be complex or costly.

Start with one recipe that you need the most. Get good at it before you try the next one. Soon you will have a whole set of home products that work for your skin and hair.

Keep in mind that green living is a path. Every small change you make helps. Share these ideas with your friends. The more people who do this, the better it is for the whole world.

Your bathroom does not have to be perfect. It just needs to be a bit better than it was yesterday. Enjoy making, trying, and finding what works best for you.


References and Educational Resources


Recent Posts


The Best Reusable Tools For A Sustainable Kitchen

A bright kitchen counter featuring various Reusable Tools for a zero waste home, including colorful beeswax wraps, mesh cloth bags, glass storage jars, and wooden utensils.
Reusable Tools

Making a green kitchen does not have to be hard. It does not have to cost a lot of money either. With the right Reusable Tools, you can cut down on trash. You will also save money over time. This guide looks at the best Reusable Tools for a busy home. We cover food storage and cleaning supplies too. These simple swaps are great for you. They are also much better for our planet.


Introduction: Why Your Kitchen Needs a Sustainable Makeover

Walk into any normal kitchen today. You will likely find a bin full of plastic. And also plastic wrap or paper towels. You might see thin bags or old sponges. Most homes make a lot of trash each year. Much of this waste ends up in the ocean. It also sits in big landfills for a long time.

But there is some good news. You can turn your kitchen into a zero waste space. It is easier than you think. The secret is to buy good tools that last. These tools replace the items we usually toss away.

A green kitchen helps the earth. That is a very big goal. But it also helps you. It makes your home a healthy place. And saves you cash in the long run. It also makes your daily life feel more simple. When you have the right tools, living green is easy. It soon feels like a normal part of your day.

This guide will show you the best tools for your home. You might be just starting out. Or you might want to find new ideas. You will find real tips that work here.


Food Storage Solutions: Ditch the Plastic for Good

Most kitchen trash comes from food storage. Small bags and plastic wrap seem easy to use. But they create a lot of waste very fast. Let us look at better tools to use instead.

Beeswax Wraps and Plant-Based Alternatives

Beeswax wraps are now very popular. They are a top choice for a green kitchen. These cloths have a special coating. It is made of wax, resin, and oil. The wrap is soft and a bit sticky. It can cling to itself or a glass bowl. Use the warmth of your hands to shape it. It can cover a piece of fruit or a loaf of bread.

To use them, warm the wrap in your hands. Then press it over your food. The wax will seal the item. This keeps your food fresh. When you are done, wash it with cool water. Use a little soap too. Let it dry in the air. Then it is ready to use again.

If you are vegan, you can find other types. These use soy wax or plant wax. They work just as well as the beeswax kind. Most wraps last about one year if you treat them well. They replace many rolls of plastic wrap.


Glass and Stainless Steel Containers

Glass jars are great for a zero waste home. As they do not hold onto bad smells. It does not get stained by food. It is safe for the oven and the freezer. Look for lids made of wood or silicone. Try to avoid plastic lids when you can.

Metal jars are also a very good pick. They are great for school lunch. They are also good for dry snacks. Metal is very strong and hard to break. It will not put chemicals into your food. Many people like how they look. They last a long time in a busy kitchen.

Silicone Storage Bags

New silicone bags have changed how we store food. These bags are soft but very tough. You can use them to freeze soup. You can also use them for small snacks. They are safe for the dishwasher. You can even use them in the microwave. They cost more than plastic bags at first. But they last for many years.

To clean them, turn the bags inside out. Wash them well with soap. If they smell like food, try baking soda. Mix it with water to make a paste. This will make them smell fresh again.


Reusable Bags: From Grocery Shopping to Produce Storage

Plastic bags are a big problem for the earth. Luckily, there are great tools to replace them. You can use these for every trip to the store.

Cotton and Mesh Produce Bags

The thin bags at the store are not good for the earth. Cotton bags are a very simple fix. Keep a set in your car or purse. Then you are always ready to shop. Mesh bags are best for fruit. They let the air move around the food. Soft cotton bags are better for greens or mushrooms.

You can even make your own bags. With some mesh fabric. You also need a sewing machine. Cut the fabric into a rectangle shape. Fold it in half and sew the sides. Add a small string at the top. This is an easy task for a rainy day.

Bread Bags and Bulk Shopping Bags

Do you buy fresh bread at the market? A cloth bread bag keeps it fresh. It also stops you from using plastic. Linen is a great fabric for bread. It lets the bread breathe just enough. This stops it from getting soggy. It also keeps the crust nice and crisp.

For bulk shopping, use large cloth bags. It helps if the bag has its weight on a tag. This is called the tare weight. These bags let you buy nuts or grain without a box. Most stores will take the bag weight off the price. Then you only pay for the food you buy.


Cleaning and Kitchen Maintenance: Sustainable Swaps

Cleaning tools can also create a lot of waste. Paper towels are a big source of trash. Here is how you can clean your home with green tools.

Unpaper Towels and Cloth Napkins

Unpaper towels are just cloth wipes. They replace the paper kind. They are made from cotton or bamboo. These cloths clean up spills very well. They also work great on dusty counters. Many people keep a stack on the counter. Just toss the dirty ones in a wash bin.

You can make your own at home. Cut old flannel into squares. If you can sew, hem the edges. If not, use special shears to stop fraying. Put them in a pile for easy use. Wash them once a week with your towels.

Cloth napkins are also a great idea. They look nice on the table. They also stop you from using paper. Keep a few sets on hand. Each person can have their own color. This means you do not have to wash them after every single meal.

Dish Brushes and Compostable Sponges

Plastic dish brushes are small but bad for the earth. Wood brushes are a better choice. They use natural fibers for the bristles. When they get old, you can compost them. Many have heads that pop off. You only have to buy a new head, not a whole new brush.

If you like sponges, look for natural ones. Some are made from wood pulp or loofah plants. These work just like the yellow plastic ones. But you can put them in the soil when they wear out. You can also use knit scrubbers made of yarn. These can be washed and used again and again.

Reusable Cleaning Cloths

Cloth wipes made of tiny fibers are very good at cleaning. You can wash them hundreds of times. But they can shed tiny bits of plastic. For a truly green kitchen, use cotton. You could also use bamboo cloths. They might not be as shiny on glass. But they are natural and will break down over time.


Food Preparation: Tools That Last a Lifetime

Think about the tools you use to cook. Many of them are made of cheap plastic. These items break fast and go in the trash. Buying better tools is a smart move. It helps the earth and your wallet.

Bamboo and Wooden Utensils

Wood spoons are very soft on your pans. They are natural and very strong. A good wood spoon can last for many years. It will last much longer than a plastic one. Try to find wood that is grown in a green way. Bamboo is also a great choice because it grows fast.

To keep them nice, wash them by hand. Do not let them sit in water. Dry them with a towel right away. Now and then, rub them with a little oil. This stops the wood from cracking. It also keeps them looking new.

Stainless Steel and Cast Iron Cookware

Good pans are a great investment. Metal and cast iron pans can last for a lifetime. You will not need to buy new pans every year. Non-stick pans often peel after a while. Metal pans do not have that problem.

Cast iron needs a little bit of extra care. You should “season” a new pan. This means you rub it with oil and bake it. Clean it with hot water and a brush. Try not to use soap on it. Dry it fast so it does not rust. A good pan will be naturally non-stick over time.

Reusable Coffee and Tea Supplies

Do you love coffee or tea? You can save a lot of waste here. Use metal filters or cloth tea bags. These stop you from using paper every morning. Many tea bags actually have plastic in them. Switching to a metal strainer is much better.

If you use a French press, you are doing great. If you have a drip machine, buy a metal filter. These fit most pots and make great coffee. You will never run out of filters again.


Food Preservation: Extending Freshness Naturally

A green kitchen is about more than just tools. It is also about saving food. If you keep food fresh, you throw less away. The right tools help you do this.

Produce Storage Containers

Some jars are made just for fresh fruit. They use vents to let the air in. This keeps the food at the right moisture level. Other jars help slow down how fast fruit gets soft. This keeps your food fresh for a longer time.

You can also use simple tricks. Learn which fruits like to be together. Some herbs stay fresh if you put them in water. Treat them like a bunch of flowers. Keep them in a glass in the fridge. They will stay green for a few weeks.

Fermentation Crocks and Preserving Jars

Old ways of saving food are popular again. Large clay pots let you make your own pickles. You can also make sour cabbage or kimchi. These pots are easy to use. They create the right space for healthy food to grow.

Glass jars have many uses. They are not just for jam. They are great for dry beans or rice. You can use them to freeze big batches of soup. They also help you keep your pantry tidy. When you buy jars, look for glass lids. These can be used forever.


Conclusion: Building Your Sustainable Kitchen One Tool at a Time

You do not have to change everything today. That would be too hard. It might even create more waste. The best way is to go slow. When a tool breaks, buy a green one. When you run out of bags, get a cloth set.

Start with the things you use most. If you use a lot of paper towels, start there. Buy some cloth wipes first. If you buy a lot of plastic bags, get some jars. Over time, you will have a green kitchen. Your trash will get smaller and smaller.

Do not worry about being perfect. That is not the goal. Every time you skip a plastic bag, you help. Small steps from many people add up fast. They make a huge impact on the world.

Green tools are often better to use. A wood spoon feels nice in your hand. Glass jars keep your food tasting fresh. Cloth napkins make dinner feel special. Your kitchen will be a happy place to be. It will be a place that is kind to the world.

Most of all, these steps become a habit. Soon, you will not even think about it. You will just grab a cloth instead of paper. Your green kitchen will just be your kitchen. It is a space that is good for your family. It is a space that is gentle on our earth.


References and Educational Resources

If you want to learn more, check out these sites. They have great tips on green living.


Recent Posts


Try these Zero Waste Oral Care Recipes Right Now

A clean bathroom counter with bamboo toothbrushes, a jar of tooth powder, and mouthwash for Oral Care Recipes, set against a soft background of green plants.
Oral Care Recipes

This article looks at green habits by sharing easy Oral Care Recipes for people who care about the earth. It checks how cutting plastic helps nature while giving you clear steps to make your own oral care at home. The guide uses safe and natural items that replace plastic wraps. This helps you live a zero waste life. By following these steps, you can help the planet through your daily habits.

A Fresh Approach to Dental Hygiene

Most dental care uses a lot of plastic. Old tubes and plastic brushes often end up in the trash or the sea. The cost to our world is very high. Large amounts of plastic brushes are thrown away every year. These things do not go away for a long time. They break into tiny bits that hurt fish and birds.

But things are changing. Many people want a lifestyle that is better for the earth. Zero waste oral care is about more than just less trash. It lets you choose what you put in your body. Store brands often have chemicals and fake sugars that you might not want.

When you make Oral Care Recipes at home, you stop using plastic. You use natural things instead. This guide gives you three recipes. You will learn to make tooth powder, mouthwash, and oil chews. Each part tells you what you need, how to make it, and why it is good for you.

Understanding the Ingredients

Before you start, it is good to know why we use these items. In a zero waste world, every part has a job.

  • Baking Soda: This is great for cleaning. It is soft but helps scrub stains off your teeth. It also helps stop the acid from germs in your mouth.
  • Bentonite Clay: This clay is full of good minerals like calcium. It is soft and helps pull out bad things. It gives your powder a good feel without hurting your teeth.
  • Coconut Oil: This oil is known for fighting germs. It has a special acid that kills the bugs that cause bad breath and tooth decay.
  • Essential Oils: Oils like mint or clove add great taste. They also help kill germs. Just make sure you use oils that are safe to put in your mouth.
  • Xylitol: This is a natural sweetener from plants. It tastes good but does not feed the germs that cause holes in teeth. It helps keep your mouth healthy.

Recipe 1: Remineralizing Mint Tooth Powder

People used tooth powder long before they used paste. It cleans well and is very easy to mix. It does not need water or extra chemicals to stay fresh. This makes it perfect for glass jars. This recipe helps keep teeth strong and clean.

Ingredients

  • 4 tablespoons Bentonite Clay
  • 2 tablespoons Calcium Carbonate powder
  • 1 tablespoon Baking Soda (if you want whiter teeth)
  • 1 tablespoon Xylitol powder (for taste and health)
  • 15-20 drops of Peppermint Essential Oil (food grade)
  • 1 teaspoon of Cinnamon powder (for taste)

Instructions

  • Prepare the jar: Use a clean, dry glass jar. Water will ruin the powder.
  • Mix the dry parts: Put the clay, calcium, soda, and xylitol in a bowl. Do not use a metal bowl or spoon. The clay can react with metal. Use wood or glass instead.
  • Add the oil: Put the mint oil and cinnamon in the bowl.
  • Mix it well: Stir it all up. If you see lumps from the oil, press them down with your spoon. Keep stirring until it looks like fine powder.
  • Storage: Put the mix in your jar and close the lid tight.

How to Use

To use this, get your brush wet. Dip the brush in the powder or use a spoon to put some on the bristles. Brush for two minutes. Rinse your mouth well. The clay makes your teeth feel very smooth.

Why This Works

The clay and calcium give your teeth the minerals they need. The soda scrubs away grime. The mint makes you feel fresh. Since there is no water, it stays good for a long time. You won’t have to make it often, and you won’t waste anything.

Recipe 2: Soothing Clove and Mint Mouthwash

Store mouthwash often comes in big plastic bottles. Many have alcohol that makes your mouth dry. A dry mouth can actually make breath worse. This recipe uses herbs to keep you fresh and soothe your gums. It has no harsh chemicals.

Ingredients

  • 2 cups of clean water
  • 1 tablespoon of whole Cloves
  • 1 teaspoon of dried Mint leaves (or 10 drops of Mint Oil)
  • A teaspoon of dried Rosemary (to keep it fresh)
  • 1 teaspoon of Xylitol (to make it less bitter)
  • 1 teaspoon of Calcium Carbonate (to help with acid)

Instructions

  • Boil water: Put the water in a small pot and let it boil.
  • Add herbs: Put the cloves, mint, and rosemary into the water.
  • Simmer: Turn down the heat. Let it sit for 10 to 15 minutes. This gets the good stuff out of the plants.
  • Cool and Strain: Take it off the heat. Let it get cold. Pour it through a cloth or sieve into a bowl. Throw the old herbs in your compost.
  • Add extras: If you use oils, add them now. Stir in the xylitol and calcium until they disappear.
  • Bottling: Pour the liquid into a glass bottle with a tight lid.

How to Use

Shake the bottle before you use it. Take a small sip. Swish it in your mouth for about a minute. Gargle and spit it out. Do not swallow it.

Why This Works

Cloves have a special oil that helps with pain and kills germs. This is great if your gums feel sore. Mint gives you that fresh feel. Rosemary helps the mix stay fresh longer. By making small amounts, you don’t need the chemicals used in stores.

Recipe 3: Coconut Oil Pulling Chews

Oil pulling is a very old way to clean the mouth. You swish oil to pull out germs. It helps your gums stay healthy. Using a spoon can be messy. Making “chews” is much easier. You can keep them in a jar for your morning routine.

Ingredients

  • 1/2 cup organic Coconut Oil
  • 10-15 drops of Mint or Orange Oil (food grade)
  • Silicon molds (small shapes)

Instructions

  • Melt the oil: If the oil is hard, melt it in a pot on low heat. Do not let it boil.
  • Add flavor: Take it off the heat and stir in your oils. Orange oil helps with white teeth. Mint is very fresh.
  • Fill the molds: Pour the oil into the small molds. Each one should be easy to chew.
  • Make them hard: Put the molds in the fridge for 20 minutes. Wait until they are white and solid.
  • Store: Take them out of the molds and put them in a glass jar. Keep them in a cool spot so they do not melt.

How to Use

Put one chew in your mouth in the morning before you eat. As it melts, swish it around. Pull it through your teeth. Try to do this for 10 to 20 minutes. The oil will turn white as it picks up germs. Spit it in the trash, not the sink. It can clog your pipes. Rinse with warm water and brush your teeth.

Why This Works

The oil sticks to germs and pulls them out from between your teeth. It helps stop plaque and makes your breath better. These chews take away the mess. They give you the right amount every time.

Safety and Storage for DIY Products

When you switch to these Oral Care Recipes, you must think about storage. Store brands have strong chemicals to keep them good for years. Your homemade items are natural. This means you must keep them clean.

Shelf Life

Things with water, like the mouthwash, do not last as long. Keep your mouthwash in the fridge. Use it up in one or two weeks. If it looks or smells odd, throw it out. The powder and chews have no water, so they stay good for months if they stay dry.

Keep it Dry

Do not put a wet brush into your jar of powder. This can let germs grow. Use a small spoon to take out what you need. This keeps the rest of the powder clean and fresh.

Good Ingredients

Always buy high-quality items. Check the label on your oils. They must be safe for your mouth. Not all oils are okay to use this way.

The Environmental Impact of Switching

Using these Oral Care Recipes does a lot for the planet. The bathroom is a place where we use too much plastic. Tubes are hard to recycle because they use plastic and metal mixed together.

When you buy items in glass or paper, you help a lot. You can wash and use glass jars again and again. Also, things like oil and clay are safe for the earth. They do not put tiny plastics into the water when you rinse them away.

This habit makes you think more about what you use. Making things by hand helps you care more about your world. It turns a boring task into a way to care for yourself and the earth at the same time.

Conclusion

Going zero waste is about small steps. Oral care is a great place to start. We do it every day, so the waste adds up fast. These three Oral Care Recipes give you a better way to clean your teeth. You can use the tooth powder, the mouthwash, and the oil chews to stay healthy.

They help you stop using plastic. You get to use simple things from nature. Making them at home saves you money. You also stop using fake chemicals. Every small change helps. Switching to your own tooth powder is a big win for a healthy planet.

References


Recent Posts


Affordable Ways to Achieve a Zero Waste Bathroom

A minimalist Zero Waste Bathroom setup featuring a bamboo toothbrush, a natural bar of soap, and a glass jar of DIY toothpaste on a wooden shelf.
Zero Waste Bathroom

This guide shows you how to reach a zero waste bathroom by using simple and cheap methods. We focus on being resourceful so that you do not have to buy expensive products. Reducing plastic in zero waste bathrooms is much easier when you use what you already have at home. These tips help you live a greener life while keeping your home clean and fresh. Making these small changes is a great way to help the planet every single day.


The bathroom is often the place where we create the most trash. Think about your daily routine. You likely see plastic bottles for soap, plastic tubes for toothpaste, and plastic sticks for cotton swabs. Most of these items are used once and then thrown away. They sit in landfills for hundreds of years. However, you can change this. Building a zero waste bathroom does not have to cost a lot of money. In fact, it can help you save money over time.

You do not need to buy fancy “eco” brands to be sustainable. You can use simple items from your kitchen or local grocery store. This guide will show you how to turn your bathroom into a green space. We will focus on easy swaps and DIY projects that anyone can do.

The Foundation of a Low-Waste Routine

The best way to start is to look at what you already own. You should not throw away half-full plastic bottles just to buy new glass ones. That would actually create more waste. Instead, use every last drop of what you have. While you do this, think about what you will buy next.

A zero waste lifestyle is built on a few simple rules. First, refuse what you do not need. If someone offers you a free plastic hotel toothbrush, just say no. Second, reduce what you use. Maybe you do not need five different types of lotion. Third, reuse your containers. An old glass jam jar is perfect for holding cotton balls. Fourth, recycle what is left. Finally, let organic things rot. This means composting items like hair from your brush or bamboo tools.

When you look at your bathroom trash, you might feel overwhelmed. Do not worry. You do not have to change everything in one day. Pick one small thing to change this week. Maybe you start with your soap. Next month, you can look at your hair care. Slow progress is still progress. This way of thinking makes the journey easy and fun.

Cost-Effective Personal Hygiene Swaps

You might think that green products are expensive. Sometimes they are, but many swaps are very cheap. Here are a few ways to save money while helping the earth.

The Return of the Bar Soap

Liquid soap is mostly water. You are paying for water and a plastic bottle. When you switch to bar soap, you get more for your money. Bar soaps are very concentrated. They also usually come in a simple paper wrap. Paper is much easier to recycle than plastic. If you find a local soap maker, you might even find bars with no wrap at all. This is a great way to support small businesses while keeping your bathroom clean.

Transitioning to Solid Hair Care

Shampoo and conditioner now come in bars too. These look like bars of soap but are made for your hair. One small bar can last as long as three plastic bottles. This saves a lot of space in your shower. It also makes traveling very easy because you do not have to worry about liquid rules at the airport. To make your bars last longer, keep them dry. Do not let them sit in a puddle of water. Use a wooden soap dish with holes so the air can dry the bar out.

Investing in a Safety Razor

Plastic razors are a huge problem for the environment. They cannot be recycled easily. A metal safety razor is a much better choice. You buy the handle once, and it can last for your whole life. You only need to replace the small metal blades. These blades are very cheap. You can often buy a pack of 100 blades for a very low price. This swap saves you a lot of money every year. It also gives you a very close and smooth shave.

DIY Zero Waste Bathroom Recipes

Making your own products is one of the most affordable ways to achieve a zero waste bathroom. Most of the ingredients are likely in your kitchen right now.

Natural Toothpaste Recipe

Most toothpaste comes in tubes that are hard to recycle. You can make a simple paste at home that works well and tastes great.

Ingredients:

  • 2 tablespoons of coconut oil (make sure it is soft)
  • 1 tablespoon of baking soda
  • 20 drops of peppermint oil for a fresh taste
  • A tiny bit of Stevia if you like it sweet

Instructions:

  1. Find a small glass jar that has a lid.
  2. Put the coconut oil and baking soda in the jar.
  3. Mix them together until they look like a smooth paste.
  4. Add your peppermint oil and mix again.
  5. To use it, just put a little bit on your toothbrush. Keep the lid on tight when you are not using it.

All-Purpose Bathroom Cleaner

You do not need harsh chemicals to clean your bathroom. Natural ingredients can kill germs and remove dirt just as well. This recipe is cheap and safe for your family.

Ingredients:

  • 1 cup of white vinegar
  • 1 cup of plain water
  • 10 drops of tea tree oil (this helps kill germs)
  • Baking soda (keep this in a separate shaker)

Instructions:

  1. Get a glass spray bottle. Mix the vinegar, water, and oil inside.
  2. Shake the bottle well before you use it.
  3. For the sink or tub, spray the liquid on the surface.
  4. If there is a tough stain, sprinkle some baking soda on it first. When you spray the vinegar on the soda, it will bubble. This bubble action helps lift the dirt away.
  5. Wipe it all clean with a cloth. Your bathroom will smell fresh and look bright.

Sustainable Textiles and Tools

The tools we use in the bathroom matter a lot. We often use paper towels or cotton pads once and toss them. Switching to cloth is a great move for zero waste bathrooms.

  • Reusable Cloth Pads: You can stop buying bags of cotton balls. Instead, use small squares of cloth. You can even cut up an old t-shirt or a soft towel. Use them to wash your face or remove makeup. When they are dirty, just put them in the wash with your clothes. They will last for years.
  • Natural Loofahs: Most shower sponges are made of plastic mesh. They fall apart and go into the ocean. A real loofah is actually a dried vegetable. It is very scratchy when dry, but it gets soft in the water. It is great for scrubbing your skin. When it gets too old, you can put it in your compost bin. It comes from the earth, so it can go back to the earth.
  • Bamboo Toothbrushes: We should change our toothbrushes every few months. Plastic ones stay in the ground forever. Bamboo toothbrushes are a better choice. Bamboo grows very fast and is very strong. When you are done with the brush, pull out the bristles with pliers. The handle can then go in the compost or the garden.

Water and Energy Conservation

A zero waste bathroom is not just about trash. It is also about the energy and water we use. Saving water helps the planet and lowers your bills.

  • Check for Leaks: A small drip in the sink might not seem like a big deal. However, it can waste many gallons of water every month. Most leaks are easy to fix with a new rubber part. These parts cost very little at a hardware store.
  • Shorter Showers: We all love a long, hot shower. But this uses a lot of water and heat. Try to keep your showers to four or five minutes. You can set a timer on your phone or play two short songs. When the songs are over, it is time to get out.
  • Low-Flow Tools: You can buy a small part called an aerator for your faucet. It adds air to the water flow. This means you use less water but the pressure still feels strong. These parts are cheap and easy to twist onto your sink.

Conclusion

Making your bathroom zero waste is a journey. You do not have to be perfect. Every plastic bottle you do not buy is a win. By making your own cleaners and using bar soaps, you save money. You also keep your home free of harsh chemicals. The more you practice these habits, the easier they become.

Start by looking at what you use most often. Is it soap? Start there. Is it toothpaste? Try the DIY recipe. Over time, these small steps add up to a big change. You will have a beautiful, clean, and green bathroom. Your wallet will thank you, and so will the planet. This is the heart of living a low-waste life. It is about doing the best you can with what you have.


References


Recent Posts


10 Easy Dehydrator Recipes That Will Save You So Much Money

A rustic kitchen table featuring a variety of colorful Dehydrator Recipes, including jars of dried fruit and vegetables next to a modern food dehydrator.
Dehydrator Recipes

Using Dehydrator Recipes is a smart way to live a zero waste life. It helps you save money on food every single week. A home Dehydrator lets you keep fresh food for much longer. These Dehydrator Recipes are very simple for any beginner to try. You can turn extra produce into great snacks that cost very little.


The Easy Way to Save Money and Stop Food Waste

Food prices are going up fast today. Many people want to save money and help the earth at the same time. A small food dehydrator is a great tool for this job. It is a simple machine for the modern kitchen. Most food drying does not need much power. It fits well with a zero waste plan for your home. Drying food takes out the water. This stops germs from growing. It keeps your fresh food safe to eat for a long time.

You will save a lot of cash with these snacks. Store-bought dried fruit and meat cost a lot of money. Often, stores charge three times what the food is worth. When you use Dehydrator Recipes at home, you do not pay for fancy bags or ads. You can buy food in bulk when it is cheap. You can also save “ugly” fruit that looks bad but tastes great. This turns waste into good food for your pantry.


1. Simple Apple Cinnamon Chips

Apple chips are a top choice for Dehydrator Recipes. They are very hard to mess up. They cost much less than the bags you find in stores. These chips give you a good crunch without any oily mess.

Instructions:

  1. Pick: Choose sweet, firm apples like Gala or Fuji.
  2. Prep: Wash the fruit and take out the core. You can leave the skin on for more fiber.
  3. Cut: Slice the apples thin. Try to make them all the same size so they dry well.
  4. Flavor: Toss the slices with a bit of lemon juice and cinnamon.
  5. Dry: Put them on the trays in a flat line. Set the heat to 135°F. Dry for 8 to 12 hours until they snap.

2. Garlic and Salt Kale Chips

Store-bought kale chips cost too much. They also break easily in the bag. Making them at home is a key part of zero waste cooking. You can use kale that is starting to wilt to make a fresh snack.

Instructions:

  1. Prep: Wash the kale. Tear the leaves into small pieces. Throw away the hard stems.
  2. Oil: Put the kale in a bowl. Use just a little olive oil to coat the leaves.
  3. Salt: Add sea salt and garlic powder. You can add nutritional yeast for a cheese taste.
  4. Dry: Spread the leaves out so they do not touch. Set the heat to 125°F. Dry for 3 to 6 hours until they are light and crisp.

3. Smoked Paprika Beef Jerky

Beef jerky is a famous Dehydrator Recipe. It saves you the most money. If you buy lean meat on sale, you can make high-protein snacks for very little.

Instructions:

  1. Meat: Use lean beef like top round. Fat can go bad, so trim it off.
  2. Cut: Put the meat in the freezer for one hour to make it firm. Slice it into thin strips.
  3. Soak: Mix soy sauce, spice, and liquid smoke in a bowl. Let the meat soak for 6 hours in the fridge.
  4. Dry: Pat the strips dry with a paper towel. Put them on trays at 160°F. Dry for 6 to 10 hours. It is done when it bends but does not break.

4. Tasty Sun-Dried Tomatoes

Jars of oil-packed tomatoes are very pricey. Use your Dehydrator when tomatoes are in season. This gives you a big supply for pasta and salad all year long.

Instructions:

  1. Prep: Cut small tomatoes in half. Cut larger ones into four parts.
  2. Trays: Place them on the trays with the skin side down. Add a little salt and herbs.
  3. Dry: Set the heat to 135°F. This can take 8 to 18 hours.
  4. Store: The tomatoes should feel like leather. Put them in clean jars. You can add oil to the jars to keep them soft.

5. Zero Waste Veggie Broth Powder

This is the best Dehydrator Recipe to stop waste. Do not throw away onion ends or carrot peels. You can turn these scraps into a great broth powder.

Instructions:

  1. Save: Keep your clean vegetable scraps in a bag in the freezer.
  2. Chop: When the bag is full, chop the scraps very small or use a blender.
  3. Dry: Spread the pulp thin on a tray sheet. Set the heat to 125°F. Dry for 8 to 12 hours until it is very dry.
  4. Grind: Put the dry bits in a blender. Turn them into a fine powder. Add a little salt. Use one spoon of powder in hot water for broth.

6. Sweet Mango Fruit Leather

Many fruit snacks in stores have too much sugar. With a Dehydrator, you can make fruit rolls from just fruit. Use ripe mangoes that are on sale for the best taste.

Instructions:

  1. Blend: Take the skin and pit off the mango. Blend the fruit until it is smooth.
  2. Spread: Pour the fruit onto a flat tray sheet. Make it about as thick as a coin.
  3. Dry: Set the heat to 135°F. Dry for 6 to 10 hours.
  4. Finish: It is done when the top is not sticky. Peel it off and roll it up in paper. Cut it into small strips.

7. Dried Home Herbs

Small jars of herbs can cost five dollars or more. Growing your own is cheap. Using a Dehydrator keeps the flavor strong for a long time.

Instructions:

  1. Pick: Use herbs like sage, oregano, or rosemary.
  2. Prep: Wash them and pat them dry with a towel. Leave them on the stems for now.
  3. Dry: Use low heat, around 95°F. High heat can take away the good smell.
  4. Store: Dry for 2 to 4 hours. They are done when they crumble in your hand. Put them in jars and keep them in a dark place.

8. Crispy Banana Coins

Bananas go bad fast. Do not throw them out. Slice them up for a snack that stays good for months. These are much better for you than fried chips.

Instructions:

  1. Cut: Use yellow bananas. Slice them into small rounds.
  2. Dip: Put the slices in a little lemon juice. This keeps them from turning brown.
  3. Dry: Spread them out on the trays. Set the heat to 135°F.
  4. Time: Dry for 8 to 12 hours. If you want them crunchy, leave them in longer.

9. Crunchy Spiced Chickpeas

Do you need a snack with lots of protein? Chickpeas are very cheap to buy. When you dry them, they become a crunchy snack that is great for trips.

Instructions:

  1. Prep: Use a can of peas. Rinse them and dry them well with a cloth.
  2. Spice: Toss them with a tiny bit of oil, salt, and chili powder.
  3. Dry: Spread them in one layer on the tray. Set the heat to 145°F.
  4. End: Dry for 12 to 15 hours. They should be very crunchy all the way through.

10. Instant Hash Browns

Potatoes are cheap, but they do not last forever. You can shred and dry them. This makes a “just add water” breakfast. It is great for camping or long-term storage.

Instructions:

  1. Boil: Shred your potatoes. Put them in boiling water for 3 minutes. This keeps them white.
  2. Cool: Put them in cold water right away. Pat them very dry.
  3. Dry: Spread the shreds thin on the trays. Set the heat to 125°F.
  4. Check: Dry for 6 to 8 hours until they feel hard. To eat, soak them in hot water for 15 minutes and then fry them.

Conclusion

Making these Dehydrator Recipes is a great way to save money. It helps you take care of the earth by using all your food. You can turn extra fruit and meat into snacks that last a long time. This puts you in charge of what you eat. As you learn more, your Dehydrator will become a top tool in your zero waste kitchen. You will enjoy great food and a lower grocery bill every month.


References


Recent Posts


Simple Recipe to Make Apple Powder from Dehydrated Apples


Glass jar of homemade Apple Powder with dehydrated apple slices and fresh whole apples arranged on a wooden kitchen counter in natural daylight.

Making your own Apple Powder is a smart way to practice zero waste living in your home kitchen. By using a good dehydrator, you can turn fresh, seasonal apples into a long-lasting ingredient that keeps most of the fruit’s healthy perks. This guide offers a clear look at the drying and grinding steps needed to make a fine Apple Powder. Learning this skill gives you a steady supply of natural flavor for many different meals.

Introduction: The Versatility of Apple Powder

Drying out fruit is an idea as old as time, but the new way of doing it has led to the rise of fruit powders. Apple Powder is just a concentrated form of dried apples that have been ground into a fine dust. Unlike whole dried fruit, the powder form gives you a real leg up in the kitchen. It provides big flavor and good health perks without changing how wet or dry a recipe feels.

In a time when zero waste living is a top goal for many homes, finding ways to save food before it goes bad is key. Apples are very prone to getting bruises or losing their crunch as they sit. By turning them into a powder, you can make them last for years instead of weeks. This article looks at the steps and the perks of making your own DIY fruit supplements.

Selecting the Right Apples for Dehydration

Not all apples are the same when you want to make a high-quality powder. The final taste of your Apple Powder depends on the mix of sugar and acid in the raw fruit.

  • Sweet Types: Fuji and Gala apples make a mild, sugary powder. This works very well as a natural way to sweeten baby foods or yogurt.
  • Tart Types: Granny Smith or Pink Lady apples make a tangy, bright powder. It tastes like green apple candy and is great for snacks or adding “pop” to baked goods.
  • Scented Types: McIntosh or Honeycrisp give off a classic “apple pie” smell that is great for spice mixes.

When you are trying to be zero waste, do not worry about how the fruit looks. Small marks on the skin do not matter once the fruit is cut and ground. Just make sure the fruit has no mold or rot inside, as those bad tastes will get stronger during the drying process.

The Science of Using a Dehydrator

To get a powder that feels like dust, the fruit must be “bone dry.” This is why a dehydrator is the most vital tool for the job. A standard home oven often has “hot spots” and does not have enough air moving around. A real dehydrator uses a heater and a fan to move air evenly at low heat.

The goal is to bring the water level of the apples down below 5%. At this point, the fruit gets brittle enough to snap in half. If any water stays inside, the “powder” will turn into a sticky clump instead of a fine dust. Using a dehydrator lets you pick the exact heat, usually around 135°F (57°C). This saves the vitamins that would be lost in the high heat of an oven.

Preparation: Slicing and Pre-Treatment

Prep work is the start of any good zero waste project. Start by washing the apples well to get rid of any wax or dirt. You can peel the fruit if you want, but keeping the skin on is better for Apple Powder. The skin holds a lot of fiber and good nutrients.

  • Even Slices: Use a slicer or a sharp knife to make pieces about 1/8-inch thick. If they are all the same size, they will all dry at the same speed.
  • Stop the Browning: To keep the apples from turning brown, soak the slices in a bowl of water with a little lemon juice for five minutes.
  • Using the Cores: In a true zero waste kitchen, you can even dry and grind the cores, as long as you take out the seeds first.

Step-by-Step Instructions: Drying the Apples

Once your slices are ready, follow these steps to make sure they get dry enough to grind.

  • Step 1: Loading the Trays: Put the slices on the trays in one single layer. Do not let them overlap, as the air needs to move to dry them out.
  • Step 2: Setting the Heat: Set your machine to 135°F. If your house is very humid, you might need more time rather than more heat.
  • Step 3: How Long It Takes: Drying usually takes between 8 and 12 hours. Start checking the fruit at the 6-hour mark.
  • Step 4: The Snap Test: Take a slice out and let it cool for a minute. If it bends, it needs more time. If it snaps like a chip, it is done.

Transforming Slices into Apple Powder

When the dried apples are cool and brittle, it is time to grind them. The tool you use will change how the powder feels.

  • High-Speed Blender: This is the best tool for making a light, flour-like powder. It can handle big batches fast.
  • Spice Grinder: Great for small batches. This way often makes the finest, most even dust.
  • Food Processor: This will likely make a coarse “apple meal.” This is still good for adding texture to bread.

Pro Tip: Use short bursts of power so you do not heat up the powder. Too much heat can melt the natural sugars and cause clumps. After you grind it, put the powder through a sifter to catch any big pieces, then grind those bits again.

Storage Solutions for Longevity

The main enemy of Apple Powder is wet air. Because the powder soaks up water very fast, you must store it the right way.

  • Tight Jars: Use glass jars with a lid that seals tight. Plastic jars can let in tiny amounts of air and may not keep the powder fresh for a long time.
  • Dry Packs: Putting a small food-safe silica pack in the jar can help soak up any extra dampness that gets in when you open the lid.
  • Checking the Mix: After the first day in the jar, give it a shake. If the powder sticks to the glass or forms clumps, it still has water in it. Put it back in the dryer for two more hours.

If you keep it in a cool, dark, and dry spot, your Apple Powder will stay tasty and healthy for 6 to 12 months.

Culinary Applications for Apple Powder

Having a jar of Apple Powder in your pantry is like having the taste of fall on hand. Since it is a zero waste product made from the whole fruit, it has a lot of flavor.

  • Baking: Swap out 10% of the flour in cake or muffin mixes for Apple Powder to get a fruit taste and extra fiber.
  • Smoothies: Add a big spoon to green drinks to hide the taste of kale without adding the bulk of a whole apple.
  • Natural Sweetener: Sprinkle it over plain yogurt or oatmeal. It gives you sweetness without the big sugar spike of white sugar.
  • Spice Rubs: Mix it with cinnamon and a bit of salt to make a dry rub for meat or roasted veggies.

The Zero Waste Impact

The good you do for the Earth by making your own fruit powder is big. Studies show that apples are one of the most wasted foods in the world. By using a dryer to fix “ugly” fruit or extra crops, you help stop gas buildup in landfills. Also, making it yourself means you do not need to buy store products that come in plastic.

This process is not just about cooking; it is about a way of life. Every core you use and every bruised apple you save helps create a better food system.

Conclusion

Making Apple Powder from dried apples is a fun project that links old ways of saving food with new ways of cooking. By learning how to remove water and how to use your dryer, you can make a healthy ingredient for many dishes. Whether you want to save cash, help the Earth through zero waste, or just try new tastes, this simple recipe is a great addition to your kitchen.


References


Recent Posts


The Ultimate Zero-Waste Recipe: Apple Peel and Core Chips for Tea

A vibrant selection of fresh whole red and green apples alongside a glass bowl overflowing with crispy, dried apple peel curls, showcasing a Zero-Waste Recipe for transforming kitchen scraps into a healthy snack.

Saving our planet starts with how we use everyday food scraps. This guide shares the Ultimate Zero-Waste Recipe to change fruit waste into a great pantry item. By using a dehydrator and simple steps, anyone can enjoy a zero waste life while making tasty, natural drinks. This article looks at the easy steps and the good impact of using apple scraps for home tea.


Introduction: New Life for Kitchen Scraps

The idea of a zero waste kitchen is not as hard as people think. It often starts with small, smart shifts in how we handle our food. Apple peels and cores are items we usually toss in the bin. However, these scraps have many good things for your body. They hold the scent and the flavor of the fruit. By making these remnants into dried chips, you are doing more than just cutting down on waste. You are keeping the best part of the harvest for yourself.

This long guide shows you how to move from waste to wellness. We will look at why the skin of the apple is so good for you. We will also see how the core can add a deep, woody taste to your drink when you dry it the right way. Our goal is to give you a full look at the Ultimate Zero-Waste Recipe. This recipe helps you be kind to the earth while you enjoy a warm, sweet cup of tea.


The Big Impact of Food Waste

Food waste is a major problem for our world today. Millions of tons of good food go to landfills every single year. When food sits in a landfill, it cannot break down the right way. This causes gases that are bad for the air. By choosing a zero waste way to prep your fruit, you help the earth stay healthy.

Apple peels are very strong and tough. Unlike some fruits with thin skin, the apple skin is made to protect the fruit. This makes it perfect for a dehydrator. When we save these parts, we show respect for the water and the work used to grow the fruit. It is a simple way to make a big difference from your own kitchen.


Health Benefits of Apple Peel Tea

Most people know that apples are good for the body. But did you know the peel is the best part? The peel has much more Vitamin K than the inside of the fruit. It also has natural things that help your brain and help you breathe well. When you steep these dried peels in hot water, these good things go right into your tea.

The core and the peel also have pectin. This is a natural fiber that is good for your gut. While you do not eat the fiber like you do when eating a fresh apple, the tea still gets the body and the sweetness of these parts. This zero waste recipe makes sure you get every bit of health from the fruit. You won’t find this kind of fresh taste in a store-bought tea bag.


The Right Tools: Using a Dehydrator

You can dry fruit in an oven, but a dehydrator is much better for this Ultimate Zero-Waste Recipe. A dehydrator moves air around in a steady way. It also keeps the heat at the same level. This is very important if you want to keep the bright colors and the good nutrients in the apple skins.

If you use an oven, it is often too hot. Even on a low setting, an oven can cook the outside of the peel while the inside stays wet. This can cause mold to grow later when you store the chips. A dehydrator lets the water leave the fruit slowly. If you set it to 57°C (135°F), you will get a dry chip that stays fresh for a very long time in a jar.


The Ultimate Zero-Waste Recipe: How to Prep

To get the best tea, how you prep your scraps is very important. Follow these easy steps to make sure your tea chips are clean and taste great.

Step 1: Pick and Wash

Try to use organic apples if you can. Since you are using the skin, you want it to be as clean as possible. Wash the apples well in a bowl of water with a little vinegar. This helps get rid of any wax on the skin. This way, the hot water can get to the flavor of the peel when you brew your tea.

Step 2: Peel and Core

Use a peeler to take off the skin in long strips. For the cores, cut away any brown spots. Some people worry about apple seeds, but using a few for tea is usually fine. If you want to be extra safe, you can just pop the seeds out with your thumb before you dry the cores.

Step 3: Keeping the Color

If you want the peels to stay red or bright, you can spray them with a little lemon juice. But since this is a zero waste plan, many people just let them turn brown. This browning actually gives the tea a nice taste like a baked apple pie. It makes the tea feel warm and rich.


Simple Steps for Drying

The change from a scrap to a tea chip happens in the dehydrator. This part takes time, but you do not have to do much work.

  1. Spread Them Out: Put the peels and core slices on the trays. Do not let them touch or overlap. They need air to move all around them to dry fast.
  2. Set the Heat: Turn your dehydrator to 57°C (135°F). This is the best heat to keep the fruit safe but keep the flavor strong.
  3. Wait: It will take about 6 to 10 hours. This depends on how much water is in the air that day.
  4. The Snap Test: Your chips are ready when they are very dry. Try to bend one. If it bends, it is not done. If it snaps like a cracker, it is ready.
  5. Cool Down: Let the chips sit out for an hour before you put them in a jar. This stops steam from forming inside the jar.

How to Store Your Chips

Proper storage is the last part of the zero waste cycle. Any water left in the chips will make them go bad. Put your chips in a glass jar with a tight lid. Keep the jar in a dark spot like a cupboard. Light can make the color and the taste go away over time.

If you keep them dry and dark, these chips will stay good for a year. Because they are so small and dry, they do not take up much room. This is a great way to save the taste of fall for the cold days of winter. Put a label on your jar with the date. Different apples have different tastes, so you might want to write the name of the apple on the jar too.


How to Brew Your Tea

Now that your chips are ready, making a cup of tea is very easy. You can use them by themselves or mix them with other things.

  • Simple Apple Tea: Put a small handful of peels and one core chip in a cup. Add boiling water. Let it sit for 7 to 10 minutes. The longer it sits, the sweeter it will be.
  • A Tasty Blend: Add a cinnamon stick or a bit of ginger to the cup. This makes a great “Spiced Apple” drink. It also tastes very good if you mix it with green or black tea.
  • Adding Sweetness: The cores have natural sugar, so you may not need to add anything. If you want it sweeter, a little bit of honey is a perfect match for the apple flavor.

Other Ways to Use Your Apple Chips

This recipe is for tea, but these chips can do many things. This is the best part of a zero waste life. One item can be used in many ways.

  1. Make Your House Smell Great: If the chips get too old to drink, put them in a pot of water on the stove. Add a little cinnamon and let it simmer. Your whole house will smell like fresh apples.
  2. Pretty Drinks: Use the curly dried peels to decorate a cold glass of juice or a cocktail. It looks very fancy.
  3. Apple Powder: You can blend the very dry peels into a powder. Add this powder to your morning oats or yogurt. It adds flavor and health in a very fast way.

Conclusion: A Small Step for the Earth

The Ultimate Zero-Waste Recipe for apple peels and cores is a great way to show love for our food. By using a dehydrator, we can save things that others throw away. This helps us create something that is good for us and good for the planet.

The next time you peel an apple, stop before you throw the skin away. That skin is the start of a wonderful cup of tea. Being zero waste does not have to be hard. It just takes a little bit of time and a simple plan to use what we have.


References


Recent Posts