Cookie Consent by Free Privacy Policy Generator Update cookies preferences

How to make Banana Peel Daiquiri cocktails

A chilled Banana Peel Daiquiri cocktail in a textured glass garnished with a dehydrated banana slice, highlighting the use of a sustainable Banana Peel syrup in zero waste drinks.

This article was crafted by a team of sustainability enthusiasts dedicated to the art of zero waste drinks. By exploring innovative ways to repurpose organic materials like Banana Peel, we aim to bridge the gap between high-end mixology and environmental responsibility. Our focus remains on extracting maximum flavor from overlooked ingredients like Banana Peels. Through rigorous testing, we ensure that every cocktail recipe contributes to a more sustainable and delicious future for home bartenders.


The Art of the Sustainable Banana Peel Daiquiri

The modern cocktail movement is undergoing a quiet revolution. It is shifting its focus from big garnishes to deep sustainability. At the heart of this shift is a simple truth. Some of our most discarded food items are actually full of flavor. This cocktail uses banana peels to create a rich, caramel-flavored syrup, ensuring no part of the fruit is wasted. The Banana Peel Daiquiri is not just a drink. It is a new way to view waste in the kitchen and behind the bar.

For a long time, the banana peel was just a joke or a piece of trash. However, in the world of zero waste drinks, it is a prized prize. When you treat it right, the peel offers a deep profile. The fruit flesh cannot match it. It has notes of bitter tannins. And has deep caramel. It has a floral earthiness. This provides a great base for a classic sour drink.


Understanding Zero Waste Drinks

Being green in the bar world is about more than just straws. It is about using every part of the plant. When we talk about Banana Peels, we talk about a huge part of the fruit weight. Usually, this goes into the trash. In a landfill, food waste breaks down and makes gas that is bad for the air. By using these peels in our drinks, we help the earth. We also make our drinks taste better.

The idea of “Discarded” ingredients is growing fast. Some brands now make spirits from food waste. The goal is to close the loop. A Banana Peel Daiquiri shows this well. It is classy, tasty, and good for the planet. You do not have to give up taste to be kind to nature.


The Star Ingredient: Banana Peels

The secret to this drink is in the peel. As a banana gets ripe, it changes. The starches turn into sugars. But the peel stays tough. It holds onto oils and good smells.

Zero-Waste Ingredient: Banana peels.

When we use Banana Peels in a syrup, we do more than add flavor. We add a heavy feel to the drink. It adds a “cooked fruit” taste. This balances the sharp lime in a regular Daiquiri. It turns a light summer drink into something with more weight. It stays fresh but feels more complex.


Creating the Banana Peel Syrup

The base of a great Banana Peel Daiquiri is the syrup. We use sugar to pull out the moisture and oils from the peel. This is called osmosis. It makes a syrup that is much stronger than one made by boiling peels in water.

Syrup Recipe

  • Prep time: 10 minutes
  • Wait time: 6–24 hours
  • Yield: About 100ml of syrup
  1. Clean the Peels: Try to use organic bananas. This is because the skin holds any spray used on the farm. Wash the peels well.
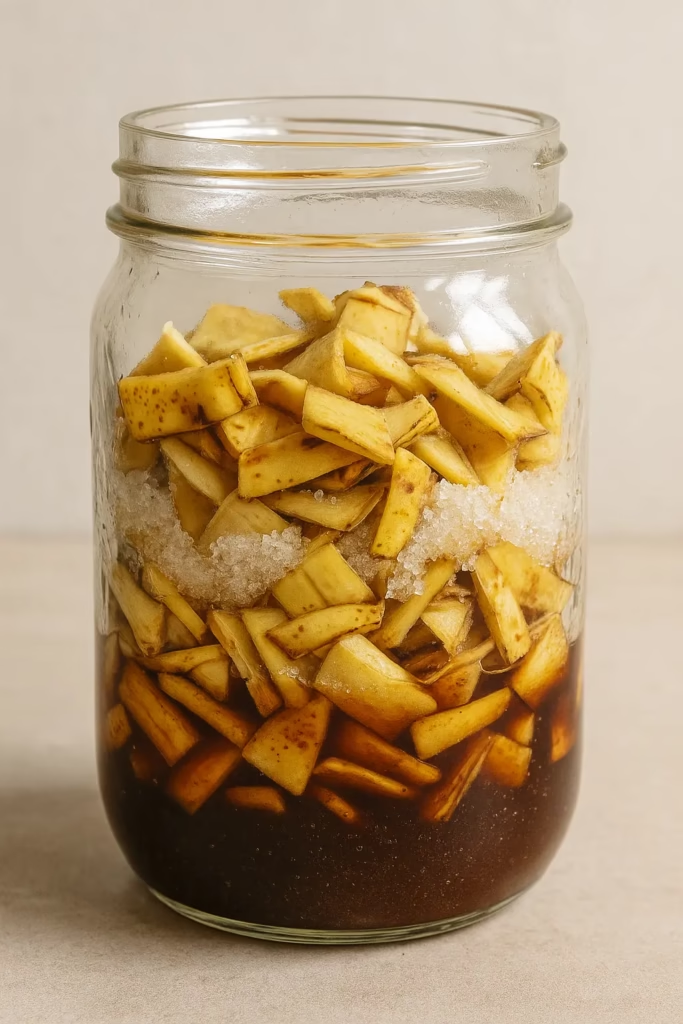
  2. Chop: Chop a clean banana peel into small pieces. Small pieces give the sugar more area to work on.
  3. Mix: Mix with an equal weight of sugar (e.g., 50g peel to 50g sugar) in a glass jar.
  4. Wait: Let it sit for 6–24 hours until a syrup forms. You will see the sugar turn into a dark liquid.
  5. Strain: Pour the syrup through a mesh tool or cloth. Press down on the peels to get all the liquid out.

The syrup you get is dark and rich. It tastes like liquid dessert. And gives the sweet touch for our Banana Peel Daiquiri. It also adds a layer of burnt sugar taste.


Selecting the Right Spirits

You can use a standard white rum. But the best choice is Discarded Banana Peel Rum. This spirit is made with peels that would be thrown away. This fits the “Banana Peels” theme perfectly. If you cannot find it, use a dark rum from Jamaica. The fruity notes of that rum go well with the peel.

The mix of wood notes from the rum and the peel oils makes a smooth feel. This makes the Banana Peel Daiquiri stand out. It feels soft on the tongue.


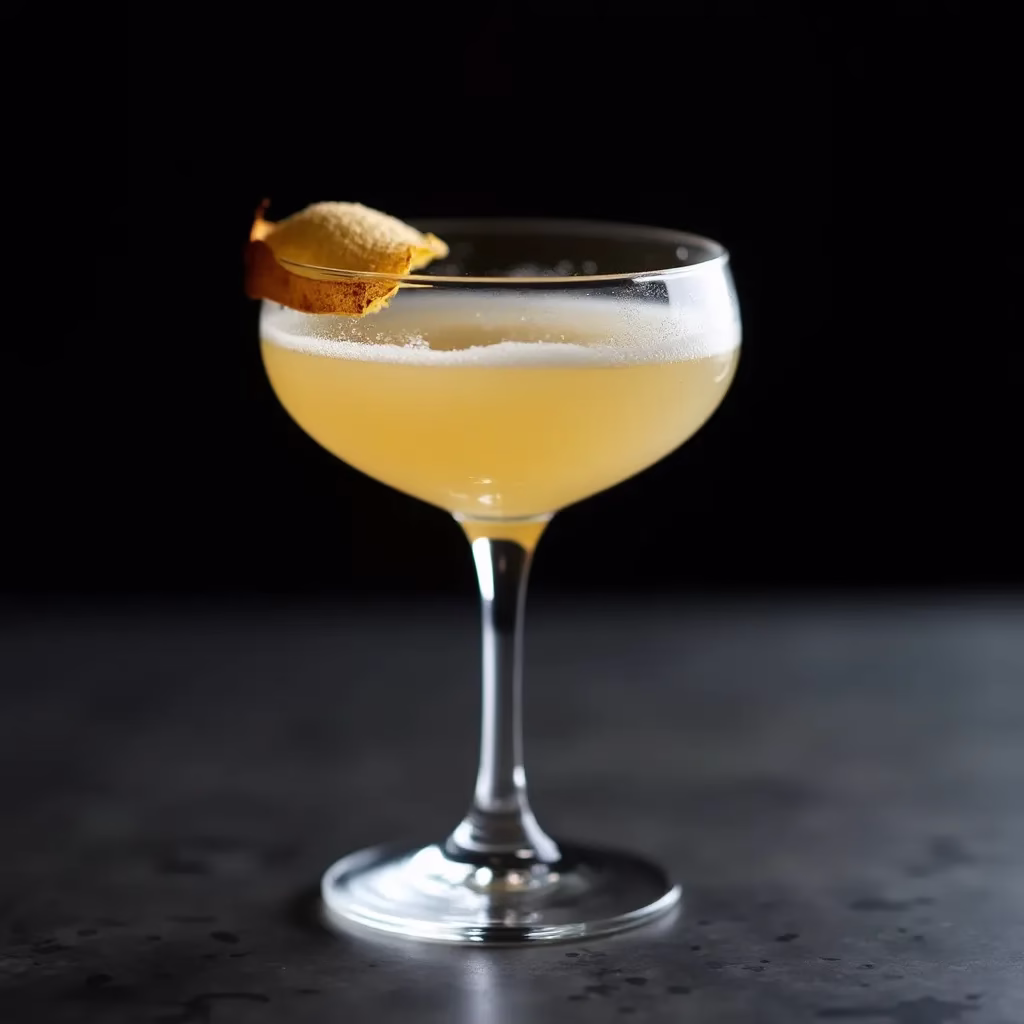
The Recipe: How to Make a Banana Peel Daiquiri

Now it is time to build the drink. A perfect Daiquiri needs balance. It needs sweet, sour, and strong parts. Because the banana peel syrup is so rich, we use a classic mix. This keeps the drink crisp.
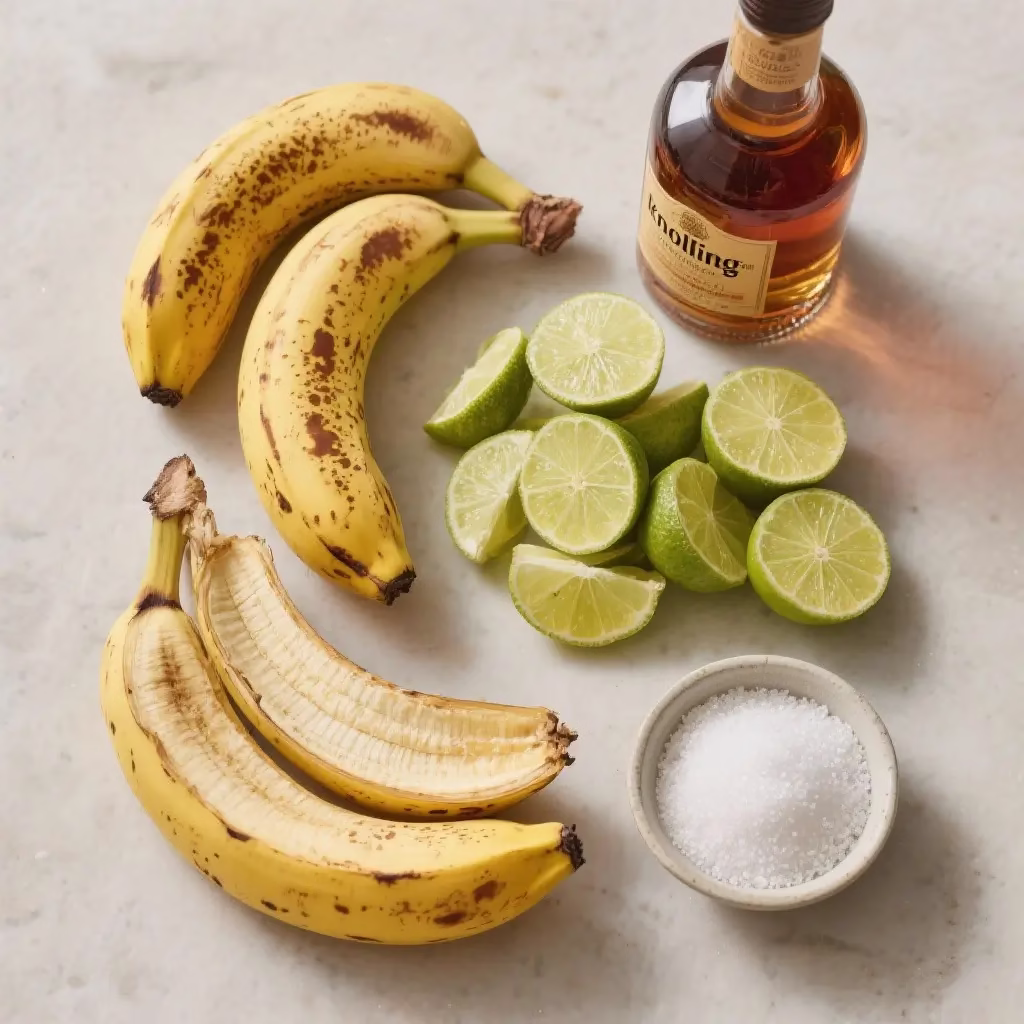
Ingredients

  • 50ml Discarded Banana Peel Rum
  • 25ml Fresh lime juice
  • 15ml Banana peel syrup
  • Ice: Use good, clear ice cubes for the best chill.

Method

  1. Chill your glass: Put a coupe glass in the freezer for 10 minutes.
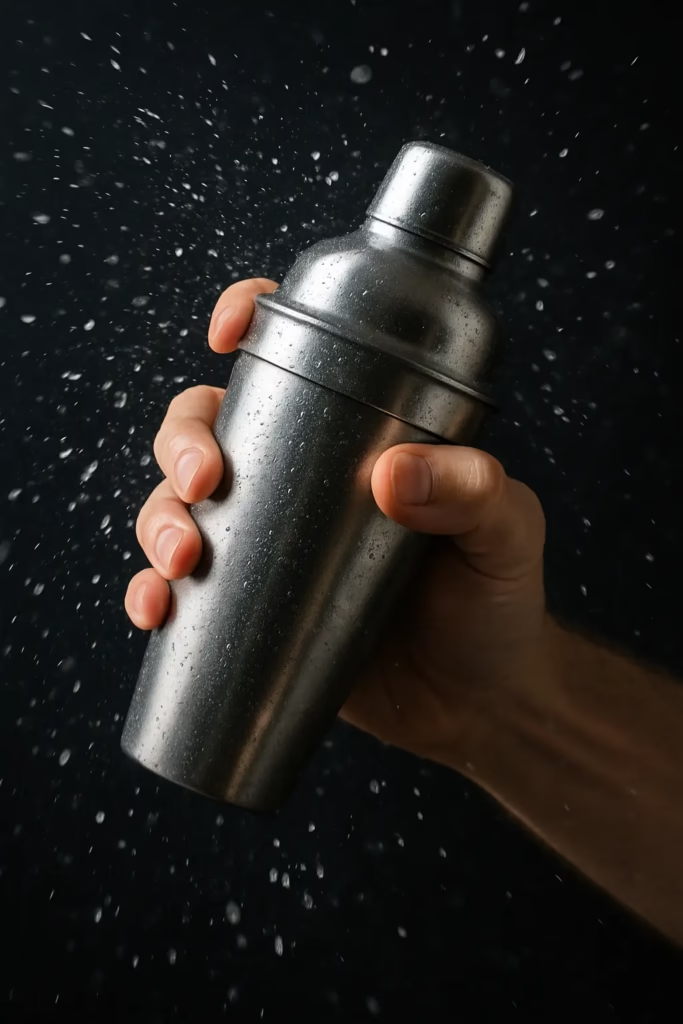
  2. Mix: Add the rum, lime juice, and syrup into a shaker.
  3. Shake: Fill the shaker with lots of ice. Shake all ingredients with ice for about 15 seconds. The shaker should feel very cold.
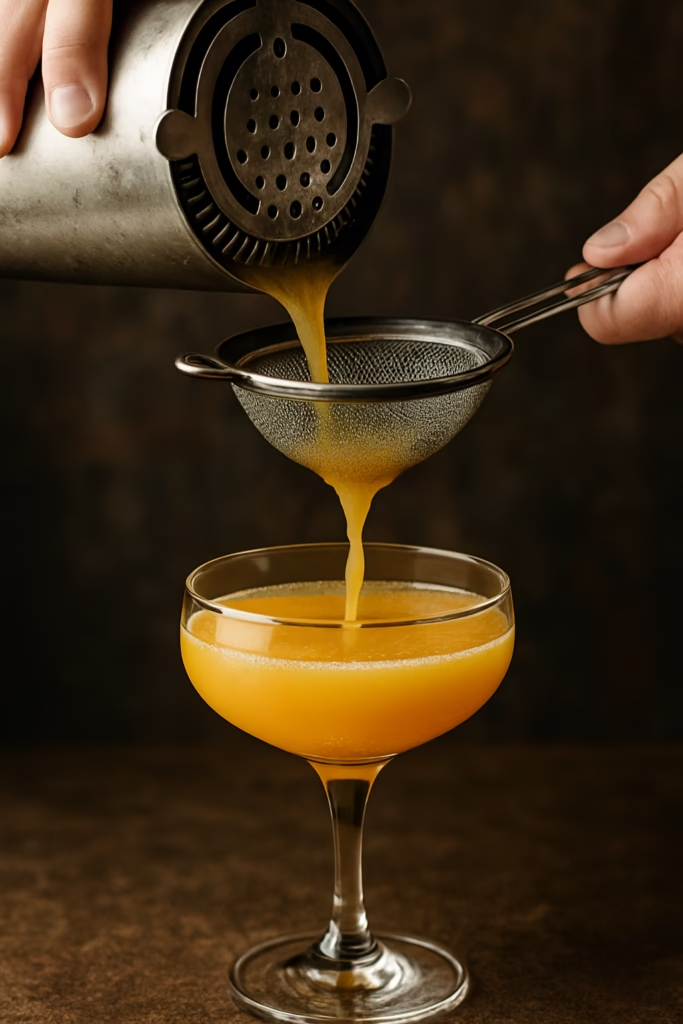
  4. Strain: Pour through two strainers into your cold glass. This keeps out small bits of ice or fruit. It keeps the drink very smooth.
  5. Garnish: Keep it simple. Use a small piece of the used peel. Or use nothing at all. Let the color of the drink be the star.

Flavor Profile and Tasting Notes

When you take a sip of a Banana Peel Daiquiri, you first taste the lime. It is bright and sharp. Then, you taste the deep sweetness of the Banana Peels.

This syrup does not taste like candy. It has a real, earthy edge. You might taste vanilla or spice. The finish is clean because of the rum. It makes you want another sip. This is why zero waste drinks are great. They do not taste like “scraps.” They taste like a better version of the drinks we already love.


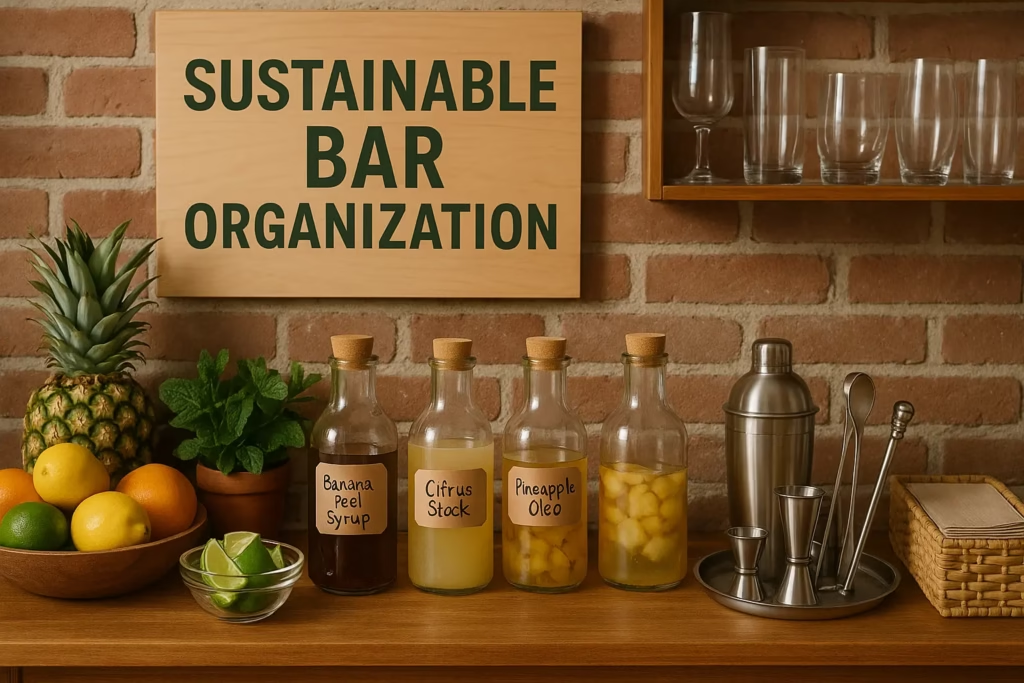
Expanding Your Zero Waste Bar

Once you make a Banana Peel Daiquiri, you can try other things. The world of zero waste drinks is very big.

  • Lime Skins: After you juice your limes, do not throw them away. You can boil them with sugar to make a lime stock. This helps you get more from your fruit.
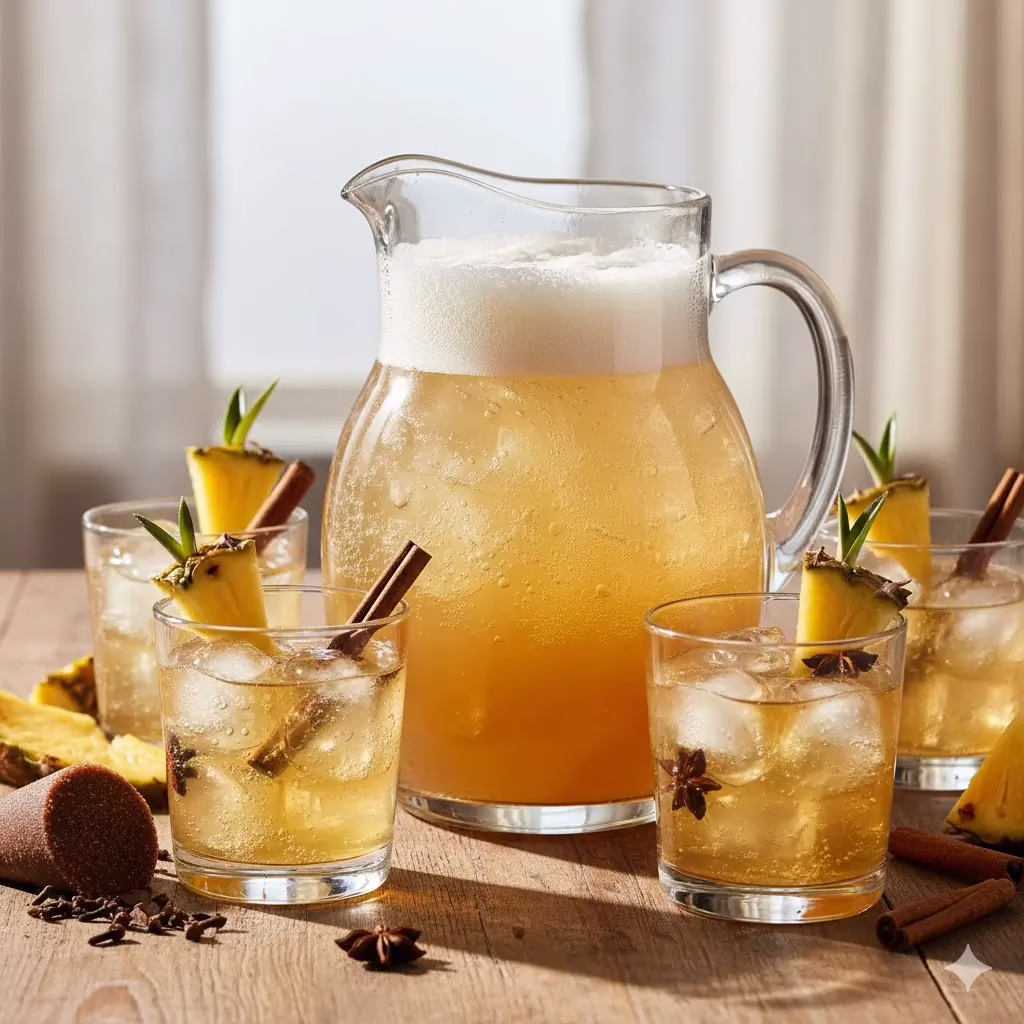
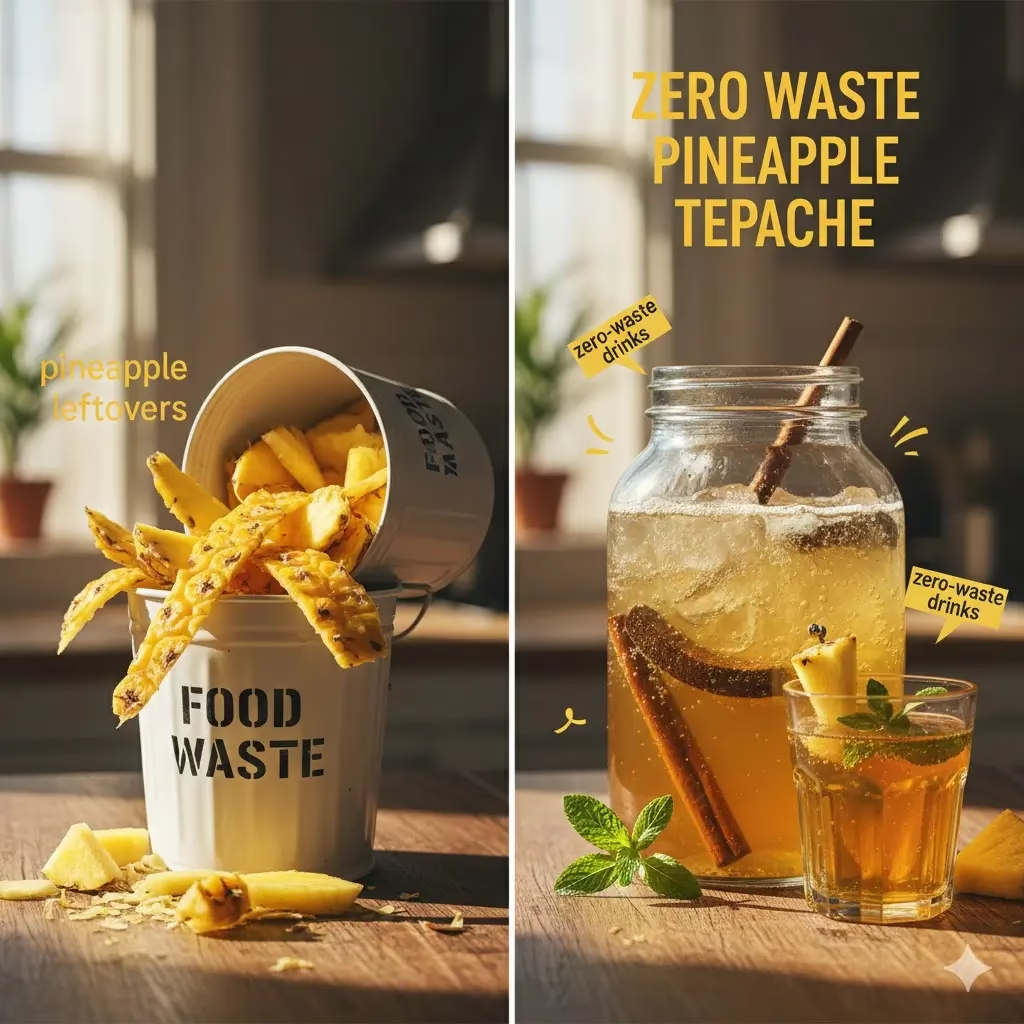
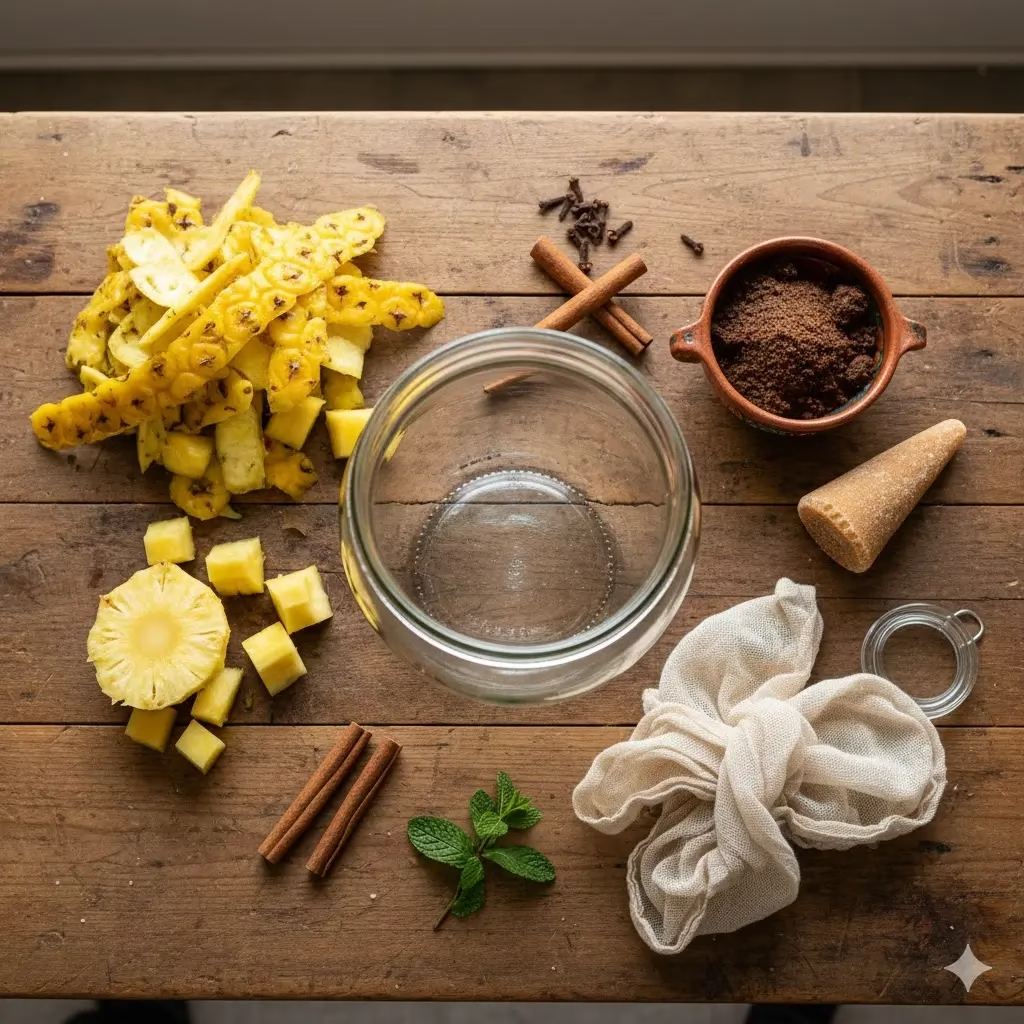
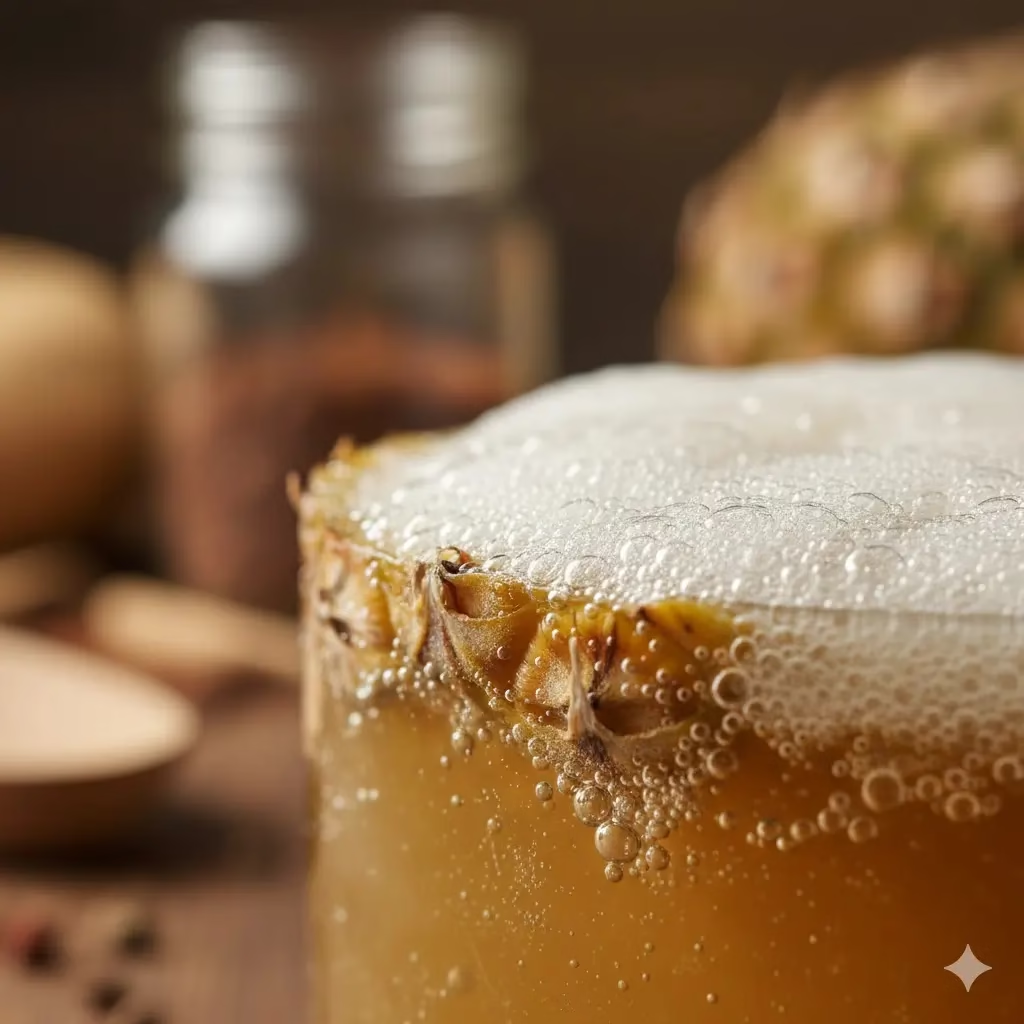
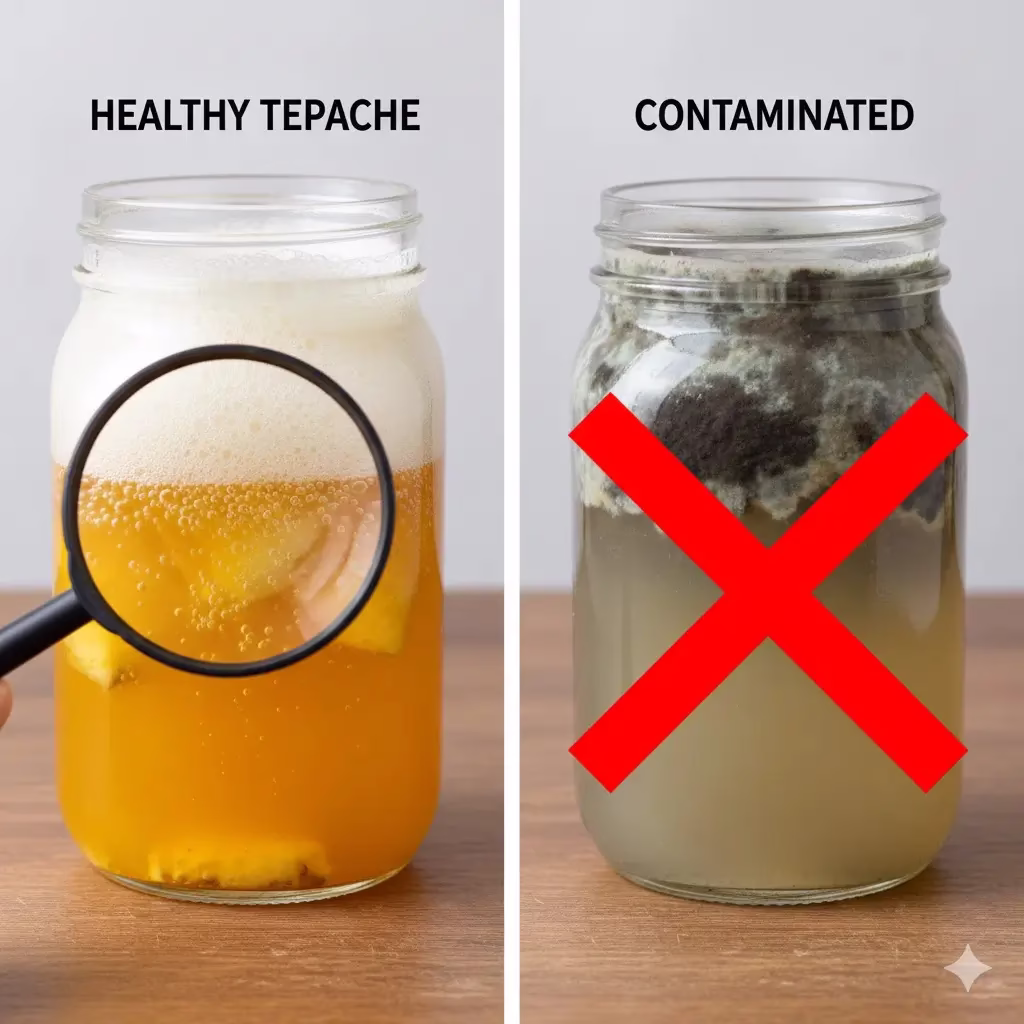
  • Pineapple Skins: Like Banana Peels, these can be used. Mix them with sugar and water to make a drink called Tepache. It is a bubbly drink you can mix with rum.
  • Coffee Grounds: Used coffee can go into spirits. It adds a dark, roasted taste to drinks.

By using Banana Peels, you learn a new skill. You start to see every scrap as a new ingredient. This makes you a better bar host.


Conclusion

The Banana Peel Daiquiri is more than a fun drink. It is a lesson in flavor. It shows us how to be mindful. By using Banana Peels, we make a fancy syrup. We prove that luxury and being green can go together. Any home bar can do this. Adding zero waste drinks to your list is a great way to help the earth.

Next time you eat a banana, look at the peel. It is not trash. It is a key part of a great drink. Shake up a Daiquiri today. Enjoy the burnt sugar notes. Cheers to a world where nothing goes to waste.


Frequently Asked Questions

Can I use any banana peel?

Yes, but the color matters. Use yellow peels with some brown spots. They have the best sugar and taste. Green peels are too bitter. Very black peels might taste too strong or sour.

How long does the syrup last?

The syrup has a lot of sugar. It will stay good for two weeks in the fridge. You can add a tiny bit of vodka to help it stay fresh for longer.

Is it safe to eat banana peels?

Yes, it is. We strain them out for the drink to keep it smooth. But peels have many vitamins. Making syrup is a safe way to get the flavor out.


References


Recent Posts


How to make Pineapple Tepache with Zero Waste

An elegant, sun-drenched shot of a tall glass pitcher filled with golden, bubbly **Pineapple Tepache**, topped with a thick layer of natural white foam. On a rustic wooden table, several glasses filled with ice and the amber-colored drink are garnished with fresh pineapple wedges and cinnamon sticks, highlighting the refreshing nature of this fermented beverage.

This guide is developed by a team focused on sustainable living and the simple joy of home fermentation. We believe that reducing kitchen waste can be both delicious and easy for everyone to try. Our goal is to help you turn common pineapple leftovers into a bubbly, refreshing treat that your whole family will enjoy. By following these steps, you can master Pineapple Tepache while helping the planet one rind at a time. We hope this journey into traditional Mexican flavors inspires you to see the value in every part of your fruit.


Understanding the Joy of Pineapple Tepache

Making your own drinks at home is a wonderful way to save money and stay healthy. Pineapple Tepache is one of the easiest fermented drinks you can try. It does not require expensive tools or hard-to-find items. Most of the magic comes from the fruit itself. When you buy a pineapple, you usually eat the sweet yellow flesh and throw away the rest. However, the skin and the hard middle part, known as the core, are full of flavor and natural yeast.

By using these parts, you are practicing a zero-waste lifestyle. This means you are making sure nothing goes to waste in your kitchen. Instead of putting scraps in the bin, you put them in a jar. After a few days, they turn into a fizzy, golden soda that tastes like a tropical vacation. It is a great alternative to sugary store-bought sodas and is much better for your gut health.

Why Choose Zero Waste Drinks?

The world creates a lot of trash every day. A big part of that trash is food waste. When we throw away pineapple leftovers, we are throwing away potential energy and nutrients. Choosing to make zero waste drinks helps the environment. It reduces the amount of trash that goes to landfills.

Furthermore, making Tepache at home is very frugal. You are essentially making a second product for free from something you already bought. It is a win-win situation for your wallet and the Earth. This process teaches us to respect our food and see the beauty in things we used to overlook.

The Ingredients You Will Need

To make a great batch of Pineapple Tepache, you only need a few simple things. Most of these are likely already in your pantry.

  1. The Pineapple: You need the skins and the core of one large, ripe pineapple. Make sure to wash the outside of the pineapple with water before you cut it to remove any dirt. Do not use soap, as we want the natural yeast on the skin to stay alive.
  2. The Sugar: Traditionally, people use piloncillo. This is a raw, dark sugar from Mexico that tastes like caramel. If you cannot find it, dark brown sugar or even honey will work just fine.
  3. The Water: Use clean, filtered water. If your tap water has a lot of chlorine, let it sit out for an hour before using it, or boil it and let it cool.
  4. The Spices: A cinnamon stick and a few whole cloves add a warm, cozy smell and taste to the drink. Some people also like to add a small slice of fresh ginger for a little bit of a spicy kick.

Step-by-Step Recipe Instructions

Follow these simple steps to create your first batch of this delicious ferment.

Step 1: Prep Your Pineapple

Start by cutting the top and bottom off your pineapple. Stand it upright and slice the skin off in long strips. Keep some of the fruit attached to the skin for extra sweetness. Chop the hard core into small pieces. You can eat the soft fruit now or save it for a fruit salad.

Step 2: Dissolve the Sugar

Take about one cup of sugar and stir it into a large glass jar filled with four cups of water. Stir until the sugar is fully dissolved. The water should look dark and rich.

Step 3: Mix the Ingredients

Add your pineapple rinds, the chopped core, the cinnamon stick, and the cloves into the sugar water. Ensure the pineapple is fully submerged. If the pieces float to the top, you can use a clean weight or a small glass lid to push them down. This prevents any fuzzy mold from growing on the fruit.

Step 4: The First Fermentation

Cover the top of the jar with a clean piece of cloth or a paper towel. Secure it with a rubber band. This allows the drink to breathe while keeping bugs away. Place the jar in a warm, dark spot in your kitchen. Let it sit for twenty-four to forty-eight hours.

Step 5: Check for Bubbles

After a day or two, you should see white foam or bubbles on the surface. This is a good sign! It means the fermentation is working. Taste a little bit with a clean spoon. If it is sweet and slightly tangy, it is ready. If you want it more sour, let it sit for another day.

Step 6: Strain and Bottle

Once you love the flavor, strain the liquid through a sieve into a clean pitcher or bottles. Discard the solids (you can compost them!). You can drink the Tepache now over ice, or put it in the fridge to stop the fermentation.

How to Serve Your Tepache

Pineapple Tepache is very versatile. If you want a non-alcoholic treat, serve it in a tall glass with lots of ice. You can add a squeeze of lime juice to make it even more refreshing. For those who enjoy a cocktail, Tepache makes an amazing base. You can mix it with a light beer for a traditional “Tepache con Cerveza” or add a splash of rum or tequila for a tropical evening drink.

The fizz and the spice make it a perfect partner for spicy food like tacos or grilled chicken. It cleanses the palate and cools the tongue. Because it contains natural probiotics, it is also a great drink to have after a big meal to help your stomach feel settled.

Tips for Success and Safety

While fermenting at home is safe, there are a few things to keep in mind. Always use clean jars and tools. If you see black or green mold on the surface, throw the batch away and start over. A little bit of white foam is normal, but fuzzy colorful spots are not.

If you live in a very hot house, your Tepache will ferment very fast. Check it after twelve hours. If your house is cold, it might take three or four days. Trust your nose and your taste buds. It should smell fruity and yeasty, like a fresh cider.

Variations to Try

Once you are comfortable with the basic recipe, you can get creative. Here are a few ideas for your next batch:

  • Spicy Heat: Add a few slices of jalapeño to the jar for a spicy-sweet drink.
  • Herbaceous: Add fresh mint or basil leaves during the last day of fermentation.
  • Double Fruit: Add some mango skins or apple slices along with the pineapple.

Each change will create a new flavor profile, making this a hobby that never gets boring. The possibilities for zero waste drinks are truly endless when you start experimenting with different fruits and spices.

Conclusion: Embracing the Zero Waste Lifestyle

Learning how to make Pineapple Tepache is more than just a kitchen project. It is a way to connect with traditional wisdom and take a small step toward a better environment. By finding value in pineapple leftovers, you are proving that sustainability can be delicious. This drink is a celebration of what we can achieve when we slow down and let nature do its work.

Whether you enjoy it as a fizzy afternoon soda or as a complex cocktail base, your homemade Tepache is sure to be a hit. It is healthy, cheap, and helps the planet. So, the next time you bring a pineapple home, remember that the best part might be the part you used to throw away. Happy fermenting!


References


Recent Posts


Make these simple Knitted Scented Sachet Envelopes

These simple Knitted Scented Sachet Envelopes are a perfect way to use up your shortest knitting yarn leftovers. They are quick to make and add a touch of luxury to your drawers or closets. Because they are small, they are also a great way to practice basic knitting skills like casting on, the knit stitch, and seaming.

Materials Needed

  • Yarn: Small amounts of knitting yarn leftovers (approx. 10–15 yards per sachet). Cotton or wool works best to allow the scent to escape.
  • Needles: A pair of straight needles in a size that matches your yarn weight.
  • Filling: Dried lavender, cedar chips, or rose petals.
  • Extras: A small piece of ribbon or twine to tie the top.
  • Tools: A tapestry needle for seaming and scissors.

Pattern Instructions

1. Cast On Cast on 15 stitches. This will create a sachet that is approximately 3 inches wide. You can add more stitches if you want a larger envelope.

2. The Body Knit every row (Garter Stitch) until your piece measures about 7 inches in length. This long rectangle will be folded to create the pocket.

3. Cast Off Cast off all stitches loosely. Cut the yarn, leaving a long tail of about 10 inches. You will use this tail to sew the sides.

4. Folding and Seaming

  • Lay the knitted strip flat on a table.
  • Fold the bottom up about 3 inches. This leaves a 1-inch flap at the top.
  • Thread your tapestry needle with the long yarn tail.
  • Use a mattress stitch or a simple whip stitch to sew the left and right sides of the 3-inch pocket shut. Do not sew the top flap yet!

5. Filling the Sachet Turn the sachet right side out if you prefer a cleaner seam. Pour your dried herbs or cedar chips into the pocket. Do not overfill it, or it will be hard to close.

6. Finishing Touches Fold the top 1-inch flap down over the opening. You can sew this flap down with a single decorative button, or simply tie a ribbon around the entire sachet to keep it closed.


Why This Project Works for Zero Waste

A collection of colorful Knitted Scented Sachet Envelopes made from scrap yarn, featuring textured patchwork patterns, rustic twine bows, and decorative wooden heart buttons, displayed on a wooden surface next to dried lavender.

This is a true zero waste knitting project. If you have yarn scraps that are too short to even finish a row, you can tie them together using a “magic knot” and knit them into the sachet. The small size means no piece of luxury fiber is ever wasted.


References


Related Posts

Elevated Knitting: 10 Small Projects for Your Luxury Leftovers:


Elevated Knitting: 10 Small Projects for Your Luxury Leftovers

A high-end flat-lay featuring several small knitting projects, including a textured market bag, a colorful infinity scarf, and pastel dishcloths, arranged artistically with wooden needles and yarn on a rustic white table.

This article is brought to you by a community of fiber artists dedicated to the timeless craft of knitting. Our mission is to inspire creativity, promote sustainable practices in knitting, and help every crafter find joy in their stitches. We believe that every strand of yarn holds potential, and with a little imagination, even the smallest knitting yarn leftovers can be transformed into something beautiful. Join us as we explore the endless possibilities of knitting with what you already have.


Introduction: Transforming Your Knitting Yarn Leftovers into Treasures

Every knitter knows the feeling of finishing a big project. You have a new sweater or a warm blanket. But you also have a small ball of yarn left over. It is too small for a big project. But it is too nice to throw away. These are your luxury leftovers. They come from your best wool and silk. They are full of potential.

In our world today, we want to be more careful with what we use. Zero waste knitting is a great way to do this. It means we use every inch of our yarn. We do not waste anything. This helps the planet. It also helps us be more creative. When we have a small amount of yarn, we have to think fast. We have to try new things.

This article will show you 10 great projects for your knitting yarn leftovers. You will find ideas for your home and for your wardrobe. These knitting patterns are small and quick. They are perfect for a quiet afternoon. Let’s look at how you can turn your scraps into art.


1. The Simple Infinity Scarf

An infinity scarf is a long loop of fabric. It is very easy to make with scraps. You do not need to match the colors perfectly. In fact, a mix of colors looks very modern. You can use your softest wool for this. Since it sits near your neck, you want it to be cozy.

To make this, you just knit a long strip. You can use a basic stitch like the garter stitch. This is where you knit every row. When the strip is long enough, you sew the ends together. This creates the loop. You can add a new color whenever you run out of the old one. It is a fun way to see all your past projects in one piece.


2. The Chic Market Tote Bag

A market tote bag is very useful. It is a great way to use up cotton or linen yarn. These fibers are strong. They do not stretch too much. You can use many different colors to make stripes. This gives the bag a bright and happy look.

When you make a bag, you want a tight stitch. This makes the bag strong enough to carry heavy things. You can carry fruit or bread in it. It is much better than using a plastic bag. Using your knitting yarn leftovers for a bag is a smart move. It is practical and pretty.


3. Shabby Chic Dishcloths/Washcloths

Small squares are perfect for scraps. You can make dishcloths/washcloths in no time. For a “shabby chic” look, use light colors. Think of soft pink, pale blue, or cream. These look great in a rustic kitchen.

These projects are also good for learning. You can try a new stitch on a small scale. If you make a mistake, it is easy to fix. Cotton is the best choice for these. It soaks up water well. It also feels soft on your skin. These make great gifts for friends.


4. The Artistic Patchwork Scarf

A patchwork scarf is a work of art. You knit many small squares or rectangles. Then, you sew them all together. This lets you use very small bits of yarn. You can even use different types of yarn. You might have some fuzzy wool and some smooth silk. When you put them together, they create a rich texture.

This project takes more time than the others. But the result is worth it. It is a true “stash-buster.” Every piece tells a story. It is a great way to practice zero waste knitting. You are truly using everything you have.


5. Cozy Coasters for Your Table

Coasters are the ultimate scrap project. You only need a few yards of yarn. You can make them round or square. They protect your table from hot cups. They also add a touch of color to your room.

For a shabby chic style, you can add a little lace edge. Or, you can keep them simple. If you have luxury wool, these will feel very soft. They are a small touch that makes a house feel like a home.


6. Soft Knit Headbands

Do you have some high-quality wool left? A headband is a great use for it. It keeps your ears warm in the winter. It also looks very stylish. You can knit a simple tube and twist it in the front. This is a very popular look right now.

Because headbands are small, they are quick to knit. You can make one in an hour. They are perfect for using up that last bit of expensive cashmere.


7. Reusable Makeup Pads

Many people want to reduce waste in their beauty routine. You can knit small rounds to remove your makeup. Use soft cotton yarn for this. It is gentle on your eyes.

After you use them, you can wash them in the machine. Then, you use them again. This is a great example of zero waste knitting. It saves you money. It also helps the environment.


8. Mason Jar Cozies

Mason jars are great for storage. But they can look a bit plain. You can knit a “cozy” to go around them. This is just a small sleeve of fabric. It adds texture and color to the glass.

You can use these jars to hold pens or flowers. They fit perfectly into a shabby chic home. Use your knitting yarn leftovers to make a matching set. It makes your shelves look organized and cute.


9. Scented Sachet Envelopes

A sachet is a small bag filled with herbs. Lavender is a common choice. You can knit a small pouch and fill it with dried flowers. Put it in your sock drawer to make everything smell nice.

These are wonderful for using up tiny scraps. You can use silk yarn to make them feel extra special. They are a lovely, small luxury. Click Here for the instructions to make this.


10. A Simple Pincushion

If you sew, you always need a pincushion. You can knit a small ball and stuff it. You can even use your tiniest yarn ends as stuffing! This is the best way to ensure nothing goes to waste.

Add a vintage button to the center for a shabby chic look. It is a tiny project that is very helpful.


Tips for Using Your Scraps

Working with scraps is fun. But it can be tricky. Here are some tips to help you.

  • Group by weight: Try to use yarns that are the same thickness. This keeps your project even.
  • Mix textures: Do not be afraid to mix a fuzzy yarn with a shiny one. This adds interest.
  • Join carefully: Learn how to join yarn without making big knots. This keeps your work looking neat.
  • Think about washing: Make sure all the yarns in one project can be washed the same way.

Conclusion: Small Stitches, Big Results

Knitting is a wonderful hobby. It is even better when we use every bit of our yarn. These 10 projects show that you do not need a lot of yarn to make something great. Zero waste knitting is about being smart and creative.

Whether you make an infinity scarf or a small coaster, you are making something unique. You are giving your knitting yarn leftovers a new life. Your home will look more beautiful. Your wardrobe will be more colorful. And you will feel good knowing you used every strand. Happy knitting!


References


Recent Posts


Make This Simple Classic Scrappy Chic Square Pattern

A cozy, zoomed-in shot showcasing the intricate texture of the Scrappy Chic Square Pattern in a finished crochet blanket, draped next to a ceramic mug of tea in soft, natural morning light.

The Scrappy Chic Square Pattern uses standard terms and is perfect for using up those yarn bits. You can make these squares as large or as small as you like by adding more rounds.

Materials You Will Need

  • Yarn Scraps: Any weight, but try to keep them similar for each square.
  • Crochet Hook: Choose a size that matches your yarn (a 5mm hook works well for most scraps).
  • Scissors: To cut your yarn between color changes.
  • Tapestry Needle: To weave in your ends.

Special Stitches

  • Granny Cluster: A group of 3 double crochet (dc) stitches worked into the same space.
  • Corner: Two granny clusters separated by 2 chain stitches.

Step-by-Step Instructions

Round 1:

Start with a magic ring or chain 4 and join with a slip stitch to form a ring.

Chain 3 (this counts as your first dc). Work 2 dc into the ring. Chain 2.

Work 3 dc into the ring, chain 2. Repeat from * to * two more times.

Join with a slip stitch to the top of the starting chain 3. You should now have four clusters and four corner spaces. Fasten off your first color.

Round 2:

Join a new color in any corner space.

Chain 3, then work 2 dc, chain 2, and 3 dc all in that same corner space.

Chain 1.

In the next corner space, work 3 dc, chain 2, and 3 dc. Repeat from * to * for the next two corners.

Chain 1 and join with a slip stitch to the top of the starting chain 3. Fasten off.

Round 3:

Join your next color in any corner space.

Chain 3, then work 2 dc, chain 2, and 3 dc in that corner.

Chain 1.

In the next “side” space (the hole created by the chain 1 in the row below), work 3 dc.

Chain 1.

In the next corner, work 3 dc, chain 2, and 3 dc. Chain 1. Work 3 dc in the side space. Chain 1. Repeat from * to * around the square.

Join with a slip stitch to the top of the starting chain 3. Fasten off.

Round 4 (The Border Round):

To give your Scrappy Chic Square Pattern Blanket a clean look, use your “anchor” color for this round.

Repeat the steps for Round 3, adding a 3-dc cluster into every side space and a “corner” (3 dc, ch 2, 3 dc) into every corner space.

Join, fasten off, and weave in your ends immediately.


Tips for Success

  • Check Your Size: Measure your first few squares. If one is much bigger than the others, you may need to adjust your hook size.
  • Stay Consistent: Always use the same number of chains in your corners so the squares stay flat.
  • The Magic Ball: If you have very short scraps, tie them together with a small knot to create a “magic ball” and crochet right over the knots.

References


The Ultimate Scrappy Chic Blanket


This guide was crafted for the eco-conscious maker looking to elevate their stash-busting game. It explores the intersection of sustainability and high-end craft through the creation of The Ultimate Scrappy Chic Blanket. By focusing on intentional color theory and traditional techniques, any crafter can transform remnants into a designer-quality heirloom. Discover how to celebrate the beauty of imperfections while mastering the timeless art of crochet granny squares.


Creating The Ultimate Scrappy Chic Blanket

Making things by hand is a joy that keeps on giving. Right now, many makers want to be more mindful of the planet. While the old-fashioned “scrap blanket” has been around for a long time, today’s crafters want a look that feels fresh and stylish. This is where the Scrappy Chic Blanket comes in. It is a project that uses zero waste crocheting to make something truly beautiful.

If you have a bag full of yarn bits from old projects, don’t throw them away. Those little scraps are the start of something great. This guide will show you how to turn those bits into a high-end granny square blanket. You do not need to buy new yarn to make an heirloom that looks like it came from a fancy shop.


The Joy of Zero Waste Crocheting

Before we start, let’s talk about why zero waste crocheting is so good for us. In a world of fast fashion, making something from what you already have is a big win. It feels good to use every inch of yarn.

Every small piece of yarn took water, dye, and work to make. When you make a Scrappy Chic Blanket, you keep those bits out of the trash. The “chic” part is all about how you pick your colors. You can use a mix of scraps but still make them look neat and tidy. We will focus on how to make your yarn stash look like a pro designed it.


Why We Love Crochet Granny Squares

The foundation of this blanket is the classic granny squares. These little squares are the best part of crochet history. They are easy to carry with you. You can make one while you wait for the bus or sit in the park. Most of all, they are perfect for using up short pieces of yarn.

When you work on a granny square blanket, each square is like a tiny frame. You can swap colors whenever you run out of yarn. You can even change colors in the middle of a row. This lets you use even the tiniest “yarn cakes.” The goal is to keep your stitches even. This makes it easy to sew the squares together at the end.


How to Pick Your Colors

The secret to a Scrappy Chic Blanket is the color plan. Even if you use random scraps, you can make them look like they belong together.

  1. Pick a Main Color: Choose one color, like white or grey, to use for the very last round of every square. This acts like a frame and makes the whole blanket look calm.
  2. Sort by Tone: Group your yarn by “mood.” You could put all the bright colors together or stick to soft pastels. This helps the blanket feel balanced.
  3. Use a Spark of Color: Pick one bold color to pop up here and there. This adds a fun touch to the final look.

Easy Steps for Your Scrappy Chic Blanket

Step 1: Check Your Yarn Weight

It is best if your yarn scraps are about the same thickness. If you have a very thin yarn, you can use two strands at once. This helps the blanket stay flat and even. It also makes the granny squares feel sturdy.

Step 2: Hide Those Ends

The hardest part of a scrap project is the loose ends. To keep your work looking clean, weave in your ends as you go. Use a needle to tuck the yarn deep into the stitches. This keeps the blanket from coming apart when you wash it. A “chic” blanket is one that stays together for years!

Step 3: Make Your Squares Square

Blocking is a simple trick that makes a huge difference. Pin your finished squares to a board and give them a light mist of water. Let them dry. This makes them all the same size. It is much easier to join them when they are perfectly square.

Click Here for full instructions to make this granny blanket


Planning Your Blanket Layout

Once you have a big pile of squares, it is time to be an artist. Lay them out on the floor or a large bed. This is where the magic happens.

  • The Fade Look: Put dark squares at one end and light ones at the other.
  • The Random Look: Mix them all up so the colors dance across the blanket.
  • The Pattern Look: Group squares to make big stripes or diamond shapes.

Joining Your Squares Together

How you sew your squares changes the look of the Scrappy Chic Blanket.

  • The Hidden Seam: Use a needle to sew the edges so you can’t see the thread. This looks very sleek.
  • The Lacy Join: Use your crochet hook to make a small chain between squares. This adds a pretty detail.
  • The Ridge Join: This makes a small bump between squares. it gives the blanket a cool, textured feel.

If you use the same color to join that you used for your borders, the blanket will look very high-end.


Sustainability and Your Craft

Doing zero waste crocheting is a great way to help the earth. You can even use the very tiny bits of yarn—those too short to crochet—as stuffing for toys. This means nothing goes to waste in your craft room.

The Scrappy Chic Blanket shows that we don’t need to buy new things to be happy. We can look at what we have and see something new. It is a slow and kind way to live.


The Timeless Granny Square

Granny squares never go out of style. People have loved them for over fifty years. They fit in with modern homes and cozy cabins. Because they are made of small parts, they are the best project for busy people. You can finish one square and feel a sense of pride. Soon, those squares will grow into a full granny square blanket.

This project also tells your story. That red bit might be from a gift you made for a friend. The green bit might be from your favorite hat. It is a blanket full of memories. It is more than just a way to stay warm; it is a scrap-book made of wool.


Caring for Your New Blanket

Since you used many types of yarn, you must be gentle. It is best to wash your blanket by hand in cool water. Use a mild soap. Do not wring it out. Instead, lay it flat on a clean towel to dry. This will keep the Scrappy Chic Blanket looking new for a very long time. It could even be a gift for your kids or grandkids one day.


Final Thoughts

Starting The Ultimate Scrappy Chic Blanket is a wonderful choice. it is good for your soul and good for the world. It teaches you to play with color and try new things. You will end up with a blanket that no one else has.

As you sit with your yarn and your hook, enjoy the slow pace. Every stitch is a way to value what you already own. We hope you love making your blanket as much as we loved writing this guide. Happy crocheting!


References and Resources


Recent Posts


How to Make Chunky Pet Bed


Creating a cozy, circular Chunky Pet Bed by crocheting with fabric yarn is an excellent project for beginners because the thick yarn provides immediate structure and comfort. This pattern creates a nest-style bed with raised sides.

Materials Needed

  • Fabric Yarn: 3–4 large rolls of thick t-shirt yarn.
  • Crochet Hook: 12mm or 15mm (depending on yarn thickness).
  • Stitch Marker: Essential for working in continuous rounds.
  • Large Eye Yarn Needle.

Instructions

1. Create the Flat Circular Base

To keep the base flat and sturdy, we use a standard circular increase pattern.

  • Round 1: Start with a magic ring. Work 6 single crochet (sc) into the ring. Pull tight. (6 stitches)
  • Round 2: Work 2 sc in each stitch around. (12 stitches)
  • Round 3: 1 sc in the next stitch, 2 sc in the following stitch. Repeat from * to * around. (18 stitches)
  • Round 4: 1 sc in each of the next 2 stitches, 2 sc in the following stitch. Repeat from * to * around. (24 stitches)
  • Round 5: 1 sc in each of the next 3 stitches, 2 sc in the following stitch. Repeat from * to * around. (30 stitches)
  • Rounds 6–10: Continue this pattern, increasing the number of single sc stitches between the “2 sc” increases by one each round, until the base is the desired size for your pet.

2. Transition to the Sides

To make the sides turn upward, we stop increasing.

  • Round 11: Work 1 sc in the back loop only (BLO) of every stitch around. This creates a sharp edge that helps the wall of the bed sit vertically.

3. Build the Walls

  • Rounds 12–16: Work 1 sc in both loops of every stitch around.
    • Tip: If you want a “slouchy” bed, use a slightly larger hook for the walls. For a firm, upright wall, keep your tension tight.
  • Round 17 (The Rim): Work a slip stitch in every stitch around the top edge. This reinforces the rim so it doesn’t stretch out over time.

4. Finishing

Fasten off the yarn and leave a long tail. Use your large yarn needle to weave the tail deeply into the thick stitches to ensure it doesn’t come loose during washing or pet play.


Customization Tips

  • Extra Cushioning: You can crochet two identical flat bases and slip-stitch them together with a layer of foam or batting inside before starting the walls.
  • Low Entry: To create a “doorway” for older pets, work half-double crochets for most of the wall but switch to slip stitches for a 4-inch section across three rounds.

How to Crochet a Chunky Fabric Yarn Market Tote


Creating a market tote by crocheting with fabric yarn is a rewarding project because the thickness of the material allows the bag to work up very quickly. This pattern uses a simple “V” stitch and a solid base to ensure the bag is both sturdy and stylish.

Materials

  • 1–2 large balls of chunky fabric yarn (T‑shirt yarn or recycled textile yarn), about 350–450 g total
  • 10–12 mm crochet hook (or size needed for a dense, non‑holey fabric)
  • Scissors and yarn needle for weaving in ends

Gauge & Size

  • Aim for a dense, squishy fabric: when you make a swatch of single crochet, stitches should sit close together with minimal gaps.
  • Finished bag (flat) is roughly: 32–35 cm wide and 35–38 cm tall, plus handles.

Abbreviations (US terms)

  • ch – chain
  • sc – single crochet
  • sl st – slip stitch
  • st(s) – stitch(es)

Step 1 – Crochet the Base

  1. Ch 21 (this forms the width of the bag).
  2. Row 1: Sc in 2nd ch from hook and in each ch across (20 sc). Turn.
  3. Rows 2–8: Ch 1, sc in each st across. Turn.
  4. You now have a flat rectangle base; add a simple border so you can work in the round: ch 1, sc evenly all the way around the rectangle, placing 3 sc in each corner. Join with a sl st to first sc.

Step 2 – Build the Sides in the Round

  1. Round 1: Ch 1, sc in each st around, keeping tension firm so the fabric stays thick. Join with a sl st.
  2. Repeat Round 1 until the bag is about 30–32 cm tall from the base. Do not fasten off.
  3. As you work, stop occasionally to straighten and “squash” the bag into shape so the sides stay upright and boxy.​

Step 3 – Shape the Top Edge

  1. Work 1–2 more rounds of sc with slightly tighter tension to firm up the top edge.
  2. At the end of the last round, stop at a side seam or center point; this will be your starting point for the handles.

Step 4 – Mark Handle Positions

  1. Lay the bag flat and count the stitches around the top; divide by 2 to find the halfway point.
  2. Use stitch markers (or scraps of yarn) to mark:
    • Front handle: about 6–7 sts in from the left edge and 6–7 sts in from the right edge.
    • Mirror those positions on the back for the second handle.
  3. Leave a gap between markers where the handle opening will be (about 8–10 sts wide).

Step 5 – Crochet Handles

Front handle round:

  1. From your current position, sc around until you reach the first front marker.
  2. Ch 18–22 (this is the handle length; longer chain = longer handle). Make sure the chain is not twisted.
  3. Skip the marked gap stitches and sc into the next marker stitch to attach the chain, forming an arch.
  4. Continue with 1 sc in each stitch until you reach the first marker on the back.
  5. Repeat: ch 18–22, skip the gap stitches, sc into the next marker on the back. Continue in sc to the start of the round; join with a sl st.

Reinforce handles:

  1. Next round: Ch 1, sc in each st around, including working 1 sc into each ch of both handles.
  2. Work 1–2 more rounds the same way to bulk up the handles and top edge so they match the thick, padded look.​
  3. Fasten off and carefully weave in all ends with a yarn needle.

Optional Finishing

  • Gently stretch the handles to even them out and shape the bag corners with your hands.
  • For extra structure, you can lightly steam block (holding the steam above the yarn, not pressing) and shape the bag while it cools.

10 Unique Concepts For Crocheting With Fabric Yarn

A vibrant, top-down photograph showcasing various home decor items created by crocheting with fabric yarn, featuring a large multi-colored spiraled floor rug in the foreground and three hanging plant holders suspended from a wooden rod above. The scene is filled with artisanal textures, including chunky storage baskets and a cozy pet bed, all demonstrating the versatility of handcrafted textile art.

This article was crafted by a team of passionate textile artists and sustainable living advocates. With years of experience in various fiber arts, our collective aim is to inspire creativity and mindful consumption within the crafting community. We believe in the power of transforming discarded materials into beautiful, functional pieces, particularly through the versatile medium of crocheting with fabric yarn. Our insights are born from countless hours spent experimenting with zero waste crocheting, always seeking innovative ways to bring new life to old fabrics.


The Versatile World of Crocheting With Fabric Yarn

In a world where we want to live better and waste less, the art of crocheting with fabric yarn is a great choice. It is a craft that blends fun with care for the earth. You can turn old clothes into pretty, strong, and useful items. This is not just a small hobby. Crocheting with fabric yarn—also called t-shirt yarn—lets you try new things. You can make items with textures and shapes that you just cannot get with thin wool.

This guide looks at unique ideas that show what you can do with crochet and fabric yarn. Maybe you have crocheted for years. Maybe you are just starting to learn about zero waste crocheting. These ideas will help you pick up your hook and use your old fabric. You will learn how to turn waste into treasure. From home decor to things you can wear, you will see how fun this can be.

The Allure of Fabric Yarn: Why Crochet It?

Before we look at the projects, let’s talk about why people love this material. First, it helps the planet. It supports zero waste crocheting by using old shirts, sheets, and denim. These things would usually go in the trash. Second, the thick feel of the yarn makes very strong items. The things you make will hold their shape well. They feel heavy and good to use.

Also, it is a cheap way to craft. You can find fabric in your own closet or at a thrift store. Working with it feels good in your hands too. The soft, stretchy strips make the work calm and fun. It is a great way for any crafter to mix a classic skill with modern green goals. You get to make something new without buying more plastic or new wool.

Sculptural Plant Pot Holders and Hangers

Fabric yarn is strong and thick. This makes it perfect for plant pot holders. Most thin cords look a bit weak, but fabric yarn looks soft and natural. It still holds a heavy pot very well. You can make striped holders to add color to a window. You can also make textured baskets that hang to save space on your desk.

The yarn is bulky, so these projects are very fast to finish. You can make a whole garden set in one afternoon. You can use a single crochet stitch for a stiff, strong look. Or, try a half-double stitch for a softer feel. These holders do more than just hold a plant. They are art. They bring a warm, handmade feel to your home. Try adding big wooden beads or rings to your crochet and fabric yarn work to make it look even better.

Textural Floor Rugs and Bath Mats

Using fabric yarn for rugs is a classic idea, but you can make it look modern. Today’s fabric rugs are stylish and last a long time. The weight of the yarn keeps the rug on the floor so it does not slip. These rugs feel great under your feet. You can make round rugs for the middle of a room or long rugs for a hallway. You can even make soft bath mats that soak up water well.

The best part is choosing the colors. You can use one color for a clean look. Or, use many colors for a fun, bright rug. Try using old towels to make bath mats. This is a great zero waste crocheting task that makes a big change in your home. Since the yarn is so thick, it is easy to clean. You can often just put these rugs in the wash when they get dirty.

Artisanal Storage Baskets and Organizers

Fabric yarn is great for making baskets that stand up on their own. You can use them to hide mess in any room. Make a small bowls for your keys by the door. You could also make a big bin for toys or laundry. Crocheting with fabric yarn lets you make tools for your home that also look like art. The thick yarn makes the walls of the basket very strong. They will stay up even when they are full.

Try making a set of three baskets that fit inside each other. Use different colors to make them look like a set. This can turn a messy shelf into a neat space. You can add leather handles to make them look like they came from a store. This project is not just about cleaning up. It is about adding a handmade touch to your house. These baskets last for years because the yarn is so tough.

Chunky Pet Beds and Mats

Our pets deserve soft things too. Crocheting with fabric yarn is a smart way to make pet beds. The yarn made from old shirts is very soft on paws. The thick loops make a good cushion. These beds are easy to wash, which is very important for pet owners. They also can keep your pet’s space fresh and clean without any stress.

You can crochet a round bed with high sides for a cat. You can also make a flat mat for a big dog to lay on. Choose colors that match your couch or rug. This way, the pet bed looks like part of the room. This is a perfect zero waste crocheting project because it uses a lot of fabric. You can use up many old shirts at once. Your pet will love the soft feel of your handmade gift. Click Here for the instructions to make this.

Unique Statement Jewelry

Most people think fabric yarn is only for big things. But, you can also make very cool jewelry. You just need to use thinner strips of fabric. You can even cut strips from silk or old scarves. Imagine a thick necklace with wooden beads or a bold bangle. You can even cover hoop earrings with small crochet stitches.

This idea lets you be very creative. You can mix different types of fabric in one piece. You can even add a bit of shiny thread. Jewelry made this way is light and easy to wear all day. It is a fun zero waste crocheting project for using your smallest scraps. These pieces are great for starting a chat. They show people that you care about the planet and love to create.

Decorative Poufs and Ottomans

This is a big project where fabric yarn really wins. You can make large floor poufs and ottomans. These are very strong and work well as extra seats. You can use them to rest your feet or as a small table. The thick crochet stitches provide a lot of support.

To make this, you will need a lot of yarn and a very big hook. You can make it one solid color or use stripes. You can fill the inside with old pillows or more fabric scraps. This keeps the project zero waste. This kind of work changes how you think about crochet and fabric yarn. It moves from small crafts to real furniture. It is a big piece that shows you value handmade items.

Chic Handbags and Market Totes

Crocheting with fabric yarn is a great way to make bags. The yarn is so strong that the bag can hold a lot of weight. You can make a tote for the market or a bag for the beach. Because the yarn is thick, the bag will be done fast and will keep its shape.

Try different stitches to see what you like. A tight stitch makes a very stiff bag. A loose stitch makes a bag that can stretch. You can add stripes or different handles. You can even put a fabric lining inside or a zipper. This zero waste crocheting task lets you make a bag that is just for you. A bright bag made from old shirts is a great way to show off your style. Click Here for the instructions to make this.

Cozy Coasters and Trivets

Fabric yarn is perfect for small things like coasters. The thick fabric protects your table from hot cups and plates. It also adds a nice look to your dining table. These are very fast to make. They are perfect for using up the last bits of your yarn.

You can make round or square shapes. You can even make a big mat for a hot pot. This zero waste crocheting idea is great because you can finish a set in one night. They make wonderful gifts for friends. These items will last through many washes and many years of use.

Modern Wall Hangings and Tapestries

The look of fabric yarn is a secret tool for art. When you make wall art, it looks like a sculpture. Because the yarn is thick, you can see every stitch. The light in the room makes shadows on the art. This makes it look deep and interesting.

Modern wall art often uses big blocks of color. You can hang your art from a piece of wood you found outside. This fits the zero waste crocheting theme perfectly. These hangings also help keep a room quiet because the fabric soaks up sound. By mixing different fabrics, you can make a piece that looks very expensive.

Durable Child-Friendly Play Mats

For parents, crocheting with fabric yarn is a way to make safe play mats. Most rugs are hard or scratchy. But a mat made from cotton shirts is soft on a baby’s skin. These mats give kids a soft place to crawl or play with blocks.

The mat is heavy, so it stays in place on the floor. This makes it safer for kids. Since the yarn comes from old clothes, it is already soft and easy to wash. When it gets dirty, just put it in the machine. This zero waste crocheting project is a sweet way to make something for a child. It also teaches them about using things again.

Conclusion

Working with fabric yarn is a path of fun and care for the world. When you use old fabric, you make things that are one of a kind. You are also helping the zero waste crocheting movement. These ideas are just the start. You will find more as you try new fabrics and stitches.

Every stitch you make helps create a better future. Whether you make a small mat or a big rug, it feels good to turn waste into art. We hope these ideas help you look at your old clothes in a new way. Pick up your hook and start something great today.


References


Recent Posts


How To Make Chunky Knit Letters


Embrace a sustainable approach to home decor with our guide to crafting custom Chunky Knit Letters using zero waste knitting principles. This method ensures that every inch of your premium roving or upcycled yarn is utilized, minimizing scrap while creating high-impact, eco-friendly statement pieces. By mastering these mindful techniques, you can transform simple materials into sophisticated, handmade treasures without the environmental footprint of mass-produced decor. Discover how to curate a beautiful, personalized home or create unique, planet-conscious gifts with these delightful chunky knit creations.


How To Make Chunky Knit Letters: A Comprehensive Guide to Crafting Cozy Decor

Chunky knit letters have taken the home decor world by storm, offering a unique blend of rustic charm and modern coziness. Whether spelling out a name, a beloved word like “HOME” or “LOVE,” or simply using an initial, these plush, oversized letters add a touch of warmth and personality to any room. They’re perfect for nurseries, living rooms, bedrooms, or as thoughtful, handmade gifts. While they might look intricate, creating your own chunky knit letters is a rewarding project that’s more accessible than you might think. This guide will walk you through every step, from design to the final decorative touches, ensuring you can craft beautiful, personalized pieces for your space.

Why Choose Chunky Knit Letters?

Beyond their undeniable aesthetic appeal, chunky knit letters offer several benefits:

  • Personalization: They allow for endless customization in terms of letter choice, yarn color, and embellishments, making them truly unique.
  • Texture and Warmth: The thick, soft yarn adds incredible texture and a sense of coziness, instantly making a space feel more inviting.
  • Versatility: They can stand alone on a shelf, lean against a wall, be hung, or even be used as soft floor decor in a child’s room.
  • Handmade Charm: There’s an inherent beauty in handmade items, and chunky knit letters carry that special touch that mass-produced decor often lacks.
  • Great Gift Idea: A custom chunky knit letter or word set makes an incredibly thoughtful and personal gift for baby showers, weddings, housewarmings, or birthdays.

Now, let’s dive into how you can make these delightful creations yourself!

Section 1: Planning Your Chunky Knit Letters Project

Before you even pick up your yarn, a little planning goes a long way. This initial phase helps ensure your project runs smoothly and that you achieve the desired outcome.

Choosing Your Letter(s) and Size

Consider where your chunky knit letters will be displayed and what message you want them to convey.

  • Single Initial: Perfect for a personalized touch on a bookshelf or bedside table.
  • Full Word (e.g., “HOME,” “LOVE,” a child’s name): Requires more planning for consistency in size and alignment.
  • Size Matters: Do you want large floor-standing letters or smaller ones for a mantelpiece? The size will dictate the amount of yarn and stuffing needed. A good starting point for a prominent letter might be 12-18 inches tall.

Designing Your Letter Templates

Accuracy in your template is crucial for a well-formed letter.

  1. Drafting: On a large sheet of paper or cardboard, draw your desired letter. You can freehand it, but for better symmetry, consider using a stencil, printing a large font, or even projecting a letter onto your surface and tracing it.
  2. Width: Decide on the desired thickness of your letter. This will be the width of your “tube” of knitting. For a chunky look, aim for a width of at least 3-4 inches.
  3. Refine Edges: Use a ruler to straighten lines and curves. Ensure all corners are relatively sharp, or gently rounded if that’s your aesthetic. This template will serve as your pattern for shaping the knitted pieces.
  4. Mirror Image for Back (Optional but Recommended): While not strictly necessary if you’re careful, some prefer to create a mirror image template for the back pieces, especially for letters like ‘B’, ‘D’, ‘P’, ‘R’, etc., to ensure perfect symmetry.

Gathering Your Materials

Having all your supplies ready before you start knitting will make the process much smoother.

  • Chunky Yarn: This is the star of the show! Look for “super chunky” or “jumbo” weight yarn. Merino wool roving is popular for its incredibly soft texture and beautiful drape, but acrylic blends are also available and often more budget-friendly and durable. The quantity will depend on the size and number of letters. A good estimate is usually 500g-1kg per average-sized letter (12-18 inches), but always check the yardage/meterage on the yarn label.
  • Large Knitting Needles: Since you’re using chunky yarn, you’ll need appropriately sized needles. Often, this means 20mm-30mm (US Size 35-50) circular or straight needles. If using Merino wool roving, you might even opt for arm knitting.
  • Stuffing/Filler: Polyester fiberfill (like what’s used for pillows) is ideal. You’ll need a generous amount to make your letters plump and firm.
  • Fabric for Inner Structure (Optional but Recommended): For very large letters or letters that need to stand up well (like ‘I’ or ‘L’), a core made from felt, foam board, or even thick batting can help maintain shape and provide stability.
  • Scissors: For cutting yarn and fabric.
  • Yarn Needle (Tapestry Needle): For weaving in ends and seaming the knitted pieces together.
  • Measuring Tape: For checking dimensions and consistency.
  • Sewing Pins: To help hold pieces together during seaming.
  • Embellishments (Optional): Lace, ribbons, fabric flowers, beads, or small charms to add a shabby chic touch.
  • Hot Glue Gun (Optional): For attaching embellishments.

Section 2: The Knitting Process for Chunky Knit Letters

Now for the fun part – the knitting! The technique here is essentially creating a long, wide strip of knitting that will then be shaped into your chosen letter.

Basic Knitting for Chunky Yarn

For beginners, the garter stitch (knitting every row) is the simplest and creates a lovely, squishy texture perfect for chunky letters. If you’re comfortable, stockinette stitch (knit one row, purl one row) gives a smoother, more traditional knit look, but tends to curl, which can be managed when stuffing.

  1. Cast On: Cast on a number of stitches that will give you the desired width of your “tube” when stretched. This usually translates to around 6-10 stitches for needles 20mm or larger, but swatch to confirm. Your swatch should be about 3-4 inches wide.
    • Tip: If you’re using Merino roving for arm knitting, cast on enough loops to achieve your desired width.
  2. Knit Your Strip: Knit every row (garter stitch) or alternate knit and purl rows (stockinette stitch) until you have a very long strip. How long? This is where your template comes in.
    • Lay your knitted strip over your letter template, following the outline. You’ll need enough length to wrap around the entire perimeter of your letter, plus a little extra for seaming and fullness.
    • Example: If your letter ‘C’ has an outer perimeter of 30 inches and an inner perimeter of 20 inches, you’ll need approximately 50 inches of knitted strip (30 + 20) to cover both the outer and inner curves. For a straight letter like ‘I’, you’ll need enough length to cover all four sides. It’s always better to knit slightly too long than too short.
  1. Bind Off: Once you have sufficient length, bind off your stitches. Leave a very long tail (at least 2-3 times the total perimeter length of your letter) for seaming.

Section 3: Shaping and Assembling Your Chunky Knit Letters

This is where your long knitted strip transforms into a beautiful letter.

Forming the Letter Shape

  1. Pin to Template: Lay your knitted strip on top of your letter template. Carefully follow the curves and straight lines of your letter, pinning the knitted fabric to the template as you go. This helps maintain the shape.
  2. Seaming the Edges: You’ll essentially be creating a “tube” of knitting that follows the letter’s outline.
    • Using your yarn needle and the long tail, begin to seam the long edges of your knitted strip together. Imagine you’re folding the strip in half lengthwise and sewing the raw edges together, but in the shape of your letter.
    • For letters with straight lines (like ‘L’, ‘T’, ‘H’), this is relatively straightforward. For curved letters (like ‘C’, ‘O’, ‘S’), you’ll need to gently ease the fabric around the curves.
    • Use an invisible seam technique (like the mattress stitch) for a clean finish, or a simple whip stitch if the seam will be less visible.
  3. Internal Gaps (for letters like A, B, D, O, P, Q, R): For letters with internal holes, you’ll need to create a separate knitted “inner” loop.
    • Knit a shorter strip, calculate its length by measuring the inner perimeter of the letter’s hole.
    • Seam this shorter strip into a loop.
    • Carefully attach this inner loop to the main letter structure as you are seaming, essentially creating two joined tubes.

Stuffing and Finishing the Letter

  1. Stuffing: Once you have seamed a good portion of your letter’s shape, begin to stuff it with polyester fiberfill.
    • Stuff firmly and evenly to avoid lumpy areas. Use small handfuls of fiberfill and push it into all the corners and curves.
    • If using a fabric core: Insert your cut-out fabric core into the knitted sleeve before you begin stuffing. This core will provide a solid base for the stuffing and prevent the letter from collapsing.
  2. Close the Letter: As you stuff, continue seaming until your letter is fully formed and plump. Ensure all open edges are securely sewn shut. Weave in any remaining yarn tails discreetly.

Section 4: Adding Shabby Chic Embellishments and Finishing Touches

Now that you have a beautifully formed chunky knit letter, it’s time to add those special shabby chic details that make it truly unique. This is where your creativity can really shine!

The Essence of Shabby Chic

Shabby chic style is all about embracing aged beauty, soft pastels, distressed finishes, and romantic, feminine touches. For your chunky knit letter, this translates to adding elements that evoke a sense of vintage elegance and gentle wear. Think delicate textures and muted colors.

Ideas for Embellishments

  • Lace and Ribbons:
    • Bow Accents: Tie small bows from delicate lace ribbon or satin ribbon in muted tones (ivory, blush pink, light blue, sage green). Attach them to the curves or corners of your letter using a hot glue gun or by stitching them securely.
    • Wrapped Sections: For a more intricate look, gently wrap a section of your letter with a strip of vintage lace or a wider ribbon. Secure the ends neatly on the back.
    • Hanging Ribbons/Lace: Attach longer pieces of lace or ribbon that drape elegantly from the letter, perhaps with small beads or charms at the ends.
  • Fabric Flowers:
    • Roses and Peonies: Handmade fabric flowers, especially roses or peonies made from cotton, linen, or even silk, are perfect. Look for muted, dusty colors. You can make these yourself from scraps of fabric or purchase them from craft stores.
    • Arrangements: Cluster a few flowers together, perhaps with a small lace leaf or a few pearls, and attach them to a prominent part of your letter. A hot glue gun is very useful for this.
  • Pearls and Beads:
    • Strands: Drape a delicate strand of faux pearls across your letter, securing it at a few points. This adds an instant touch of classic elegance.
    • Individual Beads: Stitch individual pearls or small glass beads onto the knit fabric for subtle sparkle.
  • Buttons:
    • Vintage Buttons: Collect vintage-looking buttons, especially those with intricate designs, mother-of-pearl finishes, or covered in fabric. Sew them onto your letter in small groupings or as single accents.
  • Distressed Fabric Elements:
    • Ruffles and Rags: Strips of frayed, distressed fabric (like linen or burlap) can be gathered into small ruffles or tied into bows for a more rustic shabby chic feel.
  • Small Charms:
    • Keys, Birds, Crowns: Tiny metal charms with a vintage aesthetic, such as keys, bird cages, or small crowns, can be subtly attached with a loop of thin ribbon or thread.

Tips for Attaching Embellishments

  • Placement is Key: Before permanently attaching anything, experiment with different placements. Lay out your embellishments and step back to see what looks best.
  • Less Can Be More: While shabby chic embraces detail, avoid overcrowding your letter. Often, a few well-placed, thoughtful embellishments have more impact than too many.
  • Secure Attachment: Use a strong fabric glue or a hot glue gun for most embellishments. For items like buttons or heavier charms, stitching them on with a strong thread will ensure they stay put. If using a hot glue gun, apply glue sparingly to avoid it seeping through the knit.
  • Color Palette: Stick to a soft, muted color palette for your embellishments to maintain the shabby chic aesthetic. Creams, whites, pastels, and soft metallics work beautifully.

Section 5: Displaying Your Chunky Knit Letters

Once your beautiful chunky knit letters are complete, it’s time to showcase them! Their versatility allows for many creative display options.

  • Shelf or Mantel Decor: This is a classic choice. Arrange single initials or full words on a shelf, fireplace mantel, or console table. Group them with other shabby chic elements like distressed picture frames, vintage books, or small vases of dried flowers.
  • Nursery or Child’s Room: Spell out a child’s name or initial on a dresser or wall shelf. The soft texture is perfect for a cozy nursery environment.
  • Wall Art: While they are chunky, smaller letters can be hung on a wall. You might need to add a small loop or hook to the back for hanging. Consider a gallery wall arrangement with other art.
  • Bedroom Accent: Place a large initial on a bedside table or lean a word like “DREAM” against the headboard for a personalized touch.
  • Living Room Statement: A larger “HOME” or “LOVE” can make a welcoming statement on a wide window sill, a coffee table, or even as soft floor decor in a relaxed setting.
  • Photo Props: Chunky knit letters make fantastic props for baby announcements, milestone photos, or wedding photography, adding a unique and personal touch.
  • Gift Presentation: Use a custom chunky knit letter as part of a gift basket for a baby shower or a housewarming, making the presentation itself a memorable part of the gift.

Conclusion

Creating your own chunky knit letters is a delightful journey into the world of handmade decor. From the initial planning and selection of the perfect chunky yarn to the final stitches and decorative touches, each step allows for personal expression and creativity.

The result is not just a decorative object, but a warm, inviting, and truly unique piece that reflects your personal style. Whether you’re making a single initial for a cozy corner or a complete word to adorn your mantel, these plush letters are sure to bring a touch of shabby chic elegance and handmade charm to any space. So, gather your materials, unleash your inner crafter, and start knitting your way to beautiful, custom home decor that will be cherished for years to come.


External References


Recent Posts