Cookie Consent by Free Privacy Policy Generator Update cookies preferences

10 Genius Ways To Maximize Your Small Apartment Balcony

A beautifully styled small apartment balcony at sunset featuring space-saving balcony ideas like a vertical pallet garden, interlocking deck tiles, and a railing-mounted folding desk, perfectly maximizing a small balcony.

This guide offers comprehensive solutions for anyone looking to revitalize a small apartment balcony into a functional and stylish retreat. By focusing on space-saving techniques and versatile furniture, these balcony ideas ensure that even the most compact areas reach their full potential. Readers will discover how to blend aesthetics with utility to create a personalized outdoor sanctuary. Utilizing these small balcony ideas can significantly enhance the daily living experience in an urban environment.


10 Genius Ways To Maximize Your Small Apartment Balcony

Living in a big city often means your home is small. You might feel that your small apartment balcony is too tiny to use. Many people use this area to store old boxes or trash. However, even a very small space can become a great spot for you to relax. You can turn a cold concrete floor into a cozy nook. All it takes is a bit of a plan and some fun small balcony ideas.

When you have a small apartment balcony, you must think about how you live. Do you like to drink tea in the sun? Do you want to grow your own food? Once you know what you want, you can pick the right balcony ideas. These tips will help you make your space feel big and bright. You do not need a lot of money to make it look nice. You just need to be smart with the space you have.


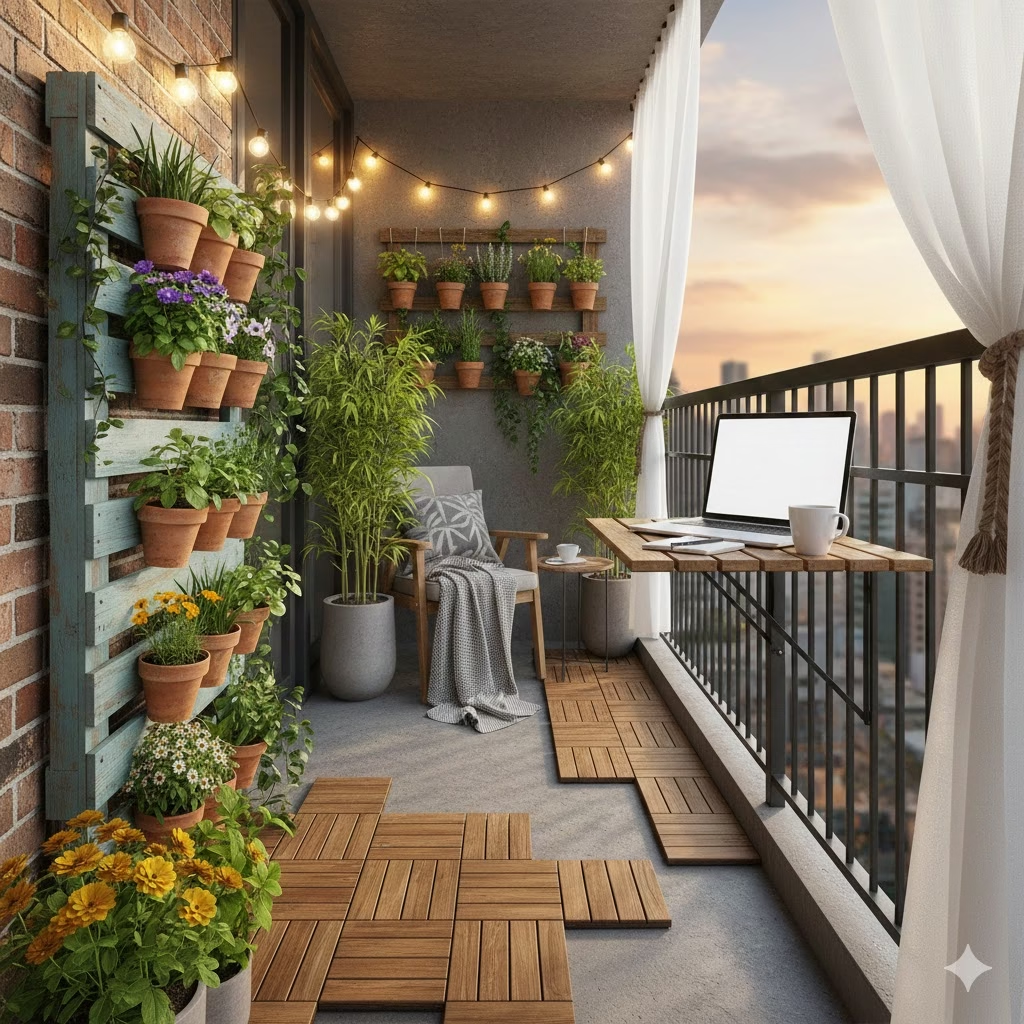
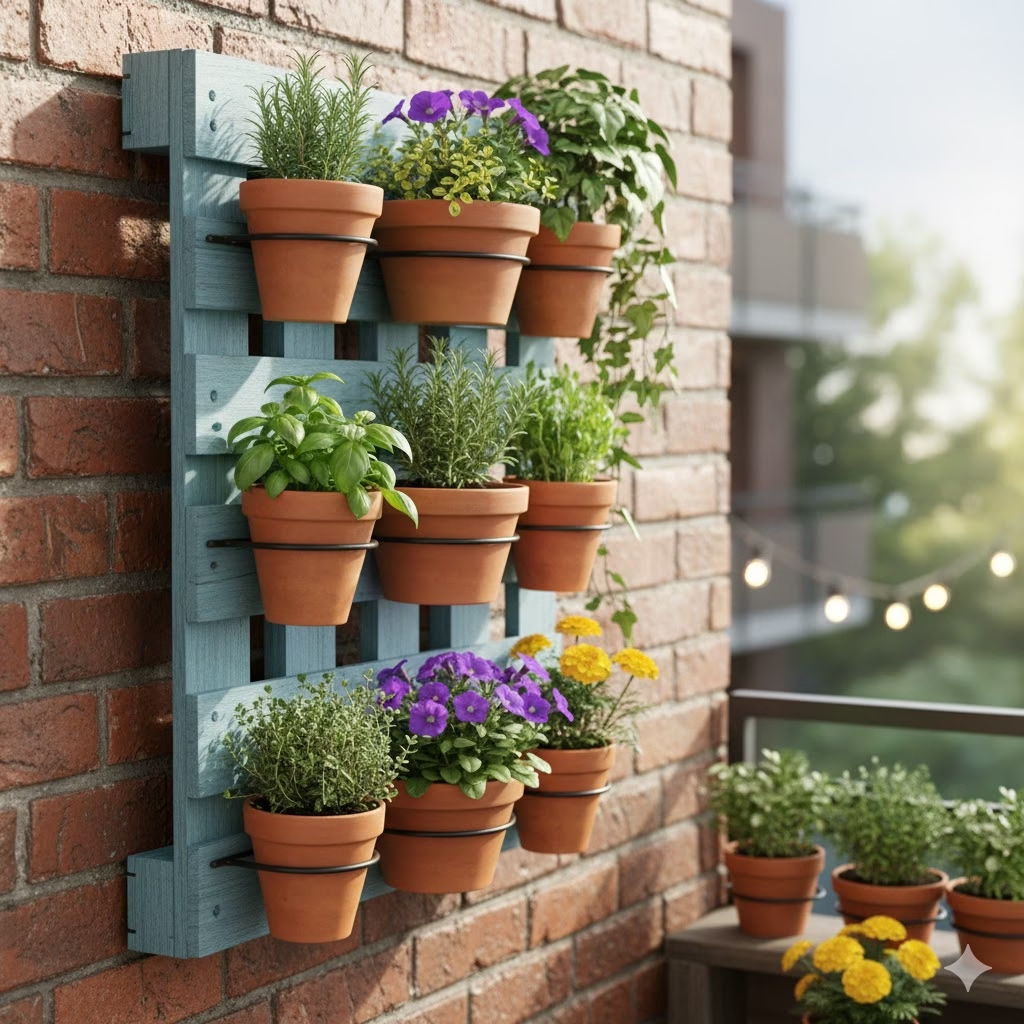
1. Think Vertically with Hanging Gardens

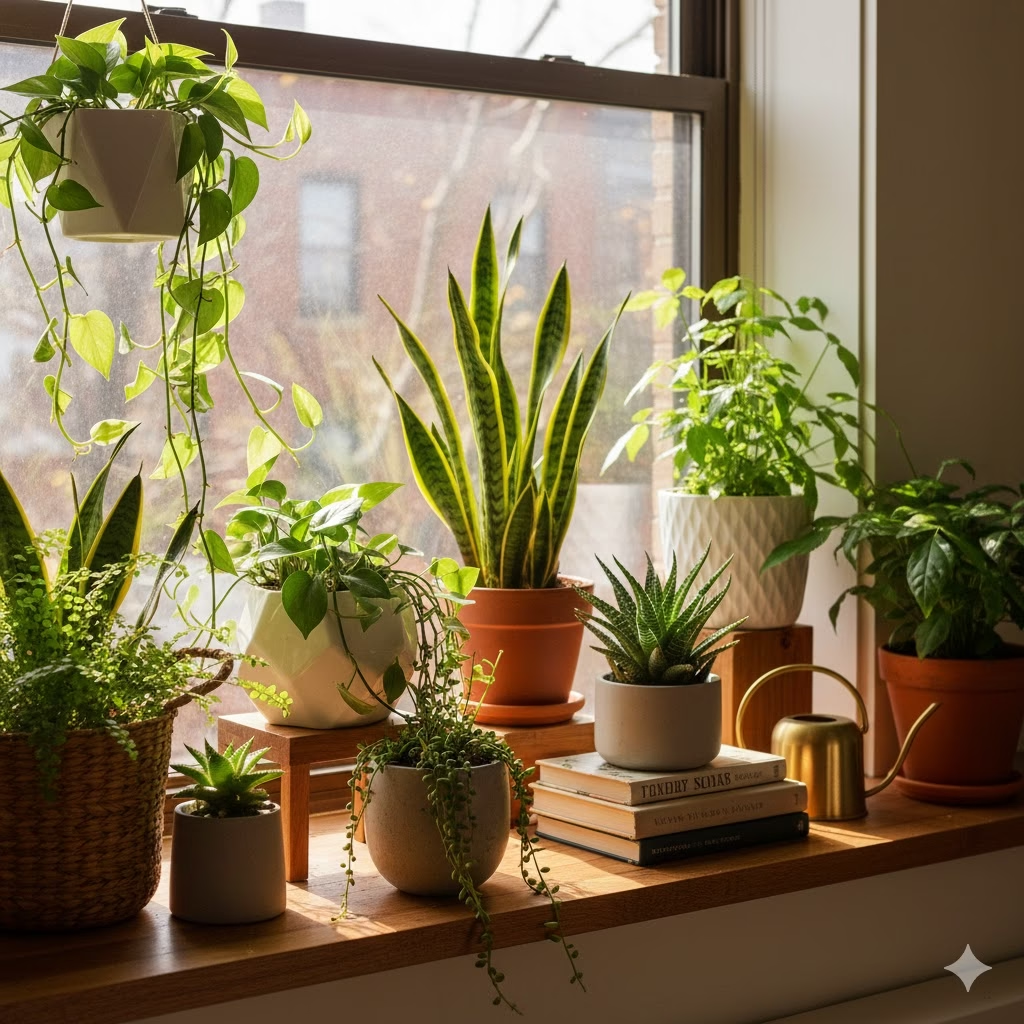
When you do not have much floor space, look at your walls. A small apartment balcony has lots of wall space that people forget to use. Vertical gardening is a smart way to add life to your home. You can hang pots from the ceiling or hook them onto the railing.

Using a trellis is one of the best small balcony ideas. You can grow vines that climb up the wood. This looks beautiful and also gives you some privacy. You can sit outside without everyone seeing you. It feels like a secret garden in the middle of the city. Plants like ivy or jasmine are great for this. They grow fast and smell wonderful.

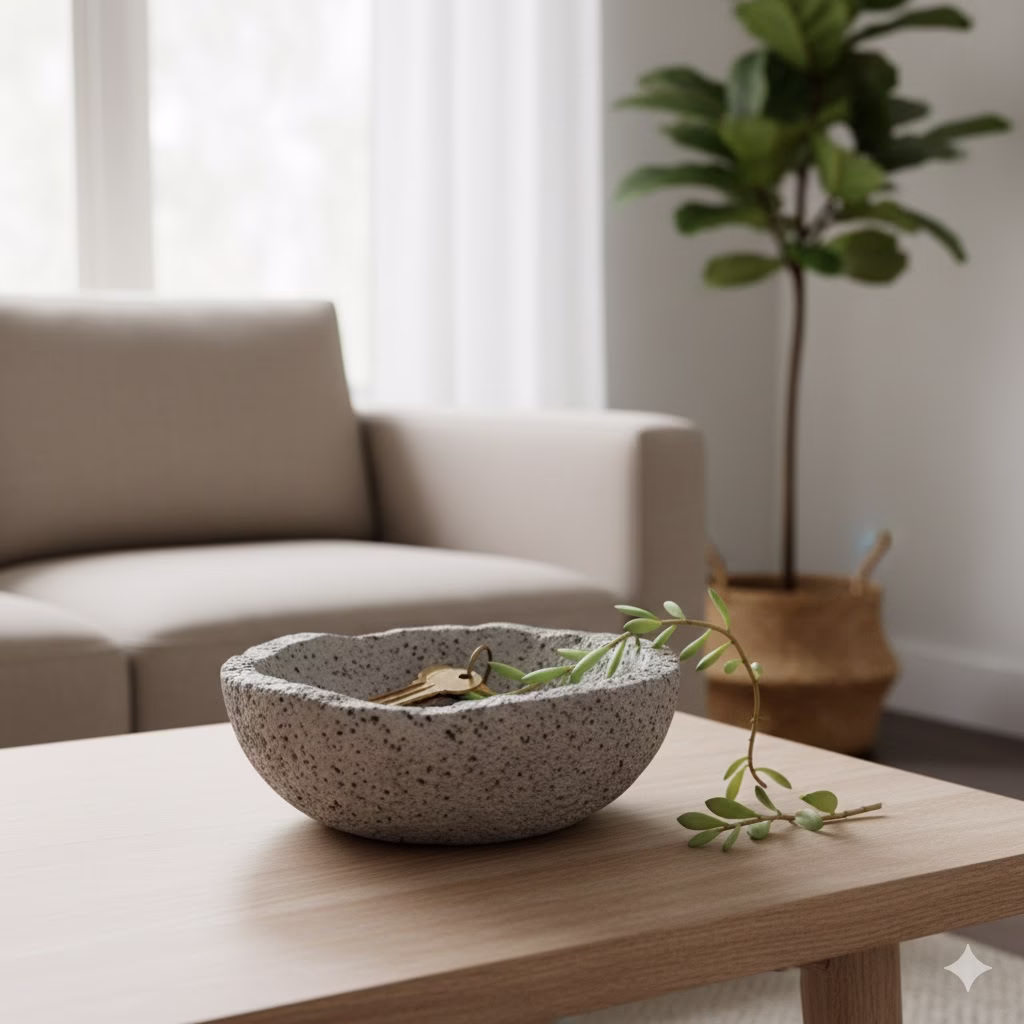
2. Invest in Multi-Functional Furniture

On a small apartment balcony, every chair and table must do more than one job. You should look for furniture that has a hidden purpose. A bench that opens up is perfect. You can sit on it to read a book, and you can hide your tools inside it. This keeps the area clean and tidy.

Another idea is to use a small stool. It can be a seat when a friend comes over. It can also be a side table for your snacks. When you pick these items, choose thin frames. Thick furniture makes a small space feel crowded. Light wood or thin metal is a better choice. These balcony ideas help keep the area feeling open and airy.

3. The Power of Folding and Hanging Tables

Many people want to eat dinner outside. But a big table will take up the whole small apartment balcony. The best fix for this is a folding table. Some tables can even hang right on the railing. When you are done eating, you just fold it down.

This is a great tip for those who work from home. You can take your laptop outside for a few hours. You get fresh air while you work. Then, you can put the table away to have room for a yoga mat or a lounge chair. It is one of those small balcony ideas that makes a big difference in how you use your home every day.

4. Create Comfort with Weather-Resistant Textiles

A bare floor can look cold and sad. To make your small apartment balcony feel like a real room, you need a rug. An outdoor rug adds color and warmth. If you pick a rug with stripes, it can make the floor look wider. This is a simple trick that designers use all the time.

You should also add soft pillows and a blanket. Make sure the fabric is made for the outdoors so it does not get ruined by rain. Layering these items makes the space very cozy. It makes you want to spend more time outside. These soft touches are key to good balcony ideas. They turn a hard ledge into a soft lounge.

5. Establish Privacy with Style

Privacy is a big worry when you live in a flat. You want to enjoy your small apartment balcony without feeling watched. You can use bamboo screens to block the view. Bamboo is light and easy to move. It also gives your balcony a tropical look.

Another choice is to use outdoor curtains. You can pull them shut when you want to be alone. Curtains move in the wind and look very elegant. If you like plants, you can use tall grass in pots. This creates a green fence that looks very natural. These small balcony ideas help you feel safe and relaxed in your own space.

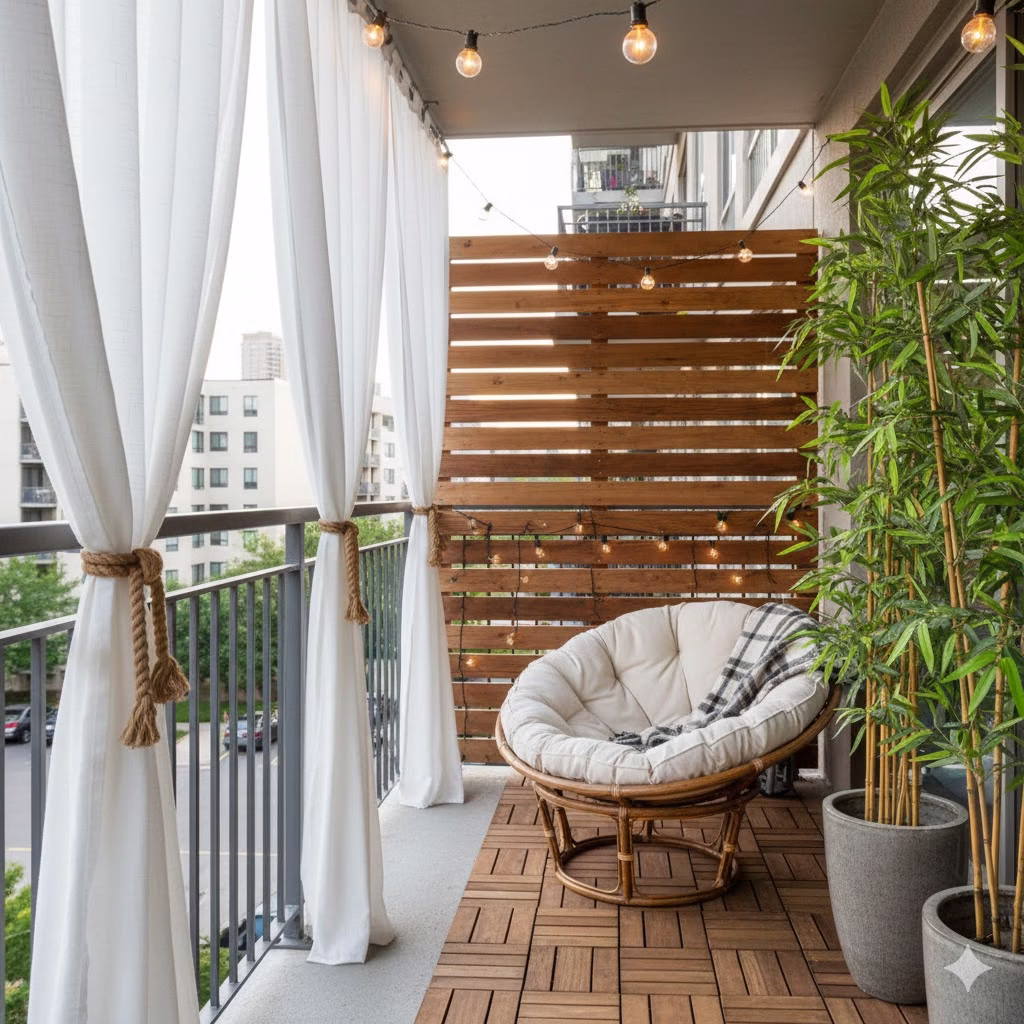
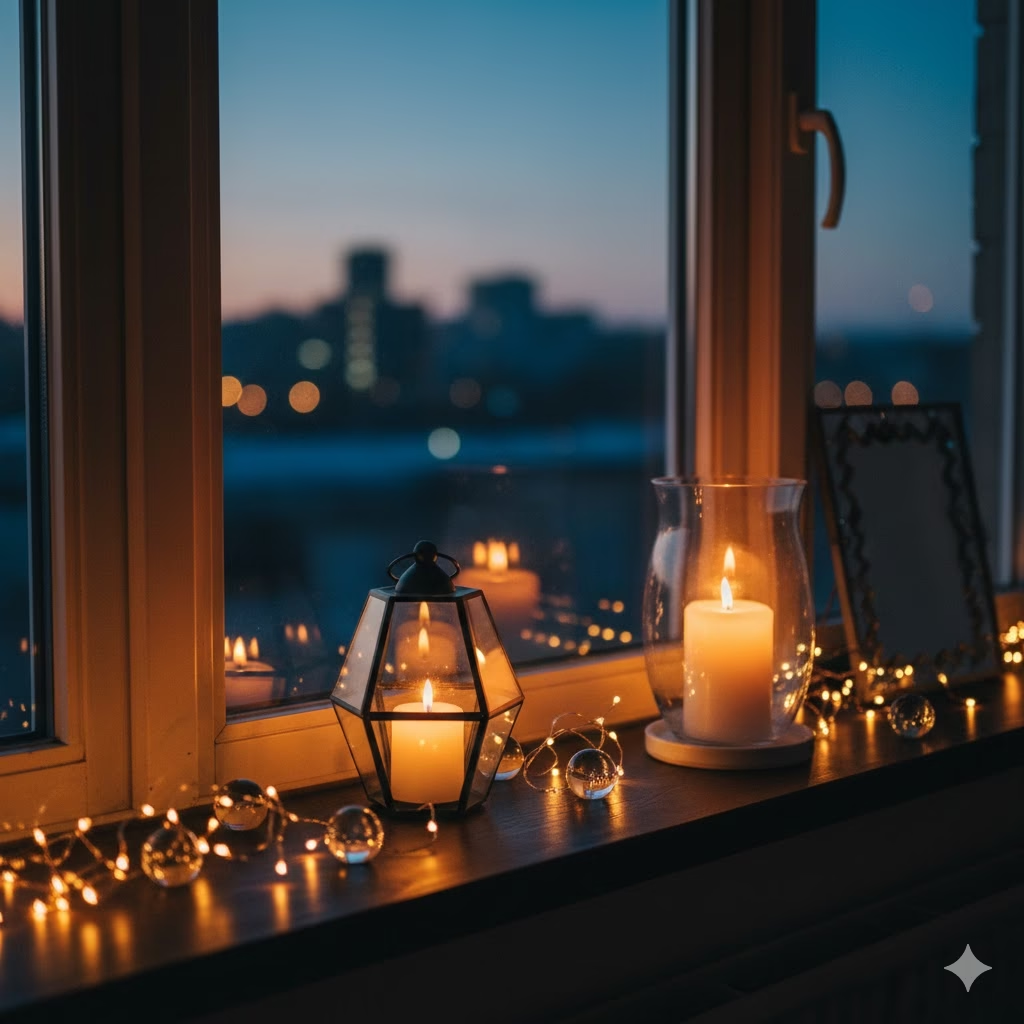
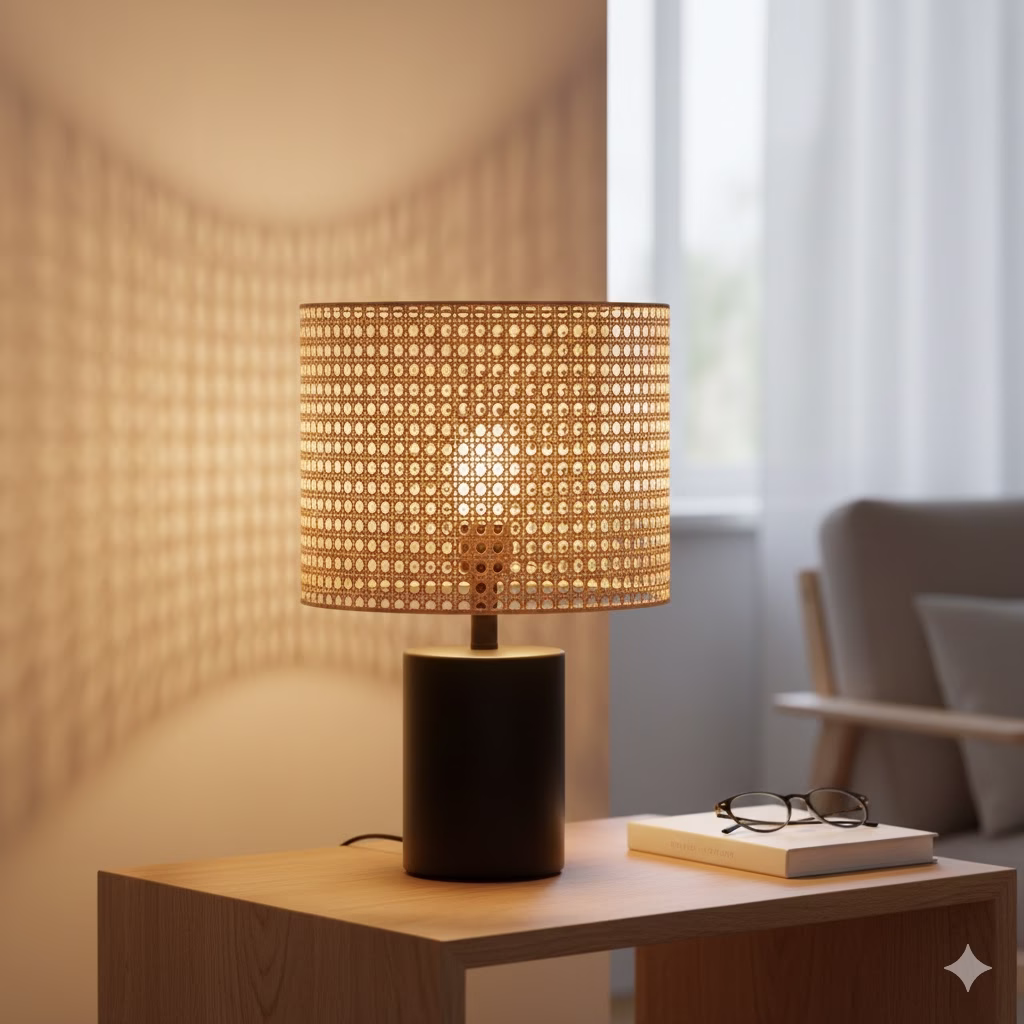
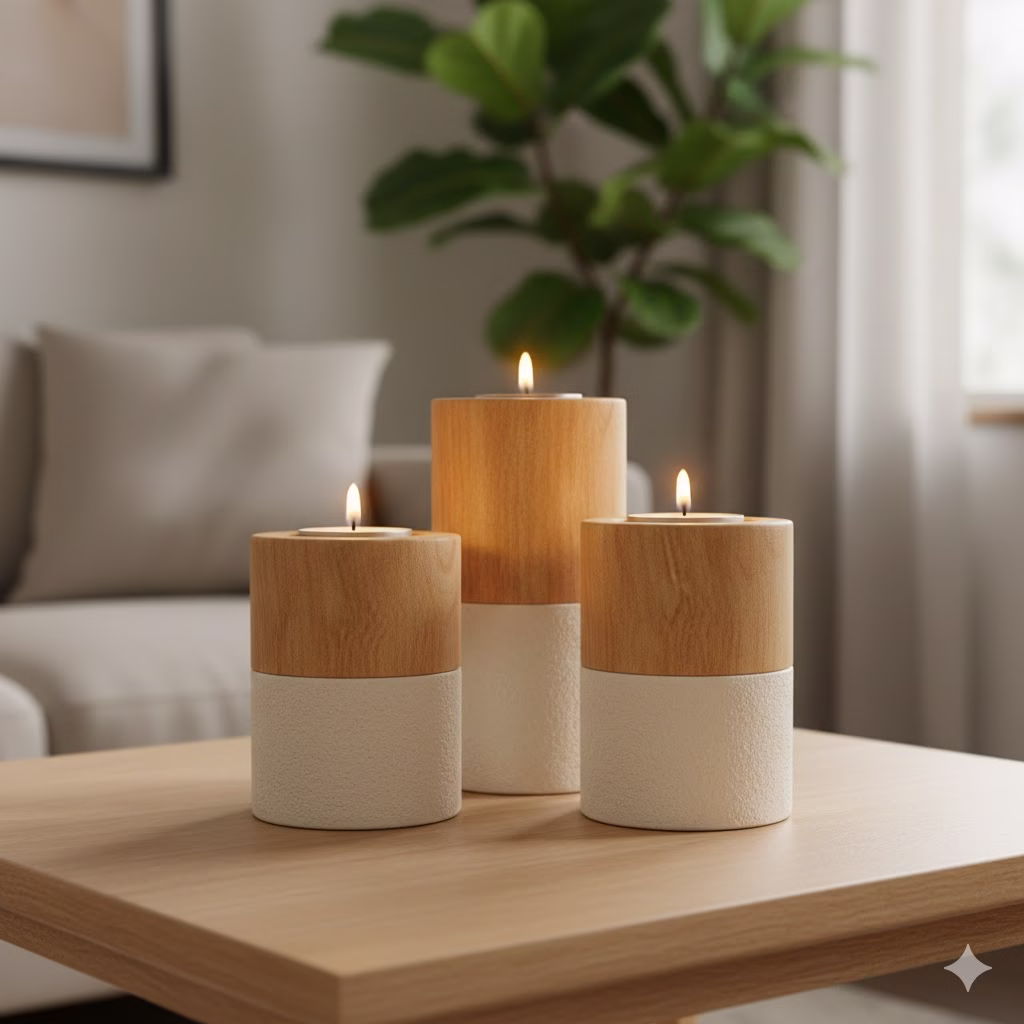
6. Layered Lighting for Ambiance

Light is very important for the mood of your small apartment balcony. Do not use the bright light that comes with the building. It is often too strong and not very pretty. Instead, use several small lights. String lights are a favorite for many people. You can wrap them around the railing.

Solar lanterns are also a smart pick. They charge in the sun all day and glow at night. You do not need to plug them in. This is great if you do not have an outlet outside. LED candles are safe too. They look like real candles but the wind will not blow them out. These balcony ideas make your night much more magical.

7. Incorporate a “Living” Floor

If your floor is ugly, you can cover it up easily. Interlocking deck tiles are perfect for a small apartment balcony. These tiles are like puzzle pieces. You just snap them together. You do not need any glue or tools. This is very good for people who rent their homes.

You can choose tiles that look like wood or stone. You can even get tiles that look like green grass. Faux grass is one of the fun small balcony ideas for kids or pets. It feels soft on your feet and stays green all year. It makes your balcony feel like a tiny backyard in the sky.

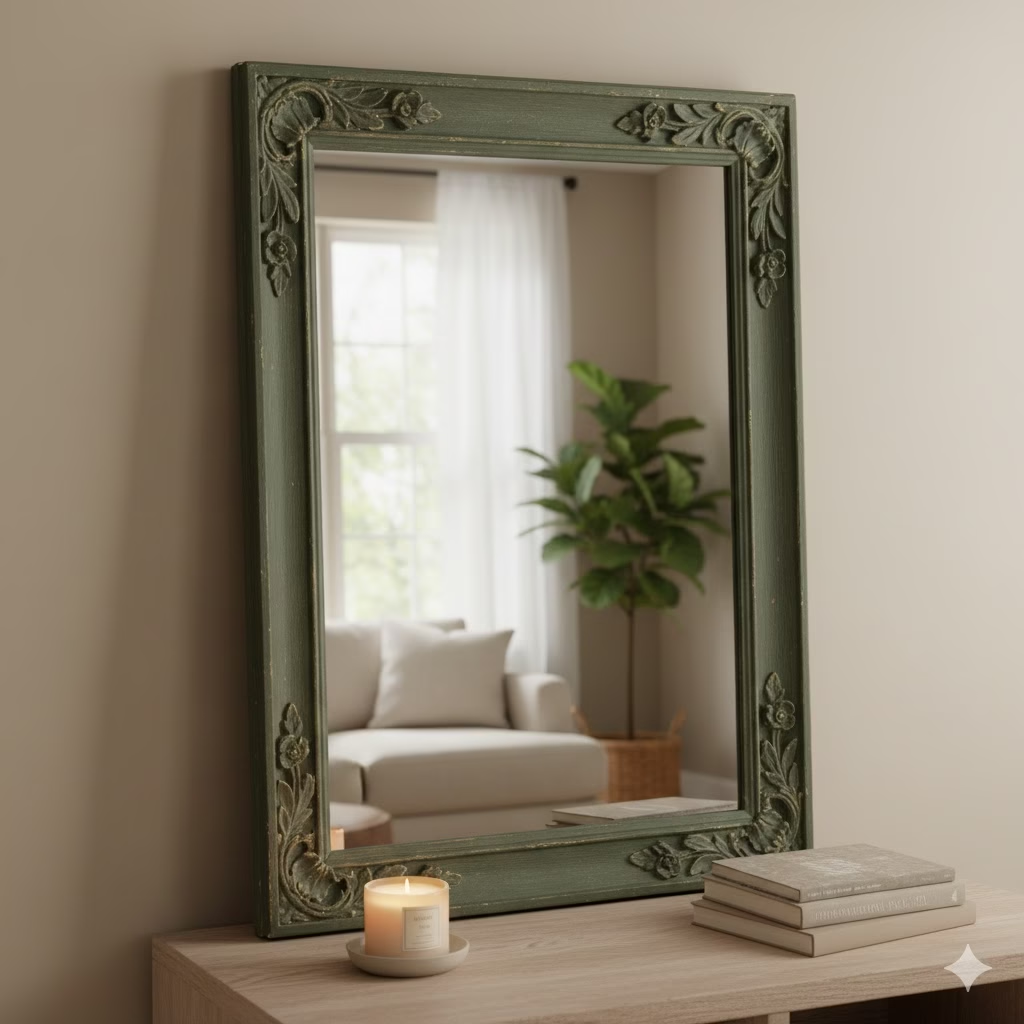
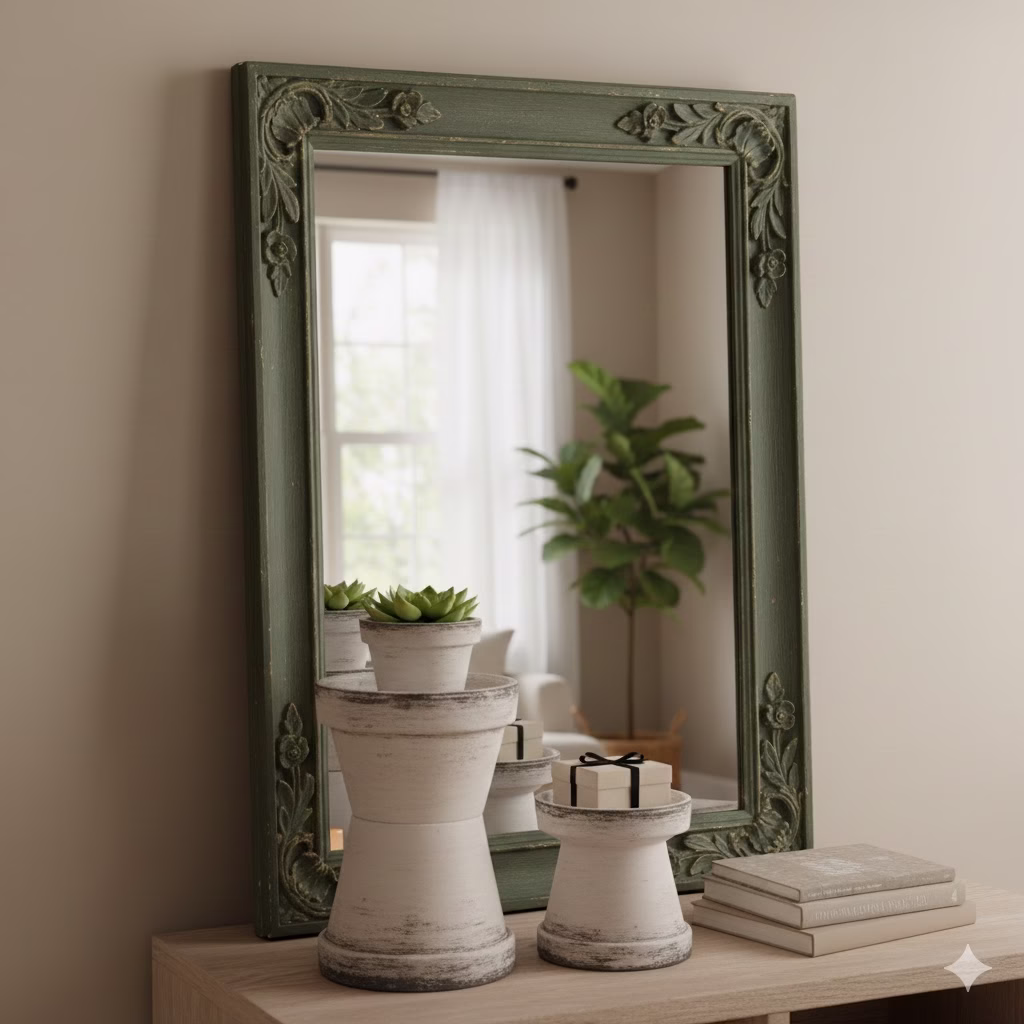
8. Use Mirrors to Create Depth

You might think mirrors only belong inside. But they are great for a small apartment balcony too. A mirror reflects the sky and the trees. This makes your balcony look like it goes on forever. It is a great way to make a tiny spot feel much larger.

Make sure you buy a mirror that is okay for the outdoors. Hang it on a wall where it can catch the light. When you look at it, you will see your plants reflected back at you. It is a simple way to add style. This is one of the most unique balcony ideas for urban living.

9. A Dedicated Herb Garden

You can grow your own food on a small apartment balcony. An herb garden is the best way to start. Herbs do not need a lot of room. You can grow them in small pots on a shelf or on the railing. Basil, mint, and parsley are easy to grow.

Having fresh herbs makes your cooking better. It also makes your balcony smell great. Every time you walk outside, you will smell the fresh mint or rosemary. This makes the space feel alive and useful. It is one of those small balcony ideas that is both pretty and practical.

10. Keep the Color Palette Cohesive

If you use too many colors, a small space can look messy. To keep your small apartment balcony looking neat, pick a few colors and stick to them. Using light colors like white or tan can make the space feel bigger. Light colors reflect the sun and keep the area bright.

You can add a pop of color with your flowers or a bright pillow. Maybe you like blue or yellow. Just use a little bit of it so it does not feel like too much. A clean look is very calming. When everything matches, your balcony ideas come together perfectly. It creates a space where you can truly rest.


Conclusion

Making the most of a small apartment balcony is a fun project. You do not need a huge deck to enjoy the fresh air. By using these small balcony ideas, you can turn any tiny space into a dream. Focus on using your walls and picking smart furniture. Add some lights and some plants to make it feel like home.

Your balcony is a part of your home that should bring you joy. Whether you are drinking coffee in the morning or watching the stars at night, it should be a place you love. Use these tips to start your makeover today. You will be very happy with your new outdoor retreat.


References


Recent Posts


10 STUNNING Shelves Above Toilet Ideas That Looks Great!

A bright, modern bathroom featuring a multi-tiered shelves above toilet unit, demonstrating 10 stunning ideas for maximizing storage. The shelves display organized items and decor.

This blog helps you create beautiful, functional, and organized living spaces. We believe every inch of your home holds potential, especially those spots you often overlook. From clever storage hacks to beautiful decor solutions, our goal is simple: to inspire and guide you. Read our latest piece. We explore the powerful transformation of shelves above toilet designs. See how they can immediately make your bathroom look better and work harder.


Introduction: Elevate Your Bathroom with Smart Shelves Above Toilet Solutions

The bathroom is often the smallest room in the house. It poses a tough question: How do you fit great storage and style into a tiny space? Look at the blank wall above your toilet. If you have ever wondered what to do with it, you are not alone. This vertical space is a secret gem. It’s perfect for both practical use and beautiful style. Say goodbye to clutter and mess. It is time to turn this forgotten wall into a key design feature and a neat place to store things.

We are giving you a detailed guide. It will show you 10 stunning shelves above toilet ideas. These ideas will not only fix your storage problems but also make your entire bathroom look better. We are going beyond just basic function. Lets explore creative fixes that fit perfectly with your current decor, no matter your personal style. We have ideas for everyone. This includes sleek, modern designs and warm, rustic charm. Get ready to use your bathroom’s full potential. Discover how the right shelving choice can make a huge difference right away.


The Power of Vertical Storage: Why Shelves Above Toilet Are a Game-Changer

Floor space is valuable in any bathroom, especially small ones. Using the space that goes up the wall is vital. It keeps things tidy and easy to reach. It does this without losing any floor space. The wall area right over your toilet is the perfect spot for this. When you install shelves here, you get many benefits:

  • You Maximize Space: This converts a wall space that was not being used into a helpful storage zone.
  • Declutter: It gives a fixed spot for important items, keeping your counter tops clear.
  • You Add Style: Good shelving and decorations can boost your bathroom’s look.
  • You Improve Access: Items you use often will be easy to grab.

Let’s look at the ideas now. First, consider these key things: your bathroom size, your style, and how much storage you truly need. Do you want to show off decorations? Do you need to hide messy items? Or a bit of both? Knowing the answers will help you choose the best shelving solution from our list.


Idea 1: Floating Shelves – The Minimalist’s Dream

Floating shelves are always popular. They have clean lines and look simple. Which seem to come right out of the wall. They offer a smooth, quiet look. This design makes a small bathroom feel bigger and more open.

Why they work:

  • Visually Light: You can’t see the brackets, so the look is less messy.
  • Flexible: They look great with modern, simple, and traditional styles.
  • Customizable: You choose how many shelves you want and how far apart they are.

Styling tips: Use these for neat stacks of towels, small plants, fancy bottles, or organized toiletries. Choose natural wood for a warmer feel. Or, pick white shelves for a sharp, clean look.


Idea 2: Built-in Recessed Shelves – Seamless Integration

Are you planning to remodel your bathroom? If so, think about the ultimate smooth storage: built-in recessed shelves. These are cut right into the wall. They offer a flat, custom look. This truly uses all the space without sticking out into the room.

Why they work:

  • Saves Space: They do not take up any visual or physical space in the room.
  • High-End Feel: This adds a rich, custom-made touch.
  • Easy to Clean: There are no dusty tops or tight corners to clean.

Styling tips: These are great for storing extra toilet paper, small decorations, or even a tiny vase. Use a tile or paint color on the back that is different from the walls. This will make it pop.


Idea 3: The Ladder Shelf (Over-the-Toilet Unit) – Maximum Impact

The ladder shelf unit (often called a space saver) is the easiest storage fix. It is common because you do not have to drill anything. It gives you the most storage space. These units stand alone. They sit around the toilet and offer many levels of storage.

Why they work:

  • No Setup Needed: Just place it behind the toilet tank.
  • Plenty of Storage: They usually have three or four big levels for keeping and showing items.
  • Clear Style: They create a strong, tall visual point in the room.

Styling tips: Look for units that mix materials. For example, metal frames with wood shelves. This looks less plain and more industrial-chic. This is the perfect spot to mix both open shelves (for towels and art) and woven bins for closed shelves storage of smaller items.


Idea 4: Industrial Pipe Shelving – Urban Edge

Want a rough, modern, or industrial farmhouse style? Try using pipe brackets. This design uses metal pipes (often black or silver) as supports. They are paired with thick, restored wood boards.

Why they work:

  • Very Strong: The materials are tough and handle moisture well.
  • Adds Character: This design makes the space much more interesting and textured.
  • Adjustable Height: The pipes can be moved to fit odd wall spaces.

Styling tips: Keep the rest of the bathroom simple. This lets the unique shelving stand out. Display old-fashioned jars, small succulents, and simple, folded linens. The rough texture of the wood looks great next to smooth ceramic fixtures.


Idea 5: Glass Shelves – Light & Contemporary

Maybe you want storage but do not want the room to feel heavy or full. Glass shelving is a great option. The clear material almost disappears. It reflects light and keeps the airiness in the room.

Why they work:

  • Airy Look: Perfect for tiny bathrooms that need storage without visual weight.
  • Easy to Clean: Glass is very simple to wipe clean.
  • Modern Appeal: It offers a very smooth and up-to-date look.

Styling tips: Everything is visible, so organization is key! Use clear or cloudy containers so everything matches. Keep items to a minimum—a few bottles of scent, a small pile of white towels, and a delicate object.


Idea 6: Shelves with Closed Storage Cabinets – The Organized Sanctuary

Sometimes, you just need to hide your things. Use a small wall cabinet in your shelves above toilet design. This gives you a good mix of items on display and items tucked away.

Why they work:

  • Discreet: Ideal for hiding less attractive items (medicine, cleaning tools, big hygiene products).
  • Dual Use: You get both open shelves for decorations and closed shelves for controlling clutter.
  • Clean Look: Doors make everything look neat and organized instantly.

Styling tips: Put the cabinet unit low or high. Use the open shelf/shelves next to it for attractive items. Make sure the cabinet handles match your other fixtures (faucets, towel racks). This creates a unified design.


Idea 7: Corner Shelving Unit – Utilizing Awkward Angles

Is the wall behind your toilet very narrow? Do you have an unusual room layout? Do not forget the corners! A tiered corner shelving unit can cleverly turn a strange corner into useful storage.

Why it works:

  • Maximized Space: It uses space that is often wasted in bathroom layouts.
  • Unique Look: This offers a slightly different, softer look than straight wall shelves.
  • Balance: It can help make a large, empty wall look visually balanced.

Styling tips: Corner units are naturally cozy. They look great with natural materials and curved shapes. Think round baskets, small pots made of clay, and hanging plants like ivy or ferns.


Idea 8: Wooden Crate Shelving – Rustic Farmhouse Charm

Do you like the cozy, rustic, or farmhouse style? Try using old wooden crates or boxes. Turn them into shallow, shelf-like shadowboxes. You can hang them individually or stack them in a fun way.

Why it works:

  • Texture and Warmth: Wood adds a natural, warm feel to a room that is mostly hard, cool surfaces (tile, porcelain).
  • Easy DIY: This project is simple and cheap to complete.
  • Depth: The box frame has a small edge. This stops items from easily falling off.

Styling tips: Fill them with vintage finds, essential oils, small bundles of dried lavender, and soft, hand-rolled washcloths. The worn look of the wood is a beautiful decoration on its own.


Idea 9: Woven Basket Shelves – Soft, Textured Storage

Forget standard wood or metal shelves for a moment. Instead, install strong brackets. Then, use large, flat-backed woven baskets as your shelves above toilet.

Why it works:

  • Texture and Softness: This adds natural fibers. This is great for making a plain, sterile bathroom feel softer.
  • Hidden Storage: The baskets can hide items well without using cabinet doors.
  • Bohemian/Coastal Vibe: Perfect for a relaxed, nature-inspired decor.

Styling tips: This works best with two or three large baskets that are all the same size. Put labels on the baskets so you know what is inside (e.g., “Toiletries,” “Linens,” “Backstock”). Pair these with simple white walls and light-colored towels.


Idea 10: Mixed Material and Asymmetrical Shelves – Modern Artistry

Ignore the usual rules! Use shelves of different lengths, depths, and materials. Arrange them in a pattern that is not symmetrical. This turns your storage solution into a piece of modern wall art.

Why they works:

  • High Design Impact: It immediately grabs attention. It shows that the design was well thought out.
  • Functional Art: It mixes practical storage with visual beauty.
  • Flexible: You can easily fit items of different sizes on these shelves.

Styling tips: Try mixing thin black metal shelves, a thick wooden shelf, and maybe a small mirror placed within the shelf layout. Pay attention to the empty space around the shelves. Display your items carefully for a gallery look.


Conclusion: Making Your Shelves Above Toilet Work for You

Choosing the perfect shelves above toilet setup means finding the best blend of function and beauty. You might choose the simple look of floating open shelves. Or, you might need the useful storage of ladder units. Maybe you prefer the smooth hiding power of closed shelves in a wall cabinet. Whatever you pick, the right choice will make your bathroom better.

Always remember to:

  1. Measure Accurately: Make sure the shelves or unit will fit. Be sure they won’t hit the toilet tank or the lid. The bottom shelf should be high enough so you can open the lid fully.
  2. Install Safely: Bathroom walls are often drywall. The items on the shelves can be heavy. Use strong wall anchors. Try to find a wall stud for the best stability.
  3. Style with Care: Think about what you display. A few beautiful, high-quality items look much better than a mess of random products.

You are doing more than adding storage. By using one of these 10 stunning shelves above toilet ideas, you are making your bathroom more organized, more beautiful, and easier to use. Start improving that forgotten wall space today!


References for Further Reading


Recent Posts


7 Window Sill Décor For The Ultimate In Small Space Styling

Rustic wooden window sill styled with lush green potted plants, including trailing vines and succulents, stacked vintage books, and warm ceramic objects. The sunlit display showcases practical, beautiful window sill décor ideas for small spaces.

It is time to make the most of your home, even if you live in a small space. This platform is all about inspiring simple home solutions that look good and work well. We focus on finding smart ways to make daily life better through good design. Our special focus is on areas many people forget, like the window sill. Look through our simple, expert tips and see how smart window sill décor can completely change the way your home feels.


In home design, every bit of space is important, especially when your space is small. Most people focus on big pieces of furniture or wall art. However, there is one small spot with huge potential: the window sill. It is much more than just a ledge. The simple window sill can become a bright focus point, a handy storage spot, or a quiet retreat. It adds beauty and value to your home. Mastering window sill décor means more than filling a space. It means smart, fresh styling that brings in natural light, shows off your personality, and makes even a tiny room feel bigger and carefully planned.

This article shares seven simple and smart ways to use your window sill. We will help you turn that forgotten ledge into a stylish, useful, and beautiful part of your home. These ideas are perfect for small homes. They are easy to use no matter your style—minimalist, plant lover, book fan, or someone who just wants more charm. Get ready to look at your windows in a new way and use all the power of great window sill décor.


1. The Urban Jungle: Bring Greenery Inside

Even in the busiest city apartment, you can create a lively, green space. The window sill is the best place to start. Building an “urban jungle” on your window sill is not just a passing style. It is a way to clean your air, lift your spirits, and add natural beauty without taking up important floor space.

Why it works in small spaces: Plants add life and color by growing tall. They make the eye look up. This makes the room feel taller and deeper. They do not take up floor space, which makes them great for small rooms or apartments.

How to make it happen:

  • Pick the right plants: Choose small or medium plants. They should be types that love the light your window offers. Succulents, cacti, air plants, snake plants, Pothos, and small ferns work well for window sills. Plants that hang down, like String of Pearls or English Ivy, add a nice, flowing effect.
  • Mix heights and textures: Do not just line up pots that look the same. Use plants of different heights, leaf shapes, and colors. A tall, thin plant next to a short, round one creates a better display. Leaves that are big and wide next to delicate, thin leaves look interesting.
  • Buy stylish pots: The containers matter just as much as the plants. Pick pots that match your room—ceramic, clay, woven baskets, or simple concrete pots. Using the same material or color makes the whole collection look good together, even if the plants are different.
  • Think about hanging: If your window sill is narrow, try using small plant stands or hanging pots above the window. This lets you have more plants without cluttering the sill.
  • Remember water drainage: Make sure your pots have holes for water to drain. Or, use a second, decorative pot underneath. This stops water from sitting and keeps your sill and plants healthy.

Quick Tip: Turn your plants now and then. This makes sure all sides get enough light so they grow evenly. Spraying water on plants that love wet air helps them, especially if the air inside your home is dry.

2. The Mini Library: Curated Reads and a Cozy Feel

If you love books and have little space, the window sill is perfect. You can create a lovely small library or show off your favorite books there. This solution saves space and adds warmth and character. It makes the room invite you to sit down with a great book.

Why it works in small spaces: Using the vertical and horizontal space for books means you save shelf or table space somewhere else. It also gives the room a cozy, smart feel without adding bulky furniture.

How to make it happen:

  • Choose your best covers: Think of your books as decoration. Pick titles with beautiful covers, interesting spines, or ones that set a certain mood. A small stack of art books or favorite novels looks very appealing.
  • Stack in creative ways: Do not line them up like soldiers. Stack them sideways, standing up, or both. This creates different heights. Use bookends to keep standing stacks neat. Bookends also act as another piece of décor.
  • Add small décor items: A pile of books can be the base for a tiny statue, a nice candle, or a small air plant. This layering makes the display richer. A bookmark hanging out of a book adds a real, lived-in touch.
  • Know how you will use it: Is this mostly for showing off, or will you take these books down often? If you use them often, make sure they are easy to grab and put back without knocking over other items.
  • Be careful with light: Strong, long-lasting sunlight can fade book covers and hurt the pages. If your window gets a lot of sun, use books you do not mind getting a little old, or use a clear film on the glass to block UV rays.

Quick Tip: For a look that fits together, try to match the colors of your book spines or covers to the rest of the room. This makes the design look planned and harmonious.

3. The Functional Command Center: Smart Storage

The window sill is not just for pretty things. It can be a very useful storage area. This is especially true in the kitchen, bathroom, or home office where there is little counter space. With good organization, your window sill décor can be both useful and beautiful.

Why it works in small spaces: It uses space that would usually be wasted. This frees up useful counter tops or drawers. By keeping things you use often close by, it makes compact areas work better.

How to make it happen:

  • In the Kitchen: Store spices in nice jars, small herb pots, olive oil and vinegar bottles, or even a tiny fruit bowl. Clear glass containers look very stylish. If the window is over the sink, this is a great place for a fancy brush holder or a small vase of fresh herbs.
  • In the Bathroom: If your bathroom needs storage, the window sill can hold cotton swabs in a clear jar, a stylish soap pump, small perfumes, or neatly rolled hand towels. Choose items that do not rust or get damaged by water. A small tray helps keep things grouped and contains any spills.
  • In the Home Office: Keep key desk items tidy: pens in a decorative holder, a small stack of notes, a beautiful paperweight, or a miniature plant for a little break from work. The natural light is also perfect for tasks where you need to see well.
  • In the Living Room: Use it for remote controls in a small basket, coasters, or a small box for keys and coins.
  • Use trays and boxes: Small, decorative trays, shallow baskets, or divided organizers keep things together and stop clutter from spreading. They also make cleaning easy—just lift the tray.
  • Think about height: Make sure the items you store do not block too much of the window. This is important if you need a lot of natural light in the room. Put taller items on the sides of the sill, away from the middle of the glass.

Quick Tip: To make everything look unified, choose storage pieces that share the same material (like all glass or all ceramic) or color. This brings a sense of calm to a mix of different items.

4. The Minimalist Monochrome: Less Is Truly More

If you live in a small space, keeping things simple is often the best way to have a calm home. The simple style of window sill décor uses clean lines, few colors, and a focus on empty space. This lets the light and the view become the main feature.

Why it works in small spaces: Simple design cuts down on visual noise. This makes a small area feel bigger, calmer, and more modern. The window sill becomes a carefully planned display instead of a place to pile things up.

How to make it happen:

  • Stick to simple colors: Choose only neutral colors, like white, black, gray, and natural wood. This simple color scheme creates a neat look that does not compete with the view outside.
  • Focus on shape and feel: Since there are few colors, the interest comes from the shape and material of the objects. Use artistic vases, smooth stone items, plain ceramic pieces, or sharp metal accents.
  • Use the Rule of Three (or One): Display items in odd numbers (like three) for a good balance, or choose just one piece that makes a big impact. A single, well-made vase or a piece of abstract art may be all you need.
  • Play with light: Objects that look great with light are best. Use clear or frosted glass, crystals, or shiny surfaces that catch the sunlight. They will spread reflections around the room. This adds movement and light.
  • Keep things useful: If you must include helpful items (like a tiny clock), make sure they match the simple colors and materials you chose. Hide any necessary mess inside simple, elegant boxes.
  • Leave empty space: Make sure there is plenty of space between the things you display. The empty space on the window sill is as important as the items themselves. It lets your eyes rest and stops the display from feeling too crowded.

Quick Tip: Think about putting up a small, simple photo (in a plain frame) that matches the simple colors. Or, put a very small succulent in a white geometric pot. This adds a little life while keeping the clean look.

5. The Seasonal Spotlight: Reflecting the Outside

Your window sill naturally connects the inside of your home to the world outside. Using it for seasonal décor is an easy, fun way to keep your home feeling fresh and current all year long. This idea works by using items that change with the seasons, keeping your décor interesting without needing a total room makeover.

Why it works in small spaces: Seasonal changes keep a small space from feeling boring. Since the items are temporary, they prevent long-term clutter. They also draw attention to the view, not the small size of the room.

How to make it happen:

  • Spring: Bring in small vases of fresh flowers like tulips or daffodils. Use pastel-colored ceramics or glass objects. A nest with decorative eggs can add a charming, simple touch.
  • Summer: Display small jars filled with sand and shells from a trip. Use light, bright colors and clear glass. A bowl of lemons or limes adds a fresh, zesty scent and look.
  • Autumn: Use small gourds, pinecones, or colorful fall leaves in a wooden bowl. Candles in deep orange, rust, or gold colors add a cozy warmth. The focus is on natural textures.
  • Winter: Keep it simple with white or silver accents. Small evergreen sprigs, miniature trees, or simple white candles are perfect. Focus on items that reflect light, like small ornaments or polished metal.
  • Use a consistent base: Keep a few basic pieces, like a simple tray or small stack of books, that stay all year. Then, swap out the smaller, seasonal items on top of them. This makes the change feel fast and simple.
  • Mind the temperature: Be careful with heat. If the sill gets very hot in summer, avoid wax candles that might melt or perishable items.

Quick Tip: Go outside and find simple, free items like smooth stones, unique twigs, or leaves. These natural elements are free and add true character to your window sill décor.

6. The Light Layering: Creating Depth and Warmth

One of the best things about a window sill is its closeness to natural light. By adding layers of artificial light, you can create a cozy, deep atmosphere, especially in the evening. This adds an extra layer of elegance to any small room.

Why it works in small spaces: Lighting creates a mood and draws attention away from the size of the room. Small lights do not take up much space but add a lot of visual impact. They make the room feel warmer and more complex.

How to make it happen:

  • Use LED String Lights: Drape delicate, battery-operated LED fairy lights or string lights across the sill. Choose warm white light for a cozy feel. You can weave them around plants or tuck them behind decorative objects.
  • Small Lamp or Lantern: If your sill is wide enough, a tiny, stylish table lamp can add a perfect bit of task lighting. If space is tight, a decorative lantern with a battery-operated candle is a safe, charming choice.
  • Candle Display (Safety First!): A few small, varied candles (pillar, tapered, or votive) on a heat-safe tray or plate add a classic, warm glow. Always use caution and never leave real flames unattended. For safety and ease, use high-quality LED flickering candles.
  • Glass and Reflection: Place items made of clear or colored glass on the sill. When the lights or candles are lit, the glass catches and reflects the light, creating beautiful sparkles and patterns on the walls.
  • Mirroring the View: A small, decorative mirror leaning against the window frame can reflect both the view outside and the internal lights, doubling the feeling of space and light.

Quick Tip: Set up your lights on a timer. This way, the moment the sun goes down, your window sill lights up automatically. This creates a charming welcome when you arrive home.

7. The Collector’s Showcase: Curated Tiny Treasures

Do you have a collection of tiny, beautiful objects that deserve a spotlight? The window sill is the perfect “micro-gallery.” It is an ideal spot to display small pieces of art, special souvenirs, or inherited items where they can catch the light and start a conversation.

Why it works in small spaces: Collections can quickly take over a room. By limiting them to the window sill, you keep the collection under control. This creates a focused, interesting display without adding clutter to tables or shelves.

How to make it happen:

  • Choose a Theme: Group items with a common theme, color, or origin. Examples: smooth stones from trips, small wooden birds, a set of colorful glass bottles, or tiny ceramic animals. Grouping them makes them look like one planned collection.
  • Use Small Risers: Use tiny, wooden blocks or small stacks of books to raise certain items. This adds height and makes the display feel more professional and organized.
  • Give Space to Each Item: Do not cram everything together. Give each piece a little bit of breathing room so it can be truly seen and appreciated. Focus on quality over quantity.
  • Protect Your Items: If your collection includes valuable or light-sensitive items, ensure the window is UV-protected, as direct sunlight can damage colors or materials over time.
  • The Glass Advantage: Glass collections (like antique inkwells, marbles, or small paperweights) look amazing on a window sill. The light shines through them, revealing their color and shape in a way that would be impossible in a darker spot.

Quick Tip: Use a shallow, colorful jewelry tray to hold very small, loose items like tiny sea glass or buttons. This keeps the collection together and makes the grouping look intentional.


Conclusion: Window Sill Décor as a Design Statement

The window sill is a small, mighty space. It is a canvas ready for your creativity. Whether you turn it into a tiny greenhouse, an organized work area, or a beautiful showcase for art, giving thought to your window sill décor will greatly improve your small space. It is a simple, cost-effective way to add beauty, light, and function to your home. By using these seven ideas, you can make sure that every inch of your space is not just used, but styled beautifully. Start styling your sill today—you will be surprised at the big impact this small change can make.


References


Recent Posts


10 Front Porch Christmas Décor Ideas To Try Now

A classic, warm-lit home exterior with a dark wood door. The entryway is heavily decorated for Christmas. Thick evergreen garland, accented with red berries, frames the door. Two matching potted trees covered in warm string lights and gold ornaments flank the door, creating perfect symmetry. Large black lanterns with glowing candles sit on the stone steps. This beautiful setup shows great Front Porch Christmas décor, maximizing holiday appeal.

The front door area sets the mood for the entire holiday season. It welcomes friends and family with warmth and festive charm. The front porch is a perfect spot for creative ideas. It easily transforms simple architecture into a winter wonderland. This guide shares many easy, stylish, and beautiful Christmas décor ideas. Every homeowner can find inspiration here to create a memorable display. These ideas range from classic green plants to modern touches. They are designed to make your home look great and maximize your holiday appeal.


Introduction: Creating a Magical Front Porch Christmas

The holidays are a great time to be creative. No space in your home gives you a better, faster result than your front porch. This is the first impression your home makes on people. This is the spot where holiday songs are heard, guests are greeted, and the magic of Christmas truly starts. You can do more than just hang a wreath. Modern decorating means layering textures and playing with light. It means choosing a theme that truly shows your personal style.

This guide gives you ten clear ideas. Each idea can turn your entryway from ordinary to amazing. Maybe you like a rustic farmhouse look. Perhaps you prefer a classic, elegant style. Or maybe you want a fun, playful display. These concepts will help you design a wonderful front porch Christmas setup this year. Get ready to cover your home in holiday cheer. Welcome the season with great style.

1. The Classic Evergreen Archway

Nothing says traditional Christmas cheer like a thick, green garland framing your front door. This popular look creates an immediate feeling of importance and warmth. It is very appealing to look at.

Details of the Evergreen Archway

  • Garland Selection: Choose a high-quality garland. Decide if you like fresh or fake greenery. Fresh pine, cedar, or fir smells wonderful and natural. Fake options look real and are easy to re-use yearly. For the best look, try using two thinner garlands together. This gives you extra volume and thickness.
  • Draping Technique: The garland should frame the door completely. Do not just hang it over the top. Secure it along the top trim and down both sides of the door. If your porch has columns or pillars, wrap the garland around them in a loose spiral. This makes the look flow well.
  • Embellishments: Keep the decorations for this look simple and classic. Add large, natural items to the greenery. Use items like oversized pinecones, fake berries, or simple brass or gold bells woven into the plants. Finish the design with a big, weather-safe velvet or linen bow. Center it clearly at the top.
  • The Symmetrical Flank: Make the archway look even grander. Place matching potted evergreen plants or small Christmas trees on both sides of the door. This symmetry creates perfect visual balance.

2. Rustic Charm with Natural & Vintage Finds

Create a cozy, nostalgic feeling by adding rustic, natural, and old elements. This simple method brings the warmth of a cabin holiday right to your front porch.

Elements of Rustic Décor

  • The Sled or Skates: An old wooden sled or a pair of vintage ice skates quickly brings up images of past holidays. Prop them up against the house or a porch bench.
  • Natural Textures: Use strong wooden crates, woven baskets, or metal tubs as charming containers. Fill them with simple items that look like they were found in nature. Use cut birch logs, large pinecones, and simple sprigs of pine or holly.
  • Textile Warmth: If your porch area is covered, decorate a bench or rocking chair. Use outdoor-safe throw blankets in buffalo-check or chunky knit styles. Add matching pillows. The fabric adds a nice layer of depth and coziness. This makes the area feel very inviting.
  • Signage: Add a rustic, hand-painted wooden sign. Include a simple holiday greeting like “Joy” or “Merry Christmas.” This gives a personal, homemade feel to the space.

3. The Power of Symmetry and Paired Planters

A highly elegant and nice-looking decorating strategy is to use symmetry. When you use pairs of identical items, you create a balanced, neat, and very polished look for your front porch.

Achieving Perfect Symmetry

  • Matching Planters: Start with two large, identical planters. They can be urns, boxes, or pots. Fill them using layers. Use taller branches or birch logs first for necessary height. Add mid-level evergreen branches (cedar, spruce) for needed volume. Finally, include winterberry stems or ribbons that hang gently over the edge.
  • Illuminated Lanterns: Place two matching outdoor lanterns on the steps or on top of the planters. Fill these lanterns with battery-operated candles or very small LED fairy lights. Set them on a timer. This gives a warm, welcoming light that turns on automatically when it gets dark.
  • Layered Doormats: Add visual depth on the floor. Put a large, patterned rug underneath a smaller, more festive doormat. For example, use a black-and-white check rug under a mat with a holiday saying.

4. Whimsical and Oversized Accents

Do not be afraid to enjoy the playful side of Christmas decorating. Whimsical, extra-large items create a memorable display. They happily appeal to guests of all ages.

Ideas for Whimsical Flair

  • Giant Ornaments: Hang a few very large, brightly colored, shatterproof ball ornaments. You can hang them from the ceiling of a covered porch. Or, place them among the greenery in your planters. This adds a fun sense of scale.
  • Figurines: A pair of classic, life-sized toy soldiers, nutcrackers, or even elegant reindeer figures standing next to the door adds drama and personality. These are traditional and effective statement pieces.
  • Candy Cane Theme: Wrap porch columns or railings in red and white stripes. Use wide outdoor ribbon to make them look like giant candy canes. This is a bold, fun choice. It works very well with classic red and green decor.

5. Coastal & Winter-White Themes

Some people prefer colors other than red and green. For them, a “winter white” or coastal theme offers a calm, beautiful choice. This is one of the most elegant Christmas décor ideas bedroom style choices. It looks perfect when moved to the outdoor setting.

White Christmas Elements

  • Flocked Greenery: Use wreaths, garlands, and mini trees covered heavily in fake snow. The artificial snow quickly creates a soft, winter wonderland look. This works even if you do not have snow outside.
  • Icy Accents: Mix the white greenery with items in cool colors. Use silver, pale blue, or icy champagne. Add clear, see-through “icicle” ornaments or silver bells. These elements reflect light beautifully and look cold.
  • Neutral Textures: Choose light-colored ribbons (burlap, white linen) and containers (white ceramic, painted wood). This helps keep the entire look light and airy.
  • Lighting: Only use warm-white or soft-glow lights. This helps create the peaceful, snowy feeling. Do not use multi-colored or blinking lights for this neat theme.

6. The Cozy Seating Nook

Does your front porch have room for a bench, swing, or set of chairs? If so, turn it into a temporary, cozy spot for reading or coffee. This quickly makes the space a usable, warm retreat.

Designing a Cozy Corner

  • Functional Decor: The decorations should also be useful items. Use weatherproof throw pillows with holiday covers. They can be cable knit, plaid, or have simple holiday phrases.
  • Warmth and Texture: Lay an outdoor-safe, festive throw blanket neatly over the arm of the chair or the back of the bench. This instantly shows people that the spot is comfortable.
  • Ambient Lighting: Place a group of glowing, flameless LED candles in different heights on a small side table or on the floor close by. This small, clearly defined area gives off warmth. It makes the whole porch feel lived-in and welcoming.

7. Vertical Interest with Window Wreaths

If your porch has windows next to it, use the vertical space well. Add height by continuing your theme past the door.

Perfect Window Dressing

  • Uniformity is Key: Hang small, matching wreaths on each window. They can be simple evergreen or a style that goes well with your main door wreath. It is important to be consistent for a neat outside look.
  • Hanging Method: Use thick, contrasting ribbon (classic red, gold, or black velvet) to hang the wreaths. Secure the ribbon with a pin on the inside or an invisible hook on the outside.
  • A Subtle Glow: Think about placing battery-operated candlestick lamps on the window sills, facing outside. This creates a soft, old-fashioned glow that is easily seen from the street. This adds another layer to your outdoor lighting plan.

8. DIY Planters and Natural Fillers

Do not buy ready-made floral arrangements. Instead, create wonderful, unique front porch planters yourself. Use a good mix of items you find outside and materials you buy. This is a cheaper and very creative choice.

Crafting the Perfect Planter

  1. The Height Element (Thriller): Start with tall, vertical pieces for necessary drama. Use birch logs, red or yellow dogwood branches, or tall ornamental grasses.
  2. The Fill Element (Filler): Add a lot of volume with evergreen cuttings. Use different types of plants like cedar, pine, and boxwood for a richer, more complex look.
  3. The Spill Element (Spiller): Let some greenery, like ivy or berry stems, hang gently over the sides of the container. This makes the edges look softer.
  4. Embellishments: Tuck in large pinecones, shiny shatterproof ornaments, or even dried orange slices and cinnamon sticks. This gives a natural, nice-smelling final touch.

9. Monochromatic and Modern Elegance

For a modern home, a simple or single-color scheme creates a sleek, neat holiday look. Think less is more. Focus strongly on the texture and shape of items, not too much color.

Modernizing Your Front Porch

  • Color Palette: Use only two or three colors at most. Try black, white, and gold, or deep green and natural wood. Using few colors makes a strong impact.
  • Sleek Shapes: Choose modern, straight lines for your planters, lanterns, and signs. Look for square, rectangular, or simple cylinder shapes.
  • Unadorned Greenery: Use simple, high-quality wreaths and garlands without ribbons or bows. The true beauty is in the look and feel of the plants themselves.
  • Metallic Pop: Add holiday shine with subtle metallic items. Use brushed brass bells, matte black lanterns, or simple gold-toned ornaments. The goal is a small hint of shine, not a very flashy look.

10. The Illuminated Pathway

A truly welcoming front porch shares its festive glow past the immediate door area. It lights up the path to the street or driveway.

Lighting the Way

  • Pathway Lights: Use simple, electric candle stakes or traditional paper bag lights. Fill the bags with sand and an LED tea light. Line the steps and walkway with these. The soft, evenly placed light creates a magical guiding effect for guests.
  • Twinkling Effects: Use very small LED or “fairy” lights on any railings, columns, or small trees nearby. Their soft, delicate twinkling adds depth and charm. Larger bulbs just cannot achieve this same effect.
  • Spotlight Focus: Use one single, warm-white spotlight. Shine it to highlight one main item. You could light up a large wreath, a tall potted tree, or a decorative sign. This smart trick draws the eye and shows off your best decorating parts.

Conclusion

Decorating your front porch for the Christmas season is one of the most satisfying holiday projects you can do. From the welcoming beauty of an evergreen archway to the soft charm of a cozy seating spot, each of these ten ideas offers a great way to create a magical entryway. Remember to layer your decorations for good visual interest. Use symmetry for a neat look. And always include warm lighting. This helps you successfully create a truly inviting glow for the season. Does your personal style lean rustic and traditional or sleek and modern? Either way, a well-decorated front porch sets the perfect, happy tone for all who come to your home.


References


Recent Posts


10 DIY Décor Ideas For Small Tables You Need Right Now

Styled oak accent table next to a light sofa, featuring a tall textured vase with pampas grass and eucalyptus, stacked books, a concrete catchall bowl with keys, and a lit candle. This image showcases successful DIY Décor Ideas for small spaces.

This information is presented with the goal of making great design accessible to everyone. Achieving a beautiful home does not require a large budget. All that is needed is a little creativity and a willingness to explore fun DIY Décor Ideas. This content specializes in simple, easy-to-follow projects that yield big results, demonstrating that the most effective home updates often come from a weekend of simple diy crafts. Discover how these easy diy and crafts projects can transform old furniture into stylish conversation pieces.


Mastering Small Space Style: The Ultimate DIY Décor Ideas

Small accent tables are often placed next to a couch or a bed. They are the quiet heroes of home design. These tables are useful and necessary, yet people often forget to style them well. Too many homeowners just put a lamp on them and stop there. They miss a big chance to add style, texture, and high-end design to their living area. A small table can be a strong focal point. If you decorate it well, it can make the whole room feel more finished and put together.

The great news is that you do not need expensive store items to get this stylish look. In fact, the most charming, personal, and stunning displays often come from great DIY Décor Ideas. This long guide gives you ten important projects. They cover many styles and techniques. They are all made to work perfectly for small accent tables. These ideas are great craft for adults who want to add a personal touch to their home. They show that great-looking décor is easy to achieve for anyone. We look closely at the tools, the steps, and the styling advice for each project. This will help your accent table go from just useful to truly beautiful.


1. The Textured Clay Vase Update

A lovely vase is key to any table display. Still, store-bought vases can cost a lot of money. This project takes a cheap vase and changes its surface. It will look like an expensive, textured piece.

The Idea and Inspiration

The popular high-end look is matte, textured ceramics. This style often has a rough, stucco-like surface. Making this look at home is much simpler than you might think. You can take any plain glass or ceramic vase. Even a vase from a thrift store will work. You can give it a full style makeover. This is one of the fastest and best DIY Décor Ideas for accent tables.

Materials and Process

  • Materials: A basic, clean vase (any shape), baking soda, matte acrylic paint (white, cream, or beige), a brush, and a small cup for mixing.
  • The Mix: The paint and baking soda mix is the secret to the texture. Start by pouring a good amount of paint into your cup. Slowly mix in baking soda until the mix is thick. It should look like light frosting or thick batter. If you add more baking soda, the texture will be rougher.
  • Application: Use an uneven, dabbing brush stroke. Put the mix onto the vase. Do not try to make it smooth. The uneven look is what makes it look like real, hand-made ceramic. Cover the whole outside surface. Let it dry fully. You might need a second layer to fully cover the original surface and make the texture pop.
  • Styling Tip: Put dry pampas grass, cotton stems, or fake eucalyptus in the finished vase. This gives you a clean, modern look that needs no care.

2. Elevated Stacked Book Storage

Books are a basic item on any table. But just stacking them can look messy. This project changes a stack of books into a smart display stand and a place to hide things.

The Idea and Inspiration

Home designers often use books to add height. They use them to hold smaller décor items in place. This trick goes even further. It uses a hollowed-out book or box as the base. This lets you hide remote controls, phone cords, or reading glasses right on the table. This project mixes style and use. It is a perfect example of great DIY Décor Ideas.

Materials and Process

  • Materials: Three to five attractive hardback books (pick colors that match your room), strong craft glue, and a small, shallow box made of wood or cardboard (this is for the hidden storage, it is optional).
  • The Look: Take off the paper dust covers. This gives the books a more stylish, textured look. Choose books with spine colors that work well together. For a matching style, paint the spines of all the books one matte color (like black or brown-grey).
  • Creating the Riser: Stack the books with the biggest one at the bottom. Put a thin layer of strong craft glue between each book. This keeps the stack steady and solid.
  • Adding Storage (Optional): If you want to add storage, here is a simple diy crafts step: Use a sharp utility knife to carefully cut out the center pages of the bottom book. Leave a half-inch border. Or, use a small, nice wooden box. Paint it the same color as the book spines. Glue it to the bottom of the lowest book.
  • Styling Tip: Place one small, valued item on top of the stack. A scented candle, a nice coaster, or a small framed photo works well. This makes people look at the height you have created.

3. Geometric Cork Coasters

Coasters must protect your table. Yet, they often do not add much style. These geometric cork coasters are a simple, high-impact craft for adults project. They add natural texture and modern shapes to your table.

The Idea and Inspiration

Cork is a great, nature-friendly material. It soaks up water well. It also keeps things from sliding. Cut the cork into cool, unexpected shapes. Add a touch of metal. This moves the coaster from just useful to truly decorative.

Materials and Process

  • Materials: Thin sheets of cork (you can buy this at most craft shops), a very sharp utility knife, a ruler, masking tape, and metallic gold or copper spray paint.
  • The Shape: Do not cut simple circles or squares. Instead, cut the cork into six-sided shapes (hexagons), long diamonds, or half-moon shapes that overlap. Use a pencil and ruler to draw your lines before you cut.
  • The Metallic Accent: Use masking tape to cover one-third or one-fourth of the coaster. For example, tape off one corner of the hexagon or the bottom edge of a diamond shape. Spray the part that is showing with the metallic paint. Let it dry completely. Then, carefully pull off the tape. This shows a clean line between the natural cork and the metallic color.
  • Styling Tip: When you are not using the coasters, place them slightly over each other on your table. Put a mug on one and a small, low succulent plant on another. This shows them off as decorative items.

4. Marble Effect Serving Tray

A tray is a designer’s secret tool. It keeps small items together. It also marks a special area on a small table. This project creates the look of costly marble or stone. It does this without the high cost or heavy weight.

The Idea and Inspiration

A tray gives a group of objects (a lamp, a vase, a candle) a visual border. This makes them look like a planned arrangement, not just random things. Real marble trays are expensive. But you can get a stunning fake finish. You just need a simple painting trick. This is a top-level DIY Décor Ideas project that gives you very nice results.

Materials and Process

  • Materials: A simple tray made of wood or MDF (even a cutting board with handles can work), white or light grey paint, black and dark grey acrylic paint, a very thin artist’s brush, and clear sealant spray. Optional: metallic gold paint for the “veins.”
  • The Base: Paint the whole tray with two coats of the light base color (white or light grey).
  • Creating the Veins: Dip the thin brush into the black or dark grey paint. Use a very light touch to draw thin, branching lines across the surface. Right away, use a damp cloth or sponge to gently dab and smudge the lines. This softens them so they blend into the base color. This blurred effect makes the marble look real.
  • Finishing: After the paint is fully dry, spray the tray with a clear sealant. This makes it strong and gives it a shiny finish that looks like smooth stone.
  • Styling Tip: Use the tray to hold all your table must-haves: a lamp, a small bowl for keys, and a remote control. The tray makes this collection look planned and organized.

5. Industrial Concrete Bowl Catchall

Small bowls work well on accent tables. They catch little items like keys or coins. This project uses quick-setting concrete to make a simple, industrial-style bowl. It will be unique and look handmade.

The Idea and Inspiration

The raw, unfinished look of concrete is a key style in modern, industrial design. Making a small concrete bowl is a simple diy and crafts activity. It gives you a very smart, touchable object.

Materials and Process

  • Materials: Quick-setting cement or plaster of Paris, two different-sized plastic or silicone bowls (one small, one a little larger), non-stick cooking spray, and sandpaper.
  • The Pour: Mix the cement as the package tells you. Make sure it is smooth but not too runny. Spray the inside of the larger bowl. Also, spray the outside of the smaller bowl with cooking spray.
  • Casting: Pour the cement into the larger bowl. Fill it halfway. Gently push the smaller bowl into the center of the cement mix. The cement should rise up around the edges. You may need to put weights or stones inside the inner bowl to hold it down.
  • The Cure: Let the cement dry and harden for the time given on the package. Once it is fully hard, carefully twist and pull out the two bowls. This shows your new concrete catchall. Sand down any rough edges.
  • Styling Tip: Put moss in the finished bowl. Place a nice air plant inside it. Or, just use it to drop your keys or jewelry when you sit down.

6. Cane Webbing Lamp Shade Revamp

If you have a plain lamp already sitting on your table, this is a great DIY Décor Ideas project. You can update its look using materials from nature that are very popular right now.

The Idea and Inspiration

Cane webbing is a material made from woven natural fibers. It is very popular in nice furniture. It brings a lovely, light texture that reminds people of older mid-century design. When you put it on a simple lamp shade, the lamp instantly looks much better.

Materials and Process

  • Materials: A simple drum-style lamp shade (one with flat sides is best), a sheet of cane webbing (you can buy this online), spray adhesive or hot glue, and scissors.
  • Measuring and Cutting: Roll the lamp shade across the cane webbing. Measure the length and height you need. Leave a bit extra for the overlap where the ends meet. Carefully cut the cane webbing to the right size.
  • Adhering: Work on small parts at a time. Spray the shade with glue or put hot glue along the edges. Slowly and tightly wrap the cane webbing around the shade. Make sure the weave is straight and the meeting point is neat.
  • Finishing: Use a little hot glue along the seam to hold it firmly. The woven pattern lets the light shine through in a beautiful way. It casts unique patterns in the room.
  • Styling Tip: Use the cane shade with a simple, modern lamp base (made of wood, metal, or ceramic). This makes the texture of the shade the main point of the design.

7. Faux Agate Slice Tray Inlays

This is a small touch that looks very dramatic. It turns a plain wooden or metal tabletop or tray into a piece of art. It uses clear resin and bright colors.

The Idea and Inspiration

Real agate slices are beautiful, but they break easily and cost a lot. You can make the look of a colorful, crystal-filled stone slice. Use epoxy resin and colored powder. Then, put this fake slice into your tabletop or a tray. This is a more complex craft for adults project. The result is a custom look that feels professional.

Materials and Process

  • Materials: Two-part clear epoxy resin, colored mica powder (blue, purple, gold), small plastic cups for mixing, wooden sticks, and a silicone mold (round or long).
  • Mixing: Follow the resin instructions exactly for mixing the two parts. Pour small amounts of the mixed resin into separate cups. Mix in different colors of mica powder.
  • Pouring the Agate: Pour the colors into the mold. Start with the main color. Drizzle small amounts of a second color and the gold color around the edge. This copies the crystal bands of the real stone. Use a stick to gently swirl (do not mix!) the colors together. This creates the stone-like vein lines.
  • Inlay (Optional): Once the resin is hard, you can glue it into a cut-out spot in your table or tray. Use a strong glue for this. Or, just use the finished slice as a dramatic coaster or a decorative piece by itself.
  • Styling Tip: The bright colors of the agate slice look best next to neutral things on the table. Things like white paint or dark wood work well.

8. Repurposed Picture Frame Mirror

Every small accent table looks better with something reflective. This bounces light around and makes the area feel bigger. This project takes an old frame and turns it into a stylish, decorative mirror.

The Idea and Inspiration

Mirrors are excellent DIY Décor Ideas because they add shine and depth. Find an attractive picture frame (one with fancy designs works well). Take out the photo and put a mirror piece in its place. This creates a high-end decorative item. It costs much less than a mirror bought from a store.

Materials and Process

  • Materials: A nice picture frame (wood, metal, or painted), a piece of mirror cut to fit the frame’s opening (most hardware or glass stores can cut this for you), and strong hardware for hanging (if you hang it) or a stand (if it rests on the table).
  • The Frame: Sand the frame and paint it or stain it to match your room. A worn look or a deep, dark stain can give it a vintage feel.
  • Assembly: Just put the custom-cut mirror piece into the frame. Do this just like you would put in a photo or print. Secure the backing.
  • Styling Tip: Lean the framed mirror up against the wall behind your table. The reflection will quickly add depth. It also makes the items in front of it (like a vase or candle) look more important.

9. DIY Painted Terra Cotta Pedestals

Give your smallest planters or decorative items the attention they should have. Put them on simple, custom-made stands.

The Idea and Inspiration

A stand lifts objects up. This makes them look special, like something in a museum. Use cheap terra cotta pots and saucers. You can make a simple but elegant stand. This adds height differences, which is a key part of good staging. This is a very good and cheap set of DIY Décor Ideas.

Materials and Process

  • Materials: Two terra cotta pots (one a little bigger than the other, or two the same size), matching terra cotta saucers, strong glue (epoxy or strong craft glue), and matte paint in your chosen color (like white or black).
  • The Assembly: Turn the larger pot upside down. Glue the smaller pot (also upside down) right on top of the larger pot’s base. This makes a stepped stand. Or, for an easier look, glue a small terra cotta saucer upside down onto the top rim of a single, inverted pot. Let the glue dry completely.
  • The Finish: Paint the whole stand with two coats of paint. For a more rustic or factory look, use a thin, dry brush to lightly add a different color paint onto the edges.
  • Styling Tip: Put a small succulent plant, a nicely wrapped box, or a tiny statue on the finished stand. This will instantly draw the eye up.

10. Textured Paint Dipped Wood Votives

Candlelight is needed for a cozy feel. These custom holders add both texture and a bit of color.

The Idea and Inspiration

Simple wooden candle holders can often look too plain. Dip them in paint mixed with baking soda (use the same trick as in Idea 1). This gives them a lovely, matte, and soft finish. It looks great next to the natural wood grain. This is a quick and useful diy and crafts project.

Materials and Process

  • Materials: Simple, plain wooden votive holders, matte paint, baking soda, a mixing cup, and masking tape.
  • The Dip Line: Use masking tape to cover the top two-thirds of the candle holder. Leave the bottom part showing. This creates a clean, professional line where the paint starts.
  • The Mix and Dip: Make the textured paint mix (paint plus baking soda) as described earlier. Hold the votive by the taped section. Slowly dip the bottom part that is showing into the paint mix. Make sure the paint covers the area up to the tape line.
  • The Cure: Carefully place the candle holder on wax paper. Let it dry fully. Once it is dry, gently pull off the masking tape. This shows the crisp line between the natural wood and the textured paint.
  • Styling Tip: Use three votives of different heights together on your accent table. This creates a warm, layered lighting display.

Conclusion: Your Small Table, Elevated

Your small accent table is more than just a place to put your cup. It is a key spot for design in your home. By taking on these DIY Décor Ideas, you are doing more than just saving money. You are adding your own unique style and creativity to your home. Each of these projects is a chance to make your space look better. They help you practice fun diy crafts and make truly custom pieces that everyone will admire. Great design is found in the small details. With these ten ideas, you have everything you need to change a plain table into a stunning design piece. Start your next project today, and watch your room get a fresh, new look.


References

For more reading and help with materials, these places offer great information on the skills and items used in these DIY Décor Ideas:


Recent Posts


10 Easy Tomatoes Soup Recipes To Make

An overhead shot displaying various Tomatoes Soup Recipes and preparation styles, including a large central bowl of creamy tomato soup garnished with basil and a side of grilled cheese, surrounded by yellow and red fresh Tomatoes.

This article is for people who enjoy the simple taste of the tomato. It shows how the tomato changes completely when cooked into a soup. We explore the best comfort food, providing ten simple Tomatoes Soup Recipes. These recipes fit any skill level, schedule, or food craving. These easy and straightforward recipes prove that the best meals are often the simplest ones. Get ready to cook a warm, healthy pot of soup using these simple methods for classic and new tomato soup ideas.


Introduction: Discover the Versatility of Tomatoes Soup Recipes

A warm bowl of tomato soup has a comforting quality that soothes the soul. It is a main meal item that many different cultures enjoy. People eat it in every age group and in all seasons. It provides warmth when it is cold. It delivers bright, fresh taste when it is warm. However, tomato soup is much more varied than the simple canned type we often remember from childhood. This article will help you explore that variety. We share 10 Easy Tomatoes Soup Recipes here. They are easy to make, full of flavor, and very enjoyable.

We think that cooking should be fun. It should not feel like a difficult chore. We chose every recipe on this list because it is simple. They use ingredients that are easy to find. The cooking methods are direct and easy to follow. You will find a new favorite here. Maybe you want the traditional comfort of a classic creamy soup. Maybe you want the smoky heat of a global recipe. Or maybe you want a lighter, fresh-tasting option. Forget about hard cooking steps. Say hello to a quick, healthy, and delicious homemade soup. Start cooking. Grab your spoon. Let’s turn simple Tomatoes into amazing soups.


Section 1: Classic Comfort

These recipes are the long-time favorites. They are the familiar, creamy, and filling bowls. And define what great tomato soup should be. They use simple, high-quality ingredients to give you the most comfort.

1. The Ultimate Creamy Tomato Soup

This soup is the perfect standard for comfort food. It is rich, smooth, and has a great mix of sweet and sour taste.

  • Key Ingredients: Canned crushed tomatoes (San Marzano are best), heavy cream, butter, onion, garlic, vegetable broth, fresh basil.
  • The Simple Method: Cook the chopped onion and garlic in butter until they are soft. Add the tomatoes and broth. Let it cook at a gentle boil for 20 minutes. Take the pot off the heat. Stir in the cream. Use a stick blender, or a regular blender, to mix it until it is perfectly smooth. Add basil on top. Finish with a small drizzle of olive oil.
  • Why It Works: Butter and cream are necessary here. They help lessen the sour taste of the tomatoes. They also create that rich, smooth texture.

2. Roasted Tomato and Garlic Soup (The Flavor Booster)

Baking the tomatoes makes their natural sweetness stronger. This gives the soup a rich flavor that is unmatched.

  • Key Ingredients: Ripe vine tomatoes, whole heads of garlic, olive oil, dried oregano, vegetable broth.
  • The Simple Method: Cut the tomatoes in half. Mix them with peeled garlic pieces, olive oil, and oregano on a baking tray. Bake them at 200°C (about 400°F) for 30 to 40 minutes. They should look caramelized. Scrape all the ingredients into a pot. Add the broth. Cook it gently for 10 minutes. Blend it until the soup is smooth.
  • A Quick Tip: Do not worry about peeling the garlic first. Baking makes it soft enough to blend into the soup easily.

3. The Three-Ingredient Wonder Soup

This recipe proves that simple cooking can be excellent. This is a classic recipe. It often comes from Italian-American cooking.

  • Key Ingredients: Canned whole peeled tomatoes, butter, onion.
  • The Simple Method: Put the tomatoes, one onion cut in half, and a large piece of butter into a pot. Bring it to a gentle boil. Cook it slowly for about 45 minutes. Stir it sometimes. Take out the onion and throw it away before you serve the soup. Add salt and pepper to taste.
  • The Magic: The onion and butter slowly melt into the tomatoes. This creates a surprisingly complex, naturally creamy, and sweet taste. You do not need to blend this soup.

Section 2: International Flavors

Tomato soup can be changed easily with seasonings from around the world. These recipes bring bright, exciting tastes from different countries. They use simple spice mixtures and ingredients.

4. Mediterranean Tomato and White Bean Soup

This is a filling, rustic soup. It mixes the bright sourness of tomatoes with the hearty taste of herbs. The beans give it a good texture.

  • Key Ingredients: Canned diced tomatoes, canned cannellini beans (washed), vegetable broth, onion, garlic, dried thyme, dried rosemary.
  • The Simple Method: Cook the onion, garlic, thyme, and rosemary in oil. Add the tomatoes and broth. Cook it gently for 15 minutes. Add the cannellini beans. Cook for a final 5 minutes until they are hot. For a thicker soup, mash about one third of the beans against the side of the pot before serving it.
  • Best Served With: A thick piece of toasted sourdough bread with olive oil on top.

5. Quick and Fiery Mexican Tomato Soup (Sopa Azteca Inspired)

This soup is simple and bright. It has a bit of heat from chipotle pepper and cilantro. It is great for a quick dinner during the week.

  • Key Ingredients: Fire-roasted diced tomatoes, vegetable broth, onion, garlic, one small chipotle pepper in adobo sauce, ground cumin.
  • The Simple Method: Cook the onion and garlic in oil. Add the tomatoes, broth, cumin, and the chipotle pepper. You can take out the seeds for less heat. Add more adobo sauce for a smoky taste. Cook gently for 15 minutes. Blend it briefly. It should still have some texture to it.
  • Garnish Power: Serve it with crushed tortilla chips, a spoonful of sour cream, and fresh cilantro leaves.

6. Curried Coconut Tomato Soup (Indian-Inspired)

This soup uses the warm spices of India. It has the sweetness of tomatoes and the richness of coconut milk. This makes a very satisfying and rich soup.

  • Key Ingredients: Canned crushed tomatoes, full-fat coconut milk, yellow onion, ginger, red curry paste or curry powder, vegetable broth.
  • The Simple Method: Cook the onion and chopped ginger in oil. Stir in the curry paste for one minute. It should smell fragrant. Add the tomatoes and broth. Cook gently for 20 minutes. Stir in the coconut milk until it is fully mixed and hot. Do not let it boil after you add the coconut milk.
  • Adjusting the Heat: Use more or less curry paste if you want the soup to be more or less spicy.

Section 3: Creative Twists

These recipes use the idea of tomato soup and try something new. They use fresh ingredients, different textures, and surprising taste combinations.

7. Fresh Tomato and Basil Gazpacho (No-Cook and Refreshing)

Not all great soups need to be heated. This chilled Spanish classic is perfect for hot weather. It shows off the pure, uncooked taste of ripe, summer-fresh Tomatoes.

  • Key Ingredients: Very ripe fresh tomatoes, cucumber, green bell pepper, red onion, garlic, red wine vinegar, olive oil, fresh basil.
  • The Simple Method: Chop all the vegetables roughly. Put them in a blender with the vinegar and olive oil. Blend it until it is smooth. Put it in the refrigerator to chill for at least two hours. This lets the flavors mix well.
  • The Secret: Find the best and ripest tomatoes you can. They are the most important part of this simple dish.

8. Tuscan Tomato Soup with Pasta (Pappa al Pomodoro Inspired)

This is a thick, rustic Italian soup. It uses stale bread or small pasta pieces to give it body and thickness. This makes it a complete meal on its own.

  • Key Ingredients: Canned crushed tomatoes, vegetable broth, onion, garlic, day-old crusty bread or small pasta like Ditali, Pecorino Romano cheese (optional).
  • The Simple Method: Cook the onion and garlic in oil. Add the tomatoes and broth. Bring it to a gentle boil. Tear the bread into small pieces. Stir it into the simmering soup. If you are using pasta, add the pre-cooked pasta instead. Cook until the bread or pasta is soft and the soup has become thick. This takes about 10 minutes. Stir in a little bit of olive oil and top with grated cheese.
  • Zero Waste: This is an excellent way to use old bread and make it into a tasty meal.

9. Spicy Smoked Paprika and Lentil Tomato Soup

This recipe adds protein and a lovely smoky, deep taste. It changes a simple side dish into a main meal.

  • Key Ingredients: Canned diced tomatoes, red lentils, vegetable broth, onion, garlic, smoked paprika, a small pinch of cayenne pepper.
  • The Simple Method: Cook the onion and garlic in oil. Stir in the smoked paprika and cayenne pepper. Add the tomatoes, vegetable broth, and washed red lentils. Cook gently for 25 to 30 minutes. The lentils should be completely soft. Add salt and pepper to taste.
  • Lentil Magic: Red lentils break down while cooking. They make the soup thick naturally. You do not need to add cream or flour.

10. Sweet and Savory Tomato Soup with Balsamic Glaze

This is a more refined soup. It uses a classic Italian flavor mix to make the overall taste deeper.

  • Key Ingredients: Canned crushed tomatoes, onion, garlic, a small amount of brown sugar, and good quality balsamic vinegar.
  • The Simple Method: Cook the onion and garlic in oil. Add the crushed tomatoes and brown sugar. Cook gently for 15 minutes. Stir in a large tablespoon of balsamic vinegar before you blend it. Cook gently for a final 5 minutes.
  • The Finishing Touch: Cook extra balsamic vinegar until it becomes a thick glaze. Pour this glaze over the finished soup right before you serve it.

Conclusion

These 10 Easy Tomatoes Soup Recipes show how simple the dish is. They also show the great variety of flavors you can create with very little effort. We looked at many styles. We covered the comfort of The Ultimate Creamy Tomato Soup and the raw, fresh taste of Fresh Tomato Gazpacho. The tomato proves that it is one of the most useful ingredients you can have in your kitchen.

Soup that you make at home is good for your body and your spirit. These recipes offer an easy way to feel that satisfaction. We encourage you to start with the recipe you like best. Try new seasonings and ingredients. Find the joy of making a warm, comforting bowl of soup from the start. These Tomatoes Soup Recipes are your guide. The perfect bowl of soup is ready to be cooked.


External References


Recent Posts


15 Simple Ideas To Make With Rocks Right Now

A rustic wooden table displaying various DIY rock crafts, including a river rock bath mat, a mini zen garden, a jar filled with illuminated rocks, and a canvas featuring a rock mosaic tree. This image showcases versatile rocks and craft ideas for adults, perfect for dollar tree crafts.

In our modern world, where everything is often made quickly and sold everywhere, there is a special joy in working with nature’s simple elements. This guide explores the surprising ways you can use rocks and pebbles. It shows that the best home décor can often be made from materials found just outside. This process of turning common stones into beautiful, useful items is both relaxing and easy on the wallet. We believe that simple, natural rocks are the perfect start for easy art and well-designed home items, proving their power to change a space and inspire great creativity.


The Simple Power of Rocks for Easy Craft and Decor

The ordinary rock is often forgotten when we think about crafting and home design. Yet, its natural feel, range of colors, and solid nature make it perfect for many do-it-yourself projects. You can make anything from simple, beautiful home accents to strong garden features. Turning common pebbles into something special is not only fun but also very inexpensive. This long article gives you 15 easy, inspiring ideas for working with rocks today. These are great craft ideas for adults. They are resourceful ways to use materials like those found at a local dollar store, making them smart dollar tree crafts.

Section 1: Zen, Spa, and Bathroom Projects

The bathroom is the perfect place to add the peaceful, natural look of stone. The projects here focus on texture. They help create a relaxing, spa-like feeling in your space.

1. The River Rock Bath Mat: A Natural Foot Massage

Change your normal shower routine into a spa moment with a custom river rock bath mat. This project feels great under your feet. It also lets water drain away easily.

  • Process: Get a flexible rubber mat. A mat with drain holes is best. Use a strong, waterproof glue, like marine epoxy, to stick smooth, flat river rocks onto the mat. Press them close together until the whole surface is covered. Let the mat dry completely for one or two full days before using it.
  • Why it works: The slightly uneven rocks create a natural, comforting foot massage. The colors of the stones are naturally calming.
  • Image Placement:

2. Bathroom Accessory Facelift

Give old or cheap bathroom items a fancy spa look. Just glue small pebbles to their surfaces.

  • Process: Use hot glue for fast and clean work. Carefully attach small, flat-sided rocks to the outside of common items. Good items to use are soap dispensers, tissue boxes, cups, and small storage caddies. Work on small areas at a time to make sure the rocks fit tightly and evenly.
  • Key Tip: Pick items that have flat or straight sides. This makes applying the rocks easier. This is a very easy and effective dollar tree crafts project.

Section 2: Useful and Beautiful Home Accents

This section shows how to use rocks to make items that are practical. They will add a natural, elegant feel to your kitchen and living areas. These are excellent craft ideas for adults who enjoy making useful items.

3. Pebble Trivets and Hot Pads

Protect your tables and counters from heat. At the same time, add a unique, natural piece to your dining table.

  • Process: Pick a base material. Cork, thick felt, or even ceramic tiles work well. The base must be able to handle heat. Use a strong, clear-drying glue. Epoxy is best because it handles heat well. Glue smooth, heat-resistant pebbles to the surface. Make sure the rocks are close together. This creates a solid surface that spreads heat well.
  • Image Placement:

4. DIY Rustic Cabinet Pulls

Give standard metal handles a natural, outdoor feel by adding natural stones.

  • Process: This works best with handles that have a flat top. Choose rocks with a flat back so they can be glued easily. Take the metal handle off the cabinet. Clean the handle and the rock very well. Put strong industrial glue or epoxy on the back of the rock. Press it firmly onto the front of the metal handle. Wait for the glue to fully dry before putting the handle back on the cabinet.
  • Design Note: Using rocks of the same size and color looks neat. Mixing sizes and colors creates a more free and relaxed look.

5. Vase, Jar, and Candle Holder Fillers

One of the easiest and best uses for polished or natural rocks is filling clear glass containers.

  • Process: Just pour clean, dry rocks into clear glass vases, jars, or candle holders.
  • Ways to Use Them:
    • Vases: The rocks make the vase heavy. This stops tall flower arrangements from tipping over.
    • Candle Holders: Layer the rocks with water. This creates a lovely base for floating candles.
    • Air Plants: The rocks give air plants (Tillandsia) a perfect base that drains well.

6. Fireplace Hearth Accents

Even an unused fireplace can be a focal point. Just add the texture of natural stone.

  • Process: Neatly arrange polished or same-sized pebbles inside the empty fireplace or on the hearth. This quickly adds texture and a clean, natural element. It looks great against painted wood or white walls.
  • Tip for Beauty: Place small battery-powered candles or fairy lights among the stones. This creates a soft, gentle light.

7. Decorative Natural Stone Bowls

Make a strong, unique dish by gluing small stones together in the shape of a bowl.

  • Process: Find a mold (a simple glass or plastic bowl). Line the mold with plastic wrap. Start layering your small, clean rocks inside the mold. Glue them to each other with a strong, clear glue like silicone or epoxy. When the entire inside of the mold is covered, and the glue is dry, gently pull the rock bowl out of the mold.
  • Image Placement:

Section 3: Art, Relaxation, and Wall Design

This section looks at using rocks as the main material for making art, wall pieces, and items that bring calm to your home and office.

8. Pebble Wall Art: Making 3D Shapes

Stones can give amazing depth and natural shape to a simple canvas.

  • Process: Get a strong canvas or a piece of wood. Draw a simple picture, like a tree outline, a heart, or a pattern. Use a strong glue. Carefully place and glue pebbles and stones to fill in your design. Use smaller pebbles for small details. Use larger stones for the main parts of the picture. Once the glue is dry, you can leave the stones natural. You can also spray paint the whole piece one color, like a dull white or black. This makes all the different stones look like one piece.
  • Why it’s special: The natural shadows created by the 3D texture are much more interesting than a flat picture.

9. The Desktop Zen Garden

This small garden is calming and helps you focus. It’s perfect for any desk or quiet corner.

  • Process: Use a shallow tray or box. Fill it with fine, clean sand. Collect a mix of small, nice-looking rocks. Some should be smooth and round. Others can have sharp edges. Arrange the rocks in the sand to make a small landscape. Include a small rake. You can find these in the dollar tree crafts aisle or make one from small wood sticks. Use the rake to draw patterns in the sand.
  • Image Placement:

10. Illuminated Rock Lanterns

Create beautiful, soft lighting that shows off the natural beauty of the stones.

  • Process: Choose a clear glass jar or lamp. Put a battery-powered LED light or LED string lights inside. Carefully stack and arrange larger, textured rocks around the light. The light will shine through and reflect off the surfaces of the stones. This makes a beautiful, natural glow.
  • Safety Note: Always use LED or battery-powered lights. Never use real flames for this project.

11. Custom Painted Kindness Rocks

Painting rocks is a popular and fun activity. It is a great way to relax and be creative.

  • Process: Find smooth, flat stones. Clean and dry them. Use colorful acrylic paints and a clear sealer. Paint small pictures, write kind messages, or draw fun designs. After sealing them, these rocks are often left in public places for strangers to find. They act as small, secret gifts of kindness. This is a simple, wonderful craft idea for adults and a fun activity for families.

Section 4: Garden and Outdoor Improvements

Rocks are naturally suited for the outdoors. They last a long time. And help with water drainage. They also connect your house to the natural landscape. These projects focus on making your garden look better and work better.

12. Decorative Planter Accents and Soil Topping

Using small pebbles on top of the soil in your potted plants does more than just look nice.

  • Process: After you water your plant, put a layer of small, clean river rocks or decorative stones on top of the soil.
  • Benefits:
    • Looks: Makes the planter look clean and finished.
    • Pest Control: Helps stop small bugs from laying eggs in the top dirt.
    • Water Saving: Helps keep the water in the soil longer by slowing down drying.
    • Stops Erosion: Keeps the soil from washing away when you water the plant.

13. Pebble Mosaic Stepping Stones

Make your own strong stepping stones. They will add color and character to your garden path.

  • Process: Mix some concrete, or buy a stepping stone kit. Pour the concrete into a mold, like a baking pan or plastic box. While the concrete is still wet, press river rocks into the surface in a pattern. You can make a spiral, a flower, straight lines, or just a free design. Make sure the tops of the rocks are level with or slightly sticking out of the concrete. Let the concrete dry completely before taking the mold off and placing the stone in your garden.
  • Image Placement:

14. Garden Borders and Edging

Use rocks to clearly mark the edges of your garden spaces. This gives a natural, softer look than wood or plastic edging.

  • Process: Gather or buy different sizes of river rocks or field stones. Line the stones up in one or two rows. This creates a strong, natural border for flower beds, vegetable areas, or paths. You can bury the larger stones a little bit to make the border solid and lasting.
  • Design Tip: Using rocks that are common in your area will make the border fit naturally with the rest of your landscape.

15. The Potted Plant Drainage Base

This is a smart, useful way to use flat stones. It helps protect surfaces from too much water.

  • Process: Glue flat-sided stones onto a small, waterproof mat, like a piece of rubber. The final piece should be just a little bigger than the bottom of your plant pot. Place the plant pot on this base. It lifts the pot up. This lets air move around. It also lets extra water drain away without sitting on your floor or shelf.

Conclusion

The projects here only cover a fraction of what you can create with just a few simple rocks and some glue. These ideas range from inexpensive dollar tree crafts that brighten up a bathroom to elegant craft ideas for adults that improve living spaces and gardens.

Natural stone is amazing because it is simple, strong, and can be used in many ways. The real joy of working with rocks is their natural beauty. They connect us instantly to the outdoors. If you are looking for a calming hobby or a way to bring natural beauty into your home, these 15 ideas prove that the best materials are often the ones we overlook. Go ahead, find your stones, and start making something today.


External References

These sources offer more inspiration and detailed steps for working with natural stone in home and garden crafts.


Recent Posts


10 Simple Crafts For Adults That you can Make Right Now

Curated collection of supplies for simple DIY projects and Crafts For Adults, including paint, beads, patterned paper, fabric scraps, and a glue gun, laid out on a rustic wooden table.

This guide is here to help you find joy in making things. We know that working with your hands is a great way to relax and feel good. We want to show you that you do not need lots of money or training to be creative. These ideas use items you likely have at home or can buy cheaply. We hope you enjoy these fun and easy Crafts For Adults.


Introduction: Why You Should Start Crafting Today

Life can be very busy. We rush from work to chores and often forget to take a break. It can be hard to find time for yourself. But did you know that making things with your hands can help you feel better? It is true. Crafting allows your mind to rest. It helps you focus on just one thing at a time. This can lower your stress. It can also make you feel proud when you finish a project.

You do not need to be a professional artist. And you do not need a big studio. You also do not need expensive tools. The best crafts are often the simplest ones. You can use things you already have in your house. You can also find great supplies at low prices. Many people love dollar tree crafts because they are cheap and fun.

This article lists ten easy craft ideas for adults. You can start any of these projects right now. We have chosen crafts that are quick to learn. They are perfect for beginners. You can do them alone to relax. Or, you can do them with friends for a fun night in. We will guide you through each step. And tell you what you need. We will also give you tips to make your project look great.

So, clear off your table. Put on some good music. Get ready to make something beautiful. Let’s get started.


1. Painted Rocks: Small Art for Everyone

This is one of the easiest ways to start being creative. Painted rocks are very popular right now. You might have seen them in parks or gardens. People call them “Kindness Rocks.” The idea is simple. You find a rock, paint it, and leave it for someone else to find. It spreads joy. But you can also keep them. They look great in your own garden or on your desk.

Why You Will Love It:

It is free to find rocks. The painting part is very relaxing. You can paint anything you want. It does not have to be perfect. Even simple dots look amazing.

What You Need:

  • Smooth rocks. Look for river stones or beach pebbles.
  • Acrylic paint. This paint covers well and dries fast.
  • Paintbrushes. You need a mix of sizes. Small ones are good for details.
  • Clear sealer. This protects the paint from rain.

How to Do It:

First, you must clean your rocks. Wash them with soap and warm water. Scrub off any dirt. Let them dry completely. The paint will stick better to a clean, dry rock.

Next, paint a base coat. This is the background color. You might paint the whole rock white, black, or blue. Let this layer dry. Now comes the fun part. Add your design. You can paint a ladybug or a flower. You can write a happy word like “Hope” or “Love.” If you are not good at drawing, just use dots. Dip the back of your paintbrush in paint. Press it on the rock. It makes a perfect circle.

Finally, protect your art. Wait until the paint is totally dry. Then, add a clear sealer. You can brush it on or spray it on. This keeps the colors bright.


2. Paper Flowers: Blooms That Last Forever

Fresh flowers are beautiful, but they die quickly. Paper flowers last for a long time. You can make a whole bouquet that never wilts. This is a great skill to learn. You can use these flowers to decorate gifts. You can also put them in a vase for your home. It is a very cheap craft to try.

Why You Will Love It:

You only need paper and glue. It is very clean work. You can do this while watching TV. It is also very fast. You can make a flower in just a few minutes.

What You Need:

  • Colorful paper. Construction paper or crepe paper works well.
  • Scissors. Make sure they are sharp.
  • Glue. A glue stick or hot glue gun is best.
  • Green wire or sticks. These are for the stems.

How to Do It:

Start with a simple rose. Cut a circle out of red or pink paper. It does not need to be a perfect circle. Now, cut a spiral into the circle. Start at the outside edge. Cut round and round until you get to the center. You will have a long strip that looks like a spring.

Now, roll it up. Start at the outside end of the spiral. Roll the paper tightly. Keep rolling until you reach the center of the circle. Let the roll loosen up a little bit. It will start to look like a flower. Put a drop of glue on the center tab at the bottom. Press the rolled paper onto the glue. Hold it for a minute.

You can make leaves out of green paper. Glue them to the bottom of the flower. If you want a stem, glue the wire to the bottom. Make five or six of these for a pretty bunch.


3. Decoupage Jars or Vases: New Life for Old Glass

Decoupage is a fancy word for a simple technique. It just means gluing paper onto an object. This is a perfect way to recycle. You can save empty pickle jars or sauce jars. With a little paper, you can turn them into beautiful vases or pencil holders. This is one of the best dollar tree crafts because you can buy glass vases for one dollar.

Why You Will Love It:

It is very easy to fix mistakes. If you put the paper in the wrong spot, just move it. The glue dries clear, so it is very forgiving.

What You Need:

  • Clean glass jars or vases. Remove all the labels first.
  • Decorative paper. You can use tissue paper, napkins, or magazines.
  • Mod Podge. This is a special glue and sealer in one.
  • A foam brush.

How to Do It:

First, clean your jar very well. Use rubbing alcohol to remove any grease. Next, prepare your paper. You can cut it into shapes. Or, you can rip it into small pieces. Ripped edges look very cool and artistic.

Dip your brush into the Mod Podge. Paint a thin layer onto the glass. Place a piece of paper on the wet glue. Paint more Mod Podge over the top of the paper. Use your brush to smooth it out. You want to get rid of any air bubbles.

Keep adding paper pieces. Overlap them slightly. Cover the whole jar. Or, you can just make a design in the center. When you are done, paint one last coat of Mod Podge over everything. It will look white at first. Do not worry. It dries clear and shiny. Let it dry overnight.


4. Friendship Bracelets: Fun with Knots

Do you remember making bracelets at summer camp? This craft is just as fun for adults. It is very nostalgic. Weaving the string is a repetitive motion. This helps your brain relax. It is like meditation. These bracelets make wonderful gifts for your friends.

Why You Will Love It:

The supplies are very small. You can carry them in your bag. You can make bracelets on the bus or in a waiting room. It is a great way to pass the time.

What You Need:

  • Embroidery floss. This comes in every color you can imagine.
  • Tape or a safety pin. This holds the bracelet while you work.
  • Scissors.

How to Do It:

Pick three or four colors of thread. Cut them about an arm’s length. Tie all the strings together in a knot at one end. Tape this knot to a table or your jeans. This keeps it steady.

Separate the strings. Take the string on the far left. Cross it over the string next to it to make a number “4” shape. Loop the tail under and pull it tight. This is your first knot. Do this twice on each string. Work your way across the row.

Then start again with the new string on the left. Keep going until the bracelet is long enough for your wrist. Tie a knot at the end. You can braid the loose ends to make ties. There are many patterns to learn, but simple stripes are the best place to start.


5. DIY Magnets: Useful Art

Everyone uses magnets. We put them on the fridge to hold photos or lists. Why use boring gray magnets? You can make custom ones that match your style. This project is super fast. It is also a great way to use up small scraps of paper or fabric.

Why You Will Love It:

These are very useful. You will use them every day. They also make cute little gifts. You can make a set of four in less than 30 minutes.

What You Need:

  • Strong magnets. You can buy these at a craft store.
  • Strong glue. Super glue or E6000 works best.
  • Items to decorate. Try bottle caps, flat glass gems, or wood shapes.

How to Do It:

Let’s make glass gem magnets. These are very popular Crafts For Adults. You need clear, flat glass marbles. You can find these in the floral section of a dollar store.

First, find a picture you like. It could be from a magazine or a photo. It needs to be small. Place the glass gem over the picture. Trace around the gem with a pencil. Cut out the circle of paper.

Put a little clear glue on the front of the picture. Press it onto the flat back of the glass gem. The image will show through the glass. It acts like a magnifying glass. Let it dry. Then, glue the magnet to the back of the paper. Wait for the glue to set completely. Now it is ready for your fridge.


6. Pressed Flower Art: Nature on Display

Flowers are lovely, but they fade. Pressing them keeps their beauty forever. You can turn them into wall art. This craft connects you with nature. It encourages you to go outside and look for pretty leaves and blooms.

Why You Will Love It:

It is slow and peaceful. Arranging the dried flowers is like doing a puzzle. The result is always elegant.

What You Need:

  • Dried flowers. You can buy them or press your own in a heavy book.
  • Cardstock paper or a blank canvas.
  • White liquid glue.
  • Tweezers.

How to Do It:

If you want to press your own flowers, pick them on a dry day. Place them between two sheets of plain paper. Put them inside a big, heavy book. Wait for two weeks. They will become flat and dry.

Now, take your paper or canvas. Lay out your dry flowers. Do not glue them yet. Play with the design. Maybe you want a circle shape. Maybe you want them to look like a meadow. Move them around until you are happy.

Pick up a flower with your tweezers. Put a tiny dot of glue on the back. You do not need much. Place it gently on the paper. Press down lightly. Do this for all the flowers. Let the glue dry. You can put your art in a frame to protect it.


7. Handmade Paper Beads: Jewelry from Trash

You can make beads out of paper. It sounds strange, but it works. They become hard and shiny. You can use old junk mail, newspapers, or magazines. This is very good for the planet because you are reusing waste. It is one of the most creative craft ideas for adults.

Why You Will Love It:

It is magical to watch a strip of paper turn into a bead. You can make custom colors. It costs almost nothing to make.

What You Need:

  • Paper. Glossy magazine pages are great.
  • A ruler and pencil.
  • Toothpicks.
  • Glue stick.
  • Clear nail polish.

How to Do It:

You need to cut the paper into long triangles. The base of the triangle should be about one inch wide. The tip should be very pointy. The strip should be long, maybe 10 inches.

Take a toothpick. Place the wide end of the paper strip against the toothpick. Start rolling the paper around the toothpick. Roll it very tight. Keep it centered. As you roll, the paper will get narrower.

When you get to the tip, add a dab of glue. Press the tip down to seal the bead. It should look like an oval shape. Leave the bead on the toothpick. Paint over the bead with clear nail polish. This makes it shiny and hard. It also protects it from water. Once it is dry, slide it off the toothpick. You can now string it onto a necklace.


8. No-Sew Fabric Coasters: Easy Home Decor

Fabric coasters protect your tables. They also add color to your room. Usually, you need to sew them. But there is a trick. You can use a special glue that melts with an iron. This makes the project very fast and easy.

Why You Will Love It:

You do not need a sewing machine. You do not need a needle and thread. It is a great way to use up small scraps of fabric.

What You Need:

  • Cotton fabric. Pick two patterns that look good together.
  • Fusible interfacing. This is the “glue” sheet. You can buy it at fabric stores.
  • An iron.
  • Scissors.

How to Do It:

Cut two squares of fabric. They should be about 4 inches by 4 inches. Cut a square of the interfacing the same size. The interfacing feels like paper, but one side is rough. That is the glue side.

Sandwich the layers. Put one piece of fabric face down. And the interfacing on top, with the rough side down. Put the second piece of fabric on top, face up.

Heat up your iron. Press the iron onto your fabric sandwich. Hold it for about 10 seconds. The heat melts the glue inside. It sticks the two pieces of fabric together. Now you have a stiff, sturdy square. You can trim the edges with zigzag scissors if you want. That’s it!


9. Custom Painted Doormat: A Warm Welcome

The front door is the first thing people see. You can make it look welcoming with a custom mat. Plain mats are cheap. You can find them at hardware stores. With a little paint, you can make it look like a designer piece.

Why You Will Love It:

It makes a big impact. And is very satisfying to peel off the tape and see your design. It is a fun outdoor project.

What You Need:

  • A plain coir doormat. This is the brown, rough kind.
  • Outdoor acrylic paint. Black is a good color to start with.
  • Masking tape or a stencil.
  • A stiff paintbrush.

How to Do It:

Decide on a design. Geometric shapes are easy. You can use masking tape to make stripes or triangles. Press the tape down really hard. You want it to stick to the rough fibers.

Dip your brush in the paint. Do not use too much paint at once. Dab the paint onto the mat. Do not brush it side to side. Push the paint down into the mat. This is called stippling. It helps you get sharp lines.

Cover all the open areas with paint. You might need two coats. When you are done, peel off the tape slowly. This is the best part. You will see your crisp, clean lines. Let the mat dry outside for a full day before you step on it.


10. Beaded Accessories: Style Your Way

Making jewelry is a classic craft. It is one of the best Crafts For Adults because the results are wearable. You can make bracelets, anklets, or chains for your glasses. Beading is simple but requires focus. It is very calming.

Why You Will Love It:

You can match your jewelry to your outfits. It is much cheaper than buying jewelry at the store. The design options are endless.

What You Need:

  • Beads. You can use glass, wood, or plastic beads.
  • Elastic cord. This is stretchy and easy to use.
  • Scissors.
  • Super glue.

How to Do It:

First, plan your design. Lay your beads out on a towel. The towel stops them from rolling away. You can do a pattern like “blue, white, blue, white.” Or you can do a random mix.

Cut a piece of elastic cord. Make it a little longer than your wrist. Put a piece of tape on one end. This stops the beads from falling off.

Start threading the beads onto the cord. Keep going until it is the right length. Wrap it around your wrist to check. When it fits, tie the two ends together. Use a strong knot. Tie it two or three times. Put a tiny drop of super glue on the knot. This ensures it will never come undone. Trim the extra string. Now wear your new bracelet with pride.


Conclusion: Time to Start Creating

We hope this list has inspired you. Crafting is not just about making things. It is about taking time for yourself. It is about clearing your mind. The ten projects listed here are simple steps into the world of making.

Remember, the goal is to have fun. Do not worry if your first try is not perfect. Enjoy the process. Feel the texture of the paper. Watch the colors of the paint mix. These simple moments bring calm to a busy day.

Whether you choose dollar tree crafts to save money or spend time making a special gift, you are doing something good for your soul. Pick one project from this list. Gather your supplies. Start crafting right now. You might be surprised at what you can create.


External References


Recent Posts


Make Meal Plans To Reduce Waste And Save Money

A woman in a sunny kitchen preparing food on a wooden counter. A small chalkboard easel displays a Meal Plans schedule for the week with meals written in chalk (MON: Lemon Herb Chicken, TUE: Veggie Stir Fry, WED: Lent Soup). In the foreground, a tablet shows a digital grocery list with items like Spinach, Chicken Breast, and Brown Rice checked off, demonstrating the integration of technology with effective Meal Planning to reduce waste and save money.

Do you struggle with high grocery bills and a frequent need to throw away spoiled food? Many households face these exact challenges every week. The best solution for conquering both is simple: adopt a smarter, more organized approach to your food. This complete guide shows how effective Meal Plans can change your financial life and help the environment. By learning the basics of organized cooking, you ensure every ingredient you buy serves a purpose. This leads directly to a smaller budget and a healthier lifestyle for everyone.


Introduction: The Simple Power of Better Meal Plans

Are you tired of standing in front of your fridge, feeling stressed about what to cook? Do you often buy expensive takeout, or worse, let good food spoil? If this describes your week, it is time to start using Meal Plans. They offer simplicity and clear direction.

Meal Planning is much more than just picking next week’s dinners. It is a smart strategy for managing all your food. This strategy saves your money, protects your time, and helps the planet. Most households waste a surprising amount of food each year. Grocery costs are always going up. Because of this, a simple list or digital planner becomes your most valuable tool. This guide will fully explain how to plan meals well. It gives you easy steps to cut down on waste, save more money, and make cooking fun again. You will get a clear map to turn stressful weeknights into simple, budget-friendly cooking successes.


Section 1: Saving Money and Helping the Earth

The best reasons to use successful Meal Plans are the money savings and the environmental benefits. These two positive outcomes work together very well. When you throw away less food, you are immediately saving money. You are getting the full value from every dollar you spend at the supermarket.

How Spoilage Hurts Your Budget

Food waste secretly drains your household money. Think about the last time you threw away limp lettuce or an expired carton of milk. You were throwing money directly into the bin. Smart Meal Plans stop this loss. They guarantee that everything you purchase has a clear use in your cooking schedule. When you shop with a good plan, you only buy what you truly need. This stops you from buying things suddenly or buying ingredients you already have. This simple habit quickly leads to smaller, more focused grocery trips. This results in huge savings over a full year.

Why Food Waste Harms the Environment

Around the world, massive amounts of food are wasted or lost. This waste is a serious problem. It creates a lot of greenhouse gases, especially methane, when it rots in landfills. By planning your food schedule, you actively reduce your own impact on the earth. You can also start using methods like using the whole vegetable. This means using scraps to make stock. These strategies become normal when you use smart Meal Planning. This change helps make your kitchen a place where little is wasted. It saves the planet and increases your savings.


Section 2: Building Your System for Effective Meal Planning

A good Meal Planning system does not have to be strict or difficult. It just needs a basic structure. The best systems are flexible. They must fit your life, your cooking skills, and your dietary needs. Here are the most important parts of a strong system:

Step 1: Check What You Have Before You Plan

Do a full check of your pantry, freezer, and fridge. Do this before you write down any meals. This is the most important step for cutting waste. Write down foods that will expire soon. Note any staple items you forgot about. List any frozen foods you need to use up. Your new weekly plan must focus first on using these existing items. This simple trick makes the food you already own decide what you will cook first. It turns old food into dinner instead of waste.

Step 2: Use Theme Days and Change Recipes

It is easy to get tired of planning meals. To keep things fresh, assign a theme to each day. For example, you could have Meatless Monday, Taco Tuesday, or Soup Sunday. This simple frame makes choosing meals much faster. Focus on a simple list of 10 to 15 recipes you know well. These should be meals that are cheap and easy to make. They should also use ingredients that are useful in many ways. This makes your shopping list simpler. It also reduces the mental effort of cooking every day.

Step 3: Add Quick, Flexible Meals

An essential part of lasting Meal Plans is building in options for when things change. This is for busy evenings or surprise events. Keep 1 or 2 ‘emergency meals’ ready. You can make them using simple foods that last a long time. These include eggs, canned beans, or frozen vegetables. Having this backup stops sudden changes from ruining your plan. It prevents you from ordering expensive takeout instead.


Section 3: Smart Meal Prep Ideas for Less Time and More Savings

Meal Prep is how you carry out your Meal Planning strategy. It is a set time, usually a few hours on the weekend, when you prepare ingredients ahead of time. Spending this time on one day saves you many hours during the busy work week.

Cooking Large Batches

The most effective meal prep involves cooking large amounts of basic ingredients. Cook a big batch of grains like rice, quinoa, or couscous. Prepare a lot of protein, such as shredded chicken or cooked beans. Roast several trays of hard vegetables like carrots or broccoli. These prepared foods are like building blocks. You can mix and match them to make different meals all week. This reduces the time you spend cooking every night.

For example, a large amount of roasted chicken can be used for three different meals:

  • Monday’s quick Chicken Salad.
  • Tuesday’s chicken wraps or tacos.
  • Wednesday’s simple chicken and vegetable stir-fry.

This method, often called ‘cook once, eat multiple times,’ is the best way to use smart meal prep ideas.

Preparing Ingredients Strategically

It also helps to simply prepare ingredients, not just full meals. Spend an hour washing, peeling, and cutting all your vegetables for the week. Put them in containers with tight lids. Having onions, peppers, or broccoli ready to cook means dinner is seconds away. This makes it much less likely you will grab expensive, less healthy pre-packaged food. For lunches, arranging layers of food in containers is a popular meal prep method. It makes quick, healthy grab-and-go meals easy.


Section 4: Advanced Ways to Save Money and Cut Waste

Once you are good at basic Meal Planning and preparation, you can use more advanced methods. These will help you save even more money and cut even more waste.

Planning for Leftovers

You must see leftovers as ‘pre-made ingredients,’ not just ‘yesterday’s dinner.’ Plan for them on purpose. If you usually cook four servings of a recipe, cook six instead. Use the extra two servings for lunch the next day. Or, turn them into a totally new meal. For example, leftover taco meat can become a topping for a quick pizza. Leftover rice can be the base for fried rice. This is the best type of ‘full-cycle’ cooking. It truly cuts down on waste.

Shopping Based on Sales and Seasons

Your Meal Planning should consider what is on sale and what food is in season. Food that is in season is always cheaper. It usually tastes much better, too. You should plan your meals around store sales. Be ready to use different ingredients if needed. This is a core skill for saving money. If items are on a big sale, buy them in larger amounts and freeze them. Buy meat or fish in bulk when the price is low. Divide it into meal portions. Label and freeze it. This makes it ready for your future Meal Plans.

Organizing Your Pantry with FIFO

Use the ‘First In, First Out’ (FIFO) rule that commercial kitchens use. When you put away new groceries, move older items to the front of the fridge and pantry. This easy organization trick makes sure you use food before it goes bad. It directly fixes a major cause of waste. Keep a list of basic foods you always need. But only buy them when they are on your weekly shopping list. This list should always come directly from your meal plan.


Conclusion: A Kitchen That Is Kind to Your Budget and the Earth

Starting to use effective Meal Plans is an investment. It gives you positive results week after week. It starts as a simple way to schedule. And quickly turns into a strong habit that adds order to your life, helps your finances, and supports the environment. By spending a small amount of time each week on careful Meal Planning, inventory checks, and using great meal prep ideas, you take full control of your kitchen.

The good results are more than just money saved. You will eat healthier food. Feel less stress during your busy week. You will feel happy knowing your home is running in an efficient, sustainable way. Start very small. Just plan three dinners this week. Then, slowly build your full system. This work will lead to a very big and positive change in how you shop, cook, and live. It proves that the best way to save money and reduce waste starts with a simple plan.


References

These sources give important information and background on why food waste is expensive and bad for the environment, and how meal planning helps.


Recent Posts


10 Good Books To Read In Your Pajamas Right Now

A woman is relaxing on a cozy light-colored couch, covered with a thick, cream-colored knitted blanket, reading a book titled "The Comfort Book." She is wearing red and white plaid pajamas. In the background, a fireplace with a lit fire glows warmly. On a wooden coffee table in the foreground, there is a stack of Books To Read, including "A Gentleman in Moscow," next to a mug filled with a hot beverage. A warm lamp provides light from above the woman.

In a world that constantly demands our attention, finding the simple joy of a good book is a true pleasure. This article guides you to discover captivating books to read that are perfect for those comfortable, pajama-clad moments. We believe that unwinding with a compelling story is a necessary form of self-care, a quiet escape from the daily rush. So, grab your favorite mug, settle into your comfiest chair, and prepare for these amazing literary finds to transport you.

Introduction: Unwind with the Best Books To Read

Life today often feels like a loud, busy song. Because of this, finding quiet moments of peace has become extremely valuable. Many of us long for the simple joy of putting on soft pajamas, making a warm drink, and jumping into a good story. Reading when you are fully relaxed holds a special kind of magic. The outside world disappears, and the story takes center stage. Your mind feels free from the day’s stress.

This article is made exactly for those moments. It features ten excellent books to read that promise to entertain, move, and inspire you right from your own home. Forget the pressure of formal settings or the demands of the day. You should enjoy these stories slowly, one cozy page at a time.

Our selection covers different types of stories and moods. We have heartwarming tales that bring back hope and thrilling mysteries that will keep you guessing, even in your most relaxed state. We are sure there is something here for every reader wrapped up in their pajamas. So, dim the lights, turn off your phone alerts, and get ready for a reading journey that celebrates the easy yet deep joy of reading.

The Power of Pajama Reading

Reading in pajamas has a charm that cannot be denied. It is a routine. That tells your mind and body that it is time to slow down. It is time to enjoy comfort and think deeply. This is not just about feeling physically good; it is about freeing your mind. When you wear your pajamas, you are not acting for anyone. You are not trying to look a certain way. You are simply being.

This state of complete ease lets you get much deeper into the story. You feel a stronger connection with the characters and what they are going through. Stories truly come to life in these moments of true comfort and relaxation. They connect with us on a personal level.

Also, pajama reading often happens when things are quiet—late at night, on lazy mornings, or during peaceful afternoons. The world outside has paused its demands. This quiet time is perfect for focusing and thinking. It lets the main ideas and messages of the book sink in. They can make you think and even give you new ways of seeing things. You practice a mindful way to escape. You nurture your soul without ever leaving your safe place.

Our Top 10 Picks for Your Cozy Reading Sessions

These ten books are perfectly suited for those times when all you want is to relax and read.

The Midnight Library by Matt Haig

Imagine a library between living and dying. It is full of endless books. Each book shows a different life you could have lived. Nora Seed gets the chance to look into these lives. She faces her past mistakes and finds out what truly makes a life valuable. Haig’s novel is a touching and hopeful look at the choices we make, getting second chances, and all the things we could be. It is a gentle yet profound read that encourages deep thought without feeling heavy. You will find it perfect for a quiet, reflective evening.

Circe by Madeline Miller

Jump into the world of Greek myths with this wonderful retelling of the goddess Circe’s story. Miller’s writing is rich and draws you in, telling a story of power, being sent away, and finding who you are. Circe is often shown as a small villain, but here she becomes a complex and strong person. She moves through a world of gods and monsters. This book provides a deep escape. It takes you to ancient lands and grand conflicts, all while you are comfortable on your couch.

Educated by Tara Westover

This amazing true story tells about Tara Westover. She grew up in a strict Mormon family in rural Idaho. Her family kept her away from normal society. Even though she never attended school until she was 17, she finally earned a PhD from Cambridge University. Her journey of teaching herself, her strength, and her search for knowledge against great odds is both difficult and inspiring. It shows the incredible power of learning and the resilience of the human spirit.

Where the Crawdads Sing by Delia Owens

This novel takes place in the beautiful but tough marshlands of North Carolina. It mixes a coming-of-age story with an exciting murder mystery. Kya Clark, known as the “Marsh Girl,” raises herself in the wild after her family leaves her. When a local young man turns up dead, people make her the prime suspect. Owens’ vivid descriptions of nature and a very engaging story make this a book you will not want to put down.

A Man Called Ove by Fredrik Backman

Meet Ove. He is a seemingly grumpy but lovable older man. His life follows strict routines. His tough outer look hides a deep ability to love and be loyal. When a noisy young family moves in next door, they shake up Ove’s perfectly organized world. This leads to new friendships and touching moments. Backman’s novel offers a lovely, funny, and deeply moving story about sorrow, community, and finding closeness in unexpected places.

The Henna Artist by Alka Joshi

Imagine yourself in Jaipur, India, in the 1950s. We see the world through the eyes of Lakshmi. She ran away from a bad marriage at age seventeen. She becomes the most popular henna artist in the city and a trusted friend to the wealthy women of high society. This vivid historical fiction explores being independent, having big goals, and the secrets women keep. It is rich in cultural details and offers a fascinating look into India after the colonial era.

Project Hail Mary by Andy Weir

If you want a smart, funny, and completely gripping science fiction adventure, this is it. Ryland Grace wakes up on a spaceship with no memory. He is millions of miles from Earth. He does not know how he got there or why. As his memories slowly return, he realizes he is the last hope for all of humankind. Weir, who wrote “The Martian,” delivers another thrilling ride. It is full of clever problem-solving and a surprisingly touching alien friendship.

The House in the Cerulean Sea by T.J. Klune

This charming and heartwarming fantasy novel is about Linus Baker. He works as a careful caseworker for the department that handles magical youth. They send him to a remote orphanage. He must find out if six dangerous magical children, including one believed to be the Antichrist, threaten the world. What he finds there changes his views and opens his heart. It is a wonderful story about family you choose, acceptance, and embracing what is truly unique.

Eleanor Oliphant Is Completely Fine by Gail Honeyman

Eleanor Oliphant lives her life with a fixed routine. She is socially awkward and keeps her past carefully hidden. Her world starts to change when she makes an unexpected friend in Raymond, the slightly messy IT guy at her office, and an older man named Sammy. This novel is a beautifully written story about loneliness, past pain, and how human connection can change everything. It tells the story with humor and real feeling.

Anxious People by Fredrik Backman

Here is another great book from Fredrik Backman. “Anxious People” is an odd and thoughtful novel about a bank robbery that goes wrong. The resulting hostage situation brings together a varied group of strangers. As they deal with their strange situation, their personal worries and secret lives come out. This leads to surprising friendships and deep discoveries. It is a moving comedy about human weaknesses, understanding others, and the amazing connections we make.

Why These Books Are Perfect for Pajama Reading

What makes these specific books just right for your cozy, pajama-clad reading sessions? A mix of things focuses on comfort, deep involvement, and gentle thinking. First, many of these selections use rich, descriptive writing. This easily transports you to a new world, whether it is ancient Greece, India, or a spaceship rushing through space.

This deep, absorbing quality is most important when you seek to escape the everyday. Second, they find a good balance between exciting stories and real emotions. They have enough mystery to keep you turning pages but do not require too much mental effort. They let you think about things but do not overwhelm you. The characters are often deeply human. Readers find their struggles, successes, and quirks easy to connect with. This sense of closeness makes the reading experience better.

Third, the speed of these books is right for relaxed reading. They give you moments of excitement and tension, but also plenty of room to enjoy the writing and take in the main ideas. Unlike complex academic books or difficult thrillers that need constant focus, these novels and true stories invite you to simply be with the story.

The emotional power of these titles—from the comforting warmth of A Man Called Ove to the inspiring journey in Educated—fits perfectly with the goal of self-care and mental rest that pajama reading is all about. They are emotionally satisfying, mentally interesting, and made perfectly to make the outside world fade for a while. You can think of them as literary comfort food.

Creating the Ultimate Cozy Reading Nook

To get the most joy from reading these wonderful books, you must create the perfect place to read. Reading in pajamas depends on comfort. A few simple additions can turn a regular spot into a special reading haven. Start with lighting; harsh overhead lights can tire your eyes and ruin the cozy feeling. Instead, choose a warm, adjustable floor lamp. Or, use a reading light that shines a soft light right onto the pages.

Next, think about where you will sit. A plush armchair, a bean bag, or even a careful pile of pillows on the floor can serve as your base. You want supportive comfort. It must let you stay relaxed for a long time.

Do not forget how important texture and warmth are. A soft, large blanket or throw is a must. This is especially true during colder months. It adds an extra layer of snugness. Keep a small table or surface close by for your reading aids. This includes a mug of tea, coffee, or hot chocolate, and maybe a small snack. Finally, reduce noise and visual distractions.

Silence your phone and find a quiet corner of your home. This lets the story fully take hold of you. It changes the simple act of reading into a moment of pure luxury. These things work together to create a safe spot. In this space, the only things that matter are the book in your hands and the comfort of your pajamas.

The Unexpected Benefits of Reading in Comfort

The most clear benefit of reading in your pajamas is relaxation. However, this habit offers many quiet but important advantages for your mind and feelings. When you purposely set aside time for this activity, you are practicing mindfulness. Focusing completely on the words on the page, without screens or chores, is a type of active meditation. This reduces stress and improves your focus. Studies show that reading fiction can temporarily slow your heart rate and ease tension in your muscles. This offers a physical break similar to light exercise.

Also, these handpicked stories, especially those about people growing and connecting, help build empathy. When you see the world through the eyes of different characters like Nora Seed or Kya Clark, you gain a wider understanding of what it means to be human. This emotional practice strengthens your ability to understand and connect with other people in real life. Finishing a long, satisfying book also gives you a small boost of self-confidence. You achieve a quiet victory in a world often full of major challenges. By choosing to read in your pajamas, you prioritize your peace, your imagination, and your personal growth. You make an investment in your own well-being that seems like simple fun.

Conclusion

The ten books shared here represent the very best in current and lasting true stories and fiction. You will find that their ability to grab your attention, comfort you, and inspire you makes them ideal. They are the perfect literary partners for those times when you choose self-care over busyness, and the warmth of your home over the demands of the world.

Reading in your pajamas is more than just a hobby; it is a statement of comfort. It offers a personal break. This activity is a way to celebrate the deep link between the reader and the story. Whether you explore other possibilities with The Midnight Library, travel to ancient worlds with Circe, or find an unexpected friend with A Man Called Ove, each book promises a worthwhile escape. Now, enjoy the quiet comfort of your cozy spot. Let these wonderful stories carry you away. You will often find the best escape between the covers of a book, especially when you are dressed for maximum comfort.


External References


Recent Posts