Cookie Consent by Free Privacy Policy Generator Update cookies preferences

The Ultimate Guide: 13 Amazing Benefits of A Bamboo Toothbrush

A close-up vertical shot of a Bamboo Toothbrush standing in a two-toned ceramic holder on a light wood counter, next to a small succulent plant in a terracotta pot, with a modern white sink and faucet blurred in the background, conveying natural and minimalist oral care aesthetics.

We’ve all stood in the toothbrush aisle, wrestling with the plastic packaging of yet another conventional brush. As busy people trying our best to live well, small choices can feel overwhelming. But what if one simple switch could make a huge difference to your health, your home, and the planet? This guide cuts through the noise. It shows how making the jump to a bamboo toothbrush is one of the easiest, most effective steps you can take toward a healthier, greener lifestyle. You don’t have to sacrifice a great clean.


Introduction

When we talk about fighting plastic pollution around the world, our focus often lands on straws or shopping bags. However, one common item in nearly every bathroom contributes quietly to our environmental problems: the plastic toothbrush. Manufacturers make over four billion plastic toothbrushes every year. Almost all of them will endure for hundreds of years after their two-month job is done.

Luckily, there is a simple and stylish new choice: the bamboo toothbrush. This is more than just a passing trend. Switching to bamboo is a practical step. It is an impactful move toward a healthier life and a greener world.

Here is the complete guide to the 13 amazing benefits you get when you choose a bamboo toothbrush for your daily routine.


Environmental Benefits

Switching to a bamboo toothbrush is one of the most powerful changes you can make in your personal effort to use less plastic. It offers many benefits for the environment.

1. Biodegradable and Compostable Handle

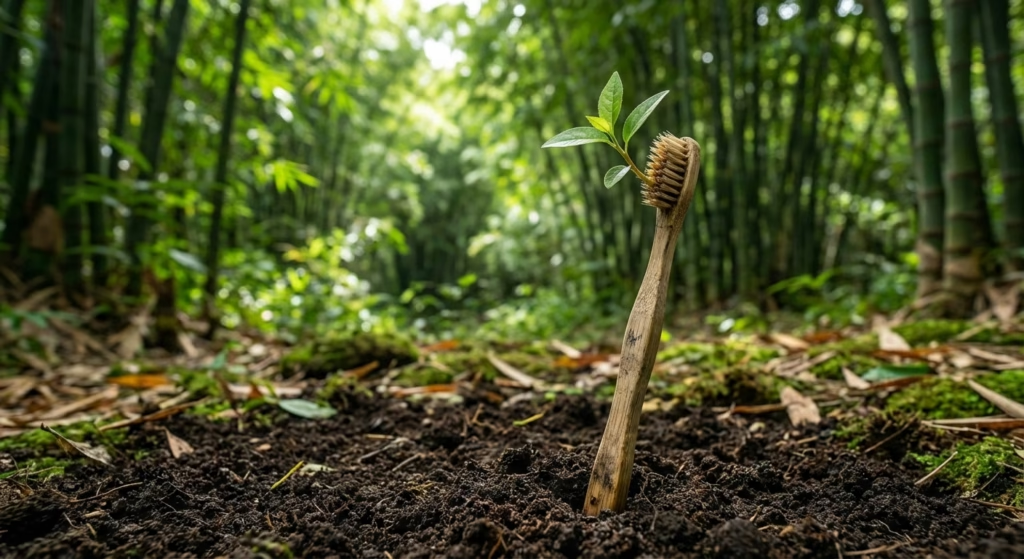
Plastic toothbrushes take centuries to break down. The bamboo handle, however, can break down naturally in compost within a few months. This is the biggest environmental win. The natural material can return to the earth easily.

How to Do It: To dispose of your used bamboo toothbrush correctly, first pull off the bristles. These are often nylon and should be put in your regular trash if you cannot find a special recycling program for them. Once the bristles are gone, you can drop the bamboo handle into your home compost bin. You can also send it to an industrial composting site. If you have a garden, you can simply bury it there. It will break down into the soil.

2. Reduced Plastic Waste

When you switch to bamboo, you help reduce the billions of plastic toothbrushes that pile up in landfills and pollute the oceans each year. These brushes cannot be recycled. Every single plastic toothbrush you prevent from entering the waste system makes a real difference. You are helping greatly in the fight against plastic pollution.

3. Highly Sustainable Resource

Bamboo is one of the fastest-growing plants on Earth. Farmers can harvest it without needing pesticides or artificial fertilizers. This makes it a highly renewable material with a much lower impact on the climate than plastic. Some types of bamboo can grow up to three feet in a single day! After harvesting, the plant grows back from its roots. This means no replanting is needed. This fast, efficient cycle uses less land and fewer resources.

4. Lower Carbon Footprint

Making a bamboo toothbrush requires less energy and fewer resources compared to making a plastic one. Plastic is made from non-renewable fossil fuels. Choosing a product that comes from a natural plant, rather than petroleum, clearly lowers the environmental cost of your oral hygiene routine. The production process is simpler and cleaner.

5. Eco-Friendly Packaging

Most bamboo toothbrushes come in packaging made from recycled or compostable cardboard. This helps even more to keep the environmental harm low. The whole product, from the handle itself to the box it comes in, is designed to be fully broken down when its life is over. This eliminates the wasteful plastic packaging you often see on store shelves.


Health and Hygiene Benefits

When you use something in your mouth daily, health and cleanliness are your top concerns. Bamboo offers surprising, natural benefits over plastic.

6. Natural Antimicrobial Properties

Bamboo naturally contains a bio-agent called “bamboo kun.” This agent stops the growth of bacteria and fungi on the handle. This helps keep your toothbrush hygienic and clean for a longer period. This natural defense means the handle resists germs and keeps things cleaner for you.

7. BPA-Free and Non-Toxic

Bamboo toothbrushes are usually free from harmful chemicals like BPA (bisphenol A). This chemical is sometimes found in plastics. Studies have linked it to potential health problems. Using a natural material ensures that no unwanted, man-made chemicals are touching your mouth every day.

8. Gentle on Gums

Many bamboo toothbrushes feature soft, high-quality bristles. These bristles are gentle on your gums and tooth enamel. They work well for people with sensitive teeth or those who suffer from gum irritation. When you buy one, always look for the label that says “soft” or “extra-soft” bristles for the most comfortable cleaning.

9. Reduces Exposure to Microplastics

You use your toothbrush every day. Using a natural material like bamboo stops the worry about swallowing tiny plastic pieces that might break off from plastic alternatives. The handle is the biggest part of the brush and is entirely natural. While the bristles may still be synthetic, you can feel better knowing that the main part of your oral care product is natural and safe.


Practical and Aesthetic Benefits

Beyond the issues of ethics and health, the bamboo toothbrush simply gives you a better experience.

10. Just as Effective

If you brush your teeth using the correct method, bamboo toothbrushes are just as strong and effective at cleaning teeth and removing plaque as their plastic rivals. They are made to meet the same high standards for oral care. You can find them with different bristle shapes and levels of hardness to match what you need.

11. Ergonomic and Comfortable

The handles are often designed to fit naturally and comfortably in your hand. This makes the simple act of brushing more pleasant. Bamboo has a natural, smooth feel that often seems warmer and less harsh than cold, hard plastic.
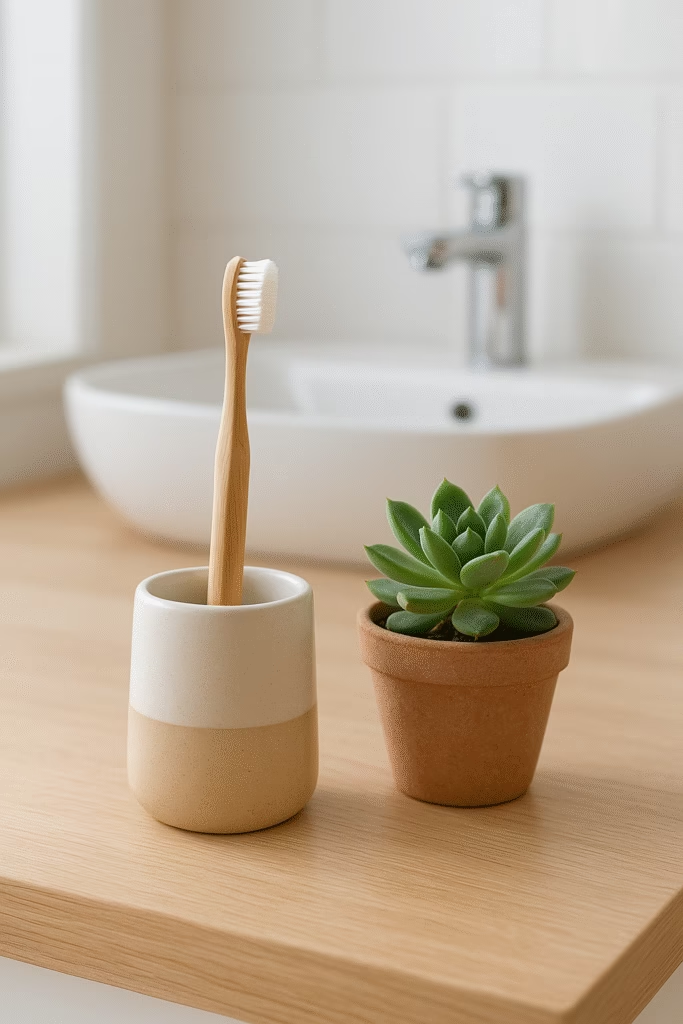
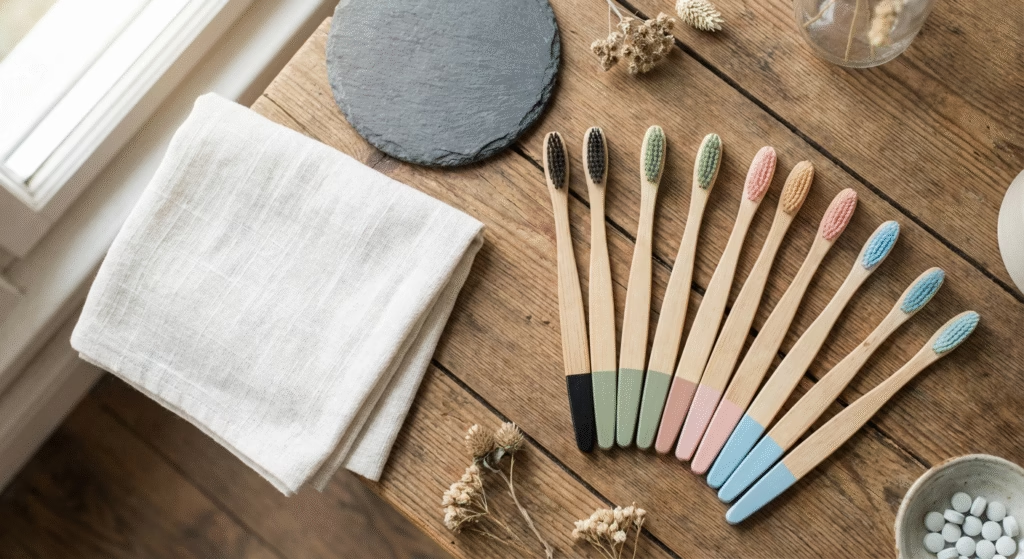
12. Stylish Design

Bamboo brushes have a natural, sleek, and simple look. This design adds an eco-conscious and stylish feel to any bathroom. They often look far more elegant than bright, plastic ones. They fit perfectly into modern, simple, or nature-inspired bathroom styles.

13. Versatile Reusing

After its life as a toothbrush is over, you can repurpose the bamboo handle for many tasks around the house.

Example and How to Do It:

When your toothbrush has reached the three-month mark, clean the handle well. Then, think about reusing it for these ideas:

  • Small Cleaning Brush: The size and shape are perfect for scrubbing the tiny gaps in bathroom grout. They are also great for getting into tight corners of the sink or cleaning small kitchen tools.
  • Garden Marker: Write the name of a plant, like a herb or flower, on the handle. Then, stick it into the soil of a pot or garden bed.
  • Art Tool: The handle can be used to apply small amounts of glue for crafting projects. It also works as a detail brush for certain kinds of art.

Here’s a fun terrarium idea: The cleaned handle can even be broken into small pieces. These pieces can be used as a tiny wood structure inside a moss terrarium. This adds a perfect natural element to your sealed little ecosystem. Learning how to build a terrarium can be a rewarding way to bring greenery indoors. You can include small pieces of the bamboo handle as part of the natural landscape in your terrarium.


Conclusion

Switching to a bamboo toothbrush is an easy, yet powerful, step toward living healthier and helping the planet. It offers top environmental benefits, like being fully biodegradable. It also gives you natural health advantages and a stylish design. Bamboo truly is an all-around better choice.

If you are looking for a simple way to use less plastic, improve your daily health routine, and bring a touch of natural style to your bathroom, the answer is clear. Make the switch today!


Frequently Asked Questions (FAQ)

How long does a bamboo toothbrush last?

A: Just like a regular plastic toothbrush, most dentists recommend you replace your bamboo toothbrush every three months. The bamboo material itself is very strong and could last longer. However, the bristles wear out, and that’s the main reason you need to replace it to keep your teeth clean effectively.

Are the bristles on a bamboo toothbrush biodegradable?

A: Most of the time, no, the bristles are not fully biodegradable. They are often made from nylon-6, nylon-4, or nylon derived from castor oil. This is done to make sure they clean well, stay clean themselves, and are soft on your gums. Nylon-4 breaks down more easily than nylon-6. But, you must still remove all the bristles and recycle or throw them away separately before you compost the handle.

Does bamboo get moldy or rot if left in the bathroom?

A: High-quality bamboo toothbrushes naturally resist mold and mildew. This is due to the inherent properties of bamboo and sometimes a light natural finish applied by the manufacturer. However, it is a natural material, so it needs to be kept dry. The best way to store it is in a holder that lets air circulate. Do not keep it in a closed cup. Allow it to dry completely between each use, just as you should with any toothbrush.

Can I recycle the handle?

A: You can compost the handle, which is actually better than recycling! Once you remove the bristles, the handle can be put in a home compost bin, sent to a large-scale composting site, or even buried in the garden soil. It will naturally break down and return to the earth.


References

  1. National Geographic – Your plastic toothbrush is a bigger problem than you realize
  2. FSD Journal – Your plastic toothbrush is a bigger problem than you realize
  3. Ancheng – What Is Bamboo Plastic And Is It As Safe As Bamboo?

Recent Posts


10 Ways To Make Money With Your Garden

Like many people, I started gardening as a fun hobby, spending many hours digging, planting, and sometimes dealing with pests. After a few good seasons, I suddenly had huge amounts of food—far more than my family could ever eat! This led me to the idea of earning money from the garden, turning a simple passion into a profitable side job. This article is a guide based on real steps, showing you how to truly Make Money and earn an income from the space you already enjoy.

Like many people, I started gardening as a fun hobby, spending many hours digging, planting, and sometimes dealing with pests. After a few good seasons, I suddenly had huge amounts of food—far more than my family could ever eat! This led me to the idea of earning money from the garden, turning a simple passion into a profitable side job. This article is a guide based on real steps, showing you how to truly Make Money and earn an income from the space you already enjoy.


The Root of the Opportunity: Turning Green Thumbs into Greenbacks

A garden is usually a place to relax, a quiet escape from the noise of daily life. But what if that peaceful space could also bring you money? People now want food that is local, organic, and unique. Because of this, your yard or garden plot holds a lot of financial possibility. Whether you have a small city plot or a large piece of land, there are many simple, creative ways to make money. You can turn extra crops, special knowledge, or even just beautiful views into a steady business.

Here are 10 complete ways you can start making money with your garden today.


1. Sell Organic Produce

This is the most direct way to make money from your garden. The best way to succeed is to focus on organic, excellent quality, and specialized crops. Today’s customers will pay extra for food they trust.

How to Do It:

  • Know Your Market: Do not just grow what is simple; grow what sells well and feels special. Think about growing special herbs (like basil, thyme, or chives), rare heirloom tomatoes, or tiny microgreens.
  • Sell Directly to Buyers:
    • Neighbors and Friends: Offer a simple weekly drop-off service. Or, set up a small stand outside your home with a box for payments.
    • Farmers’ Markets: This is the most common way to sell. Use nice displays, clear signs, and good packaging. Be ready to talk about how you grow the food and offer samples to taste.
    • CSAs (Community Supported Agriculture): Offer a paid membership. Customers pay a fee early in the year and then get a box of fresh produce every week. This guarantees income at the start of the season.
  • Sell to Businesses: Talk to local restaurants, bakeries, or specialty food stores. Chefs often need reliable, local growers for special foods. These might be edible flowers, certain types of garlic, or heritage beans. Keep a good relationship by always giving high quality and delivering on time.

Example:

Instead of just selling carrots, grow special kinds like ‘Purple Dragon’ or ‘Lunar White’ carrots. Market them as high-quality, organic items for nice meals. A pound of regular carrots might sell for $2. A beautiful, organic bunch of colored carrots can easily sell for $5–7.


2. Produce Value-Added Products

Selling fresh food is good, but turning your harvest into finished goods greatly increases your profit. It also lets you sell for a longer time. These products do not spoil quickly, making them easier to store and ship.

How to Do It:

  • Jams, Jellies, and Preserves: Use extra fruit to make special flavor mixes, such as strawberry-rhubarb jam, spiced apple butter, or tomato chutney.
  • Herbal Teas and Tinctures: Grow herbs like peppermint, chamomile, lemon balm, and lavender. Dry the leaves and flowers. Then, mix them into custom teas. Pack them nicely in sealed bags or tins with labels.
  • Baked Goods and Sauces: If your local laws allow (check food laws in your area), you can make things like zucchini bread, pesto, or hot sauces using your garden items.
  • Make it Look Good: Clean, attractive labels and packaging are very important for these finished goods. A lovely jar of homemade jam looks special and sells for a higher price than a plastic bag of raw fruit.

Example:

Use extra chili peppers and tomatoes to make your own signature hot sauce. A single batch of raw food might sell for $10. That same food could make 10 bottles of sauce. If each bottle sells for $8–10, you can earn $80–100.


3. Rent Out Your Garden Space

If your garden looks good, is well-kept, and is easy to get to, the space itself can make you money.

How to Do It:

  • Event Location: Offer your garden for small, personal events. Focus on events that need a beautiful, natural place, such as:
    • Small Weddings or Vow Renewals: Talk about the natural beauty and cozy feel.
    • Baby Showers or Birthday Parties: Offer a charming, unusual location.
    • Yoga or Meditation Classes: Provide a calm, outdoor area for local teachers.
  • Creative Lessons: Host workshops for painting outdoors, garden photography, or flower arranging. You provide the place, and local artists or teachers run the lessons.
  • Check the Details: Make sure you have enough parking, clear paths, and a simple toilet. Check your home insurance to be sure you are covered for public events. Use websites like Airbnb Experiences or local community boards to tell people about it.

Example:

Rent your pretty flower garden for a 3-hour painting class on a Sunday. Charging the teacher $50–$100 for the rental is an easy way to earn money that does not require you to sell a product.


4. Hire Out Your Garden for Photoshoots

Photographers are always looking for unique, natural, and beautiful spots for photos. They take pictures for people, businesses, or fashion magazines.

How to Do It:

  • List on Special Websites: Websites that rent out locations for photo and video work are great for finding professional photographers.
  • Show Off Special Spots: Point out unique features: a nice archway, an old stone wall, a field of specific flowers, a cute garden shed, or special lighting at sunset.
  • Set Clear Prices: Charge an hourly or half-day rate. Prices change based on where you live and how special your garden is. Set clear rules about access, using props, and keeping the plants safe.
  • Contact Photographers: Call or email local wedding, family, and senior portrait photographers. Show them high-quality pictures of your space in different seasons.

Example:

A local wedding photographer needs a fairy-tale-like place for a bride’s photo session. Renting your private, vine-covered corner and rose garden for a 2-hour shoot could earn you $75–$150.


5. Sell Specialty Seeds and Bulbs

This is a great way to make money from plants that have produced seeds. It needs very little extra growing space. Focus on special types that are not sold in large gardening stores.

How to Do It:

  • Heirloom and Rare Kinds: People want heirloom seeds that are open-pollinated. These are seeds with interesting stories or special features. If you have a type that grows well where you live, market it as ‘local and tested.’
  • Seed Kits: Make appealing, themed groups of seeds, like ‘Herb Garden for Beginners,’ ‘Mix for Hummingbirds,’ or ‘Hot Pepper Collection.’ This makes them more valuable.
  • Drying and Packing: Make sure the seeds are totally dry to stop mold. Buy small, quality paper envelopes or tins, and include full instructions for planting and care.
  • Where to Sell: Sell them online on Etsy or your own website. You can also sell them as a high-profit item at your farmers’ market stand.

Example:

Gathering and preparing seeds from one row of heirloom ‘Amish Paste’ tomatoes can give you hundreds of seed packets. Selling 50 seeds per packet for $3 each can bring in a lot of money from a small amount of plants.


6. Craft Handmade Goods

Use the beauty and good smells of your garden to make special crafts. This business attracts buyers who want natural, handmade, and local products.

How to Do It:

  • Natural Soaps and Candles: Use essential oils from your herbs (like lavender or rosemary). Add dried flowers and leaves for a nice look and feel.
  • Wreaths and Dried Flower Displays: Grow flowers specifically to dry (statice, strawflowers, lavender). Make beautiful wreaths, hanging decorations, or bouquets for inside the home.
  • Resin Jewelry: Use small, perfectly dried flowers, such as forget-me-nots or pansies, and place them in clear resin to make unique earrings, necklaces, and keychains.
  • Sales Plan: High-end craft shows, online shops, and local gift stores are the best places to sell these items. Be sure your brand shows that the items are natural and handmade.

Example:

Using a few handfuls of lavender, you can make a beautiful dried wreath that sells for $40–$60. This is much more than the flowers were worth fresh. A small soap bar with garden herbs can sell for $6–8.


7. Upcycle Garden-Related Items

This uses your creativity and simple building skills to change cheap or old materials into nice garden decor and useful items.

How to Do It:

  • Painted Pots: Buy cheap clay or old containers. Clean them well, then paint them with bright, outdoor-safe colors. Or, make them look old and worn out for a vintage feel.
  • Unique Plant Supports: Use found things, old wood, or bamboo to make nice-looking structures. These can be tall cages for tomatoes or supports for climbing plants that look better than store-bought ones.
  • Wood Slices and Walkways: If you can get old wood, cut small, flat slices to use as rustic stepping stones or for decoration.
  • Old Tools: Clean and repaint old garden tools. Sell them as special, decorative pieces for a shed or porch.

Example:

Buy a dozen plain ceramic pots for $3 each. After spending $2 on paint and one hour painting simple designs, sell the unique, upcycled planters for $15–$20 each. This gives you a great return on your time and money.


8. Create a Gardening Blog or YouTube Channel

Share your gardening life, your best tips, and your mistakes with people all over the world. This takes time to build, but the money you can earn is large and can grow easily.

How to Do It:

  • Choose Your Topic: Focus on one clear area: growing plants in city containers, running a small home farm, growing rare fruit, or controlling pests. Being specific helps you find people who really want to follow you.
  • Make Helpful Content: Write or record guides on ‘how to,’ yearly planting schedules, product reviews, and garden tours.
  • Ways to Make Money:
    • Advertising: Once you have enough viewers, you can earn money from ads placed on your videos (YouTube) or blog posts.
    • Affiliate Links: Suggest tools, seeds, and soil products that you truly use and like. You get a small payment when a follower buys something through your link.
    • Sponsorships: Work with companies to make videos or posts just about their products.

Example:

A YouTube channel focusing on ‘Growing a Garden in Small Spaces’ gets 50,000 followers. By using ad money and affiliate links for vertical planting towers, the channel can earn anywhere from a few hundred to a few thousand dollars each month.


9. Sell Stock Photos or Videos

Your garden is always giving you beautiful, natural pictures. High-quality photos and videos of plants, insects, textures, and landscapes are always needed by companies, book writers, and designers everywhere.

How to Do It:

  • Focus on Quality: Use a good camera or phone camera. Light is important; morning and late afternoon light usually works best.
  • Take Different Shots: Capture many types of pictures: close-ups of flowers and food, very close shots of insects or water drops, wide shots of your garden, and pictures of the work (hands in the dirt, watering).
  • Use Good Keywords: When you upload to stock websites (like Shutterstock, Adobe Stock), use many accurate keywords. This helps buyers find your content easily.
  • Know the Rules: Understand the difference between commercial use (for advertising) and editorial use (for news) when you send in your images.

Example:

A sharp, well-taken photo of a hand picking organic basil is put on a stock website. That one photo can be downloaded many times over several years. You earn money each time it is used.


10. Design and Sell Downloadable Products

Put your gardening knowledge into digital products that can be sold again and again without any physical items. This offers one of the highest profit margins possible.

How to Do It:

  • Gardening Planners/Workbooks: Make files (PDFs) that people can print or use digitally. These can have pages for planning where to plant seeds, tracking crop rotation, logging pest problems, and harvest times.
  • E-books and Guides: Write detailed guides on specific topics you know well. Examples include ‘Easy Pest Control for Organic Gardens,’ ‘Growing Food Inside,’ or ‘Getting Food All Year in a Cold Climate.’
  • Templates and Lists: Offer simple, useful tools like ‘Best Layout for a Beginner’s Vegetable Plot’ or ‘Things to Do in the Garden This Month.’
  • Sales Site: Use websites like Etsy or your own shop for instant digital delivery. Once you create the product, the money you earn is mostly passive.

Example:

Create a 50-page digital “Guide to Planting and Harvesting” for your local area. Selling this guide for $15 and only getting 10 sales a month gives you $150 in easy income.


Q: Do I need a big garden to make money?

A: No, not at all. Many of the most profitable activities need very little space. This includes growing tiny microgreens, selling special seeds, making finished products, and creating online content. For example, a few tall shelves can grow a lot of microgreens that sell for much money.

Q: What rules do I follow for selling food products?

A: This is very important. Rules change a lot depending on your state or country. Look up your local “cottage food laws.” These laws usually tell you what you can make in a home kitchen, how much you can sell each year, and what labels you must use. Always check with your health department before selling any food you have prepared.

Q: How do I choose a fair price for my garden products?

A: Your price should show the organic quality, the work you put in, and the local market. Do not compare your special, organic tomato to a cheap store tomato. Instead, look at prices at local farmers’ markets, specialty food stores, and handmade craft websites. Always price your best items high enough to pay for your time and materials, showing their superior quality.

Q: Can I offer garden advice without a formal degree?

A: Yes. Most clients just want advice from someone who has been successful. If your garden looks great, that proves your skill. You can start by giving personal, online advice through a newsletter or paid video calls. Focus on small areas you are good at, like composting, caring for roses, or smart water use. Your successful garden is your best selling point.


References


Recent posts

Why Starting a Garden is the Best Decision You’ll Make

A close-up of a gardener's hands gently harvesting fresh, ripe red tomatoes from a sun-drenched vine in a backyard garden.

I used to think I had a “black thumb.” I soon learned that growing a small backyard garden patch was not about being perfect; it was about getting my hands dirty. What began as a simple way to relax quickly became a deep connection to nature and a real source of pride. If modern life feels too fast, know that a bag of seeds can offer a surprising path to peace and feeling fulfilled.


The Joy You Find When You Dig In

People often start a Garden for practical reasons. They want to save money on food. They want to eat fresher vegetables. These reasons are true and good, but they are only a small part of the story. Gardening offers deep, often unexpected joy. It is a choice that makes your life better. It helps your health, your local environment, and your sense of purpose.

Our world moves fast and promises quick results. A garden changes that. It makes you slow down. It teaches you to follow the rhythm of nature. You learn to be patient. And to keep trying. You get a quiet feeling of happiness when you help a tiny seed grow into a large, food-producing plant. This simple act of growing things is very calming. It is a powerful cure for the stress and worry of modern life.

The change happens in you, not just in the soil. You change from someone who buys food to someone who makes food. You learn exactly where your food comes from. This new view gives you power. It helps you value the natural cycles of life much more.

Soil is Good for Your Mind

We know that gardening helps your mental health. Just being outside and moving your body can lift your mood. But working with soil does even more. Scientists have found that a common germ in soil, Mycobacterium vaccae, can make your brain create serotonin. Serotonin is a natural chemical that fights feeling down or depressed. Simply put, getting your hands in the dirt can make you happier.

Also, a garden helps you live in the moment. When you pull weeds, water plants, or pick food, you focus only on that task. This gives your mind a break. You forget about work, the news, and your phone for a while. It is a calm, easy activity that gives you real, beautiful results.


Better Health, Better Taste, Safe Food

One of the best and quickest rewards of starting a Garden is the better food you get. Store vegetables often travel far. They lose taste and nutrients every day they are away from the farm. Your home-grown vegetables are different. They are picked when they are most ripe. They are on your plate just minutes later.

More Vitamins and Minerals

When you grow food at home, you control the whole process. You pick the soil. You choose the fertilizer. Most important, you do not use harsh chemicals or pesticides. This means your family eats food that is full of vitamins, minerals, and nutrients. It has no hidden, bad ingredients. This change is great for everyone. It teaches children early lessons about eating well and where food comes from.

Example: The Taste of a Homegrown Tomato

To really see this benefit, try a store tomato and a ripe tomato from your own yard. The store tomato is often pale, hard, and watery. It is grown to survive a long trip. Your garden tomato is an heirloom variety. It bursts with sweet and complex flavors. It tastes like a real tomato should. Commercial farms simply cannot match this quality. Tasting one of these will turn any doubter into a dedicated gardener.

Making Your Food Supply Stronger

Our world can be unsure. Growing some of your own food helps keep you and your neighbors safe. Even a small, hard-working Garden helps. It can protect you from high food prices. It helps if the food delivery system has problems. This ability to take care of yourself gives you a strong feeling of freedom and readiness.


How to Start Your Garden: An Easy Guide

Thinking about starting a garden may seem scary. You might picture huge fields, expensive tools, and lots of hard work. That is not true. If you start small and use the right methods, gardening is easy for almost everyone. It works even if you have little space or no experience.

Step 1: Check Your Site and Sun

The most important thing for a good garden is sunlight. Most vegetables and fruits need at least six to eight hours of direct sun each day.

  • Watch: Spend a whole day looking at your yard or patio. See where the sun hits at 9 AM, noon, and 3 PM.
  • Use Pots: If your space is small, or you only get a few hours of sun, use pots. Pick plants that like some shade. This includes lettuce, spinach, kale, and herbs. You can move the pots to catch the best sun.

Step 2: Pick Your Method

You have two main ways to start a beginner Garden: planting in the ground or using raised garden beds.

Using Raised Garden Beds

Raised garden beds are often best for people just starting out:

  1. Why They Are Good: They let water drain better. The soil stays loose. The soil warms up faster in the spring. You can put in the exact soil mix you want. This is key if your ground soil is bad, rocky, or full of weeds. They also mean less bending. This makes them perfect for people who cannot move easily.
  2. How to Build: You can make a simple bed from wood that has not been treated (like cedar). Make it a square or a rectangle (like 4 feet by 8 feet). The bed should be about 10–12 inches deep.
  3. Filling It Up: Do not just put dirt from your yard into the bed. Use a good mix: 60% topsoil, 30% compost (or aged manure), and 10% perlite or vermiculite to keep the soil light and airy.

Planting in the Ground

If you have a large area:

  1. Test the Soil: Get a simple soil test kit. Find out the $\text{pH}$ level and what nutrients are already in your soil.
  2. Get Ready: Take out all the weeds in the area. A good way to prepare is called “lasagna gardening.” This means you stack layers of cardboard, compost, leaves, and straw. This kills the weeds and builds rich soil over time.

Step 3: Pick Easy Plants

Start your Garden journey with plants that grow fast and are easy to care for. This promises quick success:

  • Radishes: They go from a seed to food in only four weeks.
  • Leafy Greens (Lettuce, Spinach): They grow well when it is cooler. They do not need full sun all day.
  • Bush Beans: They do not need a support structure. They make lots of food.
  • Zucchini/Summer Squash: These plants produce a huge amount of food. You will likely have more than you can eat!
  • Herbs: Basil, mint, chives, and rosemary are simple to grow in pots or in beds.

Step 4: Water and Weed Smartly

  • Watering: Give plants a deep soak, but do not do it every day. This helps the roots grow deep. Deep roots make plants stronger. Water the soil, not the leaves. Wet leaves can get plant diseases.
  • Weeding: Weeds take food and water away from your plants. Pull them out when they are small. It is easiest to pull them right after it rains or after you water, when the soil is soft. Cover your beds with mulch (straw or leaves). This is a great way to stop weeds and keep the soil moist.

Helping the Earth with Your Garden

Starting a Garden is about more than just your own health and food. It is also a direct action toward a more sustainable life. And a strong way to lower your carbon footprint. It helps the local wildlife, too.

Cutting Down on Food Travel

The distance food travels from the farm to your table is called “food miles.” This long journey creates a lot of air pollution from trucks and planes. By growing your own food, you cut this journey down to just a few steps. The pollution caused by a home-grown head of lettuce is tiny compared to one shipped across a whole country.

Making a Home for Wildlife

Any garden, even a small one, is a safe place for local animals and insects. Plant flowers next to your vegetables. This is called companion planting. These flowers give food to pollinators like bees, butterflies, and hummingbirds. These insects are having trouble finding food today. Your garden helps them survive.

Example: Companion Planting

If you plant basil near your tomato plants, it makes the tomatoes taste better. It also helps keep away bugs like the tomato hornworm. Also, planting marigold flowers throughout your Garden can stop some pests that live in the soil. This means you do not need to buy chemical sprays. This simple way of planting helps nature keep itself in balance.

Composting is Key

Good gardening naturally includes composting. Do not throw away food scraps (like vegetable peels, coffee grounds, and eggshells) or yard waste. Instead, turn them into rich, dark material called “compost.” This compost feeds your soil. It lowers the amount of trash your house makes. It also means you do not need to buy artificial plant food.


Common Questions About Gardening

Q: Do I need a large yard to start a garden?

A: No, you do not need a big yard at all. You can have a very successful Garden in containers on a small patio. You can also use window boxes or wall planters. Many people use small raised garden beds or grow plants vertically to use less space. If space is tight, focus on easy-to-grow, high-yield plants like herbs, leafy greens, and radishes.

Q: What is the biggest mistake a new gardener makes?

A: The two most common errors are giving plants too much water or not enough water. Many beginners water a small amount every day. This makes the soil wet only at the surface. That makes the plant roots grow shallow and weak. It is much better to water deeply but less often (once every 2 to 4 days, based on the weather). This helps the roots grow deep and strong. Also, start small. Begin with just a few pots or one raised garden bed to learn the ropes.

Q: Why use raised garden beds instead of planting in the ground?

A: Raised garden beds have many benefits, especially for new gardeners or if your natural soil is poor. They let water drain very well. You can pick and mix the best soil to put inside. The soil does not get packed down easily. They also cut down on weeds and make planting and picking much easier on your back.

Q: How can I keep bugs away without using bad chemicals?

A: There are many safe, natural gardening methods. The main ways are:

  • Companion Planting: Plant things like marigolds or basil, which naturally push pests away.
  • Hand Picking: Manually pick off bigger bugs, like slugs.
  • Covers: Use light row covers to stop flying bugs from landing on your plants.
  • Good Bugs: Encourage helpful bugs like ladybugs (they eat aphids) by not spraying your plants.
  • Neem Oil: This is a safe, natural oil that works well to fight many pests and plant diseases.

Q: How much time must I spend gardening each week?

A: This can change. If you have a small, well-kept Garden, you might only need 15 to 30 minutes of work every day or two when plants are growing fast. If you use good methods like thick mulch or drip watering, you will spend much less time. This makes it a great hobby for people who are very busy.


Reference Section


Recent Posts


The Best Door Types For A Tiny Home

Exterior view of a dark, modern tiny home with a prominent, contrasting yellow entry door. The image highlights one of many potential Door Types suitable for compact living.

Moving into a tiny home is about more than just downsizing; it’s about making every single decision count. I have spent years exploring how to make small spaces feel grand. Door Types are one of the most overlooked, yet critical, parts of achieving that balance. Join me as I explore perfect door solutions. These solutions can transform your own tiny house ideas into a comfortable, functional reality.


Maximizing Space and Light: The Essential Tiny Home Door Guide

Every square inch matters when you design a modern tiny home. Standard doors work well in large houses, but they create problems in small spaces. A traditional hinged door demands a large ‘swing radius.’ This wide, clear floor space robs you of usable area for furniture or movement. The right door does more than just give you entry; it becomes a design feature, offers a source of light, and acts as a crucial space-saving device that improves tiny house living.

Your goal is to choose door types that move along the wall or hide inside it. This minimizes their effect on the floor plan. This guide will explore the best options. It includes design examples and practical ‘how to do it’ installation advice.

1. Sliding Barn Doors: The Modern Classic for Tiny Homes

Sliding barn doors are perhaps the most popular and practical internal door types for modern tiny homes. They do not swing open. Instead, they glide along a track. You fix the track above the door frame. The door rests flat against the wall when open.

Why It Works for Tiny Homes Interior

  • No Swing Space: This is the greatest benefit. It removes the swing. You free up many square feet of floor space.
  • Design Feature: They offer a great chance to add style. Use old wood for a rustic look. Use smooth metal and glass for a clean, modern tiny home style.
  • Easy Setup: The system is simple. This makes it a popular choice for people doing their own work.

Examples and Tiny House Ideas

  • The Bathroom Divider: A barn door is ideal for separating the main area from the bathroom. Space is very limited there.
  • Dividing Sleeping and Living: Use two barn doors (bi-parting) to close off a bedroom on the main floor for privacy. You can also keep them open to make the living area feel larger.
  • Chalkboard or Mirror: For best use, cover the inside of the barn door with a full-length mirror. This makes the space look bigger. Or use a chalkboard for notes and lists.

How to Do It: Installation Basics

  1. Choose the Hardware: Pick a track that is at least twice the width of your door opening. High-quality nylon or rubber wheels are necessary for quiet, smooth gliding. This is a must for tiny house living.
  2. Check Wall Strength: The track must be securely screwed into the wall studs or support blocks. The door hangs completely from the track. Thus, the wall must be very strong to hold the weight.
  3. Install the Door Guides: Small guides are mounted on the floor. These guides (often a little T-shape) stop the bottom of the door from swinging out. They are subtle but vital for safe, smooth use.

2. Pocket Doors: The Invisible Space Saver

A pocket door is like a sliding door. However, it does not glide on the outside of the wall. It slides directly into a space you build inside the wall. People call this space a ‘pocket.’

Why It Works for Tiny Homes Interior

  • Complete Hiding: When open, the door completely vanishes into the wall. This offers the smoothest path. It maximizes wall space for pictures or furniture.
  • Clean Looks: For a tidy, high-end, modern tiny home style, pocket doors keep the focus on the tiny homes interior design. They hide the hardware.

Drawbacks to Consider

  • Harder to Install: Putting in a pocket door later can be tough. It means cutting open the wall to put in the pocket frame. It is best planned when the house is first framed.
  • No Wall Access: You cannot hang heavy things (like shelves or cabinets) on the part of the wall where the door slides. The pocket holds the door and its parts.

How to Do It: Framing the Pocket

  1. Install the Pocket Frame: Pre-made pocket door frame kits are sold. They make the job easier. They include a top beam, split studs, and the track parts.
  2. Allow for Thickness: The wall must be a bit thicker than standard 2×4 framing. This is to hold the door’s thickness and the frame kit. This is key for saving space in tiny house living.
  3. Track Setup: The track is attached to the top beam. After the pocket frame is in, the door is attached to the hangers. It is then rolled into the track. Wallboard is then put over the frame.

3. French and Patio Doors: Bringing the Outdoors In

Inside doors save space. But the exterior door is where you can greatly increase the feeling of space and light. For modern tiny homes, large glass doors are vital for making the home feel big.

Why It Works for Tiny Homes

  • Light and View: Large glass panes fill the tiny homes interior with natural light. This makes the space feel much bigger and less cramped. They link the inside to the world outside.
  • Easy Inside/Outside Flow: When they open onto a deck or patio, these doors basically double your usable living space. This is the best tiny house idea.
  • Good Looks: They add to the smooth, open look of a modern tiny home.

Door Types Breakdown

  • Sliding Patio Doors: These are the most space-saving outside option. They work like barn doors but are sealed against weather. They need no swing room.
  • French Doors (Double In-Swing): These add a classic, nice appearance. But they need a big, clear floor space for their inward swing. They are best used as a main door feature on a non-busy side of the house.
  • Folding or Bi-Fold Doors: A costly choice. They let a whole wall section fold open like an accordion. This offers an amazing, wide-open feeling.

How to Do It: Sealing and Security

  1. Covering and Sealing: Outside doors can leak. Use high-quality sealing tape and caulk around the opening. Do this before putting in the door frame. This ensures a waterproof seal. This is crucial for protecting your small house.
  2. Think About Heat Value (U-factor): In tiny house living, keeping the temperature right is important. Choose double- or triple-pane Low-E (low-emissivity) glass. This maximizes insulation. It lessens heat transfer.
  3. Safe Hardware: Make sure the lock and bolt parts are strong. This is especially true for large areas of glass. Locks that fasten in many places are strongly suggested for big patio and French doors.

4. Bifold and Accordion Doors: Flexible Separation

Inside bi-fold or accordion doors consist of two or more panels. These panels fold against each other as they open. This action cuts the needed swing space in half.

Why It Works for Tiny Homes Interior

  • Closets and Utility Spaces: They are the perfect choice for small storage areas, wardrobes, or hiding a combined washer/dryer unit. They allow wider access to the space than a regular hinged door.
  • Dividing Multi-Use Areas: You may have a flexible space. It may be both an office and a guest room. Bifold or accordion door types can be used as a flexible wall. They provide short-term privacy.

Examples and Tiny House Ideas

  • The Appliance Hider: Use a clean, flat-panel bi-fold door to conceal a fridge or pantry. This makes it blend smoothly into the cabinets. This gives a unified modern tiny home look.
  • Locker Storage: Put in many narrow bi-fold doors next to each other. This creates a bank of reachable, locker-style storage.

How to Do It: Selecting the Right Panels

  1. Panel Material: For small utility doors, light core materials are fine. For larger room dividers, choose solid core panels. They offer better sound blocking and a heavier feel. This fits well with tiny house living standards.
  2. Track and Pivot: Make sure the top track is secure. Check that the pivot points (the pins on the top and bottom) are set correctly. This ensures a smooth operation without wobbling.

5. Hinged Doors (But with a Twist): Where They Still Have a Place

We usually avoid standard hinged doors. But there are times in a modern tiny home when they are still the best, most useful choice. You just need to be smart about where you put them.

The Tiny Home Twist

  • The Out-Swing Exterior: For the main entry door, choose a door that swings out. This choice immediately removes the swing space inside the tiny homes interior. This saves a lot of space and also adds a layer of safety, because people cannot easily kick the door in. Please note: Ensure your hardware and hinges are designed for outdoor use and security.
  • The Half-Door (Dutch Door): This is a clever, charming tiny house idea. A Dutch door is split in the middle. The top half can swing open while the bottom stays closed. This is great for fresh air. It is like having a half-window. It keeps pets or small kids safely inside.

How to Do It: Out-Swing Configuration

  1. Hinge Placement: Out-swing doors need hinges with pins that cannot be removed. This stops them from being easily lifted off the frame from the outside.
  2. Threshold and Sweep: The door swings out and seals against the exterior door stop. You need a very strong threshold and door sweep. This stops water from getting in. This is mandatory for tiny house living.

Conclusion: Door Selection as Design Strategy

Choosing door types in your modern tiny home should be a key design plan. It is more than just needing a door. When you choose sliders, pockets, and out-swing setups, you get back important floor space. You increase the light flow. You create an inside look that feels open, tidy, and bigger than its actual size.

Smart door choices are the sign of efficient, pleasant tiny house living. Adopt these tiny house ideas. They ensure that every door in your home opens up opportunity, not just another room.


Frequently Asked Questions (FAQ)

Q: Are sliding barn doors good for soundproofing in a tiny home?

A: Generally, no. Sliding barn doors leave a small gap between the door and the wall. Sound can easily travel through this gap. If sound privacy is vital (like for a bedroom or office), a pocket door with a solid core panel will block sound better. It seals more tightly in the frame.

Q: Which exterior door type is the most secure for a tiny home?

A: A high-quality, solid-core out-swing hinged door is often seen as the safest. Since it swings outward, you cannot kick it in. It is key to match it with a high-security lock (like a lock that fastens in many places) and a strong frame.

Q: Can I use mirrored door types to make my tiny homes interior look bigger?

A: Yes, absolutely. This is an excellent tiny house idea. Use a mirrored panel on a sliding barn door. Or put a full-length mirror on the back of a closet door. This reflects light and the visual space. It creates the feeling of a much larger room.

Q: Is it worth the extra cost to install a pocket door over a barn door?

A: A pocket door is worth the money if you want a seamless, completely clear wall for your modern tiny home design. It looks the cleanest. However, if easy setup, simple repair, and a bold design are more important, the cheaper sliding barn door is a better fit for tiny house living.

Q: What is the best material for tiny home doors to maximize energy efficiency?

A: For outside doors, choose insulated fiberglass or steel doors. They should have a good foam core and a thermal break. For inside doors, a solid wood or solid-core material will block sound better. It will also feel more substantial than hollow doors.


References


Recent Posts


10 DIY And Crafts That Are Selling On Etsy Now!

    Query successful

An overhead flat lay of four popular DIY And Crafts items arranged on a beige fabric background: a crocheted brown teddy bear, a small canvas tote bag embroidered with yellow, orange, and red flowers, a round crocheted basket with a brown base and cream sides, and a clear resin keychain shaped like the letter 'H' with dried flowers embedded inside.

I love turning simple things like thread or clay into something pretty and useful. I always think the best small businesses start with something you truly enjoy. For me, that joy is making things and diving into the world of DIY And Crafts. I know what it feels like to craft late at night and how exciting it is to make that first sale. I am here to share the best-selling secrets that help you turn your crafting ideas into real income on Etsy. Let’s make your crafting dream a successful business.


1. Custom Pet Accessories and Beds For Animals

The market for pets is growing fast. Pet owners want special, good quality items for their pets. They want things they cannot buy in regular stores. This is a great area for creative people who love both animals and making things. People really want comfortable and stylish Beds For their pets. They want these beds to look good with their home décor.

Example: Decorative Pet Beds

The best pet beds are both comfortable and stylish. Think about using custom fabrics, soft inserts, and shapes that fit modern houses. Things like simple wood frames or cozy, round donut beds are very popular.

How To Do It (Sewing Project): The Washable Pillow Pet Bed

  1. Get Your Supplies: You need strong, washable fabric (like canvas). You also need two zippers. One zipper is for the outer cover. The other is for the inner pillow insert. Get soft batting or stuffing, like poly-fil.
  2. Cut the Fabric: Cut two large rectangles for the main bed cover. Cut two pieces for the inner pillow insert. Leave an extra inch all around for seams. The size depends on the size of the pet (small, medium, or large).
  3. Sew the Insert: Sew the inner pillow pieces together on three sides. Put a zipper on the fourth side. Fill the insert with your stuffing. Zip it shut. This makes it easy to wash the inner pillow.
  4. Sew the Cover: Sew the outer cover pieces together on three sides. Put the second zipper on the fourth side. This cover can be taken off and washed easily.
  5. Final Details: Sew around the edges with a different colored thread. This makes the bed look professional and strong. You can also offer to embroider the pet’s name for a personal touch.

2. Digital Crochet Patterns

A four-panel collage featuring various DIY And Crafts items: the top left shows a chunky, cream-colored knitted throw blanket draped over a neutral armchair; the top right shows a hand holding a small, crocheted brown teddy bear plushie; the bottom left shows a hand holding a small, beige crocheted market bag with a mesh pattern; and the bottom right shows a potted green plant suspended in a white macrame/crocheted plant hanger.

Selling digital patterns is great because it costs very little to make them. You can also sell the same pattern many times. People who crochet and knit often look for new, fun, and popular designs to try.

Example: Amigurumi Plushies and Chunky Blankets

Patterns for amigurumi (stuffed toys) that need very little sewing after crocheting are popular now. Also, patterns for very chunky, textured blankets sell well. Seasonal designs, like for holidays or spooky themes, are good sellers as digital downloads.

How To Do It: Designing a Simple Crochet Pattern

  1. Plan the Item: Choose something simple but attractive. A trendy chunky coaster or a basic crotchet pattern for a hat works well. Use easy stitches (single crochet, double crochet). This helps more people use your pattern.
  2. Write the Pattern: Write down every step clearly. Use standard crochet words (like sc for single crochet, dc for double crochet). Include a guide for yarn tension (gauge). List all the things needed (yarn type, hook size).
  3. Add Pictures: Good pictures are key to a successful pattern. Include clear photos of the finished item. A clear drawing or a link to a video showing a hard part is even better.
  4. Save and Sell: Save the pattern as a clean, easy-to-read PDF file. Price it fairly (digital patterns are usually under $10). Make sure your Etsy listing uses words like crotchet patterns, beginner, chunky, and so on.

3. Personalized Embroidered Goods

Hand-sewn or machine-sewn embroidery is highly valued on Etsy. It offers unique personal details and good workmanship. Buyers look for special gifts and custom things for their homes.

Example: Custom Tote Bags and Sweatshirts

Embroidered designs on canvas tote bags and simple sweatshirts are very popular. Customers like items with their initials, a picture of their pet, or a meaningful date sewn onto the cloth. This uses both crafting ideas and basic sewing projects.

How To Do It (Crafting Idea): Custom Monogram Tote Bag

  1. Pick Good Bags: Start with a strong, quality canvas tote bag. A good blank bag makes your finished item look better.
  2. Plan the Monogram: Use a design program (or just sketch it) to create the style of the letters. Elegant script or bold, old-style letters are common choices.
  3. Put the Design on the Fabric: Use a pen that washes off or special heat paper to lightly mark the design on the bag. Place it carefully (like in the middle of a pocket or close to a strap).
  4. Embroider: Use embroidery floss and a hoop to keep the fabric flat and tight. A simple backstitch or a satin stitch works well for letters. Sew carefully and tightly for a high-quality look.
  5. Finish Up: Take off the hoop. Gently wash or wipe the fabric to remove the marks. Iron the bag flat.

4. Eco-Friendly and Zero-Waste Items

More and more people want sustainable, reusable products. This fits perfectly with the handmade feel of Etsy. These items are often small, easy to mail, and appeal to buyers who care about the environment.

Example: Reusable Fabric Goods

Think about cloth napkins, washable scrubbers (un-sponges), reusable kitchen towels, and fabric bags for snacks. These are fast sewing projects that are very useful and may lead to buyers coming back for more.

How To Do It (Sewing Project): Reusable Fabric Snack Bags

  1. Materials: You need two types of fabric. One is a decorative cotton print for the outside. The other is a food-safe, wipeable lining (like PUL). You also need a zipper or Velcro to close it.
  2. Cut and Prepare: Cut two pieces from the outer fabric and two from the lining. Make them simple rectangles, adding extra for seams.
  3. Attach the Closure: Sew the zipper or Velcro strip between the outer and lining fabrics at the top edge.
  4. Sew the Bag: Place the two outer pieces together, right sides touching. Sew around the three open sides. Do the same for the two lining pieces. Leave a small opening in the lining’s bottom seam. This is for turning the bag right-side out.
  5. Turn and Close: Gently pull the bag right-side out through the opening in the lining. Hand-sew or machine-sew the opening shut. Push the lining inside the outer pouch.

5. Polymer Clay and Resin Jewelry

Polymer clay and resin are easy to use in many ways. This lets makers quickly follow new small trends. They can offer endless unique items to wear. Lightweight earrings and detailed resin necklaces are very popular.

Example: Custom and Themed Earrings

Sellers do well by offering items for the seasons (like chunky glitter for holidays) or very specific themes (like stars, planets, plants, or abstract art). This is a great crafting idea because the materials are cheap, and the profit is high.

How To Do It (Crafting Idea): Marbled Polymer Clay Earrings

  1. Soften the Clay: Take two or three different colors of polymer clay. Work them with your hands until they are soft. Do this for each color separately.
  2. Make the Marbling: Roll the clay colors into long, thin shapes (snakes). Gently twist them together. Do not mix them too much! Roll the twisted piece flat into a thin sheet.
  3. Cut and Bake: Use a small cookie cutter or a sharp knife to cut the earring shapes. Use a needle to poke a small hole for the jump ring. Bake the clay following the directions on the package.
  4. Put it Together: When the pieces are cool, add a clear finish (glaze) to make them look professional. Use jewelry tools (pliers) to attach jump rings and earring hooks. Use hooks that do not have nickel for people with sensitive skin.

6. Handmade Candles and Wax Melts

Etsy buyers look for special smells and nice-looking items for their homes. Handmade candles and wax melts are cozy products that are great for gifts and for taking care of yourself.

Example: Unique Scent Blends and Custom Labels

Focus on complex, special scent mixes that you cannot find in stores. Think of names like ‘Rainy Day Bookshop’ or ‘Spiced Pear Cider.’ Custom labels for weddings, birthdays, or new homes are also much sought after.

How To Do It (Crafting Idea): Small-Batch Soy Wax Melts

  1. Materials: Soy wax flakes, wicks, scent oils, and small molds (silicone molds that make flowers, hearts, or simple cubes work well).
  2. Melt the Wax: Slowly melt the soy wax in a double boiler until it reaches the right pouring heat. Check the wax maker’s instructions for the temperature.
  3. Add Scent: Take the wax off the heat. Stir in the scent oil you chose. Add the oil when the wax cools a bit. This helps the smell be as strong as possible.
  4. Pour and Cool: Pour the scented wax into your molds carefully. Let them cool down completely until they are hard (this is called curing).
  5. Package: Put the melts in small, nice paper bags or plastic containers. Add a clean, branded label that clearly shows the unique scent name.

7. Modern Macrame Decor

Macrame has become a fashionable, simple home décor trend. The natural look and cozy feel of macrame fit well with Etsy buyers. They want to add warmth and style to their rooms.

Example: Plant Hangers and Wall Hangings

Macrame plant hangers and detailed wall hangings are the top sellers. You can get more buyers by offering custom sizes or colors to fit specific walls or windows.

How To Do It: Simple Macrame Plant Hanger (Easy Knots)

  1. Materials: Cotton or jute macrame cord, a metal ring, and a wooden bead (if you want).
  2. Measure and Cut: Cut four pieces of cord. They should all be the same length (about 3 or 4 times the final size you want). Pull them through the metal ring and fold them in half. Now you have eight strands to work with.
  3. Start with a Knot: About an inch below the ring, tie all eight strands together using a basic gathering knot to hold them in place.
  4. Divide and Knot: Split the eight strands into four pairs. Make the main body of the hanger by tying Square Knots and Spiral Knots in each pair many times. And check all your knots look even.
  5. Make the Basket: Near the bottom (where the plant pot will sit), use another Gathering Knot to tie all eight strands together again. This closes the base. Trim the ends neatly.

8. Custom Vinyl Decals and Stickers

Digital crafting ideas like decals and stickers can be sold easily and often. They require very little shipping if sold as a file you can cut yourself. Shipping is also minimal if sold as a physical item. They appeal to many different groups, from car lovers to small business owners.

Example: Laptop Decals and Small Business Logos

Popular items include stickers with custom pet portraits, simple line-art designs, or personalized name stickers for water bottles and computers. Business owners often buy vinyl decals of their logo for signs or product packaging.

How To Do It: Designing a Custom Decal/Sticker

  1. Software: Use a design program (like Adobe Illustrator or a free program like Inkscape or Canva) to make your design. Keep the lines clean. Use clear colors if selling a physical item.
  2. Make it Easy to Cut: If you sell a vinyl decal, simplify the design into clean lines. A cutting machine (like a Cricut or Silhouette) needs to be able to follow these lines.
  3. Sell Digital or Physical:
    • Digital: Save the design as a scalable graphic (SVG) and a transparent image (PNG). Sell it as a digital file to download.
    • Physical: Use a cutting machine and good quality vinyl or sticker paper to cut the designs. Remove the extra vinyl (weeding). Use transfer tape on the vinyl decals so the customer can put them on easily.

9. Upcycled Denim Sewing Projects

Upcycling is very popular on Etsy. It appeals to buyers who care about the environment. They want unique, sustainable fashion and accessories. Old denim jeans and jackets give you a strong, cheap material for creative sewing projects.

Example: Patchwork Bags and Accessories

Items like denim patchwork tote bags, wallets, pencil cases, and even pet toys made from old denim are in high demand. Using different shades of blue denim means every piece is truly unique.

How To Do It (Sewing Project): Upcycled Denim Patchwork Pouch

  1. Find the Material: Collect old denim jeans. Wash them very well. Cut them into small squares or strips.
  2. Make the Patchwork: Sew the denim pieces together randomly or in a pattern (like a simple checkerboard). Sew them to make a large sheet of patchwork fabric. Iron the seams flat.
  3. Build the Pouch: Use your new patchwork fabric for the outside. Cut a lining fabric to match. Sew a zipper along the top edge.
  4. Sew and Finish: Sew the outer pouch and the lining together. Turn it right-side out. Adding a strap made from an old denim seam looks great and fits the upcycled style.

10. Simple Crochet Patterns for Home Decor

Besides blankets and clothes, small crotchet patterns for home items sell very well. These projects are fast to make. They are often good items for new pattern sellers to test the market with.

Example: Crochet Coasters and Faux Plants

Coasters sell well, especially if they have modern, textured designs. People often buy them in sets of four or six. Another big trend is crocheted fake plants, like succulents or cacti. They look like real plants but need no care.

How To Do It: Quick Crochet Coasters (Set of 4)

  1. Materials: Use 100% cotton yarn (it absorbs water well) and a crochet hook that fits the yarn.
  2. The Pattern: A simple circle or square pattern is best. For a round coaster, start with a magic ring. Crochet a basic row of double crochet (dc) stitches. Increase in each row to keep the coaster flat.
  3. Make it Textured: For a modern look, try using the “camel stitch” (crocheting into the third loop). This makes the fabric look knitted. Or, use alternating front-post and back-post double crochet stitches for a woven look.
  4. Finish: End with a slip stitch. Cut the yarn and weave in all the loose ends neatly. Tie them together with a simple piece of twine to make them look nice for gifting.

Frequently Asked Questions (FAQ)

Q: Should I sell the finished item or the pattern for the DIY craft?

A: It depends on what you want to do. Selling a finished item usually costs more but takes a lot of time to make, pack, and mail. Selling a digital pattern gives you money repeatedly. It costs nothing to keep the pattern in stock or mail it. However, the price for a pattern is much lower. Many successful Etsy sellers do both to earn the most profit.

Q: How do I set a good price for my handmade items on Etsy?

A: Use this simple rule: (Material Cost + Labor Cost) x 2 + Shipping Cost = Selling Price. For your Labor Cost, multiply the time it takes to make the item by a fair hourly wage. Do not charge too little for your time! Then, look at the prices of similar items on Etsy. Make sure your price is right for the quality you offer.

Q: What are the best words to use for my DIY listings?

A: Think about what the buyer is searching for. Use a mix of general and specific words. For example, do not just use “bag.” Use “upcycled denim tote bag,” “sewing projects pattern,” “personalized gift for her,” or “small business branding sticker.” Always include relevant trending words like crafting ideas, crotchet patterns, or Beds For pets if they fit your item.

Q: Do I need a fancy sewing machine or tools to start?

A: Not always. For things like hand embroidery, macrame, or polymer clay, simple tools are enough. With sewing projects, a basic, good sewing machine is all you need to start. For specialized items like custom stickers, you will need a cutting machine like a Cricut or Silhouette. Start small and use the money you earn to buy better tools later.


Reference Section


Recent Posts


6 Of The Best Types Of Beds For Tiny House Living Now!

Bright, modern tiny house interior with a cleverly designed loft bed, showcasing innovative Beds For maximizing space and comfort in compact living.

When space is tight, every piece of furniture must earn its place. The bed is no different. As someone who has lived the tiny house life, I know design is about smart choices, not sacrifices. I have spent hours researching and testing solutions to help you find the best Beds For a sleeping spot that saves space without giving up a good night’s rest. It’s time to unlock the full potential of your tiny home interior!


The Tiny Revolution: Redefining Sleep in Tiny Homes

Tiny house living is a big idea. It is more than just a passing trend. It is a real shift toward owning less, spending less money, and living in a way that helps the planet. Tiny homes are wonderful, but they bring a unique problem: how do you fit a comfortable life—including a full-sized sleep experience—into a space smaller than many people’s garages?

The bed is usually the biggest piece of furniture in any home. In a tiny house, it becomes the most important design choice. For a normal house, a bed is just for sleeping. In a tiny house, it must do many jobs. It needs to save space and change its form. It should be a quiet place for sleeping. But then it must disappear or change to give you valuable living space during the day.

Choosing the right type of Beds For your structure is probably the most important decision for your inside design. This choice decides how well your small space works. This guide will look closely at the six best types of beds. They are perfect for using every inch of your treasured tiny house. We will show you what these beds are. We will also give practical tips on how to do it to bring these tiny house ideas to life.


1. Loft Beds: Elevating Tiny House Inspiration

The Loft Bed is the classic answer for tiny house inspiration. It is the most popular way to use the tall, vertical space that tiny homes offer. By moving the sleeping area high up and out of the way, you clear the entire area underneath it. That open space can then be used for other things.

Why It Works for Tiny House Living

Loft beds fix the space problem by creating two useful areas where there was only one. The space below the bed can become an office, a relaxing area, a place to eat, or even a storage room. This change makes your tiny home feel much larger than its actual size. It greatly increases the usable space inside your tiny home interior.

How To Do It: Maximizing the Under-Loft Space

  1. Create a Dedicated Living Area: The most common setup is making a small living room under the loft bed. You can place a small couch or two chairs there. Add a coffee table and maybe a slim set of shelves. Proper lighting is key here. Make sure the area under the loft is bright. Use ceiling lights or special lamps to keep it from feeling too dark.
  2. Set up a Home Office: If you work from home, the space beneath a loft bed is a great place for a built-in desk and shelves. This gives you a clear line between where you work and where you sleep. This is a very helpful thing to have in a small home.
  3. Use Storage Walls and Closets: Do not just use a simple ladder. Build custom stairs that have drawers inside them. Then, use the whole wall under the loft for storage from floor to ceiling. You are then creating a walk-in closet or a deep pantry.

Example: A tiny home with a 10-foot ceiling can easily hold a loft bed. It leaves about 4.5 feet of space above the mattress for headroom. That leaves 5.5 feet of usable space below. This lower space is perfect for a small kitchen shaped like a “U” or a comfortable sitting area with books.


2. Murphy Beds (Wall Beds): The Disappearing Act

Murphy Beds, also called Wall Beds, are experts at vanishing. When you are not using the bed, the entire frame and mattress fold straight up. They go right into a wall cabinet. This instantly turns your bedroom into a room that can be used for many things. These are prime examples of smart tiny house ideas.

Why It Works for Tiny House Living

Some people do not want their bedroom to look like a bedroom during the day. The Murphy bed is the best choice for them. It lets one room be a living room, a place to eat, and an office during the day. At night, it becomes a comfortable, full-sized bedroom. This ability to change is necessary for tiny homes that have open floor plans.

How To Do It: Integrating a Wall Bed

  1. Select a High-Quality Mechanism: A Murphy bed works well only if it has a smooth and strong folding system. Spend money on a piston or spring system. This allows you to open and close the bed easily and safely with just one hand.
  2. Hide It and Blend It In: Do not just install a plain box. Build custom cabinets around the bed system. When the unit is closed, it can have shelves. It can also have a desk that folds down (attached to the bottom of the bed frame). You can even hide a television behind sliding doors.
  3. Placement is Key: Put the Murphy bed on the largest wall that has no breaks. Make sure there is enough empty floor space in front of it. This space is needed to safely lower the bed. You also need room to walk around it once it is down.

Example: Put a horizontal (folds sideways) Murphy bed in a narrow tiny home. When it is closed, the cabinet is only a few feet deep. When you open it, it leaves a long, open path along the end of the bed. This makes the home feel open, even when you are asleep.


3. Sofa Beds/Daybeds: The Dual-Purpose Lounge

Sofa Beds and Daybeds are the classic pieces of furniture that do two jobs. They are a comfortable place to sit during the day. And turn into a sleeping surface at night. They are a common feature of tiny homes interior design because they are simple and useful right away.

Why It Works for Tiny House Living

These are the perfect choice for tiny homes that need a main lounge area. But they also need a place for sleeping, either every night or just for guests. Daybeds can work as a large single bed at night. During the day, they become a cozy corner for reading or simple bench seating, often next to windows.

How To Do It: Selecting and Utilizing Your Bed

  1. Focus on Comfort: If this is your main bed, do not buy a cheap folding futon. Look for beds that have a thick foam mattress or one with inner springs. The system for pulling the bed out must be simple to use and put away every day.
  2. Include Storage: The best sofa beds for tiny homes have storage built right into the piece. Look for models with hidden space under the seats. This is a good spot for sheets, pillows, and extra blankets.
  3. Daybed as Bench Seating: A daybed can easily become part of your eating area. Put a big dining table in front of it. Use the daybed as long bench seating on one side. This makes one piece of furniture serve many purposes.

Example: A full-sized sofa bed is set against the longest wall of the tiny house. When it is open, it takes up the width of the home, giving you a big place to sleep. When it is closed, it becomes the center of the entire living area.


4. Ottoman Beds: Discreet and Highly Functional

Ottoman Beds are special because they are designed for maximum storage. They look like a normal bed frame. But they have a system that lifts the mattress base up. It lifts either straight up or on a hinge near the headboard. This reveals the entire area under the bed as usable storage space.

Why It Works for Tiny House Living

In tiny homes, a common problem is finding a place for things you need but do not use daily. This includes out-of-season clothes, extra sheets, bulk food items, or emergency gear. The Ottoman Bed solves this. It turns the largest empty space in the home (under the mattress) into the largest storage unit. It is a great example of tiny house ideas that focus on hidden usefulness.

How To Do It: Making the Most of the Under-Bed Space

  1. Choose the Right Lift Mechanism: A side-lift system is easier to get into in a narrow space. You do not need room to stand at the end of the bed. A lift that goes straight up is easier for daily use. But it needs more space to open at the foot of the bed.
  2. Organize Everything Well: The storage area is deep and open. Use large, matching storage bins. Or use vacuum-sealed bags for clothing you are not wearing that season. This keeps the space neat and stops it from becoming a messy catch-all drawer.
  3. Dual-Purpose Top: If you use a small ottoman that folds out into a bed, the ottoman itself can work as a coffee table during the day. This makes it a three-in-one item: storage, table, and bed.

Example: Use a large ottoman bed in a tiny home. The huge storage space underneath can hold all out-of-season clothing. It can hold all spare towels. It can also hold most of the kitchen’s dry goods. This means you do not need a separate closet or a large pantry.


5. Divan Beds with Drawers: Accessible Daily Storage

A Divan Bed is a bed base made from a strong wooden box. It is usually covered with fabric. It is built to sit right on the floor. Most importantly, they are made to have drawers or sliding storage units built into the sides of the base. This makes them an excellent choice for Beds For things you use every day.

Why It Works for Tiny House Living

An Ottoman bed gives you one huge storage spot. A Divan Bed gives you organized, easy-to-reach storage sections. This is great for tiny house living. You can get your clothes, socks, or a book without lifting a heavy mattress. It takes the place of a separate dresser or chest of drawers.

How To Do It: Optimizing the Drawer System

  1. Select a Layout: Divan bases usually have two drawers (one on each side) or four drawers (two on each side). In a tiny house, think about a ‘Continental’ style. In this style, the drawers are only at the end of the bed. This lets you put the head of the bed close against a wall or built-in furniture. You can still reach the drawers easily.
  2. Maximize Drawer Depth: Look for models that have deep drawers that pull all the way out. Even a little extra depth adds a lot of storage space. This is helpful for bulky items like thick sweaters or towels.
  3. Add Headboard Storage: You can add to the drawer storage with a custom headboard. This headboard can have thin shelves or small cubbies. They are useful for charging phones, holding glasses, or displaying small items. The whole bed unit becomes a complete sleeping and storage area.

Example: A tiny home has a Divan bed placed in a small, recessed area. Two large drawers on the side facing the room hold all the clothes used daily. This means there is no need for a traditional chest of drawers. It makes getting ready in the morning simpler.


6. Cabin Beds/Mid-Sleeper Beds: The All-in-One Station

Cabin Beds, also called Mid-Sleeper Beds, are like Loft Beds but they sit lower. They are usually about halfway between the floor and the ceiling. The key is that they are designed as a full station. They have features built right underneath, like a desk, shelves, or a chest of drawers.

Why It Works for Tiny House Living

This type of bed is the best ready-made idea for tiny house inspiration. It is one piece of furniture that handles three important needs: sleeping, working/studying, and storage. Because the bed is lower than a full loft, it is often seen as a safer and easier choice for adults. Some adults find a high loft too hard to climb every day.

How To Do It: Integrating the Mid-Sleeper

  1. Check Headroom: The bed is lower, but still check your headroom. Make sure you can sit up comfortably on the mattress. Also, check that you have enough room to sit at the desk beneath it. People often forget to check this in small spaces.
  2. Use Components that Move: Many Cabin Beds have desks that pull out on wheels. This lets you hide the desk completely when you are not using it. You can roll it out into the middle of the room for work. This gives you more leg and elbow room than a fixed, built-in desk.
  3. Focus on Function: Use the storage space under the bed for things related to the area next to it. If the bed is near the kitchen, the shelves can hold cookbooks and small appliances. If it is near the living area, it can hold games and media.

Example: A single person living in a tiny home uses a Mid-Sleeper. The desk slides out for work each day. The shelving unit holds all their books and office supplies. This creates a dedicated home office. The office completely vanishes when the desk is pushed back under the bed for the night. This is a smart piece of tiny house interior design. It uses the floor space well for daytime activities.


Conclusion: Tailoring Your Sleep Solution

Choosing the perfect bed is not about forcing a fit. It is about finding a solution that matches your daily habits. It must also match the unique space limits of your tiny home. You might choose the high space of a Loft Bed. You might prefer the invisible nature of a Murphy Bed. Or maybe the easy storage of a Divan Bed. Each option helps you live in a bigger, more organized space.

Remember that great tiny homes use furniture that does many things well. Your bed can, and should, be one of the hardest-working items in your home. By adding these clever Beds For compact living, you are doing more than just saving space. You are creating a tiny house interior that is better, more comfortable, and full of tiny house inspiration. Embrace these tiny house ideas and turn your bedroom from a space thief into a space hero.


Frequently Asked Questions

Q: Are Loft Beds safe for tiny homes, and how do I access them?

A: Yes, Loft Beds are very safe when they are built right and secured tightly to the structure of the tiny house. You usually get to them using a fixed ladder. The best ladders have wide, comfortable steps. For the most safety and storage, many builders create stairs that have drawers built inside. This is the preferred way for daily use over a long time. Make sure the side rails are fixed tightly and meet safety rules.

Q: Do Murphy Beds use special mattresses?

A: Murphy Beds usually use a standard mattress. However, it cannot be thicker or heavier than the lifting system allows. This is usually about 10 to 12 inches thick. Standard mattresses with springs or foam work best. Do not use very heavy mattresses or ones with stiff edges. They might harm the lifting system or not fold into the cabinet correctly.

Q: How do I ensure a Sofa Bed is comfortable enough for daily sleep?

A: If you plan to sleep on a Sofa Bed every night, look for models called “everyday sleepers.” Or look for ones with a high-quality foam mattress or a pocket-sprung mattress. These are often sold separately. The thickness and quality of the mattress are much more important than the sofa’s look. Test the bed mechanism. Make sure the support bars do not press through the mattress and feel uncomfortable when you lie down.

Q: Which bed type is best for a tiny home with low ceilings?

A: For low ceilings, the best choices are the Murphy Bed or a Divan Bed with Drawers. Both sit low to the ground. This keeps the maximum space above the mattress. Loft and Cabin Beds will cut the headroom a lot. This will make the space feel cramped. The Murphy Bed lets the entire sleeping area disappear. This leaves the whole room feeling open and large.

Q: Can I build any of these beds myself?

A: Yes, many tiny house fans build their own space-saving beds successfully. Loft Beds and Cabin Beds are the easiest to build yourself. They often use standard wood beams and plywood. For Murphy Beds, you can buy the metal lifting system. This is the most important part. Then you build the wood cabinet around it yourself. Always follow clear, planned instructions for safety, especially for beds attached to the wall or placed up high.


References


Recent Posts


Stop Tossing the Peels! Your New Favourite Sustainable Drink Mixer

Close-up shot of hands peeling a ripe mango over a wooden table, revealing the vibrant orange peel. In the foreground are a small bottle labeled "Mango Peel Syrup," two finished cocktails (a light mojito-style drink and a dark old fashioned), and a bowl full of discarded peels and pits, showcasing the entire Sustainable Drink Mixer process.

As someone who loves a good drink but hates seeing good food go to waste, I’ve always been on the lookout for clever kitchen hacks. Like many of you, I used to toss mango peels without a second thought, missing out on their hidden potential for a truly Sustainable Drink Mixer. Join me as we explore how to turn those overlooked scraps into something truly spectacular for your home bar. You’ll never look at a mango the same way again!


Every day in kitchens around the world, the same thing happens. The sweet, bright flesh of a mango is carefully cut away. Then, the fragrant peel and the pit are thrown into the trash.

But wait. What if I told you that those parts you throw away hold a huge amount of flavour? They are waiting to make your homemade drinks much better. What if those discarded parts could be the key to your new favorite Sustainable Drink Mixer?

Today, living sustainably is not just a trend. It is something we must do. Finding clever ways to stop wasting food is a goal for every good cook. And today, we are starting a very exciting kitchen project. We are going to turn simple mango skins and pits into amazing syrups and sauces (called coulis). You will not only find a new, deep mango flavour, but you will also help the planet. You can do this with every delicious sip you take. Get ready to stop wasting food and start using the great potential of the whole fruit.

The Hidden Potential of Mango Skins

When we think of a mango, we only think of its juicy, yellow flesh. But the skin and even the pit hold surprising flavour and good ingredients. Mango skins are packed with antioxidants, fiber, and some vitamins. They taste stronger, often more tangy, and a little bitter compared to the sweet fruit. This makes them perfect for creating interesting and complex syrups.

When we boil the skins and pits, we pull out these incredible essences. We create a deeply scented liquid. This liquid captures the true spirit of the mango. It often has a hidden layer of flavour you will never find in plain mango juice. This is not just about saving money. It is about being creative in the kitchen. It is about using every last bit of potential from our ingredients.

The slight bitter taste in the skin is actually good for mixing drinks. It helps balance the sweetness of the sugar. It also balances the richness of the fruit. This makes the syrup taste much more mature and interesting than a simple syrup made only from the fruit pulp. This deep flavour helps the syrup pair very well with strong alcohol and sour ingredients.

Safety First: Preparing Your Mango Skins

Before we get to the delicious part, a quick and very important note on safety. Mango skins can sometimes have leftover chemicals from farming. More importantly, they have small amounts of urushiol. This is the same chemical found in poison ivy. It can cause a rash in people who are sensitive to it. Cooking usually makes many irritants harmless. But taking steps to be safe is always best.

  • Always Wash Well: You must wash your mangoes very carefully before peeling. Scrub them under running water using a vegetable brush. Do not just rinse them quickly. You must clean the surface completely.
  • Choose Organic: If you can, buy organic mangoes. This keeps any chemical exposure as low as possible. This makes using the skins much safer and better.
  • Be Careful When Handling: If your skin is easily irritated, think about wearing thin kitchen gloves while you handle the peels. This is especially true if you are making a large batch.
  • Know Your Fruit: The fresher and better the quality of the mango, the better your syrup will taste. Do not use any skins that look bruised or have signs of mould.

How to Make Mango Skin Syrup: Your New Sustainable Drink Mixer

This process is very easy. It gives you a highly flavoured syrup. This syrup will quickly become a key part of your sustainable drinks. We want a rich, flavourful liquid. It should hold the strong essence of the mango skins.

What You’ll Need:

  • Skins and pits from 3 to 4 ripe mangoes (must be washed well)
  • 4 cups (about 1 litre) of water
  • 1 cup (200g) of white sugar (you can use more or less, depending on how sweet you want it)
  • Extra options: A few slices of ginger, one cinnamon stick, a few star anise pods, or a pinch of red pepper flakes for some heat. These spices taste great with the complex notes of the skin.

Instructions:

  1. Get the Mango Scraps Ready: Enjoy the fruit pulp first. Then, collect your well-washed mango skins and pits. If a little fruit pulp is still stuck to the pit or skin, that is fine. It will only make the syrup taste richer and better.
  2. Mix Ingredients: Put the mango skins and pits into a medium-sized pot. Add the water and any extra spices you picked. Heat the mixture until it boils over medium-high heat.
  3. Cook and Flavour: Once it boils, turn the heat down to low. Cover the pot and let it cook slowly for at least 30 to 45 minutes. The longer it cooks, the more flavour you will get out of the skins. The color will also get deeper. The oils and flavour from the skin will go into the water. You will see the liquid turn a beautiful golden-orange colour. A rich smell will fill your kitchen.
  4. Add Sugar: Stir in the sugar until it is completely gone. Keep cooking slowly for another 5 to 10 minutes. This lets the sugar mix in fully and allows the syrup to get a little thicker. For a very thick syrup, cook it longer to reduce the liquid. For a lighter syrup, stop sooner.
  5. Strain: Take the pot off the heat. Carefully pour the mixture through a fine strainer into a clean bowl. Use the back of a spoon to press down hard on the solid parts (the skins and pits). You want to squeeze out every bit of liquid. Throw away the cooked skins and pits (or put them in your compost!). The liquid left behind is your strong Sustainable Drink Mixer.
  6. Cool and Store: Let the mango skin syrup cool down fully at room temperature. Once cool, pour it into a clean bottle with a tight lid. Keep it in the refrigerator. It will stay good for up to 2 to 3 weeks.

How to Make Mango Skin Coulis: A Thicker, Fruitier Option

Coulis is a thicker sauce, almost like fruit puree. It is perfect for coating the inside of a glass or mixing into drinks for a richer feel. It also works great for drizzling over desserts. This makes it a very useful item for cooks and bartenders who aim for zero waste. The coulis keeps more of the fiber from the mango skins. This gives you an extra layer of texture and a health boost.

What You’ll Need:

  • Skins and pits from 3 to 4 ripe mangoes (must be washed well, with a little fruit pulp left on)
  • 2 cups (about 500ml) of water
  • ½ cup (100g) of sugar (change this to your taste)
  • Optional: a small amount of lime juice for a bright taste and to help keep it fresh.

Instructions:

  1. Mix and Cook: Put the mango skins and pits in a pot with the water. Bring it to a boil. Then, lower the heat and cook slowly, covered, for 20 to 30 minutes. Cook until the skins are very soft and easy to poke with a fork. You are trying to make them tender, not just pull out the flavour.
  2. Blend: Carefully move the cooked skins, pits (you can remove the largest, hard pits if you want), and liquid to a powerful blender. Blend until it is very smooth. You may need to blend for a few minutes to break down all the tough pieces.
  3. Strain (Recommended): For a very smooth coulis, push the blended mixture through a fine strainer. Use a spatula to help the liquid pass through. This removes any leftover tough or gritty pieces. You get a soft texture that looks great on plates and in drinks.
  4. Sweeten and Thicken: Put the strained liquid back into the pot. Stir in the sugar. Cook slowly for another 5 to 10 minutes. Stir it often. Cook until it reaches the thickness you want for a coulis. It should cover the back of a spoon lightly. Add the lime juice if you like.
  5. Cool and Store: Let it cool down completely. Keep the coulis in a sealed container in the refrigerator for up to 1 week.

Mix It Up: Cocktails with Mango Skin Syrup

The slightly sour taste and subtle spice in the mango skin syrup make it an excellent match for aged spirits. It gives your cocktails a deeper flavour that simple mango juice cannot match. Here are two ways to use your new sustainable syrup:

The Sustainable Spicy Mango Old Fashioned

This recipe uses the complex flavour of the syrup to create a special version of a classic drink. It is perfect for showing off your Sustainable Drink Mixer.

Ingredients:

  • 2 ounces of Aged Rum or Bourbon
  • ½ ounce of Mango Skin Syrup (try the one you made with cinnamon or ginger)
  • 2 Dashes of Angostura Bitters
  • An orange peel twist, for decoration

Method:

In a rocks glass (Old Fashioned glass), mix the syrup and bitters. Add the rum or bourbon. Fill the glass with one large ice cube. Stir gently for about 30 seconds. This chills the drink well and adds the right amount of water. Squeeze the oil from the orange twist over the drink. Then drop it in to decorate. The concentrated, spicy mango flavour is wonderful with the woody and vanilla tastes of the alcohol.

The Tangy Mango & Gin Sour

The slight bitterness of the skin syrup balances the plant flavours of gin. It also balances the sourness of the lime or lemon.

Ingredients:

  • 2 ounces of Dry Gin
  • ¾ ounce of Fresh Lemon Juice
  • ¾ ounce of Mango Skin Syrup
  • 1 Egg white (this is optional, for a foamy top and texture)
  • A dash of Cardamom Bitters (also optional)

Method:

Put the gin, lemon juice, syrup, and egg white (if you use it) into a shaker. Shake it hard without ice for 15 seconds. This is called a “dry shake.” It makes the egg white foamy. Add ice to the shaker and shake again until it is very cold. Pour the drink through two strainers into a chilled coupe or rocks glass. Decorate it with a thin slice of dried mango or a small drizzle of the mango skin coulis.

Mocktails with Mango Skin Syrup & Coulis

This sustainable drink mixer works just as well in mocktails non alcoholic. It offers a complex flavour without any alcohol. The coulis is great for making beautiful, flavourful decorations.

Sparkling Mango Ginger Refresher

This easy, fizzy drink is perfect for hot days. It gives you a tropical taste without any alcohol.

Ingredients:

  • 1.5 ounces of Mango Skin Syrup (use the ginger version if you have it)
  • 1 ounce of Fresh Lime Juice
  • 4 ounces of Sparkling Water or Club Soda
  • A small branch of mint and extra lime slices for decoration

Method:

Fill a tall glass with ice. Add the mango skin syrup and lime juice. Pour in the sparkling water and stir gently. Decorate the glass with lots of mint and lime slices. The complex, tangy flavour of the Sustainable Drink Mixer makes this much better than a regular soda.

Mango Lassi Swirl (Using Coulis)

The coulis is thicker and richer. This makes it perfect for drinks that need texture, like a non-alcoholic lassi.

Ingredients:

  • 4 ounces of Plain or Vanilla Yogurt
  • 3 ounces of Mango Juice (or water/milk)
  • 1 tablespoon of Mango Skin Syrup (to make it sweeter)
  • 2 teaspoons of Mango Skin Coulis
  • A pinch of cardamom powder

Method:

Blend the yogurt, mango juice, and syrup until smooth. Pour this mix into a glass. Use a spoon to drizzle the coulis around the inside of the glass before you pour in the lassi. This creates a bright, swirling pattern. Or, swirl it gently on top before you serve it. Add a sprinkle of cardamom. This gives you deep mango flavour while making sure nothing goes to waste.

The Impact of Zero-Waste Mixology

The journey from wasted mango skins to a delicious, useful syrup is more than just a kitchen trick. It is a strong statement about how we see and use our food. Every time you make a cocktail or a mocktails non alcoholic with this Sustainable Drink Mixer, you are actively cutting down on food waste. You are saving resources. You are encouraging a more careful way of cooking and drinking.

The best part of this syrup is not just its delicious, complex flavour. It is also the good feeling you get from knowing you turned waste into a great product. This is a small change that brings big rewards. It is good for your taste buds and good for the planet. So, the next time you peel a mango, remember this: you are not just throwing away the skin. You might be throwing away a perfectly good cocktail. You are throwing away a chance to make a fantastic Sustainable Drink Mixer.


Frequently Asked Questions (FAQ)

Q: Can I use the skins from any type of mango?

A: Yes, you can use the skins from any kind of mango you have. The final flavour will change a little based on the type of mango and how ripe it is. But the basic steps for making the syrup stay the same. Very ripe mangoes usually give a sweeter syrup with less bitter taste.

Q: Why do I need to be careful about washing the mango skins?

A: Washing well is very important for two main reasons. First, it removes any possible leftover farm chemicals. Second, it reduces the urushiol in mango skins. This is the chemical that can cause a rash or allergy in some people. Cooking does help, but a clean skin is always the safest start.

Q: How long will the mango skin syrup last?

A: If you keep it in a clean, closed bottle in the refrigerator, the mango skin syrup should stay good for about two to three weeks. For a longer time, you can freeze the syrup. Pour it into ice cube trays. Once frozen, put the cubes in a freezer bag. They will last for many months this way.

Q: Can I use the mango skin syrup in baking or cooking?

A: Absolutely. This syrup is great as a shiny glaze for meat like grilled chicken or pork. You can also mix it into dressings for tropical salads. Or, use it to moisten cake layers. It adds a unique, deep mango flavour to many different foods.

Q: I don’t want to use sugar. Can I use a substitute like honey or agave?

A: Yes, you can use other sweeteners. But remember, the sugar is important for making a real syrup that works well as a Sustainable Drink Mixer. Sugar helps it stay fresh and gives it the right thickness. If you use honey or agave, you might need to use a different amount, and the syrup may not last as long. If you use a zero-calorie sweetener, the final liquid will be more of a flavoured water than a thick syrup.


References


Recent Posts


Copy My Coupon Strategy and Start Saving Right Now

A diverse group of five smiling people in a brightly lit shopping mall holding up smartphones displaying large discounts (like 75% off) and a central sign that reads "Claim Our Money-Off Coupon Now!

I used to be terrible with money. I’d see a great deal, buy something I didn’t need, and then wonder where my paycheck went. Sound familiar? It wasn’t until I treated saving like a competitive sport that everything changed. This strategy isn’t about painful budgeting; it’s about smart, tactical shopping that uses Coupon and coupons as a weapon against high prices, and I’m ready to hand you the playbook.


1. The Strategy Foundation: Shifting Your Mindset (Your Coupon Command Center)

Most people treat coupons like an afterthought—a nice surprise if they happen to stumble upon one. To truly start saving big, you must change your mindset. You are not just a shopper; you are a Savings Strategist. Your goal is to pay the absolute lowest possible price for everything you buy. This shift is the most critical first step in adopting my winning coupon strategy.

How To Do It: Building Your Coupon Command Center

Your Command Center is a designated, organized system for collecting and tracking all potential savings. Whether you prefer digital or physical methods, consistency is key.

  • Digital Hub: Create a specific folder in your email inbox titled “Coupons” or “Deals.” Sign up for newsletters from your favorite retailers and manufacturers, and immediately filter those emails into this folder. Use a dedicated browser bookmark folder for websites that offer ongoing digital coupons.
  • Physical Hub: If you prefer paper, use an accordion file or a small binder with labeled dividers. Divide sections by store (Grocery, Drugstore, Clothing) and check it before every single shopping trip. Never leave your physical coupons haphazardly in your purse or wallet.
  • The Tracking Sheet: Create a simple spreadsheet (or note in your phone) to track your savings. List the store, the item, the original price, the coupon value, and the final price. Seeing the dollar amount saved in black and white reinforces the habit and motivates you to find more coupons.

Example:

Last week, I needed laundry detergent. The regular price was $12.99. I checked my Digital Hub and found two stackable coupons: one for $2.00 off from the manufacturer’s website and a $3.00 off store coupon (triggered when buying two). If I bought two, the total savings would be $10.00 off a $25.98 purchase, bringing the final cost to $15.98 for two. Always calculate the final unit price, not just the raw savings.


2. The Art of Coupon Stacking and Maximization

This is where my strategy moves beyond simple clipping and into serious savings territory. Coupon stacking is the practice of combining multiple discounts on a single item. Many retailers allow you to combine a manufacturer’s coupon with a store’s specific coupon, a loyalty program discount, or a clearance price. This is how you achieve prices that feel almost criminal (in a good way!).

How To Do It: Mastering the Stack

Understanding the different types of coupons is vital for successful stacking:

  1. Manufacturer Coupons: Issued by the brand (e.g., Tide, Colgate). These are generally accepted at any store that carries the product but cannot be combined with another manufacturer coupon on the same item.
  2. Store Coupons: Issued by the retailer (e.g., Target Circle, CVS ExtraCare). These discounts apply to an item, category, or total purchase and can often be stacked with a manufacturer coupon.
  3. Digital/App Coupons: These are typically store coupons that you “clip” or load directly to your loyalty card via an app. They simplify the process and eliminate the need for paper.

Example: The Triple Stack

Imagine a bottle of vitamins priced at $20.00.

  • Step 1: Clearance/Sale Price: The store puts the vitamins on sale for 50% off, bringing the price to $10.00.
  • Step 2: Manufacturer Coupon: You have a $2.00 off manufacturer coupon. The price drops to $8.00.
  • Step 3: Store Coupon: You have a store coupon from their app for “$5.00 off any health item over $15.00.” Since the original item price was over $15.00, it may still qualify (read the fine print!). If it works, the price drops to $3.00.
  • Final Price: $3.00, an 85% saving! This kind of stacking is the essence of my strategy.

A common phrase to look for is “Limit one coupon per item,” which usually means one manufacturer coupon per item, leaving room for a store coupon on top.


3. Advanced Coupon Hunting: Beyond the Circular

If you only rely on the Sunday newspaper circular or the front page of a store’s website, you are leaving substantial savings on the table. The Savvy Strategist knows where to dig for hidden coupons.

How To Do It: Finding the Hidden Gems

  • Abandon Cart Coupons: Put items in an online shopping cart, proceed to the checkout screen, and then close the browser or app. Many retailers will send you an email within 24–48 hours offering a special discount code (like 10% or 15% off) to encourage you to complete the purchase.
  • The Power of Pop-Ups: When visiting a new retailer’s site, wait for the pop-up that offers a welcome discount (usually 10% to 20% off) in exchange for your email address. Use a dedicated, spam-friendly email address for this purpose to keep your main inbox clean.
  • Manufacturer Websites and Social Media: Always check the brand’s official website. Many popular brands frequently offer print-at-home manufacturer coupons that are not distributed through the traditional circulars. Follow your favorite brands on social media, as they often release exclusive, short-term codes to their followers.
  • Receipt Surveys: Look at the bottom of your receipts. Many stores (especially pharmacies and grocery chains) offer a small coupon (like $5 off your next $25 purchase) simply for taking a quick customer satisfaction survey online.

Key Insight: Never buy an expensive item (appliances, furniture, electronics) without first searching for a specific code. Search terms like “[Retailer Name] coupon code” or “[Retailer Name] first order discount” often yield valid results.


4. Integrating Coupons into Your Planning (The Savings Flow)

A spontaneous shopper uses coupons haphazardly; a Savings Strategist integrates them into a systematic plan. You need to align your shopping with the store’s sales cycle and your coupon’s validity.

How To Do It: Shopping with Intent

  • The Sale Cycle: Most stores operate on a 6-to-8-week sales cycle, meaning a product that is deeply discounted now will likely be back at that price in about two months. Use this knowledge to stock up strategically. When you have a great coupon, combine it with an item that is at its lowest price in the cycle.
  • Inventory Mindset: Think of your pantry, freezer, and closet as a small store inventory. Your goal is to never run out of something before you can buy it on sale using a coupon. If you have three tubes of toothpaste, you don’t buy more until you find a coupon/sale combination that makes the price close to zero.
  • Expiration Dates are Non-Negotiable: Check the expiration date on your coupons at least once a week. Plan your shopping trip around the coupon that is about to expire, prioritizing that purchase to ensure you don’t miss the saving opportunity.

Example: Cereal Stock-Up

A box of your favorite cereal is $4.00. You have a $1.00 off manufacturer coupon expiring in two days. The store is running a “Buy Two, Get One Free” sale this week.

  • Strategy: Buy three boxes (BOGO applies to the store’s sale, not the coupon).
  • Price: Two boxes at $4.00 = $8.00. One free box.
  • Coupon: Use two $1.00 manufacturer coupons (one for each paid item, adhering to the limit of one coupon per item).
  • Total Cost: $8.00 – $2.00 = $6.00 for three boxes (just $2.00 per box). This is a perfect execution of my strategy.

5. Avoiding the Coupon Traps and Saving Smarter

The biggest threat to your savings is the mental trap of spending money just because you have a coupon. A coupon is only a saving if you were already planning to buy the item. If it’s a purchase you wouldn’t have made otherwise, you didn’t save $10.00, you spent $40.00.

How To Do It: Stick to the List

  • The True Value Test: Before applying a coupon, ask yourself: “Would I buy this if there was absolutely no discount available?” If the answer is no, put it back. The coupon should lower the cost of a necessary item, not justify a frivolous purchase.
  • Calculate the Unit Price: Always, always calculate the price per ounce, per unit, or per item. A massive bottle of ketchup might have a better-looking coupon ($1.50 off) than a smaller bottle (50 cents off), but the smaller bottle, due to a store sale, might still offer a better price per ounce. Focus on the final unit cost after the coupon.
  • Understand Coupon Value: A 15% off coupon on a $1,000 laptop is a bigger dollar saving ($150) than a 50% off coupon on a $10 shirt ($5). Prioritize the coupons that deliver the largest absolute dollar value in your budget.

By following this disciplined, five-step strategy—building your Command Center, mastering stacking, hunting hidden coupons, integrating them into your timeline, and avoiding traps—you will transform your shopping habits from spending to truly saving right now. This is more than just clipping; it’s financial freedom one discount at a time.


Frequently Asked Questions (FAQ)

1. Are digital or paper coupons better for maximizing savings?

Both formats are essential for the ultimate savings strategy. Digital coupons (loaded to your loyalty card or found online) are often easier to manage and stack, especially with store-specific deals. However, many valuable manufacturer coupons are still only available via print-at-home formats or the Sunday circular. The best strategy is to use both and align them with the specific retailer’s policy for maximum stacking.

2. Can I use a coupon if the item is already on clearance?

In most cases, yes! This is one of the easiest ways to achieve nearly free items. Clearance prices are considered the store’s mark-down price, and a manufacturer coupon is usually accepted on top of this. The only time a coupon won’t work is if the coupon’s fine print specifically excludes clearance items, or if the system registers the item’s price as lower than the value of the coupon (which would then typically adjust the coupon down to the item’s price).

3. How do I get my favorite store’s abandoned cart coupon?

To successfully trigger an abandoned cart coupon, ensure you are logged into your account on the retailer’s website. Add items worth more than the minimum threshold (usually $50 or more) to your cart, navigate all the way to the final checkout page where you would enter payment information, and then simply close the tab or browser. Retailers want to finalize the sale and will often send a discount code via email within 24 to 48 hours to tempt you back.

4. What is the most important rule for couponing?

The most important rule is to always read the fine print. This includes expiration dates, quantity limits (“Limit of 4 like coupons in the same transaction”), and redemption rules (e.g., “Valid only on item size 10 oz or larger”). Knowing the rules ensures your strategy works flawlessly at the register and prevents frustration.


References


Recent Posts


One Shop, Months of Meals: How to Master Bulk Buying

A smiling woman stands in a bright, beautifully organized kitchen pantry, holding a jar of pasta. The shelves are fully stocked with clear, labeled glass jars containing various dry goods, illustrating successful Bulk Buying and storage.

As a busy individual navigating the challenges of modern life, I’ve always been on the hunt for smarter ways to manage my household. Like many, I struggled with endless grocery trips, food waste, and the constant feeling of never having quite enough time or money. Through trial and error, I discovered the transformative power of strategic bulk buying, turning my chaotic kitchen into a sanctuary of savings and efficiency. Join me as I share the practical strategies that helped me reclaim my weekends and make my budget go further, proving that a little planning can truly change everything.


Are you tired of endless grocery runs? Do those trips eat up your free time? Do they seem to drain your bank account too quickly? Imagine a world where one smart shopping trip sets you up with meals for weeks. It might even last for months. This way of shopping will reduce your stress. It will also boost your savings. This is not a dream. This is the power of mastering bulk buying.

Prices are rising these days. Schedules are full. Because of this, buying in larger quantities is more important than ever. The financial savings are clear. But bulk buying offers other great benefits, too. You take fewer trips to the store. You create less food waste. Your pantry becomes neat and organized. You get peace of mind because your home is well-stocked. But how do you start? What should you buy? How much is too much? And how do you handle the storage? You do not want your home to look like a messy warehouse.

This guide will teach you everything you need. You will learn how to be a bulk buying expert. We will cover smart planning tips and key item lists. And also look at creative storage ideas. We will give you advice for keeping food fresh. We will turn bulk shopping into a helpful and fun part of running your home. Get ready to change how you shop, how you stock your pantry, and how you manage your budget.

Understanding the “Why” Behind Bulk Buying

Before you start shopping, you need to understand the main benefits of bulk buying. It is more than just buying a bigger package. This is a smart way to shop. It gives you big benefits for the long run.

Financial Savings

The biggest benefit is saving money on each item. Retail stores often give discounts for larger amounts. This is because it costs them less to package and handle large orders. These small savings add up quickly. Over time, they lead to a huge drop in your total grocery bill. Think about a family that eats a lot of pasta. A 5-pound bag of pasta might cost half as much per ounce as five single 1-pound boxes. Multiply this by many staple items. The savings become very large. This strategy also helps if prices go up later. You lock in a lower price today for a bigger supply.

Time Efficiency

Imagine needing to do a major grocery shop only once a month. Maybe even less often for non-perishable foods. This frees up many hours. Those hours were spent driving to the store. They were spent walking the aisles. They were spent waiting in line. This time savings is very valuable. This is true for busy workers or parents. Use that time for hobbies, family, or just resting.

Reduced Food Waste

This may seem strange, but bulk buying can cut down on food waste. When your pantry is well-stocked, you are less likely to buy small, unplanned items. These items are often things you already have or do not need. Also, if you use good storage methods, bulk items stay fresh longer. This means fewer items go bad before you can use them. It also helps you plan meals better. You become focused on using what you have.

Environmental Impact

Buying in bulk means less packaging for each unit of food. This leads to less trash going to landfills. If you buy a large bag of rice instead of several small bags, you use less plastic or cardboard. This is a good choice for people who want to live in a greener way.

Preparedness and Peace of Mind

A fully stocked pantry brings comfort. You feel ready for anything. It could be a surprise snowstorm. Or it might be an illness that keeps you home. It might just be a busy week. Knowing you have the basics on hand lowers your stress. This sense of readiness is a huge plus.

What to Buy in Bulk: The Smart Shopper’s List

The secret to good bulk buying is knowing what is best to buy. Not every item is right for bulk. Buying too much on a whim can cause waste. Focus on long-lasting staples. Buy items you use often. Buy ingredients that stay fresh for a long time.

Pantry Staples (Dry Goods)

These foods are the core of any bulk buying plan. They store well. And are useful for many recipes. They are the base for countless meals.

  • Grains: Rice (white, brown), different kinds of pasta, oats, quinoa.
  • Legumes: Dried beans (black, kidney, chickpeas, lentils). These are cheap and healthy.
  • Flours: Regular flour, whole wheat flour, cornmeal.
  • Sugars and Sweeteners: White sugar, brown sugar, honey, maple syrup.
  • Baking Needs: Baking soda, baking powder, yeast, salt.
  • Cooking Oils: Olive oil, vegetable oil. Make sure you use good storage to keep them fresh.
  • Canned Goods: Canned tomatoes, canned beans, broths, tuna.
  • Spices and Herbs: You may not need huge amounts. But buying bigger containers of your most-used spices can save you money. These are good savings.
  • Nuts and Seeds: Almonds, walnuts, peanuts, sunflower seeds. They are great for snacks and cooking. Be careful with how you store them. They can go bad faster because of the oil they contain.
  • Dried Fruits: Raisins, cranberries.

Frozen Goods

Many items can be bought in bulk and then frozen. This makes them last much longer.

  • Meats: Chicken, ground beef, fish. Divide them into meal portions before you freeze them. This makes meal prep easier.
  • Vegetables: Broccoli, spinach, corn. These are often cheaper when you buy them frozen in large bags.
  • Fruits: Berries, banana chunks (for baking or smoothies).
  • Baked Goods: Bread, tortillas. Freeze them and only take out what you need.

Household and Personal Care Items

Do not forget the non-food basics that you use every day.

  • Cleaning Supplies: Laundry soap, dish soap, sponges.
  • Paper Products: Toilet paper, paper towels.
  • Personal Care: Soap, shampoo, toothpaste.
  • Pet Food: If you have pets, buying large bags of food can lead to big savings.

What to Avoid (or Buy Less Of)

  • Items that Go Bad Quickly: Fresh fruits, leafy greens, dairy with a close expiration date. You can freeze some, but most should be bought when you need them.
  • Items You Use Rarely: Do not buy a huge bottle of a special sauce if you use it only once a year.
  • Products That Spoil After Opening: Some foods lose quality quickly once the package is open, no matter how big the size.
  • Items Prone to Spoilage: Some delicate nuts or oils can spoil quickly if they are exposed to light, heat, or air. Be extra strict with their storage.

How to Do It: Your Step-by-Step Guide to Bulk Buying Mastery

Buying in bulk is only successful if you know how to do it. Here is your plan.

Step 1: Check What You Use and How Much

Before you shop, look closely at your habits. What do you really use often? How fast does your family use items like rice or toilet paper?

  • Check Your Pantry: Look at what you already have. What is running low? What will expire soon? This stops you from buying too much of the same thing.
  • Keep Track of Use: For a couple of weeks, watch how fast you use things. How many rolls of toilet paper does your family use each month? This helps you guess the right amount to buy.
  • Plan Your Meals: Write down your meal plan for the next month. This gives you a clear list of the ingredients you need to buy in larger amounts.

Step 2: Calculate the Real Cost

Just because a package is big does not mean it is cheap. Always find the unit price. This is the cost per ounce or pound. It tells you if you are truly getting savings.

  • Example: A 1-pound bag of rice for two dollars is two dollars per pound. A 5-pound bag for seven dollars and fifty cents is one dollar and fifty cents per pound. The 5-pound bag is the better bulk buying deal.
  • Think About Waste: If you buy a huge amount and half of it goes bad, you saved nothing. Only buy what you will actually use before it spoils.

Step 3: Find the Best Places to Shop

  • Warehouse Clubs: Stores like Costco are made for bulk shopping. The yearly fee is often covered by the great savings.
  • Online Stores: Many online sellers offer bulk deals. This is often very convenient.
  • Local Co-ops: Many smaller stores have bulk bins. You can buy the exact amount of spices, nuts, or grains you need. Prices are often very good. Bring your own jars to save money and cut down on waste.

Step 4: Invest in Good Storage Containers

This is the most important step after you buy the food. If you do not have good storage, your bulk foods will spoil.

  • Airtight Jars: These are a must for dry foods like grains, flour, sugar, and nuts. Use glass jars or strong plastic containers. They keep out pests, moisture, and smells.
  • Cool, Dark, Dry: Most dry goods stay best in these conditions. A basement shelf or a dedicated pantry is ideal.
  • Vacuum Sealers: These are great for meat and vegetables you plan to freeze. They remove the air, which stops freezer burn and keeps food fresh longer.
  • Labels: Label every item with the name and the date you bought it. This helps you use the oldest items first.
  • Shelving: Use strong, easy-to-reach shelves to keep your bulk storage neat.

Step 5: Master FIFO (First In, First Out)

This is a key method used by experts. It works perfectly for home bulk buyers. When you bring new items home, put them behind or under the older items. Always use the older stock first. This stops food from going bad at the back of the pantry.

  • Example: If you buy a new bag of flour, transfer it to your container. Then, make sure you use all the flour already in the container before starting on the new stock.

Step 6: Portion and Prepare When You Get Home

When you return from your big shop, spend a little time organizing your purchases.

  • Portion Meats: Break down large packs of meat into meal sizes before freezing. This way, you only need to thaw what you need.
  • Prep Produce: If you bought produce to freeze, wash it, cut it, and blanch it (if needed). Then freeze it in small, easy-to-use bags.
  • Transfer Dry Goods: Move your dry goods right away from the original packaging. This packaging is often not airtight. Put the food into your sturdy storage containers immediately.

Creative Storage Solutions for Your Bulk Buys

Bulk buying only works if you have a good system for storage. Do not let your great savings turn into wasted food because of bad organization.

Use All Available Space

  • Upgrade Your Pantry: If you have a pantry, use every inch. Add adjustable shelves. Use stackable containers. Put organizers on the back of the door.
  • Under-Bed Bins: For non-food items like paper towels or extra soaps, clear plastic bins under the bed are a surprisingly great spot.
  • Garage or Basement: If you have a dry, cool basement or garage, use strong shelving units. These are good for very large items like cases of canned goods. Make sure these areas are clean, dry, and not too hot or too cold.
  • Hidden Spots: Think about empty cabinets or linen closets. Use nice baskets to hide things and free up food storage space elsewhere.

Choose Smart Containers

  • Glass Jars: They look nice and are easy to clean. They are perfect for dry goods. You can see what you have inside. Mason jars work very well.
  • Plastic Containers: These are lighter than glass. They are strong and you can stack them. Choose ones that seal tightly.
  • Food-Grade Buckets: Use these for huge amounts of staples like flour or rice. They offer the best protection against moisture and pests. They are good for long-term storage.
  • Vacuum Seal Bags: Essential for freezing meat and vegetables. They remove air, which stops food from getting freezer burn and spoiling.

Keep Things Organized

  • Label Everything: Clearly write the item name, the date you bought it, and the date it should be used by.
  • Group Items: Keep similar things together. Put all the grains on one shelf. Put all the cleaning items on another.
  • Use Risers: Use small steps or risers on deep shelves. This helps you see items at the back. It stops things from getting lost.
  • First In, First Out (FIFO): Remember to always put new items behind older ones. Use the older food first. This system is key for keeping everything fresh.

Making Bulk Buying Work for Your Lifestyle

The best thing about bulk buying is that it can fit any lifestyle. It works for different family sizes and different living spaces. And it is not just one simple rule. It is a strategy you can adjust.

Start Small, Then Grow

Do not try to change your whole pantry at once. Start with one or two items you use all the time. Pick something easy to store, like pasta or rice. Once you are good at managing those, slowly add more staples. This way, the process is less scary. It also lets you perfect your method.

Think About Your Space

Your home size affects how much you can buy in bulk.

  • Small Apartments: Focus on items that are small and that you use up fast. Use tall, skinny shelves to use height. Bins under the bed are great for non-food items. You can buy cleaning products in bulk if they are concentrated and small.
  • Large Homes: If you have a large basement or garage, you have more room for big items. You can buy much larger amounts. Get strong shelves for long-term storage in climate-controlled areas.

Use Meal Prep and Batch Cooking

Bulk buying works best with meal preparation. When you have lots of ingredients ready, it is easy to:

  • Batch Cook: Spend a few hours cooking large amounts of food. This could be cooked rice, roasted veggies, or a big pot of soup. Divide it into single servings. You will have quick meals ready all week.
  • Make Freezer Meals: Prepare full meals like casseroles or burritos and freeze them. You will have healthy, homemade dinners ready on busy nights.
  • Use Ingredients Smartly: If you cook a large bag of beans, use some for tacos, some for soup, and freeze the rest.

Share the Load and the Cost

If your neighbors or friends are also interested in bulk buying, you can split large purchases. This is helpful for very big items. It also helps if you do not have much storage space. You share the initial cost. And share the work of getting the food home. You both get the benefits of savings.

Check and Adjust Often

Your needs will change over time. New products come out. Your family’s diet changes. You must check your habits regularly.

  • What is working? Do you need more of some items?
  • What is failing? Are some bulk items sitting for too long? Do you have too much?
  • Check for Spoilage: If food is often going bad, buy smaller amounts or improve your storage method.
  • Compare Prices: Check unit prices often. What was a good deal last year might not be a good deal today.

Beyond the Basics: Advanced Bulk Buying Strategies

You are now good at the basics of bulk buying. You have a system for planning and storage. Now you can try more advanced methods. These methods will help you get the most savings and efficiency. This means buying at the best time. It also means food preservation.

Buy Based on Sales and Seasons

The smartest bulk buyer does not just buy a lot. They buy a lot when the price is lowest.

  • Seasonal Foods: Prices for fruits and vegetables drop when they are in season. This is the best time to buy them in bulk. You can freeze them or preserve them. Buy apples in the fall to make applesauce. Buy cheap summer berries for freezing.
  • Holiday Sales: Big holidays often have great deals on baking supplies or certain meats. Plan ahead and stock up during these sales.
  • Clearance Deals: Look for clearance sections in your store. Items close to their “best by” date are often much cheaper. If you can use it right away, freeze it, or process it, it is a great deal. Always check the quality and date before buying.

Canning, Dehydrating, and Fermenting

For people who want to be very self-sufficient, preserving food is the ultimate step in bulk buying.

  • Canning: This is an old way to keep fruits, vegetables, and meat good for a long time. You can make and safely store homemade jams, sauces, or pickles. This is a great way to handle a large amount of fresh produce.
  • Dehydrating: This removes the water from food. This stops bacteria from growing. It is good for making dried fruits or vegetable chips. A food dehydrator is a good item to own.
  • Fermenting: Making foods like kimchi or sauerkraut not only preserves the food. It also adds healthy probiotics. This is a great way to make fresh vegetables last longer.

Join Food Co-ops or Buying Clubs

Look beyond regular stores. Check out local food co-operatives or buying clubs.

  • Food Co-ops: These are grocery stores owned by their members. They focus on bulk, local, and often organic foods. Members may pay a fee or volunteer hours for access to better prices.
  • Buying Clubs: These are groups of people who order food directly from producers or wholesalers. They get wholesale prices. This takes some organizing but can lead to very large savings.

Stock a Diverse Pantry for Safety

An advanced bulk plan means having many different types of food. Do not just buy rice and pasta. Think about different food groups and ways to get all your nutrients.

  • Protein: Dried beans, lentils, canned fish, protein powder.
  • Fats: Oils, nuts, butter.
  • Carbs: Grains, pasta.
  • Vitamins: Dried fruits, canned vegetables.Having a variety means you can always make healthy meals, even if you run low on one item.

Mastering bulk buying takes time. It needs continuous learning. You will need to change your habits as your life changes. And make your storage methods better. You may need to spend money on good containers at the start. But the long-term rewards are huge.

Imagine walking into your clean pantry. You know you have months of meals ready. Think of the extra money you have saved. And of the time you saved from fewer store trips. Think of the good feeling of cutting down on waste. This is more than just savings. It gives you more control over your money, your time, and your life.

Start slow, keep working at it, and enjoy the power of smart bulk buying. Your family, your budget, and your free time will all thank you.


Frequently Asked Questions (FAQ)

Q1: Is bulk buying always cheaper?

A1: No, not always. You must find the price per unit, such as the cost per ounce. This tells you if you are truly saving money. Also, if the food spoils before you use it, you have not saved anything. Be sure to compare prices carefully.

Q2: How can I keep pests away from my bulk dry goods?

A2: Airtight containers are the best defense. Use glass jars or strong plastic containers that seal tightly. Keep the food in a dark, cool, dry spot. You can also freeze flour or grains for a few days right after you buy them. This kills any insect eggs before you store the food long-term.

Q3: What is the best way to store large amounts of flour?

A3: Store flour in airtight, food-grade bins or buckets. Keep them in a cool, dark place. To keep whole wheat flour fresh for the longest time, you can store it in the freezer.

Q4: I have small storage space. Can I still bulk buy?

A4: Yes, you can! Focus on items you use quickly and very often. Use tall, narrow shelves to use height in your space. Think about sharing very large bulk purchases with friends. This splits the quantity and the cost.

Q5: How do I track expiration dates with many items?

A5: Labels are essential. Write the date you bought the item and the “best by” date clearly on the container. Use the “First In, First Out” (FIFO) rule. Always put new items behind the older ones. Check your pantry often to make sure nothing is past its date.

Q6: Is it safe to store food in the garage or basement?

A6: Yes, as long as the space is cool, dry, dark, and clean. Do not store food where the temperature changes a lot or where it is very humid. Use strong, sealed containers, especially if there might be insects or rodents.


References


Recent Posts


How to Get 50% Off Your Grocery Haul

A close-up of a grocery cart filled with marked-down items, showing bright stickers indicating 50% Off on meat, produce, and packaged goods, illustrating how to get a massive discount on a full grocery haul.

Are you tired of watching your grocery bill creep up every single week? What if I told you there’s a consistent, proven way to slash your spending in half—not by clipping a handful of coupons, but by simply changing when you shop? Supermarkets around the world regularly mark down high-quality items by (50% Off) or more, creating a hidden saving opportunity most shoppers completely miss. Mastering the art of the markdown is easier than you think, and it’s the secret to getting a massive discount on your next haul.

Shopping for groceries is one of the biggest expenses for most households, but it doesn’t have to be. While careful budgeting helps, the most powerful tool in your savings arsenal is timing. Savvy consumers know that knowing when and where grocery stores reduce prices on everything from fresh produce to shelf-stable goods can lead to extraordinary savings. This guide will take you step-by-step through the world of store clearance, showing you exactly how to get 50% Off your entire grocery haul without sacrificing quality or safety.

Download the The Ultimate Grocery Markdown Checklist & Tracker


Part One: The Different Types of Price Reductions

When a supermarket sells an item for less than the original price, it usually falls into one of three categories. Understanding these categories helps you prioritize your shopping efforts.

1. Sales and Specials (Advertised Deals)

These are the most common and public ways to save. They include the discounts you see advertised in the weekly circular, flyers, or bold signs throughout the store.

  • Temporary Promotions: These price cuts last for a set period, usually one week. They are designed to draw customers into the store. A good strategy is to stock up on non-perishable sale items when they hit their lowest price cycle.
  • Loyalty Programs: Many stores offer special, extra discounts that are only accessible if you are a member of their free loyalty or rewards program. Always scan your card or enter your phone number to ensure you receive these reduced prices.

2. Markdowns and Clearance (Hidden Discounts)

This is where the deepest discounts, often reaching 50% Off or more, are found. Markdowns are not advertised widely; they are internal store processes used to reduce waste and clear inventory.

  • Date-Based Reductions: These are applied to perishable items (like meat, dairy, and bakery) that are nearing their “sell-by” or “best-by” date. The store must sell them quickly before they expire. These items are usually marked with a bright sticker, often yellow or orange, showing the new, lower price.
  • Discontinued Items: These are products the store has decided not to carry anymore. They need to clear the shelf space quickly, resulting in steep discounts on these non-perishable goods. Look for special clearance shelves or endcaps dedicated to these items.

3. Buying in Bulk (Cost-Per-Unit Savings)

While not a direct price reduction, purchasing items in larger formats from wholesale clubs or bulk sections provides a significant long-term saving. You pay a higher price initially, but the cost per unit (the price per ounce, gram, or item) is much lower than the standard supermarket size. This strategy works best for items with a very long shelf life, such as paper products, cleaning supplies, and frozen goods.


Part Two: Mastering the Markdown Schedule

Markdowns are not random; they follow predictable patterns set by store management and staff routines. By timing your visit correctly, you can dramatically increase your chances of finding the best deals.

The Best Time of Day

For the deepest discounts on highly perishable items, your timing is critical.

  • Early Morning Rush: Many department managers, especially in the bakery and meat sections, complete their daily markdowns shortly after the store opens. Staff need to check the dates on stock and apply the new stickers before the day’s main shopping traffic begins. Shopping early gives you the best selection before other savvy shoppers arrive.
  • Late Evening Scramble: About one to two hours before closing, stores face a strict deadline. They must sell certain items (especially fresh, prepared foods and certain bakery items) that must be removed from the shelf that night. At this time, discounts can be incredibly steep—sometimes exceeding the 50% Off threshold—but the variety will be very limited. This is often a high-risk, high-reward shopping window.

The Best Day of the Week

The schedule for when new sales start is often more important than the specific markdown day.

  • Mid-Week (Typically Wednesday): This is often the ideal shopping day. Most major supermarket chains around the world begin their new sales week mid-week. By shopping then, you can often catch the tail end of last week’s expiring deals and the start of the new weekly sales, maximizing your savings in one trip.
  • Post-Weekend Clear-Out (Sunday or Monday): After the busiest shopping days (Friday and Saturday), stores often need to clear out fresh stock. Look for markdowns on produce, bakery goods, and items from the deli. This is done to make room for new shipments that arrive later in the week.

Pro Tip: Ask a Manager

The absolute best way to learn your local store’s schedule is to ask politely. Department managers (meat, bakery, produce) usually follow a strict routine. A simple question like, “When do you typically mark down your meat/bread?” can provide you with the exact daily window you need.


Part Three: The Essential Food Safety Protocol

When you secure an item at 50% Off because it is close to its date, immediate and proper handling is non-negotiable. Your immediate goal is to safely extend the life of the product.

The Two-Hour Rule

This rule is paramount: Never allow perishable food (meat, dairy, eggs, seafood, or prepared meals) to sit at room temperature for more than two hours. If the air temperature is hot, this time should be reduced to just one hour.

  • Immediate Cooling: Use insulated cooler bags with ice packs for your shopping trip, especially if you have a long drive home. The quicker you get the food into your own refrigerator or freezer, the safer it will be.

Safe Storage for Extended Life

The freezer is your best friend when dealing with markdowns. You can safely freeze food right up until midnight of its “Use By” date.

Food ItemRefrigerator Storage (Max)Freezer Storage (Approx.)Preparation Before Freezing
Raw Meat/Poultry1–2 days6–12 monthsRemove from store packaging; wrap tightly or vacuum seal; label and date.
Ground Meat1–2 days3–4 monthsPortion into meal sizes; double-wrap to prevent freezer burn.
Fish/Seafood1–2 days6 monthsCleaned and dried; place in an airtight container or freezer bag.
Cooked Leftovers3–4 days2–6 monthsCool completely first; store in shallow containers to speed up chilling.
Bread/Bakery3–5 days2–3 monthsSlice if desired; double-bag to prevent moisture loss.

Freezing Best Practices

  1. Re-package: The thin wrapping used by the store for meat and poultry is not adequate for long-term freezing and will cause freezer burn.
  2. Protect: Use heavy-duty aluminum foil, freezer bags, or plastic wrap. Air exposure is the enemy of frozen food quality.
  3. Portion: Divide large packages into smaller, single-meal portions before freezing. This allows you to thaw only what you need, reducing waste.
  4. Label: Always write the item, the amount, and the date you froze it on the package.

Safe Thawing

Always thaw frozen meat, poultry, and fish in the refrigerator—never on the kitchen counter at room temperature. This takes time (often a full day for a small pack), so plan ahead. Once food is thawed, it should be cooked immediately.


Part Four: Understanding Food Dates

There is often confusion over the dates printed on food packaging. These terms do not all mean the same thing, and understanding the difference is key to using your markdown items safely.

  • “Use By” Date: This is the most critical date and relates to food safety. It is a strict recommendation for the final date the food should be eaten or frozen for quality and safety reasons. You should not consume food past this date.
  • “Best By” or “Best Before” Date: This date relates to quality, not safety. The manufacturer guarantees the product will have its best flavor and texture up until this date. The food may still be safe to eat after this date, but the quality, flavor, or texture may be diminished.
  • “Sell By” Date: This date is a guide for the store’s inventory management. It tells the store how long to display the product for sale. The product should be purchased before this date, but you still have time to use it at home afterward.

Conclusion: Saving Smart, Not Sacrificing

Achieving 50% Off your grocery haul is entirely possible, but it requires strategy, not luck. By prioritizing your shopping time to catch markdowns in the early morning or late evening, and by understanding the difference between a sale and a clearance sticker, you put yourself in control of your grocery budget.

Remember that any item you buy at a deep discount needs a safety plan. The immediate transfer to cold storage and proper freezing techniques ensure that you are saving money without compromising your health. Start small by dedicating one shopping trip per week to hunting markdowns, and you will quickly see a huge impact on your household finances.

References


Recent Posts