
My crafting journey started small, but my yarn stash—and the resulting pile of empty cones—quickly grew out of control! I’ve spent years finding the most beautiful and effective ways to use every bit of my supplies, transforming what many consider trash into treasures. I know the feeling of wanting to be sustainable while also creating something truly stunning for your home or to gift. This article is my answer to that overflowing bin of Yarn Cones and my promise that they are your next great creative resource.
Unlock Your Stash: Gorgeous Makes with Yarn Cones
Yarn Cones. They sit in a corner, waiting. For many crafters, these sturdy cardboard or plastic tubes are simply the bulky remains of a successful large-scale project—often destined for the recycling bin. But for the savvy maker, these unassuming structures are a goldmine of creative potential. They are rigid, readily available, and the perfect foundation for a surprising array of gorgeous, functional, and decorative items.
This article takes you deep into the world of repurposed crafting, moving beyond the simple skein and embracing the core structure of your favorite bulk materials. We are not just covering ten projects; we are unlocking the full, beautiful potential of your yarn stash.
The Philosophy of Repurposing
Before we dive into the projects, let’s appreciate the material. Yarn Cones provide an inherent strength and cylindrical form that is difficult to replicate with typical craft supplies. This makes them ideal for structural projects, from storage to lighting. Repurposing them is a sustainable practice that not only reduces waste but also challenges your creativity to see common items in a new light.
Gorgeous Makes with Yarn Cones
Here are ten inspiring, detailed projects designed to transform those humble Yarn Cones into functional art.
Project One: Elegant Drawer Dividers
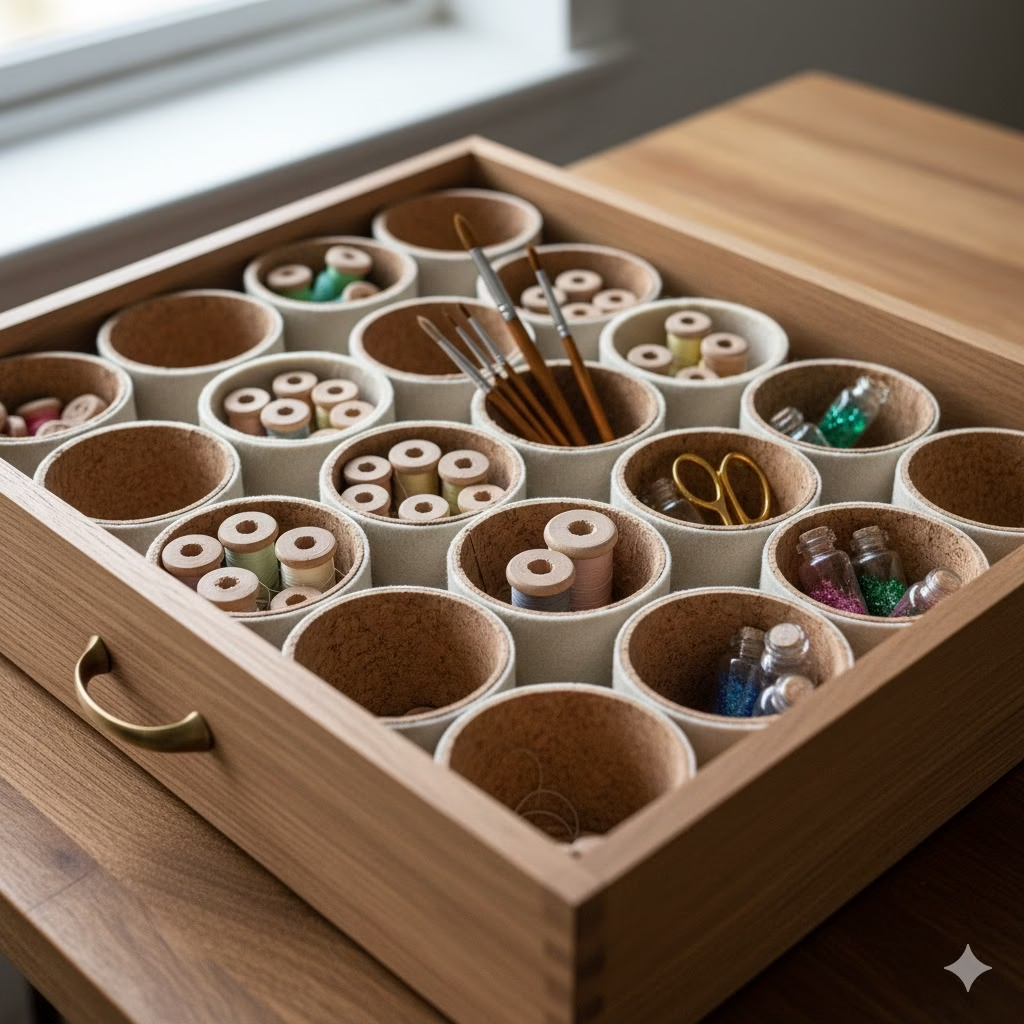
Organization is key to a calm craft space, and yarn cones are perfectly shaped to help segment those unruly drawers.
The Idea
Use the cones to create custom-sized cubbies for tools, pens, markers, or even spools of thread. The varying heights and diameters of cones from different brands add an interesting, organic look.
How to Do It
- Preparation: Gather several cones and cut them down to the height of your drawer, using a sharp utility knife or a fine-toothed saw. Sand the cut edges until smooth.
- Arrangement: Arrange the cones tightly within the drawer space. Think of it like a honeycomb pattern.
- Adhesion: Once you find a satisfactory layout, glue the cones to each other using a strong craft adhesive, ensuring they are firmly bonded side-by-side. For added stability, you can glue the entire structure to the bottom of the drawer liner, though this is often unnecessary if the arrangement is snug.
- Finishing Touch: Consider wrapping the exterior of the cones in cork paper or felt for a softer, more finished look that protects your tools.
Project Two: Miniature Holiday Trees
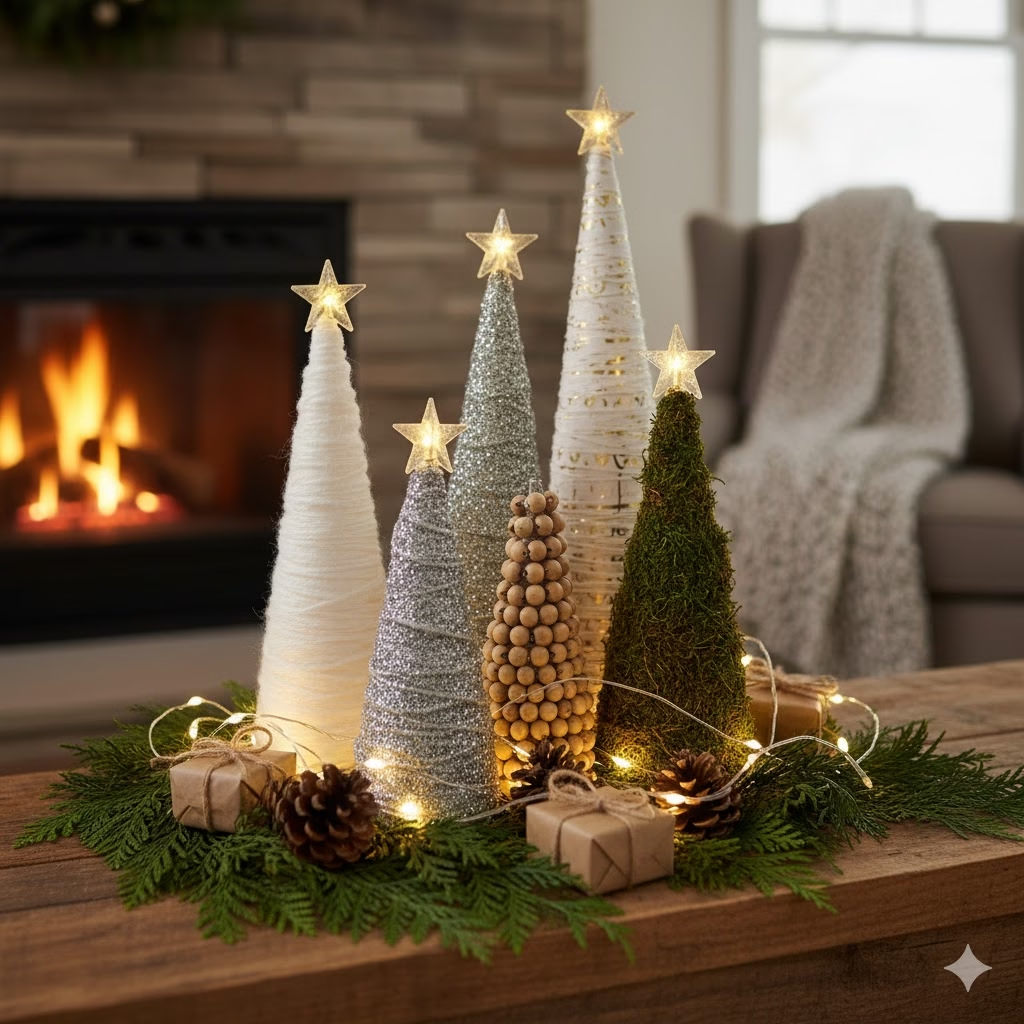
These projects are fantastic for seasonal decorating, especially if you have cones of varying heights.
The Idea
Transform a collection of cones into a stylish, minimalist forest of decorative trees. This works for Christmas, fall, or any decorative grouping.
How to Do It
- Base Layer: Paint the cones in a solid base colour—white, black, or deep forest green—to unify the look.
- Texture Application: Apply a thin layer of white craft glue over the cone’s surface. While wet, wrap the cone in a textural yarn, starting from the bottom edge and working your way up, pulling the yarn taut. Alternatively, roll the cone in glitter, fine craft sand, or small beads for a different effect.
- Topper: Secure a small decorative star, a wooden bead, or a loop of ribbon to the peak of the cone.
- Display: Arrange groups of three or five finished cones on a mantlepiece or bookshelf to create a lovely seasonal vignette.
Project Three: Desk Caddy for Pens and Tools
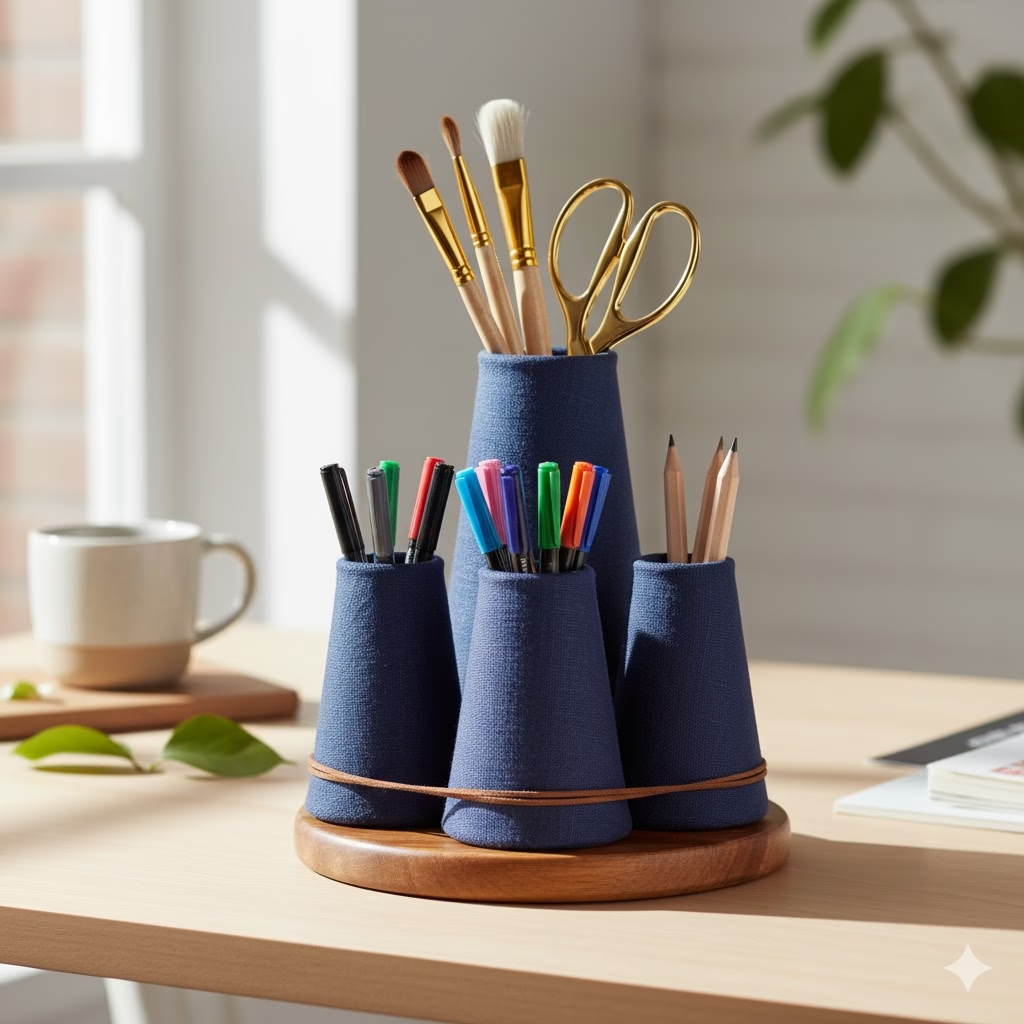
The structural integrity of a yarn cone makes it an excellent base for a desktop organizer.
The Idea
Group three or more cones to create a tiered, sectioned caddy perfect for holding writing tools, scissors, or brushes.
How to Do It
- Measure and Cut: Determine the desired heights for the caddy. It looks best with at least three different heights (e.g., five inches, seven inches, and nine inches). Cut the cones and sand the edges.
- Covering: To give the caddy a professional look, cover each cone with decorative paper, thin leather scraps, or fabric using spray adhesive.
- Assembly: Arrange the covered cones on a round or square piece of thick cardboard or wood that serves as the base. Glue the cones securely to the base and to each other where they meet.
- Embellishment: Add a ribbon or a piece of twine wrapped around the base for a final flourish.
Project Four: Rustic Woven Baskets
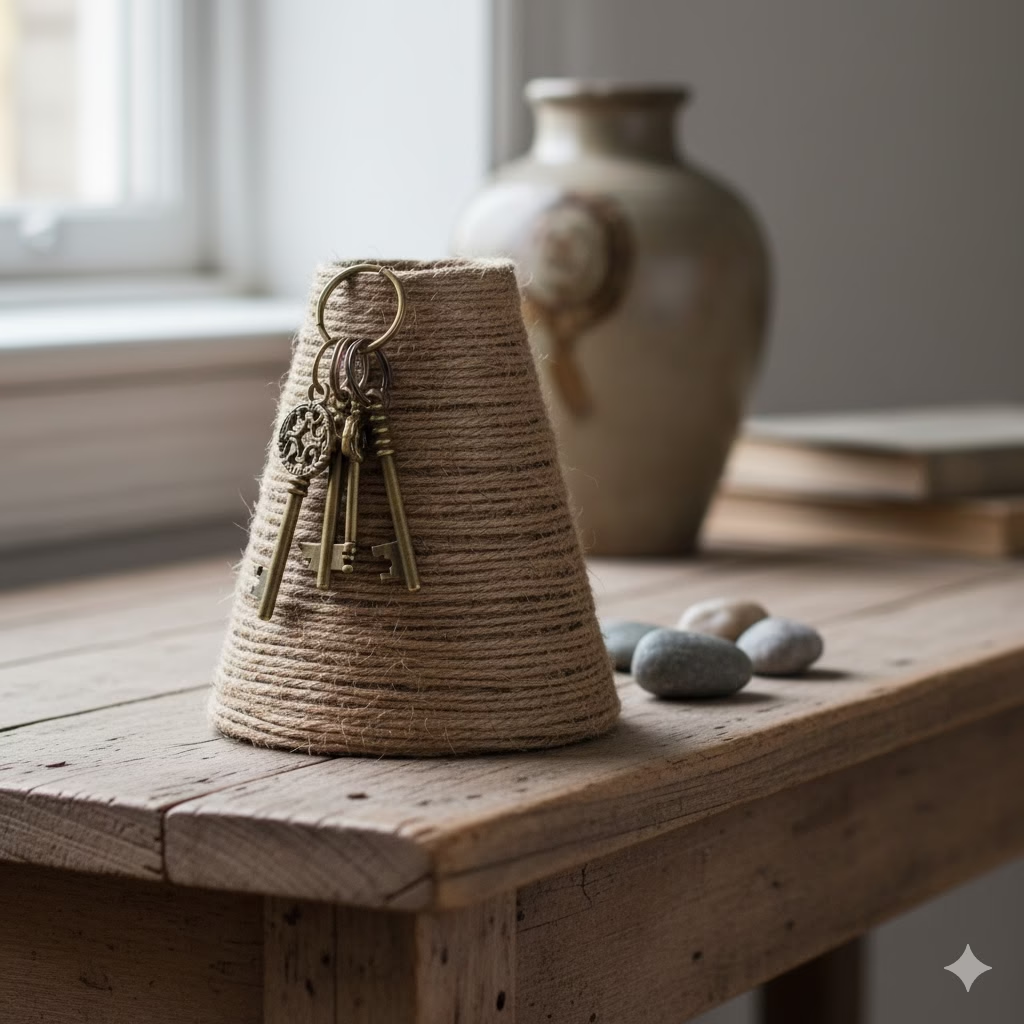
While the cones are too small for a full basket, they make ideal moulds for small, woven vessels perfect for holding keys or trinkets.
The Idea
Use the cone’s shape as a temporary structure to weave a small, open-top basket or container.
How to Do It
- Preparation: Cover the cone in plastic wrap to prevent the weaving material from sticking.
- Weaving: Use thick twine, rope, or strips of fabric as your weaving material. Start by gluing your base coil at the bottom of the cone and then spiralling up, securing the coil to itself with a hot glue gun. Ensure the coils are close together.
- Drying and Removal: Once the glue is dry and the woven structure is complete, carefully slide the finished basket off the cone mould. The basket will retain the lovely tapered shape of the cone.
Project Five: Architectural Wall Art
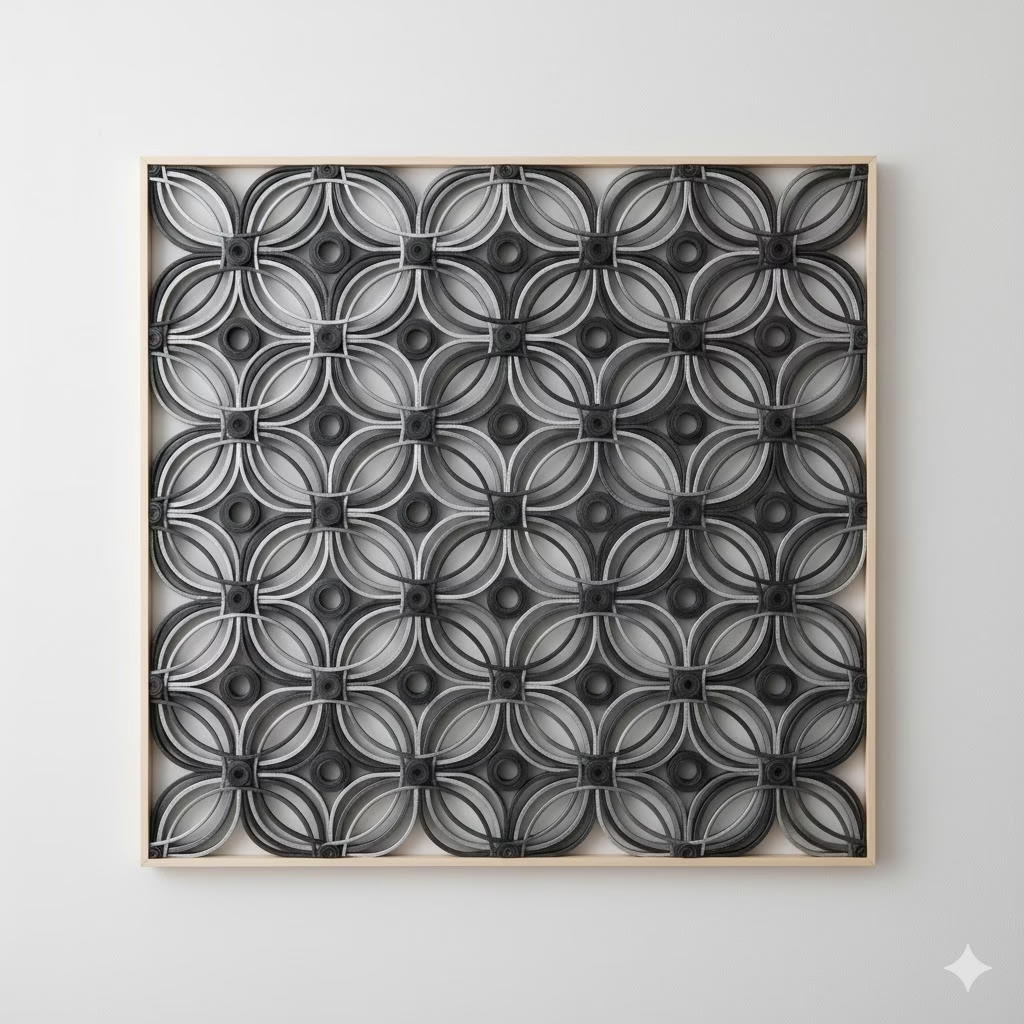
This project transforms the cone into a three-dimensional geometric element for stunning, modern wall decor.
The Idea
Slice cones into thin rings and arrange them to form intricate, textural patterns on a canvas or wooden board.
How to Do It
- Slicing: Use a sturdy craft knife to cut the cones into thin rings, about a quarter to a half inch thick. The tapered shape of the cone will create slightly different ring sizes, which adds visual interest.
- Painting: Paint the rings in a monochromatic palette (e.g., three shades of grey) or bold, contrasting colours.
- Assembly: Glue the rings onto a prepared canvas, arranging them in a repeating geometric pattern, overlapping some for a layered effect.
- Sealing: Once dry, seal the piece with a clear varnish or sealant.
Project Six: Simple Yarn Storage Spools
The most straightforward and useful repurposing is turning a large cone into a new, more manageable spool for leftover yarn remnants.
The Idea
Instead of dealing with tangles, wind your unused yarn remnants onto a cone for neat, stable storage.
How to Do It
- Cleaning: Ensure the cones are clean and free of any stray adhesive residue.
- Winding: Start by securing the end of the yarn remnant near the base of the cone with a small piece of removable tape.
- Tension: Wind the yarn onto the cone, keeping a steady, moderate tension to create a compact and stable shape. The wide base prevents the cone from tipping over while winding.
- Labeling: Use a small sticker on the base of the cone to label the yarn type, weight, and colour for easy identification later.
Project Seven: Festive Cone Crackers

Elevate your party favours or holiday tablescape with beautiful, oversized cone-based crackers.
The Idea
Use the cones as the rigid inner tube for a custom, luxurious party cracker or gift wrapping tube.
How to Do It
- Filling: Place small gifts or candies inside the cone.
- Wrapping: Cut a large rectangle of decorative wrapping paper or fabric. The width should be wide enough to cover the cone’s length, plus excess for the twisted ends.
- Assembly: Place the cone in the centre of the paper. Roll the paper tightly around the cone and secure the seam with tape or a thin line of glue.
- Twisting: Twist the excess paper at both ends and tie with ribbon to create the traditional cracker shape.
Project Eight: Unique Candle Holders

A sturdy, bottom-heavy yarn cone can be inverted and decorated to serve as a stunning, tall candle holder for battery-operated pillar candles.
The Idea
Decorate and invert the cones to create an eye-catching, tiered display for flameless candles.
How to Do It
- Weighting: For safety and stability, fill the small end of the cone (which will be the base) with sand, pebbles, or plaster of Paris to create a solid, heavy foundation.
- Decoration: Cover the entire exterior with patterned decoupage paper, mosaic tiles, or simply paint it a glossy metallic colour.
- Topper: Ensure the top surface (the wide end of the cone) is flat and stable. Place a battery-operated pillar candle securely on the wide base. Note: Never use real flame candles on a cardboard or plastic base.
Project Nine: DIY Ring or Jewellery Stand

The tapered shape is perfectly suited for stacking rings or hanging bracelets.
The Idea
Create individual or clustered stands that showcase your jewellery collection beautifully.
How to Do It
- Base: Glue the cone securely onto a small, weighted base, such as a painted wooden disk or a slab of polymer clay.
- Padding: Wrap the cone in a soft material like velvet, suede fabric, or thick felt. Use spray adhesive to keep the material smooth and taut as you wrap it around the tapered shape.
- Final Touches: Add small hooks or pins to the sides for hanging necklaces or bracelets. This creates a multi-functional display piece.
Project Ten: Custom Lamp Shade Frame

For the advanced DIYer, a strong cone can be the starting point for a small, bespoke table lamp shade.
The Idea
Use the cone as a rigid frame to drape, wrap, or cover with translucent material to diffuse light.
How to Do It
- Support: Cut the cone to the desired height for your lamp base. The small end needs a clean cut to allow light to pass through.
- Covering: Wrap the outside of the cone in a very thin, translucent fabric like linen, silk, or a fine weave cotton, secured with fabric glue.
- Perforations (Optional): For a starry effect, use a needle to carefully poke small, random holes through the cone and fabric before mounting.
- Mounting: The wide base of the cone sits directly on the lamp’s electrical fitting. Ensure the cone size is safe and appropriate for the light source being used. Always use an energy-efficient LED bulb to minimize heat.
Getting Started: Materials and Tips
The beauty of these projects is that they require minimal, inexpensive additional materials.
Core Materials Checklist
- Yarn Cones: Various sizes and materials (cardboard or plastic).
- Cutting Tools: Utility knife, craft saw, or sharp scissors.
- Adhesives: Hot glue gun, strong craft glue (like E6000), spray adhesive.
- Finishing Materials: Paint, craft papers, fabrics, twine, and ribbon.
Top Tips for Working with Cones
- Cleanliness is Key: Always wipe the cones down with a damp cloth to remove any residual yarn dust or sizing before painting or gluing.
- Cutting Cardboard Cones: Score the line multiple times with a utility knife before attempting a full cut for a cleaner edge.
- Hiding Edges: When covering a cone, always turn your raw edges slightly under before gluing to the cone to ensure a professional, clean finish.
- Weighting: For any standalone item like a caddy or candle holder, adding weight to the base (the narrow end) prevents tipping and adds a feeling of quality.
By looking at that stack of finished Yarn Cones not as clutter, but as raw construction material, you open up a sustainable and exciting new chapter in your crafting journey. Dive in, transform your stash, and enjoy the gorgeous results.
Frequently Asked Questions (FAQ)
What types of yarn cones are best for crafting?
Generally, the sturdy, thick cardboard cones are the easiest to work with for structural projects like drawer dividers or candle holders, as they are simple to cut and glue. Plastic cones are more difficult to cut but are excellent for projects involving moisture or where a smooth surface is desired before covering.
How do I ensure my finished cone projects are stable?
For any project that needs to stand up straight (like a desk caddy or a candle holder), stability is achieved by weighting the base. Fill the narrow end (which becomes the bottom) with plaster, sand, or heavy decorative pebbles before sealing it. You can also glue the finished item to a flat, heavy base material like a wooden coaster or a ceramic tile.
Can I cover the cones with yarn instead of fabric or paper?
Absolutely. Wrapping a cone in yarn—especially chunky yarn or rope—is a great way to add texture. To do this, apply a thin layer of strong craft glue or use a hot glue gun along a small section of the cone at a time, then tightly wrap the yarn in a continuous spiral from the bottom to the top. This creates a beautifully textured, uniform look.
Is it safe to use cones for lighting projects?
Yes, but only with proper safety precautions. The structure is only safe to use as a frame for a lamp shade if you use an LED light source, which emits minimal heat. Never use incandescent or halogen bulbs near the cardboard or plastic material, and ensure the yarn cones materials are not directly touching any electrical components.
What is the best way to get a smooth finish on a cardboard cone?
If you plan to paint cardboard yarn cones, first apply a coat of gesso or a thick primer. This helps fill the texture of the cardboard and prevents the paint from being absorbed unevenly, giving you a smooth, professional-looking surface when the top coat is applied.
Reference Section
- Futurelearn – The Benefits of Upcycling
- Altenew – Everything You Need to Know About Zero Waste Crafting
- shswny – The Unexpected Benefits of Crafting
Recent Posts
