Remember that feeling of finding a forgotten treasure in your grandma’s attic? That’s me, Sarah, with a lifelong love for turning overlooked items into something beautiful and functional. My weekends are often spent covered in sawdust or paint, experimenting with ways to give new life to old things. I believe that creativity shouldn’t break the bank, and that’s why I’m thrilled to share how simple wooden crates can unlock a world of DIY magic for your home.
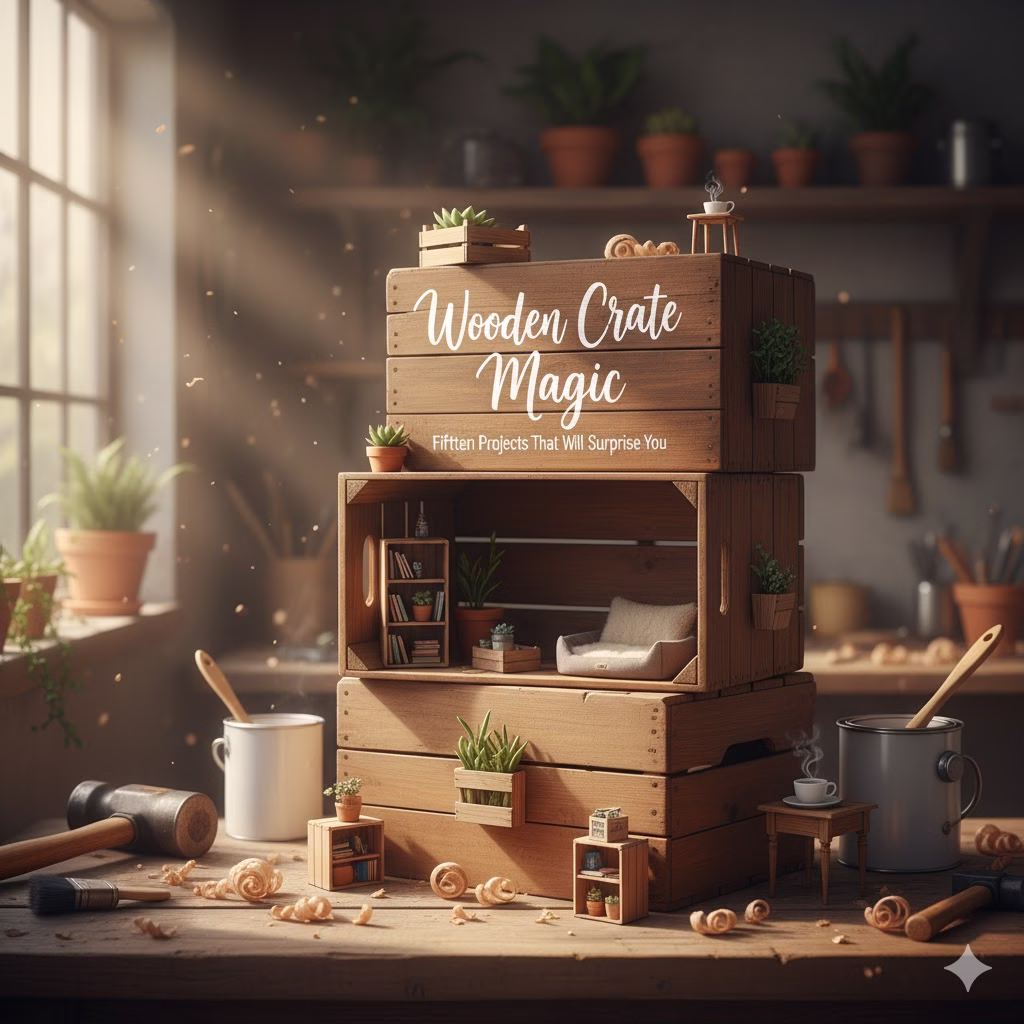
15 Brilliant Wooden Crate Projects to Instantly Upgrade Your Home
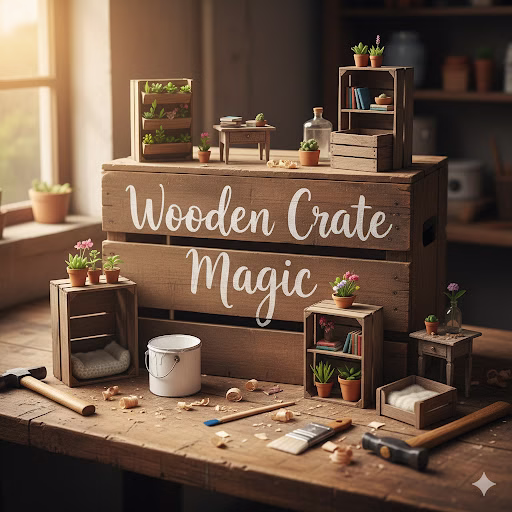
There’s something great about an old wooden crate. Maybe it’s the rustic feel, the scent of old wood, or the silent story it tells of goods once shipped and journeys taken. These simple wooden boxes should not be stored in a dusty garage. They hold an amazing, hidden potential. With a little creativity, some basic tools, and a dash of effort, you can turn these overlooked items into stunning, useful, and unique pieces for every room in your home.
Prepare to be surprised as we explore the “wooden crate magic,” looking at fifteen smart projects. These projects will not only improve your home decor but will also offer simple solutions. You will enjoy the rewarding spirit of upcycling.
The Appeal of the Wooden Crate: Why Repurpose It?
Before we look at the projects, let’s quickly understand why wooden crates are such a perfect material for DIY.
- Low Cost: You can often find wooden crates for free or very cheap. Check local markets, antique shops, or even behind grocery stores (always ask for permission!).
- Eco-Friendly: Reusing old materials reduces trash. It lowers the demand for new production, which is a great choice for the environment.
- Flexibility: Crates come in many sizes and shapes. This offers endless options for change.
- Rustic Look: The natural wood grain and aged look add warmth to any area. They fit well with farmhouse, industrial, bohemian, and even modern styles.
- Strength: These crates were built to handle the demands of shipping. They are often surprisingly strong and can hold a lot of weight once properly braced.
Now, let’s get inspired!
The Fifteen Projects That Will Surprise You
1. Chic Coffee Table with Hidden Storage
Are you tired of clutter on your coffee table? This project gives you a sleek answer.
How to do it:
- Materials: Four matching wooden crates, wood glue, screws, caster wheels (optional), sandpaper, stain or paint, polyurethane sealer.
- Assembly: Set the four crates in a square. Face their open sides outwards. This creates a space in the center. Glue and screw the crates together safely from the inside. For more strength, add a piece of plywood to the bottom. You can add one to the top as well, if you want a solid surface.
- Finishing: Smooth any rough spots with sandpaper. Stain or paint the whole piece to match your decor. Apply a few coats of polyurethane. This makes it last longer and protects it from spills. Put caster wheels on the bottom for easy movement.
- Surprise Element: The open sides allow easy shelving for books, remotes, or decor. The central space (if you add a lift-off top) offers hidden storage for blankets or magazines.
2. Elegant Bookshelf or Display Unit
Turn several crates into a custom shelf system that fits any wall.
How to do it:
- Materials: Several wooden crates (different sizes look good), wood glue, screws, wall anchors, sandpaper, paint or stain.
- Assembly: Decide how you want to set them up. You can stack them flat, upright, or in a random pattern. Make sure the crates are level. Glue and screw each crate tightly to the ones next to it. For bigger units, attach the finished piece to wall studs using L-brackets or strong wall anchors for safety.
- Finishing: Sand and finish it as you like. One color can create a clean look. Or, use different colors to highlight each space.
- Surprise Element: This is more than a bookshelf; it’s art you can change. You can move it around, add more crates later, or use it to show off plants, photos, or small art items.

3. Rolling Storage Bin for Toys or Laundry
Keep messes held in one mobile spot!
How to do it:
- Materials: One strong wooden crate, four caster wheels, screws, sandpaper, paint or stain, optional rope handles.
- Assembly: Be sure the bottom of the crate is solid. If it isn’t, brace it with a piece of plywood cut to size. Sand the crate until it is smooth. Attach one caster wheel to each bottom corner using screws.
- Finishing: Paint or stain it your preferred color. Drill holes and put strong rope handles on the short sides for easy pulling.
- Surprise Element: No more dragging heavy bins! This rolling bin makes clean-up easy for kids’ rooms, laundry areas, or even as a mobile planter for larger indoor plants.
4. Rustic Pet Bed
Give your pet a cozy and stylish place to sleep.
How to do it:
- Materials: One correct size wooden crate, sandpaper, non-toxic paint or stain, soft cushion or blanket.
- Assembly: Sand all surfaces well. Pay extra attention to any splinters. If the crate is deep, you can remove one of the long sides. This creates an easy way for your pet to get in.
- Finishing: Paint or stain the crate. Think about using a clear, pet-safe sealer. Once it is dry, put in a soft, washable cushion or blanket.
- Surprise Element: It is charming, and it raises your pet off the cold floor. You can even write your pet’s name on it!
5. Stylish Bathroom Storage Tower
Make the most of the vertical space in a small bathroom.
How to do it:
- Materials: Two or three matching wooden crates, wood glue, screws, sandpaper, paint (often a light, moisture-proof paint for bathrooms).
- Assembly: Stack the crates one on top of the other. Line them up perfectly. Glue and screw them together from the inside for a neat look. You can have all the open sides facing forward, or you can switch them for a unique design.
- Finishing: Sand and paint. You can paint the inside a bright color for a fun contrast.
- Surprise Element: This tower gives you open shelves for towels, soaps, and decor. It turns an unused corner into a useful and attractive space.
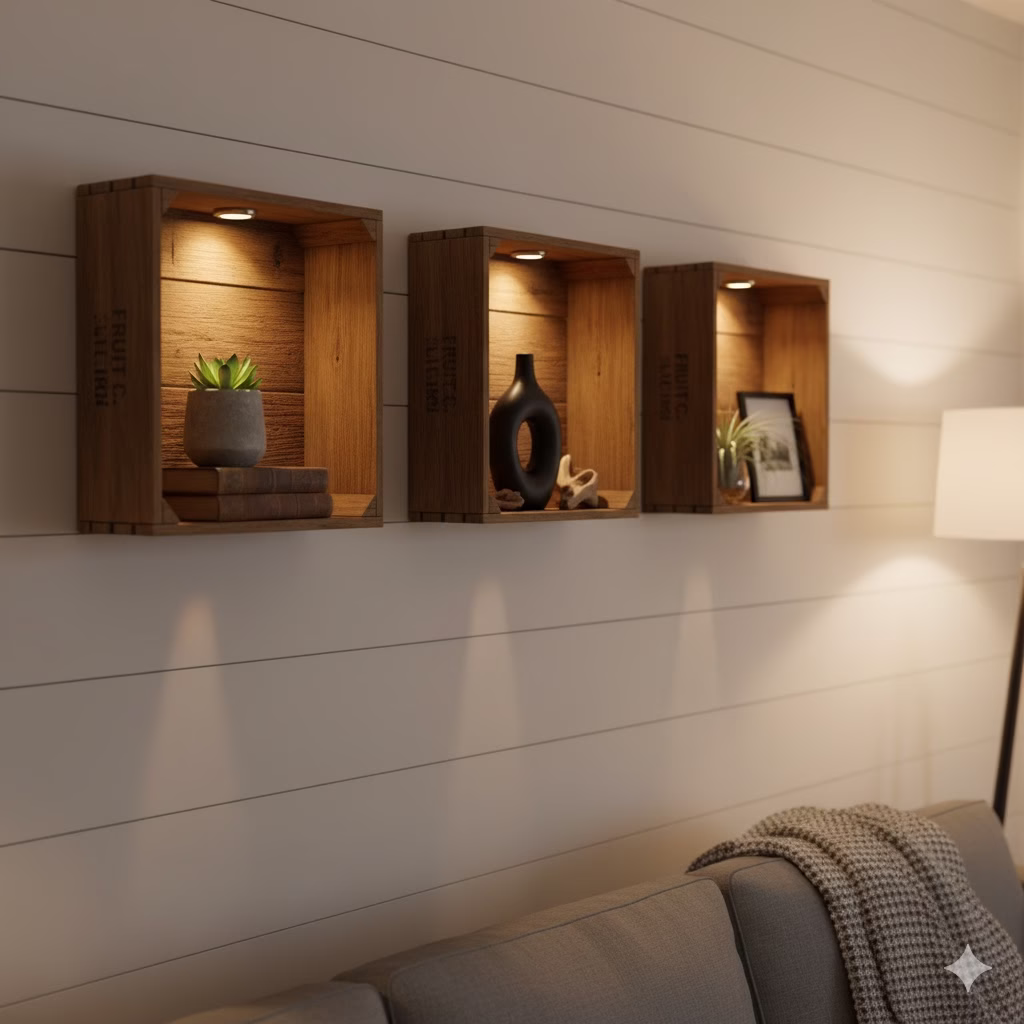
6. Unique Wall Sconces or Floating Shelves
Add character and useful surfaces to your walls.
How to do it:
- Materials: One or more shallow wooden crates or crate fronts, sandpaper, paint or stain, strong picture hangers or L-brackets, small LED lights (optional).
- Assembly: If you use a full crate, stand it on its side, open end facing out. Sand and finish. Tightly attach heavy-duty picture hangers or L-brackets to the back. Mount it to the wall studs.
- Finishing: For a wall light look, attach a small LED light to the inside top. This gives a soft, gentle glow.
- Surprise Element: These are more than just shelves; they are display boxes. They can show off small treasures, plants, or even act as a source of mood lighting.
7. DIY Planter Box or Herb Garden
Bring nature inside or improve your outdoor area.
How to do it:
- Materials: One wooden crate, plastic liner or garden cloth, potting soil, plants/herbs, sandpaper, outside-grade paint or sealer.
- Assembly: Line the inside of the crate with strong plastic sheeting or garden cloth. Staple it along the top edges. Poke small drain holes in the bottom of the liner to stop roots from rotting. Fill it with soil and plant your chosen herbs, flowers, or small vegetables.
- Finishing: Sand and apply an outside-grade paint or wood sealer. This protects the wood from water if you use it outdoors.
- Surprise Element: A beautiful, rustic planter box. You can put it on a patio, porch, or a sunny window. For an herb garden, it keeps all your cooking plants together in one nice spot.
8. Entryway Shoe Rack and Bench Combo
A helpful and welcoming piece for your home’s front area.
How to do it:
- Materials: Two strong wooden crates (or three for more seating), a solid piece of plywood for the top, wood glue, screws, sandpaper, paint or stain, optional cushion fabric and foam.
- Assembly: Put two crates next to each other. Face the open ends outwards to create shoe slots. Fasten them together with glue and screws. Cut a piece of plywood to fit across the top. It should stick out slightly over the edges. Screw the plywood top on from underneath.
- Finishing: Sand and finish the entire piece. For added comfort, make a simple cushion. Cover a piece of foam with fabric and put it on top of the plywood.
- Surprise Element: This gives you both useful shoe storage and a handy place to sit down to put on or take off shoes. The rustic look immediately makes your entryway feel friendly.
9. Vintage-Inspired Nightstand
A charming bedside piece with lots of personality.
How to do it:
- Materials: One strong wooden crate, sandpaper, paint or stain, optional small wooden legs or caster wheels.
- Assembly: Decide if you want the crate standing tall or on its side. If it’s tall, the open side faces forward, making a shelf. If it’s on its side, the top surface is wider. Sand all surfaces.
- Finishing: Paint or stain the crate. You can attach small wooden legs to raise it up or caster wheels for easy moving.
- Surprise Element: It has an open shelf for books and things you need. The flat top surface is good for a lamp and alarm clock. The rustic feel brings warmth to your bedroom.
10. Portable Art Supply Caddy
Keep your creative tools neat and ready to use.
How to do it:
- Materials: One medium-sized wooden crate, sandpaper, paint or sealer, optional wooden dividers (thin plywood strips), wood glue, handle (e.g., a stick or thick rope).
- Assembly: Sand the crate. If you want, cut thin wood strips to create sections inside the crate for different supplies (brushes, paints, pencils). Glue these dividers into place. Drill holes in the top edges of the crate on the short sides. Thread a stick or rope through to make a handle.
- Finishing: Paint or seal the caddy.
- Surprise Element: Artists and crafters will love this! It keeps everything tidy and can be easily moved from room to room. You can even take it outside for painting outdoors.
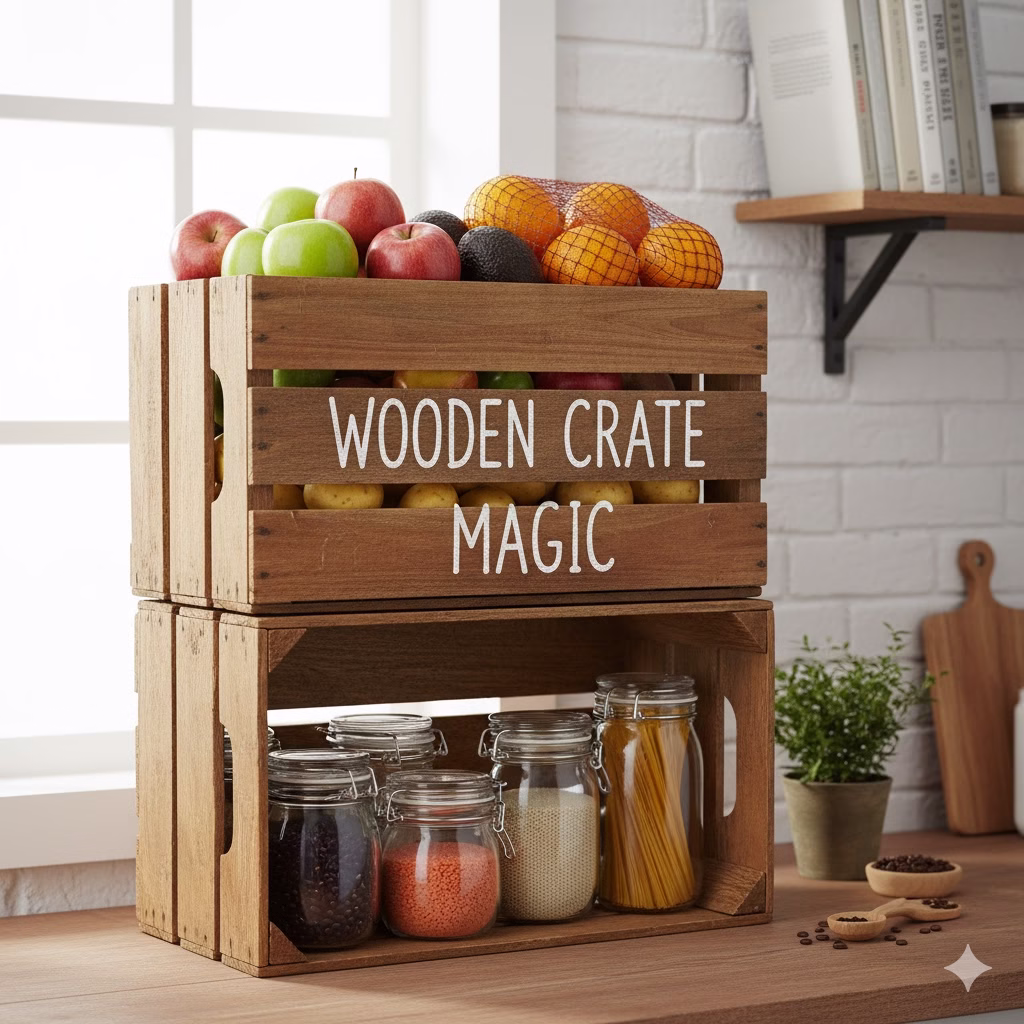
11. Stackable Pantry or Produce Bins
Organize your kitchen with style and function.
How to do it:
- Materials: Several strong wooden crates, sandpaper, food-safe sealer or paint (optional).
- Assembly: Simply sand the crates, making sure there are no splinters.
- Finishing: You can leave them natural for a rustic look. Or, you can put on a food-safe sealer so they are easy to clean.
- Surprise Element: Stack them in your pantry for tidy storage of canned goods, dry food, or vegetables. The open design lets air move around. This is perfect for things like onions and potatoes.
12. Kids’ Play Kitchen or Lemonade Stand
Start fun, pretend play with a custom project.
How to do it:
- Materials: Two or three wooden crates, plywood scraps, wood glue, screws, sandpaper, non-toxic paint, small wooden knobs, fabric for curtains (optional).
- Assembly: Use one crate as the bottom (for the oven). Put another on top for the counter or sink area. You may need to add a back panel made from plywood. Cut a circle in the top crate for a “sink.” Add a wooden knob for a “faucet.”
- Finishing: Sand and paint in bright, cheerful colors. Add small wooden knobs for oven controls. You can even add a small curtain to the “oven” opening.
- Surprise Element: This project is very rewarding. It creates a special play area that encourages many hours of creative fun.
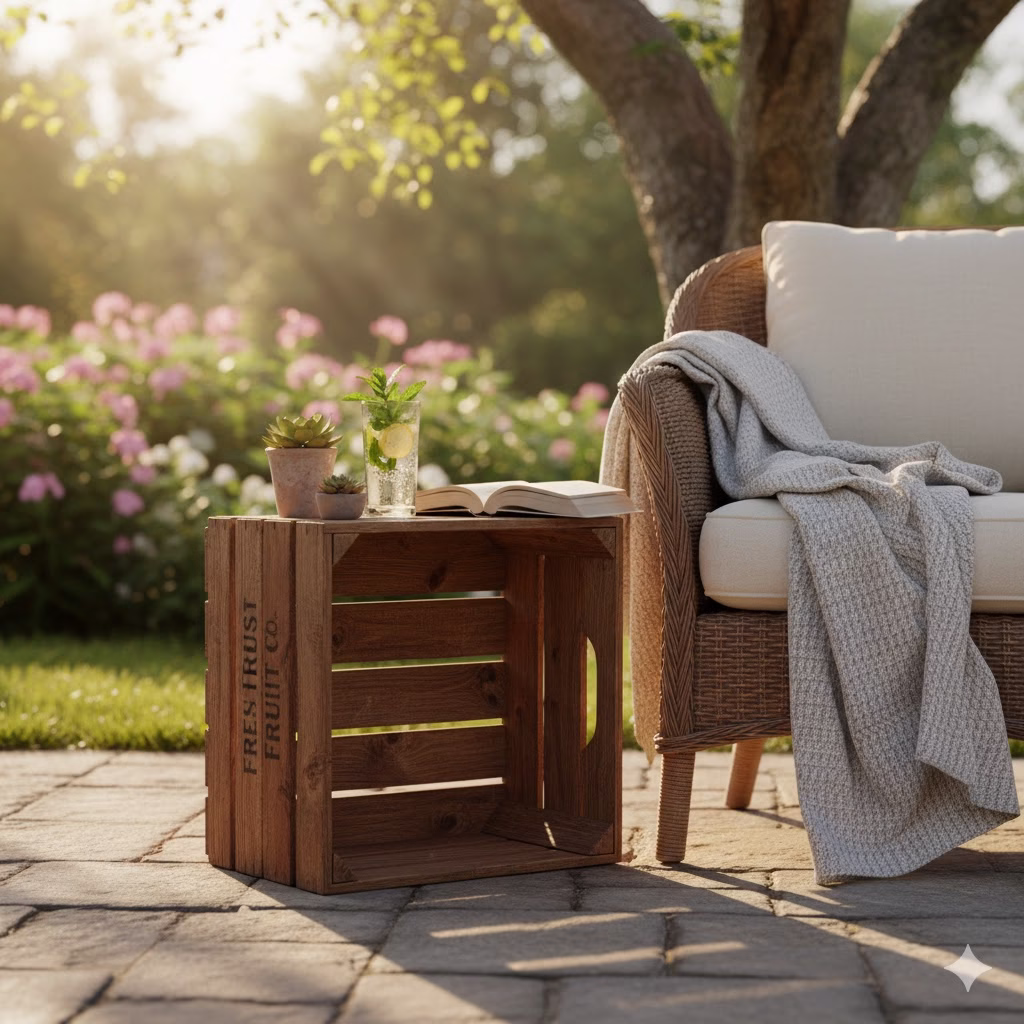
13. Outdoor Side Table or Stool
Great for a patio or garden, it is both strong and attractive.
How to do it:
- Materials: One strong wooden crate, sandpaper, outside-grade stain or paint, polyurethane sealer.
- Assembly: Just sand the crate very well.
- Finishing: Apply an outside-grade stain or paint. Follow this with several coats of an outdoor-rated polyurethane sealer. This will guard the wood from the weather and make it last longer outside.
- Surprise Element: A simple, yet effective item for any outdoor seating. It provides a handy surface for drinks, books, or small plants.
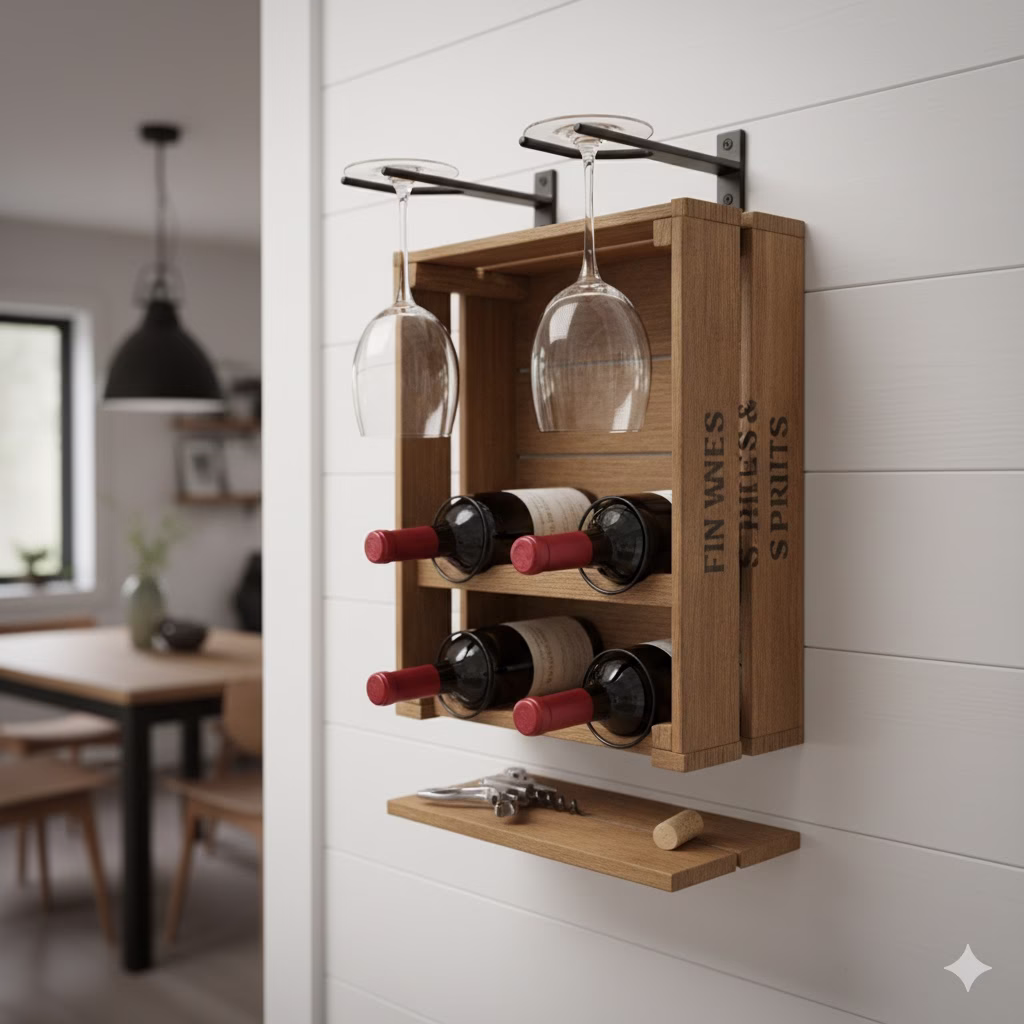
14. Wall-Mounted Wine Rack
Show off your wine collection with a rustic, cool look.
How to do it:
- Materials: One strong wooden crate, sandpaper, stain or paint, L-brackets or French cleat system, wine bottle holders (e.g., small wooden dowels or metal rings).
- Assembly: Sand the crate. You may need to add inner dividers or dowels, depending on how you want to display the bottles. For a flat display, attach small dowels across the width of the crate to hold bottles securely. Firmly mount the crate to wall studs using L-brackets or a French cleat system.
- Finishing: Stain or paint the crate to make it look nicer.
- Surprise Element: A beautiful, small way to display a few bottles of wine. It adds an unexpected, rustic feel to your dining room or kitchen.
15. Charming End Table with Magazine Holder
A multi-purpose item for your living room.
How to do it:
- Materials: One wooden crate, wood glue, screws, sandpaper, paint or stain, optional small wooden legs or caster wheels.
- Assembly: Stand the crate on its side. If the crate has slatted sides, you can use one of the open sections to hold magazines. Sand the entire surface.
- Finishing: Paint or stain the crate. Add small wooden legs or caster wheels if you prefer.
- Surprise Element: This simple setup gives you a surface for a lamp or drink. The open slats or inner space can smartly hold magazines, remotes, or even a small throw blanket, keeping your living room neat.

Essential Tips for Working with Wooden Crates
No matter which project you pick, a few basic steps will help you succeed and stay safe:
- Find Crates Safely: When you get crates, always check for stamps showing they were heat-treated (HT). Avoid those that were chemically treated (MB for Methyl Bromide). HT crates are safe for use inside. Do not use any crates that have strong chemical smells or signs of mold. If you get them from a store, always ask for permission!
- Cleaning is a Must: Wash your crates well with soapy water, especially if they are old or have been outside. A mix of water and a little bleach can help clean them. Let them dry completely.
- Sanding for Smoothness: This step is vital for both looks and safety. Use medium-grit sandpaper (about 120-150 grit) to smooth rough edges and take off splinters. Finish with fine-grit (220 grit) for a truly smooth surface, especially for items you will touch often.
- Brace the Crates: Old crates can sometimes be shaky. Use wood glue in the joints. Brace them with small nails or screws if needed, especially for furniture pieces.
- Final Touches:
- Stain: This improves the natural wood grain and adds warmth.
- Paint: This offers endless color choices to match your decor. Think about chalk paint for a worn, farmhouse look.
- Sealer/Polyurethane: This is key for long life. It protects against water, scratches, and wear. Use an outside-grade sealer for projects that will be outdoors.
Conclusion: Unleash Your Inner Crate Creator
Who knew that a simple wooden crate held so much promise? From useful storage answers to stunning home decor items, these fifteen projects are just the start of what you can do. Each change shows the power of ideas and the joy of giving a tossed-away item a second, even better, life.
So, the next time you see an old wooden crate, don’t just see a box. See the chance for a chic coffee table, a charming pet bed, a neat pantry, or a fun play kitchen. Embrace the “wooden crate magic,” roll up your sleeves, and surprise yourself with what you can create! Happy crafting!
FAQ (Frequently Asked Questions)
Q: Where can I find old wooden crates?
A: You can often find them at antique shops, flea markets, local wineries (they sometimes give them away), small grocery stores (ask first!), Facebook Marketplace, or online DIY groups. Look for crates stamped “HT” for heat-treated. These are safer than “MB” (methyl bromide) treated crates.
Q: How do I get an old wooden crate ready for a project?
A: First, wash it well with soapy water and a brush, then let it dry fully. Next, sand all surfaces and edges with medium-grit sandpaper (120-150). This removes splinters and makes the wood smooth. Follow this with fine-grit (220) for a smoother final surface. Check for loose nails and either take them out or secure them.
Q: What kind of paint or stain should I use?
A: That depends on the look you want. For a natural look, use a wood stain. For color, use acrylic or latex paint. Chalk paint is great for a rustic, worn finish. Always add a sealer like polyurethane. This is especially true for items that will be used a lot or get wet.
Q: Are wooden crates strong enough for furniture?
A: Yes, many wooden crates are quite strong, especially vintage ones made for shipping. However, for furniture like coffee tables or benches, always brace the joints with wood glue and screws to ensure safety and stability. If the bottom is weak, add a piece of plywood.
Q: Can I use crates for outdoor projects?
A: You certainly can! Just be sure to properly clean, sand, and then seal the wooden crate with an exterior-grade paint or sealer. This protects the wood from water, sun, and weather changes. It will make it last much longer outdoors.
Q: What tools do I need for these projects?
A: Most projects require simple tools: sandpaper (or an electric sander), wood glue, screws, a drill, a screwdriver, and paint brushes or rollers. For more complex projects, you may need a saw (hand saw or jigsaw) for cutting plywood or making custom dividers.
References
- Homedepot – DIY Projects and Ideas
- Bentleywp – 4 Advantages of Reusable Wood Shipping Crates
- This Old House – 25 DIY Fundamentals
Recent Posts